1
EN
FR
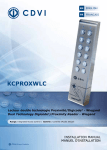
KCPROX WLC
Lecteur double technologie Proximité/Digicode® - Wiegand
Dual Technology Digicode®/Proximity Reader - Wiegand
Range: Integrated Access Control / Gamme : Contrôle d’Accès Intégré
INSTALLATION MANUAL
MANUEL D’INSTALLATION
Group Products
MANUEL D’INSTALLATION
KCPROX WLC
Dual Technology Digicode®/Proximity reader - Wiegand
1] PRODUCT PRESENTATION
Dual technology:
- Proximity reader,
- Digicode® keypad.
Output formats:
- Wiegand,
- CDVI format,
- ISO Track 2 format.
Stainless steel.
Narrow: Ideal for installation
on aluminium profile.
Backlit.
Recommended for activating
and deactivating your alarm system.
Surface-mount.
Installation with Diax® screws.
E
TANC
RESIS
M
HIGH ANDALIS
TO V
Audible and visual feedback.
Dimensions (L x W x D): 190 x 43 x 27mm.
Power supplies: 12V dc.
Consumptions: 120mA.
IP64
-25°C à +70°C
Environmental tests:
vibrations
WEEE & RoHS
CE Certification
2] NOTES & RECOMMENDATIONS
Wiring reminder
- In the case of direct connection to the CT-V900-A
(CENTAUR) central controller or one of the
LINKNET door controllers, the KCPROX WLC must
be installed within a maximum distance of 50 m.
- In other cases, the distance between
the KCPROX WLC and the (INTBUSW) door
controller must be within a maximum of 50 m
and the distance between the central controller
or panel and the last (INTBUSW) door controller
may be up to 1200 m maximum.
- Take care not to pass your wires close
to «High voltage» cables (e.g.: 230 V AC).
- 2 pairs of cables (4 strand) SYT1 8/10ths
(Shielded cables).
2
cdvi.com
cdvigroup.com
Mounting recommendations
To optimise the mounting of the KCPROX WLC and
to combat attempted tampering, it should be fitted
on a flat surface.
Back EMF protection
To protect the installation, remember to:
- install the varistor in parallel on the locking
system power supply side,
- install a 120 ohm resistor between A and B
on the last BUS RS485 door controller.
Security
- For security reasons, change the factory default
master code.
- When selecting a master code and user code
avoid simple codes (example : 3 4 5 6 7).
MANUEL D’INSTALLATION
KCPROX WLC
Dual Technology Digicode®/Proximity reader - Wiegand
3] MOUNTING KIT
(M5x8 Diax®
screw)
T20 Diax®
Spanner
Plastic
anchors
mounting screws
(M4x30)
1
1
2
2
KCPROX WLC
4] MOUNTING INSTRUCTIONS
1
2
Place the back plate on the
wall then mark with a pen
the hole location then drill
the 2 mounting holes and
the hole wiring access.
3
Insert the 2 plastic anchors
in the holes.
Mount the back plate
of the KCPROX WLC with
the screw on the wall.
4
Insert the cable in the hole
access area of the back
plate. Then mount the
keypad on the back plate.
Fasten the KCPROX WLC
keypad to the back plate
with the M5x8 Diax® screw
and T20 Diax® spanner
hardware.
5] CONNECTIONS: DIRECT CONNECTION TO THE TERMINAL BLOCKS OF A CONTROLLER
Controller terminal wirings
Wiegand
outputs
Wiegand format
outputs
ISO2 format
Outputs
CDVI format
Outputs
CDVI
CT-V900-A
LT20PB
LT20PBIP
LT20AC
LT20IP
UCA3
PROMI1000
PROMI1000PC
RED
Input voltage
12VDC
Input voltage
12VDC
Input voltage
12VDC
+12V
12 V DC
12 V DC
12 V DC
12 V DC
BLACK
0V
0V
0V
R2/0V
0V
0V
0V
0V
BROWN
Buzzer command
input
Buzzer command
input
Buzzer command
input
GREEN
DATA 0
CODE
R2/D0
CL
CL
WHITE
DATA 1
DATA
R2/D1
DA
DA
BLUE
CLOCK
CLOCK
CDVI – 1 WIRE
8 ou 18
1
PURPLE
PROGRAMMING
PROGRAMMING
PROGRAMMING
YELLOW
GREEN LED
GREEN LED
GREEN LED
ORANGE
RED LED
RED LED
RED LED
Cables
OUT2
OUT1
cdvi.com
cdvigroup.com
3
MANUEL D’INSTALLATION
KCPROX WLC
Dual Technology Digicode®/Proximity reader - Wiegand
6] CONNECTIONS: CONNECTION WITH THE (INTBUSW) DOOR CONTROLLER
KCPROX WLC
Red
12VDC
Black
0V
Brown
Buzzer command input
Green
Data 0
White
Data 1
Blue
Clock
Purple
Programming
Yellow
Green LED
Orange
Red LED
Orange
Yellow
White
Green
Blue
Red
Black
brown
Purple
KCPROX WLC
For the
programming
connect the
purple cable
with the black
cable.
INTBUSW
Strike
Magnet
Varistor
Power supply
Two different configurations,
are possible:
Shielded
cable
12VDC only
(As standard)
Cut the strap
12VAC or 24VDC
Door contact (not used)
Connect E and M
4
cdvi.com
cdvigroup.com
To other door controllers
(INTBUSW)
MANUEL D’INSTALLATION
KCPROX WLC
Dual Technology Digicode®/Proximity reader - Wiegand
INTBUSW (Contrôleur de porte)
Terminal block : Motherboard
V
Input voltage -
12
Input voltage +
1
Data O
2
Clock
3
Data 1
Terminal block : Motherboard
R
N/C contact eletromagnetic lock (+)
C
Common contact power supply (+)
T
N/O contact electric release
R
N/C contact alarm
C
Common
T
N/O contact alarm
+ ~ - Input voltage DC or AC, 12V or 24V
Without jumper : without clock
With jumper : with clock
P1
Request-to-enter input
M
Common ( P1 et P2 )
P2
Request-to-enter input
E
Door contact, N/C (Door closed) and N/O (Door open)
L
Reader activation imput (N/O) reader enabled and (N/C) reader disabled
M
Common ( E and M ) or (E and L)
A
RS485 Bus (All the A must be connected together in daisy chain)
B
RS485 Bus (All the B must be connected together in daisy chain)
Terminal block - 3 points : Piggyback board
7
LED > Red color
8
LED > Green color
9
Buzzer
STAND ALONE MODE
CENTRALIZED MODE
TELACCESS
-
- Dipswitch address set up
- Dip4 = ON
DIP SWITCH adressing
1
2
3
4
Mode
ON
ON
ON
ON
Front plate
OFF
ON
ON
ON
Reader 1
ON
OFF
ON
ON
Reader 2
OFF
OFF
ON
ON
Reader 3
ON
ON
OFF
ON
Reader 4
TERENA,
UGM-UGL,
UGP/40
PDN345BUSPROX
- Address programming during installation
- Dip4 = OFF
ST1 (Programming jumper)
ST1 (Programming jumper) : Normal
Normal (As standard)
Installation
cdvi.com
cdvigroup.com
5
MANUEL D’INSTALLATION
KCPROX WLC
Dual Technology Digicode®/Proximity reader - Wiegand
8] PROGRAMMING
For the programming
connect the purple cable
with the black cable.
Switch the power supply
off then switch it on.
2 beeps are emitted
Red LED ON
Programming
the illumination
Programming
the output
format
Programming
the number
of digits
Programming the
Bit format
A0
A1
A2
A3
1 beep
Green LED ON
1 beep
Green LED ON
1 beep
Green LED ON
1 beep
Green LED ON
Enter the illumination
time in seconds or
“00” for a permanent
illumination.
1 beep = OK
Green LED ON
4 beeps = Error
6
cdvi.com
cdvigroup.com
Enter:
- 1 = Wiegand
26-bit format
- 2 = CDVI format
- 3 = ISO Track 2
format
1 beep = OK
Green LED ON
4 beeps = Error
Enter:
4, 5 or 6 to specify the
number of digits.
1 beep = OK
Green LED ON
4 beeps = Error
Enter: 26, 30 or 44
to define the Bit number
of the Wiegand format
1 beep = OK
Green LED ON
4 beeps = Error
MANUEL D’INSTALLATION
KCPROX WLC
Dual Technology Digicode®/Proximity reader - Wiegand
Programming
Centaur or CDVI
mode
Programming
for decimal or
hexadecimal mode
Programming
the audible signal
A4
A5
A6
1 beep
Green LED ON
1 beep
Green LED ON
1 beep
Green LED ON
Enter :
- 0 = Centaur mode
- 1 = CDVI mode
1 beep = OK
Green LED ON
4 beeps = Error
Enter:
- 0 = for decimal
mode
- 1 = for
hexadecimal
mode
1 beep = OK
Green LED ON
4 beeps = Error
Enter:
- 0 = disable the
keypad beeps
- 1 = Enable the
keypad beeps
1 beep = OK
Green LED ON
4 beeps = Error
For the programming connect
the purple cable with the black
cable. Switch the power supply
off then switch it on.
2 beeps are emitted
cdvi.com
cdvigroup.com
7
MANUEL D’INSTALLATION
KCPROX WLC
Dual Technology Digicode®/Proximity reader - Wiegand
Default values
- Illumination duration: 10 seconds,
- User code lenght: 5 digits,
- 26 bit wiegand output,
- Buzzer disabled,
- Decimal mode.
from programming,
- 4 short beeps > data computing error.
Code Length
- The user code must be in 4, 5 or 6 digits,
- In decimal mode, all the keypad keys can be
used to program a user code except the B key,
- In hexadecimal mode, all the keypad keys
can be used to program a user code
except the A and B key,
- Enter the user code and then B to validate
the code.
Audible Signal
- 1 short beep > keypad powered
and key presses,
- 1 long beep > data computing
in programming,
- 2 short beeps > Entry or Exit
A] ENTRY IN PROGRAMMING
1. Enter in programming:
- Swich the power supply off,
- Connect the purple cable with the black cable,
- Switch the power supply on.
2. Two beeps are emitted to confirm entry
in programming:
- The keypad is illuminated.
- The red LED is ON.
-
The Green LED is lighting up during 1 second.
Press 1 to select 26-bit wiegand output format
Press 2 to select CDVI output format
Press 3 to select ISO Track 2 output format
One beep is emitted to confirm programming.
The Green LED is lighting up during 1 second.
3. Disconnect the purple cable with the black cable:
Two beeps are emitted to confirm exit
from programming.
Note: The command control of the buzzer
is not possible in programming mode.
D] CODE LENGTH
1. Enter in programming*.
B] ILLUMINATION DURATION
1. Enter in programming*.
A0
2. Press A0 to program the illumination duration :
- One beep is emitted.
- The Green LED is lighting up during 1 second.
- Enter the time in seconds,
10 for 10 seconds to 99 for 99 seconds
or enter 00 for a permanent illumination.
- One beep is emitted to confirm
the illumination duration.
3. Disconnect the purple cable with the black cable:
Two beeps are emitted to confirm exit
from programming.
2. Press A2 to enter in the code length
setting menu:
- One beep is emitted.
- The Green LED is lighting up during 1 second.
- Press 4 for a 4-digit user code, press 5
for a 5-digit user code or press 6 for a 6-digit
user code.
- One beep is emitted to confirm programming.
- The Green LED is lighting up during 1 second.
3. Disconnect the purple cable with the black cable:
Two beeps are emitted to confirm exit
from programming.
E] PROGRAMMING THE BIT FORMAT
C] OUTPUT FORMAT
1. Enter in programming*.
A1
2. Press A1 to enter in the output format menu:
- One beep is emitted.
* Refer to the chapter «Entry in programming».
8
cdvi.com
cdvigroup.com
A2
1. Enter in programming*.
A3
2. Press A3 to select the Bit format:
- One beep is emitted.
- The Green LED is lighting up during 1 second.
- Enter 24, 30 or 44 to define the bit format.
MANUEL D’INSTALLATION
KCPROX WLC
Dual Technology Digicode®/Proximity reader - Wiegand
- One beep is emitted to confirm programming.
- The Green LED is lighting up during 1 second.
3. Disconnect the purple cable with the black cable:
Two beeps are emitted to confirm exit
from programming.
3. Disconnect the purple cable with the black cable:
Two beeps are emitted to confirm exit
from programming.
H] AUDIBLE SIGNAL
A6
1. Enter in programming*.
F] PROGRAMMING CENTAUR OR CDVI MODE
1. Enter in programming*.
A4
2. Press A4 to select the mode:
- One beep is emitted.
- The Green LED is lighting up during 1 second.
- Press 0 for a Centaur mode or press 1
for a CDVI mode.
- One beep is emitted to confirm programming.
- The Green LED is lighting up during 1 second.
3. Disconnect the purple cable with the black cable:
Two beeps are emitted to confirm exit
from programming.
G] DECIMAL OR HEXADECIMAL MODE
1. Enter in programming mode*.
A5
2. Press A5 to enter in the mode
setting menu:
- One beep is emitted.
- The Green LED is lighting up during 1 second.
- Press 0 for a decimal mode, press 1
for a hexadecimal mode.
- One beep is emitted to confirm programming.
- The Green LED is lighting up during 1 second.
2. Press A6:
- One beep is emitted.
- The Green LED is lighting up during 1 second.
- Press 0 to disable the audible signal.
- Press 1 to enable the audible signal.
- One beep is emitted to confirm programming.
- The Green LED is lighting up during 1 second.
3. Disconnect the purple cable with the black cable:
Two beeps are emitted to confirm exit
from programming.
I] EXTERNAL CONTROL OF THE LED & BUZZER
The buzzer can be activated from an external input.
The control is done with a logic signal on the input.
Buzzer + LED Off
Buzzer + LED On
Buzzer + LED Off
OV
Centaur Mode
LED off. One beep is emitted + Orange LED when
the code is entering. The Buzzer and LED intputs
are activated.
CDVI Mode
LED off. The Buzzer and LED intputs are activated.
9] 26-BIT WIEGAND FORMAT
Chronograms
1 logic
0 logic
\DATA1
\CLOCK
\DATA0
50
µs
2ms
50
µs
2ms
* Refer to the chapter «Entry in programming».
cdvi.com
cdvigroup.com
9
MANUEL D’INSTALLATION
KCPROX WLC
Dual Technology Digicode®/Proximity reader - Wiegand
INTERFACE
- The output format is 26-bit Wiegand (Signals: DATA1, DATA0 and CLOCK),
- Output signal in open collectors (pull up of 2.2K in +5V) 26-bit hexadecimal output format.
The frame is made of 26-bit and built as follow:
- First parity: 1-bit – even parity for the first 12-bit,
- User Code: 3 half of a byte represent the code entered. Each byte is transferred from bit 7 to bit 0,
- Second parity: 1-bit – odd parity for the last 12-bit.
Bit 1
Bit 2 … bit 25
bit 26
Even parity on bit 2…bit13
Data (24 bits)
Odd parity on bit 14…bit 25
EXAMPLE A 4-DIGIT CODE: « 1 3 5 0 » Then « B »
1
0000
0000
0001
0011
0101
0000
1
Parity 1
0
0
1
3
5
0
Parity 2
The code is transmitted in hexadecimal: 001350
EXAMPLE A 5-DIGIT CODE: « 7 1 3 5 0 » Then « B »
1
0000
0111
0001
0011
0101
0000
1
Parity 1
0
7
1
3
5
0
Parity 2
The code is transmitted in hexadecimal: 071350
EXAMPLE A 6-DIGIT CODE: « 6 7 1 3 5 0 » Then « B »
1
0000
0000
0001
0011
0101
0000
1
Parity 1
0
0
1
3
5
0
Parity 2
The code is transmitted in hexadecimal: 671350
Parity 1: 0 if the number of 1 in bit 2 to bit 13 is even,
1 if the number of 1 in bit 2 to bit 13 is odd.
Parity 2: 0 if the number of 1 in bit 14 to bit 25 is odd,
1 if the number of 1 in bit 14 to bit 25 is even.
10] 30-BIT WIEGAND FORMAT
Signals output in open collectors with pull up in 30-bit hexadecimal format. The output format from the
proximity reader is 30-bit wiegand (Signal: DATA1, DATA0 and CLOCK) and is structured as follow:
1 - First parity :
10
1 bit – even parity for the first 14-bit
Code : A code is formed from 7 half byte.
Each byte is transferred from bit 7 to bit 0.
cdvi.com
cdvigroup.com
MANUEL D’INSTALLATION
KCPROX WLC
Dual Technology Digicode®/Proximity reader - Wiegand
2 - Second parity: 1 bit – odd parity for the last 14-bit
Bit 1
Bit 2 à bit 29
Bit 30
Even Parity from bit 2 to bit 15
Data (28-bit)
Odd Parity from bit 16 to bit 29
Example A: Temic card decimal code: 689905 (in hexadecimal: A86F1).
1
0000
0000
1010
0110
0110
1111
0001
0
Parity 1
0
0
A
8
6
F
1
Parity 2
The code number of the card is 00A86F1 in hexadecimal
Example B: EM badge hexadecimal code: 0100166A37
0
0000
0001
0110
0110
1010
2011
0111
1
Parité 1
0
1
6
6
A
3
7
Parité 2
The code transmitted is in hexadecimal format 0166A37
Parity 1: 0 if the number of 1 in bit 2 to bit 15 is even,
1 if the number of 1 in bit 2 to bit 15 is odd.
Parity 2: 0 if the number of 1 in bit 16 to bit 29 is odd,
1 if the number of 1 in bit 16 to bit 29 is even.
11] 44-BIT WIEGAND FORMAT
44-bit hexadecimal format. The output format from the proximity reader is 44-bit (Signal: DATA1, DATA0
and CLOCK) and is structured as follow:
1 - Data:
10 digit code number hexadecimal MSByte first.
Each hexadecimal digit = 4 bit, MSBit first
2 - LRC :
4 bit = or restricted in between the digit of the data, MSBit first.
Bit 1 to bit 40
Bit 41 to bit 44
Badge code
LRC
Example A: EM badge hexadecimal code: 01001950C3.
0000
0000
0000
0000
0001
1001
0101
0000
1100
0011
0011
0
1
0
0
1
9
5
0
C
3
3
The code number of the card is: 01001950C3 in hexadecimal code.
cdvi.com
cdvigroup.com
11
MANUEL D’INSTALLATION
KCPROX WLC
Dual Technology Digicode®/Proximity reader - Wiegand
10] PROPRIETARY FORMAT OWNED BY CDVI
This format is compatible with other CDVI products (Contact us).
11] ISO 7811 TRACK 2 FORMAT
SS
Characters
ES
LRC
SS = start sentinel > Hex B
ES = end sentinel > Hex F
LRC = Ou Exclusif de tous les caractères de la trame (including SS and ES)
The code length is set at 8 digits:
- In 4 digits > 00001234
- In 5-digits > 00012345
- In 6-digits > 00123456
/Présence
/Data
/Clock
Each digit is made of 5 bits: 4 bits data + 1 bit parity
Characters
B4
B3
B2
B1
0
0
0
0
0
1
1
0
0
0
1
0
12
Parity
2
0
0
1
0
0
3
0
0
1
1
1
4
0
1
0
0
0
5
0
1
0
1
1
6
0
1
1
0
1
7
0
1
1
1
0
8
1
0
0
0
0
9
1
0
0
1
1
A
1
0
1
0
1
B = SS
1
0
1
1
0
C
1
1
0
0
1
D = FD
1
1
0
1
0
E
1
1
1
0
0
F = ES
1
1
1
1
1
cdvi.com
cdvigroup.com
MANUEL D’INSTALLATION
KCPROX WLC
Dual Technology Digicode®/Proximity reader - Wiegand
14] NOTES
.....................................................................................................................................................
.....................................................................................................................................................
.....................................................................................................................................................
.....................................................................................................................................................
.....................................................................................................................................................
.....................................................................................................................................................
.....................................................................................................................................................
.....................................................................................................................................................
.....................................................................................................................................................
.....................................................................................................................................................
.....................................................................................................................................................
.....................................................................................................................................................
.....................................................................................................................................................
.....................................................................................................................................................
.....................................................................................................................................................
.....................................................................................................................................................
.....................................................................................................................................................
.....................................................................................................................................................
.....................................................................................................................................................
.....................................................................................................................................................
.....................................................................................................................................................
.....................................................................................................................................................
.....................................................................................................................................................
.....................................................................................................................................................
.....................................................................................................................................................
.....................................................................................................................................................
.....................................................................................................................................................
.....................................................................................................................................................
.....................................................................................................................................................
.....................................................................................................................................................
.....................................................................................................................................................
.....................................................................................................................................................
.....................................................................................................................................................
.....................................................................................................................................................
.....................................................................................................................................................
.....................................................................................................................................................
.....................................................................................................................................................
cdvi.com
cdvigroup.com
13
MANUEL D’INSTALLATION
KCPROX WLC
Lecteur double Technologie Proximité/Digicode® - Wiegand
1] PRESENTATION DU PRODUIT
Double technologie :
- Lecteur proximité,
- Digicode®.
Format de sorties :
- Wiegand,
- CDVI,
- ISO Track 2.
Inox.
Etroit : Idéal pour la pose
sur profil Aluminium.
Rétro-éclairé.
Préconisé pour l’activation
et la désactivation de votre système
d’alarme.
Pose en applique.
Montage avec vis Diax®.
Carte électronique résinée.
ANCE
SIST E
E RÉ
M
HAUT ANDALIS
AU V
Signalisation lumineuse et sonore.
Dimensions (L x l x P) : 190 x 43 x 27 mm.
Alimentations : 12 V DC.
Consommations : 120 mA.
IP64
-25°C à +70°C
Test vibrations
DEEE & RoHS
Certification CE
2] RAPPELS ET RECOMMANDATIONS
Rappel de câblage
- Dans le cas d’une connexion directe à la centrale
CT-V900-A (CENTAUR) ou une des centrales
LINKNET, le KCPROX WLC doit être placé
à une distance maximale de 50 m.
- Dans les autres situations, la distance entre le
KCPROX WLC et le contrôleur de porte (INTBUSW)
doit être de 50 m maximum. et la distance entre
la centrale ou platine jusqu’au dernier contrôleur
de porte (INTBUSW) peut atteindre 1200 m maximum.
- Attention de ne pas passer vos fils à proximité
de câbles «Courant fort» (ex: 230 V AC).
- Câbles préconisés entre le KCPROW WLC
et l’interface BUS (INTBUSW) : Câbles 2 paires
(4 fils) SYT1 8/10ème.
14
cdvi.com
cdvigroup.com
Montage
Afin d’optimiser la fixation du KC PROX WLC
et de prévenir les tentatives d’arrachage,
privilégiez les surfaces planes.
Recommandations d’installation
Pour sécuriser l’installation, n’oubliez pas de :
- placer la varistance sur le système de verrouillage,
en parallèle, au niveau de l’alimentation.
- placer une résistance de 120 ohms, entre A et B,
sur le dernier contrôleur de porte du BUS RS485.
Composition des codes
- Par soucis de sécurité, veillez à modifier le code
maître usine par celui de votre choix.
- Lors du changement du code maître usine
et de la création des codes utilisateurs, évitez
les codes trop simples (ex: les suites 3 4 5 6 7).
MANUEL D’INSTALLATION
KCPROX WLC
Lecteur double Technologie Proximité/Digicode® - Wiegand
3] KIT DE MONTAGE
Vis Diax® à tête fraisée
(M5x8)
Clé mâle coudée pour vis
Diax®
Cheville plastique
Vis cruciforme à tête
fraisée (M4x30)
1
1
2
2
KCPROX WLC
4] MONTAGE
1
2
Prenez les côtes du support
de fixation du KCPROX WLC
et percez la surface du mur.
Prévoyez la sortie des câbles,
cachés dans la surface.
3
Vissez le support de fixation
dans la surface à l’aide des 2
vis et chevilles fournies.
4
Câblez le KCPROX WLC
(Schéma page suivante) et
positionnez le sur le support
de fixation.
Pour finaliser la fixation du
KCPROX WLC, utilisez la vis
et l’outil Diax®.
5] RACCORDEMENTS CONNEXION DIRECTE AUX BORNIERS D’UNE CENTRALE
Raccordement aux bornier des centrales
Format Wiegand
Correspondances Correspondances
Sorties
Format Wiegand
Format ISO2
Format CDVI
Format CDVI
CT-V900-A
LT20PB
LT20PBIP
LT20AC
LT20IP
UCA3
PROMI1000
PROMI1000PC
ROUGE
Alimentation
12 V DC
Alimentation
12V DC
Alimentation
12V DC
+12V
12 V DC
12 V DC
12 V DC
12 V DC
NOIR
Alimentation 0V
Alimentation 0V
Alimentation 0V
R2/0V
0V
0V
0V
0V
MARRON
Commande
extérieur du buzzer
Commande
du buzzer
Commande
du buzzer
VERT
DATA 0
CODE
R2/D0
CL
CL
BLANC
DATA 1
DATA
R2/D1
DA
DA
BLEU
CLOCK
CLOCK
CDVI – 1 WIRE
8 ou 18
1
VIOLET
PROGRAMMATION
PROGRAMMATION
PROGRAMMATION
JAUNE
VOYANT VERT
VOYANT VERT
VOYANT VERT
ORANGE
VOYANT ROUGE
VOYANT ROUGE
VOYANT ROUGE
Câbles
OUT2
OUT1
cdvi.com
cdvigroup.com
15
MANUEL D’INSTALLATION
KCPROX WLC
Lecteur double Technologie Proximité/Digicode® - Wiegand
6] RACCORDEMENTS CONNEXION AVEC CONTRÔLEUR DE PORTE (INTBUSW)
KCPROX WLC
Rouge
Alimentation 12V DC
Noir
Alimentation 0V
Marron
Commande du buzzer
Vert
Data 0
Blanc
Data 1
Bleu
Clock
Violet
Programmation
Jaune
Voyant vert
Orange
Voyant rouge
Orange
Jaune
Blanc
vert
Bleu
Rouge
Noir
Marron
Violet
KCPROX WLC
Connexion
Câble Violet
et Noir pour la
programmation
INTBUSW
Gâche
Ventouse
Varistance
Alimentation
Pour l’alimentation,
il y a deux modes possibles :
Câble
blindage
12 V DC uniquement
(Configuration usine)
Coupez le strap
12 V AC ou 24 V DC
16
cdvi.com
cdvigroup.com
Si vous ne souhaitez
pas de gestion de l’etat
porte : Relier E et M
Vers d’autres contrôleur
de portes (INTBUSW)
MANUEL D’INSTALLATION
KCPROX WLC
Lecteur double Technologie Proximité/Digicode® - Wiegand
INTBUSW (Contrôleur de porte)
Bornier 5 points : Carte mère
V
Alimentation -
12
Alimentation +
1
Data O
2
Clock
3
Data 1
Bornier 16 points : Carte mère
R
Contact N.F porte Ventouse (+)
C
Contact commun + Alimentation
T
Contact N.O porte Gâche
R
Contact N.F alarme
C
Contact commun
T
Contact N.O alarme
+ ~ - Alimentation DC ou AC 12 V ou 24 V DC
Sans cavalier : sans clock
Avec cavalier : avec clock
P1
Bouton poussoir intérieur
M
Masse commune ( P1 et P2 )
P2
Bouton poussoir extérieur
E
Contact fermeture porte, N.F. (Porte fermée) et N.O. (Porte ouverte)
L
Contact autorisation lecture du badge (N.O) autorisée et (N.F) interdite
M
Masse commune ( E et M ) ou (E et L)
A
Bus RS485 (tous les A doivent être reliés entre eux sous la forme d’une chaîne)
B
Bus RS485 (tous les B doivent être reliés entre eux sous la forme d’une chaîne)
Bornier 3 points : Carte fille
7
Signalisation > couleur rouge
8
Signalisation > couleur verte
9
Buzzer
MODE AUTONOME
MODE CENTRALISÉ
TELACCESS
-
- Programmation de l’adresse par dipswitch
- Dip4 = ON
Adressage DIPSWITCH
1
2
3
4
Mode
ON
ON
ON
ON
Façade
OFF
ON
ON
ON
Lecteur 1
ON
OFF
ON
ON
Lecteur 2
OFF
OFF
ON
ON
Lecteur 3
ON
ON
OFF
ON
Lecteur 4
TERENA,
UGM-UGL,
UGP/40
PDN345BUSPROX
- Programmation de l’adresse par installation
- Dip4 = OFF
ST1 (Cavalier de programmation)
ST1 (Cavalier de programmation) : Normal
Normal (Config. usine)
Installation
cdvi.com
cdvigroup.com
17
MANUEL D’INSTALLATION
KCPROX WLC
Lecteur double Technologie Proximité/Digicode® - Wiegand
8] PROGRAMMATION
Connexion du câble
Violet et Noir
pour entrer en
programmation.
Coupez l’alimentation
puis rétablissez-la.
2 bips sonores
LED rouge ON
Programmation
de l’éclairage
Programmation
du format de
sortie
Programmation
du nombre
de termes
Programmation
du nombre de bits
A0
A1
A2
A3
1 bip
LED verte ON
1 bip
LED verte ON
1 bip
LED verte ON
1 bip
LED verte ON
Tapez la durée
de commande en
secondes ou “OO”
pour un éclairage
permanent
1 bip = OK
LED verte ON
(4 bips = Erreur)
18
cdvi.com
cdvigroup.com
Tapez :
- 1 = Wiegand 26 bits
- 2 = Format CDVI
- 3 = Format ISO
Track 2
1 bip = OK
LED verte ON
(4 bips = Erreur)
Tapez 4, 5 ou 6
pour définir le nombre
de termes.
1 bip = OK
LED verte ON
(4 bips = Erreur)
Tapez : 26, 30 ou 44
pour le nombre de bits
du code Wiegand.
1 bip = OK
LED verte ON
(4 bips = Erreur)
MANUEL D’INSTALLATION
KCPROX WLC
Lecteur double Technologie Proximité/Digicode® - Wiegand
Programmation
du mode CENTAUR
ou CDVI
Programmation
du mode décimal
ou héxadécimal
Programmation
du signal sonore
A4
A5
A6
1 bip
LED verte ON
1 bip
LED verte ON
1 bip
LED verte ON
Tapez :
- 0 = mode Centaur
- 1 = mode CDVI
1 bip = OK
LED verte ON
(4 bips = Erreur)
Tapez :
- 0 = mode décimal
- 1 = mode
héxadécimal
Tapez :
- 0 = Sans Bips touches
- 1 = Avec Bips
touches
1 bip = OK
LED verte ON
(4 bips = Erreur)
1 bip = OK
LED verte ON
(4 bips = Erreur)
Déconnexion du câble
Violet et noir
pour sortir de la
programmation
2 bips sonores
cdvi.com
cdvigroup.com
19
MANUEL D’INSTALLATION
KCPROX WLC
Lecteur double Technologie Proximité/Digicode® - Wiegand
Valeurs par défaut
- Tempo éclairage : 10 s.
- Nombre de termes : 5.
- Sortie Wiegand 26 bits.
- Buzzer inactif.
- Mode décimal.
- 4 bips courts > Erreur de saisie.
Correspondance des signaux sonores
- 1 bip court > Mise sous tension et bip touche.
- 1 bip long > Validation d’une saisie
en programmation.
- 2 bips courts > Entrée et sortie
de programmation.
A] ENTRÉE EN PROGRAMMATION
Termes utilisés
- Les codes utilisateurs doivent être composés
de 4,5 ou 6 termes.
- En mode décimal, seuls la touche B
est interdite pour composer les codes.
Touche B pour valider.
- En mode hexadécimal, seuls les touches
de 0 à 9 sont autorisées pour composer
les codes. Touche B pour valider.
- L’utilisateur doit composer son code
puis appuyer sur la touche B pour valider.
2. Tapez A1 pour choisir le format de sortie :
- Un bip est émis.
- La LED verte s’allume 1 seconde.
- Tapez 1 pour une sortie au format
Wiegand 26 bits.
- Tapez 2 pour une sortie au format CDVI.
- Tapez 3 pour une sortie au format ISO Track 2.
- Un bip de validation est émis.
- la LED verte s’allume 1 seconde.
A1
1. Coupez l’alimentation.
Reliez le fil violet au 0V.
Rétablir l’alimentation.
2. Deux bips sont émis pour confirmer l’entrée
en programmation :
- Le clavier est éclairé,
- La LED rouge est allumée.
Note : La commande extérieure du buzzer
ne fonctionne pas en programmation.
B] PROGRAMMATION DE L’ÉCLAIRAGE
3. Séparer le fil violet du fil noir :
- Deux bips sont émis pour confirmer le retour
au mode normal de fonctionnement.
D] PROGRAMMATION DU NOMBRE DE TERMES
1. Entrez en programmation* :
- Le clavier est éclairé,
- La LED rouge est allumée.
1. Entrez en programmation* :
- Le clavier est éclairé,
- La LED rouge est allumée.
2. Tapez A0 pour la temporisation
d’éclairage du clavier :
- Un bip est émis.
- La Led verte s’allume pendant 1 seconde.
- Tapez la durée de commande en secondes
(10 pour 10 secondes à 99 pour 99 secondes)
ou tapez 00 pour obtenir un éclairage permanent.
- Un bip de validation est émis.
2. Tapez A2 pour la saisie du nombre
de termes des codes :
- Un bip est émis.
- La LED verte s’allume 1 seconde.
- Tapez 4,5 ou 6 pour le nombre de termes.
- Un bip est émis pour confirmer
la programmation.
- La LED verte s’allume 1 seconde.
3. Séparer le fil violet du fil noir :
Deux bips sont émis pour confirmer le retour
au mode normal de fonctionnement.
3. Séparer le fil violet du fil noir :
Deux bips sont émis pour confirmer le retour
au mode normal de fonctionnement.
C] PROGRAMMATION DU FORMAT DE SORTIE
E] PROGRAMMATION DU NOMBRE DE BITS
1. Entrez en programmation* :
- Le clavier est éclairé.
- La LED rouge est allumée.
1. Entrez en programmation* :
- Le clavier est éclairé,
- La LED rouge est allumée.
A0
A2
* Référez-vous à la procédure d’entrée en programmation en début de chapitre.
20
cdvi.com
cdvigroup.com
MANUEL D’INSTALLATION
KCPROX WLC
Lecteur double Technologie Proximité/Digicode® - Wiegand
2. Tapez A3 pour la saisie du nombre
de bits du code Wiegand :
- Un bip est émis.
- La Led verte s’allume pendant 1 seconde.
- Tapez 26,30 ou 44 pour définir le nombre
de bits en mode Wiegand.
- Un bip est émis pour confirmer
la programmation.
- La Led verte s’allume pendant 1 seconde.
A3
3. Séparer le fil violet du fil noir :
Deux bips sont émis pour confirmer le retour
au mode normal de fonctionnement.
F] PROGRAMMATION DU MODE CENTAUR OU CDVI
1. Entrez en programmation* :
- Le clavier est éclairé,
- La LED rouge est allumée.
A4
2. Tapez A4 pour la saisie du mode :
- Un bip est émis.
- La Led verte s’allume pendant 1 seconde.
- Tapez 0 pour un fonctionnement en mode
Centaur ou tapez 1 pour sélectionner
le mode CDVI.
- Un bip est émis pour confirmer
la programmation.
- La Led verte s’allume pendant 1 seconde.
3. Séparer le fil violet du fil noir :
- Deux bips sont émis pour confirmer le retour
au mode normal de fonctionnement.
G] PROGRAMMATION DU MODE DÉCIMAL
OU HEXADÉCIMAL
1. Entrez en programmation* :
- Le clavier est éclairé,
- La LED rouge est allumée.
H] PROGRAMMATION DU SIGNAL SONORE
1. Entrez en programmation* :
- Le clavier est éclairé,
- La LED rouge est allumée.
A6
2. Tapez A6 :
- Un bip est émis.
- La Led verte s’allume pendant 1 seconde.
- Tapez 0 pour supprimer les bips touches
pendant la composition du code
et 1 pour les autoriser.
- Un bip est émis pour confirmer
la programmation.
- La Led verte s’allume pendant 1 seconde.
3. Séparer le fil violet du fil noir :
- Deux bips sont émis pour confirmer le retour
au mode normal de fonctionnement.
J] COMMANDE EXTÉRIEURE : BUZZER ET LED
Le buzzer et les voyants rouges et verts du clavier
peuvent être commandés extérieurement.
Il suffit d’appliquer un signal logique sur les entrées
correspondantes (fils marron, orange et jaune).
Buzzer + LED inactif
Buzzer + LED actif
Buzzer + LED inactif
OV
Mode Centaur
Voyants éteints. Un bip court à l’envoi du code
et voyant orange. Les entrées voyant et buzzer
sont actives.
Mode CDVI
Voyants éteints. Les entrées voyant
et buzzer sont actives
A5
2. Tapez A5 pour la saisie du mode :
- Un bip est émis.
- La Led verte s’allume pendant 1 seconde.
- Tapez 0 pour le mode décimal
et 1 pour le mode héxadécimal.
- Un bip est émis pour confirmer
la programmation.
- La Led verte s’allume pendant 1 seconde.
3. Séparer le fil violet du fil noir :
Deux bips sont émis pour confirmer le retour
au mode normal de fonctionnement.
* Référez-vous à la procédure d’entrée en programmation en début de chapitre.
cdvi.com
cdvigroup.com
21
MANUEL D’INSTALLATION
KCPROX WLC
Lecteur double Technologie Proximité/Digicode® - Wiegand
9] FORMAT DE SORTIE WIEGAND 26 BITS
0 logique
Chronogrammes
1 logique
\DATA1
\CLOCK
\DATA0
50
µs
50
µs
2ms
2ms
INTERFAÇAGE
- La communication s’effectue par une liaison de type Wiegand 26 bits (Format 26 bits hexadécimal).
- Signaux : DATA1, DATA0 et CLOCK. Sortie des signaux en collecteur ouvert (avec pulls up interne
de 2.2K au +5V)
La trame est constituée d’une totalité de 26 bits et se décompose comme suit :
- 1ère parité : 1 bit – parité paire des 12 bits suivants. Code clavier : 3 mots d’un octet représentant
le code tapé. Chaque mot est transmis bit de poids fort en premier.
- 2ème parité : 1 bit – parité impaire des 12 bits précédents.
Bit 1
Bit 2 … bit 25
bit 26
Parité paire sur bit 2… bit13
Donnée (24 bits)
Parité impaire sur bit 14… bit 25
EXEMPLE POUR UN CODE À 4 TERMES : « 1 3 5 0 » puis « B »
1
0000
0000
0001
0011
0101
0000
1
Parité 1
0
0
1
3
5
0
Parité 2
Le code émis est : 001350 en hexadécimal.
EXEMPLE POUR UN CODE À 5 TERMES : « 7 1 3 5 0 » puis « B »
0
0000
0111
0001
0011
0101
0000
1
Parité 1
0
7
1
3
5
0
Parité 2
Le code émis est : 071350 en hexadécimal.
EXEMPLE POUR UN CODE À 6 TERMES : « 6 7 1 3 5 0 » puis « B »
0
0110
0111
0001
0011
0101
0000
1
Parité 1
6
7
1
3
5
0
Parité 2
Le code émis est : 671350 en hexadécimal.
Parité 1 : Parité 2 : -
22
0
1
0
1
si
si
si
si
le
le
le
le
nombre
nombre
nombre
nombre
cdvi.com
cdvigroup.com
de
de
de
de
1
1
1
1
dans
dans
dans
dans
bit
bit
bit
bit
2 à bit 13 est paire,
2 à bit 13 est impaire.
14 à bit 25 est impaire,
14 à bit 25 est paire.
MANUEL D’INSTALLATION
KCPROX WLC
Lecteur double Technologie Proximité/Digicode® - Wiegand
10] FORMAT DE SORTIE WIEGAND 30 BITS
Structure et description du message
- Format 30 bits hexadécimal.
- La communication s’effectue par une liaison de type Wiegand 30 bits ( Signaux: DATA1 et DATA0 )
La trame est constituée d’une totalité de 30 bits et se décompose comme suit :
- 1ère parité : 1 bit – parité paire des 14 premiers bits. Code : 7 quartets représentant le code du badge.
Chaque mot est transmis bit de poids fort en premier.
- 2ème parité : 1 bit – parité impaire des 14 derniers bits
Bit 1
Bit 2 … bit 29
bit 30
Parité paire sur bit 2…bit 15
Donnée (28 bits)
Parité impaire sur bit 16… bit 29
EXEMPLE POUR UNE CARTE AYANT LE CODE DÉCIMAL : 689905 - EN HÉXADÉCIMAL : A86F1
1
0000
0000
1010
1000
0110
1111
0001
0
Parité 1
0
0
A
8
6
F
1
Parité 2
Le code émis est 00A86F1 en hexadécimal.
EXEMPLE POUR UN BADGE MARIN AYANT LE CODE HÉXADÉCIMAL : 0100166A37
0
0000
0001
0110
0110
1010
2011
0111
1
Parité 1
0
1
6
6
A
3
7
Parité 2
Le code émis est 0166A37 en hexadécimal.
Parité 1 : - 0 si le nombre de 1 dans bit 2 à bit 15 est paire
- 1 si le nombre de 1 dans bit 2 à bit 15 est impaire
Parité 2 : - 0 si le nombre de 1 dans bit 16 à bit 29 est impaire
- 1 si le nombre de 1 dans bit 16 à bit 29 est paire
11] FORMAT DE SORTIE WIEGAND 44 BITS
Structure et description du message :
- Format 44 bits hexadécimal.
- La communication s’effectue par une liaison de type Wiegand 44 bits ( Signaux: DATA1, DATA0 et CLOCK).
La trame est constituée d’une totalité de 30 bits et se décompose comme suit :
Données : 10 chiffres hexadécimaux (octet de poids fort en premier).
Chaque chiffre hexadécimal = 4 bits (bit de poids fort en premier).
LRC :
4 bit = OU exclusif entre les chiffres de la donnée (bit de poids fort en premier).
cdvi.com
cdvigroup.com
23
MANUEL D’INSTALLATION
KCPROX WLC
Lecteur double Technologie Proximité/Digicode® - Wiegand
bit 1 …. bit 40
bit 41 … bit 44
Code du badge
LRC
Format 44 bits hexadécimal.
EXEMPLE: LECTURE DES 40 BITS DU CODE
Chiffre 1
Chiffre 10
LRC
0000
0001
0000
0000
0001
1001
0101
0000
1100
0011
0011
0
1
0
0
1
9
5
0
C
3
3
Le numéro du badge est : 01001950C3 en hexadécimal.
12] FORMAT DE SORTIE FORMAT CDVI
Le KCPROX WLC fonctionne sous ce format (propriété de l’entreprise) avec certaines centrales ou platines
de la gamme CDVI (nous consulter).
13] FORMAT DE SORTIE FORMAT ISO 7811 TRACK 2
SS
Caractères
ES
Le nombre de caractères est fixé à 8 :
- En 4 termes – 00001234,
- En 5 termes – 00012345,
- En 6 termes - 00123456.
/Présence
/Data
/Clock
24
cdvi.com
cdvigroup.com
LRC
SS : Sentinelle de début > Hex B
ES : Sentinelle de fin > Hex F
LRC : Ou Exclusif de tous les caractères
de la trame (y compris SS et ES)
MANUEL D’INSTALLATION
KCPROX WLC
Lecteur double Technologie Proximité/Digicode® - Wiegand
Chaque caractère est composé de 5 bits : 4 bits de données + 1 bit de parité.
Caractères
B4
B3
B2
B1
0
0
0
0
0
Parité
1
1
0
0
0
1
0
2
0
0
1
0
0
3
0
0
1
1
1
4
0
1
0
0
0
5
0
1
0
1
1
6
0
1
1
0
1
7
0
1
1
1
0
8
1
0
0
0
0
9
1
0
0
1
1
A
1
0
1
0
1
B = SS
1
0
1
1
0
C
1
1
0
0
1
D = FD
1
1
0
1
0
E
1
1
1
0
0
F = ES
1
1
1
1
1
14] NOTES
.....................................................................................................................................................
.....................................................................................................................................................
.....................................................................................................................................................
.....................................................................................................................................................
.....................................................................................................................................................
.....................................................................................................................................................
.....................................................................................................................................................
.....................................................................................................................................................
.....................................................................................................................................................
.....................................................................................................................................................
.....................................................................................................................................................
.....................................................................................................................................................
.....................................................................................................................................................
.....................................................................................................................................................
.....................................................................................................................................................
.....................................................................................................................................................
cdvi.com
cdvigroup.com
25
MANUEL D’INSTALLATION
KCPROX WLC
Lecteur double Technologie Proximité/Digicode® - Wiegand
.....................................................................................................................................................
.....................................................................................................................................................
.....................................................................................................................................................
.....................................................................................................................................................
.....................................................................................................................................................
.....................................................................................................................................................
.....................................................................................................................................................
.....................................................................................................................................................
.....................................................................................................................................................
.....................................................................................................................................................
.....................................................................................................................................................
.....................................................................................................................................................
.....................................................................................................................................................
.....................................................................................................................................................
.....................................................................................................................................................
.....................................................................................................................................................
.....................................................................................................................................................
.....................................................................................................................................................
.....................................................................................................................................................
.....................................................................................................................................................
.....................................................................................................................................................
.....................................................................................................................................................
.....................................................................................................................................................
.....................................................................................................................................................
.....................................................................................................................................................
.....................................................................................................................................................
.....................................................................................................................................................
.....................................................................................................................................................
.....................................................................................................................................................
.....................................................................................................................................................
.....................................................................................................................................................
.....................................................................................................................................................
.....................................................................................................................................................
.....................................................................................................................................................
.....................................................................................................................................................
.....................................................................................................................................................
.....................................................................................................................................................
.....................................................................................................................................................
.....................................................................................................................................................
26
cdvi.com
cdvigroup.com
MANUEL D’INSTALLATION
KCPROX WLC
Lecteur double Technologie Proximité/Digicode® - Wiegand
.....................................................................................................................................................
.....................................................................................................................................................
.....................................................................................................................................................
.....................................................................................................................................................
.....................................................................................................................................................
.....................................................................................................................................................
.....................................................................................................................................................
.....................................................................................................................................................
.....................................................................................................................................................
.....................................................................................................................................................
.....................................................................................................................................................
.....................................................................................................................................................
.....................................................................................................................................................
.....................................................................................................................................................
.....................................................................................................................................................
.....................................................................................................................................................
.....................................................................................................................................................
.....................................................................................................................................................
.....................................................................................................................................................
.....................................................................................................................................................
.....................................................................................................................................................
.....................................................................................................................................................
.....................................................................................................................................................
.....................................................................................................................................................
.....................................................................................................................................................
.....................................................................................................................................................
.....................................................................................................................................................
.....................................................................................................................................................
.....................................................................................................................................................
.....................................................................................................................................................
.....................................................................................................................................................
.....................................................................................................................................................
.....................................................................................................................................................
.....................................................................................................................................................
.....................................................................................................................................................
.....................................................................................................................................................
.....................................................................................................................................................
.....................................................................................................................................................
.....................................................................................................................................................
cdvi.com
cdvigroup.com
27
Reference : G0301FR0334V01
Extranet : EXE-CDVI_IM KCPROX WLC CMYK A5 EN-FR 01
CDVI (Headquarters/Siège social)
FRANCE
Phone: +33 (0)1 48 91 01 02
Fax: +33 (0)1 48 91 21 21
CDVI
SWITZERLAND
Phone: +41 (0)21 882 18 41
Fax: +41 (0)21 882 18 42
CDVI
MAROC
Phone: +212 5 22 48 09 40
Fax: +212 5 22 48 34 69
CDVI
AMERICAS
Phone: +1 (450) 682 7945
Fax: +1 (450) 682 9590
CDVI
CHINA
Phone: +86 (0)10 87664065
Fax: +86 (0)10 87664165
CDVI
SWEDEN
Phone: +46 (0)31 760 19 30
Fax: +46 (0)31 748 09 30
CDVI
BENELUX
Phone: +32 (0) 56 62 02 50
Fax: +32 (0) 56 62 02 55
CDVI
IBÉRICA
Phone: +34 935 390 966
Fax: +34 935 390 970
CDVI
UK
Phone: +44 (0)1628 531300
Fax: +44 (0)1628 531003
CDVI
TAIWAN
Phone: (0)42471 2188
Fax: (0)42471 2131
CDVI
ITALIA
Phone: +39 0331 97 38 08
Fax: +39 0331 97 39 70
DIGIT
FRANCE
Phone: +33 (0)1 41 71 06 85
Fax: +33 (0)1 41 71 06 86
cdvigroup.com
Toutes les indications mentionnées sur le présent document (photos, dessins, caractéristiques et côtes) sont susceptibles
de modifications sans notification préalable.
All the specifications on this document (photos, drawing, features and dimensions) could be changed without any prior notice
Manufacturing Access Control since 1985
LA GÂCHE ÉLECTRIQUE
FRANCE
Phone: +33 (0)3 88 77 32 82
Fax: +33 (0)3 88 77 85 02