1
TE08WHB
Instruction Manual & Warranty
Indoor
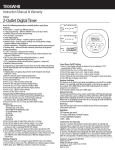
8-Outlet Digital Power Strip Timer
8 Grounded Outlets, 4 Timer Controlled Outlets
INSTALLING BATTERY
1. Install a 1.5 volt “AG13” mercury battery in the battery compartment
on the back of the timer and then close the cover.
2. All of the display shows for three seconds, then the display
reads OFF MO 12:00 AM
3. The clock starts.
SETTING THE CURRENT TIME
While holding the CLK (CLOCK) button down, press the DAY, HR (HOUR)
and MIN (MINUTE) buttons to set the day of the week, hour and minutes
respectively.
PROGRAMMING EVENTS
1. Press the PROG button once. Display reads either:
- 1 ON MO TU WE TH FR SA SU --:-- , if it has not been set.
- 1 ON and previous setting, if it has previously been set.
The number 1 indicates that you are now programming event #1.
2. Press the DAY button repeatedly. The display shows the day on
which you want the timer to turn ON. The day options include:
- All days of the week (MO TU WE TH FR SA SU)
- Any single day of the week (MO TU WE TH FR SA SU)
- Weekdays only (MO TU WE TH FR)
- Weekends only (SA SU)
3. Press the HR (HOUR) and MIN (MINUTE) buttons to select the time
of day when you want the timer to turn ON.
4. Press the PROG button once again. Display reads:
- 1 OFF MO TU WE TH FR SA SU --:--, if it has not been set.
- 1 OFF and previous setting, If it has previously been set.
5. Repeat the procedure in steps 2 and 3 to select the day and time
when you want the timer to turn OFF.
6. If you choose to set multiple programs, repeat the procedures in
steps 1 to 5 to select the time and day when you want the timer
to turn ON and OFF for the other six events.
7. When programming is complete, press the CLK (CLOCK) button
to return to the current time display.
REVIEWING YOUR PROGRAMS
1. Press the PROG button repeatedly to check the ON and OFF
setting for each event.
2. While holding the MODE button down, press the PROG button
to clear the setting.
ACTIVATING YOUR PROGRAMS
1. Press the MODE button until the AUTO indicator is displayed.
The timer will operate automatically as programmed.
2. Press the MODE button until the RDM (RANDOM) indicator is
displayed. The timer will operate randomly as programmed. random
mode runs the programs you have set, but slightly varies the ON
and OFF times to reduce predictability and give the home a
more "lived-in" look.
MANUAL OVERRIDE
1. Press the MODE button until the ON indicator is displayed.
The outputs of the timer will turn ON and remain ON until
the mode is changed again.
2. Press the MODE button until the OFF indicator is displayed.
The outputs of the timer will turn OFF and remain OFF until
the mode is changed again.
OPERATING TIMER
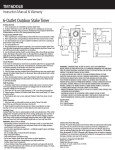
1. Plug power strip into an outlet.
2. Plug device to be connected into one of the receptacles on the
power strip. Note that 4 outlets on left are timer controlled,
4 outlets on right side are always on.
3. Check the settings of the timer are correct.
4. Turn the switch on.
RATINGS
120Vac, 15A 60Hz 1800W
Limited One Year Warranty
AmerTac™ warrants this product to be free from defects in material
and workmanship for a period of one year from the date of purchase.
AmerTac’s obligations are limited to repairing or replacing any defective
unit and are effective only if such units are returned within one year
of the purchase date to AmerTac, 250 Boulder Drive, Breinigsville, PA
18031. Warranty void if damage is due to misuse or improper installation.
In no circumstance will AmerTac be liable for consequential or incidental
damages relating in any way to this product.
Questions?, ¿Preguntas? 201.661.9945
©2011 AmerTac™
Saddle River Executive Centre,
One Route 17 South, Saddle River, NJ 07458
www.amertac.com
Made in China
TE08WHB
Manual de instrucciones y garantía
Interior
Temporizador digital con tira de alimentación con 8 tomacorrientes
8 tomacorrientes a tierra, 4 tomacorrientes controlados por temporizador
CÓMO INSTALAR LA BATERÍA
1. Instale una batería de mercurio tipo “AG13” de 1.5 voltios en el
compartimiento de la batería ubicado en la parte posterior del
temporizador. Luego, cierre la cubierta.
2. La pantalla despliega toda la información durante tres segundos,
y luego muestra OFF MO 12:00 AM
3. El reloj comienza a funcionar.
CÓMO AJUSTAR LA HORA ACTUAL
Mientras mantiene oprimido el botón CLK (RELOJ), oprima los botones
DAY (DÍA), HR (HORA) y MIN (MINUTO) para configurar el día de la
semana, la hora y los minutos respectivamente.
CÓMO PROGRAMAR EVENTOS
1. Oprima el botón PROG (PROGRAMACIÓN) una vez. La pantalla
muestra uno de los siguientes:
- 1 ON MO TU WE TH FR SA SU --:-- , si aún no se ha configurado.
- 1 ON y el ajuste anterior, si fue previamente configurado.
El número 1 indica que está programando el evento núm. 1.
2. Oprima el botón DAY (DÍA) de forma repetida. La pantalla muestra
el día que desea que el temporizador se ACTIVE. Las opciones de
días incluyen:
- Todos los días de la semana (MO TU WE TH FR SA SU)
[Lun Mar Miér Jue Vier Sáb Dom]
- Cualquier día de la semana (MO TU WE TH FR SA SU)
[Lun Mar Miér Jue Vier Sáb Dom]
- Días de la semana solamente (MO TU WE TH FR)
[Lun Mar Miér Jue Vier]
- Fines de semana solamente (SA SU) [Sáb Dom]
3. Oprima los botones HR (HORA) y MIN (MINUTO) para seleccionar
la hora del día a la que desea que el temporizador se ACTIVE.
4. Vuelva a oprimir el botón PROG (PROGRAMACIÓN). La pantalla
muestra uno de los siguientes:
- 1 OFF MO TU WE TH FR SA SU --:-- , si aún no se ha configurado.
- 1 OFF y el ajuste anterior, si fue previamente configurado.
5. Repita los pasos 2 y 3 para seleccionar el día y la hora a la que
desea que el temporizador se DESACTIVE.
6. Si decide configurar múltiples programaciones, repita los pasos
1 al 5 para seleccionar el día y la hora a la que desea que el
temporizador se ACTIVE y DESACTIVE para los seis eventos restantes.
7. Cuando finalice la programación, oprima el botón CLK (RELOJ)
para regresar a la pantalla de hora actual.
CÓMO VERIFICAR LAS PROGRAMACIONES
1. Oprima el botón PROG (PROGRAMACIÓN) de forma repetida
para verificar los ajustes de ACTIVACIÓN y DESACTIVACIÓN de
cada evento.
2. Mientras mantiene oprimido el botón MODE (MODO), oprima el
botón PROG (PROGRAMACIÓN) para borrar el ajuste.
CÓMO ACTIVAR LAS PROGRAMACIONES
1. Oprima el botón MODE (MODO) hasta que el indicador AUTO
(AUTOMÁTICO) aparezca en pantalla. El temporizador funcionará
de manera automática según fue programado.
2. Oprima el botón MODE (MODO) hasta que el indicador RDM
(ALEATORIO) aparezca en pantalla. El temporizador funcionará de
manera aleatoria según fue programado. El modo Aleatorio ejecuta
las programaciones que ha configurado, pero variará ligeramente
las horas de ACTIVACIÓN y DESACTIVACIÓN para reducir la
previsibilidad y hacer parecer que la casa está habitada.
ANULACIÓN MANUAL
1. Oprima el botón MODE (MODO) hasta que el indicador ON
(ACTIVACIÓN) aparezca en pantalla. Los tomacorrientes del
temporizador se ACTIVARÁN y permanecerán ACTIVADOS hasta que
se vuelva a cambiar el modo.
2. Oprima el botón MODE (MODO) hasta que el indicador OFF
(DESACTIVACIÓN) aparezca en pantalla. Los tomacorrientes del
temporizador se DESACTIVARÁN y permanecerán DESACTIVADOS
hasta que se vuelva a cambiar el modo.
CÓMO HACER FUNCIONAR EL TEMPORIZADOR
1. Enchufe la tira de alimentación en un tomacorriente.
2. Enchufe el dispositivo que se conectará en uno de los receptáculos
de la tira de alimentación. Observe que los 4 tomacorrientes de la
izquierda son controlados por el temporizador y
los 4 tomacorrientes de la derecha permanecen siempre activados.
3. Verifique que las configuraciones del temporizador sean correctas.
4. Encienda el interruptor.
CAPACIDADES NOMINALES
120 VCA, 15 A 60 Hz 1800 W
Garantía limitada de un año
AmerTac™ garantiza que este producto está libre de defectos de
material y mano de obra por un período de un año a partir de la fecha
de compra. Las obligaciones de AmerTac se limitan a reparar o cambiar
la unidad defectuosa y son efectivas sólo si se devuelve en un lapso de
un año a partir de la fecha de compra a AmerTac, 250 Boulder Drive,
Breinigsville, PA 18031. La garantía no será válida si el daño es causado
por mal uso o instalación inadecuada. En ningún caso AmerTac será
responsable por daños consecuentes o incidentales relacionados en
cualquier forma con este producto.
¿Preguntas? 201.661.9945
©2011 AmerTac™
Saddle River Executive Centre,
One Route 17 South, Saddle River, NJ 07458
www.amertac.com
Hecho en China
TE08WHB
Manuel d’instructions et garantie
Intérieur
Minuterie numérique avec barre d’alimentation à 8 prises
8 prises mises à la terre, 4 prises contrôlées par la minuterie
INSTALLATION DE LA PILE
1. Installer une pile au mercure de 1,5 volt « AG13 » dans le compartiment
à pile à l’arrière de la minuterie puis fermer le couvercle du compartiment.
2. Tous les affichages sont activés pendant trois secondes, puis
OFF MO 12:00 AM s’affiche.
3. L’horloge démarre.
RÉGLAGE DE L’HEURE ACTUELLE
Maintenir la touche CLK (horloge) enfoncée et appuyer sur les touches
DAY (jour), HR (heure) et MIN (minutes) pour régler le jour de la semaine,
l’heure et les minutes respectivement.
PROGRAMMATION DES ACTIVITÉS
1. Appuyer une fois sur la touche PROG (programmation). L’écran affiche:
- 1 ON MO TU WE TH FR SA SU --:-- , si le réglage n’a pas encore
été effectué.
- 1 ON et réglage précédent, si le réglage a été déjà affectué.
Le chiffre 1 indique que l'activitén°1 de la minuterie est en cours.
2. Appuyer sur la touche DAY (jour) plusieurs fois. L’écran affiche les
options de jour pour l’ACTIVATION de la minuterie. Options de
jour disponibles :
- Tous les jours de la semaine MO TU WE TH FR SA SU
(lundi, mardi, mercredi, jeudi, vendredi, samedi, dimanche)
- Chaque jour de la semaine MO TU WE TH FR SA SU
(lundi, mardi, mercredi, jeudi, vendredi, samedi, dimanche)
- Jours de la semaine uniquement MO TU WE TH FR
(lundi, mardi, mercredi, jeudi, vendredi)
- Fin de semaine uniquement SA SU (samedi, dimanche)
3. Appuyer sur la touche HR (heure) et MIN (minutes) pour sélectionner
l’heure du jour d’ACTIVATION de la minuterie
4. Appuyer à nouveau sur la touche PROG (programmation).
L’écran affiche :
- 1 OFF MO TU WE TH FR SA SU --:--, si le réglage n’a pas encore
été effectué.
- 1 OFF et réglage précédent, si le réglage a été déjà affectué.
5. Répétez les procédures des étapes 2 et 3 pour sélectionner le jour
et l’heure de DÉSACTIVATION de la minuterie .
6. En cas de réglage de plusieurs programmations, répétez les procédures
des étapes 1 à 5 pour sélectionner l’heure et le jour d’ACTIVATION
et de DÉSACTIVATION pour les six autres activités.
7. Lorsque la programmation est terminée, appuyer sur la touche
CLK (horloge) pour revenir à l’affichage de l’heure actuelle.
PASSER EN REVUE LES PROGRAMMES
1. Appuyer sur la touche PROG (programmation) plusieurs fois pour
vérifier les réglages d’ACTIVATION (ON) et de DÉSACTIVATION (OFF)
pour chaque activité.
2. Maintenir la touche MODE (mode) enfoncée et appuyer sur la touche
PROG (programmation) pour annuler les réglages.
ACTIVATION DES PROGRAMMES
1. Appuyer sur la touche MODE (mode) jusqu’à ce que s’affiche
AUTO (mode automatique). La minuterie fonctionnera sur le mode
automatique selon la programmation effectuée.
2. Appuyer sur la touche MODE (mode) jusqu’à ce que s’affiche RDM
(mode aléatoire). La minuterie fonctionnera sur un mode aléatoire
selon la programmation effectuée. Le mode aléatoire exécute les
programmes qui ont été réglés, mais les heures d’ACTIVATION et
de DÉSACTIVATION varient légèrement afin de réduire la prévisibilité
et donner l’impression qu’une maison est « en activité ».
PRIORITÉ MANUELLE
1. Appuyer sur la touche MODE (mode) jusqu’à ce que s’affiche
ON (activation). Les prises de la minuterie sont ACTIVÉES et demeurent
ACTIVÉES.
2. Appuyer sur la touche MODE (mode) jusqu’à ce que s’affiche
OFF (désactivation). Les prises de la minuterie sont DÉSACTIVÉES
et demeurent DÉSACTIVÉES .
FONCTIONNEMENT DE LA MINUTERIE
1. Brancher la barre d’alimentation dans une prise.
2. Brancher l’appareil qui doit être connecté dans l’une des prises
de la barre d’alimentation. À noter : les 4 prises de gauche sont
contrôlées par la minuterie, les 4 prises de droite sont toujours
activées.
3. Vérifier que les réglages de la minuterie sont adéquats.
4. Activer l’interrupteur.
CARACTÉRISTIQUES NOMINALES
120 VCA, 15 A 60 Hz 1800 W
Garantie limitée d’un an
AmerTac™ garantit ce produit contre tout défaut de matériaux et de
main d’œuvre pendant une période de un (1) an à partir de la date
d’achat. Les obligations d’AmerTac se limitent à la réparation ou au
remplacement de tout article défectueux et s’appliquent seulement si
l’article est retourné dans l’année de la date d’achat à AmerTac, 250
Boulder Drive, Breinigsville, PA 18031. AmerTac ne peut en aucun cas
être tenue responsable pour des dommages consécutifs ou accessoires
liés de quelque manière que ce soit à ce produit.
Questions? 201.661.9945
©2011 AmerTac™
Saddle River Executive Centre,
One Route 17 South, Saddle River, NJ 07458
www.amertac.com
Fabriqué en Chine