1
KS-AR8004D / KS-AR8002D
LVT1813-001A
[J]
POWER AMPLIFIER: INSTRUCTIONS
AMPLIFICATEUR DE PUISSANCE: MANUEL D’INSTRUCTIONS
ENGLISH
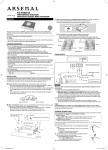
When you use more than one KS-AR8000 series amplifier, you can pile up to three of
them using the provided brackets and hex screws in two ways, X or Y.
1 Attach the provided spacers to the bottom of the amplifier (2 and 3).
Spacer's
bottom
Thank you for purchasing an ARSENAL product. Please read all instructions carefully before
operation, to ensure your complete understanding and to obtain the best possible performance
from the unit.
Bottom
2 Fix the amplifiers on both sides with the brackets (I) as illustrated.
• Be sure to mount the lowest amplifier (1) as illustrated on .
• Before piling amplifiers as X, first make the connections for the power supply (see
“POWER SUPPLY” below) and speakers (see “SPEAKER CONNECTIONS” on page 2).
For safety....
• Do not raise the volume level too much, as this will block outside sounds, making driving dangerous.
• Stop the car before performing any complicated operations.
CAUTIONS AND NOTES
X
Y
Bracket (I)
Bracket (I)
Spacer
This unit is designed to operate on 12 V DC, NEGATIVE ground electrical systems.
• This unit uses BTL (Balanced Transformerless) amplifier circuitry, i.e., floating ground system,
so comply with the following:
Do not connect the “·” terminals of the speakers to each other.
Do not connect the “·” terminals of the speakers to the metal body or chassis.
• Cover the unused terminals with insulating tape to prevent them from short circuiting.
• When an extension lead is used, it should be as thick and short as possible; connect it firmly
with insulating tape.
• Be sure to leave an appropriate space between the antenna and the wires of this unit.
• When replacing the fuse, use a 30 A fuse for KS-AR8004D or a 25 A fuse for KS-AR8002D.
• Do not let pebbles, sand or metallic objects get inside the unit.
• To keep the heat dissipation mechanism running effectively, wipe the accumulated dust off
periodically.
• Listening to the tape, radio, CD or Digital Audio Player, etc. with the volume set at a high level
for a long period of time will exhaust the battery, while the engine is turned off or while the
engine is idling.
• This unit becomes very hot. Be careful not to touch the unit not only when using but for a while
after using.
DO NOT disassemble the units since there are no user serviceable parts inside.
Spacer
Bracket (L)
Bracket (L)
Side of the unit
POWER SUPPLY
*Not included with this unit.
For Customer Use:
Enter below the Model No. and Serial No. which are located on the top or bottom of the
cabinet. Retain this information for future reference.
Model No.
Serial No.
To metallic body or chassis
Fuse
(To an accessory terminal)
Remote turn-on line
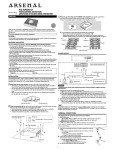
INSTALLATION
The following illustration shows a typical installation. However, you should make adjustments
corresponding to your specific car. If you have any questions or require information regarding
installation kits, consult your JVC car audio dealer or a company supplying the kits.
Ignition switch
CAUTION
Mount this unit on a firm surface, such as in the trunk or under the front seat.
To prevent short circuits while making connections, keep the battery’s negative terminal
disconnected.
• Since heat is generated in the unit, do not mount it near inflammable objects. In addition,
mount it in an area that will not prevent the unit from dissipating the heat.
• Do not mount the unit in the places subject to heat: near a radiator, in a glove compartment
or in insulated areas such as under a car mat that will prevent the unit from dissipating
heat.
• When mounting the unit under the front seat, make sure that adjusting the seat position
will not catch any wire of the unit.
Under the front seat
1 Remote turn-on line (not included with this unit)
a When you use a JVC car receiver with a remote lead, connect to the remote lead.
b When you connect a unit without a remote lead, connect to the accessory circuit of the
car which is activated by the ignition switch. In this case, noise may occur when the car
receiver is turned on or off. To avoid this noise, do not turn on or off the car receiver itself.
You can turn on or off the car receiver along with the on/off operation of the ignition switch.
2 Ground lead (not included with this unit)
3 Power cord (not included with this unit)
• When using a power cord, be sure to add the appropriate fuse near the battery as shown.
– For KS-AR8004D: 40 A
– For KS-AR8002D: 30 A
• Connect to the battery’s “ª” terminal only after all the other connections have been made.
Onto the trunk floor
Note
If the Status lamp (see “CONTROLS” on page 3) lights in red, it indicates incorrect speaker
wiring or connections. In this case, see “TROUBLESHOOTING” on page 3. Be sure to correct the
speaker wiring and other connections.
When mounting this unit, be sure to use the provided screws. If any other screws are used,
there is a risk of loosening the unit or damaging parts inside it.
• Before drilling holes in the trunk to install the unit, make sure that there is a sufficient
space under the trunk so that you do not drill holes in the fuel tank, etc.
• To detach and rotate the Logo Plate, use the provided hex wrench (3 mm).
Screw (Dia. 3/16 inch (4 mm)
× 13/16 inch (20 mm))
JVC car receiver, etc.
Car battery
TERMINAL CONNECTIONS
The appropriate wire gauge for each terminal is as follows.
• POWER terminals:
– + B and GND: AWG 8 to AWG 4 (The cross section is about 8 mm2 to 21 mm2.)
– REM: AWG 18 to AWG 8 (The cross section is about 0.8 mm2 to 8 mm2.)
• SPEAKER OUTPUT terminals:
– AWG 18 to AWG 8 (The cross section is about 0.8 mm2 to 8 mm2.)
Bracket (L)
Hex Screw (M4 × 7/16 inch (10 mm))
If you have any questions regarding the thickness of the power cord, etc., consult your nearest
JVC car audio dealer.
Logo Plate (detachable)
1 Peel off the insulating vinyl cover of a lead to expose the conductor
2
Bracket (L)
Drilled hole
3
1
inside.
• The exposed conductor should be 5/16 inch (7 mm) to 7/16 inch
(10 mm) long.
– If shorter, it may cause poor conductivity.
– If longer, it may cause a short circuit.
Loosen the hex screw in a terminal with the provided hex wrench
and insert the conductor into the terminal.
• Use the appropriate hex wrench for each terminal.
– 4 mm: +B and GND terminals
– 3 mm: REM and SPEAKER OUTPUT terminals
Fix the hex screw again to secure the conductor.
SPEAKER SYSTEMS
Make sure to comply with the following notes:
• Be sure not to connect the “·” terminals of the speakers to a common point.
• If the same lead is used for both left/right or front/rear speaker wirings, this unit cannot be used.
Always use independent leads for each speaker. In this case, redo the wiring.
• Use speakers with an impedance of 2 Ω to 8 Ω (4 Ω to 8 Ω: when used in Bridge Mode).
• Use speakers which have sufficient capacity for the unit.
For KS-AR8004D:
When you connect 4 speakers to the unit, down mixed signals (front and rear) are emitted
through the PRE OUT jacks.
For KS-AR8002D:
Incoming signals are emitted through the PRE OUT jacks.
SPEAKER CONNECTIONS
Connect the Line Output from the receiver to the INPUT jacks on this unit using RCA pin
cords (not included with this unit).
• Be sure to adjust the CROSSOVER filter switch as illustrated on the following diagrams. (See
also “CONTROLS” on page 3.)
Connection varies depending on the number of the speakers used in your car. Select the
appropriate connection referring to the following diagrams.
Before connecting:
• Securely connect all the parts. If the connections are loose, due to contact resistance etc., heat
will break out and may cause an accident. Secure and cover the cords with insulating tape and
run them under the car mats.
Note
Do not adjust the CROSSOVER filter switch while the unit is turned on.
KS-AR8004D
KS-AR8002D
2-speaker system
4-speaker system
Line Out (Rear)
Front Speaker
(left/right)
JVC car receiver, etc.
Line Out
(Front)
Line Out
Rear Speaker
(left/right)
JVC car receiver, etc.
Left speaker
Right speaker
CROSSOVER
filter switch
CROSSOVER
filter switch
Control panel
Control panel
2-speaker system (2 amplifiers)—Bridge Mode*2
2-speaker system plus subwoofer—Bridge Mode*2
Line Out (Rear) or Subwoofer Out
JVC car receiver, etc.
Line Out
(Front)
Front Speaker
(left/right)
Right speaker
Line Out
Subwoofer
JVC car receiver, etc.
Left speaker
CROSSOVER filter switch
Control panel
CROSSOVER
filter switch
Control panel
Control panel
2-speaker system—Bridge Mode*2
Line Out
Front Speaker
(left/right)
JVC car receiver, etc.
Subwoofer system (5.1channel receiver)—Bridge Mode*2
Subwoofer Out
JVC car receiver, etc.
CROSSOVER
filter switch
Subwoofer
CROSSOVER
filter switch
Control panel
Control panel
4-speaker system plus subwoofer (PRE OUT)
Down mixed signals are emitted through the PRE OUT jacks.
2-speaker system plus subwoofer (PRE OUT)
Line Out (Rear)
JVC car receiver, etc.
Line Out (Front)
Front Speaker
(left/right)
Line Out
Rear Speaker
(left/right)
JVC car receiver, etc.
Left speaker
Right speaker
CROSSOVER
filter switch
CROSSOVER
filter switch
Control panel
Control panel
ARSENAL amplifier:
KS-AR8001D
Subwoofer
System
ARSENAL amplifier:
KS-AR8001D
*1 RCA pin cords (not included with this unit)
*2 Bridge Mode: Be sure to connect the line output from the receiver to the left (L/MONO) jack on this unit.
2
Subwoofer
System
KS-AR8002D
TROUBLESHOOTING
2-speaker system plus subwoofer (1 amplifier)
The minimum impedance should be 4 Ω for each of the left and right speakers, and the
subwoofer.
For more details, consult your JVC car audio dealer.
The Status lamp does not light.
• Change the fuses if the current one is blown.
• Confirm the connections for the power supply (see “POWER SUPPLY” on page 1).
• Connect the ground lead securely to a metal part of the car.
• Turn on the equipment connected to this unit.
• Use a relay if your system employs so many amplifiers.
• Confirm the battery voltage (11 V to 16 V).
Subwoofer
JVC car receiver, etc.
Line Out
Left speaker
Right speaker
The Status lamp lights in red and/or the unit heats up abnormally.
• Use speakers of a suitable impedance.
• Correct the speaker wirings if they are short-circuited.
• Leave the unit turned off for a while to cool it down.
CROSSOVER
filter switch
The Status lamp lights in violet frequently. (Clipping*)
• Lower the input level with the Input LEVEL controller until the lamp lights in violet a few times.
* It means that the amplifier circuits are overloaded and the sound may distort due to too much
input from the car receiver.
No sound is heard.
• Confirm the connections for the power supply (see “POWER SUPPLY” on page 1).
• Connect the RCA pin cords to the INPUT jacks.
• Confirm the speaker wirings and the position of the CROSSOVER filter switch (See “SPEAKER
CONNECTIONS” on page 2).
Control panel
*1
*2
*3
*4
RCA pin cord (not included with this unit)
Bridge wiring
Use a High-pass crossover (not included with this unit).
Use a Low-pass crossover (not included with this unit).
Alternator noise is heard.
• Keep the leads of the POWER terminals away from the RCA pin cords.
• Keep the RCA pin cords away from other electrical cables in the car.
• Connect the ground lead securely to a metal part of the car.
• Make sure the negative speaker leads do not touch the car chassis.
• Replace the plugs or use plugs with load resistors.
• Connect a bypass capacitor across the accessory switches (horn, fan, etc.).
CONTROLS
To operate the following controls, detach the control cover. Attach it again after operation.
Noise is made when you connect the unit to an AM tuner.
• Move all the leads of this unit away from the antenna lead.
Control cover
SPECIFICATIONS
Power Output
Signal-to-Noise Ratio
The illustration above is for KS-AR8004D.
KS-AR8004D: 120 W RMS x 4 channels at 4 Ω and ≤ 1% THD + N
KS-AR8002D: 150 W RMS x 2 channels at 4 Ω and ≤ 1% THD + N
80 dBA (reference: 1 W into 4 Ω)
KS-AR8004D
Maximum Power Output
Load Impedance
Frequency Response
Input Sensitivity/Impedance
Distortion
Power Requirement
Grounding system
Dimensions (W×H×D)
Mass (approx.)
KS-AR8002D
Accessories
600 W
4Ω
(Normal mode: 2 Ω to 8 Ω allowance)
(Bridge Mode: 4 Ω to 8 Ω allowance)
5 Hz to 40 kHz* (+0, –3 dB)
* Subsonic filter cuts off extremely low frequency signals less than
18 Hz.
2 V /44 kΩ (0.3 V to 6 V, variable)
Less than 0.01% (at 1 kHz)
DC 14.4 V (11 V to 16 V allowance)
Negative ground
9-7/8 inch × 2-1/2 inch × 7-3/16 inch (250 mm × 62 mm × 182 mm)
KS-AR8004D: 6.2 lbs. (2.8 kg)
KS-AR8002D: 5.8 lbs. (2.6 kg)
Screw (Dia. 3/16 inch (4 mm) × 13/16 inch (20 mm)) × 4
Hex Screw (M4 × 7/16 inch (10 mm)) × 8
Hex wrench
4 mm × 1
3 mm × 1
Spacer × 4
Bracket
L×4
I×4
Design and specifications are subject to change without notice.
Status lamp
The lamp normally lights in blue while the unit is turned on.
• When the lamp does not light
• When the lamp lights in red
• When the lamp lights in violet frequently
– It indicates there may be a problem. See “TROUBLESHOOTING” on the right column.
BASS BOOST controller
Turning this boosts the 45 Hz frequency within the range of 0 dB to +18 dB. Adjust the level
while listening to the sound. This control is preset to MIN when the unit is shipped.
Input LEVEL controller
The input level can be adjusted with this control when this unit is connected to other source
equipment. Adjust the level while listening to the sound. This control is preset to MIN when
the unit is shipped.
[European Union only]
CROSSOVER frequency controller
Turning this adjusts the cutoff frequency within the range of 30 Hz to 500 Hz. Adjust the level
while listening to the sound. This control is preset to 30 Hz when the unit is shipped.
CROSSOVER filter switch
OFF: Normally, set to this position. The switch is preset to this position when the unit is
shipped.
LPF: Set to this position when you want to turn on the LPF (Low-Pass Filter) switch (the
Low-Pass Filter transmits frequencies lower than the cutoff frequency).
HPF: Set to this position when you want to turn on the HPF (High-Pass Filter) switch (the
High-Pass Filter transmits frequencies higher than the cutoff frequency).
EN, FR
© 2007 Victor Company of Japan, Limited
3
1207KMMMDWTKC
..lYe· Product Registration
IMPORTANT: Please fill-out and return in
10 days or Log to JVC.com
and register On-Line
First Name:
Last Name:
Address:
Apt#"
City
State:
Zip:
Phone:
Email Address:
Thank you! We appreciate your responses to this questionnaire.
The information you choose to share with us will be used by JVC to offer you
product information and other communications that may interest you.
If you prefer not to be contacted about these special offers, please check here. { }
Date of Purchase
Model Number
Serial Number
Purchase Price
Dealer
1) Did you:
- Purchase this product your self?
- Receive this product as a gift?
2) Is this Product:
- The first product of this type you have ever owned?
- A replacement for a similar JVC product?
- A replacement for a similar product made by another
company?
- An addition to a similar product you are still using?
3) What factors most Influenced your
decision to purchase this product?
- JVC brand reputation
- Previous experience with JVC products
-Price
- Specific product features
- Style/appearance
- Salesperson's recommendation
- Friend/relative's recommendation
- Warranty coverage
-Other
5) Your Gender:
- Male
- Female
6) Your Marital Status
- Married
- Single
7) What is your approximate annual
household income level?
-
Under $25,000
$25,000 - $49,000
$50,000 - $74,000
$75,000 - $99,000
$100,000 and over
Comments:
4) How did you learn about this product?
- Magazine Advertisement
- Newspaper Advertisement
- TV/Radio Announcement
- Product Brochure
- Direct Mail
- Mail Order Catalog
- Friend/Relative Recommendations
- Salesperson/Store Recommendation
- Internet
- Dealer Event
-Other
BT-51041-1
(0406)
JVC Thanks you for completing this
questionnaire.
Your responses will help us reach you with
offers that may interest you.
It you prefer not to receive these offers
please check here { }
Printed in China
Thank you for purchasing
Instructions
Fold so opening is at the top.
Tape in middle or on front.
I III
Please do rot seOO prcx:lucts CI cther
correspondence to this address.
JVC AMERICAS CORP
1700 Valley Road
Wayne, NJ 07470
307C
PLACE
FIRST-CLASS
STAMP
HERE
JVC®
PO BOX 9580
PEORIA IL 61612·9580
1.1111.1111.1111•••11••1.11.111.1.1.1••1.11•••1••1.11••••1••11
PRODUCT REGISTRATION CARD/QUESTIONNAIRE
I us CUSTOMERS ONLY I
Registering your product will allow us to contact you in the unlikely
event a product safety notification is required.
This form is for Product Registration purposes only. Failure to return
this form does not diminish your rights during the warranty period.
THANK YOU FOR PURCHASING THIS JVC PRODUCT
REGISTER ONLINE AT: WWW.JVC.COM
JVC
CANADA
ONLY
CANADA
SEULEMENT
WARRANTY
OWNER'S COPY OF WARRANTY CARD
COPIE D'ENREGISTREMENT DE LA GARANTIE
DU PROPRIETAIRE
GAIANTIE
(Save sales docket together with this warranty card, as a proof of dale of purchase.
La facture et cette garantie sont vos preuves de la date d'achat; rangez-Ies.)
MODEL.
KS-AR8002D
MODELE'
Purchase from.
Achete chez
Dealer's Address
Adresse du Vendeur'
No.
No
City or Town
Ville
Owner's Name
.
Nom du Proprietaire:.
Owner's Address
.
Adresse du Proprietaire·
....
SERIAL N.O.
NO DE SERlE'
..
Date purchased.
Date achete
.
Street
Rue
Provo
Provo
Postal Code
Code Postal
.
No.
No
City or Town
Ville
Street
Rue
Apt.
App.
Postal Code
Code Postal
Provo
Provo
BT-52008-1
(1007)
JVC CANADA INC.
21 Finchdene Square, Toronto, ON M1X 1A7
TEL: (416) 293-1311 FAX: (416) 293-8208
http://www.jvc.ca
.
a decouper ici
Detach here.
Printed in China
WARRANTY CONTROL CARD
CARTE DE CONTROLE DE LA GARANTIE
IMPORTANT: This warranty control card must be filled in and posted to the address indicated
on the back hereof or register via internet within 7 (seven) days from the date of purchase.
IMPORTANT: Cette carte doit etre renvoyee dQment remplie I'adresse indiquee au verso,
dans les 7 jours de la date d'achat ou aller sur Ie site par internet pour I'enregistrement.
a
KS-AR8002D
MOOEL
MODELE·
Purchased from .
Achete chez .
Dealer's Address
Adresse du Vendeur
"No.
(PLEASE PRINT/EN LETIRES MOULEES)
SERIAL NO. .
NO DE SERlE'
Date purchased .
Date achete
...................... ·······8tree1
No
Rue
Provo
City or Town
Ville
Owner's Name
Nom du Proprietaire:
Owner's Address
Adresse du Proprietaire
.
........•.............-
Provo
,. ..'Pos'tai·COde·········
Code Postal
.
No.
No
City or Town
Ville
r------:-----:---,,--,
You may also register on-line
at:www.ivc.ca
WARRANTY APPLIES ONLY TO PRODUCT
DISTRIBUTED IN CANADA BY JVC CANADA INC.
Street
Rue
Provo
Provo
Apt.
App.
......................
Postal Code
Code Postal
Vous pouvez egalement vous
inscrire par internet a:www.ivc.ca
LA GARANTIE S'APPLIQUE SEULEMENT AUX PRODUITS
DISTRIBUES AU CANADA PAR JVC CANADA INC.
JVC CANADA INC. (hereafter called "JVC") gives
the following express warranty for each new JVC
product distributed in Canada by JVC and sold
by an authorized JVC dealer.
JVC warrants that this JVC product is free, under
normal use and maintenance, from any defects in
material and workmanship subject to the following
terms and conditions:
JVC CANADA INC. ( ci-apres appele "JVC")
enonce la garantie expresse suivante pour tout
nouveau produit JVC distribue au Canada par JVC
et vendu par un detaillant JVC autorise.
JVC vous garantit que ce produit est degage, sous
utilisation et entretien normal, de tout defaut
materiel et de fabrication sous reserve des
modalites et conditions suivantes :
1. To Obtain Warranty Service:
1. Pour obtenir un service de garantie :
(a) The JVC Warranty Control Card herein
provided must be completed in full and
posted or registered via intemet within 7 days
of date of purchase of the JVC product.
(b) This JVC Warranty Control Card must be
completed in full and presented together
with proof of purchase of the JVC product
requiring service.
(c) The JVC product must be brought in for
service to an authorized JVC Service Centre.
2. Limitation:
This Warranty shall not apply to:
(a) Repair or replacement of any cabinets,
batteries, plates, connection cords, antennas, dust covers, knobs, speaker grills,
speaker cones, projection screens, projection
screen savers, and all accessories.
(b) Any defects caused or repairs required as a
result of misuse, abusive operation, negligence, improper use and/or insufficient care.
(c) Any defect caused or repairs required as
a result of not following the instructions in
the operation manual.
(d) Any JVC product tampered with, adjusted
or repaired by any party other than JVC or
authorized JVC Service Centre personnel.
(a) La carte de contraIe de garantie JVC ciincluse doit etre completee avec les
renseignements complets et etre postee ou
enregistree via internet dans les 7 jours
suivant I'achat du produit JVC.
(b) Cette carte de controle de garantie JVC doit
etre dOment remplie et etre presentee avec
la preuve d'achat du produit JVC
necessitant une reparation.
(c) Le produit JVC doit etre apporte pour
service chez un centre de service JVC
autorise.
2. Restrictions:
Cette garantie ne s'applique pas aux :
(a) Reparation ou remplacement de tout
cabinet, batteries, panneau avant, cordons
de raccord, antennes, housses de
protection, boutons, couverts de hautparleur, cones de haut-parleur, ecrans de
projection, protecteurs d'ecran de projection
et tous les accessoires.
(b) Tous defauts occasionnes ou reparations
une utilisation abusive,
requises suite
mauvaise, negligente etlou une utilisation
incorrecte.
(c) Tous defauts occasionnes ou reparations
I'omission de suivre les
requises suite
recommandations du manuel d'instruction.
(d) Tout produit JVC altere, ajuste ou repare par
tout autre entreprise que JVC ou un centre
de service d'entretien ou de service
autorise JVC.
a
a
(e)
(f)
(g)
(h)
( i)
(j)
(k)
Any JVC products on which the serial
num-ber has been defaced, modified or
removed.
Maintenance, cleaning or periodic check-up
Conversion to foreign or domestic voltage or
frequency.
Any JVC product without the Canadian
Electrical Safety Regulations 10.
Any JVC products used for commercial or
institutional, rental, or display purposes.
Parts
1 year (except video head - 90
days)
Labour... 90 days
Any JVC product which has been resold and
no longer owned by the original purchaser.
Product purchased from "outside Canada",
"bankruptcy" or "liquidator".
(e) Tout produit JVC dont Ie numero de serie a
ete altere, modifie ou enleve.
(f) L'entretien, les verifications periodiques et
nettoyage.
une frequence ou une
(g) La conversion
tension etrangere ou domestique.
(h) Tout produit JVC n'ayant pas Ie sigle
d'identification conforme aux normes
electriques Canadiennes (CSA).
(i) Pour tout produit utilise
des fins
commerciales, institutionnelles, de location
ou utilise des fins d'etalage.
Pieces............ 1 An (Excepte les h3tes
video- 90 jours)
Main d'reuvre ... 90 Jours
(j) Tout produit JVC ayant ete revendu et qui
n'est plus la propriete de I'acheteur original.
(k) Produit achete
"I'exterieur du Canada",
provenant d'une ''faillite'' ou d'un "Iiquidateur".
a
a
a
a
WARRANTY TERM (VALID FROM THE DATE OF PURCHASE)
CONDITIONS DE GARANTIE (VALABLE a PARTIR DE LA DATE D'ACHAT)
PARTS (Years)
Labour (Years)
PIECES (annees) MAIN-D'OEUVER (annees)
PRODUCT
PRODUIT
Projection TV In-Home Service
Colour TV In-Home (25" and above)
D-ILA Rear Projection In-Home Service
~CD TV In-Home Service (25" and above)
Ecrans de projection Service Domicile
Ecrans de TV Couleur Service Domicile (25" et plus)
~V projection arriere D-ILA Service
Domicile
Ecrans de LCD Service Domicile (25" et plus)
a
a
a
1
1
a
• In-home service to be provided where available
Where it is not available, the Purchaser must assume the responsibility and expense for the proper
packing, shipment and all costs associated with the delivery of the equipment to and from the closest
JVC Authorized Service Centre.
• Service domicile fourni par un detaillant disponible.
S'i1 n'y a pas de service JVC disponible proximite, I'acheteur doit assumer la responsabilite et les
coOts pour un emballage adequat, I'expedition, ainsi que tous les coOts associes
la livraison de
I'equipement chez et depuis Ie detaillant JVC autorise Ie plus pres pour un service d'entretien.
a
a
Receivers and Home Speakers purchased separately, Front
Projection and Car Audio "ARSENAL" Series
Recepteurs et Hauts-Parleurs achetes separement, Projecteur
Avant et Audio d'Auto de Serie " ARSENAL»
AC Adapters, Remote Controls, Headphones, Microphones and
Projector Lamps
Adaptateurs AC, Telecommande, Casque D'ecoute, Microphones
et Lampe de Projecteur
(I) Tout dommage cause par Ie feu, une
inondation, un eclair, une surtension ou tout
autre evenement hors du controle de JVC.
(m) POUR LES PRODUITS D'AUTOMOBILE
La garantie ne couvre pas I'elimination
d'interferences statiques ou electriques de
la voiture, Ie nettoyage de tete, les
ajustements et les couts de main d'reuvre
associes
I'enlevement ou
la
reinstallation de I'unite pour reparation.
( I) Any defects caused by fire, flood, lightning,
power surge, or other events beyond the
control of JVC.
(m) FOR AUTO PRODUCTS
Warranty does not cover elimination of car
static or electrical interferences, cleaning
of head, adjustments, or labour cost for the
removal or reinstallation of the unit for
repair.
3. Standards:
a
3.
If any defects should be found in a JVC product
within the applicable terms, necessary repairs
shall be made at no cost to the purchaser for
parts or labour when JVC acknowledges that
such defects are due to faulty material or workmanship.
Criteres:
Si un produit JVC s'averait defectueux, selon les
conditions
applicables,
les
reparations
necessaires seront effectues sans couts
additionnels
I'acheteur pour les pieces et la
main d'reuvre lorsque JVC reconnaTt que de telles
defectuosites sont causees par une defectuosite
de materiel ou de fabrication.
4. Exclusion of All Other Express Warranties:
This warranty constitutes the entire express
warranty given by JVC for JVC products and
no dealer or service centre personnel or his,
its or their agent or employee is, or are authorized to extend or enlarge this warranty on behalf of JVC.
4. Exclusion de toutes autres garanties expresses:
Cette garantie constitue I'entiere garantie express
donnee par JVC pour les produits JVC. Nul
representant ou employe d'un detaillant ou d'un
service d'entretien n'est autorise prolonger cette
garantie au nom de JVC.
5. Disclaimer of Consequential Damage:
To the extent the law permits JVC disclaims
any responsibility for loss of time or use of its
prOduct, transportation costs, or any other
indirect, incidental or consequential damage or
inconvenience.
~
a
a
5. Denegation des dommages indirects :
Dans la mesure penmise par la loi, JVC nie toute
responsabilite pour perte de temps ou d'usage de
ses produits, des coUts de transport ou tout autre
dommage ou inconvenient indirect, accidentel et
consequent.
aI'adresse ci-dessous.
And mail to the address below.
r;:;:::::]
Veuillez poster
You may also register on-line
at:www.jvc.ca
~
Vous pouvez egalement vous
enregistrer par internet a; www.jvc.ca
Detach here.
a decouper ici
a
2
Place stamp
here
2
Placez volre
timbre ici
90 DAYS
90 DAYS
90 JOURS
90 JOURS
JVC CANADA INC.
Wood Cone Speakers
Enceinte Cone en Bois
5
5
All Other Categories
Toutes les autres categories
1
1
a
a
21 Finchdene Square
Toronto, ON M1X 1A7
TO OUR VALUED CUSTOMER - THANK YOU FOR PURCHASING THIS JVC PRODUCT.
WE WANT TO HELP YOU ACHIEVE A PERFECT EXPERIENCE.
NEED HELP ON HOW TO HOOK UP?
NEED ASSISTANCE ON HOW TO OPERATE?
NEED TO LOCATE A JVC SERVICE CENTER?
LIKE TO PURCHASE ACCESSORIES?
.JVC®IS HERE TO HELP!
TOLL FREE: 1(800)252-5722
http://www.jvc.com
Remember to retain your Bill of Sale for Warranty Service.
- - - Do not attempt to service the product yourself
Caution
To prevent electrical shock, do not open the cabinet.
There are no user serviceable parts inside.
Please refer to qualified service personnel for repairs.
BT-51 029-3
(0306)
Printed in China
••••••••••••••••••••••••••••••••••••••••••••••••••••••••••••••••••••••••••••••
For customer use:
Enter below the Model No. and Serial No. which is located either on the rear, bottom or side of the cabinet.
Retain this information for future reference.
Model No.:
Serial No,:
Purchase date :
Name ot-dealer :