1
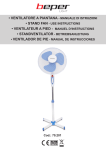
R • VENTILATORE A PIANTANA - MANUALE DI ISTRUZIONI • STAND FAN - USE INSTRUCTIONS • VENTILATEUR A PIED - MANUEL D’INSTRUCTIONS • STANDVENTILATOR - BETRIEBSANLEITUNG • VENTILADOR DE PIE - MANUAL DE INSTRUCCIONES Cod.: 70.000 ITALIANO pag. 3 ENGLISH pag. 8 FRANÇAIS pag. 13 DEUTSCH pag. 19 ESPAÑOL pag. 23 For further information and/or for instructions for use in other languages, please visit: www.beper.com Fig. 1 3 4 8 6 7 9 10 5 11 1 2 13 12 14 15 16 17 18 Fig. 2 Ventilatore a piantana Manuale di istruzioni AVVERTENZE GENERALI LEGGERE QUESTE ISTRUZIONI PRIMA DI USARE L’ARTICOLO Prima e durante l’uso dell’apparecchio è necessario seguire alcune precauzioni elementari. Dopo aver tolto l’imballaggio assicurarsi dell’integrità dell’apparecchio. In caso di dubbio non utilizzare l’apparecchio e rivolgersi a personale professionalmente qualificato. Gli elementi dell’imballaggio (sacchetti di plastica, polistirolo, ecc.) non devono essere lasciati alla portata dei bambini, in quanto potenziali fonti di pericolo. Si raccomanda di smaltire i materiali costituenti l’imballaggio secondo legge, servendosi degli appositi punti di raccolta differenziata, chiedendo eventualmente informazioni al gestore della nettezza urbana del proprio comune di residenza. Assicurarsi sempre che la tensione di rete elettrica sia uguale a quella indicata nell’etichetta dati tecnici e che l’impianto sia compatibile con la potenza dell’apparecchio. In caso di incompatibilità tra la presa e la spina elettrica, fare sostituire la presa da personale qualificato. Non tirare mai il cavo per scollegarlo dalla presa di corrente elettrica. Assicurarsi che il cavo non sia in contatto con superfici calde o taglienti. Non utilizzare l’apparecchio con il cavo danneggiato. Se il cavo di alimentazione è danneggiato, esso deve essere sostituito dal Costruttore o dal suo Servizio Assistenza Tecnica o comunque da una persona con qualifica similare, in modo da prevenire ogni rischio. In caso di guasto e/o cattivo funzionamento dell’apparecchio, spegnerlo e non manometterlo. Per l’eventuale riparazione rivolgersi solamente ad un centro autorizzato dal costruttore e richiedere l’utilizzo di ricambi originali. Il mancato rispetto di quanto sopra può compromettere la sicurezza dell’apparecchio. Collegare l’apparecchio esclusivamente ad una presa di corrente elettrica alternata. In generale è sconsigliabile l’uso di adattatori, prese multiple e/o prolunghe. Qualora il loro uso si rendesse indispensabile è necessario utilizzare solamente adattatori e prolunghe conformi alle vigenti norme di sicurezza. Questo apparecchio dovrà essere destinato solo all’uso per il quale è stato espressamente concepito. Ogni altro uso è da considerarsi improprio e quindi pericoloso, nonché far decadere la garanzia. Il costruttore non può essere considerato responsabile per eventuali danni derivati da usi impropri, erronei ed irragionevoli. L’installazione deve essere effettuata secondo le istruzioni del costruttore. Una errata installazione può causare danni a persone, animali o cose, nei confronti dei quali il costruttore non può essere considerato responsabile. Per evitare surriscaldamenti pericolosi si raccomanda di svolgere in tutta la sua lunghezza il cavo di alimentazione. Non lasciare l’apparecchio inutilmente inserito. Staccare la spina dalla rete di alimentazione quando l’apparecchio non è utilizzato e quando si esce di casa. Mantenere una adeguata distanza da pareti, oggetti, ecc. Non immergere mai l’apparecchio in acqua o in altri liquidi. Non toccare l’apparecchio con mani e/o piedi bagnati o umidi. Non usare l’apparecchio a piedi nudi. Non lasciare esposto l’apparecchio ad agenti atmosferici (pioggia, sole, etc.). Non tenere l’apparecchio vicino a fonti di calore (es. termosifone). 3 Ventilatore a piantana Manuale di istruzioni Non usare l’apparecchio nelle immediate vicinanze di vasche da bagno, docce, lavandini, piscine o in presenza di liquidi o sostanze infiammabili; mantenere una distanza minima di 1 metro. Nel caso dovesse cadere nell’acqua non toccare l’apparecchio o l’acqua. Staccare immediatamente l’interruttore generale della corrente elettrica e poi staccare la spina. Staccare sempre la spina per la pulizia dell’apparecchio. Questo apparecchio non deve essere utilizzato da persone (compresi i bambini) con capacità fisiche, sensoriali o mentali ridotte; da persone che manchino di esperienza e conoscenza dell’apparecchio, a meno che siano attentamente sorvegliate o ben istruite relativamente all’utilizzo dell’apparecchio stesso da parte di una persona responsabile della loro sicurezza. Assicurarsi che i bambini non giochino con l’apparecchio. Avviare sempre l’apparecchio con il regolatore di potenza nella posizione di minimo. Allorché si decida di smaltire come rifiuto questo apparecchio, si raccomanda di renderlo inoperante tagliandone il cavo di alimentazione. Si raccomanda inoltre di rendere innocue quelle parti dell’apparecchio suscettibili di costituire un pericolo, specialmente per i bambini che potrebbero servirsi dell’apparecchio per i propri giochi. AVVERTENZE D’USO Non collegare la spina di alimentazione senza prima aver assemblato correttamente ogni parte del ventilatore. Prima di ogni utilizzo verificare l’integrità del cavo di alimentazione e liberarlo da eventuali grovigli. Posizionare il ventilatore soltanto su superfici pari e stabili. Non posizionare il ventilatore in ambienti molto umidi. Mantenere il ventilatore ad un’adeguata distanza da pareti, porte, finestre e oggetti che potrebbero ostacolare il movimento oscillante. Non coprire in alcun modo il corpo e la griglia del ventilatore durante il funzionamento. Non infilare oggetti nella griglia e nelle fessure del corpo del ventilatore. Non staccare la spina tirando il cavo di alimentazione. Dopo ogni utilizzo del ventilatore scollegare la spina dalla presa di corrente. Se il ventilatore deve essere immagazzinato per lungo tempo e non usato regolarmente, riporre il ventilatore nel suo imballo originale e metterlo in un luogo secco ed asciutto. Quando lo si usa per la prima volta dopo un lungo tempo di inutilizzo, controllare che il ventilatore sia pulito e che le pale del motore girino liberamente (a motore spento) senza alcun freno. PRODOTTO E ACCESSORI Fig.1 1. Griglia anteriore 2. Ganci di chiusura 3. Fermo della ventola 4. Ventola 5. Fermo della griglia posteriore 6. Griglia posteriore 7. Albero motore 8. Perno di oscillazione 9. Corpo motore 10. Perno regolazione inclinazione 11. Pannello di controllo 12. Vite per aggancio al tubo 13. Tubo interno (estendibile) 14. Perno di ornamento 15. Tubo esterno 16. Viti per aggancio alla base 17. Perno di ornamento della base 18. Base d’appoggio 4 Ventilatore a piantana Manuale di istruzioni ISTRUZIONI D’USO Fig.2 ASSEMBLAGGIO DEL VENTILATORE 1. Posizionare la base di appoggio (18) sul pavimento e agganciare il tubo esterno (15) avvitando le 4 viti (incluse nella confezione). Importante: avvitare fermamente le viti alla base di appoggio in modo da garantire una buona stabilità del ventilatore, in caso contrario il ventilatore oscillerebbe pericolosamente. 2. Inserire il perno di ornamento (17) necessario per coprire le viti. 3. Estrarre il tubo interno (13), alzare fino alla misura desiderata. 4. Inserire il perno di ornamento (14) e avvitare con forza fino alla completa chiusura. 5. Infilare il pannello (11) (del ventilatore) sul tubo completamente. 6. Avvitare completamente la vite (12) in modo che il pannello sia ben saldo al tubo interno (13). 7. Posizionare la griglia posteriore (6) a contatto con la flangia del corpo motore, in modo che i fori della griglia si incastrino con i perni situati sul corpo motore (9) del ventilatore. 8. Avvitare il fermo della griglia posteriore (5) completamente in modo da bloccare la griglia al corpo motore. 9. Infilare la ventola (4) sull’albero motore (7) e avvitare il fermo della ventola (3) completamente sull’albero motore, in modo da bloccare la ventola al corpo del motore (per avvitare il fermo ruotare in senso anti-orario). 10. Portare a contatto le due griglie anteriore (1) e posteriore (6), inserendo i ganci di chiusura (2), posizionati sulla griglia anteriore (1), sulla griglia posteriore (8). Chiudere i ganci (2) in modo da bloccare le griglie. SCELTA DELLA VELOCITA’ Scegliere la velocità di ventilazione desiderata premendo i tasti del pannello di controllo (11). In posizione 0 il ventilatore è spento. In posizione 1 velocità bassa. In posizione 2 velocità media. In posizione 3 velocità alta. INCLINAZIONE DELLA TESTA E’ possibile inclinare la testa del ventilatore in differenti posizioni, permettendo di cambiare inclinazione del flusso dell’aria. Prima di cambiare l’inclinazione spegnere il ventilatore. Impugnare il corpo motore (9) ed inclinare la testa del ventilatore, a scatto, nella posizione desiderata. Attenzione: non forzare il movimento onde evitare la rottura del meccanismo di inclinazione. OSCILLAZIONE DELLA TESTA Agendo sul perno di oscillazione (8) è possibile attivare o disattivare l’oscillazione della testa del ventilatore. L’oscillazione permette di distribuire uniformemente l’aria nell’ambiente. Per attivare l’oscillazione spingere il perno di oscillazione (8) verso il basso fino a completo bloccaggio; la testa del ventilatore ruota automaticamente a destra e a sinistra. Per disattivare l’oscillazione sollevare completamente il perno (8) verso l’alto. 5 Ventilatore a piantana Manuale di istruzioni PULIZIA Prima di effettuare qualsiasi operazione di pulizia spegnere il ventilatore e scollegare la spina dalla presa di corrente. Per pulire il ventilatore utilizzare un panno morbido, eventualmente inumidito con acqua. Non utilizzare alcool o agenti chimici come diluenti, prodotti abrasivi in genere. Non spruzzare acqua e liquidi sul ventilatore, previo infiltrazioni dannose. Asciugare bene tutte le parti interessate dalla pulizia prima di accendere il ventilatore. DATI TECNICI Potenza: 41W Alimentazione: 220-240V ~ 50Hz In un’ottica di miglioramento continuo Beper si riserva la facoltà di apportare modifiche e migliorie al prodotto in oggetto senza previo preavviso. TRATTAMENTO DEI RIFIUTI DELLE APPARECCHIATURE ELETTRICHE ED ELETTRONICHE Il prodotto al termine del suo ciclo di vita deve essere smaltito seguendo le norme vigenti relative allo smaltimento differenziato e non può essere trattato come un semplice rifiuto urbano. Il prodotto deve essere smaltito presso i centri di raccolta dedicati o deve essere restituito al rivenditore nel caso si voglia sostituire il prodotto con un altro equivalente nuovo. Il costruttore si farà carico delle spese necessarie allo smaltimento del prodotto secondo quanto prescritto dalla legge. Il prodotto è composto da parti non biodegradabili e sostanze che possono inquinare l’ambiente circostante se non opportunamente smaltite. Inoltre parte di questi materiali possono essere riciclati evitando l’inquinamento dell’ambiente. E’ vostro e nostro dovere contribuire alla salute dell’ambiente. Il simbolo indica che il prodotto risponde ai requisiti richiesti dalle nuove direttive introdotte a tutela del l’ambiente (2011/65/EU) e che deve essere smaltito in modo appropriato al termine del suo ciclo di vita. Chiedere informazioni alle autorità locali in merito alle zone dedicate allo smaltimento dei rifiuti. Chi non smaltisce il prodotto seguendo quanto indicato in questo paragrafo ne risponde secondo le norme vigenti. 6 CERTIFICATO DI GARANZIA Questo apparecchio è stato controllato in fabbrica. La garanzia di applicazione è valida 24 mesi dalla data di acquisto per difetti di materiale o di fabbricazione. Lo scontrino di acquisto e il certificato di garanzia si devono presentare assieme nel caso di reclami. Se l’apparecchio dovesse richiedere assistenza tecnica rivolgersi al venditore o presso la nostra sede. Questo per conservare inalterata l’efficienza del vostro apparecchio e per NON invalidare la garanzia. Eventuali manomissioni dell’apparecchio da parte di personale non autorizzato invalideranno automaticamente la garanzia. Condizioni di garanzia Se ci sono guasti a causa di difetti di materiale e/o fabbricazione durante il periodo di garanzia, garantiamo la riparazione del prodotto gratuitamente, a patto che: - l’apparecchio sia stato usato in modo corretto ed ai fini per cui è stato costruito; - l’apparecchio sia stato riparato da esperti, cioè da persone incaricate dal fornitore; - venga presentato lo scontrino; - non rientrano in garanzia le parti che dimostrano un normale logoramento. Sono quindi escluse tutte le parti che hanno subito rotture accidentali o che sono soggette ad usura (tra le quali lampade, batterie, resistenze) e difetti derivanti da un utilizzo non domestico dell’apparecchio, negligenza nell’uso o nella manutenzione, danni da trasporto e tutti quei danni non imputabili direttamente al produttore. Se entro il periodo di garanzia emerge un difetto che non può essere riparato, l’apparecchio viene cambiato gratuitamente. Assistenza tecnica Anche dopo il periodo di garanzia prestiamo molta attenzione alle riparazioni. Per l’assistenza tecnica e/o riparazioni fuori dal periodo di garanzia ci si può rivolgere direttamente all’indirizzo sottostante. BEPER SRL Via Salieri, 30 37050 - Vallese di Oppeano - Verona Tel. 045/7134674 – Fax 045/6984019 e-mail: [email protected] Stand Fan Use instructions PRECAUTlONS Read the following instructions carefully, since they give you useful safety information about installation, use and maintenance and help you avoid mishaps and possible accidents. Remove the packing and make sure that the appliance is intact, with special attention to the supply cable. The elements of the packing (plastic bags, polystyrene, etc) do not have to be accessible to the children, in order to preserve them from danger sources. It is recommended not to throw these packing material in the domestic waste, but to deliver them to the appropriate station of collection or destruction refusals, asking eventually information to the manager of the Sanitation Department of your own municipality. If the supply cord is damaged, it must be replaced by the manufacturer, its service agent or similarly qualified persons in order to avoid a hazard. Before connecting the appliance make sure that the mains voltage corresponds to the data specified on the label. The appliance can be damaged if the voltage is not correct. If the plug does not suit the socket, let it be replaced with another suitable plug by qualified personnel only, which shall also ensure that the section of the socket cables is suitable for your appliance power absorption. Generally, the use adaptors multiple plugs and/or extensions is not recommended; should they be necessary, please use only simple or multiple adaptors and extensions in compliance with the safety rules in force, making sure that the capacity absorption limit marked on the simple adaptors and the extensions and the maximum power limit marked on the multiple adaptor are not exceeded. Do not use the appliance if the cable or the plug shows any damages. Do not use the appliance after a possible irregular working. In this case, switch it off and do not break it open. Refer to an authorized Beper after-sale service for repair and require original spare parts only. Failing to follow these instructions may impair the safety of your appliance. This appliance is to be destined to its special purpose only. Any other use is to be considered as improper and thus dangerous. The manufacturer cannot be responsible for any damages deriving from improper, wrong or incautious use. This appliance is for HOUSEHOLD USE ONLY. To protect against electric shock, do not immerse cord, plug or any parts of the appliance into water or other fluids. Do not use the appliance near explosives, highly flammable materials, gases or burning flames. Do not allow children, disabled people or every people without experience or technical ability to use the appliance if they are not properly watched over. Close supervision is necessary when any appliance used by or near children. Do not hold the appliance with wet hands or feet. Never use any accessories but those provided for by Beper. The use of accessory attachments not recommended by the appliance manufacturer may cause hazard or injury. Do not use the appliance near the bath, the shower, the wash-basin or anywhere water can turn out to be a source of danger. Do not pull the mains cable or the appliance itself when disconnecting the plug from the socket. Do not let cord hang over edge of table, or touch hot surface. Do not expose the appliance to atmospheric agents such as rain, wind, snow, hail. Do not use outdoors. Unplug from outlet when not in use, before putting on or taking off parts, and before cleaning. If you decide not to use the appliance any longer, make it unserviceable by simply cutting the supply cable after disconnecting the plug from the socket. Also make any dangerous parts unserviceable, especially for children who could play whit the appliance. Let other potential users read these instructions. Keep these instructions. 8 PRODUCT AND ACCESSORIES Fig. 1 1 – Front grid 2 – Closure nut 3 – Nut blade 4 – Blades 5 – Rear grid closure nut 6 – Rear grid 7 – Motor 8 – Swing axis 9 – Motor body 10 – Swing adjustment axis 11 – Control panels 12 – Screw pipe coupling 13 – Telescopic pipe 14 – Ornament axis 15 – External pipe 16 – Base screw 17 – Base ornament axis 18 – Base ENGLISH Stand Fan Use instructions INSTRUCTIONS Fig. 2 FAN ASSEMBLY 1 – Place the base (18) on the floor and insert the external pipe (15) by fixing it with the 4 screws (included in packaging). Important : Strongly screw the screws to the base in order to guaranty the good stability of the fan, otherwise the fan will dangerously swing. 2 – Put the ornament axis (17) in order to cover the screws. 3 – Take off the external pipe (13), and regulate it until the desired height. 4 – Insert the ornament axis (14) and strongly screw it until complete closure. 5 – Place the control panels (11) on the pipe. 6 – Screw completely with the screw (12) in order that the control panels is well fixed to the intern pipe (13). 7 – Place the rear grid (6) on the motor, in order that the holes of the grid are well inserted into the motor (9) of the fan. 8 – Strongly and completely screw the rear grid (5) in order to block the grid on the motor. 9 – Insert the blades of the fan (4) on the motor (7) and completely screw the nut blade (3) on the motor, in order to block the body motor (to screw just turn clockwise). 10 – Assembly the 2 grid front (1) and rear ones (6) by inserting the closure nut (2), place the front grid (1), on the rear grid (8). Close the nuts (2) to block the grids. SPEED SELECTION Choose the speed desired pressing on the buttons of the control panels (11). Position 0 the fan switch off. Position 1 low speed. Position 2 medium speed. Position 3 high speed. 9 Stand Fan Use instructions INSTRUCTIONS FAN ASSEMBLY 1 – Place the base (18) on the floor and insert the external pipe (15) by fixing it with the 4 screws (included in packaging). Important : Strongly screw the screws to the base in order to guaranty the good stability of the fan, otherwise the fan will dangerously swing. 2 – Put the ornament axis (17) in order to cover the screws. 3 – Take off the external pipe (13), and regulate it until the desired height. 4 – Insert the ornament axis (14) and strongly screw it until complete closure. 5 – Place the control panels (11) on the pipe. 6 – Screw completely with the screw (12) in order that the control panels is well fixed to the intern pipe (13). 7 – Place the rear grid (6) on the motor, in order that the holes of the grid are well inserted into the motor (9) of the fan. 8 – Strongly and completely screw the rear grid (5) in order to block the grid on the motor. 9 – Insert the blades of the fan (4) on the motor (7) and completely screw the nut blade (3) on the motor, in order to block the body motor (to screw just turn clockwise). 10 – Assembly the 2 grid front (1) and rear ones (6) by inserting the closure nut (2), place the front grid (1), on the rear grid (8). Close the nuts (2) to block the grids. SPEED SELECTION Choose the speed desired pressing on the buttons of the control panels (11). Position 0 the fan switch off. Position 1 low speed. Position 2 medium speed. Position 3 high speed. HEAD INCLINATION It is possible to choose various positions and change the air flow swing. Before changing it, switch off the fan. Take the motor body, unscrew the regulation axis and change the inclination of the fan as desired and screw the air strongly. Attention : do not try to force the inclination position in order to avoid any failure. SWING It is possible to activate or disconnect the swing of the fan, by touching the swing axis (8). Swing allow to provide the air uniformly. To activate the push the swig axis (8) down until completely blocked ; the head fan turns automatically from right to left. To disconnect the swing raise completely the axis (8). 10 Stand Fan Use instructions CLEANING Before cleaning, switch off and unplug the fan. For cleaning use a soft cloth, that may be softly wet. Do not use alcohol or chemical substances, or any detergent that could damaged this appliance. Do not flush water or other liquids on the fan in order to protect it. After cleaning, dry every parts before using the appliance. During the winter and when not used, keep this appliance in a dry and clean place. TECHNICAL DATA Power : 41W Power supply. 220-240V ~ 50Hz For any improvement reasons, Beper reserves the right to modify or improve the product without any notice. DISPOSAL OF OLD ELECTRICAL APPLIANCES The European directive 2011/65/EU on Waste Electrical and Electronic Equipment (WEEE), requires that old household electrical appliances must not be disposed of in the normal unsorted municipal waste stream. Old appliances must be collected separately in order to optimize the recovery and recycling of the materials they contain, and reduce the impact on human health and the environment. The crossed out “wheeled bin” symbol on the product reminds you of your obligation, that when you dispose of the appliance, it must be separately collected. 11 GUARANTEE CERTIFICATE This appliance has been checked in the factory. From the date of original purchase a 24 month guarantee applies to material and production defects. The purchase receipt and the guarantee certificate must be submitted together in case of claim to guarantee. For any technical assistance, please contact directly the seller or our head office in order to preserve the appliance’s efficiency and NOT TO void the guarantee. Any intervention on this appliance by non-authorized persons will automatically void the guarantee. Guarantee conditions If the appliance shows defects as a result of faulty material and/or production during the period of guarantee, we guarantee repair free of charge on condition that: - The appliance has been used properly and for the purpose for which it has been intended. - Repairs are professionally carried out by qualified persons who are appointed by the supplier. - The purchase receipt shall be presented. - The appliance showing a fair wear and tear shall not be covered by this guarantee. Therefore, any part that could be accidentally broken or having visible signs of use in consumable products (such as lamps, batteries, heating elements…) is excluded from the guarantee, and any defect whatsoever resulting from non-respect of the rules for use, negligence in usage and/or maintenance of the appliance, damage during transport and any other damage not attributable the supplier. For every defect that could not be repaired within the guarantee period, the appliance will be replaced free of charge. Technical assistance Even after the guarantee period we will always pay attention to repairs for defected appliances. For technical assistance and/or repairs after the guarantee period you can directly contact the below address: CONTACT YOUR DISTRIBUTOR IN YOUR COUNTRY OR AFTER SALES DEPARTMENT BEPER. E-MAIL [email protected] WHICH WILL FORWARD YOUR ENQUIRIES TO YOUR DISTRIBUTOR. Ventilateur à pied Manuel d’instructions FRANÇAIS PRECAUTIONS GENERALES Lire attentivement les précautions contenues dans cette notice car elles représentent les indications importantes sur la sécurité, l’installation, l’emploi et l’entretien de l’appareil. Cette précaution vous évitera tout contretemps et tout accident pouvant compromettre votre sécurité. Après avoir déballé l’appareil, assurez-vous de son integrité, en particulier au niveau du cordon d’alimentation. Les éléments d’emballage (sachet plastique, polystyrene, etc) ne doivent pas être laissés à la portée des enfants, puisque potentielles sources de danger. Il est recommandé de ne pas jeter les matériels d’emballage dans les déchets domestiques, mais de les déposer dans les centres de traitement des déchets appropriés, en demandant éventuellement conseil au gérant du centre de sa commune de résidence. Si le câble d’alimentation est endommagé, il sera remplacé par le fabriquant, par son service tecnique ou toute autre personne remplissant les mêmes fonctions, afin de prévenir d’éventuels risques. Avant de brancher votre appareil, vérifiez que le voltage mentionné sur la plaquette corresponde bien à celui dont vous disposez. Un voltage non approprié peut être préjudiciable à l’appareil. En cas d’incompatibilité entre la prise de courant et la fiche de l’appareil, demandez à un électricen specialisé de remplacer la prise avec un modèle adéquat. L’électricien devra surtout s’assurer que la section des câbles de la prise soit adaptée à la puissance absorbée par votre appareil.En principe, il est vivement déconseillé d’utiliser des adaptateurs, de prises multiples et/ou de rallonges, surtout dans les salles de bains ou les douches. Le cas échéant, n’utiliser que des adaptateurs simples ou multiples ainsi que de rallonges conformes aux normes de sécurité en vigueur. Veiller à ce que la limite de puissance minimum et maximum, marquée sur l’adaptateur simple/multiples ou sur les rallonges, ne soient pas dépassée. Ne pas utiliser l’appareil lorsqu’il présente des dommages au niveau du cordon ou de la fiche. Ne pas utiliser l’appareil après un éventuel dysfonctionnement. Le cas échéant, éteindre l’appareil sans le forcer. Pour la réparation, s’adresser au service aprèsvente Beper autorisé et demander la pièce détachée originale. Le non respect des précautions indiquées ci-dessus pourrait compromettre la sécurité de votre appareil. Cet appareil ne devra être utilisé que pour l’usage pour lequel il est destiné. Tout autre emploi doit être consideré responsable des dommages éventuels découlant de l’emploi inadéquat, erroné ou inattentif de l’appareil. Ne jamais plonger l’appareil dans l’eau ou dans d’autres liquides. Ne pas employer l’appareil en présence d’explosifs, de substances fortement inflammables, de gaz ou de feu. Ne pas laisser les enfants, les personnes avec des capacités physiques, sensorielles ou mentales réduites, ou manquant d’expérience ou de connaissance technique, utiliser cet appareil sans surveillance. Ne pas empoigner l’appareil avec les mains ou les pieds mouillés. Ne jamais utiliser d’accessoires non prévus par Beper. Cela pourrait comporter un risque de dommages graves. Ne pas utiliser l’appareil à proximité de baignoire, douche, lavabo ou tout autre endroit où l’eau est présente. Ne jamais tirer sur le cordon d’alimentation électrique ou sur l’appareil pour débrancher la fiche de la prise de courant. Ne pas laisser pendre le cordon. 13 Ventilateur à pied Manuel d’instructions Ne jamais exposer l’appareil à d’agents atmosphériques tels que la pluie, le vent, la neige, la grêle. Débrancher toujours l’appareil en cas de non utilisation et avant son nettoyage. Au cas où on deciderait de ne plus utiliser cet appareil, il serait vivement recommandé de le rendre complètement inopérant et d’en couper le cordon d’alimentation électrique, après avoir débranché la fiche de la prise de courant. Il est vivement conseillé de sécuriser les parties susceptibles de constituer un danger potentiel, surtout pour les enfants qui pourraient utiliser l’appareil hors d’usage pendant le jeux. Faites lire ce mode d’emploi aux autres possibles utiliseurs de l’appareil. Conserver ce mode d’emploi. CONSEILS D’UTILISATION Ne pas brancher le câble d’alimentation sans avoir au préalable correctement assemblé toutes les pièces du ventilateur. Avant d’utiliser cet appareil vérifier l’intégrité du câble d’alimentation et le libérer d’éventuels noeuds. Positionner le ventilateur uniquement sur une surface plane et stable. Ne pas placer le ventilateur dans des lieux humides. Placer le ventilateur à une distance raisonnable des mur, portes, fenêtres ou tout autre objet qui pourraît osbtruer le mouvement oscillant des palles de ventilation. Ne recouvrir en aucun cas le corps ou la grille du ventilateur pendant le fonctionnement. Ne pas introduire d’objets dans la grille ou les fissures du corps du moteur. Ne pas débrancher l’appareil en tirant sur le câble d’alimentation. Après chaque utilisation de l’appareil débrancher le câble d’alimentation de la prise de courant. Si le ventilateur devait être entreposé pour une longue durée ou non utilisé régulièrement, ranger le ventilateur dans son emballage d’origine et le placer dans un endroit sec. Lors d’une nouvelle utilisation, contrôler que le ventilateur soit propre et que les palles du moteur tournent librement (à moteur éteind) sans forcer. PRODUIT ET ACCESSOIRES Fig.1 1 – Grille avant 2 – Crochets de fermeture 3 – Fermoir des palles de ventilation 4 – Palles de ventilation 5 – Fermoir de la grille arrière 6 – Grille arrière 7 – Arbre moteur 8 – Axe d’oscillation 9 – Corps du moteur 10 – Axe de réglage de l’inclination 11 – Panneau de contrôle 12 – Vis de fixation du tube 13 – Tube interne (extensible) 14 – Axe d’ornement 15 – Tube externe 16 – Vis pour fixation de la base 17 – Axe d’ornement de la base 18 – Base d’appui 14 Ventilateur à pied Manuel d’instructions INSTRUCTIONS D’UTILISATION Fig. 2 ASSEMBLAGE DU VENTILATEUR 1 – Positionner la base d’appui (18) sur le sol et insérer le tube externe (15) en le fixant avec les 4 vis (fournies dans l’emballage). Important : visser fermement les vis à la base d’appui de sorte à pouvoir garantir une bonne stabilité du ventilateur, dans le cas contraire le ventilateur oscillerait dangeureusement. 2 – Insérer l’axe d’ornement (17) nécessaire pour courvrir les vis. 3 – Extraire le tube interne (13), le lever jusqu’à la hauteur désirée. 4 – Insérer l’axe d’ornement (14) et visser fermement jusqu’à fermeture complète. 5 – Placer le panneau (11) (du ventilateur) complétement sur le tube. 6 – Visser complétement la vis (12) de façon à ce que le panneau soit bien soudé au tube interne (13). 7 – Positionner la grille arrière (6) en contact avec le corps du moteur, de façon à ce que les trous de la grille s’encastrent avec le moteur (9) du ventilateur. 8 – Visser fermement et complétement la grille postérieure (5) de façon à bloquer la grille au corps du moteur. 9 – Placer les palles du ventilateur (4) sur l’arbre du moteur (7) et visser complètement le fermoir des palles de ventilation (3) sur l’arbre moteur, de façon à bloquer le corps du moteur (pour visser tourner dans le sens contraire des aiguilles d’une montre). 10 – Assembler les 2 grilles avant (1) et arrière (6) en insérant les crochets de fermeture (2), positionner sur la grille avant (1), sur la grille arrière (8). Fermer les crochets (2) de façon à bloquer les grilles. CHOIX DE LA VITESSE Choisir la vitesse de ventilation désirée en appuyant sur les touches du panneau de contrôle (11). En position 0 le ventilateur est éteind. En position 1 basse vitesse. En position 2 vitesse moyenne. En position 3 vitesse haute. INCLINATION DE LA TETE Il est possible d’incliner la tête du ventilateur dans différentes positions, permettant de changer l’inclination du flux d’air. Avant de changer l’inclination éteindre le ventilateur. Empoigner le corps du moteur (9) et incliner la tête du ventilateur, à crans, dans la position désirée. Attention : ne pas forcer le mouvement pour éviter de casser le mécanisme d’inclination. OSCILLATION DE LA TETE En agissant sur l’axe d’oscillation (8) il est possible d’activer ou désactiver l’oscillation de la tête du ventilateur. L’oscillation permet de distribuer uniformément l’air. Pour activer l’oscillation pousser l’axe d’oscillation (8) vers le bas jusqu’à blocage complet ; la tête du ventilateur tourne automatiquement de droite à gauche. Pour désactiver l’oscillation soulever complètement l’axe (8) vers le haut. 15 Ventilateur à pied Manuel d’instructions NETTOYAGE Avant d’effectuer toute opération de nettoyage éteindre le ventilateur et débrancher le câble d’alimentation de la prise électrique. Pour nettoyer le ventilateur utiliser un chiffon doux, légèrement humidifié avec de l’eau. Ne pas utliser d’alcool ou agents chimiques comme les diluants, produits abrasifs en tout genre. Ne pas vaporiser d’eau ou d’autres liquides sur le ventilateur pour éviter tout dommage. Bien sécher toutes les parties nettoyées avant d’allumer le ventilateur. Quand le ventilateur est inutilisé durant la saison hivernale, conserver l’appareil dans un lieu sec et propre. DONNEES TECHNIQUES Puissance : 41W Alimentation. 220-240V ~ 50Hz Dans un soucis constant d’amélioration, Beper se réserve le droit de modifier ou améliorer le produit sans aucun préavis. TRAITEMENT DES DECHETS DES APPAREILS ELECTRIQUES ET ELECTRONIQUES Le produit en fin de vie doit être détruit selon les normes en vigueur relatives à l’élimination des déchets et ne peut être traité comme simple déchet ménagé. Le produit doit être détruit dans un centre d’élimination des déchets adapté ou être restitué au revendeur dans le cas d’une substitution avec un autre produit équivalent neuf. Le fabricant prendra à sa charge les frais occasionnés pour la destruction du produit selon les termes de la loi en vigeur. Le produit est composé de pièces non biodégradables et substances qui peuvent polluer l’environnement si détruites de façon inapropriée . Par ailleurs, certaines parties de ces matières peuvent être recyclées évitant ainsi toute pollution pour l’environnement. Il est de votre et notre devoir de préserver la santé de l’environnement. Le symbole indique que le produit répond aux normes requises par les nouvelles directives introduites en faveur de l’environnement (2011/65/EU) et que le produit doit être détruit de façon appropriée au terme du cycle de vie. Au besoin, informez-vous auprès des autorités locales compétentes en matière d’élimination des déchets de votre commune. Toute personne qui ne tiendra pas compte de ces règles d’élimination des déchets indiquées dans ce paragraphe en répondra selon la loi en vigueur. 16 CERTIFICAT DE GARANTIE Cet appareil a été contrôlé en usine. La garantie est valable 24 mois à partir de la date d’achat pour tout défaut de matériel ou de fabrication. En cas de réclamation, le ticket de caisse et la garantie devront être présentés ensemble. En cas de besoin et pour toute assistance technique, veuillez contacter votre revendeur ou vous adresser à notre siège. Cela vous permettra de conserver votre appareil dans de meilleures conditions et de NE PAS invalider la garantie. Toute manipulation de l’appareil par une personne non autorisée ou non qualifiée annulera automatiquement la garantie. Conditions de garantie Pendant la durée de garantie, si des pannes provenant d’un défaut de materiel et/ou de fabrication apparaissent, nous assurons gratuitement la réparation aux conditions énoncées ci-dessous : - l’appareil a été correctement utilisé et ce uniquement à l’usage pour lequel il a été fabriqué ; - l’appareil a été réparé par des experts, c’est-à-dire par des personnes mandatées par le fournisseur ; - la présentation du ticket de caisse est obligatoire; - les pièces présentant les signes évidents d’usure ne sont pas pris en compte dans la garantie. En conséquence, sont exclus de la garantie toutes les pièces qui auraient subi des dommages accidentels ou présentant des signes d’usure normale (parmi lesquelles, ampoules, batteries, piles, résistances), toutes les pièces comportant des défauts dus à la non utilisation domestique, la négligence dans la manipulation et l’entretien, les dommages lors du transport et tous les dommages non imputables directement au producteur. Si un défaut survient lors de la période de garantie et ne peut être réparé, l’appareil sera remplacé gratuitement. Assistance technique Même après la fin de la garantie, nous accordons toujours une grande importance à la reparation. Pour toute assistance technique et/ou reparations en dehors de la garantie, veuillez vous adresser directement à l’adresse ci-desous : LE SERVICE APRÈS-VENTE EST EFFECTUÉ PAR VOTRE REVENDEUR OU PAR L’IMPORTATEUR/DISTRIBUTEUR DES PRODUITS BEPER. ÉCRIVEZ UN E-MAIL AU [email protected] POUR CONNAITRE LE CENTRE SERVICE AGRÉE BEPER LE PLUS PROCHE DE CHEZ VOUS. Standventilator Betriebsanleitung ALLGEMEINE ANLElTUNGEN 1. Diese Anleitungen aufmerksam lesen, denn sie geben wichtige Hinweise zu Ihrer eigenen Sicherheit bei Installation, Benutzung und Service. Sie können dadurch Störungen und Unfalle vermeiden, die u.U. Ihre Sicherheit beeintrachtigen können. 2. Beim Auspacken überprüfen, ob das Gerät unversehrt ist, insbesondere Anschlußkabel. 3. Im Falls der Kabel ist zerstört, die Reparierung oder die Ersetzung dürfen nur von Fachkräfter durchgeführt warden oder sie können erhbeliche Gefahren für den Benutzer entstehen. 4. Vor Geräteanschluß überprüfen, ob der Netzstrom und die Schildwerte übereinstimmen. Das Gerät kann Schäden erleiden, wenn einer nicht geeigneten Spannung unterliegt. 5. Bei Nichtubereinstimmung von Gerätestecker und Steckdose lassen Sie die Steckdose durch einen geeigneten Typ von qualifiziertem Fachpersonal ersetzen, das auch überprüfen soll, ob der Durchschnitt der Steckerkabel der vom Gerät aufgenommenen Leistung entspricht. 6. Die Benutzung von Paßstücken, Vielfrachsteckdosen und/oder Verlangerungskabel ist in der Regel nicht ratsam, insbesondere in Badezimmer oder Duschraum. Müssen diese Teile unbedingt verwendet werden, so benutzen Sie nur Einfach-oder Vielfrachpaßstücke bzw. Verlangerungskabel, die den geltenden Sicherheitsvorschriften entsprechen. Darauf achten, daß die auf dem Einfachpaß stuck bzw. Verlangerungskabel angegebene Stromleistungsgrenze und die auf dem Vielfachpaßstück angegebene Hochstleistungsgrenze nicht uberschritten werden. 7. Gerät bei beschädigtem Anschlußkabel oder Stecker nicht benutzen. 8. Bei Störung und/oder Fehlbetrieb Gerät ausschalten und nicht eingreifen. Zur eventuellen Reparatur das Gerät nur zu einer Beper Vertragsservicestelle bringen und nur den Einsatz von Originalersatzteiler, verlangen. Die Nichtbeachtung dieser Anleitungen kann die Sicherheit des Gerätes beeintrachtigen. 9. Gerät nur für der vorgesehenen Zweck, einsetzen. Jede andersartige Benutzung ist ungeeignet und deswegen gefährlich. Für Schaden, die durch unsachgemäße und unvernunftige Handhabung verursacht werden, wird nicht gehaftet. 10. Gerät keinesfalls ins Wasser bzw. in andere Flüssigkeiten tauchen. 11. Gerät nicht in der Nähe von Sprengstoffen, stark brennbaren Materialien, Gasen oder Flammen bedienen. 12. Gerät nicht von Kindern oder Ungeschickten unbewacht bedienen lassen. 13. Gerät nicht mit nassen oder feuchten Händen und Füßen berühren. 14. Für absolute Betriebssicherheit nur vorgesehene Zubehörteile verwenden.. 15. Gerät nicht im Duschraum und bei Badewanne oder beim Waschbecken benutzen: die Anwesenheit von Wasser könnte lebensgefährlich sein. 16. Stecker niemals an der Leitung bzw. an dem Gerät aus der Steckdose ziehen. 17. Das Kabel nicht herabhängen lassen. 18. Gerät nicht den Witterungseinflüssen (Regen, Wind, Schnee, Hagen usw.) aussetzen. 19. Bei Nicht benutzen bzw. Reinigen den Gerätestecker aus der Steckdose ziehen. 18 Standventilator Betriebsanleitung 20. Falls Sie entscheiden, das Gerät nicht mehr zu verwenden, dann ist es empfehlenswert, das Gerät durch Abschneiden des Anschlußkabel außer Betrieb zu setzen, nachdem der Stecker aus der Steckdose gezogen wurde. Es wird ferner empfohlen, die Geräteteile, die lebensgefährlich sein können, außer Betrieb zu setzen, besonders für die Kinder, die mit dem Gerät außer Gebrauch spielen können. 21. Beim Nichtgebrauch, vor dem Einfügen oder Entnehmen seiner Bestandteile und vor dem Durchführung von Reinigungsarbeiten muß das Gerät vom Strom abgeschaltet werden. 22. Es wird empfohlen das Gerät sauber zu halten um die o.g. Funktionsstörungen und Feuer -Gefahr zu vermeiden. 23. Achten Sie darauf, dass alle die das Gerät benutzen, diese Anleitungen lesen. 24. Diese Anleitungen aufbewahren. GEBRAUCHSANWEISUNGEN ZUSAMMENBAU DES VENTILATORS DEUTSCH 1. Standfuß (18) auf den Boden aufstellen und Standrohr (15) mit den 4 Befestigungsschauben (in der Verpackung enthalten) festmachen. 10. Setzen Sie das vordere Schutzgitter (1) an das hintere Schutzgitter (6) auf und verschließen Sie die Vergitterung, indem Sie die Befestigungshaken umlegen und die zwei Gitter festmachen. Vorsicht: Schrauben an dem Standfuß fest drehen. Sie gewährleisten einen guten Halt des Ventilators auf dem Boden. Anderfalls würde das Gerät gefährlich schwanken. 2. Abdeckkappe für den Standfuß (17) einfügen, um die Schrauben abzudecken. 3. Höhenverstellung (13) bis zur gewünschten Höhe herausnehmen. 4. Feststellring (14) einfügen und bis zum kompletten Verschluss einschrauben. 5. Schaltbrett (11) komplett auf dem Rohr einstecken. GESCHWINDIGKEITAUSWAHL Wählen Sie die Geschwindigkeitsstufen durch die verschiedenen Knöpfe des Schaltbretts (11). 0 = Standventilator ist ausgeschaltet 1= niedrige Geschwindigkeit 2 = mittlere Geschwindigkeit 3 = hohe Geschwindigkeit KOPFNEIGUNG Man kann den Ventilator-Kopf und damit auch den Eingang von dem Luftstrom in verschiedenen Stellungen neigen. Bevor Sie die Neigung verändern, schalten Sie das Gerät aus. Motorgehäuse (9) greifen und Neigung des Ventilator-Kopfes durch Nachvorne- und Hintenneigen einstellen. Der Ventilator-Kopf kann nun in einer möglichen Stellung eingerastet werden, was durch einhörbares Klicken angezeigt wird. Vorsicht: um Schäden an dem Schwenkbereich zu vermeiden, bewegen Sie den Kopf, ohne zu viel Druck zu üben. 19 Standventilator Betriebsanleitung KOPFOSZILLATION Beim Hineindrücken des Oszillationsschalters (8) kann man die Oszillation des Kopfes ein-oder abschalten. Diese Bewegung erlaubt eine gleichmäßige Luftverteilung in dem Raum. Drücken Sie den Oszillationsschalter (8) komplett nach unten, um die Oszillationsbewegung einzuschalten; der Kopf schwenkt automatisch nach rechts und nach links. Zur Abschaltung der Oszillation ziehen Sie den Schalter (8) komplett nach oben. REINIGUNG Vor der Reinigung Standventilator ausschalten und Stecker aus der Steckdose ziehen. Für die Reinigung benutzen Sie ein weiches angefeuchtetes Tuch. Niemals Alkohol, Verdünnungsmittel, Schleifmittel, usw. für die Reinigung benutzen. Kein Wasser oder andere Flüssigkeiten auf dem Gerät sprühen. Sie können es beschädigen. Vor dem folgendem Gebrauch trocknen Sie alle Teile komplett ab. 6. Feststellschraube (12) komplett einschrauben, bis das Schaltbrett (13) ganz fest an dem Rohr ist. 7. Befestigen Sie das hintere Schutzgitter (6) am Motorgehäuse (9). Achten Sie darauf, dass die Zentrierstifte des Motorgehäuses in die entsprechenden Passlöcher am hinteren Schutzgitter einrasten. 8. Drehen Sie die Befestigungsschraube (5) wieder auf das Motorgehäuse auf und ziehen Sie die Befestigungsschraube kräftig mit der Hand fest. 9. Setzen Sie die Rotorblätter (4) auf die Motorspindel auf und drehen Sie die Befestigungsmutter (3) gegen den Uhrzeigesinn, um sie an dem Motorgehäuse festzumachen. Drehen Sie mit der Hand kräftig auf die Motorspindel auf. PRODUKT UND ZUBEHÖR Fig. 1 1. vorderes Schutzgitter 2. Befestigungshaken 3. Propellerbefestigungsmutter 4. Rotorblatt 5. Befestigungsring für das hintere Schutzgitter 6. hinteres Schutzgitter 7. Motorspindel 8. Oszillationsschalter 9. Motorgehäuse SICHERHEITSHINWEIS Stromkabel erst nach dem richtigen Zusammenbau aller Teile des Standventilators an der Steckdose anschließen. Vor jedem Gebrauch die Unversehrtheit des Stromkabels überprüfen und irgendwelche Kabelverdrehung lösen. Standventilator nur auf ebene und glatte Flächen aufstellen. Standventilator in sehr feuchten Räumen nicht bedienen. 20 Standventilator Betriebsanleitung Standventilator genug entfernt von Wänden, Türen, Fenstern und Gegenständen halten, die die Oszillationen des Geräts behindern können. Gehäuse und Schutzgitter des Ventilators während des Betriebs niemals abdecken. Keine Gegenstände in dem Schutzgitter oder in den Schlitzen des Gehäuses einstecken. Stecker nicht direkt vom Stromkabel aus der Steckdose ziehen. Nach jedem Gebrauch Stecker aus der Steckdose ziehen. Sollte das Gerät für längere Zeit gelagert bleiben oder unregelmäßig benutzt werden, Standventilator in der Originalverpackung zurückstellen und an einem trockenen Ort aufbewahren. Beim ersten Gebrauch nach längerer Zeit überprüfen Sie, dass der Standventilator sauber ist und dass die Rotorblätter reibungslos und frei im Leerlauf drehen. TECHNISCHE DATEN Leistung: 41W Betriebsspannung: 220-240V ~ 50Hz In Hinblick auf eine Verbesserungsperspektive behält sich Beper das Recht vor, das betreffende Produkt ohne Voranmeldung zu ändern bzw. umzubauen. VERFAHREN FÜR DIE ENTSORGUNG VON ELEKTRO- UND ELEKTRONIKGERÄTE ABFALL Die WEEE-Richtlinie (von engl.: Waste Electrical and Electronic Equipment; deutsch: (Elektro- und Elektronikgeräte-Abfall) ist die EG-Richtlinie 2011/65/EU zur Reduktion der zunehmenden Menge an Elektronikschrott aus nicht mehr benutzten Elektro- und Elektronikgeräten. Ziel ist das Vermeiden, Verringern sowie umweltverträgliche Entsorgen der zunehmenden Mengen an Elektronikschrott durch eine erweiterte Herstellerverantwortung. Ihr Gerät enthält wertvolle Rohstoffe, die wieder verwertet werden können. Bringen Sie das Gerät zur Entsorgung zu einer Sammelstelle Ihrer Stadt oder Gemeinde. Elektro- und Elektronikgeräte mit folgender Kennzeichnung versehen und dürfen nicht mehr über Restmüll, sondern nur noch über die öffentlichen Entsorgungsträger und anschließende Rückgabe an die Hersteller und Importeure entsorgt werden. 21 GARANTIE Wir übernehmen für das von uns vertriebene Gerät eine Garantie von 24 Monaten ab Kaufdatum (Kassenbon). Kaufbeleg und Garantieschein sind wesentlich für die Gültigkeit der Garantie. Ohne diesen Nachweis kann ein kostenloser Austausch oder eine kostenlose Reparatur nicht erfolgen. Im Garantiefall geben Sie bitte das komplette Gerät in der Originalverpackung zusammen mit dem Kassenbon an Ihren Händler. Die Garantie erlischt bei Fremdeingriff. Garantiebedingungen Innerhalb der Garantiezeit beseitigen wir unentgeltlich die Mängel des Gerätes oder des Zubehörs*, die auf Material- oder Herstellungsfehler beruhen, durch Reparatur oder, nach unserem Ermessen, durch Umtausch. Garantieleistungen bewirken weder eine Verlängerung der Garantiefrist, noch beginnt dadurch ein Anspruch auf eine neue Garantie! Kaufbeleg und Garantieschein sind wesentlich für die Gültigkeit der Garantie. Ohne diesen Nachweis kann ein kostenloser Austausch oder eine kostenlose Reparatur nicht erfolgen. *Schäden an Zubehörteilen führen nicht automatisch zum kostenlosen Umtausch des kompletten Gerätes. Wenden Sie sich in diesem Fall bitte an unsere Rufnummer. Sowohl Defekte an Verbrauchszubehör bzw. Verschleißteilen (z.B. Motorkohlen, Knethaken, Antriebsriemen, Ersatzfernbedienung, Ersatzzahnbürsten, Sägeblättern usw.), als auch Reinigung, Wartung oder der Austausch von Verschleißteilen, fallen nicht unter die Garantie und sind deshalb kostenpfl ichtig! Nach der Garantie Nach Ablauf der Garantiezeit können Reparaturen kostenpfl ichtig vom entsprechenden Fachhandel oder Reparaturservice ausgeführt werden. TRETEN SIE BITTE IN VERBINDUNG MIT IHREN HÄNDLER IN IHREM LAND ODER POST SALES ABTEILUNG VON FA. BEPER. E-MAIL [email protected] DIE IHREN HÄNDLER NENNEN WIRD Ventilador de pie Manual de instrucciones PRECAUCIONES GENERALES ESPAÑOL 1. Leer prestando mucha atención las instrucciones de este manual ya que proporcionan informa ciòn importantes sobre la seguridad de instalación, de utilización y de mantenimiento. De esta ma nera se podran evitar dificultades y eventuales accidentes de perjuicio a la seguridad del usuario. 2. Sacado el embalaje, asegurarse de la integridad del aparato, prestando atención en el cable de alimentación. Los elementos de embalaje (bolsita plástica, poliestireno, etc) no deben dejarse al alcance de los niños, puesto que potenciales fuentes de peligro. Se recomienda no lanzar los materiales de emba laje en las basuras, pero de entregarlos en los centros de tratamiento de los residuos convenientes, pidiendo eventualmente consejo al gerente del centro de su municipio de residencia. 3. Si el cable de alimentación está dañado, debe ser sustituido por el fabricante o por el servicio de asistencia técnica o de todos modos por una persona con calificación similar, en modo de prevenir cualquier riesgo. 4. Antes de conectar el aparado, comprobar que el voltaje indicado en la placa de caracteristicas coincida con la tensión de la red eléctrica. El aparado puede sufrir daños en caso de tensión no correcta. 5. En caso de que la toma de corriente eléctrica y el aparato no resulten compatibles, personal pro fessionalmente cualificado podrà substituir la toma por otra idónea y podrà verificar que la sección de los cables de la toma tengan la potencia absorbida por el secador. 6. En general no se aconseja el uso de adaptadores, tomas de corriente múltiples y/o cables de prolongación, sobre todo en cuartos de baño o duchas. En el caso que fuese indispensable su utilización, es necesario servirse solo de adaptadores simples o múltiples y cables de prolongación conformes con las vigentes normas de seguridad, teniendo cuidado de no superar el lìmite de carga útil del valor de la corriente, marcado sobre el adaptador simple y los cables de prolongación, y él de potencia maxima marcado sobre el adaptador múltiple. 7 No utilizar el aparado si hubìera algun daño en el cable de alimentación o al enchufe. 8. No utilizar el aparato después de comprobar un funcionamiento irregular. En este caso apagar el aparato. Para eventuales reparaciones es necesario dirigirse a un centro de asistencia Beper autorizado, con la obligación de utilizar recambios originales. La falta de observancia de todo lo mencionado puede comprometer la seguridad del aparado. 9. Este aparado se debe destinar exclusivamente para el uso indicado. Cualquier otro tipo de utilización se debe considerar inadecuada y, por lo tanto, peligrosa. Beper no puede considerarse responsable de los daños que puedan derivarse por usos impropios, erroneos e irracionales. 10. No sumergir por ninguna razón el aparado en agua o en otros liquidos. 11. No utilizar el aparato en presencia de explosivos, substancias particularmente infla mables, gas o llamas ardientes. 12. No permitir a los niños, a los minusválidos o a otra gente sin experiencia o capacidad técnica de utilizar el aparato si no se miran correctamente . Es necesario la supervisión cercana cuando el aparato se utiliza cerca a los niños . 13. No utilizar el aparato con manos o pies mojados. 14. No utilizar por ninguna razon accesorios que no sean previstos por Beper y que podrian crear serio peligro. 23 Ventilador de pie Manual de instrucciones ADVERTENCIAS PARA EL USO No conectar la toma de alimentación antes de ensamblar de forma correcta todas las partes del ventilador. Antes de cada utilización averiguar la integridad del cable de alimentación y desatar eventuales marañas. Colocar el ventilador sólo sobre superficies iguales y estables. No colocar el aparato en ambientes demasiado húmedos. Mantener el ventilador lejos de paredes, puertas, ventanas y objetos que podrían estorbar el movimiento oscilatorio. No cubrir de ninguna manera el cuerpo y la rejilla del ventilador durante su funcionamiento. No ensertar objetos en la rejilla y en las ranuras del cuerpo del aparato. No desconectar el enchufe estirando el cable de alimentación. Después de cada utilización desconectar el enchufe de la toma de corriente. Si el aparato tiene que ser puesto en almacén por mucho tiempo y no utilizado con regularidad, hay que volver a ponerloen su embalaje y dejarlo en un lugar seco. Cuando se vuelve a utilizar por primera vez después de un largo tiempo de inutilización, averiguar que el ventilador esté limpio y que las palas del motor den la vuelta sin estorbos (con el motor apagado). PRODUCTO Y ACCESORIOS Fig. 1 1.Rejilla anterior 2.Corchetes para cerrar 3. Seguro del rotor 4.Rotor 5.Seguro de la rejilla posterior 6. Rejilla posterior 7.Árbol motor 8.Perno de oscilación 9.Cuerpo del motor 10. Perno de regolación de la inclinación 11. Panel de control 12. Tornillo para enganchar al tubo 13. Tubo interior 14. Tubo exterior 15. Pomo de regolación de la altitud 16. Tornillo para enganchar a al base 17. Perno de ornamento de la base 18. Base de apoyo ISTRUCCIONES PARA EL USO Fig. 2 MONTAJE DEL VENTILADOR 1-Colocar la base de apoyo (18) en el piso 2-Introducir el tubo interior (14) adentro del tubo exterior (14) hasta su salida 3-Introducir el perno de ornamento de la base (17) y fijar el pomo de regolación de la altitud (15) 4-Enganchar el tubo exterior (14) a la base de apoyo (18) introducendo 4 tornillos (incluidos en el embalaje) Bajar el perno de ornamento de la base (17). Importante: introducir muy bien los tornillos a la base de apoyo para garantizar la estabilidad del ventilador. En caso contrario el aparato podría oscilar de manera peligrosa. 5-Sacar el tubo interior (13), alzar hasta la medida deseada. Enganchar con fuerza el pomo de regolación de la altitud. 24 Ventilador de pie Manual de instrucciones 6-Ensertar completamente el panel de control (11) en el tubo. 7-Introducir completamente el tornillo (12) para que el panel esté bien fijado al tubo interior (13). 8-Poner la rejilla posterior (6) a contacto con la brida del cuerpo-motor de manera que los agujeros de la rejilla se encajen con los pernos del cuerpo-motor (9) del aparato. 9-Introducir completamente el seguro de la rejilla posterior (6), para fijar la rejilla al cuerpo-motor. 10-Ensertar el rotor (4) en el árbol-motor (7) e introducir completamente el seguro del rotor (3) en el árbol-motor, para fijar el rotor al cuerpo del motor. 11-Poner en contacto las dos rejillas anterior (1) y posterior (6), poniendo los corchetes para cerrar (2) de la rejilla anterior (1), en la rejilla posterior (8). Cerrar los corchetes (2) para fijar las rejillas. ELECCIÓN DE LA VELOCIDAD Elejir la velocidad de ventilación deseada apretando las teclas del panel de control (11). En posición 0 el ventilador está apagado En posición 1 baja velocidad En posición 2 velocidad mediana En posición 3 alta velocidad INCLINACIÓN DE LA CABEZA Es posible inclinar la cabeza del ventilador en diferentes posiciones, para cambiar la inclinación del flujo de aire. Antes de cambiar inclinación apagar el aparato. Agarrar el cuerpo-motor e inclinar la cabeza del ventilador, a saltos, hasta la posición deseada. Cuidado: no forzar el movimento para no romper el mecanismo de inclinación. OSCILACIÓN DE LA CABEZA Con el perno de oscilación (8) es posible activar o desactivar la oscilación de la cabeza del ventilador. La oscilación permite distribuir de manera uniforme el aire en el ambiente. Para activar la oscilación, empujar el perno de oscilación (8) hacia abajo hasta su bloqueo completo; la cabeza del ventilador da la vuelta automáticamente a la derecha y a la izquierda. Para desactivar la oscilación empujar el perno (8) completamente hacia arriba. LIMPIEZA Apagar el ventilador y desconectar el enchufe de la toma de corriente antes de hacer cualquier operación de limpieza. Para limpiar el ventilador utilizar una tela suave, eventualmente humedecida con agua. No utilizar alcohol o agentes químicos como diluyentes, productos abrasivos en general. No rociar agua y líquidos sobre el ventilador, para evitar infiltraciones peligrosas. Secar bien todas las partes mojadas del ventilador antes de encenderlo. Cuando no se utiliza el ventilador en la temporada invernal, ponerlo en un luger seco y limpio. 25 Ventilador de pie Manual de instrucciones DATOS TÉCNICOS Potencia: 41W Alimentación: 220-240V ~ 50Hz En una visión de continuo mejoramiento, Beper podrá efectuar cambios y mejoramientos sobre el producto actual sin avisar con anterioridad. PROCEDIMIENTO DE ELIMINACIÓN DE LOS EQUIPOS ELÉCTRICOS Y ELECTRÓNICOS Al término de la vida útil del aparato, no eliminar como residuo municipal sólido mixto sino eliminarlo en un centro de recogida específico colocado en vuestra zona o entregarlo al distribuidor a la hora de comprar un nuevo aparato del mismo tipo y destinado a las mismas funciones. El distribudor se cargarà el costo de eliminación de los equipos siguendo las normas actuales. Este procedimiento de recogida separada de los equipos eléctricos y electrónicos se realiza con el propósito de una política del medioambiente comunitaria con objetivos de salvaguardia, defensa y mejoramiento de la calidad del medioambiente y para evitar efectos potenciales en la salud de los seres humanos debido a la presencia de dentro de estos equipos o a un uso inapropiado de los mismos o de algunas de sus partes. Està Vuestra y nuestra competencia aiudar la defensa del medioambiente. El símbolo indica que este producto respecta la normativa europea de mdioam biente ( 2011/65/EU) y le recuerda que todos los productos electrónicos y eléctricos deben ser objeto de recogida por separado al finalizar su ciclo de vida. Para obtener información sobre el reciclaje de este producto y dónde encontrar puntos de recogida llame las supuestas autoridades locales. Una eliminación no correcta de este producto podría conllevar sanciones. 26 CERTIFICADO DE GARANTĺA Este aparato ha sido controlado en fábrica. La garantía es valida 24 meses a partir de la fecha de compra para todos los defectos de material o de fabricación. En caso de reclamación, tiene que presentar juntos el recibo fiscal y la garantía. Para la asistencia técnica, es necesario contactar su revendedor o nuestra empresa. Eso le permitirá conservar su aparato en mejores condiciones y no invalidar la garantía. Toda manipulación del aparato por una persona no autorizada o no cualificada cancelará automáticamente la garantía. Condiciones de garantía Durante la garantía, si algunas averías aparecen a causa de un defecto de material y/o fabricación, garantizamos gratuitamente la reparación a las condiciones siguientes : - el aparato ha sido utilizado correctamente y esto solamente al uso para el cual ha sido fabricado ; - expertos repararon el aparato, es decir, personas designadas por el proveedor ; - es obligatorio de presentar el recibo fiscal; - las partes que presentan señales evidentes de desgaste no se tienen en cuenta en la garantía. En consecuencia, todas las partes que habrían sufrido daños accidentales o que presentaban señales de uso normal se excluyen de la garantía (entre las cuales, bombillas, baterías, pilas, resistencias), todas las partes implicando defectos debidos a la no utilización doméstica, la negligencia en la manipulación y el mantenimiento, los daños en el transporte y todos los daños no imputables directamente al fabricante. Si un defecto aparece durante la garantía y no puede estar reparado, el aparato se sustituirá gratuitamente. Asistencia técnica Después del final de la garantía, concedemos siempre una gran importancia a la reparación. Para la asistencia técnica y/o reparaciones fuera de la garantía, es necesario contactar directamente la dirección siguiente : CONTACTE CON EL DISTRIBUIDOR DE SU PAIS O EL DEPARTAMENTO DE POST VENTA DE BEPER . ENVIE UN E-MAIL [email protected] Y LE ENVIAREMOS DATOS DE SU SERVICIO TECNICO EN SU PAIS. R BEPER SRL Via Salieri, 30 37050 - Vallese di Oppeano - Verona Tel. 045/7134674 – Fax 045/6984019 e-mail: [email protected] www.beper.com