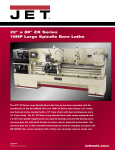
1
fresmak
MORDAZAS DE ALTA PRESION
MANUAL DE INSTRUCCIONES
MORDAZA
-mat HIDRÁULICA
C
SERVICE MANUAL
-mat HYDRAULIC VICE
E
MANUEL DE SERVICE
ETAU
-mat HYDRAULIQUE
F
BEDIENUNGSANLEITUNG
-mat HOCHDRUCKSPANNER
MECHANISCH/HYDRAULISCH
D
fresmak
MORDAZAS DE ALTA PRESION
MANUAL DE SERVICIO
w Esta mordaza ha sido sometida a verificaciones de calidad, seguridad y funcionamiento. No
obstante, debido a un manejo erróneo o al mal uso, pueden producirse situaciones de lesiones
para el trabajador o para terceras personas u otras instalaciones u objetos.
C
w Toda persona que intervenga en el desembalaje, puesta en marcha, manejo, mantenimiento
o reparaciones de esta mordaza, esta obligada a leer el presente manual de servicio.
w El operario tiene que ser mayor de 18 años, haberle sido enseñado el manejo de la mordaza,
haber demostrado su capacitación para el manejo de la misma, haber leido y entendido el
presente manual de servicio y observar en todo momento las indicaciones del mismo.
Normas de seguridad.w Protección para el personal:
w Zapatos de seguridad.
w Guantes protectores.
w Protección para la cara.
w Puesto de trabajo:
w Sujetar bien la mordaza a la mesa para evitar que esta se mueva.
w Mantener el lugar de trabajo limpio y ordenado.
w Desplazamientos:
w No situarse nunca debajo de la mordaza mientras se manipula esta con la grua.
Desembalaje.w Para proceder a desembalar la mordaza, se debe manipular esta con una grua y un imán, que
debe ser adherido a la parte superior de la mordaza intentando buscar un buen reparto de los
pesos.
w La base de la mordaza, así como el resto de la misma se hallan envueltas en un papel aceitado
especial para su mejor mantenimiento. Proceder a separar el papel y acto seguido apoyar la
base de la mordaza sobre la mesa de la máquina.
Limpieza y mantenimiento.w Para asegurar una duración y condiciones óptimas de la mordaza, debe mantenerse siempre
limpia de virutas u otros restos que puedan afectar a su perfecto funcionamiento.
w Aire a presión puede ser suficiente para limpiar la mordaza, aunque recomendamos en caso
necesario el uso de algún trapo. Atención: No utilizar productos químicos que puedan ocasionar
daños a la mordaza.
2
fresmak
MORDAZAS DE ALTA PRESION
Instrucciones generales de la Mordaza
-mat Hidráulica
Presentación:
La mordaza se envía preparada para trabajar, embalada en una caja de madera.
Esta caja esta pensada fundamentalmente para ser usada como estuche de almacenamiento
mientras la mordaza está en desuso.
La mordaza se envía con los siguientes accesorios standard:
w Juego de 4 bridas de amarre.
w Juego de chapas de protección.
w Manilla.
A.- Funcionamiento
La mordaza funciona con el simple giro de la manilla. Lleva incorporado un husillo hidráulico de
alta presión.
Al girar la manilla hacemos avanzar el carro móvil hacía la pieza de trabajo. Cuando éste hace
tope con la pieza, debemos seguir girando la manilla. En ese momento se produce un “clack” que
nos indica que ha saltado el embrague.
A partir de aquí es cuando se produce la alta presión. Cuando sintamos que el recorrido ha
terminado, es inútil que sigamos intentando girar la manilla, no vamos a conseguir más presión
y podemos estropear la mordaza.
El husillo, en su parte trasera lleva marcadas y numeradas las toneladas que se producen al girar
la manilla.
Al soltar la pieza, debemos hacer el movimiento contrario hasta oir el nuevo “clack” del embrague.
Al contrario de otras mordazas, ésta tiene el conjunto multiplicador debajo de la cabeza y no junto
a la brida. Este conjunto está sujeto por dos tornillos pasadores, uno a cada lado de la cabeza.
Así pues, el husillo hidráulico de alta presión está formado por dos conjuntos independientes:
Unidad hidráulica
Unidad de embrague
La unidad hidráulica lleva consigo el husillo principal de la mordaza.
B.- Mantenimiento/limpieza.
Es fundamental, para un buen funcionamiento, que la mordaza este limpia interiormente.
Para evitar la entrada de virutas, se envían las chapas de protección.
Para una limpieza completa debemos desmontar el carro móvil. Para ello, tenemos que desatornillar
el tornillo que lleva el carro en su parte trasera. Ahora, levantando hacía delante, se libera.
Hay que tener sumo cuidado para no perder la semi-bola que va colocada en la parte interior del
carro.
Soltando ahora los 4 tornillos de la brida posterior y los 2 tornillos de la cabeza de la mordaza,
liberamos el husillo, que sale hacia atrás con la tuerca.
Ahora tenemos la mordaza libre para su limpieza.
Un buen mantenimiento nos obliga a utilizar buenas substancias refrigerantes y anti-oxidantes.
El husillo de alta presión, no necesita rellenado periódico de aceite.
C.- Instrucciones para desmontar el husillo de la mordaza.
1. Desmontaremos el carro, tal como se explica en el punto (B) de limpieza.
2. Soltamos los 4 tornillos de la brida y los dos pasadores que lleva la mordaza en la cabeza.
Ahora, sacamos todo el conjunto “husillo – tuerca de fundido” fuera de la mordaza. La brida
sale por sí sola del husillo.
3. Para poder soltar la tuerca de fundido, debemos llevarla hacía el depósito hidráulico.
3
C
fresmak
MORDAZAS DE ALTA PRESION
Tal como hemos expresado anteriormente, ahora debemos de separar la unidad hidráulica
(husillo principal) de la unidad de embrague. Para ello, el husillo principal tiene unas partes
planas en la unión de ambas unidades. Debemos quitar el tornillo (202) y ahora sujetando el
husillo principal, desenroscar la unidad de embrague.
Ahora ya esta totalmente desmontado.
D.- Pretensado hidráulico.
C
Si al pasar el tiempo disminuye la presión debido a una perdida parcial de aceite y se hiciera
necesario volver a tensar el aceite del deposito, se deben de seguir los siguientes pasos:
1. Debemos de seguir los puntos que figuran en el apartado “C” hasta tener la unidad hidráulica
libre.
2. Ahora debemos de sujetar, en horizontal, con cuidado el conjunto de la pieza “camisa depósito”
(2005), haciendo que una de las ranuras-agujero quede hacía arriba.
3. En la ranura agujero, introducimos uno de los 2 pasadores (2004), evitando así que gire la
pieza depósito fijo (2031).
4. Soltamos el tornillo (215).
5. Ahora con una llave de uña (DIN 1804) giramos roscando la pieza (2024) en la camisa depósito
(2005). Lo normal debe de ser girar como máximo 360º
6. Volver a montar en la mordaza y probar si hemos recuperado la presión perdida.
E.- Rellenado de aceite
1. Debemos seguir los puntos que figuran en el apartado “C”, hasta tener la unidad hidráulica
libre. (Aparece como desmontaje unidad hidráulica.)
2. Soltar el prisionero (215), desenroscar la tapa tirador (2024) de la camisa de depósito (2005).
(No perder los muelles de platillo (213) ni el soporte (2026).
3. Colocar el reten (009-90; 2032-125/160) en la camisa-depósito (2005). (Con los labios hacia
el fondo).
4. Introducir el depósito fijo (2031) en la camisa depósito (2005) haciendo coincidir los agujeros
de una y otra pieza.
5. Colocando los pasadores (2004) en sus alojamientos y por medio de aire a presión se consigue
que el reten (009-90; 2032-125/160) adapte su posición correcta.
6. Con ayuda de los pasadores (2004) empujar las piezas (2031), (009-90; 2032-125/160) hasta
el fondo de la (2005).
7. Rellenar de aceite el agujero central de la pieza (2031) hasta el borde del agujero. Procurar
que el aceite no lleve aire o en su caso purgar con un alambre.
8. Colocar el reten (410-90;2033-125/160) en el pistón primario (2029) e introducirlo en el deposito
fijo (2031), sin sacar los pasadores.
9. Ahora colocar los muelles de platillo (213) el soporte (2026) y el husillo principal (2008) y roscar
la tapa tirador (2024). Esta tapa se rosca con una llave de uña (DIN 1804) hasta hacer tope.
Colocar el tornillo (215).
F.- Reglaje final
Tanto si hemos hecho un pretensado o un rellenado – podemos comprobar si esta correcto lo
que hemos hecho – antes de colocar el husillo en la mordaza.
1. Montar la unidad hidráulica con la unidad de embrague, con el tornillo (202).
2. Sujetamos el conjunto en horizontal por el husillo principal (2008) y colocamos un pasador
(2004) en el agujero del deposito fijo (2031).
3. Ahora introducimos la manilla y hacemos todo el recorrido. Debemos sentir una ligera oposición
al giro. El embrague debe hacer todo su recorrido hasta hacer tope mecánico. Si es así el
montaje ha sido correcto.
4. Si no llegamos a tope mecánico, debemos desenroscar la tapa tirador (2024) y volver a probar.
4
fresmak
MORDAZAS DE ALTA PRESION
SERVICE MANUAL
w This
-mat precision machine vice is guaranteed for quality, and workmanship. It has
been prepared for its correct operation through our established final assembly and test
procedures. Care should be taken that it is used correctly to ensure the operators and other
persons safety in the workplace.
w Each person involved in the unpacking, handling, operation and maintenance of this vice is
required to have to read this service manual. This is to ensure safety at work compliance, and
the corect understanding of the vice operation.
w The operator has to be minimum 18-years of age, it must be ensured that the operator is
capable or has to be trained on the correct vice operation by someone more senior. The operator
must be able to prove his capabilities for its handling and operation and have read and understood
this service manual and keep it available for reference.
Personal protection.w Security shoes (steel toecap type).
w Protecting gloves.
w Machine guards, safety glasses.
Worplace .w The vice must be clamped firmly to the machine table to avoid movements during a machining
operation.
w Ensure the vice jaw movements are not impeded in any way,keep the work area tidy.
Moving the vice.w Care should be taken when moving the vice. the operator must keep clear of the crane or other
lifting equipment used.
Unpacking the vice .w When unpacking the vice it should be with the use of a crane with a magnet or other safe
system. Care should be taken that the load is correctly distributed before fully lifting.
w The vice is wrapped in oiled paper for its protection during delivery. Ensure that when the oiled
paper is removed from its base it is immediately placed on a “cleaned” machine table and
clamped safely in position.
Cleaning and general maintenance.w To ensure the vice long operational life and the most favourable working conditions, it is essential
that it is cleaned very regularly, after each machining cycle of swarf or machining sludge that
can affect its correct operation.
The regular “cleaning” can be by pressure coolant gun or air gun. Together the use of a small
brush to clear the jaw movement ways can generally be effective. Cleaning by industrial rag
or paper can also usefully be done after a number of machining cycles. It must be understood
that the efficient vice operation needs clear space for clamping and unclamping. Attention:
never use chemical products which can damage the vice.
5
E
fresmak
MORDAZAS DE ALTA PRESION
The
-mat vice is supplied with all standard equipment for its correct operation. Following
accessories are included :
- Set of 4-clamps.
- Set of swarf protection sheets.
- Handle (crank).
A.- Operation of the vice.
E
The
-mat high pressure hydraulic spindle unit is actioned turning the handle clockwise.
Turn the handle until the movable jaw reaches the workpiece. When the jaw touches the workpiece,
continue turning the handle. A slight “treshold” pressure will be experienced as the clutch operates,
the high pressure clamping will take place as the handle is turned further. Once the movement
is completed do not continue turning the handle as it could damage the vice.
On the end of the spindle is marked and numbered the tons produced when the handle is turned.
To undo the workpiece move the handle anti-clockwise.
The vice has the pressure intensifier assembly. This assembly is fixed through 2 allen-set-screws,
one at each side of the vice head .
The high pressure hydra spindle comprises 2 independent assemblies :
- Hydraulic unit
- Clutch unit
B.- Cleaning/Maintenance.
Because of the industrial working conditions, on machines and in machining centres in which the
vices must work (swarf, pressure, coolants, etc.), full cleaning of the operational area of the vices
must be assessed as required by the workshop management.
To dismantle the parts for cleaning firstly undo the movable jaw for it, remove the screw on its
rear face. Now raise and lift the movable jaw. Take care not to mislay the half-ball that is inside
the movable jaw.
Loose the 4 screws of the end clamp and the 2 side screws of the vice head. The spindle is loose
and it can be taken out at the rear with the spindle shoe. Now the vice is free for its cleaning. Oil
the parts and carefully replace the parts in the reverse order. Operate the vice “open and close”
a few times to ensure it is free, before loading with workpieces.
For a good maintenance, please use good quality coolants and antioxidizing agents.
C.- Instructions for disassembling the spindle from the vice.
1. Dismantle the movable jaw as explained above on item B (cleaning).
2. Loosen the four end clamp screws and the 2 allen set screws on the head of the vice. Remove
the whole assembly “spindle-spindle shoe”. The end clamp comes out easily.
3. For removing the spindle shoe take it towards the hydraulic cylinder.
As above, the hydraulic unit (threaded spindle) must be detached from the clutch unit. For
ease dismantling, at the coupling of both units, the threaded spindle has some flats. Unscrew
the screw (No. 202), holding up the threaded spindle unscrew the clutch unit.
Take out the spindle shoe.
6
fresmak
MORDAZAS DE ALTA PRESION
D.- Hydraulic Power Setting.
If over the time the pressure decreases , the oil chamber should be resetted by following the steps
below:
1. Dismantle as shown in “C” until the hydraulic unit is detached.
2. Hold carefully , in horizontal position, the assembly of part cylinder-holder Nº 2005 ensuring
that one of the slot-hole stays upwards.
3. Introduce in the slot-hole one of the 2 side allen set screws Nº 2004 avoiding that part fixed
cylinder Nº 2031 turns.
4. Loosen screw Nº 215.
5. With a key (DIN 1804) screw part Nº 2024 into cylinder-holder Nº 2005. Normally it should
turn 360º as maximum.
6. Assemble it on the vice and check if the pressure is restored.
E.- Hydraulic oil filling up.
1. Dismantle as shwon in “C” above.
2. Unscrew the allen set screw Nº 215 and cap Nº 2024 from cylinder-holder Nº 2005. Do not
mislay the belleville springs Nº 213 and holder Nº 2026.
3. Replace seal Nº 009-090; 2032-125/160 into cylinder-holder Nº 2005 (with the sealing lips
towards bottom).
4. Introduce fixed cylinder Nº 2031 into cylinder-holder Nº 2005 matching the holes of both parts.
5. Fit allen set screw Nº 2004 in their lodgements and with an air line pressurise for the seal Nº
009-090; 2032-125/160, self-fit in position.
6. Helping with allen set screws Nº 2004, push parts Nos. 2031 and 009-090; 2032-125/160 until
the end of cylinder-holder Nº 2005.
7. Pour hydraulic oil through the central hole of part Nº 2031 until the level reaches the top,
checking that the oil chamber is completely free of air bubbles. If required, stir with a clean
wooden toothpick or similar and refill to the top.
8. Now, without taking out the allen set screws, replace gently seal Nº (410-90;2033-125/160)
into small piston Nº 2029 and introduce it into fixed cylinder Nº 2031.
9. Replace the belleville springs Nº 213, the holder Nº 2026 and threaded spindle Nº 2008 and
screw the cap Nº 2024. Screw this cap with a key (DIN 1804) until the end. Replace screw Nº
215.
F.- Final setting and regulating.
Whether a power setting on or an oil refilling has been completed, check if the operation has been
successful, before fitting the spindle in the vice.
1. Assemble with screw Nº 202 the hydraulic unit with the clutch unit.
2. Hold the assembly – by the threaded spindle- in horizontal position and introduce an allen set
screw into the hole of fixed cylinder Nº 2031.
3. Fit the handle and make the whole movement. When turning it must check for the slight treshold
pressure. The clutch must cover the whole movement until making mechanical stop. If so, the
assembly is correct.
4. If the mechanical stop is not acheived, unscrew the cap Nº 20224 and try it again.
7
E
fresmak
MORDAZAS DE ALTA PRESION
MANUEL DE SERVICE
w Cet étau a étè soumis aux verifications de qualité, sécurité et fonctionnement. Toutefois, il peut
y avoir des problèmes d’utilisation.
w La lecture de ce manuel est indispensable pour le deballage de l’étau, sa mise en service, son
utilisation et son entretien.
w L’ utilisateur doit être qualifié et doit avoir pris connaissance de toutes les instructions du
manuel.
Règles de securite.-
F
w Protections pour le personnel:
w Chaussures de securitè.
w Gants de protection.
w Masque pour le visage.
w Poste de travail:
w Fixer bien l’étau sur la table de la machine pour eviter toute mouvement.
w Le poste de travail doit etre propre et rangé.
w Déplacements de l’étau:
w Ne jamais se mettre en-dessous de l’étau lors de sa manipulation avec une grue ou un
palan.
Déballage.w Pour déballer l’étau, il faut utiliser une grue ainsi qu’un aimant qui doit adherer à la partie
supérieure de l’étau en cherchant un bon équilibre du poids.
w Enlever la feuille de protection huilée de la base de l’étau et poser l’étau sur la table de la
machine.
Entretien et maintien.w Pour assurer la durée et les conditions optimales de utilisation de l’étau, on doit le garder
propre de tout copeau qui pourrait altérer son bon fonctionnement.
w Pour le nettoyer, il suffit d’un jet d’air comprimé ou d’un chiffon. Attention: Ne jamais utiliser
de produits chimiques qui peuvent endommager l’étau.
8
fresmak
MORDAZAS DE ALTA PRESION
L’étau
suivants:
-mat est fourni en parfait état de fonctionnement, avec les accessoires standard
• Un jeu de 4 brides.
• Un jeu de tôles de protection.
• Une manivelle.
A.- Fonctionnement.
La broche hydraulique tourne à l’aide de la manivelle.
Quand on tourne la manivelle le corps mobile avance vers la pièce à serrer. Quand le mors mobile
est en contact avec la pièce de travail, il faut continuer à tourner la manivelle. A ce moment,
l’embrayage de la broche saute. C’est a partir d’ici que la haute pression se produit. Quand on
sent que le parcours est fini, c’est inutile de continuer à tourner la manivelle car on ne va pas avoir
plus de pression et on pourrait abîmer l’étau.
Les tonnes de pression sont indiquées et numérotées à l’arrière de la broche et se selectionnent
en tournant la manivelle.
Pour détacher la pièce il faut faire le mouvement contraire.
Au contraire des autres étaux, l’ensemble multiplicateur est sous la tête et non auprès de la bride.
Cet ensemble est vissé avec 2 vis, une à chaque côté de la tête.
La broche hydraulique de haute pression est composée de deux ensembles independants:
Unité hydraulique
Unité d’embrayage
La broche Nº 2008 fait partie de l’unité hydraulique.
B.- Entretien et Nettoyage.
Pour assurer son bon fonctionnement il est important que l’étau soit propre à l’intérieur.
Les tôles de protection sont livrées avec l’étau pour éviter l’entrée des copeaux.
Pour un nettoyage complet, il faut démonter le mors mobile. Pour cela, dévisser la vis à l’arrière
du mors mobile, en l’élevant à l’avant pour le dégager. Il faut faire attention à ne pas perdre la
demi-boule placée à l’interieur du mors mobile.
En dévissant les 4 vis de la bride 1014 ainsi que les 2 vis de la tête de l’étau on peut enlever par
l’arrière la broche avec l’écrou de broche.
Maintenant, l’étau est prêt pour le nettoyage.
Un bon entretien nous oblige à utiliser des bons produits réfrigérants et anti-oxydants.
C.- Démontage de la broche de l’étau.
1. Démonter le mors mobile, comme indiqué en B .
2. Dévisser les 4 vis de la bride ainsi que les 2 qui se trouvent dans la tête de l’étau. Extraire
l’ensemble “broche-écrou de broche”. La bride se détache d’elle-même de la broche.
3. Pour arriver à détacher l’écrou de broche, il faut l’emmener vers le cylindre hydralique. Comme
indiqué ci-dessus, il faut separer l’unité hydraulique de l’unité d’embrayage. Pour cela, la
broche a des parties plates à l’union des deux unités. Enlever la vis Nº 202 et en tenant la
broche, dévisser l’unité d’embrayage. De cette façon on peut sortir l’écrou de broche.
9
F
fresmak
MORDAZAS DE ALTA PRESION
D.- Precontraint Hidraulique.
Si avec le temps, la pression diminue par une perte partielle de l’huile, on doit précontraindre à
nouveau l’huile du cylindre de la fa çon suivante :
1. Faire comme dans le paragraphe C, jusqu’à ce qu’on arrive à liberer l’unité hydraulique.
2. Tenir soigneusement, l’ensemble de la piéce “porte-cylindre” Nº 2005 en position horizontale,
en maintenant une des rainures vers le haut.
3. Introduire une des deux vis Nº 2004 dans la rainure pour eviter que le cylindre-fixe Nº 2031
ne tourne.
4. Détacher la vis Nº 215.
5. Avec une clé coudée (DIN 1804), on visse la pièce Nº 2024 dans le porte-cylindre Nº 2005.
Il faut tourner à 360 degrés maximum.
F
6. Remettre la broche dans l’étau et vérifier si on a récupéré la pression.
E.- Remplissage de l’huile hydraulique.
1. Faire comme dans le paragraphe C jusqu’à ce qu’on arrive à liberer l’unité hydraulique.
2. Dévisser la vis d’arrêt Nº 215 et le couvercle-tireur Nº 2024 du porte-cylindre Nº 2005, en
faisant attention de ne pas perdre les rondelles belleville Nº 213 et le support Nº 2026.
3. Remettre la bague d’etancheité Nº 009-090; 2032-125/160 dans le porte-cylindre Nº 2005
(avec le lèvres vers le fond).
4. Introduire le cylindre fix Nº 2031 dans le porte-cylindre Nº 2005, de façon que les trous des
deux pièces coïncident.
5. La bague Nº 009-090; 2032-125/160 prend sa position à l’aide de l’air comprimé et en mettant
dans ses logements les vis d’arrêt Nº 2004.
6. A l’aide des vis d’arrêt Nº 2004, pousser jusqu’au fond du porte-cylindre Nº 2005 les pièces
Nos. 2031 et 009-090; 2032-125/160.
7. Remplir avec de l’huile le trou central de la piéce Nº 2031 jusqu’à ras-bord. L’huile doit être
libre de bulles d’air. Pour cela, il faut agiter l’huile avec un pointe bien nettoyé et on complète
encore jusqu’à ras-bord.
8. Mettre la bague Nº (410-90; 2033-125/160) dans le piston haute pression Nº 2029 et sans
enlever les vis d’arrêt, l’introduire dans le cylindre fixe Nº 2031.
9. Remettre les rondelles belleville Nº 213, le support Nº 2026 et la broche Nº 2008 et visser le
couvercle tireur Nº 2024. Ce couvercle doit être vissé jusqu’au bout avec une clé coudée (DIN
1804), mettre la vis Nº 215.
F.- Réglage final.
Si on a fait une précontrainte ou un remplissage, il faudra faire la manœuvre plusieurs fois avant
de la remettre en service.
1. Monter l’unité hydraulique avec l’unité d’embrayage avec la vis Nº 202.
2. Tenir par la broche Nº 2008 l’ensemble en position horizontale et mettre dans le trou du cylindre
fixe Nº 2031 une vis d’arrêt Nº 2004.
3. Introduire la manivelle et faire le parcours complet. On doit sentir une legère opposition. Pour
que le montage soit correct, l’embrayage doit accomplir le parcours complet.
4. Si on n’arrive pas à l’arrêt mécanique, il faut dévisser le couvercle-tireur Nº 2024 et essayer
à nouveau.
10
fresmak
MORDAZAS DE ALTA PRESION
Bedienungsanleitung
w Dieser Hochdruckspanner wurde einer Prüfung hinsichtlich Qualität, Sicherheit und Funktion
unterzogen. Dennoch könnten wegen falscher Bedienung oder falschem Gebrauch, Verletzungen
des Bedieners oder dritter Personen oder Gegenständen, Maschinen etc. auftreten.
w Jede Person vom Wareneingang bis zum Bediener oder Wartungs- oder Reparaturpersonal,
die mit dem Hochdruckspanner in Kontakt kommen, ist verpflichtet diese Bedienungsanleitung
zu lesen.
w Der Bediener sollte älter als 18 Jahre alt sein, er muß in die Bedienung / Handhabung des
Spanners eingewiesen worden sein und er muß diese Bedienungsanleitung gelesen und
verstanden haben. Den enthaltenen Anweisungen muß jederzeit strikt Folge geleistet werden.
Generell.Schutzkleidung für das Personal
w Sicherheitsschuhe
w Schutzhandschuhe
w Gesichtsschutz
D
Arbeitsplatz.w Der Hochdruckspanner ist sicher auf den Maschinentisch zu befestigen / fixieren, um Bewegungen
zu vermeiden. Geeignet sind unsere Spannpratzen in Verbindung mit T-Nutenschrauben.
w Der Arbeitsplatz muß stets sauber und aufgeräumt sein.
w Es muß dem Bediener genügend Bewegungsfreiheit zur Verfügung stehen.
Deplazierung.w Wenn der Spanner (z.B. mit einem Kran) verlegt wird, nie darunter stehen. Auf andere Personen
und Gegenstände achten.
Auspacken.w Den Hochdruckspanner mit geeigneten Hilfsmitteln (z.B. einem Kran und Magnet) am oberen
Teil aufnehmen und nachfolgend auspacken.
w Damit der Spanner vor Unwelteinflüssen und Rost bestens geschützt ist, befindet sich der
Spanner in einem eingeölten, speziellem Papier eingewickelt. Das Papier entfernen und
anschliessend den Grundkörper auf einer geeigneten Ablage (z.B. Maschinentisch ) abstellen.
Reinigung und Wartung.w Um eine dauerhafte Funktion des Spanners zu gewährleisten, sollte er immer von Spänen oder
andere Teilen, welche die perfekte Funktion negativ beeinflussen könnten saubergehalten
werden.
Die Reinigung des Spanners kann mit Druckluft erfolgen, wir empfehlen jedoch, einen sauberen
Lappen oder Ähnliches zu benutzen. Achtung: Keine chemischen Produkte anwenden, die den
Spanner beschädigen könnten.
11
fresmak
MORDAZAS DE ALTA PRESION
Der Hochdruckspanner
geliefert.
-mat wird im betriebsfertigen Zustand zum sofortigen Arbeiten
Zusammen mit dem Hochdruckspanner wird folgendes Standardzubehör mitgeliefert:
w Set Spannpratzen
w Set Schutzbleche
w Handkurbel
A.- Funktion
D
Dieser hydraulische Hochdruckspanner wird mit einem simplen Drehen der Handkurbel betätigt.
Durch fortlaufende Drehung der Handkurbel nähert sich die bewegliche Backe dem Werkstück
bis das Werkstück berührt wird. Jetzt löst sich die Kupplung der Spindel und durch weitere Drehung
der Handkurbel im Uhrzeigersinn wird der Hochdruck in der Spindel aufgebaut und über die
Spannbacken auf das Werkstück übertragen. Bei fühlbarem Widerstand ist der Hochdruck max.
aufgebaut und es ist zwecklos weiterzudrehen, denn dies könnte den Hochdruckspanner beschädigen.
Der Spanndruck verhält sich proportional zu der Anzahl der Umdrehungen bzw. den
Rillenmarkierungen, die am hinteren Teil der Spindel angebracht sind. Das Werkstück wird wieder
durch Drehungen im Gegenuhrzeigersinn gelöst. Im Gegensatz zu anderen Spannern, ist der
Kraftverstärker beim
-mat unter dem Kopfteil und nicht an der Lagerplatte. Dieser
Kraftverstärker ist durch zwei Gewindestifte befestigt, je einer auf beiden Seiten des Kopfteils. Die
hydraulische Hochdruckspindel besteht aus zwei unabhängigen Paketen:
Hydraulische Einheit
Einheit der Kupplung
B.-Reinigung
Durch die schwierigen Umgebungsbedingungen – z.B. im Bearbeitungszentrum – in denen der
Spanner arbeitet (Späne, Kühlmittel, Hochdruck etc.) ist eine periodische Reinigung grundlegend.
Für eine komplette Reinigung muss die bewegliche Backe gelöst werden. Die Schrauben, die sich
an der hinteren Seite der beweglichen Backe befinden lösen und jetzt die Backe abheben.
Aufpassen, dass dabei die Halbe Kugel, die sich im Innern der beweglichen Backe befindet, nicht
verloren geht. Die 4 Schrauben der hinteren Lagerplatte und die 2 Schrauben des Kopfteils lösen.
Die Spindel ist gelöst und kannt nach hinten mit der Spindelmutter herausgenommen werden.
Der Hochdruckspanner ist nun zum Reinigen bereit. Damit der Spanner gut erhalten bleibt, bitte
ein gutes Kühl- und Rostschutzmittel benutzen.
C.-Abmontieren der Spindel vom Spanner
1. Die bewegliche Backe, wie beim obenerwähnten Punkt B (Reinigung) erklärt wird, lösen.
2. Die 4 Schrauben der Lagerplatte und die 2 Gewindestifte, die am Kopfteil des Spanners zu
finden sind, lösen. Das ganze Paket “Spindel-Spindelmutter” vom Spanner herausnehmen. Die
Lagerplatte löst sich von alleine von der Spindel.
3. Um die Spindelmutter zu lösen, sollte diese zum hydraulischen Zylinder geschoben werden.
Wie schon oben erwähnt, muss jetzt die hydraulische Einheit (Gewindespindel) von der Einheit
der Kupplung getrennt werden. Die Gewindespindel hat zwei glatte Teile bei der Verbindungstelle
beider Einheiten. Die Schraube (202) lösen, die Gewindespindel festhalten und die Einheit der
Kupplung aufschrauben. Die Spindelmutter herausnehmen.
12
fresmak
MORDAZAS DE ALTA PRESION
D.- Hydraulisches Vorspannen
Wenn im Laufe der Zeit wegen Ölverlust die Spannkraft nachlässt, sollten die nachfolgenden
Schritte befolgt werden:
1. Die Schritte befolgen, die bei Punkt C angegeben sind, bis die Hydraulische Einheit gelöst ist.
2. Das Paket des Teils “ZylinderHülle” (2005) in waagrechter Position festhalten, sodass eines
der Rillen-Löcher oben ist.
3. In das Rillen-Loch wird jetzt einer der 2 Gewindestifte (2004) eingeführt, damit der fixe Zylinder
(2031) sich nicht dreht.
4. Die Schraube (215) lösen.
5. Das Teil (2024) mit einem Hakenschlüssel (DIN 1804) in die Zylinder-Hülle (2005) einschrauben.
Normalerweise sollte es maximum 360º drehen.
6. Wieder auf den Hochdruckspanner montieren und überprüfen, ob die verlorene Spannkraft
wiedererlangt ist.
D
E.- Auffüllen des Hydraulik-Öls
1. Die Schritte befolgen, die bei Punkt C angegeben sind, bis die Hydraulische Einheit gelöst ist.
2. Gewindestift (215) lösen und den Deckel (2024) von der Zylinder-Hülle (2005) aufschrauben.
(Weder Tellerfeder (213) noch Befestigung (2026) verlieren.)
3. Nutring (009-090; 2032-125/160) in die Zylinder-Hülle (2005) einsetzen. (mit den Lippen nach
hinten).
4. Den fixen Zylinder (2031) in die Zylinder-Hülle (2005) einführen bis die Löcher beider Teile
miteinander übereinstimmen.
5. Die Gewindestifte (2004) in ihre Gehäuse einsetzen und unter Verwendung von Luftdruck
erreichen, dass der Nutring (009-090; 2032-125/160) seine korrekte Position einnimmt.
6. Mit Hilfe der Gewindestifte (2004), die Teile (2031), (009-090; 2032-125/160) bis ans Ende der
Zylinder-Hülle (2005) drücken.
7. Das mittlere Loch des Teils (2031) bis an die Oberkante mit Hydrauliköl auffüllen. Der Ölraum
muss unbedingt luftleer sein. Dies kann erreicht werden, indem man mit einem sauberen
Stahlstift das Öl bewegt.
8. Nutring (410-90; 2033-125/160) auf den Kolben (2029) setzen und dann in den fixen Zylinder
(2031) einführen, ohne die Gewindestifte herauszunehmen.
9. Tellerfeder (213), Halter (2026) und Gewindespindel 2008 aufsetzen und den Deckel (2024)
aufschrauben. Dieser Deckel kann mit einem Hakenschlüssen (DIN 1804) aufgeschraubt
werden. Schraube (215) festschrauben.
F.- End-Regulierung
Sowohl nach dem Vorspannen als auch nach dem Nachfüllen des Hydrauliköls, kann nachgeprüft
werden ob alles korrekt ausgeführt wurde.
1. Die hydraulische Einheit und die Einheit der Kupplung mit der Schraube (202) montieren.
2. Das Paket – an der Gewindespindel (2008) – waagrecht halten und den Gewindestift (2004)
in das Loch des fixen Zylinders (2031) einsetzen.
3. Die Handkurbel einführen und die Spindel ganz durchdrehen. Ein leichter Gegendruck muss
zu spüren sein. Die Kupplung muss die ganze Strecke zurücklegen bis zum mechanischen
Stop. Wenn dies der Fall ist, dann ist die Montage korrekt verlaufen.
4. Wenn der mechanische Stop nicht erreicht wird, den Deckel (2024) aufschrauben und erneut
versuchen.
13
1057
1040
036
1043
037 1042
1049 031
1041
1048
1046
1063
1057
1051
1063
1065
1068
1062
1058
47
1061
1059
1053
031
1052
MORDAZA
NUMERO
-mat VICE
-mat
DENOMINACION
9 1040
CUERPO
9 1041
TORNILLO TENSOR
-mat
ETAU
DENOMINATION
-mat
DESIGNATION
HOCHDRUCKSPANNER
BENENNUNG
MAIN BODY
CORPS FIX
GRUNDKÖRPER
SCREW
VIS TENDEUR
SPANNSCHRAUBE
9 1042
CARRO
MOVABLE JAW
CORPS MOBILE
BEWEGLICHE BACKEN
9 1043
SEMIBOLA
HALF-BALL
DEMI-BOULE
HALBKUGEL
9 1046
TORNILLO CHAPA
SCREW
VIS
SCHRAUBE
9 1048
TUERCA DE FUNDIDO
SPINDLE SHOE
ECROU DE BROCHE
SPINDELMUTTER
9 1049
GOMA MUELLE
RUBBER SPRING
RESORT EN CAUTCHOUC
GUMMIFEDER
9 0 031
TORNILLO GOMA MUELLE
SCREW RUBBER SPRING
VIS RESORT EN CAUTCHOUC
SCHRAUBE F. GUMMIFEDER
9 1051
TORNILLO BRIDA (4)
FIXING CLAMP SCREW
VIS BRIDE
LAGERPLATTENSCHRAUBE
9 1052
BRIDA DE AMARRE
FIXING CLAMP
BRIDE DE FIXATION
SPANNPRATZE
9 1053
CHAPA DE ARRASTRE
PULLING SHEET
TOLE ENTRAINEMENT
ZIEHBLECH
9 1056
BOCA PERFIL/BAJO
LOW PROFIL JAW
MORS A PROFIL BAS
NIEDERZUGSBACKE
9 1057
BOCA LISA/ESTRIADA
PLAIN SERRATED JAW
MORS LISSE/STRIE
GLATTE/GERIFFELTE BACKE
9 1058
TORNILLOS BOCAS/SUPER.
UPPER JAWS SCREWS
VIS MORS SUPER.
SCHRAUBE F. OBERE BACKEN
8 1059
CHAPAS DE PROTECCION
PROTECTING SHEETS
TOLES DE PROTECTION
SCHUTZBLECH
8 1060
MANILLA COMPLETA
COMPLETE CRANK
MANIVELLE COMPLETE
KOMPLETTE HANDKURBEL
9 1061
BRAZO DE MANILLA
CRANK ARM
BRAS DE MANIVELLE
ARM (HANDKURBEL)
9 1062
MANGO DE MANILLA
CRANK HANDLE
POIGNEE DE MANIVELLE
GRIFFHÜLSE (HANDKURBEL)
9 0 036
BOCA LISA
PLAIN JAW
MORS LISSE
GLATTE BACKE
9 0 037
TORNILLO AMARRE/BOCA
JAW SCREW
VIS MORS LISSE
SCHRAUBE F. BACKE
9 0 047
EXAGONO DE MANILLA
CRANK HEXAGON
HEXAGONE DE MANIVELLE
SECHSKANT (HANDKURBEL)
8 1068
CHAPAS DELANTERAS
FRONT PROTECTING SHEETS
TOLES DE PROTECTION-DEVANT
VORDERES SCHUTZBLECH
9 1065
TORNILLO CHAPAS
SCREW
VIS
SCHRAUBE
9 1063
TORNILLO TAPON
CAP
COUVERCLE
STOÖPSEL
-mat
14
-mat
-mat
2005
239
2004
215
2007
2008
2009
2010
202
2012
017
018
205
020
2029
2029
2031
410
2030
213
2026
2024
016
2022
2021
2019
2019
2019
8 2000 0 090
HUSILLO
-mat SPINDLE
090
-mat
090
DENOMINACION
BROCHE
-mat
SPINDEL
090
DENOMINATION
DESIGNATION
-mat
090
BENENNUNG
9 2005 0 090
CAMISA DEPOSITO
THREADED CYLINDER
MANCHON DU CYLINDRE
ZYLINDERHÜLLE
9 2004 0 090
PASADOR CABEZA
ALLEN-SET-SCREW
GOUPILLE D'APPUI
KOPFTEILBOLZEN
9 0 239 0 200
JUNTA TORICA
O-RING
JOINT THORIQUE
O-RING
9 0 215 0 090
PRISIONERO
ALLEN-SET-SCREW
VIS D`ARRET
GEWINDESTIFT
9 2007 0 090
JUNTA TORICA
O-RING
JOINT THORIQUE
O-RING
9 2008 0 090
HUSILLO PRINCIPAL
THREADED SPINDLE
BROCHE
GEWINDESPINDEL
9 2009 0 090
PISTON LARGO
LARGE PISTON
PISTON DE PRE-SERRAGE
KOLBEN LANG
9 2010 0 090
JUNTA TORICA
O-RING
JOIN THORIQUE
O-RING
9 0 202 0 090
PRISIONERO
ALLEN-SET-SCREW
VIS D`ARRET
GEWINDESTIFT
9 2012 0 090
CAMISA DE EMBRAGUE
COUPLING SLEEVE
MANCHON FILETEE
EKUPPLUNGSHÜLLE
9 0 017 0 125
ARANDELA DE EMBRAGUE
WASHER
DISQUE D’ARRET RESSORT
KUPPLUNGSRING
9 0 018 0 125
MUELLE DE EMBRAGUE
CLUTCH SPRING
RESSORT RAPPEL EMBRAYAGE
KUPPLUNGSFEDER
9 0 205 0 090
EMBRAGUE MACHO
COUPLING DISC
DISQUE D'ACCOUPLEMENT
KUPPLUNGSSCHEIBE
9 0 020 0 090
PASADOR CILINDRICO
DOWEL PIN
GOUPILLE CYLINDRIQUE
ZYLINDERSTIFT
9 0 227 0 090
JUNTA TORICA
O-RING
JOINT THORIQUE
O-RING
9 2018 0 090
BRIDA
END CLAMP
BRIDE
LAGERPLATTE
9 2019 0 090
COJINETE AUTOLUBRICADO
TURCITE
TURCITE
TURCITE
9 2021 0 090
EMBRAGUE HEMBRA
COUPLING BODY
MANCHON D'ACCOUPLEMENT
KUPPLUNGSSTÜCK
9 2022 0 090
HUSILLO DE EMBRAGUE
TORQUE ROD
BROCHE FILETEE
GEWINDEBOLZEN
9 0 016 0 125
SEEGER DE EMBRAGUE
SAFETY RING
RONDELLE CIRCLIPS
SEEGER
9 2024 0 090
TAPA TIRADOR
CAP
COUVERCLE-TIREUR
DECKEL
9 2026 0 090
SOPORTE BELLEVILLES
BELLEVILLE SPRING SUPPORT
APPUI BELLEVILLES
TELLERFEDERHALTER
9 0 213 0 090
BELLEVILLES
BELLEVILLE SPRING
RONDELLE BELLEVILLE
TELLERFEDER
9 2030 0 090
TURCITE
TURCITE
TURCITE
TURCITE
9 0 410 0 125
RETEN PEQUEÑO
SMALL SEAL
BAGUE PETITE
NUTRING KLEIN
9 2031 0 090
DEPOSITO (Fijo)
FIXED CYLINDER
CYLINDRE FIX
ZYLINDER (FIX)
9 2029 0 090
PISTON PRIMARIO
SMALL PISTON
PISTON HAUTE PRESSION
KOLBEN
9 0 009 0 125
RETEN GRANDE
LARGE SEAL
BAGUE D'ETANCHEITE
NUTRING GROSS
15
2004
126
2005
215
239
2008
2009
2007 202
2012 017 018
019
020
2030
2032
2018 239
2031
2033
2029 2028 213
2026 1025 2024
016
2022
2021
2019
8 2000 0 125
HUSILLO
-mat SPINDLE
125
-mat
125
NUMERO
DENOMINACION
BROCHE
-mat
SPINDEL
125
DENOMINATION
-mat
125
DESIGNATION
BENENNUNG
9 0 126 0 200
JUNTA TORICA
O-RING
JOINT THORIQUE
O-RING
9 2004 0 125
PASADOR CABEZA
ALLEN-SET-SCREW
GOUPILLE D'APPUI
KOPFTEILBOLZEN
9 2005 0 125
CAMISA DEPOSITO
THREADED CYLINDER
MANCHON DU CYLINDRE
ZYLINDERHÜLLE
9 0 215 0 090
PRISIONERO
ALLEN-SET-SCREW
VIS D`ARRET
GEWINDESTIFT
9 0 239 0 125
JUNTA TORICA
O-RING
JOINT THORIQUE
O-RING
9 2008 0 125
HUSILLO PRINCIPAL
THREADED SPINDLE
BROCHE
GEWINDESPINDEL
9 2009 0 125
PISTON LARGO
LARGE PISTON
PISTON DE PRE-SERRAGE
KOLBEN LANG
9 2007 0 090
JUNTA TORICA
O-RING
JOIN THORIQUE
O-RING
9 0 202 0 090
PRISIONERO
ALLEN-SET-SCREW
VIS D’ARRET
GEWINDESTIFT
9 2012 0 125
CAMISA DE EMBRAGUE
COUPLING SLEEVE
MANCHON FILETEE
KUPPLUNGSHÜLLE
9 0 017 0 125
ARANDELA DE EMBRAGUE
WASHER
DISQUE DE A’RRET RESSORT
KUPPLUNGSRING
9 0 018 0 125
MUELLE DE EMBRAGUE
CLUTCH SPRING
RESSORT RAPPEL EMBRAYAGE
KUPPLUNGSFEDER
9 0 019 0 125
EMBRAGUE MACHO
COUPLING DISC
DISQUE DE D'ACCOUPLEMENT
KUPPLUNGSSCHEIBE
9 0 020 0 125
PASADOR CILINDRICO
DOWEL PIN
GOUPILLE CYLINDRIQUE
ZYLINDERSTIFT
9 0 239 0 200
JUNTA TORICA
O-RING
JOINT THORIQUE
O-RING
9 2018 0 125
BRIDA
END CLAMP
BRIDE
LAGERPLATTE
9 2019 0 125
COJINETE AUTOLUBRICADO
TURCITE
TURCITE
TURCITE
9 2021 0 125
EMBRAGUE HEMBRA
COUPLING BODY
MANCHON D'ACCOUPLEMENT
KUPPLUNGSSTÜCK
9 2022 0 125
HUSILLO DE EMBRAGUE
TORQUE ROD
BROCHE FILETEE
GEWINDEBOLZEN
9 0 016 0 125
SEEGER DE EMBRAGUE
SAFETY RING
RONDELLE CIRCLIPS
SEEGER
9 2024 0 125
TAPA TIRADOR
CAP
COUVERCLE-TIREUR
DECKEL
9 1025 0 125
TURCITES
TURCITES (Threaded spindle)
TURCITES
TURCITE (GRIFFHÜLSE)
9 2026 0 125
SOPORTE BELLEVILLES
BELLEVILLE SPRING SUPPORT
APUI BELLEVILLES
TELLERFEDERHALTER
9 0 213 0 125
BELLEVILLES
BELLEVILLE SPRING
RONDELLE BELLEVILLE
TELLERFEDER
9 2028 0 125
JUNTA TORICA
O-RING
JOINT THORIQUE
O-RING
9 2029 0 125
PISTON PRIMARIO
SMALL PISTON
PISTON HAUTE PRESSION
KOLBEN
9 2033 0 125
RETEN PEQUEÑO
SMALL SEAL
BAGUE PETITE
NUTRING KLEIN
9 2031 0 125
DEPOSITO (Fijo)
FIXED CYLINDER
CUYLINDRE FIX
ZYLINDER (FIX)
9 2032 0 125
RETEN GRANDE
LARGUE SEAL
BAGUE D'ETANCHEITE
NUTRING GROSS
9 2030 0 125
TURCITE
TURCITE
TURCITE
TURCITE
16
2004
126
2005
215
239
2008
2009
2007 202
2012 017 018
019
020
2030
2032
2018 239
2031 2033
2029 2028 213
016
2026 1025 2024
2022
2021
2019
8 2000 0 160
HUSILLO
-mat SPINDLE
160
-mat
160
NUMERO
DENOMINACION
BROCHE
-mat
SPINDEL
160
DENOMINATION
-mat
160
DESIGNATION
BENENNUNG
9 0 126 0 200
JUNTA TORICA
O-RING
JOINT THORIQUE
O-RING
9 2004 0 160
PASADOR CABEZA
ALLEN-SET-SCREW
GOUPILLE D'APPUI
KOPFTEILBOLZEN
9 2005 0 125
CAMISA DEPOSITO
THREADED CYLINDER
MANCHON DU CYLINDRE
ZYLINDERHÜLLE
9 0 215 0 090
PRISIONERO
ALLEN-SET-SCREW
VIS D`ARRET
GEWINDESTIFT
9 0 239 0 125
JUNTA TORICA
O-RING
JOINT THORIQUE
O-RING
9 2008 0 160
HUSILLO PRINCIPAL
THREADED SPINDLE
BROCHE
GEWINDESPINDEL
9 2009 0 160
PISTON LARGO
LARGE PISTON
PISTON DE PRE-SERRAGE
KOLBEN LANG
9 2007 0 090
JUNTA TORICA
O-RING
JOIN THORIQUE
O-RING
9 0 202 0 090
PRISIONERO
ALLEN-SET-SCREW
VIS D`ARRET
GEWINDESTIFT
9 2012 0 125
CAMISA DE EMBRAGUE
COUPLING SLEEVE
MANCHON FILETEE
KUPPLUNGSHÜLLE
9 0 017 0 125
ARANDELA DE EMBRAGUE
WASHER
DISQUE DE A'RRET RESSORT
KUPPLUNGSRING
9 0 018 0 125
MUELLE DE EMBRAGUE
CLUTCH SPRING
RESSORT RAPPEL EMBRAYAGE
KUPPLUNGSFEDER
9 0 019 0 125
EMBRAGUE MACHO
COUPLING DISC
DISQUE DE D'ACCOUPLEMENT
KUPPLUNGSSCHEIBE
9 0 020 0 125
PASADOR CILINDRICO
DOWEL PIN
GOUPILLE CYLINDRIQUE
ZYLINDERSTIFT
9 0 239 0 200
JUNTA TORICA
O-RING
JOINT THORIQUE
O-RING
9 2018 0 160
BRIDA
END CLAMP
BRIDE
LAGERPLATTE
9 2019 0 125
COJINETE AUTOLUBRICADO
TURCITE
TURCITE
TURCITE
9 2021 0 160
EMBRAGUE HEMBRA
COUPLING BODY
MANCHON D'ACCOUPLEMENT
KUPPLUNGSSTÜCK
9 2022 0 125
HUSILLO DE EMBRAGUE
TORQUE ROD
BROCHE FILETEE
GEWINDEBOLZEN
9 0 016 0 125
SEEGER DE EMBRAGUE
SAFETY RING
RONDELLE CIRCLIPS
SEEGER
9 2024 0 125
TAPA TIRADOR
CAP
COUVERCLE-TIREUR
DECKEL
9 1025 0 125
TURCITES
TURCITES (Threaded spindle)
TURCITES
TURCITE (GRIFFHÜLSE)
9 2026 0 125
SOPORTE BELLEVILLES
BELLEVILLE SPRING SUPPORT
APUI BELLEVILLES
TELLERFEDERHALTER
9 0 213 0 125
BELLEVILLES
BELLEVILLE SPRING
RONDELLE BELLEVILLE
TELLERFEDER
9 2028 0 125
JUNTA TORICA
O-RING
JOINT THORIQUE
O-RING
9 2029 0 125
PISTON PRIMARIO
SMALL PISTON
PISTON HAUTE PRESSION
KOLBEN
9 2033 0 125
RETEN PEQUEÑO
SMALL SEAL
BAGUE PETITE
NUTRING KLEIN
9 2031 0 125
DEPOSITO (Fijo)
FIXED CYLINDER
CUYLINDRE FIX
ZYLINDER (FIX)
9 2032 0 125
RETEN GRANDE
LARGUE SEAL
BAGUE D'ETANCHEITE
NUTRING GROSS
9 2020 0 125
TURCITE
TURCITE
TURCITE
TURCITE
17
INSTRUCCIONES DEL HUSILLO HIDRAULICO ARNOLD-MAT CON REGULADOR
PRESENTACIÓN:
La mordaza se envía con un regulador que permite elegir la presión adecuada para cada operación o tipo de
pieza.
FUNCIONAMIENTO:
Para poder seleccionar la presión de amarre deseada, colocar la manilla en su alojamiento y sujetándola, girar
la tapa moleteada 2036 hasta coincidir la letra con la ranura que existe delante. Cada letra supone una presión
de amarre (ver gráfico) y en el caso de coincidir el 0 con la ranura, se aplica un preapriete mecánico – mecánico.
SERVICE MANUAL FOR THE ARNOLD-MAT HYDRAULIC SPINDLE WITH PRESETTING POWER CONTROL
PRESENTATION/INTRODUCTION:
This spindle is supplied with presetting power control which allows to choose the appropriate pressure for different
operation or work pieces.
OPERATION:
For selecting the needed clamping pressure, fit the handle at its lodgement and fixing the handle turn the “cylinder
cap” 2036 making coincide the corresponding letter with the fixed mark situated on the spindle. Each letter indicates
a clamping pressure (see graphic) and if 0 coincide with the groove, a mechanical pre-setting power it’s applied.
MANUEL DE SERVICE DE LA BROCHE HYDRAULIQUE ARNOLD-MAT AVEC PRE-REGLAGE DE PRESSION
PRESENTATION:
L’étau/La broche est fourni avec un pré-réglage de pression qui nous laisse choisir la pression appropriée pour
chaque opération ou types de pièces.
FONCTIONNEMENT:
Pour sélectionner la pression désirée, on doit mettre la manivelle dans l’hexagone et en attachant la manivelle,
tourner le “couvercle du cylindre” 2036 jusqu’a faire coïncider la lettre désirée avec la marque fixe située dans la
broche. Chaque lettre est une pression (voir graphique) et en dans le cas que le 0 coïncide avec la rainure, le préserrage mécanique est applique.
BEDIENUNGSANLEITUNG DER HYDRAULIK-SPINDEL ARNOLD-MAT MIT REGULATOR
ERSCHEINUNG:
Die Spindel wird mit einem Regulator geliefert, der uns erlaubt den zweckmässigen Druck für verschiedene Vorgänge
oder Werkstücktypen auszusuchen.
PRESION (KN)
FUNKTION:
Für die Auswahl des gewünschten Spanndrucks, Handkurbel in den Sechskant einführen und festhalten. Jetzt den
Rändeldeckel 2036 drehen bis der Buchstaben mit der Rille die an der Spindel ist übereinstimmt. Jeder Buchstaben
ist ein anderer Spanndruck (siehe Grafik) und wenn 0 eingestellt wird, so entsteht ein mechanisch/mechanisches
Vorspannen.
70
60
50
40
30
20
10
0
A
B
C
POSICION
18
D
017
125
019 204 1245
621
2036
1015
2044
1241
623
087
2039
2038
2119
2118
2133
2045
018
016
128
1240
082
4021
2037
CONJUNTO REGULADOR DEL HUSILLO ARNOLD-MAT HIDRAULICO 125/160
CONJUNTO REGULADOR
DENOMINACION
PRESETTNG POWER
CONTROL ASSEMBLY
ENSEMBLE PRE-SERRAGE
DE PRESSION
DENOMINATION
DESIGNATION
REGULATOR-PAKET
BENENNUNG
9 0 017 0 125
ARANDELA DE EMBRAGUE
WASHER
DISQUE D'ARRET RESSORT
KUPPUNGSRING
9 0 125 0 125
JUNTA TORICA
O-RING
JOINT THORIQUE
O-RING
9 0 019 0 125
EMBRAGUE MACHO
COUPLING DISC
DISQUE D'ACCOUPLEMENT
KUPPLUNGSSCHEIBE
9 0 204 0 090
PASADOR CILINDRICO
DOWEL PIN
GOUPILLE CYLINDRIQUE
ZYLINDERSTIFT
9 1245 0 125
PRISIONERO
ALLEN SET SCREW
VIS D'ARRET
GEWINDESTIFT
9 2036 0 125
TAPA MOLETEADA
CYLINDER CAP
COUVERCLE DU CYLINDRE
RÄNDELDECKEL
9 0 621 0 125
PRISIONERO
ALLEN SET SCREW
VIS D'ARRET
GEWINDESTIFT
9 1015 0 090
MUELLE
SPRING
RESSORT
FEDER
9 2044 0 125
ARANDELA
WASHER
RONDELLE
SCHEIBE
9 1241 0 125
ANILLO SEEGER
SEEGER
CIRCLIPS
SEEGER
9 0 623 0 125
BOLA
BALL
BOULE
KUGEL
9 0 087 0 125
RETEN
SEAL
BAGUE
NUTRING
9 2039 0 125
HUSILLO DE EMBRAGUE
TORQUE ROD
BROCHE FILETEE
GEWINDEBOLZEN
9 2038 0 125
COLISO
SLOTED CASE
BAGUE RANUREE
GERILLTER DECKEL
9 1240 0 125
PASADOR
DOWEL PIN
GOUPILLE
BOLZEN
9 2037 0 125
HELICE
HELIX
HELICE
SPIRALE
9 4021 0 125
EMBRAGUE HEMBRA
COUPLING BODY
MANCHON D'ACCOUPLEMENT
KUPPLUNGSSTÜCK
9 0 082 0 125
JUNTA TORICA
O-RING
JOINT THORIQUE
O-RING
9 0 128 0 125
TURCITE
TURCITE
TURCITE
TURCITE
9 0 018 0 125
MUELLE DE EMBRAGUE
SPRING
RESSORT
FEDER
9 0 016 0 125
SEEGER
SEEGER
CIRCLIPS
SEEGER
9 2045 0 125
CAMISA DE EMBRAGUE
COUPLING SLEEVE
MANCHON FILETEE
KUPPLUNGSHÜLLE
9 2133 0 125
PISTON LARGO
LONG PISTON
LONGUE PISTON
KOLBEN,LANG
9 2118 0 125
BRIDA
END CLAMP
BRIDE
LAGERPLATTE
9 2119 0 125
COJINETE AUTOLUBRICADO
TURCITE
TURCITE
TURCITE
SOLO PARA 160
ONLY FOR 160
SEULEMENT POUR 160
NUR FÜR 160
9 2133 0 160
PISTON LARGO
LONG PISTON
LONGUE PISTON
KOLBEN,LANG
9 2118 0 160
BRIDA
END CLAMP
BRIDE
LAGERPLATTE
19
fresmak
MORDAZAS DE ALTA PRESION
ISO 9001
01 100 008022
4 - 8 - 2000
24-09-04
FRESMAK, s.a. · Araba Kalea, 45 · Apartado 7 · E-20800 ZARAUTZ Gipuzkoa · Spain
Tel. 34 943 834 250 · Fax 34 943 830 225 · E-mail: [email protected]
www: fresmak.com