1
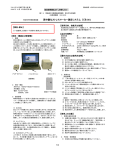
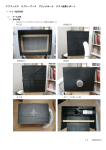
1
Instruction for BeoSound 3200 ServiceTool
R
TE
N
E
-C
O
AB
Instruction
English, German, French, Italian, Spanish, Danish,
Nederlands, Japanese
H
v/
EN
S
EN
KS
RI
T
EK
EL
IK
N
RO
2
R
TE
N
E
-C
O
AB
H
v/
EN
S
EN
KS
RI
T
EK
EL
IK
N
RO
BeoSound 3200 in service position
3
BeoSound 3200 in service position
1
R
TE
N
E
-C
O
AB
2
H
v/
8x
EN
S
EN
KS
RI
T
EK
EL
7x
IK
N
RO
4
English
This HDR-A kit is very ESD sensitive, due to the CODEC module and HDD. The HDD is also sensitive to pressure
on the top plate, high pressure can result in damage.
You will need to have the ServiceTool program installed on your computer along with the newest PPI software
edition (PPI is the chip, in which you flash the new software, located on the CODEC module).
O
AB
If you have installed the old version of the ServiceTool (called Flash Tool) you will have to remove this from your
computer, using “Add/Remove programs” in the control panel. Make sure that the folder “C:\Program Files\Bang
& Olufsen\Bang & Olufsen Flash Tool” is deleted before downloading the new Service Tool.
If you already have installed the ServiceTool, you can go directly to “Download the newest edition of the PPI
(CODEC) software”.
E
-C
R
TE
N
Downloading and installing the ServiceTool :
1. Open your Internet browser, go to “http://retail.bang-olufsen.dk”.
2. Log in with your personal password.
3. Go to “Product documentation and information”.
4. Press “audio/BeoSound/BeoSound3200”.
5. Press “Software download”.
6. Now you have the option of downloading the ServiceTool program or the PPI software for the CODEC
module.
7. Download the ServiceTool program. This is an .EXE file, when you activate the file, the ServiceTool
program will be installed on your computer.
8. Now you need to retrieve the newest edition of the PPI (CODEC) software from the Retail Business
System.
H
v/
EN
S
EN
KS
RI
Download the newest edition of the PPI (CODEC) software :
1. Open your Internet browser, go to “http://retail.bang-olufsen.dk”.
2. Log in with your personal password.
3. Go to “Product documentation and information”.
4. Press “audio/BeoSound/BeoSound3200”.
5. Press “Software download”.
6. Now you have the option of downloading the ServiceTool program or the PPI software for the CODEC
module. The Service Tool program should at this point been installed on your computer.
7. Download the PPI (CODEC) software, and place the file in the folder: C:\Program Files\Bang & Olufsen\
Bang & Olufsen ServiceTool.
8. The software file (.IMG) should now be in folder: C:\Program Files\Bang & Olufsen\Bang & Olufsen
ServiceTool along with the HD.EXE file.
T
EK
EL
Now the computer is installed with the latest edition of the ServiceTool program and PPI (CODEC) software. Now you
just need to install the USB driver, so communication can be performed from the Service Tool to the CODEC module.
IK
N
RO
Installing the USB driver:
1. Set your BeoSound 3200 up as illustrated. Do not connect
either ends of the USB cable.
2. Make sure your computer is running, and the installation of
the ServiceTool program and PPI (CODEC) software is done,
and finished.
3. Connect the USB cable to the mini USB plug on the
CODEC module.
4. Connect BS3200 to the mains.
5. Bring BS3200 into testmode 71 (press: “Display” and then
“0 2 5 8” within 3 sec. in stand-by, and press “71”).
6. Connect the other end of the USB cable to your computer,
the computer will ask for a driver, this is placed in folder: C:
\Program Files\Bang & Olufsen\Bang & Olufsen ServiceTool\
BS3200_usb_driver. Double click the driver file.
7. After installing the driver, disconnect the BS3200 from
the mains, and disconnect the USB cable (both from the
BS3200 and your computer). You only need to install this
USB driver once. Once it is installed, no updates are
needed for this driver.
��
��
��
�
��
�
�� �
�
�
�� ��
�
�� ��
��
�
�
� ��
�
� ��
�
�� � � �
�� � � � �
�� � �
�
�
��
�
��
���
English
5
Now you are able, along with the HDR-A kit to: Copy content from old to new HDD, out read information from
the HDD/CODEC module and upgrade the PPI (CODEC) software.
Choose the procedure you want to perform, and follow the description closely.
R
TE
N
E
-C
O
AB
Copying content from the old HDD to the new:
1. Make sure you have downloaded the ServiceTool.
2. Note. If you do not bring the BS3200 into TM71/connect the USB cable in the correct order, the computer
will not be able to communicate with the CODEC module, therefore follow the instruction correctly.
3. Set your BS3200 and HDR-A kit up as illustrated, connect the USB cable with the computer turned on,
and the BS3200 disconnected from the mains (remember to mount the jumper on the new HDD).
4. Connect the BS3200 to the mains.
5. Bring BS3200 into testmode 71 (press: “Display” and then “0 2 5 8” within 3 sec. in stand-by, and
press “71”).
6. Let both HDD start up (approx. 10 sec).
7. Start the ServiceTool program.
8. Select: Products/Audio/BeoSound/BeoSound 3200 and open the HD program (If you get the message:
Portable device not responding…please check connection. Check that the USB cable is connected
correctly to the CODEC module. And start from point 1).
9. Now you can select “copy disc” and the copying will begin. After copying, exit the ServiceTool program
10. After copying (A full loaded HDD takes approx. 3 hours to copy) run testmode 70 and testmode 78
when the new HDD is installed, and the old HDD is disconnected. (See the BeoSound 3200 service
manual chapter 4. The service manual is located on the Retail Business System)
H
v/
EN
S
EN
KS
RI
Service hint:
If you are located in an area
where a remote is used, cover
the IR-sensor or bring the
BS3200 into option 0 during
copy.
�
��
�
��
��
��
��
���
IK
N
�
��
�
�� �
�� ���
�
�� ��
�
�� �
� ��
� �
�
� �
�
�� � � � �
�� � �
�
�
�
��
�
RO
������
���� �����
T
EK
EL
�����
���� �����
������
���� �����
�����
���� �����
6
English
R
TE
N
E
-C
O
AB
Out read information/flash new PPI (CODEC) software:
1. Make sure you have downloaded the ServiceTool, and the newest edition of the PPI software if you are
going to flash update.
2. Note. If you do not bring the BS3200 into TM71/connect the USB cable in the correct order, the computer
will not be able to communicate with the CODEC module, therefore follow the instruction correctly.
3. Set your BS3200 up as illustrated. Do not connect the USB cable.
4. Connect the BS3200 to the mains.
5. Bring BS3200 into testmode 71 (press: “Display” and then “0 2 5 8” within 3 sec. in stand-by, and press
“71”).
6. Let the HDD start up (approx. 10 sec).
7. Connect the USB cable between the CODEC module and the computer.
8. Start the ServiceTool program.
9. Select: Products/Audio/BeoSound/BeoSound 3200 and open the HD program (If you get the message:
Portable device not responding…please check connection. Check that the USB cable is connected
correctly to the CODEC module. And start from point 1).
10. Now you can select the procedure you want to perform.
11. When you choose to format a volume, be careful not to format volume 4 (This contain decoding data
and cannot be restored.) Choose “Get volume info” first, to receive an overview. With this overview you
can easy locate the volume you want to format
12. When you choose to flash update the PPI (CODEC) software, you will be asked to type the path name to
the .IMG file. Type: C:\Program Files\Bang & Olufsen\Bang & Olufsen ServiceTool\XXXXx.img (Where the
XXXXx is placed, the correct version name should be typed, example: 046C).
H
v/
EN
S
EN
KS
RI
���
T
EK
EL
��
��
�
�
��
�
�
�
��
�
�� �
��
�
�� ��
�
� ��
��
��
�
� ��
�
� ��
�
�� � � �
�� � � � �
�� � �
��
IK
N
RO
Deutsch
7
Dieses HDR-A-Kit ist aufgrund des CODEC-Moduls und der Festplatte sehr empfindlich gegen statische
Aufladung. Die Festplatte ist außerdem empfindlich gegen Druck auf die obere Abdeckung, hoher Druck kann
zu Beschädigungen führen.
Auf Ihrem Computer muss die ServiceTool-Software sowie die neueste PPI-Softwareversion installiert sein
(PPI ist der Chip auf dem CODEC-Modul, in den die neue Software flashprogrammiert wird).
O
AB
Wenn Sie noch die alte Version des ServiceTools (das Flash Tool) installiert haben, müssen Sie diese in der
Systemsteuerung unter „Software“ mit „Programme ändern oder entfernen“ löschen. Achten Sie darauf,
den Ordner „C:\Program Files\Bang & Olufsen\Bang & Olufsen Flash Tool“ vor dem Herunterladen des neuen
ServiceTools zu löschen.
E
-C
Wenn Sie das ServiceTool bereits installiert haben, können Sie direkt zu „Download the newest edition of the PPI
(CODEC) software“ übergehen.
R
TE
N
ServiceTool herunterladen und installieren:
1. Öffnen Sie Ihren Internetbrowser und geben Sie http://retail.bang-olufsen.dk ein.
2. Loggen Sie sich mit Ihrem persönlichen Passwort ein.
3. Gehen Sie zu „Product documentation and information“ („Produktdokumentation und Informationen“).
4. Klicken Sie auf „audio/BeoSound/BeoSound3200“.
5. Klicken Sie auf „Software download“ („Software-Download“).
6. Sie haben nun die Wahl, das ServiceTool oder die PPI-Software für das CODEC-Modul herunterzuladen.
7. Laden Sie das ServiceTool herunter. Wenn Sie diese ausführbare Datei starten, wird das ServiceTool auf
Ihrem Computer installiert.
8. Nun müssen Sie die neueste Version der PPI- (CODEC-) Software aus dem Retail System herunterladen.
H
v/
EN
Neueste Version der PPI- (CODEC-) Software herunterladen:
1. Öffnen Sie Ihren Internetbrowser und geben Sie http://retail.bang-olufsen.dk ein.
2. Loggen Sie sich mit Ihrem persönlichen Passwort ein.
3. Gehen Sie zu „Product documentation and information“ („Produktdokumentation und Informationen“).
4. Klicken Sie auf „audio/BeoSound/BeoSound3200“.
5. Klicken Sie auf „Software download“ („Software-Download“).
6. Sie haben nun die Wahl, das ServiceTool oder die PPI-Software für das CODEC-Modul herunterzuladen.
Das ServiceTool muss zu diesem Zeitpunkt bereits auf Ihrem Computer installiert sein.
7. Laden Sie die PPI- (CODEC-) Software herunter und speichern Sie sie im Ordner C:\Program Files\
Bang & Olufsen\Bang & Olufsen ServiceTool.
8. Die Softwaredatei (.IMG) muss sich nun mit der HD.EXE-Datei im Ordner C:\Program Files\Bang &
Olufsen\Bang & Olufsen ServiceTool befinden.
S
EN
KS
RI
IK
N
RO
USB-Treiber installieren:
1. Stellen Sie die BeoSound 3200 wie gezeigt auf. Schließen
Sie noch keines der beiden Enden des USB-Kabels an.
2. Achten Sie darauf, dass Ihr Computer läuft und die
neuesten Versionen des ServiceTools und der
PPI- (CODEC-) Software installiert sind.
3. Schließen Sie das USB-Kabel am USB-Miniport des CODECModuls an.
4. Schließen Sie die BeoSound 3200 am Netz an.
5. Stellen Sie die BeoSound 3200 in den Testmodus 71
ein (drücken Sie im Standbybetrieb „Display“ und dann
innerhalb von drei Sekunden „0 2 5 8“ sowie „71“).
6. Schließen Sie das andere Ende des USB-Kabels am
Computer an. Der Computer fragt nun nach einem Treiber,
dieser befindet sich im Ordner C:\Program Files\Bang &
Olufsen\Bang & Olufsen ServiceTool\BS3200_usb_driver.
Doppelklicken Sie auf die Treiberdatei.
7. Nach der Treiberinstallation trennen Sie die BeoSound 3200
vom Netz und das USB-Kabel sowohl von der BeoSound
3200 als auch von Ihrem Computer. Sie müssen den USBTreiber nur einmal installieren. Nach der Installation muss
dieser Treiber nicht mehr aktualisiert werden.
T
EK
EL
Nun sind auf dem Computer die neuesten Versionen des ServiceTools und der PPI- (CODEC-) Software installiert.
Sie müssen nun nur noch den USB-Treiber installieren, der für die Kommunikation zwischen ServiceTool und
CODEC-Modul erforderlich ist.
��
��
��
�
��
�
�� �
�
�� �
�
� ���
��
��
�
� ��
�
� ��
�
�� � � �
�� � � � �
�� � �
��
��
��
��
���
8
Deutsch
Sie können nun gemeinsam mit dem HDR-A-Kit Daten von der alten auf die neue Festplatte kopieren,
Informationen vom HDD/CODEC-Modul auslesen und die PPI- (CODEC-) Software aktualieren.
Wählen Sie den gewünschten Vorgang und befolgen Sie genau die Anleitung.
R
TE
N
E
-C
O
AB
Daten von der alten auf die neue Festplatte kopieren:
1. Achten Sie darauf, dass Sie das ServiceTool heruntergeladen haben.
2. Hinweis: Wenn Sie die BeoSound 3200 nicht in den Testmodus 71 einstellen bzw. das USB-Kabel nicht in
der richtigen Reihenfolge anschließen, kann der Computer nicht mit dem CODEC-Modul kommunizieren,
befolgen Sie die Anleitung deshalb genau.
3. Verbinden Sie die BeoSound 3200 und das HDR-Kit wie gezeigt und schließen Sie das USB-Kabel an,
während der Computer eingeschaltet und die BeoSound 3200 vom Netz getrennt ist (denken Sie daran,
die Brücke auf die neue Festplatte zu setzen).
4. Schließen Sie die BeoSound 3200 am Netz an.
5. Stellen Sie die BeoSound 3200 in den Testmodus 71 ein (drücken Sie im Standbybetrieb „Display“ und
dann innerhalb von drei Sekunden „0 2 5 8“ sowie „71“).
6. Lassen Sie beide Festplatten hochfahren (ca. 10 s).
7. Starten Sie das ServiceTool.
8. Wählen Sie: Products/Audio/BeoSound/BeoSound 3200 und öffnen Sie das HD-Programm. (Wenn Sie
die Meldung „Portable device not responding… please check connection.“ („Tragbares Gerät reagiert
nicht ... bitte Verbindung prüfen.«) erhalten, prüfen Sie bitte die Verbindung. Prüfen Sie, ob das USBKabel richtig am CODEC-Modul angeschlossen ist. Beginnen Sie dann erneut bei Punkt 1.)
9. Sie können nun „copy disc« („Disk kopieren«) wählen, worauf der Kopiervorgang beginnt. Nach dem
Kopieren beenden Sie das ServiceTool.
10. Nach dem Kopieren (für das Kopieren einer vollen Festplatte sind ca. drei Stunden nötig) lassen Sie die
Testmodi 70 und 78 ablaufen, während die neue Festplatte installiert und die alte getrennt ist. (Siehe
BeoSound 3200 Serviceanleitung, Kapitel 4. Sie finden die Serviceanleitung im Retail System.)
H
v/
EN
S
EN
KS
RI
Servicehinweis:
Wenn in der Nähe eine
Fernbedienung benutzt wird,
decken Sie den IR-Sensor ab oder
stellen Sie die BeoSound 3200
während des Kopiervorgangs auf
Option 0 ein.
T
EK
EL
�
IK
�
��
��
�
�
�
��
��
�
��
�� �
�
�� ���
�
�
��
�� ��
�
�� �
� ��
� �
�
� �
�
�� � � � �
�� � �
�
�
N
������
���� �����
RO
�����
���� �����
���
������
���� �����
�����
���� �����
Deutsch
9
R
TE
N
E
-C
O
AB
Informationen auslesen/Flashprogrammierung der neuen PPI- (CODEC-) Software:
1. Achten Sie darauf, dass Sie das ServiceTool heruntergeladen haben sowie die neueste Version der PPISoftware, falls Sie eine Flashprogrammierung durchführen möchten.
2. Hinweis: Wenn Sie die BeoSound 3200 nicht in den Testmodus 71 einstellen bzw. das USB-Kabel nicht in
der richtigen Reihenfolge anschließen, kann der Computer nicht mit dem CODEC-Modul kommunizieren,
befolgen Sie die Anleitung deshalb genau.
3. Stellen Sie die BeoSound 3200 wie gezeigt auf. Schließen Sie das USB-Kabel nicht an.
4. Schließen Sie die BeoSound 3200 am Netz an.
5. Stellen Sie die BeoSound 3200 in den Testmodus 71 ein (drücken Sie im Standbybetrieb „Display“ und
dann innerhalb von drei Sekunden „0 2 5 8“ sowie „71“).
6. Lassen Sie die Festplatte hochfahren (ca. 10 s).
7. Schließen Sie das USB-Kabel am CODEC-Modul und am Computer an.
8. Starten Sie das ServiceTool.
9. Wählen Sie: Products/Audio/BeoSound/BeoSound 3200 und öffnen Sie das HD-Programm. (Wenn Sie
die Meldung „Portable device not responding… please check connection.“ („Tragbares Gerät reagiert
nicht ... bitte Verbindung prüfen.«) erhalten, prüfen Sie bitte die Verbindung. Prüfen Sie, ob das USBKabel richtig am CODEC-Modul angeschlossen ist. Beginnen Sie dann erneut bei Punkt 1.)
10. Sie können nun das gewünschte Verfahren wählen.
11. Wenn Sie einen Datenträger (Volume) formatieren möchten, achten Sie darauf, nicht Datenträger 4 zu
formatieren (dieser enthält Decodierungsdaten, die nicht wiederhergestellt werden können). Wählen Sie
zuerst „Get volume info« („Volume-Info«), um eine Übersicht zu erhalten. In dieser Übersicht finden Sie
einfach den Datenträger, den Sie formatieren möchten.
12. Wenn Sie eine Flashaktualisierung der PPI- (CODEC-) Software wählen, werden Sie aufgefordert, den
Pfad zur .IMG-Datei anzugeben. Geben Sie ein: C:\Program Files\Bang & Olufsen\Bang & Olufsen
ServiceTool\XXXXx.img (für XXXXx geben Sie die zutreffende Versionsbezeichnung ein, z.B. 046C).
H
v/
EN
S
EN
KS
RI
T
EK
EL
���
IK
N
RO
��
��
��
�
��
��
�
�
�
�� �
��
�
�� �
�
� ���
�
�
�
�
�
� ��
�
� ��
�
�� � � �
�
�
�
�
��
�� � �
��
10
Français
Ce kit HDR-A est très sensible à l’électricité statique à cause du module CODEC et du HDD. Le HDD est également
sensible à la pression exercée sur le plateau supérieur, une pression élevée pouvant entraîner des dégâts.
Dans votre ordinateur, vous devez disposer du programme ServiceTool ainsi que de la dernière version du logiciel
PPI (PPI est la puce dans laquelle vous lancez le nouveau logiciel situé dans le module CODEC).
O
AB
Si vous disposez de l’ancienne version du ServiceTool (appelée Flash Tool), vous devez la supprimer de votre
ordinateur en utilisant « Ajout/Suppression de programmes » dans le panneau de configuration. Assurezvous que le dossier « C:\Program Files\Bang & Olufsen\Bang & Olufsen Flash Tool » a été supprimé avant de
télécharger le nouveau Service Tool.
E
-C
Si vous avez déjà installé le ServiceTool, vous pouvez aller directement à « Download the newest edition of the
PPI (CODEC) software » (Télécharger la dernière version du logiciel PPI (CODEC).
R
TE
N
Téléchargement et installation du ServiceTool :
1. Ouvrez votre navigateur Internet, allez à « http://retail.bang-olufsen.dk ».
2. Entrez votre mot de passe.
3. Allez à « Product documentation and information » (Documentation et information sur le produit).
4. Appuyez sur « audio/BeoSound/BeoSound3200 ».
5. Appuyez sur « Software download » (Téléchargement du logiciel).
6. A présent, vous avez la possibilité de télécharger le programme ServiceTool ou le logiciel PPI pour le
module CODEC.
7. Téléchargez le programme ServiceTool. Il s’agit d’un fichier .EXE qu’il suffit d’activer pour que le
programme ServiceTool soit installé dans votre ordinateur.
8. Maintenant, vous devez récupérer la dernière version du logiciel PPI (CODEC) à partir du Retail System.
H
v/
EN
Télécharger la dernière version du logiciel PPI (CODEC) :
1. Ouvrez votre navigateur Internet, allez à « http://retail.bang-olufsen.dk ».
2. Entrez votre mot de passe.
3. Allez à « Product documentation and information » (Documentation et information sur le produit).
4. Appuyez sur « audio/BeoSound/BeoSound3200 ».
5. Appuyez sur « Software download » (Téléchargement du logiciel).
6. A présent, vous avez la possibilité de télécharger le programme ServiceTool ou le logiciel PPI pour le
module CODEC. A l’heure qu’il est, le programme Service Tool a dû déjà être installé dans votre ordinateur.
7. Téléchargez le logiciel PPI (CODEC) et placez le fichier dans le dossier : C:\Program Files\Bang & Olufsen\
Bang & Olufsen ServiceTool.
8. Le fichier contenant le logiciel (.IMG) doit désormais se trouver dans le dossier : C:\Program Files\Bang &
Olufsen\Bang & Olufsen ServiceTool avec le fichier HD.EXE.
S
EN
KS
RI
IK
N
RO
Installation du gestionnaire USB :
1. Installez votre BeoSound 3200 selon l’illustration. Ne
connectez aucune extrémité du câble USB.
2. Assurez-vous que l’ordinateur fonctionne et que
l’installation du programme ServiceTool et du logiciel PPI
(CODEC) a été faite et est terminée.
3. Connectez le câble USB à la mini-fiche USB du module
CODEC.
4. Connectez le BS3200 au secteur.
5. Mettez le BS3200 en mode test 71 (appuyez sur : « Display
» puis sur « 0 2 5 8 » dans un délai de 3 s, l’appareil étant
en veille, puis appuyez sur « 71 »).
6. Connectez l’autre extrémité du câble USB à votre ordinateur
qui vous demande alors un gestionnaire, qui est placé dans
le dossier : C:\Program Files\Bang & Olufsen\Bang & Olufsen
ServiceTool\BS3200_usb_driver. Double-cliquez sur le fichier
gestionnaire.
7. Après avoir installé le gestionnaire, débranchez le BS3200
du secteur et débranchez le câble USB (aussi bien du
BS3200 que de votre ordinateur). Il vous suffit d’installer le
gestionnaire USB une seule fois. Une fois installée, aucune
mise à jour de ce gestionnaire n’est nécessaire.
T
EK
EL
Désormais, la dernière version du programme ServiceTool et du logiciel PPI (CODEC) est installée dans l’ordinateur.
Maintenant, il suffit d’installer le gestionnaire USB afin de pouvoir établir la communication entre le Service Tool et le
module CODEC.
��
��
��
��
��
�
��
�
�� �
�� �
�
� ���
��
��
�
� ��
�
� ��
� �
�
� �
�
�� � � � �
�� � �
��
�
��
���
Français
11
Maintenant, vous êtes en mesure, avec le kit HDR-A, de copier le contenu de l’ancien HDD vers le nouveau HDD,
lire des informations du module HDD/CODEC et remplacer le logiciel PPI (CODEC) par la nouvelle version.
Choisissez la procédure que vous souhaitez effectuer et suivez scrupuleusement la description.
R
TE
N
E
-C
O
AB
Copier le contenu de l’ancien HDD vers le nouveau :
1. Assurez-vous d’avoir téléchargé le ServiceTool.
2. Remarque. Si vous ne mettez pas le BS3200 en TM71 ou ne connectez pas le câble USB dans le bon
ordre, l’ordinateur ne sera pas capable de communiquer avec le module CODEC, raison pour laquelle il est
important de suivre correctement les instructions.
3. Installez le BS3200 et le kit HDR-A selon l’illustration, connectez le câble USB, l’ordinateur étant en marche
et le BS3200 étant débranché du secteur (ne pas oublier d’installer le cavalier sur le nouveau HDD).
4. Connectez le BS3200 au secteur.
5. Mettez le BS3200 en mode test 71 (appuyez sur : « Display » puis sur « 0 2 5 8 » dans un délai de 3 s,
l’appareil étant en veille, puis appuyez sur « 71 »).
6. Laissez démarrer les deux HDD (env. 10 s).
7. Démarrez le programme ServiceTool.
8. Sélectionnez : Products/Audio/BeoSound/BeoSound 3200 puis ouvrez le programme HD (Si le message
: « Portable device not responding… please check connection » (L’appareil portable ne répond pas…)
s’affiche, prière de vérifier la connexion. Vérifiez que le câble USB est correctement connecté au module
CODEC. Et démarrez à partir du point 1).
9. Vous pouvez maintenant sélectionner « copy disc » (copier disque) après quoi la copie commence. Après
avoir effectué la copie, quittez le programme ServiceTool
10. Après avoir effectué la copie (un HDD totalement chargé nécessite environ 3 heures de copie), exécutez
le mode test 70 et le mode test 78 lorsque le nouveau HDD est installé et que l’ancien HDD est
déconnecté. (Consultez le manuel de service du BeoSound 3200, chapitre 4. Le manuel de service se
trouve dans le Retail System)
H
v/
EN
S
EN
KS
RI
Astuces pour la maintenance :
Si vous vous trouvez dans une zone
dans laquelle une télécommande
est utilisée, couvrez le capteur IR
ou mettez le BS3200 sur option 0
pendant la copie.
T
EK
EL
�
�
��
������
���� �����
��
��
�
��
���
������
���� �����
�����
���� �����
IK
N
�
��
�
�� �
�� ���
�
�
�� ��
�
�� �
� ��
� �
�
� �
�
�� � � � �
�� � �
�
�
��
��
RO
�����
���� �����
12
Français
R
TE
N
E
-C
O
AB
Lire des informations/lancer le nouveau logiciel PPI (CODEC) :
1. Assurez-vous d’avoir téléchargé le ServiceTool et la dernière version du logiciel PPI si vous devez lancer la
mise à jour.
2. Remarque. Si vous ne mettez pas le BS3200 en TM71 ou ne connectez pas le câble USB dans le bon
ordre, l’ordinateur ne sera pas capable de communiquer avec le module CODEC, raison pour laquelle il est
important de suivre correctement les instructions.
3. Installez votre BS3200 selon l’illustration. Ne connectez pas le câble USB.
4. Connectez le BS3200 au secteur.
5. Mettez le BS3200 en mode test 71 (appuyez sur : « Display » puis sur « 0 2 5 8 » dans un délai de 3 s,
l’appareil étant en veille, puis appuyez sur « 71 »).
6. Laissez démarrer le HDD (env. 10 s).
7. Connectez le câble USB entre le module CODEC et l’ordinateur.
8. Démarrez le programme ServiceTool.
9. Sélectionnez : Products/Audio/BeoSound/BeoSound 3200 puis ouvrez le programme HD (Si le message
: « Portable device not responding…please check connection » (L’appareil portable ne répond pas…)
s’affiche, prière de vérifier la connexion. Vérifiez que le câble USB est correctement connecté au module
CODEC. Et démarrez à partir du point 1).
10. Maintenant, vous pouvez sélectionner la procédure que vous voulez effectuer.
11. Quand vous choisissez de formater un volume, faites attention de ne pas formater le volume 4 (Il
contient des données de décryptage et ne peut être restauré.) Choisissez d’abord « Get volume info
» (Chercher info volume) afin d’avoir une vue d’ensemble. Avec cette vue d’ensemble, vous pouvez
facilement localiser le volume que vous souhaitez formater.
12. Quand vous choisissez de lancer la mise à jour du logiciel PPI (CODEC), l’ordinateur vous demande d’entrer
le chemin d’accès au fichier .IMG. Tapez : C:\Program Files\Bang & Olufsen\Bang & Olufsen ServiceTool\
XXXXx.img (A la place de XXXXx, il faut taper le nom correct de la version, par exemple : 046C).
H
v/
EN
S
EN
KS
RI
T
EK
EL
���
IK
N
RO
��
��
�
�
��
�
�
�
��
�
�� �
��
�
�� ��
�
� ��
��
��
�
� ��
�
� ��
�
�� � � �
�� � � � �
�� � �
��
Italiano
13
Il presente kit HDR-A è molto sensibile alle scariche elettrostatiche (ESD), a causa del modulo CODEC e HDD.
HDD è anche molto sensibile alla pressione sulla piastra superiore e l’alta pressione può danneggiarlo.
È necessario aver installato il programma ServiceTool sul computer insieme alla nuovissima edizione del software
PPI (PPI è il chip in cui si può implementare il flashing del nuovo software, localizzato sul modulo CODEC).
O
AB
Se è stata installata una vecchia versione di ServiceTool (denominata Flash Tool), occorre rimuoverla dal computer
utilizzando l’opzione “Aggiungi/rimuovi programmi” nel Pannello di controllo. Accertarsi che la cartella “C:
\Program Files\Bang & Olufsen\Bang & Olufsen Flash Tool” sia eliminata prima di scaricare il nuovo Service Tool.
Se è già stato installato ServiceTool, si può passare direttamente all’opzione “Download the newest edition of
the PPI (CODEC) software” (Download dell’ultima edizione del software PPI (CODEC))
E
-C
R
TE
N
Download e installazione di ServiceTool:
1. Aprire il proprio browser per Internet e andare alla pagina “http://retail.bang-olufsen.dk”.
2. Collegarsi con la propria password personale.
3. Andare all’opzione “Product documentation and information” (Documentazione e informazioni sui
prodotti)
4. Premere “audio/BeoSound/BeoSound3200”.
5. Premere “Software download” (Download del software).
6. Ora è possibile scaricare il programma ServiceTool o il software PPI per il modulo CODEC.
7. Download del programma ServiceTool. Si tratta di un file.EXE; attivando il file, il programma ServiceTool
sarà installato sul vostro computer.
8. Successivamente è necessario acquisire l’ultima edizione del software PPI (CODEC) dal Retail System.
H
v/
EN
Download dell’ultima edizione del software PPI (CODEC):
1. Aprire il proprio browser per Internet e andare alla pagina “http://retail.bang-olufsen.dk”.
2. Collegarsi con la propria password personale.
3. Andare all’opzione “Product documentation and information” (Documentazione e informazioni sui
prodotti)
4. Premere “audio/BeoSound/BeoSound3200”.
5. Premere “Software download” (Download del software).
6. Ora è possibile scaricare il programma ServiceTool o il software PPI per il modulo CODEC. A questo punto il
programma Service Tool dovrebbe essere stato installato sul vostro computer.
7. Scaricare il software PPI (CODEC) e mettere il file nella cartella: C:\Program Files\Bang & Olufsen\Bang &
Olufsen ServiceTool.
8. Il file (.IMG) dovrebbe essere presente nella cartella: C:\Program Files\Bang & Olufsen\Bang & Olufsen
ServiceTool insieme al file HD.EXE.
S
EN
KS
RI
T
EK
EL
Ora è stata installata l’ultima versione del programma ServiceTool e del software PPI (CODEC) sul computer. Ora basta
installare il driver USB, per consentire la comunicazione da Service Tool al modulo CODEC.
IK
N
RO
Installazione del driver USB:
1. Installare BeoSound 3200 come illustrato. Non collegare
nessuna estremità del cavo USB.
2. Accertarsi che il computer sia in funzione e che sia stata
completata l’installazione del programma ServiceTool e di PPI
(CODEC).
3. Collegare il cavo USB alla presa Mini USB sul modulo
CODEC.
4. Collegare BS3200 all’alimentazione di rete.
5. Mettere BS3200 in testmode 71 (premere: »Display« e poi
»0 2 5 8« entro 3 sec. in stand-by, quindi premere »71«).
6. Collegare l’altra estremità del cavo USB al computer;
quest’ultimo richiederà un driver che è stato collocato nella
cartella: C:\Program Files\Bang & Olufsen\Bang & Olufsen
ServiceTool\BS3200_usb_driver. Fare un doppio clic sul file
del driver.
7. Dopo l’installazione del driver, scollegare BS3200
dall’alimentazione di rete e scollegare il cavo USB (sia da
BS3200, sia dal computer). Basta installare il driver USB solo
una volta. Dopo l’installazione questo driver non necessita
di alcun aggiornamento.
��
��
��
��
��
�
��
�
�� �
�� �
�
� ���
��
��
�
� ��
�
� ��
� �
�
� �
�
�� � � � �
�� � �
��
�
��
���
14
Italiano
Insieme al kit HDR-A ora è possibile: copiare il contenuto del nuovo HDD, leggere le informazioni dal modulo
HDD/CODEC e aggiornare il software PPI (CODEC).
Scegliere la procedura che si desidera eseguire e seguire attentamente le informazioni descritte.
R
TE
N
E
-C
O
AB
Copia del contenuto dal vecchio HDD al nuovo:
1. Accertarsi di aver scaricato ServiceTool.
2. Nota. Se non si mette BS3200 in TM71 o non si collega il cavo USB nell’ordine corretto, il computer non
potrà comunicare con il modulo CODEC, quindi seguire correttamente le istruzioni.
3. Installare BS3200 e il kit HDR-A come illustrato, collegare il cavo USB con il computer acceso e BS3200
scollegato dall’alimentazione di rete (rammentare di montare il ponticello sul nuovo HDD).
4. Collegare BS3200 all’alimentazione di rete.
5. Mettere BS3200 in testmode 71 (premere: “Display” e poi “0 2 5 8” entro 3 sec. in stand-by, quindi
premere “71”).
6. Avviare entrambi gli HDD (ca. 10 sec).
7. Avviare il programma ServiceTool.
8. Selezionare: Products/Audio/BeoSound/BeoSound 3200 e aprire il programma HD (se compare il
messaggio: “Portable device not responding…please check connection” (Il dispositivo portatile non
risponde, controllare la connessione), controllare che il cavo USB sia collegato correttamente al modulo
CODEC. Iniziare dal punto 1).
9. Ora è possibile selezionare “copy disc” (Copia disco) e inizia il processo di copiatura. Al termine della
copiatura uscire dal programma ServiceTool.
10. Dopo la copiatura (un HDD pieno impiega ca. 3 ore per eseguire la copia) lanciare testmode 70 e
testmode 78 quando è stato installato il nuovo HDD ed è stato scollegato il vecchio HDD. (Consultare
il manuale di servizio di BeoSound 3200, capitolo 4. Il Manuale di servizio è disponibile presso il Retail
System)
H
v/
EN
S
EN
KS
RI
Suggerimento di servizio:
Se l’utente si trova in un’area
in cui si utilizza il telecomando,
coprire il sensore IR oppure
impostare BS3200 sull’opzione
0 durante il processo di copia.
�
���
������
���� �����
�����
���� �����
IK
N
�
��
��
�
�
�
��
��
�
��
�� �
�
�� ���
�
�
��
�� ��
�
�� �
� ��
� �
�
� �
�
�� � � � �
�� � �
�
�
RO
������
���� �����
T
EK
EL
�����
���� �����
Italiano
15
R
TE
N
E
-C
O
AB
Lettura delle informazioni ed implementazione flashing del nuovo software PPI (CODEC):
1. Accertarsi di aver scaricato ServiceTool e l’ultima edizione del software PPI, se si sta per implementare il
flashing dell’aggiornamento.
2. Nota. Se non si mette BS3200 in TM71, o non si collega il cavo USB nell’ordine corretto, il computer non
potrà comunicare con il modulo CODEC, quindi seguire correttamente le istruzioni.
3. Installare BS3200 come illustrato. Non collegare il cavo USB.
4. Collegare BS3200 all’alimentazione di rete.
5. Mettere BS3200 in testmode 71 (premere: “Display” e poi “0 2 5 8” entro 3 sec. in stand-by, quindi
premere “71”).
6. Avviare HDD (ca. 10 sec).
7. Collegare il cavo USB tra il modulo CODEC e il computer.
8. Avviare il programma ServiceTool.
9. Selezionare: Products/Audio/BeoSound/BeoSound 3200 e aprire il programma HD (se compare il
messaggio: “Portable device not responding…please check connection” (Il dispositivo portatile non
risponde, controllare la connessione), controllare che il cavo USB sia collegato correttamente al modulo
CODEC. Iniziare dal punto 1).
10. Ora scegliere la procedura che si desidera eseguire.
11. Quando si sceglie di formattare un volume, prestare attenzione per non formattare il volume 4
(quest’ultimo contiene i dati di decodificazione e non può essere ripristinato.) Scegliere innanzi tutto
“Get volume info” (Mostra informazioni sul volume) per visualizzare la presentazione. Grazie a questa
presentazione è possibile localizzare facilmente il volume che si desidera formattare.
12. Quando si sceglie di aggiornare il flashing del software PPI (CODEC) all’utente viene chiesto di digitare il
nome del percorso per il file.IMG. Digitare: C:\Program Files\Bang & Olufsen\Bang & Olufsen ServiceTool\
XXXXx.img (Nella posizione XXXXx si dovrebbe digitare il nome corretto della versione, ad esempio: 046C).
H
v/
EN
S
EN
KS
RI
���
T
EK
EL
��
��
��
�
�
�
�
�
��
�
�� �
��
�
�� ��
�
� ��
��
��
�
� ��
�
� ��
�
�� � � �
�� � � � �
�� � �
��
IK
N
RO
16
Español
Este kit HDR-A es muy sensible a la ESD (descarga electrostática), por culpa del módulo CODEC y del disco duro.
El disco duro también es sensible a la presión en la placa superior; la alta presión puede causar daños.
Deberá tener instalado el programa ServiceTool en su ordenador junto con la edición del software PPI más
reciente (PPI es el chip donde se aloja el nuevo software, ubicado en el módulo CODEC).
O
AB
Si tiene instalada una versión antigua del programa ServiceTool (denominada Flash Tool) deberá desinstalarla de su
ordenador, usando la opción »Agregar o quitar programas« del Panel de control. Asegúrese de que se ha borrado
la carpeta »C:\Archivos de programa\Bang & Olufsen\Bang & Olufsen Flash Tool« antes de descargar ServiceTool.
E
-C
Si ya ha instalado ServiceTool, puede ir directamente a »Download the newest edition of the PPI (CODEC)
software« (Descargar la edición más reciente del software PPI (CODEC)).
R
TE
N
Descarga e instalación de ServiceTool:
1. Abra su navegador de Internet, vaya a »http://retail.bang-olufsen.dk«.
2. Acceda con su contraseña personal.
3. Vaya a »Product documentation and information«.
4. Seleccione »audio/BeoSound/BeoSound3200«.
5. Seleccione »Software download«.
6. Ahora podrá descargar el programa ServiceTool o el software PPI para el módulo CODEC.
7. Descargue el programa ServiceTool. Es un archivo .EXE; al ejecutar este archivo, el programa ServiceTool
se instalará en su equipo.
8. Ahora necesita recuperar la edición más reciente del software PPI (CODEC) del Sistema para minoristas.
H
v/
EN
Descargue la edición más reciente del software PPI (CODEC):
1. Abra su navegador de Internet, vaya a »http://retail.bang-olufsen.dk«.
2. Acceda con su contraseña personal.
3. Vaya a »Product documentation and information«.
4. Seleccione »audio/BeoSound/BeoSound3200«.
5. Seleccione »Software download«.
6. Ahora podrá descargar el programa ServiceTool o el software PPI para el módulo CODEC. El programa
ServiceTool deberá estar instalado en su ordenador.
7. Descargue el software PPI (CODEC) y guarde el archivo en la carpeta: C:\Archivos de programa\Bang &
Olufsen\Bang & Olufsen ServiceTool.
8. El archivo de software (.IMG) deberá estar en la carpeta: C:\Archivos de programa\Bang & Olufsen\Bang
& Olufsen ServiceTool junto con el archivo HD.EXE.
S
EN
KS
RI
IK
N
RO
Instalación del controlador del USB:
1. Configure su BeoSound 3200 como se indica. No conecte
ningún extremo del cable USB.
2. Asegúrese de que el ordenador está encendido y de que se
ha completado la instalación del programa ServiceTool y el
software PPI (CODEC).
3. Conecte el cable USB a la clavija mini USB en el módulo
CODEC.
4. Conecte su BS3200 a la red eléctrica.
5. Coloque su BS3200 en modo de prueba 71 (pulse:
»Display« y después »0 2 5 8« antes de 3 seg. en modo
standby y, a continuación, pulse »71«).
6. Conecte el otro extremo del cable USB al ordenador, éste
le pedirá el controlador que encontrará en la carpeta: C:
\Archivos de programa\Bang & Olufsen\Bang & Olufsen
ServiceTool\BS3200_usb_driver. Haga doble clic en el archivo
del controlador.
7. Una vez instalado el controlador, desconecte su BS3200 de
la alimentación y desconecte el cable USB (tanto de BS3200
como del ordenador). Sólo necesita instalar el controlador
del USB una vez. Una vez instalado, no es necesario
actualizarlo.
T
EK
EL
Ya tiene instalada en su ordenador la edición más reciente del programa ServiceTool y del software PPI (CODEC).
Sólo le falta instalar el controlador del USB para poder establecer la comunicación entre el programa ServiceTool
y el módulo CODEC.
��
�
��
��
�
��
�
�� �
�
�� ��
�
�� ��
��
�
�
�
� �
�
� ��
�
�� � � �
�� � � � �
�� � �
�
�
�
��
��
���
Español
17
Ahora ya puede, junto con el kit HDR-A: Copiar el contenido de un disco duro antiguo a uno nuevo, leer
información del módulo CODEC/HDD y actualizar el software PPI (CODEC).
Seleccione el procedimiento que desea llevar a cabo y siga la descripción con detalle.
R
TE
N
E
-C
O
AB
Copiar el contenido de un disco duro antiguo a uno nuevo.
1. Asegúrese de que ha descargado el programa ServiceTool.
2. Nota. Si no pone BS3200 en la posición TM71 o no conecta el cable USB en el orden correcto, el
ordenador no podrá comunicarse con el módulo CODEC; siga las instrucciones correctamente.
3. Configure su BS3200 y el kit HDR-A como se indica, conecte el cable USB con el ordenador encendido y
BS3200 desconectado de la alimentación (recuerde montar el puente en el disco duro nuevo).
4. Conecte su BS3200 a la red eléctrica.
5. Coloque su BS3200 en modo de prueba 71 (pulse: »Display« y después »0 2 5 8« antes de 3 seg. en
modo standby y, a continuación, pulse »71«).
6. Deje que ambos discos duros arranquen (aprox. 10 seg.).
7. Ejecute el programa ServiceTool.
8. Seleccione: Products/Audio/BeoSound/BeoSound 3200 y abra el programa HD (Si aparece el mensaje:
»Portable device not responding…please check connection«. (Dispositivo portátil no responde…
comprobar conexión.) Compruebe que el cable USB esté conectado correctamente al módulo CODEC. Y
comience de nuevo desde el punto 1).
9. Ahora puede seleccionar »copy disc« para iniciar la copia. Después, salga del programa ServiceTool
10. Una vez realizada la copia (un disco duro totalmente lleno tarda aprox. 3 horas en copiarse) ejecute el
modo de prueba 70 y el 78 cuando haya instalado el nuevo disco duro y desconectado el antiguo. (Vea
el capítulo 4 del manual de mantenimiento de BeoSound 3200. Encontrará este manual en el Sistema
para minoristas)
H
v/
EN
S
EN
KS
RI
Consejo de mantenimiento:
Si está usted en un área donde se
utiliza una central satélite, cubra
el sensor de infrarrojos o sitúe su
BS3200 en la opción 0 durante el
proceso de copiado.
�
�
��
��
��
��
���
������
���� �����
�����
���� �����
IK
N
�
��
�
�� �
�
�
� ��
�
�
��
�� ��
�
�� �
� ��
�
�� � � �
�� � � � �
�� � �
��
��
�
RO
������
���� �����
T
EK
EL
�����
���� �����
18
Español
R
TE
N
E
-C
O
AB
Leer información/nuevo software PPI (CODEC):
1. Asegúrese de que ha descargado el programa ServiceTool y la edición más reciente del software PPI si va
a realizar una actualización instantánea.
2. Nota. Si no pone BS3200 en la posición TM71 o no conecta el cable USB en el orden correcto, el
ordenador no podrá comunicarse con el módulo CODEC; siga las instrucciones correctamente.
3. Configure su BS3200 como se indica. No conecte el cable USB.
4. Conecte su BS3200 a la red eléctrica.
5. Coloque su BS3200 en modo de prueba 71 (pulse: »Display« y después »0 2 5 8« antes de 3 seg. en
modo standby y, a continuación, pulse »71«).
6. Deje que el disco duro arranque (aprox. 10 seg).
7. Conecte el cable USB entre el módulo CODEC y el ordenador.
8. Ejecute el programa ServiceTool.
9. Seleccione: Products/Audio/BeoSound/BeoSound 3200 y abra el programa HD (Si aparece el mensaje:
»Portable device not responding…please check connection«. (Dispositivo portátil no responde…
comprobar conexión.) Compruebe que el cable USB esté conectado correctamente al módulo CODEC. Y
comience de nuevo desde el punto 1).
10. Ahora puede seleccionar el procedimiento que desee llevar a cabo.
11. Si selecciona formatear un volumen, tenga cuidado de no formatear el volumen 4 (este volumen
contiene datos de descodificación y no pueden recuperarse.) Seleccione primero »Get volume info«
para obtener una visión general. Con esta visión general podrá localizar fácilmente el volumen que
desea formatear.
12. Si opta por actualizar el software PPI (CODEC) de forma instantánea, se le pedirá que escriba el nombre
de la ruta al archivo .IMG. Escriba: C:\Archivos de programa\Bang & Olufsen\Bang & Olufsen ServiceTool\
XXXXx.img (Donde XXXXx deberá sustituirse por el nombre de la versión correcta, por ejemplo: 046C).
H
v/
EN
S
EN
KS
RI
��
��
�
��
�
��
� ��
�
�
� ���
��
��
�
� ��
�
� ��
�
�� � � �
�� � � � �
�� � �
��
�
�
���
T
EK
EL
�
��
��
��
IK
N
RO
Dansk
19
Dette HDR-A-udstyr er meget ESD-følsomt på grund af CODEC-modulet og harddisken. Harddisken er også
følsom over for tryk på toppladen, og den kan blive beskadiget, hvis toppladen udsættes for stort tryk.
Service Tool-programmet skal være installeret på din computer sammen med den nyeste udgave af PPI-software
(PPI er den chip, som du flasher den nye sotfware i. Den befinder sig på CODEC-modulet).
O
AB
Hvis du har installeret den gamle version af Service Tool (kaldet Flash Tool), skal programmet slettes fra
computeren ved hjælp af programmerne »Tilføj/Fjern programmer« i Kontrolpanelet. Sørg for, at mappen »C:
\Program Files\Bang & Olufsen\Bang & Olufsen Flash Tool« er slettet, før du downloader det nye Service Tool.
Hvis du allerede har installeret Service Tool, kan du gå direkte til »Download the newest edition of the PPI
(CODEC) software« (»download den nyeste udgave af PPI (CODEC)-softwaren«).
E
-C
R
TE
N
Sådan downloader og installerer du ServiceTool:
1. Åbn din Internet-browser, gå til »http://retail.bang-olufsen.dk«.
2. Log ind med din personlige adgangskode.
3. Gå til »Product documentation and information«. (»Produktdokumentation og –information«)
4. Tryk på »audio/BeoSound/BeoSound3200«.
5. Tryk på »Software download«.
6. Nu kan du downloade Service Tool-programmet eller PPI-software til CODEC-modulet.
7. Download ServiceTool-programmet. Dette er en .EXE-fil. Når du aktiverer filen, bliver ServiceToolprogrammet installeret på din computer.
8. Nu skal du hente den nyeste udgave af PPI (CODEC)-softwaren i Retail systemet.
H
v/
EN
Sådan downloader du den nyeste udgave af PPI (CODEC) softwaren:
1. Åbn din Internet-browser, gå til »http://retail.bang-olufsen.dk«.
2. Log ind med din personlige adgangskode.
3. Gå til »Product documentation and information«. (»Produktdokumentation og –information«)
4. Tryk på »audio/BeoSound/BeoSound3200«.
5. Tryk på »Software download«.
6. Nu kan du downloade Service Tool-programmet eller PPI-software til CODEC-modulet. Service Toolprogrammet skal være installeret på din computer på dette tidspunkt.
7. Download PPI (CODEC)-softwaren, og placer filen i følgende mappe: C:\Program Files\Bang & Olufsen\
Bang & Olufsen ServiceTool.
8. Softwarefilen (.IMG) ligger nu i mappen: C:\Program Files\Bang & Olufsen\Bang & Olufsen ServiceTool
sammen med filen HD.EXE.
S
EN
KS
RI
IK
N
RO
Sådan installerer du USB-driveren:
1. Sæt BeoSound 3200 op som vist. Du må ikke tilslutte USBkablet endnu.
2. Sørg for, at computeren er tændt, og at installationen af
Service Tool-programmet og PPI (CODEC)-softwaren er
gennemført og afsluttet.
3. Tilslut USB-kablet til mini-USB-stikket på CODEC-modulet.
4. Sæt stikket til BS3200 i stikkontakten.
5. Sæt BS3200 i test mode 71 (tryk: »Display« og derefter »0
2 5 8« inden for tre sekunder i stand-by, og tryk derefter
»71«).
6. Tilslut den anden ende af USB-kablet til computeren.
Computeren beder om en driver, som ligger i mappen: C:
\Program Files\Bang & Olufsen\Bang & Olufsen ServiceTool\
BS3200_usb_driver. Dobbeltklik på driverfilen.
7. Når du har installeret driveren, skal du afbryde strømmen
til BS3200, og fjerne USB-kablet (både fra BS3200 og
computeren). Du behøver kun installere USB-driveren
én gang. Når den er installeret, er der ikke brug for
opdateringer.
T
EK
EL
Nu er den nyeste udgave af Service Tool-programet og PPI (CODEC)-softwaren installeret på computeren. Nu mangler
du bare at installere USB-driveren, så Service Tool og CODEC-modulet kan kommunikere med hinanden.
��
��
��
��
��
�
��
�
�� �
�� �
�
� ���
��
��
�
� ��
�
� ��
� �
�
� �
�
�� � � � �
�� � �
��
�
��
���
20
Dansk
Nu kan du gøre følgende ved hjælp af HDR-A-udstyret: Kopiere indholdet af den gamle harddisk til den nye,
udlæse oplysninger fra harddisk/CODEC-modulet, og opgradere PPI (CODEC)-softwaren.
Vælg den fremgangsmåde, du ønsker at gennemføre, og følg beskrivelsen nøje.
R
TE
N
E
-C
O
AB
Sådan kopierer du indhold fra den gamle harddisk til den nye:
1. Sørg for, at du har downloadet ServiceTool.
2. Bemærk. Hvis du ikke sætter BS3200 i TM71/tilslutter USB-kablet i den korrekte rækkefølge, kan
computeren ikke kommunikere med CODEC-modulet. Derfor skal instrukserne følges nøje.
3. Sæt BS3200 og HDR-A-udstyret op som beskrevet. Tilslut USB-kablet til computeren, mens den er
tændt, og mens strømmen er afbrudt fra BS3200 (husk at fastgøre jumperen på den nye harddisk).
4. Sæt stikket til BS3200 i stikkontakten.
5. Sæt BS3200 i test mode 71 (tryk: »Display« og derefter »0 2 5 8« inden for tre sekunder i stand-by, og
tryk derefter »71«).
6. Lad begge harddiske starte op (ca. 10 sekunder).
7. Start ServiceTool-programmet.
8. Vælg: Products/Audio/BeoSound/BeoSound 3200, og åbn HD-programmet. (Hvis du får meddelelsen:
»Portable device not responding…please check connection« (»Ingen forbindelse til det bærbare udstyr...
kontrollér forbindelse«). Kontrollér, at USB-kablet er korrekt tilsluttet til CODEC-modulet. Begynd fra
punkt 1 igen).
9. Nu kan du vælge »Copy disc« (»kopiér disk«), hvorefter kopieringen begynder. Når kopieringen er
gennemført, skal du lukke Service Tool-programmet.
10. Når du har kopieret (det tager ca. 3 timer at kopiere en fuld harddisk), skal du køre test mode 70 og
test mode 78, når den nye harddisk er installeret og den gamle harddisk er frakoblet. (Se kapitel 4 i
servicemanualen til BeoSound 3200. Servicemanualen ligger i Retail systemet).
H
v/
EN
S
EN
KS
RI
Service-tip:
Hvis du befinder dig i et
område, hvor der bruges en
fjernbetjening, skal du tildække
IR-føleren, eller sætte BS3200
på Option 0, mens der kopieres.
�
IK
N
�
��
��
�
�
�
��
��
�
��
�� �
�
�� ���
�
�
��
�� ��
�
�� �
� ��
� �
�
� �
�
�� � � � �
�� � �
�
�
RO
������
���� �����
T
EK
EL
�����
���� �����
���
������
���� �����
�����
���� �����
Dansk
21
R
TE
N
E
-C
O
AB
Udlæs oplysninger/flash ny PPI (CODEC)-software:
1. Hvis du skal flash-opdatere, skal du sørge for, at du har downloadet Service Tool og den nyeste udgave
af PPI-softwaren.
2. Bemærk. Hvis du ikke sætter BS3200 i TM71/tilslutter USB-kablet i den korrekte rækkefølge, kan
computeren ikke kommunikere med CODEC-module. Derfor skal vejledningen følges nøje.
3. Sæt BS3200 op som vist. Tilslut ikke USB-kablet.
4. Sæt stikket til BS3200 i stikkontakten.
5. Sæt BS3200 i test mode 71 (tryk: »Display« og derefter »0 2 5 8« inden for tre sekunder i stand-by, og
tryk derefter »71«).
6. Lad harddisken starte op (ca. 10 sekunder).
7. Forbind USB-kablet til CODEC-modulet og computeren.
8. Start ServiceTool-programmet.
9. Vælg: Products/Audio/BeoSound/BeoSound 3200, og åbn HD-programmet. (Hvis du får meddelelsen:
»Portable device not responding…please check connection« (»Ingen forbindelse til det bærbare udstyr...
kontrollér forbindelse«). Kontrollér, at USB-kablet er korrekt tilsluttet til CODEC-modulet. Begynd fra
punkt 1 igen).
10. Nu kan du vælge den procedure, du ønsker at gennemføre.
11. Når du vælger at formatere en partition, skal du sørge for ikke at formatere partition 4. (Denne
partition indeholder dekoderdata, der ikke kan gendannes). Vælg »Get volume info« (»Hent
partitionsoplysninger«) først for at få en oversigt. Ved hjælp af oversigten er det nemt at finde den
partition, du ønsker at formatere.
12. Når du vælger at flash-opdatere PPI (CODEC)-software, bliver du bedt om at indtaste stinavnet på filen
.IMG. Indtast: C:\Program Files\Bang & Olufsen\Bang & Olufsen ServiceTool\XXXXx.img (hvor der står
XXXXx, skal navnet på den korrekte version indtastes, f.eks.: 046C).
H
v/
EN
S
EN
KS
RI
���
T
EK
EL
��
��
��
�
�
�
��
��
�
�� �
��
�
�� ��
�
� ��
��
��
�
� ��
�
� ��
�
�� � � �
�� � � � �
�� � �
��
IK
N
RO
22
Nederlands
Deze HDR-A-set is zeer gevoelig voor elektrostatische ontladingen, vanwege de CODEC-module en HDD. Verder
is de bovenplaat van de HDD drukgevoelig. Hoge druk kan schade veroorzaken.
Het ServiceTool-programma dient op uw computer geïnstalleerd te zijn, evenals de nieuwste versie van de
PPI-software (PPI is de chip waarin u de nieuwe software flasht. Deze bevindt zich op de CODEC-module).
O
AB
Is er een oudere versie van de ServiceTool geïnstalleerd (Flash Tool geheten) dan dient u deze van uw computer
te verwijderen met behulp van “Programma’s toevoegen of verwijderen” in het configuratiescherm. Zorg dat
de map “C:\Program Files\Bang & Olufsen\Bang & Olufsen Flash Tool” verwijderd is, voordat u de nieuwe
ServiceTool gaat downloaden.
E
-C
Is de ServiceTool reeds geïnstalleerd, dan kunt u rechtstreeks naar “ Download the newest edition of the PPI
(CODEC) software” (“De nieuwste versie van de PPI-(CODEC)-software downloaden” ) gaan.
R
TE
N
De ServiceTool downloaden en installeren:
1. Open uw internetbrowser en ga naar “http://retail.bang-olufsen.dk”.
2. Log in met uw persoonlijke wachtwoord.
3. Ga naar “Product documentation and information” (“Productdocumentatie en -informatie”).
4. Klik op “audio/BeoSound/BeoSound3200”.
5. Klik op “Software download”.
6. U kunt nu het programma ServiceTool of de PPI-software voor de CODEC-module downloaden.
7. Download het programma ServiceTool. Dit is een .EXE-bestand; wanneer u het bestand activeert, wordt
het programma ServiceTool op uw computer geïnstalleerd.
8. Haal nu de nieuwste versie van de PPI-(CODEC)-software van het Retail System.
H
v/
EN
De nieuwste versie van de PPI-(CODEC)-software downloaden:
1. Open uw internetbrowser en ga naar “http://retail.bang-olufsen.dk”.
2. Log in met uw persoonlijke wachtwoord.
3. Ga naar “Product documentation and information” (“Productdocumentatie en -informatie”).
4. Klik op “audio/BeoSound/BeoSound3200”.
5. Klik op “Software download”.
6. U kunt nu het programma ServiceTool of de PPI-software voor de CODEC-module downloaden. Het
programma ServiceTool moet al op uw computer geïnstalleerd zijn.
7. Download de PPI-(CODEC)-software en plaats het bestand in de map: C:\Program Files\Bang & Olufsen\
Bang & Olufsen ServiceTool.
8. Het softwarebestand (.IMG) moet nu in de map: C:\Program Files\Bang & Olufsen\Bang & Olufsen
ServiceTool staan, samen met het bestand HD.EXE.
S
EN
KS
RI
IK
N
RO
De USB-driver installeren:
1. Installeer uw BeoSound 3200 op de aangegeven manier.
Sluit de beide uiteinden van de USB-kabel niet aan.
2. Zorg dat uw computer aan staat en dat de installatie van
het programma ServiceTool en de PPI-(CODEC)-software
gereed is.
3. Sluit de USB-kabel aan op de USB-ministekker op de
CODEC-module.
4. Steek de stekker van de BS3200 in het stopcontact.
5. Zet de BS3200 in de testmodus 71 (druk op: “Display” en
vervolgens binnen 3 seconden op “0 2 5 8” in stand-by en
druk op “71”).
6. Sluit het andere uiteinde van de USB-kabel aan op uw
computer. De computer zal nu om een driver vragen; deze
bevindt zich in de map: C:\Program Files\Bang & Olufsen\
Bang & Olufsen ServiceTool\BS3200_usb_driver. Dubbelklik
op het driver-bestand.
7. Nadat u de driver heeft geïnstalleerd, neemt u de
netstekker van de BS3200 uit het stopcontact en koppelt u
de USB-kabel los (van zowel de BS3200 als uw computer).
U hoeft deze USB-driver slechts eenmaal te installeren.
Zodra hij geïnstalleerd is, zijn er geen updates meer nodig
voor deze driver.
T
EK
EL
De nieuwste versie van het programma ServiceTool en de PPI-(CODEC)-software is nu op uw computer
geïnstalleerd. U hoeft nu alleen nog maar de USB-driver te installeren, zodat de ServiceTool kan communiceren
met de CODEC-module.
��
�
��
��
�
��
�
�� �
�
�� ��
�
�� ��
��
�
�
� ��
�
� ��
�
�� � � �
�� � � � �
�� � �
�
�
�
��
��
���
Nederlands
23
Nu kunt u, met behulp van de HDR-A-set, de inhoud van de oude HDD kopiëren naar de nieuwe, informatie van
de HDD-/CODEC-module uitlezen en de PPI-(CODEC)-software upgraden.
Kies de procedure die u wilt uitvoeren en volg nauwkeurig de onderstaande beschrijving.
R
TE
N
E
-C
O
AB
Gegevens van de oude HDD naar de nieuwe kopiëren:
1. Zorg dat u de ServiceTool heeft gedownload.
2. Opmerking: Als u de BS3200 niet in TM71 zet/de USB-kabel niet in de juiste volgorde aansluit, zal de
computer niet met de CODEC-module kunnen communiceren. Volg de instructies dus nauwkeurig op.
3. Installeer uw BS3200 en HDR-A-set op de aangegeven manier, sluit de USB-kabel aan terwijl de
computer aan staat en de netstekker van de BS3200 niet in het stopcontact zit (vergeet niet om de
jumper op de nieuwe HDD te monteren).
4. Steek de stekker van de BS3200 in het stopcontact.
5. Zet de BS3200 in de testmodus 71 (druk op: “Display” en vervolgens binnen 3 seconden op “0 2 5 8”
in stand-by en druk op “71”).
6. Laat de beide HDD’s opstarten (ca. 10 sec).
7. Start het programma ServiceTool.
8. Selecteer: Products/Audio/BeoSound/BeoSound 3200 en open het HD-programma (Indien de
mededeling:”Portable device not responding... please check connection” ( “Draagbaar apparaat
reageert niet... controleer de verbinding”) verschijnt, controleer dan of de USB-kabel op de juiste manier
is aangesloten op de CODEC-module en begin weer bij punt 1).
9. U kunt nu “copy disc” (disc kopiëren”) kiezen, waarna het kopiëren begint. Na het kopiëren sluit u het
programma ServiceTool af.
10. Na het kopiëren (het kopiëren van een volle HDD neemt ongeveer 3 uur in beslag) voert u testmodus 70
en testmodus 78 uit, wanneer de nieuwe HDD geïnstalleerd is en de oude HDD is losgekoppeld (zie het
BeoSound 3200 servicehandboek, hoofdstuk 4. Het servicehandboek vindt u in het Retail System).
H
v/
EN
KS
RI
S
EN
Servicetip:
Als u zich in een
ruimte bevindt waar
een afstandsbediening
wordt gebruikt, dek de
infraroodsensor dan af of
zet de BS3200 tijdens het
kopiëren in optie 0.
T
EK
EL
�
�
��
������
���� �����
��
��
�
IK
N
�
��
��
�
��
�� �
�� ���
�
�
�� � �
�
�� �
� ��
� �
�
� �
�
�� � � � �
�� � �
�
�
��
RO
�����
���� �����
���
������
���� �����
�����
���� �����
24
Nederlands
R
TE
N
E
-C
O
AB
Informatie uitlezen/nieuwe PPI-(CODEC)-software flash-programmeren:
1. Zorg vóór het maken van een flash-update dat u de ServiceTool en de nieuwste versie van de
PPI-software heeft gedownload.
2. Opmerking: Als u de BS3200 niet in TM71 zet/de USB-kabel niet in de juiste volgorde aansluit, zal de
computer niet met de CODEC-module kunnen communiceren. Volg de instructies dus nauwkeurig op.
3. Installeer uw BS3200 op de aangegeven manier. Sluit de USB-kabel niet aan.
4. Steek de stekker van de BS3200 in het stopcontact.
5. Zet de BS3200 in de testmodus 71 (druk op: “Display” en vervolgens binnen 3 seconden op “0 2 5 8”
in stand-by en druk op “71”).
6. Laat de HDD opstarten (ca. 10 sec).
7. Sluit de USB-kabel aan op de CODEC-module en de computer.
8. Start het programma ServiceTool.
9. Selecteer: Products/Audio/BeoSound/BeoSound 3200 en open het HD-programma (Indien de
mededeling: “Portable device not responding... please check connection” ( “Draagbaar apparaat
reageert niet... controleer de verbinding”) verschijnt, controleer dan of de USB-kabel op de juiste manier
is aangesloten op de CODEC-module en begin weer bij punt 1).
10. U kunt nu kiezen welke procedure u wilt uitvoeren.
11. Wanneer u een volume wilt formatteren, let dan goed op dat u niet volume 4 formatteert (dit
bevat decodeergegevens en kan niet worden hersteld). Kies eerst “Get volume info” (“Volume-info
weergeven”) om een overzicht van de gegevens te krijgen. Met behulp van dit overzicht kunt u
gemakkelijk het volume lokaliseren dat u wilt formatteren.
12. Als u kiest voor de flash-update van de PPI-(CODEC)-software, wordt u verzocht het pad naar het
.IMG-bestand in te voeren. Type: C:\Program Files\Bang & Olufsen\Bang & Olufsen ServiceTool\
XXXXx.img (op de plaats van de XXXXx dient u de juiste versienaam te typen, bijvoorbeeld: 046C).
H
v/
EN
S
EN
KS
RI
IK
N
RO
���
T
EK
EL
��
��
�
�
��
�
�
�
��
�
�� �
��
�
�� ��
�
�
�
�
�
�
��
�
� ��
�
� ��
�
�� � � �
�
�
�
�
��
�� � �
��
��������断熱テスト 日本語
25
断熱テスト
�����モジュールと���が付いているため、この�����キットは���に非常に敏感になっています。���の
上部プレートは圧力にも敏感なため、極度の圧力がかかると故障の原因になります。
コンピュータに最新の���ソフトウェアと共に�����������プログラムをインストールしなければなりません
����は�����モジュール内にあり、新しいソフトウェアを実行させるチップです)。
O
AB
�����������の古いバージョン(����������)をインストールされている場合、コントロールパネルにある『プ
ログラムの追加/削除』を使用してそれを削除しなければなりません。新しい�����������をダウンロードす
る前に、『���������������������������������������������������������』と呼ばれるフォルダが削除されている
ことを確認してください。
E
-C
�����������を既にインストールされている場合、直接『�����������������������������������������������
��������(������������ソフトウェアの最新版をダウンロード)』を実行することができます。
R
TE
N
�����������のダウンロードおよびインストール:
��� インターネット・ブラウザをオープンし、『�����������������������������』を選びます。
��� 各自のパスワードを入力してログインします。
�����『�������������������������������������(製品のドキュメンテーションと情報)』を選びます。
�����『���������������������������』を押します。
�����『�����������������(ソフトウェアのダウンロード)』を押します。
��� ここで、�����������プログラムまたは�����モジュール用の���ソフトウェアのどちらをダウンロー
ドするか選択します。
��� �����������プログラムをダウンロードします。これは����ファイルで、ファイルを稼働させると
�����������プログラムがコンピュータにインストールされます。
��� 次に、�������������から���(�����)の最新版ソフトウェアをダウンロードします。 �
H
v/
EN
S
EN
KS
RI
���(�����)の最新版ソフトウェアをダウンロード:�
��� インターネット・ブラウザをオープンし、『�����������������������������』を選びます。
��� 各自のパスワードを入力してログインします。
�����『�������������������������������������(製品のドキュメンテーションと情報)』を選びます。
�����『���������������������������』を押します。
�����『�����������������(ソフトウェアのダウンロード)』を押します。
��� ここで、�����������プログラムまたは�����モジュール用の���ソフトウェアのどちらをダウンロードするか
選択します。この時点で������������プログラムがコンピュータにインストールされていなければなりません。
��� ���(�����)ソフトウェアをダウンロードし、ファイルを『��������������������������������
�
�������������������������l』のフォルダに入れます。
�����『�����������������������������������������������������������』のフォルダに����というソフトウェ
アファイルと������ファイルが入ります。
T
EK
EL
これでコンピュータに�����������プログラムの最新版と���(�����)ソフトウェアがインストールされたことになり
ます。あとは���ドライバをインストールすれば、�����������から�����モジュールへの通信が可能となります。
IK
N
RO
���ドライバのインストール:
��� �������������を図のようにセットアップします。
���ケーブルはまだ接続しないでください。
��� コンピュータが稼働し、�����������プログラムと���(�����)ソフ
トウェアのインストールが済んでいることを確認してください。�
��� ���ケーブルを�����モジュールのミニ���プラグに接続します。
��� ������を電源に接続します。
��� ������をテストモード��にします(スタンバイの状態
で『�������』を押し、その後�秒以内に『�������』、そ
して『��』を押します)。
��� ���ケーブルのもう一方の端をコンピュータに接続する
と、コンピュータがドライバを要求します。これは
『�����������������������������������������������
�����������������������������』フォルダ内にあります。
ドライバのファイルをダブルクリックします。
��� ドライバのインストールが終了したら������を電源から外し、
���ケーブルを外します(������とコンピュータの両方から)。
���ドライバは一度だけインストールする必要があります。一度
インストールが終了すればアップデートの必要もありません。
��
��
��
��
��
��
��
��
��
��
��
��
��
�
�
�� �
���
������
�� �
��
�
��
�
��
��
� ��
��
�
�
��
�
�
� � ��
�
�����
��
�� ��
� � ��� � �
��
�
� � � � �� � � �
��
�
� � � � �� �
��
�
��
��
��� ���
一度分
再度組
くださ
テスト
以下に
電源プ
スト用
ご注意
セット
ださい
�����で
この電
26
������断熱テスト
日本語
断熱テスト �����キットと併用して、古い���から新しい���へのコピー、���������モジュールからの情報の読み
取り、���(�����)ソフトウェアのアップデートが行えるようになります:
一度分解したセットには必ず断熱テストを行わなければなりません。
再度組み立てを完了し、お客様へ返却する準備が整った時点でテストを行って
希望する手順を選び、説明に対して厳密に従います。
ください。
テストを行っている最中にフラッシュオーバーしてはいけません。
R
TE
N
E
-C
O
AB
古い���から新しい���へのコピー:
以下に従って断熱テストを行ってください:
��� �����������をダウンロード済みであることを確認してください。
電源プラグの�ピンをショートさせ、断熱テスト用端末に接続します。断熱テ
��� ご注意。������をテストモード��(����)にしていない、または���ケーブルを正しい順序で接
スト用の他の端末をアンテナソケットのシャシーピンに接続します。
続していないと、コンピュータは�����モジュールと通信をすることができませんので、説明には
正確に従ってください。
ご注意!
��� ������と�����キットを図に示したようにセットアップし、コンピュータのスイッチをオンにし、������を
セットを破損しないよう、必ず両方の断熱テスト用端末をしっかり接続してく
電源から外した状態でUSBケーブルを接続します(必ず新しい���にジャンパーを取り付けてください)。
ださい。
��� ������を電源に接続します。
��� ������をテストモード71にします(スタンバイの状態で『�������』を押し、その後�秒以内に『�������』、そして『��』を押します)。
�����で最大���になるまで断熱テストの電圧をゆっくりと上げてください。
��� 両方の���をスタートします(約��秒)。
この電圧を1秒間保ち、それからゆっくりと下げます。
��� �����������プログラムをスタートします。
��� �������������������������������������を選択し、��プログラムを開始します(『����������������
��������������������������������������(ポータブル・デバイスの応答なし�接続を確認してくだ
さい)』というメッセージが出たら、���ケーブルが正しく�����モジュールに接続されているこ
とを確認します。その後、最初(1)から始めてください)。
�����『���������(ディスクをコピー)』を選択するとコピーを開始します。コピーが済んだら、�����������プログラムを終了します。
���� コピー終了後(���がフルの場合、コピーに約�時間かかります)、新しい���のインストールが済
み、古い���が外されている状態で、テストモード��と��を実行します。(�������������のサービ
スマニュアルの第�章をご覧ください。サービスマニュアルは�������������にあります)。
H
v/
EN
S
EN
KS
RI
サービスのヒント:
リモコンを使用する場所で
作業を行っている場合、コ
ピーの最中は、��センサーを
覆うか、������をオプショ
ン�に設定してください。
���
������
������
���� �����
���� �����
�����
�����
���� �����
���� �����
IK
���
N
��
�� �
�
�
�
�
�� � � �
�� �� ��
�� � �� �
��
� �� �� �
� �
�
��
�
�� � � �� ����� ��
� � �� ���
�
�
�
�
� �
� � �
���
� �
� � �
�
�� �
�
� ���
�� ��� � �
�
� �� �
�
�� �� � � �
�
�� � �
��
RO
������
���� �����
������
���� �����
T
EK
EL
�����
���� �����
�����
���� �����
��������断熱テスト 日本語
27
R
TE
N
E
-C
O
AB
情報の読み取り����(�����)の最新版ソフトウェアの実行: �
断熱テスト
��� �����������、そしてアップデートを実行するには���の最新版ソフトウェアをダウンロードしたことをご確認ください。
��� ご注意。������をテストモード��(����)にしていない、または���ケーブルを正しい順序で接続していない
と、コンピュータは�����モジュールと通信をすることができませんので、説明には正確に従ってください。
��� ������を図のようにセットアップします。���ケーブルはまだ接続しないでください。
��� ������を電源に接続します。
��� ������をテストモード��にします(スタンバイの状態で『�������』を押し、その後�秒以内に
『�������』、そして『��』を押します)。
��� ���をスタートします(約��秒)。
��� �����モジュールとコンピュータを結ぶ���ケーブルを接続します。�
��� �����������プログラムをスタートします。
��� �������������������������������������を選択し、��プログラムを開始します(『����������������
��������������������������������������』というメッセージが出たら、���ケーブルが正しく
�����モジュールに接続されていることを確認します。その後、最初(�)から始めてください)。
���� ご希望の手順をお選びください。
���� 一部をフォーマットする場合、ボリューム�をフォーマットしないようご注意ください(これにはデコー
ディング・データが含まれており、後で復活させることはできません。)まず『���������������(ボリュ
ームの情報を得る)』を選択して概要を受け取ります。この概要でフォーマットしたい部分を容易に突
き止めることができます。
���� ���(�����)ソフトウェアのアップデートを実行すると、����ファイルへのパスネームを入力す
るよう指示が出ます。『��������������������������������������������������������������������』
(�����には正しいバージョン名を入力します:例えば『����』など)と入力します。
H
v/
EN
S
EN
KS
RI
�
���
��
T
EK
EL
��
��
��
�
�
�
�
�
�
��
�� �
��
�
�� ��
�
� �
��
�� ��
�
�
� ��
� ��
�� � � �
�� � � � �
�� � �
��
一度
再度
くだ
テス
以下
電源
スト
ご注
セッ
ださ
�����
この
IK
N
RO
28
R
TE
N
E
-C
O
AB
H
v/
EN
S
EN
KS
RI
T
EK
EL
IK
N
RO
Bang & Olufsen
DK-7600 Struer
Denmark
Phone +45 96 84 11 22*
Fax +45 97 85 39 11
3543390 01-04