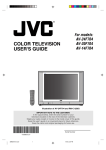
1
®
For model:
AV-20FD24
TV/DVD COMBO
USER'S GUIDE
POWER
TV CATV
PLAY MODE
DISPLAY
SLEEP
TIMER
AUDIO
AUDIO
TITLE
1
2
SUBTITLE
4
5
JUMP
7
8
9
0
RETURN
C.C.
ANGLE
3
6
MARKER ZOOM REPEATA-B RETURN
– SLOW +
MUTING
CANCEL
LIGHT
SELECT
/ENTER
+
CH
VOL
–
VOL
INPUT
+
CH
–
DVD SETUP
TV MENU
PREV NEXT
B.SEARCH
OPEN/CLOSE
TV/DVD DVD MENU
PLAY
F.SEARCH
STOP
PAUSE/STILL
TV / DVD
IMPORTANT NOTE TO THE CUSTOMER:
In the space below, enter the serial number for your
television (located on the rear of the television cabinet).
Staple your sales receipt or invoice to the inside cover of this guide.
Keep this user's guide in a convenient place for future reference.
Keep the carton and original packaging for future use.
Serial Number
5J00401A[E] Cover
1
16:5:03, 17:07
CAUTION
RISK OF ELECTRIC SHOCK
DO NOT OPEN
CAUTION: TO REDUCE THE RISK OF ELECTRIC
SHOCK, DO NOT REMOVE COVER (OR
BACK). NO USER-SERVICEABLE
PARTS INSIDE. REFER SERVICING TO
QUALIFIED SERVICE PERSONNEL.
The lightning flash with arrowhead
symbol, within an equilateral triangle is
intended to alert the user to the
presence of uninsulated dangerous
voltage within the product's
enclosure that may be of sufficient magnitude to constitute a risk of electric shock.
The exclamation point within an
equilateral triangle is intended to alert
the user to the presence of important
operating and maintenance (servicing)
instructions in the literature accompanying the appliance.
WARNING: TO PREVENT FIRE OR SHOCK HAZARD, DO NOT EXPOSE THIS APPLIANCE TO RAIN OR
MOISTURE.
CAUTION: TO PREVENT ELECTRIC SHOCK DO NOT USE THIS POLARIZED PLUG WITH AN
EXTENSION CORD, RECEPTACLE OR OTHER OUTLET UNLESS THE BLADES CAN
BE FULLY INSERTED TO PREVENT BLADE EXPOSURE.
WARNING: This equipment has been tested and found to comply with the limits for a Class B digital device,
pursuant to Part 15 of the FCC Rules. These limits are designed to provide reasonable protection
against harmful interference in a residential installation. This equipment generates, uses and can
radiate radio frequency energy and, if not installed and used in accordance with the instructions,
may cause harmful interference to radio communications.
However, there is no guarantee that interference will not occur in a particular installation. If this
equipment does cause harmful interference to radio or television reception, which can be
determined by turning the equipment off and on, the user is encouraged to try to correct the
interference by one or more of the following measures:
- Reorient or relocate the receiving antenna.
- Increase the separation between the equipment and receiver.
- Connect the equipment into an outlet on a circuit different from that to which the receiver is
connected.
- Consult the dealer or an experienced radio/TV technician for help.
CAUTION: Changes or modifications not expressly approved by the partly responsible for compliance with
the FCC Rules could void the user's authority to operate this equipment.
CAUTION:
THIS DIGITAL VIDEO PLAYER EMPLOYS A LASER SYSTEM.
Location of the required Marking
The rating sheet and the safety caution
are on the rear of the unit.
TO ENSURE PROPER USE OF THIS PRODUCT, PLEASE
READ THIS USER'S GUIDE CAREFULLY AND RETAIN FOR
FUTURE REFERENCE. SHOULD THE UNIT REQUIRE MAINTENANCE, CONTACT A JVC AUTHORIZED SERVICE CENTER.
USE OF CONTROLS, ADJUSTMENTS OR THE PERFORMANCE OF PROCEDURES OTHER THAN THOSE SPECIFIED
HEREIN MAY RESULT IN HAZARDOUS RADIATION EXPOSURE.
VIDEO
UHF/
VHF
(MONO)
AUDIO
R
TO PREVENT DIRECT EXPOSURE TO LASER BEAM, DO NOT
TRY TO OPEN THE ENCLOSURE. VISIBLE LASER RADIATION MAY BE PRESENT WHEN THE ENCLOSURE IS OPENED.
DO NOT STARE INTO BEAM.
CERTIFICATION: COMPLIES WITH
FDA RADIATION PERFORMANCE
STANDARDS, 21 CFR SUBCHAPTER J.
2
5J00401A[E] (02-05)
2
DIGITAL
AUDIO OUT
LINE IN 1 COAXIAL
22/05/2003, 14:16
IMPORTANT SAFEGUARDS
1. READ INSTRUCTIONS
All the safety and operating instructions should be read before the unit is operated.
2. RETAIN INSTRUCTIONS
The safety and operating instructions should be retained for future reference.
3. HEED WARNINGS
All warnings on the unit and in the operating instructions should be adhered to.
4. FOLLOW INSTRUCTIONS
All operating and use instructions should be followed.
5. CLEANING
Unplug this unit from the wall outlet before cleaning. Do not use liquid cleaners or aerosol cleaners.
Use a damp cloth for cleaning the exterior cabinet only.
6. ATTACHMENTS
The manufacturer of this unit does not make any recommendations for attachments, as they may cause
hazards.
7. WATER AND MOISTURE
Do not use this unit near water. For example, near a bathtub, washbowl, kitchen sink, laundry tub, in a wet
basement, or near a swimming pool.
PORTABLE CART WARNING
(symbol provided by RETAC)
8. ACCESSORIES
Do not place this unit on an unstable cart, stand, tripod, bracket, or table.
The unit may fall, causing serious injury, and serious damage to the unit.
8A. An appliance and cart combination should be moved with care. Quick stops,
excessive force, and uneven surfaces may cause the appliance and cart
combination to overturn.
9. VENTILATION
Slots and openings in the cabinet back or bottom are provided for ventilation,
S3126A
and to ensure reliable operation of the unit, and to protect it from overheating.
These openings must not be blocked or covered. The openings should never be blocked by placing the unit
on a bed, sofa, rug, or other similar surface. This unit should never be placed near or over a radiator or heat
source. This unit should not be placed in a built-in installations such as a bookcase or rack unless proper
ventilation is provided or the manufacturer’s instructions have been adhered to.
10. POWER SOURCES
This unit should be operated only from the type of power source indicated on the rating plate. If you are not
sure of the type of power supply to your home, consult your appliance dealer or local power company. For
units intended to operate from battery power, or other sources, refer to the operating instructions.
11. GROUNDING OR POLARIZATION
This unit is equipped with a polarized alternating-current line plug (a plug having one blade wider than the
other). This plug will fit into the power outlet only one way. This is a safety feature. If you are unable to insert
the plug fully into the outlet, try reversing the plug. If the plug should still fail to fit, contact your electrician to
replace your obsolete outlet. Do not defeat the safety purpose of the polarized plug, if your unit is equipped
with a 3-wire grounding-type plug, a plug having a third (grounding) pin. This plug will only fit into a grounding-type power outlet. This too, is a safety feature. If you are unable to insert the plug into the outlet, contact
your electrician to replace your obsolete outlet.
Do not defeat the safety purpose of the grounding-type plug.
3
5J00401A[E] (02-05)
3
16:5:03, 17:07
IMPORTANT SAFEGUARDS
(Continued)
12. POWER-CORD PROTECTION
Power-supply cords should be routed so that they are not likely to be walked on or pinched by items placed
upon or against them, paying particular attention to cords at plugs, convenience receptacles, and the point
where they exit from the appliance.
13. LIGHTNING
To protect your unit from a lightning storm, or when it is left unattended and unused for long periods of time,
unplug it from the wall outlet and disconnect the antenna or cable system. This will prevent damage to the
unit due to lightning and power line surges.
14. POWER LINES
An outside antenna system should not be located in the vicinity of overhead power lines or other electric
light or power circuits, or where it can fall into such power lines or circuits. When installing an outside
antenna system, extreme care should be taken to keep from touching such power lines or circuits, as
contact with them might be fatal.
15. OVERLOADING
Do not overload wall outlets and extension cords, as this can result in a risk of fire or electric shock.
16. OBJECT AND LIQUID ENTRY
Do not push objects through any openings in this unit, as they may touch dangerous voltage points or short
out parts that could result in fire or electric shock. Never spill or spray any type of liquid into the unit.
17. OUTDOOR ANTENNA GROUNDING
If an outside antenna or cable system is connected to the unit, be sure the antenna or cable system is
grounded to provide some protection against voltage surges and built-up static charges, Section 810 of the
National Electrical Code, ANSI/NFPA 70, provides information with respect to proper grounding of the mast
and supporting structure, grounding of the lead-in wire to an antenna discharge unit, size of grounding
conductors, location of antenna discharge unit, connection to grounding electrodes, and requirements for
the grounding electrode.
18. SERVICING
Do not attempt to service this unit yourself as opening or removing covers may expose you to dangerous
voltage or other hazards. Refer all servicing to qualified service personnel.
19. DAMAGE REQUIRING SERVICE
Unplug this unit from the wall outlet and refer servicing to qualified service personnel under the following
conditions:
a. When the power-supply cord or plug is damaged.
b. If liquid has been spilled, or objects have fallen into the unit.
c. If the unit has been exposed to rain or water.
d. If the unit does not operate normally by following the operating instructions. Adjust only those
controls that are covered by the operating instructions, as an improper adjustment of other controls
may result in damage and will often require extensive work by a qualified technician to restore the
unit to its normal operation.
e. If the unit has been dropped or the cabinet has been damaged.
f . When the unit exhibits a distinct change in performance, this indicates a need for service.
20. REPLACEMENT PARTS
When replacement parts are required, be sure the service technician uses replacement parts specified by
the manufacturer or those that have the same characteristics as the original part.
Unauthorized substitutions may result in fire, electric shock or other hazards.
21. SAFETY CHECK
Upon completion of any service or repairs to this unit, ask the service technician to perform safety checks to
determine that the unit is in proper operating condition.
22. HEAT
The product should be situated away from heat sources such as radiators, heat registers, stoves, or other
products (including amplifiers) that produce heat.
23. DISC TRAY
Keep your fingers well clear of the disc tray as it is closing. It may cause serious personal injury.
24. CONNECTING
When you connect the product to other equipment, turn off the power and unplug all of the equipment from
the wall outlet. Failure to do so may cause an electric shock and serious personal injury. Read the owner's
manual of the other equipment carefully and follow the instructions when making any connections.
25. SOUND VOLUME
Reduce the volume to the minimum level before you turn on the product. Otherwise, sudden high volume
sound may cause hearing or speaker damage.
4
5J00401A[E] (02-05)
4
16:5:03, 17:07
26. SOUND DISTORTION
Do not allow the product output distorted sound for a longtime. It may cause speaker overheating and fire.
27. HEADPHONES
When you use the headphones, keep the volume at a moderate level. If you use the headphones continuously with high volume sound, it may cause hearing damage.
28. LASER BEAM
Do not look into the opening of the disc tray or ventilation opening of the product to see the source of the
laser beam. It may cause sight damage.
29. DISC
Do not use a cracked, deformed, or repaired disc. These discs are easily broken and may cause serious
personal injury and product malfunction.
30. NOTE TO CATV SYSTEM INSTALLER
This reminder is provided to call the CATV system installer’s attention to Article 820-40 of the NEC that
provides guidelines for proper grounding and, in particular, specifies that the cable ground shall be connected to the grounding system of the building, as close to the point of cable entry as practical.
EXAMPLE OF ANTENNA GROUNDING AS PER THE
NATIONAL ELECTRICAL CODE
ANTENNA LEAD IN WIRE
GROUND CLAMP
ELECTRIC SERVICE
EQUIPMENT
ANTENNA
DISCHARGE UNIT
(NEC SECTION 810-20)
GROUNDING CONDUCTORS
(NEC SECTION 810-21)
GROUND CLAMPS
NEC-NATIONAL ELECTRICAL CODE
S2898A
POWER SERVICE GROUNDING
ELECTRODE SYSTEM
(NEC ART 250, PART H)
CONDENSATION
Moisture will form in the operating section of the player if the player is brought from cool surroundings
into a warm room or if the temperature of the room rises suddenly. When this happens, player's
performance will be impaired.
To prevent this, let the player stand in its new surroundings for about an hour before switching it on, or
make sure that the room temperature rises gradually.
Condensation may also form during the summer if the player is exposed to the breeze from an air
conditioner. In such cases, change the location of the player.
Power Source
AC Outlet
Wider Hole
and Blade
Polarized AC Cord Plug
(One blade is wider than the other.)
TO USE AC POWER SOURCE
Use the AC polarized line cord provided for operation on AC. Insert
the AC cord plug into a standard 120V 60Hz polarized AC outlet.
NOTES:
• Never connect the AC line cord plug to other than the specified
voltage (120V 60Hz). Use the attached power cord only.
• If the polarized AC cord does not fit into a non-polarized AC
outlet, do not attempt to file or cut the blade. It is the user’s
responsibility to have an electrician replace the obsolete outlet.
• If you cause a static discharge when touching the unit and the
unit fails to function, simply unplug the unit from the AC outlet
and plug it back in. The unit should return to normal operation.
5
5J00401A[E] (02-05)
5
16:5:03, 17:07
Features
Color TV With DVD/CD player
Unique space saving design combines a 20" flat color TV and a DVD/CD player.
The DVD disc has much more capacity, but is the same size as the audio CD disc. Picture/Audio quality of the DVD
exceeds other software. Picture quality is higher than Super VHS. Audio quality is higher than audio CD. The DVD
also has special options; audio language selection, subtitle language selection or multi-angle, etc.
The DVD PLAYER can play back audio CDs.
High Quality Picture
Horizontal Resolution
More than 500 lines. It exceeds Super VHS (400 lines) or Laser Disc (430 lines) in resolution.
Compatible with a wide range of DVD audio outputs
Digital Audio Jack (Coaxial)
• When a component with a built-in Dolby Digital decoder is connected, Dolby Digital sound can produce the effect
of being in a movie theater or a concert hall.
• Surround standard different from Dolby Digital. This format is already in use in many theaters. By connecting this
unit to a DTS decoder or an AV amplifier with a built-in DTS decoder, the DTS audio of DVD discs recorded in this
format can be enjoyed. However, audio will not be output from the analog audio output jacks.
• By connecting this unit to an AV amplifier with a built-in MPEG decoder, the MPEG audio of DVD discs recorded
in this format can be enjoyed.
• The Linear PCM sound of a 48 kHz/16 bit through 96 kHz/20 bit exceeds audio CD sound.
Convenience Features
Frame Advance - The PAUSE/STILL moves one frame at a time.
Slow Motion - The SLOW moves you back and forth through the program by 4 steps of 1/8-1/2 times.
Repeat Playback - You can repeat chapter track or title between two selected points.
Program Playback - You can play back tracks in programmed sequences.
Zoom (DVD only) - You can zoom in the selected subject on the screen during playback.
Note: Make sure that discs are suitable for the following functions.
Multi-Language - Maximum 32 language subtitles and maximum 8 language soundtracks can be played back for
movies or programes.
Multi-Angle - Pictures of Sports or a Live Concert are recorded with many cameras. When you play such a disc,
you can change the angles during playback.
Parental Control - You can limit the play back of scenes or sounds of adult DVD discs which have parental level.
Video Aspect Ratio - You can change the aspect ratio of the screen for your monitor.
TV Features
Flat Picture Tube - It reduces the influence of surrounding light resulting in outstanding image detail and clarity.
181 Channel Tuner - Receives standard VHF and UHF broadcast channels and up to 113 cable channels. The
actual number of channels received depends upon channel reception in your area or your cable system.
Closed Caption Decoder With Full Text Mode - Displays text captions or full screen text on the screen for
hearing impaired viewers.
Picture Adjustments Using The Remote Control - The On-Screen display allows precise remote control adjustment of BRIGHTNESS, CONTRAST, COLOR, TINT and SHARPNESS.
Programmable TV Sleep Timer - Operable from the remote control, the TV can be programmed up to 120
minutes to turn off automatically.
On-Screen 3 Language Display - You can select one of 3 languages, English, Spanish or French for on-screen
programming.
V-Chip - The V-Chip function can read the rating of a TV program or movie content if the program is encoded
with this information. V-chip will allow you to set a restriction level.
This product incorporates copyright protection technology that is protected by method claims of certain U.S.
patents and other intellectual property rights owned by Macrovision Corporation and other rights owners. Use
of this copyright protection technology must be authorized by Macrovision Corporation, and is intended for
home and other limited viewing uses only unless otherwise authorized by Macrovision Corporation. Reverse
engineering or disassembly is prohibited.
6
5J00401A[E] (06-11)
6
16:5:03, 17:07
• As an “ENERGY STAR®” partner, JVC has determined that this product or product
model meets the “ENERGY STAR®” guidelines for energy efficiency.
ENER Y STAR
IMPORTANT RECYCLING INFORMATION
This product utilizes both a Cathode Ray Tube (CRT) and other components
that contain lead. Disposal of these materials may be regulated in your
community due to environmental considerations. For disposal or recycling
information, please contact your local authorities, or the Electronic Industries
Alliance: http://www.eiae.org
Contents
Before using your unit
Advanced Function
IMPORTANT SAFEGUARDS ........................ 3
Power source ................................................. 5
Features ......................................................... 6
Contents ......................................................... 7
Parts and functions ........................................ 8
Remote control ............................................... 9
Antenna connections .................................... 11
Cable TV connections .................................. 12
Zooming/Locating desired scene ................. 30
Repeat, Random and Program playback/
Repeat A-B ................................................... 31
Marking desired scenes ............................... 32
Changing soundtrack language/Subtitles ..... 33
Changing angles/Title selection/DVD menu ... 34
TV operation
Setting the language .................................... 13
TV operation ................................................. 14
Closed captions ............................................ 16
To memorize channels ................................. 17
Setting the V-Chip ........................................ 19
Picture control adjustment ............................ 22
Stereo and separate audio program (SAP) .. 23
Sound control adjustment ............................ 24
Playback operation
Disc .............................................................. 25
Preparation/Status display of disc ................ 26
Playback procedure ..................................... 27
Special playback .......................................... 28
MP3 playback ............................................... 29
Additional Information
Setting language .......................................... 35
Setting the aspect ratio of TV screen/
Setting on screen display ............................. 36
Dynamic Range Control ............................... 37
Parental control setting ................................ 38
To change the parental level ........................ 39
Temporary disabling of rating level by
DVD disc ...................................................... 40
Language code list ....................................... 41
Connections to other equipments ................ 42
Problems and troubleshooting ...................... 44
Reception disturbances ................................ 46
Specifications ............................................... 47
Appendix (Remote programming) ................ 48
7
5J00401A[E] (06-11)
7
16:5:03, 17:07
Parts and functions
Front
Disc tray
PREVIOUS button
NEXT button
OPEN/CLOSE button
STOP button
Power indicator
Remote sensor
POWER
STOP
PREVIOUS
PLAY
NEXT
OPEN/CLOSE
POWER
VIDEO
VOLUME
CHANNEL
POWER button
HOW TO OPEN THE FRONT DOOR
L/MONO AUDIO
LINE 2 IN
R
AUDIO (L/R)/VIDEO IN jacks
(LINE 2)
Headphone Jack
VOLUME +/– buttons
PLAY button
CHANNEL +/– buttons
Rear
AUDIO (L/R)/VIDEO IN jacks (LINE 1)
RF IN jack
VIDEO
UHF/
VHF
(MONO)
AUDIO
R
DIGITAL
AUDIO OUT
LINE IN 1 COAXIAL
COAXIAL DIGITAL AUDIO OUT jack
VIDEO
UHF/
VHF
(MONO)
AUDIO
R
DIGITAL
AUDIO OUT
LINE IN 1 COAXIAL
AC power cord
8
5J00401A[E] (06-11)
8
22/05/2003, 11:17
Remote control
Page
POWER
TV CATV
DISPLAY
PLAY MODE
SLEEP
TIMER
AUDIO
AUDIO
TITLE
1
2
3
SUBTITLE
4
5
6
7
JUMP
8
C.C.
ANGLE
9
RETURN
0
MARKER ZOOM REPEATA-B RETURN
– SLOW +
MUTING
CANCEL
LIGHT
SELECT
/ENTER
+
CH
VOL
–
INPUT
VOL
+
CH
–
TV/CATV switch
Switch to operate TV or CATV
POWER
Power on/off
PLAY MODE
Select playback mode
DISPLAY
Call information
PREV NEXT
B.SEARCH
OPEN/CLOSE
TV/DVD DVD MENU
PLAY
F.SEARCH
STOP
PAUSE/STILL
31
15,26
AUDIO (for DVD)
Change sound track language of DVD
SLEEP TIMER
Set sleep timer
15
AUDIO (for TV)
Switch the sound of TV
23
TITLE
Select title
34
0-9
Direct channel selection of TV
Input setting
Enter a password
14,18
29~31
19,21,38~40
Set Subtitle
33
JUMP
Locating desired scene
30
ANGLE
Change playback angle
34
C.C.
Switch between TV/Caption/Text in
Closed Caption mode
16
RETURN (for TV)
Switch between present/last channels
15
MARKER
Index
32
ZOOM
Zoom
30
REPEAT A-B
Repeat playback between A and B
31
RETURN (for DVD)
Remove DVD set up menu
SLOW +/–
Forward/Reverse-slow motion
CANCEL
Reset information in the menu 22,24,30~32,38,39
LIGHT
Turn the illumination on for CH and VOL
10
MUTING
Turn the sound on and off
14
SELECT/ENTER
Enter information in the menu
Select option in the menu
CH +/– (▲▼)
Select channel of TV
10,15
Cursor buttons 13,17~22,24,27,29,30,32,34~39
VOL +/– (
)
35~40
28
13,19,21,
27,29~32,34~40
Adjust volume
10,14
Cursor buttons 13,17~22,24,27,29,30,32,34~39
INPUT
Switch between TV channel/LINE
TV MENU
Display menu of TV setup
DVD SETUP
Display menu of DVD setup
43
13,17~22,24
35~39
PREV/NEXT
Skip chapter to forward or reverse direction
TV/DVD
Switch between the TV mode/DVD mode
DVD MENU
Display menu of DVD software
PLAY
Playback
28
10,26
34
B.SEARCH/F.SEARCH Fast Forward/Review playback
TV / DVD
33
SUBTITLE
DVD SETUP
TV MENU
10,48
10,13,14,26
28
27~29,31,34,40
OPEN/CLOSE
Open the tray/ Close the tray
27,29,40
STOP
Stop
27,29,31
PAUSE/STILL
Pause CD sound/Still picture of DVD
28
9
5J00401A[E] (06-11)
9
16:5:03, 17:07
Remote control
Inserting Batteries
1
Slide the battery compartment
cover in the direction of the
arrow.
Install two “AA” batteries
2 (supplied),
3
paying attention to
Replace the compartment
cover.
the polarity diagram in the
battery compartment.
BATTERY PRECAUTIONS
The precautions below should be followed when using batteries in this device:
1. Use only the size and type of batteries specified.
2. Be sure to follow the correct polarity when installing the batteries as indicated in the battery compartment.
Reversed batteries may cause damage to the device. To avoid a potential short circuit, insert the “–” end first.
3. Do not mix different types of batteries together (e.g. Alkaline and Carbon-zinc) or old batteries with fresh ones.
4. If the device is not to be used for a long period of time, remove the batteries to prevent damage or injury from
possible battery leakage.
5. Do not try to recharge batteries not intended to be recharged; they can overheat and rupture. (Follow battery
manufacturer’s directions.)
6. When you change the batteries, try to complete the task within three minutes. If you take longer than three
minutes, the remote control codes for your Cable Box may have to be reset (see page 48).
REMOTE CONTROL BASICS
• Before you can operate the remote control, you must first install the batteries (included). See
“Inserting Batteries” on this page above for instructions.
• Press the POWER button to turn the television on or off.
• Make sure the TV/CATV switch is set to TV. Move the switch to CATV only if you need to operate a cable box.
(You must set the remote control to operate a cable box. Please see page 48 for instructions.)
• Press the CH + and CH – buttons to scan through the channels. Tap the CH + or CH – button to move through
the channels one channel at a time.
• Press VOL + or VOL – to raise or lower the volume. An indicator bar will appear on screen to show you the
television volume level.
• The CH +/– and VOL +/– buttons are also used to navigate JVC’s on screen menu system.
• You can directly access specific channels using the 10-key pad.
• This remote includes illuminated buttons for key features like CH +/– buttons, and VOL +/– buttons. Press the
LIGHT button to turn the illumination on.
• Each press of TV/DVD on the remote control, switches the screen between the TV screen (TV mode) and the
DVD screen (DVD mode). You can operate a TV and TV menu in the TV mode, and a DVD and DVD SETUP
menu in the DVD mode.
Operation
• Aim the remote control at the remote sensor and
press control buttons to operate.
• Operate the remote control within 30° angle on
either side of the remote sensor, up to a distance of Approx. 5 meters.
Approx. 5 meters
10
5J00401A[E] (06-11)
10
16:5:03, 17:07
Antenna connections
If you are using an indoor or outdoor antenna, follow the instructions below that correspond to your antenna
system. If you are using a cable TV service (CATV), see page 12 for Cable TV connections.
Combination VHF/UHF Antenna (Single 75 ohm Cable or 300 ohm Twin-lead Wire)
Connect the 75 ohm Cable from the Combination
VHF/UHF Antenna to the Antenna Jack.
Antenna
Jack
Antenna
Jack
UHF/
VHF
UHF/
VHF
75 ohm
Coaxial
Cable
If your Combination VHF/UHF Antenna has a 300
ohm Twin-lead Wire, the use of the 300-75 ohm
Matching Transformer may be necessary.
300-75 ohm Matching
Transformer (not supplied)
Combination VHF/UHF Antenna (Separate VHF and UHF 300 ohm Twin-lead Wires)
Antenna
Jack
300-75 ohm Matching
Transformer (not supplied)
UHF/
VHF
Connect the UHF 300 ohm Twin-lead Wire to the
Combiner (not supplied). Connect the VHF 300
ohm Twin-lead Wire to the 300-75 ohm Matching
Transformer. Attach the Transformer to the Combiner, then attach the Combiner to the Antenna
Jack.
Combiner
(not supplied)
UHF 300 ohm
VHF 300 ohm
Separate VHF/UHF Antennas (75 ohm VHF Cable and 300 ohm UHF Twin-lead Wires)
Connect the VHF 75 ohm cable and UHF 300 ohm
Twin-lead Wire to the Combiner. Attach the Combiner to the Antenna Jack.
Antenna
Jack
UHF/
VHF
VHF 75 ohm
Combiner
UHF 300 ohm
11
5J00401A[E] (06-11)
11
16:5:03, 17:07
Cable TV connections
This TV/DVD has an extended tuning range and can tune most cable channels without using a Cable
TV Converter box. Some cable companies offer “premium pay channels” in which the signal is
scrambled. Descrambling these signals for normal viewing requires the use of a descrambler device
which is generally provided by the cable company.
FOR SUBSCRIBERS TO BASIC CABLE TV SERVICE
Antenna
Jack
For basic cable service not requiring a Converter/Descrambler
box, connect the CATV 75 ohm Coaxial Cable directly to the
Antenna Jack on the back of the TV/DVD.
UHF/
VHF
75 ohm
Coaxial Cable
FOR SUBSCRIBERS TO SCRAMBLED CABLE TV SERVICE
If you subscribe to a cable TV service which requires the use of a Converter/Descrambler box, connect the
incoming 75 ohm Coaxial Cable to the Converter/Descrambler box. Using another 75 ohm Coaxial Cable,
connect the output jack of the Converter/Descrambler box to the Antenna Jack on the TV/DVD. Follow the
connections shown below. Set the TV/DVD to the output channel of the Converter/Descrambler box (usually
channel 3 or 4) and use the Converter/Descrambler box to select channels.
Incoming
75 ohm
CATV Cable
75 ohm Cable to
TV/DVD
Converter/
Descrambler
Antenna
Jack
UHF/
VHF
FOR SUBSCRIBERS TO UNSCRAMBLED BASIC CABLE TV SERVICE WITH
SCRAMBLED PREMIUM CHANNELS
If you subscribe to a cable TV service in which basic channels are unscrambled and premium channels require the
use of a Converter/Descrambler box, you may wish to use a signal Splitter and an A/B Switch box (available from
the Cable company or an electronics supply store). Follow the connections shown below. With the switch in the “B”
position, you can directly tune any nonscrambled channels on your TV/DVD. With the switch in the “A” position, tune
your TV/DVD to the output of the Converter/Descrambler box (usually channel 3 or 4) and use the Converter/
Descrambler box to tune scrambled channels.
Converter/
Descrambler
Incoming
75 ohm
CATV Cable
Splitter
A/B Switch
A
75 ohm Cable
to TV/DVD
Antenna
Jack
B
UHF/
VHF
12
5J00401A[E] (12-17)
12
17/5/03, 4:26 PM
Setting the language
You can choose from three different languages (English, French and Spanish) for the on-screen displays.
Adjustment menus and messages will appear in the language of your choice.
On-screen language selection (step 5) will automatically appear on the screen when you press the MENU
button initially. Select the language you prefer first, then proceed with the other menu options.
To turn on the TV/DVD, press POWER. The Power indicator
1 will
light.
POWER
TV CATV
TV MENU. The TV menu
2 Press
screen will appear.
DISPLAY
PLAY MODE
SLEEP
TIMER
AUDIO
AUDIO
TITLE
1
2
3
SUBTITLE
4
5
6
JUMP
7
8
9
0
RETURN
C.C.
ANGLE
MARKER ZOOM REPEATA-B RETURN
– SLOW +
MUTING
CANCEL
LIGHT
or
until the SET-UP
3 Press
menu appears.
V-CHIP SET
LANGUAGE/IDIOMA/LANGUE
<
or
button.
INPUT
+
–
DVD SETUP
OPEN/CLOSE
TV/DVD DVD MENU
PLAY
/
/
/
>
/MENU
VOL
CH
B.SEARCH
>
/MENU
V-CHIP SET
LANGUAGE/IDIOMA/LANGUE
<
TV MENU
PREV NEXT
/
or
to select the
4 Press
“LANGUAGE” option, then press
CH
–
/
SELECT
/ENTER
+
VOL
/
or
to select the
5 Press
desired language: English
(ENGLISH), Spanish
(ESPAÑOL) or French
(FRANCAIS), then press
ENTER.
F.SEARCH
STOP
PAUSE/STILL
LANGUAGE/IDIOMA/LANGUE
ENGLISH
ESPAÑOL
FRANCAIS
<
/
>
/ENTER/MENU
Press TV MENU until the MENU
screen is cleared.
TV / DVD
NOTE:
• If the unit does not operate properly,
or No key operation (by the unit and/
or the remote control): Static electricity,
etc., may affect the player's operation.
Disconnect the AC power cord once, then
connect it again.
• The TV section has its own menu and also
DVD section has its own menu (see page
35).
13
5J00401A[E] (12-17)
13
16:5:03, 17:07
TV operation
turn on the TV/DVD, press
1 To
POWER.
the volume level by
2 Adjust
pressing VOL + or –. The volume
POWER
TV CATV
level will be indicated on the
screen by green bars. As the
volume level increases, so do
the number of bars. If the volume
decreases, the number of green
bars also decreases.
32
DISPLAY
PLAY MODE
SLEEP
TIMER
AUDIO
AUDIO
TITLE
1
2
3
SUBTITLE
4
5
6
JUMP
7
8
9
0
RETURN
C.C.
ANGLE
MARKER ZOOM REPEATA-B RETURN
– SLOW +
MUTING
CANCEL
LIGHT
SELECT
/ENTER
+
CH
VOL
–
INPUT
VOL
+
CH
–
DVD SETUP
TV MENU
PREV NEXT
B.SEARCH
OPEN/CLOSE
TV/DVD DVD MENU
PLAY
F.SEARCH
STOP
PAUSE/STILL
the TV/CATV menu
3 Set
option to the appropriate
position. (See page 17.)
TV
- VHF/UHF channels
CATV - CABLE TV channels
the Direct Channel selection
4 Press
buttons to select the channel.
TV Mode Direct Channel Selection
When the TV/CATV menu option is
in the TV position, all channels can
be instantly selected by using two
buttons. (for example, to select
channel 2, press “0”, then “2”. If
you press only “2”, channel
selection will be delayed for a few
seconds.) For channels 10 and
above, press the 2 digits in order.
CH 012
CATV Mode Direct Channel Selection
When the TV/CATV menu option is in the CATV position, channels
can be selected as follows:
TO SELECT CATV CHANNELS:
1-9:
Press “0” twice, then 1-9 as needed. Example, to select
channel 2, press “002”.
10-12:
Press “0”, then the remaining 2 digits. Example, to
select channel 12, press “012”.
13-99:
Press the 2 digits in order. Example, to select channel
36, press “36”.
100-125: Press the 3 digits in order. Example, to select channel
120, press “120”.
NOTE FOR CHANNELS 1-12:
If only 1 or 2 buttons are pressed, the corresponding channel
will be selected in 2 seconds.
MUTING
The MUTING button instantly turns the volume down completely when you press it.
Press MUTING button and the volume level will instantly go to
zero. To restore the volume to its previous level, press MUTING
button again.
TV / DVD
NOTES:
• If a channel with no broadcast is
selected, the sound will automatically be muted.
• If a station being viewed stops
broadcasting, the TV will automatically shut itself off after 15 minutes.
14
5J00401A[E] (12-17)
VOLUME
14
16:5:03, 17:07
CHANNEL UP/DOWN
POWER
TV CATV
Press and release CH + or –. The
channel automatically stops at the
next channel set into memory.
For proper operation, before selecting channels, they should be set into
the memory. See pages 17 and 18
“To memorize channels”
DISPLAY
PLAY MODE
SLEEP
TIMER
AUDIO
AUDIO
DISPLAY
TITLE
1
2
3
SUBTITLE
4
5
6
JUMP
7
8
9
0
RETURN
C.C.
ANGLE
MARKER ZOOM REPEATA-B RETURN
– SLOW +
CANCEL
Press DISPLAY to display the
current informations on the screen.
Press DISPLAY again to disappear
the call display.
• Channel number or VIDEO mode
• Stereo or SAP (second audio
program) audio status
• Audio output status
STEREO SAP
CH 012
SEL. MONO+SAP
LIGHT
RETURN
MUTING
SELECT
/ENTER
+
CH
VOL
–
INPUT
VOL
+
This button allows you to go back to
the last channel selected by
pressing RETURN. Press RETURN
again to return to the last channel
you were watching.
CH
–
TV MENU
DVD SETUP
PREV NEXT
B.SEARCH
OPEN/CLOSE
TV/DVD DVD MENU
PLAY
F.SEARCH
STOP
PAUSE/STILL
TV / DVD
SLEEP TIMER
To set the TV/DVD to turn off after a
preset amount of time, press SLEEP
TIMER on the remote control. The
clock will count down 10 minutes for
each press of SLEEP TIMER (120,
110, ...10, 0). After the sleep time is
programmed, the display will appear
briefly every ten minutes to remind you
that the sleep timer is operating. To
confirm the sleep timer setting, press
SLEEP TIMER and the remaining time
will be displayed for a few seconds. To
cancel the sleep timer, press SLEEP
TIMER repeatedly until the display
turns to 0.
SLEEP
120
15
5J00401A[E] (12-17)
15
16:5:03, 17:07
Closed captions
WHAT IS CLOSED CAPTIONING?
This television has the capability to decode and display Closed Captioned television programs. Closed Captioning
will display text on the screen for hearing impaired viewers or it will translate and display text in another language.
POWER
TV CATV
DISPLAY
PLAY MODE
SLEEP
TIMER
AUDIO
AUDIO
TITLE
1
2
3
SUBTITLE
4
5
6
JUMP
7
8
9
0
RETURN
C.C.
ANGLE
MARKER ZOOM REPEATA-B RETURN
– SLOW +
MUTING
CANCEL
LIGHT
SELECT
/ENTER
+
CH
VOL
–
INPUT
VOL
+
Captions: This Closed Caption Mode will display text on the
screen in English or another language (depending on the setting of the Closed Captions CH 1/2).
Generally, Closed Captions in English are transmitted on Captions Channel 1 and Closed Captions in other languages are
transmitted on Captions Channel 2.
Text: The Text Closed Caption Mode will usually fill the screen
with a programming schedule or other information.
After selecting a Closed Caption Mode, it will stay in effect until it
is changed, even if the channel is changed.
If the Captions signal is lost due to a commercial or a break in
the signal, the Captions will reappear when the signal is received
again. If the channels are changed, the Captions will be delayed
approximately 10 seconds. The Captions will appear in places
on the screen where they will least interfere with the picture,
usually on the bottom of the screen. News programs will usually
show three-line Closed Captions which scroll onto the screen.
Most other shows provide two or three lined Captions placed
near the character who is speaking so the viewer can follow the
dialogue. Words in italics or underlined describe titles, words in
foreign languages or words requiring emphasis. Words that are
sung usually appear enclosed by musical notes.
For television programs broadcasting with Closed Captions, look
in your TV guide for the Closed Captions symbol (CC).
CH
–
TV MENU
DVD SETUP
PREV NEXT
B.SEARCH
OPEN/CLOSE
TV/DVD DVD MENU
PLAY
F.SEARCH
STOP
PAUSE/STILL
TO VIEW CLOSED CAPTIONS
Press C.C. to switch between
normal TV and the two closed
caption modes (captions and full
screen text). Closed captioning will
display text on the screen for
hearing impaired viewers.
TV / DVD
NOTES:
• When selecting Closed Captions, the captioning will be delayed approximately 10 seconds.
• If no caption signal is received, no captions will appear, but the television will remain in the Caption Mode.
• Misspellings or unusual characters may occasionally appear during Closed Captioning. This is normal with
Closed Captioning, especially with live programs. This is because during live programs, captions are also
entered live. These transmissions do not allow time for editing.
• When Captions are being displayed, on-screen displays, such as volume and mute may not be seen or may
interfere with Closed Captions.
• Some cable systems and copy protection systems may interfere with the Closed Captioned signal.
• If using an indoor antenna or if TV reception is very poor, the Closed Caption Decoder may not appear or
may appear with strange characters or misspelled words. In this case, adjust the antenna for better reception
or use an outdoor antenna.
16
5J00401A[E] (12-17)
16
16:5:03, 17:07
To memorize channels
This TV/DVD is equipped with a channel memory feature which allows channels to skip up or down to the next
channel set into memory, skipping over unwanted channels. Before selecting channels, they must be programmed into the TV/DVD’s memory. In addition to normal VHF and UHF channels, this TV/DVD can receive up
to 113 Cable TV channels. To use this TV/DVD with an antenna, set the TV/CATV menu option to the TV mode.
When shipped from the factory, this menu option is in the CATV mode.
TV/CATV SELECTION
TV MENU in the TV mode.
1 Press
The TV menu screen will appear.
TV CATV
POWER
PLAY MODE
DISPLAY
SLEEP
TIMER
AUDIO
1
2
3
SUBTITLE
4
5
6
JUMP
7
8
9
0
RETURN
C.C.
TV/CATV
ADD/DELETE
AUTO CH MEMORY
AUDIO
TITLE
ANGLE
or
until the CHANNEL2 Press
SETUP menu appears.
<
3 Press
CATV”.
or
CANCEL
CATV
ADD
/
/
/
>
/MENU
SELECT
/ENTER
+
–
>
/MENU
LIGHT
CH
VOL
/
TV/CATV
ADD/DELETE
AUTO CH MEMORY
<
MUTING
/
to select the “TV/
MARKER ZOOM REPEATA-B RETURN
– SLOW +
/
CATV
ADD
INPUT
VOL
+
CH
or
to select the TV
4 Press
or CATV mode.
TV - VHF/UHF channels
CATV - CABLE TV channels
TV/CATV
ADD/DELETE
AUTO CH MEMORY
–
TV MENU
TV
ADD
DVD SETUP
PREV NEXT
B.SEARCH
OPEN/CLOSE
<
TV/DVD DVD MENU
PLAY
F.SEARCH
STOP
/
/
/
>
/MENU
TV MENU until the MENU
5 Press
screen is cleared.
PAUSE/STILL
TV / DVD
17
5J00401A[E] (12-17)
17
16:5:03, 17:07
AUTOMATIC MEMORY TUNING
TV MENU in the TV mode. The TV menu screen
1 Press
will appear.
or until CHANNEL-SETUP
2 Press
menu appears.
TV CATV
POWER
PLAY MODE
DISPLAY
TV/CATV
ADD/DELETE
AUTO CH MEMORY
<
SLEEP
TIMER
AUDIO
AUDIO
TITLE
1
2
3
SUBTITLE
4
5
6
JUMP
7
8
9
0
RETURN
C.C.
ANGLE
MUTING
CANCEL
LIGHT
INPUT
or .
The TV will begin memorizing all the
channels available in your area.
Press TV MENU until the MENU
4 screen
is cleared.
TV/CATV
ADD/DELETE
AUTO CH MEMORY
<
TV MENU
DVD SETUP
/
/
>
/MENU
the desired channel to be
1 Select
memorized or deleted using Direct
Channel Selection (0-9), or CH + or –.
or
until CHANNEL3 Press
SETUP menu appears.
TV/CATV
ADD/DELETE
AUTO CH MEMORY
CATV
ADD
TV/DVD DVD MENU
<
OPEN/CLOSE
/
CATV
ADD
+
–
B.SEARCH
>
/MENU
VOL
CH
PREV NEXT
/
to select the “AUTO
TV MENU in the TV mode.
2 Press
The TV menu screen will appear.
CH
–
or
SELECT
/ENTER
+
VOL
/
3 CH MEMORY”, then press
Press
TO ADD/DELETE CHANNELS
MARKER ZOOM REPEATA-B RETURN
– SLOW +
/
CATV
ADD
PLAY
/
/
>
/
/MENU
F.SEARCH
STOP
PAUSE/STILL
or
4 Press
DELETE”.
to select the “ADD/
TV/CATV
ADD/DELETE
AUTO CH MEMORY
<
/
/
/
CATV
ADD
>
/MENU
or
to select ADD or
5 Press
DELETE, whichever function you
TV / DVD
want to perform.
TV/CATV
ADD/DELETE
AUTO CH MEMORY
Press TV MENU until the MENU
6 screen
is cleared.
steps 1-6 for other channels
7 Repeat
you want to add or delete.
18
5J00401A[E] (18-23)
18
16:5:03, 17:07
<
/
/
/
CATV
DELETE
>
/MENU
Setting the V-Chip
An age limitation can be set to forbid children to see and hear violent scenes or pictures for adults, etc.
The TV/DVD corresponds to “TV RATING” and “MOVIE RATING”. To use the V-Chip function, you must
register a password.
TO REGISTER PASSWORD
TV MENU in the TV mode. The TV menu
1 Press
screen will appear.
POWER
TV CATV
or
until the SETUP
2 Press
menu appears.
DISPLAY
PLAY MODE
SLEEP
TIMER
AUDIO
V-CHIP SET
LANGUAGE/IDIOMA/LANGUE
AUDIO
<
TITLE
1
2
3
SUBTITLE
4
5
6
JUMP
7
8
9
0
RETURN
C.C.
ANGLE
MUTING
CANCEL
/
/
>
/MENU
Press
or
to select the “V3 CHIP
or .
SET”, then press
V-CHIP SET
LANGUAGE/IDIOMA/LANGUE
MARKER ZOOM REPEATA-B RETURN
– SLOW +
/
<
/
/
/
>
/MENU
LIGHT
SELECT
/ENTER
+
CH
the password (4 digits)
4 Enter
using Direct Channel Selection
(0-9), then press ENTER.
V-CHIP SET
VOL
–
INPUT
VOL
NEW
PASSWORD
+
<0
CH
–
TV MENU
DVD SETUP
PREV NEXT
B.SEARCH
OPEN/CLOSE
TV/DVD DVD MENU
PLAY
F.SEARCH
STOP
PAUSE/STILL
:
>
9/ENTER/CANCEL/MENU
“ ” appears instead of the number.
the same password again
5 Enter
for the safety, then press ENTER.
Now the password was registered
and V-Chip setting menu will
appear on the display.
V-CHIP SET
CONFIRM
PASSWORD
<0
:
>
9/ENTER/CANCEL/MENU
TV / DVD
NOTES:
• If you forget the password, you cannot set the V-Chip.
• To avoid forgetting the password, write
it down and keep in the safe place.
19
5J00401A[E] (18-23)
19
16:5:03, 17:07
Setting the V-Chip
(Continued)
TO SET THE V-CHIP
SET menu, press
1 In theor V-CHIP
to select the “US TV
V-CHIP SET
V-CHIP
US TV RATING
MOVIE RATING
CAN ENG RATING
CAN FRE RATING
CHANGE PASSWORD
RATING”.
POWER
TV CATV
DISPLAY
PLAY MODE
SLEEP
TIMER
AUDIO
AUDIO
TITLE
1
2
3
SUBTITLE
4
5
6
JUMP
7
8
9
0
RETURN
C.C.
ANGLE
MARKER ZOOM REPEATA-B RETURN
– SLOW +
MUTING
CANCEL
LIGHT
SELECT
/ENTER
+
CH
VOL
–
INPUT
VOL
+
CH
–
TV MENU
DVD SETUP
PREV NEXT
B.SEARCH
OPEN/CLOSE
TV/DVD DVD MENU
PLAY
F.SEARCH
STOP
PAUSE/STILL
TV / DVD
To use after the TV is protected
When the program applied to the VChip setting is received, enter the
password. Protection can be cancelled.
NOTE:
The V-Chip function is activated only
on programs and tapes that have the
rating signal.
or
to display the
2 Press
desired setting.
OFF :
TV-Y :
TV-Y7 :
TV-G :
TV-PG:
TV-14 :
TV-MA:
US TV RATING is not set
All children
7 years old and above
General Audience
Parental guidance
14 years old and above
17 years old and above
20
/
/
/
>
/MENU
When you select TV- Y7, TV-PG, TV-14 or TV-MA, press
DISPLAY to show the contained rating. Press
or to select
the desired item you want. Press or to select “ON” or “OFF”.
If you want to back to V-CHIP SET menu, press TV MENU.
or
to select the “MOVIE RATING”. Press
3 Press
to select desired rating.
MOVIE RATING is not set
All ages
Parental guidance
Parental guidance
less than 13 years old
R
: Under 17 years old
Parental guidance suggested
NC-17 : 17 years old and above
X
: Adult only
V-CHIP SET
V-CHIP
US TV RATING
MOVIE RATING
CAN ENG RATING
CAN FRE RATING
CHANGE PASSWORD
OFF :
G
:
PG
:
PG-13 :
or
to select the
4 Press
“CAN ENG RATING”, then press
or
to select desired rating.
<
/
/
/
or
: OFF
: OFF
:G
: OFF
: OFF
>
/MENU
V-CHIP SET
V-CHIP
US TV RATING
MOVIE RATING
CAN ENG RATING
CAN FRE RATING
CHANGE PASSWORD
: OFF
: OFF
: OFF
:G
: OFF
E: Exempt
Exempt programming includes: news, sports,
documentaries and other information program< / / / /MENU>
ming, talk shows, music videos, and variety programming.
C: Programming Intended for Children
Violence Guidelines: There will be no realistic scenes of violence. Depictions of
aggressive behavior will be infrequent and limited to portrayals that are clearly
imaginary, comedic or unrealistic in nature.
C8+: Programming Intended for Children 8 and Over
Violence Guidelines: Any realistic depictions of violence will be infrequent, discreet, of low intensity and will show the consequences of the acts. There will be
no offensive language, nudity or sexual content.
G: General Audience
Programming will contain little violence and will be sensitive to themes which
could affect younger children.
PG: Parental Guidance
Programming intended for a general audience, but which may not be suitable for
younger children. Parents may consider some content not appropriate for children aged 8-13.
14+: 14 Years and Older
Parents are strongly cautioned to exercise discretion in permitting viewing by preteens and early
teens. Programming may contain mature themes and scenes of intense violence.
18+: Adult
Material intended for mature audiences only.
20
5J00401A[E] (18-23)
<
: OFF
: TV-Y
: OFF
: OFF
: OFF
16:5:03, 17:07
or
5 Press
CHIP”. Press
to select “Vor
to display
“ON” to activate the V-Chip
function.
TV MENU until the MENU
6 Press
screen is cleared.
TV CATV
POWER
PLAY MODE
DISPLAY
SLEEP
TIMER
AUDIO
1
2
3
SUBTITLE
4
5
6
JUMP
7
8
9
0
RETURN
C.C.
<
CANCEL
or
until SETUP
2 Press
menu appears.
V-CHIP SET
LANGUAGE/IDIOMA/LANGUE
<
/
/
/
/
>
/MENU
the Password using Direct
4 Enter
Channel Selection (0-9), then
INPUT
VOL
press ENTER.
V-CHIP SET
+
<0
DVD SETUP
TV/DVD DVD MENU
PLAY
:
PASSWORD
TV MENU
OPEN/CLOSE
>
/MENU
V-CHIP SET
LANGUAGE/IDIOMA/LANGUE
–
B.SEARCH
/
or
to select the “V3 Press
CHIP SET”, then press
or .
CH
PREV NEXT
/
SELECT
/ENTER
+
–
>
/MENU
LIGHT
CH
VOL
/
TV MENU in the TV mode.
1 Press
The TV menu screen will appear.
<
MUTING
/
TO CHANGE PASSWORD
MARKER ZOOM REPEATA-B RETURN
– SLOW +
/
: ON
: TV-Y
:G
: OFF
: OFF
AUDIO
TITLE
ANGLE
V-CHIP SET
V-CHIP
US TV RATING
MOVIE RATING
CAN ENG RATING
CAN FRE RATING
CHANGE PASSWORD
F.SEARCH
STOP
or
to select
Press
5 “CHANGE
PASSWORD”, then
press
or
V-CHIP SET
V-CHIP
US TV RATING
MOVIE RATING
CAN ENG RATING
CAN FRE RATING
CHANGE PASSWORD
.
PAUSE/STILL
<
the new password using
6 Enter
Direct Channel Selection (0-9),
TV / DVD
>
9/ENTER/CANCEL/MENU
/
/
/
<0
the same password again
7 Enter
for safety, then press ENTER.
:
>
9/ENTER/CANCEL/MENU
CHANGE PASSWORD
CONFIRM
PASSWORD
TV MENU repeatedly to
8 Press
return to normal screen.
>
/MENU
CHANGE PASSWORD
NEW
PASSWORD
then press ENTER.
: ON
: TV-Y
:G
: OFF
: OFF
<0
:
>
9/ENTER/CANCEL/MENU
21
5J00401A[E] (18-23)
21
16:5:03, 17:07
Picture control adjustment
Picture controls are factory preset but you can adjust them individually as follows:
TV MENU in the TV mode. The TV menu
1 Press
screen will appear.
POWER
TV CATV
or
until PICTURE
2 Press
menu appears.
BRIGHTNESS
CONTRAST
COLOR
TINT
SHARPNESS
DISPLAY
PLAY MODE
SLEEP
TIMER
AUDIO
AUDIO
TITLE
1
2
3
SUBTITLE
4
5
6
JUMP
7
8
9
0
RETURN
C.C.
ANGLE
<
/
/
/
/MENU
0
+32
0
0
0
>
or
to select the item
3 Press
you want to adjust.
BRIGHTNESS
CONTRAST
COLOR
TINT
SHARPNESS
<
/
/
/
0
+32
0
0
0
/CANCEL/MENU
>
MARKER ZOOM REPEATA-B RETURN
– SLOW +
MUTING
CANCEL
LIGHT
SELECT
/ENTER
+
4 Press
setting.
or
to adjust the
CH
VOL
–
INPUT
VOL
+
CH
–
TV MENU
DVD SETUP
PREV NEXT
B.SEARCH
OPEN/CLOSE
BRIGHTNESS
CONTRAST
COLOR
TINT
SHARPNESS
increase brightness
increase contrast
decrease brightness
decrease contrast
be brilliant color
be greenish color
be pale color
be reddish color
makes picture softer
makes picture clearer
TV/DVD DVD MENU
PLAY
F.SEARCH
STOP
PAUSE/STILL
your desired setting press
5 After
TV MENU until the MENU
screen is cleared.
CANCEL
Pressing CANCEL while making
picture adjustments will return all
adjustments to the factory preset
levels.
TV / DVD
NOTE:
The CONTRAST default setting is set
to maximum at the factory.
22
5J00401A[E] (18-23)
22
16:5:03, 17:07
Stereo and separate audio program (SAP)
The TV/DVD is equipped with a feature known as Multi-channel TV Sound or MTS. MTS broadcasts greatly
enhance TV viewing by bringing you programs with high fidelity stereo sound.
MTS also provides an extra channel called the Separate Audio Program or SAP which broadcasters can use to
transmit a second language for bilingual transmission or for other purposes.
POWER
TV CATV
DISPLAY
PLAY MODE
SLEEP
TIMER
AUDIO
AUDIO
TITLE
1
2
3
SUBTITLE
4
5
6
JUMP
7
8
9
0
RETURN
C.C.
ANGLE
MARKER ZOOM REPEATA-B RETURN
– SLOW +
CANCEL
LIGHT
LISTENING TO STEREO SOUND
When the TV is turned on or a
channel selection is made, make
certain the STEREO appears on
the screen. This means that
“Stereo” broadcasting is
available. You can enjoy stereo
sound from the left and right
speakers.
STEREO
CH 013
• When “Mono” broadcasting is
received, no indication is
displayed.
• If the broadcast signal is not
strong enough or clear stereo
sound is not available, press
AUDIO on the center of the
remote control to change to
mono sound. The noise should
be eliminated. Press it again to
return to the stereo sound.
LISTENING TO SAP (SEPARATE AUDIO PROGRAM)
MUTING
SELECT
/ENTER
+
CH
VOL
–
INPUT
VOL
+
CH
When the TV is turned on or a
channel selection is made, make
certain the SAP appears on the
screen. This means that the
“Separate Audio Program”
broadcasting is available.
STEREO SAP
CH 013
–
TV MENU
DVD SETUP
PREV NEXT
B.SEARCH
OPEN/CLOSE
TV/DVD DVD MENU
PLAY
F.SEARCH
STOP
TO SELECT DESIRED SOUND
Press AUDIO to select the
desired sound.
PAUSE/STILL
SEL. STEREO
TV / DVD
MONO+SAP BROADCASTING
MONO SOUND
(MAIN)
MONO + SAP SOUND
(MONO)
SAP SOUND
STEREO+SAP BROADCASTING
STEREO SOUND
(MAIN)
SAP SOUND
MONO SOUND
(MAIN)
MONO + SAP SOUND
(MAIN)
23
5J00401A[E] (18-23)
23
16:5:03, 17:07
Sound control adjustment
Sound controls are factory preset but you can adjust them individually as follows:
TV CATV
POWER
PLAY MODE
DISPLAY
SLEEP
TIMER
AUDIO
TV MENU in the TV mode.
1 Press
The TV menu screen will appear.
or
until the AUDIO
2 Press
menu appears.
BASS
TREBLE
BALANCE
HYPER SURROUND
STABLE SOUND
AUDIO
<
TITLE
1
2
3
SUBTITLE
4
5
6
JUMP
7
8
9
0
RETURN
C.C.
ANGLE
/
/
/
0
0
0
OFF
ON
>
/MENU
or
to select the item
3 Press
you want to adjust.
BASS
TREBLE
BALANCE
HYPER SURROUND
STABLE SOUND
<
/
/
/
/CANCEL/MENU
0
0
0
OFF
ON
>
MARKER ZOOM REPEATA-B RETURN
– SLOW +
MUTING
CANCEL
LIGHT
SELECT
/ENTER
+
CH
VOL
–
INPUT
VOL
+
CH
–
TV MENU
DVD SETUP
PREV NEXT
B.SEARCH
OPEN/CLOSE
TV/DVD DVD MENU
PLAY
F.SEARCH
STOP
PAUSE/STILL
TV / DVD
Press
4 BASS:
or
to adjust the setting.
or
to adjust the bass sound.
Press
TREBLE:
Press
or
to adjust the treble sound.
BALANCE:
Press
or
to obtain an equal sound level from both
speakers.
HYPER SURROUND:
Press
or
to set the hyper surround feature “ON” or “OFF”.
STABLE SOUND:
Press
or
to set the stable sound feature “ON” or “OFF”.
Hyper surround feature
The hyper surround feature expands the audio listening field
wider and deeper to create exceptional sound quality from the
TV’s speakers. The feature uses stereo signals from a TV
broadcast or video input.
Stable sound feature
When the loud sound is made, the stable sound feature
automatically lower the sound.
your desired setting press TV MENU until the MENU
5 After
screen is cleared.
CANCEL
Pressing CANCEL while making sound adjustments will return all
adjustments to the factory preset levels.
24
5J00401A[E] (24-31)
24
16:5:03, 17:07
Disc
The following types of discs can be played on this unit.
Disc type and logo mark
Recorded content
DVD Video
Audio
+
Video
Audio CD
Audio
• DVD-ROM, Video CD, SVCD, CVD,
Photo CD, etc. cannot be played.
• Some CD-R/RWs can not be played
back depending on the recording
conditions.
• This unit is to be used exclusively
with the NTSC color system. PAL and
SECAM system discs cannot be used
with this unit.
Disc size
5 inches
(12 cm)
3 inches
(8 cm)
5 inches
(12 cm)
3 inches
(8 cm)
5 inches
(12 cm)
CD-R/CD-RW
Recordable
CD-DA/MP3 file
ReWritable
3 inches
(8 cm)
Region Number
Region number (Regional restriction code) is built-in to the unit and DVD video discs.
Region number “1” or “ALL” of DVD video discs can be used on this unit.
Title
1
DVD DISC
When two or more movies are recorded on a disc,
the disc is divided into two or more sections.
Each section is called a “TITLE”.
TITLE1
CHAPTER 1
TITLE2
CHAPTER 2
CHAPTER 1
CHAPTER 2
CHAPTER 3
TRACK 4
TRACK 5
Chapter
The titles can be subdivided into many sections.
Each section is called a “CHAPTER”.
Audio CD Track
CD CD
Audio
TRACK 1
TRACK 2
TRACK 3
An Audio CD can contain several items.
These are assigned to the tracks.
Removing Disc from Case
Be sure to hold the edge of disc. Do not touch the surface of the disc.
Pick up the disc gently from the case.
• Do not scratch the disc.
• Do not get dirt on the surface of the disc.
• Do not stick a label or adhesive tape on the disc.
• Do not drop or bend the disc.
Storing Disc
• Store the disc in the case to avoid risk of scratches, dirt or damage.
• Do not leave disc exposed to direct sunlight or in hot or humid places.
Cleaning Disc
Wipe the disc with a clean, dry cloth from center to edge.
• Do not wipe the disc round.
• Do not use liquid or aerosol cleaners.
25
5J00401A[E] (24-31)
25
17/5/03, 4:27 PM
Preparation/Status display of disc
The following pages describe the
setup/operation in DVD mode.
Preparation
Before DVD/CD operation, please make preparations as follows.
the AC cord plug into a standard 120V 60Hz polarized
1 Insert
AC outlet.
TV CATV
POWER
• If the AC cord plug is plugged in for the first time, wait for
about 5 seconds before pressing POWER.
PLAY MODE
DISPLAY
NOTE: When connecting to other equipment, unplug the unit
from the AC outlet.
SLEEP
TIMER
AUDIO
AUDIO
POWER on the unit or on the remote control to turn on
2 Press
the unit. The POWER indicator will light.
TITLE
1
2
3
SUBTITLE
4
5
6
JUMP
7
8
9
0
RETURN
TV/DVD to select DVD
3 Press
mode.
MARKER ZOOM REPEATA-B RETURN
The DVD startup screen will appear on the screen.
C.C.
ANGLE
– SLOW +
MUTING
CANCEL
LIGHT
SELECT
/ENTER
+
Status display of disc
CH
VOL
–
• Every time you press POWER, the TV/DVD starts from TV
mode.
• When using an amplifier, switch on the amplifier.
INPUT
Press DISPLAY. The status display of the disc will appear on the
screen.
DVD
VOL
+
CH
Title elapsed playing time
Title number
Chapter number Title total time
–
TV MENU
DVD SETUP
PREV NEXT
TV/DVD DVD MENU
Disc operation
T
B.SEARCH
OPEN/CLOSE
PLAY
F.SEARCH
STOP
1/8
C
1/19
0:07:18 2:02:31
1/8 Eng DolbyDigital
1/8 Eng
1/1
Camera angle
PAUSE/STILL
Audio language Subtitle language
A kind of audio
To make status display disappear, press DISPLAY again.
TV / DVD
Audio CD
Track elapsed playing time
NOTE:
If the unit does not operate properly:
Static electricity, etc., may affect the player's operation. Disconnect the AC power
cord once, then connect it again.
Disc operation
Track number
Play list
T
1/8
0:02:31
0:53:09
Track total time
Playlist
1 2 3 4 5 6 7 8
• When you play a CD disc, the status display will appear
and remain on the screen.
26
5J00401A[E] (24-31)
26
16:5:03, 17:07
Playback procedure
OPEN/CLOSE on
1 Press
the unit or the remote conPOWER
TV CATV
DISPLAY
PLAY MODE
SLEEP
TIMER
AUDIO
AUDIO
TITLE
1
2
3
SUBTITLE
4
5
6
JUMP
7
8
9
0
RETURN
C.C.
ANGLE
trol.
The disc tray will open.
a disc onto the tray.
2 Place
Position it with the printed
label side up, align it with
the guides, and place it in
its proper position.
MARKER ZOOM REPEATA-B RETURN
– SLOW +
MUTING
CANCEL
LIGHT
SELECT
/ENTER
+
CH
VOL
–
INPUT
VOL
+
CH
–
B.SEARCH
OPEN/CLOSE
The disc tray closes automatically.
On the TV-screen, “ ”
changes to “ ” and then
playback commences.
DVD SETUP
TV MENU
PREV NEXT
OPEN/CLOSE or
3 Press
PLAY.
TV/DVD DVD MENU
PLAY
STOP
F.SEARCH
• A menu screen will
appear on the TV screen,
if the disc has a menu
feature.
PAUSE/STILL
4 Press
/
or
/
to make a selection.
NOTES:
• If a non-compatible disc is loaded, “Incorrect Disc”, “Region Code Error” or “Parental Error” will appear on the TV screen according to the type of loaded disc. If these
appear, check your disc again (see pages
25 and 38).
• Some discs may take a minute or so to
start playback.
• When you set a single-faced disc label
downwards (ie. the wrong way up) and
press PLAY or OPEN/CLOSE on the unit,
“
” will appear on the display for about
5 seconds and then “No Disc” or “Incorrect Disc” will be displayed.
• Some playback operations of DVDs may
be intentionally fixed by software producers. Since this unit plays DVDs according
to the disc contents the software producers designed, some playback features
may not be available. Also refer to the instructions supplied with the DVDs.
SELECT.
5 •Press
Title is selected and play commences.
STOP to end playback.
6 Press
• The unit memorizes the stopped point, depending on the
disc. “ ” appears on the screen. Press PLAY to resume
playback (from the scene point).
• If you press STOP again or unload the disc (“ ” appears
on the screen.), the unit will clear the stopped point.
stop the playback, press STOP.
7 To
Then press OPEN/CLOSE.
The disc tray opens.
Remove the disc and then press POWER.
The disc tray closes automatically and unit turns off.
27
5J00401A[E] (24-31)
27
16:5:03, 17:07
Special playback
Note: There may be a slight delay between when you press the button and
the function activating.
Fast Forward Playback
Press F.SEARCH during normal playback.
Each press of F.SEARCH will increase the speed of the search
(x 2),
(CD:
(x 4),
(x 2),
(x 8),
(x 4),
(x 15).
(x 8),
(x 20))
POWER
TV CATV
• To resume normal playback, press PLAY.
DISPLAY
PLAY MODE
Review Playback
SLEEP
TIMER
AUDIO
AUDIO
Press B.SEARCH during normal playback.
TITLE
1
2
3
SUBTITLE
4
5
6
Each press of B.SEARCH will increase the speed of the search
(x 2),
(x 4),
(x 8),
(x 15).
(x 2),
(x 4),
(x 8),
(x 20))
(CD:
JUMP
7
8
9
• To resume normal playback, press PLAY.
0
RETURN
C.C.
ANGLE
MARKER ZOOM REPEATA-B RETURN
– SLOW +
MUTING
CANCEL
LIGHT
To resume normal playback,
press PLAY.
CH
–
INPUT
VOL
+
Frame Advance
CH
–
DVD SETUP
TV MENU
PREV NEXT
Press PAUSE/STILL during
normal playback to pause playback.
SELECT
/ENTER
+
VOL
Still Playback
Press PAUSE/STILL during still playback.
One frame is advanced each time you press PAUSE/STILL.
TV/DVD DVD MENU
To resume normal playback, press PLAY.
B.SEARCH
OPEN/CLOSE
PLAY
F.SEARCH
STOP
PAUSE/STILL
Slow-motion Playback
Press SLOW(–) Reverse or SLOW(+) Forward during
normal playback or still playback.
Each press of SLOW will change the speed of the slow x1/2,
x1/4, x1/6, x1/8.
TV / DVD
• To resume normal playback, press PLAY.
• To resume the still playback, press PAUSE/STILL.
NOTE:
The unit is capable of holding a still video
image or On screen display image on your
television screen indefinitely. If you leave
the still video image or On screen display
image displayed on your TV for an extended period of time, you risk permanent
damage to your television screen. Projection televisions are very susceptible.
Locating a chapter or track
Press NEXT(
) or PREV(
) during playback to
locate a chapter that you want to watch.
Each time you press the button, a chapter or track is
skipped.
28
5J00401A[E] (24-31)
28
22/05/2003, 10:26
MP3 playback
This player can play back the MP3-data
which has been recorded on CD-R or CDRW. To produce the MP3-data, you need a
Windows-PC with CD-ROM drive and a MP3encoding Software (not supplied).
The Apple-HFS-System can not be played.
MP3 CD Information
Limitations on MP3 CD playback
• MP3 CD is the disc that is standardized by
ISO9660, its file name must include 3-digits
extension letters, “mp3”.
• The directory and file names of the MP3
CD must correspond to the ISO
standardized files.
• This unit can read 200 files per disc. If
one directory has more than 200 files, it
reads up to 200 files, the remaining files will
be omitted.
• MP3 CD’s cannot be used for playback for
the purpose of recording.
• It may take more than one minute for this
unit to read MP3 files depending on its
structure.
• Music recorded by “Joliet Recording
Specification” can be played back, the file
name is displayed on the screen. Long file
names will be condensed.
• The music files recorded by “Hierarchical
File System” (HFS) cannot be played.
Notes on MP3 files
To play back MP3 CD in the recorded order,
1. Use MP3 software that records data
alphabetically or numerically.
2. Name each file including two-digit or threedigit number (e.g. “01” “02” or “001” “002”).
3. Refrain from making too many sub-folders.
CAUTION:
• Some MP3 CDs can not be played back
depending on the recording conditions.
• The CD-R/RW that has no music data or
non-MP3 files can not be played back.
Press OPEN/CLOSE.
1 The
disc tray will open.
Place a disc onto the tray.
PLAY or OPEN/CLOSE.
2 Press
The disc tray closes automatically.
Scanning...
On the TV-screen, “Scanning...”
will appear. Scanning will take as
much time as the number of file.
menu screen will appear
3 AonMP3
the TV screen.
T
-/18
0:00:00
/
01 Ð
Japan
02 Ð
Bay Bridge
03 Ð
CLOSE MY EYES
04 Ð
DIVE TO BLUE
05 Ð
Honey
06 Ð
BLUE EYES
07 Ð
Blurry Eyes
08 Ð
flower
09 Ð
Lies and Truth-
10 Ð
winter fall
Press / or / or Number
buttons (0-9) to select the desired
track, then press ENTER. Track is
selected and play commences.
• In case the folder includes more than 11 tracks, press
or
to display next track list.
/Enter/0-9/PlayMode
STOP to end playback.
4 Press
• The unit records the stopped point. “
” appears on the
screen. Press PLAY to resume playback (from the scene
point).
• If you press STOP again or unload the disc, the unit will
clear the stopped point.
press OPEN/CLOSE.
5 Then
The disc tray opens.
Remove the disc and press POWER.
The disc tray closes automatically and the unit turns off.
NOTES:
• During MP3-Playback, you can not use SEARCH, A-B
Repeat functions.
• You can use Repeat (Track or All), Random functions and
Program playback for MP3 CD Playback (see page 31).
29
5J00401A[E] (24-31)
29
17/5/03, 4:27 PM
Zooming/Locating desired scene
Zooming
This unit will allow you to zoom in on the frame image. You
can then make selections by switching the position of the
frame.
TV CATV
POWER
PLAY MODE
DISPLAY
SLEEP
TIMER
AUDIO
AUDIO
TITLE
1
2
3
SUBTITLE
4
5
6
JUMP
7
8
9
0
RETURN
C.C.
ANGLE
MARKER ZOOM REPEATA-B RETURN
– SLOW +
MUTING
CANCEL
LIGHT
TV/DVD to select
1 Press
DVD mode.
1
Press ZOOM during playback.
The center part of the
image will be zoomed in.
Each press of ZOOM will
change the ZOOM 1
2 (x 3) and
3
(x 2),
(x 4).
/ / /
to view a different part of the frame.
2 Press
You may move the frame from the center position to UP,
DOWN, LEFT or RIGHT direction.
mode press ZOOM repeatedly to return to a
3 In1:1theviewzoom
( Off).
SELECT
/ENTER
+
CH
VOL
–
INPUT
VOL
+
Locating Desired Scene
CH
–
DVD SETUP
TV MENU
PREV NEXT
B.SEARCH
OPEN/CLOSE
Use the title, chapter and time recorded on the disc to
locate the desired point to play back.
TV/DVD DVD MENU
PLAY
F.SEARCH
STOP
JUMP during play1 Press
back.
Jump
PAUSE/STILL
_ _ / 19
1/8
0:00:00 / 2:02:31
/Enter/0 9/Cancel/Jump
TV / DVD
Press
or
2 Track)”
or “
NOTES:
• You can select the Pause, Slow or
Search playback in the zoom mode.
• Some discs may not respond to zoom
feature.
to select the “ C (Chapter)”, “ T (Title/
(Time)”.
3 Press Number buttons (0–9) to input the number.
• If you input a wrong number, press CANCEL.
• Refer to the package supplied with the disc to check the
numbers.
4 Press ENTER.
• Playback starts.
• When you change the title, playback starts from
Chapter 1 of the selected title.
• Some discs may not work in the above operation.
30
5J00401A[E] (24-31)
30
16:5:03, 17:07
Repeat, Random and Program playback/Repeat A-B
Press PLAY MODE during playback or stop mode.
Each time you press PLAY MODE, playback mode changes as follows.
DVD
Audio CD/MP3 CD
On screen
display
→
On screen
display
Operation
Title:
Repeats the current title.
↓
Chapter: Repeats the current chapter.
↓
Off:
Resumes normal playback.
→
• During stop mode, PLAY MODE key is not effective.
DISPLAY
PLAY MODE
SLEEP
TIMER
AUDIO
1
2
3
SUBTITLE
4
5
6
JUMP
7
8
9
0
RETURN
C.C.
MARKER ZOOM REPEATA-B RETURN
– SLOW +
CANCEL
MUTING
LIGHT
SELECT
/ENTER
+
CH
VOL
–
INPUT
Repeats entire disc.
Repeats the current track.
Plays the tracks in random order.
Plays the tracks in program order.
Resumes normal playback.
AUDIO
TITLE
ANGLE
All:
↓
Track:
↓
Random Play:
↓
*Program:
↓
(Status display):
Operation
VOL
+
• During stop mode, you can not select “
Track”.
*Program menu
Use number buttons (0–9) to
enter the track’s number you
want to program, then press
ENTER. The track number and
total time are displayed. Repeat
this step to enter additional
tracks. When you have finished
entering tracks, press PLAY to
start Program playback.
A playlist of your programmed
tracks is displayed.
Program
1 5
8:29
2 8
8:54
3 3
7:31
4 __
Total 3
0:24:54
/Enter/0
9/Cancel/Play/PlayMode
Program Playback
T
5/8
0:02:31
0:08:29
CH
–
TV MENU
PREV NEXT
B.SEARCH
OPEN/CLOSE
Playlist
DVD SETUP
5
TV/DVD DVD MENU
PLAY
STOP
8
3
F.SEARCH
PAUSE/STILL
NOTES:
• If you enter a wrong number – press CANCEL.
• To cancel program play, press STOP 3 times.
• To clear the programs on the program menu – press CANCEL until all programs are cleared.
• The program is cancelled when you open the disc tray or turn off the power.
Repeat A-B
Repeat A-B playback allows you to repeat material between two selected points.
REPEAT A-B during playback.
1 Press
The start point is selected.
A
REPEAT A-B again.
2 Press
The end point is selected. Playback starts at the point that you selected. Playback
stops at the end point, returns to Point A automatically, then starts again.
To resume normal playback press REPEAT A-B again. “
screen.
Off” appears on the
NOTES:
• Some discs may not work with the repeat operation.
• In Repeat A-B mode, subtitles near point A or B may not appear.
• You may not be able to set Repeat A-B, depending on the scenes of the DVD.
• Repeat A-B does not work with MP3 CD and interactive DVDs.
5J00401A[E] (24-31)
31
A B
16:5:03, 17:07
31
Marking desired scenes
The TV/DVD stores the points that you
want to watch again. You can resume
playback from that scene.
Marking the Scenes
MARKER during
1 Press
playback.
Marker
1
2
3
TV CATV
POWER
PLAY MODE
DISPLAY
C
C
C
T
T
T
/Enter/Cancel/Marker
SLEEP
TIMER
AUDIO
AUDIO
TITLE
1
2
3
SUBTITLE
4
5
6
JUMP
7
8
9
0
RETURN
C.C.
ANGLE
the blank Marker
2 Select
using / , then press
ENTER at the desired
scene.
Marker
1
2
3
• Up to 3 scenes can be
selected.
• Repeat this procedure to
set the other 2 scenes.
T
T
T
1
C
C
C
3
0
08
50
3
0
08
50
4
0
12
27
6
0
17
04
3
0
08
50
4
0
12
27
6
0
17
04
/Enter/Cancel/Marker
MARKER ZOOM REPEATA-B RETURN
– SLOW +
MUTING
CANCEL
LIGHT
SELECT
/ENTER
+
–
INPUT
Returning to the Scenes
MARKER during
1 Press
playback or stop mode.
CH
VOL
3 Press MARKER to remove this display.
VOL
Marker
1
2
+
3
T
T
T
1
1
1
C
C
C
CH
–
TV MENU
DVD SETUP
PREV NEXT
B.SEARCH
OPEN/CLOSE
TV/DVD DVD MENU
PLAY
/Enter/Cancel/Marker
F.SEARCH
STOP
PAUSE/STILL
or to select
2 Press
the Marker 1-3.
Marker
1
2
3
T
T
T
1
1
1
C
C
C
/Enter/Cancel/Marker
TV / DVD
SELECT.
3 Press
Playback starts from the marked scene.
NOTES:
• The marking is canceled when you open
the disc tray or turn the power off.
• Some subtitles recorded around the
marker may fail to appear.
To Cancel the Mark
1 Press MARKER.
2 Press or to select the Marker 1-3.
3 Press CANCEL.
32
5J00401A[E] (32-41)
32
16:5:03, 17:07
Changing soundtrack language/Subtitles
Changing soundtrack language
TV CATV
POWER
You can select the language when you play a multilingual
disc.
PLAY MODE
DISPLAY
AUDIO during play1 Press
back.
SLEEP
TIMER
AUDIO
TITLE
1
2
3
SUBTITLE
4
5
6
JUMP
7
8
9
0
RETURN
C.C.
ANGLE
MARKER ZOOM REPEATA-B RETURN
– SLOW +
MUTING
2/8 Fra Dolby Digital
AUDIO
CANCEL
The current soundtrack
language will appear.
AUDIO repeatedly
2 Press
until the desired language
is selected.
1/8 Eng Dolby Digital
LIGHT
SELECT
/ENTER
+
The on-screen display will
disappear after a few seconds.
CH
VOL
–
INPUT
VOL
+
CH
Turning the Subtitles On and Off
–
TV MENU
PREV NEXT
B.SEARCH
OPEN/CLOSE
DVD SETUP
TV/DVD DVD MENU
PLAY
STOP
Subtitles
F.SEARCH
When playing back a disc recorded with subtitles, you
can turn the subtitles on or off.
Press SUBTITLE during playback until “Off” appears.
Off
PAUSE/STILL
NOTES:
• If the desired language is not heard after pressing the SUBTITLE button several times, the language is not recorded
on the disc.
• Changing soundtrack language is cancelled when you open the disc tray. The
initial default language or available language will be heard if the disc is played
back again.
• Changing subtitle language is cancelled
when you open the disc tray.
• Some functions may not work on some
DVDs. You may not be able to turn subtitles on or off or change subtitles. While
playing the DVD, the subtitle may
change when:
- you open or close the disc tray
- you change the title.
• In some cases, the subtitle language is
not changed to the selected one immediately.
Changing the subtitle language
You can select the language when playing back a disc
recorded with multi-lingual subtitles.
SUBTITLE repeat1 Press
edly during playback until
your desired language appears.
1/32 Eng
2 The on-screen display will disappear after a few seconds.
33
5J00401A[E] (32-41)
33
16:5:03, 17:07
Changing angles/Title selection/DVD menu
Changing angles
When playing back a disc recorded with multi-angle facility, you can change the view angle.
TV CATV
POWER
PLAY MODE
DISPLAY
SLEEP
TIMER
AUDIO
AUDIO
TITLE
1
2
3
SUBTITLE
4
5
6
JUMP
7
8
9
0
RETURN
C.C.
ANGLE
MARKER ZOOM REPEATA-B RETURN
– SLOW +
MUTING
CANCEL
LIGHT
SELECT
/ENTER
+
CH
VOL
–
INPUT
+
CH
–
DVD SETUP
B.SEARCH
OPEN/CLOSE
TV/DVD DVD MENU
PLAY
STOP
1/9
The current angle will appear.
2 Press ANGLE repeatedly until the desired angle is selected.
Title selection
Two or more titles are recorded on some discs. If the title
menu is recorded on the disc, you can select the desired
title.
TITLE during playback.
1 Press
Title menu appears on the screen.
VOL
TV MENU
PREV NEXT
ANGLE during play1 Press
back.
2 Press / or / to select the desired title.
ENTER or PLAY.
3 Press
The playback of the selected title will start.
F.SEARCH
PAUSE/STILL
DVD menu
Some DVDs allow you to select the disc contents using the
menu.
When you play back these DVDs, you can select the subtitle language and sound-track language,etc. using the
DVD menu.
TV / DVD
DVD MENU during playback.
1 Press
The DVD menu appears on the screen.
• Press DVD MENU again to resume playback at the scene
when you pressed DVD MENU.
NOTES:
• Depending on the DVD, you may not
be able to change the angles even if
multi-angles are recorded on the DVD.
• Depending on the DVD, you may not
be able to select the title. Depending
on the DVD, a “title menu” may simply
be called a “menu” or “title” in the instructions supplied with the disc.
2 Press / or / to select the desired item.
ENTER.
3 Press
The menu continues to another screen. Repeat steps 2
and 3 to set additional items if any.
34
5J00401A[E] (32-41)
34
16:5:03, 17:07
Setting language
You can change the default settings
to customise performance to your
preference.
POWER
TV CATV
DISPLAY
PLAY MODE
SLEEP
TIMER
AUDIO
AUDIO
TV/DVD to select
1 Press
DVD mode.
Press DVD SETUP in the
stop mode or No Disc.
or
to select
Press
“Language”, then press
or ENTER.
or
to select
2 Press
“OSD Language”, then
press
or ENTER.
TITLE
1
2
3
SUBTITLE
4
5
6
JUMP
7
8
9
0
RETURN
or
to select de3 Press
sired language (e.g. Eng-
MARKER ZOOM REPEATA-B RETURN
lish), then press ENTER.
The menu returns to “Language” menu automatically.
C.C.
ANGLE
– SLOW +
MUTING
CANCEL
LIGHT
SELECT
/ENTER
+
CH
VOL
–
INPUT
DVD SETUP
OPEN/CLOSE
Language
OSD Language
Menu
Audio
Subtitle
English
English
English
English
/Enter/Setup/Return
• If you want to return to the
previous menu, press
or RETURN.
OSD Language
English
Francais
Espanol
/Enter/Setup/Return
4 Repeat steps 2-3 for other “Language” setting.
TV MENU
TV/DVD DVD MENU
PLAY
/Enter/Setup/Return
+
–
B.SEARCH
Language
Picture
Sound
Parental
VOL
CH
PREV NEXT
Main Menu
Other: (Menu/Audio/Subtitle)
If you want to select another language, enter the language
code (see the Language code list on page 41).
F.SEARCH
STOP
PAUSE/STILL
Off: (subtitle)
Subtitles do not appear.
5 Press DVD SETUP to remove the Menu screen.
TV / DVD
NOTES:
• If the selected soundtrack language is
not recorded on the disc, the original
language will be heard.
• If the selected subtitle language is not
recorded on the disc, the first-priority
language is selected.
35
5J00401A[E] (32-41)
35
16:5:03, 17:07
Setting the aspect ratio of TV screen/Setting on screen display
Setting the aspect ratio of TV screen
You can select the aspect ratio for your TV.
TV/DVD to select
1 Press
DVD mode.
POWER
TV CATV
DISPLAY
PLAY MODE
SLEEP
TIMER
AUDIO
1
TITLE
Press DVD SETUP in the
stop mode or No Disc.
Press
or
to select
“Picture”, then press
or
ENTER.
2
3
SUBTITLE
4
5
6
JUMP
7
8
9
0
RETURN
C.C.
MARKER ZOOM REPEATA-B RETURN
– SLOW +
MUTING
CANCEL
LIGHT
SELECT
/ENTER
+
–
INPUT
VOL
+
CH
–
DVD SETUP
TV MENU
PREV NEXT
B.SEARCH
OPEN/CLOSE
TV/DVD DVD MENU
PLAY
/Enter/Setup/Return
or
to select
2 Press
“TV Screen”, then press
F.SEARCH
STOP
or
to select
Press
3 your
desired screen type,
then press ENTER.
Picture
TV Screen
Display
4:3
On
TV Screen
16:9
4:3
4:3
You have the following screen sizes to choose from:
16:9
Wide screen
Select this mode when connecting to a wide-screen TV.
A wide screen picture is displayed full size.
Letterbox
4:3
Select this mode when connecting to a conventional TV.
When playing back a wide screen-DVD disc, it displays
the wide picture with black bands at the top and bottom of
screen.
CH
VOL
Language
Picture
Sound
Parental
AUDIO
or ENTER.
ANGLE
Main Menu
PAUSE/STILL
4:3
Panscan
It displays the wide picture on the whole screen with left
and right edges automatically cut off.
• If you want to return to the previous menu, press
RETURN.
or
4 Press DVD SETUP to remove the Menu screen.
Status on screen display
On screen display can be switched on or off when you
press the buttons.
DVD SETUP in the stop mode or No Disc.
1 Press
Press
or
to select “Picture”, then press
or ENTER.
TV / DVD
Press
or
2 “Display”.
NOTE:
If the DVD disc is not formatted in the pan
& scan style, it displays 4:3 style.
Off:
Picture
TV Screen
Display
or ENTER to
3 Press
select “On” or “Off”.
On:
4:3
On
Picture
TV Screen
Display
4:3
Off
On screen displays appear when you press the
buttons (factory setting).
On screen displays do not appear when you press
any buttons.
• If you want to return to the previous menu, press
RETURN.
36
5J00401A[E] (32-41)
to select
4 Press DVD SETUP to remove the Menu screen.
36
16:5:03, 17:07
or
Dynamic Range Control
DRC (Dynamic Range Control) enables you to control the dynamic range
so as to achieve a suitable sound for
your equipment.
TV/DVD to select
1 Press
DVD mode.
Main Menu
Language
Picture
Sound
Parental
Press DVD SETUP in the
stop mode or No Disc.
Press
or
to select
“Sound”.
/Enter/Setup/Return
TV CATV
POWER
PLAY MODE
DISPLAY
SLEEP
TIMER
AUDIO
AUDIO
TITLE
1
2
3
SUBTITLE
4
5
6
JUMP
7
8
9
0
RETURN
C.C.
ANGLE
or ENTER to se2 Press
lect “DRC”.
Sound
DRC
On
/Enter/Setup/Return
or ENTER to se3 Press
lect “On” or “Off”.
Sound
DRC
Off
MARKER ZOOM REPEATA-B RETURN
– SLOW +
MUTING
CANCEL
LIGHT
+
CH
VOL
–
INPUT
VOL
CH
–
DVD SETUP
B.SEARCH
OPEN/CLOSE
• If you want to return to the previous menu, press
RETURN.
or
+
TV MENU
PREV NEXT
/Enter/Setup/Return
SELECT
/ENTER
4 Press DVD SETUP to remove the Menu screen.
TV/DVD DVD MENU
PLAY
F.SEARCH
STOP
PAUSE/STILL
TV / DVD
NOTES:
• This function works only during playback of Dolby Digital recorded discs.
• The level of Dynamic Range Reduction
may differ depending on DVD video
disc.
37
5J00401A[E] (32-41)
37
16:5:03, 17:07
Parental control setting
Some discs are specified not suitable
for children. Such discs can be prevented from play back with the unit.
TV CATV
POWER
PLAY MODE
DISPLAY
SLEEP
TIMER
AUDIO
AUDIO
TV/DVD to select
1 Press
DVD mode.
1
2
3
SUBTITLE
4
5
6
JUMP
7
8
9
0
RETURN
C.C.
ANGLE
or
to select
2 Press
“Parental Level”, then press
Press
or
to select a
3 level
from Off or 1–8. Press
or ENTER to set the selected level.
MARKER ZOOM REPEATA-B RETURN
– SLOW +
MUTING
CANCEL
+
CH
VOL
–
INPUT
VOL
+
CH
–
TV MENU
Parental
Password
Parental Level
Off
8
Parental Level
Off
1
2
3
4
5
• Level Off: The parental control setting does not function.
• Level 8: Almost all DVD software can be played back.
• Level 1: DVD software for adults cannot be played
back.
• Select from the level 1 to level 8. The limitation will be
more severe as the level number is lower.
DVD SETUP
PREV NEXT
B.SEARCH
OPEN/CLOSE
TV/DVD DVD MENU
PLAY
F.SEARCH
STOP
Press
or
to select
4 “Password”,
then press
or ENTER.
Parental
Password
Parental Level
Off
1
PAUSE/STILL
number buttons (0–
5 Press
9) for the password.
Don’t forget the password.
• If you input a wrong
number, press CANCEL.
TV / DVD
NOTES:
• If each setup (P.35–39) has been
completed, the unit can always be
operated under the same conditions
(especially with DVD discs).
Each setup will be retained in the
memory when you turn the power off.
• Depending on the discs, the unit cannot limit playback.
• Some discs may not be encoded with
specific rating level information though
its disc jacket says “adult.” For those
discs, the age restriction will not work.
ENTER to store the
6 Press
password.
Note: Now the rating is
locked and the setting cannot be changed unless you
enter the correct password.
38
Password
Password
1234
Parental
Password
Parental Level
On
1
• If you want to return to the previous menu, press
or RETURN.
7 Press DVD SETUP to remove the parental control screen.
38
5J00401A[E] (32-41)
/Enter/Setup/Return
/Enter/Setup/Return
LIGHT
SELECT
/ENTER
Language
Picture
Sound
Parental
Press DVD SETUP in the
stop mode or No Disc.
or
to select
Press
“Parental”, then press
or
ENTER.
or ENTER.
TITLE
Main Menu
16:5:03, 17:07
To change the parental level
TV/DVD to select DVD mode.
1 Press
Press DVD SETUP in the stop mode or No Disc.
Press
ENTER.
TV CATV
POWER
PLAY MODE
DISPLAY
SLEEP
TIMER
AUDIO
1
2
3
SUBTITLE
4
5
6
JUMP
7
8
9
0
RETURN
C.C.
to select “Parental”, then press
or
to select
2 Press
“Password”, then press
or ENTER.
number buttons (0–
3 Press
9) to enter the password
you have stored.
MUTING
CANCEL
SELECT
/ENTER
CH
–
INPUT
VOL
+
CH
–
DVD SETUP
TV MENU
PREV NEXT
Password
Parental Level
On
1
Password
Password
1234
ENTER.
4 Press
The password is now Off.
Parental
or
to select
5 Press
“Parental Level”. Then
Parental
Password
Parental Level
Off
1
LIGHT
+
VOL
Parental
• If you input a wrong number, press CANCEL.
MARKER ZOOM REPEATA-B RETURN
– SLOW +
or
AUDIO
TITLE
ANGLE
or
TV/DVD DVD MENU
or ENTER. The
press
Parental Level screen is
displayed.
Press
or
to select a
6 level
from Off or 1–8 and
then press
or ENTER.
Password
Parental Level
Off
1
Parental Level
3
4
5
B.SEARCH
PLAY
6
F.SEARCH
7
8
OPEN/CLOSE
STOP
/Enter/Setup/Return
PAUSE/STILL
or
to select
7 Press
“Password” and then press
or ENTER.
Parental
Password
Parental Level
Off
8
TV / DVD
number buttons (0–
8 Press
9) to enter a 4-digit password.
NOTE:
Do not forget the password. If you forget the
password, contact the dealer that you
purchased the unit from.
Password
Password
9876
Note: You can enter a new password.
ENTER.
9 Press
The parental level is now
changed and locked.
Parental
Password
Parental Level
On
8
• If you want to return to the previous menu, press
RETURN.
or
10 Press DVD SETUP to remove the parental control screen.
39
5J00401A[E] (32-41)
39
16:5:03, 17:07
Temporary disabling of rating level by DVD disc
Depending on the DVD disc, the disc
may try to temporarily cancel the
rating level that you have set.
It is up to you to decide whether to
cancel the rating level or not.
TV CATV
POWER
PLAY MODE
DISPLAY
SLEEP
TIMER
AUDIO
AUDIO
TITLE
1
2
3
SUBTITLE
4
5
6
JUMP
7
8
9
0
RETURN
C.C.
ANGLE
a DVD disc and press
1 Load
PLAY (see page 27).
DVD disc has been designed to temporarily cancel
2 IfthetheRating
level, the screen which appears after inserting
a DVD will change, depending on which disc is played. If
you select “YES” with the ENTER key, “Your disc exceeds
the parental control level.” screen will then appear.
Your disc exceeds the parental control level.
Password
Enter/0–9/Cancel/Return
MARKER ZOOM REPEATA-B RETURN
– SLOW +
MUTING
CANCEL
LIGHT
SELECT
/ENTER
+
CH
VOL
–
INPUT
VOL
+
wish to cancel the set rating level temporarily, enter
3 Iftheyou4-digit
password.
Then press ENTER.
Alternatively, if the password has not been set, playback
will commence. If you don’t know (or have forgotten) the
password, select “STOP”.
The setting screen will disappear. Press OPEN/CLOSE to
remove the disc.
CH
–
TV MENU
DVD SETUP
PREV NEXT
B.SEARCH
OPEN/CLOSE
To quit entering, press RETURN.
TV/DVD DVD MENU
PLAY
STOP
F.SEARCH
will commence if the entered password was cor4 Playback
rect.
PAUSE/STILL
TV / DVD
NOTE:
The rating level will remain disabled until the
disc is ejected.
When the disc is ejected, the original rating
level will be set again automatically.
40
5J00401A[E] (32-41)
40
17/5/03, 4:26 PM
Language code list
Enter the appropriate code number for the initial settings “Menu”, “Audio” and/or “Subtitle” (see page 35).
Language Name Code
Language Name Code
Language Name Code Language Name Code
Abkhazian
1112
Fiji
1620 Lingala
2224 Singhalese
2919
Afar
1111
Finnish
1619 Lithuanian
2230 Slovak
2921
Afrikaans
1116
French
1628 Macedonian
2321 Slovenian
2922
Albanian
2927
Frisian
1635 Malagasy
2317 Somali
2925
Amharic
1123
Galician
1722 Malay
2329 Spanish
1529
Arabic
1128
Georgian
2111
2322 Sundanese
2931
Armenian
1835
German
1415 Maltese
2330 Swahili
2933
Assamese
1129
Greek
1522 Maori
2319 Swedish
2932
Aymara
1135
Greenlandic
2122 Marathi
2328 Tagalog
3022
Azerbaijani
1136
Guarani
1724 Moldavian
2325 Tajik
3017
Bashkir
1211
Gujarati
1731 Mongolian
2324 Tamil
3011
Basque
1531
Hausa
1811 Nauru
2411 Tatar
3030
Bengali; Bangla 1224
Hebrew
1933 Nepali
2415 Telugu
3015
Bhutani
1436
Hindi
1819 Norwegian
2425 Thai
3018
Bihari
1218
Hungarian
1831 Oriya
2528 Tibetan
1225
Breton
1228
Icelandic
1929 Panjabi
2611 Tigrinya
3019
Bulgarian
1217
Indonesian
1924 Pashto, Pushto 2629 Tonga
3025
Burmese
2335
Interlingua
1911 Persian
1611 Turkish
3028
Byelorussian
1215
Irish
1711 Polish
2622 Turkmen
3021
Cambodian
2123
Italian
1930 Portuguese
2630 Twi
3033
Catalan
1311
Japanese
2011 Quechua
2731 Ukrainian
3121
Chinese
3618
Javanese
2033 Rhaeto-Romance 2823 Urdu
3128
Corsican
1325
Kannada
2124 Romanian
2825 Uzbek
3136
Croatian
1828
Kashmiri
2129 Russian
2831 Vietnamese
3219
Czech
1329
Kazakh
2121 Samoan
2923 Volapük
3225
Danish
1411
Kirghiz
2135 Sanskrit
2911 Welsh
1335
Dutch
2422
Korean
2125 Scots Gaelic
1714 Wolof
3325
English
1524
Kurdish
2131 Serbian
2928 Xhosa
3418
Esperanto
1525
Laothian
2225 Serbo-Croatian 2918 Yiddish
2019
Estonian
1530
Latin
2211 Shona
2924 Yoruba
3525
Faroese
1625
Latvian, Lettish 2232 Sindhi
2914 Zulu
3631
Malayalam
41
5J00401A[E] (32-41)
41
17/5/03, 4:26 PM
Connections to other equipments
The exact arrangement you use to interconnect various video and audio components to the TV/DVD is dependent on the model and features of each component. Check the Owner's Manual provided with each component
for the location of video and audio inputs and outputs.
Using an AV Amplifier with built-in digital surround
If you are using an Amplifier with a built-in digital surround as follows, you can enjoy the various audio systems
including Dolby Digital Surround audio that sounds just like the movie.
Connect an AV amplifier with built-in Dolby Digital decoder, DTS decoder, MPEG decoder or etc as
shown below.
Rear of TV/DVD
UHF/
VHF
(MONO)
AUDIO
R
Subwoofer
TV/DVD
VIDEO
DIGITAL
AUDIO OUT
Front
Speaker
(Right)
Front
Speaker
(Left)
LINE IN 1 COAXIAL
Coaxial Digital
Audio Output
Center Speaker
Coaxial digital cable (not supplied)
To Coaxial Digital Audio Input
Surround
Speaker (Left)
AV Amplifier with built-in digital surround
decoder as listed above
Surround
Speaker
(Right)
* Manufactured under license from Dolby Laboratories. “Dolby” and the double-D symbol are trademarks of Dolby
Laboratories. Confidential unpublished works. © 1992-1997 Dolby Laboratories, Inc. All rights reserved.
* “DTS” and “DTS Digital Out” are trademarks of Digital Theater Systems, Inc.
NOTE:
• When you make the connections above, do not set DOLBY DIGITAL to DOLBY DIGITAL, MPEG to MPEG to ON on the AV
Amplifier. If you do, a loud noise will suddenly come out from the speakers, affecting your ears or causing the speakers to be
damaged.
• When playing DTS-encoded CDs, only noise will be heard from the speakers or analogue stereo outputs.
• Some DTS decoders which do not support DVD-DTS interface may not work properly with the unit.
42
5J00401A[E] (42-43)
42
17/5/03, 4:27 PM
Using the audio/video inputs
If you connect the TV/DVD to VCR, camcorder or TV game, you can select by pressing INPUT.
Press INPUT repeatedly to select the desired mode.
“LINE1”, “LINE2” or TV channel will display on the screen for 4 seconds.
LINE 1
TV Channel
LINE 1
(Back)
LINE 2
(Front)
NOTE: In the DVD mode this key will not operate.
1. To connect the TV/DVD to a VCR
Press the INPUT to select the desired mode to use the TV as a monitor.
Operate your VCR as usual.
Rear of TV/DVD
VIDEO IN
VCR
VIDEO
UHF/
VHF
(MONO)
AUDIO
R
To Audio/Video
OUT
DIGITAL
AUDIO OUT
LINE IN 1 COAXIAL
AUDIO IN (L)
AUDIO IN (R)
2. To connect the TV/DVD to a camcorder
To playback from the camcorder, connect the camcorder to the TV/DVD as shown.
Front of TV/DVD
Camcorder
VIDEO IN
VIDEO
To Audio/Video OUT
L/MONO AUDIO
LINE 2 IN
R
AUDIO IN (R)
AUDIO IN (L)
Audio/Video cord (not supplied)
3. To connect the TV/DVD to a TV Game
Front of TV/DVD
VIDEO IN
VIDEO
L/MONO
AUDIO
R
LINE 2 IN
AUDIO IN (R)
To Audio/Video OUT
AUDIO IN (L)
Audio/Video cord (not supplied)
43
5J00401A[E] (42-43)
43
16:5:03, 17:07
Problems and troubleshooting
Use the following check list for troubleshooting when you have problems with your unit. Consult your local dealer
or service outlet if problems persist.
Be sure all connections are properly made when using with other units.
SYMPTOMS
POSSIBLE SOLUTIONS
PAGE
POWER
• Make sure the power cord is plugged in.
• Try another AC outlet.
• Power is off, check fuse or circuit breaker.
• Unplug unit, then plug it back in.
5
10
–
5
Poor sound or No sound
• Station or CATV experiencing problems, tune to another station.
• Check Volume adjustments (Volume and Muting).
• Check for sources of possible interference.
14
14
46
Poor picture or No picture
• Station or CATV experiencing problems, tune to another station.
• Check antenna or CATV connections, reorient antenna.
• Check for sources of possible interference.
• Check picture control adjustments.
14
11,12
46
22
Poor reception on some channels
• Station or CATV experiencing problems, tune to another station.
14
• Station signal is weak, reorient antenna to receive weaker station. 11,12
• Check for sources of possible interference.
46
Poor color or no color
• Station or CATV experiencing problems, tune to another station.
• Make sure channels are set into memory.
• Check picture control adjustments.
• Check antenna or CATV connections, reorient antenna.
• Check for sources of possible interference.
TV/DVD does not operate.
TV BROADCAST RECEPTION
• Station or CATV experiencing problems, tune to another station.
• Make sure channels are set into memory.
• CATV company is scrambling signal.
• Check antenna orientation.
• Check all CATV connections.
• Set TV/CATV menu option to the CATV mode.
• Station or CATV system problems, try another station.
14
18
22
11,12
46
14
18
–
11
12
17
14
Horizontal or diagonal bars on
screen
• Check antenna connections, reorient antenna.
• Check for sources of possible interference.
11,12
46
No reception above channel 13
• Make sure TV/CATV menu option is in the appropriate mode.
• If using antenna, check UHF antenna connections.
17
11
TV shuts off
• No broadcast on station tuned.
• Sleep Timer is set.
• Power interrupted.
18
15
–
18
Closed - Caption is not activated.
• TV station experiencing problems or program tuned is not closed
captioned. Try another channel.
• Check CATV connection or VHF/UHF antenna, reposition or
rotate antenna.
• Press C.C. button to turn on the closed caption decoder.
Picture wobbles or drifts
No CATV reception
Display is not shown in your
language.
• Select proper language in the menu options.
44
5J00401A[E] (44-BACK)
44
16:5:03, 17:07
11,12
16
13
SYMPTOMS
POSSIBLE SOLUTIONS
PAGE
DVD
Playback doesn’t start.
• No disc is inserted.
• The disc may be dirty. Clean up the disc.
• The unit cannot play CD-ROMs, etc.
27
25
–
No picture
• TV/DVD selector is not set correctly.
26
No sound
• Check the input selector of the amplifier is set properly.
• The unit is in the Special playback mode.
• Select the correct Audio Output position on AV amplifier.
–
28
42
Picture is distorted during CUE or
REVIEW.
• The picture will be distorted occasionally.
–
Stopping playback, search, slowmotion play, repeat play, or
program play, etc. cannot be
performed.
• Some discs may not do some of the functions.
–
No 4:3 (16:9) picture
• The setup does not match your TV.
36
No on-screen display
• Select Display On.
36
No surround sound
• The setup does not match your stereo system.
42
The unit or remote operation key
is not functioning.
• Turn off the unit and unplug the AC power cord for several
minutes, then replug it.
–
Playback does not start when the
title is selected.
• Check the RATING LEVEL setup.
Audio soundtrack and/or subtitle
language is not changed when
you play back a DVD.
• Multilingual language is not recorded on the DVD disc.
No subtitle
• Some discs have no subtitles.
• Subtitles are cleared. Press SUBTITLE.
33
Angle cannot be changed.
• Multi-angles are not recorded on the DVD disc.
34
“
• The function is prohibited with the unit or the disc.
–
” appears on the screen.
38~40
35
–
REMOTE CONTROL
The remote control does not
function.
• Aim at the remote control at the remote sensor.
• Operate within Approx. 5 Meters or reduce the light in the room.
• Clear the path of the beam.
• The batteries are weak. Replace the batteries.
• Check the batteries are inserted correctly.
10
45
5J00401A[E] (44-BACK)
45
16:5:03, 17:07
Reception disturbances
Most types of television interference can be remedied by adjusting the height and position of the VHF/UHF
antenna. Outdoor antennas are recommended for best results. The most common types of television
interference are shown below. If one of these symptoms appear when the TV/DVD is connected to a Cable
TV system, the disturbance may be caused by the local Cable TV company broadcast.
IGNITION
Black spots or horizontal streaks may appear, the picture may flutter or
drift. Usually caused by interference from automobile ignition systems,
neon lamps or AC powered tools and appliances such as drills or hair
dryers.
GHOSTS
Ghosts are caused by the television signal following two paths. One is
the direct path and the other is reflected by tall buildings, hills or other
large objects. Changing the direction or position of the antenna may
improve the reception.
SNOW
If the TV/VCR is located far from the TV station, in a fringe reception
area where the signal is weak, small dots may appear in the picture.
If the signal is extremely weak, the installation of a larger external
antenna may be necessary.
RADIO FREQUENCY INTERFERENCE (RFI)
Caused by two-way radios, this type of interference produces moving
ripples or diagonal streaks in the picture. Some cases may cause a
loss of contrast in the picture. Changing the direction and position of
the antenna or installing an RFI filter may improve the picture.
PICTURE SIZE VARIATION
A slight picture size variation is normal when you adjust the CONTRAST
or BRIGHTNESS settings.
CARE AND MAINTENANCE
To prevent fire or shock hazard, disconnect the TV/DVD from the power source before cleaning.
The finish on the cabinet may be cleaned with mild soap and a soft, damp cloth and cared for as other furniture.
Use caution when cleaning or wiping the plastic parts.
46
5J00401A[E] (44-BACK)
46
16:5:03, 17:07
Specifications
GENERAL
Power supply:
Power consumption:
Weight:
Dimensions:
TELEVISION
Picture tube:
Tuner type:
Receiving channels:
Antenna input:
Speaker:
Audio output power:
DVD/CD player
Signal system:
Applicable disc:
Frequency response:
Input:
Headphone Jack:
Digital audio out:
Pickup:
ACCESSORIES:
AC 120V 60Hz
Operation: 115W
Stand by: 4W
56.1lbs (25.5 kg)
Width : 22-5/8 inches (574 mm)
Height : 20-3/8 inches (515 mm)
Depth : 19-1/8 inches (483 mm)
Type 20 (508 mm diagonal)
Quartz PLL Frequency Synthesized
VHF
2-13
UHF
14-69
CATV 14-36 (A)-(W)
37-59 (AA)-(WW)
60-85 (AAA)-(ZZZ)
86-94 (86)-(94)
95-99 (A-5)-(A-1)
100-125 (100)-(125)
01 (5A)
VHF/UHF In 75 ohm coaxial
1-13/16 x 3-7/8 inches (46 x 99 mm), 8 ohm x 2
2.5W + 2.5W
NTSC
1. DVD (12cm, 8cm)
2. CD (12cm, 8cm)
DVD: 4Hz - 22KHz
CD: 4Hz - 20KHz
Video : (RCA) 1 Vp-p/75ohm
Audio : (RCA) –8 dB/50Kohm
3.5mm Stereo mini-jack
0.5Vp-p 75ohms terminated
CD : Wavelength: 775 - 815 nm
Maximum output power: 0.5 mW
DVD : Wavelength: 650 - 666 nm
Maximum output power: 2.0 mW
Remote control x 1
Batteries (2 x AA)
47
5J00401A[E] (44-BACK)
47
16:5:03, 17:07
Appendix (Remote programming)
REMOTE PROGRAMMING
Setting the CATV Codes
You can program your remote to operate your cable box, satellite receiver by using the instructions and codes
listed below. If the equipment does not respond to any of the codes listed below or to the code search function,
use the remote control supplied by the manufacturer.
Cable Box or Satellite setup
The remote control is programmed with CATV and/or Satellite codes for power on, power off, channel up, channel
down, and 10 key operation.
1) Find the CATV/Satellite brand from the list of codes shown below.
2) Slide the 2-way selector switch to “CATV ”.
3) Press and hold down the DISPLAY button.
4) With the DISPLAY button held down, enter the first code number listed using the 10 key pad.
5) Release the DISPLAY button.
6) Confirm the operation of the Cable Box/Satellite receiver.
• If your CATV or Satellite box does not respond to the first code, try the others listed. If it does not respond to any
code, try the Search Codes Function as shown below.
Cable Box
CODES
Cable Box
CODES
ABC
Archer
Cableview
Citizen
Curtis
Diamond
Eagle
Eastern
GC Brand
Gemini
General Instrument
Hamlin
Hitachi
Jerrold
Macom
Magnavox
Memorex
Movietime
Oak
Panasonic
Paragon
Philips
Pioneer
024
032, 025
051, 032
022, 051
058, 059
024, 032, 025
029
034
032, 051
022, 043
065, 024, 025, 026, 027, 020, 021, 022, 057, 023
040, 041, 042, 045, 058, 064
049, 024
065, 024, 025, 026, 027, 020,021, 022, 057, 023
049, 050, 051, 054
033
030
032, 051
039, 037, 048
055, 056, 060, 071
063
028, 029, 030, 052, 053, 031, 069
047, 062
Pulsar
Puser
RCA
Realistic
Regal
Regency
Rembrandt
Samsung
Scientific Atlanta
SLMark
Sprucer
Stargate
Telecaption
Teleview
Texscan
Tocom
Toshiba
Unika
Universal
Videoway
Viewstar
Zenith
Zenith/Drake Satellite
051, 032
032
061, 070
032
058, 064, 040, 041, 042, 045, 068
034
037, 032, 051, 038
051
057, 058, 059
051, 047
051, 056
032, 051
067
047, 051
044
035, 036, 066
050
032, 025
022, 032
052
029, 030
063, 046
046
Digital Satellite
Systems
CODES
Digital Satellite
Systems
CODES
Echostar
Express VU
G.E.
G.I.
Gradiente
Hitachi
HNS (Hughes)
Panasonic
100, 113, 114
100, 113
106
108
112
104, 111
104
105
Philips
Primestar
Proscan
RCA
Sony
Star Choice
Toshiba
Uniden
102, 103
108
106, 109, 110
106, 109, 110
107
104, 108
101
102, 103
Cable/Satellite Search Codes Function:
1)
2)
3)
4)
Slide the 2-Way Mode Selector switch to CATV.
Press the TV POWER and RETURN buttons. Hold for at least three seconds and release.
Press TV POWER, see if the CATV or Satellite box responds.
If there was a response, press RETURN. The operating codes are now set. If there was no response, repeat Step 3.
If you repeat Step 3 a total of 52 times without a response, use the remote control which came with the equipment.
5) Press RETURN to exit.
48
5J00401A[E] (44-BACK)
48
16:5:03, 17:07
Memo
○
○
○
○
○
○
○
○
○
○
○
○
○
○
○
○
○
○
○
○
○
○
○
○
○
○
○
○
○
○
○
○
○
○
○
○
○
○
○
○
○
○
○
○
○
○
○
○
○
○
○
○
○
○
○
○
○
○
○
○
○
○
○
○
○
○
○
○
○
○
○
○
○
○
○
○
○
○
○
○
○
○
○
○
○
○
○
○
○
○
○
○
○
○
○
○
○
○
○
○
○
○
○
○
○
○
○
○
○
○
○
○
○
○
○
○
○
○
○
○
○
○
○
○
○
○
○
○
○
○
○
○
○
○
○
○
○
○
○
○
○
○
○
○
○
○
○
○
○
○
○
○
○
○
○
○
○
○
○
○
○
○
○
○
○
○
○
○
○
○
○
○
○
○
○
○
○
○
○
○
○
○
○
○
○
○
○
○
○
○
○
○
○
○
○
○
○
○
○
○
○
○
○
○
○
○
○
○
○
○
○
○
○
○
○
○
○
○
○
○
○
○
○
○
○
○
○
○
○
○
○
○
○
○
○
○
○
○
○
○
○
○
○
○
○
○
○
○
○
○
○
○
○
○
○
○
○
○
○
○
○
○
○
○
○
○
○
○
○
○
○
○
○
○
○
○
○
○
○
○
○
○
○
○
○
○
○
○
○
○
○
○
○
○
○
○
○
○
○
○
○
○
○
○
○
○
○
○
○
○
○
○
○
○
○
○
○
○
○
○
○
○
○
○
○
○
○
○
○
○
○
○
○
○
○
○
○
○
○
○
○
○
○
○
○
○
○
○
○
○
○
○
○
○
○
○
○
○
○
○
○
○
○
○
○
○
○
○
○
○
○
○
○
○
○
○
○
○
○
○
○
○
○
○
○
○
○
○
○
○
○
○
○
○
○
○
○
○
○
○
○
○
○
○
○
○
○
○
○
○
○
○
○
○
○
○
○
○
○
○
○
○
○
○
○
○
○
○
○
○
○
○
○
○
○
○
○
○
○
○
○
○
○
○
○
○
○
○
○
○
○
○
○
○
○
○
○
○
○
○
○
○
○
○
○
○
○
○
○
○
○
○
○
○
○
○
○
○
○
○
○
○
○
○
○
○
○
○
○
○
○
○
○
○
○
○
○
○
○
○
○
○
○
○
○
○
○
○
○
○
○
○
○
○
○
○
○
○
○
○
○
○
○
○
○
○
○
○
○
○
○
○
○
○
○
○
○
○
○
○
○
○
○
○
○
○
○
○
○
○
○
○
○
○
○
○
○
○
○
○
○
○
○
○
○
○
○
○
○
○
○
○
○
○
○
○
○
○
○
○
○
○
○
○
○
○
○
○
○
○
○
○
○
○
○
○
○
○
○
○
○
○
○
○
○
○
○
○
○
○
○
○
○
○
○
○
○
○
○
○
○
○
○
○
○
○
○
○
○
○
○
○
○
○
○
○
○
○
○
○
○
○
○
○
○
○
○
○
○
○
○
○
○
○
○
○
○
○
○
○
○
○
○
○
○
○
○
○
○
○
○
○
○
○
○
○
○
○
○
○
○
○
○
○
○
○
○
○
○
○
○
○
○
○
○
○
○
○
○
○
○
○
○
○
○
○
○
○
○
○
○
○
○
○
○
○
○
○
○
○
○
○
○
○
○
○
○
○
○
○
○
○
○
○
○
○
○
○
○
○
○
○
○
○
○
○
○
○
○
○
○
○
○
○
○
○
○
○
○
○
○
○
○
○
○
○
○
○
○
○
○
○
○
○
○
○
○
○
○
○
○
○
○
○
○
○
○
○
○
○
○
○
○
○
○
○
○
○
○
○
○
○
○
○
○
○
○
○
○
○
○
○
○
○
○
○
○
○
○
○
○
○
○
○
○
○
○
○
○
○
○
○
○
○
○
○
○
○
○
○
○
○
○
○
○
○
○
○
○
○
○
○
○
○
○
○
○
○
○
○
○
○
○
○
○
○
○
○
○
○
○
○
○
○
○
○
○
○
○
○
○
○
○
○
○
○
○
○
○
○
○
○
○
○
○
○
○
○
○
○
○
○
○
○
○
○
○
○
○
○
○
○
○
○
○
○
○
○
○
○
○
○
○
○
○
○
○
○
○
○
○
○
○
○
○
○
○
○
○
○
○
○
○
○
○
○
○
○
○
○
○
○
○
○
○
○
○
○
○
○
○
○
○
○
○
○
○
○
○
○
○
○
○
○
○
○
○
○
○
○
○
○
○
○
○
○
○
○
○
○
○
○
○
○
○
○
○
○
○
○
○
○
○
○
○
○
○
○
○
○
○
○
○
○
○
○
○
○
○
○
○
○
○
○
○
○
○
○
○
○
○
○
○
○
○
○
○
○
○
○
○
○
○
○
○
○
○
○
○
○
○
○
○
○
○
○
○
○
○
○
○
○
○
○
○
○
○
○
○
○
○
○
○
○
○
○
○
○
○
○
○
○
○
○
○
○
○
○
○
○
○
○
○
○
○
○
○
○
○
○
○
○
○
○
○
○
○
○
○
○
○
○
○
○
○
○
○
○
○
○
○
○
○
○
○
○
○
○
○
○
○
○
○
○
○
○
○
○
○
○
○
○
○
○
○
○
○
○
○
○
○
○
○
○
○
○
○
○
○
○
○
○
○
○
○
○
○
○
○
○
○
○
○
○
○
○
○
○
○
○
○
○
○
○
○
○
○
○
○
○
○
○
○
○
○
○
○
○
○
○
○
○
○
○
○
○
○
○
○
○
○
○
○
○
○
○
○
○
○
○
○
○
○
○
○
○
○
○
○
○
○
○
○
○
○
○
○
○
○
○
○
○
○
○
○
○
○
○
○
○
○
○
○
○
○
○
○
○
○
○
○
○
○
○
○
○
○
○
○
○
○
○
○
○
○
○
○
○
○
○
○
○
○
○
○
○
○
○
○
○
○
○
○
○
○
○
○
○
○
○
○
○
○
○
○
○
○
○
○
○
○
○
○
○
○
○
○
○
○
○
○
○
○
○
○
○
○
○
○
○
○
○
○
○
○
○
○
○
○
○
○
○
○
○
○
○
○
○
○
○
○
○
○
○
○
○
○
○
○
○
○
○
○
○
○
○
○
○
○
○
○
○
○
○
○
○
○
○
○
○
○
○
○
○
○
○
○
○
○
○
○
○
○
○
○
○
○
○
○
5J00401A[E] (44-BACK)
49
16:5:03, 17:07
49
○
JVC COMPANY OF AMERICA
Division of U.S. JVC CORP.
1700 Valley Road
Wayne, New Jersey 07470
JVC CANADA, INC.
21 Finchdene Square
Scarborough, Ontario
Canada M1X 1A7
J5J00401A K
03/05
5J00401A[E] (44-BACK)
Printed in Thailand
50
16:5:03, 17:07
MANUEL
D'INSTRUCTIONS
TÉLÉCOULEUR/DVD
Pour le modèle:
AV-20FD24
POWER
TV CATV
PLAY MODE
DISPLAY
SLEEP
TIMER
AUDIO
AUDIO
TITLE
1
2
3
SUBTITLE
4
5
6
JUMP
7
8
9
C.C.
ANGLE
0 RETURN
MARKER ZOOM REPEATA-B RETURN
Ð SLOW +
MUTING
CANCEL LIGHT
SELECT
/ENTER
+
CH
VOL
Ð
VOL
+
INPUT
CH
Ð
TV MENU
PREV NEXT
B.SEARCH
OPEN/CLOSE
DVD SETUP
TV/DVD DVD MENU
PLAY
F.SEARCH
STOP
PAUSE/STILL
TV / DVD
REMARQUE:
Veuillez inscrire dans les espaces ci-dessous le n˚ de série de
votre téléviseur (sités à l'arrière du téléviseur).
Agrafez votre reçu ou votre facture à la page intérieure de ce guide. Rangez ce
manuel dans un lieu où vous le retrouverez rapidement pour vous y référer.
Gardez le carton et l'emballage d'origine pour une utilisation ultéríeure.
Numéro de série
5J00401A[F] Cover
1
17/5/03, 5:00 PM
ATTENTION
RISQUE DE CHOC ELECTRIQUE
NE PAS OUVRIR
ATTENTION: AFIN DE REDUIRE LES RISQUES DE
CHOC ELECTRIQUE, NE PAS RETIRER LE
COUVERCLE (OU LE PANNEAU ARRIERE).
AUCUNE PIECE NE PEUT ETRE REPAREE
PAR L'UTILISATEUR. CONFIEZ L'APPAREIL
A UN TECHNICIEN QUALIFIE.
Le signe représentant un éclair dans un
triangle équilatéral a pour but d'avertir
l'utilisateur du danger présenté par des
pièces non isolées à l'intérieur de l'appareil
et dont la tension est suffisante pour
provoquer des décharges électriques
dangereuses.
Le point d'exclamation dans un triangle
équilatéral a pour but d'avertir l'utilisateur
que des instructions importantes relatives à
l'utilisation et à l'entretien se trouvent dans
le manuel accompagnant l'appareil.
AVERTISSEMENT: AFIN D'EVITER TOUT RISQUE D'INCENDIE OU D'ELECTROCUTION, N'EXPOSEZ
PAS CET APPAREIL A LA PLUIE NI A L'HUMIDITE.
ATTENTION: POUR PREVENIR LES CHOCS ELECTRIQUES, N'UTILISEZ PAS CETTE FICHE
POLARISEE AVEC UNE RALLONGE, UNE PRISE DE COURANT OU UNE AUTRE
SORTIE DE COURANT, SAUF SI LES LAMES PEUVENT ETRE INSEREES A FOND
SANS EN LAISSER AUCUNE PARTIE A DECOUVERT.
AVERTISSEMENT: Cet appareil a fait l'objet de tests qui ont déterminé qu'il est en conformité avec les
limites imposées pour les appareils numériques de la classe B, selon le chapitre 15, des
règles de la FCC. Ces limites sont prescrites afin d'offrir une protection raisonnable
contre toute interférence préjudiciable dans une installation résidentielle. Cet appareil
produit, emploie et peut être la cause d'un rayonnement radioélectrique et, si
l'installation et l'emploi ne sont pas conformes aux instructions, risque de présenter un
brouillage nuisible aux radiocommunications.
Toutefois, il est impossible de garantir qu'aucune interférence ne sera produite par une
installation particulière. Si cet appareil est la source de brouillage nuisible à la réception
des émissions radiophoniques ou télévisuelles, déterminé en allumant et en éteignant
plusieurs fois de suite l'appareil, l'utilisateur pourra tenter de résoudre ce problème de
brouillage par une des mesures suivantes:
- Changer l'orientation ou l'installation de l'antenne de réception.
- Eloigner davantage l'appareil du récepteur.
- Brancher le cordon d'alimentation de l'appareil dans une prise ou sur un circuit séparé
du récepteur.
- Consulter le distributeur ou un technicien expérimenté en radio/TV pour assistance.
ATTENTION: Tout changement ou toute modification n'étant pas autorisée de façon explicite par
l'organisme responsable de la conformité aux règles de la FCC peut entraîner
l'interdiction à l'utilisateur d'utiliser cet appareil.
PRÉCAUTIONS :
CE LECTEUR DVD UTILISE UN SYSTEME LASER.
Emplacement des marquages nécessaires
La fiche signalétique et les instructions de
sécurité sont situées à l'arrière de l'appareil.
POUR UTILISER CORRECTEMENT CE PRODUIT, VEUILLEZ
LIRE CE GUIDE D'UTILISATION SOIGNEUSEMENT ET
GARDEZ-LE A TITRE DE RÉFÉRENCE FUTURE. SI
L'APPAREIL DOIT SUBIR DES OPÉRATIONS DE MAINTENANCE, CONTACTEZ UN CENTRE DE SERVICE JVC AGRÉÉ.
L'UTILISATION DES COMMANDES, DES RÉGLAGES OU
L'EXÉCUTION DE PROCÉDURES QUI NE SONT PAS
SPÉCIFIÉES DANS CE DOCUMENT PEUVENT ENTRAINER
UNE EXPOSITION DANGEREUSE AU RAYON LASER.
VIDEO
UHF/
VHF
(MONO)
POUR ÉVITER TOUTE EXPOSITION DIRECTE AU RAYON
LASER, NE TENTEZ PAS D'OUVRIR LE COMPARTIMENT. UN
RAYONNEMENT LASER VISIBLE RISQUE D'ETRE PRÉSENT
QUAND LE COMPARTIMENT EST OUVERT. IL NE FAUT PAS
REGARDER LE FAISCEAU.
AUDIO
R
CERTIFICATION : CONFORME AUX NORMES
« FDA RADIATION PERFORMANCE STANDARDS, 21 CFR SUBCHAPTER J. »
2
5J00401A[F] (02-05)
2
DIGITAL
AUDIO OUT
LINE IN 1 COAXIAL
22/05/2003, 14:16
IMPORTANTES MESURES DE SECURITE
1. Lisez les instructions
Lisez attentivement toutes les instructions sur le fonctionnement et la sécurité avant de mettre l'appareil en
marche.
2. Conservez les instructions
Gardez les instructions, pour vous y référer plus tard, au besoin.
3. Tenez compte de ces mises en garde
Toutes les mises en garde imprimées sur l'appareil ou contenues dans le manuel d'instructions doivent être
observées.
4. Observez les instructions
Toutes les instructions sur le fonctionnement et l'utilisation doivent être suivies.
5. Nettoyage
Débranchez l'appareil de la prise électrique avant de le nettoyer. N'utilisez pas de produits de nettoyage
liquides ni en aérosol, mais essuyez l'appareil avec un linge humide.
6. Accessoires
Le fabricant de cet appareil ne conseille aucun accessoire car leur emploi peut être dangereux.
7. Eau et humidité
N'utilisez pas l'appareil dans des endroits humides ou près de l'eau, comme par exemple à proximité d'une
baignoire, d'un évier de cuisine ou de salle de bain, dans un sous-sol humide ou autour d'une piscine.
8. Emplacement de l'appareil
MISE EN GARDE EN CAS
D'UTILISATION D'UN CHARIOT
Ne placez pas cet appareil vidéo sur un chariot, support, trépied ou table
(Symbole foumi par la RETAC)
instable, car il pourrait en tomber, se casser et blesser sérieusement
quelqu'un se trouvant à proximité.
8A. Si vous voulez déplacer l'appareil avec le chariot sur lequel il est placé,
procédez avec prudence, car des arrêts brusques, une force excessive ou
des surfaces inégales peuvent causer le renversement de l'appareil avec le
chariot.
S3126A
9. Ventilation
Les fentes et les orifices se trouvant à l’endos et sous le boîtier de l’appareil sont destinées à assurer sa
ventilation de manière à ce qu’il fonctionne sans anomalie et qu’il ne soit pas exposé à une surchauffe.
N'obstruez pas ces orifices d'aération en plaçant l'appareil sur une surface molle, comme un lit, un divan ou
un tapis. Ne le placez pas non plus près ou au-dessus d'un radiateur ou d'une bouche de chauffage ni sur une
étagère ou dans un meuble fermé, dont les parois pourraient bloquer la circulation d'air autour de l'appareil.
Suivez les instructions du fabricant.
10. Source d'alimentation
Cet appareil ne peut être raccordé qu'à la source d'alimentation indiquée sur sa plaque signalétique.
Si vous ne connaissez pas la tension de votre source de courant, questionnez votre marchand ou votre
compagnie d'électricité locale. Pour les appareils destinés à être alimentés par des piles ou autres sources
de courant, consultez le manuel d'instructions.
11. Mise à la terre ou polarisation
Cet appareil est doté d'une fiche polarisée de courant alternatif (une lame plus large que l'autre) qui ne peut
se brancher sur la prise que d'une seule façon. S'il vous est impossible de la brancher sur la prise, essayez
de l'inverser. Si c'est toujours impossible, demandez à un électricien de vous remplacer la prise désuète.
N'essayez pas de neutraliser l'objectif sécuritaire de la fiche polarisée si votre appareil est doté d'une fiche
à 3 broches à mise à la terre. Cette fiche peut se brancher seulement sur une prise électrique à mise à la
terre. Ceci est aussi un dispositif de sécurité.
12. Protection du cordon d'alimentation
Le cordon d'alimentation doit être acheminé de façon à ne pas être écrasé ni coincé. Il faut aussi faire
attention aux fiches, prises et points de sortie de l'appareil.
13. Orage électrique
Pour éviter les dommages causés par la foudre ou les soudaines hausses de tension, débranchez
l'appareil de la prise électrique et déconnectez l'antenne ou le système de câblodistribution si l'appareil doit
rester sans surveillance et inutilisé pendant une longue période.
3
5J00401A[F] (02-05)
3
17/5/03, 5:00 PM
IMPORTANTES MESURES DE SECURITE (SUITE)
14. Lignes de haute tension
L'antenne extérieure ne doit pas être placée à proximité de lignes d'alimentation aériennes ni de circuits de
courant, ni de telle façon qu'elle puisse toucher ces lignes ou circuits en tombant. Pendant l'installation de
l'antenne extérieure, il faut être très prudent de ne pas toucher ces lignes ou circuits car leur contact peut
être fatal.
15. Surcharge
Ne surchargez pas les prises électriques murales ni les cordons de rallonge, car cela risque de causer un
incendie ou des chocs électriques.
16. Pénétration de liquide ou corps étranger
Faites attention de ne pas laisser tomber un corps étranger ni de laisser pénétrer un liquide dans les
orifices de l'appareil, car cela peut toucher des points de tension dangereux, causer un court-circuit, un
incendie ou des chocs électriques. Ne versez jamais de liquide sur l'appareil.
17. Mise à la terre de l'antenne extérieure
Si une antenne extérieure ou un système de transmission par câble est relié à l'appareil, vous devez vous
assurer que l’antenne ou le système de transmission par câble est convenablement mis à la terre de
manière à être protégé, dans toute la mesure du possible, contre les surtensions et les charges d’électricité
statique. La section 810 du code national de l'électricité (ANSI/NFPA 70) vous renseigne sur les moyens
appropriés de mettre le mât et la structure de support à la terre, de la mise à la terre du fil de descente vers
un élément de décharge de l'antenne, et du raccordement des électrodes de mise à la terre.
18. Service ou réparation
Le consommateur ne doit pas essayer de réparer l'appareil lui-même, mais doit se limiter aux réglages
décrits dans le manuel d'instructions. En cas de besoin, confiez l'appareil à un centre de service autorisé.
19. Dommages exigeant des réparations
L'appareil doit être débranché de la prise électrique et confié à un réparateur qualifié si:
a. La fiche ou le cordon d'alimentation a été endommagé;
b. Un objet est tombé ou un liquide a pénétré à l'intérieur de l'appareil;
c. L'appareil a été exposé à la pluie;
d. L'appareil ne fonctionne pas convenablement quand vous suivez les instructions. Effectuez
seulement les réglages expliqués dans le manuel d'instructions, car des réglages inadéquats peuvent
endommager sérieusement l'appareil, qui exigera alors des réparations coûteuses par un technicien
qualifié pour retrouver son bon état de fonctionnement;
e. L'appareil est tombé ou son boîtier a été endommagé;
f. Le fonctionnement de l'appareil a changé de façon marquante.
20. Pièces de rechange
Quand il est nécessaire de remplacer certaines pièces de l'appareil, assurez-vous que le réparateur utilise
es pièces recommandées par le fabricant ou ayant les mêmes caractéristiques que les pièces originales.
Le remplacement par des pièces non autorisées peut causer un incendie, des chocs électriques ou
d'autres accidents.
21. Vérification de sécurité
Après service ou réparation, demandez au technicien d’effectuer des vérifications de sécurité pour
s’assurer que l’appareil est en bon état de fonctionnement.
22. Chaleur
N’exposez pas cet appareil à des sources de chaleur, comme des radiateurs, bouches de chauffage,
cuisinières ou autres appareils dégageant ou produisant de la chaleur, y compris un amplificateur.
23. Compartiment à disque
Gardez les doigts à l'écart du compartiment à disque quand il se ferme, sinon vous risquez de vous blesser
sérieusement.
24. Connexion
Quand vous connectez le produit sur un autre matériel, éteignez la machine et débranchez tout le matériel
de la prise murale. Sinon, un choc électrique peut se produire ainsi que des blessures graves. Lisez
soigneusement le manuel d'utilisateur des autres appareils et suivez les instructions quand vous effectuez
les connecxions.
25. Volume sonore
Réduisez le volume au niveau minimum avant d'allumer l'appareil. Sinon, un volume sonore élevé soudain
risque d'endommager les oreilles ou les hauts-parleurs.
4
5J00401A[F] (02-05)
4
17/5/03, 5:00 PM
26. Distortion sonore
Le produit de ne doit pas produire un son déformé pendant longtemps. Sinon, le haut-parleur risque de
surchauffer ou de brûler.
27. Écouteurs
Quand vous utilisez les écouteurs, maintenez le volume à un niveau modéré. Si vous utilisez les écouteurs
continuellement à un volume sonore élevé, l'ouïe peut être affectée.
28. Faisceau laser
Il ne faut pas regarder à l'intérieur de l'ouverture du compartiment à disque ou de la ventilation de l'appareil
pour regarder le faisceau laser. Sinon, vous risquez d'endommager la vue.
29. Disque
Il ne faut pas utiliser de disque craqué, déformé ou réparé. Ces disques se brisent facilement et peuvent
causer des blessures sérieuses et un mauvais fonctionnement de l'appareil.
30. Remarque à la personne qui effectuera le raccordement au réseau de câblodistribution
Cet avis est destiné à lui rappeler l'article 820-40 du Code national de l'électricité (NEC) qui donne les
lignes de conduite sur la mise à la terre correcte et qui stipule que "la mise à la terre du câble doit être
raccordée à un système de mise à la terre de l'édifice, aussi près que possible de son point d'entrée".
EXEMPLE DE LA MISE A LA TERRE DE L'ANTENNE SELON
LES INSTRUCTIONS DU CODE DE L'ELECTRICITE
Câble de descente d'antenne
Bride de mise à la terre
Equipement du
service électrique
Elément de décharge de l'antenne
(Article 810-20 du NEC)
Conducteurs de mise à la terre
(Article 810-21 du NEC)
Brides de mise à la terre
NEC - Code national de l'électricité
S2898A
Système d'électrodes de mise à la terre du courant
(Art. 250, section H, du NEC)
Condensation
Une couche d'humidité se formera dans la partie opérationnelle du lecteur si celui-ci passe d'un milieu froid
dans une salle chauffée ou si la température de la salle augmente subitement. Dans ces cas-là, la performance
du lecteur sera affectée.
A des fins préventives, placez le lecteur dans son nouvel environnement pendant environ une heure avant de
l'allumer, ou veillez à faire monter la température de la salle petit-à-petit.
Une couche de condensation peut également se former pendant l'été si le lecteur est exposé à l'air d'un
climatiseur. Dans ces cas, changez l'emplacement du lecteur.
Source d'alimentation
Prise du CA
Trou et lame
plus larges
Cordon CA à fiche polarisée
(une lame plus large que l’autre)
POUR UTILISER LA SOURCE D’ALIMENTATION
Utiliser le cordon du CA polarisé qui convient à l’opération du CA. Insérez la fiche du
CA à la prise du CA polarisée (120 volts, 60 hertz).
REMARQUES:
• Ne branchez jamais le cordon du CA sur une prise à tension autre que celle
spécifiée (120 volts, 60 hertz) et utilisez seulement le cordon d’alimentation fourni.
• S’il est impossible d’insérer la fiche polarisée dans une prise du CA non
polarisée, n’essayez pas de couper ni de limer la lame la plus large, Il incombe
à l’utilisateur de demander à un électricien de remplacer la prise désuète.
• Si vous recevez un choc électrique quand vous touchez l’appareil, et qu’il cesse
de fonctionner, débranchez-le simplement de la prise électrique, attendez
quelques minutes puis branchez-le de nouveau. L’appareil devrait alors
fonctionner normalement.
5
5J00401A[F] (02-05)
5
17/5/03, 5:00 PM
Caractéristiques
Télécouleur avec lecture DVD/CD audio
Conception unique en son genre pour économiser l'espace qui combine un plat 20” de télécouleur et un lecture
DVD/CD audio.
Le disque DVD a une très grande capacité quoique sa taille soit celle d’un CD audio.
La qualité de l’image et du son du DVD est supérieure à celle des autres supports.
L’image est meilleure que celle du Super VHS, et la qualité du son est plus grande que celle du CD audio.
De plus, le disque DVD permet des options spécifiques telles que la sélection du langage du film ou des sous-titres,
et la vision en multi-angles.
Le lecteur DVD accepte le disque DVD ainsi que le CD audio.
La qualité d’image (HQ)
Résolution horizontale :
plus de 500 lignes c’est à dire plus que le S VHS (400 lignes) ou le laser disque (430 lignes).
Compatibilité à une large gamme de sorties audio :
prise audio digital optique , prise coaxial :
• Lorsque l’appareil connecté intègre un décodeur Dolby digital, le son produit est celui d’un “ son-cinéma ” ou “ son
théatre ”.
• Son “ surround ”, différent d’un son Dolby digital. Ce format de son est déjà utilisé dans de nombreux théatres : Par
simple connexion de cet appareil à un décodeur DTS ou à un ampli AV intégrant un décodeur DTS (Digital Theater
system), on retrouve en sortie le son DTS du DVD enregistré dans ce format. Toutefois, la sortie audio ne sera pas
possible à partir de la prise analogique.
• Si l’appareil est connecté à un ampli AV intégrant un décodeur MPEG, la lecture se fera en son MPEG (si le DVD a été
enregistré en MPEG).
• Le son linéaire PCM d’un 48 kHz/16 bit sur un 96kHz/20 bit dépasse le son d’un CD audio.
Les “ PLUS ” de cet appareil
Avance image par image - La fonction PAUSE/STILL permet l’avance image par image.
Ralenti - La touche SLOW vous permet de faire reculer ou avancer le programme par 4 fois 1/8 - 1/2.
Lecture répétée - Fonction “ Repeat ” applicable sur un chapitre, un titre, une piste, un segment entre deux points.
Lecture programmée (CD Audio) - Les plages ont été programmées dans un ordre préférenciel.
ZOOM (DVD) - Pendant la lecture, possibilité de Zoom avant.
Note: S’assurer que les disques intègrent les fonctions suivantes.
Multi-langages - possibilité de 8 langues maximum pour le film, 32 langues maxi pour les sous-titres.
Multi-angles - Les images de sport ou de concert sont filmées par plusieurs cameras. Cet appareil permet une lecture
à angles multiples par simple utilisation de la touche multi angle.
Contrôle parental - possibilité de verrouillage de scènes ou de son sur certains disques pour adultes intégrant le blocage
parental.
Format écran vidéo - sélection du format de l’écran pour la lecture.
Fonctions TV
Tube cathodique plat - Il réduit les nuisances de la lumière ambiante en accentuant les détails et la clarté de l’image.
Système de syntonisation 181 canaux - Peut capter tous les canaux VHF/UHF de télévision disponibles dans
votre région et jusqu'à 113 canaux câblodistribués. Le nombre réel de canaux captés dépend de la réception des
canaux dans votre région ou de votre système de câblodistribution.
Décodeur de sous-titres avec mode de texte intégral - Fait apparaître les sous-titres ou un texte sur tout l'écran
pour les téléspectateurs malentendants.
Réglage de l'image par télécommande - L'affichage à l'écran permet de régler avec précision, au moyen de la
télécommande, la luminosité, la couleur, le contraste, la netteté et la teinte de l'image.
Minuterie d'arrêt différé programmable - Le télécouleur peut être programmé, par télécommande, pour s'éteindre
automatiquement après une période pouvant aller jusqu'à 120 minutes.
Affichage trilingue à l'écran - Vous pouvez choisir l'affichage des étapes de la programmation en trois langues:
français, anglais ou espagnol.
Puce V - La puce V permet de classer une émission télévisée ou le contenu d’un film. Grâce à cette information, il
est possible de définir un niveau de restriction.
Cet appareil int-ègre une technologie de protection des droits d’auteurs qui est couverte aux Etats-Unis par
des brevets détenus par Macrovision Corporation et d’autres sociétés, soit par d’autres formes de propriété
intellectuelle appartenant également à Macrovision et à d’autres sociétés. L’utilisation de la technologie visant
à la protection des droits d’auteur doit être autorisée par Macrovision Corporation, et doit être limitée à des fins
domestiques, ou similaires, sauf accord préalable de Macrovision Corporation. La rétro-technique et le
désassemblage sont interdits.
6
5J00401A[F] (06-11)
6
17/5/03, 5:00 PM
ENER Y STAR
• Comme société «ENERGY STAR®», JVC a déterminé que ce produit ou modèle
de produit est conforme aux directives «ENERGY STAR®» pour le rendement
énergétique.
IMPORTANTES INFORMATIONS DE RECYCLAGE
Ce produit utilise à la fois un tube cathodique et d’autres composants qui
contiennent du plomb. Il se peut que l’évacuation de ces matériaux soit
réglementée dans votre communauté afin de protéger l’environnement. Pour de
plus amples renseignements sur l’évacuation ou le recyclage, veuillez contacter
vos autorités locales ou l’association Electronic Industries Alliance à http://
www.eiae.org
Table des matieres
Avant la première utilisation
Fonctions évoluées
IMPORTANTES MESURES DE SECURITE . 3
Source d’alimentation ..................................... 5
Caractéristiques ............................................. 6
Table des matieres ......................................... 7
Commandes et fonctions ............................... 8
Télécommande .............................................. 9
Raccordements des antennes ..................... 11
Raccordements a la câblodistribution .......... 12
Zoom/Repérage de la scène désirée ........... 30
Lecture répétée, Lecture au hasard et Lecture
programmée/Lecture à répétition A-B .......... 31
Indexage d’une scène .................................. 32
Changement de langue de la bande son/
Sous-titres .................................................... 33
Changement des angles/Sélection du titre/
Menu DVD .................................................... 34
Fonctionnement du télécouleur
Informations complémentaires
Choix de la langue ....................................... 13
Fonctionnement du télécouleur .................... 14
Sous-titres .................................................... 16
Mise en mémoire des canaux ...................... 17
Utilistion de la Puce V .................................. 19
Ajustements de l’image ................................ 22
Stéréophonie et canal son séparé (SAP) ..... 23
Ajustement des réglages sonores ................ 24
Sélection de la langue .................................. 35
Réglage du format écran/Réglage de
l’affichage ..................................................... 36
Dynamique audio (contrôle de la gamme
d’amplification) ............................................. 37
Réglage des différents niveaux de blocage ... 38
Pour changer le niveau parental .................. 39
Fonction d’annulation temporaire du
verrouillage parental dans le disque DVD .... 40
Liste des codes langues ............................... 41
Connexion à un autre appareil ..................... 42
Problèmes et anomalies ............................... 44
Problemes de reception ............................... 46
Fiche technique ............................................ 47
Appendice (Programmation avec la
télécommande) ............................................ 48
Lecture d’un disque
A propos du disque ...................................... 25
Préparation/Affichage d'état disque ............. 26
Lecture en mode basique ............................. 27
Lecture en modes spéciaux ......................... 28
Lecture de fichiers MP3 ............................... 29
7
5J00401A[F] (06-11)
7
17/5/03, 5:00 PM
Commandes et fonctions
VUE AVANT
Touche précédent (PREVIOUS)
Touche d'arrêt (STOP)
Conpartiment disque
Touche suivant (NEXT)
Voyant
d’alimentation
(POWER)
Touche ouverture/
fermeture (OPEN/CLOSE)
Capteur de la
télécommande
POWER
STOP
PREVIOUS
PLAY
NEXT
OPEN/CLOSE
POWER
VIDEO
VOLUME
CHANNEL
Interrupteur (POWER)
R
Prises d'entrée AUDIO (L/R) /
VIDEO (LINE 2)
Prise d'écouteur (HEADPHONE)
COMMENT OUVRIR LE PANNEAU FRONTAL
L/MONO AUDIO
LINE 2 IN
Commandes de volume
(VOLUME + / –)
Touche de lecture (PLAY)
Sélecteurs de canaux (CHANNEL + / –)
VUE ARRIERE
Prise d'antenne UHF/VHF
(UHF/VHF)
Prises d'entrée AUDIO (L/R) / VIDEO (LINE 1)
VIDEO
UHF/
VHF
(MONO)
AUDIO
R
DIGITAL
AUDIO OUT
LINE IN 1 COAXIAL
Prise de sortie audio digital coaxial
VIDEO
UHF/
VHF
(MONO)
AUDIO
R
DIGITAL
AUDIO OUT
LINE IN 1 COAXIAL
Cordon d'alimentation du CA
8
5J00401A[F] (06-11)
8
22/05/2003, 11:18
Télécommande
Page
POWER
TV CATV
DISPLAY
PLAY MODE
SLEEP
TIMER
AUDIO
AUDIO
TITLE
1
2
3
SUBTITLE
4
5
6
JUMP
7
8
9
C.C.
ANGLE
RETURN
0
TV/CATV switch
Commutation TV ou CATV
POWER
Touche STANDBY/MARCHE-ARRET 10,13,14,26
PLAY MODE
Sélection du mode de lecture
DISPLAY
Recherche de l'information
AUDIO (pour DVD)
Changer la langue du film (DVD)
33
SLEEP TIMER
Réglage de l'arrêt différé
15
AUDIO
(pour la télévision)
Commande de son de la télévision
23
TITLE
Sélection du titre
34
0-9
Sélection directe de canal du réglage d'entrée
télévision
14,18
Réglage de l'arrêt différé
29~31
Entrer un mot de passe
19,21,38~40
MUTING
CANCEL
LIGHT
SELECT
/ENTER
+
CH
VOL
–
INPUT
Sous-titres
33
JUMP
Repérage de la scène désirée
30
ANGLE
Changer l’angle de lecture
34
C.C.
Commutation entre TV/Sous-titres/Texte
dans le mode Sous-titres fermé
16
RETURN
(pour la télévision)
Commutation entre canaux présent/précédent 15
MARKER
Afficher un titre, un chapitre, la durée
32
ZOOM
Zoom
30
REPEAT A-B
Répéter la lecture entre A et B
31
RETURN (pour DVD) Fait disparaître le menu de configuration DVD 35~40
VOL
+
CH
SLOW +/–
Avance/Retour-Ralenti
CANCEL
Réinitialisation des informations dans le menu
22,24,30~32,38,39
LIGHT
Permet d'activer l'illumination pour CH (canal)
et VOL
10
MUTING
Activation et désactivation du son
14
SELECT/ENTER
Permet de saisir les informations dans le menu
13,19,21,
Sélection d'une option de menu 27,29~32,34~40
CH +/– (▲▼)
Sélection du canal TV
10,15
Curseurs de déplacement
13,17~22,24,27,29,30,32,34~39
Règlage du volume
10,14
Touches curseurs 13,17~22,24,27,29,30,32,34~39
–
TV MENU
DVD SETUP
PREV NEXT
B.SEARCH
OPEN/CLOSE
31
15,26
SUBTITLE
MARKER ZOOM REPEATA-B RETURN
– SLOW +
10,48
TV/DVD DVD MENU
PLAY
F.SEARCH
STOP
PAUSE/STILL
VOL +/– (
TV / DVD
)
28
INPUT
Commutation entre canal TV/LIGNE
TV MENU
Affichage du menu de configuration TV 13,17~22,24
DVD SETUP
Affichage du menu de configuration DVD
35~39
PREV/NEXT
Sauter un chapitre en avant ou en arriere
28
TV/DVD
Commutation entre le mode TV/mode DVD 10,26
DVD MENU
Affichage du menu de logiciel DVD
B.SEARCH/F.SEARCH Lecture en Avance Rapide/Retour
43
34
28
PLAY
Lecture
OPEN/CLOSE
Ouverture/Fermeature du compartiment
27~29,31,34,40
27,29,40
STOP
Arrêt
27,29,31
PAUSE/STILL
Pause
28
9
5J00401A[F] (06-11)
9
17/5/03, 5:00 PM
Télécommande
INSERTION DES PILES
1
Ouvrez le couvercle du
compartiment à piles en le
faisant glisser dans la
direction de la flèche.
Insérez deux piles “AA” en
2 observant
leurs polarités, tel
3 Fermez le couvercle.
qu'indiqué sur le diagramme.
PRECAUTIONS A PRENDRE AVEC LES PILES
Quand cet appareil est alimenté par des piles, vous devez observer les précautions suivantes:
1. Utilisez seulement des piles de format et de genre spécifiés.
2. Quand vous insérez les piles, assurez-vous d'observer leur polarité, tel qu'indiqué à l'intérieur du compartiment.
Si vous inversez les piles, vous pouvez endommager l'appareil. Pour éviter tout risque de court-circuit, introduisez
d'abord le pôle “–”.
3. Ne mélangez pas des piles de genres différents (par exemple des piles alcalines avec des piles au carbonezinc) ou
d'anciennes piles avec de nouvelles piles.
4. Si l'appareil ne doit pas être utilisé pendant un certain temps, retirez les piles du compartiment pour éviter qu'elles
coulent et endommagent l'appareil.
5. N'essayez pas de recharger des piles non rechargeables, car elles peuvent surchauffer et éclater. Suivez les
instructions du fabricant des piles.
6. Lorsque vous remplacez les piles, essayez de le faire en moins de trois minutes. Si vous dépassez les trois
minutes, les codes de télécommande relatifs au décodeur câble risquent d'être réinitialisés (voir page 48).
Fonctiones de base de la télécommande
• Avant de pouvoir utiliser la télécommande,vous devez d’abord poser les piles (fournies). Reportez-vous à la section
“INSERTION PES PILES” au bas de cette page pour instructions.
• Appuyez sur le bouton POWER pour mettre la télévision en marche ou à l’arrêt.
• Assurez-vous que le commutateur TV/CATV se trouve sur la position TV. Mettez le commutateur sur la position
CATV seulement si vous devez utiliser une boîte de câble.
(Il faut régler la télécommande pour utilisation avec boîtier de câbles. Consultez la page 48 pour lire les instructions.)
• Appuyez sur les boutons CH + et CH – pour balayer à travers les canaux. Tapez sur le bouton CH+ou CH – pour
passer à travers les canaux un à la fois.
• Appuyez sur VOL + ou VOL – pour augmenter ou baisser le volume. Une barre indicatrice apparaîtra à l’écran pour
vous montrer le niveau du volume de la télévision.
• Les boutons CH +/– et VOL +/– servent également à la navigation dans le système JVC de menus à l’écran.
• Vous pouvez accéder directement à des canaux particuliers à l’aide du pavé à clavier numérique.
• Certaines touches de ce boîtier de télécommande peuvent être éclairées, par exemple les touches CH +/– ou VOL
+/–. Appuyez sur la touche LIGHT pour que ces touches s'éclairent.
• Chaque fois que vous appuyez sur TV/DVD sur la télécommande, l'écran passe du mode TV au mode DVD. Vous
pouvez utiliser une télévision et un menu TV dans le mode TV, ainsi qu'un DVD et menu de configuration DVD dans
le mode DVD.
Fonctionnement
• Pointez la télécommande sur le capteur et
appuyez sur les commandes pour la faire
fonctionner.
• Utilisez la télécommande dans un angle de 30˚ de
chaque côté du capteur, jusqu'à une distance
d'environ 5 mètres.
Env. 5 metres (15 pieds)
10
5J00401A[F] (06-11)
10
17/5/03, 5:00 PM
Raccordements des antennes
Si vous utilisez une antenne intérieure ou extérieure (non fourni), suivez les directives ci-dessous, qui
correspondent à votre genre d'antenne. Si vous êtes abonné à un service de câblodistribution (CATV),
voyez les directives de la page 12.
Antenne combinée VHF/UHF (câble unique de 75 ohms ou fil jumelé de 300 ohms)
Raccordez le câble de 75 ohms de l'antenne
combinée VHF/UHF à la prise d'antenne.
Prise
d’antenne
Prise
d’antenne
UHF/
VHF
UHF/
VHF
Câble
coaxial 75
ohms
Si votre antenne VHF/UHF combinée est dotée
d'un fil jumelé de 300 ohms, il est put-être
nécessaire d'utiliser un transformateur adapté
300/75 ohms.
Transformateur
adapté 300/75 ohms
(non fourni)
Antenne VHF/UHF combinée (fils jumelés séparés VHF et UHF de 300 ohms)
Transformateur
adapté 300/75 ohms
(non fourni)
Prise
d’antenne
Raccordez le fil jumelé UHF de 300 ohms à un
multiplexeur (non fourni). Raccordez le fil jumelé
VHF de 300 ohms au transformateur adapté
300/75 ohms. Raccordez le transformateur au
multiplexeur puis branchez le multiplexeur sur la
prise d'antenne.
UHF/
VHF
Multiplexeur
(non fourni)
UHF 300 ohms
VHF 300 ohms
Antennes séparées VHF/UHF (câble de 75 ohms de l'antenne VHF et fil jumelé UHF 300 ohms)
Raccordez le câble de 75 ohms de l'antenne
VHF et le fil jumelé de l'antenne UHF de 300
ohms au multiplexeur (non fourni) et branchez
ce dernier sur la prise d'antenne.
Prise
d’antenne
UHF/
VHF
VHF 75 ohms
Multiplexeur
(non fourni)
UHF 300 ohms
11
5J00401A[F] (06-11)
11
17/5/03, 5:00 PM
Raccordements a la câblodistribution
Ce TV/DVD a une gamme de syntonisation étendue et peut capter la plupart des canaux sans utiliser un
convertisseur. Certaines compagnies de câblodistribution permettent le visionnement de “canaux payants” dont le
signal est brouillé. Pour regarder ces signaux, un débrouilleur, en général fourni par la compagnie, est nécessaire.
POUR LES ABONNES AUX SERVICES DE BASE DE CÂBLODISTRIBUTION
Prise
d’antenne
Pour les services de base du câble sans convertisseur/
débrouilleur, raccordez directement le câble coaxial 75 ohms de
la câblodistribution à la prise d'antenne, à l’endos du l'appareil.
UHF/
VHF
Câble coaxial
75 ohms
POUR LES ABONNES AUX SERVICES DE CABLODISTRIBUTION A CANAUX
BROUILLES
Si vous souscrivez aux services de câblodistribution exigeant l'utilisation d'un convertisseur/débrouilleur,
raccordez le câble coaxial d'entrée de 75 ohms au convertisseur/débrouilleur. Au moyen d'un autre câble
coaxial de 75 ohms, raccordez la prise de sortie du convertisseur/débrouilleur à la prise d'antenne du
télécouleur. Suivez les instructions ci-dessous. Réglez le télécouleur sur le canal de sortie du convertisseur/
débrouilleur (en général 3 ou 4) et utilisez le convertisseur/débrouilleur pour choisir le canal.
Câble d'entrée
75 ohms du
câble
Convertisseur/débrouilleur
Câble 75 ohms
vers le
télécouleur/DVD
Prise
d’antenne
UHF/
VHF
POUR LES ABONNES AUX SERVICES DE BASE DE CÂBLODISTRIBUTION AVEC
CANAUX PAYANTS BROUILLES
Si vous souscrivez aux services de câblodistribution dont les canaux sont payants et brouillés, exigeant
l'utilisation d'un convertisseur/débrouilleur, il est peut être nécessaire d'utiliser un séparateur et une boîte de
commutation A/B (vendu par l'installateur du câble ou dans tout magasin spécialisé). Quand le commutateur A/B
est réglé à la position “B”, il est possible de syntoniser tous les canaux non brouillés en utilisant le système de
syntonisation du télécouleur. Quand il est réglé à la position “A”, il est possible de syntoniser le téléviseur sur le
canal de sortie du décodeur (en général 3 ou 4) et d'utiliser le convertisseur/débrouilleur pour syntoniser les
canaux brouillés.
Convertisseur/débrouilleur
Câble d'entrée
75 ohms du
câble
Séparateur
Commutateur A
B
A/B
Câble 75 ohms
vers le
télécouleur/DVD
UHF/
VHF
12
5J00401A[F] (12-17)
12
Prise
d’antenne
17/5/03, 5:00 PM
Choix de la langue
Vous pouvez choisir parmi les trois langues suivantes (Anglais, Français et Espagnol) pour l’affichage à l’écran.
Les menus et les messages de réglage apparaîtront dans la langue de votre choix.
Le choix de la langue d’affichage à l’écran (opération 5) se présente à vous, automatiquement, lorsque vous
appuyez initialement sur la touche MENU. Tout d’abord, choisissez la langue que vous désirez puis passez aux
autres options offertes par le menu.
Pour mettre l'appareil en circuit, pressez l'interrupteur
(POWER). L'indicateur Power s'allume.
1
POWER
TV CATV
la touche TV MENU.
2 Pressez
Le menu TV apparaît à l'écran.
DISPLAY
PLAY MODE
SLEEP
TIMER
AUDIO
AUDIO
TITLE
1
2
3
SUBTITLE
4
5
6
JUMP
7
8
9
0
RETURN
C.C.
ANGLE
MARKER ZOOM REPEATA-B RETURN
– SLOW +
MUTING
CANCEL
LIGHT
Appuyez sur
ou
jusqu’à ce
3 que
le menu SYSTEME DE
REGLAGE apparaisse.
REGLAGE PUCE V
LANGUAGE/IDIOMA/LANGUE
<
langue d'affichage (LANGUAGE),
puis pressez la touche
ou
.
INPUT
+
–
DVD SETUP
OPEN/CLOSE
TV/DVD DVD MENU
PLAY
/
/
/
>
/MENU
VOL
CH
B.SEARCH
>
/MENU
REGLAGE PUCE V
LANGUAGE/IDIOMA/LANGUE
<
TV MENU
PREV NEXT
/
la touche
ou
pour
4 Pressez
choisir l'option du choix de la
CH
–
/
SELECT
/ENTER
+
VOL
/
la touche
ou
5 Pressez
choisir la langue désirée:
pour
français (FRANCAIS), anglais
(ENGLISH) ou espagnol
(ESPAÑOL), puis pressez la
touche ENTER.
F.SEARCH
STOP
PAUSE/STILL
LANGUAGE/IDIOMA/LANGUE
ENGLISH
ESPAÑOL
FRANCAIS
<
/
>
/ENTER/MENU
Pressez de nouveau la touche
TV MENU jusqu'à ce que l'écran
MENU disparaisse.
TV / DVD
REMARQUES:
• Si l'appareil ne fonctionne pas
correctement ou les touches ne
répondent pas (sur l'appareil et/ou la
télécommande) : l'électricité statique ou
un autre facteur risquent d'affecter le
fonctionnement du lecteur. Débranchez le
cordon d'alimentation du CA une fois, puis
rebranchez-le.
• La section TV a son propre menu ce qui
est également le cas de la section DVD
(voir page 35).
5J00401A[F] (12-17)
13
13
17/5/03, 5:00 PM
Fonctionnement du télécouleur
mettre l'appareil en circuit,
1 Pour
pressez l'interrupteur (POWER).
le volume au niveau
2 Réglez
désiré en pressant les touches de
POWER
TV CATV
réglage du VOL + ou –. Le niveau
du son sera indiqué à l'écran par
des barres vertes. Au fur et à
mesure que le volume augmente,
le nombre de barres augmente
aussi à l'écran, et vice versa.
VOLUME
32
DISPLAY
PLAY MODE
SLEEP
TIMER
AUDIO
AUDIO
le menu de sélection de
3 Réglez
mode TV/CATV à la position
appropriée (Voyez à la page 17).
TITLE
1
2
3
SUBTITLE
4
5
6
JUMP
7
8
9
0
RETURN
C.C.
ANGLE
MARKER ZOOM REPEATA-B RETURN
– SLOW +
MUTING
CANCEL
LIGHT
SELECT
/ENTER
+
CH
VOL
–
INPUT
VOL
+
CH
–
TV MENU
DVD SETUP
PREV NEXT
B.SEARCH
OPEN/CLOSE
TV/DVD DVD MENU
PLAY
F.SEARCH
STOP
PAUSE/STILL
TV
- Canaux VHF/UHF
CATV - Canaux du CABLE
les touches d'accès direct
4 (0Pressez
à 9) pour choisir les canaux.
Sélection directe des canaux
Quand le menu des options est
réglé à la position “TV”, tous les
canaux peuvent être sélectionnés
instantanément en pressant deux
touches (par exemple “0” et “2” pour
choisir le canal 2. Si vous pressez
seulement “2”, la sélection du canal
peut être retardée de quelques
secondes). Pour les canaux
supérieurs à 10, pressez les 2
touches, dans l'ordre.
CNL 012
Sélection directe des canaux câblodistribués
Quand le menu des options est réglé à la position “CATV”, les
canaux peuvent être captés tel que suit:
POUR CHOISIR LES CANAUX:
1-9:
Pressez deux fois la touche 0, puis 1 à 9, selon le cas.
exemple, pour le canal 2, pressez “002”.
10-12: Pressez d'abord la touche 0 puis les deux autres
touches. exemple, pour le canal 12, pressez “012”.
13-99: Pressez les deux touches, dans l'ordre. exemple, pour le
canal 36, pressez “36”.
100-125: Pressez les trois chiffres, dans l'ordre. exemple, pour le
canal 120, pressez “120”.
REMARQUE POUR LES CANAUX 1 A 12:
Si seulement 1 ou 2 touches sont pressées, le canal correspondant
sera capté 2 secondes plus tard.
TV / DVD
REMARQUES:
• Si un canal inactif est choisi, le son
est immédiatement coupé et l'écran
devient bleu. Les touches de
volume et de mise en sourdine ne
seront pas opérationnelles.
• Si la station que vous regardez
cesse d'émettre, le télécouleur se
met hors circuit 15 minutes plus
tard.
Touche MUTING
Le signal sonore est automatiquement coupé quand vous
appuyez sur la touche MUTING.
Appuyez sur la touche MUTING; le signal sonore est
immédiatement coupé. Pour rétablir le signal sonore à sa
valeur d'origine, appuyez une nouvelle fois sur la touche
MUTING.
14
5J00401A[F] (12-17)
14
17/5/03, 5:00 PM
TOUCHES DE SELECTION DE
CANAUX + ET –
POWER
TV CATV
DISPLAY
PLAY MODE
SLEEP
TIMER
AUDIO
AUDIO
TITLE
1
2
3
SUBTITLE
4
5
6
JUMP
7
8
9
0
RETURN
C.C.
ANGLE
MARKER ZOOM REPEATA-B RETURN
– SLOW +
MUTING
CANCEL
LIGHT
SELECT
/ENTER
+
CH
VOL
–
INPUT
VOL
+
CH
Pressez et relâchez la touche CH + ou
–. L'appareil passe automatiquement
au prochain canal mis en mémoire.
Pour obtenir de bons résultats, avant
de choisir les canaux, ils doivent être
mis dans la mémoire du télécouleur.
Voyez la section sur la “Mise en
memoire des canaux”, aux pages 17
et 18.
CNL 012
Touche DISPLAY
Appuyez sur la touche DISPLAY
pour afficher, comme suit, les
informations sur l'écran.
Pressez de nouveau la touche
DISPLAY pour faire disparaître
l’affichage du rappel.
STEREO SAP
CNL 012
SEL. MONO+SAP
• Numéro de canaux ou mode VIDÉO
• Programmes audio séparés (SAP)
• Soritie audio
REVUE RAPIDE (RETURN)
Cette touche permet de retourner au
canal que vous regardiez
précédemment. Pressez-la de
nouveau pour retourner au canal
actuel.
CNL 007
–
TV MENU
DVD SETUP
PREV NEXT
B.SEARCH
OPEN/CLOSE
TV/DVD DVD MENU
PLAY
F.SEARCH
STOP
PAUSE/STILL
TV / DVD
ARRET DIFFERE (SLEEP
TIMER)
Pour programmer l'appareil pour qu'il
s'éteigne automatiquement après une
période prédéterminée, pressez la
touche SLEEP TIMER de la
télécommande. L'heure affichée
reculera de 10 minutes à chaque
pression, c'est-à-dire qu'elle comptera
120, 110 ...10, 0, Après la
programmation de la durée avant
l'arrêt différé, le chiffre affiché disparaît
puis réapparaît temporairement toutes
les dix minutes pour rappeler que
cette fonction est activée. Pour vérifier
la durée restante, pressez une fois la
touche SLEEP TIMER et cette durée
sera temporairement affichée. Pour
désactiver cette fonction, pressez de
façon répétée la touche SLEEP TIMER
jusqu'à ce que l'affichage indique "0".
ARRET DIF.
120
15
5J00401A[F] (12-17)
15
17/5/03, 5:00 PM
Sous-titres
QUE SIGNIFIE SOUS-TITRAGE?
Ce télécouleur a la capacité de décoder et d'afficher les émissions télévisées avec sous-titres. Ce genre
d'émissions affichent un texte sur l'écran pour les téléspectateurs malentendants, ou traduisent et affichent le
texte en une autre langue.
Sous-titres (CAPTIONS): Ce mode fait afficher le texte à
l'écran en anglais ou en une autre langue (suivant le réglage
du sélecteur canaux 1 ou canaux 2).
POWER
TV CATV
En général, les émissions à sous-titres anglais sont
transmises au canal 1 et les émissions à sous-titres en une
autre langue sont transmises au canal 2.
DISPLAY
PLAY MODE
SLEEP
TIMER
AUDIO
AUDIO
TITLE
1
2
3
SUBTITLE
4
5
6
JUMP
7
8
9
0
RETURN
C.C.
ANGLE
MARKER ZOOM REPEATA-B RETURN
– SLOW +
MUTING
CANCEL
LIGHT
SELECT
/ENTER
+
CH
VOL
–
INPUT
VOL
+
CH
–
TV MENU
DVD SETUP
PREV NEXT
B.SEARCH
OPEN/CLOSE
TV/DVD DVD MENU
PLAY
F.SEARCH
STOP
PAUSE/STILL
TV / DVD
Texte (TEXT): En général, ce mode fait apparaître tout un
texte sur le tiers de l'écran affichant un horaire des émissions
ou d'autres informations.
Quand vous choisissez le mode de sous-titrage, il restera en
effet jusqu'à ce que vous le changiez, même si vous changez
de canal. Si le signal de sous-titrage est perdu, à cause d'une
annonce télévisée ou une interruption de transmission, les
sous-titres apparaîtront de nouveau quand le signal est reçu
de nouveau.
Quand vous changez de canal, les sous-titres apparaîtront
environ 10 secondes plus tard.
Les sous-titres apparaissent en général au bas de l'écran,
pour avoir le moins d'interférence possible avec l'image. Pour
les émissions de nouvelles, d'habitude trois lignes défilent à
l'écran. La plupart des autres émissions offrent deux ou trois
lignes de sous-titres près de la personne qui parle afin que le
téléspectateur puisse suivre facilement le dialogue.
Les mots soulignés ou en italique indiquent des titres, des
mots en langue étrangère ou des mots qui doivent être
accentués. Les mots chantés sont en général entourés de
notes musicales.
Dans les guides d'émissions télévisées, celles à sous-titrage
sont en général suivies du symbole “CC” (CLOSED CAPTIONED).
POUR VOIR LES SOUS-TITRES
Appuyez sur la touche C.C. sur la
télécommande pour commuter
entre le mode de télévision
normale et les deux modes de
sous-titrage: sous-titre (Caption) et
texte pleine écran (Full Screen Text).
SS-TITRE CNL 1
REMARQUES:
• Quand vous choisissez le mode à sous-titrage, les sous-titres apparaissent à l’écran environ 10 secondes plus tard.
• Si aucun signal de sous-titrage n’est reçu, les sous-titres n’apparaissent pas mais le télécouleur reste en mode de
sous-titrage.
• Des fautes d’orthographe ou des caractères insolites apparaissent parfois pendant le sous-titrage. C’est tout-à-fait
normal, surtout si l’émission est en direct, car alors les sous-titres sont créés en direct et il n’y a pas assez de temps
pour les vérifier.
• En mode de sous-titrage, l’affichage du volume ou de la coupure du son peut ne pas être visible ou peut interférer
avec les sous-titres.
• Certains systèmes de câblodistribution ou de protection anticopie peuvent interférer avec le sous-titrage.
• Si vous utilisez une antenne intérieure ou si la réception est mauvaise, le texte ou soustitre peut ne pas apparaître
ou apparaître avec des fautes ou des caractères insolites. Dans ce cas, changez la position de l’antenne ou utilisez
une antenne extérieure.
16
5J00401A[F] (12-17)
16
17/5/03, 5:00 PM
Mise en mémoire des canaux
Les canaux disponibles dans votre région peuvent être programmés dans la mémoire de ce TV/DVD. Ce qui
permet de balayer tous les canaux mémorisés, en ordre croissant/décroissant, à partir du canal présent, ou de sauter
les canaux non désirés. Avant de choisir les canaux, ils doivent avoir été mis en mémoire. En plus de recevoir les
canaux VHF et UHF, votre nouvel appareil peut aussi capter jusqu'à 113 canaux câblodistribués. Pour utiliser ce TV/
DVD avec une antenne, réglez l'option de menu TV/CATV à la position “TV”. Lorsque l'appareil est expédié de l'usine,
cette option est réglée à la position “CATV”.
TV/CATV SELECTION
TV CATV
POWER
PLAY MODE
DISPLAY
SLEEP
TIMER
AUDIO
AUDIO
TITLE
1
2
3
SUBTITLE
4
5
6
JUMP
7
8
9
0
RETURN
C.C.
ANGLE
la touche TV MENU
1 Pressez
dans le mode TV. L'indicateur
Power s'allume.
Appuyez sur
ou
jusqu’à ce
2 que
le menu PROG. CNL
apparaisse.
TV/CATV
CATV
AJOUTER/ANNULATION AJO
AUTO CNL MEMO
<
MUTING
CANCEL
/
/
>
/MENU
la touche
ou
pour
3 Pressez
choisir le mode “TV/CATV”.
MARKER ZOOM REPEATA-B RETURN
– SLOW +
/
TV/CATV
CATV
AJOUTER/ANNULATION AJO
AUTO CNL MEMO
LIGHT
<
SELECT
/ENTER
+
/
/
/
>
/MENU
CH
VOL
–
INPUT
VOL
+
la touche
ou
pour
4 Pressez
choisir le mode TV (télévision)
ou CATV.
TV/CATV
TV
AJOUTER/ANNULATION AJO
AUTO CNL MEMO
CH
–
TV MENU
DVD SETUP
PREV NEXT
B.SEARCH
OPEN/CLOSE
TV/DVD DVD MENU
PLAY
F.SEARCH
STOP
PAUSE/STILL
TV - Canaux VHF/UHF
CATV - Canaux du CABLE TV
<
/
/
/
>
/MENU
de nouveau la touche
5 Pressez
TV MENU jusqu'à ce que l'écran
MENU disparaisse.
TV / DVD
17
5J00401A[F] (12-17)
17
17/5/03, 5:00 PM
SYNTONISATION AUTOMATIQUE DES CANAUX
PROGRAMMES EN MEMOIRE
POWER
TV CATV
la touche TV MENU dans le mode TV.
1 Pressez
Le menu TV apparaît à l'écran.
sur
ou
jusqu’à ce
2 Appuyez
que le menu PROG. CNL
apparaisse.
TV/CATV
CATV
AJOUTER/ANNULATION AJO
AUTO CNL MEMO
DISPLAY
PLAY MODE
SLEEP
TIMER
AUDIO
1
TITLE
AUDIO
2
4
5
6
JUMP
7
8
9
C.C.
RETURN
0
/
/
/
>
/MENU
Pressez la touche
ou
pour
3 choisir
le mode “AUTO CNL MEMO”,
puis pressez la touche
ou
.
L'appareil commence à mettre en
mémoire tous les canaux disponibles
dans votre région.
3
SUBTITLE
ANGLE
<
4
TV/CATV
CATV
AJOUTER/ANNULATION AJO
AUTO CNL MEMO
<
/
/
/
>
/MENU
Pressez de nouveau la touche TV
MENU jusqu'à ce que l'écran MENU
disparaisse.
MARKER ZOOM REPEATA-B RETURN
TO ADD/DELETE CHANNELS
– SLOW +
MUTING
CANCEL
LIGHT
SELECT
/ENTER
+
Choisissez le canal que vous souhaitez mémoriser ou effacer
1 en
utilisant les touches de sélection directe de canal
(touches numériques 0-9) ou la touche CH + ou –.
CH
VOL
–
INPUT
la touche TV MENU.
2 Pressez
Le menu TV apparaît à l'écran.
VOL
+
CH
–
TV MENU
DVD SETUP
PREV NEXT
B.SEARCH
OPEN/CLOSE
Appuyez sur
ou
jusqu’à ce
3 que
le menu PROG. CNL
apparaisse.
TV/DVD DVD MENU
PLAY
<
F.SEARCH
STOP
PAUSE/STILL
TV/CATV
CATV
AJOUTER/ANNULATION AJO
AUTO CNL MEMO
/
/
>
/
/MENU
la touche
ou
pour
4 Pressez
choisir “AJOUTER/ANNULATION”.
TV/CATV
CATV
AJOUTER/ANNULATION AJO
AUTO CNL MEMO
<
TV / DVD
/
/
>
/MENU
sur
ou
pour
5 Appuyez
sélectionner AJO ou ANN, quelle
que soit la fonction que vous
souhaitez utiliser.
6
Pressez de nouveau la touche TV
MENU jusqu'à ce que l'écran MENU
disparaisse.
les étapes 1-6 pour les
7 Répétez
autres canaux que vous souhaitez
ajouter ou supprimer.
18
5J00401A[F] (18-23)
/
18
17/5/03, 5:00 PM
TV/CATV
CATV
AJOUTER/ANNULATION ANN
AUTO CNL MEMO
<
/
/
/
>
/MENU
Utilisation de la Puce V
Une limitation d’âge peut être réglée pour interdire aux enfants de regarder et d’entendre les scènes
violentes, les images pour adultes, etc. Le TV/DVD possède les classifications “CLASS. PROG. TV” et
“CLASS. FILM”. Pour utiliser la fonction puce V, programmez d’abord un mot de passe.
POUR PROGRAMMEZ UN MOT DE PASSE
la touche TV MENU dans le mode TV.
1 Pressez
Le menu TV apparaît à l'écran.
TV CATV
POWER
PLAY MODE
DISPLAY
SLEEP
TIMER
AUDIO
sur
ou
jusqu’à
2 ceAppuyez
que le menu SYSTEME DE
REGLAGE apparaisse.
REGLAGE PUCE V
LANGUAGE/IDIOMA/LANGUE
AUDIO
<
TITLE
1
2
3
SUBTITLE
4
5
6
JUMP
7
8
9
0
RETURN
C.C.
ANGLE
MUTING
CANCEL
SELECT
/ENTER
CH
–
INPUT
VOL
+
V”, pressez la touche
ou
.
sélection directe de canal (0-9),
puis en appuyant sur la touche
ENTER.
OPEN/CLOSE
TV/DVD DVD MENU
PLAY
F.SEARCH
STOP
/
/
>
/MENU
REGLAGE PUCE V
NOUVEAU
MOT DE PASSE
<0
DVD SETUP
B.SEARCH
/
le mot de passe (4 chiffres)
4 Entrez
en utilisant les touches de
–
PREV NEXT
>
/MENU
REGLAGE PUCE V
LANGUAGE/IDIOMA/LANGUE
<
CH
TV MENU
/
LIGHT
+
VOL
/
Pressez la touche
ou
pour
3 choisir
le mode “REGLAGE PUCE
MARKER ZOOM REPEATA-B RETURN
– SLOW +
/
PAUSE/STILL
:
>
9/ENTER/CANCEL/MENU
“ ” apparaît à la place du chiffre.
de nouveau le même mot
5 Entrez
de passe pour vérification, puis
appuyez sur la touche ENTER.
Maintenant le mot de passe a été
enregistré et le menu Réglage de
la puce V va s'afficher.
REGLAGE PUCE V
CONFIRMER
MOT DE PASSE
<0
:
>
9/ENTER/CANCEL/MENU
TV / DVD
REMARQUES:
• Si vous avez oublié votre mot de
passe, vous ne pouvez pas régler
la puce V.
• Pour ne pas oublier votre mot de
passe, notez-le quelque part et
conservez-le dans un endroit sûr.
19
5J00401A[F] (18-23)
19
17/5/03, 5:00 PM
Utilisation de la Puce V
(Suite)
POUR RÉGLER LA PUCE V
le menu REGLAGE PUCE
1 Dans
ou
V, appuyez sur la touche
REGLAGE PUCE V
V-CHIP
CLASS. PROG. TV
CLASS. FILM
CLASS. CAN ANG
CLASS. CAN FRA
CHANGE. MOT DE PASSE
pour choisir la classification
“CLASS. PROG. TV”.
TV CATV
POWER
PLAY MODE
DISPLAY
SLEEP
TIMER
AUDIO
AUDIO
TITLE
1
2
3
SUBTITLE
4
5
6
JUMP
7
8
9
0
RETURN
C.C.
ANGLE
MARKER ZOOM REPEATA-B RETURN
– SLOW +
CANCEL
LIGHT
sur la touche
ou
2 Appuyez
pour afficher le réglage souhaité.
MUTING
+
CH
VOL
–
INPUT
–
DVD SETUP
PREV NEXT
B.SEARCH
OPEN/CLOSE
TV/DVD DVD MENU
PLAY
F.SEARCH
STOP
PAUSE/STILL
TV / DVD
Pour utiliser le téléviseur après le
réglage de la protection
Lorsque vous souhaitez regarder une
émission télévisée correspondant au
réglage de la puce V.
REMARQUE:
La fonction puce V est en service
uniquement pour les émissions et les
bandes qui ont un signal de classification.
:
G
:
PG
:
PG-13 :
:
NC-17 :
X
:
Aucun réglage pour
CLASS. FILM
tous les âges
assistance parentale
assistance parentale,
moins de 13 ans
moins de 17 ans, assistance parentale conseillée
plus de 17 ans
adultes seulement
la touche
ou
pour
4 Pressez
choisir le mode “CLASS. CAN
FRA”, puis appuyez sur la
ou
pour afficher le
touche
type de classification souhaité.
20
>
/MENU
REGLAGE PUCE V
V-CHIP
CLASS. PROG. TV
CLASS. FILM
CLASS. CAN ANG
CLASS. CAN FRA
CHANGE. MOT DE PASSE
<
/
/
/
: OFF
: OFF
:G
: OFF
: OFF
>
/MENU
REGLAGE PUCE V
V-CHIP
CLASS. PROG. TV
CLASS. FILM
CLASS. CAN ANG
CLASS. CAN FRA
CHANGE. MOT DE PASSE
: OFF
: OFF
: OFF
:G
: OFF
E: Exemptées.
Les programmes exempts comprennent: les
< / / / /MENU>
informations, les émissions sportives, les
documentaires et autres programmes d ’information, les débats, les vidéos de
musique, et les programmes de variétes.
G: Général.
Directives de violence: il n ’y aura aucune scène réaliste de violence. Les descriptions de comportements agressifs seront rares et limitées à des
représentations de nature clairement fictive, comique ou irréaliste.
8ans+: Général-Déconseillé aux jeunes enfants.
Directives de violence: toute description réaliste de violence sera rare, discrète
ou peu intensive,et montrera les conséquences des actes. Il n ’y aura ni langage
choquant, ni nudité, ni contenu sexuel.
13ans+: Cette émission peut ne pas convenir aux enfants de moins de 13 ans.
Programmes destinés à une audience générale, mais qui peuvent ne pas convenir
à de jeunes enfants. Les parents peuvent juger que certain contenu ne convient
pas à des enfants âgés de 8 à 13 ans.
16ans+: Cette émission ne convient pas aux moins de 16 ans.
Les parents sont fortement avisés d ’exercer leur discrétion avant d ’autoriser
l’écoute par des pré adolescents et des jeunes adolescents. Les programmes
peuvent contenir des thèmes mûrs ainsi que des scènes de violence intense.
18ans+: Cette émission est réservée aux adultes.
Matériel destiné uniquement à un public adulte.
20
5J00401A[F] (18-23)
/
classification souhaité.
R
CH
TV MENU
/
la touche
ou
pour choisir le mode “CLASS.
3 Pressez
ou
pour afficher le type de
FILM”. Appuyez sur la touche
VOL
+
/
OFF : Aucun réglage pour CLASS. PROG. TV
TV-Y : tous les enfants
TV-Y7 : enfants de plus de 7 ans
TV-G : programme pour enfants
TV-PG: assistance des parents
TV-14 : adolescents de plus de 14 ans
TV-MA: adolescents de plus de 17 ans
Dans le cas de TV-Y7, TV-PG, TV-14 et TV-MA, appuyez sur la
touche DISPLAY pour connaître le niveau. Utilisez la touche
ou
pour sélectionner la valeur voulue. Appuyez sur la touche
ou pour choisir “ON” ou “OFF”. Appuyez sur la touche TV MENU
pour revenir dans le menu REGLAGE PUCE V.
OFF
SELECT
/ENTER
<
: OFF
: TV-Y
: OFF
: OFF
: OFF
17/5/03, 5:00 PM
la touche
ou
pour
5 Pressez
choisir le mode V-CHIP. Pressez
REGLAGE PUCE V
V-CHIP
CLASS. PROG. TV
CLASS. FILM
CLASS. CAN ANG
CLASS. CAN FRA
CHANGE. MOT DE PASSE
la touche
ou
pour afficher
“ON” pour mettre ne service la
fonction V-CHIP.
de nouveau la touche
6 Pressez
TV MENU jusqu'à ce que l'écran
<
/
/
/
: ON
: TV-Y
:G
: OFF
: OFF
>
/MENU
MENU disparaisse.
TV CATV
POWER
PLAY MODE
DISPLAY
SLEEP
TIMER
AUDIO
AUDIO
TITLE
1
2
3
SUBTITLE
4
5
6
JUMP
7
8
9
0
RETURN
C.C.
ANGLE
MARKER ZOOM REPEATA-B RETURN
– SLOW +
CANCEL
POUR CHANGER LE MOT DE PASSE
la touche TV MENU dans
1 Pressez
le mode TV. Le menu TV apparaît à
l’écran.
sur
ou
jusqu’à
2 ceAppuyez
que le menu SYSTEME DE
REGLAGE apparaisse.
REGLAGE PUCE V
LANGUAGE/IDIOMA/LANGUE
<
/
SELECT
/ENTER
+
–
INPUT
PUCE V”, pressez la touche
ou
.
REGLAGE PUCE V
LANGUAGE/IDIOMA/LANGUE
VOL
+
de canal (0-9), puis en appuyant
sur la touche ENTER.
TV MENU
OPEN/CLOSE
F.SEARCH
STOP
la touche
ou
5 Pressez
choisir le mode “CHANGE.
>
/MENU
:
REGLAGE PUCE V
V-CHIP
CLASS. PROG. TV
CLASS. FILM
CLASS. CAN ANG
CLASS. CAN FRA
CHANGE. MOT DE PASSE
MOT DE PASSE”, pressez la
touche
ou
.
PAUSE/STILL
le nouveau mot de passe
6 Entrez
en utilisant les touches de
TV / DVD
sélection directe de canal (0-9),
puis appuyez sur la touche
ENTER.
/
de nouveau le même mot
7 Entrez
de passe pour vérification, puis
appuyez sur la touche ENTER.
à plusieurs reprises sur
8 Appuyez
la touche TV MENU pour
retourner à un écran normal.
17/5/03, 5:00 PM
/
/
: ON
: TV-Y
:G
: OFF
: OFF
>
/MENU
CHANGE. MOT DE PASSE
NOUVEAU
MOT DE PASSE :
<0
21
>
9/ENTER/CANCEL/MENU
pour
<
5J00401A[F] (18-23)
/
REGLAGE PUCE V
<0
DVD SETUP
TV/DVD DVD MENU
PLAY
/
MOT DE PASSE
–
B.SEARCH
/
le mot de passe en utilisant
4 Entrez
les touches de sélection directe
CH
PREV NEXT
>
/MENU
LIGHT
CH
VOL
/
la touche
ou
pour
3 Pressez
choisir le mode “REGLAGE
<
MUTING
/
>
9/ENTER/CANCEL/MENU
CHANGE. MOT DE PASSE
CONFIRMER
MOT DE PASSE :
<0
>
9/ENTER/CANCEL/MENU
21
Ajustements de l’image
Les commandes de réglage de l'image ont été préréglées à l'usine, mais vous pouvez les régler
individuellement comme suit.
la touche TV MENU dans le mode TV.
1 Pressez
Le menu TV apparaît à l'écran.
TV CATV
POWER
PLAY MODE
DISPLAY
sur
ou
jusqu’à
2 ceAppuyez
que le menu IMAGE
apparaisse.
SLEEP
TIMER
AUDIO
LUMINOSITE
CONTRASTE
COULEUR
TEINTE
NETTETE
<
AUDIO
TITLE
1
2
3
SUBTITLE
4
5
6
JUMP
7
8
9
0
RETURN
/
/
/
/MENU
0
+32
0
0
0
>
la touche
ou
pour
3 Pressez
choisir le paramètre que vous
désirez régler.
C.C.
ANGLE
LUMINOSITE
CONTRASTE
COULEUR
TEINTE
NETTETE
<
/
/
/
0
+32
0
0
0
>
/CANCEL/MENU
MARKER ZOOM REPEATA-B RETURN
– SLOW +
MUTING
CANCEL
LIGHT
SELECT
/ENTER
+
4 Appuyez sur la touche
ou
pour faire varier le réglage.
CH
VOL
–
INPUT
LUMINOSITE
VOL
+
CONTRASTE
CH
–
COULEUR
TV MENU
DVD SETUP
NETTETE
PREV NEXT
TV/DVD DVD MENU
TEINTE
B.SEARCH
OPEN/CLOSE
PLAY
Augmentation de la
luminosité
Augmentation du
contraste
Augmentation de la
brillancedes couleurs
Augmentation de
dominante verte
Augmentation de la
netteté de l’image
Diminution de la
luminosité
Diminution du
contraste
Diminution de la
brillance des couleurs
Augmentation de la
dominante rouge
Diminution de la
netteté de l’image
F.SEARCH
STOP
PAUSE/STILL
le paramètre voulu, pressez de nouveau la touche TV
5 Après
MENU jusqu'à ce que l'écran MENU disparaisse.
REMISE A L'ETAT INITIAL (CANCEL)
Pressez la touche CANCEL pendant le réglage de
l'image pour retourner les réglages d'image à leurs
niveaux prédéterminés à l'usine.
TV / DVD
REMARQUE:
Le contraste a été réglé au maximum
à l'usine.
22
5J00401A[F] (18-23)
22
17/5/03, 5:01 PM
Stéréophonie et canal son séparé (SAP)
Ce TV/DVD est doté des circuits MTS (Multi-channel TV Sound). Les circuits MTS augmentent le plaisir de la
télévision puisque la stéréophonie devient possible. La spécification MTS prévoit également la présence d’un
canal son supplémentaire (canal son séparé) qui peut être utilisé par la station pour diffuser en même temps
les mêmes informations sonores dans une autre langue, soit parce que la station désire offrir des émissions
bilingues, soit parce qu’elle souhaite offrir un service supplémentaire.
POWER
TV CATV
DISPLAY
PLAY MODE
SLEEP
TIMER
AUDIO
AUDIO
TITLE
1
2
3
SUBTITLE
4
5
6
JUMP
7
8
9
0
RETURN
C.C.
ANGLE
MARKER ZOOM REPEATA-B RETURN
– SLOW +
MUTING
CANCEL
LIGHT
SELECT
/ENTER
+
CH
VOL
–
INPUT
VOL
+
CH
–
TV MENU
DVD SETUP
PREV NEXT
B.SEARCH
OPEN/CLOSE
TV/DVD DVD MENU
PLAY
F.SEARCH
STOP
ÉCOUTE D’UNE ÉMISSION EN STÉRÉOPHONIE
Après la mise en circuit du
téléviseur, ou l’accord sur une
STEREO
station, la mention STEREO
apparaît à l’écran si l’émission
reçue est en stéréophonie. Vous
pouvez alors profiter de la
stéréophonie grâce aux hautparleurs gauche et droit de
l’appareil.
CNL 013
• Si l’émission reçue est en
monophonie, aucune mention
n’apparaît à l’écran.
• Si la qualité de la réception est
médiocre, ou encore si la
réception en stéréophonie n’est
pas suffisamment claire,
appuyez sur la touche AUDIO
pour passer en monophonie.
Dans ce cas, les parasites dans
de la reproduction sonore
seront éliminés. Appuyez une
nouvelle fois sur cette touche
pour revenir au mode
stéréophonique.
ÉCOUTE D’UNE ÉMISSION AVEC CANAL SON SÉPARÉ (SAP)
Après la mise en service du
téléviseur, ou l’accord sur une
STEREO SAP
CNL 013
station, la mention SAP
apparaisse à l’écran si l’émission
reçue est accompagnée d’un
canal son séparé. Normalement
les émissions SAP contiennent le
son principal (langue) et le son
SAP (deuxième langue ou
informations).
PAUSE/STILL
Pour choisir les sons désirés
Appuyez sur la touche AUDIO.
SEL. STEREO
TV / DVD
ÉMISSION MONOPHONIQUE + CANAL SON SÉPARÉ
Son principal
(monophonie)
canal son séparé
Son principal(monophonie)
+ canal son séparé
ÉMISSION STÉRÉOPHONIQUE + CANAL SON SÉPARÉ
Son principal
(stéréophonie)
Son principal
(monophonie) + canal
son séparé
canal son séparé
Son principal
(monophonie)
23
5J00401A[F] (18-23)
23
17/5/03, 5:01 PM
Ajustement des réglages sonores
Les réglages sonores ont été réalisés en usine mais vous pouvez les modifier à votre guise de la manière suivante.
TV CATV
POWER
PLAY MODE
DISPLAY
la touche TV MENU.
1 Pressez
Le menu TV apparaît à l'écran.
sur
ou
jusqu’à
2 ceAppuyez
que le menu AUDIO
apparaisse.
SLEEP
TIMER
AUDIO
GRAVES
AIGUES
EQUILIBRE
SURROUND
STABLE SOUND
AUDIO
<
TITLE
1
2
3
SUBTITLE
4
5
6
JUMP
7
8
9
0
RETURN
C.C.
/
/
>
/MENU
la touche
ou
pour
3 Pressez
choisir le paramètre que vous
désirez régler.
ANGLE
/
0
0
0
OFF
ON
GRAVES
AIGUES
EQUILIBRE
SURROUND
STABLE SOUND
<
/
/
/
0
0
0
OFF
ON
>
/CANCEL/MENU
MARKER ZOOM REPEATA-B RETURN
– SLOW +
MUTING
CANCEL
LIGHT
SELECT
/ENTER
+
CH
VOL
–
INPUT
VOL
+
CH
–
TV MENU
DVD SETUP
PREV NEXT
B.SEARCH
OPEN/CLOSE
TV/DVD DVD MENU
PLAY
F.SEARCH
STOP
PAUSE/STILL
sur la touche
ou
4 Appuyez
pour faire varier le réglage.
GRAVES:
Pressez la touche
ou
pour régler les graves.
AIGUES:
Pressez la touche
ou
pour régler les aiguës.
EQUILIBRE:
Appuyez sur
ou
pour obtenir le même niveau sonore
dans les deux hauts-parleurs.
SURROUND:
Appuyez sur
ou
pour activer “ON” ou désactiver “OFF” la
fonction son ambiophonique.
STABLE SOUND:
Appuyez sur
ou
pour activer “ON” ou désactiver “OFF” la
fonction sons stables.
Fonction son ambiophonique (SURROUND)
La fonction de son ambiophonique agrandit et approfondit le
champ d’écoute pour créer une qualité de son exceptionnelle
en provenance des haut-parleurs de la TV. La fonction utilise
des signaux stéréo d’une diffusion TV ou d’une entrée vidéo.
Fontion sons stables (STABLE SOUND)
Lorsque les sons deviennent puissants, cette fonction les
atténue automatiquement.
TV / DVD
le paramètre voulu, pressez de nouveau la touche TV
5 Après
MENU jusqu'à ce que l'écran MENU disparaisse.
DÉFAUT (CANCEL)
Tandis que vous effectuez les réglages sonores, appuyez sur la
touche CANCEL pour rétablir les valeurs usine.
24
5J00401A[F] (24-25)
24
17/5/03, 5:01 PM
A propos du disque
Les types de disques suivants peuvent être lus sur cet appareil.
Marque sur disque
Disque
Vidéo DVD
CD Audio
CD-R/CD-RW
Recordable
Contenu
Diamètre
Audio
+
Vidéo
5 pouces
(12 cm)
3 pouces
(8 cm)
Audio
5 pouces
(12 cm)
3 pouces
(8 cm)
• Les DVD-ROM, CD Video, SVCD,
CVD, Photo CD, etc. ne peuvent pas
être lus.
• Certains CD-R/RW ne peuvent pas
être lus selon les conditions
d’enregistrement.
• Cet appareil ne peut s’utiliser qu’avec
le système couleur NTSC. Les
disques pour systèmes PAL et
SECAM ne fonctionnent pas avec cet
appareil.
5 pouces
(12 cm)
Fichier CD-DA/MP3
ReWritable
3 pouces
(8 cm)
Numéro de Région
Le numéro de région (code de restriction régional) est intégré dans l’appareil et dans les disques
vidéo DVD.
Les numéros de région “1” ou “ALL” des disques vidéo DVD peuvent être utilisés sur cet appareil.
1
Disque DVD
Titre
lorsque le disque comprend 2 films ou plus,
il est divisé en 2 ou plusieurs parties,
chacune d’entre elles étant désignée par “ TITRE ”.
Titre1
Chapitre 1
Titre2
Chapitre 2
Chapitre 1
Chapitre 2
Chapitre 3
Plage 4
Plage 5
Chapitre
Les titres peuvent être subdivisés en de nombreuses
sections. Chaque section est appelée un “CHAPITRE”.
Plages ou pistes
CD Audio
Plages 1
Plage 2
Plage 3
Un CD audio comporte plus de 2 morceaux de musique.
Ces morceaux sont assignés à des plages.
Pour sortir un disque de son compartiment.
Le tenir par le bord sans toucher la surface, et manipuler sans heurt.
• Attention de ne pas le rayer.
• Ne pas salir la surface du disque.
• Ne jamais y coller d’adhésif.
• Ne pas le faire tomber ou le distordre.
Rangement des disques
• Remettre le disque dans son enveloppe protectrice pour le mettre
à l’abri de tout dommage.
• Eviter de le laisser exposé au soleil ou de le placer dans un lieu
trop chaud ou humide.
Nettoyage du disque
L’essuyer avec un chiffon sec propre depuis le centre jusqu’au bord
• Ne pas l’essuyer en tournant.
• Ne pas utiliser de nettoyant liquide ou en aérosol.
25
5J00401A[F] (24-25)
25
17/5/03, 5:01 PM
Préparation/Affichage d’état disque
Les pages qui suivent décrivent le
réglage/le fonctionnement en mode
DVD.
Préparation
Avant l’utilisation d’un DVD/CD, veuillez faire comme suit.
la fiche du cordon CA dans une prise CA
1 Introduisez
polarisée standard 120V 60Hz.
POWER
TV CATV
DISPLAY
PLAY MODE
SLEEP
TIMER
AUDIO
AUDIO
TITLE
1
2
3
SUBTITLE
4
5
6
JUMP
7
8
9
0
RETURN
C.C.
ANGLE
MARKER ZOOM REPEATA-B RETURN
– SLOW +
MUTING
CANCEL
LIGHT
• Si vous branchez la fiche du cordon CA pour la première
fois, veuillez attendre environ 5 secondes avant d’appuyer
sur POWER.
REMARQUE: Quand vous branchez sur un autre matériel,
débranchez l'appareil de la prise CA.
sur POWER sur l'appareil ou sur la télécommande
2 Appuyez
pour mettre l'appareil sous tension. Le voyant POWER
s'allume.
• Chaque fois que vous appuyez sur POWER, le TV/DVD
commence à partir du mode TV.
• Quand vous utilisez un amplificateur, mettez-le sous
tension.
Appuyez sur TV/DVD pour
3 choisir
le mode DVD.
L’écran de démarrage du DVD
apparaît à l’écran.
SELECT
/ENTER
+
CH
VOL
–
INPUT
Affichage d’état du disque
VOL
+
Appuyez sur DISPLAY. L'affichage d'état du disque apparaît à
l'écran.
CH
–
TV MENU
DVD SETUP
PREV NEXT
B.SEARCH
OPEN/CLOSE
DVD
TV/DVD DVD MENU
PLAY
F.SEARCH
STOP
Temps écoulé de lecture du titre
Numéro de titre
Numéro de
Temps total du titre
chapitre
Opération
du disque
PAUSE/STILL
T 1/8
C 1/19
0:07:18 2:02:31
1/8 Fra DolbyDigital 2/8 Fra 1/1
Angle caméra
Langue des sous-titres
Langue audio
Type audio
TV / DVD
Pour faire disparaître l'affichage d'état, réappuyez sur DISPLAY.
CD AUDIO
Temps écoulé de lecture
REMARQUE:
Si l'appareil ne fonctionne pas
correctement :
L'électricité statique ou un autre facteur
peuvent affecter le fonctionnement du
lecteur. Débranchez le cordon
d'alimentation CA une fois, puis
rebranchez-le.
Opération
du disque
Numéro de piste
Liste
d’écoute
T 1/8
0:02:31 0:53:09
Temps total de
la piste
Selections
1 2 3 4 5 6 7 8
• Quand vous lirez le CD, l’affichage d’état apparaîtra sur
l’écran et y restera.
26
5J00401A[F] (26-29)
26
17/5/03, 5:01 PM
Lecture en mode basique
sur OPEN/
1 Appuyez
CLOSE de l'appareil ou
POWER
TV CATV
DISPLAY
PLAY MODE
SLEEP
TIMER
AUDIO
AUDIO
TITLE
1
2
3
SUBTITLE
4
5
6
JUMP
7
8
9
0
RETURN
C.C.
ANGLE
MARKER ZOOM REPEATA-B RETURN
– SLOW +
MUTING
CANCEL
SELECT
/ENTER
+
–
INPUT
VOL
+
CH
–
TV MENU
PREV NEXT
B.SEARCH
OPEN/CLOSE
un disque sur le
2 Placez
plateau.
Tenez le disque,
positionnez le avec le côté
imprimé vers le haut,
alignez le avec les guides,
et placez le dans la position
correcte.
LIGHT
CH
VOL
la télécommande.
Le compartiment à
disque s'ouvre.
sur OPEN/
3 Appuyez
CLOSE ou PLAY.
Le compartiment à disque
se ferme automatiquement.
Sur l’écran TV, “ ” passe
à “
” puis la lecture
commence.
DVD SETUP
TV/DVD DVD MENU
PLAY
STOP
F.SEARCH
• Un écran de menu peut
s'afficher sur l'écran TV,
si le disque a une
fonction de menu.
PAUSE/STILL
REMARQUES:
• Si un disque non compatible est chargé,
“Ce Disque Ne Peut Etre Lu.”, “Code
Regional Incorrect” ou “Erreur Bloq.
Parental” s'affichera sur l'écran TV selon le
type de disque chargé. Dans ce cas,
revérifiez votre disque (voir pages 25 et 38).
• Certains disques ont besoin d'environ une
minute avant que la lecture démarre.
• Quand vous placez le côté imprimé d'un
disque vers le bas (c.-à-d. dans le mauvais
sens) et que vous appuyez sur PLAY ou
OPEN/CLOSE sur l'appareil, “
”
s'affichera pendant 5 secondes, puis “Pas
de Disque” continuera à s'afficher.
• Certaines opérations de lecture DVD
peuvent être fixées délibérément par les
réalisateurs de logiciels.
Comme cet appareil lit les DVD en fonction
du contenu du disque conçu par les
réalisateurs de logiciels, certaines fonctions
de lecture risquent de ne pas exister.
Consultez également les instructions
fournies avec les DVD.
4 Appuyez sur
/
ou
/
pour faire une sélection.
sur SELECT.
5 Appuyez
• Le titre est sélectionné, et la lecture commence.
sur STOP pour finir la lecture.
6 Appuyez
• L'appareil enregistre le point final selon le disque. “
”
s'affiche à l'écran. Appuyez sur PLAY pour reprendre la
lecture (à partir de la scène).
• Si vous réappuyez sur STOP ou déchargez le disque
(“ ” s'affiche à l'écran), l'appareil efface le point final.
arrêter la lecture, appuyez sur STOP.
7 Pour
Ensuite, appuyez sur OPEN/CLOSE.
Le compartiment à disque s'ouvre.
Retirez le disque, puis appuyez sur POWER.
Le compartiment à disque se ferme automatiquement et
l'appareil se met hors tension.
27
5J00401A[F] (26-29)
27
17/5/03, 5:01 PM
Lecture en modes spéciaux
REMARQUE: un léger retard peut se
manifester après que vous avez
appuyé sur le bouton pour activer la
fonction.
TV CATV
POWER
PLAY MODE
DISPLAY
Lecture rapide
Appuyez sur F.SEARCH pendant la lecture normale.
Chaque fois que vous appuyez sur F.SEARCH, la vitesse de
recherche augmente par
(x2),
(x4),
(x8),
(x15).
(CD:
(x 2),
(x 4),
(x 8),
(x 20))
• Pour reprendre la lecture normale, appuyez sur PLAY.
Lecture en arrière
SLEEP
TIMER
AUDIO
AUDIO
TITLE
1
2
3
SUBTITLE
4
5
6
JUMP
7
8
9
0
RETURN
C.C.
ANGLE
MARKER ZOOM REPEATA-B RETURN
– SLOW +
MUTING
CANCEL
SELECT
/ENTER
CH
–
INPUT
VOL
+
–
DVD SETUP
PREV NEXT
B.SEARCH
OPEN/CLOSE
Arrêt de lecture
Appuyez sur PAUSE/STILL
pendant la lecture normale la
pour pauser.
Pour reprendre la lecture
normale, appuyez sur PLAY.
Avance d'image
CH
TV MENU
• Pour reprendre la lecture normale, appuyez sur PLAY.
LIGHT
+
VOL
Appuyez sur B.SEARCH pendant la lecture normale.
Chaque fois que vous appuyez sur B.SEARCH, la vitesse de
recherche augmente par
(x2),
(x4),
(x8),
(x15).
(CD:
(x 2),
(x 4),
(x 8),
(x 20))
Appuyez sur PAUSE/STILL pendant l'arrêt sur image.
Vous avancez d'une image chaque fois que vous appuyez sur
PAUSE/STILL.
TV/DVD DVD MENU
PLAY
F.SEARCH
STOP
PAUSE/STILL
Pour reprendre la lecture normale, appuyez sur PLAY.
Lecture au ralenti
Appuyez sur SLOW(–) ou SLOW(+) pendant la lecture
normale ou l'arrêt sur image.
Chaque fois que vous appuyez sur SLOW, la vitesse de
ralenti augmente par 1/2, 1/4, 1/6, 1/8.
TV / DVD
Remarque:
Le CD vidéo ne peut pas être lu en marche arrière au ralenti.
REMARQUE:
Cet appareil est capable de maintenir
indéfiniment une image vidéo à l'arrêt ou
une image affichée sur votre écran de
télévision. Si vous laissez l'image vidéo
à l'arrêt ou l'affichage à l'écran trop
longtemps sur votre écran de télévision,
vous risquez d'endommager votre écran
de télévision de façon permanente. Les
télévisions de projection sont très
sensibles.
• Pour reprendre la lecture normale, appuyez sur PLAY.
• Pour reprendre l'arrêt sur image, appuyez sur PAUSE/STILL.
Localisation d'un chapitre ou d'une piste
Appuyez sur NEXT (7
7) ou PREV (6
6) pendant la lecture
pour localiser un chapitre que vous souhaitez regarder.
Chaque fois que vous appuyez sur la commande, vous sautez
un chapitre ou une piste.
28
5J00401A[F] (26-29)
28
17/5/03, 5:01 PM
Lecture de fichiers MP3
Ce lecteur peut lire les données MP3 qui sont
enregistrées sur CD-R ou CD-RW. Pour produire
les données MP3, il vous faut disposer d'un PC
Windows comportant un graveur de CD-ROM
et un logiciel de codage MP3 (non fourni).
Le système Apple HFS ne peut pas être lu.
sur OPEN/CLOSE.
1 Appuyez
Le compartiment à disque s'ouvre.
Informations concernant les
CD de fichiers MP3
sur OPEN/CLOSE ou PLAY
2 Appuyez
de l'appareil. Le compartiment à
Limitations de la lecture de CD avec
fichiers MP3
• Le CD de fichiers MP3 doit être au format
de disque normalisé selon l'ISO9660; les
noms de fichier doivent comporter trois
chiffres et les lettres d'extension “mp3”.
• Le nom des répertoires et des fichiers du
CD MP3 doivent correspondre aux normes
des fichiers ISO.
• Cet appareil peut lire jusqu'à 200 fichiers
par disque. Si un répertoire comporte plus
de 200 fichiers, les fichiers excédentaires
sont omis.
• Les CD MP3 ne peuvent pas être utilisés
pour la lecture lors de l’enregistrement.
• La lecture des fichiers MP3 peut demander
une minute et plus à cet appareil, selon
leur structure.
• La musique enregistrée selon la norme
d'enregistrement “Joliet” peut être lue;
dans ce cas, le nom du fichier est affiché
sur l'écran de manière abrégée.
• Les fichiers de musique enregistrés selon
le système “Hierarchical File System”
(HFS) ne peuvent pas être lus.
Remarques concernant les fichiers MP3
Pour lire le CD de fichiers MP3 dans l'ordre
d'enregistrement,
1. Veuillez utiliser le logiciel MP3 avec la
fonction qui peut enregistrer les données
alphabéti-quement ou numériquement.
2. Nous vous recommandons d'affecter à
chaque fichier un nom comportant deux
ou trois chiffres, comme “01” “02” ou “001”
“002”.
3. Veuillez éviter de constituer un trop grand
nombre de sous-dossiers pour refléter vos
préférences.
Placez un disque sur le plateau.
Scanning...
disque se ferme automatiquement.
Sur l'écran du téléviseur, le message
“Scanning...” est affichés. La durée
du processus dépendra du nombre
de fichiers.
Un écran du menu MP3 apparaît
3 sur
l’écran télévisé.
Appuyez sur
/ ou
/ ou
sur les touches numériques
pour sélectionner la piste que
vous désirez, puis appuyez sur
ENTER. La plaga choisie est
reproduite.
T
-/18
0:00:00
/
01 Ð
Japan
02 Ð
Bay Bridge
03 Ð
CLOSE MY EYES
04 Ð
DIVE TO BLUE
05 Ð
Honey
06 Ð
BLUE EYES
07 Ð
Blurry Eyes
08 Ð
flower
09 Ð
Lies and Truth-
10 Ð
winter fall
/Enter/0-9/PlayMode
• Dans le cas où le dossier comporterait plus de 11 pistes,
appuyez sur
ou
pour afficher la liste suivante de pistes.
sur STOP pour finir la lecture.
4 Appuyez
• L'appareil enregistre le point final. “ ” s'affiche à l'écran.
Appuyez sur PLAY pour reprendre la lecture (à partir de
la scène).
• Si vous réappuyez sur STOP ou déchargez le disque,
l'appareil efface le point final.
appuyez sur OPEN/CLOSE.
5 Ensuite,
Le compartiment à disque s'ouvre.
Retirez le disque, puis appuyez sur POWER.
Le compartiment à disque se ferme automatiquement et
l'appareil se met hors tension.
REMARQUES:
• Durant la lecture de CD MP3, la fonction Recherche et répétition
A-B ne fonctionne pas.
• Vous pouvez utiliser les fonctions de lecture répétée (Repeat) ou
aléatoire (random) et de lecture de programme pour la lecture des
CD MP3 (voir page 31).
AVERTISSEMENT:
• Certains CD de fichiers MP3 ne pourront
pas être lus si les conditions
d'enregistrement ne sont pas conformes.
• Les CD-R/RW qui ne comportent pas de
fichiers de musique ou qui comportent des
fichiers non MP3 ne peuvent pas être lus.
29
5J00401A[F] (26-29)
29
17/5/03, 5:01 PM
Zoom/Repérage de la scène désirée
Zoom
Cet appareil vous permet de faire un zoom avant sur
l'image. Ensuite, vous pouvez effectuer des sélections en
changeant la position de l'image.
TV CATV
POWER
PLAY MODE
DISPLAY
SLEEP
TIMER
AUDIO
AUDIO
TITLE
1
2
3
SUBTITLE
4
5
6
JUMP
7
8
9
0
RETURN
C.C.
ANGLE
MARKER ZOOM REPEATA-B RETURN
– SLOW +
MUTING
CANCEL
LIGHT
SELECT
/ENTER
+
CH
VOL
–
INPUT
/
/
/
3 (x 4).
pour afficher une autre partie
Il vous est possible de déplacer l'image depuis sa position
centrale vers le HAUT, vers le BAS, vers la GAUCHE ou vers
la DROITE.
le mode zoom, appuyez sur ZOOM à plusieurs
3 Dans
reprises pour retourner à une vue 1:1 ( Arret).
Repérage de la scène désirée
–
DVD SETUP
OPEN/CLOSE
sur
2 Appuyez
de l'image.
2 (x 3) et
+
TV MENU
B.SEARCH
1
Appuyez sur ZOOM
pendant la lecture.
Vous ferez un zoom avant
sur la partie centrale de
l'image.
Chaque fois que vous
appuyez sur ZOOM, vous
modifierez le ZOOM 1 (x 2),
VOL
CH
PREV NEXT
Appuyez sur TV/DVD pour
1 choisir
le mode DVD.
Utiliser le titre, le chapitre et l’heure enregistrés sur le
disque pour repérer la position de relecture requise.
TV/DVD DVD MENU
PLAY
F.SEARCH
STOP
sur JUMP pen1 Appuyez
dant la lecture.
Jump
PAUSE/STILL
_ _ / 19
1/8
0:00:00 / 2:02:31
/Enter/0 9/Cancel/Jump
TV / DVD
sur
ou
2 “Appuyez
T (titre/piste)” ou “
REMARQUES:
• Vous pouvez sélectionner Pause,
Ralenti ou Recherche dans le mode zoom.
• Certains disques ne répondent pas à la
fonction zoom.
pour selectionner “ C (Chapitre)”,
(heure)”.
Appuyez sur les touches numérotées (0-9) pour taper le
3 numéro.
• Si vous tapez un numéro incorrect, appuyez sur CANCEL.
• Se reporter à l’emballage fourni avec le disque pour
vérifier les numéros.
sur ENTER.
4 •Appuyez
La lecture commence.
• Lorsque vous changez le titre, la relecture commence
à partir du chapitre 1 du titre sélectionné.
• Il se peut que l’opération ci-dessus ne soit pas possible
pour certains disques.
30
5J00401A[F] (30-37)
30
17/5/03, 5:01 PM
Lecture répétée, Lecture au hasard et Lecture programmée/Lecture à répétition A-B
Appuyez sur PLAY MODE pendant la lecture ou le mode d'arrêt.
Chaque fois que vous appuyez sur PLAY MODE, le mode de lecture change comme suit.
CD AUDIO/CD MP3
DVD
Affichage
à l’écran
→
Affichage
à l’écran
Fonctionnement
Titre:
Répète le titre en cours.
↓
Chapitre: Répète le chapitre en cours.
↓
Arret:
Reprend une lecture normale.
• Pendant le mode arrêt, la touche PLAY MODE ne
fonctionne pas.
DISPLAY
PLAY MODE
SLEEP
TIMER
AUDIO
1
2
3
SUBTITLE
4
5
6
JUMP
7
8
9
0
RETURN
C.C.
MARKER ZOOM REPEATA-B RETURN
– SLOW +
MUTING
CANCEL
LIGHT
SELECT
/ENTER
+
CH
VOL
–
INPUT
Totale:
↓
Piste:
↓
Arret:
↓
Lecture aléatoire:
↓
*Programmme:
↓
(Affichage du statut):
Répète le disque en entier.
Répète la piste en cours.
Reprend une lecture normale.
Lit les pistes en ordre aléatoire.
Lit les pistes en ordre programmé.
Reprend une lecture normale.
AUDIO
TITLE
ANGLE
→
Fonctionnement
• En mode arrêt, vous ne pouvez pas sélectionner “
*Menu programme
Utilisez les touches numérotées (0-9)
pour entrer le numéro de piste que vous
souhaitez programmer, puis appuyez sur
ENTER. Le numéro de piste et le temps
total sont affichés. Répétez cette étape pour
entrer une piste supplémentaire. Lorsque
vous avez fini d’entrer des pistes, appuyez
sur PLAY afin de commencer la lecture
programmée. Une liste d’écoute des pistes
que vous avez programmées est affichée.
VOL
B.SEARCH
OPEN/CLOSE
Totale 3 0:24:54
/Enter/0 9/Cancel/Play/PlayMode
Lecture Programmee
0:02:31 0:08:29
Selections
5 8 3
–
PREV NEXT
Programmee
1 5 8:29
2 8 8:54
3 3 7:31
4 __
T 5/8
+
CH
TV MENU
Piste”.
DVD SETUP
TV/DVD DVD MENU
PLAY
STOP
F.SEARCH
PAUSE/STILL
REMARQUES:
• Si vous tapez un numéro incorrect, appuyez sur CANCEL.
• Pour annuler la lecture programmée, appuyez 3 fois sur STOP.
• Pour effacer les programmes du menu programme, appuyez sur CANCEL jusqu’à ce que tous les programmes soient effacés.
• Le programme est annulé quand vous ouvrez le compartiment à disque ou quand vous éteignez l'appareil.
Lecture à répétition A-B
La lecture à répétition A-B vous permet de répéter le document entre deux points sélectionnés.
sur REPEAT A-B pendant la lecture.
1 LeAppuyez
point de démarrage est sélectionné.
sur REPEAT A-B. Le point d'arrêt est sélectionné.
2 LaRéappuyez
lecture commence au point que vous avez sélectionné.
A
La lecture s'arrête au point final, retourne au point A automatiquement et recommence.
Pour reprendre la lecture normale, réappuyez sur REPEAT A-B. “
à l'écran.
A B
Arret” s'affiche
REMARQUES:
• Certains disques ne fonctionnent pas avec la répétition.
• Dans le mode de répétition A-B, les sous-titres près du point A ou B risquent de ne pas s'afficher.
• Il sera éventuellement impossible de définir la répétition A-B, en fonction des scènes du DVD.
• La répétition A-B ne fonctionne pas avec un CD MP3 et DVD interactif.
5J00401A[F] (30-37)
31
17/5/03, 5:01 PM
31
Indexage d’une scène
Le lecteur reprend les points que
vous souhaitez à nouveau visionner.
Vous pouvez reprendre la lecture à
partir de ces scénes.
TV CATV
POWER
PLAY MODE
DISPLAY
Pose d’un index
la lecture, appuyer sur
1 Pendant
MARKER.
Marker
1 T
2 T
3 T
C
C
C
/Enter/Cancel/Marker
SLEEP
TIMER
AUDIO
AUDIO
TITLE
1
2
3
SUBTITLE
4
5
6
JUMP
7
8
9
0
RETURN
C.C.
ANGLE
MARKER ZOOM REPEATA-B RETURN
– SLOW +
MUTING
CANCEL
LIGHT
SELECT
/ENTER
+
CH
VOL
–
INPUT
l'index vierge en
2 Sélectionnez
utilisant
/ .
Au moment choisi, presser
ENTER.
Marker
1 T 1
2 T
3 T
• Vous pouvez sélectionner
jusqu’à 3 scènes différentes.
• Répétez cette procédure pour
définir les 2 autres scènes.
C 3
C
C
0 08 50
/Enter/Cancel/Marker
3 Presser MARKER pour valider et revenir en écran neutre.
Lecture d’une scène indexée
sur MARKER pendant
1 Appuyez
la lecture ou le mode d'arrêt.
VOL
+
Marker
1 T 1
2 T 1
3 T 1
C 3
C 4
C 6
0 08 50
0 12 27
0 17 04
CH
–
TV MENU
DVD SETUP
PREV NEXT
B.SEARCH
OPEN/CLOSE
/Enter/Cancel/Marker
TV/DVD DVD MENU
PLAY
F.SEARCH
STOP
Appuyez sur
/
pour
2 sélectionner
le Marqueur 1-3.
PAUSE/STILL
Marker
1 T 1
2 T 1
3 T 1
C 3
C 4
C 6
0 08 50
0 12 27
0 17 04
/Enter/Cancel/Marker
TV / DVD
3 Appuyer sur SELECT la lecture démarre au point mémorisé.
Pour annuler l’index
REMARQUES:
• L’indexage est automatiquement
annulé par ouverture du disque ou
arrêt de l’appareil.
• Certains sous-titres enregistrés près
du marqueur peuvent ne pas être
affichés.
1 Appuyer sur MARKER.
2 Appuyez sur / pour sélectionner le Marqueur 1-3.
3 Appuyer sur CANCEL.
32
5J00401A[F] (30-37)
32
17/5/03, 5:01 PM
Changement de langue de la bande son/Sous-titres
Sélection d’une autre langue pendant la lecture
TV CATV
POWER
PLAY MODE
DISPLAY
SLEEP
TIMER
AUDIO
AUDIO
Vous pouvez sélectionner la langue quand vous passez un
disque multilingue.
sur AUDIO
1 Appuyez
pendant la lecture.
La langue actuelle de la
bande son s'affiche.
TITLE
1
2
3
SUBTITLE
4
5
6
sur AUDIO à
2 Appuyez
plusieurs reprises jusqu'à
JUMP
7
8
9
ce que la langue voulue
soit sélectionnée.
0
RETURN
C.C.
ANGLE
MARKER ZOOM REPEATA-B RETURN
– SLOW +
MUTING
CANCEL
LIGHT
SELECT
/ENTER
+
–
INPUT
+
–
PREV NEXT
L'affichage à l'écran
disparaît après quelques
secondes.
Sous-titres
Activer ou désactiver les sous-titres
VOL
CH
TV MENU
1/8 Eng Dolby Digital
Quand vous repassez un disque enregistré avec des soustitres, vous pouvez activer ou désactiver les sous-titres.
CH
VOL
2/8 Fra Dolby Digital
DVD SETUP
Appuyez sur SUBTITLE
pendant la lecture jusqu'à
l'affichage de “Arret”.
Arret
TV/DVD DVD MENU
Modification de la langue de sous-titrage
B.SEARCH
OPEN/CLOSE
PLAY
STOP
F.SEARCH
Vous pouvez sélectionner la langue quand vous repassez
un disque enregistré avec des sous-titres multilingues.
PAUSE/STILL
REMARQUES:
• Si vous n'entendez pas la langue désirée
après avoir appuyé sur SUBTITLE
plusieurs fois, la langue de votre choix
n'est pas enregistrée sur le disque.
• La modification de la langue de la bande
son est annulée quand vous ouvrez le
compartiment à disque. Vous entendrez
la langue initiale par défaut ou la langue
disponible si vous repassez le disque.
• La modification de la langue de soustitrage est annulée quand vous ouvrez
le compartiment à disque.
• Certaines fonctions peuvent ne pas
marcher sur certains DVD. Il se peut que
vous ne puissiez pas activer ou désactiver
ou changer les sous-titres. Pendant la
lecture du DVD, le sous-titre peut changer
quand :
- vous ouvrez ou fermez le compartiment
à disque;
- vous changez le titre.
• Dans certains cas, la langue de soustitrage ne passe pas immédiatement à
la langue sélectionnée.
sur SUBTITLE à
1 Appuyez
plusieurs reprises pendant
la lecture jusqu'à l'affichage
de la langue voulue.
1/32 Eng
2 L'affichage à l'écran disparaît après quelques secondes.
33
5J00401A[F] (30-37)
33
17/5/03, 5:01 PM
Changement des angles/Sélection du titre/Menu DVD
Modifications des angles
Quand vous passez un disque enregistré avec une fonction
multi-angles, vous pouvez changer l’angle de vue.
TV CATV
POWER
PLAY MODE
DISPLAY
SLEEP
TIMER
AUDIO
1
2
3
SUBTITLE
4
5
6
JUMP
7
8
9
0
RETURN
C.C.
MARKER ZOOM REPEATA-B RETURN
– SLOW +
MUTING
CANCEL
LIGHT
SELECT
/ENTER
+
CH
VOL
–
INPUT
1/9
L'angle actuel s'affiche.
AUDIO
TITLE
ANGLE
sur ANGLE
1 Appuyez
pendant la lecture.
sur ANGLE à plusieurs reprises jusqu'à ce que
2 Appuyez
l'angle voulu soit sélectionné.
Sélection du titre
Au moins deux autres titres sont enregistrés sur certains
disques. Si le menu titre est enregistré sur le disque, vous
pouvez sélectionner le titre voulu.
Appuyez sur TITLE pendant la lecture.
1 Le
menu Titre s'affiche à l'écran.
VOL
+
sur
2 Appuyez
voulu.
CH
/
ou
/
pour sélectionner le titre
–
TV MENU
DVD SETUP
PREV NEXT
B.SEARCH
OPEN/CLOSE
TV/DVD DVD MENU
PLAY
STOP
sur ENTER ou PLAY.
3 Appuyez
La lecture du titre sélectionné commence.
F.SEARCH
PAUSE/STILL
Menu DVD
Certains DVD vous permettent de sélectionner le contenu
du disque à l'aide du menu.
Quand vous passez ces DVD, vous pouvez sélectionner la
langue de sous-titrage et la langue de la bande sonore,
etc., à l'aide du menu DVD.
TV / DVD
Appuyez sur DVD MENU pendant la lecture.
1 Le
menu DVD s'affiche à l'écran.
REMARQUES:
• Selon le DVD, il peut s'avérer
impossible de modifier les angles
même si des angles multiples sont
enregistrés sur le DVD.
• Selon le DVD, il peut s'avérer
impossible de sélectionner le titre.
Selon le DVD, un “menu titre” peut
simplement s'appeler un “menu” ou un
“title” dans les instructions fournies
avec le disque.
• Réappuyez sur DVD MENU pour reprendre la lecture à
la scène qui passait quand vous avez appuyé sur DVD
MENU.
Appuyez sur
2 voulu.
/
ou
/
pour sélectionner l'élément
sur ENTER.
3 Appuyez
Le menu passe à un autre écran. Répétez les étapes 2 et
3 pour définir l'élément complètement.
34
5J00401A[F] (30-37)
34
17/5/03, 5:01 PM
Sélection de la langue
Vous pouvez changer les réglages
par défaut pour personnaliser les
opération selon vos préférences.
TV CATV
POWER
PLAY MODE
DISPLAY
SLEEP
TIMER
AUDIO
1
2
3
SUBTITLE
4
5
6
JUMP
7
8
9
0
RETURN
C.C.
disque.
Appuyez sur ou
pour
sélectionner “Langue”, puis
appuyez sur ou ENTER.
Menu Principal
Langue
Image
Son
Parental
/Enter/Setup/Return
AUDIO
TITLE
ANGLE
Appuyez sur TV/DVD pour choisir le mode DVD.
1 Appuyez
sur DVD SETUP dans le mode d'arrêt ou Sans
sur
ou
2 Appuyez
pour sélectionner “OSD
Langue”, puis appuyez
sur ou ENTER.
Langue
OSD Langue
Menu
Audio
SS.Titrage
Francais
Francais
Francais
Francais
/Enter/Setup/Return
MARKER ZOOM REPEATA-B RETURN
– SLOW +
MUTING
CANCEL
LIGHT
SELECT
/ENTER
+
CH
VOL
–
INPUT
VOL
sur
3 Appuyez
sélectionner
ou pour
la langue
voulue (p. ex. francais),
puis appuyez sur ENTER.
Le menu retourne au menu
“Langue” automatiquement.
OSD Langue
English
Francais
Espanol
+
/Enter/Setup/Return
• Si vous souhaitez retourner au menu précédent, appuyez
sur
ou RETURN.
CH
–
TV MENU
DVD SETUP
PREV NEXT
B.SEARCH
OPEN/CLOSE
TV/DVD DVD MENU
PLAY
F.SEARCH
STOP
PAUSE/STILL
Répétez les étapes 2-3 pour un autre réglage de “Langue”.
4 Autres:
(Menu/Audio/SS.Titrage)
Si vous souhaitez sélectionner une autre langue, tapez le
code langue (consultez la liste des codes langues à la page
41).
Arret: (SS. Titrage)
Les sous-titres ne s'affichent pas.
TV / DVD
sur DVD SETUP pour faire disparaître l’écran
5 Appuyez
Menu.
REMARQUES:
• Si la langue du film sélectionnée n'est
pas enregistrée sur le disque, vous
entendrez la langue originale.
• Si la langue des sous-titres
sélectionnée n'est pas enregistrée sur
le disque, la langue prioritaire est
sélectionnée.
35
5J00401A[F] (30-37)
35
17/5/03, 5:01 PM
Réglage du format écran/Réglage de l’affichage
Réglage du format écran
Vous pouvez sélectionner le format de l'image pour votre
téléviseur.
sur TV/DVD pour choisir
1 Appuyez
le mode DVD.
POWER
TV CATV
DISPLAY
PLAY MODE
SLEEP
TIMER
AUDIO
AUDIO
1
2
3
SUBTITLE
4
5
6
JUMP
7
8
9
0
RETURN
TITLE
C.C.
ANGLE
MARKER ZOOM REPEATA-B RETURN
– SLOW +
MUTING
CANCEL
LIGHT
SELECT
/ENTER
+
–
INPUT
VOL
+
CH
–
TV MENU
DVD SETUP
PREV NEXT
B.SEARCH
OPEN/CLOSE
TV/DVD DVD MENU
PLAY
F.SEARCH
STOP
sur
ou
pour
2 Appuyez
sélectionner “Ecran TV”, puis
appuyez sur
ou ENTER.
Appuyez sur
ou
pour
3 sélectionner
le type d'écran
voulu; ensuite, appuyez sur
ENTER.
Langue
Image
Son
Parental
/Enter/Setup/Return
Image
Ecran TV
OSD
4:3
Marche
Ecran TV
16:9
4:3
4:3
Vous pouvez choisir un écran parmi les tailles suivantes:
16:9
GRAND ÉCRAN
Sélectionnez ce mode quand vous vous branchez sur un
téléviseur à large écran.
Une image grand écran s'affiche dans toute sa taille.
4:3
TÉLÉ NORMALE
Sélectionnez ce mode quand vous êtes branché sur une
télévision traditionnelle. Quand vous passez un disque DVD
grand écran, il affiche l'image grand écran avec des bandes
noires en haut et en bas de l'écran.
CH
VOL
Appuyez sur DVD SETUP dans le
mode d'arrêt ou Sans disque.
Appuyez sur
ou
pour
sélectionner “Image”, puis
appuyez sur ou ENTER.
Menu Principal
PAUSE/STILL
4:3
PAN SCAN
Il affiche l'image grand écran sur tout l'écran avec coupure
automatique des bordures gauche et droite.
• Si vous souhaitez retourner au menu précédent, appuyez sur
ou RETURN.
sur DVD SETUP pour faire disparaître l’écran
4 Appuyez
Menu.
Réglage de l’affichage
Vous pouvez activer ou désactiver l'affichage à l'écran en
appuyant sur les commandes.
TV / DVD
sur DVD SETUP dans le mode d'arrêt ou Sans disque.
1 Appuyez
Appuyez sur
ou
pour sélectionner “Image”, puis
ou ENTER.
Appuyez sur
ou
2 sélectionner
“OSD”.
REMARQUE:
Si le disque DVD n'est pas formaté dans
le style “pan & scan”, il affiche le style 4:3.
pour
Image
Ecran TV
OSD
Appuyez sur ou ENTER pour
3 sélectionner
“Marche” ou “Arret”.
4:3
Marche
Image
Ecran TV
OSD
4:3
Arret
Marche: Les affichages à l'écran apparaissent quand vous
appuyez sur les commandes (réglages d’usine).
Arret:
Les affichages à l'écran n'apparaissent pas quand
vous appuyez sur des touches quelconques.
• Si vous souhaitez retourner au menu précédent, appuyez sur
ou RETURN.
sur DVD SETUP pour faire disparaître l’écran
4 Appuyez
Menu.
36
5J00401A[F] (30-37)
36
17/5/03, 5:01 PM
Dynamique audio (contrôle de la gamme d’amplification)
La fonction DRC (dynamique audio contrôle de la gamme d’amplification)
vous permet de contrôler la gamme
d’amplification dynamique afin
d’obtenir un son adapté à votre
équipement.
sur TV/DVD pour
1 Appuyez
choisir le mode DVD.
Menu Principal
Langue
Image
Son
Parental
Appuyez sur DVD SETUP
dans le mode d'arrêt.
ou
Appuyez sur
pour sélectionner “Son”.
/Enter/Setup/Return
POWER
TV CATV
Appuyez sur ou ENTER
2 pour
sélectionner “DRC”.
DISPLAY
PLAY MODE
SLEEP
TIMER
AUDIO
1
2
3
SUBTITLE
4
5
6
JUMP
7
8
9
0
RETURN
C.C.
DRC
Marche
AUDIO
TITLE
ANGLE
Son
/Enter/Setup/Return
sur ou ENTER
3 Appuyez
pour sélectionner “Marche”
ou “Arret”.
Son
DRC
Arret
MARKER ZOOM REPEATA-B RETURN
– SLOW +
MUTING
CANCEL
SELECT
/ENTER
+
CH
VOL
–
INPUT
/Enter/Setup/Return
LIGHT
VOL
+
• Si vous souhaitez retourner au menu précédent, appuyez
sur
ou RETURN.
sur DVD SETUP pour faire disparaître l’écran
4 Appuyez
Menu.
CH
–
TV MENU
DVD SETUP
PREV NEXT
B.SEARCH
OPEN/CLOSE
TV/DVD DVD MENU
PLAY
F.SEARCH
STOP
PAUSE/STILL
TV / DVD
REMARQUES:
• La fonction Dynamique audio (contrôle de
la gamme d’amplification) ne fonctionne que
lorsque vous lisez des disques enregistrés
en Dolby Digital.
• Le niveau de la dynamique audio dépend
de chaque DVD.
37
5J00401A[F] (30-37)
37
17/5/03, 5:01 PM
Réglage des différents niveaux de blocage
Certains disques ne conviennent pas
aux enfants. Ces disques peuvent être
limités pour ne pas fonctionner avec
l'appareil.
POWER
TV CATV
DISPLAY
PLAY MODE
SLEEP
TIMER
AUDIO
AUDIO
TITLE
1
2
3
SUBTITLE
4
5
6
JUMP
7
8
9
0
RETURN
C.C.
ANGLE
MARKER ZOOM REPEATA-B RETURN
– SLOW +
MUTING
CANCEL
SELECT
/ENTER
+
–
INPUT
VOL
+
CH
–
TV MENU
PREV NEXT
B.SEARCH
OPEN/CLOSE
DVD SETUP
TV/DVD DVD MENU
PLAY
STOP
Appuyez sur DVD SETUP
dans le mode d'arrêt.
Appuyez sur
ou
pour sélectionner
“Parental”, puis appuyez
sur
ou ENTER.
Appuyez sur
ou
2 pour
sélectionner “Niveau
Parental”, puis appuyez
ou ENTER.
sur
sur
ou
pour
3 Appuyez
sélectionner un niveau
pouvant être inactif ou de 1
ou
à 8. Appuyez sur
ENTER pour régler le
niveau sélectionné.
Langue
Image
Son
Parental
/Enter/Setup/Return
Parental
Code Secret
Niveau Parental
Arret
8
Niveau Parental
Arret
1
2
3
4
5
/Enter/Setup/Return
F.SEARCH
PAUSE/STILL
• Niveau Arrét : Le réglage de contrôle parental ne
fonctionne pas.
• Niveau 8: Il est possible de passer tous les logiciels
DVD.
• Niveau 1: Il est impossible de passer les logiciels DVD
destinés aux adultes.
• Sélectionnez un niveau entre 1 et 8. Les restrictions
sont plus sévères quand le numéro de niveau est faible.
sur
ou
4 Appuyez
pour sélectionner
Parental
Code Secret
Niveau Parental
“Code Secret”, puis
appuyez sur
ou
ENTER.
sur les touches
5 Appuyez
numérotées (0-9) pour le
mot de passe.
REMARQUES:
• Si chaque configuration (p.35~39) a été
réalisée, l'appareil peut toujours être
utilisé dans les mêmes conditions
(spécialement avec les disques DVD).
Chaque configuration restera en
mémoire si vous éteignez l'appareil.
• Selon les disques, l'appareil ne peut pas
limiter la lecture.
• Il est possible que certains disques ne
soient pas codés avec les informations
spécifiques du niveau de classification bien
que la pochette de disque porte la mention
“adulte”. Pour ces disques, les restrictions
d'âge ne fonctionnent pas.
38
Arret
1
Code Secret
Code Secret
1234
N’oubliez pas votre mot de
passe.
• Si vous tapez un numéro incorrect, appuyez sur CANCEL.
sur ENTER pour
6 Appuyez
mémoriser le mot de passe.
Parental
Code Secret
Marche
Niveau Parental 1
Remarque: La classification
est désormais verrouillée,
et il est impossible de modifier le paramètre à moins
d'introduire le bon mot de passe.
• Si vous souhaitez retourner au menu précédent,
ou RETURN.
appuyez sur
sur DVD SETUP pour faire disparaître l'écran de
7 Appuyez
contrôle parental.
38
5J00401A[F] (38-41)
Menu Principal
LIGHT
CH
VOL
sur TV/DVD
1 Appuyez
pour choisir le mode DVD.
17/5/03, 5:01 PM
Pour changer le niveau parental
sur TV/DVD pour choisir le mode DVD.
1 Appuyez
Appuyez sur DVD SETUP dans le mode d'arrêt ou Sans
disque.
Appuyez sur
appuyez sur
TV CATV
POWER
PLAY MODE
DISPLAY
SLEEP
TIMER
AUDIO
AUDIO
TITLE
1
2
3
SUBTITLE
4
5
6
JUMP
7
8
9
0
RETURN
C.C.
ANGLE
MARKER ZOOM REPEATA-B RETURN
– SLOW +
MUTING
CANCEL
LIGHT
SELECT
/ENTER
+
CH
VOL
–
INPUT
VOL
+
CH
–
TV MENU
DVD SETUP
PREV NEXT
B.SEARCH
OPEN/CLOSE
TV/DVD DVD MENU
PLAY
2
ou
pour sélectionner “Parental”, puis
ou ENTER.
ou
Appuyez sur
Parental
pour sélectionner “Code
Code Secret
Marche
Secret”, puis appuyez sur
Niveau Parental 1
ou ENTER.
F.SEARCH
STOP
sur les touches
3 Appuyez
numérotées (0-9) pour
Code Secret
Code Secret
1234
taper le mot de passe que
vous avez enregistré.
• Si vous tapez un numéro incorrect, appuyez sur
CANCEL.
sur ENTER.
4 Appuyez
Le mot de passe est
maintenant désactivé.
sur
ou
5 Appuyez
pour sélectionner “Niveau
Parental”, puis appuyez
sur
ou ENTER.
L’écran du niveau parental
s’affiche.
sur
ou
6 Appuyez
pour sélectionner un
niveau pouvant être inactif
ou de 1 à 8, puis appuyez
sur
ou ENTER.
Parental
Code Secret
Niveau Parental
Arret
1
Parental
Code Secret
Niveau Parental
Arret
1
Niveau Parental
3
4
5
6
7
8
/Enter/Setup/Return
PAUSE/STILL
sur
ou
7 Appuyez
pour sélectionner “Code
Secret”, puis appuyez sur
ou ENTER.
TV / DVD
REMARQUE:
Il ne faut pas oublier le mot de passe.
Si vous oubliez le mot de passe, contactez
le vendeur chez lequel vous avez acheté
l'appareil.
sur les touches
8 Appuyez
numérotées (0-9) pour
Parental
Code Secret
Niveau Parental
Arret
8
Code Secret
Code Secret
9876
saisir un mot de passe de
4 caractères.
Remarque: Vous pouvez modifier le mot de passe à
votre gré.
sur ENTER.
9 Appuyez
Maintenant, le niveau
Parental
Code Secret
Marche
parental est modifié et
Niveau Parental 8
verrouillé.
• Si vous souhaitez retourner au menu précédent,
ou RETURN.
appuyez sur
sur DVD SETUP pour faire disparaître l'écran
10 Appuyez
de contrôle parental.
39
5J00401A[F] (38-41)
39
17/5/03, 5:01 PM
Fonction d’annulation temporaire du verrouillage parental dans le disque DVD
Il se peut que le disque DVD essaie
d’annuler temporairement le niveau
parental que vous avez défini. C’est à
vous de voir si vous voulez annuler le
niveau parental ou non.
TV CATV
POWER
PLAY MODE
DISPLAY
SLEEP
TIMER
AUDIO
AUDIO
TITLE
1
2
3
SUBTITLE
4
5
6
JUMP
7
8
9
0
RETURN
C.C.
ANGLE
MARKER ZOOM REPEATA-B RETURN
– SLOW +
MUTING
CANCEL
LIGHT
SELECT
/ENTER
+
CH
VOL
–
INPUT
VOL
+
un disque DVD, et
1 Chargez
appuyez sur PLAY (voir
page 27).
disque DVD a été conçu pour annuler temporairement
2 leSi leniveau
parental, l’écran qui apparaît après avoir inséré
un DVD changera, en fonction du disque lu.
Si vous sélectionnez “YES” à l’aide de la touche ENTER,
“Votre choix depasse la limite du bloq.parental.
Votre choix depasse la limite du blog.parental.
Code Secret
Enter/0–9/Cancel/Return
vous souhaitez annuler temporairement le niveau
3 Siparental,
entrez le mot de passe à 4 chiffres.
Appuyez sur ensuite ENTER.
Si vous n’avez pas défini de mot de passe, la lecture
commencera. Si vous ne connaissez pas (ou avez oublié)
le mot de passe, sélectionnez “STOP”.
L’écran de définition du mot de passe disparaît. Appuyez
sur OPEN/CLOSE pour retirer le disque.
Pour arrêter la saisie, appuyez sur RETURN.
CH
–
TV MENU
DVD SETUP
PREV NEXT
B.SEARCH
OPEN/CLOSE
TV/DVD DVD MENU
PLAY
STOP
lecture commence si le mot de passe saisi est
4 La
correct.
F.SEARCH
PAUSE/STILL
TV / DVD
REMARQUE:
Cette annulation temporaire de niveau
parental sera conservée jusqu’à l’éjection
du disque.
Une fois le disque éjecté, le niveau
parental d’origine sera restauré
automatiquement.
40
5J00401A[F] (38-41)
40
17/5/03, 5:01 PM
Liste des codes langues
Entrez les codes numériques appropriés lors du réglage initial des paramètres “Menu”, “Audio” ou “SS.Titrage”
(voir page 35).
Language Name Code
Language Name Code
Language Name Code
Language Name Code
Abkhazian
1112 Fiji
1620
Lingala
2224
Singhalese
2919
Afar
1111
Finnish
1619
Lithuanian
2230
Slovak
2921
Afrikaans
1116 French
1628
Macedonian
2321
Slovenian
2922
Albanian
2927 Frisian
1635
Malagasy
2317
Somali
2925
Amharic
1123 Galician
1722
Malay
2329
Spanish
1529
Arabic
1128 Georgian
2111
Malayalam
2322
Sundanese
2931
Armenian
1835 German
1415
Maltese
2330
Swahili
2933
Assamese
1129 Greek
1522
Maori
2319
Swedish
2932
Aymara
1135 Greenlandic
2122
Marathi
2328
Tagalog
3022
Azerbaijani
1136 Guarani
1724
Moldavian
2325
Tajik
3017
Bashkir
1211 Gujarati
1731
Mongolian
2324
Tamil
3011
Basque
1531 Hausa
1811
Nauru
2411
Tatar
3030
Bengali; Bangla
1224 Hebrew
1933
Nepali
2415
Telugu
3015
Bhutani
1436 Hindi
1819
Norwegian
2425
Thai
3018
Bihari
1218 Hungarian
1831
Oriya
2528
Tibetan
1225
Breton
1228 Icelandic
1929
Panjabi
2611
Tigrinya
3019
Bulgarian
1217 Indonesian
1924
Pashto, Pushto 2629
Tonga
3025
Burmese
2335 Interlingua
1911
Persian
1611
Turkish
3028
Byelorussian
1215 Irish
1711
Polish
2622
Turkmen
3021
Cambodian
2123 Italian
1930
Portuguese
2630
Twi
3033
Catalan
1311 Japanese
2011
Quechua
2731
Ukrainian
3121
Chinese
3618 Javanese
2033
Rhaeto-Romance 2823
Urdu
3128
Corsican
1325 Kannada
2124
Romanian
2825
Uzbek
3136
Croatian
1828 Kashmiri
2129
Russian
2831
Vietnamese
3219
Czech
1329 Kazakh
2121
Samoan
2923
Volapük
3225
Danish
1411 Kirghiz
2135
Sanskrit
2911
Welsh
1335
Dutch
2422 Korean
2125
Scots Gaelic
1714
Wolof
3325
English
1524 Kurdish
2131
Serbian
2928
Xhosa
3418
Esperanto
1525 Laothian
2225
Serbo-Croatian
2918
Yiddish
2019
Estonian
1530 Latin
2211
Shona
2924
Yoruba
3525
Faroese
1625 Latvian, Lettish
2232
Sindhi
2914
Zulu
3631
41
5J00401A[F] (38-41)
41
17/5/03, 5:01 PM
Connexion à un autre appareil
La configuration exacte des liaisons entre les divers appareils audio et vidéo et le TV/DVD, dépend du modèle
et des particularités de chacun. Pour connaître l'emplacement des entrées et des sorties audio et vidéo,
reportez-vous au mode d'emploi qui est fourni avec chaque appareil.
Utilisation d’un ampli AV avec décodeur intégré
En connectant un ampli avec décodeur intégré il est possible de bénéficier d’un montage “home cinéma” avec
un son dolby surround d’une qualité parfaite.
Connectez un ampli AV intégrant un décodeur numérique Dolby, un décodeur DTS, un décodeur MPEG
ou etc comme c'est indiqué ci-dessous.
AV (D)
Caisson
de basses
Arrière TV/DVD
UHF/
VHF
(MONO)
AUDIO
R
H-P
TV/DVD
VIDEO
HP AV
(G)
DIGITAL
AUDIO OUT
LINE IN 1 COAXIAL
Sortie audio
digital coaxial
Câble coaxial digital (non fourni)
Enceinte centrale
Vers l’entrée coaxial digital
HP Surround (G)
HP Surround
(D)
Ampli AV intégrant un décodeur
(voir ci-dessus)
* Fabriqué sous licence de Dolby Laboratories. “Dolby” et le symbole double D sont des marques commerciales de
Dolby Laboratories. Œuvres confidentielles non publiées. © 1992-1997 Dolby Laboratories, Inc.. Tous droits
réservés.
* “DTS” et “DTS Digital Out” sont des marques déposée par Digital Theatre Systems, Inc.
REMARQUES:
• Quand vous effectuez les connexions ci-dessus, Il ne faut pas activer DOLBY DIGITAL sur DOLBY DIGITAL et
MPEG sur MPEG sur l'ampli AV. Sinon, un bruit fort sortira brusquement des hauts-parleurs et risquera de vous
faire mal aux oreilles et d'endommager les hauts-parleurs.
• Quand vous passez des CD DTS, vous n'entendrez que du bruit dans les hauts-parleurs ou les sorties stéréo
analogiques.
• Certains décodeurs DTS, qui n'acceptent pas l'interface DVD-DTS, risquent de ne pas fonctionner correctement
avec l'appareil.
42
5J00401A[F] (42-43)
42
17/5/03, 5:01 PM
Using the audio/video inputs
Si vous reliez le TV/DVD au magnétoscope, au caméscope,au à un jeu vidéo ou DVD, vous pouvez choisir
l’appareil au moyen de la touche INPUT.
Appuyez plusieurs fois sur la touche INPUT pour choisir le mode désiré. “LINE1”, “LINE2” ou TV canal s’affiche
sur l’écran pendant 4 secondes.
LINE 1
TV Canal
LINE 1
(Arrière)
LINE 2
(Avant)
REMARQUE:
Cette touche ne fonctionne pas dans le mode DVD.
1. Pour raccorder le téléviseur à un magnétoscope
Appuyez sur la touche INPUT pour choisir le mode désiré et utiliser le téléviseur comme un moniteur.
Faites fonctionner le magnétoscope de la façon habituelle.
Arrière du TV/DVD
Entrée video
VCR
VIDEO
UHF/
VHF
(MONO)
AUDIO
R
Vers la sortie
audio/video
DIGITAL
AUDIO OUT
LINE IN 1 COAXIAL
Entrée audio (G)
Entrée audio (D)
2. Pour relier le TV/DVD à un caméscope
Pour la lecture de la cassette du caméscope, reliez le caméscope au TV/DVD de la manière illustrée.
Avant du TV/DVD
Caméscope
Entrée video
VIDEO
Vers la sortie audio/video
L/MONO AUDIO
LINE 2 IN
R
Entrée audio (D)
Entrée audio (G)
Câble Audio/Vidéo (non fourni)
3. Pour relier le TV/DVD à un jeu vidéo
Avant du TV/DVD
JEU VIDÉO
Entrée video
VIDEO
L/MONO
AUDIO
R
LINE 2 IN
Entrée audio (D)
Vers la sortie audio/video
Entrée audio (G)
Câble Audio/Vidéo (non fourni)
43
5J00401A[F] (42-43)
43
17/5/03, 5:01 PM
Problèmes et anomalies
Vérifier avant tout que les connexions avec les autres équipements sont bien faites.
La liste ci-dessous peut s’avérer utile dans le cas de problèmes mineurs.
Si les problèmes persistent, il est important de consulter la station technique la plus proche.
SYMPTÔME
SOLUTION POSSIBLE
PAGE
• Assurez-vous que le cordon d'alimentation soit branché.
• Essayez une autre prise.
• Il n'y a pas de courant. Vérifiez le fusible ou le disjoncteur.
• Débranchez l'appareil pendant une heure puis branchez-le de nouveau.
5
10
–
5
ALIMENTATION
L'appareil ne fonctionne pas.
RECEPTION D’EMISSIONS TELEVISEES
• Problème à la station ou au réseau de câblodistribution.
Essayez une autre station.
Mauvais son ou son inexistant.
• Vérifiez le réglage du son (VOL ou MUTING).
• Recherchez des sources d'interférences possibles.
Mauvaise image ou image
inexistante.
Mauvaise réception de certains
canaux.
Mauvaise couleur ou couleur
inexistante.
L'image tremble ou dérive.
Pas de réception de la
câblodistribution.
• Problème à la station ou au réseau de câblodistribution.
Essayez une autre station.
• Vérifiez le raccordement de la CATV ou de l'antenne.
Ou changez la position de l'antenne.
• Recherchez des sources d'interférences possibles.
• Vérifiez les réglages de l'image.
14
14
46
14
11,12
46
22
• Problème à la station ou au réseau de câblodistribution.
14
Essayez une autre station.
• Le signal de la station est faible. Changez la position de l'antenne. 11,12
• Recherchez des sources d'interférences possibles.
46
• Problème à la station ou au réseau de câblodistribution.
14
Essayez une autre station.
• Assurez-vous que les canaux soient mis en mémoire.
18
• Vérifiez les réglages de l'image.
22
• Vérifiez le raccordement de la CATV ou de l'antenne.
11,12
Ou changez la position de l'antenne.
• Recherchez des sources d'interférences possibles.
46
14
• Problème à la station ou au réseau de câblodistribution.
Essayez une autre station.
18
• Assurez-vous que les canaux soient mis en mémoire.
–
• La compagnie de câblodistribution brouille les signaux.
11
• Vérifiez la position de l'antenne.
12
• Vérifiez le raccordement au réseau de câblodistribution.
17
• Réglez l'option du menu de TV/CATV sur le mode CATV.
14
• Problème à la station ou au réseau de câblodistribution.
Essayez une autre station.
Barres horizontales ou diagonales • Assurez-vous que le menu du mode TV/CATV soit réglé au mode approprié. 11,12
• Recherchez des sources d'interférences possibles.
46
à l'écran.
•
Assurez-vous
que
l'option
du
menu
du
mode
TV/CATV
soit
17
Pas de réception au-delà du
réglé sur um mode approprié.
canal 13.
• Si vous utilisez une antenne UHF, vérifiez son raccordement.
11
• La station cesse d'émettre.
18
Le télécouleur s'éteint.
• L'arrêt différé est réglé.
15
• Il n'y a pas de courant.
–
• La station a des problèmes ou cette émission n'est pas sous18
titrée. Essayez un autre canal.
Le décodeur de sous-titres ne • Vérifiez le raccordement de la CATV ou de l'antenne VHF/
11,12
fonctionne pas.
UHF, ou changez la position de l'antenne.
• Pressez la touche C.C. pour mettre le décodeur en circuit.
16
L'affichage n'est pas montré
dans la langue sélectionnée.
• Choisissez la langue voulue parmi les options du menu.
44
5J00401A[F] (44-BACK)
44
17/5/03, 5:01 PM
13
SYMPTÔME
SOLUTION POSSIBLE
PAGE
DVD
La lecture ne démarre pas.
• Pas de disque chargé.
• Disque sale/le nettoyer.
• CD ROM, ne peut être lu etc...
27
25
–
Pas d’image
• Le sélecteur TV/DVD n'est pas réglé correctement.
26
Pas de son
• Voir si le sélecteur d’entrée de l’ampli est bien réglé.
• L’appareil est en mode de Lecture Spécial.
• Sélectionne la position de sortie audio correcte sur l'ampli AV.
–
28
42
L’image est distordue en AV RAP
ou RET.RAP.
• Défaut d’image passager.
–
Pause lecture, recherche, ralenti,
repeat, lecture programmée, ne
peuvent se faire.
• Certains disques n’intègrent pas telle ou telle fonction.
–
Pas d’image 4 : 3 ou 16 : 9
• Le réglage n’est pas compatible avec le TV.
36
Pas d’affichage OSD.
• Sélectionner OSD Marche.
36
Pas de son surround.
• Le réglage du système stéréo est incorrect.
42
L’appareil, ou certaines touches
ne fonctionnent pas.
• Eteindre l’appareil débrancher le cordon d’alim.
Qques minutes. Rebrancher.
–
La lecture ne démarre pas
lorsque le titre est choisi.
• Vérifier le règlage du BROQ. PARENTAL.
La langue du film ou des sous
titres n’est pas modifiable en
cours de lecture.
• Le disque n’est pas multilangues.
Pas de sous-titres.
• Certains disques n’en ont pas.
• Les sous-titres sont annulés. Presser la touche SUBTITLE.
35
Pas de changement d’angle possible. • Le disque DVD n’est pas multi-angles.
“
” s’affiche sur l’écran.
38~40
• La fonction demandée n’existe pas sur ce appareil ou film.
33
34
–
–
TELECOMMANDE
La télécde ne fonctionne pas.
• Diriger la télécde vers le sensor.
• Opérer à 5m environ ou réduire l’éclairage.
• Dégagez le trajet du faisceau.
• De la pièce. Les piles sont à remplacer.
• Voir si elles sont insérées correctement.
10
45
5J00401A[F] (44-BACK)
45
17/5/03, 5:01 PM
Problemes de reception
Il est possible de remédier à la plupart des interférences à la télévision en réglant la hauteur et en
changeant la position de l'antenne VHF/UHF. Pour obtenir les meilleurs résultats, il est recommandé
d'utiliser une antenne extérieure. La plupart des interférences sont expliquées ci-dessous. Si un de ces
symptômes apparaît quand le télécouleur est raccordé au système de câblodistribution, le problème peut
être causé par votre compagnie de câblodistribution locale.
ALLUMAGE
Des taches noires ou des rayures horizontales peuvent apparaître ou
l'image peut trembler ou dériver. En général, ces interférences sont
causées par le système d'allumage de véhicules, des lampes au néon,
des perceuses électriques ou d'autres appareils électriques.
IMAGE-FANTOME
Les images-fantômes sont souvent causées par le signal télévisé qui suit
deux voies, une, la directe, et l'autre, qui est réfléchie par des édifices,
collines ou autres obstacles sur son chemin. Il est souvent possible
d'améliorer la réception en changeant la direction ou la position de
l'antenne.
IMAGE ENNEIGEE
Si votre récepteur se trouve dans les régions limitrophes d'une station
de télévision où le signal est faible, l'image peut être criblée de petits
points. Dans ce cas, il est peut-être nécessaire d'utiliser une antenne
extérieure pour obtenir une bonne réception.
INTERFERENCE DE LA FREQUENCE RADIO
Ce genre d'interférence produit des parasites en forme d'ondulations ou
de rayures diagonales, et dans certains cas, une perte de contraste de
l'image. Il est possible d'améliorer l'image en changeant la direction et la
position de l'antenne ou en installant un filtre RFI.
VARIATION DE LA GRANDEUR DE L'IMAGE
Une légère variation de la grandeur de l'image est normale lors du réglage
de la commande de contraste ou de luminosité.
SOINS ET ENTRETIEN
Pour éviter les risques d'incendie ou de choc électrique, déconnectez l'appareil de la source du CA avant de le
nettoyer. Comme pour nettoyer tout meuble, essuyez le boîtier avec un linge doux humecté d'eau légèrement
savonneuse. Faites attention en nettoyant ou en essuyant les pièces en plastique.
46
5J00401A[F] (44-BACK)
46
17/5/03, 5:01 PM
Fiche technique
DONNEES GENERALES
Sources d'alimentation:
Consommation de courant:
Poids:
Dimensions:
TELECOULEUR
Tube image:
Syntonisateur:
Canaux captés:
Entrée d'antenne:
Haut-parleur:
Puissance de sortie audio:
LECTURE DVD/CD AUDIO
Standard:
Disques compatibles:
Réponse en fréquence:
Entrée:
Prise d’ecouteur:
Sortie Digital Audio:
Pick-up:
ACCESSOIRES:
AC 120V 60Hz
En marche: 115 Watts
En veill: 4 Watts
56,1lbs (25,5 kg)
Largeur
: 22-5/8 po (574 mm)
Hauteur
: 20-3/8 po (515 mm)
Pro fondeur : 19-1/8 po (483 mm)
Type 20 (508 mm diagonale)
A synthétiseur de fréquences à boucle d'asservissement à quartz (PLL)
VHF
2-13
UHF
14-69
CATV 14-36 (A)-(W)
37-59 (AA)-(WW)
60-85 (AAA)-(ZZZ)
86-94 (86)-(94)
95-99 (A-5)-(A-1)
100-125 (100)-(125)
01 (5A)
Câble coaxial VHF/UHF 75 ohms
1-13/16 x 3-7/8 po (46 x 99 mm), 8 ohms x 2
2,5W + 2,5W
NTSC
1. DVD (12cm, 8cm)
2. CD (12cm, 8cm)
DVD: 4Hz - 22KHz
CD: 4Hz - 20KHz
Video : (RCA) 1 Vc-à-c/75ohm
Audio : (RCA) –8 dB/50Kohm
Mini-prise stéréo 3,5mm
0,5Vc-à-c 75 ohm
CD: longueur d’onde : 775-815nm
puissance maximum de sortie 0,5mW
DVD: longueur d’onde : 650-666nm
puissance maximum de sortie : 2,0mW
Télécommande x 1
Piles (2 x AA)
47
5J00401A[F] (44-BACK)
47
17/5/03, 5:01 PM
Appendice (Programmation avec la télécommande)
PROGRAMMATION AVEC LA TÉLÉCOMMANDE
Réglage du récepteur CATV
Vous pouvez programmer votre télécommande pour qu'elle puisse commander votre récepteur câble ou
satellite en utilisant les instructions et les codes indiqués ci-dessous. Si l'équipement ne répond à aucun de
ces codes ou à la fonction de recherche, utilisez la télécommande fournie par le fabricant.
Configuration du décodeur câble box ou Satellite
La télécommande est programmée avec des codes CATV et/ou Satellite pour la mise sous tension, la mise
hors tension, le canal précédent ou suivant et un fonctionnement sur clavier numérique.
1) Repérez la marque CATV/Satellite dans la liste de codes ci-dessous.
2) Placez le sélecteur 2 positions (TV/CATV) sur “CATV”.
3) Maintenez la touche DISPLAY enfoncée.
4) Avec la touche DISPLAY enfoncée, tapez le premier code indiqué en utilisant le pavé clavier numérique.
5) Relâchez la touche DISPLAY.
6) Vérifiez le bon fonctionnement du récepteur câble/Satellite.
• Si le décodeur câble ou satellite ne répond pas au premier code, essayez les autres. S'il ne répond à aucun
code, essayez la fonction de recherche de codes décrite au bas de la page.
Décodeur câble
CODES
Décodeur câble
CODES
ABC
Archer
Cableview
Citizen
Curtis
Diamond
Eagle
Eastern
GC Brand
Gemini
General Instrument
Hamlin
Hitachi
Jerrold
Macom
Magnavox
Memorex
Movietime
Oak
Panasonic
Paragon
Philips
Pioneer
024
032, 025
051, 032
022, 051
058, 059
024, 032, 025
029
034
032, 051
022, 043
065, 024, 025, 026, 027, 020, 021, 022, 057, 023
040, 041, 042, 045, 058, 064
049, 024
065, 024, 025, 026, 027, 020,021, 022, 057, 023
049, 050, 051, 054
033
030
032, 051
039, 037, 048
055, 056, 060, 071
063
028, 029, 030, 052, 053, 031, 069
047, 062
Pulsar
Puser
RCA
Realistic
Regal
Regency
Rembrandt
Samsung
Scientific Atlanta
SLMark
Sprucer
Stargate
Telecaption
Teleview
Texscan
Tocom
Toshiba
Unika
Universal
Videoway
Viewstar
Zenith
Zenith/Drake Satellite
051, 032
032
061, 070
032
058, 064, 040, 041, 042, 045, 068
034
037, 032, 051, 038
051
057, 058, 059
051, 047
051, 056
032, 051
067
047, 051
044
035, 036, 066
050
032, 025
022, 032
052
029, 030
063, 046
046
Système Satellite
numérique
CODES
Système Satellite
numérique
CODES
Echostar
Express VU
G.E.
G.I.
Gradiente
Hitachi
HNS (Hughes)
Panasonic
100, 113, 114
100, 113
106
108
112
104, 111
104
105
Philips
Primestar
Proscan
RCA
Sony
Star Choice
Toshiba
Uniden
102, 103
108
106, 109, 110
106, 109, 110
107
104, 108
101
102, 103
Fonction de recherche de codes:
1) Positionnez le sélecteur de mode (sélecteur TV/CATV) sur CATV.
2) Appuyez sur les touches TV POWER et RETURN. Maintenez la pression environ trois secondes puis
relâchez.
3) Appuyez sur TV POWER et voyez si le récepteur CATV ou Satellite répond.
4) Si vous obtenez une réponse, appuyez sur RETURN. Les codes de fonctionnement sont maintenant définis.
Si vous n'obtenez pas de réponse, répétez l'étape 3. Si vous répétez l'étape 3 52 fois sans obtenir de réponse,
utilisez la télécommande qui a été fournie avec l'équipement.
5) Appuyez sur RETURN pour quitter.
48
5J00401A[F] (44-BACK)
48
17/5/03, 5:01 PM
Memo
○
○
○
○
○
○
○
○
○
○
○
○
○
○
○
○
○
○
○
○
○
○
○
○
○
○
○
○
○
○
○
○
○
○
○
○
○
○
○
○
○
○
○
○
○
○
○
○
○
○
○
○
○
○
○
○
○
○
○
○
○
○
○
○
○
○
○
○
○
○
○
○
○
○
○
○
○
○
○
○
○
○
○
○
○
○
○
○
○
○
○
○
○
○
○
○
○
○
○
○
○
○
○
○
○
○
○
○
○
○
○
○
○
○
○
○
○
○
○
○
○
○
○
○
○
○
○
○
○
○
○
○
○
○
○
○
○
○
○
○
○
○
○
○
○
○
○
○
○
○
○
○
○
○
○
○
○
○
○
○
○
○
○
○
○
○
○
○
○
○
○
○
○
○
○
○
○
○
○
○
○
○
○
○
○
○
○
○
○
○
○
○
○
○
○
○
○
○
○
○
○
○
○
○
○
○
○
○
○
○
○
○
○
○
○
○
○
○
○
○
○
○
○
○
○
○
○
○
○
○
○
○
○
○
○
○
○
○
○
○
○
○
○
○
○
○
○
○
○
○
○
○
○
○
○
○
○
○
○
○
○
○
○
○
○
○
○
○
○
○
○
○
○
○
○
○
○
○
○
○
○
○
○
○
○
○
○
○
○
○
○
○
○
○
○
○
○
○
○
○
○
○
○
○
○
○
○
○
○
○
○
○
○
○
○
○
○
○
○
○
○
○
○
○
○
○
○
○
○
○
○
○
○
○
○
○
○
○
○
○
○
○
○
○
○
○
○
○
○
○
○
○
○
○
○
○
○
○
○
○
○
○
○
○
○
○
○
○
○
○
○
○
○
○
○
○
○
○
○
○
○
○
○
○
○
○
○
○
○
○
○
○
○
○
○
○
○
○
○
○
○
○
○
○
○
○
○
○
○
○
○
○
○
○
○
○
○
○
○
○
○
○
○
○
○
○
○
○
○
○
○
○
○
○
○
○
○
○
○
○
○
○
○
○
○
○
○
○
○
○
○
○
○
○
○
○
○
○
○
○
○
○
○
○
○
○
○
○
○
○
○
○
○
○
○
○
○
○
○
○
○
○
○
○
○
○
○
○
○
○
○
○
○
○
○
○
○
○
○
○
○
○
○
○
○
○
○
○
○
○
○
○
○
○
○
○
○
○
○
○
○
○
○
○
○
○
○
○
○
○
○
○
○
○
○
○
○
○
○
○
○
○
○
○
○
○
○
○
○
○
○
○
○
○
○
○
○
○
○
○
○
○
○
○
○
○
○
○
○
○
○
○
○
○
○
○
○
○
○
○
○
○
○
○
○
○
○
○
○
○
○
○
○
○
○
○
○
○
○
○
○
○
○
○
○
○
○
○
○
○
○
○
○
○
○
○
○
○
○
○
○
○
○
○
○
○
○
○
○
○
○
○
○
○
○
○
○
○
○
○
○
○
○
○
○
○
○
○
○
○
○
○
○
○
○
○
○
○
○
○
○
○
○
○
○
○
○
○
○
○
○
○
○
○
○
○
○
○
○
○
○
○
○
○
○
○
○
○
○
○
○
○
○
○
○
○
○
○
○
○
○
○
○
○
○
○
○
○
○
○
○
○
○
○
○
○
○
○
○
○
○
○
○
○
○
○
○
○
○
○
○
○
○
○
○
○
○
○
○
○
○
○
○
○
○
○
○
○
○
○
○
○
○
○
○
○
○
○
○
○
○
○
○
○
○
○
○
○
○
○
○
○
○
○
○
○
○
○
○
○
○
○
○
○
○
○
○
○
○
○
○
○
○
○
○
○
○
○
○
○
○
○
○
○
○
○
○
○
○
○
○
○
○
○
○
○
○
○
○
○
○
○
○
○
○
○
○
○
○
○
○
○
○
○
○
○
○
○
○
○
○
○
○
○
○
○
○
○
○
○
○
○
○
○
○
○
○
○
○
○
○
○
○
○
○
○
○
○
○
○
○
○
○
○
○
○
○
○
○
○
○
○
○
○
○
○
○
○
○
○
○
○
○
○
○
○
○
○
○
○
○
○
○
○
○
○
○
○
○
○
○
○
○
○
○
○
○
○
○
○
○
○
○
○
○
○
○
○
○
○
○
○
○
○
○
○
○
○
○
○
○
○
○
○
○
○
○
○
○
○
○
○
○
○
○
○
○
○
○
○
○
○
○
○
○
○
○
○
○
○
○
○
○
○
○
○
○
○
○
○
○
○
○
○
○
○
○
○
○
○
○
○
○
○
○
○
○
○
○
○
○
○
○
○
○
○
○
○
○
○
○
○
○
○
○
○
○
○
○
○
○
○
○
○
○
○
○
○
○
○
○
○
○
○
○
○
○
○
○
○
○
○
○
○
○
○
○
○
○
○
○
○
○
○
○
○
○
○
○
○
○
○
○
○
○
○
○
○
○
○
○
○
○
○
○
○
○
○
○
○
○
○
○
○
○
○
○
○
○
○
○
○
○
○
○
○
○
○
○
○
○
○
○
○
○
○
○
○
○
○
○
○
○
○
○
○
○
○
○
○
○
○
○
○
○
○
○
○
○
○
○
○
○
○
○
○
○
○
○
○
○
○
○
○
○
○
○
○
○
○
○
○
○
○
○
○
○
○
○
○
○
○
○
○
○
○
○
○
○
○
○
○
○
○
○
○
○
○
○
○
○
○
○
○
○
○
○
○
○
○
○
○
○
○
○
○
○
○
○
○
○
○
○
○
○
○
○
○
○
○
○
○
○
○
○
○
○
○
○
○
○
○
○
○
○
○
○
○
○
○
○
○
○
○
○
○
○
○
○
○
○
○
○
○
○
○
○
○
○
○
○
○
○
○
○
○
○
○
○
○
○
○
○
○
○
○
○
○
○
○
○
○
○
○
○
○
○
○
○
○
○
○
○
○
○
○
○
○
○
○
○
○
○
○
○
○
○
○
○
○
○
○
○
○
○
○
○
○
○
○
○
○
○
○
○
○
○
○
○
○
○
○
○
○
○
○
○
○
○
○
○
○
○
○
○
○
○
○
○
○
○
○
○
○
○
○
○
○
○
○
○
○
○
○
○
○
○
○
○
○
○
○
○
○
○
○
○
○
○
○
○
○
○
○
5J00401A[F] (44-BACK)
49
17/5/03, 5:01 PM
49
○
JVC COMPANY OF AMERICA
Division of U.S. JVC CORP.
1700 Valley Road
Wayne, New Jersey 07470
J5J00401A
03/05
5J00401A[F] (44-BACK)
JVC CANADA, INC.
21 Finchdene Square
Scarborough, Ontario
Canada M1X 1A7
K
Imprimé en Thaïlande
50
17/5/03, 5:01 PM