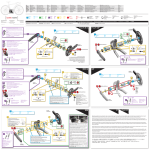
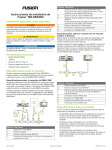
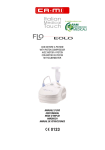
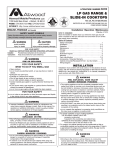
Download DTT - Rotor
Transcript
3
1
E
E
D
C
E
C
ROTOR COMPONENTES TECNOLÓGICOS SL
Pol.Ind. Conmar. C/Miño, 14. 28864, Ajalvir, Madrid, Spain
Phone: +34 91 884 38 46. Fax: +34 91 884 38 65
F
D
1
A - TAPA IZQUIERDA
INSTALACIÓN DE PEDALIER, PLATOS Y PEDALES
C - TÓRICA
D - PEDALIER
2 DESMONTAJE CONJUNTO BIELA IZQUIERDA
F - ESPACIADOR LADO IZQUIERDO
G - ESPACIADOR LADO DERECHO
- SENTIDO HORARIO
- SENTIDO ANTIHORARIO
Tornillo DTT -
G - ESPACIADOR LADO DERECHO
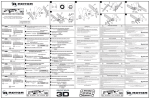
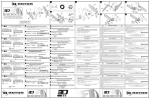
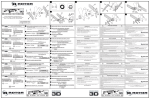
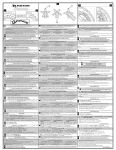
ROTOR 3D MTB CRANKSET.
QUICK INSTALLATION GUIDE.
XC3-104/64 BCD
XC2-110/74 BCD
Product specifications may change for improvement without notice.
A - NON-DRIVE SIDE CAP
www.rotorbike.com
F - NON-DRIVE SIDE SPACER
G - DRIVE SIDE SPACER
C - O-RING
D - BOTTOM BRACKET
- TURN ANTICLOCKWISE
3
ROTOR 3D MTB.
MONTAGEANLEITUNG.
XC3-104/64 BCD
XC2-110/74 BCD
1
BITTE NICHT
AUSEINANDERBAUEN
BITTE NICHT DIE
SCHRAUBE ENTFERNEN
2
F - SPACER NICHT ANTRIEBSSEITE
G - SPACER ANTRIEBSSEITE
C - DICHTUNG
D - INNELAGER
- Drehrichtung gegen den Uhrzeigersinn
- Drehrichtung im Uhrzeigersinn
FR
PEDALIER ROTOR 3D VTT.
NOTICE D'INSTALLATION.
XC3-104/64 BCD
XC2-110/74 BCD
Les spécifications des produits peuvent changer sans préavis à des fins d'amélioration.
A - VIS D'AXE (CÔTÉ OPPOSÉ
À LA TRANSMISSION)
Révisé: 07/2012
E - ASSEMBLAGE CÔTÉ TRANSMISSION
B - ASSEMBLAGE CÔTÉ OPPOSÉ
NE PAS DEMONTER
C - O-RING
D - BOITIER DE ROULEMENT
Le specifiche del prodotto possono cambiare senza preavviso.
- VTT
D - MOVIMENTO CENTRALE
Versione del: 07/2012
5
6
7
4
XC2 : 4,0mm
XC3 : 7,5mm
1 INSTALLATION DU BOITIER DE ROULEMENT,
F - DISTANZIALE LATO NON DI GUIDA
G - DISTANZIALE LATO GUIDA
- Giro orario
- MTB
8
DISASSEMBLY
1. Using a Allen 5mm key, unscrew the DTT bolt 2.5 turns (counter-clockwise).
WARNING: DO NOT REMOVE THE BOLT from the Non-Drive Side arm.
2. Using a Allen 8mm key unscrew the Non-Drive Side Cap (counter-clockwise)
and remove it.
3. Remove the Non-Drive Side arm and the O-ring from the axle.
4. Remove the Drive Side Assembly.
NON-DRIVE SIDE CAP INSTALLATION / PRELOAD
ALLEN 8 mm
PRELOAD BOTTOM BRACKET BEARINGS.
DO NOT OVER THIGTHEN THE BEARINGS.
ENSURE THEY TURN SMOOTHLY WITH NO LATERAL PLAY.
FIXING NON-DRIVE SIDE ASSEMBLY
DTT Bolt - T - ALLEN 5mm:
7-8 Nm
O-RING NICHT ANTRIEBSSEITE / SPACER INSTALLATION
For more information about installation, maintenance, and warranty, visit:
www.rotorbike.com
8
XC2 : 6,5mm
XC3 : 10,0mm
T - ClÉ ALLEN 5mm:
1,5 TOUR
NE PAS RETIRER /
ENLEVER LA VIS
G - CALE CÔTÉ DROIT
LINKE KURBELSCHRAUBE MONTIEREN UND VORSPANNEN
T-
INBUS 8 mm
1. Benutzen Sie einen 5mm Inbus, lösen Sie die DTT Schraube im Uhrzeigersinn
2,5 Umdrehungen.
Achtung! Bitte entfernen Sie nicht die Schraube des linken Kurbelarms!
2. Benutzen Sie einen 8 mm Inbus und lösen Sie im Uhrzeigersinn die
Kurbelschraube.
3. Entfernen Sie den linken Kurbelarm und den O-Ring von der Achse.
4. Entfernen Sie nun den rechten Kurbelarm (Antriebsseite).
BITTE DAS INNENLAGER VORSPANNEN.
BITTE NICHT DAS LAGER ZU FEST ANZIEHEN.
STELLEN SIE SICHER DAS DIE LAGER SICH OHNE SPIEL FREI
BEWEGEN.
FIXIEREN DER LINKEN KURBEL
Weitere Informationen zur Pflege, Wartung und Service bekommen Sie auf:
T - INBUS 5mm:
www.rotorbike.com
DTT Schraube - DREHMOMENT 7-8 Nm
4
INSTALLATION DES CALES CÔTÉ GAUCHE
8 SÉCURISER LA CUVETTE COTÉ OPPOSÉ AUX PLATEAUX
5
INSTALLATION/ASSEMBLAGE DE LA MANIVELLE GAUCHE
6
INSTALLATION ET PRÉCONTRAINTE DE LA MANIVELLE GAUCHE
T-
CLÉ ALLEN 8 mm ASSUREZ-VOUS QUE LES ROULEMENTS TOURNENT LIBREMENT
7
Assicuratevi di leggere e comprendere il manuale d'uso fornito dai produttori del movimento
centrale, delle corone e dei pedali
FIXATION DE LA MANIVELLE GAUCHE
T - ClÉ ALLEN 5mm:
Pour plus d'information concernant le montage, les garanties, la maintenance, visitez notre site web:
7-8 Nm
www.rotorbike.com
INSTALLAZIONE DELLL'O-RING/DISTANZIALE LATO
NON-DRIVE
F- DISTANZIALE LATO NON DI GUIDA
5
XC2 : 6,5mm
XC3 : 10,0mm
INSTALLAZIONE E ASSEMBLAGGIO LATO NON DI GUIDA
2 RIMUOVERE IL GRUPPO LATO SINISTRO
DTT vite -
NON RIMUOVERE
IL BULLONE
3 MONTAGGIO GRUPPO SUL LATO DESTRO
6 MONTAGGIO/PRECARICO CALOTTA LATO SINISTRO
G - DISTANZIALE LATO GUIDA
XC2 : 4,0mm
XC3 : 7,5mm
3D XC3 - 104/64 BCD
3D XC2 - 110/74 BCD
7
5-6 Nm
DEMONTAGE
PRECHARGER LES ROULEMENTS DU BOITIER DE PEDALIER.
NE PAS SERRER LES ROULEMENTS TROP FORT.
Visser la Vis DTT -
ClÉ ALLEN 8mm:
1. A l'aide d'une clé Allen de 5 mm, desserrez la vis DTT de 2.5 tours (dans le
sens inverse des aiguilles d'une montre).
AVERTISSEMENT: NE PAS RETIRER CETTE VIS DE LA MANIVELLE
GAUCHE.
2. A l'aide d'une clé Allen de 8mm desserrez (dans le sens inverse des aiguilles
d'une montre) le capuchon côté gauche et enlevez la vis.
3. Enlever le bras de manivelle gauche et le joint torique de l'axe de pédalier.
4. Enlever le restant du pédalier (côté droit/transmission).
SANS JEU LATERAL.
1 MONTAGGIO MOVIMENTO CENTRALE, PEDALE E CORONE 4
T - BRUGOLA 5mm:
1,5 GIRI
T-
XC2 : 6,5mm
XC3 : 10,0mm
F- CALE CÔTÉ GAUCHE
XC2 : 4,0mm
XC3 : 7,5mm
www.rotorbike.com
SICHERUNG DER SCHRAUBE NICHT ANTRIEBSSEITE
T - INBUS 8mm:
DREHMOMENT 5-6 Nm
AUSBAU
6
Veillez à lire et comprendre le manuel d'utilisateur fourni par le fabricant du boitier de pédalier,
des plateaux et du pédalier
Lire les notices de montage ROTOR SABB / BB1 / PF4124 / PF4624 / BB3024(BB4024) ou
pressfit, et les manuels pour les Q-RINGS:
www.rotorbike.com
SECURE NON-DRIVE SIDE CAP
T - ALLEN 8mm:
5-6 Nm
NON-DRIVE SIDE ASSEMBLY INSTALLATION
INSTALLATION DER BAUEINHEIT NICHT ABTRIEBSSEITE
T-
- Giro antiorario
www.rotorbike.com
XC2 : 6,5mm
XC3 : 10,0mm
5
7
Si desea más información acerca de la instalación, mantenimiento y garantía, visite:
DES PÉDALES ET DES JOINTS
E - DRIVE SIDE ASSEMBLY
NON SMONTARE
NON-DRIVE SIDE O-RING / SPACER INSTALLATION
F- SPACER NICHT ANTRIEBSSEITE
BITTE NICHT DIE
SCHRAUBE ENTFERNEN
RECHTER KURBELARM MONTIEREN
FIJACIÓN CONJUNTO BIELA IZQUIERDA
Tornillo DTT - T - ALLEN 5mm:
7-8 Nm
T-
Leggere i manuali d'uso ROTORE SABB / BB1 / PF4124 / PF4624 / BB3024(BB4024) e Q-RING:
NON RIMUOVERE
IL BULLONE
C - O-RING
3
T - INBUS 5mm:
1,5 UMDREHUNGEN
3 INSTALLATION DU PÉDALIER (CÔTÉ TRANSMISSION / DROIT)
ROTORE 3D PEDIVELLA MTB. XC3-104/64 BCD
GUIDA MONTAGGIO RAPIDO. XC2-110/74 BCD
B - GRUPPO LATO SINISTRO
DTT Schraube -
Visser la Vis DTT -
G - CALE CÔTÉ DROIT
- Tourner dans le sens des aiguilles d'une montre
A - CALOTTA LATO SINISTRO
www.rotorbike.com
ENTFERNEN DES LINKEN KURBELARMS
F - CALE CÔTÉ GAUCHE
- Tourner dans le sensinverse des aiguillers d'une montre
IT
BEDIENUNGSANLEITUNG
FÜR INNENLAGER,
.
KETTENBLÄTTER UND PEDALE
PRECARGUE LOS RODAMIENTOS DE LA CAJA DE PEDALIER.
ALLEN 8 mm NO SOBRECARGUE LOS RODAMIENTOS.
F- NON-DRIVE SIDE SPACER
XC2 : 4,0mm
XC3 : 7,5mm
2 ENLEVER LA MANIVELLE GAUCHE
À LA TRANSMISSION
NE PAS RETIRER LA VIS
DRIVE-SIDE ASSEMBLY INSTALLATION
G - SPACER ANTRIEBSSEITE
- MTB
4
DO NOT REMOVE
THE BOLT
Lesen Sie bitte die Montage-Anleitung für ROTOR SABB / BB1 / PF4124 / PF4624 /
BB3024(BB4024) Innenlager, Q-Rings auf:
E - RECHTE KURBEL
B - LINKE KURBEL
7
5-6 Nm
DESMONTAJE
ASEGÚRESE DE QUE GIRAN SUAVEMENTE SIN JUEGO LATERAL.
Die Bedienungsanleitungen der Hersteller für Innenlager, Kettenblätter und Pedale befolgen.
Auf Grund stetiger Verbesserung am Produkt, kann es zu geringen Abweichungen kommen.
Letzte Überarbeitung 07/2012.
A - LINKE KURBELSCHRAUBE
T - ALLEN 5mm:
1,5 TURNS
G - DRIVE SIDE SPACER
- MTB
DE
REMOVE THE NON-DRIVE SIDE ASSEMBLY
DTT Bolt -
- TURN CLOCKWISE
T-
ALLEN 8mm:
1. Usando una llave Allen de 5mm, afloje el tornillo DTT ~2 vueltas y media
(en sentido antihorario).
ATENCIÓN: NO DESMONTE EL TORNILLO DTT DE LA BIELA IZQUIERDA.
2. Usando una llave Allen de 8 mm desmonte la Tapa Izquierda aflojándola
en sentido contrario a las agujas del reloj.
3. Desmonte la Biela Izquierda y la Tórica del eje.
4. Desmonte el Conjunto Biela Derecha.
6 INSTALACIÓN TAPA IZQUIERDA / PRECARGA
XC2 : 4,0mm
XC3 : 7,5mm
Read ROTOR SABB / BB1 / PF4124 / PF4624 / BB3024(BB4024), and Q-RINGS user
manuals:
2
8
6
PRECARICARE I CUSCINETTI DEL MOVIMENTO CENTRALE.
BRUGOLA 8 mm NON STRINGERE ECCESSIVAMENTE I USCINETTI.
ASSICURARSI CHE GIRINO LIBERAMENTE SENZA GIOCO LATERALE.
FISSAGGIO GRUPPO LATO SINISTRO
DTT vite -
B
A
FIJACIÓN TAPA IZQUIERDA
T-
5 INSTALACIÓN CONJUNTO BIELA IZQUIERDA
Be sure to read and understand the user manual provided by the bottom bracket, rings
and pedal´s manufacturer.
Revised: 07/2012
DO NOT DISASSEMBLE
DO NOT REMOVE
THE BOLT
8
XC2 : 6,5mm
XC3 : 10,0mm
F- ESPACIADOR LADO IZQUIERDO
NO DESMONTAR EL TORNILLO
COMPLETAMENTE
1 BOTTOM BRACKET, RINGS AND PEDALS INSTALLATION
E - DRIVE SIDE ASSEMBLY
B - NON-DRIVE SIDE ASSEMBLY
T - ALLEN 5mm:
1,5 VUELTAS
3 INSTALACIÓN CONJUNTO BIELA DERECHA
- MTB
EN
4 INSTALACIÓN TÓRICAS / ESPACIADOR IZQUIERDO
www.rotorbike.com
NO DESMONTAR
E
T
B - CONJUNTO BIELA IZQUIERDA
NO DESMONTAR
EL TORNILLO
D
DTT
7-8 Nm
C
DTT
Consulte el manual de instalación de su pedalier ROTOR SABB / BB1 / PF4124 / PF4624
/ BB3024(BB4024) y de sus platos ROTOR Q-Rings en:
E - CONJUNTO BIELA DERECHA
C
4
B
Lea y comprenda en su totalidad el manual de usuario proporcionado por el fabricante
de sus pedalier, platos y pedales.
NOTA: las epecificaciones pueden cambiar por mejoras sin previo aviso. Revisada: 07/2012
T
B
: 6,5mm
F:XC2
XC3 : 10mm
www.rotorbike.com
[email protected]
BIELAS ROTOR 3D MONTAÑA XC3-104/64 BCD
GUÍA DE INSTALACIÓN RÁPIDA. XC2-110/74 BCD
DTT
T
B
ES
7
E
C
2
A
3D XC3 - 104/64 BCD
3D XC2 - 110/74 BCD
5
G
D
C
G:
XC2 : 4,0mm
XC3 : 7,5mm
8
SICURO NON-DRIVE CALOTTA LATERALE DI SICUREZZA
LATO NON GUIDA
T-
BRUGOLA 8mm:
5-6 Nm
SMONTAGGIO
1. Usando una chiave a brugola da 5mm, svitare il bullone DTT di 2,5 giri
(senso antiorario).
AATTENZIONE: NON RIMUOVERE IL BULLONE dal braccio lato sinistro.
2. Usando una chiave a brugola da 8mm, svitare la calotta lato sinistro (senso
antiorario) e rimuoverla.
3. Rimuovere il braccio lato sinistro e l'O ring dal perno
4. Rimuovere il gruppo lato destro.
T - BRUGOLA 5mm:
Per maggiori informazioni su montaggio, manutenzione e garanzia visitate il sito:
7-8 Nm
www.rotorbike.com
B
AVISOS DE SEGURIDAD
El manual de usuario contiene información muy útil e importante acerca de la correcta instalación, uso y mantenimiento de su producto
ROTOR. Debe leer, comprender y seguir cuidadosamente las instrucciones que aparecen en dicho manual. Mantenga el manual en un lugar
seguro para futuras consultas.
No realice ninguna modificación o ajuste que no esté explícitamente descrita en el manual. Si tuviera alguna duda sobre su capacidad para
llevar a cabo la instalación o mantenimiento, por favor, acuda a un taller cualificado.
Una instalación u operación de mantenimiento incorrecta puede reducir drásticamente el rendimiento del producto y podría provocar un
accidente con resultado de lesiones o incluso la muerte.
Por favor, lleve su bicicleta regularmente a un taller cualificado para inspeccionar cualquier signo de fatiga, rotura, deformación o exceso de
uso. Cualquier componente que se encuentre en mal estado por exceso de uso, fatiga, rotura, deformación o impactos ha de ser
reemplazado inmediatamente.
No llevar a cabo un mantenimiento adecuado reduce drásticamente la vida útil del producto así como su rendimiento.
Si tiene cualquier duda, comuníquela en su punto de venta ROTOR más cercano o contacte con [email protected].
MANTENIMIENTO
Inspeccione sus componentes ROTOR en busca de impactos, fisuras, perdida de piezas o deformaciones antes de cada uso, así como
después de cada caída. Si Hay presencia de algunas de las circunstancias previamente mencionadas, no use sus componentes hasta que
no hayan sido sustituidos.
ATENCIÓN:
El uso continuado de piezas dañadas, puede ocasionar perdida de control de la bicicleta, así como daños severos e incluso la muerte.
Es responsabilidad del usuario examinar el producto regularmente para determinar su revisión o sustitución. El ciclista debe inspeccionar la
bicicleta, así como sus componentes, con frecuencia para localizar daños producidos por el uso normal o abusivo. Revise, por favor, estos
daños después de cada salida. Controle también periódicamente el apriete correcto de la tornillería, pero no sobreapriete los tornillos.
SAFETY WARNING
T
7-8 Nm
CONDICIONES DE GARANTIA
- Los productos ROTOR y todos sus componentes están garantizados durante 2 años contra cualquier fallo de fabricación o
material defectuoso. En el caso de existir alguna avería durante el periodo de garantía, Rotor Componentes Tecnológicos se
compromete a reparar o sustituir el componente o producto defectuoso sin cargo para el cliente. Además, en algunos países, Rotor
está obligado a asegurar cualquier garantía legal, definida por la ley de cada país, para la protección del usuario.
- Los componentes con una vida útil limitada por el uso y las roturas no achacables a defectos de fabricación no están cubiertas por
esta garantía.
- Fallos o roturas causadas por un uso inapropiado, instalación defectuosa o un mantenimiento inadecuado (según se indica en el
manual de usuario) no están cubiertos por esta garantía.
- Conserve su factura de compra, pues le permitirá ejercer su derechocomo comprador a la garantía.
- La garantía será anulada en los siguientes casos:
- Incumplimiento de los requisitos anteriormente mencionados.
- Instalación inadecuada.
- Uso negligente o instalación de piezas inadecuadas.
Estas y otras instrucciones de productos ROTOR están disponibles en:
www.rotorbike.com
Rotor Componentes Tecnológicos SL - C/Miño, 14. 28864 AJALVIR MADRID
T. 918843846 F. 918843865 [email protected]
ROTOR WARRANTY POLICY
This owners manual contains important and useful information regarding the proper installation, operation, care, and maintenance of your
ROTOR product. Carefully read, follow and understand the instructions as detailed in this owner’s manual. Keep this manual in a safe place
for future reference.
.If you have any doubt whatsoever regarding your ability to install or service this product, please consult your ROTOR dealer and seek the
assistance of a professional bicycle mechanic. Do not perform any modifications or adjustments that are not outlined in this manual.
Incorrect installation or servicing may impair performance, and could result in a dangerous situation leading to serious injury or death.
Components that have experienced excessive wear, deformations or impacts or other damage need immediate professional inspection or
replacement. Please have this product regularly inspected by a qualified mechanic for any signs of wear or damage.
Failure to perform necessary and essential maintenance could drastically reduce the service life of your ROTOR product and reduce its
performance.
If you have any questions, please contact a professional bike mechanic or your nearest ROTOR dealer for additional information.
Caution!: Please consult the relevant manufacturer’s instruction manuals for your BB set or pedals, If necessary, consult their technical
service department for the correct installation procedure.
- The ROTOR products and its components are guaranteed for 2 YEARS against any manufacturer defects or defective materials. In
the event of a warranty defect, Rotor´s sole obligation under this warranty is to repair or replace, at its option, the defective part or
product at no charge. Moreover, in some countries, Rotor is obliged to ensure any legal warranty defined by law for the customer's
protection.
- Elements subject to wear and breakdowns that the manufacturer is not responsible for, are not covered by this warranty.
- Failures or breakdowns caused by improper use, poor assembly or inadequate maintenance as declared in the supplied
instructions or the user manual are not covered by this warranty.
- Always keep your receipt or invoice.
- The following acts void this warranty:
- Failure to fulfil the requirements above.
- Improper installation.
- Improper use or installation of inadequate parts.
MAINTENANCE
Inspect your ROTOR product for wear, looseness or damage including cracks, dents and serious scratches, before each ride and after every
fall or crash. Do not use your ROTOR product until it has been thoroughly inspected, repaired or replaced.
WARNING:
Continuing to use damaged parts may lead to loss of control and cause serious injury or death.
Cyclists should inspect their whole bicycle and parts on a regular basis or consult with a professional bicycle mechanic, to determine the need
for service, or replacement and to detect damage that may have occurred from normal use.
Check all parts for damage and wear before every use. Check the bolts and other fasteners periodically for tightness. Ensure they are
tightened to the correct torque values.
Warranty Service: Original purchaser must send their Rotor product along with the retailer's original bill, credit card receipt or other
satisfactory proof of date of purchase of the product.
Sicherheitshinweis!
These instructions and others for Rotor Bike Components products are available for download at:
www.rotorbike.com
Rotor Componentes Tecnológicos SL - C/Miño, 14. 28864 AJALVIR MADRID SPAIN
T. +34 918843846 F. +34 918843865 [email protected]
ROTOR Garantiebestimmungen
Diese Montageanleitung beinhaltet wichtige und nützliche Informationen zur Installation, Wartung und Pflege ihres Rotor Produkts. Lesen
Sie bitte die Montageanleitung sorgfältig durch und bewahren Sie sie an einem sicheren Ort auf. Haben Sie dennoch Zweifel oder sind sich
nicht sicher, ob Sie das Rotor Produkt auch richtig montiert haben, dann wenden Sie sich bitte an ihren autorisierten Rotor Händler. Führen
Sie bitte keine Veränderungen oder Einstellungen durch die nicht ausdrücklich beschrieben sind.
Nicht korrekte Installation oder Pflege mindern die Wirkung und können Sie in schwierige, gefährliche Situationen bringen, die zu
Verletzungen oder zum Tode führen kann.
Komponenten die einem übermäßigen starken Gebrauch, Verformungen oder gr. Belastungen oder gar Beschädigungen ausgesetzt sind,
sollten sofort von einem professionellen Mechaniker untersucht und gegebenenfalls ausgetauscht werden.
Lassen Sie ihr ROTOR Produkt bitte regelmäßig von einem autorisierten Händler auf Schäden überprüfen.Fehlende, unbedingt notwendige
Wartung kann die Lebenserwartung ihres Rotor Produktes drastisch verkürzen und eine richtige Funktion ist nicht mehr gewährleistet.
Wenn Sie noch weitere Fragen haben , kontaktieren Sie ihren autorisierten Rotorhändler für weitere Informationen.
Caution!: Bitte lesen sie auch die Montageanleitungen der anderen Anbauteile, wie innenlager oder Pedale sorgfältig durch und wenn
notwendig nehmen Sie kontakt mit der jeweiligen Servicestelle auf um ein korrektes montieren Ihrer Anbauteile zu gewährleisten.
- Rotor Produkte und ihre Komponenten haben 2 Jahre Garantie ab Kaufdatum. Die Garantie deckt ausschließlich Mängel am
Material und Herstellungsfehler ab. Im Falle eines Fehlers innerhalb der Garantie behält sich Rotor vor, ob sie den Schaden
austauschen oder reparieren.
- Darüber hinaus ist Rotor dazu verpflichtet, in einigen Ländern, sich an die gegebenen Gesetze zum Kundenschutz zu halten
- Die Garantie deckt keine Beschädigung durch Stürze, Unfälle, mangelhafte Montage Missbrauch mangelhafte Wartung und
Pflege.
- Bitte heben Sie die Rechnung gut auf.
- Folgende Fakten führen zum Verlust der Garantie:
- Nichterfüllung der oben genannten Anforderungen
- Unsachgemäße Montage
-Unsachgemäße Benutzung oder ungeeignete, nicht passende Teile.
PFLEGE:
Prüfen Sie regelmäßig Ihr Rotor Produkt vor Beanspruchung und nach Unfällen auf Defekte, Kratzer, Beulen oder andere Schäden.
Benutzen Sie Ihr Rotor Produkt nicht, wenn sie es nicht gründlich geprüft haben, gegebenenfalls ersetzt oder repariert haben.
WARNING:
Eine weitere Benutzung beschädigter Teile kann dazu führen, dass Sie die Kontrolle verlieren und es zu Verletzungen oder zum Tod kommen
kann. Radfahrer sollten ihr Rad regelmäßig durch eine autorisierten Händler oder professionellen Mechaniker prüfen lassen, vereinbaren
Sie einen Termin zum regelmäßigen Service, damit Verschleißteile ausgetauschtr werden können oder Fahler behoben werden.
Prüfen sie alle Teile vor jeder Fahrt auf etwaige Fehler. Prüfen Sie die Schrauben und Halterungen regelmäßig auf festen Sitz. Stellen Sie
sicher, dass alle Schrauben mit dem richtigen Drehmoment angeschraubt wurden.
Garantie Service! Um Garantieansprüche geltend zu machen, muß folgende Information beigelegt werden: Der Erstbesitzer muß
eine Kopie des aussagekräftigen Kaufbelegs einschicken.
AVERTISSEMENT DE SÉCURITÉ
Cette notice de montage contient des informations importantes et utiles concernant l'installation et la maintenance de votre produit ROTOR.
Merci de lire et de suivre les instructions de montage indiquées dans ce manuel. Veiller à conserver cette notice, pour les prochains
démontages et remontages de votre potence.N'exécutez pas de modifications ou rajustements qui ne sont pas décrits dans ce manuel.
Si vous avez un doute à votre capacité d'entretenir ou réparer ce produit, apportez votre cycle chez un réparateur qualifié.
Une installation incorrecte du produit peuvent altérer la performance du produit et pourraient aboutir à une situation dangereuse menant à la
blessure ou la mort. Faites inspecter ce produit régulièrement par un mécanicien qualifié pour n'importe quels signes d'usure. Les
composants qui ont éprouvé l'usure excessive, des craquements, des déformations ou des impacts ont besoin d'être remplacés
immédiatement.Ne pas exécuter la maintenance du produit pourrait résolument réduire la durée d'utilisation de votre potence ROTOR et
réduire sa performance.
Si vous avez des questions, merci de contacter un mécanicien cycle ou votre revendeur agrée ROTOR le plus proche pour de plus amples
renseignements.
Attention!: Si n'importe quelles instructions dans ce manuel de l'utilisateur sont contraires aux instructions données par le fabricant de votre
guidon, fourche, cadre etc, contactez leur service d'entretien pour expliquer votre plan et demander leur approbation.
MAINTENANCE
Inspectez votre potence ROTOR avant chaque sortie, vérifier qu'il n'y a pas des fentes et/ou de rayures sérieuses, que les vis soient
correctement serrées, et faite vérifier votre potence auprès d'un professionnel après chaque chute ou accident. Si n'importe laquelle des
conditions précédentes est présente, n'utilisez pas votre potence ROTOR jusqu'à ce qu'il ait été réparé ou remplacé.
MISE EN GARDE:
Utiliser des produits endommagés peut mener à la perte de contrôle de la bicyclette et causer des blessures ou la mort.
C'est la responsabilité des utilisateurs d'examiner régulièrement les produits pour déterminer le besoin de maintenance ou le remplacement
des pièces. Le cycliste devrait inspecter leur bicyclette régulièrement pour détecter les dégâts éventuels. Vérifier l'état et les serrages de
toutes les pièces avant chaque utilisation.
AVVERTENZA DI SICUREZZA
Questo manuale contiene informazioni importanti e utili per il corretto montaggio, funzionamento, cura e manutenzione del vostro prodotto
ROTOR. Leggete attentamente, seguire e comprendere bene le istruzioni contenute in questo manuale. Conservate il manuale in un luogo
sicuro per poterlo consultare in futuro.Per qualsiasi dubbio circa la vostra capacità di montare o fare manutenzione a questo prodotto,
consultate il vostro rivenditore ROTOR e richiedete l'assistenza di un meccanico specializzato in biciclette. Non apportate modifiche o fate
regolazioni che non siano specificate in questo manuale.Montaggio o manutenzione non corretti possono compromettere le prestazioni e
tradursi in situazioni pericolose che possono causare lesioni gravi o morte.
I componenti che sono stati sottoposti a eccessiva usura, deformazioni o urti o altri danni richiedono un'immediata ispezione professionale e
un'eventuale sostituzione.Fate controllare regolarmente questo prodotto da un meccanico specializzato per verificare le presenza di segni
di usura o danni. La mancata esecuzione della manutenzione necessaria ed essenziale può ridurre drasticamente sia la durata del vostro
prodotto ROTOR che le sue prestazioni.
Per qualsiasi domanda contattate un meccanico specializzato in biciclette o il vostro rivenditore ROTOR più vicino per avere ulteriori
informazioni.
Attenzione: consultate il manuale di istruzioni del produttore per il set movimento centrale o i pedali. Se necessario rivolgetevi al reparto
assistenza tecnica per la corretta procedura di montaggio.
MANUTENZIONE
Controllate sul vostro prodotto ROTOR la presenza di usura, allentamenti o danni comprese incrinature, ammaccature e graffi importanti
prima di qualsiasi uscita e dopo ogni caduta o incidente. Non usate il prodotto ROTOR prima che sia stato attentamente ispezionato, riparato
o sostituito.
ATTENZIONE:
continuare ad usare parti danneggiate può portare alla perdita del controllo e causare gravi lesioni o morte.
I ciclisti devono controllare regolarmente la bicicletta nel suo insieme e nei suoi singoli pezzi, o farla controllare da un meccanico
specializzato per stabilire se è necessario procedere a manutenzione o sostituzione e verificare se ci sono stati danni a seguito del normale
uso della bicicletta.
Prima di ogni uso controllate che i componenti non siano danneggiati o usurati. Controllate periodicamente la tenuta dei bulloni e degli altri
dispositivi di fissaggio; verificate che siano stretti secondo i corretti valori di coppia.
3D XC3 - 104/64 BCD
3D XC2 - 110/74 BCD
Diese Anleitung und andere Anleitungen von Rotor Produkten können Sie downloaden unter:
www.rotorbike.com
Rotor Componentes Tecnológicos SL C/Miño 14, 28864 AJALVIR MADRID SPAIN
T. +34 918843846 F. +34 918843865 [email protected]
GARANTIE ROTOR
- ROTOR garanti ce produit et ses composants pendant 2 ANS contre n'importe quels défauts de fabrication ou des matériaux
défectueux. En cas d'un défaut de garantie, l'obligation unique de Rotor est de réparer ou remplacer, à son choix, la partie
défectueuse ou le produit gratuitement. De plus, dans quelques pays, Rotor est obligé à assurer n'importe quelle garantie légale
définie conformément à la loi pour la protection du client.
- La garantie des produits ne peut être mise en cause pour les faits/les dommages indépendants et extérieurs à ROTOR .
- Les échecs ou les pannes causées par l'utilisation incorrecte, le mauvais montage ou l'absence de maintenance comme indiqué
dans les instructions de montage ou le manuel de l'utilisateur ne sont pas couverts par cette garantie.
- Gardez toujours votre reçu ou facture, cette garantie ne couvre pas de produits dont le numéro de série ou l'identification ont été
effacés, endommagés ou modifiés.
- Les actes suivants annulent cette garantie:
- l'Échec d'accomplir les exigences ci-dessus.
- Installation incorrecte.
- Utilisation incorrecte ou installation de parties inadéquates.
Cette notice, ainsi que d'autres notices de montage sont également téléchargeable sur le site:
www.rotorbike.com
Rotor Componentes Tecnológicos SL C/Miño, 14. 28864 AJALVIR MADRID SPAIN
T. +34 918843846 F. +34 918843865 [email protected]
POLITICA DI GARANZIA ROTOR
- I prodotti ROTOR e i relativi componenti sono garantiti per 2 ANNI da difetti di fabbricazione o materiali difettosi. Qualora si
evidenzi un difetto in garanzia, l'unico obbligo di Rotor, in base a questa garanzia, consiste nella riparazione o sostituzione gratuita,
a sua discrezione, del componente o del prodotto. Inoltre, in alcuni paesi, Rotor è obbligata a fornire la garanzia prevista dalla legge
per la tutela dei consumatori.
- Gli elementi soggetti ad usura o rotture di cui il produttore non è responsabile non sono coperti da questa garanzia.
- Questa garanzia non copre i guasti o le rotture causati da uso improprio, montaggio non corretto o manutenzione inadeguata
come specificato nelle istruzioni fornite o nel manuale d'uso.
- Conservate sempre la ricevuta o fattura.
- Le azioni che seguono invalidano questa garanzia:
- mancato rispetto dei requisiti di cui sopra
- montaggio non corretto
- uso improprio o montaggio di componenti inadeguati
Assistenza in garanzia L'acquirente originario deve inviare il prodotto Rotor unitamente alla fattura originale del rivenditore, la
ricevuta della carta di credito o altro documento che dimostri la data di acquisto del prodotto.
Queste istruzioni e le istruzioni degli altri prodotti Rotor Bike Components possono essere scaricate dal sito:
www.rotorbike.comm
Rotor Componentes Tecnológicos SL C/Miño, 14. 28864 AJALVIR MADRID SPAIN
T. +34 918843846 F. +34 918843865 [email protected]
3
1
E
E
D
D
C
2
F
E
D
XC3-104/64 BCD
XC2-110/74 BCD
Product specificaties kunnen worden verbeterd zonder melding.
A - NON-DRIVE SIDE KAP
E - DRIVE SIDE (TANDWIELKANT) MONTAGE
B - NON-DRIVE SIDE MONTAGE
VERWIJDER NOOIT
DE BOUT
C - O-RING
Revisie: 07/2012
VERBODEN TE
DEMONTEREN
F - NON DRIVE SIDE ASVULRING
G - DRIVE SIDE ASVULRING
D - BOTTOM BRACKET
1
BOTTOM BRACKET, PEDAAL EN Q-RING INSTALLATIE
Zorg dat u de handleidingen van de bottom bracket, tandwielen en pedaal leveranciers
gelezen en begrepen heeft.
Lees de ROTOR SABB / BB1 / PF4124 / PF4624 / BB3024(BB4024) , en Q-Rings
gebruikersaanwijzingen op:
www.rotorbike.com
2 VERWIJDER DE NON DRIVE SIDE KANT
VERWIJDER NOOIT
DE BOUT
- DRAAI RECHTSOM
G - DRIVE SIDE ASVULRING
- MTB
D
E
DTT
7-8 Nm
8
6
4
C
INSTALLATIE VAN NON DRIVE ASVULRING
F- NON-DRIVE SIDE ASVULRING
XC2 : 4,0mm
XC3 : 7,5mm
3D XC3 - 104/64 BCD
3D XC2 - 110/74 BCD
XC2 : 6,5mm
XC3 : 10,0mm
8
BEVESTIG NON-DRIVE SIDE CUP
T - INBUS 8mm:
5-6 Nm
DEMONTAGE
5
INSTALLATIE VAN NON-DRIVE SIDE ASSEMBLY EN AS
6
NON-DRIVE SIDE BOUT INSTALLATIE
T-
INBUS 8 mm
GEEF VOORSPANNING AAN DE BRACKETLAGERS.
GEEF NOOIT TE VEEL SPANNING.
CONTROLEERT U DAT DE LAGERS SOEPEL DRAAIEN ZONDER
ZIJWAARTSE SPELING.
1. Gebruik een 5mm inbus sleutel, schroef de DTT bout 2,5 slagen los.
(tegen de klok in).
WAARSCHUWING: VERWIJDER NOOIT DE BOUT UIT DE LINKER CRANKARM.
2. Gebruik een 8mm inbus sleutel om de non- drive side bout uit de as te
draaien. Draai tegen de klok in en verwijder de bout.
3. Verwijder de crankarm en O-ring van de as.
4. Verwijder de drive- side kant.
7 AANDRAAIEN VAN DE NON DRIVE SIDE BOUT
DTT Bout -
T - INBUS 5mm:
7-8 Nm
B
A
T
5mm:
DTT Bout - T1,5- INBUS
OMWENTELINGEN
T
B
: 6,5mm
F:XC2
XC3 : 10mm
DTT
3 DRIVE-SIDE INSTALLATIE
- DRAAI LINKSOM
C
4
B
www.rotorbike.com
[email protected]
ROTOR 3D CRANKSET MTB.
MONTAGEHANDLEIDING.
DTT
T
B
NL
7
E
C
C
ROTOR COMPONENTES TECNOLÓGICOS SL
Pol.Ind. Conmar. C/Miño, 14. 28864, Ajalvir, Madrid, Spain
Phone: +34 91 884 38 46. Fax: +34 91 884 38 65
5
G
C
A
3D XC3 - 104/64 BCD
3D XC2 - 110/74 BCD
G:
XC2 : 4,0mm
XC3 : 7,5mm
B
VEILIGHEIDS WAARSCHUWING
Deze handleiding bevat belangrijke en nuttige informatie over de juiste installatie, bediening, verzorging en onderhoud van uw ROTOR
product. Lees aandachtig, volg en begrijp de instructies zoals beschreven in deze handleiding. Bewaar deze handleiding op een veilige plaats
voor toekomstige referentie. Als u twijfelt over uw vermogen om dit product te installeren, raadpleeg dan uw ROTOR dealer en roep de hulp in
van een professionele fietsenmaker. Voer geen wijzigingen of aanpassingen uit die niet worden beschreven in deze handleiding. Onjuiste
installatie of onderhoud kan de prestaties nadelig beïnvloeden, en kan in een gevaarlijke situatie resulteren tot ernstig letsel of de dood.
Onderdelen die overmatige slijtage hebben, vervormingen of andere schade moeten onmiddellijk gepresenteerd worden voor professionele
controle of vervanging Zorg ervoor dat dit product regelmatig gecontroleerd wordt door een bekwame monteur op tekenen van slijtage of
schadeNiet uitvoeren van essentieel onderhoud verkort drastisch de levensduur van uw product. Als u nog vragen heeft, neem dan contact
op met een professionele fietsenmaker of uw dichtstbijzijnde ROTOR dealer voor meer informatie.
ONDERDOUD
IInspecteer uw ROTOR product op slijtage, schade zoals scheuren, deuken en diepe krassen, voor elke rit en na elke crash. Gebruik uw
ROTOR product niet voordat het is geïnspecteerd, gerepareerd of vervangen. Check regelmatig of alle bouten aan het aanhaalmoment
voldoen.
WAARSCHUWING:
Doorgaan met het gebruiken van beschadigde onderdelen kan leiden tot verlies van controle, serieuze verwonding of zelfs dood.
Voor meer informatie over installatie, onderhoud en garantie, bezoekt U
www.rotorbike.com of e-mail naar [email protected]
3D XC3 - 104/64 BCD
3D XC2 - 110/74 BCD
T
7-8 Nm
ROTOR GARANTIE BELEID:
- ROTOR producten hebben 2 jaar garantie tegen productiefouten of defecte materialen. In het geval van een garantiegeval.Bij een
garantiegeval, is de enige verplichting van ROTOR het kostenloos vervangen of reparen van het betreffende product. In sommige
landen is ROTOR verplicht een wettelijke garantie te waarborgen.
- Elementen blootgesteld aan slijtage en defecten waar ROTOR niet verantwoordelijk voor is worden niet door deze garantie
gedekt.
- Problemen en defecten veroorzaakt door onjuist gebruik, slechte montage of onvoldoende onderhoud worden niet door deze
garantie gedekt.
- Bewaart u altijd uw bon.
-Het volgende verbreekt de garantie:
-Verzuimen aan de bovengenoemde warden te voldoen.
-Verkeerde installatie.
- Verkeerd gebruik of het gebruik van verkeerde onderdelen.
Garantie Service: Originele aankoper moet zijn ROTOR product, samen met zijn originele aankoopbewijs versturen.
Deze instructies en instructies voor andere ROTOR Bike Components onderdelen zijn te downloaden op:
www.rotorbike.com
Rotor Componentes Tecnológicos SL C/Miño, 14. 28864 AJALVIR MADRID SPAIN
T. +34 918843846 F. +34 918843865 [email protected]


