1
V 2.5
8089591
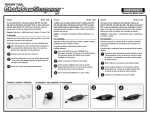
Drill Bit
Sharpening Jig
User Manual
Please read and understand all instructions before use.
Retain this manual for future reference.
V 2.5
8089591
Drill Bit
Sharpening Jig
FUNCTIONS
The Drill Bit Sharpening Jig will sharpen drill bits from 5/64 to 1/2 in. with any power drill operating
between 2,000 and 3,500 RPM
SAFETY
IMPORTANT SAFETY PRECAUTIONS
WARNING! Read and understand all instructions before using this tool. The operator must follow basic
precautions to reduce the risk of personal injury and/or damage to the equipment. Before allowing
someone else to use this tool, make sure they are aware of all safety information.
WARNING! The warnings, cautions and instructions discussed in this instruction manual cannot cover
all possible conditions and situations that may occur. Common sense and caution are factors that
cannot be built into this product, but must be supplied by the operator.
NOTE: Keep this manual for safety warnings, precautions, operating, inspection and
maintenance instructions.
WORK AREA
1.
2.
3.
4.
5.
6.
Operate in a safe work environment. Keep your work area clean and well lit.
Do not use in the presence of flammable gases or liquids.
Keep anyone not wearing the appropriate safety equipment away from the work area.
Minimize distractions in the work environment. Distractions can cause you to lose control
of the tool.
Store tools properly in a safe and dry location to prevent rust or damage.
Always lock up tools and keep them out of the reach of children.
For technical questions call 1-800-665-8685
3
V 2.5
Drill Bit Sharpening Jig
8089591
PERSONAL SAFETY
CAUTION! Wear protective equipment approved by the Canadian Standards Association (CSA) or
American National Standards Institute (ANSI) when using the tool.
1.
2.
3.
4.
5.
Head Protection
a. Always wear impact safety goggles that provide front and side protection for the eyes.
b. Wear the appropriate rated dust mask or respirator.
c. Wear earplugs if the power tool or work environment is noisy.
d. Wear a full-face shield if your work creates metal filings or wood chips.
e. Wear a hard hat to protect your head from falling objects.
Gloves
a. The gloves should provide protection based on the work materials.
b. Wear suitable gloves to reduce the effects of vibration.
Protective Clothing
a. Wear protective clothing designed for the work environment and tool. Examples are
electrical non-conductive clothes or clothes treated to resist corrosive liquids or materials.
Foot Protection
a. Steel toe footwear or steel toe caps to prevent injury from falling objects.
b. Non-skid footwear is recommended to maintain footing and balance.
Control the tool, personal movement and the work environment to avoid personal injury or
damage to tool. Stay alert, watch what you are doing and use your common sense.
a. Keep articles of clothing, jewelry, hair, etc., away from moving parts to avoid entanglement
with a tool.
b. Do not operate any machine/tool when tired or under the influence of drugs,
alcohol or medications.
c. Do not overreach when operating a tool. Proper footing and balance enables better control
of a tool in unexpected situations.
d. Use clamps or other practical ways to support or secure the tool to a stable platform.
Holding the tool by hand or against your body is not stable and may lead to loss of control
and injury.
TOOL USE AND CARE
1.
2.
3.
4.
4
Use the correct tool for the job. Do not force a tool or attachment to do the work of a larger
industrial tool. Maximize tool performance and safety by using the tool for its intended task.
This tool was designed for a specific function. Do not modify or alter this tool or use it for an
unintended purpose.
Securely hold this tool using both hands, unless it is designed for single hand use. Using a tool
with only one hand can result in loss of control.
Maintain tools with care (see Maintenance).
For technical questions call: 1-800-665-8685
8089591
Drill Bit Sharpening Jig
V 2.5
UNPACKING
1.
2.
3.
Carefully remove the parts and accessories from the box. Retain packaging material until you
have carefully inspected and satisfactorily installed or operated the tool.
Make sure that all items in the parts list are included.
Inspect the parts carefully to make sure the tools and accessories were not damaged
while shipping.
WARNING! Do not operate the tool if any part is missing. Replace the missing part before operating.
Failure to do so could result in a malfunction and serious personal injury.
PARTS IDENTIFICATION
Contents:
•
Drill Bit Sharpening Jig
OPERATION
CAUTION! Wear suitable eye protection when operating this tool.
1.
2.
3.
4.
5.
Mount the tool to a workbench or other stable surface for easy operation
and stability.
Place the drill bit in the correctly sized drill guide.
Do not begin sharpening until the drill has been running at full speed
(between 2,000 and 3,500 RPM) for at least 2 seconds.
Ensure that the drill bit is parallel to the grinding stone and held firmly in
place with your thumb. See image below for correct procedure.
Steadily push the drill bit towards the grinding stone while keeping the
drill bit level.
CAUTION! Do not use excessive force. This will create a rounded
cutting edge on the drill bit.
Visit www.princessauto.com for more information
5
V 2.5
Drill Bit Sharpening Jig
8089591
CAUTION! Do not sharpen a drill bit for more than 5 seconds. This will cause excessive heating
and may damage or melt the drill guide.
6.
7.
8.
9.
Cool the drill bit in water for 5 minutes between each sharpening.
Repeat the procedure for each cutting surface (most drill bits have 2 edges, although there
are exceptions).
For excessively dull drill bits, it may be necessary to sharpen the bit multiple times to achieve
the desired level of sharpness.
Lubricate the input shaft with a non-penetrating oil or lubricant after use.
MAINTENANCE
1.
2.
3.
4.
5.
Maintain the tool with care. A tool in good condition is efficient, easier to control and will
prevent unnecessary problems.
Keep the tool handles clean, dry and free from oil/grease at all times.
Follow instructions for lubricating and changing accessories.
Inspect the tool fittings periodically. Have damaged or worn components repaired or replaced
by an authorized technician.
Maintain the tool’s label and name plate. These carry important information. If unreadable or
missing, contact Princess Auto Ltd. for replacements.
CAUTION! Only qualified service personnel should repair the tool.
LUBRICATION
Only use the lubricants supplied with the tool or specified by the manufacturer. Other lubricants may not
be suitable and may damage the tool or cause a malfunction during use.
CAUTION! NEVER use a penetrating oil to lubricate the tool. Penetrating oil may act as a solvent that
will break down the housing.
STORAGE
When not in use for an extended period, apply a thin coat of lubricant to the steel parts to avoid rust.
Remove the lubricant before using the tool again.
DISPOSING OF TOOL
If your tool has become damaged beyond repair, do not throw it out. Bring it to the appropriate
recycling facility.
TROUBLE SHOOTING
If the tool does not function properly or if it is missing parts, contact Princess Auto Ltd. for a solution. If
unable to do so, have a qualified technician service the tool.
6
For technical questions call: 1-800-665-8685
V 2,5
8089591
Gabarit d’affûtage
de foret
Manuel d'utilisateur
Vous devez lire et comprendre toutes les instructions avant d'utiliser l'appareil.
Conservez ce manuel afin de pouvoir le consulter plus tard.
V 2,5
8089591
Gabarit d’affûtage
de foret
FONCTIONS
Le gabarit d’affûtage de foret affûtera les forets de 5/64 à 1/2 po à l’aide de n’importe quelle perceuse
fonctionnant à une plage de régimes de 2 000 à 3 500 tr/min.
SÉCURITÉ
CONSIGNES DE SÉCURITÉ IMPORTANTES
AVERTISSEMENT ! Lisez et assurez-vous de comprendre toutes les instructions avant d’utiliser cet
outil. L’utilisateur doit respecter les précautions de base afin de réduire le risque de blessure et/ou de
dommage à l’équipement. Avant de permettre à une autre personne d’utiliser cet outil, assurez-vous
qu’elle est au courant de toutes les consignes de sécurité.
AVERTISSEMENT ! Les avertissements, les attentions et les instructions mentionnés dans ce manuel
d’instructions ne peuvent pas couvrir toutes les conditions et situations possible de survenir.
L’opérateur doit faire preuve de bon sens et prendre toutes les précautions nécessaires afin d’utiliser
l’outil en toute sécurité.
REMARQUE : Conservez ce manuel qui contient les avertissements de sécurité, les précautions, les
instructions de fonctionnement, d’inspection et d’entretien.
AIRE DE TRAVAIL
1.
2.
3.
4.
5.
6.
Travaillez dans un environnement de travail sécuritaire. Gardez votre aire de travail propre
et bien éclairée.
N’utilisez pas d’outils électriques en présence de gaz ou de liquides inflammables.
Assurez-vous que les personnes qui ne portent pas l’équipement de sécurité approprié ne se
trouvent pas à proximité de l’aire de travail.
Minimisez les distractions au sein de l’environnement de travail. Les distractions peuvent
causer une perte de contrôle de l’outil.
Rangez les outils correctement dans un lieu sécurisé et sec pour empêcher la rouille
ou les dommages.
Gardez toujours les outils dans un endroit verrouillé et hors de la portée des enfants.
En cas de questions techniques, appelez le 1-800-665-8685
3
V 2,5
Gabarit d’affûtage de foret
8089591
SÉCURITÉ PERSONNELLE
ATTENTION ! Portez de l’équipement de protection homologué par l’Association canadienne de
normalisation (CSA) ou l’American National Standards Institute (ANSI) quand vous utilisez l’outil.
1.
2.
3.
4.
5.
Protection de la tête
a. Portez toujours des lunettes antiprojections qui offrent une protection frontale et latérale
pour les yeux.
b. Portez un masque antipoussières ou un appareil respiratoire nominal approprié.
c. Portez des bouchons d’oreilles si l’outil électrique ou l’environnement de travail
est bruyant.
d. Portez un écran facial panoramique si votre travail produit des limailles ou des
copeaux de bois.
e. Portez un casque de protection pour vous protéger de la chute d’objets.
Gants
a. Les gants doivent protéger en fonction des matériaux travaillés.
b. Portez des gants appropriés pour réduire les effets des vibrations.
Vêtements de protection
a. Portez des vêtements de protection conçus pour l’environnement de travail et pour l’outil.
Des exemples sont des vêtements en tissu non conducteur ou en tissu traité pour résister
aux liquides ou aux produits corrosifs.
Protection des pieds
a. Chaussures à embout d’acier ou à coquilles d’acier pour éviter les blessures dues à la
chute d’objets.
b. Les chaussures antidérapantes sont recommandées pour maintenir la stabilité
et l’équilibre.
Gardez le contrôle de l’outil, de vos mouvements et de l’environnement de travail pour éviter les
blessures ou le bris de l’outil. Restez alerte, portez attention à vos gestes et faites preuve
de bon sens.
a. Tenez les vêtements, les bijoux, les cheveux, etc. à l’écart des pièces mobiles pour éviter
qu’ils ne se coincent dans l’outil.
b. N’utilisez pas d’appareils ou d’outils si vous êtes fatigué ou sous l’effet de drogues,
d’alcool ou de médicaments.
c. N’utilisez pas l’outil si vous devez étirer les bras pour vous en servir. Une stabilité et un
équilibre appropriés sont nécessaires afin d’avoir un meilleur contrôle de l’outil en cas de
situations inattendues.
d. Utilisez des pinces de serrage ou toute autre méthode pratique pour soutenir ou bien fixer
l’outil à une plateforme stable. Si vous tenez l’outil manuellement ou contre vous, il sera
instable, ce qui peut entraîner une perte de contrôle et des blessures.
UTILISATION ET ENTRETIEN DE L’OUTIL
1.
2.
4
Utilisez le bon outil pour la tâche à effectuer. Ne forcez pas un outil ou un accessoire pour
effectuer le travail d’un outil industriel plus gros. Maximisez la performance de l’outil et la
sécurité en utilisant l’outil pour des travaux pour lesquels il a été conçu.
Cet outil a été conçu pour une utilisation spécifique. Évitez de modifier ou d’altérer cet outil ou
de l’utiliser à une fin autre que celle pour laquelle il a été conçu.
En cas de questions techniques, appelez le 1-800-665-8685
8089591
3.
4.
Gabarit d’affûtage de foret
V 2,5
Tenez cet outil solidement des deux mains, sauf s’il est conçu pour une utilisation avec une
seule main. L’utilisation de l’outil d’une seule main peut causer une perte de maîtrise.
Entretenez les outils avec soin (voir Entretien).
DÉBALLAGE
1.
2.
3.
Retirez soigneusement les pièces et les accessoires de la boîte. Conservez les matériaux
d’emballage jusqu’à ce que vous ayez inspecté avec soin et installé ou utilisé l’outil de
manière satisfaisante.
Assurez-vous que tous les articles sur la liste de pièces sont compris.
Inspectez les pièces attentivement pour vous assurer que les outils et les accessoires n’ont pas
été endommagés pendant le transport.
AVERTISSEMENT ! Ne faites pas fonctionner l’outil si des pièces sont manquantes. Remplacez
les pièces manquantes avant l’utilisation. Le non-respect de cet avertissement peut entraîner une
défectuosité ou des blessures graves.
IDENTIFICATION DES PIÈCES
Contenu:
•
Gabarit d'affûtage de foret
UTILISATION
ATTENTION ! Portez une protection oculaire adéquate en utilisant
cet outil.
1.
2.
3.
4.
5.
Montez l’outil sur un établi ou toute autre surface stable pour
en faciliter le fonctionnement et garantir la stabilité.
Placez le foret dans le gabarit au format correspondant.
Ne faites pas d’affûtage tant que la perceuse n’aura pas
fonctionné à plein régime (entre 2 000 et 3 500 tr/min)
pendant au moins 2 secondes.
Veillez à ce que le foret soit parallèle à la pierre d’affûtage et le tenir fermement en place avec
votre pouce. Voyez l’image ci-dessous pour la bonne façon de procéder.
Poussez le foret de manière constante vers la pierre d’affûtage en maintenant le foret de niveau.
ATTENTION ! N’utilisez pas une force excessive. Cela produirait un bord
de coupage arrondi sur le foret.
ATTENTION ! Ne dépassez pas 5 secondes en affutant un foret. Cela entraînerait une surchauffe
susceptible d’endommager ou de faire fondre le guide de forage.
6.
7.
Faites refroidir le foret dans l’eau pendant 5 minutes entre chaque affûtage.
Répétez la procédure pour chaque surface de coupe (la plupart des forets ont 2 bords,
mais il y a des exceptions).
Visitez www.princessauto.com pour plus d'informations
5
V 2,5
8.
9.
Gabarit d’affûtage de foret
8089591
Dans le cas des forets très émoussés, il se peut qu’il soit nécessaire de
les affûter plusieurs fois pour obtenir le niveau tranchant désiré.
Après usage, graissez l’arbre d’entrée avec une huile ou un lubrifiant
non pénétrant.
ENTRETIEN
1.
2.
3.
4.
5.
Entretenez l’outil avec soin. Un outil en bon état sera efficace, plus facile
à maîtriser et préviendra les problèmes inutiles.
Gardez les poignées de l’outil propres, sèches et exemptes d’huile ou de
graisse en tout temps.
Suivez les instructions pour lubrifier et remplacer les accessoires.
Inspectez périodiquement les raccords de l’outil. Demandez à un
technicien autorisé de réparer ou de remplacer les composants
endommagés ou usés.
Veillez à ce que l’étiquette et la plaque d’identification demeurent
intactes sur l’outil. Elles comportent des renseignements importants. Si elles sont illisibles ou
manquantes, communiquez avec Princess Auto Ltd. pour les remplacer.
ATTENTION ! Seul un personnel d’entretien qualifié doit effectuer la réparation de l’outil.
LUBRIFICATION
Utilisez seulement les lubrifiants fournis avec l’outil ou spécifiés par le fabricant. Les autres lubrifiants
pourraient ne pas convenir et risqueraient d’endommager l’outil ou de causer un mauvais fonctionnement
durant l’utilisation.
ATTENTION ! N’utilisez JAMAIS une huile pénétrante pour lubrifier l’outil. Une huile pénétrante peut
agir comme un solvant qui brisera le boîtier.
ENTREPOSAGE
Si l’outil n’est pas utilisé pendant une période prolongée, appliquez une mince couche de lubrifiant sur les
pièces en acier pour éviter qu’elles ne rouillent. Enlevez le lubrifiant avant de réutiliser l’outil.
MISE AU REBUT DE L’OUTIL
Si votre outil est trop endommagé pour être réparé, ne le jetez pas. Apportez-le à un centre
de recyclage approprié.
DÉPANNAGE
Si l’outil ne fonctionne pas correctement ou si des pièces sont manquantes, veuillez contacter Princess
Auto Ltd. afin de trouver une solution. Si ce n’est pas possible, demandez à un technicien qualifié de
réparer l’outil.
6
En cas de questions techniques, appelez le 1-800-665-8685