1
(263IO) SPA ENGLISH 7.5” X 10.3” PANTONE 295U 08/05/2014
English
SET UP (continued)
Setup the spa with at least 2 persons.
Move the entire package to the selected site. Do not drag the spa tub across the ground as this can
cause damage and leakage.
Open the carton carefully as this carton can be used to store the spa during long term storage or when
not in use.
Lay out all the parts on the ground and make sure all the parts are accounted for. For missing or
damaged parts contact the appropriate Intex Service Center listed in the separate “Authorized service
Centers” sheet.
1.
2.
Spa Control Unit Assembly
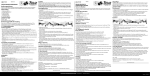
Connect the control panel (3) cable plug into the receptacle on top of the spa control base and screw in
the plug cover firmly by hand (see drawing 1).
Screw the control panel bolts (4) with the provided bolt wrench (6) to secure the control panel (see
drawing 2).
Plug the spa control unit into an electrical outlet.
1.
2.
3.
2
1
3
6
4
1
2
Inflation
Inflate the Spa Tub Wall
1.
2.
3.
4.
Take out the ground cloth (19) and spread it over the cleared area. Then spread out the spa liner over
the ground cloth and point the drain valve towards a suitable draining area. Note: Spread the ground
cloth with the bubbles facing down over the cleared area where you intend to setup your spa.
Press the button located on top of the control base and remove the back cover (see drawing 3).
Unscrew the control base inflation cap (5) to reveal the air blower inflation outlet, insert one end of the
inflation hose (7) into the outlet and turn to the right to lock it (see drawing 4).
Unscrew the air valve cap to reveal the stem in the up position for inflation. Insert the other end of the
inflation hose (7) into the valve and turn to the right to lock it in position (see drawing 5).
3
4
1
5
2
Press
5
7
SAVE THESE INSTRUCTIONS
7
Page 9
263
A