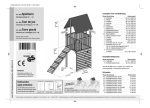
1
HYDRO TOP USER’S MANUAL MANUEL D’UTILISATION BEDIENUNGSANLEITUNG GB Dear Customer, Thank you for choosing a Teuco Top whirlpool bath. The whirlpool, or water massage, uses the combined action of water and air to offer pleasurable moments of relaxation and well-being for mind and body. In addition, Teuco has enriched the whirlpool system with numerous functions, making it still more convenient, safe and beneficial to use. CONTENTS GENERAL INFORMATION . . . . . . . . . . . . . . . . . . . . . . . . . . . . . . . . . . . . . . . . . . . . . . . . . . . . . . . . . . . . . . .23 - WHAT IS A WATER MASSAGE? - BENEFITS OF A WATER MASSAGE - TEUCO QUALITY - USEFUL HINTS ON PROPER USE OF THE WHIRLPOOL SAFETY AND HYGIENE IN THE TEUCO WHIRLPOOL BATH - WARNINGS INSTRUCTIONS FOR USE - PARTS OF THE WHIRLPOOL BATHTUB . . . . . . . . . . . . . . . . . . . . . . . . . . . . . . . . . . . . . . . . . . . . . . . . . . . . .26 - PRELIMINARY OPERATIONS . . . . . . . . . . . . . . . . . . . . . . . . . . . . . . . . . . . . . . . . . . . . . . . . . . . . . . . . . . . .28 - DETAILS OF THE CONTROL PANEL (QUICK START - ALARM) - DETAILS OF THE REMOTE CONTROL . . . . . . . . . . . . . . . . . . . . . . . . . . . . . . . . . . . . . . . . . . . . . . . . . . . . . . .30 - WHIRLPOOL FUNCTION . . . . . . . . . . . . . . . . . . . . . . . . . . . . . . . . . . . . . . . . . . . . . . . . . . . . . . . . . . . . . . . . . .32 - DISPLAY SETTINGS - INFO (CLOCK - LANGUAGE) . . . . . . . . . . . . . . . . . . . . . . . . . . . . . . . . . . . . . . . . . . . . . .35 - ADDITIONAL FUNCTIONS (LIGHT - HEATER) . . . . . . . . . . . . . . . . . . . . . . . . . . . . . . . . . . . . . . . . . . . . . . . . . .37 - DISINFECTION . . . . . . . . . . . . . . . . . . . . . . . . . . . . . . . . . . . . . . . . . . . . . . . . . . . . . . . . . . . . . . . . . . . . . . . . .38 MAINTENANCE . . . . . . . . . . . . . . . . . . . . . . . . . . . . . . . . . . . . . . . . . . . . . . . . . . . . . . . . . . . . . . . . . . . . .40 - CLEANING OF SURFACES (See CLEANING INSTRUCTIONS manual attached) - REPLACING THE REMOTE CONTROL BATTERIES - CLEANING THE WHIRLPOOL JETS - CLEANING THE SUCTION VALVE REPAIRS . . . . . . . . . . . . . . . . . . . . . . . . . . . . . . . . . . . . . . . . . . . . . . . . . . . . . . . . . . . . . . . . . . . . . . . . . .41 - DIAGNOSTICS MESSAGES USE AND MAINTENANCE MANUAL This manual provides a guide for the safe use of your Teuco whirlpool bathtub. As such, it should be read through carefully and in its entirety before using the product. This manual constitutes an integral part of the product and must be kept for future reference. Teuco Guzzini Spa reserves the right to make such changes as are deemed appropriate without prior notice and without any obligation to update. 22 HYDRO TOP General Information GB WHAT IS A WATER MASSAGE? In short, a modern technique based on a principle as old as time itself: the mechanical capacity of water to benefit the organism. Many positive effects can be generated from a massage combining air and water, elements essential to our existence. BENEFITS OF A TEUCO WATER MASSAGE The Teuco water massage is a source of pleasant relaxation, a matchless medium for restoring vitality, well-being and joie-de-vivre. The functional principles tending to maintain a healthy mind in a healthy body have been researched and applied to the design of the Teuco whirlpool, studying the way people live their lives today, often under stress, and the need to have their spirits fully restored. The Teuco whirlpool performs important functions in maintaining bodily harmony and beauty: relaxing the skin and strengthening its defences against hostile elements, toning the muscles. It also has an optimum stimulating effect on blood circulation, metabolic activity and the lymphatic system, and is of help in the treatment of rheumatic conditions and trauma. The massaging action of the water can be made still more effective by adding special Teuco essences: these are natural water-soluble extracts of aromatic and medicinal herbs supplied in bottles of 250 ml (5 measures), available from Teuco Dealers. If a more localized treatment is desired, these essences can also be applied directly to the body, preferably using a horsehair mitten. They relax and moisturize the skin, stimulating cell renewal, creating a firmer tissue structure and helping the body to look slimmer from head to toe. The Top whirlpool comes with the “Pulsator” function, developed to increase the efficiency of the water massage. By varying the amount of air contained in the jet, the “Pulsator” applies a gradual, pleasurable and rhythmic pressure to the skin that has an immediate toning effect. TEUCO QUALITY Teuco takes the greatest care over the materials used in its products, making technological improvements continuously both to the plastics utilized, and to details of construction. All tubs are fashioned from cast acrylic resin. The frame is steel, with antivibration mounts. Pipelines are of high strength material. Teuco whirlpool bathtubs carry the mark, indicating that they are designed and manufactured in accordance with the essential requirements of European directives 73/23 - 93/68 on electrical safety and 89/336 - 92/31 - 93/68 on electromagnetic compatibility. The safety of Teuco whirlpool systems is also certified officially by (Italian Quality Mark Institute) as being in compliance with the application of current European standards. HYDRO TOP 23 GB USEFUL HINTS ON PROPER USE OF THE WHIRLPOOL Given the relaxing and invigorating effects of a water massage, doubtless the best time to take a whirlpool bath is after sport or physical exercise, although not on a full stomach and never before food has been properly digested. The temperature of the water needs to be around 37 °C to obtain maximum benefit from the massage. In the case of new users, most especially, whirlpool sessions should be restricted to just a few minutes. Thereafter, the duration can be increased gradually to 15-20 minutes, but always subject to the user’s general physical fitness. SAFETY AND HYGIENE IN THE TEUCO WHIRLPOOL BATHTUB All Teuco whirlpool bathtubs are designed to offer unmatched quality, safety and hygiene. Hydro Clean System This is a system (Teuco patent) that comes into operation whenever the bath is used without the whirlpool, closing off the jets and the suction valve to prevent the system from being fouled by soap or other residual matter. Drainage system The reason for incorporating this technical feature is to ensure that any water left in the system after emptying the tub will be eliminated, avoiding the formation of lime scale and leaving the bath perfectly clean after use. Automatic disinfection The whirlpool system can be disinfected automatically by activating a relative cycle from the electronic control panel; this generates a flow of cleansing fluid that sterilizes the pump, the jets and the surface of the tub. System shutoff In the event of the jets or suction valve being blocked by any part of the body or by an object in the bath, this safety system will deactivate the whirlpool immediately. Level switch This device prevents the whirlpool system from starting up until the bath has filled to a minimum level. 24 HYDRO TOP GB WARNINGS To ensure the appliance is correctly installed, follow all the instructions in the accompanying installation manual with due care. Incorrect installation may result in injury to persons and animals or damage to property. The manufacturer declines any liability for injury or damage attributable to incorrect installation. For proper use of the appliance, follow the instructions given in this manual. This appliance must be used only for the purpose for which it was designed. The manufacturer declines any liability for injury or damage attributable to improper use. Only adult persons should use the appliance. Children and the disabled may use the whirlpool, but under constant supervision. For special cases (elderly people, those with high blood pressure or heart disease, and pregnant women) seek medical advice before using the whirlpool. When using the whirlpool bath it is advisable to utilize the special essences made by Teuco; these are available at points of sale and from Teuco authorized service centres. It is important never to use bubble bath or other foamable toiletries when the whirlpool is in operation; these can be added to a normal soaking bath, when the whirlpool is not in use. Take care, with the whirlpool system in operation, that the suction valve is never obstructed by any object or part of the body, and in particular, keep hair well clear. Do not block the air intake (on panelled versions, the space between the floor and the panel; on built-in versions, the vents of the inspection panel). When not in use, isolate the whirlpool system from the electrical power supply at the thermal-magnetic RCD switch installed up-line of the appliance. In the event of breakdown or malfunction occurring during the warranty period, contact a Teuco technician or approved service centre only. The manufacturer declines any liability for damage or injury caused by appliances that have been tampered with or incorrectly repaired. HYDRO TOP 25 Instructions for use GB PARTS OF THE WHIRLPOOL BATHTUB Taps Remote control Waterproof and unsinkable. Dispenser cap cleansing fluid container. Whirlpool jet The jet bosses are adjustable for direction to suit personal preference. The rate at which water flows from the single jet can be controlled by rotating the nozzle. Care must be taken not to aim the jets directly at the suction valve; this could depressurize the system and adversely affect its performance. 26 HYDRO TOP GB Hand-held shower with pull-out shower hose Control panel incorporates the display indicating operation of the system, the alarm button and the Quick Start button (Whirlpool Quick Start). Pop-up waste handle Opens and closes the pop-up waste Suction valve Connects with the pump circulating water from the tub back to the jets Underwater light HYDRO TOP 27 GB PRELIMINARY OPERATIONS POWERING-UP THE SYSTEM Position the isolating switch (fitted during installation) at ON. The display goes into STAND-BY mode, showing the exact time. 20 : 30 Display in STAND-BY mode FILLING THE TUB Fill the tub until the water covers the jets. DETAILS OF CONTROL PANEL AND DISPLAY WHIRLPOOL ON/OFF button Display Shows messages LED BLINKING Led: Indicates reception of signals from Remote Control (see Remote Control) 28 ALARM ON/OFF button Infrared receiver HYDRO TOP GB WHIRLPOOL QUICK START Once the system has been powered up, the whirlpool function can be activated by pressing a single button at the control panel. The function maintains the settings most recently stored (see WHIRLPOOL). To start the whirlpool, press the “HYDRO” button. The whirlpool starts and the display shows: 1 5 36° C 20 : 30 WH I RLPOOL Display indicating Whirlpool in progress The exact time. The temperature of the water in the tub. The duration of the whirlpool session (TIMER) in minutes. Confirmation that the Whirlpool is in operation. 1 5 36° C 20 : 30 WH I RLPOOL To make adjustments, use the remote control (see REMOTE CONTROL). When the whirlpool has finished, the system shuts off and the display reverts to STAND-BY. DISINFECTION of the system is not carried out (see DISINFECTION). Display indicating Whirlpool in progress 20 : 30 Display in STAND-BY mode To cut the session short, press HYDRO a second time or use the remote control (see REMOTE CONTROL: Preliminary Operations); the system shuts off and the display reverts to STAND-BY. ALARM The ALARM can be activated directly from the control panel. The alarm locks up the system, shutting off any functions currently selected, and can also activate a bell or other sounder, provided that this is already installed (see directions for installing the tub). To activate the alarm, press the “ALARM” button. A L A R M Display indicating “ALARM” status To reset the system, press the HYDRO button or the I/O button on the remote control; the display reverts to STAND-BY mode and the system shuts off. HYDRO TOP 20 : 30 Display in STAND-BY mode 29 GB DETAILS OF REMOTE CONTROL Infrared emitter O/I - ON/OFF button FUNCTIONS Switches the control panel ON and OFF HYDRO: Whirlpool ON/OFF button ADJUSTMENTS “▼” and “▲”: Buttons used to select/adjust functions ENTER: Button used to confirm selections/settings These buttons are included only on certain versions - see bottom of page LIGHT: Underwater light ON/OFF button HEATER: Heater ON/OFF button ACCESSORIES INFO: Button used to access settings - Change display CLOCK setting - Select display LANGUAGE TOP HL version TOP WHIRLPOOL versions TOP 30 TOP L TOP H TOP HL HYDRO TOP GB SWITCHING ON FROM THE REMOTE CONTROL To switch on, press the “0/I” button; the welcome message will appear in the control panel display for a few seconds. Thereafter, the display switches to READY; the system can now be used (see WHIRLPOOL). WELCOME TO HYDRO TOP 36° C 20 : 30 READY Display indicating READY status To switch off the panel, press the “0/I” a second time: if no whirlpool cycle has been selected, the system shuts off and the display reverts to STAND-BY. 20 : 30 Display in STAND-BY mode If at least one Whirlpool cycle has been selected, a message will be displayed prompting DISINFECTION (see DISINFECTION). START D I S I NFECT I ON? Display showing Disinfection prompt AUTOMATIC SHUTOFF: If no control panel or remote control button is pressed within 30 minutes following power-up or since the last function was active (TIMER setting) the system shuts off and the display reverts to STAND-BY. DISINFECTION of the system is not carried out (see DISINFECTION). HYDRO TOP 31 Whirlpool function GB Special essences made by Teuco can be used when the whirlpool is in operation. Do not use soaps, bath oils or other foamable products. STARTING THE WHIRLPOOL Pressing the “O/I” button to switch on, the display goes into READY mode. 36° C 20 : 30 READY Display indicating READY status Start the Whirlpool by pressing the “HYDRO” button. The whirlpool starts and the display shows: The exact time. The temperature of the water in the tub. The duration of the whirlpool session (TIMER) in minutes (adjustable). Whirlpool in progress. 1 5 36° C 20 : 30 WH I RLPOOL Display indicating Whirlpool in progress When the whirlpool has finished, the system shuts off and the display reverts to READY. 36° C 20 : 30 READY Display indicating READY status To cut the session short, press HYDRO a second time; the system shuts off and the display reverts to READY. MASSAGE DOES NOT START!!! If the message “ADD WATER” is displayed, fill the tub to the level at which the selected massage is able to start. ADD WAT ER Display in DIAGNOSTICS mode 32 HYDRO TOP GB WHIRLPOOL SETTINGS With the WHIRLPOOL in operation, the user can: 1 5 36° C 20 : 30 WH I RLPOOL - Adjust the air flow - Activate the PULSATOR effect - Change the duration of the Whirlpool session Display indicating Whirlpool in progress Press “ENTER” the display will show the Whirlpool menu. Wh i rlpoo l AIR Select the setting to be changed using the “▲” and “▼” buttons. ▼ Wh i rlpoo l P ULSA TOR Wh i rlpoo l T I MER ▲ N▼ 30m▲ Whirlpool menu AUTOCONFIRM: If no button is pressed for 5 seconds while the Whirlpool menu remains active, the display reverts to the massage currently selected. ADJUSTING THE AIR FLOW Select AIR from the Whirlpool menu. Wh i rlpoo l AIR ▼ Whirlpool menu Press “ENTER” the display will show the Air adjustment scale. Use the “▲ and ▼” buttons to increase or reduce the flow of air. Confirm the selection by pressing “ENTER” the display will revert to the Whirlpool menu. Wh i rlpoo l AIR AIR adjustment display Wh i rlpoo l AIR ▼ Whirlpool menu AUTOCONFIRM: If no button is pressed for 5 seconds while the Air menu remains active, the current setting AUTOCONFIRMS and the display reverts to the Whirlpool menu. HYDRO TOP 33 GB ACTIVATING THE PULSATOR EFFECT Select PULSATOR N from the Whirlpool menu. Wh i rlpoo l PULSA TOR ▲ N▼ Whirlpool menu with PULSATOR off Press “ENTER” to activate the PULSATOR the display shows PULSATOR Y in the Whirlpool menu. Wh i rlpoo l PULSA TOR ▲ S▼ Whirlpool menu with PULSATOR on To deactivate the PULSATOR press “ENTER” a second time from the Whirlpool menu. the display will revert to PULSATOR N. Wh i rlpoo l PULSA TOR ▲ N▼ Whirlpool menu with PULSATOR off AUTOCONFIRM: If no button is pressed for 5 seconds while the Whirlpool menu remains active, the display reverts to the massage currently selected. CHANGING THE DURATION OF THE WHIRLPOOL SESSION Select TIMER from the Whirlpool menu. Wh i rlpoo l T I MER 30m▲ Whirlpool menu Press “ENTER” the display will show the Timer. Use the “▲ and ▼” buttons to increase or reduce the duration between 1 and 30 minutes. Confirm the selection by pressing “ENTER” the display will revert to the Whirlpool menu. Wh i rlpoo l T I MER 30m Display showing TIMER Wh i rlpoo l T I MER 30m▲ Whirlpool menu AUTOCONFIRM: If no button is pressed for 5 seconds while the TIMER menu remains active, the current setting AUTOCONFIRMS and the display reverts to the Whirlpool menu. 34 HYDRO TOP Display settings - INFO GB Whenever a function is activated, or the system is ready (Display showing READY) the user can: - Set the CLOCK - Change the Language of the display Press the “INFO” button the display will show the Info menu. Select the setting to be changed using the “▲” and “▼” buttons. I NFO C l o ck 20 : 30 I NFO Languag e 20 : 30 ▲ EN▼ I NFO ¬ 20 : 30 ▼ ▲ Info menu AUTOCONFIRM: If no button is pressed for 5 seconds while the Info menu remains active, the display reverts to the previous item. CLOCK Select TIME from the Info menu. I NFO C l o ck 20 : 30 ▼ Info menu Press “ENTER” the display will show SET HOURS. Use the “▲ and ▼” buttons to change the Hours displayed. Confirm the selection by pressing “ENTER” the display shows SET MINUTES. Use the “▲ and ▼” buttons to change the Minutes displayed. Confirm the selection by pressing “ENTER” the display shows SELECT Clock MODE. Use the “▲ and ▼” buttons to change the Clock display MODE. Confirm the selection by pressing “ENTER” the display will revert to the Info menu. I NFO 20 : 30 Change hour Display showing Clock I NFO 20 : 30 Change m i nu t e s Display showing Clock I NFO 08 : 30P Change mode Display showing Clock I NFO C l o ck 20 : 30 ▼ Info menu AUTOCONFIRM: If no button is pressed for 5 seconds while the Clock menu remains active, the current setting AUTOCONFIRMS and the display reverts to the Info menu. HYDRO TOP 35 GB LANGUAGE Select LANGUAGE from the Info menu. I NFO Languag e 20 : 30 ▲ EN▼ Info menu Press “ENTER” the display shows the language currently selected. Use the “▲ and ▼” buttons to change the display language. Confirm the selection by pressing “ENTER” the display will revert to the Info menu. I NFO Languag e 20 : 30 EN Display indicating Language I NFO Languag e 20 : 30 ▲ EN▼ Whirlpool menu AUTOCONFIRM: If no button is pressed for 5 seconds while the Language menu remains active, the current setting AUTOCONFIRMS and the display reverts to the Info menu. 36 HYDRO TOP ADDITIONAL functions GB Having switched on by pressing the “O/I” button, the user can activate certain additional functions (available only on certain versions: see under DETAILS OF THE REMOTE CONTROL). UNDERWATER LIGHT Whenever a function is activated, or the system is ready (Display showing READY) the user can switch on the underwater light. Switch on by pressing the “LIGHT” button. As the light comes on, the display will indicate its “on” status for a few seconds, then revert to the previous item. 1 5 36° C 20 : 30 L I GHT ON Switch off by pressing the “LIGHT” button. When the light goes out, the display will indicate its “off” status for a few seconds, then revert to the previous item. 1 5 36° C 20 : 30 L I GHT OFF Display indicating Light ON Display indicating Light OFF UNDERWATER LIGHT DOES NOT COME ON!!! If the message “ADD WATER” is displayed, fill the tub to the level at which the underwater light comes on. ADD WAT ER Display in DIAGNOSTICS mode HEATER Whenever the WHIRLPOOL function is activated, the user can switch on the heater to keep the water in the bathtub at a steady temperature. 1 5 36° C# 20 : 30 Press the “HEATER” button to switch on. HEAT ER ON As the heater comes on, the display will indicate its “on” status (#) for a few seconds, then revert to the previous Display indicating Heater ON item. Press the “HEATER” button to switch off. The heater switches off, and the display indicates the “off” status for a few seconds before reverting to the previous item. 1 5 36° C 20 : 30 HEAT ER OFF Display indicating Heater OFF AUTOMATIC SHUTOFF: When the function currently selected ceases operating, the heater will also shut off. HYDRO TOP 37 DISINFECTION GB When the system is switched off using the “O/I” button and after at least one whirlpooI cycle has been selected, a DISINFECTION cycle will follow. During Disinfection, both the remote control and the control panel are deactivated except for the “O/I” and “ALARM” buttons, which can be used to suspend the Disinfection cycle at any given moment. RUNNING THE DISINFECTION CYCLE START Be sure to VACATE THE BATHTUB before Disinfection D I S I NFECT I ON? takes place. Display showing Disinfection prompt Press “ENTER” to start the Disinfection. The display shows a warning message for a few seconds. LEAVE BATHTUB To postpone the disinfection cycle, press the “O/I” button and the display will revert to STAND-BY. Thereafter, the display indicates Disinfection in progress. The disinfection cycle is automatic and includes the following steps: - whirlpool system operates for 1 minute approximately, with cleansing fluid supplied from the dispenser; - pause of 10 minutes allowing disinfectant action; - suction valve closes. When the Disinfection cycle has finished, the system shuts off and the display reverts to STAND-BY. Turn the handle of the pop-up waste to empty the tub. D I S I NFECT I ON RUNN I NG 20 : 30 Display in STAND-BY mode DISINFECTION DOES NOT START!!! If the message “ADD WATER” is displayed, fill the tub to the level at which the Disinfection cycle is able to start. ADD WAT ER Display in DIAGNOSTICS mode 38 HYDRO TOP GB DISINFECTION DOES NOT START!!! If the message “ADD DISINFECTANT” is displayed, replenish the dispenser with liquid so that the Disinfection cycle is able to start. Remove the Disinfectant dispenser cap, turning anticlockwise. ADD SAN I T I ZER Display in DIAGNOSTICS mode Fill the container with Disinfectant so that the function can start. Replace and secure the dispenser cap. Use ONLY disinfectant solution supplied by Teuco. POSTPONING THE DISINFECTION CYCLE To postpone the disinfection cycle, press the “O/I” button; the system shuts off and the display reverts to STAND-BY. START D I S I NFECT I ON? Display showing Disinfection prompt Turn the handle of the pop-up waste to empty the tub. 20 : 30 Display in STAND-BY mode AUTOMATIC SHUTOFF: If there is no response within 5 seconds when the display prompts START DISINFECTION?, the system shuts off and the display reverts to STAND-BY. DISINFECTION of the system is not carried out. HYDRO TOP 39 MAINTENANCE GB CLEANING OF SURFACES See CLEANING INSTRUCTIONS manual attached. REPLACING THE REMOTE CONTROL BATTERIES To replace the batteries of the Remote Control, undo the four screws and remove the protective cover. Remove the spent batteries and replace with two new ones, type AAA-1.5V. Be certain to maintain the polarity as indicated when fitting the new batteries to the remote control. Refit the cover, taking care to position the waterproof seal correctly. Do not dispose of used batteries as normal refuse; place them in designated collection bins. CLEANING THE WHIRLPOOL JETS Remove the protective grille using the special key provided (2 - Whirlpool jet). For cleaning purposes, use water only. The ball (4 - Whirlpool jet) can be dismantled further by unscrewing the nozzle and pressing the locking tab at the point indicated by the arrow. To ensure smooth operation of the Whirlpool jet, refit the nut (3) and tighten without forcing. CLEANING THE SUCTION VALVE Remove the safety screw (1). Remove the grille (2) by rotating anticlockwise. Unscrew the valve element (3). For cleaning purposes, use water only. When reassembling, make sure that the valve element (3) is screwed fully home. Refit the safety screw (1). In the event of breakdown or malfunction (e.g. system fault, replacement of lamp for underwater light, problems with pump, control unit, power unit... ) contact the nearest Teuco Authorized Service Centre (see list attached). The company will acknowledge no liability for damage to appliances that have been tampered with. 40 HYDRO TOP GB REPAIRS If any part of the appliance fails to operate as it should, call the nearest Teuco Authorized Service Centre (see list attached). DIAGNOSTICS MESSAGES The appliance is equipped with various safety features which monitor the operation of the system. In the event of malfunction, a controller automatically deactivates the function currently in use. The type of error detected is shown on the bottom line of the display. Certain kinds of trouble can be rectified without calling in a technician; the following table indicates the action to take when a function locks up. TROUBLE OR FAULT CAUSE ACTION ADD WATER Whirlpool system prevented from starting up due to insufficient water in tub. Fill the tub with water to the minimum level allowing the system to self-activate. ADD DISINFECTANT Disinfection cycle prevented from starting due to insufficient liquid in dispenser. Replenish the dispenser with liquid disinfectant supplied by Teuco. LOW PRESSURE Suction valve blocked. Clean the suction valve (see maintenance heading). If the display indicates a fault other than those mentioned in the table, the system needs to be RESET as follows: - isolate the appliance from the power supply - reconnect power after a few seconds - select the function which locked up previously. If the fault persists, call the nearest Teuco Authorized Service Centre (see list attached). HYDRO TOP 41 F Cher client, Nous vous remercions d’avoir choisi un Hydromassage Top Teuco. L’hydromassage, à travers l’action combinée de l’eau et de l’air, est à même de vous offrir d’agréables moments de relax et de bien-être pour le corps et l’esprit. De plus, Teuco a enrichi l’hydromassage d’innombrables fonctions pour que son utilisation résulte encore plus agréable, sûre et bénéfique. TABLE DES MATIÈRES INFORMATIONS GÉNÉRALES . . . . . . . . . . . . . . . . . . . . . . . . . . . . . . . . . . . . . . . . . . . . . . . . . . . . . . . . . . . .43 - QU’EST-CE QUE L’HYDROMASSAGE? - LES BÉNÉFICES DE L’HYDROMASSAGE - LA QUALITÉ TEUCO - QUELQUES CONSEILS UTILES POUR UNE UTILISATION CORRECTE DE L’HYDROMASSAGE - SÉCURITÉ ET HYGIÈNE DE L’HYDROMASSAGE TEUCO - AVERTISSEMENTS INSTRUCTIONS D’UTILISATION - DÉTAILS DE L’HYDROMASSAGE . . . . . . . . . . . . . . . . . . . . . . . . . . . . . . . . . . . . . . . . . . . . . . . . . . . . . . . . . .46 - OPÉRATIONS PRÉLIMINAIRES . . . . . . . . . . . . . . . . . . . . . . . . . . . . . . . . . . . . . . . . . . . . . . . . . . . . . . . . . . .48 - CARACTÉRISTIQUES DU PANNEAU DE CONTRÔLE (QUICK START - ALARME) - CARACTÉRISTIQUES DE LA TÉLÉCOMMANDE . . . . . . . . . . . . . . . . . . . . . . . . . . . . . . . . . . . . . . . . . . . . . . . . .50 - FONCTION HYDROMASSAGE . . . . . . . . . . . . . . . . . . . . . . . . . . . . . . . . . . . . . . . . . . . . . . . . . . . . . . . . . . . . . .52 - RÉGLAGES DE L’AFFICHEUR - INFO (HORLOGE - LANGUE) . . . . . . . . . . . . . . . . . . . . . . . . . . . . . . . . . . . . . . . .55 - FONCTIONS SUPPLÉMENTAIRES (LIGHT - HEATER) . . . . . . . . . . . . . . . . . . . . . . . . . . . . . . . . . . . . . . . . . . . . .57 - DÉSINFECTION . . . . . . . . . . . . . . . . . . . . . . . . . . . . . . . . . . . . . . . . . . . . . . . . . . . . . . . . . . . . . . . . . . . . . . . .58 MAINTENANCE . . . . . . . . . . . . . . . . . . . . . . . . . . . . . . . . . . . . . . . . . . . . . . . . . . . . . . . . . . . . . . . . . . . . .60 - NETTOYAGE DES SURFACES (Voir manuel joint : INSTRUCTIONS POUR LE NETTOYAGE) - REMPLACEMENT DES PILES DE LA TÉLÉCOMMANDE - NETTOYAGE DES BOUCHES DE L’HYDROMASSAGE - NETTOYAGE DE LA BOUCHE D’ASPIRATION RÉPARATIONS . . . . . . . . . . . . . . . . . . . . . . . . . . . . . . . . . . . . . . . . . . . . . . . . . . . . . . . . . . . . . . . . . . . . . .61 - MESSAGES DE DIAGNOSTIC DES PANNES MANUEL D’UTILISATION ET DE MAINTENANCE Ce manuel représente un guide qui vous permettra d’utiliser l’Hydromassage Teuco en toute sécurité. Lisez-le attentivement avant de mettre en route l’appareil. Ce manuel doit toujours accompagner l’appareil. Conservez-le pour toute consultation future. Teuco Guzzini Spa se réserve le droit de modifier ses produits sans préavis ni remplacement. 42 HYDRO TOP Informations générales F QU’EST-CE QUE L’HYDROMASSAGE Il s’agit d’une technique moderne basée sur un principe qui nous arrive de l’antiquité : la capacité mécanique de l’eau de faire du bien à l’organisme. Par un mélange d’air et d’eau, éléments essentiels pour notre vie, il est possible de déclencher une cascade d’effets positifs. LES BÉNÉFICES DE L’HYDROMASSAGE TEUCO L’hydromassage Teuco offre d’agréables moments de relax, une possibilité sans pareille de retrouver fraîcheur, bien-être et joie de vivre. Les principes fonctionnels qui jouent un rôle bénéfique sur le bien-être psycho-physique ont été étudiés et appliqués aux baignoires d’hydromassage Teuco en pensant à l’homme d’aujourd’hui et à son style de vie souvent marqué par le stress, dans le but de lui redonner toute sa vitalité. En matière d’harmonie et de beauté corporelle, l’hydromassage Teuco joue un rôle important : il détend l’épiderme et renforce ses défenses contre les attaques extérieures, il tonifie les muscles. C’est également un excellent stimulant pour la circulation sanguine, le métabolisme et la circulation lymphatique; il est recommandé pour traiter les formes rhumatismales et traumatiques. L’hydromassage peut avoir une action encore plus efficace grâce aux produits phytocosmétiques Teuco : des essences naturelles à base d’herbes aromatiques et curatives contenues dans des flacons de 250 ml correspondant à 5 doses à verser dans l’eau; disponibles auprès des revendeurs Teuco. Vous pouvez également les appliquer directement sur le corps en les faisant pénétrer sur les parties à traiter, de préférence avec un gant de crin. Elles jouent plusieurs rôles : relaxant pour la peau, stimulant pour le renouvellement des cellules et hydratant pour tonifier les tissus et amincir tout le corps. L’hydromassage Top est équipé de la fonction “Pulsator”, développée pour augmenter le rendement de l’hydromassage. En utilisant les variations de la quantité d’eau contenue dans le jet, le massage “Pulsator” exerce une pression graduelle, agréable et rythmée sur la peau pour un effet tonifiant immédiat. LA QUALITÉ TEUCO Teuco apporte une attention particulière aux matériaux utilisés pour la fabrication de ses appareils à travers une amélioration technologique constante des matières plastiques et des différentes pièces. Toutes les baignoires sont réalisées en méthacrylate moulé : le châssis est en acier et est équipé de pieds anti-vibration; les conduits sont garantis haute résistance. Les baignoires d’hydromassage Teuco portent le label qui certifie qu’elles ont été conçues et réalisées conformément aux conditions dictées par les directives européennes n° 73/23 - 93/68 en matière de sécurité électrique et n° 89/336 92/31 - 93/68 en matière de compatibilité électromagnétique. La sécurité des installations d’hydromassage est certifiée officiellement par (Institut italien du marquage qualité) sur la base de la conformité aux normes européennes en vigueur. HYDRO TOP 43 F QUELQUES CONSEILS UTILES POUR UNE UTILISATION CORRECTE DE L’HYDROMASSAGE Vu l’effet relaxant et régénérant de l’hydromassage, le meilleur moment pour s’y abandonner est sans aucun doute après une activité sportive ou à la fin d’une journée de travail, loin des repas et dans tous les cas après la fin de la digestion. Pour obtenir un bon effet massant, la température de l’eau doit être maintenue constante autour de 37°C. La durée des séances d’hydromassage doit se limiter à quelques minutes, surtout si on l’utilise pour la première fois. Les séances suivantes pourront être progressivement prolongées jusqu’à 15/20 minutes, mais toujours en accord avec les conditions physiques générales du sujet. SÉCURITÉ ET HYGIÈNE DE L’HYDROMASSAGE TEUCO Toutes les baignoires d’hydromassage Teuco se basent sur des caractéristiques qui garantissent un excellent niveau de qualité, de fonctionnement, de sécurité et d’hygiène. Hydro Clean System En cas de bain traditionnel, ce système breveté entre en fonction en fermant automatiquement les buses qui envoient le mélange eau/air ainsi que la crépine d’aspiration pour bloquer l’infiltration de savon ou autres résidus. Système de drainage Ce système a été adopté pour éliminer éventuellement les dépôts d’eau dans l’installation afin d’éviter la formation de calcaire et laisser la baignoire parfaitement propre après l’utilisation. Programme de désinfection automatique Il est possible de lancer un programme de désinfection de l’installation d’hydromassage en intervenant sur le panneau de commande pour injecter un produit stérilisant et désinfecter la pompe, les buses et toute la surface de la baignoire. Arrêt d’urgence Si les buses ou la bouche d’aspiration de l’hydromassage sont bouchées par des objets ou des parties du corps, le système de sécurité désactive immédiatement l’installation. Niveaustat Dispositif qui empêche le démarrage si l’eau dans la baignoire n’atteint pas un certain niveau minimum. 44 HYDRO TOP F AVERTISSEMENTS Pour installer correctement l’appareil, suivre attentivement toutes les indications du manuel d’installation. Une installation incorrecte peut causer des dommages aux personnes, aux choses ou aux animaux. Le constructeur ne répond pas des dommages éventuels causés par une installation erronée. Pour installer correctement l’appareil, suivre les indications reportées dans le présent manuel. Ce produit peut être destiné uniquement à l’utilisation pour laquelle il a été conçu. Le constructeur n’est pas responsable des dommages éventuels dérivant des utilisations impropres. L’utilisation de cet appareil est réservée aux personnes. Les enfants et les porteurs de handicaps peuvent utiliser l’hydromassage sous réserve d’une surveillance continue. Dans les cas particuliers (personnes âgées, hypertendus, malades du coeur, femmes enceintes), l’utilisation de l’hydromassage est subordonnée à un avis médical. Pendant l’utilisation de l’hydromassage, il est conseillé d’utiliser les hydro-essences Teuco disponibles dans les points de vente et les Centres d’Assistance Agréés. Ne jamais utiliser de bains moussants ou d’autres produits similaires; il sera toutefois possible d’utiliser ce genre de produit si l’on ne met pas en route l’hydromassage. Pendant l’utilisation de l’hydromassage, ne pas obstruer la bouche d’aspiration avec des objets ou parties du corps. Éviter en particulier tout contact avec les cheveux. Ne pas obstruer les bouches d’air (espace entre le sol et l’habillage d’inspection de la baignoire encastrée). Quand l’hydromassage n’est pas utilisé, débrancher l’alimentation par l’interrupteur électrique en déclenchant le disjoncteur différentiel magnétothermique en amont de l’appareil. En cas de panne ou de dysfonctionnement de l’appareil, pour jouir de la garantie si celle-ci est encore valide, contacter exclusivement des techniciens autorisés. Le constructeur ne répond pas des dommages éventuels causés par des produits modifiés ou réparés de façon impropre. HYDRO TOP 45 Instructions pour l’utilisation F LES DÉTAILS DE L’HYDROMASSAGE Robinetterie Télécommande Imperméable et flottante. Bouchon de la réserve contenant le liquide désinfectant. Buse d’hydromassage Les buses des Jets sont orientables selon les exigences de l’utilisateur. Il est possible de régler le débit d’eau de chaque Jet en tournant la buse. Faire attention à ne pas orienter les buses d’hydromassage en direction de la bouche d’aspiration; ceci pourrait provoquer une dépression dans l’installation et entraîner une chute des performances. 46 HYDRO TOP F Douchette manuelle avec flexible démontable Panneau de contrôle il renferme l’afficheur qui visualise les phases de fonctionnement de l’installation, la touche d’Alarme et la touche Quick Start (Hydromassage instantané). Poignée de vidage Permet d’ouvrir et de fermer le montant de vidage Crépine d’aspiration Aspire l’eau dans la baignoire pour la conduire aux Jets d’hydromassage Spot immergé HYDRO TOP 47 F OPÉRATIONS PRÉLIMINAIRES METTRE L’INSTALLATION SOUS TENSION Mettre l’interrupteur général programmé en phase d’installation sur “ON”. L’afficheur se met en STAND-BY et visualise l’heure exacte. 20 : 30 Afficheur en condition de STAND-BY REMPLIR LA BAIGNOIRE Remplir la baignoire jusqu’à ce que le niveau d’eau dépasse les buses. CARACTÉRISTIQUES DU PANNEAU DE CONTRÔLE AVEC AFFICHEUR HYDROMASSAGE Touche marche/arrêt Afficheur Visualise les messages LED Lumineuse Led CLIGNOTANTE : Réception d’impulsions provenant de la télécommande (voir Télécommande) 48 ALARME Touche marche/arrêt Récepteur Infrarouges HYDRO TOP F QUICK START - HYDROMASSAGE INSTANTANÉ Après avoir mis l’installation sous tension, il est possible de lancer la fonction Hydromassage en appuyant sur un seul bouton du panneau de contrôle. La fonction a gardé les dernières valeurs mémorisées (voir HYDROMASSAGE). Pour lancer la fonction Hydromassage, appuyer sur la touche “HYDRO”. Le massage démarre et l’afficheur visualise : 1 5 36° C 20 : 30 HYDROMASSAGE Afficheur Hydromassage en cours L’heure exacte. La température de l’eau dans la baignoire. La durée (TIMER) en minutes de l’hydromassage. L’ hydromassage en cours. 1 5 36° C 20 : 30 HYDROMASSAGE Pour procéder aux réglages, utiliser la télécommande (voir TÉLÉCOMMANDE). Lorsque l’hydromassage est terminé, l’installation s’éteint et l’afficheur se remet en mode STAND-BY. La DÉSINFECTION de l’installation n’a pas lieu (voir DÉSINFECTION). Afficheur Hydromassage en cours 20 : 30 Afficheur en condition de STAND-BY Pour arrêter la fonction avant son temps programmé, appuyer de nouveau sur la touche HYDROMASSAGE ou utiliser la télécommande (voir TÉLÉCOMMANDE : Opérations Préliminaires); l’installation s’arrête et l’afficheur se remet en mode STAND-BY. ALARME Il est possible de mettre l’ALARME en route à partir du panneau de contrôle. L’Alarme bloque l’installation en arrêtant toute fonction en cours et peut également faire retentir une sonnerie, uniquement si cette dernière a été préalablement installée (voir instructions de montage de la baignoire). Pour mettre en route l’Alarme, appuyer sur la touche “ALARM”. A L A R M E Afficheur en mode “ALARME” Pour débloquer l’installation, appuyer sur la touche HYDRO ou sur la touche I/O de la télécommande; l’afficheur se remet en mode STAND-BY et l’installation s’arrête. HYDRO TOP 20 : 30 Afficheur en condition de STAND-BY 49 F CARACTÉRISTIQUES DE LA TÉLÉCOMMANDE Émetteur à infrarouges O/I - Touche marche/arrêt FONCTIONS MISE EN MARCHE - ARRÊT du panneau de contrôle HYDRO : Touche marche/arrêt Fonction hydromassage FONCTIONS ACCESSOIRES RÉGLAGES “▼” et “▲” : Touches de sélection/réglage des fonctions ENTER : Touche confirmant la sélection/réglage des fonctions Ces touches sont présentes uniquement sur certaines versions - voir au bas de la page HEATER : LIGHT : Touche marche/arrêt du spot dans la Touche marche/arrêt du Réchauffeur baignoire INFO : Touche donnant accès aux programmations - Changer l’HEURE sur l’afficheur - Sélectionner LANGUE sur l’afficheur Version TOP HL Versions HYDROMASSAGE TOP TOP 50 TOP L TOP H TOP HL HYDRO TOP F METTRE L’INSTALLATION EN ROUTE À PARTIR DE LA TÉLÉCOMMANDE Pour mettre en marche l’installation, appuyer sur la touche “0/I”; l’afficheur du panneau de contrôle visualise le message de bienvenue pendant quelques secondes. Puis l’afficheur se met en attente READY; l’installation est prête et peut être utilisée (voir HYDROMASSAGE). B I ENVENUE DANS HYDRO TOP 36° C 20 : 30 READY Afficheur sur READY Pour éteindre le panneau, appuyer de nouveau sur la touche “0/I” : si l’installation n’a pas accompli au moins un cycle d’Hydromassage, elle s’éteint et l’afficheur se remet en mode STAND-BY. Si l’installation a accompli au moins un cycle d’Hydromassage, l’afficheur demande si l’on souhaite passer à la DÉSINFECTION (voir DÉSINFECTION). 20 : 30 Afficheur en condition de STAND-BY DEMARRAGE DES I NFECT I ON? L’afficheur visualise la demande de Désinfection ARRÊT AUTOMATIQUE : Si l’on n’a appuyé sur aucune touche du panneau de contrôle ou de la télécommande dans les 30 minutes qui suivent l’allumage ou la dernière fonction (TIMER terminé), l’installation s’arrête et l’afficheur se remet en mode STAND-BY. Le cycle de DÉSINFECTION n’a pas lieu (voir DÉSINFECTION). HYDRO TOP 51 Fonction HYDROMASSAGE F Pendant le fonctionnement de l’hydromassage il est possible d’utiliser les produits phytocosmétiques Teuco. Ne pas utiliser de savons, huiles ou produits moussants. COMMENT FAIRE DÉMARRER L’HYDROMASSAGE Après avoir mis l’installation en marche en appuyant sur la touche “O/I” l’afficheur se met en état d’attente : READY. 36° C 20 : 30 READY Afficheur sur READY Lancer la fonction Hydromassage en appuyant sur la touche “HYDRO” . Le massage démarre et l’afficheur visualise : L’heure exacte. La température de l’eau dans la baignoire. La durée (TIMER) en minutes de l’hydromassage (modifiable). L’Hydromassage en cours. 1 5 36° C 20 : 30 HYDROMASSAGE Afficheur Hydromassage en cours Lorsque l’hydromassage est terminé, l’installation s’éteint et l’afficheur se remet en condition d’attente READY. 36° C 20 : 30 READY Afficheur sur READY Pour arrêter la fonction HYDROMASSAGE avant son temps programmé, appuyer de nouveau sur la touche HYDRO; l’installation s’arrête et l’afficheur se remet en mode READY. LE MASSAGE NE COMMENCE PAS!!! Si l’afficheur visualise “AJOUTER EAU”, remplir la baignoire pour que le massage sélectionné puisse commencer. AJOUTER EAU Afficheur sur DIAGNOSTIC 52 HYDRO TOP F RÉGLAGES DE L’HYDROMASSAGE Lorsque l’HYDROMASSAGE est en marche, il est possible de : - Régler le flux de l’air - Lancer l’effet PULSATOR - Modifier la durée de l’hydromassage Appuyer sur la touche “ENTER” l’afficheur visualise le menu Hydromassage. Utiliser les touches “▲” et “▼” pour choisir la valeur programmée à modifier. 1 5 36° C 20 : 30 HYDROMASSAGE Afficheur Hydromassage en cours Hydromassag e AIR Hydromassag e P ULSA TOR ▼ ▲ N▼ Hydromassag e T I MER 30m▲ Menu Hydromassage AUTOCONFIRMATION : Si l’on ne choisit aucune fonction à l’intérieur du menu Hydromassage dans les 5 secondes qui suivent, l’afficheur visualise à nouveau le massage en cours. RÉGLER LE FLUX DE L’AIR Après avoir choisi AIR dans le menu Hydromassage. Hydromassag e AIR ▼ Menu Hydromassage Appuyer sur la touche “ENTER” l’afficheur visualise le réglage de l’air. Utiliser les touches “▲ et ▼” pour augmenter ou diminuer le flux d’air. Confirmer le réglage en appuyant sur la touche “ENTER” l’afficheur visualise à nouveau le menu Hydromassage. Hydromassag e AIR Afficheur indiquant Réglage de l’AIR Hydromassag e AIR ▼ Menu Hydromassage AUTOCONFIRMATION : Si l’on n’effectue aucune autre opération à l’intérieur du menu de réglage de l’air dans les 5 secondes qui suivent, le réglage est AUTOCONFIRMÉ et l’afficheur se remet sur le menu Hydromassage. HYDRO TOP 53 F LANCER L’EFFET PULSATOR Après avoir sélectionné PULSATOR N dans le menu Hydromassage Hydromassag e P ULSA TOR ▲ N▼ Menu Hydromassage PULSATOR éteint Lancer l’effet PULSATOR en appuyant sur la touche “ENTER” l’afficheur visualise PULSATOR S dans le menu Hydromassage. Hydromassag e P ULSA TOR ▲ S▼ Menu Hydromassage PULSATOR allumé Pour désactiver l’effet PULSATOR du menu Hydromassage, appuyer de nouveau sur la touche “ENTER”. L’afficheur visualise à nouveau PULSATOR N. Hydromassag e P ULSA TOR ▲ N▼ Menu Hydromassage PULSATOR éteint AUTOCONFIRMATION : Si l’on ne choisit aucune fonction à l’intérieur du menu Hydromassage dans les 5 secondes qui suivent, l’afficheur visualise à nouveau le massage en cours. MODIFIER LA DURÉE DE L’HYDROMASSAGE Après avoir choisi TIMER dans le menu Hydromassage Hydromassag e T I MER 30m▲ Menu Hydromassage Appuyer sur la touche “ENTER” l’afficheur visualise le Timer (minuterie). Utiliser les touches “▲ et ▼” pour augmenter ou diminuer la durée de fonctionnement de 1 à 30 minutes. Confirmer le réglage en appuyant sur la touche “ENTER” l’afficheur visualise à nouveau le menu Hydromassage. Hydromassag e T I MER 30m Afficheur indiquant TIMER Hydromassag e T I MER 30m▲ Menu Hydromassage AUTOCONFIRMATION : Si l’on n’effectue aucune autre opération à l’intérieur du menu TIMER dans les 5 secondes qui suivent, le réglage est AUTOCONFIRMÉ et l’afficheur se remet sur le menu Hydromassage. 54 HYDRO TOP Réglages de l’afficheur - INFO F Lorsqu’une fonction est en cours ou lorsque l’installation est en condition d’attente (Afficheur indiquant READY), il est possible de : - Régler l’horloge CLOCK - Modifier la langue affichée Appuyer sur la touche “INFO” l’afficheur visualise le menu Info. Utiliser les touches “▲” et “▼” pour choisir la valeur programmée à modifier. I NFO Hor log e 20 : 30 I NFO Langue 20 : 30 ▲ FR▼ I NFO ¬ 20 : 30 ▼ ▲ Menu Info AUTOCONFIRMATION : Si l’on ne fait aucun choix à l’intérieur du menu Info dans les 5 secondes qui suivent, l’afficheur visualise le menu précédent. HORLOGE Après avoir choisi HEURE dans le menu Info I NFO Hor log e 20 : 30 ▼ Menu Info Appuyer sur la touche “ENTER” l’afficheur visualise le CHANGEMENT de l’HEURE. Utiliser les touches “▲ et ▼” pour modifier l’heure qui est affichée. Confirmer le réglage en appuyant sur la touche “ENTER” l’afficheur visualise le CHANGEMENT des MINUTES. Utiliser les touches “▲ et ▼” pour modifier les minutes qui sont affichées. Confirmer le réglage en appuyant sur la touche “ENTER” l’afficheur visualise le NOUVEAU MODE d’indiquer l’HEURE. Utiliser les touches “▲ et ▼” pour modifier le MODE d’indiquer l’Heure. Confirmer le réglage en appuyant sur la touche “ENTER” l’afficheur visualise à nouveau le menu Info. I NFO 20 : 30 Mod i f . h e ure Afficheur Clock I NFO 20 : 30 Mod i f . M i nu t es Afficheur Clock I NFO 08 : 30P Mod i f . Mode Afficheur Clock I NFO Hor log e 20 : 30 ▼ Menu Info AUTOCONFIRMATION : Si l’on n’effectue aucune autre opération à l’intérieur du changement de l’heure dans les 5 secondes qui suivent, le réglage est AUTOCONFIRMÉ et l’afficheur visualise à nouveau le menu Info. HYDRO TOP 55 F LANGUE Après avoir choisi LANGUE dans le menu Info I NFO Langue 20 : 30 ▲ FR▼ Menu Info Appuyer sur la touche “ENTER” l’afficheur visualise la langue utilisée. Utiliser les touches “▲ et ▼” pour passer à une autre langue. Confirmer le réglage en appuyant sur la touche “ENTER” l’afficheur visualise à nouveau le menu Info. I NFO Langue 20 : 30 FR Afficheur Langue I NFO Langue 20 : 30 ▲ FR▼ Menu Hydromassage AUTOCONFIRMATION : Si l’on n’effectue aucune autre opération à l’intérieur du changement de Langue dans les 5 secondes qui suivent, le réglage est AUTOCONFIRMÉ et l’afficheur visualise à nouveau le menu Info. 56 HYDRO TOP Fonctions SUPPLÉMENTAIRES F Après avoir mis l’installation en marche en appuyant sur la touche “O/I”, il est possible d’utiliser certaines fonctions supplémentaires disponibles uniquement sur certaines versions (voir quelles sont ces versions dans les CARACTÉRISTIQUES DE LA TÉLÉCOMMANDE). SPOT IMMERGÉ - LIGHT Durant la fonction HYDROMASSAGE ou si l’installation est en condition d’attente (afficheur sur READY), il est possible d’allumer le spot dans la baignoire. Allumer le spot en appuyant sur la touche “LIGHT”. Le spot s’allume et l’afficheur signale pendant quelques secondes que l’opération a eu lieu puis visualise le message précédent. 1 5 36° C 20 : 30 ECLA I RAGE ON Éteindre le spot en appuyant sur la touche “LIGHT”. Le spot s’éteint et l’afficheur signale pendant quelques secondes que l’opération a eu lieu puis visualise le message précédent. 1 5 36° C 20 : 30 ECLA I RAGE OFF Afficheur sur Light ON Afficheur sur Light OFF LE SPOT NE S’ALLUME PAS!!! Si l’afficheur visualise “AJOUTER EAU”, remplir la baignoire jusqu’au niveau nécessaire pour que le spot s’allume. AJOUTER EAU Afficheur sur DIAGNOSTIC RÉCHAUFFEUR - HEATER Durant la fonction HYDROMASSAGE, il est possible d’allumer le réchauffeur de l’eau pour maintenir la température de l’eau constante. Allumer le réchauffeur en appuyant sur la touche “HEATER”. Le réchauffeur s’allume et l’afficheur signale pendant quelques secondes que l’opération a eu lieu (#-HEATER ON) puis visualise à nouveau le message précédent. 1 5 36° C# 20 : 30 RECHAUFFEUR ON Afficheur sur Heater ON Éteindre le réchauffeur en appuyant sur la touche “HEATER”. 1 5 36° C 20 : 30 RECHAUFFEUR OFF Le réchauffeur s’éteint et l’afficheur signale pendant quelques secondes que l’opération a eu lieu (HEATER OFF) puis visualise Afficheur sur Heater OFF à nouveau le message précédent. ARRÊT AUTOMATIQUE : Lorsque la fonction en cours s’arrête, le réchauffeur s’éteint automatiquement. HYDRO TOP 57 DÉSINFECTION F Lorsque l’on éteint l’installation en appuyant sur la touche “O/I” après avoir conclu au moins un cycle d’Hydromassage, la baignoire est prête pour le cycle de DÉSINFECTION. Durant la Désinfection, la télécommande et le panneau de contrôle sont désactivés à l’exception des touches “O/I” et “ALARM” grâce auxquelles il est toujours possible d’interrompre la Désinfection. POUR PROCÉDER À UN CYCLE DE DÉSINFECTION Avant de faire démarrer le cycle de Désinfection, SORTIR DE LA BAIGNOIRE. Faire démarrer la Désinfection en appuyant sur la touche “ENTER”. L’afficheur visualise pendant quelques secondes un message d’avertissement. DEMARRAGE DES I NFECT I ON? L’afficheur visualise la demande de Désinfection SORT I R DE LA BA I GNO I RE Pour NE PAS effectuer la Désinfection, appuyer sur la touche “O/I” : le circuit s’arrête et l’afficheur se met en condition de STAND-BY. Puis il visualise la Désinfection; EN DES I NFECT I ON Le cycle de Désinfection effectue automatiquement : - fonctionnement de l’hydromassage pendant 1 minute environ et distribution du produit désinfectant issu de la réserve dans le circuit; - pause de 10 minutes avec action du produit désinfectant dans le circuit; - fermeture de la bouche d’aspiration. Une fois le cycle de désinfection terminé, l’installation s’arrête et l’afficheur se remet en condition de STAND-BY. Vider la baignoire en tournant la poignée de vidage. 20 : 30 Afficheur en condition de STAND-BY LA DÉSINFECTION NE DÉMARRE PAS!!! Si l’afficheur visualise “AJOUTER EAU”, remplir la baignoire jusqu’au niveau nécessaire pour faire démarrer la Désinfection. 58 AJOUTER EAU Afficheur sur DIAGNOSTIC HYDRO TOP F LA DÉSINFECTION NE DÉMARRE PAS!!! Si l’afficheur visualise “AJOUTER DÉSINFECTANT”, remplir le récipient prévu à cet effet pour faire démarrer la Désinfection. AJOUTER ASSA I N I SSANT Afficheur sur DIAGNOSTIC Ôter le bouchon du produit désinfectant en le tournant dans le sens inverse des aiguilles d’une montre. Remplir le récipient de désinfectant de sorte que la fonction puisse démarrer. Refermer le bouchon. Utiliser EXCLUSIVEMENT la solution désinfectante Teuco. POUR NE PAS EFFECTUER LE CYCLE DE DÉSINFECTION Pour NE PAS effectuer la Désinfection, appuyer sur la touche “O/I”. L’installation s’arrête et l’afficheur se met en condition de STAND-BY. Vider la baignoire en tournant la poignée de vidage. DEMARRAGE DES I NFECT I ON? L’afficheur visualise la demande de Désinfection 20 : 30 Afficheur en condition de STAND-BY ARRÊT AUTOMATIQUE : Si l’on n’effectue aucun choix lorsque l’afficheur visualise DÉMARR. DÉSINFECTION? dans les 5 secondes qui suivent, l’installation s’arrête et l’afficheur se met en condition de STAND-BY. Le cycle de DÉSINFECTION n’a pas lieu. HYDRO TOP 59 MAINTENANCE F NETTOYAGE DES SURFACES Voir manuel joint : INSTRUCTIONS POUR LE NETTOYAGE. REMPLACEMENT DES PILES DE LA TÉLÉCOMMANDE Pour remplacer les piles de la télécommande, retirer le couvercle de protection en desserrant les quatre vis. Enlever les piles et les remplacer par deux neuves de type AAA-1,5V. Attention! respecter la polarité en installant les piles dans la télécommande. Reposer le couvercle de protection en faisant attention au joint d’étanchéité. Ne pas abandonner les vieilles piles dans la nature mais les déposer dans les poubelles prévues à cet effet. NETTOYAGE DES BOUCHES DE L’HYDROMASSAGE Démonter la grille de protection à l’aide de la clé prévue à cet effet (2-buse hydromassage). N’utiliser que de l’eau pour le nettoyage. La bille (4-buse hydromassage) peut être démontée en dévissant la buse et en appuyant sur la languette de blocage au point indiqué par la flèche. Pour obtenir un fonctionnement parfait de la buse, remonter la douille (3) en la vissant sans forcer. NETTOYAGE DE LA BOUCHE D’ASPIRATION Retirer la vis (1). Démonter la grille (2) en la tournant dans le sens inverse des aiguilles d’une montre. Dévisser l’obturateur (3). N’utiliser que de l’eau pour le nettoyage. Lors du remontage, s’assurer que l’obturateur (3) est vissé à fond. Remonter la vis de sécurité (1). En cas de panne ou de dysfonctionnement (par ex. : anomalie, remplacement de l’ampoule du spot immergé, pompe, unité de contrôle, unité de puissance ...), s’adresser au Centre d’Assistance Technique Teuco du département (voir liste C.A.T. Teuco). La société ne répond pas des dommages éventuels provoqués par des appareils manipulés de façon impropre. 60 HYDRO TOP F RÉPARATIONS En cas de problèmes, téléphoner directement au Centre d’Assistance Technique Agréé le plus proche (voir liste C.A.T. Teuco). MESSAGES DE DIAGNOSTIC DES PANNES L’appareil est équipé de plusieurs systèmes de sécurité qui contrôlent si l’installation fonctionne correctement. En cas de panne, le système désactive la fonction en cours. L’afficheur visualise le type d’erreur relevée sur la dernière ligne. Certaines de ces anomalies sont réparables sans besoin de faire appel au technicien; le tableau ci-dessous explique comment rétablir la fonction qui s’est bloquée. CAUSES QUE FAIRE AJOUTER EAU L’eau dans la baignoire n’est pas au niveau minimum nécessaire pour le fonctionnement de l’hydromassage. Ajouter de l’eau dans la baignoire de sorte que l’hydromassage puisse fonctionner. AJOUTER DÉSINF. Absence de liquide désinfectant dans la réserve d’où impossibilité de lancer la fonction de désinfection. Ajouter du liquide désinfectant fourni par Teuco dans la réserve prévue à cet effet. SOUS-PRESSION Bouche d’aspiration colmatée. Nettoyer la bouche d’aspiration (voir paragraphe maintenance). ANOMALIE Si l’afficheur visualise des erreurs différentes de celles qui figurent dans le tableau, remettre l’installation À ZÉRO en procédant de la façon suivante : - couper l’alimentation électrique de l’appareil - le remettre sous tension au bout de quelques secondes - relancer la fonction qui s’était bloquée. Si l’anomalie persiste, s’adresser au Centre Assistance Technique Teuco agréé (voir liste C.A.T. Teuco). HYDRO TOP 61 D Sehr geehrte Kundin, sehr geehrter Kunde, wir danken Ihnen für das Vertrauen, das Sie uns mit der Wahl einer TEUCO Hydromassage Top bewiesen haben. Durch die kombinierte Wirkung von Wasser und Luft schenken Sie Ihrem Geist und Körper ein angenehmes Gefühl wohltuender Entspannung. Zahlreiche Zusatzfunktionen machen das Erlebnis der TEUCO Hydromassage noch komfortabler, sicherer und gesünder. INHALTSVERZEICHNIS ALLGEMEINE INFORMATIONEN . . . . . . . . . . . . . . . . . . . . . . . . . . . . . . . . . . . . . . . . . . . . . . . . . . . . . . . . . .63 - WAS IST HYDROMASSAGE - DIE GESUNDHEITSFÖRDERNDEN WIRKUNGEN DER HYDROMASSAGE - QUALITÄT VON TEUCO - TIPPS FÜR DEN RICHTIGEN GEBRAUCH DER HYDROMASSAGE - SICHERHEIT UND HYGIENE DER TEUCO HYDROMASSAGE - HINWEISE BEDIENUNGSANLEITUNGEN - KOMPONENTEN DER HYDROMASSAGE . . . . . . . . . . . . . . . . . . . . . . . . . . . . . . . . . . . . . . . . . . . . . . . . . . . .66 - ERSTE SCHRITTE . . . . . . . . . . . . . . . . . . . . . . . . . . . . . . . . . . . . . . . . . . . . . . . . . . . . . . . . . . . . . . . . . . .68 - EIGENSCHAFTEN DES SCHALTDISPLAYS (QUICK START - ALARM) - EIGENSCHAFTEN DER FERNBEDIENUNG . . . . . . . . . . . . . . . . . . . . . . . . . . . . . . . . . . . . . . . . . . . . . . . . . . . .70 - FUNKTION HYDROMASSAGE . . . . . . . . . . . . . . . . . . . . . . . . . . . . . . . . . . . . . . . . . . . . . . . . . . . . . . . . . . . . . .72 - EINSTELLUNGEN DES DISPLAYS - INFO (UHR - SPRACHE) . . . . . . . . . . . . . . . . . . . . . . . . . . . . . . . . . . . . . . . .75 - ZUSATZFUNKTIONEN (BELEUCHTUNG - ZUSATZHEIZUNG) . . . . . . . . . . . . . . . . . . . . . . . . . . . . . . . . . . . . . . . .77 - DESINFEKTION . . . . . . . . . . . . . . . . . . . . . . . . . . . . . . . . . . . . . . . . . . . . . . . . . . . . . . . . . . . . . . . . . . . . . . . .78 WARTUNG . . . . . . . . . . . . . . . . . . . . . . . . . . . . . . . . . . . . . . . . . . . . . . . . . . . . . . . . . . . . . . . . . . . . . . . .80 - REINIGUNG DER OBERFLÄCHEN (Siehe beiliegende REINIGUNGSANLEITUNGEN) - AUSTAUSCH DER BATTERIEN FÜR DIE FERNBEDIENUNG - REINIGUNG DER HYDROMASSAGEDÜSEN - REINIGUNG DER ANSAUGÖFFNUNG REPARATUR . . . . . . . . . . . . . . . . . . . . . . . . . . . . . . . . . . . . . . . . . . . . . . . . . . . . . . . . . . . . . . . . . . . . . . .81 - STÖRUNGSMELDUNGEN BEDIENUNGS- UND WARTUNGSANLEITUNG Lesen Sie dieses Handbuch vor Inbetriebnahme der Hydromassage von Teuco aufmerksam durch, da es Hinweise und Anleitungen für einen sicheren Gebrauch der Hydromassage beinhaltet. Bewahren Sie diese Bedienungs- und Wartungsanleitung sorgfältig auf, da sie wichtiger Bestandteil der Anlage ist und als Nachschlagewerk dient. Teuco Guzzini Spa behält sich das Recht vor, ohne Vorankündigung alle für notwendig erachteten Änderungen vorzunehmen, ohne dass sich daraus Ersatzansprüche ableiten lassen. 62 HYDRO TOP Allgemeine Informationen D WAS IST HYDROMASSAGE Es handelt sich um eine alte Lehre verbunden mit moderner Technik: Die mechanische Bewegung von Wasser steigert unser Wohlgefühl. Mit einer kombinierten Luft-Wassermassage, zwei lebenswichtigen Elementen, wird eine Vielzahl positiver Wirkungen auf unseren Körper ausgeübt. DIE GESUNDHEITSFÖRDERNDEN WIRKUNGEN DER HYDROMASSAGE TEUCO Hydromassagen bieten entspannende Momente, einmalige Gelegenheiten zum Auftanken neuer Lebensfrische und Wohlbefinden. Die auf das psychophysische Wohlbefinden orientierten Funktionsprinzipien der TEUCO Whirlpools sollen die Stresserscheinungen der modernen Gesellschaft abbauen und dem Menschen zu neuer Lebenskraft verhelfen. Für einen gesunden und schönen Körper trägt die TEUCO Hydromassage in entscheidendem Maß bei: sie entspannt die Haut und erhöht ihre Widerstandskraft gegen äußere Einflüsse, außerdem stärkt sie die Muskeln. Die Wassermassage fördert ebenfalls den Blut- und Lymphkreislauf sowie den Stoffwechsel; sie ist daher zur Behandlung rheumatischer Leiden und Verletzungen geeignet. Die Wirkung der Hydromassage kann durch Verwendung spezieller Kräuterzusätze von Teuco weiterhin gesteigert werden: natürliche, duftende Heilkräuteressenzen in 250 ml-Flacons, die für jeweils 5 Anwendungen reichen und im Wasser gelöst werden; die Kräuteressenzen sind bei den TEUCO Vertretungen erhältlich. Sie können diese Essenzen auch direkt auf die gewünschten Körperstellen auftragen und mit einem Frottierhandschuh gleichmäßig einreiben. Die Essenzen entspannen die Haut, stimulieren die Erneuerung der Körperzellen, spenden Feuchtigkeit, straffen die Gewebe und sind zudem schlankheitsfördernd. Die Funktion “Pulsator-Massage” stellt ein weiteres Plus der Hydromassage Top dar. Unter Nutzung der unterschiedlichen Luftmenge im Wasserstrahl übt die “Pulsator-Massage” einen angenehmen, rhythmisch abgestuften Druck mit unmittelbar spürbarem hautspannendem Effekt aus. QUALITÄT VON TEUCO TEUCO legt größten Wert auf die eingesetzten Materialien, wie es die ständigen technologischen Innovationen an Kunststoffen und Bauteilen bezeugen. Sämtliche Whirlpools sind aus gegossenem Sanitär-Acryl: Der Stahlrahmen ist mit Schwingschutzfüßen ausgeführt; die Leitungen halten höchsten Beanspruchungen stand. Die TEUCO Whirlpools weisen das Prüfzeichen auf und erfüllen also bei Planung und Herstellung die wesentlichen Anforderungen der europäischen Richtlinien 73/23 - 93/68 hinsichtlich der elektrischen Sicherheit und 89/336 - 92/31 93/68 in puncto elektromagnetischer Verträglichkeit. Die Sicherheit der Hydromassage-Systeme ist zudem auf der Grundlage der geltenden europäischen Normen durch das italienische Qualitätszeichen zertifiziert. HYDRO TOP 63 D TIPPS FÜR DEN RICHTIGEN GEBRAUCH DER HYDROMASSAGE Wegen des entspannenden und belebenden Effektes der Hydromassage bietet sich die Anwendung nach dem Sport an, nicht jedoch sofort nach den Mahlzeiten, sondern erst nach einer Verdauungspause. Zur Erzielung optimaler Massageergebnisse sollte die Wassertemperatur konstant bei etwa 37°C liegen. Die Dauer der Hydromassage sollte höchstens wenige Minuten betragen, besonders bei den ersten Anwendungen. Die Dauer der folgenden Anwendungen kann schrittweise bis auf 15/20 Minuten erhöht werden, wenn der gesundheitliche Zustand des Benutzers dies zulässt. SICHERHEIT UND HYGIENE DER TEUCO HYDROMASSAGE Alle TEUCO Whirlpools garantieren höchste Qualitätsstandards, Funktionalität, Sicherheit und Hygiene. Hydro Clean System Dieses patentierte TEUCO System schließt automatisch Massagedüsen und Ansaugöffnungen und schützt die Anlage vor Seife oder anderen Rückständen, wenn der Whirlpool für ein normales Bad benutzt wird. Rest-Wasser-Entleerung Diese technische Funktionslösung sorgt für die Abführung von Wasserrückständen in der Anlage, schützt vor Kalkablagerungen und lässt den Whirlpool nach dem Gebrauch hygienisch sauber. Automatisches Desinfektionsprogramm Vom elektronischen Schaltdisplay aus wird ein desinfizierendes Mittel ins Badewasser eingelassen, das Anlage, Pumpe, Massagedüsen und Wanne desinfiziert. Schutzabschaltung Sofortiges Abschalten der Hydromassage bei Verstopfung von Ansaugöffnung und Düsen durch Körperteile oder Gegenstände. Füllstandmesser Startet die Hydromassage erst, nachdem das Wasser in der Wanne den erforderlichen Füllstand erreicht hat. 64 HYDRO TOP D HINWEISE Gehen Sie bei der Installation der Anlage genau nach der beigefügten Anleitung vor. Eine nicht vorschriftsmäßige Installation kann zu Sachschäden und Verletzungen von Personen oder Tieren führen. Der Hersteller übernimmt keine Haftung für Schäden, die auf eine nicht sachgerechte Installation zurückzuführen sind. Beachten Sie bei Benutzung der Anlage die Hinweise der vorliegenden Bedienungsanleitung. Dieses Produkt darf nicht für bestimmungsfremde Zwecke verwendet werden. Der Hersteller haftet nicht für Schäden, die auf einen bestimmungsfremden Gebrauch zurückgehen. Dieses Produkt ist nur für den Gebrauch durch Personen bestimmt. Kinder und behinderte Menschen dürfen die Hydromassage nur im Beisein einer Hilfsperson anwenden. Ältere oder herzkranke Menschen, Personen mit hohem Blutdruck und schwangere Frauen müssen vor der Benutzung der Hydromassage ihren Arzt konsultieren. Der Hydromassage sollten die bei den autorisierten Händlern und Kundendienststellen erhältlichen TEUCO Kräuteressenzen zugegeben werden. Vor allen Dingen dürfen während der Hydromassage kein Badeschaum oder andere schaumbildende Mittel verwendet werden; bei einem normalen Bad sind diese Mittel natürlich weiterhin möglich. Achten Sie während des Massagebetriebs darauf, dass die Ansaugöffnung nicht durch Gegenstände oder Körperteile verdeckt wird und Sie nicht mit den Haaren in die Nähe der Öffnung geraten. Die Luftansaugschlitze (zwischen Fußboden und Wannenwand bzw. die Öffnungen des Inspektionspaneels bei der Einbauversion) dürfen nicht verdeckt sein. Wird der Whirlpool nicht benutzt, so unterbrechen Sie die Stromversorgung am vorgeschalteten Schutzschalter. Bei Betriebsstörungen wenden Sie sich bitte ausschließlich an autorisiertes Fachpersonal, damit Ihr Garantieanspruch erhalten bleibt. Der Hersteller haftet nicht für Schäden, die auf unsachgemäß ausgeführte Wartungs- oder Reparaturarbeiten zurückgehen. HYDRO TOP 65 Bedienungsanleitungen D DIE KOMPONENTEN DER HYDROMASSAGE Armaturen Fernbedienung Wasserdichte und schwimmende Ausführung. Stöpsel Behälter für Desinfektionsmittel. HYDROMASSAGEDÜSEN Sie können die Düsen nach Ihren Anforderungen beliebig schwenken. Indem Sie die Düsen drehen, können Sie außerdem ihren Wasserdurchfluss einstellen. Richten Sie die Hydromassagedüsen aber nicht gegen die Ansaugöffnung, um einen Unterdruck in der Anlage mit daraus folgendem Leistungsabfall zu vermeiden. 66 HYDRO TOP D Handbrause mit ausziehbarem Schlauch Schaltdisplay Mit Anzeige des Anlagebetriebs und der Tasten Alarm sowie Quick Start (Direktstart der Hydromassage). Griff der Ablaufgarnitur Öffnet und schließt den Ablauf Ansaugöffnung Saugt das Wasser im Whirlpool an und fördert es an die Hydromassagedüsen Unterwasserscheinwerfer HYDRO TOP 67 D ERSTE ARBEITSSCHRITTE EINSCHALTEN DER STROMVERSORGUNG Schalten Sie den bei Installation der Anlage eingebauten Hauptschalter auf “ON”. Das Display geht auf STANDBY und zeigt die genaue Uhrzeit an. 20 : 30 Display auf STANDBY FÜLLEN DES WHIRLPOOLS Lassen Sie Wasser in den Whirlpool einlaufen, bis die Massagedüsen bedeckt sind. EIGENSCHAFTEN DES SCHALTDISPLAYS HYDROMASSAGE EIN/AUS Taste Display Anzeige der Meldungen LED Led BLINKEND: Empfang der Signale von der Fernbedienung (siehe Fernbedienung) 68 ALARM EIN/AUS Taste IR-Empfänger HYDRO TOP D QUICK START - DIREKTSTART DER HYDROMASSAGE Nachdem Sie die Stromversorgung eingeschaltet haben, können Sie vom Schaltdisplay aus mit nur eine Taste die Funktion Hydromassage direkt starten. Die Funktion übernimmt die zuletzt gespeicherten Einstellungen (siehe HYDROMASSAGE). Drücken Sie zum Start der Funktion Hydromassage die Taste “HYDRO”. Die Hydromassage startet und auf dem Display erscheint: 1 5 36° C 20 : 30 HYDROMASSAGE Anzeige Hydromassage im Gang Die genaue Uhrzeit. Die Wassertemperatur im Whirlpool. Die Dauer (TIMER) der Hydromassage in Minuten. Die ablaufende Hydromassage. 1 5 36° C 20 : 30 HYDROMASSAGE Für die Einstellungen verwenden Sie die Fernbedienung (siehe FERNBEDIENUNG). Nach der Hydromassage schaltet sich die Anlage ab und das Display kehrt in den Zustand STANDBY zurück. Es erfolgt keine DESINFEKTION der Anlage (siehe DESINFEKTION). Anzeige Hydromassage im Gang 20 : 30 Display auf STANDBY Drücken Sie zum vorzeitigen Beenden der Funktion erneut die Taste HYDROMASSAGE oder verwenden Sie hierfür die Fernbedienung (siehe FERNBEDIENUNG: Erste Schritte); die Anlage schaltet sich ab und das Display kehrt in den Zustand STANDBY zurück. ALARM Sie können vom Schaltdisplay aus den ALARM aktivieren. Der Alarm schaltet die Anlage und sämtliche ablaufenden Funktionen ab. Er kann zudem eine Klingel einschalten, falls diese zuvor installiert worden ist (siehe Montageanleitungen des Whirlpools). Zum Aktivieren des Alarms drücken Sie die Taste “ALARM”. A L A R M Display auf “ALARM” Um die Anlage wieder freizugeben, drücken Sie die Taste HYDRO bzw. I/O auf der Fernbedienung; das Display kehrt in den Zustand STANDBY zurück und die Anlage schaltet sich ab. HYDRO TOP 20 : 30 Display auf STANDBY 69 D EIGENSCHAFTEN DER FERNBEDIENUNG IR-Sender O/I - EIN/AUS Taste FUNKTIONEN EINSCHALTEN - AUSSCHALTEN des Schaltdisplays HYDRO: EIN/AUS Taste Funktion Hydromassage EINSTELLUNGEN “▼” und “▲”: Tasten zum Abrufen/Einstellen der Funktionen ENTER: Taste zum Übernehmen der abgerufenen/eingestellten Funktionen Diese Tasten sind nur in einigen Versionen vorhanden - siehe Seitenfuß ZUSATZFUNKTIONEN LIGHT: EIN/AUS Taste Unterwasserscheinwerfer HEATER: EIN/AUS Taste der Zusatzheizung Info: Taste zum Abrufen der Einstellungen - Änderung der UHRZEIT am Display - Auswahl der SPRACHE am Display System TOP HL Systeme Hydromassage TOP TOP 70 TOP L TOP H TOP HL HYDRO TOP D EINSCHALTEN DER ANLAGE ÜBER DIE FERNBEDIENUNG Zum Einschalten der Anlage drücken Sie die Taste “0/I”; auf dem Schaltdisplay erscheint kurz die Begrüßungsmeldung. Anschließend stellt sich das Display in den Wartezustand READY: Die Anlage befindet sich nun in Betriebsbereitschaft (siehe HYDROMASSAGE). W I LKOMMEN I N HYDRO TOP 36° C 20 : 30 READY Display auf READY Zum Abschalten des Schaltdisplays drücken Sie erneut die Taste “0/I”: 20 : 30 wurde nicht wenigstens ein Hydromassage-Zyklus durchgeführt, schaltet sich die Anlage ab und das Display kehrt in den Zustand STANDBY zurück. Display auf STANDBY DES I NFEKT I ON STARTEN? Wurde wenigstens ein Hydromassage-Zyklus durchgeführt, erscheint auf dem Display die Aufforderung zur DESINFEKTION Auf dem Display erscheint die Aufforderung zur Desinfektion (siehe DESINFEKTION). SELBSTABSCHALTUNG: Falls Sie innerhalb von 30 Minuten nach der Einschaltung bzw. der zuletzt aktivierten Funktion (TIMER abgelaufen) keine Taste weder am Schaltdisplay noch auf der Fernbedienung drücken, schaltet sich die Anlage ab und das Display kehrt in den Zustand STANDBY zurück. Die DESINFEKTION der Anlage wird nicht ausgeführt (siehe DESINFEKTION). HYDRO TOP 71 Funktion HYDROMASSAGE D Sie können während des Betriebs der Hydromassage die TEUCO Kräuteressenzen verwenden. Benutzen Sie keine Seife, Badeöle oder andere schäumende Produkte. EINSCHALTEN DER HYDROMASSAGE FUNKTION Nachdem Sie die Anlage mit der Taste “O/I” eingeschaltet haben, geht das Display in den Wartezustand READY. 36° C 20 : 30 READY Display auf READY Starten Sie die Funktion Hydromassage mit der Taste “HYDRO”. Die Hydromassage startet und auf dem Display erscheint: Die genaue Uhrzeit. Die Wassertemperatur im Whirlpool. Die Dauer (TIMER) der Hydromassage in Minuten (einstellbar). Die ablaufende Hydromassage. 1 5 36° C 20 : 30 HYDROMASSAGE Anzeige Hydromassage im Gang Nach der Hydromassage schaltet sich die Anlage ab und das Display kehrt in den Zustand READY zurück. 36° C 20 : 30 READY Display auf READY Drücken Sie zum vorzeitigen Beenden der Funktion HYDROMASSAGE erneut die Taste HYDRO: Die Anlage schaltet sich ab und das Display kehrt in den Zustand READY zurück. DIE MASSAGE STARTET NICHT!!! Falls das Display “WASSER EINFÜLLEN” anzeigt, lassen Sie Wasser bis zum Einschalten der abgerufenen Massage einlaufen. 72 WASSER E I NFULLEN Display auf DIAGNOSE HYDRO TOP D EINSTELLUNGEN DER HYDROMASSAGE Während der Funktion HYDROMASSAGE können Sie: - Die Luftbeimischung einstellen - Die PULSATOR-MASSAGE einschalten - Die Dauer der Hydromassage einstellen Drücken Sie die Taste “ENTER” auf dem Display erscheint das Hydromassage Menü. Rufen Sie mit den Tasten “▲” und “▼” die zu ändernde Einstellung ab. 30 36° C 20 : 30 HYDROMASSAGE Anzeige Hydromassage im Gang Hydromassag e LUF T Hydromassag e PULSA TOR ▼ ▲ N▼ Hydromassag e T I MER 30m▲ Menü Hydromassage SELBSTBESTÄTIGUNG: Falls Sie innerhalb von 5 Sekunden im Menü Hydromassage keine Auswahl vornehmen, kehrt das Display erneut zur Anzeige der ablaufenden Massage zurück. DIE LUFTBEIMISCHUNG EINSTELLEN Wählen Sie die Option LUFT im Menü Hydromassage aus. Hydromassag e LUF T ▼ Menü Hydromassage Drücken Sie die Taste “ENTER” das Display zeigt die Luftbeimischung an. Drücken Sie die Tasten “▲ und ▼”, um die Luftbeimischung zu erhöhen bzw. zu verringern. Übernehmen Sie die Einstellung mit der Taste “ENTER” auf dem Display erscheint erneut das Hydromassage Menü. Hydromassag e LUF T Anzeige LUFTBEIMISCHUNG Hydromassag e LUF T ▼ Menü Hydromassage SELBSTBESTÄTIGUNG: Falls Sie innerhalb von 5 Sekunden im Menü Luftbeimischung keine weiteren Arbeitsgänge vornehmen, erfolgt die SELBSTBESTÄTIGUNG dieser Einstellung und auf dem Display erscheint erneut das Hydromassage Menü. HYDRO TOP 73 D DIE PULSATOR-MASSAGE EINSCHALTEN Wählen Sie die Option PULSATOR N im Menü Hydromassage aus. Hydromassag e PULSA TOR ▲ N▼ Menü Hydromassage mit abgeschalteter PULSATOR-MASSAGE Starten Sie die PULSATOR-MASSAGE mit der Taste “ENTER” auf dem Display erscheint PULSATOR S im Menü Hydromassage. Hydromassag e PULSA TOR ▲ S▼ Menü Hydromassage mit eingeschalter PULSATOR-MASSAGE Zum Abschalten der PULSATOR-MASSAGE vom Menü Hydromassage aus drücken Sie erneut die Taste “ENTER”. Hydromassag e PULSA TOR ▲ N▼ Menü Hydromassage mit abgeschalteter PULSATOR-MASSAGE SELBSTBESTÄTIGUNG: Falls Sie innerhalb von 5 Sekunden im Menü Hydromassage keine Auswahl vornehmen, kehrt das Display erneut zur Anzeige der ablaufenden Massage zurück. DIE DAUER DER HYDROMASSAGE EINSTELLEN Wählen Sie die Option TIMER im Menü Hydromassage aus. Hydromassag e T I MER 30m▲ Menü Hydromassage Drücken Sie die Taste “ENTER” auf dem Display erscheint der Timer. Drücken Sie die Tasten “▲ und ▼”, um die Betriebsdauer zu erhöhen bzw. zu verringern (1 - 30 Minuten). Übernehmen Sie die Einstellung mit der Taste “ENTER” auf dem Display erscheint erneut das Hydromassage Menü. Hydromassag e T I MER 30m Anzeige TIMER Hydromassag e T I MER 30m▲ Menü Hydromassage SELBSTBESTÄTIGUNG: Falls Sie innerhalb von 5 Sekunden im Menü TIMER keine weiteren Arbeitsgänge vornehmen, erfolgt die SELBSTBESTÄTIGUNG dieser Einstellung und auf dem Display erscheint erneut das Hydromassage Menü. 74 HYDRO TOP Einstellungen des Displays - INFO D Beim Einschalten einer Funktion bzw. mit Anlage im Wartezustand (Display auf READY) können Sie: - Die UHR einstellen - Die Sprache ändern Drücken Sie die Taste “INFO” auf dem Display erscheint das Menü Info. Rufen Sie mit den Tasten “▲” und “▼” die zu ändernde Einstellung ab. I NFO Uhr ze i t 20 : 30 I NFO Sprach e 20 : 30 ▲ DE ▼ I NFO ¬ 20 : 30 ▼ ▲ Menü Info SELBSTBESTÄTIGUNG: Falls Sie innerhalb von 5 Sekunden im Menü Info keine weiteren Arbeitsgänge vornehmen, kehrt das Display erneut zur Anzeige des vorigen Menüs zurück. UHR Wählen Sie die Option UHR im Menü Info aus. I NFO Uhr ze i t 20 : 30 ▼ Menü Info Drücken Sie die Taste “ENTER” auf dem Display erscheint STUNDE einstellen. Drücken Sie die Tasten “▲ und ▼”, um die angezeigte Stunde einzustellen. Übernehmen Sie die Einstellung mit der Taste “ENTER” auf dem Display erscheint MINUTEN einstellen. Drücken Sie die Tasten “▲ und ▼”, um die angezeigten Minuten einzustellen. Übernehmen Sie die Einstellung mit der Taste “ENTER” auf dem Display erscheint UHRMODUS einstellen. Drücken Sie die Tasten “▲ und ▼”, um den UHRMODUS einzustellen. Übernehmen Sie die Einstellung mit der Taste “ENTER” auf dem Display erscheint erneut das Menü Info. I NFO 20 : 30 And er . St und en Anzeige Uhr I NFO 20 : 30 And er . M i nu t en Anzeige Uhr I NFO 08 : 30P And er . Modus Anzeige Uhr I NFO Uhr ze i t 20 : 30 ▼ Menü Info SELBSTBESTÄTIGUNG: Falls Sie innerhalb von 5 Sekunden bei der Uhreinstellung keine weiteren Arbeitsgänge vornehmen, erfolgt die SELBSTBESTÄTIGUNG der Einstellung und das Display kehrt erneut zur Anzeige des Menüs Info zurück. HYDRO TOP 75 D SPRACHE Wählen Sie die Option SPRACHE im Menü Info aus. I NFO Sprach e 20 : 30 ▲ DE ▼ Menü Info Drücken Sie die Taste “ENTER” auf dem Display erscheint die verwendete Sprache. Drücken Sie die Tasten “▲ und ▼”, um die gewünschte Sprache einzustellen. Übernehmen Sie die Einstellung mit der Taste “ENTER” auf dem Display erscheint erneut das Menü Info. I NFO Sprach e 20 : 30 DE Anzeige Sprache I NFO Sprach e 20 : 30 ▲ DE ▼ Menü Info SELBSTBESTÄTIGUNG: Falls Sie innerhalb von 5 Sekunden bei der Spracheinstellung keine weiteren Arbeitsgänge vornehmen, erfolgt die SELBSTBESTÄTIGUNG der Einstellung und das Display kehrt erneut zur Anzeige des Menüs Info zurück. 76 HYDRO TOP ZUSATZFUNKTIONEN D Nachdem Sie die Anlage mit der Taste “O/I” eingeschaltet haben, können Sie bei bestimmten Versionen einige Zusatzfunktionen aufrufen (siehe Versionen unter EIGENSCHAFTEN DER FERNBEDIENUNG). UNTERWASSERSCHEINWERFER - LIGHT Während der Funktion HYDROMASSAGE bzw. bei Anlage im Wartezustand (Display auf READY) können Sie den Whirlpool mit dem Unterwasserscheinwerfer beleuchten. Schalten Sie den Unterwasserscheinwerfer mit der Taste “LIGHT” ein. Der Unterwasserscheinwerfer schaltet sich ein, das Display blendet kurz die Einschaltmeldung ein und kehrt danach auf die vorherige Anzeige zurück. 1 5 36° C 20 : 30 L I GHT AN Schalten Sie den Unterwasserscheinwerfer mit der Taste “LIGHT” ab. Der Unterwasserscheinwerfer schaltet sich ab, das Display blendet kurz die Abschaltmeldung ein und kehrt danach auf die vorherige Anzeige zurück. 1 5 36° C 20 : 30 L I GHT AUF Anzeige Licht EIN Anzeige Licht AUS DER UNTERWASSERSCHEINWERFER SCHALTET SICH NICHT EIN!!! Falls das Display “WASSER EINFÜLLEN” anzeigt, lassen Sie Wasser bis zum Einschalten des Unterwasserscheinwerfers einlaufen. WASSER E I NFULLEN Display auf DIAGNOSE ZUSATZHEIZUNG Während der Funktion HYDROMASSAGE können Sie die Zusatzheizung im Whirlpool einschalten, um die Wassertemperatur konstant zu halten. Schalten Sie die Zusatzheizung mit der Taste “HEATER” ein. Die Zusatzheizung schaltet sich ein, das Display blendet kurz die Einschaltmeldung (#-HEATER ON) ein und kehrt danach auf die vorherige Anzeige zurück. 1 5 36° C# 20 : 30 HE I ZER AN Schalten Sie die Zusatzheizung mit der Taste “HEATER” ab. Die Zusatzheizung schaltet sich ab, das Display blendet kurz die Abschaltmeldung (HEATER OFF) ein und kehrt danach auf die vorherige Anzeige zurück. 1 5 36° C 20 : 30 HE I ZER AUF Anzeige Zusatzheizung EIN Anzeige Zusatzheizung AUS SELBSTABSCHALTUNG: Beim Beenden der ablaufenden Funktion schaltet sich ebenfalls die Zusatzheizung ab. HYDRO TOP 77 DESINFEKTION D Wenn Sie die Anlage mit der Taste “O/I” nach mindestens einem Hydromassage-Zyklus abschalten, richtet sich der Whirlpool auf die DESINFEKTION ein. Bei der Desinfektion werden Fernbedienung und Schaltdisplay deaktiviert mit Ausnahme der Tasten “O/I” und “ALARM”, mit denen Sie die Desinfektion jederzeit beenden können. DIE DESINFEKTION AUSFÜHREN STEIGEN SIE AUS DEM WHIRLPOOL, bevor Sie die Desinfektion starten. Starten Sie die Desinfektion mit der Taste “ENTER”. Das Display blendet kurz eine Warnmeldung ein. DES I NFEKT I ON STARTEN? Auf dem Display erscheint die Aufforderung zur Desinfektion WANNE VERLASSEN Drücken Sie zum ÜBERSPRINGEN der Desinfektion die Taste “O/I”, die Anlage schaltet sich ab und das Display kehrt in den Zustand STANDBY zurück. Anschließend erscheint die Anzeige der ablaufenden Desinfektion. DES I NFEKT I ON Der automatische Desinfektionszyklus läuft wie folgt ab: - ca. 1 Minute langer Betrieb der Hydromassage mit Einlass des Desinfektionsmittels aus dem Behälter; - 10 Minuten Pause zur Wirkung des Desinfektionsmittels in der Anlage; - Schließen der Ansaugöffnung. Nach der Desinfektion schaltet sich die Anlage ab und das Display kehrt in den Zustand STANDBY zurück. 20 : 30 Display auf STANDBY Entleeren Sie den Whirlpool, indem Sie den Griff der Ablaufgarnitur drehen. DIE DESINFEKTION STARTET NICHT!!! Falls das Display “WASSER EINFÜLLEN” anzeigt, lassen Sie Wasser bis zum Einschalten der Desinfektion einlaufen. WASSER E I NFULLEN Display auf DIAGNOSE 78 HYDRO TOP D DIE DESINFEKTION STARTET NICHT!!! Falls das Display “DESINFEKTIONSMITTEL EINFÜLLEN” anzeigt, WASSER füllen Sie den entsprechenden Behälter bis zum Einschalten DES I NFEKT I ONSM . der Desinfektion. Display auf DIAGNOSE Drehen Sie den Stöpsel des Desinfektionsmittels gegen den Uhrzeigersinn ab. Füllen Sie den Behälter mit Desinfektionsmittel bis zum Einschalten der Funktion auf. Schrauben Sie den vorab abgenommenen Stöpsel wieder auf. Verwenden Sie AUSSCHLIESSLICH die von TEUCO gestellte Desinfektionslösung. DIE DESINFEKTION ÜBERSPRINGEN Drücken Sie zum ÜBERSPRINGEN der Desinfektion die Taste “O/I”. Die Anlage schaltet sich ab und das Display kehrt in den Zustand STANDBY zurück. Entleeren Sie den Whirlpool, indem Sie den Griff der Ablaufgarnitur drehen. DES I NFEKT I ON STARTEN? Auf dem Display erscheint die Aufforderung zur Desinfektion 20 : 30 Display auf STANDBY SELBSTABSCHALTUNG: Falls Sie innerhalb von 5 Sekunden bei der Anzeige DESINFEKTION STARTEN? keine Auswahl vornehmen, schaltet sich die Anlage ab und das Display kehrt in den Zustand STANDBY zurück. Die DESINFEKTION der Anlage wird nicht ausgeführt. HYDRO TOP 79 WARTUNG D REINIGUNG DER OBERFLÄCHEN Siehe beiliegende REINIGUNGSANLEITUNGEN. AUSTAUSCH DER BATTERIEN FÜR DIE FERNBEDIENUNG Nehmen Sie hierzu den Schutzdeckel durch Abdrehen der vier Schrauben ab. Entfernen Sie die entladenen Batterien und tauschen Sie diese durch 2 Akkus der Größe AAA-1,5V aus. Legen Sie die neuen Batterien mit der richtigen Polarität in die Fernbedienung. Bringen Sie den Schutzdeckel wieder an und achten Sie hierbei auf das hermetische Abschließen der Dichtung. Entsorgen Sie Altbatterien nur in den entsprechenden Containern. REINIGUNG DER HYDROMASSAGEDÜSEN Das Gitter mit Hilfe des vorgesehenen Schlüssels (2-Hydromassagedüsen) abnehmen. Verwenden Sie zur Reinigung ausschließlich Wasser. Sie können die Kugel (4-Hydromassagedüsen) zerlegen, indem Sie den Düsenkopf abdrehen und die Feststellzunge an der vom Pfeil gezeigten Stelle zusammendrücken. Drehen Sie den Ring (3) nicht allzu fest wieder auf, um die Funktionstüchtigkeit der Hydromassagedüsen nicht zu beeinträchtigen. REINIGUNG DER ANSAUGÖFFNUNG Die Schraube (1) ausdrehen. Das Gitter (2) durch Drehen gegen den Uhrzeigersinn abnehmen. Drehen Sie das Verschlussstück (3) ab. Verwenden Sie zur Reinigung ausschließlich Wasser. Achten Sie beim Wiedereinbau darauf, das Verschlussstück (3) bis zum Anschlag festzudrehen. Setzen Sie die Sicherheitsschraube wieder ein (1). Wenden Sie sich bei Betriebsstörungen (z.B.: Ausfall, Austausch der Lampe im Unterwasserscheinwerfer, Pumpe, Steuereinheit, Leistungseinheit ...) bitte ausschließlich an das technische TEUCO Servicezentrum in ihrem Gebiet (siehe TEUCO C.A.T. Verzeichnis). Der Hersteller haftet nicht für Schäden, die auf unsachgemäß durchgeführte Wartungs- oder Reparaturarbeiten zurückzuführen sind. 80 HYDRO TOP D REPARATUR Melden Sie Betriebsstörungen telefonisch direkt dem nächstgelegenen technischen Servicezentrum (siehe TEUCO C.A.T. Verzeichnis). STÖRUNGSMELDUNGEN Die Anlage ist mit verschiedenen Sicherheitssystemen zur Überwachung der fehlerfreien Funktion ausgestattet. Im Störungsfall schaltet das System die jeweils ablaufende Funktion aus. Auf der letzten Displayzeile erscheint der aufgetretene Fehler. Einige dieser Störungen können Sie selbst ohne Hilfe des Installateurs beheben; in nachstehender Tabelle finden Sie die Arbeitsschritte, mit denen Sie die gestörte Funktion wiederherstellen können. STÖRUNG URSACHE ABHILFE WASSER EINFÜLLEN Das Wasser hat den Mindestfüllstand zum Einschalten der Hydromassage nicht erreicht. Füllen Sie soviel Wasser in den Whirlpool ein, bis sich die Hydromassage einschaltet. DESINF. EINFÜLLEN Es fehlt Desinfektionsmittel zum Starten der Desinfektion. Füllen Sie den entsprechenden Behälter mit dem Desinfektionsmittel von TEUCO auf. UNTERDRUCK Die Ansaugöffnung ist verstopft. Reinigen Sie die Ansaugöffnung (Lesen Sie den Abschnitt Wartung). Sollten auf dem Display von dieser Tabelle abweichende Fehler erscheinen, müssen Sie die Anlage folgendermaßen ZURÜCKSETZEN: - unterbrechen Sie die Stromversorgung - schalten Sie die Versorgung nach einigen Sekunden wieder ein - führen Sie die gestörte Funktion erneut aus. Sollte die Störung weiterhin bestehen, wenden Sie sich an das autorisierte TEUCO Servicezentrum (siehe TEUCO C.A.T. Verzeichnis). HYDRO TOP 81 Teuco Guzzini S.p.A. Via Virgilio Guzzini,2 62010 Montelupone (MC) - Italy - Tel.0733/2201 Fax 0733/220391 - NUMERO VERDE 800-270270 United Kingdom: Teuco U.K. Ltd. 160 City Road London EC1V 2NP Tel. 44 (0) 207 608 3090 - Fax + 44 (0) 207 608 3089 www.teuco.co.uk E-mail: [email protected] France: Teuco France 151 Avenue du Maine 75014 Paris Téléphone 033_1_58142070 Télécopie 033_1_45452260 www.teuco.fr [email protected] España: Teuco España s.l. C/ Granada, 45 08740 Sant Andreu de la Barca Barcelona Tel. 0034_902_8898.03 - Fax 0034_902_8898.04 www.teuco.es [email protected] 67000944000 (2005.00) Russia: “TEUCO OOO” Via Bolshaja Cherkizovskaja, 24a 107553 Moscow