Download Manual
Transcript
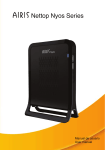
NETTOP NYOS SERIES Manual de Usuario User's Manual Manuel d'Utilisation Índice / Index / Indice ............................................................................ 1 Manual de Usuario (Español) ........................................................... 3 Antes de comenzar ............................................................................ 4 Asegúrese de tenerlo todo ................................................................ 5 Familiarícese con el equipo ................................................................ 6 Uso del equipo .................................................................................... 7 Solución de problemas ....................................................................... 8 User's Manual (English) .................................................................... 10 Before starting ....................................................................................11 Make sure you have everything ....................................................... 12 Get to know the computer ............................................................... 13 Use of the computer .......................................................................... 14 Problem solving .............................................................................. 15 Manuel d'Utilisation (Français) ............................................................... 17 Avant de commencer ........................................................................... 18 Contenu de la boite ............................................................................. 19 Connaissance du produit ................................................................... 20 Utilisation de lordinateur ................................................................... 21 Résolution des problèmes ............................................................... 22 WEEE/CE ....................................................................................... 23 No tire nunca este equipo electrónico con los desechos domésticos. Pida información a su ayuntamiento sobre las posibilidades de una correcta eliminación que no arruine el medio ambiente. Respete siempre las normas vigentes en la materia. Los transgresores están sujetos a las sanciones y a las medidas que establezca la ley. The symbol of the crossed out wheeled bin indicates that the product (electrical and electronic equipment) should not be placed in municipal waste. Please check local regulations for disposal of electronic products. Ne jetez jamais cet équipement électronique avec les déchets domestiques ou sur la voie publique. Renseignez vous auprès de votre collectivité locale pour le recyclage ou la collecte dans un organisme approprié afin de respecter l'environnement. Respectez toujours les normes en vigueur, les transgresseurs sont soumis aux sanctions et mesures prévues par la loi. -1- ES NETTOP NYOS SERIES Manual de Usuario -2- -3- ES NETTOP NYOS SERIES Manual de Usuario -2- -3- Antes de comenzar Asegúrese de tenerlo todo Debe tener en cuenta estos consejos importantes para un correcto uso del equipo: Cuando reciba el equipo, retire el embalaje con cuidado y compruebe si tiene todos los artículos listados a continuación. En caso de que no sea así, consulte con el fabricante o su distribuidor. Para evitar el posible calentamiento del equipo, asegúrese de no bloquear las aberturas de ventilación. No use el dispositivo sobre superficies desiguales o inestables para evitar caídas. No coloque o deje caer sobre el equipo elementos pesados y no ejerza fuertes presiones sobre el mismo. No exponga el dispositivo a la luz directa del sol, a condiciones climatológicas adversas, temperaturas extremas, cambios bruscos de temperatura o humedad Evite la influencia de campos magnéticos sobre el equipo. No coloque cerca del equipo fuentes de calor o frío como pueden ser calefactores, bombas de calor y/o aire acondicionado No utilice productos químicos para la limpieza del equipo. Evite, en la medida de lo posible, la exposición a polvo o suciedad (puede afectar al normal funcionamiento de los elementos de ventilación/refrigeración) No manipule el interior del equipo ya que podría ocasionar daños irreparables. Consulte con el servicio técnico para que dicha manipulación la realice un técnico cualificado. Si decide transportar el equipo, embálelo de forma apropiada para evitar daños durante el desplazamiento. -4- Ordenador Caja de accesorios con: - Soporte para uso del equipo en posición vertical - Guía rápida de uso - Adaptador de corriente - Cable de alimentación - Hoja de garantía - Driver CD con controladores y manual de usuario - CD/DVD para instalación/recuperación del sistema operativo (sólo si adquirió esta opción en el momento de la compra del producto) Una vez comprobado que tiene todo el material necesario, continúe leyendo el resto del manual para conocer más a fondo su equipo. -5- ES Antes de comenzar Asegúrese de tenerlo todo Debe tener en cuenta estos consejos importantes para un correcto uso del equipo: Cuando reciba el equipo, retire el embalaje con cuidado y compruebe si tiene todos los artículos listados a continuación. En caso de que no sea así, consulte con el fabricante o su distribuidor. Para evitar el posible calentamiento del equipo, asegúrese de no bloquear las aberturas de ventilación. No use el dispositivo sobre superficies desiguales o inestables para evitar caídas. No coloque o deje caer sobre el equipo elementos pesados y no ejerza fuertes presiones sobre el mismo. No exponga el dispositivo a la luz directa del sol, a condiciones climatológicas adversas, temperaturas extremas, cambios bruscos de temperatura o humedad Evite la influencia de campos magnéticos sobre el equipo. No coloque cerca del equipo fuentes de calor o frío como pueden ser calefactores, bombas de calor y/o aire acondicionado No utilice productos químicos para la limpieza del equipo. Evite, en la medida de lo posible, la exposición a polvo o suciedad (puede afectar al normal funcionamiento de los elementos de ventilación/refrigeración) No manipule el interior del equipo ya que podría ocasionar daños irreparables. Consulte con el servicio técnico para que dicha manipulación la realice un técnico cualificado. Si decide transportar el equipo, embálelo de forma apropiada para evitar daños durante el desplazamiento. -4- Ordenador Caja de accesorios con: - Soporte para uso del equipo en posición vertical - Guía rápida de uso - Adaptador de corriente - Cable de alimentación - Hoja de garantía - Driver CD con controladores y manual de usuario - CD/DVD para instalación/recuperación del sistema operativo (sólo si adquirió esta opción en el momento de la compra del producto) Una vez comprobado que tiene todo el material necesario, continúe leyendo el resto del manual para conocer más a fondo su equipo. -5- ES Uso del equipo Familiarícese con equipo 1 4 5 6 2 7 8 9 10 11 3 1. 2. 3. 4. 5. 6. 7. 8. 9. 10. 11. Botón de Encendido Conectores USB Auriculares - Micrófono Puerto Serie (COM) Salida VGA Conectores USB Conector Teclado (PS/2) Conector Ratón (PS/2) Conectores USB Conector Red (RJ-45) Conectores Audio Modelo Nyos 100 1 5 2 3 4 6 7 8 9 10 11 12 1. 2. 3. 4. 5. 6. 7. 8. 9. 10. 11. 12. Botón de Encendido Lector de Tarjetas Conectores USB - IEEE 1394 Auriculares - Micrófono Salida HDMI Salida VGA Conector e-SATA Conectores USB Conector S-Video Conector Red (RJ-45) Conector Antena (TV) Conectores Audio Modelo Nyos 200 ES Para poder usar el equipo, necesitará conectar éste mediante la fuente de alimentación incluida a una toma de pared convencional. Una vez completado este paso podrá usar el botón de encendido para iniciar el equipo por primera vez. Durante el proceso de inicio, el equipo iniciará una prueba automática para verificar que los componentes que lo forman funcionan de forma correcta (POST) Si algún elemento no funcionase como debiera, sería avisado en este momento. A continuación se iniciará la carga del sistema operativo, o bien deberá instalarlo si este elemento no fue adquirido en el momento de la compra. Los LEDs indicadores del equipo le ayudarán a conocer el estado en el que se encuentra su equipo (encendido, apagado, disco duro con actividad) Indicador de encendido (LED1) à Con el equipo encendido este LED estará encendido de forma fija; si el equipo está suspendido lo hará de forma intermitente; si el equipo está apagado o en hibernación permanecerá apagado. Indicador de actividad de disco duro (LED2) à Siempre que el disco duro del equipo presente actividad este indicador brillará de forma más o menos constante (en función de la intensidad de uso del disco) Indicador de actividad de red (LED3) à Muestra la actividad de red Indicador de actividad de lector de tarjetas (LED4, sólo disponible según versiones) à Encargado de indicar la transferencia de datos desde/hasta una tarjeta de memoria conectada al equipo. El Driver CD que acompaña al equipo incluye todos los controladores y aplicaciones necesarias para utilizar el producto adquirido. Tenga en cuenta que es necesario, además del producto, una licencia de un sistema operativo compatible si ésta no se adquirió en el momento de la compra. En el caso de que surja algún problema durante el uso del CD o con cualquier otra aplicación, consulte con el fabricante/proveedor de ésta o busque información al respecto de la incidencia en las páginas de soporte. La imagen final del producto puede variar en función de la versión y/o configuración entregada. Para más información, consulte con su distribuidor o fabricante. -6- -7- Uso del equipo Familiarícese con equipo 1 4 5 6 2 7 8 9 10 11 3 1. 2. 3. 4. 5. 6. 7. 8. 9. 10. 11. Botón de Encendido Conectores USB Auriculares - Micrófono Puerto Serie (COM) Salida VGA Conectores USB Conector Teclado (PS/2) Conector Ratón (PS/2) Conectores USB Conector Red (RJ-45) Conectores Audio Modelo Nyos 100 1 5 2 3 4 6 7 8 9 10 11 12 1. 2. 3. 4. 5. 6. 7. 8. 9. 10. 11. 12. Botón de Encendido Lector de Tarjetas Conectores USB - IEEE 1394 Auriculares - Micrófono Salida HDMI Salida VGA Conector e-SATA Conectores USB Conector S-Video Conector Red (RJ-45) Conector Antena (TV) Conectores Audio Modelo Nyos 200 ES Para poder usar el equipo, necesitará conectar éste mediante la fuente de alimentación incluida a una toma de pared convencional. Una vez completado este paso podrá usar el botón de encendido para iniciar el equipo por primera vez. Durante el proceso de inicio, el equipo iniciará una prueba automática para verificar que los componentes que lo forman funcionan de forma correcta (POST) Si algún elemento no funcionase como debiera, sería avisado en este momento. A continuación se iniciará la carga del sistema operativo, o bien deberá instalarlo si este elemento no fue adquirido en el momento de la compra. Los LEDs indicadores del equipo le ayudarán a conocer el estado en el que se encuentra su equipo (encendido, apagado, disco duro con actividad) Indicador de encendido (LED1) à Con el equipo encendido este LED estará encendido de forma fija; si el equipo está suspendido lo hará de forma intermitente; si el equipo está apagado o en hibernación permanecerá apagado. Indicador de actividad de disco duro (LED2) à Siempre que el disco duro del equipo presente actividad este indicador brillará de forma más o menos constante (en función de la intensidad de uso del disco) Indicador de actividad de red (LED3) à Muestra la actividad de red Indicador de actividad de lector de tarjetas (LED4, sólo disponible según versiones) à Encargado de indicar la transferencia de datos desde/hasta una tarjeta de memoria conectada al equipo. El Driver CD que acompaña al equipo incluye todos los controladores y aplicaciones necesarias para utilizar el producto adquirido. Tenga en cuenta que es necesario, además del producto, una licencia de un sistema operativo compatible si ésta no se adquirió en el momento de la compra. En el caso de que surja algún problema durante el uso del CD o con cualquier otra aplicación, consulte con el fabricante/proveedor de ésta o busque información al respecto de la incidencia en las páginas de soporte. La imagen final del producto puede variar en función de la versión y/o configuración entregada. Para más información, consulte con su distribuidor o fabricante. -6- -7- Solución de problemas ES Su equipo ha sido configurado y probado en nuestras instalaciones para evitar que pueda presentar ningún problema. La información contenida en esta sección le ayudará a identificar si realmente se trata de un problema técnico que deba ser reportado al servicio técnico. Apague el equipo Compruebe que el equipo se encuentra correctamente conectado tanto a la toma de alimentación como a los periféricos imprescindibles para su funcionamiento (únicamente teclado, ratón y monitor) Compruebe a su vez la conexión a la toma de alimentación del monitor y el cable de video que une a éste con el equipo Encienda su equipo prestando especial atención a los mensajes que puedan aparecer durante el arranque (podrían ser de gran utilidad para un técnico cualificado) Intente iniciar sesión en el sistema operativo, teniendo en cuenta que el problema podría estar causado por algún controlador, servicio o aplicación de éste. Es necesario descartar esta posible causa llevando a cabo las siguientes pruebas: - Iniciar sesión en modo seguro - Iniciar sesión con la última configuración buena conocida - Reinstalar el sistema operativo y los controladores para descartar al 100% un problema de software (salvo excepciones, no cubiertos por la garantía) Si el problema persiste, póngase en contacto con el servicio técnico según los datos incluidos en las condiciones de la garantía teniendo en cuenta que necesitarán la siguiente información: Nombre del producto Número de serie Fecha y lugar de compra Mensaje de error recibido así como escenario en el que se produce Pruebas realizadas Versiones tanto del sistema operativo como de los drivers y aplicaciones utilizadas -8- -9- Solución de problemas ES Su equipo ha sido configurado y probado en nuestras instalaciones para evitar que pueda presentar ningún problema. La información contenida en esta sección le ayudará a identificar si realmente se trata de un problema técnico que deba ser reportado al servicio técnico. Apague el equipo Compruebe que el equipo se encuentra correctamente conectado tanto a la toma de alimentación como a los periféricos imprescindibles para su funcionamiento (únicamente teclado, ratón y monitor) Compruebe a su vez la conexión a la toma de alimentación del monitor y el cable de video que une a éste con el equipo Encienda su equipo prestando especial atención a los mensajes que puedan aparecer durante el arranque (podrían ser de gran utilidad para un técnico cualificado) Intente iniciar sesión en el sistema operativo, teniendo en cuenta que el problema podría estar causado por algún controlador, servicio o aplicación de éste. Es necesario descartar esta posible causa llevando a cabo las siguientes pruebas: - Iniciar sesión en modo seguro - Iniciar sesión con la última configuración buena conocida - Reinstalar el sistema operativo y los controladores para descartar al 100% un problema de software (salvo excepciones, no cubiertos por la garantía) Si el problema persiste, póngase en contacto con el servicio técnico según los datos incluidos en las condiciones de la garantía teniendo en cuenta que necesitarán la siguiente información: Nombre del producto Número de serie Fecha y lugar de compra Mensaje de error recibido así como escenario en el que se produce Pruebas realizadas Versiones tanto del sistema operativo como de los drivers y aplicaciones utilizadas -8- -9- Before starting Please take into account the following recommendations to use the computer correctly: NETTOP NYOS SERIES To avoid possible overheating of the computer, please make sure that the ventilation grids have not been blocked. Do not use on uneven or unstable surfaces to avoid tipping over. Do not put anything or let anything fall on the computer or place any heavy weight on top of the same. Do not expose to direct sunlight, adverse weather situations, extreme temperatures, abrupt changes of temperature or humidity... Avoid the influence of magnetic fields on the computer. Do not put the computer near sources of heat or cold such as heaters, heat pumps and/or air conditioning units Do not use chemical products to clean the computer. Avoid exposure to dust or dirt as much as possible (it may affect the normal operation of the ventilation/cooling elements) Do not touch the inside of the computer as irreparable damage may be caused. Contact the technical service for a qualified technician to service the computer. If you decide to move the computer, pack it appropriately in order to avoid any damage during transport. User's Manual - 10 - - 11 - EN Before starting Please take into account the following recommendations to use the computer correctly: NETTOP NYOS SERIES To avoid possible overheating of the computer, please make sure that the ventilation grids have not been blocked. Do not use on uneven or unstable surfaces to avoid tipping over. Do not put anything or let anything fall on the computer or place any heavy weight on top of the same. Do not expose to direct sunlight, adverse weather situations, extreme temperatures, abrupt changes of temperature or humidity... Avoid the influence of magnetic fields on the computer. Do not put the computer near sources of heat or cold such as heaters, heat pumps and/or air conditioning units Do not use chemical products to clean the computer. Avoid exposure to dust or dirt as much as possible (it may affect the normal operation of the ventilation/cooling elements) Do not touch the inside of the computer as irreparable damage may be caused. Contact the technical service for a qualified technician to service the computer. If you decide to move the computer, pack it appropriately in order to avoid any damage during transport. User's Manual - 10 - - 11 - EN Make sure you have everything When you receive the computer, open up the packaging carefully and make sure you have all the items listed below. If anything is missing, check with the manufacturer or distributor. Computer Accessories box with: - Support to use the computer in a vertical position - Quick User guide - Current adaptor - Power supply cable - Warranty sheet - CD Driver with controllers and user guide - CD/DVD for the installation/recovery of the operating system (only if this option was chosen at the moment of purchase of the product) Get to know the computer 1 4 5 6 2 7 8 9 10 11 3 1. 2. 3. 4. 5. 6. 7. 8. 9. 10. 11. ON button USB connectors Earphones - Microphone Serial port (COM) VGA output USB connectors Keyboard connector (PS/2) Mouse connector (PS/2) USB connectors LAN connector (RJ-45) Audio connectors Model Nyos 100 Once you have checked that you have everything, continue reading the user guide in order to learn more about your computer. 1 5 2 7 3 4 6 8 9 10 11 12 1. 2. 3. 4. 5. 6. 7. 8. 9. 10. 11. 12. ON button Card reader USB connectors - IEEE 1394 Earphones - Microphone HDMI output VGA output e-SATA connector USB connector S-Video output LAN connector (RJ-45) TV-Tuner connector (TV) Audio connectors Model Nyos 200 The final image of the product may vary depending on the version and/or configuration provided. For further information, please contact your distributor or manufacturer. - 12 - - 13 - EN Make sure you have everything When you receive the computer, open up the packaging carefully and make sure you have all the items listed below. If anything is missing, check with the manufacturer or distributor. Computer Accessories box with: - Support to use the computer in a vertical position - Quick User guide - Current adaptor - Power supply cable - Warranty sheet - CD Driver with controllers and user guide - CD/DVD for the installation/recovery of the operating system (only if this option was chosen at the moment of purchase of the product) Get to know the computer 1 4 5 6 2 7 8 9 10 11 3 1. 2. 3. 4. 5. 6. 7. 8. 9. 10. 11. ON button USB connectors Earphones - Microphone Serial port (COM) VGA output USB connectors Keyboard connector (PS/2) Mouse connector (PS/2) USB connectors LAN connector (RJ-45) Audio connectors Model Nyos 100 Once you have checked that you have everything, continue reading the user guide in order to learn more about your computer. 1 5 2 7 3 4 6 8 9 10 11 12 1. 2. 3. 4. 5. 6. 7. 8. 9. 10. 11. 12. ON button Card reader USB connectors - IEEE 1394 Earphones - Microphone HDMI output VGA output e-SATA connector USB connector S-Video output LAN connector (RJ-45) TV-Tuner connector (TV) Audio connectors Model Nyos 200 The final image of the product may vary depending on the version and/or configuration provided. For further information, please contact your distributor or manufacturer. - 12 - - 13 - EN Use of the computer Problem solving In order to use the computer, this should be connected to a conventional socket by means of the power supply cable provided. Once this is carried out, you may press the ON button to start the computer for the first time. Your computer has been configured and tested at our installations in order to avoid any possible problems. The information contained in this section will help you to identify if in fact it is a technical problem that requires reporting to the technical service. During the starting up process, the computer will go through an automatic checking process to verify that all the components are operating properly (POST). If any component does not work as it should you will be advised immediately. After this the operating system start-up, or this will have to be installed if you did not purchase the same when buying the computer. The LED lights on the computer will help you to know what is actually happening at any moment of time (switched on, switched off, hard disk active) Switched on light (LED1) à When the computer is switched on this LED will be alight; if the computer is suspended the LED will flash; if the computer is off or hibernated the LED light will be off. Hard disk activity indicator (LED2) à When the computer hard disk is active the light will shine more or less constantly (depending upon the level of use of the disk) Network activity indicator (LED3) à Shows the network activity Card reader activity indicator (LED4 is only available, depending upon the versions) à This indicates data transfer from/to a memory card connected to the computer. The Driver CD that comes with the computer contains all the controllers and applications necessary for using the product purchased. Please take into account that, in addition to the product, a compatible operating system licence is necessary, if this was not bought at the moment of the purchase. If any problem were to arise during the use of the CD or with any other application, please contact the manufacturer/supplier of the same or search for information with respect to the incident in the support pages. - 14 - Switch off the computer Check that the computer is properly connected to the both the mains electricity supply and also the peripheries that are absolutely necessary for using it (only the keyboard, the mouse and the monitor) At the same time check the monitor mains electricity supply plug and also the video cable connecting it to the computer. Switch on the computer paying special attention to any messages that may appear during the start up (these could be of great use to a qualified technician). Try to start a session with the operating system, taking into account that the problem could be caused by a controller or a service or application of the same. The following tests should be carried out in order to rule out this possible cause: - Start the session in the safe mode - Start the session with the last known good configuration feature - Reinstall the operating system and the controllers in order to rule out software problems 100% (with a few exceptions, not covered by the warranty) If the problem persists, please contact the technical service in accordance with the details included in the warranty conditions, taking into account that the following information will be required: Name of the product Serial number Date and place of purchase Error message received and also the scenario in which it was produced Test carried out The versions of the operating system and also the drivers/applications used - 15 - EN Use of the computer Problem solving In order to use the computer, this should be connected to a conventional socket by means of the power supply cable provided. Once this is carried out, you may press the ON button to start the computer for the first time. Your computer has been configured and tested at our installations in order to avoid any possible problems. The information contained in this section will help you to identify if in fact it is a technical problem that requires reporting to the technical service. During the starting up process, the computer will go through an automatic checking process to verify that all the components are operating properly (POST). If any component does not work as it should you will be advised immediately. After this the operating system start-up, or this will have to be installed if you did not purchase the same when buying the computer. The LED lights on the computer will help you to know what is actually happening at any moment of time (switched on, switched off, hard disk active) Switched on light (LED1) à When the computer is switched on this LED will be alight; if the computer is suspended the LED will flash; if the computer is off or hibernated the LED light will be off. Hard disk activity indicator (LED2) à When the computer hard disk is active the light will shine more or less constantly (depending upon the level of use of the disk) Network activity indicator (LED3) à Shows the network activity Card reader activity indicator (LED4 is only available, depending upon the versions) à This indicates data transfer from/to a memory card connected to the computer. The Driver CD that comes with the computer contains all the controllers and applications necessary for using the product purchased. Please take into account that, in addition to the product, a compatible operating system licence is necessary, if this was not bought at the moment of the purchase. If any problem were to arise during the use of the CD or with any other application, please contact the manufacturer/supplier of the same or search for information with respect to the incident in the support pages. - 14 - Switch off the computer Check that the computer is properly connected to the both the mains electricity supply and also the peripheries that are absolutely necessary for using it (only the keyboard, the mouse and the monitor) At the same time check the monitor mains electricity supply plug and also the video cable connecting it to the computer. Switch on the computer paying special attention to any messages that may appear during the start up (these could be of great use to a qualified technician). Try to start a session with the operating system, taking into account that the problem could be caused by a controller or a service or application of the same. The following tests should be carried out in order to rule out this possible cause: - Start the session in the safe mode - Start the session with the last known good configuration feature - Reinstall the operating system and the controllers in order to rule out software problems 100% (with a few exceptions, not covered by the warranty) If the problem persists, please contact the technical service in accordance with the details included in the warranty conditions, taking into account that the following information will be required: Name of the product Serial number Date and place of purchase Error message received and also the scenario in which it was produced Test carried out The versions of the operating system and also the drivers/applications used - 15 - EN NETTOP NYOS SERIES FR Manuel d'Utilisation - 16 - - 17 - NETTOP NYOS SERIES FR Manuel d'Utilisation - 16 - - 17 - Avant de commencer Contenu de la boite Prenez soin des recommandations suivantes avant de commencer pour bien utiliser votre ordinateur Quand vous déballez l'ordinateur, vérifiez que vous avez bien tous les éléments, en cas de manqué, contactez votre revendeur. Ordinateur Accessoires : - Support pour placer l'ordinateur en position verticale - Guide de démarrage rapide - Adaptateur secteur - Câble d'alimentation - Carte de garantie - CD de Pilotes et manuel - CD d'installation du système (Seulement si l'option a été sélectionnée à l'achat) Pour éviter une éventuelle surchauffe, assurez-vous que les grilles de ventilation ne soient pas obstruées. Ne pas utiliser sur une surface instable. Ne rien poser de lourd ou ne rien laisser tomber sur l'ordinateur. Ne pas exposer à la lumière directe du soleil, à la chaleur, ou à l'humidité, évitez les projections d'eau ... Evitez le contact et la proximité d'objets magnétiques. Ne placez pas l'ordinateur à proximité d'une source de chaleur (chauffage feu cuisinière, éclairage, ) N'utilisez pas de produits chimiques pour nettoyer l'ordinateur. Evitez l'exposition à la poussière et aux saletés (Cela pourrait dégrader l'effet de la ventilation et des éléments de refroidissement) Ne pas démonter l'ordinateur, cela pourrait causer des dommages irréparables. Contactez le service technique compétent pour intervenir à l'intérieur de l'ordinateur. Pour déplacer l'ordinateur , protégez le pour éviter les dégâts. - 18 - Une fois le contenu vérifié, continuez la lecture pour apprendre à vous servir du produit. - 19 - FR Avant de commencer Contenu de la boite Prenez soin des recommandations suivantes avant de commencer pour bien utiliser votre ordinateur Quand vous déballez l'ordinateur, vérifiez que vous avez bien tous les éléments, en cas de manqué, contactez votre revendeur. Ordinateur Accessoires : - Support pour placer l'ordinateur en position verticale - Guide de démarrage rapide - Adaptateur secteur - Câble d'alimentation - Carte de garantie - CD de Pilotes et manuel - CD d'installation du système (Seulement si l'option a été sélectionnée à l'achat) Pour éviter une éventuelle surchauffe, assurez-vous que les grilles de ventilation ne soient pas obstruées. Ne pas utiliser sur une surface instable. Ne rien poser de lourd ou ne rien laisser tomber sur l'ordinateur. Ne pas exposer à la lumière directe du soleil, à la chaleur, ou à l'humidité, évitez les projections d'eau ... Evitez le contact et la proximité d'objets magnétiques. Ne placez pas l'ordinateur à proximité d'une source de chaleur (chauffage feu cuisinière, éclairage, ) N'utilisez pas de produits chimiques pour nettoyer l'ordinateur. Evitez l'exposition à la poussière et aux saletés (Cela pourrait dégrader l'effet de la ventilation et des éléments de refroidissement) Ne pas démonter l'ordinateur, cela pourrait causer des dommages irréparables. Contactez le service technique compétent pour intervenir à l'intérieur de l'ordinateur. Pour déplacer l'ordinateur , protégez le pour éviter les dégâts. - 18 - Une fois le contenu vérifié, continuez la lecture pour apprendre à vous servir du produit. - 19 - FR Utilisation de l'ordinateur Connaissance du produit Avant de commencer, assurez vous bien que l'ordinateur est branché au secteur avec l'alimentation fournie dans la boite. Ensuite, appuyez sur le bouton marche pour démarrer l'ordinateur. 1 4 5 6 2 7 8 9 10 11 3 1. 2. 3. 4. 5. 6. 7. 8. 9. 10. 11. Bouton Marche / Arrêt Ports USB Prises Micro/Ecouteurs Port COM Connecteur VGA Ports USB Port PS/2 Clavier Port PS/2 Souris Ports USB Prise Réseau (RJ-45) Prises Micro/Ecouteurs Nyos 100 1 5 2 7 3 4 6 8 9 10 11 12 1. 2. 3. 4. 5. 6. 7. 8. 9. 10. 11. 12. Bouton Marche / Arrêt Lecteur de cartes 4 en 1 Ports USB - IEEE 1394 Prises Micro/Ecouteurs Connecteur HDMI Connecteur VGA Connecteur eSATA Ports USB Prise S-Vidéo Prise Réseau (RJ-45) Prise Antenne (TV) Prises Micro/Ecouteurs/Entrée Ligne Pendant la mise en route, l'ordinateur vérifie un a un les composants intégrés afin de certifier leur bon fonctionnement (POST). Si un des composants venait à être défectueux, vous serez averti immédiatement. Après ceci le système d'exploitation se lance (uniquement si vous avez acheté le produit installé). Sinon vous serez obligé de l'installer. Les voyants sur l'ordinateur vous aident à savoir à n'importe quel moment l'état et les traitements de votre ordinateur (éteint, allumé, disque dur en lecture/écriture) Voyant marche (LED1) à Allumé quand l'ordinateur est en marche ; clignotant quand l'ordinateur est en veille ; si l'ordinateur est éteint ou en hibernation le voyant est éteint. Voyant du disque dur (LED2) à Quand le disque dur travaille le voyant s'allume et s'éteint (cela dépends du niveau d'utilisation du disque dur.) Voyant du réseau (LED3) à désigne l'activité du réseau Oyant du lecteur de cartes (LED4 présent que sur certains modèles) à Indique le transfert de donnée du lecteur de cartes. Le CD fournit avec l'ordinateur comprends tous les pilotes pour l'installation des périphériques. En plus du produit une License pour le système d'exploitation est nécessaire. Nyos 200 Le design final du produit peut être légèrement différent des illustrations. Pour plus d'information, consultez votre revendeur. - 20 - - 21 - FR Utilisation de l'ordinateur Connaissance du produit Avant de commencer, assurez vous bien que l'ordinateur est branché au secteur avec l'alimentation fournie dans la boite. Ensuite, appuyez sur le bouton marche pour démarrer l'ordinateur. 1 4 5 6 2 7 8 9 10 11 3 1. 2. 3. 4. 5. 6. 7. 8. 9. 10. 11. Bouton Marche / Arrêt Ports USB Prises Micro/Ecouteurs Port COM Connecteur VGA Ports USB Port PS/2 Clavier Port PS/2 Souris Ports USB Prise Réseau (RJ-45) Prises Micro/Ecouteurs Nyos 100 1 5 2 7 3 4 6 8 9 10 11 12 1. 2. 3. 4. 5. 6. 7. 8. 9. 10. 11. 12. Bouton Marche / Arrêt Lecteur de cartes 4 en 1 Ports USB - IEEE 1394 Prises Micro/Ecouteurs Connecteur HDMI Connecteur VGA Connecteur eSATA Ports USB Prise S-Vidéo Prise Réseau (RJ-45) Prise Antenne (TV) Prises Micro/Ecouteurs/Entrée Ligne Pendant la mise en route, l'ordinateur vérifie un a un les composants intégrés afin de certifier leur bon fonctionnement (POST). Si un des composants venait à être défectueux, vous serez averti immédiatement. Après ceci le système d'exploitation se lance (uniquement si vous avez acheté le produit installé). Sinon vous serez obligé de l'installer. Les voyants sur l'ordinateur vous aident à savoir à n'importe quel moment l'état et les traitements de votre ordinateur (éteint, allumé, disque dur en lecture/écriture) Voyant marche (LED1) à Allumé quand l'ordinateur est en marche ; clignotant quand l'ordinateur est en veille ; si l'ordinateur est éteint ou en hibernation le voyant est éteint. Voyant du disque dur (LED2) à Quand le disque dur travaille le voyant s'allume et s'éteint (cela dépends du niveau d'utilisation du disque dur.) Voyant du réseau (LED3) à désigne l'activité du réseau Oyant du lecteur de cartes (LED4 présent que sur certains modèles) à Indique le transfert de donnée du lecteur de cartes. Le CD fournit avec l'ordinateur comprends tous les pilotes pour l'installation des périphériques. En plus du produit une License pour le système d'exploitation est nécessaire. Nyos 200 Le design final du produit peut être légèrement différent des illustrations. Pour plus d'information, consultez votre revendeur. - 20 - - 21 - FR Résolution des problèmes Votre ordinateur a été testé et vérifié lors de sa fabrication et de son assemblage.. Les informations ci-dessous vont vous servir à vérifier si en fait il y a un problème technique qui nécessite de contacter notre service technique. Eteignez votre ordinateur Vérifiez que votre ordinateur soit bien branché au secteur avec uniquement les périphériques nécessaires (Clavier, souris et écran) Vérifiez aussi l'alimentation du moniteur et son câblage. Mettez en route et portez attention aux messages qui s'afficheraient au démarrage (Ils pourraient très utiles aux techniciens du support). Essayez de démarrer une session du système en prenant en considération que le problème pourrait venir d'un programme, d'un pilote, ou d'un périphérique. Les tests suivants doivent être tentés dans l'ordre pour isoler le problème : - Démarrez en mode sans échec. - Démarrez la dernière bonne configuration connue. - Réinstallez le système et les pilotes dans ce cas vous aurez isolé les éventuels problèmes logiciels. (qui ne sont pas couverts par la garantie) Si le problème persiste, prenez contact avec le service technique et munissez vous des informations suivantes : Nom du produit. Numéro de Série. Date d'achat et enseigne. Message d'erreur et processus à suivre pour reproduire la panne. Tests réalisés. Versions du système d'exploitation et des pilotes installés. - 22 - WEEE/CE DECLARACIÓN DE CONFORMIDAD DECLARATION OF CONFORMITY Nombre del suministrador / Supplier´s name: INFINITY SYSTEM S.L. Dirección / Address: A2, Km 48,5, PARCELA 12 B, P. I. DE CABANILLAS (GUADALAJARA) Teléfono / Telephone: 949 349 100 Fax: 949 349 173 C.I.F.: B-81477507 - Declara, bajo su responsabilidad que el equipo / Declare, Under their responsability tha the device: Descripción del aparato / Device description: Equipo Nettop Intel Atom Marca / Brand: AIRIS Modelo / Model name: AIRIS NETTOP Fabricante / Manufacturer: INFINITY SYSTEM S.L. PAÍS / Country: ESPAÑA Ref. Modelo / Model reference: Nyos 100 (NET100) - Es conforme con las especificaciones técnicas que le son de aplicación en el día de la fecha según la Directiva 99/5 del Parlamento Europeo y del Consejo de 9 de marzo de 1999, transpuesta a la legislación española mediante el RD 1890/2000, de 20 de noviembre de 2000 y en particular con / It´s agreed that the specifications are acording to the Europe Parlament directive 99/5 and with the borrad of 9th March of 1999, acording with the Spanish law RD 1890/2000, on 20th November of 2000 and in particular with: Series específicas de ensayos de radio recogidos en la norma / Specific series of radio testing acording to the rules: Relatives to the Directive 2004/108/EC amended by 89/336/EEC and its amendments 92/31/EEC and 93/68/EEC: EN 55024:1998+A1:2001+A2:2003 EN 61000-4 SERIES EN 55022:2006, Class B EN 61000-3-2: 2006 EN 61000-3-3:1995+A1:2001+A2:2005 En Guadalajara, a 17 de febrero de 2009 D. Antonio González Fernández Director de Calidad - 23 - Résolution des problèmes Votre ordinateur a été testé et vérifié lors de sa fabrication et de son assemblage.. Les informations ci-dessous vont vous servir à vérifier si en fait il y a un problème technique qui nécessite de contacter notre service technique. Eteignez votre ordinateur Vérifiez que votre ordinateur soit bien branché au secteur avec uniquement les périphériques nécessaires (Clavier, souris et écran) Vérifiez aussi l'alimentation du moniteur et son câblage. Mettez en route et portez attention aux messages qui s'afficheraient au démarrage (Ils pourraient très utiles aux techniciens du support). Essayez de démarrer une session du système en prenant en considération que le problème pourrait venir d'un programme, d'un pilote, ou d'un périphérique. Les tests suivants doivent être tentés dans l'ordre pour isoler le problème : - Démarrez en mode sans échec. - Démarrez la dernière bonne configuration connue. - Réinstallez le système et les pilotes dans ce cas vous aurez isolé les éventuels problèmes logiciels. (qui ne sont pas couverts par la garantie) Si le problème persiste, prenez contact avec le service technique et munissez vous des informations suivantes : Nom du produit. Numéro de Série. Date d'achat et enseigne. Message d'erreur et processus à suivre pour reproduire la panne. Tests réalisés. Versions du système d'exploitation et des pilotes installés. - 22 - WEEE/CE DECLARACIÓN DE CONFORMIDAD DECLARATION OF CONFORMITY Nombre del suministrador / Supplier´s name: INFINITY SYSTEM S.L. Dirección / Address: A2, Km 48,5, PARCELA 12 B, P. I. DE CABANILLAS (GUADALAJARA) Teléfono / Telephone: 949 349 100 Fax: 949 349 173 C.I.F.: B-81477507 - Declara, bajo su responsabilidad que el equipo / Declare, Under their responsability tha the device: Descripción del aparato / Device description: Equipo Nettop Intel Atom Marca / Brand: AIRIS Modelo / Model name: AIRIS NETTOP Fabricante / Manufacturer: INFINITY SYSTEM S.L. PAÍS / Country: ESPAÑA Ref. Modelo / Model reference: Nyos 100 (NET100) - Es conforme con las especificaciones técnicas que le son de aplicación en el día de la fecha según la Directiva 99/5 del Parlamento Europeo y del Consejo de 9 de marzo de 1999, transpuesta a la legislación española mediante el RD 1890/2000, de 20 de noviembre de 2000 y en particular con / It´s agreed that the specifications are acording to the Europe Parlament directive 99/5 and with the borrad of 9th March of 1999, acording with the Spanish law RD 1890/2000, on 20th November of 2000 and in particular with: Series específicas de ensayos de radio recogidos en la norma / Specific series of radio testing acording to the rules: Relatives to the Directive 2004/108/EC amended by 89/336/EEC and its amendments 92/31/EEC and 93/68/EEC: EN 55024:1998+A1:2001+A2:2003 EN 61000-4 SERIES EN 55022:2006, Class B EN 61000-3-2: 2006 EN 61000-3-3:1995+A1:2001+A2:2005 En Guadalajara, a 17 de febrero de 2009 D. Antonio González Fernández Director de Calidad - 23 - DECLARACIÓN DE CONFORMIDAD DECLARATION OF CONFORMITY Nombre del suministrador / Supplier´s name: INFINITY SYSTEM S.L. Dirección / Address: A2, Km 48,5, PARCELA 12 B, P. I. DE CABANILLAS (GUADALAJARA) Teléfono / Telephone: 949 349 100 Fax: 949 349 173 C.I.F.: B-81477507 - Declara, bajo su responsabilidad que el equipo / Declare, Under their responsability tha the device: Descripción del aparato / Device description: Equipo Nettop basado en Intel G43 con soporte FullHD Marca / Brand: AIRIS Modelo / Model name: AIRIS NETTOP Fabricante / Manufacturer: INFINITY SYSTEM S.L. PAÍS / Country: ESPAÑA Ref. Modelo / Model reference: Nyos 200 (NET200) - Es conforme con las especificaciones técnicas que le son de aplicación en el día de la fecha según la Directiva 99/5 del Parlamento Europeo y del Consejo de 9 de marzo de 1999, transpuesta a la legislación española mediante el RD 1890/2000, de 20 de noviembre de 2000 y en particular con / It´s agreed that the specifications are acording to the Europe Parlament directive 99/5 and with the borrad of 9th March of 1999, acording with the Spanish law RD 1890/2000, on 20th November of 2000 and in particular with: Series específicas de ensayos de radio recogidos en la norma / Specific series of radio testing acording to the rules: Relatives to the Directive 2004/108/EC amended by 89/336/EEC and its amendments 92/31/EEC and 93/68/EEC: EN 55024:1998+A1:2001+A2:2003 EN 61000-4-2:1995+A1:1998+A2:2001 EN 61000-4-3:2006 EN 61000-4-4:2004 EN 61000-4-5:2006 EN 61000-4-6:2007 EN 61000-4-8:1993+A1:2001 EN 61000-4-11:2004 EN 55022:2006, Class B ITE EN 61000-3-2: 2006 EN 61000-3-3:1995+A1:2001+A2:2005 En Guadalajara, a 17 de febrero de 2009 D. Antonio González Fernández Director de Calidad - 24 - NETTOP NYOS SERIES Manual de Usuario User's Manual Manuel d'Utilisation


