1
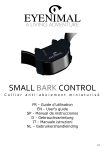
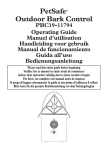
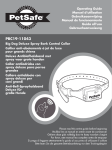
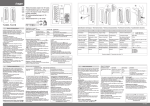
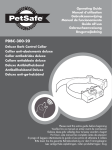
Anti-Bark Collar
Collier anti-aboiements
Halsband tegen blaffen
Operating and Training Guide
Manuel d’utilisation et de dressage
Handleiding en Africhtingsgids
Please read this entire guide before beginning
Veuillez lire ce manuel en entier avant de commencer
Gelieve deze gids volledig door te lezen voordat u begint
Thank you for choosing PetSafe®, the best selling brand of
electronic training solutions in the world. Our mission is to
ensure your pet’s safety by providing you the tools and techniques
to successfully train your pet. If you have any questions, please
contact the Customer Care Centre or visit our website at
www.petsafe.net.
____________________________________________________________________
Table of Contents
Components ........................................................................... 3
Features .................................................................................. 3
How the PetSafe Anti-Bark Collar Works .................................. 4
Key Definitions ....................................................................... 4
Fit the Anti-Bark Collar ........................................................... 5
To Insert and Remove the Battery ............................................ 7
Modes of Operation ................................................................ 8
What to Expect During Use of the Anti-Bark Collar ................. 9
Regular Maintenance .............................................................. 9
To Test the Anti-Bark Collar .................................................. 10
Accessories ........................................................................... 10
Frequently Asked Questions .................................................. 11
Troubleshooting .................................................................... 12
To Discharge the Anti-Bark Collar ......................................... 12
Terms of Use and Limitation of Liability ................................ 13
Français .............................................................................. 15
Nederlands .......................................................................... 28
____________________________________________________________________
“In a Tuskegee University study of adult shelter dogs wearing
the PetSafe Anti-Bark Collar for six 30-minute sessions over two
weeks, we detected no long-term adverse effects, and all dogs
dramatically reduced their barking by the second day.”
Dr. Janet Steiss and Dr. Caroline B. Schaffer
Tuskegee University
2
www.petsafe.net
Components
T
TES
Battery
(PetSafe® RFA-67)
PetSafe Anti-Bark Collar
W
ar
ra
nt
y
Operating Guide
Warranty
Card
Features
• Tone Correction option
• Tone plus Static Correction options
• 3 Training Modes (up to 6 levels of Static Correction)
• Patented Perfect Bark™ technology for the most reliable bark detection
• Water Resistant
• Low Battery Indicator Light
• On/Off Switch
• Lifetime Limited Warranty
www.petsafe.net
3
How the PetSafe Anti-Bark Collar Works
• The Anti-Bark Collar has a unique patented sensor technique that provides the most
reliable bark detection available. The Anti-Bark Collar uses both vibration and sound
sensors to discriminate your dog’s bark from external noises.
• You choose whether your dog’s barking will be corrected with Tone only or with a
combination of Tone and harmless Static Correction.
• If the Tone only mode is your choice, each time your dog barks, he will hear a “Bad
Dog” Tone.
• If a mode for Tone and Static Correction is selected, a simultaneous Tone and Static
Correction will be administered through the Contact Points only when both the
vibration from the vocal cords and the sound from the bark match the bark sampling
criteria.
• This correction can be customised to your dog. Correction can be set to administer
4 corrections at the same level before increasing to a higher correction level (up
to Level 6), or may be set to increase in intensity every time your dog barks, to a
maximum of Level 6.
• As a built-in safety feature, if your dog barks 15 times or more within a 50 second
period, the Anti-Bark Collar will automatically shut off for 3 minutes.
Important:
• Before playing with your dog, remove the Anti-Bark Collar. The
activity may cause your dog to bark, which could lead to him
associating the play with the Static Correction.
• Never leave the Anti-Bark Collar on your dog for more than 12
consecutive hours.
____________________________________________________________________
Key Definitions
Indicator Light: Indicates that the Anti-Bark
Collar is functioning properly in the TEST Mode,
and when the battery is low.
Sound Activated Sensor: Detects the sound of
your dog’s bark.
Mode Switch: Adjusts the training mode. This
switch is also used to turn the Anti-Bark Collar off,
and for testing
Sensor Probe: Detects the vibrations of your dog’s
bark. Note:The Sensor Probe is not adjustable.
Contact Points: Deliver the safe Static
Correction.
4
www.petsafe.net
Indicator Light
off
test
Mode
Switch
Sound Activated
Sensor
Battery
Sensor
Probe
Contact Points
Fit the Anti-Bark Collar
Important: The proper fit and placement of your Anti-Bark Collar is
important for effective operation. The Contact Points must have direct
contact with your dog’s skin on the underside of his neck.
To ensure a proper fit, please follow these steps:
1. Make sure that the battery is not installed in the AntiBark Collar.
2. Have your dog standing comfortably.
3. Centre the Contact Points underneath your dog’s neck,
touching the skin.
YES
NO
Note: It is sometimes necessary to trim the hair
around the Contact Points to make sure that contact
is consistent.
4. The PetSafe QuickFit™
Collar is designed so you
can quickly attach and
Metal Buckle
remove the Anti-Bark
Collar from your dog
while maintaining the
desired fit.
a. With the Snap Buckle
fastened, thread the
“C” Loop
Snap Buckle
collar through the
Metal Buckle.
b. Slide the excess collar through the “C” Loop on
top of the Snap Buckle. This will hold the collar in
place.
c. Once the collar fit is determined, simply use the
Snap Buckle to remove and replace the collar.
5. The Anti-Bark Collar should fit snugly, yet loose
enough to allow one finger to fit between a Contact
Point and your dog’s neck. Allow your dog to wear the
collar for several minutes, then recheck the fit. Check the fit
again as your dog becomes more comfortable with the AntiBark Collar.
6. Trim the collar as follows:
a. Mark the desired length of the collar with a pen. Allow for
growth if your dog is young or grows a thick winter coat.
b. Remove the Anti-Bark Collar from your dog and cut off
excess.
www.petsafe.net
5
Important: Do not attach a lead to the collar. This can
result in pulling the Contact Points too tightly against your
dog’s neck. Attach a lead to a separate, non-metallic collar
or harness, making sure the extra collar does not put
pressure on the Contact Points.
Important: For comfort, safety and effectiveness of product, please ensure
the following:
• Check the fit to prevent excessive pressure by being able to insert one
finger between the Contact Point and your pet’s skin.
• Your pet must be carefully examined daily for any signs of a rash or sore.
• If a rash or sore is observed, discontinue the use of the Anti-Bark Collar
for a few days.
• If the condition persists beyond 48 hours, see your veterinarian.
• Your pet’s neck and the Contact Points must be washed weekly with a
wash cloth and mild hand soap, then rinsed thoroughly.
A condition called Pressure Necrosis, which is a devitalisation of the skin
due to excessive and prolonged contact against the Contact Points, may
occur if the steps above are not followed.
6
www.petsafe.net
To Insert and Remove the Battery
Note: Do not install the battery while the Anti-Bark Collar is on your dog.
This Anti-Bark Collar uses a replaceable PetSafe® battery (RFA-67). This
unique battery is designed to make battery replacement easier and increase
water protection.
To insert the battery, align the symbols
on the battery (arrow) and Anti-Bark
Collar (triangle). Use a large coin to
turn the battery clockwise until the
arrow lines up with the lock symbol on
the housing.
To remove the battery, turn the
battery counter-clockwise using a large
coin. DO NOT attempt to cut into
or pry open the battery. Be sure to
discard the used battery properly.
A replacement PetSafe® battery (RFA-67) can be found at many retailers.
Contact the Customer Care Centre or visit our web site at www.petsafe.net
to locate a retailer near you.
Battery Life
Average battery life is 2 to 4 months, depending on how often your dog barks.
However, due to your dog’s learning process, your first battery may not last as
long as replacement batteries.
Indicator Light
The Indicator Light acts as a low battery indicator. While in a Correction Mode,
the light will flash once every 2 to 3 seconds to indicate a low battery. While in
TEST Mode, a low battery will cause the Indicator Light to turn on, and the
Anti-Bark Collar will not respond to testing until the battery is replaced.
www.petsafe.net
7
Modes of Operation
Turn to the OFF position when the AntiOff
Bark Collar is not in use to conserve battery
power.
Mode 1:
1
• The Anti-Bark Collar starts at Level 1
(Tone and Static Correction) and continues
2
to give a Level 1 correction each time your
dog barks within 30 seconds, to a maximum
3
of 4 times.
Test
• If the dog continues to bark, the Anti-Bark
Collar will proceed to Level 2. After 4
consecutive barks at Level 2
within 30 seconds, the correction level will increase.
• The correction levels will continue to increase in this fashion up to Level 6.
• If the dog does not bark within 30 seconds of the previous bark, the Anti-Bark
Collar will reset itself to Level 1.
Note: All 6 levels of correction are a simultaneous Tone and Static Correction.
Mode 2:
The Anti-Bark Collar starts at Level 1 (Tone and Static Correction) and
increases to the next higher level (up to Level 6) each time your dog barks
within 30 seconds of the previous bark.
If your dog does not bark again within 30 seconds, the Anti-Bark Collar will
reset itself to Level 1
Mode 3:
The Anti-Bark Collar will deliver a Tone only, without Static Correction each
time your dog barks.
TEST:
Turn to the TEST Mode to verify that your Anti-Bark Collar is working
properly. Do not use this mode for normal operation. See “To Test the AntiBark Collar”
off
test
8
www.petsafe.net
What to Expect During Use of the Anti-Bark Collar
Important: Do not leave your dog alone the first few times he receives a
Static Correction.
Step One: (Day 1-5) Start by putting the Anti-Bark Collar on Mode 1. Now
put your dog in the situation where it has barked in the past. This situation
should not be one where strangers arrive or enter your property. Upon
barking, the dog will receive Audible Tone and Static Corrections as he barks.
This should curb the behaviour quickly. If this training mode does not stop
your dog’s barking after one hour and excessive barking is still occurring,
switch the collar to Mode 2.
Step Two: (Day 6 and beyond) Your dog is now ready for the tone only mode
of the collar, which is Mode 3. In this mode, your pet will only receive audible
tone with no static correction. Your pet may need the occasional refresher
course if barking reappears. In this case, go back to step one and reintroduce
the static correction.
____________________________________________________________________
Regular Maintenance
• Check Contact Points for tightness weekly
Note: Do not adjust the factory preset Sensor Probe.
• Clean Contact Points with alcohol weekly
Note: Remove the battery and discharge the Anti-Bark
Collar before touching the Contact Points.
• Check your dog’s neck for irritation and wash neck
weekly.
www.petsafe.net
9
To Test the Anti-Bark Collar
Important: To avoid feeling the Static Correction yourself, never touch
the two Contact Points simultaneously.
1. Turn the Mode Switch to TEST.
2. Hold the unit by the collar with the Indicator Light
TEST!
facing towards you. The unit should be within 15-25 cm
(6-10 in) of your mouth.
3. In order to trigger the unit, say “Test” loudly into the
Sound Activated Sensor.
4. The Indicator Light will flash three times to show that it
is functioning properly.
5. If the Indicator Light does not flash, ensure that the
battery is properly installed, and/or replace the battery. If the Indicator Light
still does not flash, contact the Customer Care Centre or visit our website at
www.petsafe.net.
6. Return the Mode Switch to the training mode of your choice before
replacing the Anti-Bark Collar on your dog.
Note: The TEST Mode is not intended for normal operation. If the Anti-Bark Collar
is left in TEST Mode while on your dog, it can cause false correction and may reduce
battery life.
OFF
off
TEST
LOW
test
BAT
Accessories
To purchase additional accessories for your PetSafe Anti-Bark Collar, contact
the Customer Care Centre or visit our website at www.petsafe.net to locate a
retailer near you.
Component
Part Number
Battery - two pack
RFA-67D-11
10
www.petsafe.net
If the collar breaks, you do not have to replace the whole unit. The collar
is replaceable; however under normal circumstances there is no need to
separate the collar and receiver. Please contact the Customer Care Centre for
replacement collar and instructions.
Frequently Asked Questions
Will my dog stop
barking completely?
• The Anti-Bark Collar effectively and humanely
stops all barking when it is worn. It should only be
worn during periods of unwanted barking.
Will another dog’s
bark set off the AntiBark Collar?
• No.
Is the Anti-Bark Collar • Yes. The Anti-Bark Collar is designed to get your
safe and humane?
dog’s attention, not to punish him. However, the
initial Static Correction may startle your dog.
Will the Anti-Bark
• The Anti-Bark Collar is safe and effective for all
Collar work for my
breeds and sizes of dogs, though it may be too large
dog?
for dogs under 3.6 kg (8 lb) to wear comfortably.
Can I attach a lead to • No. This can result in pulling the Contact Points too
the Anti-Bark Collar? tightly against your dog’s neck. Attach a lead to a
separate, non-metallic collar or harness, making sure
the extra collar does not put pressure on the Contact
Points.
www.petsafe.net
11
Troubleshooting
My dog keeps barking • Tighten the Anti-Bark Collar and/or trim your
(does not respond to
dog’s hair where the Contact Points touch his
the Static Correction). neck to ensure good skin contact.
• Test the Anti-Bark Collar (see “To Test the AntiBark Collar” section).
• Increase the Training Mode.
• Replace the battery.
• Contact the Customer Care Centre or visit our
website at www.petsafe.net.
The Indicator Light
• Make sure the Mode Switch is not set to TEST.
keeps flashing.
• Replace the battery.
• If the light continues to flash with a new battery,
contact the Customer Care Centre.
To Discharge the Anti-Bark Collar
Important: Avoid touching the Contact Points unless the Anti-Bark
Collar is completely discharged.
After removing the battery, turn the Mode Switch to TEST. The unit will
discharge within 5 seconds.
12
www.petsafe.net
Terms of Use and Limitation of Liability
1. Terms of Use
This Product is offered to you conditioned upon your acceptance without modification
of the terms, conditions and notices contained herein. Usage of this Product implies
acceptance of all such terms, conditions, and notices.
2. Proper Use
This Product is designed for use with pets where training is desired. The specific
temperament of your pet may not work with this Product. We recommend that you do
not use this Product if your pet is less than 3.6 kg (8 lb) or if your pet is aggressive. If you
are unsure whether this is appropriate for your pet, please consult your veterinarian or
certified trainer.
Proper use includes reviewing the entire Guide provided with your Product and any
specific Caution statements.
3. No Unlawful or Prohibited Use
This Product is designed for use with pets only. This pet training device is not intended to
harm, injure or provoke. Using this Product in a way that is not intended could result in
violation of national or local laws.
4. Limitation of Liability
In no event shall Radio Systems Corporation be liable for any direct, indirect, punitive,
incidental, special or consequential damages, or any damages whatsoever arising out of
or connected with the use or misuse of this Product. Buyer assumes all risks and liability
from the use of this Product.
5. Modification of Terms and Conditions
Radio Systems Corporation reserves the right to change the terms, conditions and notices
under which this Product is offered.
Compliance
This equipment has been tested and found to comply with relevant EU
Electromagnetic Compatibility, Low Voltage and R&TTE Directives. Before using
this equipment outside the EU countries, check with the relevant local R&TTE
authority. Unauthorised changes or modifications to the equipment that are not
approved by Radio Systems Corporation are in violation of EU R&TTE regulations,
could void the user’s authority to operate the equipment, and void the warranty.
www.petsafe.net
13
Important Recycling Advice
Please respect the Waste Electrical and Electronic Equipment regulations in your
country. This equipment must be recycled. If you no longer require this equipment,
do not place it in the normal municipal waste system. Please return it to where it
was purchased in order that it can be placed in our recycling system. If this is not
possible, please contact the Customer Care Centre for further information.
Product Warranty
Please register your product online at www.petsafe.net.
14
www.petsafe.net
Français
Merci d’avoir choisi PetSafe®, la marque de solutions de dressage
électronique la plus vendue de par le monde. Notre mission est de
garantir la sécurité de votre animal en mettant à votre disposition les
outils et techniques qui vous permettront de le dresser efficacement.
Si vous avez des questions, veuillez contacter le Service clientèle ou
visiter
notre site web à l’adresse www.petsafe.net.
____________________________________________________________________
Table des matières
Contenu du kit ...................................................................... 16
Caractéristiques .................................................................... 16
Fonctionnement du collier anti-aboiements de PetSafe ........... 17
Définitions ............................................................................ 17
Ajustement du collier anti-aboiements.................................... 18
Insérer et retirer la pile........................................................... 20
Modes de fonctionnement ..................................................... 21
À quoi s’attendre lors de l’utilisation du collier
anti-aboiements..................................................................... 22
Entretien régulier .................................................................. 22
Test du collier anti-aboiements .............................................. 23
Accessoires............................................................................ 23
Questions fréquemment posées .............................................. 24
Dépannage............................................................................ 25
Déchargement du collier anti-aboiements ............................... 25
Conditions d’utilisation et limitation de responsabilité ............ 26
____________________________________________________________________
« Au cours d’une étude réalisée par l’université de Tuskegee sur
des chiens de refuge adultes portant le collier anti-aboiements
de PetSafe lors de 6 séances de 30 minutes pendant deux
semaines, nous n’avons constaté aucune conséquence négative
à long terme. De plus, tous les chiens ont montré une réduction
significative de leurs aboiements dès le deuxième jour. »
Dr. Janet Steiss et Dr. Caroline B. Schaffer
Université de Tuskegee
www.petsafe.net
15
Contenu du kit
TES
T
Pile
(PetSafe® RFA-67)
Collier anti-aboiements de PetSafe
W
ar
r
an
ty
Carte
de garantie
Manuel d’utilisation
Caractéristiques
• Option de correction par signal sonore
• Options de correction électrostatique plus signal sonore
• 3 modes de dressage (jusqu’à 6 niveaux de correction électrostatique)
• Technologie « Perfect Bark™ » brevetée pour une détection des aboiements
la plus fiable qui soit
• Dispositif étanche
• Voyant de pile faible
• Interrupteur Marche/arrêt
• Garantie à vie
16
www.petsafe.net
Fonctionnement du collier anti-aboiements de PetSafe
• Le collier anti-aboiements propose une technologie de capteur brevetée unique en son
genre offrant le système de détection des aboiements le plus fiable au monde. Le collier
anti-aboiements fonctionne grâce à des capteurs sonores et de vibrations ce qui permet
au système de distinguer les aboiements de votre chien des bruits extérieurs.
• Vous pouvez choisir de corriger les aboiements de votre chien avec un signal sonore
uniquement ou en combinant un signal sonore avec une correction électrostatique
inoffensive.
• Si vous optez pour le mode Signal sonore uniquement, votre chien entendra un signal «
Méchant chien » chaque fois qu’il aboie.
• Si vous sélectionnez le mode Signal sonore et correction électrostatique, un
signal sonore et une correction électrostatique sont envoyés simultanément via
les contacteurs uniquement lorsque les vibrations des cordes vocales et le son des
aboiements correspondent aux critères d’échantillonnage des aboiements.
• Il est possible de personnaliser cette correction en fonction de votre chien. Le collier
peut être réglé pour administrer 4 corrections du même niveau avant de passer à un
niveau de correction supérieur (jusqu’au niveau 6) ou pour augmenter d’intensité
chaque fois que votre chien aboie, jusqu’au niveau maximum (6).
• Par mesure de sécurité, le collier anti-aboiements s’éteint automatiquement pendant 3
minutes si votre chien aboie 15 fois ou plus sur une période de 50 secondes.
Important :
• Avant de jouer avec votre chien, retirez le collier anti-aboiements.
Cette activité risque de faire aboyer votre chien, ce qui pourrait le
conduire à associer le jeu à la correction électrostatique.
• Ne laissez jamais le collier anti-aboiements sur votre chien pendant
plus de 12 heures consécutives.
____________________________________________________________________
Définitions
Voyant lumineux : Indique que le collier antiaboiements fonctionne correctement en mode
TEST. Indique aussi que la pile est faible.
Capteur sonore : Détecte le son des aboiements
de votre chien.
Sélecteur de mode : Règle le mode de dressage.
Ce sélecteur sert aussi à éteindre le collier antiaboiements et à des fins de test.
Palpeur : Détecte les vibrations des aboiements
de votre chien. Remarque : Il est impossible de régler
le palpeur.
Contacteurs : Délivrent une correction
électrostatique inoffensive.
www.petsafe.net
Voyant lumineux
off
test
Sélecteur
de mode
Capteur sonore
Pile
Palpeur
Contacteurs
17
Ajustement du collier anti-aboiements
Important : Pour un fonctionnement efficace, il est important
d’ajuster et de placer correctement le collier anti-aboiements. Les
contacteurs doivent être directement en contact avec la peau de votre
chien, au niveau de la face inférieure du cou.
Pour assurer un ajustement correct, veuillez suivre les
étapes ci-dessous :
1. Vérifiez que la pile n’est pas installée dans le collier antiaboiements.
2. Installez votre chien dans une position confortable.
3. Centrez les contacteurs sous le cou de votre chien, en
contact avec la peau.
Remarque : Il est parfois nécessaire de couper les poils
autour des contacteurs pour assurer un contact permanent.
YES
NO
4. Le collier « QuickFit™ »
de PetSafe est conçu pour
Boucle métallique
vous permettre d’attacher
et de retirer rapidement
le collier anti-aboiements
tout en conservant
l’ajustement souhaité.
a. Après avoir attaché
Boucle à ouverture rapide Boucle en forme de « C »
la boucle à ouverture
rapide, faites passer le
collier dans la boucle métallique.
b. Glissez la partie du collier qui dépasse dans la
boucle en forme de « C » située sur le haut de la
boucle à ouverture rapide afin de la maintenir en
place.
c. Une fois l’ajustement du collier déterminé, il vous
suffit d’utiliser la boucle à ouverture rapide pour
retirer et remettre le collier.
5. Le collier anti-aboiements doit être bien ajusté, mais
suffisamment lâche pour vous permettre de glisser un doigt
entre le contacteur et le cou de votre chien. Laissez le collier
pendant plusieurs minutes sur votre chien, puis vérifiez à
nouveau l’ajustement. Vérifiez-le une nouvelle fois lorsque
votre chien sera plus à l’aise avec le collier anti-aboiements.
18
www.petsafe.net
6. Raccourcissez le collier comme suit :
a. Marquez la longueur souhaitée du collier à l’aide d’un stylo. Laissez une certaine
marge si votre chien est jeune ou développe un pelage épais en hiver.
b. Retirez le collier anti-aboiements de votre chien et coupez l’excédent.
Important : N’attachez pas de laisse au collier. Les
contacteurs risquent en effet d’exercer une pression trop
forte sur le cou de votre chien. Attachez une laisse à un
collier ou un harnais non métallique distinct en vérifiant
que le collier supplémentaire ne fait pas pression sur les
contacteurs.
Important : Pour une utilisation confortable, sûre et efficace du produit,
veuillez vérifier les points suivants :
• Vérifiez l’ajustement pour éviter toute pression excessive : vous devez
pouvoir passer un doigt entre le contacteur et la peau de l’animal.
• Examinez soigneusement votre animal tous les jours pour vérifier
l’absence de signes de rougeur ou de plaie.
• En cas de rougeur ou de plaie, retirez le collier anti-aboiements pendant
quelques jours.
• Si cet état persiste au-delà de 48 heures, consultez votre vétérinaire.
• Lavez chaque semaine le cou de l’animal et les contacteurs à l’aide d’un
gant et de savon doux pour les mains, puis rincez soigneusement.
Une nécrose cutanée, c’est-à-dire une dévitalisation de la peau due à
un contact excessif et prolongé entre la peau et les contacteurs, risque
d’apparaître si les étapes ci-dessus ne sont pas respectées.
www.petsafe.net
19
Insérer et retirer la pile
Remarque : N’installez pas les piles tant que le collier anti-aboiements est sur votre chien.
Ce collier anti-aboiements utilise une pile PetSafe® (RFA-67) remplaçable.
Cette pile unique est conçue pour faciliter le remplacement de la pile et offrir
une meilleure protection contre la pénétration d’eau.
Pour insérer la pile, alignez les
symboles situés sur la pile (flèche) et
le collier anti-aboiements (triangle).
Utilisez une grosse pièce de monnaie
pour faire tourner la pile dans le sens
des aiguilles d’une montre jusqu’à ce
que la flèche soit alignée sur le symbole
représentant un cadenas sur le boîtier.
Pour retirer la pile, faites-la tourner
dans le sens inverse des aiguilles
d’une montre avec une grosse pièce
de monnaie. N’essayez PAS de
couper dans la pile ou de l’arracher.
Prenez soin d’éliminer la pile usagée
conformément aux réglementations.
Vous pouvez trouver des piles PetSafe® de rechange (RFA-67) chez de
nombreux revendeurs. Contactez le Service clientèle ou visitez notre site
web à l’adresse www.petsafe.net pour connaître l’adresse d’un distributeur à
proximité de chez vous.
Durée de vie de la pile
La pile a une durée de vie de 2 à 4 mois en fonction de la fréquence des aboiements
de votre chien. Cependant, en raison du dressage de votre chien, il est possible que
la première pile ne dure pas aussi longtemps que les piles de rechange.
Voyant lumineux
Le voyant lumineux sert de voyant de pile faible. En mode Correction, le voyant
clignote toutes les 2 à 3 secondes pour indiquer que la pile est faible. En mode TEST,
le voyant lumineux reste allumé pour indiquer que la pile est faible et le collier antiaboiements ne répond plus aux tests tant que la pile n’a pas été remplacée.
20
www.petsafe.net
Modes de fonctionnement
Placez la molette sur la position OFF
Éteint
lorsque vous n’utilisez pas le collier antiaboiements afin d’économiser la pile.
Mode 1 :
1
• Le collier anti-aboiements démarre au
niveau 1 (signal sonore et correction
2
électrostatique) et continue à envoyer une
correction de niveau 1 chaque fois que
3
votre chien aboie dans les 30 secondes, avec
Test
un maximum de 4 fois.
• Si le chien continue à aboyer, le collier
anti-aboiements passe au niveau 2. Après 4
aboiements consécutifs au niveau 2
dans les 30 secondes, le niveau de correction augmente.
• Les niveaux de correction continuent d’augmenter selon ce mode jusqu’au
niveau 6.
• Si le chien n’aboie pas dans les 30 secondes qui suivent le précédent
aboiement, le collier anti-aboiements est automatiquement réinitialisé sur le
niveau 1.
Remarque : Les 6 niveaux consistent en un signal sonore et une correction
électrostatique simultanés.
Mode 2 :
Le collier anti-aboiements démarre au niveau 1 (signal sonore et correction
électrostatique) et passe au niveau suivant (jusqu’au niveau 6) chaque fois que
votre chien aboie dans les 30 secondes qui suivent le précédent aboiement.
Si votre chien n’aboie plus dans les 30 secondes, le collier anti-aboiements est
réinitialisé sur le niveau 1.
Mode 3 :
Le collier anti-aboiements envoie uniquement un signal sonore, sans correction
électrostatique, chaque fois que le chien aboie.
TEST :
Choisissez le mode TEST pour vérifier le bon fonctionnement de votre collier
anti-aboiements. N’utilisez pas ce mode pour une utilisation normale du
collier. Reportez-vous à la section « Test du collier anti-aboiements ».
off
test
www.petsafe.net
21
À quoi s’attendre lors de l’utilisation du collier
anti-aboiements
Important : Ne laissez pas votre chien seul les quelques premières fois où il
reçoit une correction électrostatique.
Étape 1 : (Jours 1-5) Commencez par régler le collier anti-aboiements
sur le mode 1. Mettez ensuite le chien dans une situation où il a aboyé par
le passé. Il ne doit pas s’agir d’un scénario où des étrangers arrivent ou
pénètrent sur votre propriété. En cas d’aboiement, le chien reçoit un signal
sonore et des corrections électrostatiques. Cela devrait rapidement réfréner
ce comportement. Si ce mode de dressage ne met pas fin aux aboiements de
votre chien au bout d’une heure et que le chien continue d’aboyer de manière
excessive, réglez le collier sur le mode 2.
Étape 2 : (Jour 6 et au-delà) Votre chien est maintenant prêt pour le mode
Signal sonore uniquement du collier, qui est le mode 3. Avec ce mode, votre
chien reçoit uniquement un signal sonore sans correction électrostatique. Votre
chien aura peut-être besoin d’un cours de rafraîchissement occasionnel si les
aboiements réapparaissent. Dans ce cas, revenez à l’étape 1 et réintroduisez la
correction électrostatique.
____________________________________________________________________
Entretien régulier
• Vérifiez le serrage des contacteurs une fois par semaine
Remarque : Ne réglez pas le serrage du palpeur, lequel est
préréglé en usine.
• Nettoyez les contacteurs à l’alcool une fois par semaine
Remarque : Retirez la pile et déchargez le collier anti-aboiements
avant de toucher les contacteurs.
• Vérifiez que le cou de votre chien ne présente aucun
signe d’irritation et nettoyez-le une fois par semaine.
22
www.petsafe.net
Test du collier anti-aboiements
Important : Pour éviter de ressentir la correction électrostatique, ne
touchez jamais les deux contacteurs simultanément.
1. Réglez le sélecteur de mode sur TEST.
2. Tenez le récepteur par le collier en tournant le voyant
TEST!
lumineux vers vous. L’unité doit être à 15 à 25
centimètres de votre bouche.
3. Pour déclencher le système, prononcez le mot « Test »
d’une voix forte dans le capteur sonore.
4. Le voyant lumineux clignote trois fois pour montrer
qu’il fonctionne correctement.
5. Si le voyant lumineux ne clignote pas, assurez-vous que la
pile est correctement installée et/ou remplacez-la. S’il ne clignote toujours
pas, veuillez contacter le Service clientèle ou visiter notre site web à l’adresse
www.petsafe.net.
6. Repositionnez le sélecteur de mode sur le mode de dressage de votre choix
avant de remettre le collier anti-aboiements sur votre chien.
Remarque : Le mode TEST n’est pas conçu pour une utilisation normale. Si vous
laissez le collier anti-aboiements en mode TEST après l’avoir remis sur le chien, il
risque d’envoyer des corrections erronées et de réduire la durée de vie de la pile.
OFF
off
TEST
LOW
test
BAT
Accessoires
Pour acheter des accessoires supplémentaires pour votre collier anti-aboiements
de PetSafe, contactez le Service clientèle ou visitez notre site web à l’adresse
www.petsafe.net pour obtenir l’adresse d’un revendeur près de chez vous.
Article
Numéro de référence
Pile - pack de deux
RFA-67D-11
www.petsafe.net
23
En cas de cassure du collier, vous ne devez pas remplacer l’ensemble du
système. Le collier peut être remplacé. Cependant, en temps normal, il n’est
pas nécessaire de séparer le collier et le récepteur. Veuillez contacter le Service
clientèle pour obtenir un collier de rechange et des instructions pour le
remplacement.
Questions fréquemment posées
Mon chien arrêtera-t-il • Le collier anti-aboiements met fin de manière
complètement d’aboyer ? efficace et sûre aux aboiements lorsqu’il est porté.
Il ne doit être porté qu’en cas d’aboiements
indésirables.
Les aboiements d’un
autre chien risquent-ils
de déclencher le collier
anti-aboiements ?
Le collier antiaboiements est-il
inoffensif et sûr ?
Le collier antiaboiements
fonctionnera-t-il avec
mon chien ?
Puis-je attacher une
laisse au collier antiaboiements ?
24
• Non.
• Oui. Le collier anti-aboiements est conçu pour
attirer l’attention de votre chien, pas pour le
punir. La correction électrostatique initiale risque
toutefois de le surprendre.
• Le collier anti-aboiements est sûr et efficace
pour toutes les races et tailles de chiens. Il risque
toutefois d’être trop grand pour être porté de
manière confortable par des chiens de moins 3,6
kg.
• Non. Les contacteurs risquent en effet d’exercer
une pression trop forte sur le cou de votre chien.
Attachez une laisse à un collier ou un harnais
non métallique distinct en vérifiant que le collier
supplémentaire ne fait pas pression sur les
contacteurs.
www.petsafe.net
Dépannage
Mon chien continue
• Resserrez le collier anti-aboiements et/ou coupez les
d’aboyer (il ne répond poils de votre chien à l’endroit où les contacteurs
pas à la correction
touchent son cou pour garantir un bon contact
électrostatique).
avec la peau.
• Testez le collier anti-aboiements (reportez-vous à
la section « Test du collier anti-aboiements »).
• Augmentez le mode de dressage.
• Remplacez la pile.
• Contactez le Service clientèle ou visitez notre site
web à l’adresse www.petsafe.net.
Le voyant lumineux
• Vérifiez que le sélecteur de mode n’est pas réglé sur
continue de clignoter.
TEST.
• Remplacez la pile.
• Si le voyant continue de clignoter avec une nouvelle
pile, contactez le Service clientèle.
Déchargement du collier anti-aboiements
Important : Évitez de toucher les contacteurs tant que le collier antiaboiements n’est pas complètement déchargé.
Après avoir retiré la pile, positionnez le sélecteur de mode sur TEST. Le collier
va se décharger dans les 5 secondes.
www.petsafe.net
25
Conditions d’utilisation et limitation de responsabilité
1.Conditions d’utilisation
Ce produit vous est proposé sous réserve que vous acceptiez, sans modification
aucune, les termes, conditions et avis contenus dans le présent manuel. L’utilisation
de ce produit implique l’acceptation de l’ensemble de ces termes, conditions et avis.
2.Utilisation correcte
Ce produit est conçu pour être utilisé sur des animaux pour lesquels un dressage
est souhaitable. Il est possible que le tempérament particulier de votre animal soit
incompatible avec ce produit. Nous vous conseillons de ne pas utiliser ce produit si
votre animal pèse moins de 3,6 kg ou présente un comportement agressif. Si vous
n’êtes pas certain que ce produit convienne à votre animal, veuillez consulter votre
vétérinaire ou un dresseur agréé.
Par utilisation correcte, nous entendons également la lecture de l’intégralité du
manuel fourni avec le produit, ainsi que les avertissements spécifiques.
3.Aucune utilisation interdite ou illicite
Ce produit est exclusivement conçu pour être utilisé avec des animaux. Ce
dispositif de dressage des animaux n’a pas pour but de faire du mal, de blesser
ou de provoquer. Toute utilisation de ce produit allant à l’encontre de sa finalité
pourrait constituer une violation des lois fédérales, locales ou nationales en vigueur.
4.Limitation de responsabilité
Radio Systems Corporation ne pourra en aucun cas être tenu pour responsable de
tout dommage direct, indirect, punitif, accidentel, particulier ou consécutif ou de
tout autre dommage résultant de l’utilisation normale ou abusive de ce produit.
L’acquéreur endosse tous les risques et responsabilités découlant de l’utilisation de
ce produit.
5.Modification des conditions générales
Radio Systems Corporation se réserve le droit de modifier les termes, conditions et
avis gouvernant l’utilisation de ce produit.
Conformité
Cet équipement a été testé et certifié conforme aux directives européennes en matière
de Compatibilité Électromagnétique, de Basse tension et de R&TTE. Avant d’utiliser
cet équipement en dehors des pays de l’UE, veuillez prendre contact avec l’autorité
R&TTE locale compétente en la matière. Toute modification non autorisée de
l’équipement non approuvée par Radio Systems Corporation constitue une violation
des réglementations R&TTE de l’UE et pourrait annuler le droit de l’utilisateur
d’utiliser l’équipement ainsi que la garantie.
26
www.petsafe.net
Avis important concernant le recyclage
Veuillez vous conformer aux réglementations relatives aux déchets d’équipements
électriques et électroniques en vigueur dans votre pays. Cet équipement doit être
recyclé. Si vous n’avez plus besoin de cet équipement, ne l’introduisez pas dans
le circuit ordinaire d’élimination des déchets municipaux. Veuillez le renvoyer
au magasin où vous l’avez acheté afin que nous puissions l’introduire dans notre
système de recyclage. Si ce n’est pas possible, veuillez contacter le Service clientèle
pour plus d’informations.
Garantie du produit
Veuillez enregistrer votre produit en ligne à l’adresse www.petsafe.net.
www.petsafe.net
27
Nederlands
U hebt gekozen voor PetSafe®, ‘s werelds best verkochte merk
voor elektronische trainingsoplossingen. De veiligheid van uw
huisdier is belangrijk en wij specialiseren ons daarom in middelen
en technieken waarmee u het dier kunt trainen. Voor vragen kunt
u contact opnemen met de Klantendienst of een bezoek brengen
aan onze website op www.petsafe.net.
____________________________________________________________________
Inhoudsopgave
Onderdelen ........................................................................... 29
Kenmerken ........................................................................... 29
Hoe de PetSafe-halsband tegen blaffen werkt .......................... 30
Definities .............................................................................. 30
De halsband tegen blaffen aanpassen...................................... 31
De batterij plaatsen en verwijderen ......................................... 33
Werkstanden ......................................................................... 34
Wat u kunt verwachten van de halsband tegen blaffen ............. 35
Normaal onderhoud .............................................................. 35
De halsband tegen blaffen testen ............................................ 36
Accessoires............................................................................ 36
Veelgestelde vragen................................................................ 37
Probleemoplossing ................................................................ 38
De halsband tegen blaffen ontladen........................................ 38
Gebruiksvoorwaarden en beperking van aansprakelijkheid ...... 39
____________________________________________________________________
“In een onderzoek van de Tuskegee University onder volwassen
asielhonden die de PetSafe-halsband tegen blaffen zes sessies van
30 minuten lang hadden gedragen gedurende twee weken, zijn geen
nadelige gevolgen op de lange termijn waargenomen. Bij alle honden
was het blaffen reeds de tweede dag aanzienlijk verminderd.”
Dr. Janet Steiss en Dr. Caroline B. Schaffer
Tuskegee University
28
www.petsafe.net
Onderdelen
T
TES
Batterij
(PetSafe® RFA-67)
PetSafe-halsband tegen blaffen
W
ar
ra
nt
y
Garantiebewijs
Gebruikshandleiding
Kenmerken
• Geluidssignaalcorrectie
• Geluidssignaal- plus statische correctie
• Drie trainingsstanden (maximaal 6 niveaus van statische correctie)
• Gepatenteerde Perfect Bark™-technologie voor betrouwbare blafdetectie
• Waterdicht
• Statusindicator batterij
• Aan/uit-schakelaar
• Beperkte levenslange garantie
www.petsafe.net
29
Hoe de PetSafe-halsband tegen blaffen werkt
• De halsband tegen blaffen is voorzien van een unieke gepatenteerde sensortechniek
die de meest betrouwbare blafdetectie biedt. De halsband tegen blaffen gebruikt
zowel trillings- als geluidssensoren om het blaffen van uw hond te onderscheiden van
externe geluiden.
• U bepaalt zelf of het blaffen van uw hond wordt gecorrigeerd met alleen een
geluidssignaal of met een combinatie van een geluidssignaal en een onschadelijke
statische correctie.
• Als u voor het geluidssignaal kiest, krijgt uw hond elke keer dat hij blaft een “Foei”toon te horen.
• Als u een geluidssignaal met statische correctie gebruikt, krijgt uw dier via de
contactpunten gelijktijdig een geluidssignaal en een statische correctie toegediend.
Dit gebeurt alleen wanneer de trilling van de stembanden èn het geluid van het
blaffen overeenkomen met de voorbeeldcriteria van het blaffen.
• Deze correctie kan worden aangepast aan uw hond. De correctie kan zo worden
ingesteld dat er vier correcties van hetzelfde niveau worden toegediend voordat het
correctieniveau wordt verhoogd (maximaal tot niveau 6). U kunt de correctie ook
zo instellen dat de intensiteit wordt verhoogd telkens wanneer uw hond blaft, tot het
maximale niveau 6.
• De halsband tegen blaffen heeft een ingebouwde veiligheidsfunctie, zodat deze
automatisch 3 minuten lang wordt uitgeschakeld wanneer uw hond binnen 50
seconden 15 keer of vaker blaft.
Belangrijk:
• Verwijder de halsband tegen blaffen voordat u met de hond gaat spelen.
Mogelijk begint de hond tijdens het spelen te blaffen, waardoor hij de
statische correctie met het spelen kan gaan associëren.
• Laat uw hond de halsband tegen blaffen nooit langer dan twaalf uur
achtereen dragen.
____________________________________________________________________
Definities
Verklikkerlampje: geeft in de TEST-modus aan
dat de halsband tegen blaffen goed functioneert
en geeft aan wanneer de batterij bijna leeg is.
Geluidssensor: neemt het geluid van het blaffen
van uw hond waar.
Modusschakelaar: hiermee stelt u de trainingsstand
in. Deze schakelaar gebruikt u ook om de halsband
tegen blaffen uit te schakelen en te testen.
Sensorsonde: neemt de trillingen van het blaffen van
uw hond waar. Opmerking: de sensorsonde is niet instelbaar.
Contactpunten: dienen de veilige statische correctie toe.
30
www.petsafe.net
Verklikkerlampje
off
test
Modusschakelaar
Geluidssensor
Batterij
Sensorsonde
Contactpunten
De halsband tegen blaffen aanpassen
Belangrijk: voor een correcte werking moet de halsband tegen blaffen goed
passen en op de juiste manier zijn aangebracht. De contactpunten moeten
aan de onderzijde van de hals in aanraking komen met de huid van uw hond.
Volg de onderstaande stappen om de halsband aan te
passen:
1. Controleer of de batterij niet in de halsband tegen
blaffen is geplaatst.
2. Zorg ervoor dat uw hond rustig staat.
3. Let erop dat de contactpunten in het midden van de
hals aan de onderzijde de huid raken.
Opmerking: Soms is het noodzakelijk het haar rond
de contactpunten bij te knippen, zodat het contact met
de huid niet wordt verbroken.
YES
4. De PetSafe QuickFit™halsband is zo ontworpen
Metalen gesp
dat u de halsband
tegen blaffen snel kunt
omdoen en verwijderen,
zonder dat u deze steeds
opnieuw passend hoeft te
maken.
a. Maak de klikgesp
“C”-lus
Klikgesp
vast en haal de
halsband door de
metalen gesp heen.
b. Haal het overgebleven deel van de halsband door
de “C”-lus bovenop de klikgesp. Hierdoor blijft het
overgebleven deel van de halsband goed zitten.
c. Nadat u de halsband goed passend hebt gemaakt,
gebruikt u de klikgesp om de halsband om te doen
en te verwijderen.
5. De halsband tegen blaffen moet goed aansluiten, zolang
er maar voldoende ruimte is voor een vinger tussen de
contactpunten en de hals van uw hond. Laat de hond de
halsband enkele minuten omhouden en controleer opnieuw
of de halsband goed aansluit. Controleer nogmaals of de
halsband tegen blaffen goed aansluit wanneer uw hond aan
de halsband begint te wennen.
www.petsafe.net
NO
31
6. Knip de halsband als volgt bij:
a. Markeer de gewenste lengte met een pen. Houd er rekening mee dat uw huisdier
mogelijk nog groeit of een dikke wintervacht kan krijgen.
b. Verwijder de halsband tegen blaffen en knip het overtollige gedeelte af.
Belangrijk: bevestig nooit een riem aan de halsband.
Daarmee kunt u de contactpunten te dicht tegen de hals
aan trekken. Bevestig een riem aan een afzonderlijke, nietmetalen halsband of een tuigje. Let daarbij erop dat de
extra halsband geen druk uitoefent op de contactpunten.
Belangrijk: let op de volgende punten om u te verzekeren van comfort,
veiligheid en doelmatigheid van het product:
• Controleer of de halsband niet te strak zit en te veel druk uitoefent. Er moet
een vinger tussen de contactpunten en de huid van het dier passen.
• Controleer elke dag zorgvuldig of u geen uitslag of kleine wondjes ziet.
• Is dit wel het geval, dan laat u de halsband tegen blaffen enkele dagen af.
• Raadpleeg uw dierenarts indien na 48 uur geen verbetering optreedt.
• De hals van uw huisdier en de contactpunten moeten elke week
worden gereinigd met een washandje en een milde zeep. Spoel de zeep
vervolgens goed uit.
Indien u de bovenstaande aanwijzingen niet zorgvuldig opvolgt, kan
druknecrose ontstaan. Dit is een aandoening waarbij de huid wordt
aangetast als gevolg van te lang en te nauw contact met de contactpunten.
32
www.petsafe.net
De batterij plaatsen en verwijderen
Opmerking: installeer de batterij nooit terwijl uw dier de halsband tegen blaffen draagt.
Deze halsband tegen blaffen maakt gebruik van een vervangbare PetSafe®-batterij
(RFA-67). Deze unieke batterij is zo ontworpen dat deze eenvoudig kan worden
vervangen en goed is beschermd tegen vocht.
Plaats de batterij met de pijl tegen de
driehoek op de halsband tegen blaffen.
Gebruik een grote munt om de batterij
met de klok mee te draaien totdat de
pijl tegen het vergrendelingssymbool op
de behuizing valt.
Verwijder de batterij door deze met een
grote munt tegen de klok in de draaien.
Probeer de batterij NOOIT te openen of
kapot te snijden. Zorg dat u zich op de
juiste manier van de gebruikte batterijen
ontdoet.
Vervangende PetSafe®-batterijen (RFA-67) zijn verkrijgbaar bij vele
verkooppunten. Neem voor een lijst met adressen contact op met de
Klantendienst of bezoek onze website op www.petsafe.net.
Levensduur van de batterij
Een batterij gaat gemiddeld 2 tot 4 maanden mee, afhankelijk van hoe vaak uw
hond blaft. In verband met het leerproces van uw hond is het echter mogelijk
dat de eerste batterij minder lang meegaat dan vervangende batterijen.
Verklikkerlampje
Het verklikkerlampje functioneert ook als statusindicator voor de batterij. In
een correctiestand knippert het lampje elke 2 tot 3 seconden eenmaal om aan
te geven dat de batterij bijna leeg is. In de TEST-stand gaat het verklikkerlampje
branden wanneer de batterij bijna leeg is. De halsband tegen blaffen reageert
dan niet meer op de test, totdat de batterij is vervangen.
www.petsafe.net
33
Werkstanden
Schakel de halsband tegen blaffen uit
Uit
wanneer deze niet wordt gebruikt. Op deze
manier gaat de batterij langer mee.
Stand 1:
1
• De halsband tegen blaffen begint op niveau
1 (geluidssignaal en statische correctie) en
2
geeft telkens wanneer uw hond blaft binnen
30 seconden een statische correctie van
3
niveau 1 af, met een maximum van vier keer.
Test
• Als de hond doorgaat met blaffen, gaat
de halsband tegen blaffen over op niveau
2. Nadat binnen 30 seconden 4 keer
achtereen is geblaft op niveau 2, wordt het
correctieniveau verhoogd.
• Het correctieniveau wordt op deze manier steeds een stapje verhoogd tot niveau 6.
• Als de hond niet blaft binnen 30 seconden na de voorgaande blaf, wordt de
halsband tegen blaffen automatisch weer teruggezet op niveau 1.
Opmerking: alle zes correctieniveaus geven gelijktijdig een geluidssignaal en een
statische correctie af.
Stand 2:
De halsband tegen blaffen begint op niveau 1 (geluidssignaal en statische
correctie) en gaat telkens wanneer uw hond blaft binnen 30 seconden na de
voorgaande blaf een niveau omhoog.
Als de hond niet opnieuw blaft binnen 30 seconden na de voorgaande blaf,
wordt de halsband tegen blaffen automatisch weer teruggezet op niveau 1.
Stand 3:
De halsband tegen blaffen geeft telkens wanneer uw hond blaft een
geluidssignaal zonder statische correctie af.
TEST:
Gebruik de TEST-stand om te controleren of de halsband tegen blaffen goed
werkt. Gebruik deze stand niet bij normaal gebruik. Raadpleeg het gedeelte
“De halsband tegen blaffen testen”.
off
test
34
www.petsafe.net
Wat u kunt verwachten van de halsband tegen blaffen
Belangrijk: laat uw hond de eerste paar keer dat hij een statische correctie
krijgt toegediend niet alleen.
Stap 1: (Dag 1-5) Stel de halsband tegen blaffen in op stand 1. Breng uw
hond in een situatie die eerder heeft geleid tot blaffen. Kies geen situatie
waarbij vreemden aankomen of uw terrein betreden. Als de hond gaat blaffen,
ontvangt hij bij elke blaf een hoorbaar geluidssignaal en statische correcties.
Hierdoor zou het gedrag snel moeten stoppen. Als uw hond na een uur in deze
trainingsstand nog niet is opgehouden met (overmatig) blaffen, schakelt u de
halsband in op stand 2.
Stap 2: (Dag 6 en later) Uw hond is nu zo ver dat u de stand Alleen
geluidssignaal van de halsband kunt gebruiken. Dit is stand 3. In deze stand
wordt alleen een hoorbaar geluidssignaal afgegeven, zonder statische correctie.
Mogelijk dient u de training van tijd tot tijd te herhalen als uw hond opnieuw
begint te blaffen. In dat geval gaat u terug naar stap 1 en maakt u opnieuw
gebruik van de statische correctie.
____________________________________________________________________
Normaal onderhoud
• Controleer elke week of de contactpunten goed aansluiten
Opmerking: laat de fabrieksinstellingen van de sensorsonde
ongewijzigd.
• Reinig de contactpunten elke week met alcohol
Opmerking: verwijder de batterij en ontlaad de halsband
tegen blaffen voordat u de contactpunten aanraakt.
• Controleer de hals van uw hond regelmatig op
huidirritaties en was de hals elke week.
www.petsafe.net
35
De halsband tegen blaffen testen
Belangrijk: raak de twee contactpunten nooit gelijktijdig aan; u loopt
dan het risico zelf een statische correctie toegediend te krijgen.
1. Zet de modusschakelaar op TEST.
2. Houd de eenheid bij de halsband vast met het
TEST!
verklikkerlampje naar u toe gericht. De eenheid moet
ongeveer 15-25 cm van uw mond zijn verwijderd.
3. Probeer de eenheid te activeren door luid “Test” te
zeggen in de geluidssensor.
4. Als de eenheid goed werkt, knippert het
verklikkerlampje driemaal.
5. Als het verklikkerlampje niet knippert, controleert u of
de batterij goed is geplaatst en/of vervangt u de batterij. Neem contact op
met de Klantendienst of bezoek onze website op www.petsafe.net als het
verklikkerlampje nog steeds niet werkt.
6. Zet de modusschakelaar weer in de gekozen trainingsstand voordat u uw
hond de halsband weer omdoet.
Opmerking: de teststand is niet bedoeld voor normaal gebruik. Als de halsband tegen blaffen
in de teststand wordt gelaten terwijl uw hond de halsband draagt, kunnen er onterecht
correcties worden toegediend en kan de levensduur van de batterij worden verkort.
OFF
off
TEST
LOW
test
BAT
Accessoires
Als u extra accessoires wilt aanschaffen voor uw PetSafe-halsband tegen blaffen,
kunt u contact opnemen met de Klantendienst of bezoek onze website op www.
petsafe.net om te zoeken naar een leverancier bij u in de buurt.
Onderdeel
Onderdeelnummer
Dubbelpak batterijen
RFA-67D-11
36
www.petsafe.net
Het is niet nodig de hele eenheid te vervangen wanneer de halsband kapotgaat.
De halsband is vervangbaar. Onder normale omstandigheden is het echter niet
nodig de halsband en de ontvanger van elkaar te scheiden. Neem contact op
met de Klantendienst voor een vervangende halsband en instructies.
Veelgestelde vragen
Zal mijn hond helemaal • Wanneer de halsband tegen blaffen wordt
ophouden met blaffen?
gedragen, wordt het blaffen op een doeltreffende
en humane manier geheel gestopt. De halsband
mag alleen worden gedragen tijdens perioden van
ongewenst blaffen.
Kan de halsband
• Nee.
tegen blaffen worden
geactiveerd door het
blaffen van een andere
hond?
Is de halsband tegen
• Ja. Hij kan in het begin echter wel schrikken van de
blaffen veilig en
statische correcties van de statische correcties.
humaan?
Is de halsband tegen
blaffen geschikt voor
mijn hond?
• De halsband tegen blaffen is veilig en doeltreffend
voor honden van elk ras en elke grootte. Voor
honden van minder dan 3,6 kg kan de halsband
echter wel te groot zijn om comfortabel te kunnen
worden gedragen.
Kan ik een riem aan de • Bevestig een riem aan een afzonderlijke, niet-metalen
halsband tegen blaffen
halsband of een tuigje. Let daarbij erop dat de extra
bevestigen?
halsband geen druk uitoefent op de contactpunten.
www.petsafe.net
37
Probleemoplossing
Mijn hond blijft blaffen • Maak de halsband iets strakker en/of knip de
(reageert niet op de
vacht van uw hond bij op de plaats waar de
statische correctie).
contactpunten de hals raken zodat deze goed in
aanraking komen met de huid.
• Test de halsband tegen blaffen (raadpleeg het
gedeelte “De halsband tegen blaffen testen”).
• Verhoog de trainingsstand.
• Vervang de batterij.
• Neem contact op met de Klantendienst of bezoek
onze website op www.petsafe.net.
Het verklikkerlampje • Controleer of de modusschakelaar niet is ingesteld
blijft knipperen.
op TEST.
• Vervang de batterij.
• Neem contact op met de Klantendienst als het
lampje met een nieuwe batterij nog steeds blijft
knipperen.
De halsband tegen blaffen ontladen
Belangrijk: raak de contactpunten alleen aan als de halsband tegen
blaffen volledig is ontladen.
Verwijder de batterij en zet de modusschakelaar op TEST. Binnen 5 seconden
wordt de eenheid ontladen.
38
www.petsafe.net
Gebruiksvoorwaarden en beperking van
aansprakelijkheid
1. Gebruiksvoorwaarden
Dit product wordt u aangeboden onder de voorwaarde dat u akkoord gaat met de hierin
genoemde bepalingen, voorwaarden en kennisgevingen. Door dit product te gebruiken,
verklaart u zich akkoord met al deze bepalingen, voorwaarden en kennisgevingen.
2. Correct gebruik
Dit product is bedoeld als trainingshulpmiddel voor huisdieren. Het is mogelijk dat
het karakter van uw huisdier niet geschikt is om dit product te gebruiken. Wij raden
het gebruik van dit product af als uw huisdier minder dan 3,6 kg weegt of agressief is.
Raadpleeg uw dierenarts of een gediplomeerd trainer als u niet zeker weet of dit product
geschikt is voor uw huisdier.
Bij correct gebruik hoort ook het geheel doornemen van de handleiding die bij het
product is meegeleverd en eventuele specifieke veiligheidsvoorschriften.
3. Geen onwettig of verboden gebruik
Dit product is uitsluitend bedoeld voor gebruik met huisdieren. Dit trainingshulpmiddel voor
huisdieren is niet bedoeld om schade toe te brengen, te verwonden of te provoceren. Gebruik
van dit product op een andere manier dan waarvoor het is bedoeld, kan strafbaar zijn.
4. Beperking van aansprakelijkheid
In geen geval kan Radio Systems Corporation aansprakelijk worden gehouden voor enige
directe, indirecte, punitieve, incidentele, bijzondere of gevolgschade, of enige andere vorm
van schade die voortvloeit uit of in verband staat met het gebruik of misbruik van dit
product. Alle risico’s en aansprakelijkheid met betrekking tot het gebruik van dit product
komen voor rekening van de koper.
5. Wijziging van voorwaarden en bepalingen
Radio Systems Corporation behoudt zich het recht voor wijzigingen aan te brengen in de
bepalingen, voorwaarden en kennisgevingen waaraan dit product onderhevig is.
Conformiteit
Deze apparatuur is getest en voldoet geheel aan de geldende EU-voorschriften voor
elektromagnetische compatibiliteit, de laagspanningsrichtlijnen en de R&TTErichtlijnen. Raadpleeg de plaatselijke R&TTE-autoriteiten als u van plan bent deze
apparatuur te gebruiken buiten de EU. Ongeautoriseerde wijzigingen of aanpassingen
aan de apparatuur die niet door Radio Systems Corporation zijn goedgekeurd,
vormen een inbreuk op de Europese R&TTE-richtlijnen. Hierdoor kunnen zowel uw
gebruiksrecht op dit product als de garantie komen te vervallen.
www.petsafe.net
39
Belangrijk advies met betrekking tot hergebruik
Respecteer de richtlijnen voor elektronisch en elektrotechnisch afval in uw land.
Deze apparatuur moet beschikbaar worden gesteld voor recycling. Geef het apparaat
niet met de normale afvalverwerking mee als u het niet meer gebruikt. Lever het
apparaat in waar u het hebt aangeschaft, zodat het door ons kan worden gerecycled.
Als dit u niet lukt, neemt u voor meer informatie contact op met de Klantendienst.
Productgarantie
Registreer uw product on line op www.petsafe.net.
40
www.petsafe.net
www.petsafe.net
41
42
www.petsafe.net
www.petsafe.net
43
Radio Systems Corporation
10427 Electric Avenue
Knoxville, TN 37932
(865) 777-5404
www.petsafe.net
400-715-23
©Copyright 2006, Radio Systems Corporation