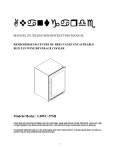
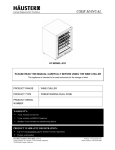
1
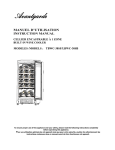
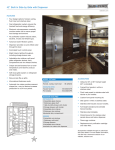
MANUEL D’UTILISATION
INSTRUCTION MANUAL
REFROIDISSEUR A VIN/UNITE DE BREUVAGES
ENCASTRABLE
BUILT-IN WINE & BEVERAGE CENTER
LBWC-42SD
To ensure proper use of this appliance and your safety, please read the following instructions completely
before operating this appliance. Pour une utilisation optimale de cet appareil ainsi que pour votre sécurité,
veuillez lire attentivement les instructions contenues dans ce manuel avant de faire fonctionner cet appareil.
04-05-10
TABLE DES MATIÈRES
DESCRIPTION DES COMPOSANTES ………….………………………….….3
PRECAUTIONS IMPORTANTES ……………………………………………..4-5
AVANT D’UTILISER VOTRE APPAREIL…………………………………….… 5
INSTRUCTIONS D’INSTALLATION ……………………………………………5
INSTALLATION…………………………………………………………..... 5
INSTALLATION INTEGREE……..………………………………..…….…6
MISE A LA TERRE……………………………………………........…….6-7
CARACTERISTIQUES ………………………………………………………….. 7
MODE D’EMPLOI………………………………………………………………….8
REGLAGE DE TEMPÉRATURE…………………………………8
LUMIERES ……………………………………………………….. 8
VERROUILLAGE………………….…………………………….…8
NETTOYAGE ET ENTRETIEN…………………………..……………………..10
NETTOYAGE …………………………………………………………......10
VACANCES …………..………………………………………………... ..10
ECONOMIE D’ENERGIE …………………………………………..…… 10
DEPANNAGE ……………..……………………………………………………..11
2
DESCRIPTIONS DES COMPOSANTES
Note: Les contrôles (no. 1 & 5) se retrouvent sur
le devant des portes de l’unité.
1) Contrôles électroniques (zone de gauche)
2) Ventilateurs
3) Lumières intérieures
4) Cabinet
5) Contrôles électroniques (zone de droite)
6) Bac d’égouttement
7) Tablettes à vin
8) Tablettes droites *
* : 1 ensemble de 3 tablette droites inclus, par unité, pour
conversion en centre de breuvage
SPECIFICATIONS – Modèle LBWC-42SD
Description du produit
Refroidisseur a vin /unité de breuvages 24” encastrable
No. Modèle
LBWC-42SD
Dimensions
(pouces)
Largeur
Hauteur
Profondeur
23 1/2”
34”
23 1/4"
Poids net ( lbs)
104 lbs
Dimensions nécessaires à l’encastrement
Largeur, profondeur et hauteur
minimales
Largeur
Hauteur
Profondeur
24”
34 1/2”
24"
3
PRÉCAUTIONS IMPORTANTES
AVERTISSEMENT
•
•
•
•
•
•
Pour diminuer les risques d’incendie, d’électrocution ou
d’accident pendant l’utilisation de votre appareil, veuillez
suivre les mesures de sécurité suivantes :
Veuillez lire toutes les instructions avant d’utiliser l’appareil.
DANGER ou AVERTISSEMENT : Les risques d’enfermement ou de suffocation pour les enfants
demeurent une réalité. Les appareils abandonnés ou jetés demeurent un danger, même s’ils ne
sont placés dans le garage que pour quelques jours.
Avant de jeter votre ancien appareil, enlevez les portes et laissez les tablettes à leur place afin que
les enfants ne puissent pas se glisser facilement à l’intérieur.
Ne laissez pas d’enfants jouer avec l’appareil.
Ne nettoyez jamais les pièces de l’appareil avec des liquides inflammables. Les vapeurs
provoquées par ces liquides risquent de déclencher un incendie ou une explosion dangereuse.
Ne placez pas l’appareil près d’essence ou de tout autre produit liquide ou gazeux inflammable. La
fumée que ces produits dégagent pourrait déclencher un incendie ou une explosion dangereuse.
- Conservez ces instructions Avant son utilisation l’appareil doit être positionné et installé adéquatement en suivant les
directives contenues dans ce manuel, sous la section « installation ». Lorsque vous utilisez
un appareil électrique, il convient de toujours d’observer les précautions de base afin de
réduire le risque de choc électrique, de feu ou de blessure corporelle.
AVERTISSEMENTS :
1. Lire toutes les instructions contenues dans ce manuel avant d'utiliser l'appareil.
2. Brancher l’appareil dans une prise de courant à 3 fiches, et ne pas utiliser de cordon
rallonge.
3. Il est recommandé d’utiliser un circuit électrique indépendant qui serait dédié uniquement
à cet appareil.
4. Avant de nettoyer l’appareil, assurez-vous de couper l’alimentation électrique. Ne nettoyez
jamais l'unité avec une préparation acide, de l’essence, du pétrole ou autre sorte de
substance chimique qui pourrait endommager l’appareil.
5. Ne jamais entreposer ou utiliser de l’essence, de gaz ou de liquides inflammables près de
cet appareil.
6. Débrancher l’appareil avant de procéder au nettoyage, à la maintenance ou à la
réparation.
7. Les réparations ne doivent être effectuées que par les centres de service autorisés.
8. Ne pas faire fonctionner l’appareil si le cordon ou la fiche est endommagé. Ne pas tenter
de réparer ou de remplacer des pièces de l’appareil. (sauf remplacement d’ampoule)
9. Pour assurer une ventilation adéquate le devant de l’appareil doit être libre. Choisir un
endroit bien ventilé, ou la température se situe au dessus de 15 ºC (59 ºF) et en dessous
de 24º C (75º F).
4
10. Cet appareil ne convient pas pour un usage extérieur.
11. L’appareil de ne doit pas être installé près d’une source de chaleur. Évitez les installations
au soleil direct ou à très hautes températures.
12. Si vous prévoyez ne pas utiliser l‘appareil durant une longue période de temps il est
préférable de laisser la porte ouverte. Si un peu de condensation se créer simplement
l’essuyer.
13. Afin d’obtenir le rendement maximal de cet appareil il doit être mis à niveau.
14. Ne jamais laisser d’enfants utiliser ou jouer avec cet appareil.
15. Danger : risque d'emprisonnement d'enfant.
16. Avant de mettre votre appareil au rebut veuillez retirer la porte et laisser les tablettes à
l’intérieur pour que les enfants ne puissent pas facilement y grimper.
17. L’appareil ne peut être utilisé que pour un usage domestique, ce pour lequel il a été conçu.
Le fabricant ne sera responsable d’aucun dommage résultant d’une utilisation inadaptée
ou de réparations effectuées par du personnel non qualifié. Une utilisation de type
commerciale annulera toute garantie.
NOUS VOUS RECOMMANDONS DE CONSERVER CES INSTRUCTIONS
ATTENTION : CET APPAREIL EST RÉSERVÉ UNIQUEMENT À UN USAGE DOMESTIQUE
INSTALLATION
AVANT D’UTILISER VOTRE APPAREIL
1. Retirez l‘emballage extérieur et intérieur. Lisez le mode d’emploi.
2. Assurez vous d’avoir toutes les pièces suivantes :
• Un manuel d’instruction
• 14 tablettes pour les bouteilles de vin
• 3 tablettes pour les breuvages
3. Placez l’appareil à l’endroit qui lui est réservé puis attendez environ 3-4 heures avant
de le brancher. Vous éviterez ainsi des troubles de fonctionnement au niveau du
système de refroidissement possiblement occasionnés lors du transport.
INSTALLATION
1. Cet appareil est conçu pour être encastré ou installé de manière autonome.
2. Avant de raccorder l'appareil à la source de pouvoir, assurez-vous qu’il a été en
position debout depuis au moins 4 heures. Cela réduira le risque d'un mauvais
fonctionnement du système de refroidissement résultant d’une manipulation inadéquate
pendant le transport. Nettoyez la surface intérieure avec l'eau tiède en utilisant un linge
doux.
5
3. Cette unité n'est pas conçue pour être installée dans un véhicule récréatif ou encore pour
être alimentée avec un convertisseur. Après avoir branché l'appareil dans la prise murale,
mettre l'unité en marche et laisser refroidir pendant 3-4 heures avant de la remplir.
4. Placez l’appareil à l’abri des rayons du soleil et de sources de chaleur (four, chauffage,
radiateur, etc.). Une exposition directe à la lumière du soleil peut affecter le revêtement
acrylique de l’appareil et les sources de chaleur peuvent en faire déranger son
fonctionnement. Il est recommandé de placer l’appareil dans un endroit où la température
ambiante se situe entre 15° et 24°C (59°F-76°F).
5. Ne pas utiliser d’adaptateur ni de rallonge.
L'INSTALLATION INTÉGRÉE
1. Pour une installation intégrée tenir compte des dimensions inscrites sur le diagramme de
la figure (A) afin de permettre l’ouverture complète de la porte et le plein accès aux
tablettes escamotables.
2. Si l’appareil est installé entre des cabinets sans cadres une languette ou un panneau de ½
peuvent être nécessaires sur le côté de charnière. La bande agira comme une entretoise
entre l'appareil et la porte du cabinet. La largeur de l'ouverture doit inclure la largeur de la
languette ou du panneau.
Notez : la porte devrait dépasser d’au moins 1” le périmètre des cabinets
Figure A
LOCALISER
PRISE
23 1/2"
23 1/4 "
MISE À LA TERRE
AVERTISSEMENT
L'utilisation inadéquate de la fiche de mise à la terre peut engendrer des risques
de choc électrique.
Si le cordon d’alimentation est endommagé, faites-le remplacer par un centre de service autorisé.
Pour votre sécurité cet appareil devrait être correctement mis à la terre. Cet appareil
est équipé d’une fiche de courant à trois tiges pour réduire le risque de choc
électrique. Si la fiche ne s’insère pas facilement ou à fond dans la prise de courant,
consulter un électricien.
6
Cet appareil requiert une prise de branchement à 3 brins au standard de 115 Volt
A.C./60Hz.
Cet appareil n'est pas conçu pour être utilisé avec un convertisseur.
Le cordon d’alimentation devrait être rangé derrière l'appareil et ne devrait ne pas être
exposé.
Ne débranchez jamais l'appareil en tirant sur le cordon d’alimentation.
N'utilisez pas de cordon rallonge. Si le cordon est trop court, consultez un électricien
qualifié ou un technicien de service et faites installer une prise plus près de l'appareil
CARACTERISTIQUES
LA LUMIÈRE INTÉRIEURE
Chaque zone a sa propre lumière intérieure, qui peut être allumée en appuyant sur
l’interrupteur à partir du panneau de commandes. Les appareils sont munis d’écrans LED
haute efficacité pour offrir durabilité et économie d’énergie.
DEUX ZONES DE TEMPÉRATURE
L’appareil comporte deux zones, divisées par une partition. Chaque zone a son contrôle de
température indépendant et son propre étalage. Chaque zone peut tenir jusqu'à 21 bouteilles
de vin ou encore 54 cannettes.
LES ÉTAGÈRES
Toutes les étagères sont à profondeur complète et ont des supports pour les retenir des deux
côtés. Toutes les étagères peuvent être retirées pour loger de plus grandes bouteilles.
RETIRER UNE ÉTAGÈRE
Enlevez toutes les bouteilles de l’étagère. Soulevez l'étagère vers le haut et ensuite tirez
doucement vers l’extérieur.
NOTE : ASSUREZ-VOUS QUE LES ÉTAGÈRES SONT FERMEMENT EN PLACE AVANT
DE PLACER LES BOUTEILLES.
7
MODE D’EMPLOI
Panneau de contrôle gauche
Panneau de contrôle droit
Il est recommandé de placer l’appareil dans un endroit où la température ambiante se
situe entre 15° et 24°C (59°F-75°F). Si la température ambiante est supérieure ou
inférieure à la température recommandée, il se peut que le fonctionnement de l’appareil
en soit affecté.
Par exemple, exposer votre appareil à un froid extrême ou à de fortes chaleurs peut faire
fluctuer les températures intérieures. La température zonale peut avoir une différence de
+/- 5°F (+/- 3º C) selon le chargement et les conditions ambiantes.
La plage de température de chacune des deux zones se situe entre 1° à 18°C , soit de
de 34° à 65°F .
RECOMMANDATION RELATIVES À LA TEMPÉRATURE POUR CONSERVATION
DU VIN
Vins mousseux et rosés : de 5ºC à 8ºC (41ºF-46ºF)
Vins secs et blancs : de 7ºC à 12ºC (45ºF-53ºF)
Vins rouges : de 14°C à 18°C (59ºF-65ºF)
VERROUILLER ET DÉVERROUILLER LE PANNEAU DE CONTRÔLE
L’appareil est équipé d’un mécanisme automatique de verrouillage du tableau de commandes.
Ce dispositif empêche tout changement non désiré des paramètres. La fonction de
verrouillage s’activera automatiquement 5 secondes après la dernière pression d’une touche.
Pour déverrouiller le tableau de commandes, maintenez enfoncé les touches
et
pendant 3 secondes; le tableau de commandes émettra alors un signal sonore et clignotera
une fois pour indiquer qu’il est actif et prêt à accepter de nouveaux paramètres. Vous devez
déverrouiller le panneau de commandes à chaque fois que vous désirez régler la température,
changer l’affichage (C° - °F), allumer ou éteindre la lumière, etc…
ATTENTION : lorsque le panneau est verrouillé, aucune touche ne fonctionnera et l'indicateur
s’affichera pendant 5 secondes pour vous rappeler que la touche appuyée est verrouillée.
8
INTERRUPTEUR MARCHE/ARRÊT
Pour éteindre l'appareil, déverrouillez le panneau de commandes et tenez la touche
pendant 2 secondes.
RÉGLAGE DE LA TEMPÉRATURE
Il faut d’abord déverrouiller le panneau de commandes. Vous pouvez choisir de régler la
température en degré Fahrenheit ou Celsius en appuyant sur la touche . La sélection
apparaîtra en bleue dans la fenêtre d’affichage.
Pour régler la température, une fois le panneau de commandes déverrouillé, vous devez
(plus chaud) ou
appuyer sur l’une des 2 touches suivantes pour augmenter ou diminuer :
(plus froid). La température la température affichée augmentera ou diminuera d'un (1) degré
chaque fois.
REMARQUE : En pressant sur la touche marche /arrêt
, le cellier arrêtera son cycle de
refroidissement mais ne coupera pas le courant. Si l’appareil est débranché, éteint ou qu’il y a
une panne de courant, il faudra attendre entre trois et cinq minutes avant de redémarrer
l’appareil. Si vous tentez de le faire avant ce délai, l’appareil ne redémarrera pas.
Si vous utilisez l’appareil pour la première fois ou que vous le redémarrez après qu’il ait été
arrêté pendant une longue période, il pourrait y aura une différence entre la température que
vous avez sélectionnée et celle indiquée sur le panneau d’affichage. Ceci est normal étant
donné la durée du temps d’activation. Lorsque l’appareil aura fonctionné quelques heures,
tout rentrera dans l’ordre.
ECLAIRAGE INTÉRIEUR
L’éclairage intérieur s’éteindra automatiquement après dix minutes. Vous devrez alors
déverrouiller le panneau de commandes et ensuite appuyer sur la touche
pour le rétablir.
9
NETTOYAGE ET ENTRETIEN
NETTOYAGE
•
•
•
•
•
•
•
•
•
Nettoyez votre appareil au moment de l'installation, il est recommandé de le nettoyer
régulièrement.
Éteignez d'abord l'appareil et débranchez ensuite l'unité de la prise murale.
Enlevez tout le contenu.
Lavez l'intérieur avec un linge humide qui a été trempé dans une solution de bicarbonate
de soude et d'eau tiède. La solution devrait être environ 2 cuillères à soupe de
bicarbonate de soude par quart d'eau. Ne jamais utiliser de produits abrasifs pour
nettoyer l’intérieur ou l’extérieur de l’appareil.
Assurez-vous de garder le joint de porte (d’étanchéité) propre pour que l’unité fonctionne
efficacement.
L'extérieur de l'appareil devrait être nettoyé avec un savon doux et de l'eau chaude.
Séchez l'intérieur et l'extérieur avec un linge doux.
La poussière ou toute autre particule obstruant l’évent peut affecter le niveau d'efficacité
de l'appareil.
Au besoin, nettoyer l’évent avec un aspirateur.
LES VACANCES
•
•
Courtes Vacances : Laissez l'appareil en marche pendant les vacances de moins de trois
semaines.
Grandes vacances : si l'appareil ne sera pas utilisé pendant plusieurs mois, enlever tout le
contenu et débrancher. Nettoyez et séchez complètement l'intérieur. Pour prévenir la
formation possible de condensation, de moisissure, ou d’odeurs laissez la porte
légèrement ouverte.
POUR DÉPLACER VOTRE APPAREIL
•
•
•
•
•
•
Éteindre l'appareil et débrancher ensuite l'unité de la prise murale
Retirer le contenu
Visser les pattes jusqu’à la base pour éviter qu’elles s’endommagent
Fermer la porte solidement à l’aide d’un ruban adhésif
S’assurer que l’appareil demeure en position debout
Protéger l’extérieur de l’appareil avec un recouvrement
POUR ÉCONOMISER DE L'ÉNERGIE
•
•
L'appareil devrait être installé dans la un endroit sec et frais, loin des sources de chaleur,
de d’autres appareils ou encore de la lumière directe du soleil.
Assurez-vous que la porte est correctement fermée quand l'appareil est en fonction.
PANNE DE COURANT
La plupart des coupures de courant se rétablissent en quelques heures et ne devraient pas
affecter la température de votre cellier si vous ouvrez la porte le moins possible. Si le courant
ne se rétablit pas avant longtemps, voyez à protéger le contenu de l’appareil.
GARANTIE
Garantie limitée de 1 an sur pièces et main d’œuvre
10
DÉPANNAGE
Bien souvent vous pouvez résoudre de petits problèmes mécaniques sans avoir à faire appel au centre
de service. Essayez les suggestions ci-dessous pour voir si vous pouvez résoudre le problème avant
de procéder à un appel du service.
PROBLEME(S)
L’appareil de fonctionne pas
La température intérieure n’est pas assez froide
La température est trop froide
Vibrations/ L’appareil semble faire trop de bruit
Les ventilateurs partent et arrêtent fréquemment.
Condensation à l’extérieur de l’appareil
CAUSE(S) POSSIBLE(S)
L’appareil n’est pas branché
Le disjoncteur est déclenché ou un fusible a
sauté
Vérifier le réglage de température
La porte est ouverte trop souvent
La porte n’est pas complètement fermée
Le joint d’étanchéité est abimé
L’appareil a été débranché pour une longue
période de temps et lui faut 4 heures pour être
complètement refroidi.
Vérifier le réglage de la température
La température ambiante de la pièce est trop
froide
S’assurer que l’appareil est de niveau.
Si la vibration continue, éteindre l’appareil et le
dis connecter. Le son de crécelle peut provenir
du fluide réfrigérant, ce qui est normal. À la fin
de chaque cycle, vous pourriez entendre des
gargouillis provenant du fluide qui circule dans
les conduits. La contraction et la dilatation des
murs
intérieurs
peuvent
produire
des
craquements et des cliquetis.
Afin de faire circuler l’air et de maintenir la
température approprié à l’intérieur de l’unité, les
ventilateurs doivent effectuer leur cycle de mise
en marche et arrêt quand le compresseur n’est
pas en fonction. Les ventilateurs feront le cycle
de mise en marche et arrêt pendant que le
compresseur n’est pas en fonction environ à
toutes les 10 secondes. Ce cycle est normal et a
pour but de faire circuler l’air ainsi que d’assurer
l’opération continue des ventilateurs. Si le
ventilateur s’arrête complètement et ne complète
pas son cycle, le ventilateur n’est pas
opérationnel.
La porte est entrouverte, ce qui amène l’air froid
de l’intérieur à se mêler à l’air chaud de
l’extérieur
Codes:E0-E1-E2
Une sonde est défectueuse. Placez un appel de
service.
La porte ne ferme pas bien
L’appareil n’est pas de niveau (voir section
installation)
Le joint d’étanchéité devrait être nettoyé
Les étagères ne sont pas bien installées
Pour contacter le centre de service autorisé :
A.G. I. SERVICE
450.963.1303/1.888.6512534
11
TABLE OF CONTENTS
COMPONENTS AND PARTS ………………………………………………... 12
IMPORTANT SAFETY PRECAUTIONS…………………………………….. 13
INSTALLATION INSTRUCTIONS
BEFORE USING YOUR APPLIANCE…………………………..…… ... 13
FREE STANDING OR BUILT-IN INSTALLATION….………..…
13-14
ELECTRICAL CONNETION …………………………………………… 14
APPLIANCE FEATURES …………………………………………………….. 15
OPERATING YOUR APPLIANCE
TEMPERATURE CONTROL & DISPLAY..…………………………… 16
TEMPERATURE SETTING & LIGHTS …………………………… 16-17
LOCK SETTING ………………………………………………………... 16
CARE AND MAINTENANCE
AUTOMATIC DEFROST…………..…………………………………... 18
CLEANING …………………………………………………………….. 18
ENERGY SAVING TIPS .…………………………………………….... 18
VACATIONS ……….……………………….………..………………... 18
MOVING YOUR APPALICANCE…………………………………….. 18
TROUBLESHOOTING GUIDE……………………………………………….
19
COMPONENTS AND PARTS
Note: The control panels (Item no.
1 & 5) are on the front of the unit.
1) Temperature Control and Display (Left
Zone)
2) Circulation Fan
3) Interior Light
4) Cabinet
5) Temperature Control and Display (Right Zone)
6) Drip Pan
7) Sculptured Vinyl Shelf (Wine Storage)
8) Flat Chrome Shelf (Beverage Storage)
SPECIFICATIONS - Model LBWC-42SD
Product Description
24” Stainless Steel Built-In Wine & Beverage Center
Model No.
LBWC-42SD
Unit Dimensions
( inches )
Width
Height
Depth
23 1/2”
34”
23 1/4”
Net Weight ( lbs)
104 lbs
Built-in requirements
Width
Height
Depth
24”
34 ½”
24”
Width, Depth, Height
13
IMPORTANT SAFETY INSTRUCTIONS
WARNING
•
•
•
•
•
•
•
To reduce the risk of fire, electrical shock,
or injury when using your appliance, follow
these basic precautions:
Read all instructions before using the wine or beverage cooler.
DANGER or WARNING: Risk of child entrapment.
To avoid the possibility of child entrapment, please take the following precautions
before throwing out the appliance.
- Remove all doors from the unit.
- Leave the shelves in place so that children may not easily climb inside.
Never allow children to operate, play with, or crawl inside the appliance.
Refrigerants: All refrigeration products contain refrigerants, which under the
guidelines of federal law must be removed before disposal of product. It is the
consumer’s responsibility to comply with federal and local regulations when
disposing of this product.
Never clean appliance parts with flammable fluids. The fumes can create a fire
hazard or explosion.
Do not store or use gasoline or any other flammable vapors and liquids in the
vicinity of this or any other appliance. The fumes can create a fire hazard or an
explosion.
-Save these instructions-
PRIOR TO USE THE UNIT SHOULD BE POSITIONED AND INSTALLED PROPERLY BY
FOLLOWING THE INSTRUCTIONS CONTAINED IN THIS MANUAL. WHEN YOU USE AN
ELECTRICAL DEVICE, YOU SHOULD ALWAYS OBSERVE THE BASIC PRECAUTIONS TO
REDUCE THE RISK OF ELECTRIC SHOCK, FIRE OR PERSONAL INJURY.
PRECAUTIONS:
1. Read all instructions before in this manual before using your unit.
2. Plug into a grounded 3-prong outlet, do not remove grounding prong, do not use
an adapter, and do not use an extension cord.
3. It is recommended that a separate circuit, serving only your appliance be provided.
4. Never clean appliance parts with flammable fluids. These fumes can create a fire
hazard or explosion. And do not store or use gasoline or other flammable vapours
and liquids in the vicinity of this or any other appliance. The fumes can create a fire
hazard or explosion.
5. Do not store or use gasoline or any other flammable vapours and liquids in the
vicinity of this or any other appliance. The fumes can create a fire hazard or
explosion.
6. Before proceeding with cleaning and maintenance operations, make sure the
power line of the unit is disconnected.
7. Do not connect or disconnect the electric plug when your hands are wet.
14
8. Do not attempt to repair or replace any part of your appliance unless it is
specifically recommended in this material. All other servicing should be referred to
a qualified technician.
9. If the power cord is damaged, have it replaced by an authorized Service Center. Do
not attempt to repair or replace any part of your appliance unless it is specifically
recommended in this material. All other servicing should be referred to a qualified
technician.
10. To ensure proper ventilation for your appliance, the front of the unit must be completely
unobstructed. Choose a well-ventilated area with temperatures between 59°F (15°C)
and 75°F (24°C).
11. This unit is not designed for use in a garage or any other outside installation.
12. Locate the wine cellar away from direct sunlight and heat sources.
13. It is important for the appliance to be levelled in order to work properly
14. Never allow children to operate, play with, or crawl inside the appliance.
15. WARNING: Risk of child entrapment.
16. Before throwing out the appliance remove all doors from the unit and leave the
shelves in place so that children may not easily climb inside.
17. Do not use this equipment for other than its domestic intended purpose. A commercial
use will void the warranty. The manufacturer will not be held responsible for damage
due to misuse or repairs performed by unauthorized servicers.
WE RECOMMEND TAHT YOU KEEP THIS MANUAL HANDY FOR FUTURE REFERENCE
IMPORTANT: THIS PRODUCT I INTENTED FOR DOMESTIC USE ONLY
INSTALLATION INSTRUCTIONS
BEFORE USING YOUR APPLIANCE:
1. Remove the exterior and interior packing. Read all instructions
2. Make sure you have all of the following parts:
•
•
•
1 instruction manual
14 wine bottle shelves
3 beverage shelves
3. Before connecting the wine cellar to the power source, let it stand upright for
approximately 2 hours. This will reduce the possibility of a malfunction in the cooling
system from handling during transportation.
15
INSTALLATION
1. This appliance is designed to be installed built-in or free standing.
2. After plugging the appliance into a wall outlet, allow the unit to cool down for 3-4
hours before placing wine bottles or beverage cans in the appliance. This appliance is
not designed to be used in a RV (recreational vehicle) with an inverter.
3. Locate the appliance away from direct sunlight and sources of heat (stove, heater,
radiator, etc.). Direct sunlight may affect the acrylic coating and heat sources may
increase electrical consumption. Ambient temperature below 15°F (59°C) or above
75°F (24°C) may hinder the performance of this appliance.
4. Plug the appliance into dedicated, properly installed-grounded wall outlet. Any
questions concerning power and/or grounding should be directed toward a certified
electrician or an authorized service center.
5. Do not use an extension cord or an adapter.
BUILT-IN INSTALLATION
The cutout dimension illustrated in figure (A) allows for door
swing and access to the pull-out shelves when installed as
a built-in appliance.
If installing between frameless
cabinets, a ½” wide filler strip or side panel may be needed
on hinge side.
The filler strip will act as a spacer between the appliance
case and adjacent cabinet door swing. The width of the
opening must include the filter panels.
Note: The door should protrude at least 1” beyond the
surrounding cabinets and the cutout depth must be
24”.
23 1/4”
23 1/2”
Figure A
ELECTRICAL CONNECTION
WARNING
Improper use of the grounded plug can result in the risk of electrical shock. If the power
cord is damaged, have it replaced by an authorized service center.
•
This appliance should be properly grounded for your safety. The power cord of this
appliance is equipped with a three-prong plug which mates with standard three prong
wall outlets to minimize the possibility of electrical shock.
•
This appliance requires a standard 115 Volt A.C. /60Hz electrical outlet with three-prong
ground.
•
This appliance id not designed to be use with an inverter.
16
•
•
The cord should be secured behind the appliance and not left exposed or dangling to
prevent accidental injury.
Never unplug the appliance by pulling the power cord. If the power cord is too short, do
not use an extension cord, have a qualified electrician or service technician install an
outlet near the appliance.
APPLIANCE FEATURES
INTERIOR LIGHT
Each zone has its own interior light, which can be switched on or off by pressing the pad light
on the control panel. Long-life and high efficiency LEDs are installed for durability and energy
saving.
TWO TEMPERATURE ZONES
There are two zones in this appliance, and each zone has its independent temperature control
and display. Each of the two zones can be used to store wine bottles or beverages. Each of
the two zones can hold up to 21 bottles or 54 cans.
ENGAGED WINE SHELVES
All the shelves have tabs to engage the cabinet on both sides. Any of the shelves can be
removed to accommodate larger bottles.
TO REMOVE A SHELF:
Remove all bottles (cans) from the shelves. Lift the shelf upwards and then gently pull out the
shelf.
TO REPLACE A SHELF:
Place the sides of the shelves back onto the supporting guides of the cabinet and push back
until the shelf tabs slide into place.
NOTE: ENSURE THAT THE TABS ARE FIRMLY ENGAGED IN PLACE BEFORE
STORING ANY BOTTLES.
17
OPERATING YOUR APPLIANCE
It is recommended you install the wine cellar in a place where the ambient temperature is
between 15ºC-24ºC (59ºF-75ºF). If the ambient temperature is above or below recommended
temperatures, the performance of the unit may be affected. For example, placing your unit in
extreme cold or hot conditions may cause interior temperatures to fluctuate.
Heat sources or extreme cold ambient temperatures may also cause the unit not to perform
correctly.The zone temperature may have a tolerance of +/-5°F (+/-3°C) from setting
depending on different loading and ambient conditions.
Both sides of the unit can be set between 1-18°C (34°-65°F)
RECOMMENDED TEMPERATURE SETTINGS
Rose and sparkling wines: 5°C-8ºC (41°F-46ºF)
Dry/white wines: 7°C-12ºC (45°F-53ºF)
Red wines: 14°C-18ºC (59°F-65ºF)
CONTROL PANELS
Wine cellar control panel (Left Side)
Beverage center control panel (Right Side)
CONTROL PANEL LOCK
Your wine cellar is equipped with an automatic control panel lock function. This function will prevent
any unwanted changes to your temperature or power settings. The lock function will activate
automatically 5 seconds after the last time a button is pushed on the control panel.
To unlock the control panel lock, press and hold both the
and buttons for 3
seconds the control panel will beep and blink once indicating that the control
panel is active and the settings can be changed. You must unlock the control
panel every time you want to set the temperature, change the display setting (°F
- °C) turn on or off the light and to power off the cellar.
ON/OFF Power
To turn OFF the cellar, unlock the control panel then press the
button and hold 2 seconds.
Temperature Control and Display
1. When the unit is plugged in all of the display and indicators will light for 3 seconds and an audible
beep will be heard.
2. The temperatures in left zone and right zone can be independently controlled and displayed.
3. The temperature in either zone can be controlled between 39°F to 65°F (4°C to 18°C). (The zone
temperature may have a tolerance of +/-5°F (+/-3°C) from setting depending on different loading
and ambient conditions.)
Indicators Lights
•
•
When lit, the
indicator light indicates that all of the control pads are locked and no
adjustment can be made to that zone.
indicator light indicates that the corresponding zone is in the refrigeration cycle
When lit, the
(compressor is running). The
indicator will go off once the desired temperature is reached.
Note: The
light will remain on and the compressor may continue to run for several
minutes after the desired temperature is reached.
Lock and Unlock
The lock feature is designed to prevent the settings of your wine cooler from being adjusted
accidentally. In order to adjust any of the settings you must unlock the control panel by pressing the
“lock” pad for approximately 3 seconds. Once the unit is unlocked an audible beep will be heard and the
“lock” indicator light will go out.
If no selection is made to adjust the unit in approximately one minute the control panel will automatically
return to the “lock” mode.
To lock the unit manually press the
“lock” pad.
Temperature setting
• Unlock the control panel by pressing the
pad for approximately 3 seconds. Once the control
panel is unlocked an audible beep will be heard and the
indicator will go out.
• Under normal conditions the temperature display indicates the current temperature of the
corresponding zone. When adjusting the temperature, the temperature display will flash to
indicate that the temperature is being adjusted.
• The temperature in both left zone and right zone can be set independently by pressing
(warmer) or
(colder) pads that correspond to desired zone. The temperature range of both
zones can be set between 39°F to 65°F (4°C to 18°C) +/- 3°C. (+/-5°F)
• When the pad
(warmer) or
(colder) is pressed, the temperature displayed will increase
or decrease in an increment of one degree. If the pad
(warmer) or
(colder) is pressed
and held for 2 seconds, the temperature displayed will increase or decrease in a speed of one
degree per half second.
• Once you have adjusted the left or right zone to the desired temperature, release the
temperature pad. At this time the temperature displayed will flash for approximately 3 seconds
to confirm the selected temperature. Once the display stops flashing the temperature display
will indicate the current temperature of that zone.
19
Note:
The temperature display can be changed between Celsius and Fahrenheit by simultaneously
pressing and holding both pads
This unit cannot be in
(warmer) and
(colder) for approximately 3 seconds.
(Lock) mode to perform this operation.
Interior Light
To turn on / off the interior light, press the
perform this operation.
(Light) pad. The unit cannot be in the
(Lock) mode to
17
CARE AND MAINTENANCE
Defrost
•
•
•
•
The ice build-up on the inner back wall during compressor operation will be automatically defrosted
in a compressor off cycle.
When defrosting is in process, the indicators for both zones will go off, and the circulation fans
for both zones will run.
Each zone has its own drip pan placed at the bottom against rear wall. (See illustration on page 2.)
Defrost water will drain into the drip pans. Water accumulated in the drip pans should be discarded
periodically. It is recommended to empty the drip pans every second or third week. (You will learn
how often to empty the drip pans is practicable for your local climate.)
Cleaning Your Appliance
•
•
•
•
•
•
•
•
Upon installation of your new appliance, it is recommended that it be cleaned thoroughly.
Unplug the unit from the wall outlet.
Remove all contents.
Wash the inside with a damp warm cloth soaked in lukewarm water and baking soda solution. The
solution should be about 2 tablespoons of baking soda to a quart of water.
Be sure to keep the door gasket (seal) clean to keep the unit running efficiently.
The outside of the appliance should be cleaned with mild detergent and warm water.
Dry the interior and exterior with a soft cloth.
Dust or anything else blocking the vent may hinder the cooling efficiency of the appliance. Vacuum
the vent if necessary.
Vacation Time
•
•
•
•
•
•
Unplug the unit from the wall outlet.
Remove all the contents.
Clean the appliance.
Leave the door open slightly to avoid possible formation of condensation, mold, or odors.
Short vacations: Leave the appliance operating during vacations of less than three weeks.
Long vacations: If the appliance will not be used for several months, remove all content and
unplug the power cord. Clean and dry the interior thoroughly. To prevent odor and mold growth,
leave the door open slightly, blocking it open if necessary.
Moving Your Appliance
•
•
•
•
Unplug the unit from the wall outlet.
Remove all the contents.
Securely tape down all loose items inside your appliance.
Tape the doors shut.
Energy Saving Tips
•
•
The appliance should be located in the coolest area of the room, away from heat producing
appliances or heating ducts, and out of the direct sunlight.
Ensure that door is closed when the appliance is plugged in.
18
TROUBLESHOOTING GUIDE
You can solve many common appliance problems easily, saving you the cost of a possible
service call. Try the suggestions below to see if you can solve the problem before calling for
service.
PROBLEM
Appliance does not operate.
Temperature inside the appliance is too warm.
Temperature inside the appliance is too cold.
Vibrations.
Moisture forms on inside appliance walls.
Moisture forms on outside of appliance.
The door will not close properly.
POSSIBLE CAUSE
Not plugged in.
The circuit breaker has tripped or there is a blown
fuse.
Temperature control is set too warm. Turn the
control to a cooler setting and allow several hours
for the temperature to stabilize.
Door is kept open too long or is opened too
frequently. Warm air enters the appliance every
time the door is opened. Open the door less
often.
The door is not closed completely.
The door gasket does not seal properly.
The appliance has recently been disconnected
for a period of time. 4 hours are required for the
appliance to cool down completely.
Temperature control is set too cold. Turn the
control to a warmer setting and allow several
hours for the temperature to stabilize.
Check to assure that the appliance is on a level
surface.
The appliance is touching the wall. Re-level the
appliance and move it from the wall.
If continued vibration occurs, turn off the
appliance and unplug the power plug. Contact
Customer Service Dept. for further assistance.
Door is slightly open.
Door is kept open too long, or is opened too
frequently. Open the door less often.
The door is not sealed properly.
Door is slightly open, causing cold air from inside
the appliance to meet warm moist air from
outside.
The appliance is not on a level surface.
The gasket is dirty.
WARRANTY
1 year, parts and labor.
Authorized service:
A.G. I. SERVICE
450.963.1303/1.888.6512534
[email protected]
19