1
~
¸
~
Cod. 252.173.02
IT
GB
DE
FR
ES
NL
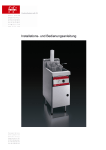
FRIGGITRICE A GAS 8 LITRI - SERIE 65
8-LITRE GAS FRYER – 65 SERIES
GAS-FRITTEUSE 8 LITER - SERIE 65
FRITEUSE À GAZ 8 LITRES - SÉRIE 65
FREIDORA DE GAS 8 LITROS–SERIE 65
GASFRITEUSE 8 LITER - SERIE 65
0063
MOD. 65-40 FRG
65-70 FRG
ITALIANO
SOMMARIO
6.6
OIL LOAD ............................................................................. 11
6.7
EMPTYING THE BOWL ....................................................... 11
1. AVVERTENZE ................................................................... 4
7. MAINTENANCE, CLEANING AND CARE ........................ 11
2. RISPONDENZA ALLE DIRETTIVE "CEE" –
8. INSTALLATION DIAGRAMS ........................................... 24
APPARECCHIATURE A GAS ............................................... 4
9. TECHNICAL DATA .......................................................... 25
3. TABELLA DATI TECNICI - FRIGGITRICI .......................... 6
10. EXPLODED FUNCTIONAL PARTS TABLES MOD. 65-40
3.1
CARATTERISTICHE DEI GAS .............................................. 6
FRG 65-70 FRG.................................................................. 26
4. ISTRUZIONI PER L'INSTALLATORE QUALIFICATO ....... 7
4.1
INSTALLAZIONE DELL'APPARECCHIATURA..................... 7
4.2
NORME DI LEGGE, REGOLE TECNICHE E LINEE
DEUTSCH
INHALTSVERZEICHNIS
GENERALI ............................................................................. 7
1. HINWEISE ..........................................................................4
4.3
SCARICO FUMI PER APPARECCHI TIPO "A"..................... 7
2. ÜBEREINSTIMMUNG MIT DEN EG-RICHTLINIEN FÜR ...4
4.4
CONTROLLO PERDITE GAS ................................................ 7
3. TABELLE TECHNISCHE DATEN - FRITTEUSEN ........... 12
5. MANUTENZIONE............................................................... 7
5.1
5.2
TRASFORMAZIONE PER FUNZIONAMENTO CON ALTRI
3.1
KENNDATEN DER GASARTEN .......................................... 12
4. ANWEISUNGEN FÜR DEN INSTALLATEUR .................. 13
GAS – FRG ............................................................................ 7
4.1
INSTALLATION .................................................................... 13
SOSTITUZIONE PARTI DI RICAMBIO ................................. 7
4.2
GESETZLICHE, TECHNISCHE UND ALLGEMEINE
6. ISTRUZIONI PER L’UTENTE............................................. 7
VORSCHRIFTEN ................................................................. 13
6.1
ACCENSIONE DEI BRUCIATORI FRIGGITRICE ................. 7
4.3
ABGASLEITUNG FÜR GERÄTE "A" ................................... 13
6.2
TEMPERATURE INDICATIVE DELLA MANOPOLA DELLA
4.4
KONTROLLE GASLECKSTELLEN...................................... 13
VALVOLA ............................................................................... 8
6.3
SPEGNIMENTO BRUCIATORI FRIGGITRICE ..................... 8
6.4
SPEGNIMENTO TOTALE FRIGGITRICE ............................. 8
6.5
TERMOSTATO DI SICUREZZA ............................................ 8
6.6
CARICO OLIO ........................................................................ 8
6.7
SCARICO DELLA VASCA ..................................................... 8
7. MANUTENZIONE, PULIZIA E CURA ................................ 8
5. WARTUNG ....................................................................... 13
5.1
UMBAU FÜR DEN BETRIEB MIT ANDEREN GASARTEN –
FRITTEUSEN ....................................................................... 13
5.2
AUSTAUSCH VERSCHIEDENER TEILE ............................ 13
6. ANWEISUNGEN FÜR DEN BENUTZER .......................... 13
6.1
EINSCHALTEN DER FRITTEUSENBRENNER .................. 14
6.2
TEMPERATURANGABEN AUF DEM VENTIL-
8. SCHEMI DI INSTALLAZIONE .......................................... 24
DREHSCHALTER ................................................................ 14
9. DATI DI TARGA............................................................... 25
6.3
AUSSCHALTEN DER FRITTEUSENBRENNER ................. 14
10. TAVOLE ESPLOSI PARTI FUNZIONALI MOD. 65-40
6.4
KOMPLETTES AUSSCHALTEN DER FRITTEUSE ............ 14
FRG 65-70 FRG ................................................................. 26
6.5
SICHERHEITSTHERMOSTATE .......................................... 14
6.6
BEFÜLLEN DES BECKENS MIT ÖL ................................... 14
6.7
BECKEN ENTLEEREN ........................................................ 14
ENGLISH
INDEX
7. WARTUNG, REINIGUNG UND PFLEGE.......................... 14
1. WARNINGS ....................................................................... 4
2. COMPLIANCE WITH “EEC” DIRECTIVES – GAS
APPLIANCES ........................................................................ 4
3. TECHNICAL DATA TABLE ............................................... 9
3.1
GAS CHARACTERISTICS ..................................................... 9
8. INSTALLATIONSSCHEMEN............................................ 24
9. TECHNISCHE DATEN ..................................................... 25
10. DETAILZEICHNUNGEN DER BETRIEBSTEILE MOD. 6540 FRG 65-70 FRG............................................................. 26
FRANÇAIS
SOMMAIRE
4. INSTRUCTIONS FOR THE QUALIFIED INSTALLER...... 10
4.1
APPLIANCE INSTALLATION .............................................. 10
1. AVERTISSEMENTS ...........................................................4
4.2
LAWS, TECHNICAL REGULATIONS AND GENERAL
2. CONFORMITÉ AUX DIRECTIVES "CEE"–
RULES .................................................................................. 10
4.3
DISCHARGE OF FUMES FOR TYPE “A” APPLIANCES ... 10
4.4
CHECKING FOR GAS LEAKS ............................................ 10
5. MAINTENANCE ............................................................... 10
5.1
CONVERSION FOR USE WITH A DIFFERENT TYPE OF
GAS - FRYER....................................................................... 10
5.2
CHANGING SPARE PARTS ................................................ 10
APPAREILLAGES À ..............................................................4
3. TABLEAU DONNÉES TECHNIQUES - FRITEUSES ....... 15
3.1
4.1
INSTALLATION DE L'APPAREILLAGE ............................... 16
4.2
NORMES RÉGLEMENTAIRES, RÈGLES TECHNIQUES ET
GÉNÉRALES ........................................................................ 16
6. USER INSTRUCTIONS .................................................... 10
6.1
LIGHTING THE FRYER BURNERS .................................... 10
6.2
APPROXIMATE VALVE KNOB TEMPERATURES ............ 11
6.3
TURNING THE FRYER BURNERS OFF ............................ 11
6.4
TURNING THE FRYER OFF COMPLETELY ...................... 11
6.5
SAFETY THERMOSTAT...................................................... 11
CARACTÉRISTIQUES DES GAZ ........................................ 15
4. INSTRUCTIONS POUR L'INSTALLATEUR QUALIFIÉ .... 16
4.3
ÉVACUATION DES FUMÉES POUR LES APPAREILS DE
TYPE "A"............................................................................... 16
4.4
CONTRÔLE DES PERTES DE GAZ ................................... 16
5. ENTRETIEN ..................................................................... 16
2
5.1
TRANSFORMATION POUR UN FONCTIONNEMENT AVEC
3. TABEL MET TECHNISCHE GEGEVENS – FRITEUSES. 21
D'AUTRES GAZ– FRITEUSE .............................................. 16
5.2
REMPLACEMENT DE PIÈCES DÉTACHÉES .................... 16
3.1
6. INSTRUCTIONS DE MISE EN SERVICE ......................... 17
6.1
ALLUMAGE DES BRÛLEURS DE LA FRITEUSE .............. 17
6.2
TEMPÉRATURES INDICATIVES DE LA MANETTE DE LA
EXTINCTION DES BRÛLEURS DE LA FRITEUSE ............ 17
6.4
EXTINCTION TOTALE DE LA FRITEUSE .......................... 17
6.5
THERMOSTAT DE SÉCURITÉ ........................................... 17
6.6
REMPLISSAGE DE L'HUILE ............................................... 17
6.7
VIDAGE DE LA CUVE ......................................................... 17
PLAATSING VAN HET TOESTEL ....................................... 22
4.2
VERPLICHTE NORMEN, TECHNISCHE EN ALGEMENE
4.3
ROOKAFVOER VOOR TOESTELLEN VAN HET TYPE “A”. ..
4.4
CONTROLE VAN GASLEKKEN. ......................................... 22
.............................................................................................. 22
5. ONDERHOUD. ................................................................. 22
5.1
AANPASSINGEN VOOR GEBRUIK MET ANDERE
GASSEN – FRITEUSE. ........................................................ 22
7. ENTRETIEN ET NETTOYAGE ......................................... 17
8. SCHEMAS D'INSTALLATION ......................................... 24
4.1
BEPALINGEN. ...................................................................... 22
SOUPAPE ............................................................................ 17
6.3
EIGENSCHAPPEN VAN DE GASSEN ................................ 21
4. INSTRUCTIES VOOR DE ERKENDE INSTALLATEUR. .. 22
5.2
6.
PLAATSING VAN WISSELSTUKKEN. ................................ 22
INSTRUCTIES VOOR DE INGEBRUIKNEMING. ........ 22
9. DONNÉES TECHNIQUES ............................................... 25
6.1
AANSTEKEN VAN DE BRANDERS. ................................... 22
10. ÉCLATÉS DES PARTIES FONCTIONNELLES MOD. 65-
6.2
BENADERENDE TEMPERATUREN OP DE
BEDIENINSKNOP VAN DE KLEP. ...................................... 23
40 FRG 65-70 FRG ............................................................ 26
6.3
DOVEN VAN DE BRANDERS VAN DE FRITEUSE. ........... 23
6.4
VOLLEDIGE UITDOVING VAN DE FRITEUSE. ................. 23
6.5
VEILIGHEIDSTHERMOSTAAT. ........................................... 23
1. ADVERTENCIAS ............................................................... 4
6.6
VULLEN VAN DE OLIE IN DE KUIP. ................................... 23
2. CONFORMIDAD A LAS DIRECTIVAS “CEE” -
6.7
LEEGMAKEN VAN DE KUIP. .............................................. 23
ESPAÑOL
ÌNDICE
APARATOS DE ..................................................................... 4
7. ONDERHOUD EN REINIGING. ........................................ 23
3. TABLA DATOS TÉCNICOS – FREIDORAS .................... 18
8. INSTALLATIESCHEMA’S ................................................ 24
3.1
CARACTERÍSTICAS DE LOS GASES ................................ 18
9. NAAMBORD .................................................................... 25
4. INSTRUCCIONES PARA EL INSTALADOR
10. SCHEMA’S VAN DE FUNCTIONELE DELEN MOD. MOD.
CUALIFICADO..................................................................... 19
65-40 FRG 65-70 FRG........................................................ 26
4.1
INSTALACIÓN DEL EQUIPO .............................................. 19
4.2
NORMAS DE LEY, NORMAS TÉCNICAS Y LÍNEAS
GENERALES........................................................................ 19
4.3
4.4
5.
DESCARGA DE HUMOS PARA APARATOS TIPO "A" .... 19
CONTROL DE FUGAS DE GAS .......................................... 19
MANTENIMIENTO ...................................................... 19
5.1
TRANSFORMACIÓN PARA FUNCIONAMIENTO CON
OTROS TIPOS DE GAS - FRG ........................................... 19
5.2
6.
SUSTITUCIÓN DE LAS PIEZAS DE REPUESTO .............. 19
INSTRUCCIONES PARA EL USUARIO ..................... 19
6.1
ENCENDIDO DE LOS QUEMADORES FREIDORA .......... 19
6.2
TEMPERATURAS INDICATIVAS DEL MANDO DE LA
VÁLVULA ............................................................................. 20
6.3
APAGADO QUEMADORES FREIDORA............................. 20
6.4
APAGADO TOTAL DE LA FREIDORA ................................ 20
6.5
TERMOSTATO DE SEGURIDAD ........................................ 20
6.6
CARGA DEL ACEITE ........................................................... 20
6.7
VACIADO DE LA CUBA ....................................................... 20
7. MANTENIMIENTO, LIMPIEZA Y CUIDADO .................... 20
8. ESQUEMAS DE INSTALACIÓN ...................................... 24
9. DATOS TÉCNICOS ......................................................... 25
10. TABLAS DE DESPIECES DE LAS PARTES
FUNCIONALES MOD. 65-40 FRG 65-70 FRG................... 26
NEDERLANDSE
INHOUDSTAFEL
1. WAARSCHUWING. ........................................................... 5
2. CONFORM DE EUROPESE RICHTLIJN VOOR
GASTOESTELLEN. ............................................................... 5
3
♦
ITALIANO
MANUALE D’USO
QUESTO APPARECCHIO E' DESTINATO ALLA COTTURA DI
ALIMENTI E DEVE ESSERE USATO ESCLUSIVAMENTE DA
PERSONALE PROFESSIONALMENTE QUALIFICATO, NEL MODO
INDICATO DA QUESTO MANUALE DI ISTRUZIONI.
1. AVVERTENZE
♦
♦
♦
♦
•
Leggere attentamente il presente libretto in quanto fornisce
importanti indicazioni riguardanti la sicurezza di installazione,
d'uso e manutenzione.
Conservare con cura questo libretto per ulteriore consultazione.
L'installazione dell'apparecchio e l'eventuale adattamento ad altri
tipi di gas deve essere effettuata solamente da personale
professionalmente qualificato.
Per eventuali riparazioni rivolgersi solamente ad un centro
d'assistenza tecnica autorizzato dal costruttore ed esigere parti di
ricambio originali.
Tutte le parti sigillate dal costruttore non devono essere
manomesse, eventuali regolazioni (solo per il cambio gas) sono
ad indirizzo esclusivo del personale professionalmente qualificato.
Il mancato rispetto di quanto sopra può compromettere la sicurezza
dell'apparecchiatura.
2. RISPONDENZA ALLE DIRETTIVE "CEE" – APPARECCHIATURE
A GAS
Questo apparecchio ha ottenuto il certificato di omologazione "CE"
essendo rispondente alle prove di collaudo eseguite secondo la norma:
"ESIGENZE ESSENZIALI ANNEXE I DIRECTIVE CEE 90/396 DM
26/06/1990"
ENGLISH
•
Das Nichteinhalten
beeinträchtigen.
♦
♦
♦
♦
Read this handbook through carefully as it provides important
information for a safe installation, use and maintenance.
Keep this handbook in a safe place for future reference.
Only professionally skilled personnel must install the appliance
and, if required, convert it to receive a different type of gas.
Only call one of the manufacturer’s authorised technical
assistance centres for repairs and demand original spare parts.
The parts which have been sealed by the manufacturer must not
be tampered with. Any adjustments (only for gas changeover)
must be performed by professionally qualified personnel.
Failure to observe the above could undermine the safety of the
appliance.
2. COMPLIANCE WITH “EEC” DIRECTIVES – GAS APPLIANCES
This appliance has obtained the “CE” type approval certificate as it
complies with the acceptance tests carried out in accordance with the
following standard:
"ESSENTIAL REQUIREMENTS ANNEX I EEC DIRECTIVE 90/396 MD
26/06/1990"
DEUTSCH
MONTAGEANLEITUNG
DIESES
GERÄT
IST
FÜR
DAS
AUFWÄRMEN
VON
NAHRUNGSMITTELN IN BEHÄLTERN GEPLANT UND DARF
AUSSCHLIESSLICH DURCH QUALIFIZIERTES PERSONAL UNTER
BEACHTUNG DER BEDIENUNGSANLEITUNG BEDIENT WERDEN.
1. HINWEISE
♦
♦
♦
Die Bedienungsanleitung ist vor der Inbetriebnahme des Gerätes
aufmerksam durchzulesen, da sie wichtige Hinweise in Bezug auf
die Sicherheit bei Installation, Bedienung und Wartung des
Gerätes enthält.
Die Bedienungsanleitung ist zwecks jeder weiteren Einsicht
sorgfältig aufzubewahren.
Die Installation des Geräts und eventuelle Anpassungen an
andere Gasarten darf ausschließlich von qualifiziertem
Fachpersonal durchgeführt werden.
Hinweise
kann
die
Gerätesicherheit
EG-RICHTLINIEN
FÜR
Dieses Gerät entspricht den, gemäss der Vorschrift über die
“WESENTLICHEN, DER 1. EG-RICHTLINIE 90/396 VOM 26/06/1990
HINZUGEFÜGTEN
ANFORDERUNGEN"
durchgeführen
Abnahmeprüfungen und besitzt daher das CE-Genehmigungszertifikat.
FRANÇAIS
MODE D’EMPLOI
LES FRITEUSES SONT DES APPAREILS DESTINÉS À LA CUISSON
D'ALIMENTS ET DOIVENT ÊTRE UTILISÉES EXCLUSIVEMENT PAR
UN
PERSONNEL QUALIFIÉ
DANS
LE
RESPECT DES
INSTRUCTIONS FIGURANT DANS LE PRÉSENT MANUEL.
L’appareillage est réservé à un usage exclusivement professionnel.
1. AVERTISSEMENTS
♦
♦
♦
♦
•
1. WARNINGS
♦
dieser
2. ÜBEREINSTIMMUNG MIT DEN
GASVERBRAUCHSEINRICHTUNGEN
USER’S MANUAL
THIS APPLIANCE HAS BEEN MADE FOR COOKING FOOD AND
MUST ONLY BE USED BY PROFESSIONALLY SKILLED
PERSONNEL IN THE WAY DESCRIBED IN THIS INSTRUCTION
MANUAL.
Für eventuelle Reparaturen ausschließlich vom Hersteller befugte
Kundendienstzentren beauftragen und Original-Ersatzteile
anfordern.
Alle vom Hersteller versiegelten Teil dürfen nicht beschädigt
werden, eventuelle Einstellungen (nur bei Gaswechsel) müssen
durch qualifiziertes Fachpersonal vorgenommen werden.
Lire attentivement les recommandations et autres instructions du
présent manuel qui fournissent d'importantes indications relatives
à la sécurité quant à l'installation, l'utilisation et l'entretien.
Conserver soigneusement ce manuel pour pouvoir le consulter à
tout moment.
L'installation de l'appareil et son éventuelle adaptation à d'autres
types de gaz doivent être effectuées uniquement par du
personnel qualifié.
Pour toute réparation s'adresser uniquement à un centre
d'assistance technique autorisé par le fabricant et exiger des
pièces détachées originales.
Toutes les parties scellées par le fabricant ne doivent pas être
manipulées, les éventuels réglages (uniquement pour le
changement de gaz) doivent être exclusivement effectués par un
personnel professionnellement qualifié.
Le non-respect de ce qui est reporté ci-dessus peut compromettre la
sécurité de l'appareillage.
2. CONFORMITÉ AUX DIRECTIVES "CEE"– APPAREILLAGES À
GAZ
Cet appareil a obtenu le certificat d'homologation "CE", les essais
effectués étant conformes à la norme:
"EXIGENCES ESSENTIELLES ANNEXE I DIRECTIVE CEE 90/396
DM 26/06/1990"
ESPAÑOL
INSTRUCCIONES DE USO
ESTE APARATO ESTÁ DESTINADO EXCLUSIVAMENTE A LA
COCCIÓN
DE
ALIMENTOS
Y
DEBE
SER
UTILIZADO
EXCLUSIVAMENTE
POR
PERSONAL
PROFESIONAL
CUALIFICADO, DE LA MANERA INDICADA EN ESTA MANUAL DE
INSTRUCCIONES.
1. ADVERTENCIAS
♦
♦
♦
♦
♦
Leer detenidamente este folleto ya que proporciona información
importante acerca de la seguridad de instalación, de uso y de
mantenimiento.
Guardar con cuidado este folleto para cualquier futura consulta.
La instalación del aparato y su eventual adaptación a otros tipos
de gas debe ser efectuada sólo por personal profesional
cualificado.
Para eventuales reparaciones dirigirse exclusivamente a un
centro de servicio técnico autorizado por el constructor y se
deben exigir piezas de repuesto originales.
Todas las partes selladas por el constructor no pueden ser
modificadas. Eventuales regulaciones (sólo para el cambio de
gas) son competencia exclusiva de personal profesional
cualificado.
El incumplimiento de cuanto antedicho puede perjudicar la seguridad
del aparato.
2. CONFORMIDAD A LAS DIRECTIVAS “CEE” - APARATOS DE
GAS
4
Este aparato ha conseguido el certificado de homologación "CE" siendo
conforme a las pruebas de ensayo efectuadas según la norma:
"EXIGENCIAS BÁSICAS, ANEXO I DIRECTIVA CEE 90/396 DM
26/06/1990"
NEDERLANDSE
GEBRUIKSAANWIJZING
DE FRITEUSES ZIJN TOESTELLEN BESTEMD VOOR HET BAKKEN
VAN VOEDINGSWAREN EN MOGEN UITSLUITEND DOOR
GEKWALIFICEERD PERSONEEL BEDIEND WORDEN MET
INACHTNEMING VAN DE IN DEZE HANDLEIDING VERMELDE
INSTRUCTIES.
1. WAARSCHUWING.
♦
♦
♦
♦
♦
Lees aandachtig de aanbevelingen en de instructies in deze
handleiding. Zij verschaffen belangrijke aanwijzingen wat betreft
veiligheid, plaatsing, gebruik en onderhoud van de toestellen.
Bewaar deze handleiding zorgvuldig zodat u die op ieder gewenst
moment kan raadplegen.
De plaatsing van het toestel en de eventuele omschakeling voor
gebruik met andere gassen mag alleen door daarvoor speciaal
opgeleide technici uitgevoerd worden.
Herstellingen mogen uitsluitend door een door de fabrikant
erkende installateur uitgevoerd worden Eis steeds originele
wisselstukken.
De door de fabrikant hermetisch afgesloten onderdelen mogen
niet worden geopend. Eventuele afstellingen mogen alleen
worden verricht bij het omstellen op een andere gassoort.
Het niet respecteren van deze voorwaarden kan de veiligheid van het
toestel in gevaar brengen.
2. CONFORM DE EUROPESE RICHTLIJN VOOR GASTOESTELLEN.
Dit toestel verkreeg het homologatiegetuigschrift “CE”. De toestellen
werden getest conform de norm: “Noodzakelijke Vereisten. Bijlage 1.
Richtlijn CEE 9./936 van 26/06/1990”.
5
ITALIANO
MANUALE D’USO
3. TABELLA DATI TECNICI - FRIGGITRICI
MODELLO
BRUCIA
TORI
N° x kW
CONSUMO GAS
TOTALE
CAPACITA'
VASCA
POTENZA
TOTALE
GPL
METANO
L
G30/G31
G20
kW
m³/h
kg/h
DIAMETRO UGELLI
IN CENTESIMI DI
MILLIMETRO
GPL
METANO
G30/G31
G20
30/37
20 mbar
mbar
65-40 FRG
2 x 3,15
8
6,3
0,489
0,666
88L
140L
65-70 FRG
4 x 3,15
8+8
12,6
0,979
1,333
88L
140L
30
51
PILOTA
3.1
CARATTERISTICHE DEI GAS
I dati relativi alle potenze e ai consumi sono riferiti ai seguenti tipi di gas:
TIPO DI GAS
POTERE
CALORIFICO INF.
(PCI)
G20 (gas metano)
CH4
9,45
kW m³/h
PRESSIONE D’ ALIMENTAZIONE
mbar
mm c.d.a.
20
200
G30 (butano) C4H10
12,68 kW/kg
30
300
G31 (propano) C3H8
12,87 kW/kg
37
370
G25 (G20L – DE)
8,12
kW m³/h
20
200
G25 (aardgas NL)
8,12
kW m³/h
25
250
In fase di installazione degli apparecchi è necessario che le pressioni dei gas di alimentazione siano quelle sopraccitate per poter avere il massimo
rendimento dei bruciatori.
Pressioni mbar: 1 millibar = 1 mbar = 10 mm c.d.a. (millimetri di colonna d'acqua)
Potenza: 1 kW = 860 kcal = 3,6 MJ = 3412 BTU
6
4. ISTRUZIONI PER L'INSTALLATORE QUALIFICATO
•
4.1
•
•
•
•
•
•
•
4.2
•
•
4.3
INSTALLAZIONE DELL'APPARECCHIATURA
•
Togliere l’apparecchiatura dall’imballo, assicurarsi dell’integrità
della stessa e in caso di dubbio non utilizzarla e rivolgersi a
personale professionalmente qualificato.
Posizionare l’apparecchiatura sempre sotto una cappa di
aspirazione, dopo essere posta in opera, dovrà essere livellata
agendo sui piedini.
L'allacciamento dell'apparecchiatura deve essere effettuato
sempre mediante tubazioni rigide in acciaio zincato o rame.
Tutte le tenute sui filetti di giunzione, devono essere garantite da
materiali certificati per l’utilizzo con i gas.
Se l'apparecchiatura viene installata a parete, a contatto con
materiale infiammabile, occorre interporre tra apparecchiatura e
parete uno strato di materiale isolante resistente al calore,
oppure lasciare uno spazio di 200 mm tra apparecchiatura e
parete.
L'impianto a gas a monte dell'apparecchiatura, così pure le
caratteristiche
dei
locali
nei
quali
viene
installata
l'apparecchiatura, devono rispondere alle norme in vigore.
Prima di allacciare l’apparecchiatura si deve verificare la
corrispondenza tra i gas di predisposizione della stessa, e quello
disponibile per l’alimentazione al fine di verificare l’idoneità. Se
non si trova la corrispondenza tra i due si deve procedere come
descritto nel paragrafo “Trasformazione per il funzionamento con
altri gas”
Applicare sempre un rubinetto di intercettazione fra ogni
apparecchiatura e la tubazione di allacciamento del gas.
Verificare che l'aerazione dei locali sia sufficiente durante il
funzionamento dell'apparecchiatura, considerando che la
quantità di aria necessaria alla combustione è di 2 m³/h di aria
per ogni kW di potenza installata.
•
•
•
•
•
NORME DI LEGGE, REGOLE TECNICHE E LINEE
GENERALI
Norme prevenzione infortuni.
Attenersi alle prescrizioni e alle Norme di riferimento in vigore nel
paese in cui l’apparecchio viene installato
5.2
•
SCARICO FUMI PER APPARECCHI TIPO "A"
Gli apparecchi devono essere installati in locali adatti per lo scarico dei
prodotti della combustione, che deve avvenire nel rispetto di quanto
prescritto dalle norme di installazione. Le nostre apparecchiature sono
considerate, (V. Tabelle Dati Tecnici), come apparecchi a gas di tipo
"A" non previste per essere collegate ad un condotto naturale di scarico
dei prodotti della combustione.
Tali apparecchi devono scaricare in apposite cappe, o dispositivi
similari, collegate ad un camino di sicura efficienza oppure direttamente
all'esterno.
In mancanza è ammesso l'impiego di un aspiratore di aria collegato
direttamente all'esterno, di portata non minore di quanto richiesto, V.
tabella 1, maggiorato del ricambio d'aria necessaria per il benessere
degli operatori.
•
•
4.4
CONTROLLO PERDITE GAS
Ad installazione avvenuta, è necessario controllare che non ci siano
perdite di gas sulle giunzioni delle tubazioni, mediante soluzione di
acqua saponata; eventuali perdite verranno segnalate da bolle di
schiuma. Non adoperare mai fiamme per controllare eventuali perdite.
Con l'apparecchiatura pronta per l'uso, controllare che non ci siano
perdite di gas, verificando sul contatore, se inserito (per un periodo di
30 minuti), che non ci sia passaggio e consumo di gas.
•
•
•
5. MANUTENZIONE
La manutenzione è ridotta al minimo, per effetto di una corretta
costruzione delle apparecchiature. Tuttavia, si consiglia di far
controllare gli impianti da personale qualificato, almeno due volte l'anno.
N.B.: il costruttore declina ogni responsabilità per danni diretti o
indiretti causati da errata installazione, cattiva
manutenzione, manomissioni, usi impropri e dal mancato
rispetto delle norme antinfortunistiche di prevenzione
incendi e di sicurezza per gli impianti a gas.
5.1
TRASFORMAZIONE PER FUNZIONAMENTO CON ALTRI
GAS – FRG
L'apparecchiatura viene collaudata e predisposta per funzionamento a
gas secondo quanto indicato nella tabella caratteristiche posta in
prossimità dell'entrata gas sull'apparecchiatura.
Per funzionamento con altri gas procedere come di seguito indicato:
La trasformazione deve essere effettuata da personale
qualificato
La dotazione degli ugelli per la conversione ad un altro tipo di
gas, diverso da quello che era stata predisposta
l’apparecchiatura, normalmente è contenuta in un sacchetto di
nylon con relative etichette supplementari riportanti tutte le
tipologie dei gas.
Se la dotazione non fa parte del corredo, si deve richiederla al
concessionario/importatore
accertandosi
prima
che
l’apparecchiatura possa funzionare con altri tipi di gas.
Una volta terminata la trasformazione e le dovute regolazioni,
bisogna applicare nello spazio apposito della targhetta
caratteristiche, la etichetta relativa al gas corrispondente,
ritagliando quella interessata.
Sostituzione ugello bruciatore (fig. 1):
togliere il cruscotto (20) e sostituire gli ugelli (30) secondo il tipo
di gas (vedi tabella DATI TECNICI).
Sostituzione ugello bruciatore pilota:
togliere il cruscotto (20), svitare il dado del bruciatore pilota e
sostituire l'ugello (19) secondo il tipo di gas (vedi tabella DATI
TECNICI).
Regolazione dei bruciatori, verifica pressioni di alimentazione e
funzionamento:
effettuata la sostituzione degli ugelli, verificare che le pressioni
del gas, sia in entrata che in uscita della valvola, siano quelle
riportate sulla tabella DATI TECNICI. Per fare questo, togliere le
viti situate sulla presa di pressione (11) della valvola (1), inserire
un tubo di gomma collegato ad un manometro e controllare la
pressione. Se la pressione in entrata, dovesse risultare diversa
da quella prescritta, ricercare la causa e provvedere a renderla
secondo quanto prescritto.
Regolazione bruciatore pilota:
il bruciatore non necessita di alcuna regolazione.
Regolazione del minimo – bruciatore:
la valvola ha funzionamento acceso/spento, quindi non necessita
di regolazione.
SOSTITUZIONE PARTI DI RICAMBIO
Valvola termostatica (6):
togliere il cruscotto (1), svitare i raccordi di collegamento entrata
(9) ed uscita (10). Svitare il raccordo (11) tubetto pilota e la
termocoppia (12). Svitare le viti (13) di fissaggio della valvola al
supporto. Sfilare il bulbo del termostato (31) dalla vasca (14)
dopo averla svuotata dell'olio e aver svitato il premistoppa (15).
Sostituire la valvola e rimontare il tutto controllando la tenuta
dell'olio sul premistoppa (15) con l'olio caldo in vasca.
ATTENZIONE: il bulbo del termostato della valvola (31) deve
essere posizionato verso l'interno della vasca (fig. 1)
Termostato di sicurezza (8):
svuotare la vasca dall'olio, svitare il premistoppa (16), estrarre il
bulbo del termostato (8), sostituire il termostato. Rimontare il
tutto controllando la tenuta dell'olio sul premistoppa (16) con
l'olio caldo in vasca.
ATTENZIONE: il bulbo del termostato (32) deve essere
posizionato verso la parte esterna della vasca.
Termocoppia (12):
svitare la termocoppia (12) dalla valvola (6) e dal pilota (17),
quindi sostituirla.
Candela di accensione (18):
svitare il dado di fissaggio candela (19) al pilota e sostituire la
candela.
Accenditore piezoelettrico (20):
sfilare il cavo di collegamento candela, svitare il dado di
fissaggio del piezoelettrico al cruscotto e sostituirlo.
Sostituzione bruciatore (27):
svitare le due viti di fissaggio del bruciatore alla vasca, svitare il
dado (28) di fissaggio del porta - ugello (29). Sostituire il
bruciatore e rimontare il tutto.
N.B.: Dopo ogni sostituzione o riparazione, controllare il corretto
funzionamento degli organi sostituiti e provvedere alla messa a
punto degli stessi.
Controllare le tenute sui raccordi gas con acqua saponata, non
usare mai fiamme libere.
6. ISTRUZIONI PER L’UTENTE
6.1
ACCENSIONE DEI BRUCIATORI FRIGGITRICE
Accensione fiamma pilota:
Accertarsi che la manopola della valvola di sicurezza termostatica sia
sulla posizione CHIUSO (simbolo
). Premere a fondo il pulsante
e mantenendolo premuto, spingere contemporaneamente il pulsante
7
dell'accenditore piezoelettrico. La fiamma pilota si accenderà
automaticamente.
Verificare l'accensione attraverso la feritoia (21) sul cruscotto
dell'apparecchiatura.
Tenere premuto il pulsante (24) della valvola per 10-15 secondi allo
scopo di permettere il riscaldamento della termocoppia, quindi
rilasciarlo.
Nel caso che il pilota dovesse spegnersi, ripetere l'operazione.
Accensione dei bruciatori e regolazione della temperatura:
Dopo aver acceso la fiamma pilota, ruotare la manopola (22) della
valvola di sicurezza termostatica (6) nella posizione da minimo 1 a
massimo 8 (gli altri numeri indicano le temperature intermedie). I
bruciatori si accendono automaticamente e una volta raggiunta la
temperatura prefissata con la manopola, la valvola termostatica
spegnerà i bruciatori e li riaccenderà nuovamente quando la
temperatura sarà scesa.
6.2
TEMPERATURE INDICATIVE DELLA MANOPOLA
DELLA VALVOLA
Pos. 1 = 100°C
Pos. 4 = 135°C
Pos. 7 = 170°C
Pos. 2 = 110°C
Pos. 5 = 145°C
Pos. 8 = 180°C
7. MANUTENZIONE, PULIZIA E CURA
Far controllare da un tecnico specializzato, almeno due volte l'anno.
Le parti in acciaio devono essere pulite con acqua, detersivo ed uno
straccio bagnato; i detersivi non devono contenere nessuna sostanza
corrosiva o abrasiva, poiché sono dannose per le superfici in acciaio.
Dopo il lavaggio risciacquare con acqua pulita ed asciugare con un
panno asciutto.
Qualora l'apparecchiatura non venga utilizzata per lunghi periodi,
passare energicamente su tutte le superfici in acciaio un panno
imbevuto di olio di vaselina in modo da stendere un velo protettivo;
inoltre arieggiare periodicamente i locali.
Evitare nel modo più assoluto il contatto continuo o saltuario con
materiale ferroso onde non provocare inneschi di corrosione. Pertanto,
mestoli, palette, cucchiai, ecc. dovranno essere in acciaio inossidabile.
Evitare per la stessa ragione di pulire l'acciaio inox con paglietta,
spazzole o raschietti d'acciaio comune. Può essere eventualmente
adoperata lana di acciaio inossidabile passata nel senso della
satinatura.
Pos. 3 = 125°C
Pos. 6 = 160°C
Tolleranza ± 10%
6.3
SPEGNIMENTO BRUCIATORI FRIGGITRICE
Ruotare la manopola fino alla posizione
. I bruciatori si
spegneranno e rimarrà accesa solo la fiamma pilota.
6.4
SPEGNIMENTO TOTALE FRIGGITRICE
Premere a fondo il pulsante
(23), quindi rilasciarlo. Con questa
operazione si chiude il passaggio del gas ai bruciatori e al bruciatore
pilota. Il pulsante rimarrà premuto automaticamente per 1 minuto,
quindi ritornerà nella posizione iniziale. Solo a questo punto, la
friggitrice potrà essere rimessa in funzione, se necessario, ripetendo le
operazioni dall'inizio.
6.5
TERMOSTATO DI SICUREZZA
Oltre alla valvola di sicurezza termostatica (1), l'apparecchio dispone
anche di un termostato di sicurezza (8) situato all'interno del cruscotto,
che interviene qualora la valvola di sicurezza termostatica non spenga i
bruciatori nel momento in cui l'olio ha raggiunto la temperatura
massima.
Se si verifica l'intervento del termostato di sicurezza, ricercare subito la
causa e, se necessario, sostituire il pezzo non funzionante. Per
riaccendere i bruciatori, occorre prima spingere il pulsante rosso posto
sul termostato di sicurezza.
6.6
CARICO OLIO
Verificare che il rubinetto scarico vasca sia chiuso. Caricare olio o
grasso fino all'altezza delle tacche di livello minimo o massimo,
stampate sul retro della vasca.
6.7
SCARICO DELLA VASCA
L'utente dovrà preoccuparsi che esista un apposito serbatoio per la
raccolta dell'olio di scarico. Montare il tubo di scarico con innesto a
baionetta conformemente al disegno. Azionare la leva per lo scarico
dell'olio secondo il disegno.
Apparecchiature a pavimento:
l'apparecchiatura è già fornita di una bacinella raccogli - olio;
posizionare tale bacinella al di sotto del tubo di scarico all'interno del
vano della friggitrice, aprire la leva del rubinetto e scaricare l'olio
all'interno della bacinella.
8
ENGLISH
USER’S MANUAL
3. TECHNICAL DATA TABLE
MODEL
BURNERS
BOWL
CAPACITY
No. x kW
L
TOTAL
POWER
kW
TOTAL GAS
CONSUMPTION
NATURAL
LPG
GAS
G30 – G31
G20
kg/h
m³/h
DIAMETER OF NOZZLES IN
HUNDREDTHS OF A MILLIMETRE
NATURAL
LPG
GAS
G30 – G31
G20
30 mbar 37mbar
20 mbar
65/40 FRG
2 x 3.15
8
6.3
0.489
0.666
88L
140L
65/70 FRG
4 x 3.15
8+8
12.6
0.979
1.333
88L
140L
30
51
PILOT
3.1
GAS CHARACTERISTICS
The data relative to power and consumption refer to the following types of gas:
TYPE OF GAS
NET HEAT
VALUE
(NHV)
G20 (natural gas) CH4
9.45
kW m³/h
PRESSURE SUPPLY
mbar
mm water
20
200
G30 (butane) C4H10
12.68 kW/kg
30
300
G31 (propane) C3H8
12.87 kW/kg
37
370
G25 (G20L – DE)
8.12
kW m³/h
20
200
G25 (aardgas NL)
8.12
kW m³/h
25
250
When installing the appliances, the gas supply pressures must be those given above in order to have maximum burner efficiency.
Pressures mbar: 1 millibar = 1 mbar = 10 mm c.d.a. (water column millimetres)
Power: 1 kW = 860 kcal = 3.6 MJ = 3412 BTU
9
4. INSTRUCTIONS FOR THE QUALIFIED INSTALLER
4.1
•
•
•
•
•
•
•
APPLIANCE INSTALLATION
Take the unit out of the packaging. Check that it is in good
condition. If in doubt, do not use it and contact professionally
qualified personnel.
Always place the unit under an aspiration hood. After installation,
it will need to be levelled by using the feet.
Always use rigid galvanised steel or copper pipes for connecting
the appliance.
All the seals on the joining threads must be made using
materials that are certified for use with gas.
If the appliance is wall mounted, in contact with flammable
material, place a layer of heat-resistant insulating material
between the appliance and the wall or leave a space of 200 mm
between the appliance and the wall.
The appliance gas system and the characteristics of the room in
which the appliance is installed must comply with current laws.
Before connecting the unit, you must check what kind of gas it is
set up to use, and whether the gas which is available to power it
is suitable. If the available gas is not suitable for the appliance,
proceed as described in the paragraph "Changeover for
operation with other types of gas".
Always install a cutoff cock between each appliance and the gas
pipe.
Check that aeration in the room is sufficient when the appliance
is working, considering that the necessary quantity of air for
combustion is 2 m³/h of air for each kW of installed power.
4.2
RULES
•
•
4.3
•
•
5.2
•
DISCHARGE OF FUMES FOR TYPE “A” APPLIANCES
CHECKING FOR GAS LEAKS
5. MAINTENANCE
There is very little maintenance thanks to the correct way the
appliances have been made. However, we do advise having the
systems checked by qualified personnel at least twice a year.
N.B.: the manufacturer declines all responsibility for direct or indirect
damages caused by incorrect installation, bad maintenance,
tampering, improper use and the failure to comply with the
accident prevention norms regarding the prevention of fire and
safety for gas systems.
CONVERSION FOR USE WITH A DIFFERENT TYPE OF
GAS - FRYER
The appliance is tested and set for working with gas according to the
characteristics table affixed in proximity to the appliance’s gas inlet.
In order for it to function with a different type of gas, proceed as follows:
•
•
•
Standard UNI-CIG 8723, Ministerial circular no. 68 dated
25/11/69 and variations.
Accident prevention laws.
Once installed, check there are no gas leaks from the pipe joints by
using a soapy water solution. You will know if there are leaks by the
foamy bubbles that form. Never use bare flames to check for leaks.
When the appliance is ready for use, check there are no gas leaks, by
checking on the gauge, if used (for a period of 30 minutes), that there is
no passage or consumption of gas.
5.1
•
LAWS, TECHNICAL REGULATIONS AND GENERAL
The appliances must be installed on premises that are suitable for the
discharge of the combustion products and must comply with the
installation rules. Our appliances are considered type “A” gas
appliances (see the Technical Data Tables) and are not for connecting
to a natural discharge duct for combustion products.
These appliances must discharge through specific extractors, or similar
devices, connected to a properly working flue or discharged directly
outside.
If this is not possible, an air suction device can be used connected
directly to the outside, with a capacity that must be no less than that
required, see Table 1, plus the quantity of fresh air that is necessary for
the well-being of the workers.
4.4
•
The conversion must be carried out by qualified personnel
The set of nozzles for changeover to another type of gas,
different from the type for which the unit was set up, is normally
contained in a nylon bag with relative additional labels that show
all the types of gas.
•
•
•
•
•
If the set is not provided, it must be requested from the
dealer/importer, first ascertaining that the unit can in fact work
with other types of gas.
Once changeover and necessary adjustments are complete, the
label for the corresponding gas must be place in the appropriate
place on the characteristics tag, cutting out the correct one.
Changing the burner nozzle (Fig. 1):
open the compartment doors, change the nozzles (30) according
to the type of gas (see the TECHNICAL DATA table).
Changing the pilot burner nozzle:
remove the panel (20), unscrew the pilot burner nut and change
the nozzle (19) according to the type of gas (see the
TECHNICAL DATA table).
Adjusting the burners, checking supply pressures and working
order:
once the nozzles have been changed, check that the gas
pressure, both in the valve output and input, is as given in the
TECHNICAL DATA table. To do this, remove the screws on the
valve’s (1) pressure tap (11), insert a rubber pipe connected to a
gauge and check the pressure. If the inlet supply pressure is
different to that specified, find the cause and correct it.
Adjusting the pilot burner:
this burner needs no adjusting.
Regulating the minimum flame – burner:
The valve has a on/off function so needs no adjusting.
CHANGING SPARE PARTS
Thermostatic cock (6):
remove the control panel (1), unscrew thw entrance (9) and exit
(10) joint connections. Unscrew the small pilot pipe fitting (11)
and the thermocouple (12). Unscrew the screws (13) fixing the
valve to the suport. Pull the thermostat bulb (31) out from the
bowl after having emptied it of oil and having unscrewed the nut
(15).
Change the valve and put everything back in place, checking for
oil leaks on the thermostat (15) with hot oil in the bowl.
ATTENTION: the valve thermostat bulb (31) must be placed
towards the inside of the bowl (fig. 1)
Safety thermostat (8)
drain the oil from the bowl, unscrew the nut (16), extract the
thermostat bulb (8) and change the thermostat. Put everything
back in place, checking for oil leaks on the thermostat bulb (16)
with hot oil in the bowl.
ATTENTION: the thermostat bulb (32) must be placed towards
the outside of the bowl.
Thermocouple (12):
unscrew the thermocouple (12) from the valve (6) and from the
pilot (17) and then change it.
Ignition plug (18):
Unscrew the plug securing nut (19) on the pilot and change the
plug.
Piezoelectric lighter (20):
remove the ignition plug connection cable, unscrew the nut
attaching the piezoelectric lighter to the control panel and
replace it.
Changing the pilot (27):
Unscrew the two burner securing screws on the bowl, unscrew
the nut (28) securing the burner to the gas distribution shaft.
Change the burner and then put everything back in place.
N.B.: After each replacement, check that the substituted parts function
correctly and are properly tuned.
Check for leaks on the gas pipe fittings with a soapy water
solution – never use a bare flame.
6. USER INSTRUCTIONS
6.1
LIGHTING THE FRYER BURNERS
Lighting the pilot flame:
Make sure that the thermostatic safety valve knob is in the CLOSED
position ( symbol). Press the
push button right down and, holding it
pressed, press the piezoelectric lighter push button at the same time.
The pilot flame lights automatically.
Check that the flame is lit through the holes (21) on the appliance panel.
Keep the valve push button (24) pressed for 10-15 minutes to heat the
thermocouple and then let it go.
Repeat this operation if the burner goes out.
Lighting the burners and adjusting the temperature:
Once the pilot flame is lit, turn the thermostatic safety valve (6) knob
(22) from the minimum 1 position to the maximum 8 (the other numbers
represent the intermediate temperatures). The burners light
automatically and once the temperature set by the knob is reached, the
10
thermostatic valve turns the burners off, lighting them again when the
temperature drops.
6.2
APPROXIMATE VALVE KNOB TEMPERATURES
ITEM 1 = 100°C
ITEM 4 = 135°C
ITEM 7 = 170°C
ITEM 2 = 110°C
ITEM 5 = 145°C
ITEM 8 = 180°C
ITEM 3 = 125°C
ITEM 6 = 160°C
Tolerance ± 10%
6.3
TURNING THE FRYER BURNERS OFF
Turn the knob round to position
only the pilot flame alight.
6.4
. The burners will go out, leaving
TURNING THE FRYER OFF COMPLETELY
Press the
push button right down (23) and then let it go. This stops
gas reaching the burners and the pilot burner. This button will stay
down automatically for 1 minute after which it returns to its initial
position. Only now can the fryer be turned on again, repeating the steps
from the beginning.
6.5
SAFETY THERMOSTAT
Besides the thermostatic safety valve (1), the appliance also features a
safety thermostat (8) situated inside the control panel and will work if
the thermostatic valve fails to turn the burners out when the oil reaches
maximum temperature.
If a safety thermostat intervention takes place, find the reason
immediately and change the part that is not working if necessary. Press
the red push button on the safety thermostat (8) to light the burners
again.
6.6
OIL LOAD
Check that the bowl drainage tap is closed. Fill up with oil or fat until
you reach the minimum or maximum notch printed on the back of the
bowl.
6.7
EMPTYING THE BOWL
The user must make sure that there is a specific tank for collecting the
drained water. Mount the drain pipe with bayonet joint, conforming to
the drawing. Operate the lever to drain the water as shown in the
drawing.
Floor appliances:
The appliance already has an oil drip tray; place this tray under the
drain pipe inside the fryer compartment, open the cock lever and drain
the oil from inside the bowl.
7. MAINTENANCE, CLEANING AND CARE
Have it checked by a specialised technician check at least twice a year.
Clean the steel parts with water, detergent and a wet cloth. The
detergent used must not contain any corrosive or abrasive substance
as it can damage the steel surfaces.
After washing, rinse with clean water and dry with a dry cloth.
If the appliance is going to be out of use for a long time, rub all steel
parts briskly with a cloth soaked in Vaseline oil, leaving a protective
layer. Also aerate the premises periodically.
Any contact with ferrous materials, both continuous and occasional,
must be avoided at all costs as such materials can corrode. This means
that ladles, slices, spoons, etc., must be in stainless steel.
For the same reason, avoid cleaning the stainless steel parts with steel
wool, brushes or scrapers made of ordinary steel. Stainless steel wool
can be used, rubbing it in the direction of the grain.
11
DEUTSCH
MONYAGEANLEITUNG
3. TABELLE TECHNISCHE DATEN - FRITTEUSEN
MODELL
BRENNEL
N° x kW
WANNE
KAPAZ.
GESAMT
LEISTUNG
L
kW
GESAMTGASVERBR
AUCH
FLUSSIG
ERDGAS
GAS
G20/G25
G30/G31
m³/h
kg/h
DURCHMESSER DUSEN
1/100 mm
FLUSSIG
ERDGAS
GAS
G 20/G25
G30/G31
20/25mbar
28-30/37mbar
65-40 FRG
2 x 3,15
8
6,3
0,492
0,66
88L
140L
65-70 FRG
4 x 3,15
8+8
12,6
0,984
1,33
88L
140L
30
51
ZUENDFLAMME
3.1
KENNDATEN DER GASARTEN
Die den Leistungen und dem Verbrauch entsprechenden Daten beziehen sich auf die folgenden Gasarten:
GASART
HEIZLEISTUNG
DRUCK
VERSORGUNG
(PCI)
mbar
mm Wassersäule
G20 (Erdgas )
9,45
kW m³/h
20
200
G25 (Erdgas)
8,12
kW m³/h
25
250
G30 (Flüssiggas)
12,68
kW/kg
30
300
G31
12,87
kW/kg
37
370
Während der Geräteinstallation muss der Druck der Gasversorgung unbedingt obigen Angaben entsprechen, damit eine einwandfreie Brennerleistung erzielt
werden kann.
Druckwerte mbar = Millibar = 1 mbar = 10 mm c.d.a. (Millimeter in der Wassersäule)
Leistung = 1 kW = 860 kcal = 3.6 MJ = 3412 BTU
12
•
•
4. ANWEISUNGEN FÜR DEN INSTALLATEUR
4.1
•
•
•
•
•
•
4.2
•
•
4.3
INSTALLATION
Das Gerät aus der Verpackung nehmen und es auf seine
Unversehrtheit hin prüfen, im Zweifelsfall nicht benutzen und
sich an qualifiziertes Fachpersonal wenden.
Das Gerät immer unter einer Dunstabzugshaube aufstellen,
nach der Aufstellung
muss es durch die Stellfüsse nivelliert werden.
Der Geräteanschluss muss mit starren Rohrleitungen aus
verzinktem Stahl oder Kupfer durchgeführt werden.
Alle Gewindedichtungen müssen aus zertifiziertem Material sein,
das für den Gasgebrauch garantiert wird.
Wird das Gerät an der Wand im Kontakt mit brennbaren
Materialien installiert, muss zwischen Gerät und Wand eine
hitzebeständige Isolierschicht angebracht oder zwischen Gerät
und Wand mindestens 200 mm Freiraum gelassen werden.
Vor dem Anschluss des Gerätes prüfen, ob das zum Einsatz
kommende Gas und die Gerätevorrichtung demselben Typ
entsprechen. Sollte keine Übereinstimmung vorliegen, muss wie
im Abschnitt “Umbau für den Betrieb mit anderen Gasarten”
beschrieben, vorgegangen werden.
Die bauseitige Gasversorgungsanlage sowie die Räume, in
denen das Gerät aufgestellt wird, müssen den gültigen Normen
entsprechen.
Sicherstellen,
dass
die
Raumlüftung
während
des
Gerätebetriebs ausreicht. Für die Verbrennung sind pro kW
installierter Leistung 2 m³/h Luft nötig.
GESETZLICHE, TECHNISCHE
VORSCHRIFTEN
UND
•
•
ALLGEMEINE
Unfallverhütungsvorschriften.
Immer einen Sperrhahn zwischen den einzelnen Geräten und
der Versorgungsleitung einbauen.
•
•
ABGASLEITUNG FÜR GERÄTE "A"
Die Geräte müssen in Räumen aufgestellt werden, die sich für die
Ableitung der Verbrennungsgase, die unter Beachtung der
Installationsnormen zu erfolgen hat, eignen. Unsere Geräte sind (siehe
Tabelle Technische Daten) als Gasgeräte des Typs "A" klassifiziert, d.h.
sie können nicht an eine natürliche Abgasleitung angeschlossen
werden.
Diese Geräte müssen ihre Abgase in geeignete Dunstabzugshauben
oder ähnliche Vorrichtungen, die an einen sicheren Kamin oder direkt
nach außen anzuschließen sind, ableiten.
Bei fehlender Abzugshaube ist der Einsatz eines direkt nach außen
angeschlossenen Luftabzugs gestattet. Der Durchsatz muss
mindestens den Erfordernissen laut Tabelle 1 entsprechen und um die
für das Wohlbefinden der Bediener nützliche Luft vergrößert werden.
4.4
•
KONTROLLE GASLECKSTELLEN
Nach der Installation ist unter Anwendung von Seifenwasser
sicherzustellen, dass aus den Rohranschlüssen kein Gas austritt.
Eventuelle Leckstellen werden durch Schaumblasen signalisiert. Nie mit
offenen Flammen nach Gasleckstellen suchen.
Bei betriebsbereitem Gerät sicherstellen, dass keine Gasleckstellen
vorhanden sind. Dabei am Zähler (wenn vorhanden) 30 Minuten lang
prüfen, ob Gas durchfließt.
5.2
•
•
•
•
•
•
•
5. WARTUNG
•
•
Durch ihre einwandfreie Bauweise sind diese Geräte extrem
wartungsarm. Es ist auf jeden Fall empfehlenswert, alle Anlagen
mindestens zweimal jährlich von Fachpersonal prüfen zu lassen.
•
•
Hinweis: Der Hersteller lehnt jede Verantwortung für direkte oder
indirekte Schäden
ab, die auf eine nicht fachgerecht durchgeführte Installation,
eine
mangelnde Wartung, eine Umrüstung des Gerätes, einen
unsachgemäßen
Gebrauch und ein Nichtbefolgen der Unfall- und
Brandschutzvorschriften
für Gasgeräte zurückzuführen sind.
5.1
UMBAU FÜR DEN BETRIEB MIT ANDEREN GASARTEN
– FRITTEUSEN
Das Gerät wird laut den Angaben im Typenschild in der Nähe des
Gaseingangs des Geräts für den Betrieb getestet und ausgelegt.
Für den Betrieb mit anderen Gasarten sind folgende Anweisungen zu
beachten:
Die Umrüstung muss durch Fachpersonal erfolgen
Die Ausrüstung der Düsen für die Umstellung auf eine andere
Gasart, die von der Vorrüstung des Gerätes abweicht, ist
normalerweise in einem Plastikbeutel zusammen mit den
entsprechenden Aufklebern der anderen Gasarten enthalten.
Liegt diese Ausstattung nicht bei, muss man sie beim
Wiederverkäufer/Importeur
verlangen, vorher prüfen, ob das Gerät mit anderen Gasarten
arbeiten kann.
Sobald die Umstellung und die notwendigen Einstellungen beendet
sind, muss
man auf dem entsprechenden Feld des Typenschildes den
Aufkleber mit der
neuen Gasart anbringen, indem man diesen herausschneidet.
Austausch Brennerdüsen (Abb.1):
die Bedienblende (20) abnehmen und die Düsen (30) je nach
eingesetzter Gasart austauschen (siehe Tabelle TECHNISCHE
DATEN).
Austausch Zündbrennerdüse:
die Bedienblende (20) abnehmen, die Mutter des Zündbrenners
ausschrauben und die Düse (19) je nach eingesetzter Gasart
austauschen (siehe Tabelle TECHNISCHE DATEN).
Einstellung der Brenner, Überprüfung des Versorgungsdrucks
und Betrieb:
Den Austausch der Düsen durchführen und sicherstellen, dass
der Gasdruck sowohl am Eingang als auch am Ausgang des
Ventils mit den Angaben der Tabelle der TECHNISCHEN
DATEN übereinstimmt. Dazu die Schrauben am Druckanschluss
(11) des Ventils (1) entfernen, einen Gummischlauch mit einem
Manometer einführen und den Druck überprüfen. Sollte der
Versorgungsdruck
nicht
dem
vorgeschriebenen
Wert
entsprechen, die Ursache ausfindig machen und den Druck den
Angaben anpassen.
Einstellung des Zündbrenners:
Der Zündbrenner benötigt keinerlei Einstellung.
Einstellung der Min.-Regelung des Brenners:
Das Ventil funktioniert durch Ein- und Ausschalten und benötigt
daher keinerlei Einstellung.
•
•
•
•
AUSTAUSCH VERSCHIEDENER TEILE
Thermostatventil (6):
die Bedienblende (1) abnehmen und die Anschlussleitungen am
Ein- (9) und Ausgang (10) ausschrauben. Den Anschluß (11)
des Zündbrennerschlauchs und das Thermoelement (12)
ausschrauben. Die Befestigungsschrauben (13) des Ventils vom
Halter ausschrauben. Das Öl aus dem Becken entfernen, die
Stopfbüchse (15) ausschrauben und die Thermostatkugel (31)
aus dem Becken (14) herausziehen.
Das Ventil austauschen, alle Teile wieder montieren und bei mit
heißem Öl gefüllten Becken die Öldichtung auf der Stopfbüchse
(15) überprüfen.
ACHTUNG: Die Thermostatkugel des Ventils (31) muss sich auf
der Innenseite des Beckens befinden (Abb. 1).
Sicherheitsthermostat (8):
das Öl aus dem Becken entfernen, die Stopfbüchse (16)
ausschrauben, die Thermostatkugel (8) herausziehen und den
Thermostat austauschen. Alle Teile wieder montieren und bei mit
heißem Öl gefüllten Becken die Öldichtung auf der Stopfbüchse
(16) überprüfen.
ACHTUNG: Die Thermostatkugel (32) muss sich auf der
Außenseite des Beckens befinden.
Thermoelement (12):
das Thermoelement (12) vom Ventil (6) und vom Zündbrenner
(17) losschrauben und austauschen.
Zündkerze (18):
die Befestigungsmutter (19) der Zündkerze vom Zündbrenner
losschrauben und die Zündkerze austauschen.
Piezozünder (20):
das Anschlusskabel der Zündkerze herausziehen, die
Befestigungmutter des Piezozünders von der Bedienblende und
den Piezozünder austauschen.
Zündbrenner (27):
die beiden Befestigungsschrauben des Brenners vom Becken
ausschrauben und die Befestigungmutter (28) des Düsenhalters
(29) losschrauben. Den Brenner austauschen und alle Teile
wieder montieren.
Hinweis:
Nach jedem Austausch bzw. jeder Reparatur den
einwandfreien Betrieb der Teile prüfen und diese
einstellen.
Die Gasanschlüsse mit Seifenwasser auf ihre Dichtheit
prüfen - keinesfalls offenes Feuer dazu benützen.
6. ANWEISUNGEN FÜR DEN BENUTZER
13
6.1
Standgeräte:
EINSCHALTEN DER FRITTEUSENBRENNER
Zündbrenner einschalten:
Sicherstellen, dass sich der Drehschalter des ThermostatSicherheitsventils in der Stellung GESCHLOSSEN ( ) befindet. Den
ganz hineindrücken und gleichzeitig den Piezozünder
Druckknopf
drücken. Der Zündbrenner zündet automatisch.
Dieser Vorgang kann durch die Schlitze (21) auf der Bedienblende des
Geräts überprüft werden.
Den Druckknopf (24) des Ventils für 10-15 Sekunden gedrückt halten,
um das Thermoelement zu erwärmen, dann loslassen.
Sollte der Zündbrenner erlöschen, den Vorgang wiederholen.
Einschalten der Brenner und Temperatureinstellung:
Nach dem Einschalten des Zündbrenners den Drehschalter (22) des
Thermostat-Sicherheitsventils (6) auf eine der Positionen zwischen
Minimum 1 und Maximum 8 stellen (die anderen Zahlen geben die
dazwischenliegenden Temperaturen an). Die Brenner zünden
automatisch und werden nach dem Erreichen der mit dem Drehschalter
vorgegebenen Temperatur durch das Thermostatventil ausgeschaltet.
Bei Absinken der Temperatur werden die Brenner erneut durch das
Ventil eingeschaltet.
6.2
TEMPERATURANGABEN
DREHSCHALTER
POS. 1 = 100°C
POS. 4 = 135°C
POS. 7 = 170°C
AUF
POS. 2 = 110°C
POS. 5 = 145°C
POS. 8 = 180°C
DEM
VENTIL-
POS. 3 = 125°C
POS. 6 = 160°C
Das Gerät wird bereits mit einer Ölsammelschale geliefert. Diese
Sammelschale unter den Abflussschlauch im Inneren der
Fritteusengehäuses stellen, den Hebel des Abflusshahns öffnen und
das Öl in die Sammelschale fließen lassen.
7. WARTUNG, REINIGUNG UND PFLEGE
Das Gerät mindestens zweimal jährlich von einem Fachmann prüfen
lassen.
Alle Stahlteile mit Wasser, Reinigungsmittel und einem feuchten
Lappen reinigen; die Reinigungsmittel dürfen keine korrosiven oder
scheuernden Stoffe enthalten, da diese die Stahloberflächen
beschädigen würden.
Nach der Reinigung reichlich mit klarem Wasser nachspülen und mit
einem Lappen trocknen.
Wird das Gerät längere Zeit nicht in Betrieb genommen, sind alle Teile
aus Edelstahl mit einem mit Vaselinöl getränkten Tuch einzureiben,
wodurch eine dünne Schutzschicht gebildet wird; ferner ist der Raum in
regelmäßigen Zeitabständen zu lüften.
Zur Vorbeugung einer Korrosion ist ein andauernder oder auch nur
vorübergehender Kontakt mit Eisenmetallen unbedingt zu vermeiden,
damit keine Oxidation zustande kommt. Aus diesem Grund dürfen
ausschließlich Schöpflöffel, Schaber, Esslöffel usw. aus Edelstahl
verwendet werden.
Für die Reinigung des Geräts dürfen aus dem zuvor genannten Grund
weder Stahlwolle, Stahlbürsten oder -schaber verwendet werden.
Eventuell kann Edelstahlwolle verwendet werden, wobei bei der
Reinigung auf die Richtung der Satinierung zu achten ist.
Tolleranz ± 10%
6.3
AUSSCHALTEN DER FRITTEUSENBRENNER
Den Drehschalter auf
drehen. Die Brenner erlöschen und es brennt
nur der Zündbrenner weiter.
6.4
KOMPLETTES AUSSCHALTEN DER FRITTEUSE
Den Druckknopf
(23) ganz hineindrücken und dann loslassen. Durch
diesen Vorgang wird die Gaszufuhr zu den Brennern und zum
Zündbrenner geschlossen. Der Druckknopf bleibt automatisch für 1
Minute in gedrückter Stellung und kehrt dann in die Ausgangsposition
zurück. Erst jetzt kann die Fritteuse, wenn notwendig, durch
Wiederholung der obengenannten Schritte wieder in Betrieb genommen
werden.
6.5
SICHERHEITSTHERMOSTATE
Neben dem Thermostat-Sicherheitsventil (1) verfügt das Gerät auch
noch über einen Sicherheitsthermostat (8). Dieser befindet sich auf der
Innenseite der Bedienblende und schreitet dann ein, wenn die Brenner
bei Erreichen der Höchsttemperatur des Öls nicht durch das
Thermostat-Sicherheitsventil ausgeschaltet werden.
Nach jedem Einschreiten des Sicherheitsthermostats ist unverzüglich
die Ursache ausfindig zu machen und nötigenfalls das defekte Teil
auszutauschen. Um die Brenner erneut einzuschalten, muss zuerst der
rote Druckknopf auf dem Sicherheitsthermostat gedrückt werden.
6.6
BEFÜLLEN DES BECKENS MIT ÖL
Überprüfen, ob der Abflusshahn des Beckens geschlossen ist. Dann
das Becken bis zur Höhe der auf der Rückseite des Beckens
eingestanzten Mindest- oder Höchstmarkierungen mit Öl oder Fett
anfüllen.
6.7
BECKEN ENTLEEREN
Der Bediener hat für die Bereitstellung eines Sammelbehälters für das
abfließende Öl Sorge zu tragen. Den Abflussschlauch mit
Bajonettverschluss laut Abbildung montieren. Den Hebel für den
Ölabfluss laut Abbildung betätigen.
14
FRANÇAIS
MODE D‘EMPLOI
3. TABLEAU DONNÉES TECHNIQUES - FRITEUSES
BRÛLEURS
MODÈLE
N° x kW
CAPACITÉ
CUVE
L
CONSOMMATION GAZ
TOTALE
PUISSANCE
GAZ
TOTALE
GPL
NATUREL
G30/G31
G20/G25
kW
kg/h
m³/h
DIAMÈTRE INJECTEURS EN
CENTIÈMES DE MILLIMÈTRE
GAZ
GPL
NATUREL
G30/G31
G20/G25
28-30/37 mbar
20/25 mbar
65/40 FRG
2 x 3,15
8
6,3
0,489
0,666
88L
140L
65/70 FRG
4 x 3,15
8+8
12,6
0,979
1,333
88L
140L
30
51
VEILLEUSE
3.1
CARACTÉRISTIQUES DES GAZ
Les données relatives aux puissances et aux consommations se réfèrent aux types de gaz suivants:
TYPE DE GAZ
POUVOIR
CALORIFIQUE INF.
PRESSION
(PCI)
mbar
(mm)
D'ALIMENTATION
G20 (gaz naturel) CH4
9.45 kW/m³/h
20
200
G30 (butane) C4H10
12.68 kW/kg
30
300
G31 (propane) C3H8
12.87 kW/kg
37
370
G25 (G20L – DE)
8.12 kW/m³/h
20
200
G25 (aardgaz NL)
8.12 kW/m³/h
25
250
En phase d'installation des appareils il faut que les pressions des gaz soient celles citées ci-dessus pour pouvoir avoir un rendement maximum des
brûleurs.
Pressions mbar: 1 millibar = 1 mbar = 10 mm c.d.a. (millimètres de colonne d'eau)
Puissance: 1 kW = 860 kcal = 3,6 MJ = 3412 BTU
15
4. INSTRUCTIONS POUR L'INSTALLATEUR QUALIFIÉ
4.1
•
INSTALLATION DE L'APPAREILLAGE
Déballer l'appareil, s'assurer de l'intégrité de celui-ci et en cas de
doute ne pas l'utiliser et s'adresser à un personnel
porfessionnellement qualifié.
Positionner toujours l'appareil sous une hotte d'aspiration, après
l'avoir monté et mis à niveau en intervenant sur les pieds.
Le branchement de l'appareillage doit toujours être effectué à
l'aide de tuyaux rigides en acier zingué ou en cuivre.
L'étanchéité sur les filets de jonction doit être garantie par des
matériaux certifiés pour l'utilisation de gaz.
Si l'appareillage est installé au mur, en contact avec des
matériaux inflammables, il faut interposer entre l'appareillage et
le mur un isolant résistant à la chaleur, ou bien laisser un espace
de 200 mm entre l'appareillage et le mur.
Avant de raccorder l'appareil il faut vérifier la correspondance
entre le gaz prévu pour celui-ci et celui disponible pour
l'alimentation et son éventuelle adaptation. S'il n'y a pas de
correspondance entre les deux, il faut procéder comme décrit au
paragraphe “Adaptation pour un fonctionnement avec d'autres
gaz”.
L'installation au gaz en amont de l'appareillage et les
caractéristiques du lieu d'installation doivent être conformes aux
normes en vigueur.
Vérificer que l'aération des locaux soit suffisante durant le
fonctionnement de l'appareillage, étant donné que la quantité
d'air nécessaire à la combustion est de 2 m³/h d'air pour chaque
kW de puissance installée.
•
•
•
•
•
pertes des bulles se formeront. Ne jamais faire de flamme pour
contrôler les pertes.
Lorsque l'appareil est prêt à l'emploi, contrôler qu'il n'y ait pas de
pertes, en observant sur le compteur, si enclenché (pendant 30
minutes), qu'il n'y ait ni passage ni consommation de gaz.
5. ENTRETIEN
La qualité et la précision de la fabrication des appareillages réduisent
au minimum l'entretien. Il est toutefois recommandé de faire contrôler
les installations par du personnel qualifié, au moins deux fois par an.
N.B.:
5.1
TRANSFORMATION POUR
AVEC D'AUTRES GAZ– FRITEUSE
•
•
Normes pour la prévention des accidents.
Appliquer toujours un robinet de coupure d'alimentation entre
chaque appareillage et le tuyau de branchement du gaz.
Respecter les Normes d’installation NBN 51.003 (uniquement
pour le marché belge)
•
Conditions réglementaires d’installation (uniquement pour le marché
français)
L’installation et l’entretien de l’appareil doivent être effectués
comformément aux normes et à la réglementation en vigueur,
notamment :
-
Réglement de sécurité contre l’incendie et la panique dans les
établissements recevant du public :
a)
•
•
•
Prescriptions générales
Pour tous les appareils :
- Articles GZ
Installations aux gaz combustibles et hydrocarbures liquéfiés
Ensuite, suivant l’usage :
- Articles CH
- Chauffage, ventilation, réfrigération, conditionnement d’air et
production de vapeur et d’eau chaude sanitaire.
- Articles GC
Installation d’appareils de cuisson destinés à la restauration.
•
•
b) Prescriptions particulières à chaque type d’établissements
recevant du public (hôpitaux, magasins, etc.).
5.2
4.3
ÉVACUATION DES FUMÉES POUR LES APPAREILS DE
TYPE "A"
Les appareils doivent être installés dans des locaux prévus pour
l'évacuation des produits de la combustion, qui doit être conforme aux
normes d'installation. Nos appareillages sont considérés, (Voir Tableau
Données Techniques), en tant qu' appareils à gaz de type "A" non
prévus pour être raccordés à un conduit naturel d'évacuation des
produits de la combustion.
Les fumées doivent s'évacuer à travers de hottes spéciales, ou des
dispositifs semblables, raccordées à une cheminée sûre ou bien
directement à l'extérieur.
Dans le cas contraire, il est possible d'utiliser un aspirateur d'air
raccordé à l'extérieur, de portée non inférieure à celle demandée, Voir
tableau 1, en considérant aussi le renouvellement d'air ncassaire au
bien-être des opérateurs.
4.4
•
•
CONTRÔLE DES PERTES DE GAZ
Une fois l'appareil installé, contrôler qu'il n'y ait pas de pertes de gaz
sur les jonctions des tuyaux, à l'aide d'eau et de savon; en cas de
UN
FONCTIONNEMENT
L'appareillage est essayé et réglé pour un fonctionnement au gaz
naturel selon ce qui est indiqué sur le tableau des caractéristiques
présent près de l'entrée de gaz sur l'appareillage.
Pour un fonctionnement avec d'autres gaz procéder de la façon
suivante:
4.2
NORMES RÉGLEMENTAIRES, RÈGLES TECHNIQUES
ET GÉNÉRALES
•
•
le constructeur décline toute responsabilité pour les
endommagements directs ou indirects dus à une mauvaise
installation, à un mauvais entretien, à une intervention non
prévue sur l'appareillage, à une mauvaise utilisation et au
non-respect des normes de prévention incendies et de
sécurité pour les installations au gaz.
•
La transformation doit être effectuée par du personnel qualifié
Les pièces en dotation des injecteurs pour l’adaptation à un
autre type de gaz, différent de celui qui était prévu sur l’appareil,
est normalement contenu dans un sachet en nylon avec les
relatives étiquettes supplémentaires reportant tous les types de
gaz.
Si ces pièces ne sont pas fournies, il faut la demander auprès du
concessionnaire/importateur en s’assurant avant que l’appareil
peut fonctionner avec d’autres types de gaz.
Une fois terminée l’adaptation et les réglages nécessaires, il faut
appliquer dans l’espace de la plaquette des caractéristiques
prévu à cet effet l’étiquette relative au gaz correspondant.
Remplacement de l'injecteur brûleur (fig. 1):
enlever le tableau de commande (20) et remplacer les injecteurs
(30) selon le type de gaz (voir tableau DONNÉES
TECHNIQUES).
Remplacement de l'injecteur brûleur veilleuse:
enlever le tableau de commande (20), dévisser l'écrou du brûleur
veilleuse et remplacer l'injecteur (19) selon le type de gaz (voir
tableau DONNÉES TECHNIQUES).
Réglage des brûleurs, contrôle des pressions d'alimentation et
de fonctionnement:
une fois remplacés les injecteurs, vérifier que les pressions du
gaz, en entrée et en sortie de la soupape, soient celles reportées
sur le tableau DONNÉES TECHNIQUES. Pour cela, enlever les
vis présentes sur la prise de pression (11) de la soupape (1),
introduire un tube en caoutchouc raccordé à un manomètre et
contrôler la pression. Si la pression en entrée est différente de
celle indiquée, en rechercher la cause et pourvoir à la rendre
comme indiquée.
Réglage du brûleur veilleuse:
le brûleur ne nécessite d'aucun réglage.
Réglage du minimum – brûleur:
grâce au fonctionnement allumé/éteint, la soupape ne nécessite
d'aucun réglage.
REMPLACEMENT DE PIÈCES DÉTACHÉES
Soupape thermostatique (6):
enlever le tableau de commande (1), dévisser les raccords
d'entrée (9) et de sortie (10). Dévisser le raccord (11) tuyau
veilleuse et le thermocouple (12). Dévisser les vis (13) de
fixation de la soupape au support. Retirer la boule du thermostat
(31) de la cuve (14) après l'avoir vidée et avoir dévisser le
presse-étoupe (15).
Remplacer la soupape et remonter le tout en contrôlant la tenue
de l'huile sur le presse-étoupe (15) avec l'huile chaude dans la
cuve.
ATTENTION: la boule du thermostat de la soupape (31) doit être
positionnée vers l'intérieur de la cuve (fig. 1)
Thermostat de sécurité (8):
vider l'huile de la cuve, dévisser le presse-étoupe (16), retirer la
boule du thermostat (8), remplacer le thermostat. Remonter le
tout en contrôlant la tenue de l'huile sur le presse-étoupe (16)
avec l'huile chaude dans la cuve.
ATTENTION: la boule du thermostat (32) doit être positionnée
vers l'extérieur de la cuve.
Thermocouple (12):
16
•
•
•
N.B.:
dévisser le thermocouple (12) de la soupape (6) et de la
veilleuse (17) et le remplacer.
Bougie d’allumage (18):
dévisser l'écrou de fixation bougie (19) à la veilleuse et
remplacer la bougie.
Allumeur piézo-électrique (20):
retirer le câble de raccordement bougie, dévisser l'écrou de
fixation du piézo-électrique au tableau de commande et le
remplacer.
Remplacement du brûleur (27):
dévisser les deux vis de fixation du brûleur à la cuve, dévisser
l'écrou (28) de fixation du porte-injecteur (29). Remplacer le
brûleur et remonter le tout.
L'utilisateur doit se munir d'un réservoir ou récipient pour récupérer
l'huile évacuée de la friteuse. Monter le tuyau d'évacuation pourvu de
raccord à baïonnette comme indiqué sur le dessin. Amener la manette
d'évacuation de l'huile dans la position indiquée sur le dessin.
Après chaque remplacement ou réparation, contrôler le bon
fonctionnement des pièces remplacées et pourvoir à la mise
au point de ceux-ci.
Contrôler les tenues sur les raccords de gaz avec de l'eau et
du savon, ne jamais utiliser de flammes libres.
6. INSTRUCTIONS DE MISE EN SERVICE
Appareillages au sol:
6.1
l'appareillage est déjà fourni d'un bac pour la récupération de l'huile;
positionner ce bac sous le tuyau de vidage de la friteuse, ouvrir le levier
du robinet et vider l'huile à l'intérieur du bac.
ALLUMAGE DES BRÛLEURS DE LA FRITEUSE
Allumage flamme veilleuse:
Contrôler que la manette de la soupape de sécurité thermostatique soit
sur la position FERMÉ (symbole ). Appuyer à fond sur le bouton et
tout en le maintenant enfoncé, pousser sur le bouton de l'allumeur
piézo-électrique. La flamme veilleuse s'allumera automatiquement.
Vérificer l'allumage à travers la fente (21) sur le tableau de commande
de l' appareillage.
Maintenir enfoncé le bouton (24) de la soupape pendant 10-15
secondes afin de permettre le chauffage du thermocouple, et le
relâcher.
Si la veilleuse s'éteint, répéter l'opération.
Allumage des brûleurs et réglage de la température:
Après avoir allumé la flamme veilleuse, tourner la manette (22) de la
soupape de sécurité thermostatique (6) de la position minimum 1 à la
position maximum 8 (les autre chiffres indiquent les températures
intermédiaires). Les brûleurs s'allument automatiquement et une fois
atteinte la température préétablie avec la manette, la soupape
thermostatique éteindra les brûleurs et les rallumera à nouveau lorsque
la température sera descendue.
6.2
TEMPÉRATURES INDICATIVES DE LA MANETTE DE LA
SOUPAPE
Pos. 1 = 100°C
Pos. 4 = 135°C
Pos. 7 = 170°C
Pos. 2 = 110°C
Pos. 5 = 145°C
Pos. 8 = 180°C
7. ENTRETIEN ET NETTOYAGE
Confier à un technicien qualifié, au moins deux fois par an, le contrôle
de l'appareil.
Les parties en acier doivent être nettoyées avec de l'eau, du détergent
et un chiffon humide; les détergents ne doivent contenir aucune
substance corrosive ou abrasive, qui pourraient endommager les
parties en acier.
Après le lavage rincer avec de l'eau propre et essuyer avec un chiffon
sec.
Dans le cas où l'appareil ne serait pas utilisé pendant une longue
période de temps, appliquer sur toutes les parties en acier une pellicule
de vaseline à l'aide d'un chiffon; veiller en outre à renouveler
régulièrement l'air des locaux.
Veiller à éviter tout contact avec des matières ferreuses pour prévenir la
corrosion. Aussi, veiller à utiliser des louches, des cuillères et autres
ustensiles en acier inox.
Éviter pour la même raison de procéder au nettoyage de l'acier de la
marmite à l'aide de paillettes, brosses et autres raclettes en acier
standard. Pour le nettoyage il est possible d'utiliser la laine d'acier à
passer dans le sens du satinage.
Pos. 3 = 125°C
Pos. 6 = 160°C
Tolérance ± 10%
6.3
EXTINCTION DES BRÛLEURS DE LA FRITEUSE
Tourner la manette jusqu’à la position
. Les brûleurs s’éteindront et
seule la flamme veilleuse restera allumée.
6.4
EXTINCTION TOTALE DE LA FRITEUSE
Appuyer à fond sur le bouton
(23), et le relâcher. Avec cette
opération le passage du gaz aux brûleurs et au brûleur veilleuse se
ferme. Le bouton restera enfoncé automatiquement pendant 1 minute,
et retournera sur la position initiale. Seulement maintenant, la friteuse
pourra être remise en marche, si nécessaire, en répétant les opérations
du début.
6.5
THERMOSTAT DE SÉCURITÉ
Outre la soupape de sécurité thermostatique (1), l'appareil dispose
aussi d'un thermostat de sécurité (8) situé à l'intérieur du tableau de
commande, qui intervient si la soupape de sécurité thermostatique
éteint les brûleurs lorsque l'huile atteint la température maximum.
Lorsque le thermostat de sécurité intervient, en rechercher
immédiatement la cause et, si nécessaire, remplacer la piéce ne
fonctionnant pas. Pour rallumer les brûleurs, il faut d'abord pousser sur
le bouton rouge présent sur le thermostat de sécurité.
6.6
REMPLISSAGE DE L'HUILE
Vérifier que le robinet d'évacuation de la cuve soit fermé. Remplir
d'huile ou de graisse jusqu'à la hauteur des encoches du niveau
minimum ou maximum, imprimées sur l'arrière de la cuve.
6.7
VIDAGE DE LA CUVE
17
ESPAÑOL
INSTRUCCIONES DE USO
3. TABLA DATOS TÉCNICOS – FREIDORAS
QUEMADOR
ES
CAPACIDA
D
CUBA
N° x kW
L
65-40 FRG
2 x 3,15
65-70 FRG
4 x 3,15
MODELO
CONSUMO TOTAL GAS
POT.
TOTAL
kW
GPL
G30 – G31
kg/h
METANO
G20
m³/h
30 mbar 37mbar
METANO
G20
20 mbar
8
6,3
0,489
0,666
88L
140L
8+8
12,6
0,979
1,333
88L
140L
30
51
PILOTO
3.1
DIÁMETRO BOQUILLAS EN
CENTÉSIMAS DE MILÍMETRO
GPL
G30 – G31
CARACTERÍSTICAS DE LOS GASES
Los datos correspondientes a las potencias y los consumos hacen referencia a los siguientes tipos de gas:
TIPO DE GAS
PODER
CALORIFICO INF.
(PCI)
G20 (gas metano)
CH4
9,45
kW m³/h
PRESIÓN DE ALIMENTACIÓN
mbar
mm c.d.a.
20
200
G30 (butano) C4H10
12,68 kW/kg
30
300
G31 (propano) C3H8
12,87 kW/kg
37
370
G25 (G20L – DE)
8,12
kW m³/h
20
200
G25 (aardgas NL)
8,12
kW m³/h
25
250
En la fase de instalación de los aparatos es necesario que las presiones de los gases de alimentación sean las antedichas a fin de poder conseguir el
máximo rendimiento de los quemadores.
Presiones mbar: 1 milibar = 1 mbar = 10 mm c.d.a. (milímetros de columna de agua)
Potencia: 1 kW = 860 kcal = 3,6 MJ = 3412 BTU
18
4. INSTRUCCIONES PARA EL INSTALADOR CUALIFICADO
4.1
•
•
•
•
•
•
•
4.2
•
•
4.3
Para el funcionamiento con otros tipos de gas se debe proceder como
indicado a continuación:
INSTALACIÓN DEL EQUIPO
Sacar el aparato de su embalaje, comprobando su integridad.
En caso de duda, no utilizarlo, y dirigirse a personal profesional
cualificado.
Ubicar el aparato siempre bajo una campana de aspiración. Tras
su colocación, debe nivelarse mediante las patas.
La conexión del aparato debe ser efectuada siempre utilizando
tubos rígidos en acero galvanizado o cobre.
Todos los cierres de las roscas de unión deben estar hechos de
materiales certificados para la utilización con gases.
Si el aparato se instala pegado a la pared, en contacto con
material inflamable, es preciso intercalar, entre el aparato y la
pared, una capa de material aislante resistente al calor, o bien
dejar un espacio de 200 mm entre el aparato y la pared.
La instalación general del gas, aguas arriba del aparato, así
como las características de los entornos donde se instala el
aparato, deben cumplir las normas vigentes.
Antes de conectar el aparato, se debe comprobar que el gas
para el que aquél está predispuesto y el gas disponible de
alimentación correspondan, con el fin de verificar su idoneidad.
Si los dos gases no se corresponden, se debe proceder como se
describe en el párrafo "Transformación para funcionamiento con
otros gases".
Colocar siempre una llave de paso de abre-cierre entre cada
aparato y la tubería de abastecimiento del gas.
Verificar que la ventilación de los entornos sea suficiente
durante el funcionamiento del aparato, considerando que la
cantidad de aire necesaria para la combustión es de 2 m³/h de
aire por cada kW de potencia instalada.
NORMAS DE LEY, NORMAS TÉCNICAS Y LÍNEAS
GENERALES
•
•
•
•
5.2
DESCARGA DE HUMOS PARA APARATOS TIPO "A"
•
•
CONTROL DE FUGAS DE GAS
Terminada la instalación es necesario comprobar que no haya fugas
de gas por los empalmes de las tuberías, utilizando una solución de
agua jabonosa; las eventuales fugas de gas quedarán señaladas por
burbujas de espuma. No utilizar nunca llamas para comprobar
eventuales fugas.
Con el aparato listo para el uso, comprobar que no haya fugas de gas,
verificando que el contador, si presente, que no haya paso ni consumo
de gas por un periodo de 30 minutos.
5.
•
Normas UNI-CIG 8723, circular M.I. n° 68 del 25/11 /69 y
variantes.
Normas de prevención de accidentes.
Los aparatos se deben instalar en sitios aptos para la descarga de los
productos de la combustión que debe efectuarse según cuanto
prescrito por las normas de instalación. Nuestros aparatos son
considerados ( ver Tablas de Datos Técnicos ) como aparatos de gas
del tipo “A” no previstos para enlazarlos con un conducto natural de
descarga de los productos de la combustión.
Dichos aparatos deben descargar en campanas al efecto o en
dispositivos similares, enlazados con una chimenea cuya eficiencia es
preciso asegurar, o bien deben descargar directamente al exterior.
A falta de esto se admite la utilización de un extractor de aire
conectado directamente con el exterior, de capacidad no inferior a
cuanto requerido , V. tabla 1, aumentada del recambio de aire
necesario para asegurar el bienestar de los operadores.
4.4
•
•
•
•
•
MANTENIMIENTO
La transformación debe ser efectuada por personal cualificado
Los elementos de las boquillas necesarios para la conversión en
otro tipo de gas distinto del que se había previsto para el aparato
normalmente se encuentra en una bolsa de nylon, con las
etiquetas correspondientes suplementarias en las que se
muestra todos los tipos de gas.
Si estos elementos no se entregan con la máquina, es necesario
solicitarlas al distribuidor o importador, comprobando antes que
el aparato sea capaz de funcionar con otros tipos de gas.
Una vez terminada la trasnformación y las regulaciones
adecuadas, es necesario aplicar en el espacio correspondiente
de la placa de características la etuiqueta del gas en cuestión,
recortándola.
Sustitución boquilla quemador (fig.1):
quitar el panel (20) y cambiar las boquillas (30) según el tipo de
gas (ver tabla DATOS TÉCNICOS).
Sustitución boquilla quemador piloto:
quitar el panel (20), desenroscar la tuerca del quemador piloto y
cambiar la boquilla (19) según el tipo de gas (ver tabla DATOS
TÉCNICOS).
Regulación de los quemadores, comprobación de las presiones
de alimentación y funcionamiento:
efectuado el cambio de las boquillas, comprobar que las
presiones del gas, tanto en entrada como en salida de la válvula,
sean las indicadas en la tabla DATOS TÉCNICOS. Para esto se
deben quitar los tornillos situados en la toma de presión (11) de
la válvula (1), introducir un tubo de goma conectado a un
manómetro y leer la presión. Si la presión de alimentación en
entrada resultara ser diferente de la prescrita, averiguar la causa
y proceder a restablecer la presión prescrita.
Regulación quemador piloto:
el quemador no precisa ninguna regulación.
Regulación del mínimo – quemador:
la válvula tiene un funcionamiento de encendido/apagado, por lo
que no precisa ajustes.
SUSTITUCIÓN DE LAS PIEZAS DE REPUESTO
Válvula termostática (6):
quitar el panel (1), desenroscar los empalmes de conexión
entrada (9) y salida (10). Desenroscar el empalme (11) tubito
piloto y el termopar (12). Desenroscar los tornillos (13) de
fijación de la válvula al soporte. Quitar el bulbo del termostato
(31) de la cuba (14) después de haber vaciado el aceite y haber
desenroscado el prensaestopas (15).
Cambiar la válvula y montar de nuevo el todo comprobando la
estanqueidad al aceite en el prensaestopas (15) con el aceite
caliente en la cuba.
ATENCIÓN: el bulbo del termostato de la válvula (31) debe estar
colocado hacia el interior de la cuba (fig. 1)
Termostato de seguridad (8):
vaciar el aceite de la cuba, desenroscar el prensaestopas (16),
quitar el bulbo del termostato (8), cambiar el termostato. Montar
de nuevo el todo comprobando la estanqueidad al aceite en el
prensaestopas (16) con el aceite caliente en la cuba.
ATENCIÓN: el bulbo del termostato (32) debe estar colocado
hacia la parte externa de la cuba.
Termopar (12):
desenroscar el termopar (12) de la válvula (6) y del piloto (17),
luego cambiarlo.
Bujía de encendido (18):
desenroscar la tuerca de fijación de la bujía (19) al piloto y
cambiar la bujía.
Encendedor piezoeléctrico (20):
desconectar el cable de conexión de la bujía, desenroscar la
tuerca de fijación del piezoeléctrico al panel y cambiarlo.
Sustitución quemador (27):
desenroscar los dos tornillos que fijan el quemador a la cuba,
desenroscar la tuerca (28) de fijación del portaboquilla (29).
Cambiar el quemador y montar de nuevo el todo.
El mantenimiento se reduce al mínimo gracias a una construcción
esmerada de los aparatos. De todas maneras se aconseja encargar un
control de los aparatos a personal cualificado, por lo menos dos veces
al año.
•
N.B.: el constructor rehusa cualquier responsabilidad por daños
directos o indirectos causados por una instalación errada, por un
mantenimiento descuidado, por modificaciones ilícitas, por usos
inadecuados y por el incumplimiento de las normas de
prevención de accidentes y de seguridad aplicables a las
instalaciones de gas.
N.B.: Después de cada sustitución o reparación, comprobar que sea
correcto el funcionamiento de los órganos sustituidos y
proceder a ponerlos a punto.
Comprobar las estanqueidades en los empalmes del gas
utilizando agua jabonosa, no utilizar nunca llamas libres.
5.1
TRANSFORMACIÓN PARA FUNCIONAMIENTO
OTROS TIPOS DE GAS - FRG
CON
El aparato es ensayado y predispuesto para funcionar a gas, según
cuanto indicado en la tabla de características aplicada en el aparato
cerca de la entrada del gas.
6.
INSTRUCCIONES PARA EL USUARIO
6.1
ENCENDIDO DE LOS QUEMADORES FREIDORA
Encendido llama piloto:
19
Comprobar que el mando de la válvula de seguridad termostática esté
en la posición CERRADO (símbolo ). Apretar a fondo el botón
y
manteniéndolo apretado, pulsar contemporáneamente el botón del
encendedor
piezoeléctrico.
La
llama
piloto
se
enciende
automáticamente.
Comprobar el encendido por la ranura (21) en el panel del aparato.
Mantener pulsado el botón (24) de la válvula por 10-15 segundos a fin
de permitir el calentamiento del termopar, luego soltarlo.
Si el piloto se apaga repetir la operación.
Encendido de los quemadores y regulación de la temperatura:
Después de encender la llama piloto, girar el mando (22) de la válvula
de seguridad termostática (6) en la posición entre mínimo 1 y máximo 8
(los otros números indican las temperaturas intermedias). Los
quemadores se encienden automáticamente y una vez alcanzada la
temperatura configurada con el mando, la válvula termostática apaga
los quemadores y vuelve a encenderlos cuando la temperatura baja.
6.2
Encargar un control a un técnico especializado por lo menos dos veces
al año.
Las partes en acero se deben limpiar con agua, detergente y un trapo
mojado; los detergentes no deben contener ninguna sustancia
corrosiva ni abrasiva, ya que son perjudiciales para las superficies en
acero. Tras el lavado aclarar con agua limpia y secar con un paño
seco. Si no se va a utilizar el aparato por mucho tiempo, pasar fuerte
sobre todas las superficies en acero, un paño empapado de aceite de
vaselina a fin de dejar una capa protectora; además ventilar
periódicamente los ambientes. Evitar terminantemente el contacto
continuo o casual con material ferroso a fin de no provocar inicios de
corrosión. Por lo tanto los cucharones, las paletas, las cucharas, etc.,
deben ser de acero inoxidable.
Por el mismo motivo hay que evitar limpiar el acero inoxidable con lana,
cepillos o rascadores de acero común. Eventualmente se puede utilizar
lana de acero inoxidable pasándola en la dirección del satinado.
TEMPERATURAS INDICATIVAS DEL MANDO DE LA
VÁLVULA
Pos. 1 = 100°C
Pos. 4 = 135°C
Pos. 7 = 170°C
Pos. 2 = 110°C
Pos. 5 = 145°C
Pos. 8 = 180°C
Pos. 3 = 125°C
Pos. 6 = 160°C
Tolerancia ± 10%
6.3
APAGADO QUEMADORES FREIDORA
Girar el mando hasta la posición
. Los quemadores se apagan y
queda encendida sólo la llama piloto.
6.4
APAGADO TOTAL DE LA FREIDORA
Apretar a fondo el botón (23), luego soltarlo. Con esta operación se
corta el paso del gas para los quemadores y el quemador piloto. El
botón queda automáticamente apretado por 1 minuto, luego vuelve a la
posición inicial. Sólo ahora se puede poner en función la freidora , a ser
necesario repitiendo las operaciones desde el comienzo.
6.5
TERMOSTATO DE SEGURIDAD
Además de la válvula termostática de seguridad (1), el aparato dispone
también de un termostato de seguridad (8) situado dentro del panel,
que interviene si la válvula de seguridad termostática no apaga los
quemadores cuando el aceite ha alcanzado la temperatura máxima.
Si interviene el termostato de seguridad, averiguar enseguida la causa
y, a ser necesario, cambiar la pieza estropeada. Para encender de
nuevo los quemadores, es preciso primero apretar el botón rojo situado
en el termostato de seguridad.
6.6
CARGA DEL ACEITE
Comprobar que el grifo de vaciado de la cuba esté cerrado. Cargar el
aceite o la grasa hasta la altura de las marcas de nivel mínimo o
máximo, impresas en la parte trasera de la cuba.
6.7
VACIADO DE LA CUBA
El usuario debe comprobar que haya un depósito adecuado para
recoger el aceite vaciado. Montar el tubo de vaciado con conexión de
bayoneta conformemente al dibujo. Accionar la palanca para vaciar el
aceite según el dibujo.
Aparatos de pavimento:
el aparato viene ya equipado con una bandeja para recoger el aceite;
colocar esta bandeja debajo del tubo de vaciado, dentro del espacio de
la freidora, abrir la palanca del grifo y vaciar el aceite dentro de la
bandeja.
7. MANTENIMIENTO, LIMPIEZA Y CUIDADO
20
NEDERLANDSE
GEBRUIKSAANWIJZING
3. TABEL MET TECHNISCHE GEGEVENS – FRITEUSES.
BRANDERS
aantal x kW
in liter
kW
LPG
G30/G31
kg/h
AARDGAS
G20/G25
m³/h
65/40 FRG
2 x 3,15
8
6,3
0,489
0,666
88L
140L
65/70 FRG
4 x 3,15
8+8
12,6
0,979
1,333
88L
140L
30
51
TYPE
TOTAAL
VERMOGEN
TOTAAL GASVERBRUIK
DOORSNEDE VAN DE
INJECTOREN IN 1/100 VAN EEN
MILLIMETER
LPG
AARDGAS
G30/G31
G20/G25
28-30/37 mbar
20/25 mbar
INHOUD
KUIP
WAAKVLAM
3.1
EIGENSCHAPPEN VAN DE GASSEN
De gegevens over het vermogen en het verbruik verwijzen naar volgende gassen:
CALORISCH
VERMOGEN INF.
(PCI)
Mbar
(mm)
G20 (aardgas) CH4
9.45 kW/m³/h
20
200
G30 (butaan) C4H10
12.68 kW/kg
30
300
G31 (propaan) C3H8
12.87 kW/kg
37
370
G25 (G20L – DE)
8.12 kW/m³/h
20
200
G25 (aardgas NL)
8.12 kW/m³/h
25
250
GAS
DRUK VOEDING
Voor een optimaal rendement moet bij de plaatsing van de toestellen de druk gelijk zijn aan de hierboven vermelde waarden.
Druk mbar = 1 millibar = 1 mbar = 10 mm c.d.a. (millimeters kolom water)
Vermogen = 1 kW = 860 kcal = 3.6 MJ = 3412 BTU
21
4. INSTRUCTIES VOOR DE ERKENDE INSTALLATEUR.
•
4.1
•
•
•
•
•
•
PLAATSING VAN HET TOESTEL
•
Haal de apparatuur uit de verpakking, verzeker u ervan dat ze
heel is en gebruik haar in geval van twijfel niet, maar wend u tot
vakmensen.
Zet het apparaat altijd onder een afzuigkap. Nadat het geplaatst
is, dient het met Zehulp van de pootjes waterpas te worden
gezet.
De aankoppeling van het toestel moet altijd uitgevoerd worden
met vaste leidingen in verzinkt staal of koper.
De verbindingsschroefdraden dienen altijd gasdicht te zijn, wat
moet worden gegarandeerd door materiaal dat gecertificeerd is
voor het gebruik met gas.
Alvorens de apparatuur aan te sluiten, dient u te controleren dat
het gas waar deze voor gemaakt is en het beschikbare gas met
elkaar overeenstemmen..
Als deze twee niet met elkaar
overeenstemmen, dient u te handelen als wordt beschreven in
de paragraaf “Aanpassingen voor werking met andere gassen”.
Als het toestel tegen muur wordt geplaatst in contact met
ontvlambare materialen moet steeds een warmtebestendige
isolator tussen de muur en het toestel geplaatst worden.
Voorzien. Ofwel moet een vrije ruimte van 200 mm tussen de
muur en het toestel gelaten worden.
Ga na of er voldoende ventilatie is in de lokalen voor gebruik van
het toestel, wetende dat er voor verbranding 2m³/u lucht nodig is
voor elke bevestigde kW.
De gastoevoer naar het toestel en de ruimte waar de toestellen
geplaatst worden moeten voldoen aan de daarvoor geldende
normen.
•
•
•
4.2
VERPLICHTE NORMEN, TECHNISCHE EN ALGEMENE
BEPALINGEN.
•
•
4.3
“A”.
Normen voor ongevalpreventie.
Breng altijd een afsluitkraan aan tussen elk toestel en de
gasleiding.
5.2
•
•
CONTROLE VAN GASLEKKEN.
Na plaatsing van het apparaat moet de installatie op gaslekken
gecontroleerd worden. Controleer de verbindingen van de gasleidingen
met behulp van water en zeep. Zijn er lekken dan zullen er zich bellen
vormen. Gebruik nooit vlammen om lekken op te sporen.
Wanneer het toestel gebruiksklaar is controleer dan nogmaals door de
gasmeter gedurende 30 minuten te observeren zonder dat er
doorstroming of verbruik van gas is.
De kwaliteit en de precisie waarmee de toestellen vervaardigd werden
verminderen het onderhoud van de apparaten tot een minimum. Wel is
het aan te raden de toestellen minstens tweemaal per jaar te doen
nazien door gekwalificeerde technici.
De fabrikant verwerpt elke vorm van verantwoordelijkheid voor
schade die rechtstreeks of onrechtstreeks het gevolg is van
een foute plaatsing, slecht onderhoud, niet voorziene ingrepen
op de apparaten, verkeerd gebruik of het niet naleven van de
brandpreventie en veiligheidsnormen voor gasinstallaties.
5.1
AANPASSINGEN
GASSEN – FRITEUSE.
•
•
•
5. ONDERHOUD.
N.B.
•
ROOKAFVOER VOOR TOESTELLEN VAN HET TYPE
De lokalen waar de apparaten geplaatst worden moeten voorzien zijn
van een afvoer voor verbrandingsresten. De afvoer moet voldoen aan
de plaatsingsnormen. Onze apparaten worden beschouwd als
gastoestellen van het type “A” (zie tabel technische gegevens) en zijn
dus niet geschikt om geplaatst te worden met enkel een natuurlijke
afvoer van verbrandingsresten.
De rook moet geëvacueerd worden door middel van speciale
afzuigsystemen, of gelijkwaardige apparaten die verbonden zijn met
een daarvoor geschikte schouw of die de verbrandingsresten
rechtstreeks naar open lucht evacueren.
Omgekeerd is het mogelijk een luchtzuiger te plaatsen die rechtstreeks
buitenlucht aanzuigt met ten minste het in tabel 1 gewenste vermogen
en rekening houdende met de voor de werknemers noodzakelijke
luchtverversing.
4.4
•
De ombouw moet uitgevoerd worden door speciaal daarvoor
opgeleide technici.
De spuitmonden om over te gaan op andere gassoorten dan
waarop het apparaat werd afgesteld, bevinden zich over het
algemeen in een plastic zakje met bijbehorende extra etiketten
met alle gassoorten.
Indien dit niet het geval is, dienen ze bij de dealer/importeur te
worden aangevraagd. Verzeker u er echter allereerst van dat
het apparaat ook op andere gassoorten kan werken.
Zodra op de andere gassoort is overgegaan en de nodige
afstellingen zijn verricht, dient op de hiervoor bestemde ruimte
van het plaatje met kenmerken het etiket te worden geplakt
betreffende de overeenkomstige gassoort, door de betreffende
gassoort uit te knippen.
Vervanging van de injector van de brander (fig.1):
Verwijder het bedieningspaneel (20) en vervang de injectoren
(30) in functie van het gebruikte gas (zie tabel met technische
gegevens).
Vervanging van de injector van de waakvlam
Verwijder het bedieningspaneel (20), schroef de waakvlam los
en vervang de injector (19) naar gelang het gebruikte gas (zie
tabel met technische gegevens).
Afstelling van de branders, controle van de druk
De druktoevoer bij aankomst en bij vertrek van de klep moet
gelijk zijn aan deze vermeld op het identificatieplaatje dat de
kenmerken van het apparaat vermeld en moet overeenstemmen
met de in de handleiding gegeven waarden (zie tabel met
technische gegevens). Controleer na vervanging van de injectors
de druktoeveoer door een rubberen buis met een
watermanometer of een gelijkaardig systeem in het drukventiel
(10) te plaatsen, na de schroeven verwijderd te hebben. (Fig. 1)
Als na controle de druk verschillend is van de gewenste
waarden, spoor dan de oorzaak op en breng de druk in
overeenstemming met de gewenste waarden.
Afstelling van de waakvlam
De waakvlam moet niet afgesteld worden.
Afstelling van de minimale stand
Door de aan/uit functie heeft de klep geen regeling nodig.
VOOR
GEBRUIK
MET
ANDERE
De apparaten zijn getest en afgesteld voor gebruik met aardgas (zie
identificatieplaatje bij aanvoerkoppeling gasleiding aan toestel).
Ga voor gebruik met andere gassen als volgt te werk:
•
N.B.
PLAATSING VAN WISSELSTUKKEN.
Thermische klep (6):
Verwijder het bedieningspaneel (1), schroef de gasleidingen (9
en 10) los. Schroef de waakvlamverbinding (11) en het
thermokoppel (12) los. Schroef de bevestigingsschroeven (13)
van de klep los van de bevestigingsrail. Verwijder de
thermostaatkop (31) van de kuip (14) na deze leeggemaakt te
hebben en de kabelwartel (15) te hebben losgeschroefd.
Vervang de klep en bouw het geheel terug op. Controleer het
gedrag van de olie op de kabelwartel (15) met de warme olie in
de kuip.
OPGELET: de thermostaatkop van de klep (31) moet naar de
binnenkant van de kuip gericht worden (fig. 1).
Veiligheidsthermostaat (8):
Haal de olie uit de kuip, schroef de kabelwartel (16) los,
verwijder de thermostaatkop (8), vervang de thermostaat. Bouw
alles opnieuw op. Controleer het gedrag van de olie op de
kabelwartel (16) met de warme olie in de kuip.
OPGELET: de thermostaatkop (32) moet naar de buitenkant van
de kuip gericht worden.
Thermokoppel (12):
Schroef het thermokoppel (12) van de klep (6) en van de
waakvlam (17) los en vervang deze.
Aansteekkaars (18):
Schroef de bevestigingsschroef van de kaars (19) aan de
waakvlam los en vervang de kaars.
Piézo-elektrische ontsteking (20):
Verwijder de aansluitingskabel van de kaars, schroef de
bevestigingsschroef van de piézo-elektrische ontsteking los van
het bedieningspaneel en vervang deze.
Vervangen van de brander (27):
Schroef beide bevestigingsschroeven van de brander los,
schroef de bevestigingsschroef (28) van de injectordrager (29)
los. Vervang de branderen bouw het geheel terug op.
Controleer na elke vervanging of reparatie het goed functioneren
van de vervangen de stukken en controleer de afstelling.
Controleer op gaslekken met behulp van water en zeep. Gebruik
nooit vuur om lekken op te sporen.
6.
INSTRUCTIES VOOR DE INGEBRUIKNEMING.
6.1
AANSTEKEN VAN DE BRANDERS.
De waakvlam aansteken.
22
De bedieningsknop van de veiligheidsklep van de thermostatische
veiligheidsklep in stand DICHT staat (
symbool). Druk de
knop
volledig in en druk tegelijkertijd op de piézo-elektrische schakelaar. De
waakvlam zal automatisch aanspringen.
Controleer de ontsteking door de opening (21) op het bedieningspaneel
van het toestel.
Hou de knop (24) 10 tot 15 seconden ingedrukt om de verwarming van
het thermokoppel mogelijk te maken en laat dan de knop los.
Indien de waakvlam uitdooft, herhaal de bewerking.
Aansteken van de branders en temeratuurregeling:
Na de waakvlam te hebben aangestoken, draai de hendel (22) van de
thermostatische veiligheidsklep (6) van de minimumstand 1 naar de
maximumstand 8 (de tussenliggende cijfers verwijzen naar de
tussenliggende temperaturen). De branders springen automatisch aan.
Wanneer de gewense temperatuur bereikt is, zal de thermostatische
klep de branders doven en ze opnieuw aansteken als de temperatuur
daalt.
6.2
BENADERENDE
TEMPERATUREN
BEDIENINSKNOP VAN DE KLEP.
Stand 1 = 100°C
Stand 4 = 135°C
Stand 7 = 170°C
Stand 2 = 110°C
Stand 5 = 145°C
Stand 8 = 180°C
OP
7. ONDERHOUD EN REINIGING.
Doe het apparaat minstens tweemaal per jaar nazien door een
gekwalificeerde technicus.
De roestvrije oppervlakken reinigen met een vochtige doek, water en
zeep. Gebruik geen reinigingsmiddelen die chloor of schurende
bestanddelen bevatten. Na het wassen de roestvrije oppervlakken
spoelen met helder water.
Mocht het toestel lange tijd niet gebruikt worden breng dan met behulp
van een vod een dunne laag vaseline aan op de roestvrije
oppervlakken. Verlucht geregeld de lokalen.
Vermijd elk contact met ijzerhoudende stoffen om roestvorming te
voorkomen. Vermijd daarom ook het gebruik van roestvrije lepels of
ander roestvij gereedschap.
Vermijd om dezelfde reden het gebruik van stalen borstels of schrapers
bij het schoonmaken van de kuip. Het gebruik van ijzeren sponsjes is
wel toegelaten, mits gewreven wordt in dezelfde richting als de glans.
DE
Stand 3 = 125°C
Stand 6 = 160°C
Mogelijke afwijking ± 10%
6.3
DOVEN VAN DE BRANDERS VAN DE FRITEUSE.
Draai de hendel tot de positie . De branders zullen uitdoven en enkel
de waakvlam zal blijven branden.
6.4
VOLLEDIGE UITDOVING VAN DE FRITEUSE.
Druk de knop
(23) volledig in en laat deze los. Met deze handeling
sluit u de toevoer af van het gas naar de branders en naar de
waakvlam. De knop zal 1 minuut lang automatisch ingedrukt blijven en
zal dan vanzelf terugkeren in de oorspronkelijke stand. Pas dan kann
de friteuse weer aangezet worden. Indien nodig herhaal bovenvermelde
handelingen.
6.5
VEILIGHEIDSTHERMOSTAAT.
Naast een thermostatische veiligheidsklep (1) heeft het toestel ook een
veiligheidsthermostaat (8). Deze bevindt zich in het bedieningspaneel
en treedt automatisch in werking als de thermostatische veiligheidsklep
de branders dooft wanneer de olie de maximumtemperatuur bereikt.
Als de veiligheidsthermostaat in werking treedt zoek dan onmiddellljk de
oorzaak en vervang eventueel het defecte onderdeel. Om de branders
opnieuw aan te steken druk eerst op de rode knop van de
veiligheidsthermostaat.
6.6
VULLEN VAN DE OLIE IN DE KUIP.
Controleer of de afvoerkraan van de kuip gesloten is. De kuip vullen
met olie of vet tot aan de inkepingen, achteraan de kuip, die het
maximum en het minimum aanduiden.
6.7
LEEGMAKEN VAN DE KUIP.
De gebruiker moet zich voorzien van een recipiënt om de olie uit de
friteuse op te vangen. Paats de afvoerbuis, voorzien van een
bajonetverbinding, zoals op de tekening. Breng de afvoerhendel in de
stand zoals aangeduid op de tekening.
Toestellen op de grond.
Het toestel is reeds voorzien van een recuperatiebak. Plaats deze bak
onder de afvoerbuis van de friteuse, open de kraan en doe de olie in de
bak vloeien.
23
8. SCHEMI DI INSTALLAZIONE - INSTALLATION DIAGRAMS – INSTALLATIONSSCHEMEN - SCHEMAS D'INSTALLATION - ESQUEMAS DE
INSTALACIÓN- INSTALLATIESCHEMA’S
24
9. DATI DI TARGA - TECHNICAL DATA – TECHNISCHE DATEN – DONNÉES TECHNIQUES - DATOS TÉCNICOS – NAAMBORD
25
10. TAVOLE ESPLOSI PARTI FUNZIONALI MOD. 65-40 FRG 65-70 FRG– EXPLODED FUNCTIONAL PARTS TABLES MOD. 65-40 FRG 65-70 FRG
- DETAILZEICHNUNGEN DER BETRIEBSTEILE MOD. 65-40 FRG 65-70 FRG- ÉCLATÉS DES PARTIES FONCTIONNELLES MOD. 65-40 FRG 6570 FRG - TABLAS DE DESPIECES DE LAS PARTES FUNCIONALES MOD. 65-40 FRG 65-70 FRG- SCHEMA’S VAN DE FUNCTIONELE DELEN
MOD. MOD. 65-40 FRG 65-70 FRG.
32
FIG. 1
14
31
29
15
16
18
19
3
8
20
2
28
30
27
11
12
17
12
10
25
26
1
9
4
23
5
13
6
24
22
FIG. 2
PIL
PIL
6
MIN
26