1
ISTRUZIONI DI MONTAGGIO
INSTRUCTION POUR LE MONTAGE
ASSEMBLY INSTRUCTIONS
MONTAGEANWEISUNGEN
Quadro elettronico per il comando di due motori monofasi
Coffret electronique pour le contrôle de deux moteurs monophase
Electronic panel for the control of two single phase motors
Elektronische Steuerung für zwei Einphasenmotoren
Mod.
DE22-FE-iec
IMPORTANTI ISTRUZIONI PER LA SICUREZZA
ATTENZIONE - É IMPORTANTE PER LA SICUREZZA DELLE
PERSONE CHE VENGANO SEGUITE TUTTE LE ISTRUZIONI
CONSERVARE CON CURA QUESTE ISTRUZIONI
1° - Tenete i comandi dell'automatismo (pulsantiera, telecomando etc.) fuori
dalla portata dei bambini. I comandi devono essere posti ad un’altezza
minima di 1,5mt dal suolo e fuori dal raggio d’azione delle parti mobili.
2° - Effettuare le operazioni di comando da punti ove l'automazione sia visibile.
3° - Utilizzare i telecomandi solo in vista dell'automazione.
4° - Avvertenze : Sulle altre misure di Protezione contro rischi attinenti
l'installazione o l'utilizzazione del Prodotto vedi, a completamento di
questo libretto di Istruzioni, le Avvertenze RIB allegate. Qualora queste
non siano pervenute chiederne l'immediato invio all'Ufficio Commerciale
RIB.
LA DITTA RIB NON ACCETTA NESSUNA RESPONSABILITÀ per eventuali
danni provocati dalla mancata osservanza nell'installazione delle norme di
sicurezza e le leggi attualmente in vigore.
I
F
INSTRUCTIONS IMPORTANTES POUR LA SECURITE
IL EST IMPORTANT POUR LA SECURITE DES PERSONNES
DE SUIVRE ATTENTIVEMENT TOUTES INSTRUCTIONS
GARDER MODE D’EMPLOI
1° - Gardez les commandes de l'automatisme (boutons poussoirs, telecommande
etc.) hors de la portée des enfants. Les commandes doivent être placées au
minimum à 1,5 m du sol, et hors de rayon d’action des pièces mobiles.
2° - Il faut donner les commandes d'un lieu, où on peut voir l'automatisme.
3° - Il faut utiliser les émetteurs seulement si on voit le portail.
4° - Avertissements: Sur les autres mesures de Protection contre les risques relatifs
a l'installation ou l'utilisation du Produit, voir, à titre de complément de ce livret
d'instructions, les Avertissements RIB ci-jointes. Dans le cas où celles-ci ne
vous seraient pas parvenues, en demander l'envoi immédiat au Bureau
Commercial Etranger RIB (Ufficio Commerciale Estero RIB).
L'ENTREPRISE R.I.B. N'ACCEPTE AUCUNE RESPONSABILITÉ pour des
dommages éventuels provoqués par le manque d'observation lors de l'installation
des normes de sécurité et lois actuellement en vigueur.
IMPORTANT SAFETY INSTRUCTIONS
WARNING - IT IS IMPORTANT FOR THE SAFETY OF PERSONS
TO FOLLOW ALL INSTRUCTIONS
SAVE THESE INSTRUCTIONS
1° - Keep the automatism control (push-button, remote control, etc) out of the
reach of children. The control systems must be installed at a minimum
hight of 1.5 mt from the groundsurface and not interfere with the mobile
parts.
2° - Command pulses must be given from sites, where You can see the gate.
3° - Use transmitters only if You can see the gate.
4° - Warnings: when you have finished reading this instruction booklet, please
refer to the RIB instructions attached for the other precautionary measures
against risks connected with the installation or use of the product. If you
have not received these, ask RIB Export Office to send them immediately.
R.l.B. accepts IS NOT LIABLE for any damage caused by the not abiding ofthe
safety regulations and laws at present in force not being observed during
installation.
GB
D
WICHTIGE GEBRAUCHSANWEISUNGEN FÜR DIE SICHERHEIT
ACHTUNG - UM PERSONEN VOLLKOMMEND GARANTIEREN
ZU KöNNEN IST ES WICHTIG DASS ALLE
INSTALLATIONSVORSCHRIFTEN BEOBACHTET WERDEN
1° - Bewahren Sie die Geräte für die automatische Steuerung (Drucktaster, Funksender,
u.s.w.) an einem für Kinder unzugänglichen Platz auf. Die Steuerungen müssen
mindestens auf einer minimal Höhe von 1,5 mt gestellt werden und sich ausserhalb
der Raum der bewegenden Teile befinden.
2° - Die Betätigung der automatischen Steuerungs soll nur ausgeführt werden wenn die
automatische Anlage sichtbar ist.
3° - Die Funksender nur inn den Fällen benützen wenn die automatische Anlage sichtbar ist.
4° - Achtung: Für weitere Schutzmaßnahmen im Rahmen der Installation und
Anwendung der Produkte siehe die beiliegenden RlB-Sicherheitshinweise, die diese
Gebrauchsanleitung ergänzen. Sollten Sie diese nicht erhalten haben, fördern Sie
sie bitte sofort bei der RlB Exportabteilung an.
DIE FIRMA R.I.B. HAFTET NICHT für eventuelle Schäden, die bei der Installation durch
Nichtbeachtung der zur Zeit gültigen Sicherheitsvorschriften vertrommen entstanden
sind.
®
automatismi per cancelli
automatic entry systems
I
COMPLIMENTI: LEI HA SCELTO IL MEGLIO
I prodotti RIB infatti rappresentano il risultato tecnologicamente più
avanzato nel campo dei sistemi automatici d’apertura.
RIB progetta e costruisce sistemi per ogni esigenza di automazione:
destinati a cancelli a battente e scorrevoli, basculanti, portoni,
serrande, tapparelle, lucernari e barriere.
Ora, dopo una installazione a regola d’arte, il Suo automatismo RIB
svolgerà la sua funzione per Lei alla perfezione, senza bisogno di
riparazioni, e con una minima manutenzione per anni ed anni.
E se Lei volesse corredare questo automatismo con accessori che lo
rendano più versatile e rispondente alle sue esigenze, preferisca
sempre accessori originali RIB.
Perché gli automatismi e gli accessori RIB sono progettati per
funzionare insieme.
F
COMPLIMENTS:
VOUS AVEZ CHOISI LE MIEUX
Les produits RIB représentent le résultat technologiquement plus
avancé dans le domaine des systèmes automatiques d’ouverture.
RIB projete et construit systèmes pour chaque exigence d’automation:
Pour portails coulisantes, pour portails à battants, pour barrieres, pour
rideaux et pour lucarnes.
Maintenant, après une installation à régle de l’art, son automatisme
RIB exercera sa fonction à la perfection, il n’aura pas besoin de
réparations ou d’entretien pour beaucoup d’années.
Si vous désiriez ajouter à votre automatisme des accessoires pour le
rendre plus fonctionnel, préferez les accessoires originaux RIB.
Car les accessoires RIB sont projetés pour fonctionner ensemble.
GB
CONGRATULATION:
YOU HAVE CHOOSEN THE BEST
The products RIB symbolize the most advanced technical result in the
range of the automatic opening systems.
RIB plans and builds systems for every kind of automation: Swing and
sliding gates, garage doors, rolling shutters, blinds, sectional folding
doors, and barriers.
Now, after a perfect installation, Your automatism RIB will work
perfectly.
It will not need any repairs and any maintenance for many years.
If You like to add to this automatism some accessories, prefer always
original RIB accessories, because the automatisms and the
accessories RIB are planned to function together.
D
GLÜCKWUNSCH,
SIE HABEN DAS BESTE AUSGEWÄHLT
Die RIB Produkte stellen im Bereich der automatischen
Öffnungssysteme das technologisch modernste Entwicklung dar.
RIB entwirft und konstruiert anspruchsvolle automatische
Öffnungssysteme für Schiebetore, Drehtore, Garagentore,
Sektionaltore, Rolläden und sowohl Schranken für Parksysteme.
Nach einer ordnungsgemäßen Installation wird RIB Automatik ohne
Reparaturen und mit geringster Wartung jahrelang perfekt
funktionieren.
Und wenn Sie noch dazu Ihre RIB Automatik mit dem elektrischen
Zubehör anzuschaffen, weil die RlB Automatik und das RIB
Zubehör aufeinander abgestimmt sind.
IMPORTANTI ISTRUZIONI DI SICUREZZA PER L’INSTALLAZIONE
ATTENZIONE
UNA SCORRETTA INSTALLAZIONE PUÓ PORTARE A DANNI RILEVANTI
SEGUIRE TUTTE LE ISTRUZIONI PER UNA CORRETTA INSTALLAZIONE
1° - Questo libretto d’istruzioni è rivolto esclusivamente a del personale
specializzato che sia a conoscenza dei criteri costruttivi e dei dispositivi di
protezione contro gli infortuni per i cancelli, le porte e i portoni motorizzati
(attenersi alle norme e alle leggi vigenti).
2° - Se non é previsto nella centralina elettrica, installare a monte della medesima
un’interruttore di tipo magnetotermico (onnipolare con apertura minima dei
contatti pari a 3mm) che riporti un marchio di conformità alle normative
internazionali.
3° - Per la sezione ed il tipo dei cavi la RIB consiglia di utilizzare un cavo di tipo
NPI07VVF con sezione minima di 1,5mm2 e comunque di attenersi alla norma
IEC 364 e alle norme di installazione vigenti nel proprio Paese.
IMPORTANT MODE D’EMPLOI DE SECURITE POUR L’INSTALLATION
ATTENTION
UNE INSTALLATION INCORRECTE PEUT CAUSER DE GRANDS DOMMAGES
SUIVRE TOUTES INSTRUCTIONS POUR UNE CORRECTE INSTALLATION
1° - Ce manuel d’instruction est adresse seulement au personnel specialisé qui
a une connaissance des critères de construction et des dispositifs de protection
contre les accidents en ce qui concerne les portails, les portes et les portes
cochères motorisees (suivre les normes et les lois en vigueur).
2° - A fin de proceder al’entretien des parties electriques, connecter à l’installation un
distonteur differentiel magneto thermique (qui disconnait toutes les branchements
de la ligne avec ouverture min. des branchements de 3 mm ) et qui soit conforme
aux normes internationales.
3° - Pour la section et le type des câbles à installer nous vons conseillons di utiliser
un cable NPI07VVF avec une section min de 1,5 mm2 en respectant quand même
la norme IEC 364 et les normes nationales d’installation.
IMPORTANT SAFETY INSTRUCTION FOR INSTALLATION
WARNING
INCORRECT INSTALLATION CAN LEAD TO SEVERE INJURY
FOLLOW ALL INSTALLATION INSTRUCTIONS
1° - This instruction booklet is exclusively dedicated to specialized staff who are
aware of the construction criteria and of the accident prevention protection
devices for motorized gates and doors (according to the current regulations and
laws).
2° - To maintain electrical parts safely it is advisable to equip the installation with a
differential thermal magnetic switch (onnipolar with a minimum opening of the
contacts of 3mm) and must comply with the international rules.
3° - As for electric cable type and section RIB suggests cable type NPI07VVF with
minimum section of 1,5mm 2 and however respect IEC 364 rule and general
national security regulations.
WICHTIGE SICHERHEITSVORSCHRIFTEN FÜR DIE INSTALLATION
ACHTUNG
EINE FALSCHE INSTALLATION KANN ZU BEDEUTENDE SHADEN FÜHREN.
FÜR EINE KORREKTE ANLAGE ALLE GEBRAUCHSANWEISUNGEN FOLGEN
1° - Diese Montageanweisung kann ausschließlich von der Fachleuten
gebraucht werden, die die Instandsetzung und die Schutzvorrichtungen zur
Verhinderung von Unfällen bei motorisierten Toren kennen (nach die aktuellen
Normen und Gesetze).
2° - Für die Wartung der elektrischen Teile ist es ratsam, zwischen der Anlage und
dem Netzanschluß einen magnetisch-thermischen Differenzialschalter (mit der
minimale Öffnung allen Kontakte von 3 mm) unterbricht die ein
Konformitätzeichen aller internationaler Normen vorträgt.
3° - Für den Kabelguerschnitt und die Kabeltypen halten Sie sich an den Normen IEC
364 (minimale Kabelquerschnitt von der 1,5 mm 2 mit der Bezeichnung
NPI07VVF) und für die Montage an die Normen des jeweiligen Landes.
DE22-FE-iec
I T A L I A N O
QUADRO ELETTRONICO PER IL COMANDO
DI UNO O DUE MOTORI MONOFASI
(COD.ABDE250)
Importante per avere un riscontro del funzionamento più immediato della centralina:
I led gialli segnalano le alimentazioni a bassissima tensione.
I led verdi segnalano gli impulsi dati dai comandi e devono rimanere spenti (dovrebbero accendersi solo all'atto del comando).
I led rossi segnalano i contatti delle sicurezze e dei finecorsa e devono rimanere accesi tutti (dovrebbero spegnersi solo in caso di intervento delle sicurezze o dei
finecorsa).
LED
L1
L2
L3
L4
L5
L6
L7
L8
L9
L10
L11
L12
L13
L14
L15
L16
- (Giallo) - Segnala la presenza delle tensioni 24Vac e 12Vdc.
- (Verde) - Segnala il contatto dato dal pulsante di stop (n.c.).
- (Verde) - Segnala il contatto dato dal pulsante di impulso singolo (n.a.).
- (Rosso) - Segnala il contatto dato dal finecorsa motore 1 che ferma la chiusura (n.c.).
- (Rosso) - Segnala il contatto dato dal finecorsa motore 2 che ferma la chiusura (n.c.).
- (Verde) - Segnala il contatto dato dal pulsante di apertura (n.a.).
- (Verde) - Segnala il contatto dato dal pulsante di chiusura (n.a.).
- (Rosso) - Segnala il contatto dato dalle sicurezze in apertura (es. costole mobili) (n.c.).
- (Rosso) - Segnala il contatto dato dalle sicurezze in chiusura (es. costole mobili) (n.c.).
- (Rosso) - Segnala il contatto dato dalle fotocellule (n.c.).
- (Verde) - Automazione in fase di apertura.
- (Rosso) - Automazione in fase di chiusura.
- (Giallo) - Segnala che il microprocessore è alimentato (5Vcc) (su circuito ausiliare)
- (Rosso) - Segnala il contatto dato dal finecorsa motore 1 che ferma l'apertura (n.c.).
- (Rosso) - Segnala il contatto dato dal finecorsa motore 2 che ferma l'apertura (n.c.).
- (Verde) - Segnala il contatto dato dal pulsante per l'apertura pedonale (n.a.).
TRIMMER
P1
- Per regolare il tempo di funzionamento (120" max).
P2
- Per regolare il tempo di ritardo del secondo battente in fase di chiusura (25" max).
P3
- Per regolare il tempo di attesa prima di avere la chiusura automatica (120" max).
P4
- Per regolare il tempo dell'apertura pedonale (20" max).
SW1 -DIP-SWITCH 8 VIE (SU CIRCUITO AUSILIARE)
DIP 1
- Se posizionato in "OFF" le Fotocellule intervengono solo in fase di chiusura.
DIP 2
- Se posizionato in "OFF" non abilita la chiusura automatica.
DIP 3
- Se posizionato in "OFF" alimenta "L-L" con continuità.
- Se posizionato in "ON" alimenta "L-L" ad intermittenza.
DIP 4
- Se posizionato in "OFF" il lampeggiatore e il motore sono alimentati contemporaneamente.
- Se posizionato in "ON" il lampeggiatore parte 3 secondi prima del motore.
DIP 5
- Se posizionato in "OFF" l'impulso radio e l'impulso singolo agiscono come specificato nel paragrafo "funzionamento radiocomando".
- Se posizionato in "ON" I'impulso radio o impulso singolo, dopo che il cancello ha iniziato ad aprirsi, non avranno più efficacia (non si avrà più lo stop)
fino al raggiungimento del finecorsa o della fine del tempo di funzionamento di apertura.
Mentre il cancello richiude, I'impulso radio o l'impulso singolo fermano il movimento del cancello per poi riprenderlo automaticamente nel senso inverso,
dopo un tempo di pausa prefissato.
DIP 6
- Se posizionato in "OFF" si avrà il funzionamento automatico di tutte le funzioni.
- Se posizionato in "ON" si avrà il funzionamento ad uomo presente (vedi paragrafo funzionamento ad uomo presente)
DIP 7
- Se posizionato in "OFF" non sarà abilitata la funzione "colpo di sgancio elettroserratura".
DIP 8
- Se posizionato in ON" abilita la schedina opzionale "attivazione box" (ACQ9070) per 3 minuti.
- Se posizionato in "OFF" per un solo secondo (1").
DIP S3 - N.B.: In apertura esiste un ritardo fisso di 1,5 secondi onde evitare l'apertura contemporanea dei due battenti. Escludibile dal DIP S3 se chiuso.
RELÉ
K1
K2
K3
K4
K5
K6
K7
K8
K9
- Relè di potenza che abilita l'apertura del motore 1.
- Relè di potenza che abilita la chiusura del motore 1.
- Relè di potenza che abilita l'apertura del motore 2.
- Relè di potenza che abilita la chiusura del motore 2.
- Relè che disattiva i motori 1 e 2.
- Relè che abilita la frizione elettrica al motore 1.
- Relè che abilita la frizione elettrica al motore 2.
- Relè di comando della spia di segnalazione di cancello aperto.
- Relè di comando della serratura elettrica 12Vac.
CONNETTORE J1
Connettore fisso per il sostegno della logica a microprocessore.
MORSETTIERA J2
13
- Contatto finecorsa che ferma la chiusura del motore 2 (n.c.).
7
- Contatto finecorsa che ferma la chiusura del motore 1 (n.c.).
12
- Contatto finecorsa che ferma l'apertura del motore 2 (n.c.).
- Contatto finecorsa che ferma l'apertura del motore 1 (n.c.).
4
K
- Contatto impulso singolo (n.a.).
- Pulsante pedonale (n.a.).
P
2
- Pulsante stop (n.c.).
MORSETTIERA J3
8
- Comune (n°3 morsetti disponibili).
10
- Contatto fotocellule (n.c.).
B
- Contatto costole mobili in chiusura (n.c.).
E
- Contatto costole mobili in apertura (n.c.).
11
- Pulsante chiude (n.a.).
9
- Pulsante apre (n.a.).
MORSETTIERA J5
Morsettiera per collegamento teleruttori esterni.
MORSETTIERA J6
LN
- Alimentazione 230V 50/60 Hz.
- Morsetto di terra.
T
- Collegare al morsetto di terra del motore
CONNETTORE J7
Connettore per l'alloggiamento di radio ricevitori R.l.B..
MORSETTIERA J8
A*
- Comune di alimentazione.
A
- Alimentazione 24Vac per fotocellule.
D+D- Alimentazione 12Vdc per accessori.
SL
- Alimentazione led spia cancello aperto.
1
- Alimentazione serratura elettrica 12Vac.
CHB
- Uscita contatto radio canale B (n.a.) con radio ricevitori tipo "C".
CHC
- Uscita contatto radio canale C (n.a.) con radio ricevitori tipo "C".
MORSETTIERA J9
M1
- Motore monofase - U1 comune.
W1-V1 - Invertitori
- Motore monofase - U2 comune.
M2
W2-V2 - Invertitori
- Uscita di alimentazione lampeggiatore elettronico 230V.
L-L
CONNETTORE J10
In posizione ON (Dip 8) alimenta tramite una schedina opzionale (attivazione ausiliaria box codice ACQ9070) una lampada di cortesia per 3 minuti (40W max).
Il led verde sulla schedina segnala che è alimentata.
Il led rosso sulla schedina segnala l'abilitazione del relè per la luce del box.
In posizione OFF (Dip 8) il relè della schedina opzionale darà un impulso di 1" (esempi di applicazione comando di relè timerizzati, luci giardino, accesso garage,
corridoi sotterranei ecc.). N.B.: Non inserire il timer di chiusura automatica a scheda (ACQ9050) in quanto la funzione di chiusura automatica è gestita dal
microprocessore, vedi trimmer P3 o paragrafo "chiusura automatica".
PULSANTIERE E SELETTORI
In caso di due o più pulsantiere collegate in parallelo tra loro i comandi apre e chiude (morsetti 9 e 11) ed in serie tra loro i contatti di stop (morsetto 2).
Eventuali selettori a chiave vanno collegati fra i morsetti 8-9-11.
Se non vengono previsti pulsanti di stop effettuare un ponte fra i morsetti 2 e 8.
PULSANTE APERTURA PEDONALE
Premendo questo pulsante si avrà l'apertura di una sola anta (M1) per un tempo regolato dal trimmer P4 (MAX 20").
Questa anta potrà richiudersi automaticamente dopo il tempo impostato sul trimmer P3 (Dip 2 in posizione "ON"), oppure tramite l'impulso dato dal pulsante di
chiusura (Morsetto 11) o dall'impulso radio o dall'impulso singolo (Morsetto K).
Durante la manovra pedonale sono abilitate tutte le sicurezze come da funzionamento normale, ma agenti solo sul motore 1.
FOTOCELLULE
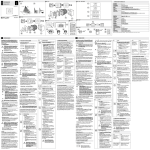
Le fotocellule (inserite come in figura) hanno la possibilità di interrompere il moto dell'automatismo sia in fase di apertura che di chiusura (con ripristino del moto a
fine interposizione). Vedi Norme UNI 8612 - punto 6.1.4.1 - punto 6.1.4.2.
In caso di guasto alle fotocellule, se si comanda il moto del cancello, non si avrà la segnalazione del lampeggiatore e i motori resteranno fermi.
Con Dip-1 posizionato in ON, le fotocellule intervengono in fase di apertura e chiusura, se posizionato in OFF intervengono solo in fase di chiusura(in posizione
"OFF" il funzionamento non è più conforme alle Norme UNI8612).
N.B.: In caso di collegamento di due o più coppie di fotocellule collegare a tutti i trasmettitori e ricevitori l'alimentazione A*-A ed in serie fra loro i morsetti 8-10.
RADIOCOMANDO
Mediante l'attuazione del contatto dato dal relè della ricevente radio (agente sulla spinetta J7 fra i morsetti 1-2) si effettua l'apertura (a cancello chiuso o in qualsiasi
posizione tranne quella di fine ciclo di apertura) e la chiusura (quando il timer di funzionamento ha finito di contare il tempo di apertura).
Se il cancello è in movimento e si interviene con il radiocomando il primo impulso che si darà sarà lo Stop e il secondo sarà di consenso al moto in senso inverso
rispetto a quello precedente alla fermata.
CHIUSURA AUTOMATICA
La chiusura automatica dell'automatismo viene effettuata dopo il tempo impostato sul trimmer P3 e può essere disinserita agendo sul Dip 2 nella posizione OFF.
N.B.: La chiusura automatica si inserisce automaticamente quando ha finito di contare il timer di funzionamento (P1).
A cancello aperto, ogni qual volta si passa davanti alle fotocellule, il timer di chiusura automatica riprende a contare dall'inizio.
Se viene a mancare la corrente a cancello aperto, la chiusura automatica viene disattivata.
É quindi necessario dare il comando per chiudere il cancello.
PULSANTE STOP
Dopo l'avvenuta apertura si può mantenere aperta l'automazione anche se il tempo di chiusura automatica (P3) è inserito, è sufficiente premere il pulsante di stop.
A questo punto l'automazione rimarrà aperta finché un nuovo impulso la farà richiudere.
REGOLAZIONE TEMPI
I tempi di questo quadro elettronico si possono regolare solo quando il cancello è chiuso.
Se i trimmer vengono regolati a metà corsa o a cancello aperto, il microprocessore aspetterà di essere arrivato in chiusura (e cioè a fine ciclo) prima di dare l'avvio
ai nuovi tempi impostati.
COLLEGAMENTO PULSANTIERA CON LED SPIA 12V PER LA SEGNALAZIONE DI CANCELLO APERTO (POTENZA MAX 6W)
Collegare la spia fra il morsetto 8 e il morsetto SL.
LAMPEGGIATORE 230V
Collegare il lampeggiatore ai morsetti L-L.
Durante il movimento, se intervengono le sicurezze, il lampeggiatore continua a funzionare.
COLPO DI SGANCIO ELETTROSERRATURA
Dando il comando di apertura la centralina dà un momentaneo impulso di chiusura alle ante per facilitare lo sgancio dell'elettroserratura.
Questa funzione è escludibile tramite il Dip 7.
N.B.: Con i finecorsa collegati il colpo di sgancio (Dip.7) non viene eseguito.
FRIZIONE ELETTRICA
La regolazione della frizione viene fatta tramite il commutatore a cinque posizioni posto sulla sinistra del trasformatore di rete, variando così la tensione di uscita ai
capi dei motori da un minimo di 140V a un massimo di 230V.
Tale frizione si include automaticamente dopo due secondi dall'inizio di ogni manovra.
Questo per dare il massimo di spunto, al/ai motori al momento della partenza.
N.B.: La frizione è dimensionata per una potenza max di uscita di 800W.
FUNZIONAMENTO "A UOMO PRESENTE"
Questa funzione si può inserire tramite il Dip 6.
In questo caso il radiocomando o impulso singolo e il tempo di chiusura automatica (P3) vengono esclusi automaticamente.
Tuttavia si possono applicare fotocellule o costole mobili con la sola funzione di fermare l'automazione anche se l'operatore tiene premuto il pulsante di apre o
chiude.
Rimangono perciò a disposizione l'impulso apre (8-9), l'impulso chiude (8-11) e l'impulso pedonale (8-P).
SICUREZZE (COSTE RADIO - PNEUMATICHE - MECCANICHE O FOTOCOSTA)
Il collegamento delle costole mobili di sicurezza dipende dalla collocazione delle medesime sull'impianto stesso.
Nel caso si voglia proteggere il raggio d'azione del cancello durante l'apertura si consiglia di collegare le costole mobili ai morsetti 8-E.
Se si vuole proteggere il raggio d'azione dal cancello durante la chiusura sarà opportuno collegare le costole mobili ai morsetti 8-B.
In questi 2 casi se la costola mobile viene azionata, l'automazione avrà un'inversione di marcia.
In alternativa se si vuole evitare l'inversione di marcia, le costole mobili possono essere collegate in serie al pulsante di stop.
FINECORSA
Nel caso si utilizzino finecorsa elettromeccanici collegare gli stessi ai morsetti 8-4 per fermare l'apertura e 8-7 per fermare la chiusura del motore 1, tra 8-12 per
fermare l'apertura e 8-13 per fermare la chiusura del motore 2.
N.B.: Con i finecorsa collegati il colpo di sgancio (Dip.7) non viene eseguito.
I finecorsa se non si usano sono da ponticellare con il n°8 (comune contatti)
Se viene collegato un solo motore, collegare lo stesso ai morsetti U1V1W1 (M1) e quindi collegare i finecorsa 8-4 e 8-7 per fermare sia l'apertura che la chiusura del
motore 1.
MESSA A PUNTO DEL QUADRO
Una volta effettuati tutti i collegamenti come da schema è buona norma seguire questo metodo per prevenire eventuali errate manovre:
A - Porre l'automatismo in condizioni di riposo (con motoriduttori sbloccati).
B - Verificare che premendo il pulsante di apertura (8-9) si eccitino i relè di potenza K1 e K3 e che i motori girino nel senso di apertura (eventualmente invertire i
fili V e W lasciando inalterato il collegamento del filo U del motore che gira in senso contrario).
C - Verificare che la chiusura, del primo battente sia comandata dal motore collegato fra i morsetti V2-U2-W2.
Il ritardo con cui il 2° motore partirà per la chiusura sarà regolabile tramite il trimmer P2 (max.25").
D - Regolare il timer di funzionamento tramite il trimmer P1 in modo da lasciare sfrizionare il riduttore in apertura 2-3 sec.(in mancanza di finecorsa.
(Il timer di funzionamento è alimentato durante tutta la fase di apertura, e durante la chiusura dopo che ha avuto il consenso dal timer di ritardo del 2° battente).
Con un solo motore collegato, mettere il trimmer P2 nella posizione di conteggio minimo, il motore sfrizionerà in chiusura un secondo in più rispetto all'apertura.
N.B.: IN CASO DI COLLEGAMENTO DI UN SOLO MOTORE COLLEGARE A "M1".
N.B.: É OBBLIGATORIA LA MESSA A TERRA NELLA CENTRALINA (NORME CEI 61-1).
CARATTERISTICHE DI FUNZIONAMENTO
- Range di temperatura
- Umidità
- Tensione di alimentazione
- Frequenza
- Assorbimento massimo scheda ( esclusi motori, lampade e attuatori esterni )
- Microinterruzioni di rete
- Potenza massima gestibile all’uscita motore
- Carico massimo all’uscita lampeggiatore
- Corrente disponibile all’uscita alim. fotocellula
- Connettore radio-ricevitore con alimentazione
- Grado di protezione
- Peso apparecchiatura
- Ingombro
- Volume
da 0 a 70 °C
< 95% senza condensazione
230V~ ±10%
50/60 Hz
70 mA
20 mS
1 CV
40W 250V cos =1
0,8A 24Vac ±15%
0,8A 24Vac ±15%
IP54
3Kg
20,5x24x10,5 cm
5166 cm3
- Tutti gli ingressi devono essere utilizzati come contatti puliti perché I’alimentazione è generata internamente alla scheda ed è disposta in modo da garantire il
rispetto di isolamento doppio o rinforzato rispetto alle parti in tensione.
- Tutti gli ingressi vengono gestiti da un circuito integrato programmabile ( PAL ), sia quelli di carattere funzionale che quelli di sicurezza.
DE22-FE-iec
F R A N Ç A I S E
COFFRET ÉLECTRONIQUE POUR LA COMMANDE
D'UN OU DEUX MOTEURS MONOPHASE
(COD.ABDE250)
Important pour obtenir une confirmation immédiate du fonctionnement de la centrale :
- Les leds jaunes signalent les alimentations à très basse tension.
- Les leds vertes signalent les impulsions fournies par les commandes et doivent rester éteintes (elles doivent s'allumer uniquement au moment de la commande).
- Les leds rouges signalent les contacts des sécurités et des fins de course, elles doivent toutes rester allumées (elles doivent s'éteindre uniquement en cas
d'intervention des sécurités ou des fins de course).
LED
L1
L2
L3
L4
L5
L6
L7
L8
L9
L10
L11
L12
L13
L14
L15
L16
- (Jaune)
- (Verte)
- (Verte)
- (Rouge)
- (Rouge)
- (Rouge)
- (Rouge)
- (Rouge)
- (Rouge)
- (Rouge)
- (Verte)
- (Verte)
- (Jaune)
- (Rouge)
- (Rouge)
- (Verte)
- Signale la présence des tensions 24 Vca et 12 Vcc.
- Signale le contact donné par le bouton - poussoir d'arrêt (N.F.).
- Signale l'impulsion donnée par le bouton-poussoir d'impulsion seule ou par la radio (N.O.).
- Signale le contact fourni par le fin de course moteur 1 qui arrête la fermeture.
- Signale le contact fourni par le fin de course moteur 2 qui arrête la fermeture.
- Signale l'impulsion donnée par le bouton-poussoir d'ouverture (N.O.).
- Signale l'impulsion donnée par le bouton-poussoir de fermeture (N.O.).
- Signale le contact donné par les sécurités en phase d'ouverture (ex. montants mobiles) (N.F.).
- Signale le contact donné par les dispositifs de sécurité en phase de fermeture (ex. montants mobiles) (N.F.).
- Signale le contact donné par les photocellules (N.F.).
- Automatisme en phase d'ouverture.
- Automatisme en phase de fermeture.
- Signale que le microprocesseur est alimenté (5 Vcc) (sur circuit auxiliaire).
- Signale le contact fourni par le fin de course moteur 1 qui arrête l'ouverture (N.F.).
- Signale le contact fourni par le fin de course moteur 2 qui arrête l'ouverture (N.F.).
- Signale le contact fourni par le bouton-poussoir pour le passage piétons (N.O.).
POTENTIOMETRES
P1
- Réglage du temps de fonctionnement (120" max).
P2
- Réglage du temps de retard du second battant en phase de fermeture (25" max).
P3
- Réglage du temps d'attente avant la fermeture automatique (120" max).
P4
- Pour régler le temps de passage piétons (20"maxi.)
SW1
DIP-INTERRUPTEUR 8 VOIES (SUR CIRCUIT AUXILIAIRE)
DIP 1
- Si positionné sur "OFF" il n'abilite pas l'intervention des cellules pendant l'ouverture.
DIP 2
- Si positionné sur "OFF" il n'abilite pas la fermeture automatique.
DIP 3
- Si positionné sur "OFF" il alimente "L-L" en continuité.
- Si positionné sur "ON" il alimente "L-L" par intermittence (Clignotant).
DIP 4
- Si positionné sur "OFF" il alimente le clignotant et le moteur au même temps.
- Si positionné sur "ON" le clignotant part 3 secondes avant le moteur.
DIP 5
- Si positionné sur "OFF" I'impulsion radio et l'impulsion seule agissent comme spécifié dans le paragraphe "radio".
- S'il est positionné sur "ON", I'impulsion radio ou l'impulsion seule, aprés que le portail a commencé à s'ouvrir, n'auront plus effet (l'arrêt ne se produira
plus) jusqu'a au moment que le fin de course ou la fin du temps de fonctionnement d'ouverture soient atteintes.
Tandis que le portail se referme, l'impulsions radio et l'impulsion seule arrêtent le mouvement de le portail pour le reprendre automatiquement ensuit
dans le sens inverse, après un temps de pause préfixé.
DIP 6
- Si positionné sur "OFF", on obteindra le fonctionnement automatique de toutes les fonctions.
- Si positionné sur "ON" on aura le fonctionnement en présence de l'homme (Voir le paragraphe du fonctionnement en présence de l'homme).
DIP 7
- Si positionné sur "OFF" la fonction "clic de désenclenchement" serrure électrique ne sera pas validée.
- Si positionné sur "ON" , il habilite le circuit optionnelle "carte d'eclairge" (ACQ9070) pendant 3 minutes.
DIP 8
- Si positionné sur "OFF" idem pendant une seule seconde (1").
DIP S3 - N.B.: En phase d'ouverture il existe un retard fixe de 1,5 secondes afin d'éviter l'ouverture simultanée des deux battants.
Peut être exclue au moyen DIP S3 si fermé.
RELAIS
K1
K2
K3
K4
K5
K6
K7
K8
K9
- Relais de puissance pour l'ouverture du moteur 1.
- Relais de puissance pour la fermeture du moteur 1.
- Relais de puissance pour l'ouverture du moteur 2.
- Relais de puissance pour la fermeture du moteur 2.
- Relais de déactivation des moteurs 1 et 2.
- Relais de validation de l'embrayage électrique moteur 1.
- Relais de validation de l'embrayage électrique moteur 2.
- Relais de commande du led de signalisation du portail ouvert.
- Relais de commande de la serrure électrique 12 Vca.
CONNECTEUR J1
Connecteur fixe de soutien logique à microprocesseur.
BORNIER J2
13
- Contact fin de course qui arrête la fermeture du moteur 2 (NF).
7
- Contact fin de course qui arrête la fermeture du moteur 1 (NF).
12
- Contact fin de course qui arrête l'ouverture du moteur 2 (NF).
- Contact fin de course qui arrête l'ouverture du moteur 1 (NF).
4
K
- Contact impulsion unique (N.O.).
- Bouton-poussoirs passage piétons (NO)
P
2
- Bouton-poussoir d'arrêt (N.F.).
BORNIER J3
8
- Commun (3 bornes disponibles)
10
- Contact Photocellule (N.F.).
B
- Contact cordon de sécurité en phase de fermeture (N.F.).
E
- Contact cordon de sécurité en phase d'ouverture (N.F.).
11
- Bouton-poussoir fermeture (N.O.).
9
- Bouton-poussoir ouverture (N.O.).
BORNIER J5
Bornier pour le branchement des télérupteurs extérieurs.
BORNIER J6
LN
- Alimentation 230V 50/60 Hz ±10%
- Borne de mise à terre.
T
- Brancher à la borne de terre du moteur
CONNECTEUR J7
Connecteur pour récepteur radio R.I.B..
BORNIER J8
A*
- Commun de alimentations.
A
- Alimentation 24 Vca pour photocellules.
D+D- Alimentation 12 Vcc pour accessoires.
SL
- Alimentation led témoin portail ouvert.
1
- Alimentation serrure électrique 12 Vca.
CHB
- Sortie contact radio, canal B (N.O.).
CHC
- Sortie contact radio, canal C (N.O.).
BORNIER J9
M1
- Moteur monophasé - U1 commun.
W1-V1 - Inverserus
- Moteur monophasé - U2 commun.
M2
W2-V2 - Inverserus
- Sortie d'alimentation clignotant électronique 230V.
L-L
BORNIER J10
Sur "ON" (DIP 8), ce bornier alimente, via la carte optionnelle (activation auxiliaire box code ACQ9070), une lampe d'appoint pendant 3 minu tes (40W max.).
La LED verte sur la carte indique que celle-ci est alimentée.
La LED rouge sur cette même carte indique la validation du relais d'éclairage du box.
Sur "OFF" (DIP 8) le relais de la carte optionnelle donnera une impulsion d'"1" (par exemple pour relais temporisés, éclairages jardin, accès garage, couloirs
souterrains etc.).
N.B.: Ne pas insérer le timer de fermeture automatique par carte (ACQ9050) étant donné que la fonction de fermeture automatique est gérée par microprocesseur,
voir potentiomètre P3 ou paragraphe "Fermeture automatique".
BOUTON POUSSOIRS ET SELECTEURS
Dans le cas de deux ou plusieurs boutons poussoirs, connecter les commandes d'ouverture et de fermeture parallèlement entre elles (bornes 9 et 11 ) et les
contacts d'arrêt en série entre eux (borne 2) .
Des sélecteurs éventuels à clef doivent être connectés entre les bornes 8-9-11.
Si des boutons d'arrêt ne sont pas prévus, effectuer un pont entre les bornes 2 et 8.
BOUTON-POUSSOIR PASSAGE PIETONS
Ce bouton-poussoir permet l'ouverture d'une seule porte (M1) pendant une durée réglée depuis le trimmer P4 (MAXI. 20").
Cette porte pourra se refermer automatiquement après la durée programmée sur le trimer P3 (Dip 2 en position "ON") soit par l'intermédiaire de l'impulsion fournie
par le bouton-poussoir de fermeture (Borne 11) soit par l'impulsion radio soit par l'impulsion simple (Borne K).
Durant la manoeuvre piétons, toutes les sécurités sont enclenchées comme pour le fonctionnement normal mais agissent uniquement sur le moteur 1.
CELLULES
Les photocellules (connectées comme indiqué sur le schéma) peuvent interrompre le mouvement de l'automatisme en cours d'ouverture ou de fermeture (avec
reprise du mode de fonctionnement en fin d'excitation).
En cas de panne des photocellules, si l'on commande le mouvement du portail, on n'aura pas de signalisation par témoins clignotants et les moteurs resteront
arrêtés. Si le DIP-1 est sur la position ON les photo-céllules interviennent en ouverture et en fermeture, est sur OFF elles interviennent seulement en fermeture.
N.B.: En case de branchement de deux couples de photocellules ou plus, relier l'alimentation A*-A è tous les émetteurs et récepteurs et les Bornes 8-10 en série.
RADIO
Grâce à la realisation du contact donné par le relais de la radio réceptrice (agissant sur la petite fiche J7 entre les bornes 1-2) s'effectuent l'ouverture (du portail
fermé ou bien dans n'importe quelle position sauf celle de fin de cycle d'ouverture) et la fermeture (seulement lorsque le portail est ouvert).
Si le portail est en mouvement et si l'on intervient avec la radio, la première impulsion que l'on donnera sera celle de l'arrêt, et la seconde sera l'autorisation à
effectuer le mouvement en sens contraire au précédent à l'arrêt).
BOUTON-POUSSOIR D'ARRET
Une fois que l'ouverture s'est produite, on peut mantenir l'automatisation ouverte, même si le temps de fermeture automatique (P3) est enclenché, simplement en
poussant sur le bouton poussoir d'arrêt..
A ce moment-là l'Automatisation réstera ouverte jusqu'à ce qu'une nouvelle impulsion la refermera
FERMETURE AUTOMATIQUE
La fermeture automatique de l'automatisation est effectué après le temps établi sur le bouton de réglage P3, et peur être débrancée en déplaçant le DIP 2 sur la
position "OFF".
N.B.: La fermeture automatique s'enclenche automatiquement lorsque le portail est ouvert et la fin de course de fin d'ouverture est activée (P1).
Quand le portail est ouvert, chaque fois que l'on passe devant le cellules, le minuteur de fermeture automatique se remet à compter depuis le début.
S'il n'y avait plus de courant lorsque le portail est ouvert, la fermeture automatique est désactivée.
Il est par conséquent nécessaire de donner la commande pour fermer le portail.
REGLAGE DES TEMPS
Les temps de ce coffret électronique peuvent se réglés seulement lorsque le portail est fermé.
Si les boutons de réglage son réglés à mi-course ou lorsque le portail est ouvert, le microprocesseur attendra d'être arrivéà la fermeture (c'est-à-dire en fin du
cycle) avant de mettre en route les nouveaux temps établis.
POUSSOIRS AVEC UN LED DE 24V POUR SIGNALISATION DE PORTAIL OUVERT (PUISSANCE MAX. 6W)
Brancher le témoin aux bornes 8 et SL.
CLIGNOTANT 230V
Connecter le clignotant aux bornes L-L.
Au cours du mouvement en cas d'intervention des sécurités, le clignotant continue de fonctionner.
CLIC DE DECLENCHEMENT SERRURE ELECTRIQUE
Lors de la commande d'ouverture, la centrale donne une impulsion momentanée de fermeture des portes pour faciliter le declenchement de la serrure électrique.
Cette fonction peut être excluse par DIP-SWITCH 7.
N.B. : Lorsque les fins de course sont branchés, le déclenchement (Dip.7) n'a pas lieu.
EMBRAYAGE ELECTRIQUE
Le réglage se fait par le commutateur à 5 positions situé sur la gauche du transformateur en variant ainsi la tension de sortie aux bornes moteurs d'un minimum de
140V a un maximum de 230V.
Cet embrayage est automatiquement exclu pendant 2 secondes après le commencement de chaque manoeuvre.
Ce système sert à fournir le maximum de puissance au(x) moteur(s) (lor du démarrage).
N.B.: L'embrayage est dimensionné pour une puissance max de sortie de 800W (2 x 400).
FONCTIONNEMENT "EN PRESENCE DE L'HOMME"
Cette fonction peut être présélectionnée par le DIP 6.
Dans ce cas la radiocommande ou impulsion unique et le temps de fermeture automatique (P3) sont automatiquement exclus.
Toutefois il est possible d'installer les photocellules ou cordons de sécurites avec la seule fonction d'arrêter l'automatisme même lorsque l'opé rateur maintient la
pression sur la bouton ouverture/fermeture.
Restent donc à disposition l'impulsion d'ouverture (8-9), l'impulsion de fermeture (8-11) et l'impulsion passage piétons (8-P).
SECURITES (CORDONS RADIO - PNEUMATIQUES - MECANIQUE - FOTOCOSTA)
Le branchement des cordons mobiles de sécurité dépend de l'emplacement de ceux-ci sur l'installation même.
Dans le cas où l'on voudrait protéger le rayon d'action du portail en phase d'ouverture, il est conseillé de relier les cordons aux bornes 8-E.
Si l'on veut protéger le rayon d'action du portail en phase de fermeture il est conseillé de relier les cordons aux bornes 8-B.
Dans ces deux cas, si le cordon est actionné, I'automatisme effectuera une inversion de marche.
Si l'on désire éviter l'inversion de marche, par les cordons ceux-ci peuvent être reliés en série au bouton-poussoir d'arrêt.
FIN DE COURSE
En cas d'utilisation de fins de course électromécaniques, les brancher aux bornes 8-4 pour arrêter l'ouverture et 8-7 pour arrêter la fermeture du moteur 1, entre 812 pour arrêter l'ouverture et 8-13 pour arrêter la fermeture du moteur 2.
N.G. : Lorsque les fins de course sont branchés, le déclenchement n'a pas lieu.
Si les fins de course ne sont pas utilisés, exécuter un pontage avec le n° 8 (commun des contacts).
En cas de branchement d'un seul moteur, le brancher aux bornes U1V1W1 (M1) puis brancher les fins de course 8-4 et 8-7 pour arrêter tant l'ouverture que la
fermeture du moteur 1.
MISE AU POINT DU COFFRET
Une fois tous les branchements effectués en suivant le schéma, il est conseillé de suivre cette méthode afin d'éviter éventuelles erreurs d'installation:
A - Placer l'automatisme en position de repos (avec motoréducteurs débloqués).
B - En pressant le bouton-poussoir d'ouverture (8-9), vérifier que les relais de puissance K1 et K3 soient excités et que les moteurs tournent dans le sens
d'ouverture (éventuellement intervertir les fils V et W en laissant tel quel le branchement du fil U du moteur qui tourne dans le sens contraire).
C - Vérifier que la fermeture du premier battant soit commandée par le moteur branché aux bornes V2-U2-W2.
Le retard de fermeture du second moteur pourra être réglé au moyen du potentiométre P2 (25" max.).
- Régler le timer de fonctionnement au moyen du potentiométre P1 de faç à faire patiner le réducteur en phase d'ouverture pendant 2.3 secondes. (Le timer de
fonctionnement est alimenté en permanence pendant l'ouverture, et en fermeture après validation du timer de retard deuxiéme battant).
En présence d'un seul moteur, placer le potentiométre P2 en position de comptage minimum: le moteur sera alimenté en fermeture une seconde en plus par
rapport à l'ouverture.
N.B.: EN CAS DE BRANCHEMENT D'UN SEUL MOTEUR, CONNECTER A "M1".
N.B.: LA MISE A TERRE DE LA CENTRALE EST OBLIGATOIRE (NORMES CEI 61-1).
D
CARACTERISTIQUES TECHNIQUES
- Gamme de température
- Humidité
- Tension d’alimentation
- Fréquence
- Consommation maxi. carte (à l’exclusion des moteurs, lampes et actionneurs externes)
- Micro-interruptions de réseau
- Puissance maximale disponible à la sortie moteur
- Charge maximale à la sortie lampe clignotante
- Courant disponible à la sortie alim. cellule photo-électrique
- Connecteur radio-récepteur avec alimentation
- Degré de protection
- Poids appareil
- Dimensions
- Volume
de 0° à 70°C
< 95% sans condensation
230 V~ ± 10%
50/60 Hz
70 mA
20 mS
1 CV
40 W 250 V cos = 1
0,8 A 24Vca ± 15%
0,8 A 24Vca ± 15%
IP54
3 kg.
20,5 x 24 x 10,5 cm.
5166 cm3
- Toute les entrée doivent être utilisées comme contacts propres car l’alimentation est produite à l’intérieur de la carte et est disposée de façon à garantir le respect
d’isolation double ou renforcée par rapport aux partie sous tension.
- Toutes les entrées sont gérées par un circuit intégré programmable (PAL) qu’elles soient de caractère fonctionnel ou de sécurité.
DE22-FE-iec
E N G L I S H
ELECTRONIC CONTROL PANEL
FOR ONE OR TWO SINGLE-PHASE MOTORS
(COD.ABDE250)
Important - to check operation of the control unit faster :
The yellow leds indicate very low voltage power supplies.
The green leds indicate pulses emitted by commands and they are normally not illuminated (they should come on only when a command is transmitted).
The red leds indicate the contacts of safety devices and limitswitches and they are normally all illuminated (they should switch off only if the safety devices or the
limit switches operate).
LEDS
L1
L2
L3
L4
L5
L6
L7
L8
L9
L10
L11
L12
L13
L14
L15
L16
- (Yellow)
- (Red)
- (Green)
- (Red)
- (Red)
- (Green)
- (Green)
- (Red)
- (Red)
- (Red)
- (Green)
- (Red)
- (Yellow)
- (Red)
- (Red)
- (Green)
- Signals that there are voltages of 24VAC and 12VDC.
- Signals contact given by the stop push-button (n.c.).
- Signals contact given by the single pulse push-button (n.o.).
- Signals that motor 1 limitswitch has stopped closure phase (n.c.).
- Signals that motor 2 limitswitch has stopped closure phase (n.c.).
- Signals contact given by the opening push-button (n.o.).
- Signals contact given by the closing push-button (n.o.).
- Signals contact given by the safety devices during opening (e.g. mobile strips) (n.c.).
- Signals contact given by the safety devices during closing (e.g. mobile strips) (n.c.).
- Signals contact givern by the photo cells (n.c.).
- Signals that automation is in opening phase.
- Signals that automation is in closing phase.
- Signals that the microprocessor is fed (5VDC) (on the auxiliary circuit).
- Signals that motor 1 limitswitch has stopped opening phase (n.c.).
- Signals that motor 2 limitswitch has stopped opening phase (n.c.).
- Signals that push button for pedestrian access has been pressed (n.o.).
TRIMMERS
P1
- Regulates the operating time (max. 120").
P2
- Regulates the second leaf delay time in the closing phase (max. 25").
P3
- Regulates the waiting time before there is automatic closing (max. 120").
P4
- For regulating pedestrian access time (20” max).
SW1
8-WAY DIP-SWITCHES (ON AUXILIARY CIRCUIT)
- If set to "OFF", it does not enable the intervention of the photocells during opening.
DIP 1
DIP 2
- If set to "OFF", it does not enable automatic closing.
DIP 3
- If set to "OFF", it feeds "L-L" with continuity.
- If set to "ON", it feeds "L-L" intermittently.
DIP 4
- If set to "OFF", the flashing light and the motor are fed at the same time.
- If set to "ON", the flashing light starts 3 seconds before the motor.
DIP 5
- If set to "OFF", the radio jpulse and the single pulse operate as specified in the "radio control operation" paragraph.
- If set to "ON", after the gate has started opening the radio pulse or single pulse will no longer be effective (there will nolonger be the stop), until the limit
switch is reached or until the end of the opening operating time.
Whilst the gate closes again, the radio pulse or single pulse stop the movement of the gate and then start it again automatically in the opposite direction,
after a predetermined pause.
- If set to "OFF", all the functions operate automatically.
DIP 6
- If set to "ON", it operates with somebody present (see "operation with somebody present" paragraph).
DIP 7
- If set to "OFF", the "electric lock release stroke" function is not enabled.
- If set to "ON", it enables the optional "box activation" card (ACQ9070) for 3 minutes.
DIP 8
- If set to "OFF", it enables the optional "box activation card for just one second (1").
DIP S3 N.B.: During opening there is a fixed delay of 1.5 seconds to prevent the two leaves from opening at the same time.
This function is disabled when DIP S3 is closed.
RELAIS
K1
K2
K3
K4
K5
K6
K7
K8
K9
- Power relay which activates the opening of motor 1.
- Power relay which activates the closing of motor 1.
- Power relay which activates the opening of motor 2.
- Power relay which activates the closing of motor 2.
- Relay which deactivates motors 1 and 2.
- Relay which activates the electric clutch for motor 1.
- Relay which activates the electric clutch for motor 2.
- Relay controlling for the light signalling the gate is open.
- Relay controlling 12 VAC electric lock.
CONNECTOR J1
Fixed connector which supports the microprocessor logic.
PLUG J2
13
7
12
4
K
P
2
PLUG J3
8
10
B
E
11
9
- N.C. contact for motor 2 closing limitswitch.
- N.C. contact for motor 1 closing limitswitch.
- N.C. contact for motor 2 opening limitswitch.
- N.C. contact for motor 1 opening limitswitch.
- Single pulse contact (n.o.).
- Pedestrian push button (n.o.).
- Stop push-button (n.c.).
- Common contact (3 terminals available).
- Photo cells contact (n.c.).
- Mobile strips contact during closing (n.c.).
- Mobile strips contact during opening (n.c.).
- Closes push-button (n.o.).
- Opens push-button (n.o.).
CONNECTOR J5
Terminal board for connecting external contactors.
PLUG J6
FN
- 230V 50/60 Hz power supply.
- Earth terminal.
T
- Connect to motor earth terminal.
CONNECTOR J7
Connector for housing R.I.B. radio receivers.
PLUG J8
A*
A
D+DSL
1
CHB
CHC
PLUG J9
M1
V1-W1
M2
W2-V2
L-L
- Common wire for power supply.
- 24VAC power supply for photo cells.
- 12VDC power supply for accesssories.
- Gate open light LED power supply.
- 12VAC electric lock power supply.
- Radio channel B contact output (n.o.).
- Radio channel C contact output (n.o.).
- Monophase motor- U1 common wire.
- Inverters
- Monophase motor - U2 common wire.
- Inverters
- 230V electronic flashing light feed output.
CONNECTOR J10
When it is in the ON position (dip-switch 8), it supplies a courtesy lamp for 3 minutes (max. 40W9 by means of an optional card (box auxiliary activation code
ACQ9070).
The green LED on the card signals that it is fed.
The red LED on the card signals the relay is enabled for the box light. In the "OFF" position (dip-switch 8), the optional card relay will give a 1 " pulse (examples of
applications: timed relay control, garden lights, access to garage, underground corridors, etc.).
N.B.: Do not insert the automatic closing timer on the card (ACQ9050), since the automatic closing function is managed by the microprocessor, see trimmer P3 or
the "automatic closing" paragraph.
PUSH-BUTTONS AND SELECTORS
Should there be two or more push-button panels, connect the open and close controls (terminals 9 and 11 ) in parallel between them/with one another and the stop
contacts (terminal 2) in series between them/with one another.
Any key selectors must be connected between terminals 8-9-11
If no stop push-buttons are scheduled, make a bridge between terminals 2 and 8.
PEDESTRIAN ACCESS PUSH BUTTON
By pressing this button, only one leaf (M1) will open for an interval regulated by trimmer P4 (MAX 20”).
This leaf will automatically close again after the time set on trimmer P3 (Dipswitch 2 set to "ON”) or with the pulse given by the "CLOSE” button (Terminal 11) or with
the radio pulse or single pulse (Terminal K).
During the pedestrian manoeuvre, all safety devices are enabled as in normal operation but they affect only motor 1.
PHOTO CELLS
The photo cells (inserted as in the figure) make it possible to interrupt the movement of the automatism both in the opening and in the closing phase (with movement
being reset at the end of the intervention).
Should the photo cells be damaged, if you give a gate movement command, the flashing light will not signal and the motors will remain stationary.
Operate dip-switch 1 to eliminate photo cell intervention during opening.
N.B.: If two or more pairs of photo cells are connected, connect the A*-A power supply to all the transmitters and receivers and connect terminals 8-10 in series with
one another.
RADIO
By making the contact given by the radio receiver relay (operating pin J7 between terminals 1-2), the gate is opened (if it is closed or in any position except at the
end of the opening cycle) and closed (when the operation timer has finished counting the opening time).
If the gate is moving and you intervene with the radio control, the first pulse you give will be Stop and the second will be consent for movement in the opposite
direction to the one it was moving in before it was stopped.
AUTOMATIC CLOSURE
The automatism closes automatically after the time set on trimmer P3 and can be disconnected by operating dip-switch 2 in the "ON" position.
N.B.: Automatic closing is automatically connected when the operation timer (P1 ) has finished counting.
When the gate is open, every time you go in front of the photo cells, the automatic closing timer starts counting from the beginning again.
In case of power failure fail when the gate is open, automatic closing is deactivated.
It is therefore necessary to give a command to shut the gate.
STOP PUSH-BUTTON
When the gate has opened, you can keep the automation open, even if the automatic closing time (P3) is connected, just by pressing the stop push-button.
At this point the automation will stay open until a new pulse makes it close again.
TIME ADJUSTMENTS
The times of this electronic board/panel can only be adjusted when the gate is closed.
If the trimmers are adjusted at half stroke or when the gate is open, the microprocessor will wait until it closes (i.e. at the end of the cycle) before starting the newly
set times going.
PUSH-BUTTON PANEL WITH 24V LIGHT LED FOR SIGNALLING THE GATE IS OPEN (MAX. POWER 6W)
Connect the light between terminal 8 and terminal SL.
230V FLASHING LIGHT
Connect the flashing light to terminals L-L.
If the safety devices intervene during movement, the flashing light continues operating.
ELECTRIC LOCK RELEASE STROKE
When you give the opening command, the central unit gives a momentary closing pulse to the wings to make the electric lock release easier.
This function can be cut out using dip-switch 7.
N.B.: When the limitswitches are connected, the release command (Dip.7) is not given.
ELECTRIC CLUTCH
The clutch is adjusted by means of the five-position commutator to the left of the main transformer, thus varying the output voltage at the motor heads from a
minimum of 140V to a maximum of 230V.
This clutch is automatically cut out two seconds after every manoeuvre begins.
This is to give the maximum pickup to the motor/s at the starting moment.
N.B.: The clutch is designed for a max. output power of 800W.
OPERATION "WITH SOMEBODY PRESENT"
This function can be inserted by means of dip-switch 6.
In this case, radio control, the single pulse and the automatic closing time (P3) are cut out automatically.
However, photo cells or strips can be applied with their only function being that of stopping automation even if the operator keeps the open or close push-button
pressed down.
However, the OPEN pulse (8-9), the CLOSE pulse (8-11) and the pedestrian pulse (8-P) remain available.
SAFETY DEVICE (RADIO-PNEUMATIC-MECHANICAL STRIPS OR PHOTOSTRIP)
Safety device connections depend on the how they are arranged on the system.
Should you wish to protect the gate's range of action whilst it is opening, we advise you to connect the strips to terminals 8-E.
If you wish to protect the gate's range of action whilst it is closing, the best idea is to connect the strips to terminals 8-B.
In these 2 cases, if the strips is operated, the automation will move in the opposite direction.
Alternatively, if you want to avoid a change in direction, the strips can be connected in serie with the terminal 2 stop push-button (Fig. 1).
LIMIT SWITCHES
If electro-mechanical limitswitches are used, connect them to terminals 8-4 to stop opening and 8-7 to stop closing by motor 1, and to 8-12 to stop opening and 8-13
to stop closing by motor 2.
N.B.: When the limitswitches are connected , the release command (Dip.7) is not given.
If the limitswitches are not used, the relative terminals must be connected to the common terminal n°8.
If only one motor is connected, connect it to terminals U1 V1 W1 (M1) and then connect limit switches 8-4 and 8-7 to stop opening and closing motion of motor 1.
SETTING THE CONTROL PANEL
Once all the connections have been made as in the diagram, it is a good idea to follow the following method to prevent any faulty manoeuvres:
A
- Put the automatism in quiescent conditions (with the motoriductor released).
B
- Check that power relays K1 and K3 are excited when the opening push-button (8-9) is pressed, and that the motors revolve in the opening direction (if
necessary, invert wires V and W leaving the connections of wire B on the motor which revolves in the opposite direction unaltered).
C
- Check that the first leaf is commanded to close by the motor connected between terminals V2-U2-W2.
The delay before the second motor starts the closing process can be adjusted with trimmer P2 (max. 25").
D
- Adjust the operation timer using trimmer P1 so as to let the reduction gear clutch slide for 2-3 secs during opening.
(The operation timer is fed during the whole opening phase and during closing, after it has had the consent from the second leaf delay timer).
When there is only one motor connected, put trimmer P2 in the minimum count position, and the motor clutch will slide for a second longer during closing than
during opening.
N.B.: IF ONLY ONE MOTOR IS CONNECTED, CONNECT TO "M1".
N.B.: IT IS OBLIGATORY TO EARTH THE CENTRAL UNIT (CEI REGULATIONS 61-1).
TECHNICAL SPECIFICATIONS:
- Temperature range
- Humidity
- Supply voltage
- Frequency
- Maximum consumption of card (excluding motors, lamps and external actuators)
- Transient mains power drops
- Maximum power at motor output shaft
- Max. load at flasher output
- Available current at photocell power output
- Radio receiver connector with power supply
- Electrical protection
- Weight of equipment
- Dimensions
- Volume
from 0 to 70°C
< 95% without condensation
230V~ ± 10%
50/60 Hz
70 mA
20 mS
1 Hp
40W 250V cos = 1
0.8A 24Vac ±15%
0.8A 24Vac ±15%
IP 54
3 Kg
20.5x24x10.5 cm
5166 cm3
- All inputs must be used as clean contacts because the power supply is generated on the card and is arranged so as to ensure double or reinforced insulation with
respect to live parts.
- All inputs (function - safety) are controlled by a programmable integrated circuit (PAL).
DE22-FE-iec
D E U T S C H
ELEKTRONISCHE STEUERUNG
FÜR EINEN ODER ZWEI EINPHASEN MOTORS
(COD.ABDE250)
Wichtige Hinweise zur schnelleren Funktionsbestätigung der Steuerung:
Die gelben Led signalisieren die Niedrigstspannung-Versorgungen.
Die grünen Led signalisieren die von den Befehlen ausgehenden Impulse und dürfen nur bei Befehlseingabe aufleuchten.
Die roten Led signalisieren die Kontakte der Sicherungen und Endschalter und müssen stets aufleuchten (sie erlischen nur bei Auslösung der Sicherungenoder
Endschalter).
LED
L1
L2
L3
L4
L5
L6
L7
L8
L9
L10
L11
L12
L13
L14
L15
L16
TIMER
P1
P2
P3
P4
- (gelb)
- (rot)
- (grün)
- (rot)
- (rot)
- (grün)
- (grün)
- (rot)
- (rot)
- (rot)
- (grün)
- (rot)
- (gelb)
- (rot)
- (rot)
- (grün)
- Zeigt das Vorhandensein der Spannungen 24V W.S. und 12V G.S..
- Zeigt, daß die Stopptaste einen Kontakt ausgelöst hat (n.g.).
- Zeigt, daß die Einzelimpulstaste einen Kontakt ausgelöst hat (n.o.).
- Signalisiert den Kontakt des Motor-Endschalters 1, der den Schließvorgang beendet (n.g.).
- Signalisiert den Kontakt des Motor-Endschalters 2, der den Schließvorgang beendet (n.g.).
- Zeigt, daß der Druckschalter für das Öffnen einen Kontakt ausgelöst hat (n.o.).
- Zeigt, daß der Drucktaster für das Schließen einen Kontakt ausgelöst hat (n.o.).
- Zeigt, daß die Öffnungssicherheitsvorrichtung einen Kontakt ausgelöst hat (z.B. bewegliche Kontaktleisten) (n.g.).
- Zeigt, daß die Schließicherheitsvorrichtung einen Kontakt ausgelöst hat (z.B. bewegliche Kontaktleisten) (n.g.).
- Zeigt, daß die Fotozellen einen Kontakt ausgelöst haben (n.g.).
- Automatik in der Öffnungsphase.
- Automatik beim Schließen.
- Zeigt, daß Mikroprozessor versorgt ist (5V G.S.) (auf den Steuerstromkreis).
- Signalisiert den Kontakt des Motor-Endschalters 1, der den Öffnungsvorgang beendet (n.g.).
- Signalisiert den Kontakt des Motor-Endschalters 2, der den Öffnungsvorgang beendet (n.g.).
- Signalisiert den durch den Taster ausgelösten Kontakt zur Fußgänger-Öffnung (n.o.).
- Einstellung der Betriebszeit (120" max).
- Einstellung der Verzögerungszeit beim Schließen des zweiten Flügels (25" max).
- Einstellung der Wartezeit, bevor die automatische Schließung erfolgt (120" max).
- Zur Einstellung der Dauer der Fußgänger-Öffnung (20" max.).
SW1
DIP-SCHALTER 8-WEG-STEUERUNG (AUF DEM STROMNEBENKREIS)
DIP 1
- Bei OFF-Stellung: werden die Fotozellen nicht aktiviert.
DIP 2
- Bei OFF-Stellung: wird die automatische Schließung nicht aktiviert.
DIP 3
- Bei OFF-Stellung: "L-L" wird ständig versorgt.
DIP 4
- Bei OFF-Stellung: sind die Blinckleuchte und der Motor gleichzeitig versorgt.
- Bei ON-Stellung: leuchtet die Blinkleuchte 3 Sekunden bevor der Motor zu laufen beginnt.
DIP 5
- Bei OFF-Stellung: der Funkimpuls und der Einzelimpuls funktionieren wie im Kapitel "Funkbetrieb" beschrieben.
- Bei ON-Stellung: die Wirksamkeit des Funk-bzw.
Einzelimpulses wird ausgeschaltet, nachdem das Tor begonnen hat sich zu Öffnen (es kann nicht mehr gestoppt werden), bis de Endschalter erreicht
oder die Betriebszeit der Phase "Öffnen" beendet ist.
Während sich das Tor wieder schließt, stoppen der Funk bzw. oder der Einzelimpuls die Bewegung des Tores, welches, nach einer voreingestellten
Pause, die Bewegung im entgegensetzten Sinn wieder aufnimmt.
DIP 6
- Bei OFF-Stellung: ist der automatische Betrieb aller Funktionen aktiviert.
- Bei ON-Stellung: der Betrieb ist bei Totmannschaltung aktiviert (siehe Kapitel "Betrieb bei Totmannschaltung").
DIP 7
- Bei OFF-Stellung: wird die Funktion "Elektroschlöß Öffnungsschlag" nicht aktiviert
- Bei ON-Stellung: wird für 3 Minuten die Zusatzplatine (ACQ9070) aktiviert.
DIP 8
- Bei OFF-Stellung nur für eine Sekunde (1").
DIP S3 ANMERKUNG: Beim Öffnen besteht eine mit 1,5 Sekunden bestimmte Verzögerung, um das gleichzeitige Öffnen der beiden Torflügel zu vermeiden.
- Bei geschlossenem DIP S3 nicht aktiviert.
RELAIS
K1
K2
K3
K4
K5
K6
K7
K8
K9
- Leistungsrelais: aktiviert Motor 1 zum Öffnen.
- Leistungsrelais: aktiviert Motor 1 zum Schließen.
- Leistungsrelais: aktiviert Motor 2 zum Öffnen.
- Leistungsrelais: aktiviert Motor 2 zum Schließen.
- Entaktiviert die Motoren 1 und 2.
- Relais: Aktiviert die elektrische Kupplung von Motor 1.
- Relais: Aktiviert die elektrische Kupplung von Motor 2.
- Relais: Steuert die Kontrollampe beim Öffnen des Tores.
- Relais: Zur Steuerung des elektrischen Schlosses (12V WS).
STECKSOCKEL J1
Fester Verbinder zur Stütze der Mikroprozessorlogik.
KLEMMLEISTE J2
13
- Endschalter-Kontakt zur Beendigung des Schließvorgangs durch Motor 2 (n.g.).
7
- Endschalter-Kontakt zur Beendigung des Schließvorgangs durch Motor 1 (n.g.).
12
- Endschalter-Kontakt zur Beendigung des Öffnungsvorgangs durch Motor 2 (n.g.).
- Endschalter-Kontakt zur Beendigung des Öffnungsvorgangs durch Motor 1 (n.g.).
4
K
- Einzelimpuls-Kontakt (n.o.).
- Taster Fußgängerfunktionen (normalerweise offen)
P
2
- Stopptaste (n.g.).
KLEMMLEISTE J3
8
- Normalkontakt (3 Klemmen verfügbar).
10
- Kontakt für die Fotozellen (n.g.).
B
- Kontakt für die beweglichen Kontaktleisten beim Schließen (n.g.).
E
- Kontakt für die beweglichen Kontaktleisten beim Öffnen (n.g.).
11
- Drucktaste schließt (n.o.).
9
- Drucktaste öffnet (n.o.).
KLEMMLEISTE J5
Klemmenbrett zum Anschluß äußerer Schützen.
KLEMMLEISTE J6
LN
- Netzanschluß 230V 50/60 Hz ±10%.
- Erdung.
T
- An die Motor-Erdungsklemme anschließen.
STECKSOCKEL J7
Verbinder zur Aufnahme von RlB-Funkempfängern.
KLEMMLEISTE J8
A*
- Gemeinsamer Anschluß zur Stromversorgung.
A- Stromversorgung 24V W.S. für die Fotozellen.
D+ D- Stromversorgung 1 2V G.S. für das Zubehör
SL
- Stromversorgung der LED-Anzeige "Tor offen".
1
- Stromversorgung für das elektrische Schloß.
CHB
- Ausgang für den Funkkontakt Kanal B (n.o.).
CHC
- Ausgang für den Funkkontakt Kanal C (n.o.).
KLEMMLEISTE J9
M1
- Anschluß Einphasenmotor - U1 Gemeinsam.
V1-W1 - Wechselrichter
- Anschluß Einphasenmotor - U2 Gemeinsam.
M2
W2-V2 - Wechselrichte;
- Ausgang der Stromversorgung der elektrischen Blinklichte 230V. (Nicht zur Anwendung des Elektroschloßes).
L-L
STECKSOCKEL J10
Bei der ON-Stellung (DlP-Schalter 8), wird über eine Zusatzplatine (Kode.Nummer ACQ9070) drei Minuten lang (40W max.) eine Zusatzlampe mit Storm versorgt.
Der grüne LED-Anzeiger auf der Platine zeigt die Stromversorgung an.
Die rote LED-Anzeige signalisiert die Erregung des Relais für das Zusatzlicht.
Bei der OFF-Stellung (DlP-Schalter 8), gibt das Relais-Zusatz-Platine einen Impuls von 1".
Anwendungsbeispiele: (Relaisbefehle für Timer, Gartenbeleuchtung, Garagenzufahrt, unterirdische Gänge, u.s.w.).
Bitte beachten Sie: Schließen Sie nicht den Timer für das automatische Schließen nicht an die Steuertafel (ACQ9050) an, da die Funktion "automatisches
Schließen" über den Mikroprozessor gesteuert ist, siehe Timer P3 oder Kapitel "automatisches Schließen".
TASTE ODER SCHLÜSSELSCHALTER
Falls zwei oder mehr Drucktasten vorhanden sind, schalten Sie die Steuerung zum Öffnen und Schließen (Klemmen 9 und 11) die Stoppkontakte in Serie (Klemme
2).
BETRIEB TASTER FUSSGÄNGER-ÖFFNUNG
Durch Betätigung dieses Tasters wird die Öffnung nur eines Flügels (M1) für die auf dem Trimmer P4 eingestellte Zeit (MAX. 20”) ausgelöst.
Dieser Flügel schließt automatisch nach der auf dem Trimmer P3 (Dip 2 auf Position “ON”) eingegebenen Zeit oder kann durch den vom Schließtaster (Klemme 11)
bzw. von der Fernbedienung ausgehenden Impuls oder durch Einzelimpuls (Klemme K) geschlossen werden.
Während der Fußgängerfunktionen sind sämtliche Sicherungen wie bei Normalbetrieb aktiviert; sie wirken jedoch nur auf Motor 1 ein.
PHOTOZELLEN
Die (laut Abbildung eingebauten) Photozellen ermöglichen, die automatische Bewegung sowohl beim Öffnen als auch beim Schließen zu unterbrechen. (Sobald die
Zwischenschaltung der Lichtschranke beseitigt ist, wird die Bewegung wieder aufgenommen).
Bei Versagen der Photozellen funktionieren die Blinkleuchte und die Motoren nicht.
Mit dem DIP-1 in ON stellung reagieren die Photozellen sowohl Bein Öffnen als auch beim Schließen, bei OFF Stellung nur beim Schließen.
Bitte beachten Sie: Im Falle von zwei oder mehr Lichtschranken Schließen Sie alle Übertragungs- und Empfangsgeräte and das Netz A*-A an, und schalten Sie die
Klemmen 8-10 in Serie.
FUNKSTEUERUNG
Mit Hilfe des vom Relais des Funkempfänges (Stecker J7 zwischen den Klemmen 1.2) ausgelösten Kontaktes, öffnet man das Tor (es ist geschlossen oder in einer
beliebig anderen Position außer am Ende des Öffnungszyklus), und man schließt es (nach dem Öffnen schließt sich das Tor automatisch mit Hilfe des Timers).
Wenn die Funksteuerung in den Bewegungsablauf des Tores eingreift, wird das Tor vorerst gestoppt und dann wird die vor dem Stop ausgeführte Bewegung
umgekehrt.
AUTOMATISCHES SCHLIEßUNG
Das automatische Schließen erfolgt nach der auf dem Timer P3 eingestellten Zeit und kann mit Hilfe des DlP-Schalters 2 in OFF-Stellung ausgeschaltet werden.
Beachten Sie Bitte: Das Tor schließt automatisch, wenn es offen ist und der Timer P1 aktiviert ist.
Bei offenem Tor wird der Timer jedesmal neu aktiviert, wenn die Lichtschranken unterbrochen werden.
Bei Stromausfall bei geöffnetem Tor wird der automatische Schließvorgang ausgeschaltet.
Es ist daher notwendig, das Signal zum Schließen zu geben.
STOPPTASTE
Nach der Toröffnung kann die Automatik angehalten werden, auch wenn die automatische Schließung mit dem Timer P3 eingeschaltet ist.
Es genügt die Stoppdrucktaste zu bedienen.
Das Tor bleibt nun offen bis ein neuer Impuls zum Schließen gegeben wird.
ZEITEINSTELLUNG
Die Zeiten dieser elektronischen Steuerung können nur bei geschlossenem Tor eingestellt werden.
Wenn die Timer bei halboffenem oder offenen Tor eingestellt werden, wartet der Mikroprozessor bis das Tor geschlossen ist (das heißt: bis zum Ende des
Bewegungsablaufes) und richtet sich erst nach den neu eingestellten Zeiten.
ANSCHLUß DER DRUCKTASTE MIT 12V-LEDANZEIGER UM "TOR-OFFEN" ZU SIGNALISIEREN (MAX. LEISTUNG 6 W)
Schalten Sie die Anzeige Zwischen die Klemme 8 und die Klemme SL.
BLINKLEUCHTE
Schließen Sie die Blinkleuchte an die Klemmen L-L.
Wenn Während der Bewegung Sichersvorrichtungen eingesetzt werden, funktioniert die Blinkleuchte weiter.
ELEKTROSCHLÖß ÖFFNUNGSSCHLAG
Wenn Sie das Signal zum Öffnen geben, gibt die Steuerung einen Momentimpuls zum Schließen der Torflügel, um das Lösen des Elektroschloßes zu erleichtern.
Diese Funktion kann mit dem DIP-Schalter 7 ausgeschaltet werden.
NB.: Mit den angeschlossenen Endschaltern wird der Freigabeimpuls (Dip 7) nicht ausgeführt.
EINSTELLUNG DER ELEKTRO-KUPPLUNG
Die Einstellung der Kupplung erfolgt mittels eines Fünfstellenschalters, der an der linken Seite des Netztrafos angebracht ist, indem man die Ausgansspannung an
den Motorenenden von einem Minimum von 140V bis zum Maximum von 230V regelt.
Diese Kupplung schaltet sich nach 2 Sekunden nach dem Beginn aller Handlungen ein, damit dem/den Motor/en beim Start das größte Anlaufmoment gegeben
wird. Beachten Sie bitte: Die Kupplung ist mit einer Ausgangsleistung von max. 800W bemessen.
TOTMANNSCHALTUNG
Diese Funktion wird über den DlP-Schalter 6 eingeschaltet in diesem Falle werden der Funkimpuls oder Einzelimpuls und die automatische Schließzeit (P3)
automatisch ausgeschaltet.
Man kann aber auch Fotozellen oder bewegliche Kontaktleisten anbringen, die nur die Funktion haben die Automatik zu stoppen, auch wenn man die Drucktaste
zum Öffnen oder Schließen gedrückt hält.
Die Impulse Öffnen (8-9), Schließen (8-11) und Fußgänger (8-P) stehen demnach weiter zur Verfügung.
SICHERHEITSKONTAKTLEISTEN
Der Anschluß der beweglichen Kontaktleisten hängt vom Ort, wo diese angebracht sind ab.
Im Falle, daß man den Öffnungsvorgang des Tores absichern will, schließt man sie am besten an die Klemmen 8-E.
Wenn man den Schließvorgang absichern will, schließt man sie an die Klemmen 8-B.
In diesen2 Fällen wird die automatische Bewegung umgekehrt.
Falls die Bewegung nicht umgekehrt werden soll, können die Kontaktleisten in Serie an die Stopdrucktaste geschaltet werden.
ANSCHLUß DER ENDSCHALTER
Bei Verwendung elektromechanischer Endschalter Anschluß an den Klemmen 8-4 zur Beendigung des Öffnens und an 8-7 zur Beendigung des Schließvorgangs
durch Motor 1, zwischen 8-12 zur Beendigung des Öffnens und 8-13 zur Beendigung des Schließvorgangs durch Motor 2 ausführen.
NB.: Mit den angeschlossenen Endschaltern wird der Freigabeimpuls (Dip 7) nicht ausgeführt.
Bei Nichtverwendung von Endschaltern sind diese an Nr. 8 zu überbrücken (Normalkontakte).
Wird nur ein Motor angeschlossen, den Anschluß an den Klemmen U1V1W1 (M1) ausführen und anschließend die Endschalter 8-4 und 8-7 zur Beendigung des
Öffnungs- und Schließvorgangs durch Motor 1 anschließen.
EINSTELLUNG DER STEUERUNG
Sobald alle Anschlüsse laut Schema gemacht worden sind, überprüfen Sie bitte die Anlage wie folgt, um eine eventuelle falsche Bedienung zu vermeiden:
A
- Schalten Sie die Automatik aus (die Motorantriebe müssen entsperrt sein).
- Überprüfen Sie, ob beim Drücken der Taste für das Öffnen (8-9) das Leistungsrelais K1 und K3 erregt werden und ob die Motoren sich in der
B
Öffnungsrichtung drehen (eventuell müssen die Drähte V und W vertauscht werden), ohnedassman den Draht U des Motores, der in umgekehrten Sinn
dreht, wechselt.
C
- Überprüfen Sie, daß das Schließen des ersten Torflügels mit den Motor erfolgt, der zwischen den Klemmen V2-U2-W2 angeschlossen ist.
Die Verzögerung, mit der der zweite Motor startet, wird mit dem Timer P2 eingestellt.
D
- Stellen Sie den Timer P1, der für den Betrieb zuständig ist, so ein, daß er das Untersetzungsgetriebe beim Start 2-3 Sekunden entkuppelt läßt. (Der Timer
für die Betriebszeit ist Während des gesamten Öffnungsvorganges aktiviert, und Während des Schließens, sobald er vom Verzögerungstimer des zweiten
Torflügels das Signal erhalten hat).
Falls nur ein Motor angeschlossen ist, stellen Sie den Timer P2 auf das Minimum ein, so daß der Motor beim Schließen eine Sekunde später als beim Öffnen
entkuppelt.
BEACHTEN SIE BITTE: IM FALLE, DAß NUR EIN MOTOR ANGESCHLOSSEN WIRD, Schließen SIE DIESEN AN "M1" AN.
BEACHTEN SIE BITTE: DIE ERDUNG DER STEUERUNG IST NOTWENDIG (NORM CEI 61-1).
TECHNISCHE DATEN:
- Temperaturbereich
- Feuchtigkeit
- Versorgungsspannung
- Frequenz
- Max. Stromaufnahme Karte (ohne Motoren, Leuchten und äußere Zylinder)
- Netz-Mikroschalter
- Max. Motor-Abtriebsleistung
- Max. Last Blinkleuchtenausgang
- Verfügbarer Strom Ausgang Photozellenversorgung
- Anschluß Funkempfänger mit Versorgung
- Schutzgrad
- Gerätgewicht
- Platzbedarf
- Volumen
0 bis 70°C
< 95 % ohne Kondensation
230 V~ ± 10 %
50/60 Hz
70 mA
20 mS
0,735 kW
40 W 250 V cos = 1
0,8 A 24Vac ± 15 %
0,8 A 24Vac ± 15 %
IP 54
3 kg
20,5 x 24 x 10,5 cm
5166 cm3
- Sämtliche Eingänge sind als Leerkontakte zu verwenden, da die Versorgung intern über die Karte gesteuert und so eingerichtet ist, daß die doppelte bzw.
verstärkte Isolierung gegenüber den Spannungsteilen gewährleistet bleibt.
- Sämtliche Eingänge für betriebs- und sicherheitstechnische Funktionen werden durch einen programmierbaren integrierten Kreis (PAL) gesteuert.
- QUESTA APPARECCHIATURA É CONFORME ALLE NORME:
- CET APPAREIL SE CONFORME AUX NORMES SUIVANTES:
- THIS DEVICE COMPLIES WITH THE FOLLOWING NORMS:
- DIESES GERÄT ENTSPRICHT DIE FOLGENDEN NORMEN:
Cod. ABDE 221 - 951211- Rev. 01
- UNI 8612
- CEI 61-50, V1, V2, V3, V4 - EN60335-1 A51
- CEI 70-1, V1
®
Dir.89/336/CEE
25014 CASTENEDOLO (BS)-ITALY
Via Matteotti, 162
Telefono 030.2135811
Telefax 030.21358279
automatismi per cancelli
automatic entry systems
La presente macchina non può funzionare in modo
indipendente ed è destinata ad essere incorporata in
un impianto costituito da ulteriori elementi. Rientra
perciò nell’Art. 4 paragrafo 2 della Direttiva
89/392/CEE (Macchine) e successive modifiche, per
cui segnaliamo il divieto di messa in servizio prima che
l’impianto sia stato dichiarato conforme alle
disposizioni della Direttiva
Il Presidente