1
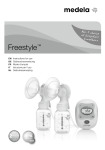
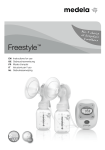
Freestyle™
EN
DE
FR
IT
NL
Instructions for use
Gebrauchsanweisung
Mode d’emploi
Istruzioni per l’uso
Gebruiksaanwijzing
EN Parts List
DE Teileliste
FR Liste des pièces
IT Elenco componenti
NL Onderdelenlijst
p
m
j
h
k
l
n
m
o
i
a
c
b
d
e
f
g
EN Parts List
DE Teileliste
FR Liste des pièces
IT Elenco componenti
NL Onderdelenlijst
a 810.7084
EN
DE
FR
IT
NL
b
EN
DE
FR
IT
NL
e EN
DE
FR
IT
NL
f EN
DE
FR
IT
NL
g EN
DE
FR
IT
NL
Calma Multi-Lid
Calma Multi-Deckel
Multi-Couvercles Calma
Tappo Calma
Calma Multi-deksel
d 200.1513
Freestyle Connector
Freestyle Verbindungsstück
Connecteur Freestyle
Connettore Freestyle
Freestyle Connector
k EN
DE
FR
IT
NL
200.1512
200.1524
l EN
DE
FR
IT
NL
c
Freestyle Tubing
Freestyle Schlauch
Tuyau Freestyle
Tubicino Freestyle
Freestyle Slang
811.0021
Bottle 150 ml
Flasche 150 ml
Biberon 150 ml
Poppatoio 150 ml
Melkflesje 150 ml
200.1591
Motor unit
Motoreinheit
Bloc-Motor
Unità motore
Motoreenheid
m
EN
DE
FR
IT
NL
n EN
DE
FR
IT
NL
Disc
Deckeleinlage
Disque de transport
Disco
Deselinleg
i EN
DE
FR
IT
NL
810.7062
Lid
Deckel mit Öffnung
Baque
Ghiera
Ringdeksel
DE
15 – 25
FR
26 – 36
Rechargeable battery
Wiederaufladbarer Akku
Batterie rechargeable
Batteria ricaricabile
Oplaadbare accu
810.0462
Bottle stand
Standfuss
Support
Supporto
Standaard
811.7010
Cooling element
Kühlelement
Elément réfrigérant
Elemento di refrigerazione
Koelelement
200.0383
Cooler bag
Kühltasche
Sac isoterm
Borsa termica
Koeltas
IT
37– 47
o 200.1547
h 810.0473
EN
DE
FR
IT
NL
j 200.2714
EN
DE
FR
IT
NL
PersonalFit™ Breastshield 24 mm
PersonalFit™ Brusthaube 24 mm
PersonalFit™ Téterelle 24 mm
Coppa per il seno PersonalFit™ 24 mm
PersonalFit™ Borstschild 24 mm
EN
4 –14
EN
DE
FR
IT
NL
Freestyle Bag
Freestyle Tasche
Sac Freestyle
Borsa Freestyle
Freestyle tas
p 200.4725 Euro
EN
DE
FR
IT
NL
200.4726 UK / U S / J P
200.4727 AUS / NZ
Mains Adapter 12V
Netzadapter 12V
Adapteur 12V
Trasformatore 12V
Netstroomadapter 12V
NL
48 – 58
4
Thank you for choosing the Freestyle breastpump. Breastmilk is the natural choice for your
baby, but there are reasons and situations where breastfeeding is not possible. For over
50 years, it has been Medela’s conviction that these mothers and babies can be supported. In close co-operation with breastfeeding experts, Medela, one of the market leaders,
has researched and developed breastpumps that perfectly meet breastfeeding mothers
needs. For mothers who insist on the best for their babies and themselves.
«Because you care».
Why Freestyle™?
Freestyle is the best solution, if you have little time and want to pump efficiently and
effectively and remain flexible and mobile.
The double pump with the innovative 2-Phase technology encourages milk production
and is proven to give you more milk, in less time. Vacuum can be adjusted for your comfort
and a cleverly designed memory function enables you to recall your personal pumping
rhythm each time you pump. Freestyle is compact and easily transported: it will become
an inseparable companion when you are separated from your baby.
What is 2-Phase Expression ®?
Medela has been the first company worldwide to deeply
research babies and their feeding behaviour. The results
have led to the development of the 2-Phase-ExpressionTechnology. 2-Phase-Expression is based on the natural
sucking rhythm of the baby: Short, stimulating movements
(Stimulation) are followed by longer, more intensive ones
(Expression), ensuring an optimal milkflow. Thus, more milk
can be expressed in a shorter time – and more comfortably.
Indications for use
Freestyle is an electric/ battery powered breastpump for supporting breastfeeding mothers.
Freestyle is ideal:
I To help overcome mother or baby breastfeeding problems
– Support mother of babies with feeding difficulties (cleft lip/palate, prematurity
or neurological problems)
– Enhance flat or inverted nipples
– S ore and cracked nipples
– B reast inflammation
Important safeguards
When using electrical devices, basic safety precautions should always be followed,
including the following:
Read all instructions before use.
Product
I
I
I
I
I
I
I
Keep appliance dry and do not place in direct sunlight.
Do not get the product wet.
Do not place in or drop motor unit into water or other liquid.
Do not spray or pour liquid directly onto the pump.
Check pump kit components for wear or damage.
This is a single user product. Use by more than one person may present a health risk.
There are no user-serviceable parts inside the Freestyle. Do not attempt to repair the
Freestyle Breastpump yourself.
Electricity
Only use the mains adapter or battery that comes with the Freestyle Breastpump.
Make sure the voltage of the mains adapter is compatible with the power source.
Plug the mains adapter into Freestyle Breastpump first and then into wall socket.
Always unplug electrical devices immediately after using.
Separation from the mains is only assured through the disconnection of the mains
adapter from the wall socket outlet.
I Keep the mains adapter away from heated surfaces.
I Do not reach for any electrical device if it has fallen into water. Unplug immediately.
I
I
I
I
I
Use
I Use the product only for its intended use as described in this instruction manual.
I Use Medela original accessories only.
I Never operate an electrical device if it has a damaged cord or plug, if it is not working
properly, if it has been dropped or damaged, or dropped into water.
I The product should never be left unattended when plugged into a power source.
I Do not use outdoors.
I Do not use while bathing or showering.
I Do not use while sleeping or overly drowsy.
I Do not drive while free-hand pumping.
I Supervision is necessary when this product is used in the vicinity of children.
I If problems or pain occur, consult your lactation consultant or physician.
I Equipment not suitable for use in the presence of explosive atmospheres.
I Equipment not suitable for use in the presence of a flammable anaesthetic mixture
with air or with oxygen or nitrous oxide.
5
6
I Portable and mobile radio frequency communications equipment can affect the
Freestyle Breastpump.
I The Freestyle Breastpump needs special precautions regarding EMC
(Electromagnetic compatibility) and needs to be installed and put into service
according to the EMC information provided in these instructions for use.
SAVE THIS INSTRUCTION MANUAL
How to clean Freestyle pump set
Please follow these handling and cleaning instructions. Use drinking water quality only.
Disassemble all parts prior to cleaning.
a
b
c
e
d
f
i
h
j
a
b
c
d
e *
f
h
i
j
Firstly rinse with cold water, second wash
thoroughly with hot soapy water, finally
rinse. Medela recommends
✓
✓
✓
✓
✓
✓
✓
✓
✓
covering with cold water in a saucepan
and boiling out for 5 min.
✓
✓
✓
✓
✓
✓
✓
✓
✓
or
washing in top rack of dishwasher
✓
✓
✓
✓
✓
✓
✓
✓
✓
or
with Quick Clean Microwave Bag
✓
✓
✓
✓
–
✓
✓
✓
✓
or
with b-well Steam Sterilizer
✓
✓
✓
✓
–
✓
✓
✓
✓
✓
✓
✓
✓
–
✓
✓
✓
✓
Part
Clean prior to first and once daily
Clean immediatly after each use
Firstly rinse with cold water, second
wash thoroughly with hot soapy water,
finally rinse.
*if it is dirty only
Note: Food coloring may discolor components which will not affect performance.
Medela can assume no liability for a wrong handling.
You can find more information at: www.medela.com
7
8
How to prepare your Freestyle
8
3
4
7
9
6
10
Control buttons
1 On / Off button
2 Let-down button
Timer reset button
3 Vacuum decrease button (-)
4 Vacuum increase button (+)
5 Memory button
11
2
5
1
Open the battery compartment by sliding the back
panel of the pump down.
LCD-Display
6 Timer
7 Stimulation phase indicator
8 AC power indicator
9 Battery power indicator
10 Expression phase indicator
11 Memory «on» indicator
Insert the battery into the
Close the battery
compartment with the arrows
compartment.
and the note «This Side Down»
pointing towards the pump.
Plug in the mains adapter and charge until the battery power
indicator shows four bars and stops flashing (up to 24 h).
Pump may be used while charging.
Do not unplug the mains adapter until the charging
is completed.
Electrical/ Battery operation
The pump can be mains adapter and battery operated.
Mains symbol on the display
The pump is plugged in.
Battery indicator on the display
Battery power state
4 bar-battery indicator on the display
Full battery, 3h pumping time
1 bar-battery indicator flashes
20 min.pumping time only
Battery has been removed
Battery indicator flashes
Empty battery
"bAtt" flashes on the display
Charging for first time
Removal of battery
(Up to 24h for charging-time)
Caution:
The battery used in this device may present a risk of fire or chemical burn if mistreated.
Do not disassemble, heat or incinerate. Replace battery with Medela part number 200.1512
only. Use of another battery may present a risk of fire or explosion.
When storing the battery for a limited length of time, store within the following temperature
range: -20° to 50° C (-4° to 140° F). When storing the units for an extended time, store
within the following temperature range 0° to 25° C (32° to 77°F). Dispose of used battery
promptly. Keep away from children. Do not disassemble and do not dispose of in fire.
Note
If the pump has been running for 30 minutes without any manipulation, the Freestyle will
automatically switch off.
Avoid removing battery. Removing the battery will reset the battery indicator and requires
a recharging time of up to 24 hours to readjust the battery indicator.
9
10
How to assemble your
Freestyle pump kit
Insert membrane into
connector body.
Snap clear cap onto
connector body.
Push the breastshield onto
the connector.
Screw connector onto
the bottle.
Connect tubing to the
breastshields and pump.
For single pumping, place
unused tube into tubing dock.
How to use your Freestyle
Centre your breastshield over
your nipple.
Caution:
Hold the bottle as on the
photo, not on the connector.
– Do not tilt or overfill bottle.
– Take care not to kink tubing.
Once your milk starts to flow,
press 2 to switch to the
Expression Phase.
After two minutes the pump
will automatically switch to
the Expression Phase.
Switch on the breastpump by
pressing 1.
The pump will begin pumping
in the Stimulation Phase.
Adjust the vacuum during
pumping to your comfort level
by pressing 3/4.
To memorize your personal pattern,
press the button 5 while pumping in the Expression Phase for
three seconds, until the display flashes and the pump beeps
three times.
Finish pumping session as usual.
To activate your memorized setting, start the pump and
press 5.
11
12
If you wish to use a second Stimulation Phase press 2 again. Once finished pumping
switch off the breast pump, and disassemble the pump kit items. Use bottle stand to
prevent tip over spillage.
Timer
The timer automatically starts when the pump is turned on.
If for any reason you want to restart the timer during a pump session, press the button 2
and hold for 3 seconds. This will restart the timer, but Freestyle will continue to pump.
How to store/thaw breastmilk
Medela recommends using the following guidelines for storing and thawing breastmilk.
For Healthy Term Babies.
Room
temperature
Refrigerator
Refrigerator
freezer
compartment
Freezer
Freshly expressed
breastmilk
Do not store
at room
temperature
3 - 5 days at
approx. 4°C
6 months at
approx. -16°C
12 months at
approx. -18°C
Thawed breastmilk
(previously frozen)
Do not store
10 hours
Do not refreeze after thawing!
I Never fill bottles/bags more than ¾ full to allow space for possible expansion.
I Do not thaw frozen breastmilk in a microwave oven or in a pan of boiling water
(danger of burning).
Troubleshooting
Trouble
Solution
If there is low or
no suction.
All connections of the kit and breastpump are secure.
Back cap is firmly attached at three connection points.
Hold the bottle on the breastshield not on the connector.
Breastshield is assembled correctly and forms a complete
seal around the breast.
If single pumping, make sure the unused tube is securely
connected to the tubing dock.
Take care not to kink tubing.
If the pump
gets wet
Unplug the mains adapter from the wall socket and turn the
pump off.
I M ake sure not to turn the pump upside down. Display has
to face up.
I Store the pump for 24 hours in a dry and warm place.
Note:
Do not try to speed up the drying process by applying heat
or by using any drying equipment.
Do not expose the pump to direct sunlight.
«Err» accompanied
by 3 beeps
Contact local Medela office or sales point.
Mains adapter symbol
flashing and pump does
not turn on
Contact local Medela office or sales point.
Battery power indicator
flashes and shows
four bars
Contact local Medela office or sales point.
13
14
Warranty
In the "International Warranty" booklet you find all information about the warranty.
Disposal
The unit is made of various metal and plastics. Before disposal, the device is to be
rendered unusable and it must not be disposed of as unsorted municipal waste in
accordance with local regulations. Use your local return and collection system for
waste electrical and electronic equipment (incl. batteries). Improper disposal may
have harmful effects in the environment and on public health.
….still a question….
Am I using the right size breastshield?
….Every mother is different and needs her personal size, therefore Medela offers five
different sizes PersonalFit breastshield.
Answer some questions at
http://www.medela.com/IW/en/breastfeeding/good-to-know/right-size-of-breastshield.html
to know if the actual breastshield is the right one for you.
Is it possible to pump hands-free?
Yes. With Easy Expression you can pump and have your hands free for other activities.
Visit our website
www.medela.com/IW/en/breastfeeding/good-to-know/tips-hands-free-expression,
there you can find a detailed description of a correct use of Easy Expression.
Herzlichen Dank, dass Sie sich für die Milchpumpe Freestyle entschieden haben.
Muttermilch ist an sich das Beste für Ihr Baby, doch es gibt viele Gründe, weshalb Stillen
nicht immer möglich ist. Als einer der Marktführer setzt sich Medela seit über 50 Jahren mit
Überzeugung für das Wohl von Babys und Müttern ein. In Zusammenarbeit mit Stillexperten
und mit führenden Forschern hat Medela Milchpumpen entwickelt, die optimal auf die
Bedürfnisse stillender Frauen abgestimmt sind. Für Mütter, die das Beste für ihr Baby und
sich wollen. «Because you care».
Warum Freestyle™?
Möchten Sie Zeit sparen und trotzdem Ihr Baby ausschliesslich mit Muttermilch ernähren
und dabei flexibel sowie mobil bleiben? Freestyle ist die richtige Antwort auf Ihre Bedürfnisse.
Das beidseitige Abpumpen und die innovative 2-Phase Expression Technologie erhöhen
den Milchfluss und ermöglichen es Ihnen in einer kürzeren Zeitspanne mehr Milch
effizienter abzupumpen. Ferner können Sie die Stärke und Dauer Ihren individuellen
Bedürfnissen anpassen und jederzeit so abspeichern, dass beim nächsten Abpumpvorgang automatisch Ihr persönlicher Rhythmus abgerufen wird. Ausserdem lässt sich
die Freestyle bequem überallhin mitnehmen und wird zu einer unverzichtbaren Begleiterin
bei der Arbeit sowie in Ihrer Freizeit.
Was ist 2-Phase Expression®?
Als weltweit erstes Unternehmen hat Medela das Verhalten
von Babys an der Mutterbrust durch jahrelange
Forschungsarbeit in die 2-Phase-Expression Technologie
einfliessen lassen. Diese beruht auf dem natürlichen
Saugrhythmus des Babys: Auf kurze, stimulierende
(Stimulationsphase) folgen lange, intensive Bewegungen
(Abpumpphase) die für optimalen Milchfluss sorgen.
Damit kann auf angenehme Art mehr Milch in weniger Zeit
abgepumpt werden.
Verwendungszweck
Die elektrische Milchpumpe Freestyle dient zum Abpumpen von Muttermilch.
Freestyle eignet sich:
I Um Stillschwierigkeiten seitens der Mutter oder des Babys zu lindern/zu überwinden
– Um die Ernährung von Kindern mit oralen Fehlbildungen, frühgeborenen Kindern,
Kindern mit neurologischen Problemen oder kranken Kindern sicher zu stellen
– Um Flach- und Hohlwarzen hervorzuholen
– Zur Entlastung von verletzten und blutenden Brustwarzen
– Zur Entlastung bei Brustentzündung
15
Wichtige Sicherheitshinweise
Bei der Verwendung elektrischer Geräte ist stets auf die Einhaltung der grundlegenden
Sicherheitsvorkehrungen zu achten, einschliesslich der Folgenden: Lesen Sie bitte alle
Anweisungen vor dem Gebrauch.
Produkt
16
Das Gerät trocken halten und nicht direktem Sonnenlicht aussetzen.
Das Gerät nicht nass werden lassen.
Den Motor nicht in Wasser oder andere Flüssigkeiten legen oder fallen lassen.
Keine Flüssigkeit direkt auf die Pumpe sprühen oder schütten.
Die Teile des Pumpsets auf Abnutzung oder Beschädigung überprüfen.
Dieses Produkt ist für nur eine Benutzerin bestimmt. Die Benutzung durch verschiedene
Personen kann ein Gesundheitsrisiko darstellen.
I Freestyle enthält keine Teile, die vom Kunden repariert werden können. Versuchen Sie
nicht, die Milchpumpe selbst zu reparieren.
I
I
I
I
I
I
Elektrische Teile
I Ausschliesslich den mit der Milchpumpe Freestyle gelieferten Netzadapter oder Akku
verwenden.
I Sicherstellen, dass die Spannung des Netzadapters mit der Stromquelle kompatibel ist.
I Den Netzadapter zuerst in die Milchpumpe Freestyle und dann in die Steckdose
einstecken.
I Elektrische Geräte nach der Verwendung immer von der Stromversorgung trennen.
I Die Trennung vom Versorgungsnetz ist nur durch Trennen des Netzadapters von der
Steckdose gewährleistet.
I Den Netzadapter von heissen Oberflächen fern halten.
I Niemals nach einem ins Wasser gefallenen elektrischen Gerät greifen ohne zuvor den
Netzadapter herauszuziehen.
Verwendung
I Das Produkt ausschliesslich für den in dieser Gebrauchsanweisung beschriebenen
Verwendungszweck benutzen.
I Nur Originalzubehör von Medela verwenden.
I Ein elektrisches Gerät nie in Betrieb nehmen, wenn der Netzadapter beschädigt ist,
wenn es nicht korrekt funktioniert, wenn es heruntergefallen, beschädigt oder ins Wasser
gefallen ist.
I Das Gerät niemals unbeaufsichtigt lassen, wenn es an einer Stromquelle
angeschlossen ist.
I Gerät nicht im Freien verwenden.
I Gerät nicht beim Baden oder Duschen verwenden.
I Gerät nicht verwenden, wenn Sie schlafen oder übermässig müde sind.
I Während des freihändigen Abpumpens sollten Sie nicht Auto fahren.
I Bei Verwendung dieses Produkts in der Nähe von Kindern ist eine entsprechende
Beaufsichtigung notwendig.
I Wenn Probleme oder Schmerzen auftreten, wenden Sie sich bitte an Ihre Stillberaterin
oder Ihren Arzt.
I Das Gerät ist nicht für den Betrieb im explosionsgefährdeten Bereich geeignet.
I Gerät nicht in der Nähe entflammbarer Narkosemittelmischungen mit Luft, Sauerstoff
oder Stickoxid betreiben.
I Tragbare und mobile Radiofrequenz-Kommunikationsgeräte können die Milchpumpe
Freestyle beeinflussen.
I Die Milchpumpe Freestyle erfordert besondere Vorsichtsmassnahmen in Bezug auf EMV
(Elektromagnetische Verträglichkeit) und muss entsprechend den in dieser
Gebrauchsanweisung gegebenen EMV-Informationen installiert und in Betrieb
genommen werden.
BEWAHREN SIE DIESE GEBRAUCHSANWEISUNG SORGFÄLTIG AUF.
17
Wie Sie Ihr Freestyle Zubehör
reinigen
Beachten Sie bitte die folgenden Hinweise und verwenden Sie nur Trinkwasserqualität.
Vor dem Reinigen nehmen Sie bitte alle Teile auseinander.
18
a
b
c
e
d
Teile
a
f
b
c
i
h
j
d
e *
f
h
i
j
Reinigung vor dem ersten Gebrauch und einmal täglich
Von Hand mit kaltem Wasser abspülen;
mit warmem Seifenwasser reinigen;
mit klarem heissem Wasser spülen.
Zusätzlich empfiehlt Medela
✓
✓
✓
✓
✓
✓
✓
✓
✓
in einem Topf mit kaltem Wasser
bedecken und für 5 min.auskochen
✓
✓
✓
✓
✓
✓
✓
✓
✓
oder im oberen Korb des Geschirrspülers reinigen
✓
✓
✓
✓
✓
✓
✓
✓
✓
oder mit Quick Clean
Mikrowellen-Beuteln
✓
✓
✓
✓
–
✓
✓
✓
✓
oder mit b-well Dampfsterilisator
✓
✓
✓
✓
–
✓
✓
✓
✓
✓
✓
✓
✓
–
✓
✓
✓
✓
Reinigung sofort nach jedem Gebrauch
Von Hand mit kaltem Wasser abspülen;
mit warmem Seifenwasser reinigen;
mit klarem heissem Wasser spülen.
* Bitte nur reinigen, falls verschmutzt
Hinweis: Farbstoffe von Lebensmitteln können Teile verfärben, was jedoch keinen Einfluss
auf die Funktion hat.
Medela übernimmt keine Haftung für unsachgemässe Reinigung.
Detaillierte Reinigungshinweise finden Sie unter: www.medela.com
Wie Sie die Milchpumpe
vorbereiten
8
3
4
7
9
6
10
Tasten
1 Ein- / Aus-Taste
2 "Let-down" Taste
Reset-Taste für Timer
3 Taste um Vakuum zu reduzieren
4 Taste um Vakuum zu erhöhen
5 Memory-Funktionstaste
11
2
5
1
Um den Akku einzulegen,
öffnen Sie das Akkufach in
Pfeilrichtung.
LCD-Display
6 Timer
7 Anzeige Stimulationsphase
8 Netzstromanzeige
9 Akkuanzeige
10 Anzeige Abpumpphase
11 Anzeige Memory «on»
Legen Sie den Akku hinein,
wobei der Hinweis "This side
down" in Richtung der Pumpe
weisen muss.
Schliessen Sie das Akkufach.
Schliessen Sie den Netzadapter an das Stromnetz an bis die
Ladestandsanzeige (9) aufhört zu blinken und auf dem Display
„bAtt“ nicht mehr erscheint. Dies kann bis zu 24h dauern.
Die Pumpe kann während des Aufladevorgangs verwendet
werden.
Hinweis: Ziehen Sie den Netzadapter erst heraus, wenn der
Aufladevorgang beendet ist.
19
Netzbetrieb/Akkubetrieb
Die Pumpe kann mit Netzadapter oder Akku betrieben werden.
Netzadapter-Symbol auf dem Display
Netzadapter in der Steckdose eingesteckt
Akkusymbol auf dem Display
Ladezustand des Akkus
Akkusymbol mit 4 Balken auf dem Display
Akku voll, ca. 3h Pumpdauer
Akkusymbol blinkt mit 1 Balken
20 min. Restdauer zum Abpumpen
Akku wurde aus Motoreinheit entnommen
Akkusymbol blinkt ohne Balken
Akku leer
"bAtt" blinkt
Erstes Aufladen
Aufladen nach Entnahme des Akkus
(bis 24h Ladezeit)
20
Vorsicht
Bei Missbrauch kann der Akku des Geräts ein Brand- oder Verätzungsrisiko darstellen.
Zerlegen Sie den Akku nicht, erhitzen und verbrennen Sie ihn nicht. Ersetzen Sie den Akku
nur durch den Artikel mit der Nummer 200.1512. Der Gebrauch eines anderen Akkus stellt
eine Brand- oder Explosionsgefahr dar. Für einen begrenzten Zeitraum kann der Akku im
Bereich folgender Temperaturen gelagert werden: -20° bis 50° C (-4° bis 140° F). Wenn
Sie den Akku über einen längeren Zeitraum lagern, dann nur in diesem Temperaturbereich:
0° bis 25° C (32° bis 77° F).
Entsorgen Sie defekte Akkus umgehend. Von Kindern fernhalten. Nicht zerlegen und nicht
verbrennen.
Hinweis
Nach 30 Minuten Bedienungspause schaltet sich Freestyle automatisch ab. Entfernen Sie
nicht den Akku aus der Motoreinheit. Bitte bedenken Sie, dass eine Entnahme des Akkus
eine Ladezeit von bis zu 24 Stunden erfordert!
Wie Sie das Pumpset
zusammensetzen
Setzen Sie die Membrane in
das Verbindungsstück ein.
Rasten Sie die durchsichtige
Befestigen Sie nun die
Kappe beim Verbindungsstück Brusthaube.
ein.
Schrauben Sie das
Verbindungsstück auf
die Flasche.
Für das beidseitige
Abpumpen schliessen
Sie den Schlauch an
beide Verbindungsstücke
und die Pumpe an.
Für ein einseitiges Abpumpen, stecken Sie den
unbenutzten Schlauch in die
Schlauchhalterung.
21
Wie Sie Ihre Freestyle verwenden
22
Nehmen Sie die Brusthaube
so an die Brust, dass die
Brustwarze im Tunnel der
Brusthaube gut zentriert ist.
Schalten Sie die Milchpumpe
durch Drücken der Taste 1 ein.
Nun startet die
Stimulationsphase.
Drücken Sie die Tasten 3/4,
um die Vakuumstärke
einzustellen.
Hinweis:
– Halten Sie die Flasche
gerade, wie auf dem Foto,
nicht am Verbindungsstück.
Überfüllen Sie diese nicht.
– Achten Sie darauf, den
Schlauch nicht zu knicken.
Sobald die Milch zu fliessen
beginnt, drücken Sie die Taste
2, um in die Abpumpphase
zu wechseln.
Hinweis: Nach zwei Minuten
wechselt die Pumpe automatisch in die Abpumpphase.
Zum Abspeichern Ihres individuellen Pumpprogramms,
drücken Sie die Taste 5 während der Abpumpphase für drei
Sekunden, bis die Anzeige auf dem Display blinkt und die
Pumpe drei Signaltöne abgibt. Beenden Sie das Abpumpen
wie gewohnt.
Um Ihre bevorzugte Einstellung zu aktivieren, starten Sie
die Pumpe und drücken danach die Taste 5.
Um eventuell einen weiteren Milchspendereflex zu erreichen, kann jederzeit zwischen
Stimulation und Abpumpen gewechselt werden.
Wenn das Abpumpen beendet ist, schalten Sie die Milchpumpe aus. Verwenden Sie
den Standfuss, um ein Umkippen der Flasche zu vermeiden.
Timer
Der Timer startet automatisch, wenn die Pumpe eingeschaltet wird.
Wenn Sie den Timer aus irgendeinem Grund während des Abpumpens neu starten
möchten, drücken Sie die Taste 2 und halten diese drei Sekunden lang gedrückt.
Hierdurch wird der Timer neu gestartet, Freestyle pumpt jedoch weiter.
Wie Sie die Muttermilch
aufbewahren
Medela empfiehlt, die folgenden Richtlinien für das Aufbewahren und Auftauen von
Muttermilch einzuhalten. Diese gelten für gesunde, termingeborene Babys.
Frisch abgepumpte
Muttermilch
Raumtemperatur
Kühlschrank
Tiefkühlfach
des Kühlschranks
Tiefkühltruhe
Nicht bei
Raumtemperatur
stehen lassen
3–5 Tage
bei 4°C
6 Monate
bei ca. -16°C
12 Monate bei
ca. -18°C
Aufgetaute Muttermilch Nicht
(vorher eingefroren)
aufbewahren
10 Stunden
Nicht wieder einfrieren
I Beim Einfrieren Milchflaschen/Beutel nur zu 3/4 füllen, um Platz für Ausdehnung
zu lassen.
I Gefrorene Milch nie im Mikrowellenofen oder in einem Topf mit kochendem Wasser
auftauen (Verbrennungsgefahr).
23
Störungen beheben
Störung
Lösung
Die Pumpe saugt zu
schwach oder gar nicht
Alle Verbindungen prüfen.
Kappe an den drei Verbindungspunkten korrekt einrasten.
Während des Abpumpens Brusthaube und nicht
Verbindungsstück halten.
Brusthaube korrekt zusammensetzen und gut anliegend an
die Brust nehmen.
Beim einseitigen Abpumpen unbenutzten Schlauch in die
Schlauchhalterung stecken. Schlauch nicht knicken.
Die Pumpe wird nass
Netzadapter aus der Steckdose ziehen.
Pumpe ausschalten.
Pumpe nicht auf den Kopf stellen, das Display muss nach
oben zeigen.
Pumpe 24 Stunden lang an einem trockenen und warmen
Ort aufbewahren.
24
Hinweis:
Pumpe nicht direktem Sonnenlicht aussetzen.
Trockenvorgang nicht durch Anwendung von Wärme
beschleunigen.
„Err“ + 3 Signaltöne
Kontaktieren Sie die Medela Vertretung oder
die Verkaufsstelle.
Das Netzadapter-Symbol
blinkt
Die Pumpe schaltet sich
nicht ein
Kontaktieren Sie die Medela Vertretung oder
die Verkaufsstelle.
Die Akkuanzeige blinkt
mit vier Balken
Kontaktieren Sie die Medela Vertretung oder
die Verkaufsstelle.
Garantie
In der Broschüre "Internationale Gewährleistung" finden Sie detaillierte Informationen
zur Garantie.
Entsorgung
Das Gerät besteht aus verschiedenen Metallen und Kunststoffen. Das Gerät ist vor
der Entsorgung unbrauchbar zu machen und sollte nicht als Hausmüll, sondern gemäss
lokalen Vorschriften entsorgt werden. Nutzen Sie am Wohnort eingerichtete Rückgabeund Sammelsysteme für die Entsorgung von elektrischen und elektronischen Geräten
(inkl. Akku). Die unsachgemässe Entsorgung kann schädliche Auswirkungen auf die
Umwelt und die Gesundheit haben.
... noch eine Frage ...
Hat die Brusthaube die richtige Grösse für mich?
... Jede Frau benötigt ihre individuelle Passform, darum bietet Medela fünf unterschiedliche
PersonalFit Brusthaubengrössen an.
Beantworten Sie unter
http://www.medela.com/DE/de/breastfeeding/good-to-know/right-size-of-breastshield.html
einige kurze Fragen, um festzustellen, ob die vorhandene Grösse passt.
Gibt es eine Möglichkeit freihändig abzupumpen?
Selbstverständlich. Mit dem Easy Expression Bustier können Sie während des Abpumpens
bequem Zeitung lesen.
Besuchen Sie unsere Website unter
www.medela.com/DE/de/breastfeeding/good-to-know/tips-hands-free-expression.html,
hier finden Sie detaillierte Informationen über die genaue Anwendung von Easy Expression
Bustier.
25
Medela vous remercie d’avoir fait l’acquisition du tire-lait Freestyle. Le lait maternel est le
meilleur aliment pour votre enfant, mais il existe de nombreuses raisons et circonstances
pour lesquelles l’allaitement au sein n’est pas possible. Depuis plus de 50 ans, l’objectif de
Medela, un des leaders sur le marché des tire-laits et accessoires pour l’allaitement, est de
soutenir le bien-être des mamans et de leur bébé. Medela a développé des tire-laits qui
répondent de façon optimale aux besoins des mamans allaitantes, en collaboration avec
des experts de l’allaitement et des chercheurs avant-gardistes. Pour les mamans qui ne
veulent que le meilleur pour elles et pour leur bébé. «Parce que cela vous touche».
Pourquoi Freestyle™?
26
Vous désirez gagner du temps tout en allaitant votre bébé sans renoncer à votre flexibilité
et votre mobilité ? Alors, Freestyle est la réponse à vos besoins.
Le double pompage et la technologie innovante d’expression à 2 phases augmentent le
débit de lait et permettent de pomper plus de lait en moins de temps. Vous pourrez
également régler l’intensité et la durée du pompage en fonction de vos besoins et à tout
moment mémoriser votre rythme personnel. Freestyle est facilement transportable partout
dans votre sac, devenant un compagnon indispensable, tant au travail que dans votre
temps libre.
Qu’est-ce-que la technologie d’expression à
2 phases (2-Phase Expression®)?
Medela est la première société au monde à avoir concentré
ses recherches sur le réflexe de succion du bébé pendant
l’allaitement au sein. Les résultats ont abouti au développement de la technologie d’expression à 2 phases. Cette
technologie se base sur le rythme naturel de succion du
bébé : les mouvements brefs et rapides (phase de stimulation)
sont suivis de mouvements plus longs et intenses (phase
d’expression), qui permettent d’obtenir un débit optimal du
lait. Le lait est ainsi exprimé plus rapidement, de manière
douce et efficace.
Mode d’emploi
Le tire-lait électrique Freestyle permet d’exprimer le lait maternel. Freestyle convient :
l pour réduire/surmonter les problèmes d’allaitement pouvant être liés à la maman ou
au bébé
– p our assurer l’alimentation d’enfants présentant une malformation orale,
d’enfants prématurés, malades ou atteints de problèmes neurologiques
– pour aider à faire ressortir les mamelons plats ou ombiliqués
– pour aider à soulager et réduire les crevasses des mamelons
– pour soulager les inflammations du sein
Précautions de sécurité
Lorsque vous utilisez un appareil électrique, il convient d’observer les précautions
de sécurité de base, y compris les suivantes : lire les instructions avant utilisation.
Produit
Maintenir l’appareil au sec et ne pas l’exposer à l’action directe des rayons du soleil.
Ne pas mouiller le produit.
Ne pas immerger ni laisser tomber le bloc-moteur dans l’eau ou tout autre liquide.
Ne pas vaporiser ou verser un liquide directement sur la pompe.
Contrôler l’éventuelle usure ou défectuosité des composants du kit de la pompe.
Le produit est destiné à un usage individuel. Son utilisation par plusieurs personnes
peut présenter un risque pour la santé.
l Le tire-lait Freestyle ne comporte aucune pièce qui peut être réparée par le client.
Ne tentez pas de réparer seul le tire-lait Freestyle.
l
l
l
l
l
l
Éléments électriques
l Utilisez exclusivement l’adaptateur ou la batterie fournis avec le tire-lait Freestyle.
l Assurez-vous que la tension de l’adaptateur soit compatible avec l’alimentation
électrique.
l Branchez préalablement l’adaptateur dans le tire-lait Freestyle, puis dans la prise
de courant.
l Débranchez les appareils électriques immédiatement après leur utilisation.
l Le débranchement du réseau n’est assuré que par le retrait de l’adaptateur de la prise de
courant.
l Gardez l’adaptateur loin des surfaces chaudes.
lNe tentez pas de récupérer un appareil électrique tombé dans l’eau.
Débranchez immédiatement la prise.
Utilisation
l Ne destinez le produit qu’à l’usage pour lequel il est prévu, tel que le décrit le
mode d’emploi.
l N’utilisez que les accessoires originaux Medela.
l N’utilisez jamais un appareil électrique si un câble ou une prise est endommagée,
s’il ne fonctionne pas bien, s’il est tombé ou abîmé ou s’il est tombé dans l’eau.
l Ce produit ne doit jamais être laissé sans surveillance lorsqu’il est branché à une
prise de courant.
l Ne l’utilisez pas à l’extérieur.
l N’utilisez pas le tire-lait pendant le bain ou la douche.
l Ne l’utilisez pas pendant que vous dormez ou lorsque vous êtes trop assoupie.
l Lors du pompage en fonction mains libres, ne vous mettez pas au volant d’une voiture.
l Une supervision est nécessaire si le produit est utilisé à proximité d’enfants.
lSi vous rencontrez des problèmes ou éprouvez des douleurs, il convient de consulter
votre conseiller en allaitement ou un médecin.
27
l Le produit ne doit pas être utilisé dans des zones à risques d’explosion.
l Ne pas utiliser l’appareil en présence d’un mélange anesthésique inflammable au contact
de l’air, d’oxygène ou d’oxyde nitreux.
l Les appareils de communication à radiofréquences, portables ou mobiles, peuvent
perturber le fonctionnement du tire-lait Freestyle.
l Le tire-lait Freestyle exige des précautions spéciales concernant la CEM (compatibilité
électromagnétique) et doit être installé et mis en service en conformité avec les
informations relatives à la CEM contenues dans le présent mode d’emploi.
GARDEZ CE MODE D’EMPLOI.
28
Comment nettoyer et stériliser
votre tire-lait Freestyle
Suivre les instructions suivantes. N’utilisez que de l’eau potable. Démonter et désassembler
toutes les pièces (sauf bloc moteur) du set d’accessoires du tire-lait (téterelle, tuyau,
valve/membrane, biberon…).
a
b
c
d
e
Éléments
f
a
b
i
h
j
c
d
e*
f
h
i
j
Nettoyer avant la première utilisation, puis 1 fois par jour.
Nettoyer manuellement à l’eau froide, puis à
l’eau chaude savonneuse, rincer à l’eau chaude.
Medela recommande également :
✓
✓
✓
✓
✓
✓
✓
✓
✓
dans une casserole, couvrir d’eau froide et
laisser bouillir pendant 5 min.
✓
✓
✓
✓
✓
✓
✓
✓
✓
ou de laver sur le panier supérieur du
lave-vaisselle
✓
✓
✓
✓
✓
✓
✓
✓
✓
ou d’utiliser un sachet pour micro-ondes
Quick Clean (désinfection vapeur)
✓
✓
✓
✓
–
✓
✓
✓
✓
Ou d’utiliser le stérilisateur à vapeur b-well
✓
✓
✓
✓
–
✓
✓
✓
✓
✓
✓
✓
✓
–
✓
✓
✓
✓
Nettoyage immédiat après chaque utilisation
Rincer manuellement à l’eau froide, puis à l’eau
chaude savonneuse, rincer à l’eau chaude.
*Uniquement s’il est sale
Remarque : les couleurs des aliments sont susceptibles de tâcher les éléments du tire-lait,
sans pour autant compromettre son fonctionnement.
Medela décline toute responsabilité en cas d’utilisation inappropriée ou contraire
aux indications.
Pour des informations plus détaillées, veuillez consulter le site www.medela.com
29
Comment préparer le
bloc-moteur de votre Freestyle
8
3
4
7
9
6
10
11
2
5
1
30
Ouvrir le compartiment de
la batterie dans le sens
de la flèche.
Boutons de commande
1 Bouton On / Off
2 Bouton d’extraction du lait
Bouton de réinitialisation du
programmateur
3 Bouton de réduction du vide (-)
4 Bouton d’augmentation du vide (+)
5 Bouton de mémoire
Affichage LCD
6 Programmateur
7 Indicateur de phase de stimulation
8 Indicateur de courant AC
9 Indicateur d’autonomie de la batterie
10 Indicateur de phase d’extraction
11 Indicateur de mémoire «on»
Insérer la batterie avec
l’indication «This side down»
orientée vers le bloc-moteur.
Fermer le compartiment.
Reliez l’adaptateur au réseau électrique.
Laissez-le en charge jusqu’à ce que l’indicateur (9) s’arrête de
clignoter et «bAtt» disparaisse de l’écran (jusqu’à 24h).
Le tire-lait peut être utilisé pendant la charge.
Attention : Ne débranchez pas l’adaptateur jusqu’à la charge
complète.
Fonctionnement électrique ou sur batterie
Le tire-lait peut fonctionner au courant électrique ou uniquement sur batterie.
Indicateur de courant (10) sur écran
Adaptateur relié au réseau électrique
Indicateur de charge (9) sur écran
Indique l’état de charge
Indicateur de charge à 4 barres sur écran
Batterie chargée, 3h d’autonomie de pompage
L’indicateur de charge à 1 barre clignote
20 min. d’autonomie de pompage La batterie
a été retirée
L’indicateur de charge clignote sans barre
Batterie déchargée
bAtt clignote
Première utilisation
Recharge après retrait de la batterie
(jusqu’à 24h pour recharger)
Attention
Si elle subit de mauvais traitements, la batterie utilisée dans cet appareil peut entraîner
un risque d’incendie ou de combustion chimique. Ne pas la démonter, la chauffer ou
l’incinérer.
Remplacer la batterie uniquement par l’article Medela 200.1512. L’utilisation d’une
batterie différente peut comporter un risque d’incendie ou d’explosion.
Conserver la batterie à une température de -20° à 50°C (-4° à 140°F) pendant une
durée limitée, de 0° à 25°C (32°F à 77°F) pendant une durée prolongée.
Évacuer dès que possible la batterie usagée. Tenir à distance des enfants. Ne pas
démonter et ne pas éliminer par le feu.
Remarque
Après 30 minutes sans aucune manipulation pendant l’usage, Freestyle s’éteint
automatiquement. Le retrait de la batterie exige une recharge jusqu’à 24h.
31
Comment assembler votre tire-lait
Freestyle
Insérer la membrane dans
le connecteur.
Presser le capuchon
transparent sur le connecteur.
Insérer la téterelle.
Visser le connecteur
au biberon.
Pour un double pompage,
relier le tuyau au connecteur
et au bloc-moteur.
En cas de pompage simple,
placer le tube non utilisé dans
le support du tube.
32
Comment utiliser votre Freestyle
Centrer le mamelon dans le
conduit de la téterelle.
– Tenir le biberon en position
verticale, comme sur la
photo.
Ne pas le remplir trop.
– Éviter de tordre le tuyau.
Appuyer sur le bouton 1.
Le tire-lait commencera à
aspirer dans la phase de
stimulation.
Appuyer sur le bouton 3 ou 4
pour régler le niveau de vide.
Lorsque le lait commence
à s’écouler, appuyer sur le
bouton 2 pour passer à la
phase d’expression.
Après 2 minutes, le tire-lait
passe automatiquement à
la phase d’expression.
Pour mémoriser la dernière session de pompage
appuyer sur le bouton 5 pendant trois secondes lors de la
phase d’expression jusqu’à ce que l’indicateur 11 clignote
et que la pompe émette trois bips. Terminer la session de
pompage en mode normal.
Pour reproduire la session mémorisée,
appuyer sur le bouton 1, puis 5.
33
Si vous le désirez, vous pouvez à tout moment passer de la phase de stimulation à la
phase d’expression et vice versa. Dès que le pompage est terminé, éteindre le tire-lait.
L’écran reste allumé quelques secondes. Utiliser le support du biberon pour éviter de
le renverser.
Programmateur
Le programmateur démarre automatiquement à l’allumage de la pompe.
Pour relancer le programmateur pendant une session de pompage, appuyer sur le
bouton 2 et le maintenir pendant 3 secondes.
Ceci permet de relancer le programmateur, pendant que le tire-lait Freestyle continue
de pomper.
34
Comment conserver
le lait maternel
Medela recommande d’observer les indications suivantes pour la conservation et la
décongélation du lait maternel. Ces conseils sont valables pour les enfants en bonne
santé nés à terme.
Température
ambiante
Réfrigérateur
Compartiment
congélateur du
réfrigérateur
Congélateur
Lait maternel fraîchement Ne pas laisser à de 3 à 5 jours 6 mois à environ 12 mois à
recueilli
température
à 4°C
-16°C
-18°C
ambiante
Lait maternel décongelé
(précédemment congelé)
Ne pas
conserver
10 heures
Ne pas recongeler
l Lors de la congélation, ne pas remplir le biberon ou les sachets à plus des ¾ afin de
laisser de la place pour la dilatation du lait.
l Ne pas décongeler le lait maternel dans un four à micro-ondes ni dans une casserole
d’eau bouillante (risque de brûlure).
Résolution des problèmes
Panne
Solution
Le tire-lait est faible ou
ne pompe pas
Vérifier toutes les connexions.
Bien raccorder le capuchon transparent aux trois points de
connexion.
Pendant l’usage, tenir le biberon à partir de la téterelle et non
pas du connecteur.
Assembler correctement la téterelle, la faire adhérer au sein.
Insérer le tuyau non utilisé dans son support.
Ne pas plier le tuyau.
Le tire-lait est mouillé
Débrancher la fiche de la prise.
Éteindre le tire-lait.
Positionner le bloc-moteur avec l’écran vers le haut.
Conserver l’appareil dans un lieu sec et chaud pendant 24h.
Ne pas exposer l’appareil à la lumière directe du soleil.
Ne pas tenter d’accélérer le processus de séchage à l’aide
d’une source de chaleur.
„Err“ + 3 bips
Contactez votre distributeur Medela ou votre point d’achat.
Le symbole de
l’adaptateur de réseau
clignote La pompe ne
s’allume pas
Contactez votre distributeur Medela ou votre point d’achat.
L’indicateur de charge
à 4 barres clignote
Contactez votre distributeur Medela ou votre point d’achat.
35
Garantie
Les informations détaillées relatives à la garantie se trouvent dans le livret
« Garantie internationale ».
Elimination des déchets
L’ensemble est constitué de divers éléments en métal et en plastique. Avant son
élimination, l’appareil doit être rendu inutilisable et ne doit pas être jeté avec les
ordures ménagères, conformément aux réglementations locales. Utilisez le système
local pour la récupération et la collecte d’appareils électriques et électroniques usagés
(y compris les piles). L’élimination incorrecte des déchets peut avoir des effets nocifs
sur l’environnement et la santé publique.
... Encore une question...
36
La taille de la téterelle me convient-elle ?
... Chaque femme présente une forme de sein personnelle, c’est pour cette raison que
Medela offre cinq tailles différentes de téterelles PersonalFit. Sur le site
http://www.medela.com/FR/fr/breastfeeding/good-to-know/right-size-of-breastshield.html,
vous trouverez les indications nécessaires pour choisir la bonne taille, en répondant à
une simple question.
Est-il possible de pomper en mode mains libres ?
Certainement. Avec le bustier Easy Expression, vous pourrez aisément lire votre journal
préféré pendant la séance de pompage.
Visitez notre site
www.medela.com/FR/fr/breastfeeding/goo-to-know/tips-hands-free-expression.html,
vous y trouverez les informations détaillées pour une utilisation correcte du bustier Easy
Expression.
Medela La ringrazia per aver acquistato il tiralatte Freestyle. Il latte materno è la scelta
naturale per il suo bambino, ma in alcuni casi non è possibile allattare al seno. Medela
si impegna a supportare queste madri e questi bambini da più di 50 anni. In stretta
cooperazione con gli esperti dell’allattamento al seno, Medela, leader del mercato, ha
condotto delle ricerche per sviluppare tiralatte che soddisfino pienamente le esigenze
delle mamme. Per madri che vogliono il meglio per i loro bambini e per loro stesse.
«Perché per te è importante».
Perchè Freestyle™?
Se desidera risparmiare tempo e comunque allattare il suo bambino senza rinunciare
alla sua flessibilità e mobilità, allora Freestyle è la risposta ai suoi bisogni.
Il doppio pompaggio e l’innovativa tecnologia 2-Phase Expression aumentano il flusso di
latte e rendono possibile pompare più latte in meno tempo. Inoltre Lei potrà regolare
l’intensità e la durata del pompaggio ai propri bisogni e in ogni momento memorizzare
il suo personale ritmo. Freestyle si lascia trasportare comodamente e ovunque nella sua
comoda borsa, diventando un inseparabile compagno - al lavoro come nel tempo libero.
Che cosa è 2-Phase Expression®?
Medela è stata la prima società al mondo a concentrare
la ricerca sulla suzione del bimbo durante l’allattamento
al seno. I risultati hanno portato allo sviluppo della tecnologia 2-Phase Expression. Questa tecnologia si basa sul
naturale ritmo di suzione del bimbo: a movimenti brevi e
stimolanti (fase di stimolazione), seguono movimenti più
lunghi e intensivi (fase di estrazione), che provvedono ad
un ottimale flusso del latte. Così in modo piacevole viene
pompato più latte in minor tempo.
Istruzioni per l’uso
Il tiralatte elettrico Freestyle serve a pompare latte materno. Freestyle è adatto:
I per alleviare/superare problemi di allattamento da parte della mamma o del bimbo
– p er assicurare l’alimentazione ai bambini con una malformazione orale, bambini
pre-termine, bambini malati o con problemi neurologici
– per far fuoriuscire capezzoli piatti o rientrati
– per alleviare ferite e capezzoli sanguinanti
– per alleviare infiammazioni al seno
37
Misure di sicurezza
Quando si usano gli apparecchi elettrici, occorre sempre osservare le precauzioni
basilari di sicurezza, comprese le seguenti: Leggere le istruzioni prima dell’uso.
Prodotto
Mantenere l’apparecchio asciutto e non esporlo all’azione diretta dei raggi solari.
Non bagnare il prodotto.
Non mettere o non far cadere in acqua o altro liquido l’unità motore.
Non spruzzare o versare liquidi direttamente sulla pompa.
Controllare eventuale usura o danni dei componenti del kit della pompa.
Il prodotto è destinato all’uso individuale. L’uso da parte di più persone può esporre
a rischi per la salute.
I Nel tiralatte Freestyle non vi sono parti riparabili dal cliente. Non tentare di riparare
da soli il tiralatte Freestyle.
I
I
I
I
I
I
Elementi elettrici
Usare solo il trasformatore o la batteria forniti con il tiralatte Freestyle.
Assicurarsi che la tensione del trasformatore sia compatibile con l’alimentazione elettrica.
Collegare il trasformatore prima nel tiralatte Freestyle e poi nella presa di corrente.
Staccare gli apparecchi elettrici subito dopo l’uso.
Il distacco dalla rete è assicurato solo dall’estrazione del trasformatore dalla presa
di corrente.
I Tenere il trasformatore lontano da superfici riscaldate.
INon cercare di raccogliere un apparecchio elettrico caduto in acqua. Staccate subito
la spina.
I
I
I
I
I
38
Uso
I Usare il prodotto solo per l’uso a cui è destinato, descritto nel manuale di istruzioni.
I Utilizzare solamente accessori originali Medela.
I Non usare mai un apparecchio elettrico se ha un cavo o una spina danneggiati,
se non funziona bene, se è caduto o danneggiato o se è caduto in acqua.
I Il prodotto non deve mai essere lasciato incustodito mentre è collegato ad una presa
di corrente.
I Non utilizzare all’aperto.
I Non usare il tiralatte durante il bagno o la doccia.
I Non usarlo mentre dorme o è troppo assopita.
I Durante il pompaggio a mani libere non mettersi alla guida dell’automobile.
I È necessaria una supervisione se il prodotto viene usato in prossimità di bambini.
ISe compaiono problemi o dolori, consultare il vostro consulente per l’allattamento
o un medico.
I Il prodotto non deve essere utilizzato in aree a rischio di esplosione.
I Equipaggiamento da non utilizzarsi in presenza di miscele infiammabili anestetiche con
aria oppure ossigeno oppure ossido nitroso.
I Gli apparecchi di comunicazione a radiofrequenza, portatili o mobili, possono disturbare
il tiralatte Freestyle.
I Il tiralatte Freestyle richiede precauzioni speciali riguardanti l’EMC, e deve essere
installato e messo in servizio in conformità alle informazioni sull’EMC contenute
in queste istruzioni per l’uso.
CONSERVATE QUESTO MANUALE D’ISTRUZIONI.
39
Come pulire e sterilizzare il suo
tiralatte Freestyle
Seguire le seguenti istruzioni. Usare solo acqua potabile. Smontare tutte le parti del kit.
a
b
c
e
d
Componenti
f
a
i
h
j
b
c
d
e *
f
h
i
j
Pulizia prima del primo impiego, 1 volta/giorno.
40
Lavare a mano con acqua fredda, poi con
acqua calda saponata, risciacquare con
acqua calda. Medela consiglia inoltre:
✓
✓
✓
✓
✓
✓
✓
✓
✓
in una casseruola coprire con
acqua fredda e bollire per 5 min.
✓
✓
✓
✓
✓
✓
✓
✓
✓
o lavare nel cestello superiore
della lavastoviglie
✓
✓
✓
✓
✓
✓
✓
✓
✓
o con sacca per microonde
Quick Clean
✓
✓
✓
✓
–
✓
✓
✓
✓
o con sterilizzatore a vapore b-well
✓
✓
✓
✓
–
✓
✓
✓
✓
✓
✓
✓
✓
–
✓
✓
✓
✓
Pulizia subito dopo ogni impiego
Lavare a mano con acqua fredda,
poi con acqua calda saponata,
risciacquare con acqua calda.
*Solo se sporco
Nota: le colorazione dei cibi possono scolorire i componenti senza comprometterne
il funzionamento.
Medela non assume alcuna responsabilità per un uso sbagliato delle indicazioni.
Informazioni più dettagliate si trovano sul sito www.medela.com
Come preparare l’unità motore
del suo Freestyle
8
3
4
7
9
6
10
Tasti di comando
1 Tasto On / Off
2 Tasto estrazione latte
Tasto reset timer
3 Tasto riduzione vuoto (-)
4 Tasto aumento vuoto (+)
5 Tasto Memory
11
2
5
1
Display LCD
6 Timer
7 Indicatore
8 Indicatore
9 Indicatore
10 Indicatore
11 Indicatore
Fase di stimolazione
corrente AC
autonomia batteria
Fase di estrazione
Memory «on»
Aprire lo scomparto della
batteria in direzione della
freccia.
Inserire la batteria con
l’indicazione „This side down“
orientata verso l’unità motore.
Chiudere lo scomparto.
Collegare l’adattatore alla rete elettrica.
Lasciarlo in carica finchè l’indicatore (9) non smette di
lampeggiare e "bAtt" sparisce dal Display (fino a 24h).
Il tiralatte può essere usato durante la carica.
Attenzione: Non scollegare l’adattatore fino al completamento
della carica.
41
Funzionamento elettrico o con la batteria
Il tiralatte può funzionare a corrente elettrica o solo con la batteria.
42
Indicatore corrente (10) sul Display
Adattatore collegato alla rete elettrica
Indicatore di carica (9) sul Display
Indica lo stato di carica
Indicatore di carica con 4 barre sul Display
Batteria carica, 3h di autonomia
per pompaggio
Indicatore di carica con 1 barra lampeggia
20min. di autonomia per pompaggio
Batteria è stata rimossa
Indicatore di carica senza barre lampeggia
Batteria scarica
bAtt lampeggia
Primo utilizzo
Ricaricamento dopo rimozione della batteria
(fino a 24h per ricaricare)
Attenzione
Se maltrattata, la batteria utilizzata in questo dispositivo può comportare un rischio
di incendio odi combustione chimica. Non smontarla, riscaldarla o incenerirla.
Sostituire la batteria solo con l’articolo Medela 200.1512. L’utilizzo di una batteria
diversa può comportare il rischio di incendio o di esplosione.
Conservare la batteria ad una temperatura tra -20° a 50°C (- 4° a 140° F) per un periodo
di tempo limitato, tra da 0° a 25°C (32°F e 77°F ) per un periodo di tempo prolungato.
Smaltire quanto prima la batteria utilizzata. Tenere lontano dai bambini. Non smontare
e non smaltire utilizzando il fuoco.
Nota
Dopo 30 minuti senza alcuna manipolazione durante l’utilizzo, Freestyle si spegne
automaticamente. La rimozione della batteria comporta una ricarica fino a 24h.
Come assemblare il suo Freestyle
Inserire la membrana nel
connettore.
Far scattare il cappuccio
trasparente sul connettore.
Inserire la coppa per il seno.
Avvitare il connettore al
poppatoio.
Per un doppio pompaggio
collegare il tubicino ad
entrambi i connettori e
all’unità motore.
In caso di pompaggio singolo,
posizionare il tubicino non
usato nella sede del tubo.
43
Come usare il suo Freestyle
44
Centrare il capezzolo nel condotto della coppa del seno.
– Tenere il poppatoio dritto
come nella foto.
Non riempirlo troppo.
– Evitare di attorcigliare
il tubicino.
Premere il tasto 1.
Il tiralatte inizierà ad aspirare
nella fase di stimolazione.
Appena il latte comincia a
defluire, premere il tasto 2
per passare alla fase di
estrazione.
Dopo 2 min. il tiralatte passa
automaticamente alla fase
di estrazione.
Per memorizzare l’ultima sessione di pompaggio
premere il tasto 5 per tre secondi durante la fase di estrazione
fino a quando l’indicatore 11 lampeggia e la pompa emette
tre bip. Terminare la sessione di pompaggio come normale.
Per riprodurre la sessione memorizzata premere il
tasto 1 e poi il 5.
Premere il tasto 3/4 per
regolare il livello di vuoto.
Se si desidera, si può in ogni momento passare dalla fase di stimolazione a quella di
estrazione e viceversa. Terminato il pompaggio, spegnere il tiralatte, il display rimane
acceso per pochi secondi. Usare il supporto del poppatoio per evitare ribaltamenti.
Timer
Il timer parte automaticamente all’accensione della pompa.
Per riavviare il timer nel corso di una sessione di pompaggio, premere
il tasto 2 e mantenetelo premuto per 3 secondi.
Questo comporta il riavvio del timer, mentre il tiralatte Freestyle continua il pompaggio.
Come conservare il latte materno
Medela consiglia di osservare le seguenti indicazioni per la conservazione e il
decongelamento del latte materno. Queste sono valide per i bambini sani nati a termine.
Latte materno appena
estratto
Latte materno scongelato
(in precedenza congelato)
Temperatura
ambiente
Frigorifero
Scomparto
congelatore
del frigorifero
Congelatore
Non lasciare
a temperatura
ambiente
3-5 giorni
a 4°C
6 mesi
a ca.-16°C
12 mesi
a -18°C
Non conservare 10 ore
Non ricongelare
I Nel congelare non riempire i poppatoi/le sacche per più di ¾, in modo da lasciare
spazio per la dilatazione.
I Non scongelare il latte materno in un forno a microonde né in una pentola di acqua
bollente (pericolo di bruciature).
45
Risoluzione dei problemi
46
Difetto
Soluzione
Il tiralatte è debole o
non pompa
Assicurare tutte le connessioni.
Collegare bene il cappuccio trasparente nei tre punti di
connessione.
Durante l’uso tenere il poppatoio dalla coppa per il seno
e non dal connettore.
Assemblare correttamente la coppa, farla aderire bene
al seno.
Inserire il tubicino non usato nella sua sede.
Non piegare il tubicino.
Il tiralatte è bagnato
Staccare la spina dalla presa.
Spegnere il tiralatte.
Posizionare l’unità motore con il display verso l’alto.
Tenere l’apparecchio in un luogo asciutto e caldo per 24h.
Non esporre l’apparecchio alla luce diretta del sole.
Non cercare di accelerare il processo di asciugatura
con fonti di calore.
„Err“ + 3 pips
Contattare il distributore Medela o il negozio di acquisto.
Simbolo dell’adattatore
di rete lampeggia
La pompa non si accende
Contattare il distributore Medela o il negozio di acquisto.
Indicatore di carica
con 4 barre lampeggia
Contattare il distributore Medela o il negozio di acquisto.
Garanzia
Informazioni dettagliate in merito alla garanzia si trovano nel libretto
“Garanzia Internazionale”.
Smaltimento
Questo prodotto è conforme alla Direttiva EU 2002/96/EC
Il simbolo del cestino barrato riportato sull’apparecchio indica che il prodotto, alla fine
della propria vita utile, dovendo essere trattato separatamente dai rifiuti domestici , deve
essere conferito in un centro di raccolta differenziata per apparecchiature elettriche ed
elettroniche oppure riconsegnato al rivenditore al momento dell’acquisto di una apparecchiatura equivalente. L’utente è responsabile del conferimento dell’apparecchio a fine vita
alle appropriate strutture di raccolta. L’adeguata raccolta differenziata per l’avvio successivo dell’apparecchio dismesso al riciclaggio, al trattamento e allo smaltimento ambientalmente compatibile contribuisce ad evitare possibili effetti negativi sull’ambiente e sulla
salute e favorisce il riciclo dei materiali di cui è composto il prodotto.
Lo smaltimento abusivo del prodotto da parte dell’utente comporta delle sanzioni
amministrative di cui al D.lgs. n.22/1997 ( art. 50 e seguenti del D.lgs 22/97).
Per informazioni più dettagliate inerenti i sistemi di raccolta disponibili, rivolgersi al
servizio locale di smaltimento rifiuti, o al negozio in cui è stato effettuato l’acquisto.
... Ancora una domanda ...
La coppa per il seno è della misura giusta per me?
... Ogni donna ha una forma del seno tutta personale, per questo Medela offre
cinque misure diverse di coppa per il seno PersonalFit.
Risponda ad un breve questionario sul sito
http://www.medela.com/IT/it/breastfeeding/good-to-know/right-size-of-breastshield.html
per verificare se la coppa per il seno a disposizione è della misura giusta.
È possibile pompare a mani libere?
Certamente. Con il Corpetto Easy Expression potrà comodamente leggere il suo giornale
preferito durante la sessione di pompaggio.
Visiti il nostro sito
www.medela.com/IT/it/breastfeeding/good-to-know/tips-hands-free-expression.html,
troverà le informazioni dettagliate per il corretto uso del Corpetto Easy Expression.
47
Hartelijk dank dat u voor de Freestyle borstkolf hebt gekozen. Moedermelk is het beste
voor uw baby, maar er zijn situaties waarin borstvoeding geven niet altijd mogelijk is.
Als een van de marktleiders op dit gebied zet Medela zich al meer dan 50 jaar vol
overtuiging in voor het welzijn van baby’s en moeders. In samenwerking met deskundigen
op het gebied van borstvoeding en vooraanstaande onderzoekers heeft Medela borstkolven ontwikkeld die optimaal zijn afgestemd op de behoeften van vrouwen die borstvoeding geven. Voor moeders die het beste voor hun baby en zichzelf willen. „Uit liefde“.
Waarom Freestyle™?
Wilt u tijd besparen en toch uw baby uitsluitend met moedermelk voeden en hierbij flexibel
en mobiel blijven? De Freestyle is precies wat u nodig hebt.
Het dubbel afkolven en de innovatieve 2-Phase Expression technologie verhogen de
melkstroom en zorgen ervoor dat u in een kortere tijd, efficiënter meer melk kunt afkolven.
U kunt bovendien de vacuüminstellingen en het ritme aan uw individuele behoeften
aanpassen en op elk gewenst moment opslaan, zodat bij de volgende kolfsessie
automatisch uw persoonlijke instellingen worden gebruikt. De Freestyle kunt u daarnaast
gemakkelijk overal mee naartoe nemen en wordt al gauw een onmisbaar maatje voor op
het werk en in uw vrije tijd.
Wat is 2-Phase Expression®?
Als eerste ter wereld heeft Medela het drinkgedrag van
baby’s aan de moederborst door middel van jarenlange
onderzoeken geïntegreerd in de 2-Phase Expression
technologie. Deze technologie is gebaseerd op het natuurlijke zuigritme van de baby: een snel, stimulerend zuigritme
(stimulatiefase) wordt gevolgd door langzamer, intensiever
zuigen (afkolffase), dat voor een optimale melkstroom
zorgt. Zo kan op comfortabele wijze meer melk worden
afgekolfd in minder tijd. Borstkolven die met deze technologie zijn uitgerust worden 2-Fase borstkolven genoemd.
Beoogd gebruik
48
De elektrische borstkolf Freestyle is bedoeld voor het afkolven van moedermelk.
Freestyle is geschikt:
I Om borstvoedingsproblemen bij moeder of kind te verminderen of te verhelpen.
– O m de voeding van kinderen met orale aangeboren afwijkingen, vroeggeborenen,
kinderen met neurologische problemen of zieke kinderen mogelijk te maken.
– Om platte en ingetrokken tepels naar buiten te halen
– Om pijnlijke of bloedende tepels te ontzien
– Voor verlichting bij een borstontsteking
Belangrijke veiligheidsinstructies
Bij het gebruik van elektrische apparaten moeten altijd de fundamentele voorzorgsmaatregelen in acht worden genomen wat betreft uw veiligheid. Dit betekent ook dat u
vóór gebruik alle instructies dient te lezen.
Product
Het apparaat droog houden en niet blootstellen aan direct zonlicht.
Het apparaat niet nat laten worden.
De motor niet in water of andere vloeistoffen leggen of laten vallen.
Geen vloeistof direct op de pomp spatten of gieten.
De onderdelen van de pompset op slijtage of beschadiging controleren.
Dit product is slechts voor één gebruiker bestemd. Gebruik door meerdere personen
kan een gezondheidsrisico inhouden.
I Freestyle bevat geen onderdelen die door de klant gerepareerd kunnen worden.
Probeer de pomp niet zelf te repareren.
I
I
I
I
I
I
Elektrische onderdelen
I Gebruik uitsluitend de bij de Freestyle borstkolf meegeleverde netstroomadapter of accu.
I Zorg ervoor dat de spanning van de netstroomadapter overeenstemt met de stroombron.
I De netstroomadapter eerst op de Freestyle borstkolf aansluiten en dan pas in het stopcontact steken.
I Elektrische apparaten na gebruik altijd loskoppelen van het lichtnet.
I U koppelt het apparaat los van het lichtnet door de stekker van de netstroomadapter uit
het stopcontact te halen.
I De netstroomadapter uit de buurt van hete oppervlakken houden.
I Nooit naar een in het water gevallen elektrisch apparaat grijpen zonder eerst de
netstroomadapter uit het stopcontact te trekken.
Gebruik
I Het product uitsluitend gebruiken voor het in deze gebruiksaanwijzing beschreven
beoogde gebruik.
I Uitsluitend originele toebehoren van Medela gebruiken.
I Een elektrisch apparaat nooit inschakelen wanneer de netstroomadapter beschadigd is,
wanneer het apparaat niet goed functioneert, wanneer het op de grond of in het water
gevallen is of wanneer het beschadigd is geraakt.
I Het apparaat nooit zonder toezicht achterlaten, indien het op een stroombron
aangesloten is.
I Het apparaat is niet geschikt voor buitengebruik.
I Niet bij het baden of douchen gebruiken.
I Apparaat niet gebruiken wanneer u slaapt of erg moe bent.
I Tijdens het afkolven zonder handen mag u geen auto rijden.
I Bij gebruik van dit product in de buurt van kinderen voldoende toezicht houden op het
apparaat.
49
I Indien problemen of pijn optreden, contact opnemen met uw borstvoedingsdeskundige
of arts.
I Het apparaat is niet geschikt voor gebruik op plaatsen waar explosiegevaar bestaat.
I Apparaat niet gebruiken in de buurt van brandbare anesthesiemengsels met lucht,
zuurstof of stikstofoxiden.
I Draagbare en mobiele communicatieapparaten die gebruik maken van radiogolven
kunnen de Freestyle-borstkolf beïnvloeden.
I De borstkolf Freestyle vereist speciale voorzorgsmaatregelen in verband met de
elektromagnetische compatibiliteit (EMC) en moet volgens de in deze gebruikshandleiding opgenomen EMC-gegevens worden geïnstalleerd en in bedrijf genomen.
BEWAAR DEZE GEBRUIKSHANDLEIDING ZORGVULDIG.
50
Zo reinigt u de accessoires van
de Freestyle
Neem de volgende instructies in acht en gebruik uitsluitend water van drinkwaterkwaliteit.
Haal vóór het reinigen alle onderdelen uit elkaar.
a
b
c
d
Onderdelen
e
a
f
b
c
i
h
d
j
e *
f
h
i
j
Reiniging voor het eerste gebruik en daarna eenmaal dagelijks
Met de hand met koud water afspoelen;
met warm zeepsop reinigen; met
schoon, heet water afspoelen. Daarnaast
beveelt Medela het volgende aan:
✓
✓
✓
✓
✓
✓
✓
✓
✓
in een pan met koud water onderdompelen en gedurende 5 min. uitkoken.
✓
✓
✓
✓
✓
✓
✓
✓
✓
of reinigen in het bovenste rek van de
vaatwasmachine
✓
✓
✓
✓
✓
✓
✓
✓
✓
of met Quick Clean Magnetronzakken
✓
✓
✓
✓
–
✓
✓
✓
✓
of met de B-well stoomsterilisator
✓
✓
✓
✓
–
✓
✓
✓
✓
✓
✓
✓
✓
✓
✓
✓
✓
✓
Direct na ieder gebruik reinigen
Met de hand met koud water afspoelen;
met warm zeepsop reinigen; met
schoon, heet water afspoelen.
* Alleen reinigen als de onderdelen vies zijn
Let op: kleurstoffen van levensmiddelen kunnen onderdelen doen verkleuren, maar dit
heeft geen invloed op de werking.
Medela is niet aansprakelijk voor de gevolgen van ongeschikte reinigingsmethoden.
Gedetailleerde reinigingsinstructies vindt u op: www.medela.com
51
De borstkolf voorbereiden
8
3
4
7
9
6
10
Knoppen
1 Aan-/uit-knop
2 Knop om mee van Fase te wisselen
Reset-knop voor timer
3 Knop om vacuüm te verminderen
4 Knop om vacuüm te verhogen
5 Geheugenknop
11
2
5
1
Om de accu te plaatsen,
opent u het accuvak in de
richting van de pijl.
52
Lcd-display
6 Timer
7 Indicatie stimulatiefase
8 Stroomindicatielampje
9 Accustatus
10 Indicatie afkolffase
11 Indicatie Memory „on“
Plaats de accu in het apparaat. Hierbij moet de zin
„This side down“ in de richting
van de pomp wijzen.
Sluit het accuvak.
Sluit de netstroomadapter op een stopcontact aan totdat het
accustatuslampje (9) ophoudt te knipperen en op het display
de melding „bAtt“ verdwijnt. Dit kan tot 24 uur duren.
De kolf kan tijdens het opladen worden gebruikt.
Let op: koppel de netstroomadapter pas los als het oplaadproces is voltooid.
Gebruik met netstroom/accu
De kolf kan met de netstroomadapter of de accu worden gebruikt.
Netstroomadaptersymbool op het display
Netstroomadapter aangesloten op
het stopcontact
Accusymbool op het display
Oplaadstatus van de accu
Accusymbool met 4 balkjes op het display
Accu vol, ca. 3 uur onafgebroken gebruik
Accusymbool knippert met 1 balkje
20 min. Resterende duur voor het afkolven
Accu is uit motoreenheid verwijderd
Accusymbool knippert zonder balkjes
Accu leeg
„bAtt“ knippert
Eerste keer opladen
Opladen na verwijdering van accu
(oplaadtijd tot 24 uur)
Let op
Verkeerd gebruik van de accu van dit apparaat kan tot brand- of letselrisico leiden.
U mag de accu niet demonteren, verwarmen of verbranden. Vervang de accu alleen door
het artikel met artikelnummer 200.1512 Het gebruik van een andere accu kan tot brandof explosiegevaar leiden. De accu kan gedurende een beperkte periode worden bewaard
bij de volgende temperaturen: -20° tot 50° C (-4° tot 140° F). Wanneer u de accu
gedurende een langere periode bewaart, dient u de volgende temperaturen aan te
houden: 0° tot 25° C (32° tot 77° F).
Verwijder defecte accu’s onmiddellijk. Uit de buurt van kinderen houden.
Niet demonteren en niet verbranden.
Opmerking:
wanneer de Freestyle gedurende 30 minuten niet gebruikt is, schakelt het apparaat
automatisch uit. Verwijder de accu niet uit de motoreenheid. Houd er rekening mee dat de
accu na verwijderd te zijn geweest, wel opnieuw tot 24 uur lang opgeladen moet worden!
53
De pompset in elkaar zetten
54
Plaats de membranen in
de connector.
Klik de transparante kap in
de connector vast.
Bevestig nu het borstschild.
Schroef de connector op
het melkflesje.
Voor dubbel afkolven (twee
borsten tegelijk), sluit u de
slang op beide connectors en
de motor aan.
Voor enkel afkolven (één
borst tegelijk), steekt u de
ongebruikte slang in de
slanghouder.
Het gebruik van de Freestyle
Plaats het borstschild zo aan
de borst dat de tepel zich
goed in het midden van de
tunnel van het borstschild
bevindt.
Schakel de borstkolf in door
op knop 1 te drukken.
Nu begint de stimulatiefase.
Druk op knop 3/4 om de
vacuümsterkte in te stellen.
Let op:
– houd het flesje rechtop,
zoals op de foto, niet aan de
connector. Het flesje mag
niet te vol gekolfd worden.
– Zorg ervoor dat de slang
tijdens afkolven niet kan
knikken.
Zodra de melk begint te
stromen op knop 2 drukken
om naar de afkolffase over
te schakelen.
Let op: na 2 minuten schakelt
de borstkolf automatisch over
naar de afkolffase.
Als u uw individuele kolfprogramma wilt opslaan,
drukt u tijdens de afkolffase gedurende drie seconden op
knop 5, totdat de indicator op het display knippert en de kolf
drie signaaltonen geeft. Beëindig het afkolven zoals gewoonlijk.
Om uw voorkeursinstelling te activeren,
start u de borstkolf en drukt u daarna op knop 5.
55
Om eventueel nog een toeschietreflex op te wekken, kunt u op elk gewenst moment tussen
de stimulatiefase en de afkolffase wisselen.
Als het afkolven is beëindigd, zet u de borstkolf uit. Gebruik de flesstandaard om te
voorkomen dat het flesje omvalt.
Timer
De timer start automatisch als de borstkolf wordt ingeschakeld.
Als u de timer om een of andere reden tijdens het kolven opnieuw wilt starten,
drukt u op knop 2 en houdt u deze gedurende drie seconden ingedrukt.
Hierdoor wordt de timer opnieuw gestart, de Freestyle blijft echter kolven.
De moedermelk bewaren
Medela adviseert de volgende richtlijnen aan te houden voor het bewaren en ontdooien van
moedermelk. Deze gelden voor gezonde, à terme geboren baby’s.
56
Kamertemperatur
Koelkast
Vriesvak van
de koelkast
Diepvriezer
Vers afgekolfde
moedermelk
Niet bij kamertemperatuur
laten staan
3–5 dagen
bij 4 °C
6 maanden bij
ca. -16 °C
12 maanden bij
ca. -18 °C
Ontdooide moedermelk
(voorheen ingevroren)
Niet bewaren
10 uur
Niet opnieuw invriezen
I Bij invriezen melkflessen/zakjes maar voor 3/4 vullen om ruimte te laten voor uitzetten.
I Bevroren melk nooit in de magnetron of in een pan met kokend water ontdooien
(verbrandingsgevaar).
Storingen verhelpen
Storing
Oplossing
De borstkolf zuigt te zwak
of helemaal niet
Alle verbindingen controleren.
Kap op de drie verbindingspunten correct vastklikken.
Tijdens het kolven houdt u het borstschild en niet de
connector vast.
Borstschild correct in elkaar zetten en goed laten aansluiten
op de borst.
Tijdens enkel afkolven, steekt u de ongebruikte slang in de
slanghouder. Slang niet knikken.
De borstkolf wordt nat
Netstroomadapter uit het stopcontact halen.
Borstkolf uitschakelen.
Borstkolf niet op de kop zetten, het display moet naar boven
wijzen.
Bewaar de borstkolf gedurende 24 uur op een droge en
warme plaats.
Let op:
borstkolf niet blootstellen aan direct zonlicht.
Het drogen mag niet door inwerking van warmte
worden versneld.
„Err“ + 3 signaaltonen
Neem contact op met de winkel waar u de borstkolf
hebt gekocht.
Het netstroomadaptersymbool knippert
De borstkolf schakelt
zich niet in
Neem contact op met de winkel waar u de borstkolf
hebt gekocht.
De accuweergave knippert met vier balkjes
Neem contact op met de winkel waar u de borstkolf
hebt gekocht.
57
Garantie
In de brochure „Internationale garantie“ vindt u gedetailleerde informatie over de garantie.
Verwijdering als afval
Het apparaat bestaat uit verschillende metalen en kunststoffen. Het apparaat moet vóór
het weggooien onbruikbaar worden gemaakt en mag niet als huisvuil afgevoerd worden;
het moet daarentegen verwerkt worden overeenkomstig de lokale voorschriften. Gebruik
daarvoor de in uw woonplaats ingevoerde recycling- en inzamelsystemen voor de
verwijdering van elektrische en elektronische apparaten (incl. accu). Onjuiste verwijdering
kan schadelijke gevolgen hebben voor het milieu en de gezondheid.
... nog een vraag ...
Heeft het borstschild de juiste maat voor mij?
... Geen vrouw is hetzelfde, daarom biedt Medela het PersonalFit Borstschild in vijf
verschillende maten aan.
Beantwoord op
http://www.medela.com/BX/nl/breastfeeding/good-to-know/right-size-of-breastshield.html
een paar korte vragen om te bepalen of uw borstschild de juiste maat heeft.
Zijn er mogelijkheden om zonder handen te kolven?
Vanzelfsprekend. Met de Easy Expression Bustier kunt u tijdens het kolven comfortabel de
krant lezen.
Bezoek onze website op
www.medela.com/BX/nl/breastfeeding/good-to-know/tips-hands-free-expression.html,
hier vindt u gedetailleerde informatie over het correcte gebruik van Easy Expression Bustier.
58
Notes
Notes
Notes
EMC / Technical Description
Electromagnetic Compatibility (EMC, IEC 60601-1-2:2001)
IEC 60601-1-2, Table 201
Electromagnetic Emissions
The Freestyle is intended for use in the electromagnetic environment specified below.
The customer or the user of the Freestyle should assure that it is used in such environment.
Emission Tests
Compliance
Electromagnetic environment - guidance
RF emissions
CISPR 11
Group 1
The Freestyle uses RF energy only for its internal function. Therefore, its RF emissions are very low and are
not likely to cause any interference in nearby electronic
equipment.
RF emissions
CISPR 11
Class B
Harmonic emissions
IEC 61000-3-2
Class A
Voltage fluctuations /
flicker emissions
IEC 60000-3-3
Complies
The Freestyle is suitable for use in all establishments,
including domestic establishments and those directly
connected to the public low-voltage power supply
network that supplies buildings used for domestic
purposes.
Warning – The Freestyle should not be used adjacent to or stacked with other equipment. If adjacent or
stacked use is necessary, the Freestyle should be observed to verify normal operation in the configuration in which it will be used. The Freestyle was not tested for immunity to electromagnetic disturbances.
EN Technical specifications
DE Technische Daten
FR Caractéristiques techniques
IT Caratteristiche tecniche
NL Technische gegevens
vacuum (approx.)
-20 … -270 mmHg
-3 … -35 kPa
45 … 120 cpm
In
100 ... 240 V 50/60 Hz
Out
12 V
1 A / 1,5 A
alternating current
direct current
Li-Ion Battery
7.4 VDC nominal
2000 mAh
122 x 90 x 58 mm
370 g
kg
270 g
+40
Operation
Betrieb
En Service
Utilizzo
Gebruik
+70
Transport / Storage
Transport / Lagerung
Transport / Stockage
Transport / Stoccaggio
Transport / Opslag
+5
°C
-25
°C
80
Operation
Betrieb
En Service
Utilizzo
Gebruik
95
Transport / Storage
Transport / Lagerung
Transport / Stockage
Transport / Stoccaggio
Transport / Opslag
20
20
106
70
kPa
S
AS
CL
Please see accompanying papers
Begleitpapiere beachten
Respecter les consignes des documents
d’accompagnement
Consultare la documentazione allegata
Zie bijgevoegde documenten
Must not be disposed of together with household
refuse
Darf nicht zusammen mit Hausmüll entsorgt werden
Ne doit pas être éliminé avec les ordures ménagères
Non deve essere smaltito con i rifiuti domestici
Mag niet samen met huisvuil weggegooid worden
Protection class II
Type BF
ISO 9001
ISO 13485
CE (93/42/EEC)
Tested acoording to
IEC 60601-1/A2:1995
International Sales
Medela AG
Lättichstrasse 4b
6341 Baar
Switzerland
Phone +41 (0)41 769 51 51
Fax +41 (0)41 769 51 00
[email protected]
www.medela.com
Australia
Medela Pty Ltd, Medical Technology
3 Arco Lane, Heatherton
Vic 3202
Australia
Phone +61 (0) 3 9552 8600
Fax
+61 (0) 3 9552 8699
[email protected]
www.medela.com.au
France
Medela France Sarl
14, rue de la Butte Cordière
91154 Etampes cedex
France
Phone +33 (0)1 69 16 10 30
Fax +33 (0)1 69 16 10 32
[email protected]
www.medela.fr
Germany & Austria
Medela Medizintechnik
GmbH & Co. Handels KG
Postfach 1148
85386 Eching
Germany
Phone +49 (0)89 31 97 59-0
Fax +49 (0)89 31 97 59 99
[email protected]
www.medela.de
Italy
Medela Italia Srl
Via Turrini, 19 – Loc. Bargellino
40012 Calderara di Reno (BO)
Italy
Phone + 39 051 72 76 88
Fax
+ 39 051 72 76 89
[email protected]
www.medela.it
Switzerland
Medela AG, Medical Technology
Lättichstrasse 4b
6341 Baar
Switzerland
Phone +41 (0)848 633 352
Fax +41 (0)41 769 51 00
[email protected]
www.medela.ch
United Kingdom
Medela UK Ltd.
Huntsman Drive
Northbank Industrial Park
Irlam, Manchester M44 5EG
United Kingdom
Phone +44 (0)161 776 0400
Fax +44 (0)161 776 0444
[email protected]
www.medela.co.uk
Netherlands & Belgium
Medela Benelux BV
Uilenwaard 31
5236 WB ’s-Hertogenbosch
Netherlands
Phone +31 73 690 40 40
Fax +31 73 690 40 44
[email protected]
[email protected]
www.medela.nl
www.medela.be
©Medela AG/200.4122/2012-09/B
Medela AG
Lättichstrasse 4b
6341 Baar, Switzerland
www.medela.com