1
INSTRUCTIONS FOR USE
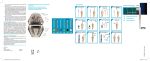
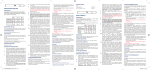
SUGGESTED POST SIZE FOR EACH TOOTH (GUIDELINES ONLY)
DESCRIPTION
MACRO-LOCK POST™ ILLUSION™ is a serrated taper
post , length 20 mm.
MACRO-LOCK POST™ ILLUSION™ is a translucent fiber
post with a colored resin matrix which becomes translucent
in the mouth. The post color will re-appear on command
under cold air, water spray if re-treatment is required.
●1
●2
●3
●4
Diam. apical tip
0.80
0.80
1.00
1.00
Diam. Post head
1.35
1.47
1.67
1.83
INDICATIONS FOR USE
In case of insufficient residual tooth structure (<4mm), the
post is needed to support and secure the coronal restoration.
CONTRAINDICATIONS
Insufficient residual dentin: at least 1.5 mm of tooth structure around the preparation.
PRECAUTIONS
The post must be cleaned with alcohol before insertion in
the canal. Avoid touching the posts with your fingers after
cleaning. Shortening the post should be done outside of the
mouth.
The use of rubber dam is recommended. The crown must
cover the preparation for at least 1.5 mm of healthy dentin in
order to get the ferrule effect.
ADVERSE REACTIONS
None known to date.
STEP-BY-STEP INSTRUCTIONS
1. Root canal preparation.
2. Select the correct MACRO-LOCK POST™ ILLUSION™.
Determine the post size according to the anatomical situation
of the tooth using the radiograph and the calibrating paper.
3. Determine the length of the coronal build-up, which will
account for 1/3 of the final post length. Remove the root filling
with the starter Drill (rotation speed 1000-2000 rpm) as deep
as necessary for the post to be inserted to 2/3 of the root
length. At least 4 mm of root canal filling should remain in the
apical region. In case of curved canal, this calculated length
is not suitable.
4. Shape the canal with the Finishing Drill corresponding to
the selected MACRO-LOCK POST™ ILLUSION™ size, (rotation speed 1000-2000 rpm).
5. Try in the post, to check that the post is properly seated in
the canal Shorten the post to its final length with a diamond
disc outside of the mouth. Never use a crimping instrument,
such as wire cutters, as the pressure can destroy the structure of the post.
6. Clean post with alcohol.
7. Apply etching in the post space and to the exposed dentin
for 15 seconds*. Rinse for 10 seconds. Remove the excess
water with paper points but leave surface moist. Do not put
the etching in contact with the gingiva.
8. Apply 2 coats* of the primer with a thin brush (e.g. Composibrush RTD) in the post space. Remove excess using paper
points and gently air dry all surfaces. Enamel and dentin surfaces should have a uniform, glossy appearance. If not, repeat application. Light-cure the primer* inside the post space
for 10 to 20 seconds.
9. Apply a single coat of primer to the post. Gently air dry
5 seconds and light-cure the post for 10 to 20 seconds (if
needed) outside the mouth*.
10. Mix the cement* and apply it in post space and to the post
using a Lentulo spiral or a syringe tip. Seat the post immediately. Remove excess with appropriate instruments. If dual
cure cement, light-cure for 40 to 60 seconds, applying gentle
pressure with the tip of the curing light probe.
11. Apply 2 coats of bonding agent* to the exposed post, cement and coronal areas. Remove excess and air-dry with jet
of air. Light-cure for 20 seconds (if needed).
12. Directly model the build-up using a composite core buildup material*.
OTHER RECOMMENDATIONS
MACRO-LOCK POST™ ILLUSION™ can be disinfected with
medical alcohol.
They can neither be sterilised nor disinfected in thermo disinfector. Post sterilization using Autoclave
is possible. Place posts in individual plastic bags. Autoclave
could affect the coloration of the post.
Do not storage in direct sun light or artificial
MACRO-LOCK POST™ ILLUSION™ Starter and Finishing
Drills: the instruments are supplied non-sterile. Disinfect and
sterilize instruments before each use.
Disinfect instruments with disinfecting or cleaning agents
adapted for rotary instruments and follow the manufacturer’s
instructions for use.
Do not disinfect instruments in thermo disinfector.
Control instruments visually before each use: change instruments when they are damaged, corroded or dull.
MODE D’EMPLOI
SAFETY AND LIABILITY
RTD declines any liability or compensation for possible damage due to:
- Use of instruments which do not belong to the system and
which may impair the function.
- Failure to observe the instructions for use The user is responsible for testing the material for its suitability and use for
any purpose not explicitly stated in the instructions for use.
For Dental use only.
* Refer to the manufacturer ’s instructions for use.
INDICATIONS
Le tenon sert de support à la restauration coronaire en cas
de substance dentaire résiduelle inférieure à 4 mm.
SUGGESTION POUR LE CHOIX DU TENON
DESCRIPTION
MACRO-LOCK™Illusion™ en fibres de quartz est un tenon
coloré dans la masse. Il devient translucide en bouche.
Sous simple spray d’eau froide le tenon redeviendra coloré
en cas de besoin de visualisation.
Son niveau de radio-opacité est de 1.50 mm Al (ISO 4049)
●1
●2
●3
●4
Diam. apical tip
0.80
0.80
1.00
1.00
Diam. Post head
1.35
1.47
1.67
1.83
CONTRE-INDICATIONS
Parois dentinaires inférieures à 1,5mm au niveau coronaire.
PRECAUTIONS D’EMPLOI
Le tenon doit être nettoyé à l’alcool avant toute insertion
dans la bouche du patient.
Ne pas toucher le tenon avec vos mains.
Le tenon doit être coupé à l’extérieur de la bouche du patient.
L’usage de la digue est recommandé.
Le recouvrement prothétique doit être d’au moins 1.5 mm
de structure dentaire saine pour obtenir l’effet de sertissage désiré (Ferrule effect).
EFFETS SECONDAIRES
Aucun effet secondaire connu à ce jour.
PREPARATION PAS-A-PAS
1. Préparation canalaire.
2. Choisir le MACRO-LOCK™ ILLUSION™adapté à l’anatomie du canal d’après analyse radiographique et film calibreur.
3. Déterminer la longueur du tenon : la longueur du tenon dans le canal doit être le double de celle du tenon
au niveau de la restauration. Retirer l’obturation radiculaire
avec le foret Préformage, (1000-2000 t.min-1). Il doit rester
un minimum de 4mm d’obturation jusqu’à l’apex. Dans le
cas de canaux très courbés, il n’est pas toujours possible
d’atteindre cette longueur.
4. Préparer le canal radiculaire adapté au tenon choisi
avec le foret finition correspondant, (1000-2000 t.min-1).
5. Vérifier que le tenon est bien ajusté au canal ainsi pré-
paré.
6. Raccourcir le tenon à la longueur adéquate avec un disque
diamanté. Ne pas utiliser de pinces, car la pression exercée
risque de détruire la structure du tenon.
7. Nettoyer le tenon à l’alcool.
8. Mordancer le canal et la partie coronaire pendant 15 secondes*. Rincer le canal pendant 10 secondes et le sécher
légèrement avec des pointes de papier. Les parois canalaires
doivent rester humides. Eviter tout contact avec la gencive.
9. Appliquer 2 couches d’adhésif sur la préparation à l’aide
de l’applicateur de type Composibrush RTD. Retirer l’excès
de produit avec des pointes de papier. Sécher légèrement
avec un jet d’air. La surface canalaire doit avoir un aspect
lisse et brillant. Si tel n’est pas le cas, renouveler l’application. Photopolymériser l’adhésif* dans le canal pendant 10
à 20 secondes.
10. Appliquer une seule couche d’adhésif* sur le tenon. Sécher 5 secondes avec un jet d’air. Photopolymériser pendant
10 à 20 secondes (extra oral) si nécessaire.
11. Mélanger le ciment* et l’appliquer dans le canal et sur le
tenon avec un bourre pâte ou une seringue. Insérer immédiatement le tenon et enlever les excès de ciment avec un
instrument adapté. Dans le cas d’un ciment dual, photopolymériser pendant 40-60 secondes, en exerçant une pression
modérée sur le tenon avec le bout de la lampe appuyée à
l’extrémité du tenon.
12. Appliquer 2 couches d’adhésif* préparé sur le tenon, le ciment et la dentine exposés. Enlever les excès d’adhésif avec
un jet d’air. Photopolymériser si nécessaire.
13. Reconstituer le moignon avec un matériau composite.
AUTRES RECOMMANDATIONS
Les tenons ne peuvent être ni stérilisés, ni purifiés au désinfecteur thermique. La stérilisation des tenons par autoclave
est possible. Placer les tenons dans des sachets individuels.
L’autoclave pourrait avoir une incidence sur la perte de la
coloration du tenon.
Conserver les tenons à l’abri de la lumiére.
Forets Universal Drill et Finishing Drill: les instruments sont
livrés non stériles. Stériliser avant utilisation. Désinfecter les
instruments avec des solutions* de rinçage adaptées aux
instruments rotatifs. Les forêts ne peuvent être ni stérilisés,
ni purifiés au désinfecteur thermique. Vérifier les instruments
avant chaque utilisation. Changer les instruments quand
c’est nécessaire.
Un kit de réaccés canalaire est disponible en cas de besoin,
contacter votre distributeur.
SECURITE ET RESPONSABILITE
RTD décline toute responsabilité pour des dommages causés par :
- l’utilisation d’instruments étrangers au système
- le non respect des instructions d’utilisations spécifiées dans
cette notice
Il revient à l’utilisateur de s’assurer que les produits sont bien
appropriés à l’utilisation prévue.
Destiné à l’usage dentaire uniquement.
* Se reporter aux instructions du fabricant
|
0459
-2007-
R.T.D.
3 Rue Louis Neel
Technoparc
Espace Gavanière
38120 ST-EGREVE - FRANCE
www.rtd.fr
[email protected]
NOT4580 Rev. 10/07
GB
Manual
F
Manuel