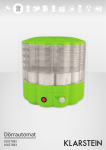
1
D Bedienungsanleitung Dörrautomat GB Instruction manual dehydrator F Mode d’emploi Déshydrateur I Istruzioni per l’uso Essiccatore CZ Návod k použití sušičky ovoce BHG 601 BHG 601 D Inhalt GB INDEX Hinweis zum Umweltschutz. . . . . . . . . . . . . . . 4 Notice for environment . . . . . . . . . . . . . . . . . . . 4 Technische Daten. . . . . . . . . . . . . . . . . . . . . . . . . 4 Technical Details. . . . . . . . . . . . . . . . . . . . . . . . . . 4 Wichtige Hinweise . . . . . . . . . . . . . . . . . . . . . . . . 9 Important. . . . . . . . . . . . . . . . . . . . . . . . . . . . . . . . . 16 Allgemeines zum Dörren. . . . . . . . . . . . . . . . . . 9 The basics of drying. . . . . . . . . . . . . . . . . . . . . . . 16 Das Dörrgerät BHG 601: Vorbereitung, Dörrzeit, Temperaturstufen und Lagerung. . . . . . . 10 The desiccating appliance BHG 601: Preparation, Desiccating time, Temperatur setting and Storage. . . . . . . . 17 Reinigung. . . . . . . . . . . . . . . . . . . . . . . . . . . . . . . . . 11 Cleaning . . . . . . . . . . . . . . . . . . . . . . . . . . . . . . . . . . 18 Zubereitung. . . . . . . . . . . . . . . . . . . . . . . . . . . . . . . 12 How you unse dried food. . . . . . . . . . . . . . . . . . 19 Verwendung von Gedörrtem. . . . . . . . . . . . . . 14 Preparation . . . . . . . . . . . . . . . . . . . . . . . . . . . . . . . 20 Garantie. . . . . . . . . . . . . . . . . . . . . . . . . . . . . . . . . . . 15 Guarantee. . . . . . . . . . . . . . . . . . . . . . . . . . . . . . . . . 22 F Contenu I Indice Remarque relative a la Protection de L’environnement. . . . . . . . . . . . . . . . . . . . . . . 4 Indicazioni per la tutela dell'ambiente . . . . . . . . . . . . . . . . . . . . . . . . . . . . . 5 Données techniques. . . . . . . . . . . . . . . . . . . . . . 4 Dati tecnici. . . . . . . . . . . . . . . . . . . . . . . . . . . . . . . . 5 Remarques Importantes. . . . . . . . . . . . . . . . . . . 23 Importanti indicazioni. . . . . . . . . . . . . . . . . . . . . 30 Generalites concernant la Deshydratation D’aliments. . . . . . . . . . . . . . . . . . . . . . . . . . . . . . . . . 23 Informazioni generali sull'essiccatura. . . . . . . . . . . . . . . . . . . . . . . . . . . . 30 Le Deshydrateur Preparation, Duree de Deshydratation, Degres de Temperature, Stockage. . . . . . 24 L'essiccatore BHG 601: Preparazione, tempo di essiccatura, livelli di temperatura e conservazione. . . 31 Entretien. . . . . . . . . . . . . . . . . . . . . . . . . . . . . . . . . . 25 Pulizia. . . . . . . . . . . . . . . . . . . . . . . . . . . . . . . . . . . . . 32 Preparation des Aliments. . . . . . . . . . . . . . . . . . 26 Utilizzo di alimenti essiccati . . . . . . . . . . . . . . . 33 L’utilisation de Deshydrates. . . . . . . . . . . . . . . . 28 Preparazione. . . . . . . . . . . . . . . . . . . . . . . . . . . . . . 34 Garantie. . . . . . . . . . . . . . . . . . . . . . . . . . . . . . . . . . . 29 Garanzia . . . . . . . . . . . . . . . . . . . . . . . . . . . . . . . . . . 36 CZ OBSAH Poznámka k ochraně životního prostředí. . . 5 Technické údaje. . . . . . . . . . . . . . . . . . . . . . . . . . . 5 Důležité bezpečnostní informace . . . . . . . . . 37 Všeobecně o sušení. . . . . . . . . . . . . . . . . . . . . . . 37 Funkce: Příprava, Doba sušení, Nastavení teploty a Skladování . . . . . . . . . 38 Údržba. . . . . . . . . . . . . . . . . . . . . . . . . . . . . . . . . . . . 39 Příprava. . . . . . . . . . . . . . . . . . . . . . . . . . . . . . . . . . . 40 Úprava potravin. . . . . . . . . . . . . . . . . . . . . . . . . . . 42 Záruční list. . . . . . . . . . . . . . . . . . . . . . . . . . . . . . . . 43 3 BHG 601 D I Hinweis zum Umweltschutz Dieses Produkt darf am Ende seiner Lebensdauer nicht über den normalen Haushaltsabfall entsorgt werden, sondern muss an einem Sammelpunkt für das Recycling von elektrischen und elektronischen Geräten abgegeben werden. Das Symbol auf dem Produkt, in der Gebrauchsanleitung oder auf der Verpackung weist darauf hin. BHG 601 Die Werkstoffe sind gemäß ihrer Kennzeichnung wiederverwertbar. Mit der Wiederverwendung, einer stofflichen oder anderen Form der Verwertung von Altgeräten, leisten Sie einen wichtigen Beitrag zum Schutze unserer Umwelt. Indicazioni per la tutela dell'ambiente Al termine della sua durata non smaltire il prodotto con i normali rifiuti domestici, ma consegnarlo agli appositi centri di raccolta per il riciclaggio di prodotti elettrici ed elettronici. Tale esigenza è indicata dal simbolo apposto sul prodotto, nelle istruzioni per l'uso o sulla confezione. Bitte fragen Sie bei Ihrer Gemeindeverwaltung nach der zuständigen Entsorgungsstelle. environmentAL NOTICE If you need to dispose of the product in the future, please note that electrical products should not be disposed of with household waste. Please recycle where facilities exist. Check with your local authority or retailer for recycling advice. (Waste Electrical and Electronic Equipment Directive) Technical Details: Connected load: 230 V / 50 Hz / 700 W Measurements (H x W x D): 340 x 340 x 340 mm Weight: 4,5 kg Chiedere all'amministrazione del proprio comune informazioni sugli appositi centri di riciclaggio. Dati tecnici: Alimentazione: 230 V / 50 Hz / 700 W Dimensioni dell'apparecchio (A x L x P): Technische Daten: Anschluss: 230 V / 50 Hz / 700 W Gerätemaße (H x B x T): 340 x 340 x 340 mm Gewicht: 4,5 kg GB I materiali sono recuperabili nelle modalità indicate dal contrassegno sul prodotto. Grazie al riutilizzo dei materiali ed ad altre forme di recupero degli apparecchi usati si fornisce un importante contributo alla tutela dell'ambiente. 340 x 340 x 340 mm Peso: 4,5 kg CZ Upozornění k ochraně životního prostředí Obalový materiál a vysloužilé spotřebiče nevyhazujte do komunálního odpadu, ale na příslušná sběrná místa. Upozornění v podobě symbolu najdete na přístroji, v návodu na obsluhu a na obalovém materiálu. Materiály jsou dle své charakteristiky znovu použitelné. Opětovným použitím, recyklací a dalšími způsoby využití starých spotřebičů přispíváte velkým dílem k ochraně našeho životního prostředí. Příslušnou sběrnu zjistíte u obecní správy Vašeho bydliště. TechnickÉ ÚDAJE: Připojení: 230 V / 50 Hz / 700 W Rozměry spotřebiče (v x š x h): 340 x 340 x 340 mm Hmotnost: 4,5 kg F INDICATION RELATIVE A LA PROTECTION DE L’ENVIRONNEMENT En fin de vie, ce produit ne doit pas être éliminé avec les ordures ménagères ordinaires, mais doit être remis à un centre de collecte pour le recyclage des appareils électriques et électroniques. Le symbole figurant sur le produit lui-même, la notice d’utilisation ou l’emballage l’indique. 4 Les matériaux sont recyclables conformément à leur marquage. Avec le recyclage, la récupération des matériaux ou autres formes de valorisation des appareils usagés, vous contribuez sensiblement à la protection de notre environnement. Renseignez-vous auprès de votre municipalité sur les centres compétents pour le traitement des déchets. DONNÉES TECHNIQUES : Alimentation: 230 V / 50 Hz / 700 W Dimensions: (H x L x P): 340 x 340 x 340 mm Poids: 4,5 kg 5 BHG 601 D 12 3 1 2 1 3 2 4 12 3 5 11 6 10 9 8 1 Elektrisches Dörraggregat 4 7 BHG 601 I mit Klarsichtdeckel und Netzanschlusskabel 1 Parte elettrica con coperchio trasparente e cavo di alimentazione 2Filtro di aspirazione 2Ansaugsieb 3 Timer automatico 3Zeitschaltuhr 4 Termostato regolabile a livelli 4 Temperatur Stufenschalter 5 Piano di essicatura 5Dörretage 6Base 6Sockel Con riserva di modifiche. Änderungen vorbehalten. GB 5 6 F 1 Electrical desiccating aggregate with transparent lid CZ 1 Průhledné víko s ventilátorem vzduchu a síťovým kabelem 2Air entry filter 2Nasávací mřížka 3Timer 3 Časový spínač 4 Temperature switch 4 Termostat se třemi stupni výkonu 5 Desiccating tray 5 Sušící patra 6Base 6Podstavec Product may be subject to change. Změny vyhrazeny. 1 Partie électrique avec couvercle transparent 2Tamis 3Minuterie 4 Thermostat gradué 5 Etage de séchage 6Socle Sous réserve de modifications. 6 TÜV Rheinland Product Safety geprüfte Sicherheit 7 D WICHTIGE HINWEISE Um Schäden und Gefahren durch nicht ordnungsgemäßen Gebrauch zu vermeiden, ist die Gebrauchsanleitung zu beachten und sorgfältig aufzubewahren. Bei Weitergabe des Gerätes an andere Personen, ist sie mit zu übergeben. Andere Arbeiten als die hier beschriebenen, dürfen mit dem Gerät nicht durchgeführt werden. Es ist nur für die Verwendung im Haushalt bestimmt und nicht für gewerbliche Nutzung. Bei zweckfremdem Einsatz erlischt der Garantieanspruch. DÖRRAUTOMAT BHG 601 D Dieses Gerät entspricht den Richtlinien Nr. 2004/108/EG für elektromagnetische Verträglichkeit (EMV), sowie der Niederspannungsrichtlinie 2006/95 EG . Gerät nur an Wechselstrom – mit Spannung gemäß Typschild – anschließen. Schützen Sie das Gerät am Aufstellungsort vor Spritzwasser und Wassertropfen. Das Gerät nur in trockenen Räumen betreiben. Nach Gebrauch, vor Reinigung oder bei evtl. Störungen während des Betriebes den Netzstecker ziehen. In Betrieb wird das Gerät heiß. Kinder erkennen nicht die Gefahr, die im Um- gang mit einem elektrischen Gerät entstehen kann; deshalb Kinder niemals unbeaufsichtigt mit dem Gerät lassen. Das Gerät nicht auf heißen Oberflächen oder in der Nähe von offenen Glasflammen abstellen und betreiben. Das Gerät muss während des Betriebes frei stehen und darf nicht abgedeckt werden, damit Zu- und Abluft nicht behindert werden. WICHTIGE SICHERHEITSHINWEISE Die Sicherheit von BIELMEIER-Elektrogeräten entspricht den anerkannten Regeln der Technik und den gesetzlichen Bestimmungen. Dennoch müssen wir Sie und die Mitbenutzer auf folgende Hinweise aufmerksam machen: Bitte lesen Sie dieSE Gebrauchsanweisung vor der Inbetriebnahme sorgfältig und bewahren Sie diese auf. Das elektrische Dörraggregat mit Zuleitung niemals in Wasser tauchen. Vor Abnahme des elektrischen Dörraggregates Netzstecker ziehen! Bei offensichtlichen Schäden an Gerät oder Zuleitung, das Gerät vom Fachmann oder dem BIELMEIER-Kundendienst überprüfen lassen. Bei Zweckentfremdung oder falscher Bedienung wird keine Haftung übernommen. Allgemeines zum Dörren Trocknen und Dörren sind die ältesten dem Menschen bekannten Konservierungsverfahren. Lebensmittel enthalten mehr oder weniger Wasser. Mittels Dörren wird den Lebensmitteln Wasser und somit der Nährboden für Fäulnisund Schimmelbakterien und Gärprozesse entzogen. Bei richtigem Dörren und Lagern ist das Gedörrte jahrelang haltbar. Durch Entzug von Wasser werden die Aromastoffe konzentriert, deshalb ist Gedörrtes oft schmackhafter. Vitamine, Nährstoffe und Mineralien werden nicht beeinträchtigt. Schwefel und andere Konser vierungsstoffe werden vermieden. Auch wenn Sie bereits einkochen oder einfrieren, bringt das Dörren eine zusätzliche Bereicherung für Küche und Gaumen. Dörren an der Sonne ist in unseren Breitengraden Glücksache. Das Dörren im häuslichen Backofen verursacht durch dessen relative Geschlossenheit und zu geringe Luftzirkulation oft ein Schwitzen, Kleben oder Tropfen des Dörrgutes und der Backofen ist anschließend mühsam zu reinigen, da er nicht für das Dörren konstruiert ist. 9 D D Das Dörrgerät BHG 601 Ihr neues Dörrgerät arbeitet schneller und vorteilhafter nach einem physikalisch konsequenten System: Der von oben angesaugte Luftstrom wird von einem speziellen Heizregister gleichmäßig erwärmt. Dadurch wird die Luft für Feuchtigkeit sehr aufnahmefähig und unter leichtem Überdruck gleichmäßig in jede Dörretage einzeln verteilt und entzieht den dortigen Lebensmitteln die Feuchtigkeit. Die feuchtigkeitsgesättigte Luft durchläuft nun nicht alle weiteren Etagen, sondern wird in jeder Etage für sich nach außen abgeleitet. Deshalb hat der BIELMEIER-Dörrautomat keine Siebe oder Gitter, sondern geschlossene, reinigungsfreundliche Dörretagen. Krümel und Kräuter können nicht durchfallen. Dieses System ermöglicht ein gleichmäßiges Dörren in allen Etagen, so dass kein Umsetzen erforderlich ist und das Gerät bis kurz vor Dörrzeitende unbeaufsichtigt bzw. mit automatischer Zeitschaltuhr betrieben werden kann. Eine Prüfung des Dörrgutes ist lediglich gegen Ende der Dörrzeit mit Sicht- und Greifprobe für die letzten Feinheiten angezeigt. Besonders Anspruchsvolle können das Dörrgut evtl. sortieren und noch etwas Dörrzeit zugeben. kurz in eine Lösung (1 Eßlöffel Zitronensaft in 1 Tasse Wasser) abtupfen. Statt Zitronensaft kann man auch handelsübliches Vitamin C verwenden. Für die meisten Gemüse ist Blanchieren vorgesehen (siehe Tabelle). Das vorbereitete Gemüse wird mittels einem Drahtkorb oder Sieb in einen Topf mit kochendem Wasser getaucht. Von dem Zeitpunkt an, wenn das Wasser wieder wallt, wird die Blanchierzeit gemäß Tabelle gerechnet. Das Dörrergebnis wird gleichmäßiger, wenn man etwa gleich große Stücke schneidet. Dünne Scheiben dörren schneller, denken Sie jedoch daran, daß die Stücke beim Dörren wesentlich kleiner werden. Als etwaigen Anhaltspunkt für das Fassungs- vermögen kann man pro Dörretage je nach Sorte ca. 500 g frisches Obst bzw. 200 bis 300 g frisches Gemüse annehmen. Es empfiehlt sich, Obststücke aufrecht dicht aneinanderzustellen. Ungeschältes Obst grundsätzlich auf die Schale legen mit der Schnittfläche nach oben. Scheibenförmige Stücke sollen schuppenartig, nicht flach, auf die Etagen gelegt werden. Bei Gemüse sollte nur eine einfache Schicht gefüllt und diese gleichmäßig verteilt werden. Vorbereitung Vor der ersten Inbetriebnahme und zu Beginn jeder Dörr-Saison wird empfohlen, die Dörretagen zu spülen. Nicht scheuern! Stellen Sie das Gerät an einen Ort, wo es wäh- rend des gesamten Dörrvorganges nicht stört. Während des Dörrens kann sich je nach Dörrgut ein angenehmer, aromatischer, fruchtiger oder würziger Geruch verbreiten. Zur sicheren und appetitlichen Konservierung sollen alle Güter gut gewaschen werden. Nur einwandfreie Lebensmittel verarbeiten bzw. schadhafte Stellen großzügig herausschneiden, ebenso bei Obst das Kerngehäuse entfernen. Obst soll reif, jedoch nicht überreif sein. Im einzelnen wird in der Tabelle die jeweilige Vorbehandlung empfohlen. Will man das natürliche Bräunen der Schnitt10 flächen vermeiden, kann man die Früchte Dörrzeit Die Dörrzeit ist sehr von Art, Feuchtigkeit, Reife und Dicke des Dörrgutes sowie von der Raumluft und von der Anzahl der Etagen abhängig. Im Zweifelsfall wählt man eine kürzere Dörrzeit und führt gegen Dörrende mehrmals eine Sicht- und Greifprobe durch. Dieses Gerät versorgt alle Etagen etwa gleich mäßig mit Trockenluft, jedoch können Unterschiede des Dörrgutes etwas streuende Ergebnisse bringen. Bei hohen Ansprüchen empfiehlt sich ein Sortierdurchgang, indem man die noch weicheren Teile ca. ½ bis 1 Stunde länger dörrt. Die zubereiteten Güter sollten unmittelbar gedörrt werden. Eine Unterbrechung des Dörrvorganges sollte nicht erfolgen. Zu langes Dörren lässt bei Kräutern und ähnlichen aromatischen Gütern zu viele Geschmackstoffe entweichen. Früchte, die ohne Einweichen als Snacks verzehrt werden (oder als leichter, platzsparender Bergsteigerproviant), sollten nicht zu sehr getrocknet, d. h. gut kaufähig, nicht brüchig sein. Die Greifprobe ist am zuverlässigsten, wenn das Gedörrte abgekühlt ist. Gedörrtes Gemüse soll sich kaum noch zäh, eher spröde und brüchig angreifen. Zwiebeln und Petersilie werden papierartig. Kräuter besonders schonend dörren! Wenn ein zu intensiver Geruch entsteht, ist die Temperaturstufe zu hoch gewählt. Kräuter von Stängeln befreien, jedoch nicht weiter zerkleinern. Blättrige Kräuter sollten zwischendurch gewendet werden, um ein Zusammenkleben zu vermeiden, und füllen Sie die Etagen nicht zu voll, um die Luftzirkulation nicht zu unterbrechen. Das elektrische Dörraggregat mit dem Klar- sichtdeckel wird nun passend auf die oberste Etage gesetzt. Temperaturschalter auf die dem Dörrgut entsprechende Stufe (siehe Tabelle) einstellen. Netzstecker des Gerätes in die Netzsteckdose einstecken. Zeitschaltuhr auf die gewünschte Dörrzeit einstellen. Jetzt ist das Gerät in Betrieb und schaltet sich nach Ablauf der eingestellten Zeit automatisch ab. Temperaturstufe Die richtige Temperaturwahl ist sehr wichtig: Stufe 1 ca. 20°C über Umgebungstemperatur für Kräuter und Pilze. schweißte Portionspackungen sind wiederum zu empfehlen – für gedörrtes Gemüse ist dies die beste Aufbewahrungsart. Gedörrtes kann bei jeder Raumtemperatur, besser jedoch in trockenen, kühlen, dunklen Räumen jahrelang aufbewahrt werden. Den optimalen Geschmack hat es in den darauffolgenden Wintermonaten und im zeitigen Frühjahr. Eine gelegentliche Sichtkontrolle wird wie bei anderem Einmachgut auch hier empfohlen. Pro 10°C tieferer Temperatur verlängert sich die Lagerzeit um das Zwei- bis Dreifache. Etiketten mit Inhaltsangabe und Datum bringen Übersicht und vollenden die Freude an Ihrem wertvollen Eigenprodukt. Reinigung Vor jeder Reinigung Zeitschaltuhr auf 0 stellen und Netzstecker ziehen. Das elektrische Dörr aggregat mit dem Klarsichtdeckel verschmutzt im Gebrauch so gut wie nicht. Hier genügt von Zeit zu Zeit ein feuchtes Abwischen. Nie in Wasser tauchen! Das neue technische System macht auch die Reinigung der Dörretagen wirklich zur Nebensache. Das Dörrgut kommt normalerweise nicht zum Tropfen oder Kleben. Die Dörretagen haben keine filigranen Siebe oder Gitter. Die geschlossenen Böden können mit etwas Spülwasser gefüllt, übereinandergestapelt eingeweicht werden; so sind sie nach kurzer Zeit mühelos zu spülen. Stufe 2 ca. 40°C über Umgebungstemperatur für sämtliche Gemüse und empfindliche Obstsorten. Nicht scheuern, sonst werden die späteren Stufe 3 ca. 60°C über Umgebungstemperatur für alle Obstsorten. Das Ansaugsieb auf dem Motorteil muss Lagerung Das Dörrgut vor dem Verpacken gut abkühlen lassen. Zur Aufbewahrung sind verschließbare Gläser am besten geeignet, wie sie heute im Haushalt als Leergut anfallen. Besonders, wenn Gedörrtes nach und nach entnommen wird, eignen sich diese Gläser gut, nicht jedoch Plas tiktüten. Folienverschweißte oder vakuumver- Reinigungen immer schwieriger. unbedingt frei sein. Bei Verschmutzungen bzw. Staubbelag muss das Ansaugsieb mit Pinsel oder Staubsauger (mit geringem Sog) gereinigt werden. Alle verwendeten Bauteile und Materialien sind für Lebensmittel zugelassen und bestens geeignet. Bedingt durch Farbstoffe und evtl. Fruchtsäuren im Dörrgut (z. B. Karotten) können sich die Oberflächen der Dörretagen jedoch farblich leicht verändern. Dies ist kein Qualitätsmangel! 11 D D Zubereitung Sorte 12 Wassergehalt (%) Apfel Aprikose Ananas Bananen 84 85 86 65 Beeren 88 Birnen Datteln Erdbeeren Feigen Heidelbeeren Kirschen Melonen Pfirsich Pflaumen / Zwetschgen Weintrauben Zitrusfrüchte 83 23 90 78 83 82 81 89 81 87 81 – Artischocken 87 Blumenkohl 89 Bohnen, grün Brokkoli Gurken Kohl Kohlrabi Möhren / Pastinaken Petersilie Paprika / Peperoni gemischtes Suppengemüse Spargel Spinat Sellerie Zwiebel Tomaten 90 89 95 92 85 88 55 93 – 92 91 94 89 94 Rhabarber 95 Kürbis / Zucchini Kräuter Pilze 92 – – Vorbehandlung bzw. Bemerkung großzügig entkernen, Schnitze oder Ringe schneiden halbieren oder vierteln schälen, Scheiben schneiden gut reif, Scheiben oder Streifen schneiden außer Heidelbeeren sind Beeren wegen der Kerne nur in Kombination mit anderen Früchten brauchbar großzügig entkernen, halbieren oder schnitzen gut reif halbieren, kleine Erdbeeren ungeteilt halbiert ganz mit Stein, ungeteilt schälen, entkernen, Scheiben oder Schnitze schneiden gut reif halbieren und entsteinen, jedoch auch mit Stein und ungeteilt möglich anschneiden, möglichst kernlose Sorte Schnitze, Schalen in Streifen für Aromazwecke säubern und halbe Herzen schneiden in esslöffelgroße Stücke teilen, ½ Stunde in Salzwasser mit 1 EL Essig legen Enden und Fäden entfernen, schräg schneiden Vorbehandlung wie Blumenkohl 10 mm dicke Scheiben schneiden säubern und in Stücke schneiden (im Dampf) würfeln oder Scheiben schneiden quer oder schräg schneiden Stängel entfernen Streifen schneiden klein würfeln oder Streifen schneiden schälen , ungeteilt oder 20 mm Stücke über Dampf blanchieren bis er leicht welkt Scheiben schneiden Scheiben schneiden 30 – 45 Sek. in heißes Wasser tauchen, schälen, vierteln schälen, in Zitronenwasser tauchen, 25 mm Stücke schneiden schälen, entkernen, 8 mm Streifen oder Scheiben vom Stängel befreien, nicht zerkleinern halbieren, große Pilze in Scheiben schneiden in Zitronenwasser tauchen ja ja 3 3 (2) 3 (2) 3 Dörrzeit (Std., ca.) 4 – 8 8 – 12 8 – 12 5 – 8 3 4 – 6 3 (2) 3 3 (2) 3 3 3 3 3 (2) 6 – 12 4 – 6 6 – 12 4 – 6 4 – 6 8 – 12 8 – 12 8 – 12 3 8 – 14 3 3 (2) 8 – 14 8 – 10 2 4 – 5 3 – 4 2 5 – 7 3 – 4 3 – 4 – 2 – 3 3 – 5 2 – 3 – – 2 2 – 3 1 2 – – 2 2 2 2 2 2 2 (1) 2 2 (1) 2 2 2 2 2 5 – 6 3 – 5 6 – 8 3 – 5 3 – 5 4 – 5 2 – 3 4 – 6 3 4 – 8 2 6 3 8 – 10 – 2 3 – 5 – – – 2 1 ! 1 ! 4 – 5 2 – 3 4 – 6 ja ja ja Blanchieren (Min.) 2 – 4 Dörrstufe Bitte beachten Sie! Die angegebenen Dörrzeiten sind nur Richtwerte und können, je nach Beschaffenheit des Dörrguts stark differieren. Frühe Zwetschgen sind mangels Fruchtzucker nicht zum Dörren geeignet. Stapeln Sie die Dörretagen sorgfältig übereinander. Ein Verrutschen kann die Funktion beeinträchtigen. Vergewissern Sie sich, ob der Temperaturschalter exakt auf der gewählten Schaltstellung steht. Der Sockel muss immer zuunterst gestellt werden. Nur hiermit ist die richtige Luftführung gewährleistet. 13 D D GARANTIE Verwendung von Gedörrtem F r ü c h t e können in gedörrtem Zustand als Snacks verzehrt werden, jedoch auch als ideenreiche Zutaten für unzählige Rezepte verwendet werden. Sollen gedörrte Früchte ähnlich wie frisches Obst in Rezepten verwendet werden, müssen sie eingeweicht werden, um ihnen wieder das Wasser zuzufügen, das ihnen beim Dörren entzogen wurde. Man gibt einem Volumen Früchte dasselbe Volumen Wasser zu, z. B. 1 Tasse Dörrfrüchte und 1 Tasse Wasser und lässt es ca. 4 Stunden einwirken. Im Zweifelsfalle: weniger Wasser verwenden und kürzere Einwirkzeit. Sonst werden die Güter matschig. Im weiteren können Sie nach Kochbüchern arbeiten, die von Land zu Land vielfältige Rezepte bereithalten. Hier nur einige Anregungen: Obstkuchen und andere Backwaren, Früch- tebrot, Heidelbeertörtchen, abwechslungsreicher Ersatz für Rosinen usw. Kompotte zu Waffeln und Pfannkuchen, Auf- striche für Sandwiches, Desserts, Apfelsoße usw. Für die am Verkaufstag beginnende Garantie gelten innerhalb der EU und der Schweiz folgende Bestimmungen: Eingeweichtes Gemüse benötigt zum Ko- a) Nach unserer Wahl Reparatur oder Austausch von Teilen, die nach unserer Überprüfung Material- oder Fertigungsfehler aufweisen. chen etwa so lange wie eingefrorenes. Suppengemüse, welches relativ kleingeschnitten getrocknet wurde, kann ohne Einweichen direktin den Kochtopf zugegeben werden. Für Suppengemüse, Saucenzutaten, Salatdressings usw. kann das Gedörrte in der Küchenmaschine auf die gewünschte Korngröße gehackt und gemischt werden. Für Babykost, Cremesuppen, Saucen usw. eignet sich sehr das Mahlen von gedörrtem Gemüse. Man sollte höchstens einen Monatsbedarf als Vorrat mahlen, da durch Mahlen die Haltbarkeitsdauer abnimmt. Gedörrtes Gemüse kann ebenfalls nach dem Einweichen ohne weiteres zusammen mit frisch Geerntetem zubereitet werden. Zutaten für manche Fleisch- und Wildgerichte, Kräuter werden unmittelbar beim Würzen zermahlen oder zerstampft. Achten Sie darauf, dass keine harten Stängel dazugeraten. Zutaten für Müsli, Pudding, Yoghurt, Schlag- Pilze werden eingeweicht und wie frische ver- Chutneys usw. sahne, Speiseeis, Fruchtsalate, Früchte in Armagnac usw. wendet. Für Suppen und Saucen wird ein Teil davon zermahlen zugegeben. Man kann verschiedene Früchte kandieren Paprika und Peperoni können in der Küchen- oder glasieren, ganz nach Ihrer Phantasie. Bananen eignen sich gut für Milchdrinks und als Zutat für Babynahrung, wenn man die gedörrten Bananen pulverförmig mahlt. Verschiedene Früchte lassen sich gut mit Honig und Nüssen veredeln. Frische Früchte und gedörrte Früchte nach dem Einweichen lassen sich stets mischen. Je nach Rezept werden sie ganz belassen oder mehr oder weniger grob gehackt. Eine besondere Spezialität aus dem Himalaja 14 G e m ü s e wird vor der Kochzubereitung im allgemeinen eingeweicht. Man gibt z. B. zu 1 Tasse Dörrgemüse 1 Tasse kaltes bis warmes Wasser zu. Bitte nie mehr Wasser, als für das Gericht benötigt wird, zugeben. Auch soll das eingeweichte Gemüse vor der Zubereitung nicht zu lange stehen. ist das Fruchtleder, welches aus verschiedenen pürierten Früchten unter Zugabe von Honig, Nüssen und Gewürzen als ausgewellter Fladen in rechteckige Happen geschnitten und bis zu einem zähen Zustand gedörrt wird. Man kann den Fladen auch füllen, einrollen und in Scheiben schneiden. maschine zerkleinert oder gemahlen und als Gewürz in einem luftdichten Glas weiter aufbewahrt werden. Hier noch einige Anregungen für die unbegrenzten Möglichkeiten: Gemüsesuppen wie Minestrone, Eintöpfe wie Pichelsteiner, Gaisburger Marsch, Franz. Cassoulet, Ratatouille, Irish Stew, Gemüse gulasch, Pilzgulasch usw. 1.Garantiedauer: 2 Jahre 2.Garantieleistungen: b) Die Garantie wird nur bei Vorzeigen dieser Garantiekarte und der Verkaufsrechnung geleistet. Die Karte ist nur gültig, wenn sie am Verkaufstag vollständig ausgefüllt wurde. c) Die Garantieleistung gilt nur gegenüber dem Erstverbraucher. d) Durch die Reparatur oder den Austausch von Teilen innerhalb der Garantiedauer wird die ursprüngliche Garantiezeit weder verlängert noch erneuert. e) Transportkosten gehen zu Lasten des Käufers (gilt nicht für die ersten 6 Monate der Garantiezeit). f) Sofern der Schaden oder Mangel nicht beseitigt werden kann oder die Nachbesserung von uns abgelehnt oder unzumutbar verzögert wird, wird innerhalb von 6 Monaten ab Kauf- / Lieferdatum auf Wunsch des Endabnehmers entweder kostenfrei Ersatz geliefert oder der Minderwert vergütet oder das Gerät gegen Erstattung des Kaufpreises, jedoch nicht über den marktüblichen Preis hinaus, zurückgenommen. 3. Die Garantie gilt nicht: für Kratzer und Flecken am Gerät. für Beleuchtungs- und Kontrolllampen. für Motorbürsten. für leicht zerbrechliche Teile aus Bakelit, Glas, Plastik und so weiter, es sei denn, es handelt sich um Materialfehler, die von uns als solche anerkannt werden. für Beschädigungen, die durch falsche Installation oder Befestigung verursacht wurden. wenn das Gerät an ein Stromnetz mit höherer Spannung, als auf dem Gerät angegeben, angeschlossen wird. bei falscher oder unsachgemäßer Bedienung. bei mangelnder Sorgfalt. bei ungenügender oder falscher Wartung. bei Fallenlassen des Gerätes oder einzelner Teile. bei unsachgemäßem Transport oder unsachgemäßer Verpackung für den Transport. 4. Die Garantie erlischt: wenn das Gerät für andere als für Haushaltszwecke eingesetzt wird. wenn Personen, die nicht von unserer Firma dazu ermächtigt sind, Reparaturen oder Änderungen durchführen. Für dieses Gerät leisten wir 2 Jahre Garantie für Mängel, die auf Fertigungs- oder Materialfehler zurückzuführen sind. Die Garantiezeit beginnt mit dem Tag der Übergabe und wird nur bei Vorlage der Garantiekarte und der Verkaufsrechnung gewährt. Weitergehende Ansprüche bestehen nicht. Modell: Artischocken in Teig gehüllt und ausgebacken. Spezielle eigene Kräutermischungen, Kräuter- Wichtig! Bitte notieren Sie hier den auf dem Typenschild am Gerät befindlichen FD-Code: tees, Kräuteröle usw. Selleriesalz, Knoblauchsalz: Gedörrtes mahlen und 1 : 1 mit Salz gemischt, und vieles andere mehr finden Sie in Kochbüchern. Stempel und Unterschrift des Verkäufers Verkaufsdatum 15 GB GB IMPORTANT To avoid improper use, you must follow the instructions provided in the product manual, which should be stored in a safe place for future reference. If you give the appliance to someone else, be sure to give that person the instruction manual as well. This appliance is intended exclusively for the uses described in the instruction manual. Moreover, it is intended for private use only, and not for commercial use. The warranty is voided if the device is used for purposes other than those described herein. DEHYDRATOR BHG 601 GB This appliance conforms to the EEC directive 2004/108/ EEC for radio interference level and electromagnetic compatibility (EMC), as well as the low voltage directive 2006/95 EEC. Protect the appliance from splashing water and other forms of moisture that may be present at the place of use. Operate the appliance in dry rooms only. After use, or if there is a problem during op- eration – always disconnect the plug from the power supply before proceeding with cleaning or inspection. During operation, the appliance will become hot. Children are unaware of the dangers that can result from handling an electrical appliance. Therefore, they should never be left unattended with such an appliance. Do not place the appliance on a hot surface or operate it in the immediate vicinity of an open fire. During operation, the appliance should stand free and must not be covered to allow air to pass through freely. IMPORTANT SAFETY POINTS The safety of BIELMEIER electrical appliances conforms to the recognized technical standards and the law for appliance safety. Nevertheless, we would like to draw your attention to the following points: PLEASE READ THIS INSTRUCTION MANUAL CAREFULLY BEFORE THE FIRST USE AND KEEP THE MANUAL IN A SAFE PLACE. Connect the appliance to AC only – make sure the voltage corresponds to the markings on the appliance. Never immerse the electrical component of the appliance or the cord in water. Disconnect the mains plug before removing In the case of visible signs of damage to the appliance or the mains cable, the appliance should be examined by trained personnel or by BIELMEIER customer service. We are indemnified from liability for all dam- ages that may arise if the appliance is used for purposes other than originally intended or if it has been used inappropriately. 16 Your new dehydrator works faster and more efficiently due to its robust construction: Blanching is necessary for most vegetables The intake air, which is drawn in from above, is evenly heated by a special heater. This increases the moisture carrying capacity of the air, which removes moisture from the foods as it moves through the different drying levels by means of a slight pressure. Drying results are more even if the items are With this design, the moist air does not flow through all of the levels, but rather is vented from each individual level of the appliance. Therefore, BIELMEIER dehydrators contain no screens or wire trays, but rather solid, easy-to-clean trays. Crumbs and herbs cannot fall through. This system enables an even dehydrating on all levels; no repositioning is necessary, and the appliance can be left unattended until shortly before the drying time is finished. Visual and manual monitoring of the dried foods is only necessary just before the drying time has elapsed. At this time, people with demanding standards can sort the items and allow some to dry a little longer, if necessary. (see tables). The prepared vegetables are dipped into a pot with boiling water by means of a wire basket or strainer. The blanching period is calculated from the time when the water again comes to a boil. cut into pieces of roughly equal size. Thin slices dry more quickly, but remember that the pieces shrink considerably during the dehydration process. As an approximate guideline, you can dehy- drate about 500 grams (1 lb. 5 oz.) of fresh fruit or 200-300 grams (10-14 oz.) of fresh vegetables per tray, depending on the variety. We recommend placing pieces of fruit close together and in an upright position. Always place unpeeled fruit with the cut surface pointing upwards. Sliced fruit should not be laid flat, but should rather overlap each other, as in the scales of a fish. Vegetables should only be placed in single, evenly spaced layers. Preparation minerals are not affected, and sulphur and other preservatives are avoided. All food contains some proportion of water.. Even if you already use freezing or canning to preserve foods, dehydrating will bring a plus to your kitchen and your palate. Drying in the kitchen oven often results in condensation due to a lack of air circulation; the dripping and sticking of the juices from the drying items make the oven hard to clean, as it is not built for drying. Herbs should be dehydrated with care! If the smell is too intense, the temperature has been set too high. Before the initial use and at the beginning of each dehydrating season, we recommend that the drying trays be rinsed. Do not scour! Place the appliance where it will be out of the way throughout the whole dehydrating process. During dehydration, a pleasant aromatic, fruity or spicy odour may be present, depending on the items being dehydrated. For safe, delicious preservation, all foods Drying and dehydrating are the oldest methods of conservation known to man. Removing the water also tends to concentrate the aroma of the food and often makes dried food even tastier! The vitamins, nutrients and vitamin C can also be used. Then dab with a paper towel. the electrical component of the appliance. The basics of DEHYDRATION Desiccation removes the water content from food, thereby removing the basic conditions for decomposition, mold formation and fermenting processes. With proper dehydration and storage, food items can be preserved for years. The BHG 601 DEHYDRATOR should be washed well before dehydration. Only use foods in good condition and remove any areas with blemishes. Fruit cores should be removed. Fruit should be ripe, but not over-ripe. Consult the table for specific preparation ad- The stems of herbs should be removed, but they need not be chopped further. Leafy herbs should be turned during the desiccating process so they won’t stick together. To ensure proper air circulation, the levels should not be overfilled. Place the transparent lid on the uppermost tray of the electric dehydrating unit. Set the temperature switch to the position corresponding to the food to be dehydrated (see table). Plug in the appliance. Set the timer to desired dehydration time. vice. To avoid the natural browning of the cut sur- face, you can dip the fruit briefly in a lemon mixture (1 tablespoon lemon juice to 1 cup of water). Instead of lemon juice, commercial 17 GB DEHYDRATING time Dehydrating time varies greatly based on the type of food, the moisture content, ripeness and thickness, as well as the room air and the number of drying trays used. When in doubt, select a shorter drying time and conduct a visual and manual check towards the end of the drying period. This appliance supplies all levels with uniform amounts of drying air, but differences in the foods being dehydrated can cause uneven results. If you have very demanding standards, you may want to check the items and allow the softer pieces to dry for an extra ½ hour to 1 hour. Foods that have been prepared should be dehydrated immediately. The dehydrating process should not be interrupted. Extended dehydrating times will reduce the flavour of herbs or similar aromatic goods. Fruit that will be consumed as a dry snack without prior soaking (or used to save weight and space for hikers) should not be dried until it is brittle, but rather left so that it is chewable. Checking dehydrated foods by feeling them is best done when the foods have cooled off. Dehydrated vegetables should be brittle to the touch, rather than chewy. GB sealed and vacuum-sealed bags are also recommended; these are the best method for storing dried vegetables. Dehydrated items can be stored at room temperature for years. However, dry, cool, dark rooms are even more suitable. In any event, you will enjoy the best flavour in the subsequent winter months and early the next spring. As with other preserved items, an occasional visual check is recommended. For each 20°F (10°C) that the storage temperature is decreased, the storage time is increased by two to three times. Labels that describe the contents will help maintain order and increase the enjoyment of your precious products. The correct temperature setting is very important: Setting 1 approx. 20°C above ambient tempera ture for all herbs and mushrooms. Cleaning Before cleaning, set the timer to 0 and disconnect the power cord. The electronic dehydrating unit will only become minimally dirty through usage. Simply wipe it off with a damp cloth from time to time, and NEVER immerse this part in water! The new system does away with complicated tray cleaning. There is no dripping or sticking of the foods 18 The drying trays contain no screens or wire mesh. The trays can be easily cleaned like any dish or soaked in water. Do not use scouring materials, as this will Setting 2 approx. 40°C above ambient temperature for all vegetables and delicate kinds of fruit. make subsequent cleaning efforts more difficult. Setting 3 approx. 60°C above ambient tempera ture for all kinds of fruit. The air flow filter on the motor compo- Storage Let the dried items cool off well before storing. The best containers are clean glass jars that can be closed, such as those that are readily available in any modern household. These jars are especially suitable if the dried items are to be removed little by little over a period of time. Plastic bags are not suitable in this case. Heat- F r u i t s can be used as a snack, but also as ingredients for countless recipes. If dried fruit is to be used to substitute for fresh fruit in a recipe it must be re-hydrated by soaking it in water to replace what was removed in the dehydration process. Add the corresponding amount of water (e.g. one cup of water to one cup of fruit) and let it soak for about 4 hours. When in doubt, use a bit less water and a bit less time to prevent the items from becoming soggy. You can also use cookbooks that provide recipes based on different national or regional cuisines. Here are a few ideas: being dehydrated. Temperature setting How you use DEHYDRATED food nent must be kept free of dust under all circumstances. Dirt or dust residue should be removed with a soft brush or by using a vacuum cleaner (min. suction power). All of the materials used in the various parts of the device are highly suitable and approved for foods. Natural pigments or fruit acids from foods (e. g. carrots) may cause a slight discoloration of the surfaces of the dehydrating trays. This is not a quality defect! V e g e t a b I e s are generally rehydrated by soaking before use. Add about 1 cup of luke warm water per cup of dried vegetables. Don’t add more water than is necessary for the particular dish. In addition, vegetables that have been soaked should not be left standing for too long. Dehydrated vegetables need to be cooked about as long as frozen ones. Vegetables that have been cut relatively fine need not be soaked before being added to soup. Dried herbs that are to be used in soups, sauces, salad dressings, etc. can be cut to the desired sizes in a food processor. Dried vegetables that have been ground are blueberry muffins, varied replacement for raisins, etc. highly suitable for baby foods, cream soups, sauces, etc. You should not grind more than you expect to use in a month because grinding reduces the viability of the food. Stewed fruit goes well with waffles and pan- Dehydrated vegetables can also be effectively Fruit pies and other baked goods, fruit bread, cakes, for sandwiches, deserts, applesauce, etc. Use as ingredients for some meat and game recipes, chutneys, etc. Use as ingredients for granola, pudding, yo- ghurt, whipped cream, ice cream, fruit salad, etc. You can candy different kinds of fruit or glaze them according to your fancy. Bananas are highly suitable for milk drinks and as an additive to baby food. For such use, simply grind the dried bananas into a powder. Various fruits can be enhanced with honey or nuts. You can easily mix fresh fruit and dry fruit that has been dehydrated. Depending on the recipe, you leave them whole or chop them, but not finely. One specialty is fruit leather from the Hima- layas, which consists of various pureed fruits with honey, nuts and spices added, rolled out, cut into rectangular pieces, and then dried to a chewable consistency. After it has been rolled out, it can also be filled, rolled up and cut into rolls. combined with fresh ones. Herbs should only be ground at the time of intended use. Please be careful that all stems are removed. Dehydrated mushrooms can be used just the same as fresh ones. For soups and sauces, add some that have been ground. Paprika and chili-peppers can be cut or ground in a food processor and then stored in jars to be used as spices. Here are a few ideas: Vegetable soups, such as minestrone, rata- touille, Frenchcassoulet, Irish stew, vegetable stew, mushroom stew, etc. Artichokes wrapped in dough and fried Your own herbal blends, herbal teas, herbal oils, etc. Celery salt, garlic salt: mix 1:1 ground, dried celery (or garlic) with salt. You will find many more uses in cookbooks. There are practically unlimited applications for these dried foods. 19 GB GB preparation variety apples apricots bananas 20 water content (%) 84% 85% 65% berries 88% blueberries cherries citrus fruit dates figs grapes melons peaches pears pineapple 83% 82% – 23% 78% 81% 81% 89% 83% 86% plums 81% strawberries 90% asparagus artichokes 92% 87% cauliflower 89% beans, green broccoli cabbage carrots celery roots cucumbers onions paprika / red pepper parsley rhubarb spinach 90% 89% 92% 88% 94% 95% 89% 93% 85% 95% 91% squash / zucchini 92% tomatoes 94% stern turnips herbs mushrooms 85% – – preparation and remarks remove core completely; cut in rings or slices halves or quarters well-ripened; cut in slices or stripes except for blueberries, all berries should always be combined with other fruit leave whole with stones, whole slices; cut peels in strips for aroma uses well-ripened sliced in half cut; seedless varieties peel; remove seeds; slice in rings or squares well-ripened remove core completely; halves or smaller peel; slice in rings remove stone; slice in half; whole fruit with stone also possible halves; smaller ones whole peel; leave uncut or cut in 20-mm (½ -inch) slices clean; cut hearts in half tablespoon-size pieces; soak ½ hour in salt solution with 1 tbsp. vinegar remove ends and strings; cut diagonally preparation same as cauliflower clean and slice; (with steam) cut squarely or diagonally slice in rings cut in 10-mm (¼-inch) thick rings slice in rings cut in strips remove stems peel; dip in lemon juice; cut in 20-mm (1-inch) pieces blanch over steam until it withers slightly peel; remove seeds; cut in 8-mm (¼-inch) slices or strips dip in boiling water for 30 – 45 seconds; peel and slice in quarters cut in cubes or slices remove stems, do not chop slice in half, large rings dip in lemon juice yes yes dehydrating dial setting 3 3 (2) 3 approx. dehydrating time in hours 4 – 8 8 – 12 5 – 8 Please note! The dehydrating times listed below are approximate values. Depending on the foods, the dehydrating times may differ slightly. 3 4 – 6 Plums that ripen early in the year contain too little sugar and therefore cannot be dehydrated. 3 3 3 (2) 3 3 3 3 3 (2) 3 (2) 3 (2) 4 – 6 8 – 12 8 – 10 4 – 6 4 – 6 8 – 14 8 – 12 8 – 12 6 – 12 8 – 12 The dehydrating trays should be securely placed upon each other. 3 8 – 14 3 (2) 6 – 12 2 2 4 – 8 4 – 5 3 – 4 2 5 – 7 3 – 4 3 – 4 2 – 3 2 2 – – – – – 1 2 2 2 2 2 2 2 2 2 (1) 2 2 5 – 6 3 – 5 3 – 5 4 – 5 6 6 – 8 3 4 – 6 2 – 3 3 – 5 2 – 2 4 – 5 – 2 8 – 10 3 – 5 – – 2 1 ! 1 ! 3 – 5 2 – 3 4 – 6 yes yes yes blanching time (in min.) 2 – 3 2 – 4 Tray slippage may cause malfunction. Make sure that the temperature switch is set to the exact desired setting. In order to guarantee proper air circulation, the dehydrating tray with the fixed base should always be the lowest one. 21 GB F WARRANTY REMARQUES IMPORTANTES In the EU and Switzerland, the following conditions apply for the warranty, which begins on the date of purchase of the product: Afin d’éviter tout dommage ou danger causé par une utilisation non conforme, veuillez lire attentivement la notice d’utilisation et la conserver soigneusement. Veillez à la transmettre en cas de cession de l’appareil. N’utilisez pas cet appareil à d’autres fins que celles décrites dans ce document . L’appareil est uniquement destiné à l’utilisation privée et non à un usage commercial. Le droit de garantie expire si l’appareil est détourné de sa fonction. 1.Warranty period: 2 years 2. Conditions of warranty: a) Parts which exhibit defects in material and/or workmanship after our inspection will either be repaired or replaced at our discretion. b) The warranty will only be honoured upon presentation of this warranty card and purchase receipt. This warranty is only valid if it is filled out on the date of sale and in a complete and appropriate manner. c) This warranty is only valid for the first owner of the device. d)No replacement or repair of parts performed within the warranty period shall provide grounds for any extension of the original warranty period. e) Any transportation costs shall be borne by the purchaser (this shall not apply during the first 6 months of the warranty). f) Within the first 6 months after the purchase/ delivery of the device, if the damage or defect cannot be eliminated, if we refuse to repair the defect, or in the event of a delay in our repairing of the device, then the end user can choose from one of three options: the device will be replaced free of charge, its value will be reimbursed, or the device will be taken back with a refund of the original purchase price which shall not exceed the usual market price. 3.The warranty does not apply to: spots and scratches on the device control lamps and lights motor brushes easily breakable parts (e. g. bakelite, plastic, glass), even in the case of defects in material as recognized by us damage due to improper installation or improper repair damage caused by an inappropriate voltage supply or an inappropriate electricity network 22 Stamp and signature of salesperson F Cet appareil répond aux directives 2004/108 de la CEE relatives au déparasitage et à la compatibilité électromagnétique ainsi qu’aux directives basse tension 2006/95 de la CEE. ou projection d’eau. Utiliser l’appareil uniquement dans des endroits secs. Toujours débrancher l’appareil après utilisa- tion, avant tout nettoyage ou en cas d’anomalie pendant le fonctionnement. L’appareil devient chaud pendant son fonctionnement. Les enfants ne sont pas conscients du danger que représente l’utilisation d’appareils électriques ! Ne jamais les laisser utiliser l’appareil sans surveillance. Ne pas poser ni utiliser cet appareil sur une surface chaude ou à proximité d’une flamme (cuisinière à gaz). Lors de son fonctionnement, l’appareil doit être posé sur une surface dégagée et ne pas être recouvert,afin de permettre une bonne circulation de l’air. improper or inappropriate use of the equipment CONSIGNES DE SECURITE unsatisfactory care Les appareils électriques BIELMEIER sont con formes aux règles reconnues de la technique et aux dispositions de sécurité. Nous devons toutefois attirer votre attention et celle des co-utilisateurs sur les indications suivantes: Ne jamais immerger la partie électrique de improper transportation or insufficient packaging during transportation VEUILLEZ LIRE ATTENTIVEMENT LE MODE D’EMPLOI AVANT LA MISE EN MARCHE ET CONSERVEZ-LE SOIGNEUSEMENT. ou de son cordon, faire vérifier l’appareil par un spécialiste ou par le service après-vente BIELMEIER. 4.The warranty shall be deemed void: Ne brancher que sur du courant alternatif. Vérifier damage caused by incompetent or insufficient maintenance damage caused by dropping the equipment or part thereof in the case of use or application of the device for something other than its intended use for household purposes. in the case of any servicing or repairing of the device performed by third parties that have not been authorized for such purpose by our company. A 2-year warranty is provided for damage caused by defects in material or workmanship. The warranty period shall begin on the day of delivery or on the day the buyer takes possession of the item, and the warranty will only be honoured upon presentation of the warranty card and the purchase receipt. No further claims shall be granted. Model: BIELMEIER déshydrateur automatique BHG 601 Tenir l’appareil éloigné de toute éclaboussure Important! Please write down the FD-code located on the rating plate here: Date of sale que le voltage de votre appareil correspond bien à celui de votre installation électrique. l’appareil dans l’eau. Débrancher l’appareil avant d’enlever la partie électrique ! En cas de détérioration apparente de l’appareil Nous déclinons toute responsabilité si l’appareil est employé à un autre usage que celui prévu ou en cas de manipulation non conforme. GENERALITES CONCERNANT LA DESHYDRATATION D’ALIMENTs Le séchage ou la déshydratation constitue un des plus anciens procédés de conservation que connaisse l’humanité. autres conservateurs ne porte atteinte ni aux vitamines, ni aux substances nutritives ni aux sels minéraux. Les aliments se composent de plus ou moins d’eau. La déshydratation, en éliminant cette eau des aliments, empêche donc leur décomposition, le développement de moisissures ainsi que le processus de fermentation. Une déshydratation et un stockage corrects permettent de conserver les aliments séchés pendant plusieurs années. Le fait de déshydrater entraîne une concentration des substances aromatiques, raison pour laquelle ces aliments ont souvent une qualité gustative plus intense. .Ce procédé de conservation sans addition de soufre ou En plus de la congélation ou de la stérilisation, la déshydratation des aliments apporte un enrichissement supplémentaire pour la cuisine et le palais. Le séchage au soleil est une question de latitude. La déshydratation dans un four domestique, en raison de sa relative herméticité et de la trop faible circulation d’air, fait souvent transpirer, coller ou goutter l’aliment à déshydrater, ce qui rend ensuite le four difficile à nettoyer, car il n’est pas conçu à cet effet. 23 F Le déshydrateur Votre nouveau déshydrateur fonctionne plus rapidement et efficacement grâce à un procédé physique simple : l’air aspiré par le haut est chauffé de façon homogène à l’aide d’un chauffage adapté. L’air, qui possède alors une capacité d’absorption de l’humidité très élevée, est ensuite réparti par légère surpression entre chaque plateau où il absorbe l’humidité des aliments. L’air saturé d’humidité ne traverse pas les autres étages, mais est évacué vers l’extérieur à chaque étage. C’est pourquoi le déshydrateur automatique BIELMEIER ne possède pas de tamis ni de grille, mais seulement des étages fermés faciles à nettoyer. Les miettes d’aliments et les fines herbes ne peuvent pas traverser les plateaux. Ce système permet un séchage homogène à tous les niveaux, ce qui évite de les interchanger. et de devoir surveiller l’appareil jusqu’à la fin de l’opération, celle-ci étant programmable à l’aide d’une minuterie. Un contrôle visuel et tactile est seulement conseillé vers la fin de la durée programmée pour les derniers ajustements. Pour un résultat parfait, vous pouvez éventuellement trier les aliments séchés et ajouter quelques minutes de séchage. F nous préconisons de les tremper quelques instants dans une solution composée d’une cuillère à soupe de jus de citron pour une tasse d’eau. Les éponger ensuite à l’aide de papier absorbant. À la place du jus de citron, on peut également utiliser de la vitamine C courante. Il est vivement recommandé de blanchir la plupart des légumes (voir tableau) : les légumes prêts à l’emploi sont plongés à l’aide d’un panier métallique ou d’une passoire dans un récipient rempli d’eau bouillante. Quand l’eau recommence à bouillir, laisser blanchir le temps indiqué dans le tableau. Le résultat sera uniforme si les morceaux sont à peu près de même taille. Des tranches fines se déshydratent plus vite, mais pensez qu’elles diminuent sensiblement de volume. À titre de point de repère, on peut mettre environ 500 g de fruits frais et 200 à 300 g de légumes frais par plateau. Il est conseillé de placer les fruits tranchés à la verticale les uns contre les autres. Les fruits non épluchés doivent en principe être posés côté peau, coupe vers le haut. Les rondelles doivent être rangées en écailles, et non à plat. Les légumes doivent être répartis en une seule Préparation Avant la première mise en service et au début de chaque saison de déshydratation, il est conseillé de laver les plateaux. Ne pas utiliser de produits abrasifs. Pour la déshydratation des herbes, procéder avec délicatesse. de déranger. Pendant la déshydratation, une agréable odeur aromatique, fruitée ou épicée peut se répandre, selon l’aliment à déshydrater. Si l’odeur devient trop intense, le degré de température est trop élevé. Détacher les herbes de leur tige, sans les couper davantage. Les herbes aromatiques à feuilles doivent être retournées de temps en temps pour éviter qu’elles ne collent entre elles. Ne pas trop remplir les étages, afin de ne pas interrompre la circulation de l’air. Pour conserver les aliments de manière sûre et Ajuster maintenant le déshydrateur électrique Poser l’appareil à un endroit où il ne risque pas appétissante, il est conseillé de bien les laver. N’utiliser que des aliments sains, le cas échéant et son couvercle transparent sur le plateau supérieur. enlever généreusement les parties abîmées, et retirer le noyau des fruits. Régler le thermostat sur la position correspon- Les fruits doivent être mûrs, mais pas trop. La préparation des différents types d’aliments Brancher l’appareil sur le secteur. Régler la minuterie sur la durée de déshy- est indiquée en détail dans le tableau ci-joint. Pour éviter le brunissement naturel de la 24 couche régulière. chair des fruits ou légumes (champignons), Durée de déshydratation La durée de déshydratation dépend de la nature, de la teneur en humidité, de la maturation et de la taille des aliments, ainsi que de l’air ambiant et du nombre de niveaux. En cas de doute, il est recommandé de programmer une durée plus courte et de contrôler l’aliment à la vue et au toucher avant la fin de l’opération. Tous les étages reçoivent uniformément de l’air sec, cependant, il est possible suivant les aliments et les emplacements concernés que les résultats soient un peu différents. Pour un résultat parfait, il est conseillé de trier les aliments séchés et de continuer à déshydrater ceux qui ne le seraient pas suffisamment (compter 30 minutes supplémentaires environ). Les aliments doivent être déshydratés immédiatement après leur préparation. Ne pas interrompre l’opération. Une déshydratation trop longue fait perdre trop d’arôme aux fines herbes et autres aliments aromatiques. Les fruits séchés que l’on mangera comme snacks (ou comme provision de bouche très peu encombrante en randonnée) sans les tremper au préalable ne doivent pas être trop séchés, pour être faciles à mâcher sans casser. Le contrôle au toucher est plus sûr une fois les aliments séchés refroidis .Les légumes séchés doivent être à peine durs, plutôt cassants et friables., les oignons et le persil avoir la consistance du papier. DEGRES DE TEMPERATURE Les aliments séchés se conservent à toute température ambiante, et de nombreuses années, dans un endroit sec, frais et à l’abri de la lumière. La saveur optimale est atteinte dans les mois d’hiver suivant la déshydratation et au début du printemps. Il est conseillé de contrôler régulièrement vos aliments séchés comme on le fait pour les conserves classiques. Un stockage à une température de 10°C inférieure permet de doubler voire tripler la durée de conservation. L’étiquetage indiquant le contenu et la date améliore la vue d’ensemble et ajoute la touche finale à vos précieux produits. Entretien Avant chaque nettoyage, mettre la minuterie sur 0 et débrancher l’appareil. La partie moteur avec couvercle transparent ne se salit pratiquement jamais à l’emploi. Il suffit de l’essuyer de temps en temps à l’aide d’un chiffon humide. Ne jamais la plonger dans l’eau! Grâce au nouveau système technique, le nettoyage est un jeu d’enfant. Normalement, les aliments déshydratés ne doivent ni goutter ni coller. Les plateaux n’ont pas de tamis ou de grille fine. Les plateaux fermés remplis d’eau avec un peu Le choix de la température appropriée est très important: de liquide vaisselle peuvent être empilés pour tremper ; ils se laissent ensuite rincer rapidement et sans difficulté. Position 1 env. 20°C au-dessus de la température ambiante, pour fines herbes et champignons. Ne pas gratter, le nettoyage deviendrait sinon Position 2 env. 40° C au-dessus de la température ambiante, pour tous les légumes et les fruits délicats. La crépine placée sur le moteur doit abso- Position 3 env. 60° C au-dessus de la température ambiante, pour toutes les sortes de fruits. dant à l’aliment à déshydrater (voir tableau). dratation souhaitée. L’appareil fonctionne et s’arrête automatiquement lorsque la durée programmée est écoulée. lorsque les aliments séchés sont prélevés par petites quantités. La conservation dans des sachets de congélation soudés ou sous vide est en revanche idéale pour les légumes séchés portionnés. CONSERVATION Bien laisser refroidir les aliments déshydratés avant de les emballer. Les bocaux en verre à fermeture hermétique bien nettoyés sont particulièrement recommandés pour la conservation., d’autant plus à chaque fois plus difficile. lument rester propre. En cas de saletés ou de poussière, la crépine doit être nettoyée au pinceau ou à l’aspirateur (avec aspiration minimale). Tous les éléments et matériaux employés sont parfaitement adaptés aux aliments. Les acides de fruits contenus dans les aliments séchés (notamment les carottes) peuvent toutefois occasionner une décoloration des surfaces des plateaux. Il ne s’agit en aucun cas d’un défaut de qualité! 25 F F Préparation des aliments Aliments Pommes Abricots Ananas Bananes Fruits des bois Poires Dattes Fraises Figues Myrtilles Cerises Melons Pêches Prunes/ Quetsches Raisin Agrumes 26 Teneur en eau en % 84 85 86 65 88 83 23 90 78 83 82 81 89 81 / 87 81 – Artichauts Choux-fleurs Haricots verts 87 89 90 Brocolis 89 Concombres Choux Choux-raves Carottes/ Panais Persil Poivrons/piments Macédoine de légumes Asperges Épinards Céleris Oignons 95 92 85 88 55 93 – 92 91 94 89 Tomates 94 Rhubarbe 95 Potirons/ Courgettes Fines herbes Champignons 92 – – Préparation ou remarques Retirer le cœur, couper en quartiers ou en rondelles Couper en 2 ou en 4 Éplucher puis couper en tranches bien mûres, couper en rondelles ou dans le sens de la longueur Hormis les myrtilles, utilisables uniquement en combinaison avec d‘autres fruits à cause des pépins Retirer le cœur, couper en deux ou en quartiers Bien mûres Couper en deux (sauf les petites) Couper en 2 Entières Avec noyau, entières Éplucher, épépiner, puis couper en tranches ou en quartiers Bien mûres Couper en deux et dénoyauter (selon vos goûts) entailler, choisir si possible une variété sans pépins En quartiers, écorce coupée en lanières pour plus d’arômes Nettoyer et couper les cœurs en deux Comme les brocolis Couper les bouts et enlever les fils, couper en biseau Séparer en morceaux gros comme une cuillère à soupe, faire tremper une 1/2h dans l‘eau salée + 1 c. à soupe de vinaigre Couper en rondelles de 10 mm d‘épaisseur Nettoyer et couper en morceaux (à la vapeur) Couper en dés ou en tranches Couper en rondelles ou en biseau Enlever les tiges Couper en lanières Couper en petits dés ou en lanières Éplucher, entières ou en tronçons de 20 mm Blanchir à la vapeur jusqu‘à flétrissement Couper en tranches Couper en tranches Plonger dans l‘eau bouillante 30 – 45 secondes, éplucher, couper en quartiers Éplucher, plonger dans l‘eau citronnée, couper en tronçons de 25 mm Éplucher, épépiner, couper en lanières de 8 mm ou en tranches Enlever les tiges, ne pas hacher Couper en deux, les plus gros en tranches Tremper dans l‘eau citronnée oui oui Position Temps de déshydra(graduation) tation en heures 3 4 – 8 3 (2) 8 – 12 3 (2) 8 – 12 3 5 – 8 3 4 – 6 3 (2) 3 3 (2) 3 3 3 3 3 (2) 3 3 3 (2) 6 – 12 4 – 6 6 – 12 4 – 6 4 – 6 8 – 12 8 – 12 8 – 12 8 – 14 8 – 14 8 – 10 2 2 2 4 – 5 5 – 7 5 – 6 3 – 4 2 3 – 5 – 2 – 3 3 – 5 2 – 3 – – 2 2 – 3 1 2 – 2 2 2 2 2 (1) 2 2 (1) 2 2 2 2 6 – 8 3 – 5 3 – 5 4 – 5 2 – 3 4 – 6 3 4 – 8 2 6 3 – 2 8 – 10 – 2 3 – 5 – – – 2 1! 1! 4 – 5 2 – 3 4 – 6 oui oui oui blanchir (en min.) 2 – 4 3 – 4 3 – 4 ATTENTION! Les temps de déshydratation sont uniquement donnés à titre indicatif et peuvent varier sensiblement selon la qualité des aliments. Les jeunes prunes ne sont pas appropriées pour la déshydratation en raison de leur faible teneur en fructose. Veillez à bien empiler les plateaux les uns sur les autres. Un décalage peut influencer le bon fonctionnement de l’appareil. Assurez-vous que le thermostat est bien réglé sur la position sélectionnée. Le socle de l’appareil doit toujours se trouver tout en bas. C’est le seul moyen d’assurer une parfaite ventilation. D’autre part, le plan de travail est protégé de l’air chaud. 27 F UTILISATION DES ALIMENTS DESHYDRATES GARANTIE L e s f r u i t s peuvent être consommés déshydratés comme snacks, mais également comme ingrédients dans de nombreuses recettes. Pour la garantie prenant effet le jour de l'achat, sur les territoires de l’UE et de la Suisse, s'appliquent les conditions suivantes. Pour utiliser les fruits déshydratés comme des fruits frais, il convient de les tremper dans de l’eau pour leur rendre leur humidité. Compter un volume d’eau pour un volume de fruits, par exemple une tasse de fruits pour une tasse d’eau, et laisser tremper environ 4 heures. En cas de doute, réduire la quantité d’eau et le temps de trempage, sinon les fruits risquent de se transformer en bouillie. Vous pouvez également vous servir de livres de cuisine qui proposent des recettes variées d’un pays à l’autre. Quelques suggestions: Gâteaux aux fruits et autres pâtisseries, pains aux fruits, tartelettes aux myrtilles, comme substituts aux raisins secs, etc. Compotes pour gaufres et crêpes, garniture de sandwichs, desserts, sauces aux pommes, etc. Pour accompagner certaines viandes et gibier, chutneys, etc. Pour parfumer muesli, flans, yaourts, crème chantilly, glaces, salades de fruits, fruits à l’armagnac, etc. On peut confire et glacer différents fruits à sa guise en les enrobant au préalable dans un sirop de sucre. Les bananes conviennent particulièrement pour les laitages (milk-shake) et comme ingrédient moulu en poudre comme aliments pour bébé. Certains fruits se marient bien avec du miel et des noix. Une fois ramollis, les fruits séchés se mélangent facilement aux fruits frais. Selon la recette, on les utilisera entiers ou hachés plus ou moins finement. Étonnez votre entourage en confection- 28 F nant une spécialité de l’Himalaya, le « cuir de fruits » : il s’agit d’une galette ondulée composée de fruits réduits en purée, mélangés à du miel, des noix et des épices, que l’on peut découper en petits carrés et que l’on déshydrate jusqu’à obtenir une pâte dure comme du cuir. On peut également farcir cette galette, la rouler et la couper en tranches. L e s l é g u m e s doivent généralement être réhydratés avant cuisson. Pour une tasse de légumes on ajoutera une tasse d’eau froide à tiède. Attention : ne pas utiliser plus d’eau que nécessaire pour la recette. Cuire les légumes dès qu’ils sont réhydratés. Le temps de cuisson des légumes réhydra- tés est à peu près le même que celui des légumes congelés. Les légumes pour potages, déshydratés en petits morceaux, peuvent être directement ajoutés à l’eau de cuisson. Pour les soupes, ingrédients pour sauces, sauces de salade, etc., les aliments déshydratés seront hachés à la taille désirée, selon les goûts. Les légumes séchés moulus sont parfaite- ment adaptés pour bouillies de bébé, veloutés, sauces, etc. Il est conseillé de ne moudre que la quantité nécessaire pour un mois, car la durée de conservation diminue une fois les aliments moulus. Les légumes séchés et réhydratés pourront sans problème être cuits avec des légumes frais. Les fines herbes seront moulues ou pilées juste avant leur utilisation. Veillez à éliminer d’éventuelles tiges dures. Les champignons réhydratés s’utilisent comme des frais. En moudre une partie pour les ajouter aux potages et aux sauces. Poivrons et piments séchés peuvent être broyés ou moulus dans le robot ménager et conservés comme condiments dans un bocal hermétique. Autres suggestions de plats pour une cuisine inventive: Soupes de légumes, minestrones, pot-au-feu, potées, ratatouille, cassoulet, irish stew, goulash, etc. Composez vos propres mélanges d’herbes 1. Durée de la garantie: 2 ans 2. Prestations de garantie: a) A notre discrétion, réparation ou échange de pièces qui présentent un défaut de matériau ou de fabrication après vérification par nos soins. 3.La garantie n’est pas applicable: aux rayures et taches sur l’appareil. aux lampes d’éclairage et de contrôle. aux brosses motorisées. aux parties fragiles en bakélite, verre, plastique, etc. à moins qu’il ne s’agisse d’un défaut dans le matériau et qu’il ait été reconnu en tant que tel par nos soins. b) La garantie ne sera effectuée que sur présentation de cette carte de garantie et de la facture de l’achat. La carte n’est valable que si elle a été remplie intégralement au jour de l’achat. aux dommages qui ont été causés par une c) La prestation de garantie n’est applicable qu’au premier utilisateur. électrique dont la tension est supérieure à celle indiquée sur l’appareil. d) La période initiale de garantie n’est ni prolongée ni renouvelée du fait de la réparation ou de l’échange de pièce pendant la durée de la garantie. e) Les frais de transport sont à la charge de l’acheteur (ne s’applique pas pendant les 6 premiers mois de la garantie). f) Dans la mesure où le dommage ou le défaut ne peut pas être supprimé ou si l’amélioration a été refusée par nos soins ou si elle est retardée de manière non raisonnable, il sera procédé dans les 6 mois à partir de la date de l’achat/de livraison à un remplacement gratuit où la valeur minimale sera remboursée ou l’appareil sera repris contre remboursement du prix d’achat, mais toutefois à hauteur du prix courant du marché au maximum. installation ou une fixation inappropriée. lorsque l’appareil est raccordé à un réseau en cas de mauvaise utilisation ou d’usage inapproprié. en cas d’absence de soins. en cas d’entretien insuffisant ou inapproprié. en cas de chute de l’appareil ou de pièces individuelles. en cas de transport inapproprié ou d’emballage insuffisant en cas de transport. 4.La garantie est caduque: lorsque l’appareil a été utilisé à d’autres fins qu’un usage domestique. lorsque des personnes qui n’ont pas été agréées par notre entreprise exécutent des réparations ou des modifications sur l’appareil. Nous accordons une garantie de 2 ans sur cet appareil pour les défauts découlant de défauts dans la fabrication ou les matériaux. La durée de la garantie commence au jour de la remise et elle n’est applicable que sur présentation de la carte de garantie et de la facture de l’achat. Toute autre prétention complémentaire est nulle. Modèle: fines, infusions, huiles aux herbes, etc. Important! Veuillez noter ici le code FD se trouvant sur le panneau de type de l’appareil: Préparez votre propre sel au céleri ou à l’ail : Moudre les ingrédients voulus et les mélanger à une même quantité de sel. Découvrez d’autres recettes et mélanges en consultant vos livres de cuisine. Timbre et signature du vendeur Date de la vente 29 I I IMPORTANTI INDICAZIONI Per evitare danni e pericoli risultanti da un utilizzo non conforme si prega di attenersi alle presenti istruzioni per l'uso che dovranno essere conservate con cura. In caso di cessione dell'apparecchio a terzi, consegnare anche le presenti istruzioni. Non è consentito utilizzare l'apparecchio per eseguire lavori diversi da quelli qui descritti. L'apparecchio è destinato esclusivamente all'uso domestico e non all'uso professionale. In caso di diverso utilizzo la garanzia si estinguerà. ESSICCATORE AUTOMATICO BHG 601 I Questo apparecchio è conforme alla direttiva N. 2004/108 / CEE sulla compatibilità elettromagnetica (EMC) e alla direttiva Bassa tensione 2006/95 CEE. L'essiccatore BHG 601 Proteggere l'apparecchio da schizzi e gocce d'acqua. Utilizzare l'apparecchio solo in locali asciutti. Al termine dell'utilizzo, prima di pulire l'appa- recchio o in caso di guasti verificatisi durante il funzionamento, estrarre la spina dalla presa di alimentazione. Durante il funzionamento l'apparecchio si scalda. I bambini non comprendono i pericoli connessi all'utilizzo di un apparecchio elettrico. Pertanto, non lasciare mai l'apparecchio incustodito in presenza di bambini. Non collocare né utilizzare l'apparecchio su superfici calde o nelle vicinanze di fiamme libere di gas. Durante l'utilizzo l'apparecchio deve essere IMPORTANTI INDICAZIONI DI SICUREZZA La sicurezza degli apparecchi elettrici BIELMEIER soddisfa le regolamentazioni tecniche generalmente approvate e le normative sulla sicurezza. Tuttavia si fa presente all'utente e ad altri eventuali utilizzatori quanto segue: Si prega di leggere con attenzione le presenti istruzioni per l'uso prima della messa in funzione e di conservarle con cura. Collegare l'apparecchio solo a corrente alternata con la tensione indicata sulla targhetta. posizionato in un luogo con sufficiente spazio e non deve essere coperto, per evitare di ostacolare l'aria in ingresso o in uscita. Non immergere mai in acqua la parte elettrica con il cavo di alimentazione. Prima di staccare la parte elettrica, estrarre la spina dalla presa di alimentazione! cavo di alimentazione, far controllare l'apparecchio da un tecnico o dal servizio assistenza di BIELMEIER. Si declina ogni responsabilità in caso di uso diverso da quello previsto o di un utilizzo errato. L'asciugatura e l'essiccatura sono i più antichi mezzi per la conservazione di alimenti utilizzati dall'uomo. consente di evitare anche l'uso dello zolfo e di altri conservanti. Tutti gli alimenti contengono una percentuale variabile di acqua. Con l'essiccatura si sottrae agli alimenti tale acqua, che costituisce un terreno propizio per la formazione dei batteri saprofiti e della muffa e per i processi di fermentazione. Se l'essiccatura e la conservazione vengono effettuate correttamente, l'alimento essiccato potrà essere conservato anche per diversi anni. La sottrazione dell'acqua produce una concentrazione delle sostanze aromatiche, che influisce positivamente anche sul gusto dell'alimento. Le vitamine, le sostanze nutritive e i minerali, invece, non subiscono alcuna alterazione. Infine, questo metodo Anche se si utilizza già la sterilizzazione o la surgelazione come metodo di conservazione, l'essiccatura consentirà di arricchire ulteriore la cucina e deliziare il palato. Alle nostre latitudini l'essiccatura al sole è più l'eccezione che la regola. A causa della relativa chiusura dell'ambiente e della mancanza di sufficiente circolazione di aria, l'essiccatura in forni casalinghi causa spesso trasudamento, adesione o gocciolamento del prodotto sottoposto a essiccatura, con conseguente formazione di incrostazioni difficili da eliminare, poiché tali forni non sono ideati per questa operazione. 1 tazza di acqua. Al posto del succo di limone è possibile utilizzare anche la vitamina C normalmente reperibile in commercio. La maggior parte delle verdure dovrà essere sbollentata (vedi tabella). Utilizzando un cestello di metallo o un setaccio, la verdura preparata viene immersa in una pentola di acqua bollente. Il tempo di sbollentatura viene calcolato in base alla tabella, a partire dal momento in cui l'acqua riprende a bollire. L'aria satura di umidità non attraversa tutti gli altri piani ma viene scaricata all'esterno di ogni piano. Per questo motivo l'essiccatore automatico BIELMEIER non dispone di filtri o setacci ma di piani chiusi facili da pulire. Briciole ed erbe aromatiche non possono cadere. Questo sistema consente un'essiccatura uniforme in tutti i piani. Ciò rende superfluo il cambio di posizione degli alimenti da essiccare e consente il funzionamento dell'apparecchio senza controllo o mediante timer automatico fino quasi al termine del tempo di essiccatura. Si consiglia solo di effettuare un controllo dell'alimento sottoposto a essiccatura mediante test visivo e tattile verso la fine dell'essiccatura, per ottenere un risultato più preciso. Le persone particolarmente esigenti potranno eventualmente selezionare gli alimenti essiccati e prolungare ancora un poco il periodo di essiccatura. Il risultato dell'essiccatura sarà più uniforme Preparazione Se si essiccano verdure, distribuirle uniforme- In caso di evidenti danni all'apparecchio o al Informazioni generali sull'essiccatura 28 Il nuovo essiccatore lavora in modo più veloce ed efficace grazie all'applicazione di una legge fisica: la corrente d'aria aspirata dall'alto viene riscaldata uniformemente tramite una speciale resistenza elettrica. In tal modo l'aria diventa molto ricettiva nei confronti dell'umidità e mediante una leggera sovrapressione viene distribuita uniformemente in tutti i piani di essiccatura, per sottrarre agli alimenti la loro umidità. Prima della prima messa in funzione e all'inizio della stagione di essiccatura consigliamo di pulire i piani dell'apparecchio. Non strofinare! Collocare l'apparecchio in un posto dove non causi disturbo durante tutte le operazioni di essiccatura. Durante l'essiccatura, a seconda degli alimenti inseriti, potrà diffondersi un piacevole profumo aromatico, fruttato o piccante. Per garantire una conservazione appetitosa e nella massima sicurezza, lavare con cura tutti gli alimenti. Utilizzare solo alimenti senza difetti, rimuovere abbondantemente le parti marce ed eliminare i noccioli e i semi presenti nella frutta. se i pezzi tagliati hanno più o meno la stessa dimensione. Le fette sottili si essiccano più rapidamente. Tuttavia, è necessario considerare che quando i pezzi si essiccano, le loro dimensioni si riducono notevolmente. Come indicazione approssimativa della capa- cità dell'apparecchio si può considerare circa 500 g di frutta fresca e 200-300 g di verdura fresca per ciascun piano, a seconda del tipo di alimento utilizzato. Si consiglia di collocare i pezzetti di frutta in posizione verticale e vicini l'uno all'altro. La frutta che non è stata sbucciata va posizionata sul vassoio con la superficie di taglio rivolta verso l'alto. Gli alimenti tagliati a fette dovranno essere disposti sui piani distribuiti in strati parzialmente sovrapposti, come scaglie. mente sul piano in un solo strato. Le erbe aromatiche devono essere essiccate con molta attenzione! Se si genera un odore intenso, significa che la temperatura selezionata è troppo alta. Privare le erbe aromatiche dei gambi, ma non sminuzzarle. Le erbe aromatiche con foglie dovranno essere girate di tanto in tanto, per evitare che si attacchino tra loro. Inoltre, non è consigliabile riempire troppo i piani, per non impedire la circolazione dell'aria. La parte elettrica dell'essiccatore con il coper- chio trasparente dovrà essere posizionata sul piano superiore. Regolare la manopola della temperatura sul li- vello idoneo per il tipo di alimenti da essiccare (vedi tabella). La frutta dovrebbe essere matura, ma non troppo. Nella tabella viene indicata la preparazione Inserire la spina dell'apparecchio nella presa di Se si vuole evitare il naturale imbrunimento Impostare il timer sul tempo di essiccatura de- consigliata per ogni singolo alimento. delle superfici tagliate, è possibile immergere brevemente la frutta in una soluzione ottenuta aggiungendo 1 cucchiaio di succo di limone a alimentazione. siderato. L'apparecchio entrerà in funzione e si spegnerà dopo che sarà trascorso il tempo impostato. 29 I Tempo di essiccatura Il tempo di essiccatura dipende dal tipo, dall'umidità, dalla maturità e dallo spessore degli alimenti che si desidera essiccare, nonché dall'aria dell'ambiente e dal numero di piani utilizzati. In caso di dubbi, scegliere un tempo di essiccatura più breve e verso la fine dell'essiccatura effettuare più volte un test visivo e tattile. L'apparecchio distribuisce aria asciutta in tutti i piani in modo abbastanza uniforme. Tuttavia, differenze nei tipi di alimenti utilizzati possono produrre risultati divergenti. Se si è particolarmente esigenti, è possibile effettuare una selezione, lasciando ad essiccare le parti ancora molli per un'altra mezz'ora o un'altra ora. Essiccare subito gli alimenti preparati. Non è consigliabile interrompere l'operazione di essiccatura. Un'essiccatura troppo lunga causa la perdita di gran parte degli aromi nelle erbe e negli altri alimenti particolarmente aromatici. Non essiccare troppo i frutti che si desidera consumare come snack o come provviste da viaggio leggere e poco voluminose, in modo che rimangano facilmente masticabili (anche senza doverli mettere precedentemente a mollo) e non si rompano. La prova tattile è la più attendibile per capire se l'alimento essiccato si è raffreddato. La verdura essiccata non dovrebbe risultare dura al tatto ma piuttosto screpolata e fragile. Cipolle e prezzemolo dovrebbero avere la consistenza della carta. Livello della temperatura È molto importante selezionare la temperatura corretta: Livello 1 circa 20°C sopra la temperatura ambiente per erbe aromatiche e funghi. Livello 2 circa 40°C sopra la temperatura ambiente per tutte le verdure e per i tipi di frutta delicati. Livello 3 circa 60°C sopra la temperatura ambiente per tutti gli altri tipi di frutta. Conservazione 30 Prima di confezionare l'alimento essiccato, lasciarlo raffreddare. I contenitori più idonei sono vasetti di vetro puliti e richiudibili. Ad esempio i vasetti vuoti di altri alimenti confezionati. Questi vasetti sono particolarmente indicati e preferibili alle buste di plastica, se si desidera consumare un poco per volta l'alimento essiccato. È consigliabile anche l'uso I di porzioni confezionate con l'ausilio di pellicole saldate o sottovuoto. Per la verdura essiccata è il tipo di conservazione più idoneo. Gli alimenti essiccati possono essere conservati per anni in ogni temperatura ambiente. Tuttavia, è preferibile conservarli in locali asciutti, freschi e al buio. L'alimento avrà il gusto migliore nei mesi invernali successivi all'essiccatura e nella seguente primavera. È consigliabile effettuare occasionalmente un controllo visivo, proprio come per tutti gli altri alimenti conservati. Il periodo di conservazione si prolungherà di due-tre volte per ogni dieci gradi di temperatura in meno. L'etichettatura delle confezioni con l'indicazione del contenuto e della data consentirà di avere un migliore controllo dei prodotti essiccati e completerà il proprio prodotto di qualità, per una maggiore soddisfazione. Utilizzo di alimenti essiccati I f r u t t i possono essere consumati essiccati, come snack, oppure utilizzati come ingredienti fantasiosi per arricchire numerose ricette. Se si desidera utilizzare i frutti essiccati in ricette che prevedono l'utilizzo di frutta fresca, sarà necessario metterli a bagno per reintegrare l'acqua persa durante l'operazione di essiccatura. Ai frutti si aggiunge lo stesso volume in acqua (ad esempio, a una tazza di frutti essiccati si aggiunge una tazza di acqua) e li si lascia in ammollo per circa 4 ore. In caso di dubbi è meglio ridurre la quantità di acqua e il periodo di ammollo, per evitare che l'alimento assorba troppa acqua. Quindi sarà possibile seguire le ricette fornite nei diversi libri di cucina, che variano da Paese a Paese. Pulizia Qui viene fornito solo qualche spunto: Prima di eseguire la pulizia, regolare il timer sullo 0 ed estrarre la spina dalla presa di alimentazione. In genere la parte elettrica che comprende anche il coperchio trasparente non si sporca con l'uso. Sarà sufficiente pulirla ogni tanto con un panno umido. Non immergerla mai in acqua! Crostate ed altri dolci da forno, pane con frutta La nuova tecnologia utilizzata rende anche la pulizia dei piani un gioco da bambini. In genere gli alimenti da essiccare non gocciolano e non aderiscono ai piani. I piani di essiccatura non hanno filtri o setacci molto fini. È possibile riempire con acqua e detersivo i piani a vaschetta e lasciarli in ammollo uno sopra l'altro. In tal modo sarà possibile pulirli dopo poco senza alcuna fatica. Non strofinarli, altrimenti sarà sempre più difficile eseguire la pulizia. Mantenere sempre libero il filtro di aspi- razione sul motore. In caso di sporcizia o polvere pulire il filtro di aspirazione con un pennello o con un aspirapolvere (con aspirazione al minimo). Tutti i componenti e i materiali utilizzati sono idonei e particolarmente adatti ad essere utilizzati con gli alimenti. Tuttavia, il colore delle superfici dei piani può cambiare leggermente a causa dei coloranti e degli eventuali acidi presenti negli alimenti da essiccare (ad esempio, nelle carote). Non si tratta di un problema di scarsa qualità del materiale! secca, crostatine di mirtilli, sostituzione dell'uva passa e così via. Frutta cotta da servire insieme a cialde e pan- cake, creme da spalmare su sandwich, dessert, salsa alle mele e così via. Ingredienti per piatti di carne e selvaggina, chutney così via. Ingredienti per muesli, budini, yogurt, panna montata, gelato, macedonia, frutti in armagnac e così via. È possibile candire o glassare la frutta seguendo la propria fantasia. Le banane sono ideali per frullati al latte e come ingredienti per alimenti per neonati, dopo avere ridotto in polvere le banane essiccate. È possibile arricchire diversi frutti con miele e noci. È possibile mescolare la frutta fresca alla frutta essiccata dopo che quest'ultima è stata messa in ammollo. A seconda della ricetta i frutti verranno lasciati interi o tagliati a grossi pezzi. Una specialità dell'Himalaya è il cosiddetto “fruit leather”, che si prepara utilizzando diversi frutti frullati ai quali si aggiungono miele, noci e spezie. Al composto viene data la forma di un panetto appiattito che viene tagliato in bocconcini squadrati. Questi ultimi vengono fatti essiccare fino a quando non diventano duri. È anche possibile farcire questo panetto, arrotolarlo e tagliarlo a fette. La v e r d u r a viene generalmente messa a mollo prima di essere utilizzata. Ad esempio, per ogni tazza di verdura essiccata si aggiunge una tazza di acqua tiepida o calda. Non aggiungere più acqua di quanta non ne sia necessaria per l'alimento. Inoltre, non lasciare le verdure troppo a lungo in ammollo prima di utilizzarle. Le verdure ammollate richiedono più o meno lo stesso tempo di quelle surgelate per cuocere. Le verdure utilizzate per le zuppe, essiccate in pezzetti relativamente piccoli, potranno essere utilizzate direttamente, senza che sia necessario metterle a bagno. Le verdure essiccate utilizzate per zuppe, salse, condimento di insalate e così via, potranno essere tritate con il robot da cucina e mescolate cosi agli altri ingredienti. È consigliabile macinare le verdure essiccate utilizzate come alimenti per neonati, vellutate, salse e così via. È opportuno macinare al massimo la quantità che si prevede di consumare in un mese, poiché la durata di conservazione degli alimenti macinati si riduce. Dopo che sono state ammollate, le verdure essiccate possono essere utilizzate senza alcun problema insieme a prodotti freschi. Triturare o pestare le erbe aromatiche poco prima dell'impiego. Assicurarsi di rimuovere gli eventuali gambi duri ancora presenti. I funghi vengono messi in ammollo ed utilizzati esattamente come il prodotto fresco. Per zuppe e salse si potrà utilizzarne una parte in forma macinata. I peperoni ed i peperoncini possono essere tritati o macinati con il robot da cucina e conservati ulteriormente come spezie in un vasetto ermetico. Di seguito viene fornita qualche altra idea tra le tante infinite possibilità di impiego: Minestre di verdura e minestroni, zuppe come il Pichelsteiner (una zuppa a base di carne), il Gaisburger Marsch (uno stufato), il cassoulet francese, la ratatouille, l'irish stew (stufato irlandese), il gulasch di verdure, il gulasch di funghi e così via. Ricoprire con una pastella e friggere i carciofi. Creare miscele personali di erbe aromatiche, infusi di erbe, oli alle erbe e così via. Sale al sedano, sale all'aglio: macinare l'alimen- to essiccato e mescolarlo al sale in una proporzione 1 : 1. Nei diversi libri di cucina si potranno trovare molte altre idee. 31 I I Preparazione Alimento Mele Albicocche Ananas Banane 32 Contenuto di acqua (%) 84 85 86 65 Frutti di bosco 88 Pere Datteri Fragole Fichi Mirtilli Ciliege Meloni Pesche Prugne / Susine Uva Agrumi 83 23 90 78 83 82 81 89 81 87 81 – Pretrattamento od osservazioni Rimuovere il torsolo, tagliarle a fette o ad anelli Tagliarle a metà o in quarti Sbucciarlo, tagliarlo a fette Devono essere molto mature, tagliarle a fette o a strisce Tranne che per i mirtilli, è possibile utilizzare i frutti di bosco solo insieme ad altri frutti, a causa dei piccoli semi che contengono Rimuovere il torsolo, tagliarle a metà o a fette Devono essere molto maturi Tagliarle a metà, lasciare intere quelle piccole Tagliarli a metà Lasciarli interi Lasciarle intere, con il nocciolo Sbucciarli, togliere i semi, tagliarli a fette o a pezzetti Devono essere molto mature Tagliarle a metà e rimuovere il nocciolo oppure essiccarle intere con il nocciolo Incidere i chicchi, se possibile utilizzare varietà senza semi Tagliarli a pezzetti, tagliare la buccia a strisce per utilizzarla come aroma Carciofi 87 Cavolfiore 89 Fagiolini verdi Broccoli Cetrioli Cavolo Cavolo rapa Carote / Pastinache Prezzemolo Peperoni / Peperoncini Verdura mista per zuppe Asparagi Spinaci Sedano Cipolle Pomodori 90 89 95 92 85 88 55 93 Tagliarli a strisce – 92 91 94 89 94 Rabarbaro 95 Tagliarla a cubetti o a strisce Sbucciarli, lasciarli interi o tagliarli in pezzetti di 20 mm Sbollentarli a vapore fino a farli leggermente appassire Tagliarlo a fette Tagliarle a fette immergerli per 30 – 45 sec. in acqua bollente, sbucciarli e tagliarli in quarti Sbucciarlo, immergerlo in acqua e limone e tagliarlo in pezzi di 25 mm Sbucciarle, rimuovere i semi e tagliarle in strisce di 8 mm o a fette Privarle dei gambi, non sminuzzarle Tagliarli a metà, tagliare a fette i funghi più grossi Zucche / Zucchine 92 Erbe aromatiche – Funghi – Pulirli e tagliare i cuori a metà Tagliarlo in pezzi della grandezza di un cucchiaio, metterlo per ½ ora in acqua salata con un cucchiaio di aceto Rimuovere le punte ed i fili, tagliarli in senso obliquo Stessa preparazione del cavolfiore Tagliarli a fette con uno spessore di 10 mm Pulirlo e tagliarlo a pezzi (a vapore) Tagliarlo a cubetti o a fette Tagliarle in senso obliquo o trasversale Rimuovere i gambi Immergere in acqua e limone Sì Sì Livello di essiccatura 3 3 (2) 3 (2) 3 Tempo di essiccatura in ore (appross.) 4 – 8 8 – 12 8 – 12 5 – 8 3 4 – 6 3 (2) 3 3 (2) 3 3 3 3 3 (2) 6 – 12 4 – 6 6 – 12 4 – 6 4 – 6 8 – 12 8 – 12 8 – 12 3 8 – 14 3 3 (2) 8 – 14 8 – 10 Sbollentatura (in min.) 2 – 4 2 4 – 5 3 – 4 2 5 – 7 3 – 4 3 – 4 – 2 – 3 3 – 5 2 – 3 – 2 2 2 2 2 2 2 (1) 5 – 6 3 – 5 6 – 8 3 – 5 3 – 5 4 – 5 2 – 3 – 2 4 – 6 2 2 – 3 1 2 – – 2 (1) 2 2 2 2 2 3 4 – 8 2 6 3 8 – 10 – 2 3 – 5 – – – 2 1 ! 1 ! 4 – 5 2 – 3 4 – 6 Sì Sì Sì Osservare quanto segue! I tempi di essiccatura indicati sono solo indicativi e possono differire notevolmente in base alla natura dell'alimento da essiccare utilizzato. Le prugne primaticce non sono idonee all'essiccatura perché contengono poco fruttosio. Impilare con cura i piani uno sopra l'altro. Uno spostamento dei piani durante l'essiccatura potrebbe pregiudicare il risultato. Assicurarsi che la manopola della temperatura sia posizionata esattamente sulla posizione selezionata. La base deve essere posizionata sempre al livello più basso. Solo in questo modo viene garantita la perfetta circolazione dell'aria. 33 I CZ GARANZIA Le seguenti disposizioni di garanzia decorrono dalla data di acquisto e sono valide all’interno dell’UE e della Svizzera. 1. Periodo di garanzia: 2 anni 3.La garanzia non è valida: 2. Prestazioni di garanzia: a) Riparazione o sostituzione, a nostro esclusivo giudizio e dopo accurata verifica, di pezzi che presentano difetti di materiale o di fabbricazione. b) La garanzia è valida solo su presentazione di questo certificato di garanzia, che a sua volta è valido solo se compilato in ogni sua parte nel giorno dell’acquisto. c) La garanzia è valida solo per il primo utente. d) Il periodo di garanzia non sarà rinnovato o prolungato a seguito di successiva riparazione o sostituzione di pezzi. e) I costi di trasporto sono a carico dell’acquirente (non vale per i primi 6 mesi di garanzia). f) In caso di guasto o difetto irreparabile, qualora la riparazione venisse da noi respinta o gli interventi necessari non fossero eseguiti entro un termine adeguato, si provvederà - a scelta dell’utente entro 6 mesi dalla data di acquisto/fornitura - alla sostituzione gratuita dell’apparecchio o al rimborso del valore minimo o alla riconsegna dell’apparecchio dietro rimborso del prezzo d’acquisto, tuttavia non del prezzo corrente sul mercato. per graffi o macchie sull’apparecchio. per graffi o macchie sull’apparecchio. per le spazzole del motore. per parti leggermente fragili in bachelite, vetro, plastica e simili, eccetto che si tratti di difetti di costruzione riconosciuti da noi come tali. per danni causati da errata installazione o fissaggio. se l’apparecchio è collegato ad una rete elet- trica di tensione maggiore rispetto a quella indicata sull’apparecchio. Timbro e firma del Rivenditore Sušička ovoce BHG 601 CZ Tento spotřebič odpovídá směrnici EG 2004/108/ EWG o elektromagnetické kompatibilitě a směrnici 2006/95 EWG pro nízkonapěťové systémy. in caso di manutenzione errata o insufficiente. in caso di manutenzione errata o insufficiente. in caso di trasporto inadeguato o di imballaggio inadeguato per il trasporto. 4.La garanzia decade: se l’apparecchio è utilizzato per scopi diversi da quelli domestici. se le riparazioni e le modifiche sono esegu- Importante! Si prega di annotare l’FD- Code apposto sulla targhetta dell’apparecchio: Data dell’acquisto Spotřebič připojte jen ke zdroji střídavého napětí, které odpovídá označení na typovém štítku spotřebiče. Chraňte přístroj v místě použití před stříkající vodou a kapkami. Po ukončení provozu, před údržbou přístroje nebo při event. poruše, vytáhněte síťový kabel z elektrické zásuvky. Za provozu je spotřebič horký. Děti neznají nebezpečí, která můžou vznik- nout při zacházení s elektrickými spotřebiči, proto je nikdy nenechávejte manipulovat se spotřebičem bez dozoru. Spotřebič neodkládejte ani nenechávejte v provozu na horkém povrchu nebo v blízkosti otevřeného plynového hořáku. Spotřebič musí za provozu volně stát a nesmí být přikryt, aby nebyl zamezen přívod a odvod vzduchu. Elektrickou část spotřebiče s přívodním kabe- in caso di scarsa cura. Garantiamo questo apparecchio per un periodo di 2 anni per guasti dovuti a difetti di materiale o di fabbricazione. La garanzia decorre dal giorno della fornitura del prodotto ed è valida solo su presentazione del certificato di garanzia e della ricevuta fiscale di pagamento. Ulteriori pretese di garanzia sono escluse. 34 Abyste předešli způsobení různých škod nebo jiných nebezpečí nesprávným používáním, přečtěte si pozorně tento návod k obsluze a uschovejte si ho. Přístroj předávejte dalším osobám pouze s tímto návodem k obsluze. Spotřebič nesmí být využíván k jiným než uvedeným účelům. Je určen pouze k použití v domácnosti, nikoliv ke komerčním účelům. Při zjištění neodborného zacházení zaniká nárok na záruku. in caso di uso errato o inadeguato. ite da personale non autorizzato dalla nostra azienda. Modello: Důležité bezpečnostní informace lem neponořujte nikdy do vody. DŮLEŽITÁ BEZPEČNOSTNÍ UPOZORNĚNÍ Bezpečnost elektrospotřebičů BIELMEIER odpovídá ob ecně uznávaným technickým předpisům a zákonným ustanovením. Přesto bychom chtěli Vás i ostatní uživatele upozornit na následující skutečnosti. Před uvedením spotřebiče do provozu si přečtěte pečlivě návod k obsluze a uschovejte si ho. Spotřebič provozujte jen v suchých místnostech. Před odnětím elektrické části spotřebiče vytáhněte nejdřív přívodní kabel ze zásuvky! Při zjevném poškození spotřebiče nebo pří- vodního kabelu nechte spotřebič přezkoušet u odborníka nebo v příslušném servisu. Za eventuální škody vzniklé používáním spotřebiče k jiným než uvedeným účelům nebo nedodržením návodu k obsluze, nepřebíráme odpovědnost. Všeobecně o sušení Sušení a pražení jsou jedny z nejstarších člověku známých způsobů konzervace. Potraviny obsahují více či méně vody. Sušením je odstraněná voda a tím také živná půda pro vznik hniloby, kvasných procesů a plesnivění. Při správném sušení a skladování si usušené potraviny zachovají trvanlivost po celá léta. Odstraněním vody dochází k nahromadění aromatických látek, proto je usušená potravina často chutnější. Vitamíny, živiny a minerály zůstávají nepoškozené. Vyhnete se také použití síry a ostatních konzervačních látek. I když potraviny raději zavařujete nebo zamrazujete, přináší sušení další obohacení chutí a využití v kuchyni. Sušení na slunci v naší zeměpisné šířce není vždy možné. Sušení v domácnosti v uzavřené pečící troubě s menší možností cirkulace vzduchu je častou příčinou pocení, lepení nebo odkapávání št’ávy sušené potraviny. Údržba takto znečištěné trouby je velmi náročná, protože není k sušení zkonstruovaná. 35 CZ CZ Funkce a následně je pak nechat okapat na utěrce. Citrónovou šťávu lze nahradit vitamínem C, který snadno obstaráte v lékárně nebo v obchodě. Vaše nová sučička ovoce pracuje rychleji a efektivněji na základě fyzikálních principů. Shora nasávaný proud vzduchu je speciální topnou spirálou rovnoměrně ohříván. Tím je vzduch dobře připraven k vázání vlhkosti a lehkým přetlakem rovnoměrně rozdělen do každého jednotlivého sušícího patra, kde odebírá potravinám vlhkost. Vzduch nasycený vlhkostí neprochází všemi dalšími patry, ale je odváděn v každém patře zvlášť příslušnými otovory ven. Proto nemá sušička žádná síta ani mřížky, ale má uzavřená, snadno omyvatelná patra, kterými malé kousky ovoce a byliny nemohou propadnout. Tato soustava umožňuje rovnoměrné sušení ve všech patrech bez nutnosti jejich přesunování a spotřebič může být v provozu do krátké doby před ukončením sušení bez dozoru za použití automatického časovače. Zda byla docílena požadovaná jemnost sušené potraviny stačí vyzkoušet ke konci doby sušení, a to zrakem a na omak. Zvlášť náročné sušené potraviny se mohou eventuálně vytřídit a dobu sušení ještě o něco prodloužit. Příprava Před prvním použitím a na začátku sezóny pro sušení doporučujeme patra umýt, ale ne drhnout! Spotřebič postavte na místo, kde nebude po celou dobu sušení překážet. Během sušení se může podle druhu sušené potraviny rozšiřovat příjemná, aromatická, ovocná nebo kořeněná vůně. Aby byly suroviny spolehlivě a chutně zakonzervovány je třeba je dobře umýt. Používejte jen potraviny, které jsou nezávad- né, poškozená místa pečlivě odstraňte. U ovoce odstraňte jádřinec. Ovoce má být zralé, avšak ne přezrálé. V jednotlivých případech najdete v tabulce doporučené zpracování. Jestliže se chcete vyhnout přirozenému 36 zhnědnutí řezných ploch, můžete plody krátce namočit do roztoku z jedné polévkové lžíce citrónové šťávy a jednoho šálku vody, Pro většinu zeleniny se hodí blanšírování (viz. tabulka). Připravená zelenina se ponoří v síti nebo drátěném koši do hrnce s vařící vodou. Časové hodnoty v tabulce pro blanšírování se počítají od chvíle, kdy se voda opět začne vařit. Rovnoměrný výsledek sušení dosáhnete nakrájením ovoce na přibližně stejně velké kousky. Tenké plátky se suší rychleji, nezapomeňte však na to, že se kousky sušením ještě zmenší. Orientační objemové množství na jedno patro (podle druhu ovoce) je cca. 500 g čerstvého ovoce, případně 200 – 300 g čerstvé zeleniny. Doporučuje se kousky ovoce ukládat nasto- jato a těsně vedle sebe. Neoloupané ovoce pokládejte zásadně slupkou dolů a řeznou plochou nahoru. Kousky tvaru plátků zarovnávejte šupinovitě, ne na plocho. Zeleninu rozložte pravidelně jen v jedné vrstvě. Byliny suště velmi šetrně! Pokud vznikne příliš intenzivní vůně, je nastavená teplota příliš vysoká. Z bylin odstraňte stonky a dál je nezmenšujte. Listovou zeleninu během sušení občas obraťte, aby se neslepila. Patra nepřeplňujte, abyste nenarušili cirkulaci vzduchu. Doba sušení Doba sušení je závislá na druhu suroviny, objemu vody, zralosti a síle nakrájených plátků, stejně tak na pokojové teplotě a počtu pater sušičky. V případě pochybností lze zvolit kratší dobu sušení a provést vícekrát kontrolu zrakem i na omak. Tento spotřebič zásobuje suchým vzduchem všechna patra téměř rovnoměrně, přesto se však můžou ve výsledku objevit drobné rozdíly. Dle individuální potřeby se mohou kousky, které ještě nejsou dostatečně suché, ponechat o 0,5 až 1 hodinu déle sušit. Proces sušení má následovat bezprostředně po dokončení přípravy surovin k sušení. Celý průběh by měl proběhnout bez přerušení. Příliš dlouhé sušení bylin a podobných aromatických surovin způsobuje příliš velký únik chuťových látek. Plody, které mají být spotřebovány bez namočení, např. jako občerstvení nebo jako lehká a skladná svačinka na cesty, by se neměly přesušit. Měly by se dát snadno kousat a neměly by se lámat. Provést zkušební ochutnávku je nejspolehlivější až po vychladnutí potraviny. Sušená zelenina by měla být na omak spíš ještě tuhá, ne lámavá a drobivá. Cibule a petržel připomínají papír. Nastavení teploty Nastavení správné teploty je velmi důležité: Motorovou část sušičky s průhledným víkem Stupeň 1 asi 20°C přesahující teplotu okolí pro byliny a houby Nastavte teplotu dle druhu suroviny na odpo- Stupeň 2 asi 40°C přesahují teplotu okolí pro všechny druhy zeleniny a choulostivé druhy ovoce umístěte na horní patro. vídající stupeň teploty (viz. tabulka). Síťový kabel zastrčte do zásuvky. Časový spínač nastavte na požadovaný čas sušení. Nyní je spotřebič v provozu a vypne se automaticky po uplynutí zvolené teploty. Stupeň 3 asi 60°C přesahující teplotu okolí pro všechny ostatní druhy ovoce Skladování Po ukončení sušení nechte potravinu dobře vychladnout, teprve pak ji uskladněte. Jako skladovací nádoby jsou nejlepší umyté sklenice se šroubovacím uzávěrem, které se dnes v domácnosti běžně používají. Pokud budete odebírat sušené potraviny po částech, jsou sklenice praktičtější než sáčky. Nejlepší způsob uskladnění pro sušenou zeleninu je v sáčcích svařených foliovačkou nebo ve vakuových sáčcích. Usušené potraviny mohou být skladovány za každé pokojové teploty, lépe ale na suchých, chladných a temných místech po celé roky. Optimální chuť mají v následujícíh zimních měsících a časně na jaře. Doporučuje se příležitostná kontrola stejně jako u zavařovaných potravin. Při teplotě skladování o 10°C nižší se doba prodlouží 2 – 3 krát. Nálepky s názvem potraviny a datem provedení dodají přehled a plně završí radost z Vašeho vlastního výrobku. Údržba Před každou údržbou nastavte časový spínač do polohy 0 a vytáhněte síťový kabel ze zásuvky. Motorovou část sušičky s průhledným víkem stačí čas od času utřít vlhkým hadříkem. Nikdy ji neponořujte do vody! Nový technologický systém sušících plat udělá z jejich umývání pouze vedlejší činnost. Sušená potravina za normálních okolností nekape ani nelepí. Sušící patra nemají žádná jemná síta ani mřížky. Patro je možné naplnit trochou vody, uložit na sebe a nechat odmočit; po chvíli je lze bez problémů umýt. Dbejte na to, abyste patra nepoškrábala, další čištění by bylo o to obtížnější. Nasávací mřížka na motorové části musí být bezpodmínečně čistá. Při znečištění, např. při nánosu prachu, je nutné mřížku vyčistit štětečkem nebo vysavačem (s mírnějším stupněm sání). Všechny použité části a materiály jsou zdravotně nezávadné a doporučené pro styk s potravinami. Vzhledem k obsahu barviv, popř. ovocných kyselin v potravinách (např. mrkev), se může povrch sušících plat lehce obarvit. Toto není způsobené špatnou kvalitou použitého materiálu 37 CZ CZ PŘÍPRAVA Druh ovoce Jablka Meruňky Ananas Banány Angrešt, rybíz Hrušky Datle Jahody Fíky Borůvky Třešně Melouny Broskve Blumy / Švestky Hrozny Citrusy 38 Obsah vody v % 84 85 86 65 88 83 23 90 78 83 82 81 89 81 / 87 81 – Artyčoky 87 Květák 89 Zelené fazolky Brokolice Okurky Kapusta Kedluben Mrkev / Pastyňák Petržel Paprika / Feferonky Polévková směs Chřest Špenát Celer Cibule 90 89 95 92 85 88 55 93 – 92 91 94 89 Rajčata 94 Rebarbora 95 Dýně / Cuketa Byliny Houby 92 – – Příprava a poznámky Řezy, kolečka, odstranit jádřinec Půlky nebo čtvrtky Oloupat, kolečka Dobře zralé, kolečka, proužky V kombinaci s jiným ovocem Odstranit jádřinec, plátky Dobře zralé Půlky, malé v celku Půlky Celé S peckami, nedělit Oloupat, plátky Dobře zralé Odpeckovat, půlky Naříznout, lépe druh bez jader Plátky, kůru na nudličky pro aroma Očistit a krájet srdíčka na půlky Kousky velikosti lžíce, na 0,5 hod. do slané vody, + 1 lžíce octa Konce a vlákna odstranit, krájet šikmo Jako květák, +1 lžíce octa Plátky 1 cm Očistit, proužky (v páře) Kostky, proužky Kolečka Odstranit stonky Proužky Kostičky, nudličky Oloupat, vcelku nebo 2 cm kousky Blanšírovat v páře, až lehce zavadne Plátky, kostky, nudličky Plátky na 30 – 45 sekund, do vroucí vody, oloupat, rozčtvrtit Oloupat, 2,5 cm kousky, namáčení v kyselině citrónové Oloupat, odstranit jádra, plátky Bez stonků, nezmenšovat Plátky 3 3 (2) 3 (2) 3 3 3 (2) 3 3 (2) 3 3 3 3 3 (2) 3 3 3 (2) Doba sušení v hod. cca. 4 – 8 8 – 12 8 – 12 5 – 8 4 – 6 6 – 12 4 – 6 6 – 12 4 – 6 4 – 6 8 – 12 8 – 12 8 – 12 8 – 14 8 – 14 8 – 10 Blanšírování v min. cca. 2 – 4 2 4 – 5 3 – 4 2 5 – 7 3 – 4 3 – 4 – 2 – 3 3 – 5 2 – 3 – – 2 2 – 3 1 2 – 2 2 2 2 2 2 2 (1) 2 2 (1) 2 2 2 2 5 – 6 3 – 5 6 – 8 3 – 5 3 – 5 4 – 5 2 – 3 4 – 6 3 4 – 8 2 6 3 – 2 8 – 10 – 2 3 – 5 – – – 2 1 ! 1 ! 4 – 5 2 – 3 4 – 6 Namáčení v kyselině citrónové ano ano ano ano ano Stupeň sušení Dávejte pozor! Uvedené časy sušení jsou pouze orientační a mohou se dle jakosti sušených surovin značně odlišovat. Rané švestky jsou chudé na obsah cukru, proto nejsou k sušení příliš vhodné. Pečlivě na sebe skládejte sušící patra, špatně nasazená patra mohou zapříčinit špatnou funkci sušičky. Přesvědčte se, zda je vypínač otočen přesně na zvolený stupeň. Nezapomeňte, že patra musí stát vždy na podstavci! Jedině tak je zaručena správná cirkulace vzduchu a pracovní deska je tak chráněna před vlivem horkého vzduchu. 39 CZ CZ ZÁRUČNÍ LIST Úprava potravin O v o c e lze jíst v sušeném stavu jako malé občerstvení, ale lze ho také použít jako nápaditou přílohu v nepřeberném množství receptů. Pokud chcete použít sušené ovoce namísto čerstvého, musí se nejdříve namočit, aby se mu vrátila voda, která se sušením odebrala. Podle objemu ovoce dodáme stejné objemové množství vody, tedy např. na 1 šálek sušeného ovoce 1 šálek v ody. Pokud si nejste zcela jistí, použijte vody méně a nechte asi 4 hodiny odstát. Pokud jste i zde na pochybách, můžete nechat působit kratší dobu, surovina by mohla jinak rozbřednout. Dále je možné využít nápadů z kuchařských knih, které nabízejí velké množství receptů v každé zemi. Rady a tipy: Ovocné koláče a jiné cukrářské a pekařské výrobky, chléb s kousky ovoce, borůvkové zákusky, bohatá nabídka jako náhrada za rozinky atd. Kompoty k palačinkám nebo vaflím, poma- zánky na chlebíčky, dezerty, jablečné polevy či omáčky atd. Přísady do některých masových jídel a divo- činy, chutneys (ostrá indická směs z ovoce, bylinek, koření) atd. Z e l e n i n u doporučujeme před použitím vždy namočit. Na 1 šálek sušené zeleniny přidejte 1 šálek vody. Nedávejte víc vody než je potřeba k přípravě celého pokrmu. Namočenou zeleninu nenechávejte dlouho odstát. Pro záruku začínající dnem prodeje spotřebiče platí pro země EU (i Českou republiku) a Švýcarsko tyto podmínky: 1.Trvání záruky: 2 roky 3. Záruka se nevztahuje na případy: Namočená zelenina potřebuje k uvaření 2. Poskytování záruky: poškrábání nebo fleky na spotřebiči a na světelné kontrolky nebo žárovky a na motorové kartáče. přibližně stejně dlouhou dobu jako zelenina mražená. Zeleninu do polévek, která se suší nakrájená na nudličky, nemusíte předem namáčet. Sušenou zeleninu určenou do polévek, omáček, zálivek na saláty atd. můžete rozsekat v kuchyňském robotu na požadovanou velikost a připravit směs. K přípravě dětských pokrmů, krémových po- lévek, omáček atd. je vhodné sušenou zeleninu semlít. Do zásoby melte max. na 1 měsíc dopředu, protože mletím se zkracuje trvanlivost. Sušenou zeleninu můžete po namočení bez dalších úprav smíchat s čerstvě sklizenou. Byliny rozemelte nebo rozemněte bezpro- středně před použitím. Dávejte pozor, abyste nepřidali tuhé stonky. Houby namočte a použijte jako čerstvé. Do polévek a omáček je vhodné část usušených hub přidat i v rozemletém stavu. rozemlít v kuchyňském robotu a uchovávat jako koření ve vzduchotěsných sklenicích. Různé druhy ovoce lze kandovat nebo polévat zeleninová polévka Minestrone, jídla z jed polevou, zcela podle fantazie. Banány se hodí k mléčným nápojům a jako přísada do dětské výživy, pokud jsou v sušeném stavu umleté na prášek. Různé druhy ovoce se dají zdokonalit přidá- ním medu a ořechů. Lze také smíchat čerstvé plody spolu s usušenými, předem namočenými. Dle receptů je možné ovoce nasekat nadrobno nebo nahrubo. b)záruční oprava bude provedena jen při předložení tohoto záručního listu a dokladu o zaplacení. c) záruku mohou uplatnit pouze první majitelé spotřebiče. na lehce rozbitné díly z bakelitu, skla, plastů apod., pokud se nejedná o chybu materiálu. poškození jako následek chybné instalace nebo upevnění. kdy je spotřebič zapojen do sítě s vyšším napětím než je na spotřebiči uvedeno. chybného nebo neodpovídajícího použití. d)jestliže dojde k opravě nebo výměně spotřebiče v záruční době, záruční doba se prodlouží. nedbalosti při používání. e) poplatky za dopravu hradí kupující. nevhodného transportu nebo nedostatečného zabalení. f) v případě, že se závada nebo škoda nedá odstranit, nebo se překročí doba servisního zásahu (30 dnů), bude spotřebič vyměněn za nový, nebo vráceny peníze v prodejně, kde byl spotřebič zakoupen. Papriky a feferony je vhodné rozsekat nebo Přísada do müsli, pudingů, jogurtů, šlehačky, zmrzliny, ovocných salátů, koktejlů s alkoholem atd. a) záruční opravu provedeme podle našeho zvážení opravou nebo výměnou vadných dílů, jestliže tyto závady vznikly prokazatelně vadou materiálu nebo chybou při výrobě. upadnutí spotřebiče nebo jeho jednotlivých částí. 4. Záruka zaniká: při použití spotřebiče jinak než v domácnosti. při provádění opravy nebo změny na spotřebiči osobou jinou než pověřenou naším servisem. A na závěr ještě několik tipů: noho hrnce, zeleninový a houbový guláš, různé speciality mezinárodních kuchyní. Vlastní směsi bylin, bylinkové čaje, bylinkové oleje atd. Na tento spotřebič poskytujeme 2 roky záruku na nedostatky, které jsou označeny jako výrobní chyby nebo chyby materiálu. Záruční doba začíná dnem prodeje a je uznána po předložení záručního listu a dokladu o zaplacení. Jiné nároky neuznáváme. Celerová nebo česneková sůl (semlít usušenou zeleninu a smíchat v poměru 1 : 1 se solí). A spousty dalších nápadů můžete najít v ku- Model: chařských knihách. Důležité ! Prosím, napište si FD kód, který je umístěný na štítku: Zvláštní specialita z Himalájí je tzv. ovocná kůže, 40 která se připravuje z různých druhů kašovitého ovoce za přidání medu, ořechů a koření. Vzniklá placka se pak nakrájí třeba na malé čtverečky, které se nechají usušit a ztuhnout. Hmota se dá také naplnit, srolovat a lze z ní krájet řezy. razítko a podpis prodávajícího datum prodeje 41 Bielmeier Hausgeräte GmbH Gnaglbergstraße 6 D-94267 Prackenbach Bielmeier Hausgeräte s.r.o. Bořice 25 CZ-34401 Domažlice Tel.: +49 (0) 9942 94 88 93-0 Fax: +49 (0) 9942 94 88 93-22 E-Mail:[email protected] Internet:www.bielmeier-hausgeraete.com Tel.: +420 - 379 768 010 Fax: +420 - 379 768 020 E-Mail:[email protected] Internet:www.bielmeier.cz