1
075625 / 04-00
USE AND CARE INSTRUCTIONS
MODE D’EMPLOI ET ENTRETIEN
INSTRUCCIONES DE USO Y MANTENIMIENTO
mod. 1660 - 1661 - 1662 - 1664
mod. 1647 - 1651 - 1656 - 1658 - 1659
MOD. 1647 - 1651 - 1656 - 1658
1659 - 1660 - 1661 - 1662 - 1664
1
E D C
F
G
B A
I
mod. 1660 - 1661 - 1662 - 1664
F
H
F
I
mod. 1647 - 1651 - 1656 - 1658 - 1659
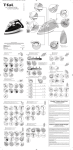
A.
B.
C.
D.
E.
F.
G.
H.
I.
Boost of steam and vertical steam button (according to model)
Spray button
Steam adjustment control (dry/steam) and anti-clogging valve
Sliding water inlet cover
Spray nozzle
Thermostat - temperature control (knob or cursor / depending on model)
Thermostat pilot light
Maximum filling mark on reservoir
Marker for temperature setting
A.
B.
C.
D.
E.
F.
G.
H.
I.
Commande du surplus de vapeur et défroissage vertical (selon modèle)
Commande du vaporisateur d’eau
Commande de réglage vapeur (sec/vapeur) et tige anti-calcaire
volet coulissant : remplissage du réservoir
Vaporisateur d’eau
Bouton / Curseur thermostat
Témoin lumineux du thermostat
Niveau de remplissage maximum
Repère de réglage thermostat
A. Botón extravapor y desarrugado vertical (según modelo)
B. Botón rocio
C. Mando de ajuste vapor (seco/vapor) y varilla antical
D. Tapa deslizante: llenado del depósito
E. Salida de rocio
F. Botón / Cursor termostato
G. Indicador luminoso del termostato
H. Nivel de llenado máximo
I. Marca de posición del termostato
IMPORTANT SAFEGUARDS
When using your iron, basic safety precautions should always be followed, including the
following :
READ ALL INSTRUCTIONS
BEFORE USING
❊
Use iron only for its intended use
❊
To protect against a risk of electric shock, do not immerse the iron in water or other
liquids
❊
When applicable, the iron should always be turned OFF (min.) before plugging or
unplugging from outlet. Never yank cord to disconnect from outlet ; instead, grasp
plug and pull to disconnect.
❊
Do not allow cord to touch hot surfaces. Let irons cool completely before putting
away. Wrap cord around iron when storing.
❊
Always disconnect iron from electrical outlet when filling with water or emptying and
when not in use.
❊
Do not operate iron with a damaged cord or if the iron has been dropped or damaged. To avoid the risk of electric shock, do not disassemble the iron. Return iron to
the manufacturer (see warranty) for examination and repair. Incorrect reassembly
can be very dangerous and armful.
❊
Close supervision is necessary for any appliance being used by or near children.
Do not leave iron unattended while connected or on an ironing board.
❊
Burns can occur from touching hot metal parts, hot water or steam. Use caution
when you turn a steam iron upside down. There may be hot water in the reservoir.
❊
This appliance is only for domestic and personal use.
SPECIAL INSTRUCTIONS
❊
To avoid a circuit overload, do not operate another high-wattage appliance on the
same circuit.
❊
If an extension cord is absolutely necessary, a 10-ampere cord should be used.
Cords rated for less amperage may overheat. Care should be taken to place the
cord so that it cannot be pulled or tripped over.
SAVE THESE INSTRUCTIONS
1 - WARNING FOR SAFE IRONING
Voltage. Your iron is designed for 120V only. Check that the power supply corresponds to the one
shown on the rating plate of the appliance.
If the iron is dropped, have it checked by an Approved After Sales Service Center before using it again.
Non-visible damage might have occured and could endanger your safety.
Never disassemble the appliance yourself : contact an approved After Sales Service Center.
2 - PRACTICAL TIPS
❊ What water should be used?
Your iron is designed to function with tap water. However, you should regularly carry out auto-cleaning
of the steam chamber to remove any scale deposits.
If you have very calcareous (hard) water (you can check this with your water supplier), you can mix
tap water with commercially-available demineralized water in the proportions:
- 50% tap water
- 50% demineralized water.
❊ Why not use other types of water?
The heat concentrates the elements contained in the water through evaporation. The types of water
listed below contain organic waste or mineral elements which may cause spitting, brown streaks or
premature ageing of your iron:
commercially-available demineralized water on its own, water from spin-dryers, scented water, softened water, water from refrigerators, water for batteries, rainwater, water from air, air conditioning units,
distilled water.
❊ Using spray starch
If you are using starch, spray it preferably on the reverse side of the fabric to be ironed. Also, allow it
to dry into the cloth rather than ironing while the laundry is still damp from the starch. Regularly clean
the iron soleplate while slightly warm, with a damp, non-abrasive pad. Then wipe with a soft cloth to
remove any deposit. Do not use abrasive scouring pads, scouring powders or iron soleplate cleaner.
3 - FILLING THE WATER TANK - GETTING STARTED
❊ First make sure that:
- the iron is unplugged
- the anti-clogging valve (C) is fully inserted
- The adjustable steam control is set to O
❊ Open the sliding water inlet cover (D).
Fill the tank as shown in the fig. 1. To avoid spilling, do not exceed the “max” filling mark indicated
on the tank (7 oz - 200 ml), by standing the iron on its heel.
Close the water inlet cover.
2
3
4 - SELECTION OF IRONING TEMPERATURES (according to model)
❊ The ironing temperature is adjusted using the thermostat knob (F) or the cursor. The thermostat
lamp lights up (G) when the iron is heating and goes off when it reaches the chosen temperature.
❊ Hints
4
5
We recommend that you iron
fabrics according to the order
specified on the iron, in order to
obtain increasing temperatures: synthetics, silk (❄), wool
(❄❄), cotton, linen (❄❄❄)...
6
Wait for a few moments after
reducing the temperature, in order to avoid scorching fragile fabrics with an excessively hot soleplate.
With mixed fiber fabrics, we recommend that you set the thermostat according to the fabric to be
ironed at the lowest temperature (e.g. for linen and viscose, choose viscose and set the thermostat to
“synthetic” ❄).
TEXTILE
THERMOSTAT CURSOR POSITION
SYNTHETICS
Acetate (Rhodia)
Acrylic (Crylor, Dralon,
Orlon, Courtelle...)
Polyamide (Nylon, Rilsan...)
•
Polyester (Tergal, Dacron,
Terital, Trevira...)
Viscose (Rayonne, Fibrane)
SILK
WOOL
••
COTTON/LINEN
•••
= Steam zone
❊ Only use steam when the thermostat is set facing the colored zone.
5 - STEAM IRONING
❊ Set the steam adjustment control (C) to between 2 and 8, depending on the required level of steam :
Min : 2, max : 8.
7
8
Important: Before using the iron for the first time
with a steam setting, we recommend that you operate it for a few moments horizontally, away from
your laundry. In the same conditions, activate the
boost of steam (A) several times before each ironing session.
This will ensure the steam chambre is clean.
❊ During the first few ironing sessions, a small amount of innocuous smoke and a smell may occur.
This phenomenon, which does not affect the use of the appliance, will soon disappear.
6. BOOST OF STEAM
To obtain a greater burst of steam, press the boost of steam button (A) in burst
❊ Hint
9
It is advisable to leave a lapse of time in between each use.
7. VERTICAL IRONING (according to model)
❊ Set the thermostat to maximum.
❊ Hang the clothing on a hanger and gently pull the fabric taut with one hand.
❊ With the iron in a vertical position and tilted slightly forward, press the boost of steam button (A) in
bursts, while moving the iron up and down (fig. 12).
WARNING : Do not keep your hands in the direct path of the steam.
❊ Hint
For fabrics other than linen, cotton or wool, keep the iron a few inches away from the fabric, to avoid
scorching it.
11
10
12
8. AUTO SHUT-OFF (According to model)
❊ Your iron is equipped with an electronic system which cuts the power supply if the iron is left on its
heel for more than 8 minutes. In this case, lamp (A) starts flashing.
❊ To continue using your iron, simply shake it slightly, until this lamp lights up continuously.
❊ At the beginning of each ironing session, stand your iron on its heel while it heats up.
A
12 bis
13
9 - SPRAY
❊ You can use the spray during dry ironing or steam ironing as long as
there is water in the reservoir.
14
❊ Simply press the spray control (B) in bursts.
15
10 - DRY IRONING
❊ Set the steam adjustment control (C) to dry “O”
11 - PRODUCT CARE AND MAINTENANCE
Before carrying out any maintenance on your iron, please ensure that
it is unplugged and that the soleplate has completely cooled down.
Never use any cleaning or descaling products.
❊ Cleaning the soleplate
Your iron’s Ultraglide soleplate can become stained with starch or by a textile ironed at an excessively high temperature. Clean the soleplate regularly while still warm with a damp non-metallic, non-scouring pad. If you use starch, spray it preferably on the reverse side of the fabric to be ironed and clean
the iron soleplate more frequently.
❊ Hint
Avoid placing your iron face down on a metal iron rest, as this will damage the soleplate. Place it on
its heel.
❊ Anti-clogging valve
- The anti-clogging valve should be cleaned
once a month.
- Unplug your iron
- Empty the water tank
- Position the steam control wheel to “0” / “Dry”
17
16
- To remove the anti-clogging valve, pull it upwards using the
grips located on either side of the steam adjustment control.
DO NOT TOUCH THE END OF THE VALVE.
❊ Soak the end of the valve for 4 hours in a glass of white
18
- Rinse the tip with tap water
- Insert it back into its housing and push into place.
Caution: the iron cannot operate without the anti-clogging valve.
❊ Self-cleaning: twice a month
- Fill the tank to the maximum filling mark.
- Set the steam adjustment control (C) to dry “O”
- Set the thermostat control to max.
- Plug in the iron and wait for the thermostat lamp to go out
- Unplug the iron and place it above a sink
- Remove the valve from its housing
- Shake the iron gently until all the water in the tank has flown out with impurities through the soleplate.
- After the operation, reinsert the anti-clogging valve correctly.
- Wait until the soleplate has completely cooled down before wipping it with a soft cloth.
19
20
12 - STORAGE
- Lower the thermostat to the minimum.
- Set the steam adjustment control (C) to dry 0, unplug the iron and wait
until the soleplate has cooled down completely.
- Empty the tank of all water.
- Wrap the cord around the heel. Stand the iron upright on its heel to store
it.
21
13 - PRACTICAL TIPS
❊ Our products are manufactured in compliance with the highest quality standards. If you have any
problems with our product, please consult the table below, in order to find a rapid solution to your
problem.
❊ If you do not find the cause of the problem, please contact our Consumer department.
14 - POSSIBLE PROBLEMS AND SOLUTIONS
Is there a problem?
Possible causes
Solutions
Water flows through the
holes of the soleplate.
The selected temperature is
too low for steam ironing
(synthetics...).
Respect the colored zone on
the thermostat, indicating
the steam zone.
You are using steam before
the iron is hot.
Wait for the thermostat
amp to go out before using
steam.
The boost of steam is used
too often.
Leave a lapse of time
between each use of the
boost of steam.
Excessive steam level.
Reduce the steam level
with the steam adjustment
cursor.
Cold iron stored flat, with
water in the tank and steam
level not on dry “O”.
Empty the water tank before
storing, set the steam
adjustment cursor to dry (0)
and store the iron on its
heel.
Incorrect thermostat reading:
temperature too low.
Consult an approved service
center.
The tank is filled beyond the
maximum level.
Partially drain the tank until
the water level is on or below
the maximum line.
The iron is used immediately
after being in auto shut-off
mode (according to model).
Shake iron gently and,
before ironing, wait for the
thermostat lamp to go out.
The anti-clogging valve is
incorrectly positioned in the
iron.
Insert the valve correctly.
Is there a problem?
Possible causes
Solutions
Brown liquid comes through
the holes of the soleplate
and stains the clothing.
You are using chemical descaling agents.
Do not use descaling
products in your iron, as they
will damage it. Follow self
cleaning procedures instead.
Use of demineralized water,
battery liquid, defrosted
refrigerator water, water from
a condenser clothes dryer or
water from a water softener.
Self-clean.
Use tap water.
Use of additives in the water
for ironing (lavender water,
finish...).
Self-clean.
Use tap water.
Matter other than scale,
contained in the water and
concentrating with heat. The
water is not only made up of
scale, but also other mineral
salts.
Self-clean.
Use tap water.
Build-up of charred “clothing”
fluff in the holes of the
soleplate or in the space
between the iron cover and
the soleplate.
Clean the soleplate with a
damp non-metallic pad.
You can vacuum clean from
time to time the gap between
the soleplate and the cover
of your iron. Then follow a
self-cleaning procedure.
Ironing at an excessively
high temperature.
Clean the soleplate.
Set the temperature
according to the table. Refer
to the maintenance section.
Linen insufficiently rinsed or
use of starch.
Clean the soleplate while still
warm with a damp non-metal
sponge.
Always spray starch on the
reverse side of the surface to
be ironed. Wait until dry.
The iron has been
accidentally dropped: the
thermostat is out of order.
Please consult the
Consumer department.
The iron soleplate is dirty (or
brown) : it may stain the
linen.
Is there a problem?
Possible causes
Solutions
Little or no steam.
Steam adjustment control set
to zero.
Set the cursor to between
2 and 8.
Scale build-up.
Remove the anti-clogging
valve and soak it in white
vinegar or pure lemon juice.
See maintenance section.
Iron used on “dry” for
excessive period of time
Clean the anti-clogging
valve.
Tank empty.
Fill the tank with tap water.
The iron has been placed
face down on a metal iron
rest.
Iron dropped or knocked.
Always place your iron on its
heel, in a stable position.
Consult an approved service
center.
The soleplate is scratched or
worn.
If you are not able to determine the cause of a fault, contact an authorized after-sales service center.
Never dismantle the appliance.
LIMITED WARRANTY
T-Fal Canada / T-Fal Corp. Warrants this iron to be free from defects in material and workmanship for
a period of one year.
The Durilium soleplate of irons so equipped is covered under limited warranty for a period of ten years
against defects in material or workmanship for any condition that would impair ironing when used
under normal household conditions. The liability of the manufacturer/distributor is limited to repair or
replacement of the Durilium soleplate judged to be defective.
Should any defect be discovered within one year of date of purchase, the following should be used in
claiming warranty :
• In Canada :
1) Return your appliance to the retailer from whom it was purchased along with proof of purchase.
OR
2) Take your appliance to nearest authorized service centre along with proof of pruchase.
OR
3) T-Fal Canada Inc. agrees to repair or replace the defective part or product at no charge provided
product is returned with all shipping charges prepaid to : T-Fal Canada Inc., 257 Finchdene Square,
Unit 1, Scarborough, Ontario, M1X 1B9 ; accompanied by proof of purchase and a letter detalling
the nature of the defect. Be certain that the appliance is wrapped carefully when shipping. The
Customer Service Department should be contacted by mail or by telephone 1-800-418-3325, prior
to any action, in the event it is possible to correct the defect without returning the unit.
Repairs not covered by this warranty will be performed at current costs for parts and labor, plus return
shipping charges.
•
In U.S.A. : Do not return the product to the retailer from whom it was purchased. T-Fal Corp. agrees
to repair or replace the defective part or product at no charge provided product is returned with all
shipping charges prepaid to your local service center accompanied by proof of purchase and a letter
detailing the nature of the defect. Be certain that the appliance is wrapped carefully when shipping.
The Customer Service department of T-Fal should be contacted by mail prior to any action in the event
it is possible to correct the defect without returning the unit.
This warranty does not apply to any unit that has been tampered with, nor to damages incurred
through negligence in use, faulty packing, or mishandling in transit by any common carrier.
Repairs not covered by this warranty will be performed at current costs for parts and labor, plus return
shipping charges.
This warranty gives you specific legal rights, and you may also have other rights which vary from state
to state.
LISEZ TOUTES LES INSTRUCTIONS AVANT
D’UTILISER VOTRE APPAREIL.
RECOMMANDATIONS IMPORTANTES
❊
Lorsque vous utilisez votre fer à repasser, veuillez observer les consignes de sécurité élémentaires suivantes :
❊
N’utilisez votre appareil que pour l’application pour laquelle il a été conçu
Afin d’éviter tout risque de décharge électrique, n’immergez pas votre appareil ou
son boîtier dans l’eau ou dans un autre liquide.
❊
❊
Si votre appareil possède un bouton marche/arrêt, mettez toujours votre appareil
sur la position Arrêt avant de le brancher ou de le débrancher de la prise de courant. Ne tirez jamais sur le cordon d’un coup sec pour le déconnecter de la prise de
courant, mais tirez au niveau de la fiche.
❊
Evitez que le cordon entre en contact avec des surfaces chaudes. Laissez votre
appareil refroidir complètement avant de le ranger et enroulez le cordon autour du
fer sans le serrer.
❊
Débranchez toujours votre appareil de la prise de courant, lorsque vous remplissez
ou videz le réservoir ou lorsque vous ne l’utilisez pas.
❊
N’utilisez pas votre appareil si le cordon n’est pas en parfait état, ou si le fer est
endommagé à la suite d’une chute ou d’un choc. Afin d’éviter tout risque de décharge électrique, n’essayez pas de démonter votre appareil vous-même. Envoyez-le à
un centre de service autorisé T-Fal (voir garantie), où il sera examiné et réparé. Un
remontage incorrect peut être à l’origine de décharges électriques lors de l’utilisation du fer.
❊
Surveillez attentivement tout appareil utilisé par ou à proximité d’enfants. Ne laissez
jamais votre appareil sans surveillance lorsqu’il est raccordé au réseau ou posé sur
la table à repasser.
❊
Les parties métalliques chaudes de l’appareil, l’eau chaude et la vapeur chaude
peuvent occasionner des brûlures. Faites attention lorsque vous retournez le fer car
le réservoir peut contenir de l’eau chaude.
INSTRUCTIONS PARTICULIERES
❊
Afin de ne pas surcharger le circuit électrique, évitez de faire fonctionner un autre
appareil puissant sur le même circuit.
❊
Si vous devez absolument employer une rallonge, utilisez un cordon de
13 ampères, les cordons d’ampérage inférieur pouvant surchauffer. Veillez à disposer le cordon de telle sorte qu’il soit impossible de le tirer par inadvertance ou de
trébucher dessus.
CONSERVER CES INSTRUCTIONS
1 - CONSEILS DE SECURITE
Vérifiez que la tension de votre installation correspond à celle du fer . Toute erreur de branchement
peut causer un dommage irréversible à l’appareil et annule la garantie.
En cas de chute de fer, faites-le vérifier par un professionnel avant de le réutiliser. Des dommages non
visibles de l’appareil peuvent être préjudiciables à votre sécurité. Ne jamais démonter votre fer adressez-vous à une station après-vente agréée T-Fal.
2 - CONSEILS PRATIQUES
❊ Quelle eau utiliser ?eau utiliser ?
Votre appareil a été conçu pour fonctionner avec l'eau du robinet. Il est cependant nécessaire de procéder régulièrement à l'auto-nettoyage de la chambre de vaporisation, afin d'éliminer le calcaire libre.
Si votre eau est très calcaire (ceci est vérifiable auprès de votre mairie ou du service des eaux), il est
possible de mélanger l'eau du robinet avec de l'eau déminéralisée du commerce dans les proportions
suivantes : - 50% d'eau du robinet, - 50% d'eau déminéralisée.
❊ Quelles eaux éviter ?
La chaleur concentre les éléments contenus dans l’eau, lors de l’évaporation. Les eaux ci-dessous
contiennent des déchets organiques ou des éléments minéraux qui peuvent provoquer des crachements, des coulures brunes ou un vieillissement prématuré de votre appareil : eau déminéralisée du
commerce pure, eau des sèche-linges, eau parfumée, eau adoucie, eau des réfrigérateurs, eau de
batterie, eau des climatiseurs, eau distillée, eau de pluie.
❊ Utilisation de l’amidon
Si vous utilisez de l’amidon, pulvérisez de préférence l’envers de la face à repasser et nettoyez fréquemment la semelle tiède avec un tampon non-abrasif humide.
3 - REMPLIR LE RESERVOIR
❊ Assurez-vous d’abord que :
- le fer est débranché
- la tige anti-calcaire est en place (C)
- La commande de réglage vapeur est positionnée sur O
❊ Baissez le volet de l’orifice de remplissage.
Remplissez le réservoir comme indiqué sur le dessin.
Assurez-vous de ne pas dépasser la capacité maximale indiquée sur le réservoir.
Refermez le volet coulissant de l’orifice de remplissage.
2
3
4 - SELECTION DE LA TEMPERATURE DE REPASSAGE (selon modèle)
❊ La température de repassage s’ajuste avec le curseur ou le bouton du thermostat. Le voyant de
thermostat s’allume (G) lorsque le fer chauffe et s’éteint lorsqu’il a atteint la température choisie.
❊ Conseils
4
5
Il est recommandé de repasser les pièces de tissu dans
l’ordre des indications portées sur le fer afin d’obtenir
des températures croissantes : synthétiques, soie, laine,
6
coton, lin...
Attendez quelques instants lorsque vous baissez la température pour ne pas brûler un tissu fragile.
Avec des fibres mélangées, nous vous recommandons de régler le thermostat en fonction du tissu qui
se repasse avec la température la plus basse (ex: lin et viscose, choisir viscose et régler le thermostat sur “synthétique” ❄).
TEXTILE
POSITION DU CURSEUR DU THERMOSTAT
Synthétiques
Acétate (Rhodia)
Acrylique (Crylor, Dralon,
Orlon, Courtelle...)
Polyamide (Nylon, Rilsan...)
•
Polyester (Tergal, Dacron,
Térital, Trévira...)
Viscose (Rayonne, Fibrane...)
Soie
Laine
••
Coton/Lin
•••
= Zone vapeur
❊ Utilisez la vapeur uniquement avec le thermostat en zone colorée.
5 - REPASSAGE A LA VAPEUR
❊ Positionnez la commande de réglage vapeur (C) entre 2 et 8 suivant le débit souhaité.
7
8
Important : avant la première utilisation de votre fer
en position vapeur, nous vous recommandons de
le faire fonctionner quelques instants en position
horizontale, éloigné de vos vêtements. Dans les
mêmes conditions actionner plusieurs fois le bouton
“vapeur” avant chaque séance de repassage.
❊ Durant les premières utilisations, il peut se produire un léger dégagement de fumée et une odeur
sans nocivité. Ce phénomène est inoffensif du à la nouveauté de votre produit.
6. FONCTION SUPERPRESSING
Pour obtenir ponctuellement un débit vapeur plus important, appuyez sur le bouton “vapeur” (A) par
impulsions.
❊ Conseil
9
Nous vous recommandons de respecter un intervalle entre 2 utilisations.
7. DEFROISSAGE VERTICAL (Selon modèle)
❊ Réglez le thermostat au maximum.
❊ Suspendez le vêtement sur un cintre et tendez légèrement le tissu d’une main.
❊ Le fer en position verticale et incliné vers l’avant, appuyez sur le bouton “vapeur” (A) par impulsions
en effectuant un mouvement de haut en bas.
❊ Conseil
Pour les tissus autres que le lin, le coton ou la laine, maintenez le fer à quelques centimètres afin de
ne pas brûler le tissu.
11
10
12
8. ARRET AUTOMATIQUE SECURITAIRE (Selon modèle)
❊ Votre fer est équipé d’un système électronique qui coupe l’alimentation si le fer reste immobile plus de
8 minutes sur le talon. Le voyant (A) se met alors à clignoter.
❊ Pour remettre le fer en marche, il suffit de l’agiter légèrement jusqu'à ce que ce voyant reste allumé.
❊ Au début de chaque séance de repassage, posez votre fer sur son talon, pendant sa montée en
température.
A
12 bis
13
9 - LE VAPORISATEUR D’EAU
❊ Vous pouvez utiliser le pulvérisateur en repassant tout aussi bien à sec
qu’à la vapeur.
14
❊ Il vous suffit d’appuyer sur le bouton du vaporisateur (B).
❊ Conseil : Assurez-vous qu’il y a toujours de l’eau dans le réservoir
15
10 - REPASSAGE A SEC
❊ Positionnez la commande de réglage vapeur (C) sur sec O
11 - ENTRETIEN
Avant tout entretien assurez vous que l’appareil soit débranché
et la semelle refroidie.
N’utilisez aucun produit d’entretien ou de détartrage.
❊ La semelle
La semelle Ultraglide de votre fer peut être tachée par l’amidon ou pas un textile repassé à une température trop élevée. Nettoyez régulièrement la semelle tiède en utilisant un tampon non-métallique
humide. Si vous utilisez de l’amidon, pulvérisez-le à l’envers de la surface à repasser et nettoyez plus
fréquemment la semelle.
❊ Conseil
Evitez de poser votre fer à plat sur un repose fer métallique car cela endommage la semelle. Reposez
le plutôt sur son talon.
❊ La tige anti-calcaire
Nous vous conseillons de nettoyer la tige anticalcaire régulièrement.
Assurez-vous que le fer soit débranché et le
réservoir vide.
Placez la commande de réglage vapeur en
position O
17
16
- Pour ôter la tige anti-calcaire, tirez la vers le haut grâce aux
préhensions situées de chaque côté.
❊ Laisser la tremper environ 2 heures dans du vinaigre d’alcool
ou du jus de citron pur.
18
- Rincer la sous l’eau du robinet
- La remettre en place dans son logement en l’enfonçant.
Attention : le fer ne peut fonctionner sans la tige anti-calcaire.
❊ Conseil
Nous vous conseillons de nettoyer une fois par mois la tige anti-calcaire.
❊ Auto-nettoyage : deux fois par mois
- Remplir le réservoir
- Positionnez la commande de réglage vapeur © sur sec “0”
- Réglez la commande du thermostat à maximum
- Branchez le fer et attendez que le voyant du thermostat s’éteigne
- Débranchez le fer, placez-le au dessus d’un évier
- Enlevez la tige anti-calcaire
- Secouez le fer légèrement jusqu'à ce que toute l’eau du réservoir (avec les impuretés) soit écoulée
par la semelle.
- A la fin de l’opération, remettez la tige anti-calcaire en place.
19
20
12 - RANGEMENT
- Positionnez la commande de réglage vapeur (C)sur sec O, débranchez
l’appareil et attendez que la semelle refroidisse.
- Videz le réservoir
- Enroulez le cordon autour du talon. Rangez le fer debout sur son talon.
21
13 - CONSEILS PRATIQUES
❊ Nos produits sont fabriqués selon des normes de haute qualité. Dans le cas où vous rencontriez un
problème avec notre produit, merci de vous référer au tableau ci-dessous afin de trouver vousmême très rapidement une solution.
❊ Si vous ne trouvez pas la cause du problème, contactez notre Service à la clientèle.
14 - PROBLEMES EVENTUELS ET SOLUTIONS
Un problème?
Causes possibles
L'eau coule par les trous de la Température sélectionnée
semelle
trop basse pour utiliser la
vapeur (synthétiques...).
Solutions
Respectez la zone colorée
sur le thermostat qui indique
la zone vapeur.
Vapeur utilisée avant que le
fer ne soit chaud.
Attendez que le voyant de
thermostat soit éteint pour
utiliser la vapeur.
Bouton “vapeur” utilisé trop
fréquemment.
Laissez un intervalle entre
les utilisations du
Bouton “vapeur”.
Débit de vapeur trop
important.
Diminuez le débit avec le
curseur de réglage vapeur.
Fer rangé froid à plat avec
eau dans le réservoir.
Videz le fer de son eau
avant le rangement, mettez
le curseur de réglage vapeur
en position sec (0) et
rangez-le sur son talon.
Thermostat déréglé :
température trop basse.
Adressez-vous à un centre
de service après-vente agréé
T-Fal.
Le réservoir est rempli
au-delà du niveau maximum.
Videz partiellement le
réservoir.
Le fer est utilisé
immédiatement après avoir
été en fonction coupe-circuit
(selon modèles).
Avant de repasser, attendez
que le voyant du thermostat
soit éteint.
La tige anti-calcaire est mal
positionnée dans le fer.
Insérez correctement la tige.
Un problème?
Causes possibles
Solutions
Des coulures brunes sortent
des trous de la semelle et
tâchent le linge.
Vous utilisez des produits
chimiques détartrants.
Il ne faut pas mettre dans
votre fer des produits de
détartrage car ils
endommagent le fer.
Utilisation d'eau déminéralisée, d'eau pour batteries,
d'eau de dégivrage du
réfrigérateur, d'eau sortant
d'un sèche-linge à
condensation et d'eau provenant d'un adoucisseur d'eau
Utilisation d’additifs dans
l’eau de repassage (eau de
lavande, apprêt...)
Procédez à un autonettoyage.
Utilisez l'eau du robinet.
Matières contenues dans
l’eau, autre que le tartre, qui
se concentrent pas la
chaleur. L’eau n’est pas
constituée que de calcaire,
mais en plus d’autres sels
minéraux.
La semelle du fer est sale
(ou brune) : elle peut tâcher
le linge.
“Bourre de linge” qui s'incruste dans les trous de la
semelle ou qui s'accumule
entre le capot du fer et la
semelle et se carbonise.
Nettoyez la semelle avec
un tampon non-métallique.
Il est possible d'aspirer de
temps en temps la fente
entre la semelle et le corps
de votre fer.
Repassage à trop haute
température.
Nettoyez la semelle.
Réglez la température
suivant le tableau.
Rinçage du linge insuffisant
ou utilisation d'amidon.
Nettoyez la semelle encore
tiède avec une éponge à
récurer non-métallique
humide.
Veillez à bien pulvériser
l'amidon sur l'envers de la
face à repasser.
Le fer est tombé
accidentellement : le thermostat ne marche plus.
Adressez-vous au Service à
la clientèle de T-Fal.
Un problème?
Causes possibles
Solutions
Peu ou pas de débit vapeur.
Curseur de réglage vapeur
positionné sur zéro
Règlez le curseur entre 2
et 8
Entartrage du fer
Sortez la tige anti-calcaire et
trempez-la dans du vinaigre
d'alcool ou du jus de citron
pur.
Trop longue utilisation à sec
Nettoyez la tige anti-calcaire.
Réservoir vide.
Remplissez le réservoir
d’eau du robinet.
Fer mis à plat sur sur un
repose-fer métallique.
Chute ou chocs.
Posez toujours le fer sur son
talon qui est stable.
Adressez-vous à un centre
service agréé.
La semelle est rayée ou
abîmée.
Ne démontez jamais l'appareil.
S'il n'est pas possible de déterminer la cause d'une panne, adressez-vous à un centre de service
après-vente agrée T-Fal, il nous fera plaisir de vous aider à résoudre votre problème.
LEA TODAS LAS INSTRUCCIONES ANTES
DE UTILIZAR SU APARATO.
RECOMENDACIONES IMPORTANTES
❊
Cuando utilice su plancha, observe las indicaciones elementales de seguridad
siguientes:
❊
Utilice solamente su aparato para el uso que ha sido diseñado
Para evitar cualquier riesgo de descarga eléctrica, no sumerja su aparato o su caja
en agua o en otro líquido.
❊
Si su aparato posee un botón de encendido/apagado, ponga siempre su aparato en
la posición apagado antes de conectarlo o desconectarlo de la toma de corriente.
Nunca tire del cordón de un golpe seco para desconectarlo de la toma de corriente, más bien tire a nivel del enchufe.
❊
Evite que el cordón entre en contacto con superficies calientes. Deje que su aparato se enfríe completamente antes de guardarlo y enrolle el cordón alrededor de
la plancha sin apretarlo.
❊
Siempre desconecte su aparato de la toma de corriente, cuando llene o vacíe el
depósito o cuando no lo utilice.
❊
No utilice su aparato si el cordón no está en perfecto estado o si la plancha se ha
dañado como resultado de una caída o de un golpe. Para evitar cualquier riesgo de
descarga eléctrica, no trate de desarmar su aparato usted mismo. Envíelo a un centro de servicio técnico autorizado (ver garantía), donde será examinado y reparado. Un armado incorrecto puede originar descargas eléctricas al utilizar la plancha.
❊
Vigile atentamente su aparato cuando sea utilizado por niños o a proximidad de los
mismos. Nunca deje su aparato sin vigilancia cuando este conectado o puesto
sobre la tabla de planchar.
❊
Las partes metálicas calientes del aparato, el agua caliente y el vapor caliente pueden ocasionar quemaduras. Prestar atención cuando voltee la plancha, el depósito
puede contener agua caliente.
INSTRUCCIONES PARTICULARES
❊
Para no sobrecargar el circuito eléctrico, evite hacer funcionar otro aparato potente en la misma toma corriente.
❊
Si tiene la necesidad de utilizar una extensión eléctrica, utilice un cordón de 13
amperios, los cordones de amperaje inferior pueden sobrecalentarse. Tenga el cuidado de disponer el cordón de forma tal que sea imposible tirar del mismo por inadvertencia o tropezar con el mismo.
CONSERVAR ESTAS INSTRUCCIONES
1 - CONSEJOS DE SEGURIDAD
Verifique que la tensión de su instalación corresponde a la de la plancha. Cualquier error de conexión
puede causar un daño irreversible en el aparato y anular la garantía.
En caso de caída de la plancha, haga que un profesional la verifique antes de volverla a poner en
funcionamiento. Daños no visibles del aparato pueden ser perjudiciales para su seguridad. Nunca
desarme su plancha, diríjase a un servicio técnico autorizado.
2 - CONSEJOS PRACTICOS
❊ ¿Que agua utilizar?
Su aparato ha sido concebido para funcionar con agua del grifo. No obstante, es necesario proceder
regularmente a la autolimpieza de la cámara de vaporización, para eliminar la cal libre.
Si su agua es muy calcárea (esto se puede verificar con su servicio de aguas), es posible mezclar el
agua del grifo con agua desmineralizada del comercio en las siguientes proporciones:
- 50% de agua del grifo, - 50% de agua desmineralizada
❊ ¿Por que no utilizar otras aguas?
No utilizar las aguas que presentamos a continuación: durante la evaporación, el calor concentra los
elementos contenidos en el agua. Las aguas siguientes contienen desechos orgánicos o elementos
minerales que pueden provocar salpicaduras, colores oscuros o un envejecimiento prematuro de su
aparato: agua desmineralizada del comercio sola, agua suavizada, agua para aires acondicionados,
agua de secadores de ropa, agua de refrigeradores, agua destilada, agua de perfume, agua para
baterías y agua de lluvia.
❊ Utilización del almidón
Si utiliza almidón, pulverice preferentemente el revés de la superficie a planchar y limpie frecuentemente la suela tibia con un estropajo no abrasivo húmedo.
3 - LLENAR EL DEPOSITO
❊ En primer lugar, asegúrese que:
- la plancha esté desconectada,
- la varilla anticalcárea está instalada (C),
- El botón de ajuste de vapor está colocado en O.
❊ Baje la tapa del orificio de llenado.
Llene el depósito como se indica en el ilustración. Para evitar los desbordamientos, no supere el
nivel “máximo” indicado en el depósito (7oz - 200 ml).
Vuelva a cerrar la tapa deslizante del orificio de llenado.
2
3
4 - SELECCION DE TEMPERATURAS DE PLANCHADO (según modelo)
❊ La temperatura de planchado se ajusta con el cursor o el botón del termostato. El indicador lumino-
so del termostato se enciende (G) cuando la plancha se calienta y se apaga cuando ha alcanzado
la temperatura escogida.
4
❊ Consejos
5
Se recomienda planchar las
piezas de tejido en el orden
en que aparecen en la plancha para obtener temperaturas crecientes: sintéticos,
6
seda, lana, algodón, lino, etc.
Espere unos minutos cuando baje la temperatura para no quemar un tejido frágil.
Con fibras mezcladas, le recomendamos ajustar el termostato en función del tejido que se plancha
con la temperatura más baja (ejemplo: lino y viscosa, escoger viscosa y ajustar el termostato sobre
“sintético” ❄).
TEXTIL
POSICION DEL CURSOR DEL TERMOSTATO
Sintéticos
Acetato (Rhodia )
Acrílico (Crylor, Dralon,
Orlon, Courtelle...)
Poliamida (Nylon, Rilsan...)
❄
Poliéster (Tergal, Dacron,
Terital, Trevira...)
Viscosa (Rayón, Fibrane...)
Seda
❄❄
❄❄❄
Lana
Algodón/Lino
= Zona vapor
❊ Utilizar el vapor únicamente con el termostato en zona coloreada.
5 - PLANCHADO AL VAPOR
❊ Coloque el mando de ajuste vapor (C) entre 2 y 8 según la cantidad deseada.
7
8
Importante: antes de la primera utilización de su
plancha en posición vapor, le recomendamos que la
haga funcionar unos breves momentos en posición
horizontal y lejos de su ropa. En las mismas condiciones, accionar varias veces el botón de extravapor
antes de cada sesión de planchado.
❊ Durante las primeras utilizaciones, puede producirse un ligero desprendimiento de humo y un olor
que no son nocivos. Este fenómeno, sin consecuencias sobre el funcionamiento, desaparecerá
rápidamente.
6. FUNCION EXTRA VAPOR
Para obtener una cantidad mayor de vapor, presione el botón del extravapor (A) por impulsos.
❊ Consejo
Le recomendamos esperar un intervalo de tiempo
entre cada uso del extravapor.
9
7. ELIMINACION VERTICAL DE ARRUGAS (Algunos modelos)
❊ Ajustar el termostato al máximo.
❊ Colgar la ropa en un gancho y tensar ligeramente el tejido con una mano.
❊ Con la plancha en posición vertical e inclinada hacia adelante, pulsar el botón de extravapor efec-
tuando un movimiento de arriba hacia abajo.
❊ Consejo
Para los tejidos que no son lino, algodón o lana, mantenga la plancha a una distancia de algunos
centímetros para no quemar el tejido.
11
10
12
8. AUTO APAGADO (Algunos modelos)
❊ Su plancha está equipada con un sistema electrónico que corta la alimentación eléctrica si la plan-
cha permanece inmóvil más de 8 minutos sobre el talón o más de 30 segundos colocada en plano
horizontal o recorgada sobre cualquiera de sus costados. Entonces, el indicador luminoso (A)
empieza a parpadear.
❊ Paso a seguir : Para volver a poner en funcionamiento la plancha, basta con agitarla ligeramente
para que el indicador luminoso quede encendido.
❊ Al comienzo de cada sesión de planchado, coloque su plancha sobre su talón, mientras sube su
temperatura.
A
12 bis
13
9 - EL ROCIADOR
❊ Usted puede utilizar el rociador para planchar tanto en seco como con
vapor.
14
❊ Basta con apoyar el botón rociador (B).
❊ Consejo: Verificar que siempre tenga agua el depósito
15
10 - PLANCHADO EN SECO
❊ Colocar el mando de ajuste vapor (C) en seco O
11 - LIMPIEZA
Antes de cualquier limpieza, asegurarse de que el aparato está
desconectado y que la suela este fría
No utilizar ningún producto de limpieza o de desincrustado
❊ La suela
- La suela Ultraglide de su plancha puede estar manchada por almidón o por un textil planchado a una
temperatura demasiado alta. Limpiar regularmente la suela tibia utilizando un paño húmedo. Si utiliza almidón, pulverícelo al revés de la superficie al planchar y limpie la suela con mayor frecuencia.
❊ Consejo
- Evite colocar su plancha sobre un reposaplancha metálico ya que esto daña la suela. Más bien coloquela sobre su talón.
❊ La varilla anticalcárea
- Le aconsejamos limpiar la varilla antical regularmente.
- Asegúrese que la plancha está desconectada
y el depósito vacío.
Colocar el mando de ajuste de vapor en posición O
17
16
- Para retirar la varilla anticálcarea, jale de la misma hacia
arriba gracias a las sujeciones situadas de cada lado.
❊ Dejarla remojar aproximadamente
2 horas en vinagre de alcohol o en jugo de limón puro.
18
- Enjuagarla con agua de la llave
- Volverla a colocar en su lugar, presionándola.
Atención: la plancha no puede funcionar sin la varilla anticalcárea.
❊ Consejo
- Le aconsejamos limpiar una vez al mes la varilla anticalcárea.
❊ Autolimpieza: dos veces al mes
- Llenar el depósito
- Colocar el mando de ajuste vapor © en seco "0"
- Ajustar el mando del termostato a máx.
- Conectar la plancha y esperar que el indicador luminoso del termostato se apague
- Desconectar la plancha, colocarla encima de un fregadero
- Retire la varilla anticalcárea de su lugar
- Sacudir la plancha ligeramente hasta que toda el agua del depósito (con las impurezas) haya fluido
por la suela.
- Al final de la operación, volver a colocar en su lugar la varilla anticalcárea.
19
20
12 - APAGADO
- Colocar el control de ajuste vapor (C) en seco O, el control del
termostato en mÌnimo y esperar que la suela se enfríe.
- Vaciar el depósito
- Enrollar el cordón alrededor del talón. Colocar la plancha parada sobre
su talón.
21
13 - CONSEJOS PRACTICOS
❊ Nuestros productos están fabricados según normas de alta calidad. En caso de tener algún
problema con nuestro producto, tenga la amabilidad de remitirse al cuadro siguiente para que usted
mismo encuentre una solución.
❊ Si no encuentra la causa del problema; contacte con nuestro Centro de Servicio Técnico
Autorizado.
14 - PROBLEMAS EVENTUALES Y SOLUCIONES
¿Problema?
Posibles causas
Soluciones
El agua fluye por los orificios
de la suela
Temperatura seleccionada
demasiado baja para utilizar
el vapor (sintéticos, etc.)
Respetar la zona coloreada
en el termostato que indica
la zona de vapor.
Vapor utilizado antes que la
plancha esté caliente.
Espere que el indicador
luminoso del termostato esté
apagado para utilizar el
vapor.
Botón de extravapor utilizado
con demasiado frecuencia.
Dejar un intervalo entre las
utilizaciones del botón de
extravapor.
Flujo de vapor demasiado
grande.
Diminuir el flujo con
el cursor de ajuste vapor.
Plancha colocada fría a
plano con agua dentro del
depósito.
Vaciar el agua de su plancha
antes de usarla, ponga el
cursor de ajuste vapor en
posición seco (0) y colocarla
sobre su talón.
Termostato desajustado:
temperatura demasiado baja.
Dirigirse a un centro
de servicio técnico
autorizado.
El depósito está lleno más
allá del nivel máximo.
Vaciar parcialmente
el depósito hasta que el nivel
de agua esté sobre la línea
máxima o debajo de la
misma.
La plancha se utiliza inmediatamente después de
haberse accionado el autoapagado (algunos modelos)
Antes de planchar, esperar a
que el indicador luminoso del
termostato esté apagado.
La varilla anticalcárea
está mal colocada en la
plancha.
Insertar correctamente la
varilla
¿Problema?
Posibles causas
Soluciones
Se derrama un líquido de
color marrón por los orificios
de la suela que manchan la
ropa
Usted utiliza productos
químicos desincrustantes.
No utilice en su plancha productos de descalcificación,
ya que la dañan.
Utilización de agua
desmineralizada, de agua
para baterías, de agua de
descongelamiento del
refrigerador, de agua que
sale de una secadora de
condensación y de agua
procedente de un
descalcificador de agua.
Proceder a una autolimpieza.
Utilización de aditivos en el
agua de planchado (agua de
lavanda, apresto, etc).
Utilizar agua de la llave
únicamente
Materias contenidas en el
agua que no son cal, que se
concentran con el calor. El
agua no está constituida
solamente de cal, sino
además de sales minerales.
No utilice ningún aditivo.
Se carbonizan pequeños
pedazos de tela incrustados
en los orificios de la suela o
en el espacio entre la
cubierta de baquelita de la
plancha y la suela.
Limpie la suela con un
paño humedo.
De vez en cuando se puede
aspirar el espacio entre la
suela y la cubierta de baquelita de su plancha.
Planchado a una
temperatura demasiado
elevada.
Limpiar la suela.
Ajustar la temperatura según
el cuadro.
Su ropa no está enjuagada
o utiliza almidón.
Limpiar la suela aún tibia con
un estropajo no metálico
húmedo.
Pulverizar el almidón al revés
de la superficie a planchar
La plancha se cae accidentalmente: el termostato ya no
funciona.
Dirigirse al Centro de
Servicio Técnico Autorizado.
La suela de la plancha está
sucia (o marrón): puede
manchar la ropa
¿Problema?
Posibles causas
Soluciones
Hay poco vapor o no hay.
Cursor de ajuste vapor colocado en cero.
Ajustar el cursor entre 2 y 8
Incrustación de la varilla
con cal.
Sacar la varilla anticalcárea y
remojarla en vinagre de alcohol o zumo de limón puro
por 2 horas aprox.
Uso en seco demasiado
prolongado.
Limpiar la varilla anticalcárea.
Depósito vacío.
Llenar el depósito de agua
de la llave.
Usted ha colocado
su plancha en
un reposaplancha metálico.
Caída o golpes.
Colocar siempre la plancha
sobre su talón, que es
estable.
Rayones con cierres o
botones metálicos.
Dirigirse a un centro de
servicio técnico autorizado.
La suela está rayada o en
mal estado.
Si no es posible determinar la causa de una avería, dirigirse a un centro de servicio técnico autorizado.
Nunca desarme el aparato.
075625 / 04-00