Transcript
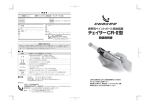
マイクチェック GB ホルダ取り扱い説明書
Micro Checker User’s Manual
99MAK009B1
特徴 Features
・本製品はマイクロメータ検査用ゲージブロックセットを保持し、マイクロメータの精度検査ができるゲージブロッ
クアクセサリです。
・可搬性に優れたコンパクトな構造で、いつでも、どこでも、素早く作業を行うことができます。
・ This is a gauge block holder specially designed for the micrometer inspection block set. It can tie all blocks in the set together to
provide efficient micrometer inspection.
・ With the compact structure excellent in portability, it can work anywhere quickly at any time.
ゲージブロックのセット方法 Setting the gauge block
測定面
Measuring surface
③クランプつまみ
③Clamp knob
②クランプコマ
②Clamp block
上から見た図→
Top view →
④クランプつまみ
④Clamp knob
①本体及びゲージブロックを図のようにセットし、ゲージブロックが落ちない
ように注意しながら②のクランプコマをゲージブロックの方向へ押さえつけ
③のクランプつまみで軽く固定します。更に④のクランプつまみでゲージブ
ロックが動かないように固定します。(注:③のクランプを締めすぎると④
のクランプが効かなくなる場合がありますのでご注意ください。)
セットできるゲージブロックは JIS、DIN、BS,FS 規格推奨の 10 個組対応です
が、9 個以下の任意サイズでご使用する場合はダミーのゲージブロックを挟ん
で合計 10 個になるようにセットして下さい。
①ゲージブロック
①Gauge blocks
横から見た図→
Side view →
Set the Micro Checker and gauge blocks as shown in the figure above. Taking care not to fall the gauge blocks, press the clamp
block ② against the gauge blocks, and secure them slightly with the clamp knob ③.
Tighten the clamp knob ④ so that the gauge blocks are secured firmly. (Note: Be aware that the clamp knob ④ will not be
effective if the clamp knob ③ is overly tightened.)
The applicable gauge block set is a 10-piece set recommended by JIS, DIN, BS, and FS standards. If the gauge blocks to be used
for inspection are nine or less pieces, please insert one or more dummy gauge block(s) to be 10 pieces in total.
使用方法
Operating method
左写真のように縦姿勢、横姿勢の何れでも使用できます。
また、付属のばねを取り付けることで、オプチカルパラレ
ルをセットし、マイクロメータの平行度をチェックするこ
とも出来ます。
(ゲージブロックの清掃、取り扱い、メンテナンスはゲー
ジブロックセットの取扱説明書をご参照ください。)
The Micro Checker can be used in either horizontal or vertical
orientation, as shown in the picture left.
The Micro Checker can also inspect the parallelism of
micrometer (anvil/spindle). Fix the spring supplied and set an
optical parallel as shown in the picture left.
(Refer to the user’s manual provided with the gauge-block set
for information on cleaning, handling and maintenance.)
付属サイズプレートの貼り方 Positioning the size plate (supplied)
②③サイズプレート
②③Size plate
③
②
①クランプコマ
①Clamp block
標準付属されている別のサイズプレートのゲージブロック構成で
使用される場合は、左図のように①クランプコマを右端に寄せた状
態で付属のサイズプレートを既存のサイズプレートの上に貼って
ください。(手順②、③)
When used with the block composition of another size plate supplied, overlay
it on the existing plate as shown in the figure left (procedures ② and ③)
after moving the clamp block ① to the right end.
持ち運びする場合、ゲージブロック及びオプチカルパラレルはマイクチェック GB ホルダから取り外して下さい。
In case of conveyance, please remove gauge blocks and optical parallel from Micro Checker.

