1
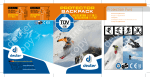
pat entpendi ng www. deut er . c om WARNING! IMPORTANT SAFETY INFORMATION. Failure to read, understand, and follow all instructions, warnings and safety precautions in this Manual and the Deuter website, deuter.com, can cause the DEATH, SERIOUS INJURY, and/or PERMANENT DISABILITY to your child. Keep this Manual for future reference for as long as you own or use the carrier. If you have any questions about the use, assembly, care, maintenance, cleaning, and storage of the carrier, please call Deuter Customer Service at 877.384.9252. YOUR CHILD’S SAFETY IS YOUR RESPONSIBILITY. For the child’s safety, DO NOT USE any Deuter child carrier without reading and following all instructions, warnings, and other safety precautions described in this Manual and on deuter.com each time you use the child carrier. DO NOT use the child carrier unless you fully understand all instructions and warnings regarding the carrier’s use, assembly, care, maintenance, cleaning, and storage. • Deuter child carriers are designed and intended to be used by ADULTS ONLY. • Deuter child carriers are designed and intended to carry ONE CHILD ONLY. • NEVER use the carrier with any child that cannot sit up unattended or without help. • NEVER use the carrier with any child that weighs more than 40 lbs./18 kg. • NEVER use the carrier with any child that weighs less than 15 lbs./7 kg. • The maximum weight limit of the child and any cargo for the carrier is 45 pounds (22 kg.) (for example, child 40 lbs./18 kg + pack 8lbs/4 kg) FAILURE TO FOLLOW THESE WARNINGS CAN RESULT IN THE DEATH, SERIOUS INJURY, OR PERMANENT DISABILITY TO THE CHILD. WARNING! CHECK FOR DAMAGE BEFORE EACH USE: • ALWAYS inspect the carrier and make sure that all snaps, straps, buckles, and adjustments are in proper working order and properly secured before each use. • ALWAYS inspect the condition of carrier before each use. • NEVER use the carrier if the carrier or any part of the carrier, including but not limited to, the frame, fabric, straps, or buckles, is or appears to be damaged, defective, or otherwise not working properly in any way. FAILURE TO FOLLOW THESE WARNINGS CAN RESULT IN THE DEATH, SERIOUS INJURY, OR PERMANENT DISABILITY TO THE CHILD. WARNING! BE CAREFUL PUTTING ON AND REMOVING THE CARRIER: • ALWAYS lift and lower the carrier and child gently. • NEVER shake or jar the carrier or child. • ALWAYS pay attention to branches, door frames, and other obstacles, as the child’s head could be higher than yours. • ALWAYS protect the child’s legs and feet from injury when you put the child carrier down and/or when the child carrier is on or near the ground. FAILURE TO FOLLOW THESE WARNINGS CAN RESULT IN THE DEATH, SERIOUS INJURY, OR PERMANENT DISABILITY TO THE CHILD. WARNING! PROTECT YOUR CHILD WHILE USING THE CARRIER: • ALWAYS carry the child in the carrier with the safety belt securely and properly fastened. • ALWAYS inspect and ensure that the safety belt is adjusted correctly to fit your child. BEFORE EACH USE, MAKE SURE YOUR CHILD CANNOT FALL OUT OF THE CARRIER, BE STRANGLED BY ANY PART OF THER CARRIER, OR SUFFER ANY OTHER ACCIDENT. DO NOT ADJUST THE CARRIER WITH THE CHILD IN IT. • NEVER leave your child unattended or unobserved in the carrier. All child carriers can tip over. • ALWAYS make sure that the child is dressed properly for the weather. • ALWAYS monitor the child frequently (every few minutes) while in carrier. Frequently check the child’s position, comfort, exposure to wind, sun, temperatures, and weather, etc. • NEVER allow the child to remain seated in the carrier for too long as doing so can limit blood circulation in the child’s legs. Remember to make frequent stops to exercise at regular intervals. • NEVER leave any child unattended in the carrier. • NEVER place more than one child in the carrier. • NEVER use the carrier as a car seat, child seat, or high chair. • NEVER allow your child to stand on the carrier seat. • NEVER use the carrier if your child will not ride calmly in carrier. • NEVER place the carrier near a campfire, cook stove, or open flame. • NEVER allow any child to eat while riding in the carrier. • ALWAYS Keep small objects away from the child while in the carrier. • NEVER place the carrier on countertops, tables, or soft, uneven, or elevated surfaces. • NEVER let go of the carrier while a child is in it. The carrier is NOT designed or intended to stand unsupported or on its own. • When attaching items to the carrier, make sure that they will not swing and hit the child or strangle, choke or otherwise cause injury to the child. • If your child has special needs, consult with a physician before using the carrier. This carrier may not be appropriate for special needs children. • ALWAYS make sure that the child is safe from falling, choking, strangulation, and all other accidents and mishaps while in the carrier. FAILURE TO FOLLOW THESE WARNINGS CAN RESULT IN THE DEATH, SERIOUS INJURY, OR PERMANENT DISABILITY TO THE CHILD. WARNING! PROTECT YOURSELF AND YOUR CHILD: • Consult with a physician before using the carrier (or partaking in any physical activity). • YOUR USE OF THE CARRIER WILL LIKELY AFFECT YOUR BALANCE AND COORDINATION. • ALWAYS avoid any sudden movements that may throw you or the child off balance. • The carrier is appropriate for leisure activities and not sporting activities. • NEVER use the carrier while skating, biking, skiing, or engaging in any activity that will affect your balance. • NEVER bend at the waist when using the carrier or you may pitch the child forward causing injury or death. • NEVER use the carrier on slippery, icy or wet surfaces or on rough or uneven terrain. • NEVER use the carrier if you feel off-balance, faint, dizzy, or nauseous. • NEVER use the carrier if you are injured or are in pain. • NEVER use the carrier at night, in the dark, or in low light conditions. • NEVER attach the carrier to bicycles, automobiles, snowmobiles, or other machines. • NEVER use the carrier on busy streets or in heavy traffic. • NEVER use the carrier on public transportation. • ALWAYS be aware of conditions around you when using the carrier. FAILURE TO FOLLOW THESE WARNINGS CAN RESULT IN THE DEATH, SERIOUS INJURY, OR PERMANENT DISABILITY TO THE CHILD. Ihrem Kind zuliebe nur mit GS-Zertifikat / For your Child’s saf et y only with GS-certificate / Conforme à la norme EN 13209-1 – Conforme à la directive européenne 2002/61/CE des tests textiles azoïques – Con forme aux exigences de sécurité / Para la segurid ad de su niño sólo con certificado GS / Per amore del vostro bambino solo con certificato GS / 安 心 の G S 認 証 製 品 1 Einstellen des Kindersitzes Kid Comfort Adjusting the child seat / Réglage du siège enfant / Ajustar la silla / Regolazione del seggiolino / Nastavitev otroškega sedeža (razvidno iz slike) / チャイルドシートとセーフティーベ ルトの調整方法 D E G S p o r t GmbH & Co. KG Siemensstraße 1 · 86368 Gersthofen · Germany Tel. + 49 (0) 8 21/ 49 87 327 · www.deuter.com D e u t e r U S A Inc. · 1341 Sherman Dr unit D · Longmont CO 80501-6192 · USA Tel. + 1 / 303 652 3102 · w w w. d e u t e r u s a . c o m de co ut py er German Innovation Since 1898 Deuter de co ut py er de co ut py er A F i K H B c 2 Anpassen des Tragesystems The name Deuter stands for innovative products with outstanding design and quality. Deuter specialises in backpacks for hiking, alpine sports, trekking, biking and many others. Le nom Deuter symbolise des produits innovateurs de grande qualité et de conception sophistiquée, répondant exactement aux exigences les plus diverses: randonnée, alpinisme, voyages, cyclisme et beaucoup d'autres. El nombre Deuter quiere decir productos innovadores de calidad y un diseño excelente. Deuter se especializa en mochilas de senderismo, Deportes alpinos, trekking, ciclismo y muchos otros. 5 6 1 de co ut py er de co ut py er 3 2 Kid Comfort Accessories Der Name Deuter steht für durchdachte und geradlinig konzipierte Produkte, die genau auf die Anforderungen verschiedenster Einsatzgebiete abgestimmt sind: Wandern, Bergsport, Reisen, Radfahren und vieles mehr. 4 Il nome Deuter simboleggia prodotti ponderati e innovativi, rispondenti alle più diverse esigenze di impiego: passeggiate in montagna, alpinismo, viaggi, ciclismo e molto di più. Ime DEUTER pomeni inovativne, stilsko oblikovane in izjemno kakovostne izdelke. Deuter se je specializiral na področju nahrbtnikov za pohodništvo, alpinizem, kolesarstvo in mnoga druga področja. ドイターは常にデザインと機能性に優れた 革新的な製品を開発するブランドです。 ドイ ターはハイキング、 トレッキング、 アルパイン スポーツ、自転車、 その他多くの分野のスポ ーツに特化したバックパックを作り続けてい ます。 Sun and Rain Cover for Kid Comfort I & II Rain Cover for Kid Comfort II & III Kids Backpacks de co ut py er Adjusting the carrying system / Ajustement du système de portage / Ajustar de árnes / Adattamento del sistema di trasporto / Nastavitev nosilnega dela nahrbtnika (razvidno iz slike) / ドイターバリクイックシステム (背面)の調整方法 Schmusebär Waldfuchs Ultra Bike Climber Kids Sleeping Bags Little Star EXP & Starlight EXP The extendible kids sleeping bags grow with your child Fox 30 & 40 Achtung! Bitte für späteres Nachschlagen aufbewahren ! Sicherheits-Hinweise zur Nutzung der Deuter Kid Comfort Kindertragen: Die Deuter Kid Comfort Kindertrage bietet Ihnen den Vorteil TÜV/GS-geprüfter Qualität für Ihr Kind. Beachten Sie bitte für die Sicherheit Ihres Kindes die untenstehenden Punkte bei jeder Nutzung der Kid Comfort Kindertragen. Die Kid Comfort Kindertrage ist für Kleinkinder, die noch nicht selbständig sitzen können, ungeeignet. D Die maximale Zuladung ist 22 kg (Kind 18 kg + Gepäck 4 kg). Transportieren Sie Ihr Kind nur angeschnallt. Achten Sie darauf, dass der Sicherheitsgurt dabei optimal für ihr Kind eingestellt ist (s. Schritt 1). Die Kid Comfort ist zwar selbststehend, lassen Sie dennoch nie Ihr Kind unbeaufsichtigt in der Trage sitzen. Selbst die stabilste Kindertrage kann umkippen! Längeres Sitzen kann zur Einschränkung der Blutzirkulation in den Beinen des Kindes führen. Es empfiehlt sich daher regelmäßig Bewegungspausen einzulegen. Bitte beachten Sie außerdem beim Gebrauch: • Der Träger muß jeder Zeit darauf gefasst sein, daß eine unerwartete Bewegung, ob von ihm selbst oder dem Kind, sein Gleichgewicht beeinträchtigt. • Die Kopfposition des in der Trage sitzenden Kindes ist höher wie die des Trägers. Deshalb Vorsicht bei Ästen, Türrahmen u.ä. • Die tragende Person sollte sich immer behutsam drehen oder beugen, da das Kind die Bewegungen ausgleichen muß. • Die Trage ist für die Nutzung bei Freizeitaktivitäten geeignet, nicht jedoch bei Sportaktivitäten. • Seien Sie sich bewusst, dass das Kind in der Trage eher unter den Wetterbedingungen und Temperaturen leiden kann, bevor Sie es tun. • Es sollte darauf geachtet werden, Verletzungen der Füße des Kindes zu vermeiden, wenn die Trage abgestellt wird bzw. die Trage am oder nahe dem Boden ist. Einstellen des Kindersitzes und Sicherheitsgurtes: Schritt 1 Der Kindersitz ist in der Höhe variabel. Ihr Kind sitzt so auch beim Heranwachsen immer in der richtigen Position. Ebenfalls läßt sich der 5-Punkt Sicherheitsgurt genau anpassen. (s. Skizze Klappseite aussen) 1. Standbügel ausklappen und Kind in die Trage setzen. D 2. Die Sitzhöhe ist dann optimal, wenn das Kind gut aus der Trage hinaussehen und die Arme uneingeschränkt bewegen kann. Sein Kinn sollte auf der Höhe des Kinnpolsters sein a . Mit Hilfe des zentralen Höhenverstellgurts B und den beiden seitlichen Zusatzriemen C lässt sich die Sitzfläche nach Wunsch absenken bzw. anheben. 3. Abhängig von der Größe des Kindes und der Sitzhöhe wählt man für die Schultergurte D eine passende Position. Dies geschieht durch lösen und wieder andrücken des Trägerherzes am Klettband E . Ist das Kind angeschnallt, Bauchgurt F einstellen und Brustgurt G schließen. Alle Bänder sollten eng aber nicht zu fest sein. 4. Bei den Modellen Kid Comort II und III den seitlichen Zustieg schließen H und zum Schluß Seitenbänder I leicht anziehen. Schritt 2 Anpassen des Deuter Vari-Quick Tragesystems: Das Vari-Quick Tragesystem erlaubt eine individuelle Anpassung an die Körpergröße des Trägers. 1 Zuerst muß der Hüftgurt korrekt platziert werden. Schulterträger und Lageverstellriemen lockern. Kid Comfort mit einem realistischen Gewicht beladen und aufsetzen. Den Hüftgurt dabei direkt auf den Hüftknochen platzieren und festziehen. 2 Schulterträger festziehen und Sitz des Vari-Quick Systems überprüfen. Der Ansatz der Schulterträger sollte zwischen den Schulterblättern liegen. Um diese Position einzustellen, mit dem Vari-Quick System die Schulterträger höher oder tiefer positionieren. Bei richtiger Einstellung umschließen die Schulterträger genau die Schultern. 3 Um die Höhe der Schulterträger zu verändern einfach das Klettband öffnen und durch 4 passende Befestigungsschlaufen führen. Danach Klettband festziehen und fixieren. 4 Schulterträger festziehen. Nicht zu stramm, denn die Hauptlast sollte auf dem Hüftgurt liegen. 5 Um die Trage zu stabilisieren, diese durch Spannen der Lageverstellriemen näher an den Rücken ziehen. 6 Zuletzt den Brustgurt schließen. (s. Skizze Klappseite innen) WARNUNG! Achten Sie darauf, die Kid Comfort beim Aufsetzen und Abnehmen nicht zu kippen. Sie könnten dabei das Kind gefährden. 1. 2. 3. 4. Kind in die Trage setzen und Sicherheitsgurte schließen. Kid Comfort aufsetzen, dabei die Schultergurte des Tragesystems relativ locker lassen. Hüftgurt richtig platzieren und fest anziehen. Dann die Schultergurte anpassen. Zuletzt Brustgurt schließen und Standbügel einklappen. Schritt 4 Abstellen und Sichern durch Klappgelenk mit Verriegelung Der Ständer der Kraxe lässt sich mit Hand oder Fuß ausklappen. Ist der Ständer vollständig ausgeklappt verriegelt sich das Gelenk K (Klickgeräusch). Dieses kann mit einer Hand wieder entriegelt werden. Die Kraxe steht durch das verriegelbare Klappgelenk (an der linken Seite) stabil und ein ungewolltes Einklappen beim Abstellen, oder wenn sich das Kind bewegt, kann nicht passieren. D Schritt 3 Aufsetzen der Kid Comfort Kindertrage: Sonnen- und Regendach für die Deuter Kid Comfort Kindertragen: Kid Comfort I & II ACHTUNG! Kleinkinder haben eine sehr empfindliche Haut. Rüsten Sie deshalb die Kid Comfort bei starker Sonnenstrahlung mit einem Sonnenschutzdach aus. Zusatzoder Ersatzteile sollten nur vom Hersteller oder Fachhandel bezogen werden. 1 D 2 Kid Comfort III Sonnendach: 1 Kid Comfort I & II: Gestänge in die beiden Stoffkanäle auf der Vorderseite der Nackenstütze stecken. Kid Comfort III: Reißverschluß im Bereich der Kopfstütze komplett öffnen und integriertes Sonnendach vorziehen. 2 Die Haken des Sonnendaches an den Schlaufen der Kinnstütze einhängen. Regendach: Kid Comfort III: Die extra erhältliche Regenhaube wird über das Sonnendach gestülpt. Kid Comfort I & II: Reißverschluß am Sonnendach öffnen und Regenschutz entfalten. [o. Abb.] 1 2 Pflege & Wartung a Der Bezug ist abwaschbar und kann mit lauwarmen Wasser und Neutralseife von Hand gereinigt werden. Der abnehmbare Kid Comfort II & III Kinnschutz a wird ebenso von Hand gereinigt und ist nicht Wäschetrockner geeignet. Um die Sicherheit der Trage zu gewährleisten alle Riemen und das Gestänge regelmäßig auf Verschleiß überprüfen. Einen verbogenen Rahmen niemals selbst in Form biegen. Bei notwendigen Repa raturen wenden Sie sich bitte an den Fachhandel oder direkt an uns. Attention! Please retain for information! Security Advice for using the Deuter Kid Comfort child carriers: Deuter Kid Comfort child carriers are TÜV tested and carry the GS (safety tested) label. For your childs safety, please consider the following safety points each time you use the Kid Comfort child carriers. children The Kid Comfort child carriers are not suitable for small who are not yet able to sit up by themselves. Only carry the child with the safety belt securely fastened. Ensure the safety belt is adjusted correctly to fit your child. (look Step 1) Even though the Kid Comfort can stand upright by itself, do not leave your child unobserved in the seat. Even the most stable child carrier can tip over! Remaining seated for a long period can limit blood circulation in the child's legs. Therefore it is advisable to make stops for exercise at regular intervals! Please consider when using: • As the child’s head could be higher than yours, pay attention to branches, door frames and other similar obstacles. • Caution: unexpected motion may affect your balance. • The bearer should avoid any sudden movements that may throw the child off balance. • The child carrier is appropriate for leisure activities and not sporting activities. • Be aware that your child may suffer from the effect of weather and temperature before you do! • To protect your child’s feet from injury, be careful when you put the child carrier down or when the child carrier is on or near the ground. GB The maximum capacity is 22 kg. (child 18 kg + pack 4 kg) Step 1 Adjusting the child seat and the safety belt: The child seat is height-adjustable, allowing your child to sit in the correct position according to their size. Additionally the 5-point safety belt can be adjusted precisely. (see illustration on outer front cover) 1. Fold out the stand and place the child in the seat. GB 2. The height of the seat is ideal when the child can see out well and move it's arms freely. Their chin should be about level with the top of the chin pad a . Using the height-adjustable strap B and both side straps C the seat can be raised or lowered as required. 3. Depending on the size of the child and the seat height, select the right position for the shoulder straps D Do this by removing the velcro which is on the centre of the shoulder straps and secure it in the correct position again E . Strap in the child and adjust the shoulder straps F and close the sternum strap G . All of the straps should be secure but not too tight. 4. Always close the side access H on Kid Comfort models II & III. Always close the side access I . Step 2 Adjusting the Deuter Vari-Quick carrying system: The Vari-Quick carrying system allows individual adjustment to your specific anatomy. 1 First, the hip belt must be correctly positioned. Place a realistic load in the Kid Comfort, loosen the shoulder straps and the grey stabiliser straps and put it on. Place the padded hip belt directly over the hip bones and tighten. Step 3 Putting on the Kid Comfort child carriers: CAUTION! Make sure you do not tip the Kid Comfort when putting it on and taking it off. This can be dangerous for the child. 1. 2. 3. 4. Step 4 Place the child in the seat, and fasten safety belt. Put on the Kid Comfort, leaving the shoulder straps of the carrying system relatively loose. Position the hip belt and tighten it. Then adjust the shoulder straps. Finally close the sternum strap and fold in the stand. Lockable stand You can unfold and retract the frame’s kickstand with your hands or feet. When fully unfolded, the stand is locked K (click). You can unlock it by hand. The lockable stand (left side) ensures a stable stand and prevents the frame from folding when put down or when the child moves. GB 2 Tighten the shoulder straps and check the fitting of the Vari-Quick system. The Vari Quick fixing point should be positioned between the shoulder blades. To change this position, raise or lower the Vari-Quick system. With correct adjustment, the shoulder straps will follow the curve of your shoulders. 3 To change the height of the shoulder straps, simply undo the Velcro closure and thread the Velcro strap through 4 suitable attachment loops. Tighten the Velcro strap and fix it. 4 Tighten the shoulder straps, but still allow the hip belt to carry most of the load. 5 Tension the grey stabiliser straps to pull the load closer to your back and your centre of gravity. 6 Finally close the sternum strap. (see illustration on inside front cover) Sun and Rain Cover for the Deuter Kid Comfort child carriers: Kid Comfort I & II NOTE! Children have very sensitive skin. Use the sun cover to protect your child from strong sunshine. Accessories or spare parts should be purchased only from the manu-facturer or specialised retailers: 1 GB 2 Suncover: 1 Kid Comfort I & II: Insert the rods into both channels in the neck support section. Kid Comfort III: Completely open zipper over the head support and pull out the integrated sun roof. 2 Attach the hooks in the loops of the chin support. Raincover: Kid Comfort III: The accessory rain cover is placed over the suncover and secured with elastic cords. Kid Comfort I & II: Open the zipper on the sun roof visor and unfold the rain cover. (not illustrated.) Kid Comfort III 1 2 Care & Maintenance a The Kid Comfort material can be washed by hand with lukewarm water and a neutral soap. The removable chin pad a of the Kid Comfort II & III should also be hand washed. Do not place it in a dryer. To guarantee the security of your child carrier always check all straps and the frame for wear and tear. Never try to reform a twisted frame by yourself. For necessary repairs please contact your specialised retailer or refer directy to the manufacturer. Important! A conserver pour consultation ultérieure Conseils d'utilisation des modèles Kid Comfort: Les porte-bébé Kid Comfort de Deuter sont testés par le TÜV et portent le label GS (conformité aux exigence de sécurité). Pour la sécurité de votre enfant, veuillez observer les points suivant quand vous utilisez le Kid Comfort. Les porte-bébé Kid Comfort ne sont pas appropriés pour les enfants ne se tenant pas encore assis seuls. La capacité maximale est de 22 kg. F (enfant 18 kg + chargement 4 kg) Ne transporter l’enfant que s'il est attaché. Faites attention que la ceinture de sécurité soit ajustée de façon idéale pour votre enfant (voir 1ère étape). Bien que le Kid Comfort tienne debout tout seul, ne laissez jamais votre enfant assis sans surveillance. Même le porte-bébé le plus stable peut se renverser! La position assise continue peut troubler la circulation du sang dans les jambes de l’enfant. Par grand froid, il y a donc aussi de gelure! Précautions à prendre pendant l’utilisation: Lorsque le porteur utilise le porte-bébé, il doit être conscient des points suivants: Pour la sécurité de votre enfant, veuillez observer les points suivants lorsque vous utilisez le porte-bébé Kid Comfort. Ne pas laisser l’enfant sans surveillance dans le porte-bébé. Ne pas utiliser avant que l’enfant sache se tenir assis seul. Veillez à ne pas heurter les pieds de l’enfant lorsque le porte enfant est au niveau du sol ou à proximité. Il convient de prendre des précautions lors de la mise en place ou du retrait du porte-bébé. Le porteur fera très attention lorsqu’il se baissera ou se penchera en avant. Le porte-bébé peut être utilisé lors des activités de loisirs mais pas dans le cadre d’activités sportives. Lorsque l’enfant est dans le porte-bébé, il peut se trouver plus haut que le porteur. Il convient donc d’avoir conscience des risques encourus (encadrement de porte, branches basses, etc… L’équilibre du porteur peut être altéré en raison des mouvements inattendus de l’enfant et de ses propres mouvements. L’enfant peut se sentir fatigué par la position assise dans le porte-bébé au bout de quelque temps, il est donc recommandé de faire des arrêts fréquents. Sachez que l’enfant dans le porte-bébé peut souffrir du temps et de la température avant vous, veillez toujours à sa protection contre le soleil, la pluie ou le vent ainsi qu’à son hydratation. Pensez que l’enfant dans le porte-bébé sera exposé plus rapidement aux conditions météorologiques et aux températures que vous. Pensez à d’éventuelles blessures aux pieds de l’enfant si vous déposez le porte-bébé, où s’il se trouve près du sol ou posé par terre. 1ere étape Réglage du siège enfant et du harnais de sécurité: Le Kid Comfort étant réglable en hauteur, votre enfant est donc toujours correctement assis, quelle que soit sa taille. Le harnais de sécurité 5-point s’ajuste de façon optimale pour le confort de portage. (voir schéma sur la page de couverture) 1. Déplier le pied stabilisateur et placer l’enfant dans le siège. F 2. La hauteur du siège est idéale quand l'enfant peut bien voir dehors et bouger librement les bras. Son menton doit se trouver au niveau du protège-menton a On peut au choix monter ou baisser le siège à l’aide de la sangle centrale de réglage de hauteur B et des sangles latérales C . 3. La position convenable des baudriers D dépend de la taille de l’enfant et de la hauteur du siège. Le réglage se fait en desserrant et pressant le velcro E . Avec l’enfant attaché, ajustez les baudriers F et fermez la sangle de poitrine G . Toutes les sangles doivent être ajustées sans être trop serrées. 4. Fermer l’entrée latérale chez H les modèles Kid Comfort II et III et serrer enfin légèrement les sangles latérales I . 2ème étape Ajustement du système de portage Deuter Vari-Quick: Système de portage Vari-Quick permet un ajustement individuel à l’anatomie du porteur. [voir schéma sur la page de couverture] 1 La ceinture doit d’abord être correctement placée. Charger le Kid Comfort de façon réaliste. Déserrer les bretelles et les sangles stabilisatrices grises, enfiler le porte-bèbé. Placer la ceinture lombaire directement sur les hanches et serrer. 3ème étape Mise sur le dos du porte-bébé Kid Comfort: ATTENTION! Prenez soin de ne pas renverser le Kid Comfort en l’enfilant ou en l’enlevant. Ce pourrait être dangereux pour l’enfant. 1. 2. 3. 4. Asseoir l'enfant dans le siège et attacher la ceinture de sécurité. Enfiler le Kid Comfort en laissant les bretelles du système de portage relativement lâches. Placer et bien serrer la ceinture. Régler ensuite les bretelles. Boucler la sangle de poitrine et replier le trépied. 4ème étape Armature dépliable avec verrouillage Le pied des porte-bébé se déplie avec la main ou le pied. Si le pied est complètement déplié, l’armature se verrouille K (on entend un déclic). Celle-ci peut de déverrouiller d’une main. Grâce à l’armature verrouillable (sur le côté gauche uniquement), le porte-bébé est stable et le pied ne peut pas se replier involontairement lorsqu’on le dépose où si l’enfant bouge. F 2 Serrer les bretelles et vérifier l'ajustement du système Vari-Quick. Il faut que la partie haute des bretelles du sac à dos soit au niveau des omoplates. Pour changer de position, lever ou baisser le système Vari-Quick. L'ajustement est correct si les bretelles épousent parfaitement la courbe des épaule. 3 Pour modifier la hauteur des bretelles, détacher le velcro de fixation et enfiler la sangle dans les 4 passants correspondants. Serrer la sangle et fixer le velcro. 4 Serrez les bretelles. Ne pas trop les tendre car le poids principal est sur la ceinture lombaire. 5 Tendre les sangles stabilisatrices grises pour rapprocher la charge du dos et du centre de gravité. 6 Boucler enfin la sangle de poitrine. Pare-soleil / pluie pour les portes-bébé Deuter Kid Comfort: Kid Comfort I & II ATTENTION! Les petits enfants ont une peau très fragile. Equipez donc par fort soleil le Kid Comfort d’un pare-soleil. Les pièces additionnelles et de rechange ne doivent être achetés qu’auprès du fabricant ou d’un revendeur spécialisé. 1 F 2 Kid Comfort III 1 2 Pare-soleil: 1 Kid Comfort I & II: Met tez les tringles dans les deux canaux au dos du porte-bébé. Kid Comfort III: ouvrir complètement le zip de l'appuie-tête et sortir le pare-soleil intégré. 2 Accrocher les cordons élastiques aux passants du protègementon. Pare-pluie: Kid Comfort III: La housse de pluie supplémentaire est placée sur le paresoleil et bloqué à l'aide des cordons élastiques. Kid Comfort I & II: ouvrir le zip du pare-soleil et déplier la housse de pluie. (sans illustration) Entretien a Le protège-menton du Kid Comfort II & III a est aussi lavable à la main mais ne doit pas être mis au sèche linge. Pour garantir la sécurité du porte-bébé, con trôlez régulièrement l’usure des différentes sang les et du cadre. Ne tentez de déplier un cadre qui serait courbé. Prenez contact avec votre revendeur (magasin spécialisé) pour toutes réparations. Atención¡ Por favor conservar esta información Información de seguridad para usar los porta-bebes Deuter Kid Comfort: Los porta-bebes Kid Comfort solamente son apropiados para niños que puedan mantenerse sentados por sí solos. Capacidad máximo 22 kg. (niño 18 kg + carga 4 kg) lleva al niño siempre con el cinturón de seguridad puesto. Asegurarse que el cinturón de seguridad esta ajustado correcta-mente a vuestro niño (ver punto 1). El Kid Comfort se mantiene de pie por si solo, pero nunca se debe dejar al niño desatendido, cualquier movimiento brusco podría hacerle volcar. No es aconsejable que el niño permanezca largos períodos de tiempo sentado, puede causarle problemas de circulación sanguínea y en invierno puede tener problemas de hipotermia. Por favor téngalo en cuenta cuando lo use: • Cuando la cabeza este más alta que la suya, preste atención a las ramas, marcos de las puertas y otros obstáculos similares. • Precaución: un movimiento inesperado puede afectar su equilibrio. • El portador debe evitar cualquier movimiento inesperado que pueda hacer caer al niño. • El porta-bebe es apropiado para actividades de ocio y no para actividades deportivas. • ¿Sabes que tu niño puede sufrir el efecto de las condiciones climatológicas y de la temperatura antes que tú? • Para proteger los pies de cualquier daño, ten cuidado cuando bajes el porta-bebé o cuando el porta-bebé esté en o cerca del suelo. ES Los porta-bebes Kid Comfort están probados por el TÜV (safety tested) label. (inspección técnica alemán) sello de inspección y seguridad GS. Para la seguridad de su niño, por favor tener en cuenta los siguientes puntos de seguridad cada vez que use el Kid Comfort. Ajustar la silla y el cinturón de seguridad Punto 1 El porta bebe se puede acoplar a la altura del niño, ajustar en la posición correcta según su tamaño. Adicionalmente el cinturón con cinco puntos de seguridad puede ser ajustado perfectamente. (ver ilustración en la portada) 1. Despliega la silla y coloca al niño en ella. ES 2. La altura idónea es cuando el niño puede ver bien y mover sus brazos libremente. Su barbilla debe estar a la altura del reposa barbilla a . Utilizando la correa ajustable de altura B y las dos correas laterales B el asiento se puede subir y bajar a su comodidad. C 3. Según el tamaño del niño y la altura de la silla, colocar las hombreras D Quitar el velcro que esta en el centro de las hombreras y ajustarlo de nuevo a la posición correcta. E . Abrochar las correas del niño, ajustar las hombreras F cerrar la correa de pecho G . Todas las correas deben estar seguras pero no demasiado ajustadas. 4. Cierre siempre el acceso lateral H en los modelos Kid Comfort II y III y finalmente ajuste para más comodidad las correas laterales I Punto 2 Ajustar el sistema de transporte Deuter Vari-Quick: El sistema de la espalda (Vari-Quick) permite un ajuste individual a tu anatomía especifica. (ver ilustración en la página de al lado) 1 El cinturón lumbar tiene que estar posicionado correctamente, llevar lo imprescindible, afloje las hombreras y las correas estabilizadoras de color gris y ajustarlas. Coloca el cinturón lumbar correctamente encima de las caderas y ajústalo. 2 Ajustar las hombreras y comprobar que el sistema Vari-Quick este correctamente ajustado. El punto de fijación del Vari-Quick debe estar situado entre los hombros. Para cambiar esta posición levantar o bajar el sistema Vari-Quick. Con un ajuste correcto las hombreras se adaptaran a la espalda del usuario. 3 Para cambiar la altura de las hombreras quitar el velcro y deslizar la cinta a través de cuatro trabillas hasta la posición deseada. Apretar y fijar. 4 Ajuste las hombreras, pero no demasiado porque el cinturón lumbar debesoportar la mayor parte del peso. 5 Ajustar las correas estabilizadoras de color gris para acercar la carga a la espalda y al centro de gravedad. 6 Finalmente cierre el cinturón del pecho. (see illustration on inside front cover) „Cuidado” al ponerte la silla o quitártela ten cuidado de no dejar caer la silla bruscamente, ya que esto puede ser peligroso para el niño. 1. 2. 3. 4. Colocar al niño en la silla y abrochar el cinturón de seguridad. Colocarte la silla en los hombros dejando las hombreras del sistema de transporte relativamente sueltas. Posicionar el cinturón lumbar y ajustarlo una vez ajustadas las hombreras. Cerrar la correa del pecho y plegar el soporte de la silla. Punto 4 Botón de bloqueo Puedes extender y retirar el bastidor del soporte con tus manos o pies. Cuando se extiende completamente, la base queda bloqueada K (click). Tu puedes abrirla con tu mano. El botón de bloqueo (solo parte izquierda), asegura una base estable y evita que el bastidor se pliegue, cuando lo bajas o cuando el niño se mueve. ES Punto 3 Colocación del porta-bebe para su transporte: Protector de sol y lluvia para el porta bebe Deuter Kid Comfort: Kid Comfort I & II 1 ES 2 Kid Comfort III 1 2 Atención! Los niños tienen la piel muy sensible. Utiliza el sun and rain cover para protegerlo del sol. Acceso-rios o piezas sueltas deben ser adquiridas solamente al fabricante o vendedor especializado Protector de sol: 1 Kid Comfort I & II: Introduce las varillas en ambos canales en la sección del soporte del cuello. Kid Comfort III: Abre completamente la cremallera que esta sobre el soporte de la cabeza y sacar el sun roof integrado. 2 Enganchar las cuerdas en los ojales que están a la altura del soporte de la barbilla. Protector de lluvia: Kid Comfort III: El accesorio protector de lluvia se coloca por encima del toldo y se fija con las cuerdas elásticas. Kid Comfort I & II: Abre la cremallera de la visera del toldo y desplegar el protector de lluvia (sin ilustración.) Cuidado y mantenimiento a El material del Kid Comfort se puede lavar a mano con agua tibia y jabón neutro, la almohadilla de la barbilla del Kid Comfort II & III a también debería lavarse a mano y no lo pongas en la secadora. Para garantizar la seguridad de vuestro port-bebe comprobar siempre todas las correas y el armazón de transporte. Nunca intente enderezar un marco torcido. Para las reparaciones por favor póngase en contacto con su vendedor especializado o directamente con el fabricante. Attenzione! Da conservare per riferimenti futuri! Norme di sicurezza per l’utilizzazione dello zaino portabambini Deuter Kid Comfort: Lo zaino portabambini Deuter Kid Comfort vi offre il vantaggio della qualità controllata dal TÜV/GS. Per la sicurza del vostro bambino vi preghiamo di rispettare i seguenti punti ogni volta che utilizzate lo zaino Kid Comfort. Lo zaino portabambini Kid Comfort non è adatto a bambini che non stanno ancora seduti da soli. Il carico massimo 22 kg. (bambino 18 kg + equipaggiamento 4 kg) I Trasportate il vostro bambino sempre con la cintura allacciata, facendo attenzione che la stessa sia regolata nella posizione ottimale per il bambino (vedi punto 1). Anche se il Kid Comfort può stare in piedi da solo, non lasciate mai il bambino incustodito seduto nello zaino: anche lo zaino più stabile può rovesciarsi! Se il bambino sta seduto a lungo, la circolazione sanguigna delle sue gambe può venire pregiudicata: si consiglia di fare regolar- mente delle pause per consentirgli di muoverle. Durante l’utilizzazione osservate inoltre i seguenti punti: • La posizione della testa del bambino trasportato nello zaino è superiore a quella di chi trasporta: attenzione quindi a rami, intelaiature di porte e simili. • Chi trasporta deve sempre considerare che un movimento improvviso, suo o del bambino, può fargli perdere l’equilibrio. • La persona che trasporta deve sempre girarsi o piegarsi con cautela, in quanto il bambino deve bilanciarne i movimenti. • Lo zaino è adatto per essere utilizzato in attività del tempo libero, ma non per attività sportive. • Siate consapevoli del fatto che il vostro bambino soffre prima di voi degli effetti del tempo e delle temperature. • Per proteggere i piedini del vostro bambino da ferite, fate attenzione posando lo zaino portabimbo o quando questo sia vicino al terreno. I Reggolazione del seggiolino e della cintura di sicurezza: Punto 1 Il seggiolino può essere variato in altezza, così che il vostro bambino crescendo si trovi sempre nella giusta posizione. Inoltre anche la cintura di sicurezza a 5 punti può essere regolata esattamente. (vedi schizzo sulla parte ribaltabile esterna) 1. Estrarre la stampella d’appoggio e sistemare il bambino nel seggiolino. I 2. L’altezza del seggiolino è ottimale se il bambino può guardarsi bene intorno e muovere comodamente le braccia.Il suo mento deve trovarsi all’altezza del sottomento a . Il seggiolino può essere alzato o abbassato a seconda delle necessità servendosi della cintura centrale B e delle due cinghie laterali supplementari C . 3. La posizione degli spallacci va scelta secondo la statura del bambino e l’altezza del seggiolino D allentando e stringendo poi di nuovo il punto centrale degli spallacci che si trova sul nastro a velcro E . Con il bambino allacciato, regolare F gli spallacci e chiudere la cintura sullo sterno G . Tutti inastri devono essere aderenti ma non troppo stretti. 4. Per i Kid Comfort II e III: chiudere l'accesso laterale H e infine stringere leggermente le cinture laterali I . Punto 2 Regolazione del sistema di trasporto Deuter Vari-Quick: Il sistema di trasporto Deuter Vari-Quick consente l’adattamento indi viduale alla statura del trasportante. 1 Posizionare correttamente il cinturone. Per far ciò, caricare il Kid Comfort con un peso reale, poi allentare gli spallacci e le cinghie di posizionamento grigie e indossare lo zaino, sistemando il cinturone direttamente sulle anche e quindi stringendolo. 2 Tendere gli spallacci e controllare il posizionamento del sistema Vari Quick. Il punto d’attaccatura degli spallacci allo zaino dovrebbe trovarsi più o meno tra le scapole: per regolare questa posizione porre gli spallacci più in alto o più in basso servendosi del sistema Vari Quick. La posizione è corretta quando gli spallacci seguono la curvatura delle spalle. 3 Per modificare l’altezza degli spallacci, aprire il nastro a velcro e farlo passare attraverso 4 passanti di fissaggio, quindi tirare il nastro e fissarlo. 4 Tendere gli spallacci, ma non troppo in quanto il carico principale si trova sul cinturone. 5 Per stabilizzare lo zaino, avvicinarlo alla schiena tendendo le cinghie di posizionamento. 6 Chiudere la cintura sullo sterno. (vedi schizzo sul lato ribaltabile intern) ATTENZIONE! Fate attenzione a non capovolgere il Kid C. indossandolo o levandovelo, potreste recar danno al bambino. 1. 2. 3. 4. Punto 4 Sedere il bambino nello zaino e chiudere le cinture di sicurezza. Indossare il Kid Comfort lasciando gli spallacci del sistema di trasporto piuttosto lenti. Posizionare correttamente e stringere il cinturone. Quindi regolare gli spallacci. Chiudere la cinghia sullo sterno e piegare il piede appoggio. Sostegno pieghevole bloccante Il sostegno del telaio si può ribaltare con la mano o con il piede. Quando è del tutto aperto, il sostegno si blocca K (fa click). Si sblocca con una mano. Il sostegno pieghevole bloccante (solo sul lato sinistro) assicura stabilità ed evita che possa chiudersi posandolo o quando il bambino si muove. I Punto 3 Per indossare lo zaino portabambini Kid Comfort: Tettuccio parasole e parapioggia per gli zaini portabambini Deuter Kid Comfort: Kid Comfort I & II 1 I 2 Kid Comfort III 1 2 ATTENZIONE! I bambini hanno una pelle molto delicata: perciò nel caso di forte irradiazione solare è necessario equipaggiare il Kid Comfort con un tettuccio parasole. Pezzi di ricambio o complementari dovrebbero venire acquistati soltanto presso il produttore o negozi specializzati. Parasole: 1 Kid Comfort I & II: inserire le barre nei due canali di stoffa sulla parte anteriore del poggiatesta. Kid Comfort III: aprire completamente la cerniera del poggiatesta ed estrarre il tettuccio integrato. 2 Agganciare gli uncinos ai passanti del sottomento. Parapioggia: Kid Comfort III: il cappuccio parapioggia in vendita separatamente si sistema sul parasole. Kid Comfort I & II: aprire la cerniera del parasole e spiegare il parapioggia (senza illustrazione) Cura & Manutenzione a Il tessuto del Kid Comfort è lavabile a mano in acqua tiepida e sapone neutro. Anche il sottomento estraibile del Kid Comfort II & III a si può lavare a mano ma non è adatto all’asciugabiancheria. Controllate regolarmente l’usura di tutte le cinghie e delle barre per garantire la sicurezza dello zaino. Non cercate mai di raddrizzare da soli una barra deformata. Rivolgetevi in caso fosse necessaria una riparazione ai rivenditori specializzati o direttamente a noi. Opgelet! Gelieve deze aanwijzingen te bewaren zodat u ze later nog kan raadplegen! Veiligheidsaanwijzingen voor het gebruik van de Deuter Kid Comfort kinderdrager: De Deuter Kid Comfort kinderdrager biedt u het voordeel van een door de technische keuringsdienst getest produkt met GS-label (getest op veiligheid) voor uw kind. Gelieve voor de veiligheid van uw kind de volgende punten in acht te nemen bij elk gebruik van de Kid Comfort drager. De Kid Comfort kinderdrager is niet geschikt voor kinderen die nog niet zelfstandig kunnen zitten. NL De maximum capaciteit is 22 kg. (kind 18 kg + bagage 4 kg) Draag uw kind enkel met de veiligheidsgordel om. Zorg ervoor dat de veiligheidsgordel daarbij optimaal is afgesteld voor uw kind (zie stap 1). De Kid Comfort kan zelfstandig blijven staan, maar laat uw kind toch nooit zonder toezicht in de drager zitten. Zelfs de meest stabiele kinderdrager kan omkantelen! Langdurig zitten kan leiden tot een verminderde bloedcirculatie in de benen van het kind. Het is daarom aan te raden regelmatig een pauze in te lassen waarin het kind wat kan bewegen. Gelieve bovendien bij het gebruik op de volgende punten te letten: • et hoofd van het kind in de drager bevindt zich hoger dan dat van diegene die het draagt. Wees daarom voorzichtig bij takken, deurkozijnen e.a • Diegene die het kind draagt moet er altijd op voorbereid zijn dat een onverwachte beweging, zowel van hemzelf als van het kind, zijn evenwicht kan verminderen. • Diegene die het kind draagt moet zich behoedzaam draaien of bukken, daar het kind deze bewegingen moet compenseren. • De drager is geschikt voor gebruik bij vrijetijdsactiviteiten, niet voor sportactiviteiten. • Denk eraan, voor u dit doet, dat het kind in de drager eerder kan te lijden hebben onder weersomstandigheden en temperaturen. • Om verwondingen aan de voeten van het kind te vermijden moet men voorzichtig zijn bij het afzetten van de drager of wanneer de drager op de grond staat of zich dicht bij de grond bevindt. Stap 1 Instellen van het kinderzitje en van de veiligheidsgordel: Het kinderzitje is in de hoogte verstelbaar, zodat het kind altijd in de juiste positie zit, overeenkomstig zijn grootte. Bovendien kan men ook de 5-punts-veiligheidsgordel precies instellen. (zie schets op de buitenflap) 1. Klap de stabiele voet open en plaats het kind op het zitje. NL 2. De zithoogte is optimaal wanneer het kind vanuit de drager goed naar buiten kan kijken en zijn armen vrij kan bewegen. Zijn kin moet zich ter hoogte van het kinkussen bevinden a . Met behulp van de centrale gordel om de hoogte in te stellen B en van de gordels lateraal C kan men het kinderzitje naar keuze verlagen of verhogen. 3. Kies, afhankelijk van de grootte van het kind en van de zit hoogte, de juiste stand voor de schoudergordel D . Maak daarvoor de velcroband in het midden E van de schoudergordel los en druk weer aan op de juiste plaats. Stel, als het kind de veiligheidsgordel omheeft, de schoudergordel juist in F en sluit de borstgordel G . Alle gordels moeten goed aansluiten, maar toch niet te vast zitten. 4. Sluit bij de modellen Kid Comfort II en III de H zijdelingse instap en span tenslotte de zijgordels goed aan I . Stap 2 Aanpassen van het Deuter Vari-Quick draagsysteem: Het Vari-Quick draagsysteem laat een individuele aanpassing toe aan de ruglengte van diegene die het kind draagt. 1 Eerst de heupgordel juist instellen. Plaats daarvoor een realistisch gewicht in de Kid Comfort. Maak dan de schouderbanden en de grijze regelbare riemen los en zet de kinderdrager op. Plaats de heupgordel daarbij precies op de heupen en trek vast aan. Stap 3 Opzetten van de Kid Comfort kinderdrager: WAARSCHUWING! Let op dat de Kid Comfort bij het opzetten en afzetten niet omkantelt. Dit zou een gevaar voor uw kind kunnen betekenen. 1. Zet het kind in de drager en sluit de veiligheidsgordel. 2. Zet de Kid Comfort op en laat daarbij de schouderbanden van het draagsysteem wat los zitten. 3. Plaats de heupgordel juist en trek vast aan. Stel dan de schoudergordel in. 4. Sluit tenslotte de borstgordel en klap de voet op. Stap 4 Klapscharnier met vergrendeling Men kan de steun van de kinderdrager uitklappen met de hand of de met de voet. Wanneer de steun volledig is uitgeklapt, wordt de scharnier vergrendeld K (klikgeluid). Dit kan men met één hand weer ontgrendelen. Dankzij het vergrendelbare klapscharnier (alleen aan de linkerkant) staat de kinderdrager stabiel en kan er zich geen ongewenst dichtklappen voordoen bij het afzetten of wanneer het kind beweegt. NL 2 Trek de schouderbanden vast aan en controleer of het Vari-Quick systeem goedzit. Het bevestigingspunt van de schouderbanden moet nu ongeveer tussen de schouderbladen liggen. Om deze positie in te stellen, de schouderbanden hoger of lager brengen. Bij een juiste instelling moeten de schouderbanden de schouders precies omsluiten. 3 Om de hoogte van de schouderbanden te veranderen mo men de velcroband openen en door de 4 passende bevestigingslussen halen. Trek daarna de velcroband goed aan en maak weer vast. 4 Trek de schouderbanden aan. Niet te vast, want het grootste deel van de last ligt op de heupgordel. 5 Om de kinderdrager te stabiliseren moet u hem dichter bij de rug trekken door de verstelbare riemen aan te spannen. 6 Sluit tenslotte de borstgordel. (zie schets op binnenflap) Zonne- en Regendakje voor de Deuter Kid Comfort kinderdrager: Kid Comfort I & II WAARSCHUWING! Kleuters hebben een zeer gevoelige huid. Voorzie de Kid Comfort daarom bij sterke zonneschijn van een zonnedakje. Accessoires koopt u best bij de producent of bij de speciaalzaak. 1 NL 2 Kid Comfort III Zonnedakje: 1 Kid Comfort I & II: steek de stangen in de beide stoffen pijpen op de voorkant van de neksteun. Kid Comfort III: open de ritssluiting bij de hoofdsteun helemaal en trek het geïntegreerde zonnedakje naar voren. 2 Maak de bandjes vast in de lussen van de kinsteun. Regendakje: Kid Comfort III: e extra te verkrijgen regenkap wordt over het zonnedakje gelegd. Kid Comfort I & II: open de ritssluiting aan het zonnedakje en vouw het regendakje open (geen afb) 1 2 Onderhoud a De Kid Comfort bekleding is afwasbaar en kan met lauwwarm water en met neutrale zeep met de hand gereinigd worden. De afneembare kinsteun van Kid Comfort III a wordt eveneens met de hand gereinigd en is niet geschikt voor de droogkast. Om de veiligheid van de kinderdrager te garanderen moeten alle riemen en stangen regelmatig op slijtage gecontroleerd worden. Breng nooit een verbogen stang zelf weer in vorm. Gelieve u voor de nodige herstellingen te richten tot de speciaalzaak of direct tot ons. Pozor, obdržite knjigico zaradi morebitnih informacij! Varnostni nasveti za uporabo deuterjevega sistema otroških nosil: Deuterjeva otroška nosila so testirana pri TÜV in nosijo oznako GS (varnostno testiranje). Zaradi varnosti vašega otroka prosimo, da upoštevate naslednja navodila vsakokrat, ko uporabljate otroška nosila Kid Comfort. Otroška nosila Kid Comfort niso primerna za majhne otroke (dojenˇcke), ki še ne sedijo samostojno. Otroka nosite samo z zapetim sistemom pasov. Preverite, da so pasovi pravilno nastavljeni za vašega otroka. (glej sliko 1). cˇeprav lahko sistem Kid comfort samostojno stoji pokonci, ne pušˇcajte otroka brez nadzora v nosilu. Tudi najbolj varna otroška nosila se lahko prevrnejo. Dolgotrajno sedenje v nosilu lahko poslabša pretok krvi v udih, zato priporoˇcamo, da se obˇcasno ustavite in razgibate otrokove noge. Prosimo, med uporabo upoštevajte: • Ker je lahko otrokova glava višje kot vaša, bodite pozorni na veje, podboje vrat in ostale podobne ovire. • Pozor: nepriˇcakovan premik vas lahko vrže iz ravnotežja. • Nosaˇc se mora izogibati vsem nenadnim premikom, ki bi lahko vrgli otroka iz nosila. • Otroško nosilo je namenjeno lažjim aktivnostim in ne športnim. • Bodite pozorni, saj vaš otrok pred vami in hitreje začuti spremembo vremena in temperature. • Da bi zaščitili stopala vašega otroka pred poškodbami, bodite previdni pri spuščanju nosila za otroke k tlom in medtem, ko je otroško nosilo v neposredni bližinin tal. SLO Maksimalna skupna teža je 22 kg. (otrok 18 kg + prtljag 4 kg) Nastavitev otroškega sedeža in varnostnih pasov: 1 korak Otroški sedež je nastavljiv po višini in omogoˇca, da otrok sedi v pravilnem in njegovi velikosti primernem položaju. Dodaten, 5-toˇckovni varnostni pas je nastavljiv zelo natanˇcno. 1. Raztegnite otroško nosilo. SLO 2. Višina sedeža je idealna, ko otrok dobro vidi naprej in prosto premika svoje roke. Otrokova brada naj bo v višini z vrhom podpore za brado a . Z uporabo pasu za nastavljanje višine B in obeh stranskih pasov C , lahko sedež poljubno spušˇcate ali dvigujete. 3. Glede na velikost otroka in višino sedeža, izberite pravilen položaj za ramenske pasove D To storite tako, da pomaknete "velcro", ki je na sredini ramenskih pasov in ga nato ponovno namestite v pravilen položaj E . Pripnite otroka in nastavite ramenska pasova F in zapnite njun povezujoˇci pas G . Vsi pasovi naj boao zategnjeni, vendar ne preveˇc na tesno. 4. Vedno zaprite stranski pristop H pri otroških nosilih in na koncu udobno zategnite stranske pasove I . (Kid Comfort II & III) 2 korak Nastavitev nosilnega dela nahrbtnika: Vari-quick nosilni sistem omogoˇca individualno nastavitev glede na vašo telesno višino (slika2): 1 Pas za boke mora biti pravilno nastavljen. Postavite realen tovor v otroško nosilo, popustite ramenska pasova in sive stabilizacijske pasove in si ga nadenite. Nastavite pas za boke toˇcno na kolˇcne kosti in zategnite. 2 Zategnite ramenska pasova in preverite postavitev vari-quick sistema. Vari-quick toˇcka pritrjevanja mora biti med ramenskima lopaticama. Za spremembo te pozicije dvignite ali spustite Vari-quick sistem. S pravilno nastavitvijo bodo ramenski pasovi sledili krivulji vaših ramen. 3 Za spremenitev višine ramenskih pasov, samo odpnite "velcro" zaporo in jo poljubno nastavite v 4 možne zareze. Nato samo vse skupaj zategnite. 4 Zategnite ramenska pasova, vendar še vedno dopustite, da boˇcni pas nosi veˇcino bremena. 5 Z zategovanjem sivih stabilizatorjev potegnete breme bliže k vašemu hrbtu in centru gravitacije. 6 Konˇcno zategnite še povezovalni pas ramenskih pasov. POZOR ! Prepreˇcite prevrnitev otroškega nosila pri dvigovanju ali spušˇcanju. To opravilo je lahko zelo nevarno za otroka. 1. Postavite otroka v sedež in zapnite varnostne pasove. 2. Dvignite otroško nosilo s popušˇcenimi stranskimi pasovi. 3.Nastavite boˇcni pas in ga zategnite 4. Na koncu zapnite in zategnite stranske pasove. 4 korak Stojalo s ključavnico Možnost nastavitve in ponastavitve okvirja z vašimi rokami in nogami. V primeru maksimalne raztegnjenosti okvirja je le ta zaklenjen (klik) K . Možnost odklepanja z rokami. Okvir, ki se zaklene (samo na levi strani) zagotavlja stabilnost in preprečuje padec, ko je položen na tla ali ob premiku otroka. SLO 3 korak Dvigovanje otroškega nosila na ramena: Soncˇno in dežno pokrivalo: Kid Comfort I & II 1 SLO 2 Kid Comfort III 1 2 OPOZORILO! Otroci imajo zelo obˇcutljivo kožo. Uporabite sonˇcno in dežno pokrivalo in zašˇcitite otroka pred moˇcnim soncem ali dežjem. Dodatke in rezervne dele je možno kupiti samo pri proizvajalcu in njegovih zastopnikih. Sonˇcno pokrivalo: 1 Kid comfort I in II: Vstavite vodila v luknje pri vratni opori. Kid Comfort III: Popolnoma odpnite zadrgo pri podporniku za glavo in potegnite ven integrirano sonˇcno pokrivalo. 2 Pripnite elastiˇcne vrvice v pripadajoˇce zanke pri podpori za brado. Dežno pokrivalo: Kid Comfort III: Dežno pokrivalo postavite preko sonˇcnega pokrivala in zavarujete z elastikami. Kid Comfort I & II: Odpnite zadrgo vizirja pri sonˇcnem pokrivalu in razvijte ven dežno pokrivalo. (ni na sliki). (ni na sliki) Vzdrževanje: a Materiale pri nosilih se pere roˇcno s toplo mehko vodo in nevtralnimi mili. Odstranljivo podporo brade pri Kid Comfort II & III Kinnschutz a je prav tako potrebno prati roˇcno. Ne dajati v sušilec. Za garancijo varnosti vašega otroka vedno preglejte vse pasove in okvir zaradi možnih poškodb. Nikoli ne poskušajte sami popraviti zvitega okvirja. Za vsa popravila kontaktirajte vašega najbližjega zastopnika ali se obrnite direktno na proizvajalca. 注意 この取扱説明書はいつでも見ら れる場所に保管しておいて下さい。 ドイターキッドコンフォートを安全に ご使用いただくために ドイター社のキッドコンフォートシリーズはドイツの安 全基準・TUV(テュフ)の認証を取得した製品です。安 全にご使用いただくために次の点にご注意下さい。 キッドコンフォートは首のすわっていないお子様、 自力で座ることができ ない小さなお子様には適応しておりません。 JAP キッドコンフォートシリーズの耐荷重は22kgです (耐荷重とはキャリー本 体、 お子様の体重、 荷室内の荷物重量の総合計を指します)。 お子様を乗せて背負う前に全てのセーフティーベルトが確実に装着さ れ、かつお子様の体にフィットしている事を必ず確認して下さい。 セーフ ティーベルトの装着、調整の方法はステップ1をご参照下さい。 キッドコンフォートは自立式ですが、転倒の危険があるためお子様を乗 せたままで本体から手を離すことは絶対にお止め下さい。 ベルトの締め方、 お子様の座り方によっては足の血行が妨げられること があります。 使用中は時々お子様を本体から降ろし、足の血行を良くす るために適度な運動をさせてあげて下さい。 ご使用中の安全のために • 使用時はお子様の頭の位置の方が、 かつぎ手である方の頭の位 置よりも高くな ります。 木の枝やドア、 その他の障害物にぶつからないよ うに細心の注意を払って下 さい。• お子様を背負った状態は普段よりも重心が高く不安定になりますので バラ ンスを崩さないようにご注意下さい。 また、 お子様の予期せぬ動 きがバランスを崩す 原因となることがありますのでご注意下さい。• お子様の転落防止のため、急な動作 は行わないで下さい。• キッドコンフォートは簡単なハイキング等での使用を想定し て発 しています。 本製品を使用しての激しい運動は行わないで下さい。• 小さなお 子様は大人より天気や気温に影響を受けやすいので、常に注意を払ってください。 • チャイルドキャリーを下ろす時、 また地面に置くとき、 または置いた際にはお子様が 怪我をしないよう細心の注意を払ってください。 ステップ1 調整 チャイルドシートとセーフティーベルトの調整: JAP キッドコンフォートのシートはお子様の成長に合わせて高さを変え、常に最適なポジ ションにお子様を座らせることができます。 さらに5箇所のセーフティーベルトはお子 様の体型に合わせて調節することができます 。 [表紙部のイラストをご参照ください] 1. スタンド (脚部) を開いて本体を自立させ、黄色のバックルを全て開放 してからお子様をシートの上に乗せて下さい。 2. シートの高さはお子様が外を自由に見渡せて且つ腕が自由に動 かせる位置が理想的です。 チンパッドの上部にお子様がアゴを乗せ たときにアゴが水平に近くなるようにして下さい a . 。 シートの高さ は高さ調整ベルト B と両サイドのストラップ C を使って調節して 下さい。 3. お子様の成長とシートの高さに合わせてショルダーストラップの高 ショルダーストラッ プの中央はベルクロで さを調節して下さい D 。 固定されていますので、取り外して正しい高さに調整して下さい E 。 チェ バックルを閉じてから ショルダーストラップ F を引いて調節し、 ストスト ラップ G を閉じて下さい。全てのストラップは強く締め すぎ ないように注意して下さい。 4. サイドアクセスバックル H を閉じ、最後にストラップ I を適度に 引いて固定して下さい。 サイドアクセスバックルはキッドコンフォートⅡ 、Ⅲにのみ付いています。. ステップ2 調整 ドイターバリクイックシステムの調整: キッドコンフォートは個人の体格に合わせて背面長を調整することができます。 [ 表紙裏側のイラストをご参照下さい] 1 最初にヒップベルトを正しい位置に合わせます。 荷物やお子様を乗せない空 荷の状態 でショルダーストラップとグレーのスタビライザーストラップを緩めてか らキッドコ ンフォートを背負います。 ヒップベルトの中心が腰骨の最も突き出てい る位置にくる ように高さを調節してストラップを強めに締めます。 . 2 その状態でショルダーストラップを締めてバリクイックシステムのフィッティン グを 確認します。 まずバリクイックシステムの固定位置(ベルクロ部) ステップ3 背負う お子様を背負う: 警告 お子様が転落する恐れがありますのでキッドコンフォートを背負う時、降 ろす時には本体を傾けないように注意して下さい。 1. 2. 3. 4. お子様をシートに乗せてセーフティーベルトを全て 締めます。 ショルダーストラップ キッドコンフォートを背負い、 を少し緩めます。 ヒップベルトを正しい位置に合わせしっかりと締めて からショ ル ダーストラップを適度に調整します。調整の方法に関して はステ ップ2をご参照下さい。 最後にチェストストラップのバックルを閉じてからスタ (脚部) を折り畳みます。 ンド ステップ4 ロック式スタンド フレームのスタンドは手で広げたり、 たたんだりできます。完全に広げた状態 になるとスタンドはクリック式でロックします。 ロックは手で解除できます。 ロック 機構(左側のみ) K は、広げた足に安定感を持たせるのと同時に、 チャイル ドキャリーを下ろす際、 スタンドが意図せずたたまれたり、 お子様の動きでスタ ンドがたたまれたりするのを防ぎます。 JAP が左右の肩甲骨の 間にあるかどうかを確認し、 ずれているようであれば直しま す。 次にショルダースト ラップの高さを確認します。 ショルダーストラップがぴっ たりと肩のラインに沿って いるのが理想的な位置です。 肩が浮いてしまう、 また はきついと感じる場合は高さの 調整を行います。 3 ショルダーストラップの 高さ調整はまずショルダーストラップの付け根にあるベルク ロを剥がし下に引 き抜きます。 次にご自身の背面長に合わせて高さを調整して再度ベ ルクロで 固定します。 固定の際は必ずはしご状のストラップループを4つ通しベルク ロ を閉じて下さい。 4 ショルダーストラップをややきつめに締めます。 ただし、全体の荷重は肩で はな く腰(ヒップベルト周辺) で受けるようにします。 5 グレーのスタビライザース トラップを引くことで荷重が体側に引き寄せられ安 定します。 6 最後にショ ルダーストラップが左右に動くのを防ぐためにチェストストラップのバッ クルを 固定します。 サンルーフ&レインカバー ドイターキッドコンフォート用オプションのご紹介: Kid Comfort I & II 警告!お子様の肌は紫外線に対して非常に敏感 です。強い日差しから肌を守るためにサン&レイ 1 ンカバーの使用をお勧めします。 サンルーフ: 1 キッドコンフォートⅠ、Ⅱ:サン ルーフ支柱をキッドコンフォート本体上部のスリ ーブに差し込んで下さい。 2 キッドコンフォートⅢ:本体上部のジッパーを完 全に開いてから内蔵のサンルーフを引き出しま す。 2 サンルーフのエラスティックコードを引 JAP っ張り、先端をチンパッド近くのループに通して 固定して下さい。 Kid Comfort III レインカバー: キッドコンフォートⅢ:レインカバ ーはサンルーフの上部にエラスティックコードで 1 固定されています。 キッドコンフォートⅠ、Ⅱ:サ ンルーフ上部のジッパーを開いてレインカバー を引き出して下さい。 2 お手入れ方法 キッドコンフォートはぬるま湯と中性洗剤を使用して手洗いすることがで a きる素材を使用しています。 お手入れの際はぬるま湯で湿らして堅く絞っ た布を使用してください。汚れのひどい場合は中性洗剤を使用してくださ い。洗浄後は風通しの良いところで陰干ししてください。 キッドコンフォート Ⅲのチンパッド a は取り外して手洗いすることができます。乾かす時に は乾燥機、 ドライヤー等は使用しないで下さい。 製品の安全性を保つためにご使用の前後には必ず全てのストラップとバ ックル、 フレームを点検して異常(磨耗や裂け目、 キズ、 ひび割れ等)がな いことを確認して下さい。一度曲がってしまったフレームを元の形に戻そ うとすると強度が落ちるので絶対に行わないで下さい。修理・点検の必要 がある場合はご購入いただいた販売店または弊社にご連絡下さい。