1
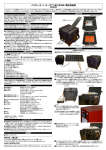
051-C 取扱説明書 Instruction Manual ヒュームコレクタ Fume Collector “Fumeresa” 型式 MODELS CKU-050-ACC (100V) CKU-060AT2-ACC (100-115V) CKU-060AT2-ACC-CE (220-240V) -はじめに Note to Users このたびは、ヒュームコレクタ“ヒュームレーサ”をお買い上げ頂き、誠にありがとうございます。 ヒュームレーサは風の技術に消臭機能を付加し、コンパクトにまとめた省エネルギー型の ヒュームコレクタです。 長期間故障なく安全にご使用いただくために、 この取扱説明書をよくお読みいただき,本機の性能を十分に発揮できますよう 正しいお取扱いをお願いします。 We greatly appreciate that you have purchased our fume collector “Fumeresa”. Fumeresa is the fume collector which added a deodorization function to technology of flow. It’s compact and energy-saving type. Please read this instruction manual thoroughly and handle this machine correctly so that you can use it safely for a long time and enjoy its full performance. 警告 WARNING 注意 CAUTION 本書中のマークについて Symbols used in this manual 絶対に行ってはいけないこと。及び、取り扱いを誤ると重大事故につながる内容を示し ています。 This symbol indicates actions that should not be performed in any case, or actions that may lead to a serious accident caused by incorrect handling. 正しく安全にご使用頂くための注意事項。及び、取り扱いを誤ると、故障の原因になる 内容を示しています。 This symbol indicates cautions to assure safe use, and actions that may lead to failure caused by incorrect handling. Original instructions 注意 CAUTION 粉塵爆発のおそれのない乾いた粉塵の吸引にご使用下さい。 Use the product for sucking up dry, non-explosive dust. 次の物質は吸引しないこと。 Do not suck up the following substances: 引火性物質・・・・・・・ガソリン・シンナー・ベンジン・灯油・塗料など。 Flammable substances ・・・・・・・Gasoline, thinner, benzene, kerosene, paint, etc. 爆発性粉塵・・・・・・・アルミニウム・マグネシウム・チタン・亜鉛・エポキシなど Explosive dust・・・・・・ Aluminum, magnesium, titanium, zinc, epoxy, etc. 火花を含んだ粉塵・・高速切断機・グラインダー・溶接機などから発生する 火花を含んだ粉塵。 Dust containing sparks・・・・・・・ Dust containing sparks generated by high-speed cutters, grinders, welding machines, etc. 火種・・・・・・・・・・・・・たばこ・油・薬品などの液体 Fire sources・・・・・・・・・ Cigarette, oil, liquid chemicals, etc. その他・・・・・・・・・・・水・油・薬品などの液体 Others・・・・・・ Water, oil, chemical liquid, etc. 引火性・爆発性・腐食物質の霧・煙・ガスが滞留している場所や、 これらの付近で使用しないこと Do not use the product in places where flammable, explosive or corrosive mist, smoke or gas is accumulated or located nearby. 2 目次 CONTENTS 1 製品使用上のご注意 Cautions on Using Product ................................................................................................. 4 1.1 全般 General ............................................................................................................................................. 4 1.2 運搬・設置・保管・輸送の条件 1.3 接続 Connection........................................................................................................................................ 4 1.4 運転 Operation .......................................................................................................................................... 5 1.5 修理・分解・改造 1.6 廃棄 The condition of carry installation, transportation and safekeeping............ 4 Repair, disassembly and modification ............................................................................ 5 Disposal ........................................................................................................................................... 5 2 製品到着時の確認 Confirmation and Preparation at Arrival ................................................................................ 5 3 製品の名称と構造 Name and Structure of Product .......................................................................................... 6 3.1 本体名称 Name of main body(050/060AT2) ............................................................................................. 6 3.2 標準付属品 Standard accessories .............................................................................................................. 7 3.3 脱着フランジ Desorption flange .................................................................................................................. 7 4 操作 Operation .................................................................................................................................................. 8 4.1 電源について Power supply ........................................................................................................................ 8 4.2 AT2 パネルについて(060AT2 のみ) AT2 panel (only 060AT2) ..................................................................... 8 4.3 リモートコネクタについて Remote connector ................................................................................................ 10 4.4 運転前の確認 4.5 運転手順 Operation procedure ................................................................................................................ 11 4.6 目詰まりお知らせサイン「C.CC」について About the “C.CC” clog sign.......................................................... 12 4.7 設定値変更(閾値)と初期圧の登録確認ついて Confirmation of setting (threshold) change and initial pressure registration................................................................................................................................................ 13 4.8 吸引力低下お知らせサイン「E.EE」について About the “E.EE” low suction power sign ................................. 14 5 Confirmation before operation ......................................................................................... 10 別売リモートケーブルについて Remote Cable (Sold Separately) ........................................................................ 15 5.1 ケーブル Remote Cable(CKU-050) .......................................................................................................... 15 5.2 電気回路図 Electrical circuit diagram(CKU-060AT2) ............................................................................... 15 5.3 各線の色と信号について Color and signal of each wire .............................................................................. 16 5.4 遠隔操作と本体操作について Remote operation and operation from main body ...................................... 17 6 保守・点検 Maintenance and Inspection .......................................................................................................... 18 6.1 保守点検時の注意事項 Cautions on maintenance and inspection ............................................................ 18 6.2 060AT2 フィルタの交換時期について Filter replacement timing ................................................................. 18 6.3 050 フィルタの交換時期について Filter replacement timing........................................................................ 18 6.4 フィルタの交換 Replacement of filter .......................................................................................................... 18 6.4..1 1次フィルタの交換 Replacement of primary of filter (CHF-2222-40)......................................................... 19 6.4..2 2次フィルタの交換 6.4..3 3次フィルタの交換 Replacement of the tertiary filter (CHF-2525-50)........................................................ 19 6.5 ヒューズ Fuse ........................................................................................................................................... 20 6.6 日常点検 Daily inspection ........................................................................................................................ 20 Replacement of secondary filter (ACC-2525-75ST) ................................................. 19 7 正常に動作しない場合の対策 8 危険シール位置/電気回路図 Indication of DANGER Labels / Electrical Circuit Diagram.......................................................... 22 Countermeasures against Abnormal Operation ................................................ 21 8.1 CKU-050-ACC MODEL ........................................................................................................................... 22 8.2 CKU-060AT2-ACC(-CE) MODEL ............................................................................................................ 22 9 本体仕様 Specifications of Main Body ............................................................................................................. 23 10 消耗品リスト Consumable Parts ........................................................................................................................ 23 3 1 製品使用上のご注意 Cautions on Using Product 1.1 全般 General 設置、接続、運転、操作、点検、故障診断の作業は、取扱説明書の内容に従い、適切に行って下さい。 誤った作業を行うと、火災・感電・けがの原因になります。 Perform installation, connection, operation, manipulation, inspection and failure diagnosis work properly in accordance with the instruction manual. Incorrect work may cause fire, electrical shock and injury. 1.2 運搬・設置・保管・輸送の条件 The condition of carry installation, transportation and safekeeping 輸送・保管については安全な場所で、温度-10℃~60℃ 湿度 80%以下の範囲として下さい。 For transport and storage, keep in a safe place, with a temperature range of -10 to +60℃ and humidity below 80%. 運搬や設置は、二人以上で行って下さい。落下などにより、けがをする恐れがあります。 During carrying-in and installation, enlist the help of others when carrying heavy objects to prevent an accident. There is danger of injury due to falling. 回転機器が内蔵されていますので、水平で振動の無い場所に設置して下さい。 Rotary equipment is built into the product. Install the product in a horizontal place without vibrations. 爆発・引火性ガス・腐食の危険がある場所や、水のかかる場所、可燃物のそばでは使用しないで下さい。 Do not use the product in places with explosive or flammable gas, with corrosion risk, with water splashes or near combustible substances. 本機は、屋内クリーンルーム内 又は、清浄度の高い工場に設置することを前提とした構造となっていますので、屋外な どには設置しないで下さい。 The product is designed to be installed in an indoor clean room or highly cleaned factory. Do not install it outdoors. 常温(周囲温度 0~40℃ / 湿度 80%以下)で、結露しない場所に設置して下さい。高温・結露は、電気部品の故障、 感電の原因になります。 Install the product in a place without dew condensation at room temperature (ambient temperature: 0 to 40ºC, humidity: 80% or less). High temperature and dew condensation may cause electrical parts to fail and may cause an electrical shock. 排気口は十分なスペース(排気口より 100 ㎜以上)を設けて下さい。排気口を塞ぐと正規の吸引力が発揮できません。 また、ボックス内部で十分な冷却が行われないため、モータ焼けや電気部品の故障原因となります。 Provide sufficient space around the exhaust port (100 mm or more). Clogging the exhaust port disables the regular suction force, and may cause motor burning and electrical part failure due to insufficient cooling inside the product. フィルタの交換、メンテナンスのしやすい場所に設置して下さい。 (フィルタ交換のため、本体正面から 350 ㎜以上のスペースが必要です。) Install the product in a place where filter replacement and maintenance can be performed easily. (To replace filters, a space of 350 mm or more is required from the main body front face.) 本機は歩行面から 0.2~2mの範囲で設置してください。 Install the product in a place 0.2 to 2.0 m from the walking surface. 本機の設置標高は 1,000m以下です。 The installation height of the product is 1,000 m or less 設置区分は汚染度Ⅱ(製造工場)です。 The installation classification is “Contamination level Ⅱ (manufacturing plant). 1.3 接続 Connection 接続は、確実におこなって下さい。ケーブルを無理に曲げたり、引っ張ったりしないで下さい。 火災・感電の原因になります。 Connect the product securely. Do not bend or pull cables forcibly. Forcible bending or pulling may cause a fire and electrical shock. 異なった電源で使用しないで下さい。また、アース線を接続してお使い下さい。 Use the correct power supply, and connect the ground wire. 電源の過電圧カテゴリーは区分Ⅲです。(産業用装置など) The category of over-voltage of the power supply is division Ⅲ (industrial device). 4 1.4 運転 Operation 運転中に移動させないで下さい。 Do not move it during the operation. 停電した時には、電源を切って下さい。復旧時に、けが・装置破損の原因になります。 Turn OFF the power when an instantaneous power interruption occurs. Otherwise, injury or product damage may be caused when the product recovers. フィルタを取り外したり、目詰まりや破損した状態で運転すると、 ブロア内への異物が混入して、故障の原因となります。 正しくフィルタを取り付けてご使用ください。 Operation without filter or with a clogged and damaged filter may cause trouble, because foreign substances enter the blower. Install the filter properly before operating the machine. 1.5 修理・分解・改造 Repair, disassembly and modification 本体を分解・改造しないで下さい。感電・けがの原因になります。内部の点検や修理はお買い上げになった販売店に連 絡して下さい。 Do not disassemble or modify the machine. Disassembly and modification may cause an electrical shock and injury. Contact your dealer for internal inspection and repair. 1.6 廃棄 Disposal 産業廃棄物として適切に処分してください。 Dispose of the product properly as industrial waste. 2 製品到着時の確認 Confirmation and Preparation at Arrival 開梱されましたら、各部の不足部品がないかご確認下さい。 万一、運送途中での破損・部品不足などがございましたら、すぐにご連絡下さい。 After unpacking, make sure that all parts are provided. Contact our company immediately if parts are damaged during transportation or not provided. 本体 Main Body 製品ネームプレートは本体に貼っていますので、ご確認下さい Confirm the product nameplate. フィルタ(本体にセットされています) Filter(set in the machine) 1 次フィルタ Primary filter・・・・・ 2 次フィルタ Secondary filter・・・ 3次フィルタ Tertiary filter・・・・・ CHF-2222-40 ACC-2525-75ST CHF-2525-50 電源ケーブル(付属)とリモートケーブル(別売) Power cable(standard accessory) and Remote cable(option) 電源ケーブル Power cable (3m) ×1 ※ ケーブルは地域によって異なります。 ※ The cable is different in each region. 100-115V 国内 220-240V 海外(Other than (Japan) Japan) 本体差し込みプラグ 本体差し込みプラグ /コンセントプラグ /コンセントプラグ Power cord plugs for main unit side and power supply socket Power cord plugs for main unit side and power supply socket リモートケーブル(別売) MT-173-8(060) MT-173-3(050) Remote cable(option)(3m) ×1 抜け防止の設計となっております。くぼみを下にし、しっかりと差し込んで 下さい。 (ピンの位置を必ず確認してください) The remote cable is so designed as to be prevented from falling off. Insert it securely with its dent facing downward. (Make sure to confirm pin positions.) MT-173-8 5 MT-173-3 3 製品の名称と構造 3.1 Name and Structure of Product 本体名称 Name of main body(050/060AT2) 吸込み口(脱着式) Suction port (detachable) CKU-050-ACC ON/OFF スイッチ ON/OFF switch 排気口 Exhaust port 切替スイッチ 主電源スイッチ MAIN POWER switch Selector switch ヒューズ BOX Fuse Box リモートコネクタ Remote connector CKU-060AT2-ACC 吸込み口(脱着フランジ) Suction port (detachable) 差圧検知ゲージ (連結治具) Differential pressure sensing gauge (Consolidated jig) 1 次フィルタ Primary filter 2次(活性炭)フィルタ Secondary (Active carbon) filter AT2 パネル(操作パネル) AT2-Panel(operation panel) 3次(高性能)フィルタ Tertiary (high efficiency) filter ヒューズ BOX Fuse Box 主電源スイッチ MAIN POWER switch ヒューズ BOX Fuse Box 6 リモートコネクタ Remote connector 3.2 標準付属品 Standard accessories 1次フィルタ Primary filter 2次フィルタ Secondary filter 3次フィルタ Tertiary filter ●1次フィルタ Primary filter: 吸込口で衝突緩衝して大きくなった粉塵(45μ以上)を捕集します。 The bigger dusts (over 45μ) by buffering and colliding in the suction port are collected. ●2次フィルタ Secondary filter: 1次フィルタを通過した粒子を粒状活性炭に衝突させて捕集するとともに、においも取り去ります。 Colliding with granulated active carbon collects the particles passed through the primary filter, and odor is removed. ●3次フィルタ Tertiary filter 2次フィルタで捕集されなかった粒子を捕集し、活性炭粒子がブロアへ侵入するのを防ぎます。 The particles escaped from the secondary filter are collected, prevent invasion of the active carbon particle into the blower. 3.3 脱着フランジ Desorption flange ご使用の環境に応じて吸込み口径の変更が必要な場合、工具なしでフランジを交換することができます。 (交換用フランジ別売) If the flange diameter needs to be changed to match usage conditions, the installed flange can be changed without having to use any tools. (Replacement flanges are sold separately) <取り外し方><Removal method> 右に回すと閉まり、左に回すとフランジを取り外すことができます。 出荷時装着径φ65 Turn the flange counterclockwise to remove it. Turning it clockwise tightens the flange. Diameter of installed flange: 75mm <交換可能なフランジ径> <Replacement flange diameters> 型 式 Model CKU-050AT-ACC CKU-060AT2-ACC フランジ径 Flange diameter φ50 φ38 φ50 φ38 7 4 操作 Operation 4.1 電源について Power supply 異なった電源で運転されますと、故障の原因になります。 Operating the product with a different power supply may cause a failure. 電圧降下の原因になりますので、タコ足配線にしないで下さい。 (電圧が降下すると起動時間が長くなります) Never adopt star-burst connection that may cause voltage drop. (If voltage drop occurs, longer time is required for startup.) 本機の電源は、単相電源です。The power supply is single-phase. 供給電圧の許容範囲は、±10%です。 電源コード(コード長さ 3m)付きです。(アース付プラグ) The allowable supply voltage range is ±10%. The power cable of 3 m with a grounding plug is included. 圧力表示切替ランプ Pressure display lamp change 4.2 AT2 パネルについて(060AT2 のみ) ⑨ ⑨ 差 圧 Differential Pressure ⑧ ⑧ 外部圧力 External Pressure ⑦ ⑦ 吸込圧力 Suction Pressure AT2 panel (only 060AT2) ⑩ 差圧設定 Differential Pressure set ⑪ 異 常 Warning ⑪ ⑫ 運転圧力表示 Operating Pressure Indication(kPa) ④ Lo ボタン Lo button ② OFF ボタン OFF button ⑩ ⑫ ⑥ ⑥ 設定値変更ボタン Set value change button ⑤ ⑤ 表示切替ボタン Display button ⑬ ⑬ 能力レベル Capacity level ④ ③ ③ Hi ボタン Hi button ② ① ① ON ボタン ON button 8 ① ② ③ ④ 名称 ランプ色 Button name Lamp color ON ボタン ON button OFF ボタン OFF button ― ― Hi / Lo ボタン Hi/Lo buttons ― ⑤ 表示切替ボタン Display Selector button ― ⑥ ⑦ ⑧ ⑨ ⑩ ⑪ ⑫ 設定値変更ボタ ン Setting Change button 吸込圧力ランプ Suction Pressure lamp ― 青 Blue 外部圧力ランプ External Pressure lamp 青 Blue 差圧ランプ Differential Pressure lamp 青 Blue 差圧設定ランプ Differential Pressure Setting lamp 異常ランプ Warning lamp 黄 Yellow 赤 Red 運転圧力表示 Operating Pressure indication ― ⑬ 能力レベルランプ Capacity Level lamp 緑 Green 説明 Description 運転を開始します。(同時にボタン左上の緑ランプが点灯します) Press this button to start equipment operation.(The green lamp at the upper left corner of the button lights.) 運転を停止します。 Press this button to stop equipment operation. Lo:1 回押すごとに1レベル降下 Lo: Each press of this button decreases the setting by 1 level. Hi:1 回押すごとに 1 レベル上昇 Hi: Each press of this button increases the setting by 1 level. ■:1 回押すごとに差圧・外部圧力・吸込圧力の順番に切り替わます。 ■:Each press of this button changes the displayed indication in the sequence of Differential Pressure, External Pressure and Suction Pressure. ■:通常モード中に 2 秒間押すと、初期の圧力を登録し、再度、長押し 2 秒間で初期登録し た圧力の値をリセットします。※1 ■:When this button is pressed and held for 2 seconds while the equipment is in normal mode, initial pressure is registered. When it is pressed again and held for 2 seconds, the registered initial pressure value will be reset.*1 長押し 2 秒間でフィルタ目詰まり設定値変更モードに移行します。 Press and hold this button for 2 seconds to activate the filter clogging setting change mode. ■:設定値変更モード中に、1 回押すごとに目詰まり閾値を 30~70 の 5 段階、任意に変更 できます。※2※3 ■:Each press of this button while the equipment is in Setting Change mode changes the threshold value in 5 phases of 30 to 70 at will.*2*3 集塵機内ファン吸込み口付近での圧力を検知し、1、2、3 次フィルタと外部圧力を加算した 合計の圧力を示しています。 Detects pressure near the internal fan suction port of the dust collector, and indicates the total pressure level including primary/secondary/ tertiary filter pressure and external pressure level. 集塵機吸込み口から吸込みフードまでの圧力を示します。 Indicates the pressure in the section between the suction port and suction hood. 1、2 次フィルタの前後で検知した圧力の差を示しています。 Indicates the pressure difference between the area in front of the primary/ secondary filter and the area behind it. 設定値変更モード中にランプが点灯します。 This lamp lights when the equipment is in Setting Change mode. 異常温度又は、インバーターに(過負荷など)異常が発生した場合、点灯します。 →対策方法は 22 ページ 7.⑥項を参照ください。 This lamp lights when a temperature error or inverter error (such as an overload) occurs. →For corrective action, refer to Section 7.⑥ on page 22. ■:現状圧力を 3 ケタで表示しています。(3 ケタ表示:0~9.99KPa) ■:Indicates the current pressure with 3 digits.(3-digit indication: 0 to 9.99kPa) ■:フィルタが目詰まりした場合、「C.CC」と現状圧力を繰り返し表示します。 ■:Displays “C.CC” and current pressure alternately when the filter becomes clogged. ■:吸引力低下した場合、「E.EE」と現状圧力を繰り返し表示します。 ■:Displays “E.EE” and current pressure alternately when suction pressure decreases. 能力レベルを表示します。(レベル 1~7) Indicates capacity level.(Levels:1 to 7) 9 ※1:初期の圧力が登録完了した場合、点滅から点灯に変わります。 ※1:The lamp stops flashing and remains lit when initial pressure registration is completed. ※2:標準出荷設定値は、「50」になります。 →配管時に登録した圧力を 100%と認識し 50%まで吸引力が低下した時を目詰まり(閾値)とします。 ※2:The default setting value is “50”. →The pressure registered at the time of duct connection is set as “100%” ,and clogging(threshold)is determined when the suction pressure decreases to 50%. ※3:閾値とは、目詰まりお知らせサイン「C.CC」が点滅する値のことです。 値を下げれば、点滅するタイミングが遅くなり、値を上げれば早くなります。 (30~70%で設定可) ※3:”Threshold” refers to the value at which the “C.CC” clog sign starts flashing. Decreasing the value delays the lamp flashing timing. Increasing the value advances the lamp flashing timing.(adjustable between 30 and 70%). 気圧の変化や温度条件により停止状態の圧力表示は-0.2kPa~0.2kPa の範囲で変化します。 The pressure representation when operation stops changes within the range from -0.2 to 0.2. because of a change in the atmospheric pressure and the temperature. また、外部ノイズの影響により一時的に圧力数値が変化する場合があります。 And the pressure representation might temporarily change because it is influenced by the extrinsic noise. 4.3 リモートコネクタについて Remote connector 遠隔操作のための運転信号入力や、フィルタ交換の信号出力などを取り出すことができます。 (オスコネクタコード 3M 別売) MT-173-8(060) MT-173-3(050) It is possible to transfer the operation signal input for the remote control, and the signal output for the filter replacement.(male connection cord: 3 meters in option). This connector is used to input an operation signal for remote operation, or to output an output signal. (3-m cord with male connector sold separately) MT-173-8 4.4 運転前の確認 MT-173-8(3m) MT-173-3(3m) (060) (050) Confirmation before operation ① 据え付け状態にがたつき等の異常がないかを確認してください。 ② アースはとれているかを確認してください。 Confirm that the product is installed properly without any abnormality such as backlash. Confirm that grounding is done correctly. ③ 電源コ-ド、ア-スの接続、絶縁、定格電圧になっているかを確認してください。 Confirm that the power cable and grounding plug are connected correctly, insulation is provided properly, and the rated voltage is realized ①~③を確認し、用意できましたら、 Confirm items [1] to [3] above, and then proceed to the item [4] ④ 主電源スイッチを入れて、AT パネルの主電源ランプの点灯を確認してください。(060AT2 のみ) Turn ON the MAIN POWER switch, and confirm that the MAIN POWER indicator lamp of AT-panel lights. (only060AT2) ⑤ AT-パネルの ON スイッチを押して運転を確認して下さい。(ランプが点灯します)(060AT2 のみ) ⑥ 主電源スイッチを入れて、前面の ON/OFF スイッチを入れて下さい。(050 のみ) Press the ON switch(AT-Panel) to start operation. (The operation indicator lamp lights.)(only060AT2) Turn on the main power switch, and push the ON/ OFF switch of the front. (only 050) ⑦ 異常音が(金属音など)ないか確認してください。 Confirm that abnormal sounds (such as metallic sounds) are not generated. 10 ⑧ 吸込みホ-スの接続がしっかりつながれているか確認してください。 Confirm that the suction hose is connected securely ⑨ 吸込みホース(フード)先端の吸引力が集塵に適切な吸引である事を確認下さい。 Confirm that the suction hose (hood) end offers suction force suitable to dust collection. ⑩ 確認後 OFF スイッチで停止し、主電源スイッチを切って下さい。 After confirming the above contents, press the OFF switch to stop the operation, and then turn OFF the MAIN POWER switch. 吸込みホースや吐出しホースがふさがれると空気が流れなくなり、 モータ焼けの原因となります。 ホースは、5メートル以下のものをご使用ください。 Clogging the suction hose or discharge hose hinders air flow, and may stops operation. Use the hose (length: shorter than 5 meters) 4.5 ① ② ③ ④ ⑤ ⑥ 運転手順 Operation procedure 設置状態を確認し、電源コンセントを入れてください。 Connect the power plug to the electrical outlet. 吸込みホース(フード)を適切な位置にセットします。 Set the suction hose (hood) to a proper position. 主電源スイッチを入れて、ランプの点灯を確認してください。 (この状態で、運転モードに入ります) Turn ON the MAIN POWER switch, and confirm that the power indicator lamp lights. (Starts the dust collector ) 能力レベルスイッチ(7段階) AT-パネルの ON スイッチを押して運転を確認して下さい。 VOLUME Press the ON switch to start the operation. 異常音がないことを再度確認し、適切な吸引であることを確認してください。 Confirm again that abnormal sounds are not generated, and confirm that the suction hose offers proper suction force. 能力レベルスイッチで任意の能力に設定して下さい。 7 段階の調整となっております。 Set on the ability of any ability level switch. And it is with the adjustment of the seven stages. 11 4.6 目詰まりお知らせサイン「C.CC」について About the “C.CC” clog sign ※「C.CC」とは、初期登録した差圧からフィルタの目詰まりを差圧で感知し、お知らせします。 「C.CC」 is an indication which the product detect the filter clogging from the differential pressure that the pressure initially registrated. ① 表示切替ボタンを 2 秒間押し初期圧を登録してください。 登録が完了した場合、圧力表示切替ランプが点滅から点灯に変わります。 初期圧設定後、設定した任意の能力レベルを変更した場合「C.CC」は自動設定され、適切な値で点灯 します。 Press and hold the Display Selector button for 2 seconds to register the initial pressure. When the registration is completed, the Differential Pressure lamp, External Pressure lamp and Suction Pressure lamp stop flashing and remain lit. If the set capacity level is changed after setting the initial pressure, ”C.CC” will be automatically set to an appropriate value and the lamp will light. ② 目詰まりした場合、「C.CC」の目詰まりお知らせサインと現在圧力が表示されます。 If clogging occurs, the “C.CC” clog sign and current pressure will be displayed. 交互点滅 Alternate flashing ③ 「C.CC」が表示された場合、1 次フィルタの交換を行ってください。それでも、初期圧付近まで表示が戻らない 場合は、2 次フィルタ(3 次フィルタも同様)の交換を行ってくだい。→フィルタ交換の詳細は、19 ページ 6.4 項を参照 ください。 When the “C.CC” clog sign is displayed, replace the primary filter. If the pressure indication does not show a level close to the initial pressure, replace the secondary filter. →See Section 6.4 on page 19 for details on filter replacement. ④ 初期圧登録後、配管を変えた場合やフィルタを全て交換された場合(排気フィルタ除く)は、再度表示切替ボタンを 2 秒間長押して初期圧をリセットしてくだい。 If the duct or all filters (excluding the exhaust filter) are replaced after the initial pressure is registered, press and hold the Display Selector button for 2 seconds again to reset the initial pressure. Ⅰ.再度 2 秒間長押し Press and hold for 2 seconds again Ⅱ.点灯から点滅へ Changes from constant lighting to flashing 目詰まりお知らせ「C.CC」サインを適正のポイントで点滅させるために 4.6①の初期圧のリセットは、必ず行ってください。 Be sure to reset the initial pressure as described in Section 4.6① to ensure that the “C.CC” clog sign flashes at an appropriate point. 差圧表示モード時のみ、「C.CC」が表示されます。 “C.CC” is displayed when the equipment is in Differential Pressure Display mode. 12 設定値変更(閾値)と初期圧の登録確認ついて Confirmation of setting (threshold) change and initial pressure registration 4.7 ① 目詰まりお知らせサイン「C.CC」を表示させるタイミングを任意で変更できます。 The timing of the display of “C.CC” clog sign can be changed by the user. 設定値変更ボタンを 2 秒間長押し、設定値変更モードに移行してください。 Press and hold the Setting Change button for 2 seconds to activate the Setting Change mode. Ⅰ.2 秒間長押し Press and hold for 2 seconds Ⅱ.点灯 Remains lit ※標準出荷設定値は、「050」になります。 * The default setting is “050”. ② 設定値変更ボタンを押し 30~70 の間で設定を行ってください。 ※出荷時 50→40→30→初期圧→70→60 の順に切り替わります。 ※30 の次に登録した初期圧が確認できます。 値を下げれば、目詰まりお知らせのタイミングが遅くなり、値を上げれば早くなります。 Press the Setting Change button and set a value in the range of 30 to 70. *In delivered products, the indication changes in the following sequence: 50→40→30→ Initial pressure→70→60. *The registered initial pressure is displayed after “30”. *Decreasing the value delays the clog sign display timing. Increasing the value advances the display timing. 1 回押すごとに値を変更 Each press changes the setting value 030 の次に初期圧 The initial pressure is displayed after”030” 設定した任意の能力レベルを変更した場合、 設定したタイミングは、自動設定されます。 If the set capacity level is changed by the user, a new timing will be automatically set. Delayed timing タイミングが遅い い ③ Advanced timing タイミングが早い い 任意の値で設定した後は、設定値変更ボタンを 2 秒間長押し、通常モードに移行してください。 ※初期圧が表示されている時に、設定値変更ボタンを 2 秒間長押した場合、設定値変更されずに 通常モードに移行します。 After changing the setting, press and hold the Setting Change button for 2 seconds to return to Normal mode. *If the Setting Change button is pressed and held for 2 seconds while the initial pressure is displayed, the setting will not be changed and the mode will return to Normal mode. 13 吸引力低下お知らせサイン「E.EE」について About the “E.EE” low suction power sign 4.8 ※この機能を使う場合、4.6 を行わないで下さい。 ① 吸込口や配管、フィルタ等の圧力損失が高く、風量が低下している場合「E.EE」の吸引力低下お知らせサインと現 状圧力が表示されます。→対策方法の詳細は、22 ページ 7⑤項を参照ください。 ※13 ページ 4.6①の初期圧を登録されている場合「E.EE」の表示はしません。 ※吸込圧力表示時のみ表示されます。 If the pressure loss in the duct is large and the airflow volume is low, the “E.EE” low suction power sign and current pressure will be displayed. →See Section 7 ⑤ on page 22 for corrective action. *When the initial pressure was registered as described in 4.5⑦ on page 11, “E.EE” will not be displayed. *This indication appears only when the suction pressure is displayed. 交互点滅 Alternate flashing 14 5 別売リモートケーブルについて Remote Cable (Sold Separately) 5.1 ケーブル Remote Cable(CKU-050) 赤 RED 黒 BLACK ON 5.2 OFF 赤と黒を短絡する The wire is short-circuited. RED-BLACK 赤と黒を短絡しない The wire is not short-circuited. 電気回路図 Electrical circuit diagram(CKU-060) リモート運転 Remote operation switch 運転入力信号 Operation input signal 1 遠隔操作切替信号 Remote-control operation switching signal 4 運転圧力信号 Operation pressure signal 2 フィルタ目詰信号 Clogging filter signal 3 運転信号 Operation output signal 5 異常信号 anomalous signal detection 6 能力レベル変更入力信号 Ability level change input signal 7 リモートモード移行 (ON 時に遠隔操作可能、この時パネル操作は不可) Shifting to remote mode (Remote control is possible in the ON, and the panel is impossible to control at this time.) ②圧力アナログ信号 出力 ≧4.7kΩ ※温度補正なし Pressure analog output : Output impedance 4.7kΩ Temperature correction is not provided. DC 1~5V LOAD インダクタ(リレー等を付加する場合は、ノイズリミッター 耐圧 DC 50V 100mmA以下 LOAD (約 33Ω+0.1μF)又は、ダイオード等を付けて下さい。 LOAD LOAD DC 0~5V +側 GND 8 LOAD GND Inductor (Install a noise limiter (approx. 33Ω+0.1μF) or diode if a relay is added) 参照例 Reference example インダクター(リレー等)を付加する場合は出力端子(端 子番号 3・5・6)にノイズリミッター(約 33Ω+0.1μF)を 付けて下さい Attach a noise limiter (Approximately 33Ω+0.1μF) to the output terminals(Nos.1.2 and 3) When adding inductors(uch as relays) 15 各線の色と信号について Color and signal of each wire 黒 PIN NO. ① Black 赤/白 Red/white 黄 Yellow 黄/白 Yellow /white 黒/白 Black/White 赤 ④ 緑 緑/白 Green/White operation. 遠隔操作切替信号 Remote-control operation switching signal Gnd ② 運転圧力信号 Operation pressure signal フィルタ目詰出力信号 Filter clogging output signal 運転出力信号 Operation output signal 異常信号 Abnormality signal 入力 INPUT :① After short-circuiting pins④and⑧、short-circuit pin①to start ⑧ ⑥ インピーダンス Role ④⑧を短絡後、①を短絡して運転を開始します 運転入力信号 Operation input signal 能力レベル変更 Change capacity level ⑤ Green 役割 Signal name ⑦ ③ Red 信号名称 遠隔信号(入力) Remote signals 線色 Wire color 出力信号 Output signals 5.3 ④と⑧を短絡してリモート操作に移行させます 短絡するとタッチパネルの操作はできなくなります Short-circuits the wires [4] and [8] to start remote operation. The AT panel is disabled while the wires [4] and [8] are short-circuited. ⑦と⑧の間で、0~5Vの電圧を印加する事で能力レベル を変更することが出来ます。 The capacity level can be changed by applying a voltage of 0 to 5V between pins ⑦and⑧. 現在の運転圧力を取り出します Transfers the current operation output. アナログ信号 Analog signal(1~5V) インピーダンス Impedance (≧4.7kΩ) 目詰まり信号を取り出します Transfers the clogging signal. オープンコレクタ出力;NPN Open collector output 運転信号(ONランプ)を取り出します Transfers the operation signal (ON indicator lamp). オープンコレクタ出力;NPN Open collector output 異常信号を取り出します Transfers the ” Abnormality “ signal オープンコレクタ出力;NPN Open collector output 接点入力(無電圧接点) Contact input Impedance 1.0kΩ 出力 OUTPUT:③~⑥(④除く)オープンコレクタ Open collector 耐圧 Voltage resistance 50V (≦100 mA) 入力電圧範囲 :⑦ 電圧入力 0~5V Input voltage range: ⑦ Voltage input of 0 to 5V インピーダンス 10.0kΩ ※+5.0V 以上印加させないでください。 Impedance: 10.0kΩ *Do not apply voltage exceeding +5.0V. 6 能力レベル Capacity level 5 電圧(DCV) Voltage(VDC) 1 0.6~1.1 2 1.2~1.7 3 1.8~2.3 4 2.4~2.9 5 3.0~3.5 6 3.6~4.1 7 4.2~5.0 ※誤差が±4%ある為、電圧を設定する際は、各レベルの中点の 電圧を印加してください。 *When setting the voltage, apply a mid-point voltage value for each level since the error range is ±4%. 16 電圧(DCV) Voltage(VDC) <7 番ピンの印加電圧閾値表> 4 3 2 1 0 0 1 2 3 4 5 能力レベル Capacity level 6 7 5.4 遠隔操作と本体操作について Remote operation and operation from main body 遠隔操作で ON/OFF する場合は、④と⑧を短絡させておきます。 ①を短絡→ON ①を短絡しない→OFF (「各線の色と信号について」の表を参照ください) Short-circuit between pin① and pin ④⑧ for remote ON/OFF. Pin① is short-circuited.→ON Pin① is not short-circuited.→OFF (Refer to the table, “ Wire colors and signals”) Pin① ①ピン Pin④ ④ピン ⑧ピン Pin⑧ ④と⑧を短絡させておきます。 Keep pins④ and⑧short-circuited. ④⑧ピンに①ピンを短絡して ON/OFF する Short-circuit pin① and pins ④⑧for ON/OFF 本体操作で ON/OFF して信号を取り出す場合は、④と⑧を短絡させないでください。 「5.3 各線の色と信号について」の説明に従い、必要な出力信号を取り出して下さい。 Do not short-circuit the wires [4] and [8] each other when transferring signals by turning ON and OFF the dust collector from the main body. Transfer required output signals in accordance with the explanation in “5.3 Color and signal of each wire” リモート操作移行中に本体側で能力レベルを変更する場合は、⑦ピンに印加していない状態で 本体 AT パネルの ON ボタンを押しながら Lo, Hi で変更することが可能です。 遠隔操作で、(⑦ピン)能力レベルの変更を行っている場合、本体側での能力レベル変更は不可となります。 To change the capacity level using the buttons on the main unit when switching to remote operation, check that pin⑦ is not shorted-circuited, then press and hold the ON button on the AT panel of the main unit, and press the Lo or Hi button. If the capacity level (pin⑦ is being changed by remote control, the buttons on the main unit cannot be used to change the capacity level. 能力レベルを変更する時にレベルが記憶される為、万が一主電源を切っても前回使用レベルを 記憶しています。 When the capacity level is changed, the set level is stored in memory. The set capacity level remains in memory even after the main power switch is turned off. 短時間で、主電源を ON/OFF するとモータの故障の原因となりますので、AT パネ ル側で ON/OFF してください。 If the main power is turned ON/OFF in short intervals, the motor may malfunction. Be sure to turn the main power ON/OFF at the AT panel. 3 分未満での頻繁な ON/OFF 操作、特に 30 秒未満で操作をされますと、故障の原 因となります。必ず 3 分以上のインターバルを置いてから ON/OFF の操作をしてくだ さい。 It causes the trouble if ON/OFF is frequently operated within 3 minutes, particularly thereunder 30 seconds. Operate ON/OFF after more than 3 minutes interval. 17 6 保守・点検 Maintenance and Inspection 6.1 保守点検時の注意事項 Cautions on maintenance and inspection 点検時は必ず電源を切り、コンセントからプラグを抜いて、電路遮断を 行ってください。 Make sure to turn off the main power, and disconnect the power plug from the electrical outlet before starting inspection to shut down the electricity. 摩耗や破損したフィルタをそのまま使用すると、吸込んだ粉塵を大気に再飛 散させ、電気部品の損傷となります。 機械の故障、事故を未然に防ぎ、 末永くご使用頂けますよう、点検、手入れは必ず行ってください。 Using a worn or damaged filter releases sucked dusts to the atmosphere, and damage electrical parts. Make sure to perform inspection and maintenance to prevent failures and accidents in the product and use the product for a long time. 6.2 060AT2 フィルタの交換時期について Filter replacement timing 目詰まりした場合、「C.CC」の目詰まりお知らせサインが点灯しましたら、1次フィルタを交換してください。また、1次フ ィルタを交換しても、目詰まりサインが消えないときには、2次(活性炭)フィルタを交換してください。3次フィルタも同 様です。 Replace the primary filter when the filter saturation lamp is turned on. But when the lamp is not turned off in spite of the replacement of the primary filter, replace the secondary (active carbon) filter. The tertiary filter is able to do the same. 6.3 050 フィルタの交換時期について Filter replacement timing 吸引力が低下したら、1次フィルタを交換してください。また、1次フィルタを交換しても解消されない場合は、2次(活 性炭)フィルタを交換してください。3次フィルタも同様です。 Replace the primary filter when suction force declines. But when it is not improved in spite of the replacement of the primary filter, replace the secondary (active carbon) filter. The tertiary filter is able to do the same. 6.4 フィルタの交換 Replacement of filter フィルタの交換時は、電源を切り、 コンセントからプラグを抜いて、電路遮断を行ってください。 Make sure to turn OFF the power, and disconnect the power plug from the electrical outlet before starting inspection. フィルタ取り付の際には、裏・表を間違えないようご注意ください (フィルタ格子の枠が排気面側です) Do not confuse the back and front of the filter. (The filter grid frame should be located on the exhaust side.) 18 6.4..1 1次フィルタの交換 Replacement of primary of filter (CHF-2222-40) 2か所のパッチン錠を外し、 上部カバーを取り外します。 Release 2 snap locks, get the top cover off パッチン(2か所) 2 snap locks 1次フィルタケースを取り出し、1次フィルタ を交換します。 Take out the primary filter case and replace the primary filter. 1次フィルタケース Filter case of primary filter 6.4..2 2次フィルタの交換 Replacement of secondary filter (ACC-2525-75ST) 上部カバーを取り外し、1次フィルタを取 り出します。 Get the top cover off and take out the primary filter. 2次フィルタを取り出し、交換します。 ※取り出す時に、指などを挟まないよう注 意して下さい。 Take out and replace the secondary filter. ※ Be careful oh your fingers when pick it up 6.4..3 3次フィルタの交換 Replacement of the tertiary filter (CHF-2525-50) 上部カバーを取り外し、1次フィルタ・2次フィル タを取り出しておきます。 3次フィルタを取り出します。 Get the top cover off and take out the primary and the secondary filter. Take out the tertiary filter case. フィルタ枠からフィルタを取り外して、フィ ルタを交換します。 Take out and replace the tertiary filter. 19 6.5 ヒューズ Fuse 過負荷により、ヒューズが切れた場合は、ヒューズを交換してください。 When the fuse is blown out by excessive current generated by a trouble in the internal equipment, replace it. ヒューズは、主電源の下にあります。うまくはずれない場合は、マイナスドライバーなどで 注意しながら引っ掛けるようにして手前に引き出して下さい。 The fuse is accommodated under the black box provided on the right side of the MAIN POWER switch. If the black box is not removed easily, carefully hook it and pull it forward with a slotted screwdriver. 黒いボックスを引き抜き、中に入っているヒューズを交換してください。 Pull out the black box provided on the side of the MAIN POWER switch, and replace the fuse. 交換ヒューズ Applicable fuse 6.6 CKU-050-ACC (100V) 3A CKU-060AT2-ACC (100-115V) 5A CKU-060AT2-ACC-CE (220-240V) 3A 日常点検 Daily inspection 点検項目 頻度 点検内容 Inspection item フィルタケース Filter case 排気の状態 Exhaust status Frequency 運転前 Before operation 1回/日 Once/day 本体の振動 Vibrations of main body 1回/日 Once/day フィルタの取り付け状態 Filter installation status 1回/月 Once/month フィルタ取り付けが緩んでいないか Are the filters installed securely? 運転時 During operation 吸込みホース端の吸引力は適切か 目詰まり信号は表示されていないか Does the suction hose end offer proper suction force? Is the clogging indicator displayed? フィルタ目づまり状態 (吸引力確認) Filter clogged status (Suction force check) 20 Description 完全に閉じているか Is the case closed completely? 排気口が閉ざされていないか Is the exhaust port unclogged? 異常振動、異常音がないか 設置レベルは出ているか Are no abnormal vibrations or sounds generated? Is the installation level correct? 7 正常に動作しない場合の対策 Countermeasures against Abnormal Operation 故障現象 原因 対策・方法 Failure phenomenon Cause Countermeasures 電源が入っていない The power is not turned ON. モータ焼け Motor seizing モータ交換(修理依頼願います) Replace the motor. (Ask for repair.) [1] 排気口/吸引口が塞がれていないか確認 (完全にふさがれると異常ランプが点灯します) Check whether the exhaust port and suction port are not clogged. (When they are fully clogged, the warning lamp is turned on.) [2] 定格電圧の確認。 (タコ足配線になっていないか) Confirm the rated voltage. (Confirm that a star-burst connection of several plugs in one outlet is not adopted.) [3] フィルタの目詰まりによりモータが過熱していないか確 認。 Confirm that the motor is not overheated by clogged filters. (1)~(3)の確認後、原因を取り除き、リセットスイッチを 押す。(リセットは、主電源スイッチの入切でもできます) リセットしても、運転が再開できない場合は、モータの温度 サーモスタッドが働いている可能性がありますので、主電 源を切り、30 分経過してから、運転を開始してください。 After checking (1) to (3) above, remove the cause of error, and press the RESET switch. (Or turn OFF and ON the MAIN POWER switch to reset the error status. Start the operation 30 minutes later.) ヒューズを交換する(ヒューズについて参照) Replace fuses. (Refer to “Fuse”) フィルタ交換 (目詰まりを放置すると③④の故障となります) Replace filters. (Clogged filters lead to the failures [3] and [4] below.) ①モ-タが起動しない。 運転中に突然停止した。 The motor is not started. The motor stops suddenly during operation. 過負荷・異常温度 により、停止した。 The motor stops due to overload or abnormal temperature. ヒューズが切れた Fuses are blown out ②吸引力低下 The suction force is deteriorated. ③粒子吹きもれ Particles are not blown completely. ④送風機異常音、 異常振動 The blower is generating abnormal sounds or abnormal vibrations ⑤「E.EE」が表示した場合 When “E.EE” is displayed ⑥異常ランプが点灯した 場合 When the Abnormality lamp lights 電源を入れる Turn ON the power. フィルタの目詰まり Filters are clogged. フィルタ取り付け不良 Filters are not installed correctly. フィルタの破損、寿命 Filters are damaged, or their life is expired. フィルタの目詰まり Filters are clogged. ブロア内への異物混入 Foreign substances have entered the blower. 電動機軸受けの破損 The motor bearing is damaged. フィルタ目詰まり、若しくは配 管、吸込口の圧力損失が高 いため、風量低下している Filters are clogged or Large pressure loss in the duct is causing a decrease in airflow volume 異常温度又は、インバーター に(過負荷など)異常が発生 した。 Temperature error or inverter error(such as overload occurred). 21 フィルタの取付け Install filters correctly フィルタ交換 Replace filters フィルタ交換 Replace filters. 修理依頼願います Ask for repair. 電動機交換(修理依頼願います) Replace the motor. (Ask for repair.) [1] [2] [3] [4] [1] [2] [3] [4] フィルタを交換する 配管を最短距離にする 配管径を大きくする 吸引口の開口を広げる Replace filters. Make the duct as short as possible. Increase the duct diameter Widen the opening suction port 電源を再投入してください。復帰しない場合は、メーカに お問い合わせください。 Turn off the equipment, then turn it on again. If the lamp is not reset, contact the manufacturer. 8 危険シール位置/電気回路図 Indication of DANGER Labels / Electrical Circuit Diagram 8.1 CKU-050-ACC MODEL 8.2 CKU-060AT2-ACC(-CE) MODEL 22 9 本体仕様 Specifications of Main Body 出力 Output (W) 電圧 Voltage (V) 電流値 Current (A) 周波数 Frequenc y (Hz) 最大風量 Maximum suction air volume (m3/min) 最大静圧 Maximum suction static pressure (kPa) 騒音値 Noise (dB) 90 100V 1.3 50/60 2.0 1.35 54 17.5 CKU-060AT2-ACC 150 100-115V 3.3 50/60 2.4 1.8 58-68 21.5 CKU-060AT2-ACC-CE 150 220-240V 1.7 50/60 2.4 1.8 58-68 21.5 型式 Model CKU-050-ACC 質量 Mass (kg) 注意 :騒音値は本体より1m離れた任意の点 A スケール(dB)で測定した値です。 Note :The “Noise” column indicates a value (dB) on the scale A at 1 m on the main body side when hose is connected to the suction port. (CKU-060AT2-ACC-CE) Machinery Directive: EN ISO12100-1:2003, EN ISO 12100-2:2003, EN 1050:1996, EN 60204-1:1997 10 消耗品リスト Consumable Parts 消耗年数 Life フィルタFilter 1次フィルタ Primary filter 消耗年数:1-3 か月 CHF-2222-40 Life:1 to 3 months 2次フィルタ Secondary filter 消耗年数:3-6ヶ月 ACC-2525-75ST Life:3 to 6 months 3次フィルタ Tertiary filter 消耗年数:6-12か月 CHF-2525-50 Life: 6 to 12 months 注)上記消耗年数はお客様の使用頻度、吸込み濃度(材質と成分)によって変わります。 Note: The life above varies depending on the use frequency and suction density (ingredient and materials). ご注意:本書の内容は、予告なしに変更することがあります。 Note: The contents of this manual are subject to change without prior notice. 23 お買い上げメモ Memo about purchase 形 式 Model 製造番号 購入年月日 運転開始日 Date of purchase Start of operation Manufacturer’s serial number: 年 月 お客様お名前 Your name : 住所 電話:Phone Address 担当者:Person in charge 本社:〒574-0052 大阪府大東市新田北町 1-25 http://www.showadenki.co.jp 東 仙 厚 北 長 名 浜 静 京 支 台 営 業 木 営 業 関 東 営 業 野 駐 古 屋 支 松 駐 岡 駐 e-mail : [email protected] 店 所 所 所 在 店 在 在 ☎03(5833)3201 ☎022(782)9901 ☎046(221)6501 ☎0277(78)6431 ☎026(225)8623 ☎052(821)1211 ☎053(451)0088 ☎054(237)2441 S H O W A D E N K I ☎+66(2330)8798 (T HAI LAN D )CO ., LTD . チコーエアーテック株式会社 CHIKO 24 金 沢 大 阪 京 都 岡 山 福 岡 北 九 海 外 昭和電 営 営 営 営 州 営 機 業 支 業 業 業 駐 業 札幌 所 店 所 所 所 在 部 ㈱ AIRTEC CO.,LTD. ☎076(223)1122 ☎06(6932)1221 ☎075(603)2323 ☎086(242)3351 ☎092(472)6631 ☎093(952)4230 ☎072(871)1511 ☎011(792)8175