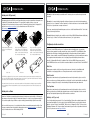
1
E006-00-000063
Table of contents
Overview
Overview ....................................................................................................... 2
Hardware Installation ................................................................................... 3
Thank you for purchasing a genuine EVGA graphics card. EVGA is an NVIDIA® Authorized Solution Provider that
builds high performance 3D cards. Our graphics cards are fully compatible with the latest 2D and 3D graphical
requirements.
Quick Start .................................................................................................... 3
Before installing your EVGA graphics card, it is highly recommended to first register the product to receive the full
support and warranty. You can register your card online at www.evga.com/register.
Hardware Installation Details ....................................................................... 4
Graphics Cards Requiring Additional Power .............................................. 4
SLI Installation .............................................................................................. 5
Software Installation .................................................................................... 5
Setting up Multiple Displays ........................................................................ 6
Quick Fixes ................................................................................................... 7
EVGA also strives to provide a full range of programs and services to enhance the customer experience including
but not limited to:
EVGA Advanced RMA (EAR) Program:
The EVGA Advanced RMA (EAR) Program is a program to protect yourself and your product in the case of product
failure. For more information please visit www.evga.com/support/ear.
EVGA Step-Up® Program:
In order to give our customers the greatest amount of flexibility when purchasing EVGA graphics cards, we have
instituted the EVGA Step-Up® Program. For more information please visit www.evga.com/stepup.
EVGA Online Community:
Additional Support ....................................................................................... 8
To visit the EVGA community forums, please visit www.evga.com/forums for more information.
Compliance Information .............................................................................. 9
EVGA Precision XTM:
Designed from the ground up to support new GPU technology, EVGA Precision XTM redefines what overclocking
software should be. For more information please visit www.evga.com/precision.
EVGA OC Scanner X:
Featuring a brand new look and layout, this popular application has been adapted to show all of the latest GeForce
vitals. For more information please visit www.evga.com/ocscanner.
EVGA FAQ:
To search our knowledge base and product FAQ, please visit www.evga.com/faq for more information.
EVGA GamingTM:
If you live to game, this is the place for you! We have the best tournaments, prizes and game servers. For more
information please visit www.evga.com/gaming.
English
1
2
English
Folding@EVGA:
5. Align your new card with the appropriate slot, (see illustration below) and press it in firmly until the card is fully
Distributed computing for the greater good. Did you know that you can turn your graphics card into a shared
supercomputer? For more information please visit www.evga.com/folding.
6. Connect the supplemental PCI Express (PCI-E) power adapter(s) to the card if applicable. (See illustration
seated. Make sure that the metal contacts of the card are completely pushed into the expansion slot.
below.)
EVGA Social NetworksTM:
Stay up to date on contests, promotions, tech tips, new products, driver releases and more by following EVGA on
your favorite social network! For more information please visit www.evga.com/sonet.
7. Replace the retaining screw to fasten the card into place, and then replace the computer cover.
8. Reconnect any devices that you detached during installation, and then connect the monitor’s video cable to
your new graphics card.
MODS RIGSTM:
9. Apply power to your system, boot to the operating system and install the proper drivers.
$1K Sponsorships for every 200 posts. Come show off your rig and join in on one of the biggest things happening
at EVGA. For more information please visit www.modsrigs.com.
Hardware Installation Details
EVGAontheTUBE:
New product unboxing, overview and features! For more information please visit www.youtube.com/teamevga.
PCI Express (PCI-E) and PCI slots are different, so prior to installation; please verify that the graphics card bus type
and available slot are the same.
Hardware Installation
Preparing Your Computer
WARNING: Turn off the power to your system and discharge your body’s static
electric charge by touching a grounded surface – for example, the metal surface of
the power supply or chassis – before performing any hardware procedure. EVGA
assumes no liability for any damage, caused directly or indirectly, by improper
installation of any components. If you do not feel comfortable with performing
the installation procedure, consult a qualified computer technician. Damage to the system components, the
graphics card, and injury to yourself may result if power is applied during installation. Now that you have
prepared your computer, you are ready to install your graphics card.
Quick Start
1. Before starting installation, it is recommended to completely remove all drivers for your existing graphics card
PCI Express (PCI-E) Graphics Cards
PCI Graphics Cards
Graphics Cards Requiring Additional Power
If your graphics card is equipped with a supplemental power adapter, it is required that it be connected at the time
of installation. This supplemental power adapter ensures that your graphics card receives the necessary power that
will allow it to function at optimal performance levels. Your card may require one or more 6 or 8-pin PCI Express
(PCI-E) supplemental power connectors. Please note that the 8-pin PCI-E power connector is not the same as the
8-pin CPU power connector. Please see the below illustration.
Always use the PCIE power cables from your Power Supply first, only use included adapters when your Power
Supply does NOT have the appropriate connectors.
8 pin or 6+2 pin
(If you have one).
6 pin
2. Power off the computer and all attached devices (keyboard, mouse, etc.).
3. Disconnect the display cable from your current display adapter on the back of the computer.
4. Remove your existing graphics card (if you have one) from your computer. You will do this by removing the
retaining screw and pulling the card out in a straight up fashion. Please note that your motherboard may have a
PCI Express (PCI-E) latch on the slot that needs to be pressed in first.
(NOTE: If your motherboard has integrated or onboard video, you may need to disable it first, please contact
your system or motherboard manufacturer for additional information.)
English
3
4
English
SLI Installation (optional)
NOTE: If adding a secondary card to an existing PC, you may be required to REINSTALL the driver again.
On some EVGA graphics cards, it is possible to link multiple graphics cards together for improved performance,
this is called SLI. To install multiple cards in SLI, follow the below instructions, please note that in SLI setups both
cards must be the same model. For a video overview of setting up SLI, please visit www.evga.com/slivideo.
Also, you can view FAQ about SLI at http://www.evga.com/support/faq/?f=58605.
Note: If the autorun driver installation menu does not appear, it can be launched manually by clicking on the
“Computer” or “My Computer” icon, and double clicking the icon for your DVD/CD drive. After that double click on
the “autorun.exe” file.
Once the autorun installation menu appears, select the “Install Video Drivers” button. This will start the driver
installation process.
Note: During installation, you may be prompted by the Microsoft WHQL (Windows Hardware Quality Labs) warning,
please select the “Continue” or “Install this driver software anyway” option, as it is safe to do so.
Setting up Multiple Displays
Install your first GeForce graphics card
into the Primary PCI Express x16 slot.
2-way SLI: Install your second GeForce
graphics card in to the secondary PCI
Express x16 slot. Connect the two cards
together using the 2-way SLI bridge
connector that came with your SLI-ready
motherboard.
3-way SLI: Install the third GeForce card into
the tertiary PCI Express slot on the
motherboard. Connect the GeForce
cards together using the 3-way SLI bridge
connector that came with your SLI-ready
motherboard.
The NVIDIA Control Panel allows you to configure a multi-display environment, whether it is through multiple
computer monitors or by using a monitor in conjunction with an HDTV. The ability to use multiple displays within
Windows can simplify many everyday tasks by spreading out the Windows Desktop area, or make working with
an HDTV even easier by allowing you to watch a movie on one of the displays, while performing other tasks on the
other display. Multiple display configurations can be made in the “Set up Multiple Displays” subsection located
in the NVIDIA Control Panel. To access the NVIDIA control panel, simply right click on the desktop, and select
“NVIDIA Control Panel”.
Single Mode
TT
BO
OM
Select just one checkbox for the monitor you wish to use as your single display. This will disable the secondary
output and is the default setting if you only have one monitor connected to the graphics card.
2-way SLI
3-way SLI
4-way SLI
Extended Mode
For ALL SLI configurations, please consult your motherboards user manual for proper placement of cards in the given PCI Express slots.
Always install the cards in 8x or 16x slots, as SLI will not function in 4x, the specific slot information should be available in the motherboards
users manual.
Select two or more checkboxes to enable more than one monitor. Once checked, right click on the monitors in the
section below to set the desired mode. Extended desktop mode can independently control resolution and refresh
rate settings for each display.
The above SLI bridges are included with your SLI ready motherboard depending on the configurations it supports. In order for your
SLI setup to work properly, you will need to use the appropriate bridge based on the number of cards you are connecting.
Duplicate Displays
Software Installation
When you boot up your computer for the first time after installing your new graphics card, Windows may detect a
new display device and attempt to install the drivers. If it gives you the option to cancel, please do so, otherwise
wait for Windows to complete the installation (a reboot may be necessary).
After this process has been completed, it is necessary to install the recommended drivers for your graphics card.
To begin, it is recommended to download the latest drivers from www.evga.com/support, alternatively, you can
install the drivers off the EVGA Installation DVD.
English
5
Select two or more checkboxes to enable more than one monitor. Once checked, right click on the monitors in the
section below to set them to duplicate display mode, and select the primary monitor. Duplicate displays require
identical resolutions between both displays.
Enabling SLI (optional)
If you installed multiple cards in SLI mode, you will need to enable SLI to get the maximum performance from your
system. To enable SLI, visit the NVIDIA control panel by right clicking on the desktop, and select “NVIDIA Control
Panel.” Next, select “Set SLI and PhysX configuration.” Finally, select “Maximize 3D Performance” and select
apply. To see a video overview of the SLI installation procedure, please visit www.evga.com/slivideo.
6
English
Quick Fixes
Problem: When viewing my PC on an HDTV, the entire desktiop is not visible, and certain areas; such as the
Windows taskbar, reside offscreen.
Problem: At boot-up, all you hear is a series of beeps from the computer, but see no image on the screen.
Solution: Firstly, ensure that you are running at the correct resolution for your display. If it is, try adjusting the
“Resize Desktop” feature. This lets you compensate for HDTV overscan so that the entire desktop is visible. In this
case, to view display elements that appear offscreen, NVIDIA recommends using the Ovescan Shift feature to pan
the desktop. You can access the Overscan Shift controls from the TV Settings page of the NVIDIA panel.
Cause: The beep sounds are a warning sound from the motherboard BIOS that says it cannot initialize the
graphics card, this can mean one of four things:
1)
2)
3)
4)
The card is not seated properly.
There is a problem with the motherboard’s graphics card slot.
Supplemental PCI-E power is not connected to the graphics card.
There is a problem with the graphics card.
Solution: Remove the card from the computer and reinsert it, making sure that the card is seated properly in the
slot, and then try to boot the computer again. If this does not work then the problem is either with the motherboard
or the graphics card and you should contact your hardware manufacturer for further assistance.
Problem: The integrated video adapter has not been disabled prior to installing the new graphics card, and/or the
previous adapter’s drivers have not been properly uninstalled.
Cause: The integrated video adapter has not been disabled prior to installing the new graphics card and/or not
having uninstalled the display drivers from your previous display adapter.
Solution: Ensure the integrated video adapter has been disabled through your motherboard’s BIOS or the
Windows Device Manager prior to installing the new graphics card, and that you have uninstalled the drivers
through the Windows Control Panel. After the new card has been installed, connect the monitor cable and if
required, any supplemental power adapters to the new card before booting up the system.
Note: For problems not listed in this document, please visit the EVGA Knowledge Base at www.evga.com/faq.
Additional Support
Should you require any assistance with the installation or troubleshooting of your EVGA graphics card, please visit
the support section of our website at www.evga.com/support. There you will be able to download drivers, check
out our extensive Knowledge Base, and submit technical and customer support inquiries. Be sure to also visit the
EVGA forums at www.evga.com/forums.
Alternatively, we can be reached by phone. Before contacting Customer Service, please review this manual. If you
need to contact Customer Service, please have your system configuration as well as your card’s model number
and serial number ready. You will need to register your product before a support technician can assist you. You
may register your card online at www.evga.com/register.
• Hours of Operation: 24/7 Technical Phone Support
• Phone Support: (888) 880-EVGA (3842)
• Tech Support Web Site: www.evga.com/support
Problem: Games lockup or crash to the desktop.
Warranty Program to Fit your Needs
Solution: Verify that all the necessary hardware drivers are installed and up to date, including the chipset, video
and sound card drivers. Reinstall the latest version of DirectX (located on EVGA installation disc) or the game itself.
Also, verify the game has all the necessary patches installed that are available from the developer.
Most EVGA products are covered under a 3 Year Warranty.
For more information please visit www.evga.com/support/warranty.
Problem: Where can I find the latest drivers for my graphics card?
Solution: The latest drivers can be found at www.evga.com/support/drivers.
English
7
8
English
Inhaltsverzeichnis
Compliance Information
FCC Compliance Information
This device complies with FCC Rules Part 15. Operation is subject to the following two conditions:
This device may not cause harmful interference, and this device must accept any interference received, including interference that may
cause undesired operation. This equipment has been tested and found to comply with the limits for a Class B digital device, pursuant to
Part 15 of the FCC Rules. These limits are designed to provide reasonable protection against harmful interference in a residential installation.
This equipment generates, uses and can radiate radio frequency energy and, if not installed and used in accordance with the
manufacturer’s instructions, may cause harmful interference to radio communications. However, there is no guarantee that interference
will not occur in a particular installation. If this equipment does cause harmful interference to radio or television reception, which can be
determined by turning the equipment off and on, the user is encouraged to try to correct the interference by one or more of the following
measures:
Increase the separation between the equipment and signal source. Connect the equipment to an outlet on a circuit different from that to
which the signal source is connected. Consult the dealer or an experienced computer technician for help. The use of shielded cables for
connection of the monitor to the graphics card is required to ensure compliance with FCC regulations. Changes or modifications to this unit
not expressly approved by the party responsible for compliance could void the user’s authority to operate the equipment.
CE Compliance Information
EMC Directive 89/336/EEC and Amendment 92/31/EEC, Class B Digital Device EN 50081-14, Generic Emissions Standard for Residential,
Commercial and Light Industrial Products (EN 55022/CISPR 22, Limits and Methods of Measurement of Radio). (EN 55022/CISPR 22,
Limits and Method of Measurement of Radio Interference Characteristics Information Technology Equipment) Warning: This is a Class B
product. In a domestic environment this product may cause radio interference in which case the user may be required to take adequate
measure. EN 50082-1, Generic Immunity Standard for Residential, Commercial and Light Industrial Products (IEC 801-2, IEC 801-3, IEC
801-4)
Übersicht ................................................................................................ 11
Hardwareinstallation .............................................................................. 12
Schnellstart ............................................................................................. 12
Hardwareinstallationsdetails .................................................................. 13
Grafikplatinen, die zusätzliche Stromversorgung benötigen ............... 13
SLI-Installation ....................................................................................... 14
Softwareinstallation ............................................................................... 15
Einrichten mehrerer Anzeigen ............................................................... 15
Problemlösungen ................................................................................... 16
Zusätzliche Unterstützung ..................................................................... 17
Macrovision Product Notice
Konformitätserklärung ........................................................................... 18
This product may incorporate copyright protection technology that is protected by U.S. patents and other intellectual property rights. Use
of this copyright protection technology must be authorized by Macrovision, and is intended for home and other limited viewing uses only
unless otherwise authorized by Macrovision. Reverse engineering or disassembly is prohibited.
Trademark Information
©2001-2015 All rights reserved. The manual is the property of EVGA corp. and is protected by copyright, trademark and other intellectual
property laws, and no part may be reproduced, transmitted, stored or translated into any other computer or foreign language without the
express prior written permission of EVGA corp. EVGA Corp. EVGA, the EVGA logo and combinations thereof are trademarks of EVGA Corp.
All brands and companies are trademarks of registered Trademarks of their respective companies and may not be used without permission.
All other trademarks are the property of their respective owners. The information contained in this manual may be subject to change without
notice. EVGA reserves the right to terminate this license if there is a violation of its terms or default by the Original Purchaser. Upon
termination, for any reason, all copies of the Software must be immediately returned to EVGA and the Original Purchaser shall be liable to
EVGA Corp. for any and all damages suffered as a result of the violation or default. The information contained herein is subject to change
without notice and is provided “AS IS” without warranty of any kind (express or implied). Users are advised to obtain the latest version of
relevant information to verify that information being relied on is current and complete.
English
9
10
Deutsch
Übersicht
Folding@EVGA:
Vielen Dank, dass Sie eine EVGA-Grafikplatine erworben haben. EVGA stellt hochwertige Grafikkarten her und ist
ein autorisierter NVIDIA®-Partner. Unsere Grafikplatinen erfüllen die neuesten 2D- und 3D-Grafik-Anforderungen.
Bevor Sie Ihre EVGA Grafikkarte installieren, empfehlen wir Ihnen, diese zunächst zu registrieren um sich die vollen
Kundendienstangebote und die Herstellergarantie zu sichern. Bitte nehmen Sie die Registrierung online unter:
eu.evga.com/register vor.
Verteiltes Rechnen für das Allgemeinwohl. Wussten Sie, dass Sie Ihre Grafikplatine in einen gemeinsam genutzten
Superrechner verwandeln können? Für weitere Details besuchen Sie bitte: www.evga.com/folding.
EVGA-Social-NetworksTM:
Bleiben Sie auf dem Laufenden über Wettkämpfe, Werbeaktionen, technische Hinweise, neue Produkte,
Treiberveröffentlichungen und mehr, in dem Sie EVGA in Ihrem bevorzugten Sozialen Netzwerk folgen! Für weitere
Details besuchen Sie bitte: www.evga.com/sonet.
EVGA bietet ein breites Spektrum an Programmen und Dienstleistungsangeboten zur Verbesserung der
Kundenzufriedenheit an, wie beispielsweise:
MODS-RIGSTM:
EVGA-Advanced-RMA (EAR):
1’000 US-Dollar Unterstützung für jeden 200-sten Eintrag. Präsentieren Sie Ihr Rechnersystem und sei ein Teil von
einem der großartigsten Ereignisse bei EVGA. Für weitere Details besuchen Sie bitte: www.modsrigs.com.
Das EVGA-Advanced-RMA-Programm (EAR) „Erweiterter Technischer Kundendienst“, bietet Ihnen die
Möglichkeit, im Falle eines Defektes schnellstmöglich einen Austausch zu erhalten. Für weitere Details besuchen
Sie bitte: eu.evga.com/support.
EVGAontheTUBE:
Neues Unboxing Produktvideo, Überblick und Features! Für mehr Informationen besuchen Sie bitte
www.youtube.com/evgaonthetube.
EVGA-StepUp®:
Um unseren Kunden eine größtmögliche Flexibilität zu bieten, ist das EVGA StepUp® Programm eingerichtet
worden. Für weitere Details besuchen Sie bitte: eu.evga.com/stepup.
Hardwareinstallation
Vorbereitung Ihres Rechners
EVGA-Online-Community:
Um die Foren der EVGA-Gemeinschaft zu nutzen, besuchen Sie bitte: www.evga.com/forums.
ACHTUNG: Schalten Sie Ihren Rechner aus bevor Sie jedwede Aktion an der
Hardware durchführen. Bauen Sie eventuell entstandene elektrostatische
Aufladungen Ihres Körpers ab, in dem Sie eine geerdete Oberfläche berühren,
zum Beispiel die Metalloberfläche des Netzteils oder des Gehäuses. Trennen Sie
den Rechner vom Stromnetz. EVGA übernimmt keine Haftung für Schäden, die
EVGA-Precision XTM:
Von Grund auf neu entwickelt, um die brandneuen Technologien der EVGA GeForce GTX zu unterstützen.
Overclocking Software wird durch das EVGA Precision XTM neu definiert. Download und Informationen unter:
eu.evga.com/precision.
EVGA-OC-Scanner X:
Mit einem neuen Layout versehen, werden alle wichtige Fakten der EVGA GeForce GTX angezeigt. Download und
Informationen utner: www.evga.com/ocscanner.
direkt oder indirekt durch unsachgemäße Installation von Komponenten verursacht werden. Falls Sie sich
nicht sicher genug fühlen um Arbeiten an der Hardware auszuführen, konsultieren Sie einen qualifizierten
Computer-Techniker. Schäden an Systemkomponenten, der Grafikplatine und Verletzungen an Ihnen selbst
können auftreten, wenn während der Arbeiten dem System Strom zugeführt wird. Wenn Sie Ihren Rechner
nun vorbereitet haben, sind Sie soweit Ihre Grafikplatine zu installieren.
EVGA-FAQ:
Schnellstart
Um Antworten auf häufig gestellte Produktfragen zu erhalten, besuchen Sie bitte: www.evga.com/faq.
1. Bevor Sie mit der Installation beginnen, empfehlen wir alle Treiber für die bisher vorhandene Grafikplatine
vollständig zu entfernen (falls schon eine im Rechner installiert war).
EVGA-GamingTM:
2. Schalten Sie den Rechner und alle angeschlossenen Peripheriegeräte (Drucker, Scanner usw.) ab.
Wenn das Spielen Ihre Leidenschaft ist, sollten Sie den unten angegebenen Link besuchen! Wir bieten die besten
Wettkämpfe, Gewinne sowie Spiele-Server. Weitere Details unter: www.evga.com/gaming.
3. Trennen Sie das Monitorsignalkabel von Ihrer vorhandenen Grafikplatine auf der Rückseite Ihres Rechners.
Deutsch
11
4. Entfernen Sie die vorhandene Grafikplatine (falls noch eine im Rechner installiert ist) aus Ihrem Rechner. Dazu
entfernen Sie die Befestigungsschraube und ziehen Sie die Grafikplatine ganz gerade heraus. Beachten Sie
bitte, dass einige Hauptplatinen am PCI-Express-Grafiksteckplatz einen Schnappriegel haben, den Sie in
diesem Fall gedrückt halten müssen um die Grafikplatine herausziehen zu können.
12
Deutsch
(HINWEIS: Falls Ihre Hauptplatine über eine integrierte Grafikeinheit verfügt, müssen Sie diese zunächst
deaktivieren. Für Informationen hierzu konsultieren Sie bitte den Hersteller Ihrer Hauptplatine oder Ihres
Rechners.)
5. Richten Sie Ihre Grafikplatine am Steckplatz aus (siehe Bild unten) und drücken Sie diese hinein, bis sie richtig
im Steckplatz sitzt.
6. Verbinden Sie die zusätzlichen PCI-Express-(PCI-E)-Stromanschlusskabel mit der Platine, falls für diese Platine
so vorgesehen (siehe Bild unten).
7. Setzen Sie die Befestigungsschrauben ein, um die Grafikplatine zu arretieren.
8. Verbinden Sie wieder alle Geräte, die Sie während der Installation vom Rechner getrennt haben. Verbinden Sie
das Monitorsignalkabel nun mit Ihrer neuen Grafikplatine.
9. Schließen Sie Ihren Rechner wieder ans Stromnetz an und schalten Sie ihn ein. Starten Sie das Betriebssystem
und installieren Sie den entsprechenden Treiber.
Hardwareinstallationsdetails
SLI-Installation (optional)
Mit einigen EVGA-Grafikplatinen ist es zur Verbesserung der Leistung möglich, mehrere Grafikplatinen miteinander
zu einem SLI System zu verbinden. Um mehrere Grafikplatinen im SLI-Verbund zu installieren, folgen Sie bitte den
unten ausgeführten Anweisungen. Beachten Sie bitte, dass in SLI-Systemen alle Grafikplatinen vom gleichen Typ
sein müssen. Für einen Überblick über die Einrichtung eines SLI-Systems in Videoform, besuchen Sie bitte:
www.evga.com/slivideo. Sie können auch im FAQ Bereich darüber nachlesen:
http://www.evga.com/support/faq/?f=58605.
PCI-Express-(PCI-E)- und PCI- Steckplätze unterscheiden sich. Vergewissern Sie sich vor der Installation, dass der
Anschlusstyp Ihrer Grafikplatine mit dem des verfügbaren Steckplatzes übereinstimmt.
PCI-Express-(PCI-E)-Grafikplatine
Installieren Sie Ihre erste EVGAGeForce-Grafikplatine im primären
PCI-Express-x16-Steckplatz.
PCI-Grafikplatine
Grafikplatinen, die zusätzliche Stromversorgung benötigen
2-Wege-SLI: Installieren Sie die zweite
GeForce Grafikkarte in dem nächsten
verfügbaren PCI Express x16 Slot. Verbinden
Sie die beiden Karten mit der 2-Way SLI
Brücke die mit Ihrem SLI fähigem
Motherboard geliefert wurde.
8-Pin oder 6+2-Pin
6-Pin
OM
Bitte benutzen Sie immer die Anschlusskabel direkt vom Netzteil wenn vorhanden. Bitte nutzen Sie die Adapter
nur, wenn das Netzteil diese Anschlüsse nicht zur Verfügung stellen kann.
TT
BO
Sollte Ihre Grafikkarte mit einem zusätzlichen Stromanschluß ausgestattet sein, so wird empfohlen, diesen für die
Dauer der Installation zu benutzen. Dieser zusätzliche Stromanschluß stellt sicher, dass Ihre Grafikkarte zu jeder
Zeit den Strom bekommt, welchen sie benötigt, um ein optimales Leistungsniveau zu erreichen. Ihre Grafikkarte
benötigt 1 oder mehr zusätzliche 6- oder 8-Pin PCI Express Stromanschlüsse. Bitte beachten Sie, dass der
8-Pin PCI-E Stromanschluß nicht dem 8-Pin CPU Stromanschluß entspricht. Bitte beachten Sie die u.a. Abbildung.
3-Wege-SLI: Installieren Sie die dritte Karte
in dem nächsten verfügbaren PCI Express
Slot auf dem Motherboard. Verbingen Sie
die GeForce Karten mit der 3-Way SLI
Brücke die mit Ihrem SLI fähigem
Motherboard geliefert wurde.
2-way SLI
3-way SLI
4-way SLI
Für alle SLI Konfigurationen: Bitte prüfen Sie die Bedienungsanleitung Ihres Motherboards für die richtige Plazierung der Karten in den PCI
Express Slots. Installieren Sie die Karten bitte nur in 8x oder 16x Slots, 4x Slots unterstüzen SLI nicht. Diese Informationen sollten Sie in der
Bedienungsanleitung des Motherboards finden.
Die oben abgebildeten SLI-Brücken sind je nach der unterstützten Konfiguration, dem SLI-fähigen Motherboard beigelegt. Um das SLI
Setup perfekt zu betreiben, sollte man die passende Brücke, je nach Anzahl der zu verbindenden Karten, benutzen.
Deutsch
13
14
Deutsch
Softwareinstallation
Klon-Modus
Wenn Sie nach der Hardwareinstallation Ihrer neuen Grafikplatine den Rechner zum ersten Mal starten und das
Betriebssystem laden, wird Windows das neue Anzeigegerät erkennen und versuchen den Treiber zu
installieren. Falls Ihnen die Option gegeben wird die automatische Treiberinstallation des Betriebssystems
abzubrechen, führen Sie dies bitte aus, andernfalls warten Sie bitte den Installationsvorgang ab und starten Sie
den Rechner falls erforderlich neu.
Nachdem dieser Vorgang abgeschlossen ist, müssen Sie die empfohlenen Treiber für Ihre Grafikplatine
installieren. Um zu beginnen, empfiehlt sich, die aktuellen Treiber über www.evga.com/support runterzuladen.
Alternativ können diese auch über die EVGA Installations DVD installiert werden.
Hinweis: Für den Fall, dass Sie eine zweite Karte in ein bestehendes System hinzufügen, ist es erforderlich die
Treiber neu zu installieren.
Hinweis: Falls das Treiberinstallationsmenü nicht automatisch aufgerufen wird, können Sie dieses manuell aufrufen.
Hierfür klicken Sie im Startmenü auf ‚Arbeitsplatz’ und doppelklicken dann auf das Symbol für Ihr DVD-/CDLaufwerk. Oder klicken Sie im Startmenü auf ‚Computer’ und klicken dann auf das Symbol für Ihr DVD-/CDLaufwerk. Danach doppelklicken Sie auf die ‘Autorun.exe’-Datei.
Sobald das Treiberinstallationsmenü erscheint, wählen Sie die Schaltfläche „Installieren des Grafiktreibers“ aus.
Dies wird den Treiberinstallationsvorgang starten.
Hinweis: Während des Installationsvorganges erhalten Sie vielleicht eine Microsoft®-WHQL-(Windows Hardware
Quality Labs)-Warnmeldung. Wählen Sie die Option ‚Fortsetzen’ oder ‚Treiber trotzdem installieren’ aus. Die
Stabilität und Sicherheit Ihres Rechners bleibt hierdurch gewährleistet.
Einrichten mehrerer Anzeigen
Wählen Sie zwei oder mehr der Markierungsfelder aus um mehr als einen Monitor zu aktivieren. Wenn diese
ausgewählt wurden, klicken Sie im Bereich darunter auf die Monitore mit der rechten Maustaste und stellen Sie
den gewünschten Klon-Modus ein. Wählen Sie das primäre Anzeigengerät aus. Das Duplizieren der Anzeige im
Klonmodus erfordert eine identische Auflösung der Monitore.
SLI-Aktivierung (optional)
Wenn Sie Grafikplatinen im SLI-Verbund installiert haben, müssen Sie nun den SLI-Modus aktivieren um die volle
Leistungsfähigkeit dieses Systems auszuschöpfen. Zur Aktivierung des SLI-Modus’ klicken Sie in der
NVIDIA®- Systemsteuerung in der Rubrik‚ SLI- und PhysX-Eigenschaften einrichten’ auf das Markierungsfeld‚
3D-Leistung maximieren’ und dann auf‚ Übernehmen’. Für einen Überblick über die Einrichtung eines SLI-Systems
in Videoform besuchen Sie bitte: www.evga.com/slivideo.
Problemlösungen
Problem: Beim Hochfahren hören Sie eine Reihenfolge von Piep-Tönen, aber Sie sehen auf dem Bildschirm kein
Bild.
Ursache: Die Pieptöne sind eine Warnmeldung des Hauptplatinen-BIOS’, die besagen, dass die Grafikplatine nicht
initialisiert werden kann, was aus einem der vier folgenden Gründe heraus entstehen kann:
1)
2)
3)
4)
Die Grafikplatine sitzt nicht richtig im Steckplatz der Hauptplatine.
Es liegt ein Defekt am Grafikplatinensteckplatz der Hauptplatine vor.
Die zusätzliche PCI-E-Stromversorgung der Grafikplatine ist nicht angeschlossen.
Es liegt ein Defekt an der Grafikplatine vor.
Das NVIDIA®-Systemsteuerungsfenster ermöglicht Ihnen das Konfigurieren mehrerer Anzeigegeräte, seien
es mehrere Computermonitore oder ein Computermonitor in Verbindung mit einem HDTV-fähigen Bildschirm.
Die Möglichkeit unter Windows mehrere Monitore zu nutzen, kann viele Tätigkeiten sehr vereinfachen, da der
Windows-Arbeitsplatz erweitert werden kann und Anwendungen auf die Monitore aufgeteilt werden können. Sie
können auch einen HDTV anschließen und einen Film anschauen, während Sie auf dem zweiten Monitor andere
Anwendungen ausführen. Die Einrichtung mehrerer Anzeigen kann in der NVIDIA®-Systemsteuerung in der
Rubrik‚ „Mehrere Anzeigen einrichten“ vorgenommen werden. Um in die NVIDIA®-Systemsteuerung zu gelangen,
klicken Sie mit der rechten Maustaste auf den Arbeitsplatz und wählen den Punkt‚ „NVIDIA®-Systemsteuerung“.
Lösung: Entnehmen Sie die Grafikplatine aus dem Rechner und setzen Sie diese erneut ein. Stellen Sie hierbei
sicher, dass sie richtig im Steckplatz sitzt. Versuchen Sie den Rechner erneut zu starten. Falls dies nicht zum Erfolg
führt, liegt ein Defekt entweder an der Haupt- oder der Grafikplatine vor. Kontaktieren Sie den Hersteller der
Hardware um weitere Hilfe zu erhalten.
Einzelanzeige-Modus
Ursache: Die integrierte Grafikeinheit der Hauptplatine ist nicht deaktiviert worden bevor die neue Grafikplatine
installiert wurde, oder der Treiber der alten Grafikplatine ist nicht deinstalliert worden.
Wählen Sie das Markierungsfeld für den Monitor aus, den Sie als Ihr Einzelanzeigegerät verwenden möchten.
Hierdurch wird der sekundäre Monitorausgang deaktiviert. Das ist auch die Standardeinstellung, wenn Sie nur
einen Monitor mit der Grafikplatine verbunden haben.
Erweiterungs-Modus
Wählen Sie zwei oder mehr der Markierungsfelder aus um mehr als einen Monitor zu aktivieren. Wenn diese
ausgewählt wurden, klicken Sie im Bereich darunter auf die Monitore mit der rechten Maustaste und stellen Sie
den gewünschten Modus ein. Im Arbeitsplatz-Erweiterungsmodus können die Auflösung und die
Bildwiederholfrequenz für jeden Monitor unabhängig voneinander eingestellt werden.
Deutsch
15
Problem: Der Onboard-Grafikanschluss wurde vor der Installation der neuen Grafikkarte nicht deaktiviert, und /
oder die vorherigen Treiber wurden nicht vollständig deinstalliert.
Lösung: Bevor Sie die neue Grafikplatine installieren, stellen Sie sicher, dass im BIOS der Hauptplatine oder im
Gerätemanager von Windows die integrierte Grafikeinheit deaktiviert wurde, und stellen Sie sicher, dass in der
Windows-Systemsteuerung der Treiber einer vorher installierten Grafikplatine deinstalliert wurde. Nach dem Einbau
der neuen Grafikplatine schließen Sie das Monitorsignalkabel an die Grafikplatine an und die eventuell
erforderlichen PCI-E-Stromanschlusskabel. Starten Sie anschließend den Rechner erneut.
16
Deutsch
Problem: Spieleanwendungen frieren ein oder stürzen ab: Überprüfen Sie, dass alle notwendigen Treiber für die
Hardware installiert sind und auf dem aktuellsten Stand sind.
Lösung: Überprüfen Sie, dass alle notwendigen Treiber für die Hardware installiert sind und auf aktuellen Stand
sind, inklusive der Treiber für den Hauptplatinen-Chipsatz, die Grafikplatine und die Audiokarte. Installieren Sie
erneut die aktuelle Version von DirectX (befindet sich auf der EVGA-Installations-Disc) oder auch erneut das Spiel
selbst. Überprüfen Sie außerdem, dass alle notwendigen Aktualisierungen installiert sind, die der
Herausgeber der Spieleanwendung anbietet.
Problem: Wo finde ich die aktuellen Treiber für meine Grafikplatine?
Lösung: Die neuesten Treiber finden Sie unter: www.evga.com/support/drivers.
Problem: Wenn die Bildausgabe des Rechners über einen HDTV-Bildschirm erfolgt, ist der Arbeitsplatz überhaupt
nicht zu sehen und einige Bereiche, wie die Windows-Taskleiste, befinden sich außerhalb des sichtbaren
Bereiches.
Lösung: Stellen Sie zunächst sicher, dass Sie die für Ihren Bildschirm korrekte Auflösung eingestellt haben. Wenn
dies der Fall ist, versuchen Sie an Ihrem Anzeigegerät die Einstellungen für den sichtbaren Bildbereich
entsprechend anzupassen, so dass alle Inhalte auf dem Bildschirm angezeigt werden.
HINWEIS: Für Probleme, die in dieser Anleitung nicht behandelt werden, konsultieren Sie bitte die
EVGA-Informationsdatenbank unter: www.evga.com/faq.
Zusätzliche Unterstützung
Die meisten EVGA Produkte besitzen eine 3-Jahres Garantie. Für mehr Informationen, besuchen Sie bitte:
www.evga.com/support/warranty.
Konformitätserklärung
FCC-Konformitätserklärung
This device complies with FCC Rules Part 15. Operation is subject to the following two conditions:
This device may not cause harmful interference, and this device must accept any interference received, including interference that may
cause undesired operation. This equipment has been tested and found to comply with the limits for a Class B digital device, pursuant to
Part 15 of the FCC Rules. These limits are designed to provide reasonable protection against harmful interference in a residential installation.
This equipment generates, uses and can radiate radio frequency energy and, if not installed and used in accordance with the
manufacturer’s instructions, may cause harmful interference to radio communications. However, there is no guarantee that interference
will not occur in a particular installation. If this equipment does cause harmful interference to radio or television reception, which can be
determined by turning the equipment off and on, the user is encouraged to try to correct the interference by one or more of the following
measures:
Increase the separation between the equipment and signal source. Connect the equipment to an outlet on a circuit different from that to
which the signal source is connected.Consult the dealer or an experienced computer technician for help. The use of shielded cables for
connection of the monitor to the graphics card is required to ensure compliance with FCC regulations. Changes or modifications to this unit
not expressly approved by the party responsible for compliance could void the user’s authority to operate the equipment.
CE-Konformitätserklärung
EMC Directive 89/336/EEC and Amendment 92/31/EEC, Class B Digital Device EN 50081-14, Generic Emissions Standard for Residential,
Commercial and Light Industrial Products (EN 55022/CISPR 22, Limits and Methods of Measurement of Radio). (EN 55022/CISPR 22,
Limits and Method of Measurement of Radio Interference Characteristics Information Technology Equipment) Warning: This is a Class B
product. In a domestic environment this product may cause radio interference in which case the user may be required to take adequate
measure. EN 50082-1, Generic Immunity Standard for Residential, Commercial and Light Industrial Products (IEC 801-2, IEC 801-3, IEC
801-4)
Macrovision-Produktmeldung
Sollten Sie Unterstützung bei der Installation oder bei der Fehlerbehebung für Ihre EVGA-Grafikplatine benötigen,
konsultieren Sie bitte die Sektion des Technischen Kundendiensts auf unserer Internetseite:
www.evga.com/support. Dort finden Sie Treiber zum Herunterladen, können die ausführliche
Informationsdatenbank durchschauen und Anfragen an den Kundendienst stellen. Besuchen Sie auch unbedingt
die EVGA-Foren unter: www.evga.com/forums.
Alternativ können Sie uns auch telefonisch erreichen. Bevor Sie den Kundendienst kontaktieren, halten Sie bitte
die Informationen bereit über die Konfiguration Ihres Rechnersystems und die Artikel- sowie die Seriennummer
Ihrer Grafikplatine. Sie müssen Ihr Produkt registrieren, damit Ihnen ein Kundendienstmitarbeiter helfen kann. Ihr
Produkt können Sie online registrieren unter: www.evga.com/register.
• Geschäftszeiten des telefonischen Kundendienstes: montags bis freitags, 09:00 bis 18:00 Uhr
(MEZ / MESZ).
• Nummer des telefonischen Kundendienstes: +49 (89) 189 049 – 11
• Internetadresse des Kundendienstes: www.evga.com/support
Deutsch
Herstellergarantie
17
This product may incorporate copyright protection technology that is protected by U.S. patents and other intellectual property rights. Use
of this copyright protection technology must be authorized by Macrovision, and is intended for home and other limited viewing uses only
unless otherwise authorized by Macrovision. Reverse engineering or disassembly is prohibited.
Handelsmarken-Information
©2001-2015 All rights reserved. The manual is the property of EVGA corp. and is protected by copyright, trademark and other intellectual
property laws, and no part may be reproduced, transmitted, stored or translated into any other computer or foreign language without the
express prior written permission of EVGA corp. EVGA Corp. EVGA, the EVGA logo and combinations thereof are trademarks of EVGA Corp.
All brands and companies are trademarks of registered Trademarks of their respective companies and may not be used without permission.
All other trademarks are the property of their respective owners. The information contained in this manual may be subject to change without
notice. EVGA reserves the right to terminate this license if there is a violation of its terms or default by the Original Purchaser. Upon
termination, for any reason, all copies of the Software must be immediately returned to EVGA and the Original Purchaser shall be liable to
EVGA Corp. for any and all damages suffered as a result of the violation or default. The information contained herein is subject to change
without notice and is provided “AS IS” without warranty of any kind (express or implied). Users are advised to obtain the latest version of
relevant information to verify that information being relied on is current and complete.
18
Deutsch
Tabla de Contenidos
Información General
Información general ............................................................................... 20
Instalación del hardware ........................................................................ 21
Gracias por adquirir la tarjeta gráfica genuina de EVGA. EVGA es un fabricante autorizado de tarjetas gráficas de
el alto rendimiento y 3D de NVIDIA®. Nuestras tarjetas gráficas son totalmente compatibles con la última
tecnología y requisitos en 2D y 3D.
Guía rápida ............................................................................................. 21
Antes de instalar la tarjeta gráfica EVGA, se recomienda registrar el producto para recibir el apoyo y la garantía.
Usted puede registrar su tarjeta en www.evga.com/register.
Detalles de la instalación de hardware ................................................. 22
Tarjetas gráficas que requieren energía adicional ................................ 22
Instalación SLI ........................................................................................ 23
Instalación del software ......................................................................... 23
Configuración de múltiple pantallas ...................................................... 24
Consultas frecuentes ............................................................................. 25
EVGA ofrece una gama completa de programas y servicios para mejorar la experiencia del cliente, incluyendo pero
no limitado a:
Programa EVGA Avanzada RMA (EAR):
EVGA avanzado RMA (EAR) es un programa para proteger su producto en el caso de fallas. Para más
información, por favor visite www.evga.com/support/ear.*
Programa EVGA Step-Up®:
Con el fin de dar a nuestros clientes el mayor grado de flexibilidad en la compra de tarjetas gráficas EVGA, hemos
instituido el programa EVGA Step-Up®. Para más información, por favor visite www.evga.com/stepup.*
EVGA Comunidad en línea:
Soporte adicional ................................................................................... 26
Para visitar los foros de la comunidad EVGA, por favor visite www.evga.com/forums.
Declaración de Conformidad ................................................................. 27
EVGA Precisión XTM:
Diseñado desde el principio para dar soporte a las nuevas tecnologías del GPU, EVGA Precision XTM redefine lo
que debe ser un software de aceleración de frecuencias del reloj. Visita www.evga.com/precision.
EVGA OC Escáner X:
Con una nueva presentación, esta popular aplicación se ha adaptado para mostrar todos los aspectos esenciales
de la GeForce. Visita www.evga.com/ocscanner.
EVGA FAQ:
Para buscar información en nuestra base de datos y Preguntas frecuentes del producto, por favor visite
www.evga.com/faq para más información.
EVGA GamingTM:
Si te gustan los juegos de ordenador, tenemos los mejores torneos, premios y servidores de juegos. Visita
www.evga.com/gaming.
Español
19
20
Español
Folding@EVGA:
Computo distribuido para grandes cosas ¿Sabía usted que podía convertir su tarjeta gráfica en un
supercomputador compartido? Visita www.evga.com/folding.
EVGA Redes SocialesTM:
Manténgase al día en concursos, promociones, consejos técnicos, nuevos productos, rede sociales y más
siguiendo EVGA en su red social preferida! Visita www.evga.com/sonet.
MODS RIGSTM:
$1,000 USD de patrocinios por cada 200 mensajes. Muestra tu PC y únete a nuestros concursos en EVGA.
www.modsrigs.com.*
EVGAontheTUBE:
Nuevo producto develado, descripción y características! Para obtener más información, visite
www.youtube.com/teamevga.
5. Alinear su nueva tarjeta con la ranura correspondiente (ver ilustración de abajo) y presione con firmeza hasta
que la tarjeta esté completamente asentada. Asegúrese de que los contactos metálicos de la tarjeta estén bien
encajados en la ranura de expansión.
6. Conecte el adaptador de corriente (s) suplementario PCI Express (PCI-E), a la tarjeta en su caso.
(Ver ilustración abajo).
7. Vuelva a colocar el tornillo de fijación para sujetar la tarjeta en su lugar, y luego vuelva a colocar la cubierta del
equipo.
8. Reconecte todos los dispositivos que fueran desconectados durante la instalación y luego conecte el cable del
monitor a su tarjeta gráfica.
9. Aplique energía al sistema, de arranque para el sistema operativo e instale los controladores adecuados.
Detalles de la instalación de hardware
PCI Express (PCI-E) y las ranuras PCI son diferentes, así que antes de la instalación, verifique que tipo de bus de la
tarjeta gráfica y ranura disponibles son las mismas.
*No aplicable en Latino América consulte a su distribuidor autorizado EVGA.
Instalación del hardware
Cómo preparar a su equipo
ADVERTENCIA: Apague el poder de su sistema y descargue la carga de electricidad
estática al tocar una superficie conectada a tierra - por ejemplo, la superficie metálica
de la fuente de alimentación o el chasis - antes de realizar cualquier procedimiento
de hardware. EVGA no asume ninguna responsabilidad por cualquier daño
causado directa o indirectamente, por una instalación incorrecta de los
Tarjetas Gráficas PCI Express (PCI-E)
Tarjetas Gráficas PCI
Tarjetas gráficas que requieren de alimentación adicional
componentes. Si no se siente cómodo con la realización de la instalación, consulte a un técnico informático
cualificado. El daño a los componentes del sistema, la tarjeta gráfica, y el daño a sí mismo puede resultar
si la energía se aplica durante la instalación. Ahora que usted ha preparado su equipo, está listo para instalar la
tarjeta gráfica.
Si la tarjeta gráfica está equipada con un adaptador de alimentación suplementaria, se requiere su conexión al
momento de la instalación. Este adaptador de alimentación suplementaria se asegura de que la tarjeta gráfica
reciba la energía necesaria que le permita funcionar a los niveles óptimos de rendimiento. Su tarjeta puede requerir
uno o más conectores de 6 o 8 pines PCI-Express (PCI-E) de energía suplementarias. Observe que el 8-pines
PCI-E conector de alimentación no es el mismo que el conector de la CPU 8-pin de alimentación. Por favor,
consulte la siguiente ilustración.
Inicio Rápido
Utilice siempre primero los cables de alimentación PCI-E de su fuente de alimentación, solo utilice los adaptadores
cuando su fuente de alimentación no tenga los conectores apropiados.
8 pines o 6+2 pines
1. Antes de comenzar la instalación, se recomienda eliminar por completo todos los controladores para la tarjeta
gráfica existente (Si usted tiene uno).
6 pines
2. Apague el ordenador y todos los dispositivos conectados (teclados, ratones, etc.).
3. Desconecte el cable de la pantalla de su adaptador de pantalla actual en la parte posterior del equipo.
4. Retire la tarjeta gráfica existente (si lo tiene) de su equipo. Para ello, quite el tornillo de sujeción y tire de la
tarjeta directamente hacia arriba y retírela de su sistema. Tenga en cuenta que la placa base puede tener un
cierre PCI Express (PCI-E) en la ranura que hay que presionar en primer lugar.
(NOTA: Si la placa base tiene integrado o tarjeta de video integrada, puede que tenga que desactivar en primer
lugar, por favor, contacte con su fabricante del sistema o la placa base para obtener información adicional.)
Español
21
22
Español
Instalación SLI (opcional)
Nota: al añadir una segunda tarjeta a un pc existente, quizás requieras reinstalar nuevamente los drivers.
En algunas tarjetas gráficas de EVGA, es posible unir varias tarjetas gráficas juntas para mejorar el rendimiento,
esto se llama SLI. Para instalar varias tarjetas en SLI, siga las siguientes instrucciones, por favor tenga en cuenta
que en configuraciones SLI ambas tarjetas deben ser del mismo modelo. Para ver un video de creación de SLI
visite, www.evga.com/slivideo. Además, puedes ver preguntas frecuentes sobre SLI en
http://www.evga.com/support/faq/?f=58605.
Nota: Si el menú de instalación del controlador autorun no aparece, se puede iniciar manualmente haciendo clic
en el icono “Equipo” o “Mi PC” luego haga doble clic en el icono de la unidad de DVD / CD. Después haga doble
clic en el archivo “autorun.exe”.
Una vez que el menú de instalación de ejecución automática, seleccione la opción “Install Video Drivers”.
Esto iniciará el proceso de instalación del controlador.
Nota: Durante la instalación, se le puede pedir por el Microsoft WHQL (Windows Hardware Quality Labs) de
advertencia, por favor, seleccione la opción “Continue” o “Install this driver software anyway”, ya que es
seguro hacerlo.
Configuración de múltiple pantallas
Instale su primera tarjeta gráfica
GeForce en la ranura PCI Express x16
principal.
SLI de 2 vías: Instale su segunda tarjeta de
gráficos GeForce en la ranura secundaria
PCI Express x16. Conecte las dos tarjetas
juntas usando el conector de puente SLI
de 2 vías que viene con la placa madre
SLI-ready.
SLI de 3 vías: Instale la tercera tarjeta
GeForce en el PCI Express terciaria
ranura en la placa madre. Conecte las
tarjetas GeForce junto con el conector
puente SLI de 3 vías que viene con la placa
madre SLI-ready.
Único modo
TT
BO
Seleccione sólo una casilla para el monitor que desea utilizar como su única pantalla. Esto desactivará la salida
secundaria y es la configuración predeterminada si sólo tiene un monitor conectado a la tarjeta gráfica.
OM
SLI de 2 vías
SLI de 3 vías
SLI de 4 vías
Para todas las configuraciones SLI, por favor consulte a su manual de usuario de su placa madre para la correcta colocación de las tarjetas
en las ranuras PCI Express dadas. Siempre instale las tarjetas en las ranuras de 8x o 16x, el SLI no funcionará en 4x, la información
específica de que ranura debe utilizar se encuentra disponible en el manual del usuario de su placas madre.
Los puentes SLI mostrados más arriba están incluidos en su placa base compatible con SLI, dependiendo de las configuraciones que
admite la placa base. Para que su configuración de SLI funcione correctamente, deberá usar el puente adecuado para el número de
tarjetas que pretende conectar.
Instalación del software
Cuando inicie el equipo por primera vez después de instalar su nueva tarjeta gráfica, es posible que Windows
detecte un nuevo dispositivo de pantalla e intente instalar controladores. Si se le da la opción de cancelar este
proceso, hágalo. De lo contrario, espere a que Windows complete la instalación (es posible que necesite reiniciar
el equipo).
Una vez que se haya completado este proceso, será necesario instalar los controladores recomendados para su
tarjeta gráfica. Para comenzar, es recomendado descargar los últimos controladores disponibles desde
www.evga.com/support, o puedes descargar los controladores de el DVD de instalación de EVGA.
Español
23
El Panel de control de NVIDIA le permite configurar un entorno multi-pantalla, ya sea a través de múltiples
monitores del ordenador o mediante el uso de un monitor junto con un HDTV. La capacidad de utilizar múltiples
pantallas en Windows puede simplificar muchas tareas cotidianas mediante la difusión de la zona del escritorio
de Windows, o hacer que el trabajo con una televisión de alta definición sea aún más fácil ya que le permite ver
una película en una de las pantallas, mientras realiza otras tareas en la otra pantalla . Múltiples configuraciones de
visualización se pueden hacer en la “Configuración de múltiples pantallas” en la subsección que se encuentra en
el Panel de control de NVIDIA. Para acceder al panel de control de NVIDIA, simplemente haga clic derecho en el
escritorio, y seleccione “Panel de control de NVIDIA”.
Modo extendido
Seleccione dos o más casillas de verificación para permitir que más de un monitor. Una vez seleccionada, haga
clic derecho en los monitores en la sección de abajo para ajustar el modo deseado. Modo de escritorio ampliado
de forma independiente puede controlar la configuración de resolución y frecuencia de actualización para cada
pantalla.
Duplicar Muestra
Seleccione dos o más casillas de verificación para permitir más de un monitor. Una vez seleccionada, haga
clic derecho en los monitores en la siguiente sección para configurar a duplicar el modo de pantalla, y seleccionar
el monitor principal. Muestra duplicada requieren resoluciones idénticas entre ambas pantallas.
Habilitación SLI (opcional)
Si ha instalado varias tarjetas en modo SLI, necesitará habilitar SLI para obtener el máximo rendimiento de su
sistema. Para habilitar SLI, visite el panel de control de NVIDIA haciendo clic derecho sobre el escritorio,
y seleccione “Panel de control de NVIDIA”. A continuación, seleccione “Ajustar configuración SLI y PhysX.”,
Seleccione “Maximizar el rendimiento 3D” y seleccionar aplicar. Para ver un vídeo explicativo del proceso de
instalación SLI, visite www.evga.com/slivideo.
24
Español
Consultas frecuentes
Problema: Al ver mi PC en un televisor, todo el escritorio no es visible y en ciertas zonas, como la barra de tareas
de Windows, residen fuera de la pantalla.
Problema: Al encender el ordenador, lo único que se oye es una serie de sonidos de la computadora, pero no se
ve ninguna imagen en la pantalla.
Solución: En primer lugar, asegurarse de que está funcionando a la resolución correcta de la pantalla. Si es así,
intente ajustar la “Resize Desktop” característica. Esto le permite compensar overscan televisión de alta definición,
para que todo el escritorio es visible. En este caso, para ver los elementos gráficos que aparecen fuera de la
pantalla, NVIDIA recomienda utilizar la función de Overscan Shift para desplazar el escritorio. Puede acceder al
Shift de Overscan controles de la página de Configuración de TV del panel de NVIDIA.
Causa: Los sonidos de tono es un sonido de advertencia de la placa base BIOS que dice que no puede inicializar
la tarjeta gráfica, esto puede significar uno de los cuatro cosas:
1)
2)
3)
4)
La tarjeta no está bien colocada.
Hay un problema con la ranura de la placa madre tarjeta gráfica.
Suplementario de alimentación PCI-E no está conectado a la tarjeta gráfica.
Hay un problema con la tarjeta gráfica.
Solución: Retire la tarjeta del ordenador y vuelva a introducirla, asegurándose de que la tarjeta está bien asentada
en la ranura, y luego tratar de arrancar el ordenador. Si esto no funciona, entonces el problema es ya sea con la
placa madre o la tarjeta gráfica y póngase en contacto con el fabricante del hardware para obtener más ayuda.
Problema: El adaptador del video integrado no ha sido desactivado antes de instalar la nueva tarjeta gráfica,
y/o los controladores del adaptador anterior no se ha desinstalado correctamente.
Causa: El adaptador de vídeo integrado no ha sido desactivado antes de instalar la nueva tarjeta gráfica y / o no
tener desinstalados los controladores de pantalla de su adaptador de pantalla anterior.
Solución: Asegúrese de que el adaptador de vídeo integrado se ha desactivado en la BIOS de tu placa base o en
el Administrador de dispositivos de Windows antes de instalar la nueva tarjeta gráfica, y que ha desinstalado los
controladores a través del Panel de control de Windows. Después que la nueva tarjeta se ha instalado, conecte
el cable del monitor y si es necesario, los adaptadores de alimentación suplementaria a la nueva tarjeta antes de
arrancar el sistema.
Problema: El bloqueo de juegos o caída en el escritorio.
NOTA: Para los problemas no mencionados en este documento, por favor visite la EVGA Knowledge Base en
www.evga.com/faq.
Soporte Adicional**
Si necesita ayuda con la instalación o reparación de su tarjeta de gráficos EVGA, por favor visite la sección de
soporte de nuestro sitio web en www.evga.com/support. Allí usted podrá descargar los controladores, echa un
vistazo a nuestra amplia base de conocimientos, y presentar solicitudes de apoyo técnico y atención al cliente. No
deje de visitar los foros de EVGA en www.evga.com/forums.
Alternativamente, se puede llegar por teléfono. Antes de contactar con Atención al Cliente, por favor revise este
manual. Si necesita comunicarse con Atención al Cliente, por favor tenga la configuración del sistema, así como el
número de su tarjeta de modelo y número de serie. Usted tendrá que registrar el producto antes de que un técnico
de soporte le pueda ayudar. Usted puede registrar su tarjeta en www.evga.com/register.
• Horario de atención: 24 / 7 soporte técnico telefónico
• Soporte telefónico: (888) 880-EVGA (3842)
• Soporte Técnico Sitio Web: www.evga.com/support
Programa de garantía para satisfacer sus necesidades
Solución: Compruebe que todos los controladores de hardware necesarios están instalados y hasta la fecha,
incluyendo el chipset, vídeo y controladores de la tarjeta de sonido. Vuelva a instalar la última versión de DirectX
(que se encuentra en el disco de instalación de EVGA) o el juego en sí. Además, compruebe que el juego tiene
todos los parches necesarios instalados que están disponibles desde el desarrollador.
La mayoría de los productos de EVGA posee 3 años de garantía. Para obtener más información por favor visite
www.evga.com/support/warranty.
**No aplicable en Latino América consulte a su distribuidor autorizado EVGA.
Problema: ¿Dónde puedo encontrar los últimos controladores para mi tarjeta gráfica?
Solución: Los controladores más recientes se pueden encontrar en www.evga.com/support/drivers.
Español
25
26
Español
Table des matières
Declaración de Conformidad
Declaración de conformidad con la FCC
Este dispositivo cumple con la Parte 15 de la FCC Riles. La operación está sujeta a las siguientes dos condiciones:
Este dispositivo no puede causar interferencias perjudiciales, y este dispositivo debe aceptar cualquier interferencia recibida, incluyendo
interferencias que puedan causar un funcionamiento no deseado. Este equipo ha sido probado y cumple con los límites para dispositivos
digitales de Clase B, de conformidad con la Parte 15 de las Reglas de la FCC. Estos límites se han dignado a proporcionar una
protección razonable contra interferencias perjudiciales en una instalación residencial. Este equipo genera, utiliza y puede irradiar energía
de radiofrecuencia y, si no se instala y utiliza de acuerdo con las instrucciones del fabricante, puede causar interferencias perjudiciales a las
comunicaciones de radio. Sin embargo, no hay garantía de que no se produzcan interferencias en una instalación particular. Si este equipo
causa interferencias perjudiciales a radio o televisión, lo cual puede ser determinada girando el equipo apagado y, se recomienda al usuario
que intente corregir la interferencia mediante una o más de las siguientes medidas: Aumentar la separación entre el equipo y la fuente de la
señal. Conecte el equipo a un tomacorriente en un circuito diferente de aquel al que está conectada la fuente de señal. Consulte al
distribuidor o a un técnico informático con experiencia para obtener ayuda. El uso de cables blindados para la conexión del monitor a la
tarjeta de gráficos es necesario para garantizar el cumplimiento con las regulaciones de la FCC. Los cambios o modificaciones a esta
unidad no aprobados expresamente por la parte responsable del cumplimiento podría invalidar la autoridad del usuario para operar el
equipo.
Declaración de Conformidad con la CE
Directiva EMC 89/336/EEC y enmienda 92/31/EEC, Dispositivo digital de clase B EN 50081-14, Emisiones Normal Genérica para
Aplicaciones Residenciales, Productos Comerciales y Industriales Ligeros (ES 55022/CISPR 22, Límites y métodos de medición de
Radio). (EN 55022/CISPR 22, Límites y método de medición de perturbaciones radioeléctricas Características de Equipos Informáticos) A
dvertencia: Este es un producto de clase B. En un entorno doméstico, este producto puede causar interferencias, en cuyo caso el usuario
puede verse obligado a tomar la medida adecuada. EN 50082-1, Norma de inmunidad genérica para uso residencial, Productos Comercial
y Industrial Ligeros (IEC 801-2, IEC 801-3, IEC 801-4).
Introduction ............................................................................................ 29
Installation du matériel ........................................................................... 30
Installation rapide ................................................................................... 30
Détails de l’installation du matériel ........................................................ 31
Cartes graphiques nécessitant une alimentation supplémentaire ....... 31
Installation du SLI ................................................................................... 32
Installation des logiciels ......................................................................... 32
Réglages pour des affichages mutliples ............................................... 33
Réparation rapide ................................................................................... 34
Support additionnel ................................................................................ 35
Aviso del producto Macrovision
Informations sur la conformité ............................................................... 36
Este producto puede incorporar tecnología con protección de derechos de autor que está protegida por patentes de EE.UU. y otros
derechos de propiedad intelectual. El uso de esta tecnología de protección de derechos de autor debe ser autorizado por Macrovision y
está destinado para el hogar y otros usos limitados a menos que sea autorizado por Macrovision. Ingeniería inversa o el desmontaje están
prohibidos.
Información de Marca Registrada
© 2001-2015 Todos los derechos reservados. El manual es propiedad de EVGA corp. y está protegido por derechos de autor, marcas
registradas y otras leyes de propiedad intelectual, y ninguna parte puede ser reproducida, transmitida, almacenada o traducida a cualquier
otro ordenador o lengua extranjera, sin el expreso permiso previo por escrito de EVGA corp. EVGA Corp. EVGA, el logotipo de EVGA y
combinaciones de los mismos son marcas registradas de EVGA Corp. Todas las marcas y compañías son marcas comerciales de las
marcas registradas de sus respectivas compañías y no pueden utilizarse sin autorización. Todas las demás marcas son propiedad de
sus respectivos propietarios. La información contenida en este manual puede estar sujeta a cambios sin previo aviso. EVGA se reserva el
derecho de terminar esta licencia si se produce una violación de sus términos o incumplimiento por parte del comprador original. Sobre
la terminación, por cualquier razón, todas las copias del Software deben ser devueltos inmediatamente a EVGA y el Comprador Original
será responsable ante EVGA Corp. por cualquier daño sufrido como resultado de la violación o incumplimiento. La información contenida
en este documento está sujeta a cambios sin previo aviso y se proporciona “TAL CUAL”, sin garantías de ningún tipo (expresa o implícita).
Los usuarios deberán obtener la última versión de la información pertinente para verificar que la información pueda ser invocada esté
actualizada y completa.
Español
27
28
Français
Aperçu
Folding@EVGA:
Nous vous remercions pour votre achat d’une carte graphique EVGA. EVGA est l’un des partenaires autorisés de
NVIDIA®, fournisseur de cartes graphiques 3D à hautes performances. Nos solutions graphiques sont totalement
compatibles avec les dernières technologies 2D et 3D.
Avant d’installer votre carte graphique EVGA, il est fortement recommandé d’enregistrer votre produit afin de
bénéficier pleinement de la garantie et du support EVGA. Vous pouvez enregistrer votre carte en ligne sur le lien
suivant www.evga.com/register.
Le calcul partagé pour le plus grand bien de tous. Savez-vous que vous pouvez dédier votre carte graphique au
calcul partagé? Veuillez visiter www.evga.com/folding.
EVGA Social NetworksTM:
Suivez l´actualité d’EVGA, les promotions en cours, les concours, les conseils techniques, les nouveaux produits et
les nouveaux drivers sur votre réseau social favori! Veuillez visitez www.evga.com/sonet.
MODS RIGSTM:
EVGA s’efforce également d’offrir une gamme complète de programmes à ses clients pour améliorer ce qui
comprend notamment:
$1K de sponsoring tout les 200 posts. Venez montrer votre plateforme et rejoignez l’un des plus fameux
programmes d’EVGA. www.modsrigs.com.
Programme EVGA Advanced RMA (EAR):
EVGAontheTUBE:
Le programme EVGA Advanced RMA (EAR) est là pour vous protéger en cas de défaut de votre produit. Pour en
savoir plus, veuillez consulter www.evga.com/support/ear.
Nouveau déballage produit, aperçu et caractéristiques! Pour plus d’informations, veuillez visiter
www.youtube.com/evgaonthetube.
Programme EVGA Step-Up® Program:
Afin d’offrir à nos clients le plus de flexibilité possible lors de l’achat d’un produit EVGA, nous avons mis en place
le programme Step-Up®. Les participants sont autorisés à échanger leurs produits EVGA contre un autre produit
disponible, supérieur et plus récent, moyennant paiement de la différence de prix entre les deux produits. Pour en
savoir plus, veuillez consulter www.evga.com/stepup.
Installation du matériel
Préparation de votre ordinateur
Attention: Eteindre votre computer et décharger votre corps de l’électricité statique
qui s’y est accumulée en touchant une surface de terre -par exemple la surface en
métal de votre châssis ou de votre alimentation avant d’effectuer toutes les
manipulations. EVGA ne reconnait aucune responsabilité pour tous les
dommages causés directement ou indirectement par une mauvaise installation
Communauté EVGA Online:
Pour visiter les forums EVGA http://fr.evga.com/forums.
Utilitaire EVGA Precision XTM:
EVGA OC Scanner X:
d’un des composants. Si vous ne vous sentez pas à l’aise avec le fait de monter vous-même vos
composants, veuillez consulter un technicien informatique qualifié. Les dommages causés à votre système,
à la carte graphique, ou à vous-même, peuvent être occasionnés si l’appareil est sous tension pendant
l’installation. Maintenant que vous avez préparé votre ordinateur, vous êtes prêt à installer votre carte
graphique.
Présentant son tout nouveau look, cette application très appréciée a été adaptée pour montrer toutes les nouvelles
fonctions de GeForce. www.evga.com/ocscanner.
Démarrage rapide
EVGA FAQ:
1. Avant l’installation de la nouvelle carte graphique, il est recommandé de supprimer tous les pilotes de
la carte graphique actuelle.
Crée dès son lancement pour supporter les nouvelles technologies au coeur du GPU, EVGA Precision XTM redéfinit
ce qu’un logiciel d’overclocking devrait être. www.evga.com/precision.
Pour effectuer des recherches dans notre base de données ou dans notre FAQ produits, veuillez visiter
www.evga.com/faq.
2. Eteindre l’ordinateur et tous les périphériques (clavier, souris, etc.).
EVGA GamingTM:
4. Retirer votre ancienne carte graphique (si vous en avez une) de votre ordinateur. Vous y parviendrez en
dévissant les vis de fixation et en retirant la carte de son slot (après avoir actionnés les fermoirs des ports
PCI-E) en tirant tout droit la carte vers vous.
(Note: si votre carte mère possède un chipset graphique intégré, vous pouvez avoir besoin de le désactiver
avant de continuer l’installation, veuillez vous référer aux instructions du constructeur de votre carte mère.)
Si vous vivez pour jouer, cet endroit est pour vous! Nous avons les meilleurs serveurs dédiés, tournois, et prix.
Veuillez visiter www.evga.com/gaming.
Français
29
3. Déconnecter le câble d’affichage de votre connecteur d’écran à l’arrière de votre ordinateur.
30
Français
5. Aligner votre nouvelle carte graphique avec le port approprié (suivre l’illustration ci-dessous) et appuyer
fermement jusqu’à que la carte soit complètement insérée. Faites attention à ce que les contacteurs métalliques
de la carte soient complètement intégrés dans le port d’extension.
6. Connecter les câbles PCI d’alimentation à la nouvelle carte graphique si applicable.
(suivre l’illustration ci-dessous).
7. Replacer la vis de fixation pour maintenir la carte en place et refermer votre châssis en remettant le panneau.
8. Reconnecter tous les périphériques et accessoires que vous aviez désinstallé lors de la préparation de
l’ordinateur et connectez le câble de votre écran sur le connecteur adapté de votre nouvelle carte graphique.
Installation du SLI (en option)
Il est possible de relier certaines des cartes graphiques EVGA entre elles pour améliorer les performances,
cela s’appelle : le SLI. Veuillez suivre les instructions suivantes, et notez que pour fonctionner en SLI les cartes
graphiques doivent être identiques. Pour regarder une vidéo d’installation du SLI, veuillez visiter
www.evga.com/slivideo. Vous pouvez aussi consulter notre FAQ dédié au SLI
http://www.evga.com/support/faq/?f=58605.
9. Allumer votre système, démarrer votre système d’exploitation, et installer les pilotes appropriés.
Installation détaillée du matériel
Les ports PCI Express (PCI-E) et PCI sont différents, avant toute installation, il est impératif de vérifier quel port
correspond au bus de votre carte graphique, veuillez vérifier que votre carte mère possède un port compatible
avec votre carte graphique.
Carte graphique PCI Express (PCI-E)
Installer votre première carte graphique
GeForce dans le premier port PCI
Express x16.
2-way SLI: Installer votre seconde carte
graphique GeForce dans le slot PCI Express
x16 secondaire. Connecter les deux cartes
ensemble en utilisant le pont connecteur
2-way SLI bridge livré avec votre carte mère
SLI-ready.
3-way SLI: Installer la troisième carte
graphique GeForce dans le PCI Express
tertiaire de votre carte mère. Connecter
les cartes GeForce ensemble en utilisant
le pont connecteur 3-way livré avec votre
carte mère SLI-ready.
Carte graphique PCI
TT
BO
Si votre carte graphique est équipée d’un connecteur d’alimentation additionnel, il doit être connecté pendant
l’installation. Le connecteur d’alimentation additionnel assure que la carte reçoit l’alimentation nécessaire pour
fonctionner à un niveau de performances optimal. Votre carte peut exiger un connecteur d’alimentation
additionnel à 6 ou 8 broches PCI Express (PCI-E) ou plus. Veuillez noter que le connecteur d’alimentation PCI-E à
8 broches n’est pas le même que le connecteur d’alimentation du processeur à 8 broches. Veuillez vous reporter à
l’illustration ci-dessous.
Toujours utiliser d’abord les câbles de votre alimentation, n’utiliser les câbles fournis avec ce produit que lorsque
votre alimentation ne possède pas les connecteurs adaptés.
8 broches ou 6+2 broches
6 broches
OM
Cartes graphiques nécessitant une source d’alimentation additionnelle
2-way SLI
3-way SLI
4-way SLI
Pour toutes les configurations SLI, veuillez consulter le manuel de votre carte mère pour un placement approprié de vos cartes dans les
slots PCI-Express. Toujours installer les cartes dans un slot 8x ou 16x, car un SLI ne fonctionnera pas dans un 4x.
Les pont SLI ci-dessus sont inclus avec votre carte mère SLI et dépendent du type de configuration utilisé. Afin que votre configuration SLI
fonctionne correctement, il vous faut opter pour le pont SLI correspondant au nombre de cartes graphiques que vous souhaitez connecter.
Installation des logiciels
Lors du premier démarrage de votre ordinateur après l’installation de votre nouvelle carte graphique, il se peut
que Windows détecte un nouvel équipement et tente d’installer les pilotes compatibles. Si vous avez l’opportunité
d’empêcher cette installation, faites-le, ou attendez que Windows la finalise (un redémarrage du système peut
s’avérer nécessaire).
Après que cette opération ait été réalisée, il est nécessaire d’installer les pilotes compatibles avec votre carte
graphique. Pour commencer, il est recommandé de télécharger les derniers pilotes sur www.evga.com/support,
ou d’installer les pilotes présents sur le DVD d’installation EVGA.
Français
31
32
Français
Note: Vous pourriez avoir à réinstaller les pilotes, si vous installez une seconde carte graphique dans une
configuration (PC) déjà existante.
Dépannage rapide
Note: Si le lancement automatique de l’installation n’apparaît pas à l’écran, l’installation peut être lancée
manuellement en cliquant sur « Ordinateur » ou « Mon ordinateur » et en effectuant un double clic sur l’icône de
votre lecteur DVD/CD. Après cela, veuillez effectuer un double clic sur le fichier autorun.exe.
Problème: Au démarrage, vous n’entendez qu’une série de bips sortant de votre ordinateur mais ne voyez aucune
image sur l’écran.
Une fois que le menu de l’installation automatique apparaît, sélectionner l’option « Install Video Drivers » pour
démarrer l’installation des pilotes.
Note: Pendant l’installation, vous pouvez être interrompu par un message d’alerte de Microsoft WHQL
(Windows Hardware Quality labs), veuillez sélectionner « continuer » ou « installer le pilote ».
Réglage d’un affichage multiple
Le panneau de contrôle NVIDIA vous permet de configurer une installation multi-écrans, par le biais de plusieurs
écrans d’ordinateurs ou en combinant un ordinateur et un HDTV. La possibilité d’utiliser plusieurs écrans sous
Windows permet de simplifier les taches du quotidien, allié à une HDTV vous pouvez regarder un film tout en
suivant l’exécution d’une autre tâche. La configuration de plusieurs écrans peut être effectuée depuis la
sous-section du panneau de contrôle NVIDIA “Réglage de plusieurs écrans”. Pour accéder au panneau de
configuration NVIDIA, veuillez simplement effectuer un clic droit sur le bureau et le sélectionner.
Mode standard
Sélectionner en cliquant la case pour l’écran que vous souhaité utiliser en tant qu’écran unique. Cela désactivera la
seconde sortie, il s’agit du réglage par défaut si vous n’avez qu’un seul écran connecté à la carte graphique.
Mode étendu
Sélectionner en cliquant 2 cases ou plus pour activer plus d’un écran. Veuillez ensuite faire un clic droit sur les
écrans de la section au dessous d’eux pour choisir le mode d’affichage désiré. Le mode bureau étendu permet de
contrôler indépendamment la résolution et le taux de rafraîchissement de chaque écran.
Dupliquer l‘affichage
Sélectionner en cliquant 2 cases ou plus pour activer plus d’un écran. Faites un clic droit sur les moniteurs pour
les régler sur duplication d’affichage et sélectionner l’écran primaire. Dupliquer l’affichage implique de régler un
affichage identique sur chacun des écrans.
Cause: Le bip est un signal d’alerte provenant du BIOS de votre carte mère qui vous avertit qu’elle n’arrive pas à
initialiser la/le(s) carte(s) graphique(s), ce qui peut signifier l’une des 4 choses suivantes:
1)
2)
3)
4)
La carte n’est pas correctement installée;
Il y a un problème avec le port de la carte graphique;
L’alimentation supplémentaire via PCI-E n’est pas bien branchée à la carte graphique;
Il y a un problème avec la carte graphique.
Solution: Enlever la carte graphique de votre ordinateur et réinsérer-la. Assurez-vous que votre carte est
correctement insérée dans le port, et essayer de redémarrer l’ordinateur. Si le problème persiste, cela signifie que
le problème vient de la carte mère soit de la carte graphique. Nous vous conseillons de contacter le constructeur
de votre matériel pour obtenir son assistance.
Problème: Ecran noir lors du boot dans Windows.
Cause: La vidéo intégré de votre carte mère n’a pas été désactivé avant d’installer la nouvelle carte graphique,
et/ou le pilote graphique n’a pas été correctement désinstallé.
Solution: Assurez-vous que la vidéo intégrée a été désactivée par le biais du BIOS de votre carte mère ou par celui
de Windows, et que les pilotes de votre ancienne solution graphique ont été correctement désinstallés. Après cela,
réinstaller la nouvelle carte graphique, connecter le câble de l’écran, et si nécessaire, connectez l’alimentation
supplémentaire à votre nouvelle carte, avant de redémarrer votre ordinateur et de mettre à jour vos pilotes.
Problème: Les jeux freeze ou plantent.
Solution: Vérifiez que l’ensemble des pilotes de votre PC et périphériques sont installés et mis à jour, ce qui inclus
les pilotes de votre carte mère, de votre carte graphique, de votre carte son. Réinstaller la dernière version de
DirectX (disponible sur le CD d’installation, et le jeu lui-même. Veuillez aussi vérifier que l’ensemble des mises à
jour et patchs du jeu ont été installés.
Activer le SLI (en option)
Si vous installez plusieurs cartes en SLI, vous aurez besoin d’activer le SLI pour obtenir les meilleurs performances
pour votre système. Dans le panneau de contrôle NVIDIA, sélectionner “Réglages de la configuration du SLI et de
PhysX” pour activer le SLI. Enfin veuillez sélectionner “Maximiser les performances 3D” et “appliquer”.
Pour regarder une vidéo présentant la procédure d’installation du SLI, veuillez vous rendre sur
www.evga.com/slivideo.
Français
33
Problème: Où trouvez les derniers pilotes pour ma carte graphique?
Solution: Les derniers pilotes sont téléchargeables @ www.evga.com/support/drivers.
34
Français
Problème: Quand je regarde mon PC sur une TV HD, le bureau n’est pas visible en entier, et certaines zones,
comme la barre des tâches, n’apparaissent pas à l’écran.
Informations sur la conformité
Solution: Pour commencer, assurez-vous que vous utilisé la bonne résolution d’affichage. Si c’est le cas, essayez
d’ajuster l’image avec la fonction « Resize Desktop » qui vous permet de compenser l’overscan de votre écran TV
HD jusqu’à ce que les éléments manquants apparaissent. NVIDIA recommande d’utiliser la fonctionnalité shift de
l’overscan pour déplacer le bureau. Vous pouvez y accéder depuis la section « TV Settings » dans le panneau de
contrôle NVIDIA.
Conformité avec la norme FCC
Cet appareil est conforme aux dispositions de la section 15 de la réglementation FCC. Son fonctionnement est soumis aux deux conditions
suivantes : cet appareil ne doit pas provoquer d’interférences préjudiciables et doit accepter toute interférence reçue, même celles qui
sont susceptibles d’entraîner un disfonctionnement indésirable. Cet appareil a subi des tests de contrôle et a été déclaré conforme aux
restrictions imposées aux appareils numériques de classe B par la section 15 de la réglementation FCC. Ces restrictions sont destinées à
assurer une protection raisonnable contre les interférences indésirables lorsque cet appareil fonctionne dans un environnement résidentiel.
Cet appareil génère, exploite et peut émettre un rayonnement de fréquence radio; en cas d’installation ou d’utilisation non conforme aux
instructions fournies par le fabricant, il peut provoquer des interférences indésirables avec les réceptions radio. Rien ne garantit cependant
que dans certaines installations spécifiques, aucune interférence ne se produira. Si cet équipement provoque des interférences indésirables
avec les réceptions radio et TV (ce que vous pourrez déterminer en allumant et éteignant l’appareil), nous vous encourageons vivement à y
remédier en prenant l’une des mesures suivantes : augmentez la distance séparant votre équipement et le récepteur ; brancher l’appareil
sur une prise de courant située sur un circuit différent de celui du récepteur ; contactez un détaillant ou technicien qualifié pour obtenir une
assistance complémentaire. L’utilisation de câbles blindés pour brancher le moniteur sur la carte graphique est obligatoire afin de satisfaire
à la réglementation FCC. Tous changements ou modifications qui ont été apportés à ce produit sans l’approbation expresse de la partie
responsable de sa conformité pourraient entraîner l’annulation du droit d’utilisation de ce matériel.
Note: Pour les problèmes qui ne sont pas listés ci-dessus, veuillez visiter la base de donnée EVGA et son FAQ sur
le lien suivant www.evga.com/faq.
Support additionnel
Si vous avez besoin d’aide pour installer votre carte graphique EVGA ou résoudre un problem technique lié à
celle-ci, veuillez visiter le support technique sur notre site web www.evga.com/support. Vous pourrez y télécharger
les pilotes, utiliser notre base de données, et poser des questions à nos services techniques et commerciaux.
Visitez nos forums http://fr.evga.com/forums.
Vous pouvez nous contacter par téléphone ou par mail. Avant de contacter le service le client, veuillez consulter
ce manuel. Si vous devez contacter le service client, nous vous prions de vous doter de la configuration de votre
système, de la référence et du numéro de série. Vous aurez besoin d’enregistrer votre produit avant de contacter le
service client, vous pouvez effectuer l’enregistrement sur le lien suivant www.evga.com/register.
• 9:00 – 18:00 Support technique téléphonique (du lundi au vendredi, heure locale)
• Support téléphonique: Amérique du Nord (888) 880-EVGA (3842) - EU +49/89-189-049-11
• Support technique en ligne: www.evga.com/support
Un programme de garantie qui répond à vos besoins
La plupart des produits EVGA sont couverts par une garantie de 3 ans. Pour plus d’informations, veuillez visiter
http://fr.evga.com/support/warranty.
Déclaration “CE” de conformité
Directive CEM 89/336/CEE et Amendement 92/32/CEE, Appareils numériques de classe B EN 500081-14, Norme générique pour les
émissions liées à des produits domestiques, commerciaux et d’industrie légère (EN 55022/CISPR 22, Limites et méthodes de mesures
radioélectriques). (EN 55022/CISPR 22, Limites et méthode de mesure des caractéristiques de perturbations radioélectriques produites
par les appareils de traitement de l’information). Avertissement : cet appareil est un produit de classe B. Dans un environnement
domestique, ce produit peut provoquer des interférences radioélectriques, auquel cas l’utilisateur est appelé à prendre les mesures
appropriées. EN 50082-1, Norme générique d’immunité pour les produits domestiques, commerciaux et d’industrie légère (CEI 801-2, CEI
801-3, CEI 801-4).
Conformité avec Macrovision Corporation
Cet appareil est protégé par les brevets américains no. 4.631.603, 4.577.216 et 4.819.098 et d’autres droits relatifs à la propriété
intellectuelle. L’utilisation de la technologie Copy Protection de Macrovision dans cet appareil doit être autorisée par Macrovision et doit
rester domestique ou « à la carte » (“Pay-per-View”), sauf autorisation écrite délivrée par Macrovision. Modifier ou démonter le dispositif de
cet appareil est interdit.
Déclaration WEEE
Dans l’Union Européenne (U.E.), cette étiquette indique que ce produit ne doit pas être jeté avec les déchets
ménagers. Il doit être déposé dans un container approprié permettant la récupération et le recyclage, en accord avec
les directives WEEE de la législation européenne (Directive 2002/96/EC).
Informations légales
2001-2015 EVGA EVGA Corporation, le logo EVGA et leurs combinaisons sont des marques de EVGA Corp. Tous les noms de la marque,
noms de société, marques de service, logos et marques de la société ou de ses sociétés affiliées ou concédants la licence sont des
marques commerciales ou des marques déposées de la société ou de ses filiales, sociétés affiliées ou concédants de licence aux
Etats-Unis et d’autres pays . D’autres sociétés, produits et noms de services peuvent être des marques déposées ou des marques de
service de tiers. EVGA se réserve le droit de résilier cette licence si il s’agit d’une violation de ses conditions ou de manquement par
l’Acquéreur d’origine. En cas de résiliation, pour quelque raison que toutes les copies du logiciel et le matériel doivent être immédiatement
retournés à EVGA et l’acheteur d’origine devra répondre à EVGA.com CORP pour tous les dommages subis à la suite de la violation ou du
manquement “.
Français
35
36
Français
Índice
Visão geral
Visão geral ............................................................................................. 38
Instalação do hardware ......................................................................... 39
Obrigado por adquirir uma placa de vídeo EVGA autêntica. A EVGA é uma fornecedora autorizada de soluções
NVIDIA® que fabrica placas 3D de alta performance. Nossas placas de vídeo são totalmente compatíveis com os
requisitos gráficos 2D e 3D mais recentes.
Início rápido ........................................................................................... 39
Antes de instalar nossa placa de vídeo EVGA, recomendamos firmemente registrar o produto para receber suporte
e garantia totais. Você pode registrar sua placa on-line em www.evga.com/register.
Detalhes da instalação do hardware .................................................... 40
Placas de vídeo exigem energia adicional ........................................... 40
Instalação de SLI ................................................................................... 41
Instalação do software .......................................................................... 41
Configuração de vários monitores ........................................................ 42
Soluções rápidas ................................................................................... 43
A EVGA também oferece uma ampla gama de programas e serviços para aprimorar a experiência do cliente,
incluindo, mas não se limitando a:
Programa RMA Avançado EVGA (EAR):
Um programa para proteger você e seu produto em caso de falha. Para obter mais detalhes, acesse
www.evga.com/support/ear.
Programa Step-Up® EVGA:
Para que nossos clientes tenham mais flexibilidade ao comprarem placas de vídeo EVGA, criamos o programa
Step-UP® EVGA. Para obter mais detalhes, acesse www.evga.com/stepup.
Comunidade EVGA on-line:
Suporte adicional ................................................................................... 44
Para visitar os fóruns da comunidade EVGA, acesse www.evga.com/forums.
Informações de conformidade .............................................................. 45
Precision XTM EVGA - para algumas placas de vídeo:
Projetado do zero para oferecer suporte às novíssimas tecnologias da GPU, o EVGA Precision XTM redefine o
conceito de software de overclocking. Acesse www.evga.com/precision.
Scanner X OC EVGA:
Com visual e layout totalmente novo, esse popular aplicativo foi adaptado para mostrar todos os recursos vitais da
sua GeForce. Acesse www.evga.com/ocscanner.
Perguntas e resposta sobre EVGA:
Pesquise nossa base de conhecimento e a seção de perguntas e respostas sobre o produto em
www.evga.com/faq.
GamingTM EVGA:
Se você gosta de jogos, esse é o lugar certo para você! Temos os melhores torneios, prêmios e servidores de
jogos. Acesse www.evga.com/gaming.
Português
37
38
Português
Folding@EVGA:
Computação distribuída para o bem de todos. Você sabia que é possível transformar sua placa de vídeo em um
supercomputador compartilhado? Acesse www.evga.com/folding.
Redes sociaisTM EVGA:
Fique atualizado sobre concursos, promoções, dicas técnicas, novos produtos, versões de drivers e muito mais
acompanhando a EVGA em sua rede social favorita! Acesse www.evga.com/sonet.
5. Alinhe a nova placa com o slot apropriado (consulte a ilustração abaixo) e pressione-a firmemente até que a
placa esteja totalmente encaixada. Certifique-se de que os contatos metálicos da placa estejam
completamente encaixados no slot de expansão.
6. Conecte a fonte de alimentação PCI Express (PCI-E) suplementar à placa, se aplicável. (Veja a ilustração
abaixo.)
7. Recoloque o parafuso para fixar a placa no lugar e reinstale a tampa do computador.
8. Reconecte quaisquer dispositivos desligados durante a instalação e, em seguida, conecte o cabo de vídeo do
monitor à sua nova placa de vídeo.
MODS RIGSTM:
9. Ligue a alimentação elétrica do sistema, inicie o sistema operacional e instale os drivers apropriados.
Patrocínios de $1K a cada 200 posts. Mostre seu equipamento e faça parte de um dos mais interessantes
acontecimentos no mundo do EVGA. www.modsrigs.com.
Detalhes da instalação do hardware
EVGAontheTUBE:
Novos produtos, unboxing, descrição e características! Para mais informações, acesse
www.youtube.com/teamevga.
Os slots PCI Express (PCI-E) e PCI são diferentes, portanto, antes da instalação, verifique se o tipo de
barramento da placa de vídeo e o do slot disponível são iguais.
Instalação do hardware
Preparação do computador
AVISO: Desligue a energia elétrica de seu sistema e descarregue a energia estática
de seu corpo tocando em uma superfície aterrada — por exemplo, a superfície
metálica da fonte de alimentação ou o chassi — antes de executar qualquer
procedimento de hardware A EVGA não assume qualquer responsabilidade por
nenhum dano causado direta ou indiretamente devido à instalação inadequada
de qualquer componente. Se não se sentir seguro para executar o procedimento de instalação, consulte
um técnico de computadores qualificado. Pode ocorrer danos aos componentes do sistema, à placa de
vídeo e ferimentos se a energia elétrica for ligada durante a instalação. Agora que seu computador está
preparado, você está pronto para instalar a placa de vídeo.
Início rápido
1. Antes de começar a instalação, recomendamos remover completamente todos os drivers de sua placa de
vídeo atual (caso você tenha uma).
2. Desligue a energia do computador e todos os dispositivos conectados (teclado, mouse etc.).
Placas de vídeo PCI Express (PCI-E)
Placa de vídeo PCI
Placas de vídeo exigem energia adicional
Se sua placa de vídeo for equipada com um adaptador de energia suplementar, se faz necessário que essa esteja
conectada no momento da instalação. Esse adaptador de energia suplementar garante que sua placa de vídeo
receba a força necessária que permitirá um funcionamento com ótimos níveis de performance. Sua placa pode
exigir um ou mais conectores de alimentação suplementares 6 ou 8-pinos PCI Express (PCI-E). Note que que o
conector de alimentação 8-pinos PCI-E não é o mesmo conector de alimentação 8-pinos da CPU. Por favor, veja
ilustração abaixo.
Sempre use em primeiro lugar os cabos de alimentação PCIE de sua fonte de alimentação, só uso adaptadores
incluídos quando seu fonte de alimentação não conter os conectores apropriados.
8 pinos ou 6+2 pinos 6 pinos
3. Desconecte o cabo de vídeo de seu adaptador de vídeo atual na parte posterior do computador.
4. Remova a placa de vídeo atual (se houver) do computador. Faça isso removendo o parafuso de fixação e
puxando a placa para fora. Observe que sua placa-mãe pode ter uma trava PCI Express (PCI-E) no slot que
precisa ser pressionada primeiro.
(OBSERVAÇÃO: se sua placa-mãe possuir vídeo integrado ou on-board, pode ser necessário desabilitá-lo
primeiro; entre em contato com o fabricante do sistema ou da placa-mãe para obter informações adicionais.)
Português
39
40
Português
Instalação de SLI (opcional)
Observação: Se adicionar uma placa secundária a um PC existente, pode ser necessário a instalação do driver
novamente.
Em algumas placas de vídeo EVGA é possível ligar a várias placas em conjunto para melhorar o desempenho, isso
é chamado SLI. Para instalar várias placas em SLI , siga as instruções abaixo, por favor, note que em
configurações SLI as placas devem ser do mesmo modelo. Para uma visão geral em vídeo de configuração SLI,
por favor acesse www.evga.com/slivideo. Você pode também acessar o FAQ sobre SLI em
http://www.evga.com/support/faq/?f=58605.
Observação: Se o menu de instalação automática de drivers não aparecer, ele poderá ser iniciado manualmente
clicando-se no ícone “Computador” ou “Meu Computador” e clicando-se duas vezes no ícone da unidade de DVD/
CD. Após isso, clique duas vezes no arquivo “autorun.exe”.
Depois que o menu de instalação automática aparecer, selecione o botão “Instalar Drivers de Vídeo”. Isso iniciará
o processo de instalação de drivers.
Observação: Durante a instalação, pode ser exibido o aviso do Microsoft WHQL (Windows Hardware Quality Labs),
selecione a opção “Continuar” ou “Instalar este driver assim mesmo”, pois é seguro fazer isso.
Configuração de vários monitores
Instale sua primeira placa de vídeo
GeForce no slot PCI Express x16
principal.
SLI de 2 vias: Instale sua segunda placa
de vídeo GeForce no Slot PCI Express x16
secundário. Conecte os dois cartões juntos
usando o conector de ponte SLI 2-way que
veio com sua placa-mãe SLI-ready.
SLI de 3 vias: Instale o terceiro cartão
GeForce no terceiro slot PCI Express
da placa-mãe. Ligue as placas GeForce
usando o conector de ponte SLI 3-way que
veio com sua placa-mãe SLI-ready.
Modo Único
OM
TT
BO
SLI de 2 vias
SLI de 3 vias
SLI de 4 vias
Para TODAS as configurações SLI, por favor consulte o seu manual de usuário da placa-mãe para a instalação correta das placas de
vídeo nos slots PCI Express fornecidos. Instale sempre as placas em slots 8x ou 16x, já que um SLI não funcionará em 4x, a informação
específica de slot deve estar disponível no manual de usuários da placa-mãe.
As pontes SLI acima são fornecidas com a sua placa-mãe compatível com SLI dependendo das configurações que ela suporta. Para
que sua configuração SLI funcione adequadamente, você precisa usar a ponte apropriada com base no número de placas que está
conectando.
Marque apenas a caixa de seleção do monitor que deseja usar como única tela. Isso desabilitará a saída
secundária e é a configuração padrão se você tiver apenas um monitor conectado à placa de vídeo.
Modo Estendido
Marque duas ou mais caixas de seleção para ativar mais de um monitor. Após marcá-las, clique com o botão
direito nos monitores na seção abaixo para definir o modo desejado. O modo de área de trabalho estendida pode
controlar as configurações de resolução e taxa de atualização independentemente para cada monitor.
Telas Duplicadas
Marque duas ou mais caixas de seleção para ativar mais de um monitor. Após marcá-las, clique com o botão
direito nos monitores da seção abaixo para configurá-los para o modo de tela duplicada e selecione o monitor
principal. Telas duplicadas exigem resolução idêntica em ambos os monitores.
Instalação do software
Quando você inicializa seu computador pela primeira vez após instalar sua nova placa de vídeo, o Windows pode
detectar um novo dispositivo de exibição e tentar instalar os drivers. Se ele oferecer a opção para cancelar, faça-o.
Caso contrário, aguarde até que o Windows complete a instalação (uma reinicialização poderá ser necessária).
Após a conclusão desse processo, é necessário instalar os drivers recomendados para sua placa de vídeo. Para
começar, recomenda-se fazer o download dos drivers mais recentes em www.evga.com/support, ou alternativa,
você pode instalar o driver com o DVD de Instalação EVGA.
Português
O Painel de Controle NVIDIA permite que você configure um ambiente de múltiplas telas, seja para vários
monitores de um computador ou usando um monitor em conjunto com uma HDTV. A possibilidade de utilizar
múltiplas telas no Windows pode simplificar várias atividades do dia-a-dia extendendo a área de trabalho do
Windows, ou fazer o trabalho com uma HDTV ainda mais fácil permitindo que você assista a um filme em uma das
telas, enquanto realiza outras tarefas na outra. As configurações para telas múltiplas podem ser feitas na
subseção “Configurar Vários Monitores” localizada no Painel de Controle NVIDIA. Para acessar o painel de
controle NVIDIA basta clicar com o botão direito em sua área de trabalho e selecionar “Painel de Controle NVIDIA”.
41
Habilitação de SLI (opcional)
Se você instalou várias placas em modo SLI, você precisa habilitar o SLI para obter o máximo desempenho de
seu sistema. Para habilitar o SLI, visite o painel de controle da NVIDIA clicando com o botão direito na área de
trabalho, e selecione “Painel de Controle NVIDIA”. Então selecione “Configurar SLI e PhysX”. Por fim, selecione
“Maximizar Performance 3D” e clique em aplicar. Para ter uma visão geral em vídeo do procedimento de instalação do SLI, por favor acesse www.evga.com/slivideo.
42
Português
Soluções rápidas
Problema: Ao exibir meu PC em uma HDTV, nem toda a área de trabalho fica visível e determinadas partes, como
a barra de tarefas do Windows, ficam fora da tela.
Problema: Durante a inicialização, tudo que você ouve é uma sequência de bips em seu computador, mas não há
imagem na tela.
Solução: Em primeiro lugar, certifique-se de ter definido a resolução correta de sua tela. Em caso afirmativo, tente
ajustar o recurso “Underscan”. Isso permite compensar o overscan da HDTV de modo que toda a área de trabalho
fique visível. Nesse caso, para exibir os elementos que ficam fora da tela, a NVIDIA recomenda usar o recurso
Overscan Shift para expandir a área de trabalho. Você pode acessar os controles de Overscan Shift na página de
Configurações de TV do painel da NVIDIA.
Motivo: Os bipes são um aviso do BIOS da placa-mãe informando não ser possível inicializar a placa de vídeo;
isso pode significar uma das quatro situações a seguir:
1)
2)
3)
4)
A placa não está encaixada corretamente.
Há um problema no slot de placa de vídeo da placa-mãe.
A energia suplementar PCI-E não está conectada à placa de vídeo.
Há um problema na placa de vídeo.
Solução: Remova a placa do computador e instale-a novamente, certificando-se de encaixá-la corretamente no
slot, e tente iniciar o computador novamente. Se isso não funcionar, o problema pode estar na placa-mãe ou na
placa de vídeo e você deve entrar em contato com o fabricante do hardware para obter assistência.
Problema: O dispositivo de vídeo integrado não foi desabilitado antes de instalar a placa de vídeo, e/ou drivers de
vídeo anteriores não foram devidamente desinstalados.
Motivo: O adaptador de vídeo integrado não foi desabilitado antes da instalação da nova placa de vídeo e/ou os
drivers do adaptador de vídeo anterior não foram desinstalados.
Solução: Certifique-se de que o adaptador de vídeo foi desabilitado por meio do BIOS da placa-mãe ou pelo
Gerenciador de Dispositivos do Windows antes da instalação da nova placa de vídeo e que você desinstalou os
drivers pelo Painel de Controle do Windows. Após a instalação da nova placa, conecte o cabo do monitor e, se
necessário, a fonte de alimentação suplementar à nova placa antes de inicializar o sistema.
OBSERVAÇÃO: Para problemas não listados neste documento, acesse a base de conhecimento da EVGA em
www.evga.com/faq.
Suporte adicional
Para solicitar qualquer assistência na instalação ou resolução de problemas de sua placa de vídeo EVGA, acesse a
seção de suporte de nosso site na Web em www.evga.com/support. Lá você poderá baixar drivers, verificar nossa
ampla base de conhecimento e enviar consultas técnicas e de suporte. Visite os fóruns
www.evga.com/forums.
Como alternativa, podemos ser contatados por telefone. Antes de entrar em contato com o serviço de
atendimento ao cliente, leia este manual. Se houver necessidade de entrar em contato com o serviço de
atendimento ao cliente, tenha à mão a configuração do sistema, o modelo e o número de série de sua placa.
Você precisará registrar seu produto para que um técnico de suporte possa ajudá-lo. Você pode registrar sua
placa on-line em www.evga.com/register.
• Horário de funcionamento: Suporte técnico por telefone 24x7
• Suporte por telefone: (888) 880-EVGA (3842)
• Site de suporte técnico na Web: www.evga.com/support
Problema: travamento ou interrupção de jogos.
Solução: Verifique se todos os drivers de hardware necessários estão instalados e atualizados, incluindo os drivers
de chipset, vídeo e placa de som. Reinstale a versão mais recente do DirectX (localizada no disco de instalação da
EVGA) ou do jogo. Além disso, verifique se o jogo possui todos os patches necessários instalados disponibilizados
pelo desenvolvedor.
Programa de garantia de acordo com suas necessidades
A maioria de produtos EVGA são cobertos com ganrantia de 3 anos. Para maiores informações acesse
www.evga.com/support/warranty.
Problema: Onde posso encontrar os drivers mais recentes de minha placa de vídeo?
Solução: Eles podem ser encontrados em www.evga.com/support/drivers.
Português
43
44
Português
目次
Informações de conformidade
Informações de conformidade com a FCC
Este dispositivo segue o artigo 15 das Regulamentações da FCC. A operação está sujeita às duas condições a seguir:
Este dispositivo não pode causar interferência nociva e deve aceitar qualquer tipo de interferência recebida, inclusive interferências que
possam causar operação indesejada. Este equipamento foi testado e se encontra em conformidade com os limites de um dispositivo
digital de Classe B, conforme o artigo 15 das Regulamentações da FCC. Esses limites foram criados para oferecer proteção contra
interferência nociva em uma instalação residencial. O equipamento gera, usa e pode irradiar energia de freqüência de rádio e, se não for
instalado e usado de acordo com as instruções do fabricante, pode causar interferência nociva em comunicações de rádio. Entretanto,
não há garantia de que a interferência não ocorra em uma instalação em particular. Se o equipamento causar interferência nociva à
recepção de rádio ou de televisão, o que pode ser determinado ligando e desligando o equipamento, o usuário deve tentar corrigir a
interferência por uma ou mais das medidas a seguir:
Aumentar a distância entre o equipamento e a origem do sinal. Conectar o equipamento a uma tomada em um circuito diferente daquele
em que a fonte de sinal está conectada. Consultar o distribuidor ou um técnico de computador com experiência no assunto para obter
ajuda. O uso de cabos protegidos para conexão do monitor à placa de gráficos é necessário para garantir a conformidade com as
regulamentações da FCC. Mudanças ou modificações na unidade não aprovadas expressamente pela parte responsável pela
conformidade anulariam a autoridade do usuário para operar o equipamento.
概要 ......................................................................................................... 47
ハードウェアのインストール ...................................................................... 48
クイックスタート ....................................................................................... 48
ハードウェアのインストールの詳細 ........................................................... 49
外部電力の必要なグラフィックカード ........................................................ 49
SLI環境の構築 ......................................................................................... 50
ソフトウェアのインストール ....................................................................... 50
Informações de conformidade com a CE
Diretiva EMC 89/336/EEC e emenda 92/31/EEC, sobre Dispositivos digitais de classe B EN 50081-14, Padrão de emissões genéricas para
produtos residenciais, comerciais e industriais leves (EN 55022/CISPR 22, Limites e métodos de medição de rádio). (EN 55022/CISPR
22, Limites e métodos de medição de equipamento de tecnologia de informações características de interferência de rádio) Aviso: É um
produto de Classe B. Em um ambiente doméstico, esse produto pode causar interferência de rádio e em tal caso, o usuário pode precisar
tomar as medidas adequadas. EN 50082-1, Padrão de imunidade genérica para produtos residenciais, comerciais e industriais leves (IEC
801-2, IEC 801-3, IEC 801-4).
マルチディスプレイを構築する方法 ........................................................... 51
トラブルシューティング .............................................................................. 52
その他サポートについて .......................................................................... 53
互換性について ....................................................................................... 54
Aviso sobre produtos da Macrovision
Este produto pode incorporar tecnologia protegida por direitos autorais que está protegida por patentes norte-americanas e outros direitos
de propriedade intelectual. O uso dessa tecnologia de proteção de direitos autorais deve ser autorizado pela Macrovision e deve ser usado
apenas para exibições domésticas e outras exibições limitadas a menos que seja autorizado de outra forma pela Macrovision. A
engenharia inversa ou a desmontagem é proibida.
Informações sobre marcas registradas
©2001-2015 Todos os direitos reservados. O manual é de propriedade da EVGA Corp e está protegido por direitos autorais, marcas
registradas e outras leis de propriedade intelectual e nenhuma arte pode ser reproduzida, transmitida, armazenada ou traduzida para
qualquer outro computador ou língua estrangeira, sem a expressa autorização por escrito da EVGA Corp. EVGA Corp EVGA, o logotipo
EVGA e suas combinações são comerciais da EVGA Corp. Todas as marcas e empresas são marcas registradas das respectivas
empresas e não podem ser utilizadas sem permissão. Todas as outras marcas são de propriedade de seus respectivos proprietários.
As informações contidas neste manual podem estar sujeitas a alterações sem aviso prévio. A EVGA se reserva o direito de rescindir esta
licença, caso haja violação de seus termos ou inadimplência do comprador original. Após o término, por qualquer motivo, todas as cópias
de software devem ser imediatamente devolvidas à EVGA e o comprador será responsável por todo quaisquer danos sofridos como
resultado da violação ou omissão. As informações aqui contidas estão sujeitas a alterações sem aviso prévio e é fornecida como é sem
qualquer garantia de qualquer tipo (explícita ou implícita). Os usuários são aconselhados a obter a versão mais recentes das informações
importantes para se certificar que tal informação é correta e completa.
Português
45
46
日本語
概要
Folding@EVGA:
EVGA グラフィックカードをお買い上げいただき、
まことにありがとうございます。EVGA は NVIDIA® の認証ソリューション
プロバイダであり、高性能 3D グラフィックアクセラレーターを提供しています。弊社のグラフィックアクセラレータカード
は最新の 2D および 3D グラフィック要求を完全に満たしています。
EVGAのグラフィックスカードをインストールする前に、製品の全てのサポートや保証を受けるために製品登録することを
強くおすすめいたします。製品はインターネット上(www.evga.com/register)から登録することができます。
また、EVGA はお客様のユーザー体験を高めるため、以下を含む幅広いプログラムとサービスを提供しています。
EVGA Step-Up® プログラム:
さらに価値をもたらす分散コンピューティーングによってあなたのグラフィックスカードを共有されたスーパーコンピュ
ーターに変えることができることをご存知ですか? 詳しくは、弊社ウェブサイトをご覧ください: www.evga.com/folding
EVGA ソーシャルネットワークTM:
コンテンツ、
プロモーション、テクニカルヒント、新製品、
ドライバリリース、SLI 改善パッチなど、EVGA のソーシャルネット
ワークで常に最新情報をゲットしよう!詳しくは、弊社ウェブサイトをご覧ください: www.evga.com/sonet
EVGAontheTUBE:
新製品の開封、概要、特徴はこちら!詳細については www.youtube.com/teamevga をご覧ください。
EVGA ビデオカードのご購入に際し、お客様に柔軟な対応ができるよう、弊社では EVGA Step-Up® プログラムを立ち上
げました。詳しくは、弊社ウェブサイトをご覧ください: www.evga.com/stepup
EVGAフォーラム:
EVGA フォーラムサイトに参加する 。詳しくは、弊社ウェブサイトをご覧ください: www.evga.com/forums
ハードウェアのインストール
コンピュータを準備する
EVGA Precision XTM:
警告:ハードウェアを扱う前に、
まずコンピュータの電源を切り、電源装置の金属部分
などに触れて体内の静電気を解放してください
EVGA は、製品や部品の一部を正しくインストールしなかったことによる直接的または
間接的な損害に対し、一切の責任を負いかねます。
ご自分でインストールを行う自信
がない場合は、資格のあるコンピュータ技術者にご相談ください。
インストール中に電源を
新しい GPU テクノロジーをサポートするために一から設計された EVGA Precision X は、オーバークロッキングソフトウ
ェアのあるべき姿を再定義します。詳しくは、弊社ウェブサイトをご覧ください: www.evga.com/Precision
TM
EVGA OC Scanner X:
一新されたルックとレイアウトが特徴的なこの人気のアプリケーションは、最新の GeForce のパワーのすべてを見せるた
めに採用されました。詳しくは、弊社ウェブサイトをご覧ください: www.evga.com/ocscanner
EVGA FAQ:
入れると、
システム部品やグラフィックカードへの損傷、
またはユーザーの怪我を招く恐れがあります。
コンピュータの準備
が整ったら、
グラフィックカードのインストールを始めましょう。
クイックスタート
製品に関するよくある質問と回答例 www.evga.com/faq
1. インストールを始める前に、別のグラフィックスカードを使っている場合ドライバーを全て削除してください。
EVGA ゲームTM:
2. パソコンの電源を切り、キーボード、マウス等全てのデバイスを取り外してください。
ゲームに生きがいを感じるなら、是非ご参加ください!最高のトーナメント、賞品、ゲームサーバーを備えています。
www.evga.com/gaming にアクセスしてください。
3. コンピュータケースのカバーを取り外します。通常、
コンピュータケースのカバーはネジやクリップで固定されていま
す。詳しい方法については、
システムの取扱説明書やその他の情報をお読みください。
4. 別のグラフィックスカードを使っている場合は、
システムから取り外してください。取り外すには、固定用のネジを外し、
真っ直ぐ上に引っ張ってください。マザーボードによっては、
グラフィックスカードを取り外す際PCI-Eスロットの掛け金
を押す必要があります。
(注意点:グラフィックス統合型やオンボードのグラフィックスを搭載しているマザーボードによ
っては、事前に無効に設定する必要があります。詳しくは、パソコンのメーカやマザーボードの製造元までお問い合わ
せください。)
日本語
47
48
日本語
5. 正しいスロットに新しいグラフィックスカードを設置します。下記の図をご覧ください。新しいカードを PCI-Express スロ
ットに合わせ。
スロットにはAGP™ スロットとPCI スロットがありますので、適切な方を選び、
カードがしっかりと固定
されるまで慎重に押し込みます。
カードの金属部分が拡張スロットに完 全に押し込まれていることを確認してくださ
い。PCI-E 補助電源アダプターがある場合は、
これをカードに接続します。
6. PCI-E 補助電源アダプターがある場合は、
これをカードに接続しま。下記の図をご覧ください。
7. 固定ネジを元に戻し、
カードを固定してから、
コンピュータカバーを元に戻します。
SLI環境の構築(オプション)
一部の EVGA グラフィックカードでは、複数のグラフィックカードをリンクしてパフォーマンスを向上することができ、
これ
は SLI と呼ばれます。SLI に複数のカードをインストールするには、次の方法に従ってください。SLI のセットアップでは両
方のカードが同一モデルである必要があることに注意してください。SLI セットアップのビデオによる概要は、
www.evga.com/slivideo をご覧ください。
また、SLI に関する FAQ は、http://www.evga.com/support/faq/?f=58605
でご覧いただけます。
8. インストール時に取り外したすべてのデバイスを再接続し、モニタのビデオケーブルを新しいビデオカードに
接続します。
9. パソコンの電源を入れます。
システムを起動させた後、適切なドライバーをインストールしてください。
ハードウェアのインストールの詳細
システムにビデオカードを取り付ける前に、ビデオカードのバスタイプと利用可能なスロットとが一致するかを確認して
ください 。
PCI-Express ビデオカード
最初のPCI Express x16スロットへ一つ目
のGeForceグラフィックカードを差し込
んでください。
双方向SLI:2 つ目の GeForce グラフィックカ
ードを第 2 の PCI Express x16 スロットにイ
ンストールします。SLI 対応マザーボードに付
属の 2 ウェイ SLI ブリッジコネクタを使用して
2 つのカードを一緒に接続します。
2-way SLI
3-way SLI
3方向SLI:3 つ目の GeForce カードをマザー
ボード上の第 3 の PCI Express スロットにイ
ンストールします。SLI 対応マザーボードに付
属の 3 ウェイ SLI ブリッジコネクタを使用して
GeForce カードを一緒に接続します。
PCI ビデオカード
TT
BO
OM
外部電力を必要とするグラフィックカードトールの詳細
グラフィックスカードに予備の電源アダプタが装備されている場合、インストール時にそれを接続する必要があります。
この予備の電源アダプタは、
グラフィックスカードが充分な電力を得て最適なパフォーマンスレベルで機能できるように
確約します。
カードは 1 つ以上の 6 または 8 ピン PCI Express (PCI-E) 予備電源コネクタを必要とすることがあります。
8 ピン PCI-E 電源コネクタは 8 ピン CPU 電源コネクタとは異なるためご注意ください。下図をご参照ください。
常に電源から PCIE 電源ケーブルを第一に使用し、電源に適切なコネクタがない場合のみ、付属のアダプタを使用して
ください。
8 ピンまたは 6+2 ピン
6 ピン
4-way SLI
すべての SLI 構成について、
ご利用のマザーボードのユーザーマニュアルを参照し、PCI Express スロットに適切にカードを配置してくださ
い。SLI は 4x で動作しないため、常に 8x または 16x スロットにカードをインストールしてください。具体的なスロット情報はマザーボードの
ユーザーマニュアルを参照してください。
上記のSLIブリッジは、サポート構成に応じて、通常SLI対応マザーボード側に付属されます。
また、SLI設定が正しく動作する為には接続カード
数に基づいて適切なブリッジをご使用していただく必要がございます。
ソフトウェアのインストール
新しいグラフィックスカードを設置した後に初めてパソコンを立ち上げた際、
システムは新しいデバイスを検出し、
ドライ
バーをインストールしようとする場合があります。
もしキャンセルできる場合はキャンセルしてください。
もしキャンセルで
きない場合は、インストールが完了するまでお待ちください。再起動が必要な場合があります。
このプロセスが完了したら、適切なドライバーをインストールすることをおすすめします。開始するには、
www.evga.com/support から最新のドライバをダウンロードするか、EVGA インストール DVD
からドライバをインストールできます。
日本語
49
50
日本語
補足:も既存の PC に第 2 のカードを追加する場合、
ドライバを再インストールする必要がある場合があります。
トラブルシューティング
補足:もし自動再生によりメニューが表示されない場合、
「コンピュータ」、もしくは「マイコンピューター」の中のDVD/CD
ドライブを選択し、autorun.exeより手動で起動させることができます。
トラブル: 起動時にコンピュータから一連のビープ音が聞こえますが、画面に画像が表示されません。
自動実行のインストールメニューが表示されたら、
メニューから [ビデオドライバのインストール] (Install Video Drivers)
ボタンを選択します。
これでドライバのインストールが始まります。
補足:インストールの際、Microsoft WHQL (Windows Hardware Quality Labs)の警告画面が表示させる場合がありま
す。[続ける] (Continue)/ [インストールする] (Install Anyway) を選択すると安心です。
マルチディスプレイを構築する方法
複数のコンピュータモニターを使用する、
または HDTV と組み合わせてモニターを使用するなどを問わず、NVIDIA コ
ントロールパネルを使ってマルチディスプレイ環境の構成ができます。Windows 内でのマルチディスプレイの使用
は、Windows デスクトップエリアを拡張して日々の作業をより簡単にしたり、HDTV を容易に使用してディスプレイの
1 つで映画を観ながら、他のディスプレイで別の作業を行ったりすることを可能にします。マルチディスプレイ構成
は、NVIDIA コントロールパネルの [Set up Multiple Displays](マルチディスプレイのセットアップ)サブセクションで行う
ことができます。NVIDIA コントロールパネルにアクセスするには、デスクトップを右クリックして、[NVIDIA Control Panel]
(NVIDIA コントロールパネル)を選択するだけです。
シングルモード
単独のディスプレイとして使用するモニタだけ、チェックボックスを選択します。
シングルモードを選択すると、2 つ目の出
力が無効となります。
これは、
グラフィックカードにモニタが 1 つしか接続されていない場合の既定値です。
原因: ビープ音はマザーボード BIOS からの警告メッセージであり、ビデオカードを起動できないことを意味しています。
これには、次のいずれかの理由が考えられます。
1) カードが正しく挿入されていません。
2) マザーボードのビデオカードスロットに問題があります。
3) PCI-E 補助電源プラグがグラフィックカードに接続されていません。
4) ビデオカードスロットに問題があります。
対処法: コンピュータからカードを取り外し、
もう一度挿入してください。
カードがスロットに正しく収まるように取り付け
てください。再度コンピュータの電源を入れてください。
これでもトラブルが解決されない場合は、問題はマザーボードか
ビデオカードにあります。詳しくはハードウェアのメーカーにお問合わせください。
トラブル: 新しいグラフィックカードをインストールする前に内蔵ビデオアダプタが無効にされていない、および(または)
以前のアダプタのドライバが適切にアンインストールされていません。
原因: 新しいビデオカードを前にが無効化されていない、
または以前のディスプレイアダプタのディスプレイドライバをア
ンインストールしていない可能性があります。
対処法: 新しいビデオカードを接続前に、マザーボードの BIOS または Windows のデバイスマネージャからを無効にす
るか、
または Windows のコントロールパネルからドライバをアンインストールしてください。新しいカードを接続た後、
モニタケーブルを接続し、
システムを起動する前に、必要に応じてPCI-E 補助電源を新しいビデオに接続してください。
拡張デスクトップ
複数のモニタを有効にするには、2 つ以上のチェックボックスを選択してください。チェックを入れた後、以下のセクション
でいずれかのモニタを右クリックし、任意のモードを選択してください。拡張デスクトップモードは、解像度、色深度、
リフ
レッシュレートの設定をディスプレイごとに独立して管理することができます。互換グラフィックカード 1 つにつき、最大 2
台までのモニタを使用することができます。
複製ディスプレイ
複数のモニタを有効にするには、2 つ以上のチェックボックスを選択してください。
デスクトップ画面で右クリック後、ディスプレイモードをクローンに設定し、
プライマリーモニタを選択します。複製ディス
プレイを使用する場合は、2 つのディスプレイの解像度が同じである必要があります 。
対処法: チップセット、ビデオ、サウンドカードドライバーを含む必要なハードウェア・ドライバーがすべて取り付けられ、
かつ最新のものになっているか確認してください。EVGAのインストールディスクやゲームに付属している、最新のDirectX
を再度インストールしてください。
また、そのゲームに必要なパッチ (開発者から入手可能) がすべて取り付けられている
かも確認してください。
トラブル: グラフィックカードの最新版ドライバの入手方法は?
SLIを有効にする方法(オプション)
SLI モードで複数のカードをインストールした場合、SLI を有効にしてシステムの最大の性能を引き出す必要がありま
す。SLI を有効にするには、デスクトップ上を右クリックして [NVIDIA Control Panel](NVIDIA コントロールパネル)を選択
し、NVIDIA コントロールパネルを開きます。続いて [Set SLI and PhysX configuration](SLI と PhysX 構成を設定する)を
選択し、最後に [Maximize 3D Performance](3D パフォーマンスを最大化する)を選択してから [Apply](適用)
を選択し
ます。SLI インストール手順のビデオによる概要は、www.evga.com/slivideo をご覧ください。
日本語
トラブル: ゲームがデスクトップ上へロックアップまたはクラッシュする。
51
対処法: 最新版ドライバは下記から入手できます。www.evga.com/support/drivers
52
日本語
トラブル: HDTVで映像を出力する際、デスクトップ画面やWindowsのタスクバーやオフスクリーン等一部の領域が表示
されません。
互換性について
対処法: まず、適切な解像度で設定されているかご確認ください。正しく設定されている場合、”サイズを変更するデスクト
ップ”の機能から調整してください。それにより、HDTVでオーバースキャンを補うことができ、デスクトップを全て表示させ
ることができます。
この場合、オフスクリーンに表示されるディスプレイ要素について、NVIDIAはオーバースキャンのシフ
ト機能を使ってデスクトップを移動させることをおすすめしています。オーバースキャンのシフト機能は、NVIDIAのコント
ロールパネルのTVの設定画面から設定することができます。
FCC互換性について
This device complies with FCC Rules Part 15. Operation is subject to the following two conditions:
This device may not cause harmful interference, and this device must accept any interference received, including interference that may
cause undesired operation. This equipment has been tested and found to comply with the limits for a Class B digital device, pursuant to
Part 15 of the FCC Rules. These limits are designed to provide reasonable protection against harmful interference in a residential installation.
This equipment generates, uses and can radiate radio frequency energy and, if not installed and used in accordance with the
manufacturer’s instructions, may cause harmful interference to radio communications. However, there is no guarantee that interference
will not occur in a particular installation. If this equipment does cause harmful interference to radio or television reception, which can be
determined by turning the equipment off and on, the user is encouraged to try to correct the interference by one or more of the following
measures:
Increase the separation between the equipment and signal source. Connect the equipment to an outlet on a circuit different from that to
which the signal source is connected. Consult the dealer or an experienced computer technician for help. The use of shielded cables for
connection of the monitor to the graphics card is required to ensure compliance with FCC regulations. Changes or modifications to this unit
not expressly approved by the party responsible for compliance could void the user’s authority to operate the equipment.
メモ: ここに記載されていないトラブルについては、EVGA ナレッジベースをご覧ください: www.evga.com/faq
その他サポートについて
EVGA グラフィックカードのインストールやトラブルシューティングでサポートが必要な場合は、弊社ウェブサイト
www.evga.com/support のサポートをご覧ください。
ここからドライバのダウンロード、
ナレッジベースの検索、テクニカ
ルサポートやカスタマーサポートのお問合わせなどを行うことができます。
また、以下からEVGA フォーラムもご利用くだ
さい: www.evga.com/forums
もしくは電話でお問い合わせいただけます。
カスタマーサービスにご連絡いただく前に、
まず本マニュアルをお読みくだ
さい。その上で、
カスタマーサービスにご連絡いただく場合は、
システム構成およびカードのモデル番号とシリアルナン
バーをお手元にご用意ください。サポートスタッフがご案内する前に、
まずお買い上げの製品を登録しておく必要があり
ます。
カードは www.evga.com/register, でご登録いただくか、
またはサポートにお電話いただき、
スタッフが代わりに登
録を行います。
• 営業時間: 24時間年中無休の電話によるテクニカルサービス
• 電話サポート: (888) 880-EVGA (3842)
• テクニカルサポート ウェブサイト: www.evga.com/support
法律情報
This product may incorporate copyright protection technology that is protected by U.S. patents and other intellectual property rights. Use
of this copyright protection technology must be authorized by Macrovision, and is intended for home and other limited viewing uses only
unless otherwise authorized by Macrovision. Reverse engineering or disassembly is prohibited.
商標について
お客様のニーズに合った保証プログラム
ほとんどの EVGA 製品は 3 年保証の対象となります。詳細については次を参照してください。
www.evga.com/support/warranty
日本語
CE互換性について
EMC Directive 89/336/EEC and Amendment 92/31/EEC, Class B Digital Device EN 50081-14, Generic Emissions Standard for Residential,
Commercial and Light Industrial Products (EN 55022/CISPR 22, Limits and Methods of Measurement of Radio). (EN 55022/CISPR 22,
Limits and Method of Measurement of Radio Interference Characteristics Information Technology Equipment) Warning: This is a Class B
product. In a domestic environment this product may cause radio interference in which case the user may be required to take adequate
measure. EN 50082-1, Generic Immunity Standard for Residential, Commercial and Light Industrial Products (IEC 801-2, IEC 801-3, IEC
801-4)
53
©2001-2015 All rights reserved. The manual is the property of EVGA corp. and is protected by copyright, trademark and other intellectual
property laws, and no part may be reproduced, transmitted, stored or translated into any other computer or foreign language without the
express prior written permission of EVGA corp. EVGA Corp. EVGA, the EVGA logo and combinations thereof are trademarks of EVGA Corp.
All brands and companies are trademarks of registered Trademarks of their respective companies and may not be used without permission.
All other trademarks are the property of their respective owners. The information contained in this manual may be subject to change without
notice. EVGA reserves the right to terminate this license if there is a violation of its terms or default by the Original Purchaser. Upon
termination, for any reason, all copies of the Software must be immediately returned to EVGA and the Original Purchaser shall be liable to
EVGA Corp. for any and all damages suffered as a result of the violation or default. The information contained herein is subject to change
without notice and is provided “AS IS” without warranty of any kind (express or implied). Users are advised to obtain the latest version of
relevant information to verify that information being relied on is current and complete.
54
日本語
目錄
概論
概論 ............................................................................................................. 56
硬體安裝 ...................................................................................................... 57
感謝您購買原裝 EVGA 顯示卡。EVGA 為 NVIDIA® 授權的高效能3D加速器供應商。我們的加速卡完全相容於最新2D
及3D繪圖技術需求。
為了保障您的保固期限及完整的售後服務,產品註冊請至 www.evga.com/register。
快速指南 ...................................................................................................... 57
EVGA 同時致力於提供全方位方案及服務以增進顧客滿意度,包含但不僅限於:
硬體安裝細節 ............................................................................................... 58
EVGA 尊榮維修服務 – 維修不打烊
顯示卡需額外電源 ........................................................................................ 58
若發生問題時EVGA尊榮維修服務保障您和您的產品。關於細節,請至 www.evga.com/support/ear。
SLI 安裝 ....................................................................................................... 59
EVGA Step-Up® Program – 升級方案,保障您的投資
軟體安裝 ...................................................................................................... 59
為提供顧客購買EVGA顯示卡最大的靈活與彈性空間,我們制訂EVGA Step-Up® Program. 更多訊息請至
www.evga.com/stepup。
多重串聯顯示設置 ........................................................................................ 60
EVGA 線上社群 – 無限分享會員超頻世界
疑難排解 ...................................................................................................... 60
參與EVGA線上社群討論區,歡迎至 www.evga.com.tw/forums。
附加支援 ...................................................................................................... 61
EVGA Precision XTM – 超頻於彈指之間
產品規範聲明 ............................................................................................... 62
徹頭徹尾為了支援GeForce 新的GPU技術,EVGA Precision XTM將為超頻軟體重新定位。
請至 www.evga.com/precision。
EVGA OC Scanner X – 讓您一手掌握系統性能
以新設計作號召,重新製做並對內容排版進行全面的優化,這受歡迎的應用程式將可廣範的運用在所有最新的GPU
上。 相關訊息請至 www.evga.com/ocscanner。
EVGA 問與答:
尋找產品相關的知識以及資料庫問與答,歡迎至 www.evga.com/faq。
EVGA GamingTM:
如果你為遊戲而活,這兒是你的歸屬!我們有最棒的遊戲聯賽,最棒的獎品和伺服器。請至
www.evga.com/gaming。
繁體中文
55
56
繁體中文
Folding@EVGA:
5. 將您新的顯示卡對齊適當的插槽(圖示如下)將其穩定地推入插槽直到固定。確認顯示卡上的金屬接點已完整插入擴
充插槽中。
分散運算能夠造福人群,帶來更強大的社會影響力。你知道你的顯示卡可以成為超級電腦的一員,參與意義非凡的蛋
白質摺疊研究計劃嗎?請至 www.evga.com/folding。
6. 如需要,將您的顯示卡接上PCI-Express補充電源線。(圖示如下)
EVGA 社群網路TM:
7. 回螺絲以固定顯示卡,接著裝回電腦機殼。
將EVGA加入你最愛的社群網絡以收到最新的競賽、促銷方案、技術密技、新產品資訊、驅動程式更新、SLI效能增強
更新檔等消息。請至 www.evga.com/sonet。
8. 重新連上在安裝前卸除的任何裝置,接著將螢幕連上您的新顯示卡。
9. 將您的系統接上電源後重新開機,並安裝適當驅動程式。
MODS RIGS : DIY組裝競賽
TM
每200個發文就有機會贏得價值$1,000的產品贊助。快加入EVGA秀出你最炫的改裝系統! www.modsrigs.com。
硬體安裝細節
PCI-Express和PCI是不同類型的插槽,因此在您的系統安裝顯示卡之前,請確認顯示卡匯流排組態,並且符合可用的
插槽。
EVGAontheTUBE:
新產品開箱、概覽及功能介紹! 如需詳細資訊,請造訪 www.youtube.com/teamevga。
硬體安裝
PCI Express (PCI-E) 顯示卡
準備好您的電腦
警告:關閉系統電源,並在進行任何硬體安裝前,觸摸已接地的表面來釋放您身上的靜
電。舉例來說:電源供應器的金屬面。
EVGA對任何因不正確安裝所造成的直接或間接損壞沒有義務負責。若您沒有把握可正
確的完成安裝,請諮詢合格的電腦技術人員。在安裝的過程中若沒有將電源關閉可能損
毀系統裝置、顯示卡及您本人。準備好您的電腦,開始安裝您的顯示卡。
快速指南
1. 開始安裝前,若您目前有使用顯示卡,建議完全移除現有顯示卡的驅動程式。
PCI 顯示卡
顯示卡需額外電源
若您的顯示卡配備了補充電源線,我們強烈建議在顯示卡安裝時即同步接上補充電源。補充電源可確保您的顯示卡能
接收到必要的電源以呈現最佳效能。您的顯示卡可能需要接上一或二個6/8pin PCI-E補充電源。請注意8-pin PCI-E電
源連接線和8-pin CPU電源連接線不同。請參考以下圖示。
首先請務必使用來自電源供應器的 PCIE 電源纜線,如果您的電源供應器沒有適當的連接器,請務必使用隨附的
配接器。
2. 將電腦及所有連接裝置的電源關閉,例如:鍵盤、滑鼠等其他連接裝置。
8針或6+2針
6針
3. 從電腦後方將連接線自您目前的顯示卡上移除。
4. 從您的電腦移除您現有的顯示卡。您需要先解下固定的螺絲並以平直的方式將卡輕輕拉起。若您的主機板有PCI-E
的插槽,請先按住安全卡榫後移除顯示卡。 (請注意:若您的主機板已內建影像裝置,您需要先停用。請聯絡您的
系統或主機板製造商獲得其他資訊)
繁體中文
57
58
繁體中文
當autorun安裝選單出現後,在選單中點選 “Install Video Drivers”,驅動安裝程序將隨即啟動。
SLI 安裝 (選擇性安裝)
EVGA 顯卡連結另數張同款支援SLI技術的顯示卡以提升效能。請注意在安裝SLI時每張顯示卡都必須是相同型號。
SLI安裝影片請連結至: www.evga.com/slivideo , 也可連結至 http://www.evga.com/support/faq/?f=58605 。
注意:在安裝的過程中,若您收到Microsoft WHQL (Windows Hardware Quality Labs) 警示,請選擇“Continue”
or “Install this driver software anyway”,因為安裝並不具危險性。
多重串聯顯示設置
NVIDIA Control Panel讓你輕鬆架設多重串聯顯示環境 , 無論您是使用多台顯示器延伸桌面可簡化您每日,或讓您
在電視上觀看您最喜愛的電影。您可至NVIDIA Control panel> Display > Set up Multiple Displays ,完成架設多重
串聯顯示架構。
安裝您的第一張GeForce顯示卡於主要
的PCI Express x16 插槽。
2-way SLI: 將第二片 GeForce 顯示卡安裝至
第二個 PCI Express x16 插槽。請使用相容於
SLI 功能之主機板隨附的 2-way SLI 橋接連接
器,連接兩片顯示卡。
3-way SLI: 將第三片 GeForce 顯示卡安裝至
主機板上的第三個 PCI Express 插槽。請使用
相容於 SLI 功能之主機板隨附的 3-way SLI
橋接連接器,連接 GeForce 顯示卡。
單一顯示模式
勾選單一顯示器。當你只有一個顯示器和顯示卡連接時,這將是預設的顯示模式。在此模式下,其餘的顯示器皆會被
停用。
延伸桌面模式
勾選兩個以上的顯示器。確認後,在任一您將使用的螢幕上使用滑鼠右鍵選擇您所需要的模式, 在延伸桌面模式下,
每個顯示器可獨立設定不同的解析度、顏色深度和更新頻率. 此模式需要連接兩個以上的顯示器至你的顯示卡。
OM
TT
BO
仿製模式
2-way SLI
3-way SLI
4-way SLI
有關所有 SLI 組態設定檔資訊,請參閱您的主機板使用手冊,將顯示卡正確安裝至特定的 PCI Express 插槽。請務必將顯示卡安裝至
8x 或 16x 插槽,因為 SLI 在 4x 不會產生作用,主機板使用手冊上應有提供特定插槽的資訊。
EVGA基於您的SLI-Ready主機板可支援的SLI組態,提供在架設SLI系統時所需的連接器,請根據您所連接的繪圖卡片數使用合適的SLI連
接器。為了讓您的SLI系統正常運作,請根據您所連接的繪圖卡片數使用合適的SLI連接器。
請先勾選兩個以上的顯示器, 在任一您將使用的螢幕上使用滑鼠右鍵設定仿製模式,並指定其中一個顯示器做為你的
主要顯示器。在仿製模式下顯示器需設定為相同解析度。
啟用SLI(選擇性啟用)
若你已安裝SLI,現在您需要啟用SLI得到完整性能裝置。請點選NVIDIA Control Panel >
Set SLI and PhysX configuration > Maximize 3D Performance選擇啟用。
完整的SLI安裝流程影片請至 : www.evga.com/slivideo。
軟體安裝
快速故障排除
安裝完成您的新顯示卡後首次重新啟動系統時,Windows會偵測到一個新的顯示裝置並試著搜尋其驅動程式。若在可
選擇情況下,請選擇取消,否則就等候Windows完成安裝(若必要會重新開機)。
問題: 開機時,您聽到自電腦中傳出連續嗶嗶聲卻沒有螢幕顯示。
在完成所有過程後,請為您的顯示卡安裝建議的驅動程式。建議先從 www.evga.com/support 下載最新的驅動程式,
或是從 EVGA 安裝 DVD 安裝驅動程式。
注意:如果在目前的電腦內安裝第二張顯示卡,您可能需要重新安裝驅動程式。
注意:若驅動安裝選單沒有自動出現,請進行手動安裝。點選“Computer”or “My Computer”圖示,選擇安裝
光碟所在的磁碟機,再點選“autorun.exe”檔案。
繁體中文
59
原因: 這是由於無法啟用顯示卡而從主機板BIOS設定傳出的警告聲響。這可能代表著四件事:
1)
2)
3)
4)
沒有安裝好顯示卡
主機板的顯示卡插槽出了問題
尚未將顯示卡接上PCI-E補充電源
顯示卡出了問題
解決方案: 自系統中移除顯示卡並重新安裝,並確認顯示卡已被完整插入顯示卡插槽中,接著重新開機。若問題沒有
解決,可能是顯示卡或是主機板出了問題,這時你您需要聯絡您的硬體製造商請求協助。
60
繁體中文
問題: 內建圖型顯示器功能未在安裝新顯示卡前關閉,或者先前安裝的驅動程式未正確移除 。
為您量身設計的保固方案
原因: 您在安裝PCI顯示卡前沒有先停用內建顯示介面卡,或是尚未將您先前使用的顯示介面卡驅動程式解除安裝。
EVGA 產品享有3年保固。更多的保固訊息請至 www.evga.com/support/warranty。
解決方案: 在安裝新顯示卡前請務必至主機板BIOS設定或是Windows裝置管理員下停用內建顯示介面卡,並至
Windows控制台將原先使用的驅動程式解除安裝。安裝完新顯示卡後,接上您的螢幕,如有需要,在開機前將顯示卡
接上補充電源。
產品規範聲明
問題: 遊戲當機或是遊戲錯誤跳回桌面。
解決方案: 確認已安裝所有需要的硬體驅動程式,包含晶片驅動程式、音效卡及顯示卡驅動程式,並且都為最新版
本。重新安裝最新版本的DirectX(於EVGA安裝光碟中)或試著重新安裝該遊戲。 另外確認已安裝所有由軟體開發商/
製造商所提供的遊戲更新檔。
問題: 我可以在哪裡下載顯示卡的最新驅動程式?
解決方案: 您可在 www.evga.com/support/drivers找到最新驅動程式。
問題: 當我在電腦觀看高畫質電視,部分或全部桌面會不見,例如Windows工具列不見、或超出螢幕範圍。
解決方案: 首先,先確認您選擇正確的顯示解析度。如果您選擇正確的解析度,嘗試去調整” Resize Desktop”
功能。這可輔助高畫質電視 overscan即能看見整個桌面。若要觀看超出螢幕範圍的畫面,NVIDIA建議您使
用”Overscan”功能調整。您能從NVIDIA panel中電視設定頁面中操作Overscan。
注意: 請至EVGA知識庫 www.evga.com/faq查詢未列出的問題 。
CE Compliance Information
EMC Directive 89/336/EEC and Amendment 92/31/EEC, Class B Digital Device EN 50081-14, Generic Emissions Standard for Residential,
Commercial and Light Industrial Products (EN 55022/CISPR 22, Limits and Methods of Measurement of Radio). (EN 55022/CISPR 22,
Limits and Method of Measurement of Radio Interference Characteristics Information Technology Equipment) Warning: This is a Class B
product. In a domestic environment this product may cause radio interference in which case the user may be required to take adequate
measure. EN 50082-1, Generic Immunity Standard for Residential, Commercial and Light Industrial Products (IEC 801-2, IEC 801-3, IEC
801-4)
Macrovision 聲明
This product may incorporate copyright protection technology that is protected by U.S. patents and other intellectual property rights. Use
of this copyright protection technology must be authorized by Macrovision, and is intended for home and other limited viewing uses only
unless otherwise authorized by Macrovision. Reverse engineering or disassembly is prohibited.
附加支援
針對您的EVGA顯示卡,如需任何設定或疑難排解的協助,請參訪我們網站上的服務區:
www.evga.com/support。在服務區您將可以下載到驅動程式,也可以看到我們為數龐大的資料庫,
並對技術上或使用者服務方面提出諮詢。請至EVGA討論區,網址如下: www.evga.com/forums 。
另外一種方式,透過電話即可聯絡我們。在聯絡客服之前,請先詳細參閱使用說明。若您必須聯絡客服以解決問題,
請在確認我們產品型號&序號時同時確認系統組態。在技術人員協助你之前,您需要先註冊您的產品。您可在
www.evga.com/register完成網路註冊。
• 電話服務時間:(9:00AM ~18:00PM)
• 電話服務:0800-282868
• 技術支援網站: www.evga.com.tw/support
繁體中文
FCC Compliance Information
This device complies with FCC Rules Part 15. Operation is subject to the following two conditions:
This device may not cause harmful interference, and this device must accept any interference received, including interference that may
cause undesired operation. This equipment has been tested and found to comply with the limits for a Class B digital device, pursuant to
Part 15 of the FCC Rules. These limits are designed to provide reasonable protection against harmful interference in a residential installation.
This equipment generates, uses and can radiate radio frequency energy and, if not installed and used in accordance with the
manufacturer’s instructions, may cause harmful interference to radio communications. However, there is no guarantee that interference
will not occur in a particular installation. If this equipment does cause harmful interference to radio or television reception, which can be
determined by turning the equipment off and on, the user is encouraged to try to correct the interference by one or more of the following
measures:
Increase the separation between the equipment and signal source. Connect the equipment to an outlet on a circuit different from that to
which the signal source is connected.
Consult the dealer or an experienced computer technician for help. The use of shielded cables for connection of the monitor to the graphics
card is required to ensure compliance with FCC regulations. Changes or modifications to this unit not expressly approved by the party
responsible for compliance could void the user’s authority to operate the equipment.
61
註冊商標資訊
©2001-2015 All rights reserved. The manual is the property of EVGA corp. and is protected by copyright, trademark and other intellectual
property laws, and no part may be reproduced, transmitted, stored or translated into any other computer or foreign language without the
express prior written permission of EVGA corp. EVGA Corp. EVGA, the EVGA logo and combinations thereof are trademarks of EVGA Corp.
All brands and companies are trademarks of registered Trademarks of their respective companies and may not be used without permission.
All other trademarks are the property of their respective owners. The information contained in this manual may be subject to change without
notice. EVGA reserves the right to terminate this license if there is a violation of its terms or default by the Original Purchaser. Upon
termination, for any reason, all copies of the Software must be immediately returned to EVGA and the Original Purchaser shall be liable to
EVGA Corp. for any and all damages suffered as a result of the violation or default. The information contained herein is subject to change
without notice and is provided “AS IS” without warranty of any kind (express or implied). Users are advised to obtain the latest version of
relevant information to verify that information being relied on is current and complete.
62
繁體中文
目录
概论
概论 ............................................................................................................. 64
硬件安装 ...................................................................................................... 65
感谢您购买原装 EVGA显卡。EVGA 为 NVIDIA® 授权的高效能3D加速器供货商。我们的加速卡完全兼容于最新2D及
3D绘图技术需求。
为了保障您的保修期限及完整的售后服务,产品注册请至 www.evga.com/register。
快速指南 ...................................................................................................... 65
EVGA 同时致力于提供全方位方案及服务以增进顾客满意度,包含但不仅限于:
硬件安装细节 ............................................................................................... 66
EVGA 尊荣维修服务 – 维修不打烊
显卡需额外电源 ........................................................................................... 66
若发生问题时EVGA尊荣维修服务保障您和您的产品。关于细节,请至 www.evga.com/support/ear。
SLI 安装 ....................................................................................................... 67
EVGA Step-Up® Program – 保障您的投资
软件安装 ...................................................................................................... 67
为提供顾客购买EVGA显卡最大的灵活与弹性空间,我们制订EVGA Step-Up® Program. 更多讯息请至
www.evga.com/stepup。
建立多个显示功能 ........................................................................................ 68
EVGA 在线社区 – 无限分享会员超频世界
疑难解答 ...................................................................................................... 68
参与EVGA社区论坛讨论区,欢迎至 www.evga.com/forums。
额外支援 ...................................................................................................... 69
EVGA Precision XTM – 超频于弹指之间
产品规范声明 ............................................................................................... 70
彻头彻尾为了支持GeForce 新的GPU技术,EVGA Precision XTM将为超频软件重新定位。
请至 www.evga.com/precision。
EVGA OC Scanner X – 让您一手掌握系统性能
以新设计作号召,重新制做并对内容排版进行全面的优化,这受欢迎的应用程序将可广范的运用在所有最新的GPU
上。相关讯息请至 www.evga.com/ocscanner。
EVGA 问与答:
寻找产品相关的知识以及数据库问与答,欢迎至 www.evga.com/faq。
EVGA GamingTM:
如果你为游戏而生活,这儿是你的归属!我们有最棒的游戏联赛,最棒的奖品和服务器。请至
www.evga.com/gaming。
简体中文
63
64
简体中文
Folding@EVGA:
6. 如需要,将您的显卡接上PCI-Express补充电源线。(图示如下)
分散运算能够造福人群,带来更强大的社会影响力。你知道你的显卡可以成为超级计算机的一员。请至
www.evga.com/folding。
7. 锁回螺丝以固定显卡,接着装回计算机机箱。
EVGA 社区网络TM:
8. 重新连上在安装前卸除的任何装置,接着将显示器连上您的新显卡。
9. 将您的系统接上电源后重新启动,并安装适当驱动程序。
将EVGA加入你最爱的社区网络以收到最新的竞赛、促销方案、技术密技、新产品信息、驱动程序更新、SLI效能增强
更新文件等消息。请至 www.evga.com/sonet。
MODS RIGS :
硬件安装细节
TM
PCI-Express和PCI是不同类型的插槽,因此在您的系统安装显卡之前,请确认显卡总线组态,并且符合可用的插槽。
每200个发文就有机会赢得价值$1,000的产品赞助。快加入EVGA秀出你最炫的改装系统! www.modsrigs.com。
EVGAontheTUBE:
新产品开箱、概述和特性!如需更多信息,请访问 www.youtube.com/teamevga。
PCI Express (PCI-E) 显卡
硬件安装
准备好您的计算机
PCI 显卡
显卡需外接电源
警告:关闭系统电源,并在进行任何硬件安装前,触摸已接地的表面来释放您身上的静
电。举例来说:电源供应器的金属面。
EVGA对任何因不正确安装所造成的直接或间接损坏没有义务负责。若您没有把握可正
确的完成安装,请咨询合格的计算机技术人员。在安装的过程中若没有将电源关闭可能
损毁系统装置、显示适配器及您本人。准备好您的计算机,开始安装您的显卡。
若您的显示适配器配备了补充电源线,我们强烈建议在显示适配器安装时即同步接上补充电源。补充电源可确保您的
显示适配器能接收到必要的电源以呈现最佳效能。您的显示适配器可能需要接上一或二个6/8pin PCI-E补充电源。请
注意8-pin PCI-E电源连接线和8-pin CPU电源连接线不同。请参考以下图示 。
始终首先使用电源的 PCIE 电源线,仅在电源不具有适当接头的情况下,才可使用随附的电源适配器。
快速安装指南
8针或6+2针
1. 开始安装前,若您目前有使用显卡,建议完全移除现有显卡的驱动程序。
6针
2. 将计算机及所有连接装置的电源关闭,例如:键盘、鼠标等其他连接装置。
3. 从计算机后方将连接线自您目前的显卡上移除。
4. 从您的计算机移除您现有的显卡。您需要先解下固定的螺丝并以垂直的方式将卡轻轻拉起。若您的主板有PCI-E的
插槽,请先按住安全卡扣后移除显示适配器。(请注意:若您的主板已内建视频装置,您需要先停用。请联络您的系
统或主板制造商获得其他信息)
5. 将您新的显卡对齐适当的插槽(图示如下)将其稳定地推入插槽直到固定。确认显卡上的金属接点已完整插入扩展插
槽中 。
简体中文
65
66
简体中文
SLI 安装 (选择性安装)
当autorun安装菜单出现后,在菜单中点选 “Install Video Drivers”,驱动安装程序将随即运行。
EVGA 显卡连结另数张同款支持SLI技术的显示适配器以提升效能.请注意在安装SLI时每张显示适配器都必须是相同型
号。SLI安装影片请连结至: www.evga.com/slivideo , 也可连结至 http://www.evga.com/support/faq/?f=58605。
注意:在安装的过程中,若您收到Microsoft WHQL (Windows Hardware Quality Labs) 警示,请选择“Continue”
or “Install this driver software anyway”,因为安装并不具危险性。
建立多个显示功能
NVIDIA Control Panel让你轻松架设多重串联显示环境 , 无论您是使用多台显示器延伸桌面可简化您每日,或让您在
电视上观看您最喜爱的电影。您可至NVIDIA Control panel> Display > Set up Multiple Displays ,完成架设多重
串联显示架构。
单一显示模式
安装您的第一张GeForce显卡于主要的
PCI Express x16 插槽。
2-way SLI: 将第二个 GeForce 显卡安装在
第二个 PCI Express x16 插槽中。使用 2 路
SLI 桥接器(随附于支持 SLI 的主板中)将
两个显卡连接在一起。
3-way SLI: 将第三个 GeForce 显卡安装在主
板上的第三个 PCI Express 插槽中。使用 3
路 SLI 桥接器(随附于支持 SLI 的主板中)
将这些显卡连接在一起。
勾选单一显示器。当你只有一个显示器和显卡连接时,这将是默认的显示模式。在此模式下,其余的显示器皆会被停
用。
延伸桌面模式
勾选两个以上的显示器。确认后,在任一您将使用的屏幕上使用鼠标右键选择您所需要的模式, 在延伸桌面模式下,
每个显示器可独立设定不同的分辨率、颜色深度和更新频率. 此模式需要连接两个以上的显示器至你的显卡 。
OM
TT
BO
仿制模式
2-way SLI
3-way SLI
4-way SLI
有关全部 SLI 配置,请参阅主板用户手册,了解如何在给定的 PCI Express 插槽中正确安装显卡。由于 SLI 无法在 4x 插槽中正常工作,
请始终在 8x 或 16x 插槽中安装显卡。插槽的具体信息应包含在主板用户手册中。
EVGA基于您的SLI-Ready主板可支持的SLI组态,提供在架设SLI系统时所需的连接器,请根据您所连接的绘图卡片数使用合适的SLI连接
器。为了让您的SLI系统正常运作,请根据您所连接的绘图卡片数使用合适的SLI连接器。
启用SLI(选择性启用)
若你已安装SLI,现在您需要启用SLI得到完整性能装置。请点选NVIDIA Control Panel >
Set SLI and PhysX configuration > Maximize 3D Performance选择启用。完整的SLI安装流程影片请至 :
www.evga.com/slivideo。
快速故障排除
软件安装
安装完成您的新显卡后首次重新启动系统时,Windows会侦测到一个新的显卡并试着搜寻其驱动程序。若在可选择情
况下,请选择取消,否则就等候Windows完成安装(若必要会重新启动)。
在完成所有过程后,请为您的显卡安装建议的驱动程序。首先,建议您从 www.evga.com/support 下载最新的驱动程
序。或者,也可通过 EVGA DVD 安装光盘安装驱动程序。
注意:如果在现有电脑上加装第二块显卡,可能需要重新安装驱动程序。
注意:若驱动安装菜单没有自动出现,请进行手动安装。点选“Computer” or “My Computer” 图标,选择安装
光盘所在的磁盘驱动器,再点选“autorun.exe”档案。
简体中文
请先勾选两个以上的显示器, 在任一您将使用的屏幕上使用鼠标右键设定仿制模式,并指定其中一个显示器做为你的
主要显示器。在仿制模式下显示器需设定为相同分辨率。
67
问题: 开机时,您听到自计算机中传出连续哔哔声却没有营幕显示。
原因: 这是由于无法启用显卡而从主板BIOS设置传出的警告声响。这可能代表着四件事:
1)
2)
3)
4)
没有安装好显卡
主板的显卡插槽出了问题
尚未将显卡接上PCI-E补充电源
显卡出了问题
解决方案: 自系统中移除显卡并重新安装,并确认显卡已被完整插入显卡插槽中,接着重新启动。若问题没有解决,
可能是显卡或是主板出了问题,这时你您需要联络您的硬件制造商请求协助。
68
简体中文
问题: 内建图型显示器功能未在安装新显示适配器前关闭,或者先前安装的驱动程序未正确移除。
为您量身设计的保修方案
原因: 您在安装PCI显卡前没有先停用内建自带显卡,或是尚未将您先前使用的显卡驱动程序卸载。
EVGA 产品享有3年保固。更多的保固讯息请至: www.evga.com/support/warranty。
解决方案: 在安装新显卡前请务必至主板BIOS设置或是Windows设备管理器下停用内建显卡,并至Windows控制台
将原先使用的驱动程序卸载。安装完新显卡后,接上您的屏幕,如有需要,在开机前将显卡接上补充电源。
产品规范声明
问题: 游戏当机或是游戏错误跳回桌面。
解决方案: 确认已安装所有需要的硬件驱动程序,包含芯片驱动程序、声卡及显示适配器驱动程序,并且都为最新版
本。重新安装最新版本的DirectX(于EVGA安装光盘中)或试着重新安装该游戏。 另外确认已安装所有由软件开发商/制
造商所提供的游戏更新档。
问题: 我可以在哪里下载显卡的最新驱动程序?
解决方案: 您可在 www.evga.com/support/drivers 找到最新驱动程序。
问题: 当我在计算机观看高清电视,部分或全部桌面会不见,例如Windows工具栏不见、或超出屏幕范围?
FCC Compliance Information
This device complies with FCC Rules Part 15. Operation is subject to the following two conditions:
This device may not cause harmful interference, and this device must accept any interference received, including interference that may
cause undesired operation. This equipment has been tested and found to comply with the limits for a Class B digital device, pursuant to
Part 15 of the FCC Rules. These limits are designed to provide reasonable protection against harmful interference in a residential installation.
This equipment generates, uses and can radiate radio frequency energy and, if not installed and used in accordance with the
manufacturer’s instructions, may cause harmful interference to radio communications. However, there is no guarantee that interference
will not occur in a particular installation. If this equipment does cause harmful interference to radio or television reception, which can be
determined by turning the equipment off and on, the user is encouraged to try to correct the interference by one or more of the following
measures:
Increase the separation between the equipment and signal source. Connect the equipment to an outlet on a circuit different from that to
which the signal source is connected.
Consult the dealer or an experienced computer technician for help. The use of shielded cables for connection of the monitor to the graphics
card is required to ensure compliance with FCC regulations. Changes or modifications to this unit not expressly approved by the party
responsible for compliance could void the user’s authority to operate the equipment.
解决方案: 首先,先确认您选择正确的显示分辨率。如果您选择正确的分辨率,尝试去调整”Resize
Desktop”功能。这可辅助高清电视 overscan即能看见整个桌面。若要观看超出屏幕范围的画面,NVIDIA建议您使
用”Overscan”功能调整。您能从NVIDIA panel中电视设定页面中操作Overscan。
CE Compliance Information
EMC Directive 89/336/EEC and Amendment 92/31/EEC, Class B Digital Device EN 50081-14, Generic Emissions Standard for Residential,
Commercial and Light Industrial Products (EN 55022/CISPR 22, Limits and Methods of Measurement of Radio). (EN 55022/CISPR 22,
Limits and Method of Measurement of Radio Interference Characteristics Information Technology Equipment) Warning: This is a Class B
product. In a domestic environment this product may cause radio interference in which case the user may be required to take adequate
measure. EN 50082-1, Generic Immunity Standard for Residential, Commercial and Light Industrial Products (IEC 801-2, IEC 801-3, IEC
801-4)
注意:请至EVGA知识库 www.evga.com/faq 查询未列出的问题。
Macrovision 声明
额外支援
This product may incorporate copyright protection technology that is protected by U.S. patents and other intellectual property rights. Use
of this copyright protection technology must be authorized by Macrovision, and is intended for home and other limited viewing uses only
unless otherwise authorized by Macrovision. Reverse engineering or disassembly is prohibited.
针对您的EVGA显卡,如需任何设定或疑难解答的协助,请参访我们官方网站上的服务区:
www.evga.com/support。在服务区您将可以下载到驱动程序,也可以看到我们为数庞大的数据库,并对技术上或使
用者服务方面提出咨询。请至EVGA讨论区,网址如下: www.evga.com/forums。
另外一种方式,透过电话即可联络我们。在联络客服之前,请先详细参阅使用说明。若您必须联络客服以解决问题,
请在确认我们产品型号&序号时同时确认系统配置。在技术人员协助你之前,您需要先注册您的产品。
您可在 www.evga.com/register完成网络在线注册。
• 电话服务时间: 24/7 技术支持
• 电话服务: (888) 880-EVGA (3842)
• 技术支持网站: www.evga.com/support
简体中文
69
注册商标信息
©2001-2015 All rights reserved. The manual is the property of EVGA corp. and is protected by copyright, trademark and other intellectual
property laws, and no part may be reproduced, transmitted, stored or translated into any other computer or foreign language without the
express prior written permission of EVGA corp. EVGA Corp. EVGA, the EVGA logo and combinations thereof are trademarks of EVGA Corp.
All brands and companies are trademarks of registered Trademarks of their respective companies and may not be used without permission.
All other trademarks are the property of their respective owners. The information contained in this manual may be subject to change without
notice. EVGA reserves the right to terminate this license if there is a violation of its terms or default by the Original Purchaser. Upon
termination, for any reason, all copies of the Software must be immediately returned to EVGA and the Original Purchaser shall be liable to
EVGA Corp. for any and all damages suffered as a result of the violation or default. The information contained herein is subject to change
without notice and is provided “AS IS” without warranty of any kind (express or implied). Users are advised to obtain the latest version of
relevant information to verify that information being relied on is current and complete.
70
简体中文
MEMO
71
MEMO
72