Transcript
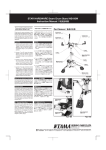
STAR HARDWARE Cymbal Stand HC103BW
Instruction Manual / 取扱説明書
Instruction Manual
Please read through this instruction
manual before starting to use.
ご使用になる前に、必ず説明書をお読みください。
Thank you for your purchase of this TAMA
STAR HC103BW Boom Stand. To ensure
safe and efficient use, please read through
this manual before beginning assembly.
Store this manual in a convenient place for
future reference.
この度は TAMA STAR シリーズハードウェアを
お買い上げ頂き、誠にありがとうございました。
製品の性能を十分に発揮し、安全にご使用頂く
ために、 組み立て前に必ず 本 説 明 書をお読み
ください。 また、本説 明 書は大切に保管して
ください。
Assembly
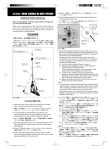
1. Loosen T-bolt A and open the tripod
to stand the bottom section upright.
Tighten T-bolt A to secure in place.
Memory lock A can be used for
consistent setup in your preferred
position.
2. Loosen T-nuts B and C. Insert the
middle and upper section, then
tighten T-nuts B and C. Memory
locks B and C can be used for
consistent setup in your preferred
position.
3. Loosen T-nut D and insert the boom
arm. After setting the angle,
direction, and length of boom arm
to your desired preferences tighten T-nut D. Memory lock D can
be used for consistent setup in your
preferred position.
4. L o o s e n T - n u t E t o a d j u s t t h e
position of the cymbal L-rod. To
secure the cymbal in place, tighten
T-nut E. Memory lock E can be
used for consistent setup in your
preferred position.
5. To attach the cymbal, remove the
Cymbal Mate and the upper felt
washer. Position the cymbal so the
L-rod goes through the center hole,
with the cymbal coming to rest on
the bottom felt washer. Place upper
felt washer back on top of the
cymbal, and secure in place using
the Cymbal Mate. The protection
sleeve should be placed in cymbal
hole to avoid any metal on metal
contact between cymbal and stand.
(Fig. 1)
Straight Cymbal Stand
This boom cymbal stand can also be
used as a straight cymbal stand if
desired. To reconfigure the stand,
loosen and remove the stopper bolt on
the cymbal L-rod. Next, loosen the
T-nut E, and remove the cymbal L-rod
from the boom arm. Then, loosen the
T-nut D, and remove the boom arm
from the upper section. Attach the
cymbal L-rod in place of the boom
arm, and tighten the T-nut D. Finally,
the stopper bolt of the cymbal L-rod
should be reattached and secured.
(Fig.2)
Cymbal Felt
STAR cymbal felts are designed so the
outer white felt ring contacts the
cymbal surface. This lesser contact
with the cymbal allows for increased
cymbal resonance. However, it is also
reversible, in which case the larger
gray portion contacts the cymbal for
containment of overtones if desired.
組立方法
1. T- ボルトA を緩めて三脚部を適当な幅に開き、
T- ボルトAを締めて固定します。 必要に応じ
て付属のメモリーロックAをパイプに固定する
事で、 お好みのポジションを再 現 する事 が
できます。
2. T-ナットB・Cを緩めて上段・中段パイプを適当な
長さに差し込み、T- ナットB・C を締めて固定
します。必要に応じて付属のメモリーロック
B・C をパイプに固定する事で、お好みのポジ
ションを再現する事ができます。
3. T-ナットDを緩めてブームアームを差し込み
ます。ブームアームの角度・向き・長さを調整し、
T- ナットDを締めて固定します。必要に応じて
付 属 のメモリーロ ックD を ブームアーム に
固定する事で、お好みのポジションを再現する
事ができます。
4. T-ナットE を緩めてシンバルLロッドをお好み
のポジションに調整し、T- ナットE を締めて
固定します。必要に応じて付属のメモリー
ロック Eをシンバル L ロッドに固 定する事で、
お好みのポジションを再現する事ができます。
Part Names / 各部の名称
Cymbal L-Rod
シンバル L ロッド
Memory Lock D
メモリーロックD
Memory Lock E
メモリーロックE
Boom Arm
ブームアーム
T-nut E
T-ナットE
T-nut D
T-ナットD
T-nut C
T-ナットC
Memory Lock C
メモリーロックC
T-nut B
T-ナットB
Memory Lock B
メモリーロックB
T-bolt A
T-ボルトA
5. シンバルを取り付けます。シンバルメイトと
上部フェルトワッシャーを取り外し、2枚の
フェルトワッシャーの間にシンバルを入れ、
シンバルメイトで固定します。この時、保護
チューブが正しくシンバル穴部に入っている
事をご確認ください。
(図 1)
Memory Lock A
メモリーロックA
HC103BW
Cymbal Mate
シンバルメイト
ストレートシンバルスタンド
本製品はブームシンバルスタンドですが、必要
Upper Felt Washer
Stopper Bolt
上部フェルトワッシャー
ストッパーボルト
に応じてストレートシンバルスタンドとしても
お使い頂けます。シンバルL ロッドのストッパー
ボルトを手で緩めて取り外し、T-ナットEを緩めて
シンバルLロッドをブームアームから取り外します。
Protection Sleeve
保護チューブ
次に T-ナットDを緩めてブームアームをスタンド
本体から取り外します。代わりにシンバルL ロッド
を差し込み、お好みの角度で T-ナットDを締めて
固定します。 最後にシンバルLロッドのストッパー
ボルトを再び取り付けます。
(図 2)
シンバルフェルト
付属のシンバルフェルトは白フェルトがシンバル
にあたる向きが標準仕様となっておりますが、
裏返してセットする事でシンバルとフェルトの
接触面積を変える事ができます。お好みのサウ
ンドに応じて向きを入れ替えてご使用下さい。
Bottom Felt Washer
下部フェルトワッシャー
Stopper Bolt
ストッパーボルト
T-nut D
T-ナットD
Fig.1 / 図1
Fig.2 / 図2
星野楽器株式会社 〒461-8717 愛知県名古屋市東区橦木町3-22
http://www.tama.com/
■ This manual is current as of April 2014. Because we are always working to improve our products, some features may change without notice.
■ この取扱説明書は、2014 年 4月現在のものです。製品改良のため、予告なく仕様を変更することがありますので、あらかじめご了承ください。