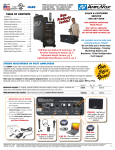
1
HP-2067-8 デジタル表示型回転計 SDM496 取扱説明書 English version follows Japanese version. もくじ 安全上のご注意 ..................... 2 ページ 準 備 .............................. 3 ページ 製品の確認 ....................... 3 ページ 適用製品 ......................... 3 ページ 取り付け ........................... 4 ページ 取付場所 ......................... 4 ページ 取付方法 ......................... 4 ページ 接 続 .............................. 5 ページ 接続端子の説明 ................... 5 ページ 使用上のお願い ................... 6 ページ 丸型ソケットの接続 ............... 7 ページ 接続例 ........................... 8 ページ 使い方 ............................. 10 ページ 回転速度表示 ..................... 10 ページ 減速比の設定 ..................... 11 ページ 減速比コードの設定例 ............. 12 ページ 小数点の表示位置 ................. 12 ページ 単位シール ....................... 12 ページ 故障の診断と対策 ................... 13 ページ 仕 様 .............................. 14 ページ お買い上げいただきありがとうございます。 この取扱説明書には、製品の取り扱いかたや安全上の注意事項を示しています。 ・取扱説明書をよくお読みになり、製品を安全にお使いください。 ・お読みになったあとは、いつでも見られるところに必ず保管してください。 Copyright ORIENTAL MOTOR CO., LTD. 2007 安全上のご注意 この製品は、一般的な産業機器の機器組み込み用として設計されています。その他の 用途には使用しないでください。この警告を無視した結果生じた損害の補償について は、当社は一切その責任を負いませんので、あらかじめご了承ください。 製品の取り扱いは、適切な資格を有する人が行なってください。 ここに示した注意事項は、製品を安全に正しくお使いいただき、お客様や他の人々へ の危害や損傷を未然に防止するためのものです。内容をよく理解してから製品をお使 いください。 ⼊๔ この警告事項に反した取り扱いをすると、死亡または重傷を負う場合がある内容を 示しています。 ●爆発性雰囲気中、引火性雰囲気中では使用しないでください。火災の原因になります。 ●取り付け、接続、操作、 点検・故障診断の作業は、 適切な資格を有する人が行なってく ださい。火災・感電・けがの原因になります。 ●回転計には、高電圧がかかる端子があります。丸型ソケットのカバー(付属)を取り 付けてください。感電の原因になります。 ●作業をするときは、回転計の電源を切ってから、行なってください。感電の原因にな ります。 ●回転計の電源入力電圧は、定格範囲を必ず守ってください。火災・感電の原因になり ます。 ●接続は接続例にもとづき、 確実に行なってください。火災・感電の原因になります。 ●電源ケーブルやリード線を無理に曲げたり、引っ張ったり、はさみ込んだりしない でください。感電・火災の原因になります。 ●回転計は、指定した以外の製品とは接続しないでください。火災・感電・装置破損の 原因になります。 ●回転計は、活電部が露出した状態で操作しないでください。感電の原因になります。 ●回転計は、分解・改造しないでください。火災・感電の原因になります。 内部の点検や修理は、お買い上げになった支店・営業所に連絡してください。 ●電源を切ってから10秒間は、回転計の端子に触れないでください。残留電圧があり 感電の原因になります。 ᵈᗧ この注意事項に反した取り扱いをすると、傷害を負うまたは物的損害が発生する 場合がある内容を示しています。 ●回転計の仕様値を超えて使用しないでください。感電・装置破損の原因になります。 ●回転計の周囲には、可燃物を置かないでください。火災の原因になります。 ●異常が発生したときは、 ただちに運転を停止して、回転計の電源を切ってください。 火災・感電・けがの原因になります。 ●絶縁抵抗測定、絶縁耐圧試験を行なうときは、端子に触れないでください。感電の原 因になります。 ●回転計を廃棄するときは、できるだけ分解し、産業廃棄物として処理してください。 2 準 備 製品の確認 パッケージを開封し、次のものがすべて揃っていることを確認してください。 不足している場合や破損している場合は、お買い求めの支店・営業所までご連絡くだ さい。 DIGITAL SPEE SDm496D mETER r/min AC100V~A C240V MADE IN JAPAN R 23 78 23 456 9 01 456 9 01 ᷫㅦᲧ⸳ቯࠬࠗ࠶࠴ ᷫㅦᲧࠦ࠼ ORIENTAL MOTO 78 回転計SDM496 1台 埋め込み取り付け用アダプタ 1個 mm /sec rps ಽ บ ⑽ ಽ บ ⑽ 丸型ソケット(ソケット・カバー) 1組 ソケットは回転計に差し込んであります。 単位シール 1枚 取扱説明書(本書) 1部 適用製品 BLUシリーズ∗、BLHシリーズ、AXUシリーズ、 AXHシリーズ、FRシリーズ FBL IIシリーズ、 HBLシリーズ BHFシリーズ(200 Wタイプ) BSMシリーズ、SS301Nタイプ、 FPシリーズ MSSシリーズ(3 Wタイプ) USシリーズ、MSS・Wシリーズ ES01、 ES02 SCシリーズ SS21タイプ、 SS31タイプ、SS21-ULタイプ 接続例1 接続例2 接続例3 8ページ 接続例4 接続例5 接続例6 接続例7 9ページ 接続例8 ∗ BLUシリーズはシンクロジックのみご使用いただけます。 重要 この製品は安全規格認定品ではありません。 安全規格認定品または安全規格適合品と組み合わせ て使用したときは、 その製品も安全規格に適合しません。 有害物質 RoHS(EU指令 2002/95/EC 27Jan.2003) 適合 3 取り付け 取付場所 回転計は機器組み込み用に設計、製造されています。 次のような場所に取り付けてください。 ◆水、油その他の液体がかからない ◆屋内 ところ ◆使用周囲温度 0∼+40 °C(凍結しないこと) ◆連続的な振動や過度の衝撃が加 ◆周囲湿度 85%以下(結露しないこと) わらないところ ◆爆発性雰囲気や有害な雰囲気のないところ ◆直射日光があたらないところ 取付方法 1. パネルに、埋め込み取り付け用アダ プタ(付属)を差し込みます。 2. 埋め込み取り付け用アダプタに、回転 計を差し込みます。 両側の固定クリップを少し広げて差し 込みます。減速比設定スイッチの設定 は、取り付け前に行なってください。 取り付け後は、埋め込み取り付け用ア ダプタに隠れて、スイッチの変更がで きなくなります。 3. 固定クリップを回転計底部の溝に はめ込みます。 ࿕ቯࠢ࠶ࡊ 65+0.5 -0 取り付け穴加工寸法[単位:mm] 適用板厚:1∼3.2 mm Ḵ R0.5એਅ 53+0.5 -0 回転計を取り外すときは、両側の固定クリップを少し押さえながら、回転計底部の溝 から外します。固定クリップを広げたまま回転計を引き抜きます。 重要 ・ 回転計の周囲には、 発熱量やノイズが大きい機器を設置しないでください。 ・ 回転計の周囲温度が40 °Cを超える場合には、 換気条件の見直しを行なうか、 筐体内をファンで 強制冷却してください。 ・ DINレールに取り付ける場合には、 オプション (別売) の表面接続ソケットEP11PFを使用してく ださい。 4 接 続 接続用のケーブルには、 電源・FG(フレームグランド) 用にはAWG18(0.75 mm2) の線径 2 のケーブルを、 入力信号用にはAWG22(0.3 mm ) の線径のツイストペアケーブルを用 意してください。 埋め込み取り付けアダプタに取り付けた回転計との接続には、付属の丸型ソケットを 使用してください。接続方法は7ページをご覧ください。 重要 1台の回転計には、1台のモーターしか接続できません。 1台の回転計で、 複数のモーターの回転速度を切り替えて表示することはできません。 接続端子の説明 回転計の接続端子の配列を下図に示します。 12ࡄ࡞ࠬ㧛30ࡄ࡞ࠬㆬᛯ GND㧔ାภࠣࡦ࠼㧕 SPPEDାภജ ̌0̍FIXାภജ N.C. 㔚Ḯജ ࠻ࠫࠚࡀ࠲ାภജ 5 6 N.C. 7 4 8 3 9 2 1 11 10 FG㧔ࡈࡓࠣࡦ࠼㧕 㔚Ḯജ ࠻ࠫࠚࡀ࠲ାภജ ■電源入力(端子2、10) 入力電源電圧は単相100∼240 V 50/60 Hzです (消費電流:0.1 A) 。 ■FG(フレームグランド) (端子9) 筐体に接地します。 (端子7) ■レートジェネレータ信号入力(端子1、 11) ■SPEED信号入力 モーターのレートジェネレータリード線を スピードコントロールパックまたはドラ イバのSPEED信号を接続します。 接続します。 スピードコントロールパックとの共用にな ります。 内部回路図 入力信号 オープンコレクタ DC5 V 10 mA以上 内部回路図 入力信号 AC2∼50 V 4.7 kΩ 12周期/回転 1 kΩ 11 47 kΩ 0.1 A 80 V 1 150 kΩ 7 100 kΩ 10 kΩ +2.5 V 5 CPU 3300 pF 0V 5 ■12パルス/30パルス選択(端子6) ・ 開放のとき12パルス/回転が選択されます。 レートジェネレータ信号入力を接続するときや12パルス/回転のSPEED信号を接 続するときは、何も接続しないで開放にしておきます。 ・ GNDと短絡したとき30パルス/回転が選択されます。 30パルス/回転のSPEED信号を接続するときは、GNDと短絡します。 ■“0”FIX(1桁目表示切り替え信号)信号入力(端子4) 接続しないと、1桁目を「0」に固定して表示します。特に、下1桁の回転数表示が必要な ときは、GNDと接続します。 回転数は、1秒間に入力されたレートジェネレータ信号またはSPEED信号のカ ウント数を元に算出・表示しています。 このため、モーターの低速運転時には、 1カウントされるか否かで、 表示値が変化します。また、レートジェネレータ出 力のスピードコントロールモーターの速度安定性範囲 (3∼10%)では、下1桁目 を安定して表示することはできません。 重要 ・ ソケットは確実に差し込んでください。 ソケットの接続が不完全な場合には、 動作不良や回転計が破損する原因になります。 ・ 回転計の電源ケーブルやFGケーブルは、 他の電源ラインやモーターケーブルとは同 一の管内に 配線しないでください。 ・ 入力信号ケーブルには、 ノイズの影響を抑えるためにシールドケーブルまたはツイストペア ケーブルを使用し、 できるだけ短く配線してください。 ・ 入力信号ケーブルは、 電磁継電器などの誘導負荷から200 mm以上離して、 さらに電源ケーブル やモーターケーブルとは平行にしないで直交するように配線してください。 ・ この製品は安全規格認定品ではありません。 安全規格認定品または安全規格適合品と組み合わ せて使用したときは、 その製品も安全規格に適合しません。 使用上のお願い スピードコントロールモーターをお使いのときは、次の点にご注意ください。 ・ 電磁ブレーキ付スピードコントロールモーターの回転速度表示について 駆動軸の位置合わせなどでモーターが停止しているときに、電磁ブレーキに通電し て電磁ブレーキを解除すると、回転計に回転速度が表示される場合があります。 回転速度が誤って表示される場合には、事前に回転計の電源を切っておくなどの処 置をお願いいたします。 ・ スピードコントロールモーターの速度増加について 回転計にスピードコントロールモーター(レートジェネレータ出力方式)を接続し たときは、モーターの回転速度が設定速度より3∼7%高くなります。回転計の表示 を確認しながら、スピードコントロールパックの回転速度を再設定してください。 6 丸型ソケットの接続 次の手順で接続してください。 1. 回転計に差し込んであるソケットを取り外します。 2. ソケットにリード線をハンダ付けします。ソケットのハンダ面には、端子 No.が表 示されています。 3. ソケットにカバーを取り付けます。ソケットの凹部とカバーの凸部を合わせてく ださい。 ࠞࡃ ಳㇱ ಲㇱ ࠰ࠤ࠶࠻ ࠞࡃ ࠰ࠤ࠶࠻ 4. 回転計にソケットを差し込みます。奥までしっかり差し込んでください。 7 接続例 接続する製品の取扱説明書と合わせてご覧ください。 1. BLUシリーズ、BLHシリーズ、 2. FBL II シリーズ、HBL シリーズ AXUシリーズ、 AXHシリーズ、 FRシリーズ (30パルス/回転) SDM496 SDM496 ࠼ࠗࡃ SPEEDାภജ 7 GND 5 12ࡄ࡞ࠬ/30ࡄ࡞ࠬㆬᛯ 6 㔚Ḯജ න⋧100㨪240 V 50/60 Hz (12パルス/回転) SPEED OUT GND̪ SPEEDାภജ 7 GND 5 12ࡄ࡞ࠬ/30ࡄ࡞ࠬㆬᛯ 6 ̪ BLUࠪ࠭ޔ AXUࠪ࠭ޔ FRࠪ࠭ߩ ႐วߪ㨬COM㨭ߦ ߥࠅ߹ߔޕ 2 10 9 FG 㔚Ḯജ න⋧100㨪240 V 50/60 Hz ࠼ࠗࡃ SPEED OUT GND ធ⛯ ߒ߹ߖࠎ 2 10 9 FG BLUࠪ࠭ߪࠪࡦࠢࡠࠫ࠶ࠢߩߺߏ↪ߚߛߌ߹ߔޕ 3.BHF シリーズ(200 W タイプ) SDM496 SPEEDାภജ 7 GND 5 12ࡄ࡞ࠬ/30ࡄ࡞ࠬㆬᛯ 6 㔚Ḯജ න⋧100㨪240 V 50/60 Hz S-MON O-COM ធ⛯ ߒ߹ߖࠎ 2 10 9 ࠻ࠫࠚࡀ࠲ାภജ 1 ࠻ࠫࠚࡀ࠲ାภജ 11 ࠬࡇ࠼ࠦࡦ࠻ࡠ࡞ࡕ࠲ߩ ࠻ࠫࠚࡀ࠲߳ 8㕍 9㕍 2 10 9 FG SDM496 SPEEDାภജ 7 GND 5 12ࡄ࡞ࠬ/30ࡄ࡞ࠬㆬᛯ 6 8 SDM496 ࠬࡇ࠼ ࠦࡦ࠻ࡠ࡞ࡄ࠶ࠢ 㔚Ḯജ න⋧100㨪240 V 50/60 Hz 5. MSS シリーズ(3 W タイプ) FG FPシリーズ・スピードコントロールタイプ ࠬࡇ࠼ ࠦࡦ࠻ࡠ࡞ࡄ࠶ࠢ FG 㔚Ḯജ න⋧100㨪240 V 50/60 Hz 4. BSMシリーズ、SS301Nタイプ 2 10 9 6. USシリーズ、MSS・Wシリーズ SDM496 ࠬࡇ࠼ ࠦࡦ࠻ࡠ࡞ࡄ࠶ࠢ ࠬࡇ࠼ ࠦࡦ࠻ࡠ࡞ࡄ࠶ࠢ 9 SPEED OUT 8 POTENTIOMETER ធ⛯ ߒ߹ߖࠎ ࠻ࠫࠚࡀ࠲ାภജ 1 ࠻ࠫࠚࡀ࠲ାภജ 11 㔚Ḯജ න⋧100㨪240 V 50/60 Hz FG 2 10 9 SPEED OUT ᭂᕈߪࠅ߹ߖࠎ 7.ES01、ES02 8. SC シリーズ セパレートタイプ:SS21 タイプ、 SS31 タイプ、SS21-UL タイプ SDM496 ࠬࡇ࠼ࠦࡦ࠻ࡠ ES01ޔES02 ࠻ࠫࠚࡀ࠲ାภജ 1 ࠻ࠫࠚࡀ࠲ାภജ 11 㔚Ḯജ න⋧100㨪240 V 50/60 Hz FG 2 10 9 SDM496 ࠬࡇ࠼ ࠦࡦ࠻ࡠ࡞ࡄ࠶ࠢ ࠬࡇ࠼ࠦࡦ࠻ࡠ࡞ࡕ࠲ߩ ࠻ࠫࠚࡀ࠲߳ 10 㕍 ࠻ࠫࠚࡀ࠲ାภജ 1 ࠻ࠫࠚࡀ࠲ାภജ 11 11 㕍 㔚Ḯജ න⋧100㨪240 V 50/60 Hz ࠬࡇ࠼ࠦࡦ࠻ࡠ࡞ࡕ࠲ߩ ࠻ࠫࠚࡀ࠲߳ 1㕍 11 㕍 2 10 9 FG 9 使い方 回転速度表示 ■電源投入時の表示 回転計は、電源投入時に各種設定状態の確定や内部の動作確認(自己検査機能) を行な い、次のような表示をします。 表示順 1. 1桁目に を表示 r/min AC100V~A 9 01 9 01 を表示 78 4. 4桁目に ᷫㅦᲧࠬࠗ࠶࠴ ޓᷫㅦᲧࠦ࠼ࠍ⸳ቯߒ߹ߔ 23 456 を表示 23 456 3. 3桁目に ᷫㅦᲧ⸳ቯࠬࠗ࠶࠴ を表示 ᷫㅦᲧࠦ࠼ ORIENTAL MOTOC240V MADE IN JAPAN R 2. 2桁目に ␜ㇱ ޓ࿁ォㅦᐲߩ␜ࠍߒ߹ߔ DIGITAL SPEE SDm496D mETER 78 5. 12パルス/30パルス選択コードと減速比コードを表示 ᷫㅦᲧࠦ࠼ࠍ␜ߒ߹ߔ ᶖἮ 12ࡄ࡞ࠬ30ࡄ࡞ࠬㆬᛯࠦ࠼ࠍ␜ߒ߹ߔ 6. 回転速度の表示(通常の表示状態になります) モーター停止時は、 を表示します。 減速比の設定により小数点の位置が 異なります。 ■12パルス/30パルス選択の確定 12パルス/30パルス選択の確定は、回転計に電源が投入されたときに行ないます 。 12パルス/回転選択のとき を表示します。 30パルス/回転選択のとき を表示します。 ■減速比コードの確定 減速比コードの変更は、電源投入後でも可能です。 設定を変更したときは、電源投入時と同じ自己検査機能の実行・表示を行ないます。 重要 ・ 減速比設定スイッチの設定は、 回転計の取り付け前 (電源投入前) に行なってください。 埋め込み取り付け用アダプタに隠れ、 スイッチの切り替えができなくなります。 ・ 電源投入後に減速比コードを変更するときは、 周囲の活電部に触れないよう十分注意して行 なってください。 10 減速比の設定 モーターに取り付けたギヤヘッド出力軸の回転速度や減速された駆動部の回転速度を 表示させるときは、回転計側面にある「減速比設定スイッチ」で減速比を設定します。 精密ドライバで調整してください。 出荷時は2つとも「0」 (減速比:1)に設定しています。 0 2 3 56 1 1 2 3 4 9 56 0 7 8 4 7 8 9 ᷫㅦᲧ⸳ቯࠬࠗ࠶࠴ 10ߩߩᢙ୯ࠍ⸳ቯߒ߹ߔ 1ߩߩᢙ୯ࠍ⸳ቯߒ߹ߔ 重要 減速比設定スイッチの設定は、 回転計の取り付け前に行なってください。 埋め込み取り付け用アダプタに隠れ、 スイッチの切り替えができなくなります。 減速比の設定には、下表の減速比コードを使用します。 ■減速比コード表(コード00∼79) ■特殊減速比コード表(コード80∼86、90∼98) 倍率 減速比 コード 減速比 ×1 ×10 ×100 ×1000 134 80 1 00 20 40 60 64.2 81 1.2 01 21 41 61 32.1 82 1.25 02 22 42 62 16.2 83 1.5 03 23 43 63 135 84 1.57 04 24 44 64 67.4 85 1.8 05 25 45 65 32.4 86 2 06 26 46 66 143 90 2.5 07 27 47 67 57.3 91 3 08 28 48 68 28.6 92 3.14 09 29 49 69 135 93 3.5 10 30 50 70 67.4 94 3.6 11 31 51 71 32.4 95 4 12 32 52 72 110 96 5 13 33 53 73 73.5 97 6 14 34 54 74 36.7 98 6.28 15 35 55 75 7 16 36 56 76 7.5 17 37 57 77 8 18 38 58 78 9 19 39 59 79 重要 表中のコード以外の数値は、 設定しないでください。 回転計が機能しなくなります。 11 減速比コードの設定例 減速比100のギヤヘッド出力軸の回転速度表示するとき、11ページの減速比コード表 を使用します。 3. 減速比設定スイッチの設定 10の位の設定スイッチに「4」を、1の位 の設定スイッチに「0」を設定します。 4 56 0 2 3 56 1 0 2 3 4 7 8 9 ᷫㅦᲧ⸳ቯࠬࠗ࠶࠴ 7 8 2. 減速比コードの読み取り 1 減速比はすべて、基本減速比と倍率の 組み合わせで決まります。 減速比100のときは、基本減速比が「1」 と倍率が「×100」の組み合わせとなりま す。 9 1. 基本減速比と倍率の決定 減速比100に相当する減速比コードを 減速比コード表(11ページ)より求めま す。基本減速比「1」の行と倍率 「×100」の 列が交差する表の「40」が求める減速比 コードです。 倍率 減速比 ×1 1 00 ×10 20 ×100 40 ×1000 60 小数点の表示位置 回転計が表示する小数点の位置は、減速比によって下表のように固定されます。 選択した減速比 減速比コード 小数点の表示位置 1∼3 3.14∼30 00∼08 09∼28 小数点表示なし 右から2桁目 31.4∼300 83、92 29∼48 右から3桁目 80、81、 82、 84、85、86 90、91、 93、 94、95、 96、 97、98 314∼9000 49∼79 右から4桁目 単位シール 単位時間あたりの生産量の表示をしたいときやrps表示にしたいときは、付属の単位 シールを回転計表示部のr/minの上に貼付してください。 減速比の設定が96種類に限定されているため、ご希望の単位で表示できないことがあ ります。 12 故障の診断と対策 ご使用の間に「回転速度の表示」が正常に行なえないときには、この項をご覧になっ て、適切な処置を行なってください。それでも正常に表示できないときは、最寄りのお 客様ご相談センターにお問い合わせください。 次の項目の点検を行なう前に、回転計に電源を投入したときの自己検査機能で回転計 に問題がないことを確認しておいてください。→10ページ 対策 現象 予想される原因 表示用のLEDが 電源が接続されてい 端子2、10の電源入力端子の接続が正しいか確 点灯しない。 ない。 認してください。 回転計とソケットの接続が正しいか確認して ください。 回転速度を表示 モーターが回転して コントロールパックを操作して、モーターの 運転を行なってください。 いない。 しない。 表示が「0000」か レートジェネレータ 端子1、11のレートジェネレータ信号入力の接 ら変化しない。 信号が正しく接続さ 続が正しいか確認してください。 れていない。 SPEED信号が正しく 端子5、7のSPEED信号入力の接続が正しいか 接続されていない。 確認してください。 減速比設定スイッチ 減速比コードを確認して、減速比設定スイッ の設定が違っている。 チを正しく設定してください。 モーターの回転 減速比設定スイッチ 減速比コードを確認して、減速比設定スイッ 速度と回転計の の設定が違っている。 チを正しく設定してください。 表示速度がずれ 12パルス/30パルス モーターの速度信号出力の方式に合った12パ ているようだ。 選択が違っている。 ルス/30パルス選択を行なってください。 回転速度の表示 ノイズの影響を受け ノイズ発生源との隔離や配線のやり直し、信 号ケーブルをシールド線やツイストペア線に が安定しない。 ている。 変更するなどの対策を行なってください。 端子9を筐体に接地してください。 モーターが停止 電磁ブレーキを解除 電磁ブレーキ付モーターの電磁ブレーキを解 除すると、回転速度が表示される場合があり しているのに、 している。 ます。 回転速度の表示 →6 ページ が出ている。 13 仕 様 項目 定格電源入力 許容電源入力範囲 消費電流 回転速度表示 設定減速比 使用周囲温度 外形寸法 質量 絶縁抵抗 絶縁耐圧 仕様 単相 100∼240 V 50/60 Hz 単相 85∼264 V 50/60 Hz 0.1 A 4桁 96種類 0∼+40 °C 49 (W)× 61(H)× 80.4 (D)mm 約200 g 常温・常湿のときに、次の箇所をDC500 Vメガーで測定した 値が100 MΩ以上あります。 ・電源入力−ケース間 ・電源入力−FG端子間 ・ケース−FG端子間 常温・常湿のときに、次の箇所に50 Hz、1.5 kVを1分間印加し ても異常を認めません。 ・電源入力−ケース間 ・電源入力−FG端子間 ・ケース−FG端子間 重要 絶縁抵抗測定、 絶縁耐圧試験は、 スピードコントロールパックとドライバそれぞれで行なってくだ さい。 スピードコントロールパックとドライバを接続した状態で、 絶縁抵抗測定、 絶縁耐圧試験を 行なうと、 製品が破損するおそれがあります。 http://www.orientalmotor.co.jp/ 䃂ຠ䈱ᕈ⢻䇮᭽䈍䉋䈶ᄖⷰ䈲ᡷ⦟䈱䈢䉄੍๔䈭䈒ᄌᦝ䈜䉎䈖䈫䈏䈅䉍䉁䈜䈱䈪䈗ੌᛚ䈒䈣䈘䈇䇯 䃂㩷㩷㩷㩷㩷䇭䇭䇭䇭䇭䇭䇭䇭㩷䈲䇮䉥䊥䉣䊮䉺䊦䊝䊷䉺䊷ᩣᑼળ␠䈱ᮡ䈪䈜䇯 䃂ຠ䈮䈧䈇䈩䈱䈗⾰䇮䈗⋧⺣䈲䈍ቴ᭽䈗⋧⺣䉶䊮䉺䊷䈻䈍䈇ว䉒䈞䈒䈣䈘䈇䇯 㩷 䊐䊥䊷䉮䊷䊦䋨ήᢱ䋩䈪䈜䇯៤Ꮺ㔚䊶PHS䈎䉌䉅䈗↪䈏น⢻䈪䈜䇯 㩷 ฃઃᤨ㑆㩷 㩷 㩷 ᧲㩷 ੩㩷 ฬฎ㩷ደ㩷 ᄢ㩷 㒋㩷 ᐔᣣ㩷 9:00䌾18:30 ᦐᣣ㩷 9:00䌾17:30 TEL 0120-925-410 TEL 0120-925-420 TEL 0120-925-430 FAX 0120-925-601 FAX 0120-925-602 FAX 0120-925-603 䈖䈱ขᛒ⺑ᦠ䈲ౣ↢⚕䉕↪䈚䈩䈇䉁䈜䇯 14 HP-2067-8 Digital Speed Indicator SDM496 Operating Manual Table of Contents Safety precautions ............................................. Page 2 Preparation ........................................................ Page 3 Checking the product ..................................... Page 3 Compatible product ........................................ Page 3 Installation .......................................................... Page 4 Installation site ................................................ Page 4 Method of installation ...................................... Page 4 Connection ......................................................... Page 5 About connection terminal .............................. Page 5 Attention ......................................................... Page 6 Connecting the round socket .......................... Page 7 Example connection ....................................... Page 8 How to use ......................................................... Page 10 Displaying the rotation speed ......................... Page 10 Setting the reduction ratio .............................. Page 11 Examples of setting the reduction ratio code .... Page 12 Placing the decimal point ............................... Page 12 Unit seal .......................................................... Page 12 Trouble diagnosis and countermeasures .......... Page 13 Specifications ..................................................... Page 14 Thank you for purchasing an Oriental Motor product. This Operating Manual describes product handling procedures and safety precautions. • Please read it thoroughly to ensure safe operation. • Always keep the manual where it is readily available. Copyright ORIENTAL MOTOR CO., LTD. 2007 Safety precautions This product is designed to be incorporated into general industrial machinery, and must not be used for other purposes. It should be noted that we are not responsible for any damages caused by ignoring this warning. Only qualified personnel should work the product. Cautions described below are intended to ensure correct use of the product and to prevent the customer and other people from being injured. Warning Handling the product without observing the instructions that accompany a “Warning” symbol may result in serious injury or death. ● Do not use the product in an explosive or flammable atmosphere. Otherwise, fire may occur. ● Only qualified installers should be assigned to the work of installation, connection, running, operation and inspection. This is intended to prevent fire, electric shock and injury. ● The digital speed indicator has a high voltage terminal in it. Be sure to put the round socket cover on (included). Otherwise, electric shock may occur. ● Before making connections, turn off the digital speed indicator. Otherwise, electric shock may occur. ● The digital speed indicator power input voltage should be within the rated range. Otherwise, fire, electric shock and injury may occur. ● Electrical connections must be made in strict accordance with the connection diagram. Otherwise, fire and electric shock may occur. ● Do not forcibly bend, pull or pinch the power supply cable and motor cable. Otherwise, electric shock and fire may occur. ● The digital speed indicator should be connected to only the designated product. This is to prevent fire, electric shock or the equipment may be damaged. ● The digital speed indicator should not be operated with the electrical parts being exposed. Otherwise electric shock may occur. ● Do not disassemble or modify the digital speed indicator. Otherwise, fire and electric shock may occur. ● Do not touch the digital speed indicator terminal for at least 10 seconds after cutting the power supply. The remaining voltage may cause electrical shocks. Caution Handling the product without observing the instructions that accompany a “Caution” symbol may result in injury or property damage. ● Do not use the digital speed indicator in excess of ratings. Otherwise, electric shock may occur the equipment may be damaged. ● Do not place combustibles around the digital speed indicator. Otherwise fire may occur. ● Immediately when trouble has occurred, stop running and turn off the digital speed indicator power. Otherwise, fire, electric shock and injury may occur. ● When testing the insulation resistance or dielectric strength, do not touch the terminal. Otherwise, electric shock may occur. ● To dispose of the digital speed indicator, disassemble it into parts and components as much as possible and dispose of individual parts/components as industrial waste. 2 Preparation Checking the product Open the package and make sure that the following items are supplied. If there is any shortage or damage, contact the sales office where you bought the product. DIGITAL SPEE SD 496D mETER m r/min AC100V~A C240V MADE IN JAPAN R 23 78 23 456 9 01 456 9 01 ᷫㅦᲧ⸳ቯࠬࠗ࠶࠴ ᷫㅦᲧࠦ࠼ ORIENTAL MOTO 78 Digital speed indicator SDM496 1 unit Installation adapter mm /sec ಽ ⑽ 1 pc. rps บ ಽ บ ⑽ Round socket (socket, cover) Unit seal 1 set 1 sheet The socket is put in the digital speed indicator. Operating manual (this manual) 1 copy Compatible product BLU series∗, BLH series, AXU series, AXH series, FR series FBL II series, HBL series BHF series (200 W type) BSM series, SS301N type, FP series MSS series (3 W type) US series, MSS・W series ES01, ES02 SC series SS21 type, SS31 type, SS21-UL type Example Connection 1 Example Connection 2 Example Connection 3 Example Connection 4 Example Connection 5 Example Connection 6 Example Connection 7 Example Connection 8 Page 8 Page 9 ∗ BLU series are only used for in the sink logic. Note The digital speed indicator SDM496 is not certified by the recognized safety standards. When the digital speed indicator is used with compatible products, which are certified by the recognized safety standards and / or the conformed safety standards, the product itself is not in conformance with the safety standards. Hazardous substances RoHS (Directive 2002/95/EC 27Jan.2003) compliant 3 Installation Installation site The digital speed indicator is designed and manufactured to be incorporated into the equipment. Install it in the following site. Not exposed to sunlight Indoors Not splashed with water, oil or Ambient temperature 0 to +40 °C other liquid (+32 to +104 °F) (non-freezing) Ambient humidity 85% or less (non-condensing) Not subjected to continuous vibration or excessive shock Not in explosive or hazardous atmosphere Method of installation 1. Insert the installation adapter (included) 2. To insert the digital speed indicator to the installation adapter. Spread the fixing clips on both sides of the adapter and insert the digital speed indicator between them. Be sure to set the gear ratio before installing into the adapter. After installation, the gear ratio cannot be changed, because switch is covered by the adapter. to the panel. 3. Put the fixing clips into the grooves at the bottom of the digital speed indicator. Fixing clip Grooves R0.5 (0.020) or less 53+0.5 -0 (2.09) +0.5 (2.56) 65-0 Mounting plate dimensions [Unit: mm (in.)] Mounting plate thickness: 1 to 3.2 mm (0.039 to 0.126 in.) When the digital speed indicator is to be uninstalled, hold the fixing clips of both sides down a little, then push them out from the bottom of the digital speed indicator. Pull the digital speed indicator out, while spreading the fixing clips. Note ・Do not place any machinery with large amount of heat and noises around the digital speed indicator. ・In cases where the surrounding temperature of the digital speed indicator exceeds 40 °C (104 °F), adjust the ventilation condition or use the forced cooling fan inside the box. ・When it is installed on the DIN rails, the flush mounting socket EP11PF is available as an option (sold separately). 4 Connection As a connecting cable, use AWG18 (0.75 mm2) for power source / FG (frame ground), and twist pair cables of AWG22 (0.3 mm2) for input signals. Use the round socket for connecting the digital speed indicator with which the installation adopter is fixed. For connection, see page 7. Note One digital speed indicator can be connected to one motor only. One digital speed indicator can display the rotation speed of one motor only, and cannot be switched from one to another to be used for several motors. About connection terminal The following diagram shows the terminal arrangement of the digital speed indicator. 12 pulse / 30 pulse selection GND (signal ground) "0" FIX signal input 5 N.C. Power supply input Tachogenerator signal input 6 SPEED signal input N.C. 7 4 8 FG (frame ground) 3 9 Power supply input 2 1 11 10 Tachogenerator signal input ■ Power input (terminals 2 and 10) Power Input voltage is from single-phase 100 to 240 V 50/60 Hz (Current consumption: 0.1 A). ■ FG (Frame ground) (terminal 9) Ground to the cabinet. ■ Tachogenerator signal input (terminals 1 and 11) Connect the tachogenerator lead line of the motor. It is used with the speed control pack. Internal connection Signal input 2 to 50 VAC 12 cycle / revolution 11 47 kΩ 0.1 A 80 V 1 150 kΩ ■ SPEED signal input (terminal 7) Connect the speed control pack or the SPEED signals of the driver. Internal connection Signal input Open collector 5 VDC 10 mA or more 7 100 kΩ 10 kΩ +2.5 V 5 4.7 kΩ 1 kΩ CPU 3300 pF 0V 5 ■ 12 pulse / 30 pulse selection (terminal 6) ・12 pulse per rotation is selected when the circuit is open. The circuit is open when there is no connection. ・30 pulse per rotation is selected when short circuits should occur with GND. In connecting the 30 pulse per rotation SPEED signal, short circuits occur with GND. ■ “0” FIX (switching signal for the first digit figure) signal input (terminal 4) The first digit figure displays “0” when not connected. When the first digit figure of the rotation number needs to be displayed, it connects to GND. The number of rotation is calculated and displayed on the basis of the number of tachogenerator signals being input in a second, or the number of SPEED signals. Therefore, under the low speed motor driving, displayed figures should be changed, depending on whether one count is taken or not. Also, under the stable speed ranges (3 to 10%) of the speed control motor of the tachogenerator output, the first digit figure is not accurately displayed. Note ・Be sure to insert the socket firmly. In case that the socket is connected incompletely, it may cause malfunctions and / or unexpected damages. ・Do not route the digital speed indicator power cable in the same conduit with other power lines or motor cables. ・Use shield cables or twist pair cables as input signal cables, in order to decrease the impact of noises. Also, be sure to make the wiring as short as possible. ・The input signal cable must be located 200 mm (8 in.) or more away from inductive loads such as electromagnetic relay, and must cross power and motor cables, not parallel to them. ・The digital speed indicator SDM496 is not certified by the recognized safety standards. When the digital speed indicator is used with compatible products, which are certified by the recognized safety standards and / or the conformed safety standards, the product itself is not in conformance with the safety standards. Attention In using the speed control motor, be sure to pay attention to the following: ・About displaying the rotation speed of the speed control motor with an electromagnetic brake. When the motor is stopped for positioning the driving shaft, releasing the electromagnetic brake may cause the digital speed indicator to display the rotation speed. In case that the rotation speed is displayed by mistake, please make sure to cut the power source of the digital speed indicator before releasing the brake. ・About increasing the speed of the speed control motor. When the speed control motor (tachogenerator output form) is connected to the digital speed indicator, the rotation speed of the motor should be increased by 3 to 7%, that is, higher than the preset speed level. While checking the digital speed indicator, reset the rotation speed figure of the speed control pack. 6 Connecting the round socket Follow the connection procedure below: 1. Pull out the socket from the speed indicator. 2. Solder the lead wires to the socket. Terminal numbers are marked on the soldering surface of the socket. 3. Install a cover on the socket. Align the concave section of the socket with the convex section of the cover. Cover Concave section Convex section Socket Cover Socket 4. Insert the socket into the speed indicator and push it all the way to the end. 7 Example connection Refer to operating manual of the product to which the digital speed indicator is connected. 1. BLU series, BLH series, AXU series, AXH series, FR series (30 pulse / revolution) SDM496 2. FBL II series, HBL series (12 pulse / revolution) SDM496 Driver SPEED signal input 7 GND 5 12 pulse/30 pulse 6 selection SPEED signal input 7 GND 5 12 pulse/30 pulse 6 selection SPEED OUT GND※ ※ For the case of BLU series, AXU series, and FR series, the terminal is "COM" instead of "GND". Power supply input 2 Signal-phase 10 100 to 240 V 9 50/60 Hz Driver SPEED OUT GND No connection Power supply input 2 Signal-phase 10 100 to 240 V 9 50/60 Hz FG FG BLU series are only used for in the sink logic. 3. BHF series (200 W type) SDM496 SPEED signal input 7 GND 5 12 pulse/30 pulse 6 selection SDM496 S-MON O-COM Tachogenerator signal input 1 Tachogenerator signal input 11 No connection Speed control pack To tachogenerator of speed control motor 8 Blue 9 Blue Power supply input 2 Signal-phase 10 100 to 240 V 50/60 Hz 9 FG FG 5. MSS series (3 W type) SDM496 SPEED signal input 7 GND 5 12 pulse/30 pulse 6 selection Power supply input 2 Signal-phase 10 100 to 240 V 9 50/60 Hz 8 FP series Speed control type Speed control pack Power supply input 2 Signal-phase 10 100 to 240 V 9 50/60 Hz FG 4. BSM series, SS301N type 6. US series, MSS・W series SDM496 Speed control pack Speed control pack 9 SPEED OUT 8 POTENTIOMETER No connection Tachogenerator signal input 1 Tachogenerator signal input 11 Power supply input 2 Signal-phase 10 100 to 240 V 9 50/60 Hz FG SPEED OUT There is no pole. 8. SC series 7. ES01, ES02 SDM496 Separate type: SS21 type, SS31 type, SS21-UL type Speed controller ES01, ES02 SDM496 Tachogenerator signal input 1 Tachogenerator signal input 11 To tachogenerator of speed control motor 10 Blue Tachogenerator signal input 1 11 Tachogenerator signal input 11 Blue Power supply input 2 Signal-phase 10 100 to 240 V 9 50/60 Hz Power supply input 2 Signal-phase 10 100 to 240 V 9 50/60 Hz FG Speed control pack To tachogenerator of speed control motor 1 Blue 11 Blue FG 9 How to use Displaying the rotation speed ■ Display at power up The digital speed indicator checks and confirms a variety of settings and inside operations by way of its ownself inspection function, at the time of turning the power source on. Then it displays the following: Display Displaying order Display the rotation speed. 1. Displaying as the first digit figure. DIGITAL SPEE SD 496D mETER m r/min AC100V~A 9 01 9 01 as the fourth digit figure. 78 4. Displaying 23 456 as the third digit figure. 456 3. Displaying 23 78 as the second digit figure. ᷫㅦᲧ⸳ቯࠬࠗ࠶࠴ 2. Displaying ᷫㅦᲧࠦ࠼ ORIENTAL MOTOC240V MADE IN JAPAN R Setting switch for the reduction ratio Set the reduction ratio code. 5. Displaying the 12 pulse / 30 pulse selection code and the reduction ratio code. Display the reduction ratio code Go out Display the 12 pulse / 30 pulse selection code 6. Displaying the rotation speed (normal display condition) When the motor stops, it displays . The number of decimal points varies, depending on the reduction ratio setting. ■ Defining the 12 pulse / 30 pulse selection The 12 pulse / 30 pulse selection is confirmed when the power source of the digital speed indicator is turned on. When 12 pulse / rotation is selected, it displays . When 30 pulse / rotation is selected, it displays . ■ Defining the reduction ratio code Changing the reduction ratio code is possible even after the power source is turned on. If changes are necessary, self-inspection function should be executed and be displayed, as is the case for the power source is turned on. Note ・Set the gear ratio before installing the adapter (before turning on the power). After installation, the gear ratio cannot be changed, for the switch is covered by and is not visible under the adapter. ・When the reduction ration code needs to be changed, be sure not to touch any electrical parts around it. 10 Setting the reduction ratio When the rotation speed of the gearhead output shaft, needs to be adjusted, set the reduction ratio by using the “setting switch for the reduction ratio” on the side of the digital speed indicator. Adjust it by the precision driver. Both are preset by “0” (reduction ratio: 1) at the time of shipping. 1 9 1 Set the second digit figure. 56 2 3 4 7 8 2 3 56 0 0 9 4 7 8 ᷫㅦᲧ⸳ቯࠬࠗ࠶࠴ Set the first digit figure. Note Set the gear ratio before installing the adapter. After installation, the gear ratio cannot be changed, for the switch is covered by and is not visible under the adapter. Use the following table of the reduction ratio code for setting the reduction ratio. ■ Reduction ratio code table (Code 00 to 79) ■ Special reduction ratio code table (Code 80 to 86, 90 to 98) Reduction Reduction Magnification Code ratio ratio ×1 ×10 ×100 ×1000 134 80 1 00 20 40 60 64.2 81 1.2 01 21 41 61 32.1 82 1.25 02 22 42 62 16.2 83 1.5 03 23 43 63 135 84 1.57 04 24 44 64 67.4 85 1.8 05 25 45 65 32.4 86 2 06 26 46 66 143 90 2.5 07 27 47 67 57.3 91 3 08 28 48 68 28.6 92 3.14 09 29 49 69 135 93 3.5 10 30 50 70 67.4 94 3.6 11 31 51 71 32.4 95 4 12 32 52 72 110 96 5 13 33 53 73 73.5 97 6 14 34 54 74 36.7 98 6.28 15 35 55 75 7 16 36 56 76 7.5 17 37 57 77 8 18 38 58 78 9 19 39 59 79 Note Do not set any codes except the ones shown in the table above. Otherwise, the digital speed indicator may malfunction. 11 Examples of setting the reduction ratio code In order to display the rotation speed of the gearhead output shaft at the reduction ratio 100, use the reduction code table on page 11. 1. Finding the basic reduction ratio and the 3. Setting the reduction ratio switch 4 56 2 3 2 3 9 1 Find the reduction ratio code that is equivalent to the reduction ratio of 100, from the reduction ratio code table (page 11). The row of the basic reduction ratio of “1” and the column of the magnification of “×100” are crossed at “40” on the table. That is the reduction ratio code to be found. Reduction Magnification ratio ×1 ×10 ×100 1 00 20 40 56 0 1 4 7 8 ᷫㅦᲧ⸳ቯࠬࠗ࠶࠴ 7 8 2. Reading the reduction ratio code Turn the right switch for the first digit figure to be set as “0”, then turn the left switch for the second digit figure to be set as “4”. 0 9 magnification Every reduction ratio is set by the combination of the basic reduction ratio and the magnification. When the reduction ratio is 100, the basic reduction ratio of “1” and the magnification figure of “×100” are combined. ×1000 60 Placing the decimal point The placement of the decimal point that the digital speed indicator displays is set by the reduction ratio as the following table shows. Selected reduction ratio Reduction ratio code Placing the decimal point 1 to 3 3.14 to 30 00 to 08 09 to 28 With no decimal point With the decimal point on the 31.4 to 300 83, 92 29 to 48 second place from the right With the decimal point on the 80, 81, 82, 84, 85, 86 third place from the right 90, 91, 93, 94, 95, 96, 314 to 9000 97, 98 49 to 79 With the decimal point on the fourth place from the right Unit seal For the production level per unit of time and the rps to be displayed, attach the unit seal on the “r/min” sign of the digital speed indicator. Setting the reduction ratio is limited to 96 different ratios. Therefore, desirable units may not be displayed. 12 Trouble diagnosis and countermeasures When “displaying the rotation speed” does not function normally during operation, read this section and give appropriate treatments. If not function normally still, contact your nearest office. Before checking the following items, make sure that the digital speed indicator has no problem by using the self-inspection functions at the time of turning the power source on. Phenomenon No LED light to be turned on. Estimated cause Measure The power supply is Check the connection of the power source not connected. input terminals 2 and 10. Check the connection of the digital speed indicator and the socket. Failure to Motor does not run. Operate the control pack and the motor. display the The tachogenerator Check the connection of the tachogenerator rotation speed. signal is not signal input terminals 1 and 11. No change in connected correctly. the figure from The SPEED signal is Check the connection of the SPEED signal “0000”. not connected input terminals 5 and 7. correctly. The setting of the Check the reduction ratio code, set the setting switch for the setting switch for the reduction ratio correctly. reduction ratio is incorrectly. The setting of the Check the reduction ratio code, set the Sensible discrepancy setting switch for the setting switch for the reduction ratio correctly. between the actual reduction ratio is rotation speed of incorrectly. the motor and the Select 12 pulse / 30 pulse in accordance with speed displayed on The 12 pulse / 30 pulse selection is the form of the speed signal output of the the digital speed indicator. incorrectly. motor. Unstable The digital speed Give some treatments including the noise display for the indicator is being source to be isolated, rewiring, changing the rotation speed. affected by noise signal cables to shield cables and / or twist interference. pair cables. Ground the terminal 9 to the cabinet. While the motor The electromagnetic The rotation speed may be displayed by being stopped, brake is released. releasing the electromagnetic brake. still the rotation See page 6 for reference. speed to be appeared on the display. 13 Specifications Items Rated power input Permissible power input range Current consumption Displaying the rotation speed Setting reduction ratio Ambient temperature range Dimensions Mass Insulation resistance Dielectric strength Specifications Single-phase 100 to 240 V 50/60 Hz Single-phase 85 to 264 V 50/60 Hz 0.1 A 4 figures 96 0 to +40 °C (+32 to +104 °F) 49 (W) × 61 (H) × 80.4 (D) mm [1.93 (W) × 2.40 (H) × 3.16 (D) in.] Approximately 200 g (7 oz.) 100 MΩ or more under normal temperature and humidity, when measured the following by a 500 VDC megger. ・Power input - Case ・Power input - FG terminal ・Case - FG terminal Sufficient to withstand the following for one minute, under normal temperature and humidity. ・Power input - Case ・Power input - FG terminal ・Case - FG terminal Note Conduct the insulation resistance measurement or withstand voltage test separately on the speed control pack and the driver. Conducting the insulation resistance measurement or withstand voltage test with the speed control pack and driver connected may result in injury or damage to the product. • Characteristics, specifications and dimensions are subject to change without notice. • is a trademark of Oriental Motor Co., Ltd. • Please contact your nearest Oriental Motor office for further information. Technical Support Line Tel:(800)468-3982 Available from 7:30 AM to 5:00 PM, P.S.T. E-mail: [email protected] www.orientalmotor.com Tel:(02)8228-0707 Fax:(02)8228-0708 Tel:(6745)7344 Fax:(6745)9405 Headquarters and Düsseldorf Office Tel:0211-5206700 Fax:0211-52067099 Munich Office Tel:08131-59880 Fax:08131-598888 Hamburg Office Tel:040-76910443 Fax:040-76910445 Tel:(03)22875778 Fax:(03)22875528 KOREA Tel:(032)822-2042~3 Fax:(032)819-8745 Tel:01256-347090 Fax:01256-347099 Tel:01 47 86 97 50 Fax:01 47 82 45 16 Tel:02-93906346 Fax:02-93906348 14 Headquarters Tel:(03)3835-0684 Tokyo, Japan Fax:(03)3835-1890 Printed on Recycled Paper