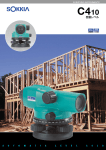
Download 取扱説明書
Transcript
SURVEYING INSTRUMENTS
C300/C310/C320/C330
自動レベル
Automatic Level
取扱説明書
OPERATOR'S MANUAL
SURVEYING INSTRUMENTS
This is the mark of the Japan
Surveying Instruments Manufacturers Association.
C300/C310/C320/C330
自動レベル
取扱説明書
このたびは自動レベル C300/C310/C320/C330
をお買い上げいただき、ありがとうござい
ます。
● この取扱説明書は、実際に機械を操作し
ながらお読みください。常に適切な取り
扱いと、正しい操作でご使用くださいま
すようお願いいたします。
● ご使用前には、標準品が全てそろってい
るかご確認ください。
(
「11. 標準品一式(格納図)」参照)
● 扱いやすく、高い精度の製品をお届けす
るため、常に研究・開発を行なっており
ます。製品の外観および仕様は、改良の
ため、予告なく変更されることがありま
すので、あらかじめご了承ください。
● 掲載のイラストは、説明を分かりやすく
するために、実際とは多少異なる表現が
されている場合があります。あらかじめ
ご了承ください。
目
次
1 . 安全にお使いいただくために ・・・・ 1
1.1 全体について ・・・・・・・・・・・・・・・・・・・・・ 2
1.2 三脚について ・・・・・・・・・・・・・・・・・・・・・ 3
1.3 標尺について ・・・・・・・・・・・・・・・・・・・・・ 3
2 . C300/C310/C320/C330 の特徴 ・・・・・・・ 4
3 . 各部の名称 ・・・・・・・・・・・・・・・・・・・・・・・・ 5
4 . 測定準備 ・・・・・・・・・・・・・・・・・・・・・・・・・・ 6
4.1 機械を据え付ける ・・・・・・・・・・・・・・・・・・・
4.2 視準をする ・・・・・・・・・・・・・・・・・・・・・・・・・
5 . 測定方法 ・・・・・・・・・・・・・・・・・・・・・・・・・・
5.1 高低差を測定する ・・・・・・・・・・・・・・・・・
5.2 水平角を測定する ・・・・・・・・・・・・・・・・・
5.3 距離を測定する ・・・・・・・・・・・・・・・・・・・
6 . 特別付属品(別売品)・・・・・・・・・・・・・
6.1 ダイアゴナルアイピース DE22 ・・・・・
7 . 機械の点検・調整 ・・・・・・・・・・・・・・・・
7.1 円形気泡管 ・・・・・・・・・・・・・・・・・・・・・・・・
7.2 自動補正機構 ・・・・・・・・・・・・・・・・・・・・・
7.3 焦点板十字線 ・・・・・・・・・・・・・・・・・・・・・
8 . 取り扱い上の注意 ・・・・・・・・・・・・・・・・
6
8
9
9
11
12
13
13
14
14
15
16
18
9 . 仕様 ・・・・・・・・・・・・・・・・・・・・・・・・・・・・・・・ 19
10 . 保守 ・・・・・・・・・・・・・・・・・・・・・・・・・・・・・・・ 20
11 . 標準品一式(格納図)・・・・・・・・・・・・・ 21
1. 安全にお使いいただくために
この取扱説明書には、製品を安全にお使いいただ
き、お使いになる人や他の人への危害、財産への損
害を未然に防ぐために、必ずお守りいただきたいこ
とが、表示されています。
その内容と図記号の意味は次のようになっていま
す。内容をよく理解してから本文をお読みくださ
い。
表示の意味
C 警告
この表示を無視して、誤った取
り扱いをすると、使用者が死亡
または重傷を負う可能性が想定
される内容を示しています。
C 注意
この表示を無視して、誤った取
り扱いをすると、使用者が傷害
を負う可能性が想定される内容
および物的損害のみの発生が予
想される内容を示しています。
-1-
1.1 全体について
C 警告
● 望 遠 鏡 で 太 陽 を 絶 対 に 見 な い で く だ さ い。
失明の原因になります。
● 望遠鏡で反射プリズムなど反射物からの太陽光
線を見ないでください。失明の原因になります。
● 格納ケースを本体に入れて持ち運ぶ際には、必
ず格納ケースの掛け金をすべて締めてくださ
い。本体が落下してケガをするおそれがありま
す。
C 注意
● 格納ケースを踏み台にしないでください。すべ
りやすくて不安定です。転げ落ちてケガをする
おそれがあります。
● 格納ケースの掛け金・ベルトが傷んでいたら機
器を収納しないでください。ケースや機器が落
下して、ケガをするおそれがあります。
● 垂球を振り回したり、投げたりしないでくださ
い。人に当たり、ケガをするおそれがあります。
-2-
1.2 三脚について
C 注意
● 機器を三脚にとめるときは、定心かんを確実に
締めてください。不確実だと機械が落下して、ケ
ガをするおそれがあります。
● 機器をのせた三脚は、蝶ねじを確実に締めてく
ださい。不確実だと三脚が倒れ、ケガをするお
それがあります。
● 三脚の石突きを人に向けて持ち運ばないでくだ
さい。人に当たり、ケガをするおそれがあります。
● 三脚を立てるときは、脚もとに人の手・足がな
いことを確かめてください。手・足を突き刺し
て、ケガをするおそれがあります。
● 三脚の持ち運びの際は、蝶ねじを確実に締めて
ください。ゆるんでいると脚が伸び、ケガをす
るおそれがあります。
1.3 標尺について
C 警告
● 雷が発生する天候下では使わないでください。
標尺は導電体ですので、落雷を受けて死傷する
おそれがあります。
● 高圧線・変電設備の近くで使用する際は取扱い
に十分注意してください。標尺は導電体ですの
で、接触すると感電のおそれがあります。
-3-
2. C300/C310/C320/C330 の特徴
短視準型自動レベル C300/C310/C320/C330 は、ソキ
ア独自の開発による磁気制動方式の自動補正機構
を内蔵しています。そのため、わずかな傾きは、自
動的に補正することができ、温度変化・衝撃に対し
ても安定性があります。
また、簡単な水平角測定機能・水平距離測定機能も
付いておりますので、土木・建築・各種工事に威力
を発揮します。
-4-
3. 各部の名称
図 3.1
1
反射鏡
8
対物レンズ
2
ピープサイト *
9
合焦つまみ
3
円形気泡管調整ねじ
10
水平目盛盤回転
4
円形気泡管
5
6
7
リング
整準ねじ
11
水平目盛盤窓
底板
12
調整ねじカバー
微動ねじ
13
接眼レンズ
*C320/C330 はガンサイトとなります。
-5-
4. 測定準備
4.1 機械を据え付ける
1)三脚の下部のバンドをはずし、固定ねじをゆる
めます。(図 4.1)
図 4.1
2)三脚の脚先を閉じたまま地面につけ、脚頭が目
の高さになるまで脚を伸ばし、固定ねじを締め
ます。
3)脚先が正三角形になるように三脚を広げます。
4)脚頭をほぼ水平にしてから、石突を踏み込み、
三脚をしっかりと据え付けます。(図 4.2)
図 4.2
-6-
5)機械を脚頭にのせ、定心かんで固定します。
(図 4.3)
図 4.3
6)球面脚頭の場合、定心か
ん を 少 し ゆ る め、底 板
6 を両手で持って脚頭
上をすべらせ、円形気泡
管 4 の○付近に気泡を
導きます。(図 4.4)
図 4.4
7)定心かんを締めます。
8)整準ねじ 5 を回して、気
泡を○の中央に入れま
す。(図 4.5)
図 4.5
-7-
4.2 視準をする
1)ピ ー プ サ イ ト 2 を 使 っ
て、対物レンズ 8 を、目
標物に向けます。
2)接眼レンズ 13 を徐々に引
き出しながら、焦点板十
字線がぼける寸前で止め
ます。
(図 4.6)
図 4.6
3)微動ねじ 7 を回して視野
の中央近くに目標物を入
れ、合焦つまみ 9 を回し
て目標物にピントを合わ
せます。(図 4.7)
4)望遠鏡をのぞきながら目
を少し上下左右に振って
みます。
5)目標像と焦点十字線が相
対的にずれなければ測定
準備完了です。ずれる場
合は、2)から合わせ直し
て下さい。
※ 5)でずれるような状態だ
と、
測定値に誤差が生じま
す。
ピント合わせはしっか
り行なって下さい。
-8-
図 4.7
5. 測定方法
5.1 高低差を測定する
1)地点 AB のほぼ中央にレベルを据え付けます。こ
の時スタジア線(「5.3 距離を測定する」参照)
を使用すると便利です。(図 5.1)
※ 機械を A、B 二点の中央に正確に置いて観測すれ
ば視準軸の水平が少し狂っていても結果に影響
せず誤差を生じません。なるべく中央に据えて
下さい。
図 5.1
2)A 点に標尺をまっすぐに立て、値 a(後視)を読
みとります。
3)B 点にも標尺を立てて視準し、値 b(前視)を読
みとります。
-9-
4)差 a-b を計算すると、高低差が求まります。
計算例
h=a-b=1.735m-1.224m=0.511m
よって B 点の方が A 点より 0.511m 高いこと
がわかります。
(B 点が A 点より低ければマイナスの符号が
付きます。)
< AB 間の距離が長い場合、または高低差が大きい
場合>
1)図5.2のように偶数の区間に分けて観測します。
図 5.2
2)計算は下記のように行ないます。
高低差 = 後視の総和 - 前視の総和
求める点の標高 = 既知点の標高 + 高低差
※ 測定精度を上げる場合には、A から B へ、B から
A へ観測して、閉合誤差を計算することをお勧め
します。
-10-
5.2 水平角を測定する
水平目盛は、時計回りにふられています。したがっ
て、向って左から右へ視準するようにして下さい。
1)垂球 14 をおろして、測点上に機械を据えます。
(図 5.3)
図 5.3
2) A 点を視準し、水平目盛盤窓 11 を見ながら水平目
盛盤回転リング 10 を回して 0°に合わせます。
(図 5.4)
図 5.4
3) B点を視準して目盛盤窓の値を読みます。
(図5.5)
図 5.5 のときは 91.5°です。
図 5.5
-11-
5.3 距離を測定する
望遠鏡の焦点板には、スタジア線が入っており、簡
単な測距(スタジア測量)ができます。
1)標尺を視準して、スタジア線に挟まれた長さ
(cm)を測定します。
(図 5.6)
図 5.6
2)標尺上で測定した cm の値をそのまま m の単位に
おきかえれば、標尺までの距離になります。
例 スタジア線に挟まれた長さが 32cm の時、標尺
までの距離 は 32m になります。
(図 5.7)
図 5.7
-12-
6. 特別付属品(別売品)
6.1 ダイアゴナルアイピース DE22
機械の後にまわれない時は、オプションのダイアゴ
ナルアイピース DE22 が便利です。
(図 6.1)
図 6.1
1) 調整ねじカバー 12 にダイアゴナルアイピースを
かぶせます。
2)接続部を軽く押さえながらダイアゴナルアイ
ピースの接眼つまみを回して、焦点板十字線に
ピントを合わせます。
以下は「4.2 視準をする」にならってご使用下さい。
-13-
7. 機械の点検・調整
7.1 円形気泡管
1)整 準 ね じ 5 を 使 っ て 気
泡を○の中央に入れま
す。
2)本体を 180°回転させま
す。(図 7.1)
図 7.1
気泡が○の中にあれば調
整は不要です。気泡が○
におさまらないときは、
次の調整を行って下さ
い。
3) 整 準ね じ 5 で ずれ 量 の
半分を戻します。(図 7.2)
図 7.2
4)あとの半分を六角棒ス
パナ 15 を使い、円形気泡
管調整ねじ 3 を回して、
○内に気泡を入れて下
さい。
(図 7.3)
5)再度望遠鏡を反転して、
気泡が○の中にあれば
調整完了です。
-14-
図 7.3
7.2 自動補正機構
1)気泡が○の中央に入るように機械を据えて下さ
い。
2)視準軸に近い整準ねじ 1ヶを左右それぞれ 1/8
回転し、十字線の動きを見て下さい。
(図 7.4)
(または、見やすい目標物を視準しながら脚、本
体などを軽くたたいてみて下さい。)
図 7.4
一瞬、十字線がずれますが、すぐ元に戻れば
正常です。使用前には必ずチェックして下さ
い。
-15-
7.3 焦点板十字線
1)30 ~ 50m 離れた A・B の中央で a1・b1 を読みと
ります。(図 7.5)
図 7.5
2)点 A から 2m の地点に機械を据え、再び a2・b2
を読みとります。(図 7.6)
図 7.6
この時、望遠鏡は点 B を視準したままにしてお
きます。
b2'=a2-(a1-b1) を計算して b2'=b2 ならば焦点
板十字線は正常です。等しくならない時は次
の調整をして下さい。
-16-
3)調整ねじカバー 12 を左に回してはずします。
図 7.7
4)調整ピン 16(「11. 標準品一式(格納図)」参照)
を使って、b2'=b2 になるまで調整します。例え
ば、図 7.6 の場合、b2 の値が大きすぎるので、
十字線を下げる必要があります。この場合は調
整ねじを少しゆるめて下さい。また、十字線を
上げたいときは調整ねじを締めて下さい。
(図 7.8)
図 7.8
5)再び 1)~ 2)までの点検を行ない、完全になる
まで調整します。
-17-
8. 取り扱い上の注意
1)本機は精密機械です。取り扱いには十分注意し
て下さい。特に振動・衝撃・ほこり・水分・湿
気はなるべくさけて下さい。
2)ねじ部を傷める原因となりますので、機械を直
接土の上に置かないで下さい。
3)機械を三脚上につけたまま一時使わないとき
は、レンズキャップ 20 を付け、ビニールカバー
18 で全体を覆って下さい。
(「11. 標準品一式
(格納図)
」参照)。
4)機械および格納ケースが汚れた場合は、水また
は薄めた中性洗剤に浸したやわらかい布を固く
絞って汚れをふきとって下さい。アルカリ性洗
剤や有機溶剤は使用しないで下さい。
5)付属品類は、運搬中に移動しないように所定の
位置に納めて下さい。
-18-
9. 仕様
望遠鏡
全長
像
対物レンズ有効径
倍率
視界(100m)
分解力
最短合焦距離
スタジア乗数、加数
水平目盛盤
直径
最小読取値
自動補正機構
範囲
円形気泡管
感度
1km 往復標準偏差
防水構造
寸法
C300/C310:
C320/C330:
質量
本体
C300 / C310 / C320 / C330
215mm
正像
36mm
/ 32mm
28 × /26 × /24 × /22 ×
1°25'(2.5m)
3.5"
/ 4.0"
0.3m(機械中心より)
100・0
103mm
1°
± 15'
10'/2mm
2.0mm
JIS 保護等級4(防まつ形)*
130(W)×215(D)×140(H)mm
130(W)×215(D)×135(H)mm
約 1.7kg(3.8lbs)
* いかなる方向からの水の飛まつを受けても有害
な影響のないもの。
-19-
10. 保守
1)使用前には、三脚各部の点検を行なって下さい。
2)作業中、雨がかかった場合は水分を良く拭き
取って下さい。
3)測量終了後、格納の際は必ず機械各部の清掃を
して下さい。特にレンズは息でくもらせ、きれ
いな布(洗いざらしの木綿が良い)または柔か
いティッシュペーパーで軽く拭いて下さい。
4)機械の回転部分、ねじの部分に異物が入ったと
思われる時や、望遠鏡内部のレンズ、プリズム
等に水滴の跡やカビ等を発見した時は、すみや
かに最寄りの営業担当までご連絡下さい。
5)常に高い精度を保持するため、年間 1 ~ 2 回の
定期点検、検査をお勧めします。その際は、最
寄りの営業担当までご連絡下さい。
-20-
11. 標準品一式(格納図)
C300/C310/C320/C330
14
15
16
20
19
17 18
ケース SE49
図 11.1
14
垂球 ・・・・・・・・・・ 1
18
ビニールカバー ・・・・1
15
六角棒スパナ ・・ 1
19
シリコーンクロス ・・1
16
調整ピン ・・・・・・ 1
20
レンズキャップ ・・・・1
17
取扱説明書 ・・・・ 1
-21-
メモ
-22-
C300/C310/C320/C330
Automatic Level
OPERATOR'S MANUAL
Thank you for selecting the C300/C310/
C320/C330.
• Before using the instrument, please read
this operator's manual carefully.
• Verify that all equipment is included.
(See "11. STANDARD EQUIPMENT")
• This specifications and general appearance of the instrument may be altered at
any time and may differ from those
appearing in brochures and this manual.
• Some of the diagrams shown in this manual may be simplified for easier understanding.
CONTENTS
1. PRECAUTIONS FOR SAFE OPERATION
••••••••••••••••••••••••••••••••••••••••••••••••• 1
1.1
1.2
1.3
GENERAL••••••••••••••••••••••••••••••••••••• 2
TRIPOD•••••••••••••••••••••••••••••••••••••••• 3
STAFF•••••••••••••••••••••••••••••••••••••••••• 4
2. FEATURES OF C300/C310/C320/C3305
3. PARTS OF THE INSTRUMENT ••••••••• 6
4. PRELIMINARIES••••••••••••••••••••••••••• 7
4.1
4.2
SETTING UP THE INSTRUMENT ••••••• 7
FOCUSSING AND SIGHTING •••••••••••• 9
5. OPERATION •••••••••••••••••••••••••••••••• 10
5.1
5.2
5.3
MEASURING HEIGHT DIFFERENCE •• 10
MEASURING HORIZONTAL ANGLE•••• 12
MEASURING DISTANCE USING
THE STADIA LINES••••••••••••••••••••••••• 13
6. OPTIONAL ACCESSORIES ••••••••••••• 14
6.1
DIAGONAL EYEPIECE DE22••••••••••••• 14
7. CHECKS AND ADJUSTMENTS •••••••• 15
7.1
7.2
7.3
CIRCULAR LEVEL •••••••••••••••••••••••••• 15
AUTOMATIC COMPENSATOR ••••••••••• 16
RETICLE CROSS-LINE
(LINE OF SIGHT) •••••••••••••••••••••••••••• 17
8. GENERAL PRECAUTIONS•••••••••••••• 19
9. SPECIFICATIONS ••••••••••••••••••••••••• 20
10.MAINTENANCE•••••••••••••••••••••••••••• 21
11.STANDARD EQUIPMENT
(Packing layout) ••••••••••••••••••••••••••• 22
1. PRECAUTIONS FOR SAFE
OPERATION
For the safe use of the product and prevention of
injury to operators and other persons as well as
prevention of property damage, items which should
be observed are indicated by an exclamation point
within a triangle used with WARNING and CAUTION statements in this operator's manual.
The definitions of the indications are listed below.
Be sure you understand them before reading the
manual's main text.
Definition of Indication
CWARNING
Ignoring this indication and
making an operation error could
possibly result in death or serious injury to the operator.
CCAUTION
Ignoring this indication and
making an operation error could
possibly result in personal
injury or property damage.
-1-
1.1 GENERAL
CWARNING
● Never look at the sun through the telescope.
Loss of eyesight could result.
● Do not look at reflected sunlight from a prism or
other reflecting object through the telescope.
Loss of eyesight could result.
● When securing the instrument in the carrying
case make sure that all catches, including the
side catches, are closed. Failure to do so could
result in the instrument falling out while being
carried, causing injury.
CCAUTION
● Do not use the carrying case as a footstool. The
case is slippery and unstable so a person could
slip and fall off it.
● Do not place the instrument in a case with a dam-
aged catch or belt. The case or instrument could
be dropped and cause injury.
● Do not wield or throw the plumb bob. A person
could be injured if struck.
-2-
1.2 TRIPOD
CCAUTION
● When mounting the instrument to the tripod,
tighten the centring screw securely. Failure to
tighten the screw properly could result in the
instrument falling off the tripod causing injury.
● Tighten securely the leg fixing screws of the tripod on which the instrument is mounted. Failure
to tighten the screws could result in the tripod
collapsing, causing injury.
● Do not carry the tripod with the tripod shoes
pointed at other persons. A person could be
injured if struck by the tripod shoes.
● Keep hands and feet away from the tripod
shoes when fixing the tripod in the ground. A
hand or foot stab wound could result.
● Tighten the leg fixing screws securely before carrying the tripod. Failure to tighten the screws could
lead to the tripod legs extending, causing injury.
-3-
1.3 STAFF
CCAUTION
● Do not use under thunderous weather conditions. Staff is conductive and if struck by lightning, death or injury could result.
● Handle with care when using near high voltage
cables or transformers. Staff is conductive and
contact could result in electric shock.
-4-
2. FEATURES OF C300/C310/C320/C330
The C300/C310/C320/C330 is equipped with a fastaction, magnetically-damped, automatic compensator. After the instrument has been approximately
leveled using the circular level, the line of sight is
accurately leveled by the automatic compensating
mechanism.
The C300/C310/C320/C330 has been designed to
allow stable surveying operations regardless of
environmental conditions such as vibration and
temperature changes.
The C300/C310/C320/C330 has a simple horizontal
circle for angle measurement, and the stadia lines
on the reticle can be used for approximate distance
measurement.
The C300/C310/C320/C330 is ideally suited for general survey work, civil engineering and construction
work.
-5-
3. PARTS OF THE INSTRUMENT
Fig.3.1
1 Reflector
8
Objective lens
Peep sight*
9
Focussing knob
Circular level
adjusting screw
4 Circular level
5 Leveling foot
screw
6 Base plate
11
Horizontal circle
positioning ring
Horizontal circle window
2
3
11
12
13
Reticle adjusting
screw cover
Eyepiece
Horizontal fine
motion screw
*The C320/C330 has a gun sight.
7
-6-
4. PRELIMINARIES
4.1 SETTING UP THE INSTRUMENT
1) Unbuckle the band around the tripod legs and
loosen the extension clamp screws. (Fig.4.1)
Fig.4.1
2) With the tripod closed, extend the tripod legs
until the tripod head is roughly at eye level, then
re-tighten the clamp screws.
3) Spread the tripod legs so that the leg tips form a
regular triangle on the ground.
4) Make sure that the tripod head is approximately
level. Fix the tripod shoes firmly into the ground.
(Fig.4.2)
Fig.4.2
-7-
5) Hold the instrument on the tripod head and
tighten the centering screw. (Fig.4.3)
Fig.4.3
6) When using the spherical head
tripod, slightly loosen the centering screw, hold the base plate
6 in both hands, and slide it
across the tripod head until the
bubble is in the proximity of the
circular level 4 . (Fig.4.4)
Fig.4.4
7) Tighten the centering screw.
8) Adjust the leveling foot screws
5 until the bubble is exactly
centered in the center circle.
(Fig.4.5)
Fig.4.5
-8-
4.2 FOCUSSING AND SIGHTING
1) Use the peep sight 2 to point the
objective lens 8 at the target.
2) Gradually turn the eyepiece 13
until just before the reticle crossline becomes blurred. (Fig.4.6)
Fig.4.6
3) Use the horizontal fine motion
screw 7 to center the target
in the field of view. Turn the 2speed focussing knob 9 to
focus on the target. (Fig.4.7)
Fig.4.7
4) Looking through the telescope,
shift your eyes slightly in the horizontal and vertical directions.
5) If there is no parallax between
the target image and the reticle, preparations for measurement are complete. If there is
parallax, repeat the above procedure from step 2) in order to
refocus the reticle.
※ If there is parallax, measurement errors may result, so
make sure to adequately focus
the target.
-9-
5. OPERATION
5.1 MEASURING HEIGHT DIFFERENCE
1) Set up the instrument at a point approximately
halfway between points A and B. The reticle
stadia lines can be used to optically compare
the distances. (See "5.3 MEASURING DISTANCE USING THE STADIA LINES".)
※ For more accurate measurement, set the instrument as close to halfway as possible, to eliminate errors due to sighting axis misalignment.
Fig.5.1
2) Position the staff vertically at point A.
Take the reading a (backsight) on the staff at
point A.
3) Then sight the staff at point B and obtain the
reading b (foresight).
4) The difference a - b is the height difference h of
B from A.
Example:
h = a - b = 1.735m - 1.224m = 0.511m
-10-
Therefore point B is 0.511m higher than point A.
(The value of h will be negative if point B is
lower than point A.)
<When the distance between points A and B is
large or if the height difference is great>
1) Divide the distance into a number of sections
and determine the height difference of each
section.
Fig.5.2
2) The height difference between points A and B is
the total of the height differences of all the sections.
The general formula is:
Altitude of the required point = altitude of known
point + total of backsight values - total of foresight
values.
※ This simple leveling technique has no error
check. It is better to measure from A to B and
back to A so that the error of closure can be calculated.
-11-
5.2 MEASURING HORIZONTAL ANGLE
The horizontal circle graduations are annotated
every 10°(360°) or 10 gon (400 gon) in a clockwise direction. As a result, sighting is performed
from left to right.
1) Use the plumb bob 14 to set up the instrument
directly above the surveying point.
Fig.5.3
2) Sight point A, and set the horizontal circle 11 to 0°
by turning the horizontal circle positioning ring 10 .
Fig.5.4
3) Sight point B and take the angle reading.
Example: 91.5°(or 91.5 gon) in (Fig.5.5) below.
Fig.5.5
-12-
5.3 MEASURING DISTANCE USING THE
STADIA LINES
The stadia lines etched on the reticle can be used
for distance measurement.
1) Sight the staff, and count the number of centimeters, , between the two stadia lines. (Fig.5.6)
Fig.5.6
2) This number is equivalent to the distance in
meters between the staff and the instrument.
Example:
If the length ( ) is 32 cm, the horizontal distance
from the instrument center A to the staff B is 32 m.
Fig.5.7
-13-
6. OPTIONAL ACCESSORIES (sold separately)
6.1 DIAGONAL EYEPIECE DE22
The diagonal eyepiece, DE22, is available for use
in restricted viewing positions.
Fig.6.1
1) Push the DE22 on to the reticle adjusting screw
cover 12 .
2) Holding the base of the DE22, focus on the reticle by turning the eyepiece of the DE22.
Perform focussing and sighting as described in "4.2
FOCUSSING AND SIGHTING".
-14-
7. CHECKS AND ADJUSTMENTS
7.1 CIRCULAR LEVEL
1) Adjust the leveling foot screws
5 to center the bubble in the
circular level 4 .
2) Turn the instrument 180°(or
200 gon). (Fig.7.1)
Fig.7.1
If the bubble is inside the
circle, no adjustment is necessary. If the bubble shifts
from within the circle, adjust
as follows:
3) Compensate for one-half of
the shift by adjusting the leveling foot
(Fig.7.2)
screws
5 .
Fig.7.2
4) Eliminate the remaining half
shift with the circular level
adjusting screws
3
using
the hexagonal wrench
(Fig.7.3)
15
.
5) Turn the instrument 180°
(or 200 gon). If the bubble
remains in the circle, adjustment is complete.
Fig.7.3
-15-
7.2 AUTOMATIC COMPENSATOR
1) Center the bubble in the circular level 4 .
2) While turning the leveling screw 1/8 of a turn to
the right or left, check
the movement of the horizontal cross-line while
sighting a clear target.
The cross-line should
bounce, then stabilise.
Fig.7.4
With automatic levels it is advisable to
check the movement of the automatic compensator before use.
A similar test can be performed as follows:
Center the bubble in the circular level.
Tap the tripod legs or the main body while sighting
a clear target. The horizontal cross-line should
bounce, but immediately return to the original position, thus indicating that the automatic compensator
mechanism is working normally.
-16-
7.3 RETICLE CROSS-LINE (LINE OF SIGHT)
1) Set the instrument halfway between two points, A
and B, 30 to 50m apart. Take readings a1 and b1.
(Fig.7.5)
Fig.7.5
2) Set the instrument at a point 2 m from point A.
Take readings a2 and b2. (Fig.7.6)
Fig.7.6
Leave the telescope sighted on point B.
Calculate
b2’ = a2 - (a1 - b1)
If b2’ = b2, the horizontal cross-line is
normal and no adjustment is necessary.
When b2’ and b2 are different, adjust
the cross-line as follows:
-17-
3) Unscrew and remove the adjusting screw cover
12
.
Fig.7.7
4) Use the adjusting pin to eliminate the difference
between b2’ and b2. (See "11. STANDARD
EQUIPMENT".) In the example shown in Fig.7.6
b2 is larger than b2’. The horizontal line needs to
be lowered. To lower the horizontal line, carefully loosen the adjusting screw by a small
amount using the adjusting pin 16 . To raise the
horizontal line, tighten the adjusting screw.
(Fig.7.8)
Fig.7.8
5) Repeat steps 1) and 2) of the adjustment procedure until the difference between b2’ and b2 is
small.
-18-
8. GENERAL PRECAUTIONS
1) The C300/C310/C320/C330 is a precision instrument.
Handle with care and avoid heavy shocks and
vibration.
2) Never place the instrument directly on the
ground.
3) When the instrument is left on the tripod, cap
the objective lens 20 and cover the entire
instrument with the vinyl cover 18 provided.(See "11. STANDARD EQUIPMENT".)
4) To clean the instrument or carrying case, lightly
moisten a soft cloth in a mild detergent solution.
Wring out excess water until the cloth is slightly
damp, then carefully wipe the surface of the
unit. Do not use any organic solvents or alkaline
cleaning solutions.
5) When the instrument is placed in the case,
store the accessories in their specified places.
-19-
9. SPECIFICATIONS
Telescope
Length:
Image:
Objective aperture:
Magnification:
Field of view:
Resolving power:
Minimum focus:
C300 / C310 / C320 / C330
215 mm (8.5 inch)
Erect
28× / 26× / 24× / 22×
36mm
/ 32mm
1°25’ (2.5m at 100m)
3.5”
/ 4.0”
0.3 m (1ft)
(from instrument center)
1:100
0
Stadia ratio:
Additive constant:
Horizontal circle
Diameter:
103 mm (4.1 inch)
Graduation:
1°or 1 gon
Automatic compensator
Range:
± 15’
Circular level
Sensitivity:
10’/2 mm
Standard deviation for 1 km (1mile) of double
run leveling:
2.0 mm (0.008ft)
Water resistance
IPX4
Size:
C300/C310: 130 (W) x 215 (D) X 140 (H) mm
C320/C330: 130 (W) x 215 (D) X 135 (H) mm
Weight:
Instrument:
1.7 kg (3.8lbs)
-20-
10. MAINTENANCE
1) Check the tripod for loose fit and loose screws.
2) Wipe off moisture completely if the instrument
gets wet during survey work.
3) Always clean the instrument before returning it
to the case. The lens requires special care.
Dust it off with a clean cloth first to remove tiny
particles. Then, after providing a little condensation by breathing on the lens, wipe it with a soft
clean cloth or lens tissue,
4) If any trouble is found on the rotatable portion,
screws or optical parts (e.g. lens), contact our
agent.
5) Check the instrument for proper adjustment
periodically to maintain the instrument accuracy.
-21-
11. STANDARD EQUIPMENT
(Packing layout)
C300/C310/C320/C330
14
15
16
20
19
17 18
Case SE49
Fig.11.1
14
Plumb bob •••••••••••• 1 18 Vinyl cover •••••• 1
15
Hexagonal wrench ••• 1 19 Cleaning cloth •• 1
16
Adjusting pin •••••••••• 1 20 Lens cap ••••••••• 1
17
Operator’s manual••• 1
-22-
MEMO
-23-
MEMO
-24-
MEMO
-25-
MEMO
-26-
第 4 版 05-0806/4th ed. 05-0806
Printed in China ©2004 SOKKIA TOPCON CO., LTD.


