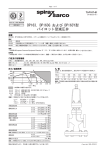
1
Solar Charge Controller Ver. 3.00 DENRYO CO., LTD. 株式会社 電 菱 日本語 取扱説明書 English User's Manual Contents 1. Safety Information............................................................................ 3 2. Appearance...................................................................................... 4 3. Connection....................................................................................... 5 4. Operation......................................................................................... 6 5. LED Indications................................................................................ 12 6. Night Light Timer.............................................................................. 13 7. Troubleshooting................................................................................16 8. Specifications................................................................................... 17 9. Certifications.................................................................................... 17 10. Limited Warranty.............................................................................. 18 11. Glossary...........................................................................................18 Thank you for purchasing the SolarAmp mini solar charge controller. This manual contains important safety, installation and operating instructions for the SolarAmp mini solar charge controller in order to prevent the users from any damage. Make sure to read all of the instructions and cautions in the manual before beginning installation. This Document must not be copied, photocopied, reproduced or converted to any electronic or machine-readable form in whole or in part without prior written approval of DENRYO CO., LTD. © 2010-2012 DENRYO CO., LTD. All Rights Reserved. 2 1. Safety Information 1-1 : Do NOT short circuit 1-2 : Protect from direct rain 1-3 : Explosion hazard 1-4 : Mounting direction 1-5 : Negative earth ground + 1-6 : Do NOT reverse polarity connection - - + 3 + - English 2. Appearance MODE SW STATUS LED STATUS MODE SW MODE LED MODE ERROR LED ERROR 120 SELECT SW SELECT SW RESET PV BATTERY LOAD + − + − + − 20 5 20 50 (mm) 4 3. Connection 3-1 : Connect wires to SolarAmp mini first 3-2 : Connect to battery Screw tightly not to loose. It is recommended to install an external fuses (less than 10A) between controller and battery. + − BATTERY 3-4 : Connect to load Cover the PV with cloth not to generate electricity. It is recommended to install an external fuses (less than 10A) between controller and load. + − − + 3-5 : Connect battery to earth ground if necessary (Negative ground) + − BATTERY 5 English 3-3 : Connect to PV 4. Operation 4-1 : Battery Type Selection Follow the white arrow when you push the MODE SW (White Button). Follow the black arrow when you push the SELECT SW (Red Button). Battery Type Selection Sealed STATUS LED MODE LED Flooded LVD Voltage Compensation Normal Operation STATUS LED MODE LED AGM Night Light Type Selection STATUS LED MODE LED Timer Detail Settings Normal Operation Gel STATUS LED *1 MODE LED (1) To start setting, push the MODE SW during normal operation, and MODE LED will blink. (2) Push the SELECT SW, and the number of MODE LED blinks will change. (3) Check the MODE LED 1 blink, then push the MODE SW. (4) Check the number of MODE LED and STATUS LED blinks. (5) Push the SELECT SW, and the number of STATUS LED blinks will change. (6) The STATUS LED blinks indicate the battery type as below. Push the SELECT SW to desired type. ・STATUS LED 1 blinks : Sealed ・STATUS LED 2 blinks : Flooded ・STATUS LED 3 blinks : AGM ・STATUS LED 4 blinks : Gel (7) Check the number of STATUS LED blinks, then push the MODE SW to finish the setting. (8) All of the LEDs blink twice, and return to normal operation. *1 Timer Detail Settings can not be selected at this stage. To access, please see 4-3 Night Light Type Selection before. 6 4-2 : LVD Voltage Compensation Follow the white arrow when you push the MODE SW (White Button). Follow the black arrow when you push the SELECT SW (Red Button). Battery Type Selection 0V STATUS LED MODE LED Normal Operation − 0.1V LVD Voltage Compensation STATUS LED MODE LED − 0.2V Night Light Type Selection STATUS LED MODE LED Timer Detail Settings Normal Operation + 0.1V STATUS LED *1 + 0.2V MODE LED STATUS LED *1 Timer Detail Settings can not be selected at this stage. To access, please see 4-3 Night Light Type Selection before. 7 English (1) To start setting, push the MODE SW during normal operation, and MODE LED will blink. (2) Push the SELECT SW, and the number of MODE LED blinks will change. (3) Check the MODE LED 2 blinks, then push the MODE SW. (4) Check the number of MODE LED and STATUS LED blinks. (5) Push the SELECT SW, and the number of STATUS LED blinks will change. (6) The STATUS LED blinks indicate the compensating voltage value as below. Push the SELECT SW to desired compensating voltage value. 0V (No Compensation) ・STATUS LED 1 blinks : ・STATUS LED 2 blinks : -0.1V ・STATUS LED 3 blinks : -0.2V ・STATUS LED 4 blinks : +0.1V ・STATUS LED 5 blinks : +0.2V (7) Check the number of STATUS LED blinks, then push the MODE SW to finish the setting. (8) All of the LEDs blink twice, and return to normal operation. 4-3 : Night Light Type Selection Follow the white arrow when you push the MODE SW (White Button). Follow the black arrow when you push the SELECT SW (Red Button). Night Light OFF (Load is always ON) Battery Type Selection MODE LED STATUS LED Night Light ON (Dusk-to-Dawn) LVD Voltage Compensation Normal Operation STATUS LED MODE LED Night Light ON (Normal Timer) Night Light Type Selection STATUS LED MODE LED Timer Detail Settings Night Light ON (Rate Timer) *1 MODE LED Normal Operation *2 *3 STATUS LED (1) To start setting, push the MODE SW during normal operation, and MODE LED will blink. (2) Push the SELECT SW, and the number of MODE LED blinks will change. (3) Check the MODE LED 3 blinks, then push the MODE SW. (4) Check the number of MODE LED and STATUS LED blinks. (5) Push the SELECT SW, and the number of STATUS LED blinks will change. (6) The STATUS LED blinks indicate the night light type as below. Push the SELECT SW to desired type. ・STATUS LED 1 blinks : Night Light OFF (Load is always ON) ・STATUS LED 2 blinks : Night Light ON (Dusk-to-Dawn) ・STATUS LED 3 blinks : Night Light ON (Normal Timer) ・STATUS LED 4 blinks : Night Light ON (Rate Timer) (7) Check the number of STATUS LED blinks, then push the MODE SW to finish the setting. (8) All of the LEDs blink twice, and return to normal operation. *12 *3 * Timer Detail Settings can be accessed once normal timer or rate timer be selected. To set up normal timer detail, Please refer to 4-4 Normal Timer Setting. To set up rate timer detail, Please refer to 4-5 Rate Timer Setting. 8 4-4 : Normal Timer Setting Follow the white arrow when you push the MODE SW (White Button). Follow the black arrow when you push the SELECT SW (Red Button). Battery Type Selection 6 hours ON STATUS LED MODE LED Normal Operation 8 hours ON LVD Voltage Compensation STATUS LED MODE LED 10 hours ON Night Light Type Selection Normal Operation STATUS LED MODE LED 12 hours ON STATUS LED Timer Detail Settings 14 hours ON MODE LED STATUS LED 9 English (1) Before setting timer detail, please refer to 4-3 Night Light Type Selection to confirm the normal timer have been turned on. (2) To start setting, push the MODE SW during normal operation, and MODE LED will blink. (3) Push the SELECT SW, and the number of MODE LED blinks will change. (4) Check the MODE LED 4 blinks, then push the MODE SW. (5) Check the number of MODE LED and STATUS LED blinks. (6) Push the SELECT SW, and the number of STATUS LED blinks will change. (7) The STATUS LED blinks indicate the hours as below. Push the SELECT SW to desired time. ・STATUS LED 1 blinks : 6 hours in nighttime ・STATUS LED 2 blinks : 8 hours in nighttime ・STATUS LED 3 blinks : 10 hours in nighttime ・STATUS LED 4 blinks : 12 hours in nighttime ・STATUS LED 5 blinks : 14 hours in nighttime (8) Check the number of STATUS LED blinks, then push the MODE SW to finish the setting. (9) All of the LEDs blink twice, and return to normal operation. 4-5 : Rate Timer Setting Follow the white arrow when you push the MODE SW (White Button). Follow the black arrow when you push the SELECT SW (Red Button). Battery Type Selection 40% of nighttime ON STATUS LED MODE LED Normal Operation 50% of nighttime ON LVD Voltage Compensation STATUS LED MODE LED 60% of nighttime ON Night Light Type Selection Normal Operation STATUS LED MODE LED 70% of nighttime ON STATUS LED Timer Detail Settings 80% of nighttime ON MODE LED STATUS LED (1) Before setting timer detail, please refer to 4-3 Night Light Type Selection to confirm the rate timer have been turned on. (2) To start setting, push the MODE SW during normal operation, and MODE LED will blink. (3) Push the SELECT SW, and the number of MODE LED blinks will change. (4) Check the MODE LED 4 blinks, then push the MODE SW. (5) Check the number of MODE LED and STATUS LED blinks. (6) Push the SELECT SW, and the number of STATUS LED blinks will change. (7) The STATUS LED blinks indicate the rate of nighttime as below. Push the SELECT SW to desired time. ・STATUS LED 1 blinks : 40% of nighttime ・STATUS LED 2 blinks : 50% of nighttime ・STATUS LED 3 blinks : 60% of nighttime ・STATUS LED 4 blinks : 70% of nighttime ・STATUS LED 5 blinks : 80% of nighttime (8) Check the number of STATUS LED blinks, then push the MODE SW to finish the setting. (9) All of the LEDs blink twice, and return to normal operation. 10 4-6 : Reset (1) (2) (1) Push MODE SW and SELECT SW simultaneously. (2) Release your hands from both of the SWs than LED (2) blink twice. Successfully reset will be completed. 4-7 : Factory defaul (1) (2) English (1) Push MODE SW and SELECT SW simultaneously. (2) Keep pushing MODE SW and release your hand from (2) SELECT SW only. (3) (4) (3) MODE LED keeps to light during the MODE SW is pushed and (3) hold for five seconds. (4) When MODE LED turned off, the factory default is compeleted. 11 5. LED Indications 5-1 : STATUS LED and ERROR LED during normal operation STATUS LED Indication Description 1 blink Indication Battery Level Low 2 blinks 3 blinks Middle Full ERROR LED Description 1 blink 2 blinks LVD (LOAD OFF) Battery Error 3 blinks 4 blinks PV Error LVD & PV Error 5-2 : MODE LED and STATUS LED during mode setting Indication MODE LED Description Indication 1 blink 1 blink Battery Type Selection 2 blinks 3 blinks 4 blinks 2 blinks 3 blinks LVD Voltage Compensation Night Light Type Selection 1 blink 2 blinks 3 blinks 4 blinks 5 blinks 1 blink 2 blinks 3 blinks 4 blinks 1 blink 2 blinks 4 blinks Timer Detail Setting 3 blinks 4 blinks 5 blinks *Factory Default Setting 12 STATUS LED Description Sealed * : Charging 14.1V Float 13.7V Flooded : Charging 14.4V Float 13.7V AGM : Charging 14.3V Float 13.3V Gel : Charging 14.3V Float 13.7V 0V * (No Compensation) -0.1V -0.2V +0.1V +0.2V Night Light OFF (Load is always ON)* Night Light ON (Dusk-to-Dawn) Night Light ON (Normal Timer) Night Light ON (Rate Timer ) Normal Timer 6h * Rate Timer 40%* Normal Timer 8h Rate Timer 50% Normal Timer 10h Rate Timer 60% Normal Timer 12h Rate Timer 70% Normal Timer 14h Rate Timer 80% 6. Night Light Timer 6-1 : Multi Timer Night Day Day Night Light OFF (Load is always ON) Dusk-to-Dawn Normal Timer 6h Normal Timer 8h Normal Timer 10h Normal Timer 12h Normal Timer 14h Rate Timer 40% Rate Timer 50% English Rate Timer 60% Rate Timer 70% Rate Timer 80% Four Operation Modes MODE Night Light OFF Night Light ON (Dusk-to-Dawn) Night Light ON (Normal Timer) Night Light ON (Rate Timer) Description Load is always ON. Load will turn on between dusk time and sunrise. Customize setting hours 6, 8, 10, 12, 14. Choose the rate of night time 40%, 50%, 60%, 70%, 80%. Load Test Method When the Night light mode is ON and push SELECT SW more than two seconds, the load will turn on. When you release your hand from SW, the load will turn off. (This method is effective only before the load turn on in the day time). 13 6-2 : Early Start Lighting Function Day Night Dusk Turn on early Other controller's night light load ON point SolarAmp mini early start lighting load ON point SolarAmp mini has the early start lighting function. The load will start to turn on from dusk. This function will operate the following day after insatlling SolarAmp mini at the earliest. Soon after installing or sudden bad weather, the load will start to turn on by the condition of PV voltage. The conditions are as described. (1) Solar voltage will be less than 10V. (2) After that, solar voltage will be less than 8V. For this reasons, you will need to wait for more than 3 minutes to start to light at the night from charging the battery. 14 6-3 : Rate Timer Function Day Night Day Rate 80% Rate 70% Winter Rate 60% Rate 50% Rate 40% English Rate 40% Rate 50% Summer Rate 60% Rate 70% Rate 80% SolarAmp mini rate timer is different from a traditional night-light timer. The lighting time of load is set by a rate (%) of night time. Even if the night time is changed seasonally, the lighting-off time will be apporoximately at the same time. There is no need to reset the timer setting as seasons change. 15 7. Troubleshooting 7-1 : Lighting ERROR LED LVD : The battery voltage is low. Please charge with the battery 12.5V or more until becoming it. Battery : The cause is as follows. • Battery is not connected • Battery is low or too high voltage • Short-circuited • Deeply discharged battery cannot charge with recovery Please check the wire connection and battery voltage for the system. PV : The PV voltage is lower than battery voltage. This error will remain for about one minute after PV begins to generate. There is no problem though this error occurs during the night. LVD&PV : LVD and the PV error occur at the same time. 7-2 : Battery is not charged SolarAmp mini charge controller will not charge unless the PV voltage is higher than battery voltage. It takes approximately 3 minutes to start charging from PV voltage. In the event of a battery fault the charge controller will not charge. On the other hand, the charge controller will not charge when battery is fully charged or battery voltage more than 13V. 7-3 : Load does not operating properly Please check LVD status of solar controller. Even If the battery voltage is over 11.5V, once the controller become LVD, the load will NOT turn on unless the battery voltage be over 12.5V. 7-4 : LED does not light SolarAmp mini automatically turns off LED. LED lights for one minute only when SELECT SW is pushed. 7-5 : Early start lighting function does not operate The Early start lighting function does not operate on that day when the installation first day and the setting were changed. Besides, when it gets dark suddenly by the bad weather, it begins to light detecting from the power generation of the solar battery as well as an usual controller. 16 8. Specifications Model System Voltage Max. input Voltage Max. input Current Max. load Current Min. input battery Voltage Grounding Self-consumption Current Reverse Polarity Protected Operation Temperature Storage Temperature Humidity Dimensions (D x W x H) Weight Battery Type Charging Voltage Load Disconnect Voltage LVD Reconnect Charging Algorithm Temperature Coefficient 9. Certifications RoHS 17 English Wire Size SA-MN05-8 12 V 25 V 8.5 A 8.5 A 6V Negative ground 1 mA Fuse:10 A - 20 〜 + 60 ℃ - 30 〜 + 70 ℃ 5 〜 95 %RH (non-condensing) 20 x 50 x 120 mm 105 g 16AWG (1.3 mm2) 〜 22AWG (0.33 mm2) Sealed, Flooded, AGM, Gel Sealed Battery:14.1 V Flooded Battery:14.4 V AGM Battery:14.3 V Gel Battery:14.0 V 11.5 V (±0.2 V) 12.5 V (±0.2 V) 3-stage (Bulk, Absorption, Float) -30 mV/℃ 10. Limited Warranty Denryo warrants this prodcut against defects in material and workmanship for a period of ONE (1) year from the date of shipment to the original end user. Before requesting warranty service, check the Operator’s Manual to be certain that there is a problem with the product, then contact our authorized distributor. 11. Glossary PV : Photovoltaics Module (Solar Panel) LVD : Low Voltage Disconnect D/D : Dusk to Dawn DENRYO CO., LTD. 28-5, Nishinippori 2 Chome, Arakawa-ku Tokyo, 116-0013 Japan TEL FAX Email Website : : : : +81-3-3802-3671 +81-3-3802-2974 [email protected] www.denryo.com 18 太陽電池充放電コントローラ Ver. 3.00 株式会社 電 菱 日本語 取扱説明書 目 次 1. 安全について ........................................................................................ 21 2. 外観 ....................................................................................................... 22 3. 配線順序 ................................................................................................ 23 4. 操作方法 ................................................................................................ 24 5. LED 表示 ............................................................................................... 30 6. ナイトライト機能について ................................................................. 31 7. トラブルシューティング ..................................................................... 34 8. 仕様 ........................................................................................................ 35 9. 規格 ........................................................................................................ 35 このたびは、SolarAmp mini をお買い上げいただきありがとうございます。 この取扱説明書は SolarAmp mini を使用するお客様や他の人々への損害を未 然に防止するために、守っていただきたい事項を記載しています。必ず良く お読みください。 本書の著作権は㈱電菱に帰属します。本書の一部あるいは全部を㈱電菱から書面によ る事前承諾を得ることなく複写複製 ( コピー ) することを禁じます。 © 2010-2012 DENRYO CO., LTD. All Rights Reserved. 20 1. 安全について 1-1:短絡禁止 1-2:雨ざらし禁止 1-3:バッテリー爆発性 ガス注意 1-4:設置方法 日本語 1-5:マイナス接地専用 + 1-6:逆接続禁止 - - + 21 + - 2. 外観 MODE SW STATUS LED MODE LED STATUS MODE SW MODE ERROR LED ERROR 120 SELECT SW SELECT SW RESET PV BATTERY LOAD + − + − + − 20 5 20 50 (mm) 22 3. 配線順序 3-1:SolarAmp mini 本体へ の配線を行う 3-2:バッテリーへの配線 を行う 緩まないよう、ネジをしっかり 締めてください。 コントローラとバッテリーの間に ヒューズ (10A 以下 ) を入れること を推奨します。 + − BATTERY 3-3:太陽電池への配線を行う 3-4:負荷への配線を行う このとき、太陽電池はカバーをする コントローラと負荷の間にヒューズ などして、発電しないようにしてく (10A 以下 ) を入れることを推奨しま ださい。 す。 − − + 3-5:必要があればバッテリー を接地する ( マイナス接地 ) + − BATTERY 23 日本語 + 4. 操作方法 4-1:バッテリータイプ選択 MODE SW ( 白いボタン ) を押すと、白い矢印の方向に進みます。 SELECT SW ( 赤いボタン ) を押すと、黒い矢印の方向に進みます。 バッテリータイプ選択 シール型 STATUS LED MODE LED 非密閉型 LVD 電圧補正 通常動作 STATUS LED 設定完了 MODE LED AGM 型 STATUS LED ナイトライトタイプ選択 MODE LED ゲル型 STATUS LED タイマー詳細設定※ 1 MODE LED (1) 通常動作時、MODE SW を押すと MODE LED が点滅し、設定が可能に なります。 (2) SELECT SW を押すと、MODE LED の点滅回数が変化します。 (3) SELECT SW を押して MODE LED が 1 回点滅するのを確認してから MODE SW を押します。 (4) MODE LED と STATUS LED が点滅するのを確認してください。 (5) SELECT SW を押すと STATUS LED の点滅回数が変化します。 (6) STATUS LED の点滅回数によって、以下の様にバッテリータイプが変化 します。設定したい項目に合わせて SELECT SW を押してください。 ・STATUS LED 1 回点滅:シール型 ・STATUS LED 2 回点滅:非密閉型 ・STATUS LED 3 回点滅:AGM 型 ・STATUS LED 4 回点滅:ゲル型 (7) STATUS LED の点滅回数を確認してから、MODE SW を押して設定を 確定してください。 (8) 全ての LED が 2 回点滅して通常動作に戻ります。 ※1 タイマー詳細設定モードは、現時点で選択できません。選択するには、4-3 のナイトライトタ イプ選択を先に行ってください。 24 4-2:LVD(低電圧遮断)電圧補正 MODE SW ( 白いボタン ) を押すと、白い矢印の方向に進みます。 SELECT SW ( 赤いボタン ) を押すと、黒い矢印の方向に進みます。 0V バッテリータイプ選択 STATUS LED MODE LED − 0.1V LVD 電圧補正 通常動作 STATUS LED 通常動作 MODE LED − 0.2V STATUS LED ナイトライトタイプ選択 MODE LED + 0.1V STATUS LED タイマー詳細設定※ 1 + 0.2V MODE LED STATUS LED ※ 1 タイマー詳細設定モードは、現時点で選択できません。選択するには、4-3 のナイトライトタ イプ選択を先に行ってください。 25 日本語 (1) 通常動作時、MODE SW を押すと MODE LED が点滅し、設定が可能に なります。 (2) SELECT SW を押すと、MODE LED の点滅回数が変化します。 (3) SELECT SW を押して MODE LED が 2 回点滅するのを確認してから MODE SW を押します。 (4) MODE LED と STATUS LED が点滅するのを確認してください。 (5) SELECT SW を押すと STATUS LED の点滅回数が変化します。 (6) STATUS LED の点滅回数によって、以下の様に補正する電圧が変化しま す。設定したい項目に合わせて SELECT SW を押してください。 ・STATUS LED 1 回点滅:0V(補正無し) ・STATUS LED 2 回点滅:− 0.1V ・STATUS LED 3 回点滅:− 0.2V ・STATUS LED 4 回点滅:+ 0.1V ・STATUS LED 5 回点滅:+ 0.2V (7) STATUS LED の点滅回数を確認してから、MODE SW を押して設定を 確定してください。 (8) 全ての LED が 2 回点滅して通常動作に戻ります。 4-3:ナイトライトタイプ選択 MODE SW ( 白いボタン ) を押すと、白い矢印の方向に進みます。 SELECT SW ( 赤いボタン ) を押すと、黒い矢印の方向に進みます。 ナイトライト OFF ( 常時負荷 ON) バッテリータイプ選択 MODE LED STATUS LED ナイトライト ON ( 夜間常時点灯 ) LVD 電圧補正 通常動作 MODE LED STATUS LED 通常動作 ナイトライト ON 2 (ノーマルタイマー)※ ナイトライトタイプ選択 MODE LED STATUS LED ナイトライト ON (レートタイマー)※3 タイマー詳細設定※ 1 MODE LED STATUS LED (1) 通常動作時、MODE SW を押すと MODE LED が点滅し、設定が可能に なります。 (2) SELECT SW を押すと、MODE LED の点滅回数が変化します。 (3) SELECT SW を押して MODE LED が 3 回点滅するのを確認してから MODE SW を押します。 (4) MODE LED と STATUS LED が点滅するのを確認してください。 (5) SELECT SW を押すと STATUS LED の点滅回数が変化します。 (6) STATUS LED の点滅回数によって、以下の様にナイトライトタイプが変 化します。設定したい項目に合わせて SELECT SW を押してください。 ・STATUS LED 1 回点滅:ナイトライト OFF(常時負荷 ON) ・STATUS LED 2 回点滅:ナイトライト ON (夜間常時点灯) ・STATUS LED 3 回点滅:ナイトライト ON (ノーマルタイマー) ・STATUS LED 4 回点滅:ナイトライト ON (レートタイマー) (7) STATUS LED の点滅回数を確認してから、MODE SW を押して設定を 確定してください。 (8) 全ての LED が 2 回点滅して通常動作に戻ります。 ※1 ※2 ※3 上記の※ 2 ノーマルタイマー、或は※ 3 レートタイマーを設定したら、選択可能です。 ナイトライト ON(ノーマルタイマー)を選択した場合は、4-4 ノーマルタイマーの時間設 定をご参照ください。 ナイトライト ON(レートタイマー)を選択した場合は、4-5 レートタイマーの割合設定を ご参照ください。 26 4-4:ノーマルタイマー時間設定 MODE SW ( 白いボタン ) を押すと、白い矢印の方向に進みます。 SELECT SW ( 赤いボタン ) を押すと、黒い矢印の方向に進みます。 夜間 6 時間点灯 バッテリータイプ選択 STATUS LED MODE LED 夜間 8 時間点灯 LVD 電圧補正 通常動作 STATUS LED MODE LED 通常動作 夜間 10 時間点灯 STATUS LED ナイトライトタイプ選択 MODE LED 夜間 12 時間点灯 STATUS LED タイマー詳細設定 夜間 14 時間点灯 MODE LED STATUS LED 27 日本語 (1) タイマーの時間を設定する前に、4-3 ナイトライトタイプ選択の手順を参 照して、ノーマルタイマーを ON にしておきます。 (2) 通常動作時、MODE SW を押すと MODE LED が点滅し、設定が可能に なります。 (3) SELECT SW を押すと、MODE LED の点滅回数が変化します。 (4) SELECT SW を押して MODE LED が 4 回点滅するのを確認してから MODE SW を押します。 (5) MODE LED と STATUS LED が点滅するのを確認してください。 (6) SELECT SW を押すと STATUS LED の点滅回数が変化します。 (7) STATUS LED の点滅回数によって、以下の様にタイマーの時間が変化し ます。設定したい項目に合わせて SELECT SW を押してください。 ・STATUS LED 1 回点滅:夜間 6 時間点灯 ・STATUS LED 2 回点滅:夜間 8 時間点灯 ・STATUS LED 3 回点滅:夜間 10 時間点灯 ・STATUS LED 4 回点滅:夜間 12 時間点灯 ・STATUS LED 5 回点滅:夜間 14 時間点灯 (8) STATUS LED の点滅回数を確認してから、MODE SW を押して設定を 確定してください。 (9) 全ての LED が 2 回点滅して通常動作に戻ります。 4-5:レートタイマー割合設定 MODE SW ( 白いボタン ) を押すと、白い矢印の方向に進みます。 SELECT SW ( 赤いボタン ) を押すと、黒い矢印の方向に進みます。 夜間の 40%点灯 バッテリータイプ選択 STATUS LED MODE LED 夜間の 50%点灯 LVD 電圧補正 通常動作 STATUS LED MODE LED 通常動作 夜間の 60%点灯 STATUS LED ナイトライトタイプ選択 MODE LED 夜間の 70%点灯 STATUS LED タイマー詳細設定 夜間の 80%点灯 MODE LED STATUS LED (1) タイマーの割合を設定する前に、4-3 ナイトライトタイプ選択の手順を参 照して、レートタイマーを ON にしておきます。 (2) 通常動作時、MODE SW を押すと MODE LED が点滅し、設定が可能に なります。 (3) SELECT SW を押すと、MODE LED の点滅回数が変化します。 (4) SELECT SW を押して MODE LED が 4 回点滅するのを確認してから MODE SW を押します。 (5) MODE LED と STATUS LED が点滅するのを確認してください。 (6) SELECT SW を押すと STATUS LED の点滅回数が変化します。 (7) STATUS LED の点滅回数によって、以下の様にタイマーの割合が変化し ます。設定したい項目に合わせて SELECT SW を押してください。 ・STATUS LED 1 回点滅:夜間の 40%点灯 ・STATUS LED 2 回点滅:夜間の 50%点灯 ・STATUS LED 3 回点滅:夜間の 60%点灯 ・STATUS LED 4 回点滅:夜間の 70%点灯 ・STATUS LED 5 回点滅:夜間の 80%点灯 (8) STATUS LED の点滅回数を確認してから、MODE SW を押して設定を 確定してください。 (9) 全ての LED が 2 回点滅して通常動作に戻ります。 28 4-6:リセット方法 (1) (2) (1) MODE SW と SELECT SW を同時に押します。 (2) SW から手を離すとリセットされ、LED が 2 回点滅します。 4-7:工場出荷設定 (1) (2) (2) SELECT SW のみをはずし、MODE SW を押し続けます。 (3) (4) (3) MODE SW を5秒程押し続けるとその間 MODE LED は点灯を続けます。 (4) MODE LED が消灯したら、工場出荷設定完了です。 29 日本語 (1) MODE SW と SELECT SW を同時に押します。 5. LED 表示 5-1:通常動作中 STATUS LED と ERROR LED 点滅回数 1 2 3 STATUS LED 内容 点滅回数 1 2 3 4 バッテリー残量 少 バッテリー残量 中 バッテリー残量 満 ERROR LED 内容 LVD ( 低電圧遮断 ) バッテリーエラー PV ( 太陽電池 ) エラー LVD & PV エラー 5-2:モード設定中 MODE LED と STATUS LED 点滅回数 MODE LED 内容 点滅回数 1 1 バッテリータイプ選択 2 3 4 2 LVD 電圧補正 3 ナイトライトタイプ選択 1 2 3 4 5 1 2 3 4 1 2 4 タイマー詳細設定 3 4 5 * 工場出荷時初期設定 30 STATUS LED 内容 シール型 * :充電 14.1V フロート 13.7V 非密閉型 :充電 14.4V フロート 13.7V AGM 型 :充電 14.3V フロート 13.3V ゲル型 :充電 14.0V フロート 13.7V 0V *(補正なし) − 0.1V − 0.2V + 0.1V + 0.2V ナイトライト OFF(常時負荷 ON) * ナイトライト ON(夜間常時点灯) ナイトライト ON(ノーマルタイマー) ナイトライト ON(レートタイマー) ノーマルタイマー 6h * レートタイマー 40%* ノーマルタイマー 8h レートタイマー 50% ノーマルタイマー 10h レートタイマー 60% ノーマルタイマー 12h レートタイマー 70% ノーマルタイマー 14h レートタイマー 80% 6. ナイトライト機能について 6-1:マルチタイマー機能 昼間 夜間 昼間 ナイトライト OFF ( 常時負荷 ON) 夜間常時点灯 ノーマルタイマー 6 時間 ノーマルタイマー 8 時間 ノーマルタイマー 10 時間 ノーマルタイマー 12 時間 ノーマルタイマー 14 時間 レートタイマー 40% レートタイマー 50% レートタイマー 60% レートタイマー 70% レートタイマー 80% ・ナイトライト ON D/D: 負荷は夕方点灯開始してから、朝になるまで ON し続けます。 ・ナイトライト ON ノーマルタイマー : 負荷は夕方点灯開始してから、タイ マーで設定した時間の間だけ ON し続けます。6,8,10,12,14 時間から選択 可能です。 ・ナイトライト ON レートタイマー : 負荷は夕方点灯開始してから、設定し た割合時間だけ ON し続けます。40,50,60,70,80%から選択可能です。 < 負荷のテスト方法 > ナイトライト ON 時に SELECT SW を 2 秒以上押すと、負荷が ON されます。 SW を離すと負荷は OFF します。(昼間の点灯開始前のみ有効です) 31 日本語 4つの動作モードと全 10 種類のタイマー動作から選択可能です。 ・ナイトライト OFF : 負荷は常に ON します。 6-2:早期点灯開始機能 昼間 夕暮れ 夜間 点灯開始が早い 従来のナイトライト 負荷 ON タイミング SolarAmp mini 早期点灯開始機能 負荷 ON タイミング 夕暮れ時の薄暗い状態から点灯開始する機能です。最短で設置後翌日から動 作開始します。 設置直後や急な天候不良時は太陽電池の発電電圧の条件によって点灯開始し ます。条件は以下の通りです。 (1) 3 分以上、太陽電池電圧が 10V 以下になる (2) その後太陽電池電圧が 8V 以下になる このため、充電している状態から夜間点灯開始までには 3 分以上待つ必要が あります。 32 6-3:レートタイマー機能 昼間 夜間 昼間 レート 80% レート 70% 冬期 レート 60% レート 50% レート 40% レート 40% レート 50% 日本語 夏期 レート 60% レート 70% レート 80% 夜時間の平均値から、設定された割合だけ点灯させる機能です。夜時間が変 化しても、動的に点灯時間を変化させます。終了時刻がほぼ同じ時刻になり ます。 設置後最短で翌日から動作開始します。(設置初日は設定割合の上限値だけ 点灯します) 33 7. トラブルシューティング 7-1:エラー表示の場合 LVD:バッテリー電圧が低くなっています。バッテリー電圧が 12.5V 以上 になるまで充電してください。 Battery:バッテリーが接続していない、ショートしている、低電圧、過電圧 のいずれかの場合に Battery エラーとなります。この他に過放電から回復充 電を試みても回復しない場合はこのエラー表示になります。バッテリーとコ ントローラの配線や、バッテリー電圧を確認してください。 PV:太陽電池の電圧がバッテリー電圧より低くなった場合にこのエラーが 出ます。このエラーが出ている状態で太陽電池の発電が開始されても、1 分 程度はエラー表示が消えません。夜間はこのエラーが発生しますが問題あり ません。 LVD & PV:LVD と PV エラーが同時に発生しています。 7-2:充電しない バッテリー電圧よりも PV 電圧が高くなければ充電しません。充電開始まで およそ 3 分程度かかります。 バッテリーが満充電 (13V 以上 ) の場合も充電しません。 7-3:放電しない LVD になっていないか確認してください。バッテリー電圧が 11.5V 以上あっ ても、一度 LVD になると、バッテリー電圧が 12.5V 以上にならないと負荷 が ON しません。 7-4:LED が点灯しない 本機は自動で LED を消灯させます。SELECT SW を押すと、1 分間 LED を 点灯させます。 7-5:早期点灯開始機能が動作しない 設置初日や、設定を変更した当日は早期点灯開始機能は動作しません。 他に天候等により急に周囲が暗くなった場合は通常のコントローラと同様に 太陽電池の発電電圧を検出して点灯開始します。 34 8. 仕様 型式 システム電圧 最大入力電圧 太陽電池入力電流 負荷電流 動作可能最低電圧 接地 自己消費電流 逆接続保護 動作温度範囲 保存温度 湿度 寸法 (D x W x H) 重量 適合電線 バッテリータイプ 充電電圧 9. 規格 RoHS 35 日本語 負荷遮断電圧 負荷再接続電圧 充電方式 温度補正 SA-MN05-8 12 V 25 V 8.5 A 8.5 A 6V マイナス接地 1 mA ヒューズ:10 A − 20 〜 60 ℃ − 30 〜 70 ℃ 5 〜 95 % RH ( 結露無きこと ) 20 x 50 x 120 mm 105 g 16AWG (1.3 mm2) 〜 22AWG (0.33 mm2) シール型、非密閉型、AGM 型、ゲル型 シール型:14.1 V 非密閉型:14.4 V AGM 型:14.3 V ゲル型:14.0 V 11.5 V ( ± 0.2 V) 12.5 V ( ± 0.2 V) 3 段階充電 ( バルク、吸収、フロート ) − 30 mV/℃ 保 証 書 このたびは当社製品をお買い上げいただき厚くお礼申し上げます。当社機器 を末永くご愛用いただけますよう下記の条件によりアフターサービスをいた します。 A 本保証書には弊社製品中下記製品番号についてのみ有効です。本保証書は再発行い たしませんので、お手元に大切に保管して下さい。また記載事項を変更した保証書 は無効となります。 B 保証期間はご購入の日より 1 ヵ年間とします。ただし当社発送の日より 18 ヵ月を 超えないものとします。 C 保証期間中であっても、下記の場合は有料となります。 ① 当社サービスマン以外の手によって、電気的、機械的な改造を加えられたセット ② 使用上または操作上の過失、事故によって故障を生じた場合 (取扱説明書記載の定格以外のヒューズを使用するなどして発生した二次的事故を含む) ③ 天災(火災、浸水等)による故障あるいは損傷の場合 ④ 販売年月日、販売店名の記入、捺印なき場合 ⑤ その他、当社の責に帰せざる故障損傷の場合 (当社所定のカートン、パッキング以外の梱包にて生じた輸送中の損傷の場合も含む) D 本保証書は、日本国内のみ有効です。 (This warranty policy is valid in Japan only) 株式会社 電 菱 機 種 SolarAmp mini 販売店名 製 造 No. 印 販売年月日 年 月 日 株式会社 電 菱 〒 116-0013 東京都荒川区西日暮里二丁目28番5号 電 話(03)3802 - 3671(代表) FAX(03)3802 - 2974 Email : [email protected] Website : www.denryo.com DM-4402