1
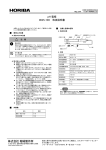
May, 2011
CODE:GZ0000243338B
© 2011 HORIBA, Ltd.
pH 電極
9615-10D 取扱説明書
お買い上げいただきありがとうございます。ご使用になる前
にこの取扱説明書をお読みください。
J
J
仕様と各部の名称
各部の名称
使用上の注意
キャップ
内部液補充口
安全のための注意
応答ガラス膜
支持管
液絡部
注 意
コネクタカバー
保護キャップ
ローレットネジ
薬品注意
電極の内部液は高濃度の塩化カリウム(3.33 mol/L-KCl)を使用
しています。内部液が手や皮膚についた場合はただちに水洗いし
てください。万一、目に入った場合はすみやかに大量の流水で
洗った後、医師の処置を受けてください。
電極コネクタ
リード線
ガラスの破片でけがをします。電極の支持管および先端はガラス
でできています。割らないように注意してください。
取り扱い上の注意
z 電極をものにぶつけたりしないでください。
z 電極にひびや割れがあると測定できません。新しい電極
に交換してください。
z 電極のコネクタ部に水やサンプルがついたり、汚れた手
で触れたりしないようにしてください。正確な測定がで
きません。
z 比較電極の内部液には必ず 3.33 mol/L-KCl 溶液(形式
300)をご使用ください。
z 電極のpH応答ガラス膜や液絡部の汚れがひどく、純水で
洗っても落ちない場合、汚れの状況に応じて洗浄を行っ
てください。(「電極の保守」
(3 ページ) 参照)
z 0.1 mol/L 以上の濃度の酸あるいはアルカリ下の連続使
用は避けてください。電極性能が損なわれたり、寿命を
短くするおそれがあります。
z フッ素イオンはガラス電極を侵すため、基本的にはフッ
素イオンを含んだ溶液の測定は行わないでください。
z 50°C以上の温度差があるサンプルに、電極を急に浸けな
いでください。ガラスが破損することがあります。
z ガラス応答膜内部に塩化銀が析出することがあります
が、性能上問題はありません。
z 電極の使用温度範囲外では使わないでください。電極が
こわれるおそれがあります。
z 電極の保管後に保護キャップや内部液補充口に白い結
晶が付着していることがありますが、性能上問題はあり
ません。
z 電極を廃棄するときは、各地方自治体の指示に従ってく
ださい。
J
温度コネクタ
仕様
切り傷注意
J
製品形式
9615-10D
使用 pH 範囲
pH 0 ~ 14
使用温度範囲
0 ~ 100°C
保管温度範囲
0 ~ 50°C
内部電極
銀 / 塩化銀
比較電極内部液
3.33 mol/L-KCl 溶液(形式 300)
液絡部材質
多孔性セラミック
接液部材質
ガラス、セラミック
電極長さ
198 mm
接液部外径
12 mm
液絡部高さ
約 13 mm (電極先端からの位置)
リード長さ
1m
計器への接続
1. 計器本体のコネクタ受け口のピンに合わせて電極コネ
クタの溝を差し込みます。
溝に合わないうちに無理に押し込まないでください。
2. 電極コネクタの金属部を持ち、溝に従って右に回しなが
ら押し込みます。
3. コネクタカバーをコネクタにかぶせ、計器本体のケース
部に軽くあたるところまでまっすぐ押し込みます。けっ
して回さないでください。
4. 計器本体のジャック部に温度コネクタをOリングが隠れ
るまでしっかりと差し込みます。
①
内容物
②
③
品名
電極 9615-10D
数量
④
1本
アタッチメントホルダ
1個
取扱説明書
1部
注記
温度コネクタは必ず接続してください。温度コネクタが接続されて
いない場合、正確な測定ができません。
〒 601-8510 京都市南区吉祥院宮の東町 2 番地
http://www.horiba.com
製品に関する技術的なお問い合わせやご相談は、カスタマーサポートセンター
までお願いいたします。
フリーダイヤル 0120-37-6045 月~金 9:00 ~ 17:00
J
電極の準備
J
測定(校正)の手順
1. 内部液補充口を開けてください。
注記
電極の保護キャップや内部液補充口に白い結晶(KCl の結晶)が付
着していることがありますが、性能上問題はありません。
純水などで洗い落としてご使用ください。
はじめて使用する場合および長期間の保管後
1. ローレットネジをゆるめて、保護キャップをはずしま
す。
②はずす
2. 内部液が補充口部まで満たされていない場合は、内部液
を補充してください。
①ゆるめる
保護キャップ
ローレットネジ
2. 内部液補充口を開けてください。
3. 標準液やサンプルに浸ける前に毎回電極の先端を純水
でよく洗い、ろ紙などでふき取ります。
3. 比較電極の内部液をスポイトで抜き取ります。
4. 応答ガラス膜の内部に気泡があるときは、電極を軽く
振って気泡を除去してください。
4. 新しい内部液(形式 300)を補充口部まで注入します。
5. サンプルに応答ガラス膜と液絡部が完全に浸るように
してください。また、内部液の液面がサンプルの液面よ
り 3 cm 以上高くなるようにしてください。
ここまで
5. 電極の先端を純水でよく洗い、ろ紙などでふき取りま
す。
6. 電極をかるく振ってサンプルとなじませて、先端部周囲
の気泡を除去してください。
注記
z 測定中は内部液補充口を必ず開けた状態にしてください。内部
液補充口が液などでふさがっていると正確な測定ができませ
ん。布などでふき取って使用してください。
z pH メータの校正 / 測定は、
pH メータの取扱説明書に従ってくだ
さい。
2
J
電極の保守
J
電極の保管
1. 電極に付着したサンプルを純水でよく洗い落とし、ろ紙
などでふき取ります。
注記
アセトン、THF などの有機溶媒や 1 mol/L 以上の酸、0.1 mol/L 以上
のアルカリを用いての洗浄は避けてください。電極の破損や性能劣
化を招きます。
z 電極の性能維持のため、1~ 2ヵ月を目安として比較電極
の内部液の交換をしてください(「電極の準備」
(2 ペー
ジ)参照)。
z 応答ガラス膜が汚れていたり、液絡部が被検液によって
汚染されていると、応答速度や感度の低下、測定誤差の
原因になります。汚れがひどく純水で洗っても落ちない
場合は洗浄を行ってください。
2. 内部液補充口を閉めます。
電極の洗浄
1. 内部液補充口を開けてください。
2. 応答ガラス膜と液絡部を、汚れに適した洗浄液に、汚れ
が取れるまで浸けてください。各洗浄液の取扱説明書を
参照してください。応答ガラス膜は洗浄液を含ませた
ガーゼなどでふき取っていただく方法でも汚れを落と
すことができます。
汚れの種類
洗浄液
一般的な汚れ
薄めた中性洗剤
油分の汚れ
アルコールや薄めた中性洗剤
無機成分などの汚れ
電極洗浄液(形式 220)
または 1 mol/L 程度の塩酸
タンパク質を含んだ汚れ
3. 保護キャップの内部を純水で洗い、水を切った後、スポ
ンジが浸る程度に純水を補充してください。
4. 保護キャップをはめてローレットネジを締め、保管しま
す。
①はめる
②締める
タンパク質分解酵素入り洗浄液
(形式 250)
液絡部の汚れ
電極洗浄液(形式 220)
ガラス部の変質 • 応答劣化
電極洗浄液(形式 220)
保護キャップ
ローレットネジ
注記
z 電極の応答ガラス膜と液絡部は乾燥させないでください。もし、
乾燥したときは内部液を交換し、純水中に 24 時間以上浸してか
ら校正を行ってください。正しく校正できない場合は、電極を
交換してください。
z 保管場所は、高温・高湿下を避け、室内の直射日光の当たらな
いところとしてください。
3. 純水で十分にすすぎ洗いをしてください。
4. 内部液を交換してください。
(「電極の準備」
(2 ページ)参照)
注記
洗浄後に測定をするときは必ず校正を行ってください。
ヒント
内部液を加圧し、液絡部から内部液をにじみ出せることにより、pH
応答を安定させる効果があります。
3
J
より正確な測定のために
精密な測定を行うときには、以下の項目を参考にしてくださ
い。
z 測定(校正)時はサンプルをスターラでゆっくり撹拌し
てください。
z 手動あるいは自動で温度補償を行ってください(pHメー
タの取扱説明書に従ってください)。
z 校正する標準液とサンプルの温度を同じにしてくださ
い。
z 電極はサンプルに深く浸けてください(比較電極の内部
液の液面がサンプルの液面より低くならないように注
意してください)
。
z 測定前に電極をサンプルで共洗いするなど、電極とサン
プルをなじませておいてください。
z 校正は測定前に行ってください。毎日測定している場合
は、1 日に 1 回以上行ってください。
4
May, 2011
CODE:GZ0000243338B
© 2011 HORIBA, Ltd.
pH Electrode
9615-10D Instruction Manual
Thank you for purchasing a HORIBA pH electrode.
Read this manual carefully, before using the electrode.
J
J
Specifications and Parts Description
Part name
Caution on Use
Safety Precautions
Cap
Internal solution
filler port
Stem
CAUTION
Chemical solution
Connector cover
The internal solution in the electrode uses potassium chloride
(3.33 mol/L-KCI). If the internal material comes in contact with the
hands or skin, wash immediately with water. If the internal solution
comes in contact with the eyes, flush with a large amount of
running water, then seek medical advice.
Glass fragments can cause injury.
The outer tube and tip of the electrode are made from glass.
Be careful not to break them.
Points of concern
z Do not shock the electrode.
z Do not measure chapped or cracked electrode. Replace
such electrode with a new one.
z Do not allow the connector to come in contact with water
or unclean hands. If not, accurate measurement cannot
be performed.
z Always use the 3.33 mol/L-KCl solution (model 300)
internal solution for reference electrode.
z If the responsive glass membrane or liquid junction is
very dirty and cannot be washed clean using pure water,
cleanse it depending on dirt condition. (Refer to “
Maintenance ” (page 3).)
z Avoid continuous use of this electrode at acidic or
alkaline concentrations above 0.1 mol/L. Using the
electrode under these conditions may harm
performance and shorten the life of the electrode.
z Do not measure the solutions which contain fluoride ion,
which may corrode the glass electrode.
z Do not suddenly immerse the electrode in samples
where the temperature variation is 50°C or more.
z Silver chloride can be detected inside the responsive
glass membrane. However, it will not cause any
performance problem.
z Do not use the electrode in any place where usable
temperature is out of the specified range.
z White crystal can adhere to the internal solution filler
port or protective cap after storage of the electrode.
However, it will not cause any performance problem.
Liquid
junction
Protective cap
Knurled nut
Electrode connector
Lead
Glass fragments
J
Responsive glass
membrane
Temp. connector
Specifications
Electrode model
9615-10D
Measurement range
pH 0 to 14
Usable temperature range
0°C to 100°C
Storage temperature range
0°C to 50°C
Internal electrode
Silver/silver chloride
Reference electrode internal
solution
3.33 mol/L-KCl solution (model 300)
Liquid junction material
Porous ceramic
Wetted material
Glass, ceramic
Electrode length
198 mm
Ext. diam. of wetted part
12 mm
Wetted part height
Approximately 13 mm (from the tip of
electrode)
Lead length
1m
J
Connecting to pH meter
1. Insert the electrode connector into the connector port
sleeve on the meter, after aligning with the pin. Do not
insert the connector unless it is aligned properly with the
connector port.
2. Press the electrode connector into the connector port on
the meter, while turning the connector to the right.
3. Slide the connector cover over the connector. Then,
push the cover in straight until it comes in light contact
with the meter case. Do not turn the cover.
4. Insert the temperature connector into the jack on the
meter. Insert the connector firmly, until the O-ring on the
connector can no longer be seen.
Packaged Contents
Name
①
Q’ty
Electrode 9615-10D
1 pc
Attachment holder
1 pc
②
③
④
Instruction manual (this book) 1 booklet
Note
Be sure to install the temperature connector. If not, accurate
measurement cannot be performed.
2 Miyanohigashi, Kisshoin Minami-ku, Kyoto 601-8510 Japan
http://www.horiba.com
For any questions regarding this product, please contact your local
agency, or inquire from the HORIBA website.
(http://global.horiba.com/contact_e/index.htm)
J
Preparation
J
Measurement (calibration)
1. Open the internal solution filler port.
Note
White crystal (KCl) can adhere to the internal solution filler port
or protective cap. However, it will not cause any performance
problem.
Wash away the white crystal with pure water.
For the first use or use after a long interval
1. Loosen the knurled nut, then remove the protective cap.
② Remove
2. If necessary, fill the electrode with new internal solution
until the solution level gets close to the internal solution
filler port.
① Loosen
Protective cap
Knurled nut
2. Open the internal solution filler port.
3. Wash the electrode with pure water and wipe it with filter
paper, prior to every immersion into standard/sample
solution.
3. Remove the existing electrode internal solution with a
dropper.
4. When there are air bubbles inside the responsive glass
membrane, stir it lightly to remove bubbles.
4. Fill the electrode with new internal solution (model 300)
until the solution level gets close to the internal solution
filler port.
5. Immerse the responsive glass membrane and liquid
junction in the sample completely.
Make sure that the surface of the internal solution inside
the electrode is higher than the surface of the sample
solution.
Up to here
5. Wash the electrode tip well with pure water, then wipe it
with filter paper.
6. Stir the electrode lightly to remove bubbles.
Note
z Be sure to keep the internal solution filler port open during
measurement. If it is clogged with the solution, accurate
measurement cannot be performed. Wipe the solution with
cloth.
z For calibration/measurement on pH meter, refer to the
instruction manual of pH meter.
2
J
Maintenance
J
Storage
1. Wash the electrode well with pure water to remove
sample completely and wipe it with filter paper.
Note
Do not use organic solvents (such as acetone or
tetrahydrofuran) or acid (above 1 mol/L) or alkaline (above 0.1
mol/L) cleansing solutions. Using such chemicals may
damage the body of the electrode or cause a decline in
performance.
z To maintain electrode performance, replace the internal
solution approximately every one or two months.
(Refer to “ Preparation ” (page 2).)
z Dirt on the responsive glass membrane or liquid junction
by the test solution may cause a decline in electrode
response and sensitivity or measurement error. If the
electrode is very dirty and cannot be washed clean
using pure water, perform cleansing.
2. Close the internal solution filler port.
Cleansing of electrode
1. Open the internal solution filler port.
2. Immerse the responsive glass membrane and liquid
junction in cleansing agent for approximately one hour
until contamination is removed. The responsive glass
membrane can also be cleaned by wiping it with cotton
gauze containing cleansing agent.
3. Wash the inside of the protective cap with pure water,
then add enough pure water to soak the sponge.
4. Attach the protective cap and tighten the knurled nut.
Type of dirt
Cleansing agent
General
Diluted neutral cleansing agent
Oil
Alcohol, or diluted neutral cleansing agent
Inorganic substance
Electrode cleaner (model 220) or Hydrochloric
acid approximately 1 mol/L
Protein
Cleansing agent including protein-cutting
enzyme (model 250)
Liquid junction
Electrode cleaner (model 220)
Altered of glass,
Slow-response
Electrode cleaner (model 220)
① Attach
② Tighten
Protective cap
Knurled nut
Note
z Do not dry the responsive glass membrane and liquid
junction. If they are dry, replace the internal solution and
immerse them in pure water for 24 hours or longer. After
these procedures, perform calibration. If calibration cannot
be performed correctly, replace the electrode.
z Avoid storing the electrode in hot and humid locations.
Store the electrode indoors, out of direct sunlight.
3. Rinse the electrode with pure water completely.
4. Replace the internal solution.
(Refer to “ Preparation ” (page 2).)
Note
Be sure to perform calibration prior to measurement after
cleansing the electrode.
Tip
Applying pressure on the internal solution and exuding it from
liquid junction have an effect of stabilizing pH response.
3
J
For accurate measurement
For accurate measurement, refer to items below.
z Stir the sample with stirrer in measurement (calibration).
z Perform temperature compensation manually or
automatically.
(Refer to the instruction manual of pH meter.)
z Temperature of standard solution and sample should be
the same.
z Rinse the electrode with the sample before
measurement.
z Immerse the responsive glass membrane and liquid
junction in the sample completely. Make sure that the
surface of the internal solution inside the electrode is
higher than the surface of the sample solution.
z Perform calibration before measurement.
If measurement is performed everyday, perform
calibration once or more a day.
4