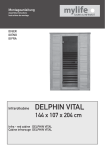
1
User Manual
AUTOMIX™ CONTROL 8
1
8 Channel Auto Mixer
Intended to alert the user to the presence of uninsulated “dangerous voltage” within the product’s
enclosure that may be of sufficient magnitude to constitute a risk of electric shock to persons.
Intended to alert the user of the presence of important operating and maintenance (servicing)
instructions in the literature accompanying the product.
CAUTION: Risk of electrical shock — DO NOT OPEN!
CAUTION: To reduce the risk of electric shock, do not remove cover. No user serviceable parts inside.
Refer servicing to qualified service personnel.
WARNING: To prevent electrical shock or fire hazard, this apparatus should not be exposed to rain or
moisture‚ and objects filled with liquids‚ such as vases‚ should not be placed on this apparatus. Before
using this apparatus‚ read the operating guide for further warnings.
Este símbolo tiene el propósito, de alertar al usuario de la presencia de “(voltaje) peligroso” sin
aislamiento dentro de la caja del producto y que puede tener una magnitud suficiente como para
constituir riesgo de descarga eléctrica.
Este símbolo tiene el propósito de alertar al usario de la presencia de instruccones importantes sobre la
operación y mantenimiento en la información que viene con el producto.
PRECAUCION: Riesgo de descarga eléctrica ¡NO ABRIR!
PRECAUCION: Para disminuír el riesgo de descarga eléctrica, no abra la cubierta. No hay piezas útiles
dentro. Deje todo mantenimiento en manos del personal técnico cualificado.
ADVERTENCIA: Para prevenir choque electrico o riesgo de incendios, este aparato no se debe exponer a
la lluvia o a la humedad. Los objetos llenos de liquidos, como los floreros, no se deben colocar encima
de este aparato. Antes de usar este aparato, lea la guia de funcionamiento para otras advertencias.
Ce symbole est utilisé dans ce manuel pour indiquer à l’utilisateur la présence d’une tension dangereuse
pouvant être d’amplitude suffisante pour constituer un risque de choc électrique.
Ce symbole est utilisé dans ce manuel pour indiquer à l’utilisateur qu’il ou qu’elle trouvera d’importantes
instructions concernant l’utilisation et l’entretien de l’appareil dans le paragraphe signalé.
ATTENTION: Risques de choc électrique — NE PAS OUVRIR!
ATTENTION: Afin de réduire le risque de choc électrique, ne pas enlever le couvercle. Il ne se trouve
à l’intérieur aucune pièce pouvant être reparée par l’utilisateur. Confiez I’entretien et la réparation de
l’appareil à un réparateur Peavey agréé.
AVIS: Dans le but de reduire les risques d'incendie ou de decharge electrique, cet appareil ne doit
pas etre expose a la pluie ou a l'humidite et aucun objet rempli de liquide, tel qu'un vase, ne doit
etre pose sur celui-ci. Avant d'utiliser de cet appareil, lisez attentivement le guide fonctionnant pour
avertissements supplémentaires.
Dieses Symbol soll den Anwender vor unisolierten gefährlichen Spannungen innerhalb des Gehäuses
warnen, die von Ausreichender Stärke sind, um einen elektrischen Schlag verursachen zu können.
Dieses Symbol soll den Benutzer auf wichtige Instruktionen in der Bedienungsanleitung aufmerksam
machen, die Handhabung und Wartung des Produkts betreffen.
VORSICHT: Risiko — Elektrischer Schlag! Nicht öffnen!
VORSICHT: Um das Risiko eines elektrischen Schlages zu vermeiden, nicht die Abdeckung enfernen.
Es befinden sich keine Teile darin, die vom Anwender repariert werden könnten. Reparaturen nur von
qualifiziertem Fachpersonal durchführen lassen.
WARNUNG: Um elektrischen Schlag oder Brandgefahr zu verhindern, sollte dieser Apparat nicht
Regen oder Feuchtigkeit ausgesetzt werden und Gegenstände mit Flüssigkeiten gefuellt, wie Vasen,
nicht auf diesen Apparat gesetzt werden. Bevor dieser Apparat verwendet wird, lesen Sie bitte den
Funktionsführer für weitere Warnungen.
2
IMPORTANT SAFETY INSTRUCTIONS
WARNING: When using electrical products, basic cautions should always be followed, including the following:
1.
2.
3.
4.
5.
6.
7.
8.
9.
10.
11.
12.
13.
14.
15.
16.
17.
18.
19.
Read these instructions.
Keep these instructions.
Heed all warnings.
Follow all instructions.
Do not use this apparatus near water.
Clean only with a dry cloth.
Do not block any of the ventilation openings. Install in accordance with manufacturer’s instructions.
Do not install near any heat sources such as radiators, heat registers, stoves or other apparatus (including amplifiers)
that produce heat.
Do not defeat the safety purpose of the polarized or grounding-type plug. A polarized plug has two blades with one
wider than the other. A grounding type plug has two blades and a third grounding plug. The wide blade or third prong is
provided for your safety. If the provided plug does not fit into your outlet, consult an electrician for replacement of the
obsolete outlet.
Protect the power cord from being walked on or pinched, particularly at plugs, convenience receptacles, and the point
they exit from the apparatus.
Only use attachments/accessories provided by the manufacturer.
Use only with a cart, stand, tripod, bracket, or table specified by the manufacturer, or sold with the apparatus. When a
cart is used, use caution when moving the cart/apparatus combination to avoid injury from tip-over.
Unplug this apparatus during lightning storms or when unused for long periods of time.
Refer all servicing to qualified service personnel. Servicing is required when the apparatus has been damaged in any
way, such as power-supply cord or plug is damaged, liquid has been spilled or objects have fallen into the apparatus,
the apparatus has been exposed to rain or moisture, does not operate normally, or has been dropped.
Never break off the ground pin. Write for our free booklet “Shock Hazard and Grounding.” Connect only to a power
supply of the type marked on the unit adjacent to the power supply cord.
If this product is to be mounted in an equipment rack, rear support should be provided.
Note for UK only: If the colors of the wires in the mains lead of this unit do not correspond with the terminals in your
plug‚ proceed as follows:
a) The wire that is colored green and yellow must be connected to the terminal that is marked by the letter E‚ the earth
symbol‚ colored green or colored green and yellow.
b) The wire that is colored blue must be connected to the terminal that is marked with the letter N or the color black.
c) The wire that is colored brown must be connected to the terminal that is marked with the letter L or the color red.
This electrical apparatus should not be exposed to dripping or splashing and care should be taken not to place objects
containing liquids, such as vases, upon the apparatus.
Exposure to extremely high noise levels may cause a permanent hearing loss. Individuals vary considerably in susceptibility to noise-induced hearing loss, but nearly everyone will lose some hearing if exposed to sufficiently intense noise
for a sufficient time. The U.S. Government’s Occupational Safety and Health Administration (OSHA) has specified the
following permissible noise level exposures:
Duration Per Day In Hours
8
6
4
3
2
1 1⁄2
1
1⁄2
1⁄4 or less
Sound Level dBA, Slow Response
90
92
95
97
100
102
105
110
115
According to OSHA, any exposure in excess of the above permissible limits could result in some hearing loss. Ear plugs or protectors to
the ear canals or over the ears must be worn when operating this amplification system in order to prevent a permanent hearing loss, if
exposure is in excess of the limits as set forth above. To ensure against potentially dangerous exposure to high sound pressure levels, it is
recommended that all persons exposed to equipment capable of producing high sound pressure levels such as this amplification system be
protected by hearing protectors while this unit is in operation.
SAVE THESE INSTRUCTIONS!
3
WICHTIGE SICHERHEITSHINWEISE
ACHTUNG: Beim Einsatz von Elektrogeräten müssen u.a. grundlegende Vorsichtsmaßnahmen befolgt werden:
1.
Lesen Sie sich diese Anweisungen durch.
2.
Bewahren Sie diese Anweisungen auf.
3.
Beachten Sie alle Warnungen.
4.
Befolgen Sie alle Anweisungen.
5.
Setzen Sie dieses Gerät nicht in der Nähe von Wasser ein.
6.
Reinigen Sie es nur mit einem trockenen Tuch.
7.
Blockieren Sie keine der Lüftungsöffnungen. Führen Sie die Installation gemäß den Anweisungen des Herstellers durch.
8.
Installieren Sie das Gerät nicht neben Wärmequellen wie Heizungen, Heizgeräten, Öfen oder anderen Geräten (auch Verstärkern),
die Wärme erzeugen.
9.
Beeinträchtigen Sie nicht die Sicherheitswirkung des gepolten Steckers bzw. des Erdungssteckers. Ein gepolter Stecker weist
zwei Stifte auf, von denen einer breiter ist als der andere. Ein Erdungsstecker weist zwei Stifte und einen dritten Erdungsstift auf.
Der breite Stift bzw. der dritte Stift dient Ihrer Sicherheit. Sollte der beiliegende Stecker nicht in Ihre Steckdose passen, wenden
Sie sich bitte an einen Elektriker, um die ungeeignete Steckdose austauschen zu lassen.
10.
Schützen Sie das Netzkabel, sodass niemand darauf tritt oder es geknickt wird, insbesondere an Steckern oder Buchsen und
ihren Austrittsstellen aus dem Gerät.
11.
Verwenden Sie nur die vom Hersteller erhältlichen Zubehörgeräte oder Zubehörteile.
12.
Verwenden Sie nur einen Wagen, Stativ, Dreifuß, Träger oder Tisch, der den Angaben des Herstellers entspricht oder zusammen
mit dem Gerät verkauft wurde. Wird ein Wagen verwendet, bewegen Sie den Wagen mit dem darauf befindlichen Gerät besonders
vorsichtig, damit er nicht umkippt und möglicherweise jemand verletzt wird.
13.
Trennen Sie das Gerät während eines Gewitters oder während längerer Zeiträume, in denen es nicht benutzt wird, von der
Stromversorgung.
14.
Lassen Sie sämtliche Wartungsarbeiten von qualifizierten Kundendiensttechnikern durchführen. Eine Wartung ist erforderlich,
wenn das Gerät in irgendeiner Art beschädigt wurde, etwa wenn das Netzkabel oder der Netzstecker beschädigt wurden,
Flüssigkeit oder Gegenstände in das Gerät gelangt sind, das Gerät Regen oder Feuchtigkeit ausgesetzt wurde, nicht normal
arbeitet oder heruntergefallen ist.
15.
Der Erdungsstift darf nie entfernt werden. Auf Wunsch senden wir Ihnen gerne unsere kostenlose Broschüre „Shock Hazard and
Grounding“ (Gefahr durch elektrischen Schlag und Erdung) zu. Schließen Sie nur an die Stromversorgung der Art an, die am
Gerät neben dem Netzkabel angegeben ist.
16.
Wenn dieses Produkt in ein Geräte-Rack eingebaut werden soll, muss eine Versorgung über die Rückseite eingerichtet werden.
17.
Hinweis – Nur für Großbritannien: Sollte die Farbe der Drähte in der Netzleitung dieses Geräts nicht mit den Klemmen in Ihrem
Stecker übereinstimmen, gehen Sie folgendermaßen vor:
a) Der grün-gelbe Draht muss an die mit E (Symbol für Erde) markierte bzw. grüne oder grün-gelbe Klemme angeschlossen
werden.
b) Der blaue Draht muss an die mit N markierte bzw. schwarze Klemme angeschlossen werden.
c) Der braune Draht muss an die mit L markierte bzw. rote Klemme angeschlossen werden.
18.
Dieses Gerät darf nicht ungeschützt Wassertropfen und Wasserspritzern ausgesetzt werden und es muss darauf geachtet
werden, dass keine mit Flüssigkeiten gefüllte Gegenstände, wie z. B. Blumenvasen, auf dem Gerät abgestellt werden.
19.
Belastung durch extrem hohe Lärmpegel kann zu dauerhaftem Gehörverlust führen. Die Anfälligkeit für durch Lärm bedingten
Gehörverlust ist von Mensch zu Mensch verschieden, das Gehör wird jedoch bei jedem in gewissem Maße geschädigt, der über
einen bestimmten Zeitraum ausreichend starkem Lärm ausgesetzt ist. Die US-Arbeitsschutzbehörde (Occupational and Health
Administration, OSHA) hat die folgenden zulässigen Pegel für Lärmbelastung festgelegt:
Dauer pro Tag in Stunden
Geräuschpegel dBA, langsame Reaktion
8
6
4
3
2
1 1⁄2
1
1
⁄2
1
⁄4 oder weniger
90
92
95
97
100
102
105
110
115
Laut OSHA kann jede Belastung über den obenstehenden zulässigen Grenzwerten zu einem gewissen Gehörverlust führen. Sollte
die Belastung die obenstehenden Grenzwerte übersteigen, müssen beim Betrieb dieses Verstärkungssystems Ohrenstopfen oder
Schutzvorrichtungen im Gehörgang oder über den Ohren getragen werden, um einen dauerhaften Gehörverlust zu verhindern. Um sich vor
einer möglicherweise gefährlichen Belastung durch hohe Schalldruckpegel zu schützen, wird allen Personen empfohlen, die mit Geräten
arbeiten, die wie dieses Verstärkungssystem hohe Schalldruckpegel erzeugen können, beim Betrieb dieses Geräts einen Gehörschutz zu tragen.
BEWAHREN SIE DIESE SICHERHEITSHINWEISE AUF!
4
INSTRUCTIONS IMPORTANTES DE SECURITE
ATTENTION: L’utilisation de tout appareil électrique doit être soumise aux precautions d’usage incluant:
1.
2.
3.
4.
5.
6.
7.
8.
9.
10.
11.
12.
13.
14.
15.
16.
17.
18.
19.
Lire ces instructions.
Gardez ce manuel pour de futures références.
Prétez attention aux messages de précautions de ce manuel.
Suivez ces instructions.
N’utilisez pas cette unité proche de plans d’eau.
N’utilisez qu’un tissu sec pour le nettoyage de votre unité.
N’obstruez pas les systèmes de refroidissement de votre unité et installez votre unité en fonction des instructions
de ce manuel.
Ne positionnez pas votre unité à proximité de toute source de chaleur.
Connectez toujours votre unité sur une alimentation munie de prise de terre utilisant le cordon d’alimentation
fourni.
Protégez les connecteurs de votre unité et positionnez les cablages pour éviter toutes déconnexions accidentelles.
N’utilisez que des fixations approuvées par le fabriquant.
Lors de l’utilsation sur pied ou pole de support, assurez dans le cas de déplacement de l’ensemble enceinte/
support de prévenir tout basculement intempestif de celui-ci.
Il est conseillé de déconnecter du secteur votre unité en cas d’orage ou de durée prolongée sans utilisation.
Seul un technicien agréé par le fabriquant est à même de réparer/contrôler votre unité. Celle-ci doit être contrôlée si
elle a subit des dommages de manipulation, d’utilisation ou de stockage (humidité,…).
Ne déconnectez jamais la prise de terre de votre unité.
Si votre unité est destinée a etre montée en rack, des supports arriere doivent etre utilises.
Note pour les Royaumes-Unis: Si les couleurs de connecteurs du cable d’alimentation ne correspond pas au guide
de la prise secteur, procédez comme suit:
a) Le connecteur vert et jaune doit être connectrer au terminal noté E, indiquant la prise de terre ou correspondant
aux couleurs verte ou verte et jaune du guide.
b) Le connecteur Bleu doit être connectrer au terminal noté N, correspondnat à la couleur noire du guide.
c) Le connecteur marron doit être connectrer au terminal noté L, correspondant à la couleur rouge du guide.
Cet équipement électrique ne doit en aucun cas être en contact avec un quelconque liquide et aucun objet
contenant un liquide, vase ou autre ne devrait être posé sur celui-ci.
Une exposition à de hauts niveaux sonores peut conduire à des dommages de l’écoute irréversibles. La susceptibilité au bruit varie considérablement d’un individu à l’autre, mais une large majorité de la population expériencera
une perte de l’écoute après une exposition à une forte puissance sonore pour une durée prolongée. L’organisme de
la santé américaine (OSHA) a produit le guide ci-dessous en rapport à la perte occasionnée:
Durée par Jour (heures)
8
6
4
3
2
1 1⁄2
1
1
⁄2
1
⁄4 ou inférieur
Niveau sonore moyen (dBA)
90
92
95
97
100
102
105
110
115
D’après les études menées par le OSHA, toute exposition au delà des limites décrites ce-dessus entrainera des pertes de l’écoute chez la
plupart des sujets. Le port de système de protection (casque, oreilette de filtrage,…) doit être observé lors de l’opération cette unité ou des
dommages irréversibles peuvent être occasionnés. Le port de ces systèmes doit être observé par toutes personnes susceptibles d’être exposées à des conditions au delà des limites décrites ci-dessus.
GARDEZ CES INSTRUCTIONS!
5
INSTRUCCIONES IMPORTANTES PARA SU SEGURIDAD
CUIDADO: Cuando use productos electrónicos, debe tomar precauciones básicas, incluyendo las siguientes:
1.
Lea estas instrucciones.
2.
3.
4.
5.
6.
7.
8.
9.
10.
11.
12.
13.
14.
15.
16.
17.
18.
19.
Guarde estas instrucciones.
Haga caso de todos los consejos.
Siga todas las instrucciones.
No usar este aparato cerca del agua.
Limpiar solamente con una tela seca.
No bloquear ninguna de las salidas de ventilación. Instalar de acuerdo a las instrucciones del fabricante.
No instalar cerca de ninguna fuente de calor como radiadores, estufas, hornos u otros aparatos (incluyendo amplificadores)
que produzcan calor.
No retire la patilla protectora del enchufe polarizado o de tipo “a Tierra”. Un enchufe polarizado tiene dos puntas, una de
ellas más ancha que la otra. Un enchufe de tipo “a Tierra” tiene dos puntas y una tercera “a Tierra”. La punta ancha (la
tercera ) se proporciona para su seguridad. Si el enchufe proporcionado no encaja en su enchufe de red, consulte a un
electricista para que reemplaze su enchufe obsoleto.
Proteja el cable de alimentación para que no sea pisado o pinchado, particularmente en los enchufes, huecos, y los puntos
que salen del aparato.
Usar solamente añadidos/accesorios proporcionados por el fabricante.
Usar solamente un carro, pie, trípode, o soporte especificado por el fabricante, o vendido junto al aparato. Cuando se use
un carro, tenga cuidado al mover el conjunto carro/aparato para evitar que se dañe en un vuelco. No suspenda esta caja de
ninguna manera.
Desenchufe este aparato durante tormentas o cuando no sea usado durante largos periodos de tiempo.
Para cualquier reparación, acuda a personal de servicio cualificado. Se requieren reparaciones cuando el aparato ha sido
dañado de alguna manera, como cuando el cable de alimentación o el enchufe se han dañado, algún líquido ha sido
derramado o algún objeto ha caído dentro del aparato, el aparato ha sido expuesto a la lluvia o la humedad, no funciona de
manera normal, o ha sufrido una caída.
Nunca retire la patilla de Tierra.Escríbanos para obtener nuestro folleto gratuito “Shock Hazard and Grounding” (“Peligro
de Electrocución y Toma a Tierra”). Conecte el aparato sólo a una fuente de alimentación del tipo marcado al lado del cable
de alimentación.
Si este producto va a ser enracado con más equipo, use algún tipo de apoyo trasero.
Nota para el Reino Unido solamente: Si los colores de los cables en el enchufe principal de esta unidad no corresponden
con los terminales en su enchufe‚ proceda de la siguiente manera:
a) El cable de color verde y azul debe ser conectado al terminal que está marcado con la letra E‚ el símbolo de Tierra
(earth)‚ coloreado en verde o en verde y amarillo.
b) El cable coloreado en azul debe ser conectado al terminal que está marcado con la letra N o el color negro.
c) El cable coloreado en marrón debe ser conectado al terminal que está marcado con la letra L o el color rojo.
Este aparato eléctrico no debe ser sometido a ningún tipo de goteo o salpicadura y se debe tener cuidado para no poner
objetos que contengan líquidos, como vasos, sobre el aparato.
La exposición a altos niveles de ruido puede causar una pérdida permanente en la audición. La susceptibilidad a la pérdida
de audición provocada por el ruido varía según la persona, pero casi todo el mundo perderá algo de audición si se expone
a un nivel de ruido suficientemante intenso durante un tiempo determinado. El Departamento para la Salud y para la
Seguridad del Gobierno de los Estados Unidos (OSHA) ha especificado las siguientes exposiciones al ruido permisibles:
Duración por Día en Horas
8
6
4
3
2
1 1⁄2
1
1
⁄2
1
⁄4 o menos
Nivel de Sonido dBA, Respuesta Lenta
90
92
95
97
100
102
105
110
115
De acuerdo al OSHA, cualquier exposición que exceda los límites arriba indicados puede producir algún tipo de pérdida en la audición.
Protectores para los canales auditivos o tapones para los oídos deben ser usados cuando se opere con este sistema de sonido para prevenir una pérdida permanente en la audición, si la exposición excede los límites indicados más arriba. Para protegerse de una exposición a
altos niveles de sonido potencialmente peligrosa, se recomienda que todas las personas expuestas a equipamiento capaz de producir altos
niveles de presión sonora, tales como este sistema de amplificación, se encuentren protegidas por protectores auditivos mientras esta unidad esté operando.
GUARDE ESTAS INSTRUCCIONES!
6
ENGLISH
AUTOMIX™ CONTROL 8
8 Channel Automatic Mixer
Introduction
Thank you for purchasing the Automix Control 8! The Architectural Acoustics Automix Control 8 is a
high quality automatic mixer with eight transformer balanced mic/line inputs. Each channel provides
a gain control, 48 volt phantom power (mic inputs), low cut filter, activity/clipping LED, an Aux send
control and a choice between manual or automatic operation. Each channel also provides a defeatable
insert point, 5 volt TTL status output and can be muted individually or multiple channels can be muted
simultaneously via an assignable mutebus. In addition, channels one and two provide an adjustable
priority control.
The master section provides a gain trim control, three 1/9 octave sweepable notch filters, a downward
expander, transformer balanced outputs (main and aux) and remote volume connections. The Automix
Control 8 has been designed to easily link multiple units together to form a single mixer with many
more inputs (16, 24, 32...). The Automix Control 8 is supplied with a see-through plexiglass security
panel to prevent changes to the installer’s settings.
Theory of
Operation
The Peavey Automix Control 8 is a classic “automatic mixer” combining several time proven techniques
to deliver maximum gain before feedback in an easy to setup and easy to use configuration. The
Automix uses VCAs (voltage controlled amplifiers) and gain computing circuits in each channel to ride
the gain downward as more microphones become active. By dropping the gain 3 dB every time the
number of active microphones double, the overall system gain remains at unity for ideal gain before
feedback performance.
A precision rectifier and logarithmic converter in each channel computes the amplitude of the audio
signal present at each microphone in real time. This channel amplitude, in decibels, is then compared
to the amplitude of the sum of all the channels, also in decibels. A simple computing circuit calculates
the mathematical difference between these two amplitudes and feeds the product to the VCA as a
gain control signal.
To better grasp how this works, let me offer a few examples. If we take the case of one person
speaking into a microphone, the amplitude in that channel will be virtually identical to the “sum of all
channels” amplitude. The difference between these two equal amplitudes is “0”. When 0 dB is fed to
the VCA control port, the result is unity gain for that channel. All of the other channels, with no one
speaking, will exhibit significantly lower amplitudes. When compared to the “sum,” which contains
a nominal signal, negative numbers result. These negative numbers, presented to the VCAs of non
active channels, command further attenuation of the noise and leakage present at these non active
channels.
A second more interesting example is two people speaking simultaneously. To simplify this example,
let’s assume they’re both speaking with the same loudness. As these two sources are incoherent,
i.e. not identical, they will sum as the square root of the sum of the squares or 3 dB more than
either individually. When each channel’s amplitude is compared to this +3 dB sum, it’s VCA will be
commanded to attenuate 3 dB. As before, the non active channels will be further attenuated. The
elegance of this approach is really apparent in this next case. Assume a person is stationed exactly
equidistant from two microphones. The identical signal arriving at both channels, being coherent,
will sum linearly to +6 dB in the sum of all channels. This results in the two channels being turned
down 6 dB. Being coherent, these two identical signals summed at -6 dB will add up to unity. These
gain relationships hold true no matter how many microphones are active and whether or not signals
are coherent. Since all computations are done in the Log domain, it doesn’t matter what the actual
amplitudes are, only the relative amplitudes between signals.
7
1
2
1. CHANNEL LEVEL
Manual Mode: In the manual mode the channel level controls provide 6 dB of gain and 50 dB of
Front Panel
attenuation.
Auto Mode: In the auto mode the control still provides 50 dB of attenuation, but the control does
not add gain to the overall system level. Instead, when the level is adjusted above “0”, the other
channels are attenuated to make the channel being adjusted sound louder in the mix without adding
to the system gain.
2. MASTER LEVEL
The master level controls the overall output level. The range is set for 10 dB of gain above, and 40
dB of attenuation.
Internal Panel
8
3
9
12
10 13
11
4
5
6
7
3. DIP SWITCHES
Each channel has four DIP switches that control the following functions.
A. MAN/AUTO
This switch determines whether the channel is operating in the automatic or manual mode.
B. OFF/MBUS
This switch is used to connect the channel to the system mutebus. This allows multiple
inputs to be muted simultaneously under external control. See MUTEBUS, page 7.
C. LO CUT/FLAT
This switch selects the low cut filter. The low cut filter provides a low frequency rolloff that
will help minimize unwanted noise (handling of mics, bumping of table, etc...). The rolloff
starts at 100 Hz (-3 dB) and is a 6 dB per octave filter.
D. OFF/+48
When this switch is in the +48 position, +48 volts of phantom power is supplied to the mic
± terminals. This provides power for condenser mics and should be defeated when using
dynamic microphones or unbalanced inputs.
8
Internal Panel
4. AUX SEND CONTROL
Controls the level of the signal being sent to the AUX bus. The level being sent to the Aux bus
will also be affected if the gain control in that channel is changed.
5. GAIN TRIM
This control sets the input gain in each channel. The amount of gain is adjustable from +25
dB to +60 dB. (Mic input.)
6. ACTIVITY/CLIPPING LED ACTIVITY
In the automatic mode the LED will glow green, indicating the channel that is predominant
in the mix (auto mode). If the channel is in the manual mode the LED will stay on if the front
panel level control is at or above the 12:00 position. The green LED is also an indication of
the status output state. If the LED is on, then the status output will be high (+5 volts). If the
LED is off, then the status output will be low (0 volts).
CLIPPING
The LED will turn red if the channel is within 1 dB of clipping.
7. PRIORITY (CHANNEL 1 and 2 ONLY)
Turning the priority control clockwise allows one channel to override the others in the mix.
It does this by “tricking” the gain computing circuits into thinking this channel is louder
than the others. Up to 9 dB of priority is available.
8. AUX MASTER LEVEL CONTROL
This control sets the level of the signal being sent to the Aux Out. This level should be set
after the individual channel levels have been set.
9. DOWNWARD EXPANDER
The downward expander can be used to attenuate the system gain when all of the input
signals are low. This can be used to prevent background room noise from being amplified.
SETTING THE DOWNWARD EXPANDER
Have someone speak into a microphone at the softest level you can expect to encounter.
Slowly turn the downward expander clockwise until the background noise between words
is attenuated. Be careful not to go too far. The more downward expander that is used, the
less “natural” sounding the system will become. This method will give you a good starting
point, but the best way to set the downward expander is during an actual meeting or event.
While doing this, the downward expander can be adjusted for the best sound. If you have to
deal with both loud and quiet events, you will need to trade off between natural sounding
ambient and background noise.
10. MASTER GAIN TRIM
This control sets the maximum overall system gain and should be set with the front panel
master gain set to the full clockwise position, all channels at unity, and external power
amps turned up and locked at operational settings. When trimmed to a safe margin below
feedback, no combination of user controls can cause feedback. This trim provides up to 25
dB of attenuation of the system gain.
11. NOTCH FILTER LEVEL CONTROL
The notch filter level control adjusts the amount of cut at the frequency selected by the
corresponding frequency control (12). It is adjustable from 0 dB to 15 dB of cut.
9
12. NOTCH FILTER FREQUENCY CONTROL
Internal Panel
The notch filter frequency control is used to select the center frequency of the notch filter.
The bottom filter has a range of 40 Hz to 925 Hz. The middle filter has a range of 260 Hz to 6
kHz. The upper filter has a range of 500 Hz to 12 kHz.
13. POWER LED
Indicates that AC mains power is connected and power switch is in the “ON” position.
24
23
18
22
19
17
15
16
25
Rear Panel
20
14
21
14. MIC INPUTS
For use with low impedance microphones or low level sources. This is a transformer
balanced input with an impedance of 2,000Ω. Input sensitivity for nominal output is -56 dBu
to -19 dBu.
LINE INPUTS
These allow line level inputs to be used. This is a transformer balanced input through a 30
dB resistive pad. Input impedance is >20 kΩ.
15. INSERT IN/OUT
This is a signal loop that allows an external device such as an EQ to be inserted into the
signal path of individual channels (refer to diagram below).
16. INSERT BYPASS SWITCH
When no signal processor is being used or bypassing the signal processor is desired, this
switch should be in the “in” position. If a signal processor is being used, then this switch
should be in the “out” position.
10
Rear Panel
17. DIRECT OUTPUTS
Each channel has direct output terminals that can be used for recording or anytime the
output of an individual channel is required. This signal is independent of “Automix” gain
manipulation. The nominal output level is 2.21 dBu (1 volt).
MUTE
Channels can be muted individually by shorting this terminal to ground. It provides
approximately 45 dB of attenuation.
STATUS OUTPUT
The status output is a DC logic output that is high (+5 volts) when the channel is active
and low (0 volts) when the channel is not active. This DC voltage can be used to key video
cameras or trigger key lights on active microphones.
NOTE: Each channel can source a maximum of 10 mA.
18. MAIN OUT
The main output is a 600Ω, transformer balanced output that can be used to feed an
external power amplifier. It is at this point the automatically mixed or the manually mixed
output is accessed. The nominal output is 2.21 dBu (1 volt).
19. AUX OUT
The aux output is a 600Ω, transformer balanced output that can be used as an additional
non-automixed output. The nominal output is 2.21 dBu (1 volt).
20. REMOTE VOLUME
The master level of the mixer can be controlled remotely with a simple connection on the
back of the unit. A 10 k pot will provide approximately 0 to 25 dB of attenuation. A 100 k
pot will provide 0 to 45 dB of attenuation. If desired, a control voltage can be inserted to
command 0 to 70 dB of attenuation. The internal gain trim must be set full clockwise to
achieve the maximum attenuation range of the remote volume (refer to diagram below).
NOTE: The control voltage should never exceed 13 volts dc.
21. MUTEBUS
The mutebus is a control port that when shorted to ground will mute all channels that
are assigned to the mutebus approximately 45 dB. The channels to be muted must be
assigned to the mutebus using the internal switch marked OFF/MBUS. See INTERNAL PANEL
FEATURES, page 4 and diagram page 7.
11
Rear Panel
22. LINK PORT
To increase the number of inputs available, multiple Automixers can be linked together.
Linking automixers is a very simple process. It can be done with a small flat-head
screwdriver and a short length of four conductor shielded wire. The following diagram and
procedures will ensure proper linking.
1. Make a linking cable.
2. Connect the mixers according to the diagram above.
3. Select the mixer to be used as the master and place its link switch in the “master”
position.
4. All other mixers in the system should have their link switches in the “slave” position.
You now have a 16 (or more) channel automatic mixer. The master controls of the unit
chosen as “master” should be used to control the system.
23. LINK SWITCH
The link switch is used to place the unit in the master or slave mode of operation. A standalone unit should always be in the master mode. See Link Port (#22).
24. POWER SWITCH
Switch to “I” position to turn on.
12
Rear Panel
25. IEC INLET (AC)
With the Power Switch in the off (O) position, plug the power cord into this connector prior
to plugging into your AC power source. Always ensure proper AC voltage and grounding
practices are utilized (proper voltage is labeled under inlet).
NOTE: FOR UK ONLY
As the colors of the wires in the mains lead of this apparatus may not correspond with the
colored markings identifying the terminals in your plug, proceed as follows: (1) The wire
which is colored green and yellow must be connected to the terminal which is marked by
the letter E or by the earth symbol or colored green or green and yellow. (2) The wire which
is colored blue must be connected to the terminal which is marked with the letter N or the
color black. (3) The wire which is colored brown must be connected to the terminal which is
marked with the letter L or color red.
13
AUTOMIX™ CONTROL 8 SPECIFICATIONS
Nominal Out = 2.21 dBu = 1 volt
Input Specifications:
Function
(ohms)
Input z
Setting
Min
Input Gains
(to bal. outputs)
Microphone
(150 ohms)
2k
Line
(10K ohms)
>20k
Input Levels
Min*
Nominal**
Max Gain
(60 dB)
-64 dBu
(0.5mV)
-43 dBu
(5.5mV)
Max Gain
(30 dB)
-35 dBu
13.7mV
Bal./
Unbal.
Connector
Bal.
Mic In (+)
Mic In (-)
Ground
Bal.
Line In (+)
Line In (-)
Ground
Max
-2 dBu
(615mV)
-14 dBu
(155mV)
+27 dBu
(17.4V)
* Minimum input level (Sensitivity) is the smallest signal that will produce nominal output (2.21 dBu) with channel and
master controls set for maximum gain.
** Nominal settings are defined s all control set at 0 dB (or 50% rotation for rotary pots.
-122 dBu (Max gain, terminated 150 ohms)
+48 volts at Mic ± terminated
0 dB to 9 dB
-3 dB at 100 Hz (6 dB per octave)
>65 dB @ 20 Hz — 20 kHz
>85 dB @ 1 kHz
EIN:
Phantom Power:
Priority (Channels 1 and 2):
Low Cut Filter:
Common Mode:
Rejection Ratio:
Output Specifications:
Function
Main Out
Minimum
Load Z
(Ohms)
Output Levels
Nominal
600
+2.21 dBu
(1V)
Aux Out
600
+2.21 dBu
(1V)
Bal./
Unbal.
Connector
Main Out (=)
Bal.
Main Out (+)
Max
+20 dBu
+16 dBm
(7.75V)
(6.44V)
(Hi Z load)
(600Ω load)
+20 dBu
+16 dBm
(Hi Z load)
(600Ω load)
Main Out (-)
Ground
Bal.
Aux Out (+)
Aux Out (-)
Ground
Distortion:
Mic Input to Main Output:
<0.2% at nominal (20 Hz to 20 kHz)
Frequency Response:
Mic Input Main Output:
Mic Input to Aux Output:
20 Hz to 20 kHz +0/-1 dB at nominal
20 Hz to 20 kHz +0/-1 dB at nominal
14
AUTOMIX™ CONTROL 8 SPECIFICATIONS
Hum and Noise:
Output
Residual Noise
Ref: 0 dBu
S/N Ratio
Ref: 2:21 dBu
Test Conditions
Main Out
-85 dBu
87 dB
All controls down
-84 dBu
86 dB
One channel nominal,
Master level nominal
-85 dBu
87 dB
All controls down
-80 dBu
82 dB
One channel send
nominal,Monitor master
nominal
Aux Out
(Hum and noise measurements: 22 Hz to 22 kHz BW)
GENERAL SPECS:
Remote volume range:
0 dB to 70 dB of attenuation
Off channel attenuation:
0 dB to 70 dB
Mute:
Channel is attenuated 45 dB when Mute to ground
connection is made.
MuteBus:
Multiple channels can be attenuation 45 dB when MuteBus
to ground connection is made.
Status output:
Status is high (5V) when channel is active. It is low (0V)
when channel is not active.
Power consumption:
AC 120 volts, 60 Hz, Domestic
AC 230 volts, 50/60 Hz Export
15 watts
Weight:
11 lbs. (4.9 kg)
Dimensions:
Width: 19" (48.26 cm)
Depth: 9 1/4" (23.49 cm)
Height: 3 1/2" (8.89 cm)
15
16
AUTOMIX™ CONTROL 8 BLOCKS
AUTOMIX™ CONTROL 8
Setting up the Automix Control 8
1. Wiring Inputs and Outputs:
For best results, it is recommended that two-conductor shielded cable is used for all input and output connections.
When making connections remember to observe proper polarity. The recommended strip length for the detachable
screw terminals is 1/2".
2. Initial Control Settings:
Channel Levels
Channel Gain Trims
Aux Send Controls
Priority
Notch Controls
Downward Expander
Aux Master Level
Master Level
Master Gain Trim
All channels in the “auto” mode
(Faceplate)
(Internal)
(Internal)
(Internal)
(Internal)
(Internal)
(Internal)
(Faceplate)
(Internal)
—
—
—
—
—
—
—
—
—
Full CCW
Full CCW
Full CCW
Full CCW
Full CCW
Full CCW
Full CCW
Full CW
Full CCW
3. Setting the Channel Level:
Set the front panel control (of the channel that is being adjusted) to the middle (12 o’clock) position. Connect a mic
or line input to the first channel. While someone is speaking into the mic (in a way that it would normally be used),
slowly increase the channel gain trim until a slight ringing (feedback) is heard or until the clip led begins to blink red
occasionally. Turn the channel gain trim down slowly until the ringing is no longer audible. This is the maximum level
that the gain trim should be set. Turn the external channel level control down (full CCW).
NOTE: The internal master gain trim (#10) may need to be turned up (CW) if the channels can be easily driven into
clipping, or feedback cannot be obtained in the normal operating range of the internal gain trim control.
Repeat this step for the remaining channels.
Return all of the external channel levels controls to their mid position (12 o’clock).
4. Setting the Notch Filter:
The notch filter can be set in a couple of ways. It can be set using test equipment to pinpoint frequencies that are
prone to feedback, or it can be set “by ear.” For the purpose of this manual, the “by ear” method will be described:
A. Slowly increase the master gain trim (internal) until a slight ringing is audible.
B. Select the proper frequency range and turn the corresponding level control CW to about the 12 o’clock position.
C. Slowly turn the frequency control back and forth until the ringing is no longer audible.
D. Again, slowly increase the master gain trim until ringing is heard. If this is a different frequency, repeat steps B
and C. If it is not a different frequency, try turning the frequency control while listening to the feedback. Stop when
the feedback is as low as possible. If the feedback is still audible, turn the corresponding level control CW toward
the -15 setting until the feedback is gone.
5. Setting the Overall Level:
Set the master level control (external) for the desired overall output level. This mixer’s levels are now set and the
mixer’s other features (downward expander, low cut and priorities) can be set as desired for the application.
6. Attaching the Security Panel:
Attach the security plexiglass with the eight supplied screws. This will prevent any unwanted tampering with the
settings.
17
ESPAÑOL
AUTOMIX™ CONTROL 8
Introducción
¡Le agradecemos haber adquirido el Automixcontrol 8! El Architectural Acoustics Automix control 8
es un mezclador automático de alta calidad, con ocho entradas de micrófono/línea equilibradas por
transformador. Cada canal posee control de ganancia, alimentación fantasma de 48 V (entradas de
micrófono), filtro de corte de bajos, LED indicador de actividad/recorte de señal, control de señal de
muestra auxiliar y la opción de operación manual o automática. Cada canal también posee un punto
de inserción anulable y salida de estado de lógica TTL (5 V). Se puede silenciar individualmente o
simultáneamente con varios canales, mediante un bus de silenciado asignable. Además, los canales 1
y 2 tienen control de prioridad ajustable.
La sección maestra provee un control de recorte de ganancia, tres filtros de muesca con barrido
de frecuencia de 1/9 de octava, un expansor descendente, salidas equilibradas por transformador
(principal y auxiliar) y conexiones para control de volumen remoto. El mezclador Automix control 8 ha
sido diseñado para interconectar fácilmente entre sí varias unidades y formar un único mezclador con
muchas más salidas (16, 24, 32…). Para evitar modificaciones a las configuraciones del instalador, el
mezclador Automix 8 se suministra con un panel de seguridad de plexiglas transparente.
Teoría de
Operación
La Peavey Automix es una “mezcladora automática” clásica que combina varias técnicas ya probadas
por el tiempo para proporcionar una ganancia máxima, antes de producirse la retroalimentación, en
una configuración fácil de ajustar y usar.
La Automix cuenta con dispositivos amplificadores controlados por voltaje (VCA) y circuitos de
cálculo de ganancia en cada canal para bajar la ganancia al activarse más micrófonos. Al hacer
caer la ganancia en 3dB cada vez que se dobla el número de micrófonos activos, el nivel global
de ganancia del sistema permanece en la unidad para un desempeño de ganancia ideal antes de
retroalimentación. Un rectificador de precisión y convertidor logarítmico calcula la amplitud de la
señal de audio presente en cada micrófono en tiempo real. Esta amplitud de canal, en decibeles. Un
circuito de cómputo sencillo calcula la diferencia matemática entre estas dos amplitudes y alimenta
el resultado al VCA como una señal de control de ganancia.
Para entender mejor cómo funciona esto, permíteme dar unos cuantos ejemplos. Si tenemos el caso
de una persona hablando en un micrófono, la amplitud en ese canal será virtualmente idéntica a la
amplitud de “la suma de todos los canales”. La diferencia entre estas dos amplitudes equivalentes
es “0”. Cuando se alimenta 0 dB al puerto de control VCA el resultado es una ganancia de la unidad
para ese canal. Todos los demás canales sin nadie hablando, exhibirán amplitudes significativamente
menores. Cuando se comparan con la “suma”, que contiene una señal nominal, da como resultado
números negativos. Estos números negativos presentados a los dispositivos VCA de los canales
inactivos, ordenan una mayor atenuación del ruido y fuga presentes en estos canales inactivos.
Un segundo ejemplo más interesante es dos personas hablando simultaneamente. Para simplificar
este ejemplo, asumamos que ambas están hablando al mismo volumen. Como estas dos fuentes
son incoherentes, p. ej. No idénticas, sumarán como la raiz cuadrada de la suma de los cuadrados o
3 dB más que cualquiera de las dos individualmente. Cuando la amplitud de cada canal se compara
con esta suma de +3 dB, se ordenará a su VCA que atenúe en 3 dB. Como en el ejemplo anterior, los
canales inactivos serán atenuados aún más. La elegancia de este enfoque es realmente evidente en
este siguiente caso. Asume que una persona está situada exactamente a la misma distancia de dos
micrófonos. La señal idéntica que llega a cada micrófono, al ser coherente, sumará linealmente +6
dB en la suma de todos los canales. Esto tiene como resultado que se baje en 6 dB a los dos canales.
Al ser coherentes, estas dos señales idénticas con una suma de -6 dB darán como resultado la
unidad.
Estas relaciones de ganancias son válidas sin importar cuántos micrófonos estén activos, ni si las
señales son coherentes o no. Ya que estos cálculos son realizados en el dominio logarítmico, no
importa cuales sean las amplitudes relativas entre señales.
18
1
2
1. NIVEL DE CANAL
Modo manual: En el modo manual, los controles de nivel de canal proveen 6 dB de ganancia y 50
Panel Frontal
dB de atenuación.
Modo automático: En modo automático el control aún provee 50 dB de atenuación, pero no
agrega ganancia al nivel general del sistema. En lugar de ello, cuando el nivel se ajusta por arriba
de “0”, los otros canales se atenúan para hacer que el canal ajustado predomine en la mezcla con
mayor intensidad sonora, sin aumentar la ganancia del sistema.
2. NIVEL MAESTRO
El nivel maestro controla el nivel de salida general. La banda está configurada para 10 dB de
ganancia positiva y 40 dB de atenuación.
8
3
Panel Interno
9
12
10 13
11
4
5
6
7
3. INTERRUPTORES
DIP
Cada canal tiene cuatro interruptores DIP que controlan las siguientes funciones:
A. MANUAL/AUTOMÁTICO
Este conmutador determina si el canal funciona en modo manual o en modo automático.
B. DESACTIVADO/BUS DE SILENCIADO
Este interruptor se utiliza para conectar el canal al bus de silenciado del sistema. Esto
permite que varias entradas se silencien simultáneamente mediante un control externo. Vea
BUS DE SILENCIADO en la página 18.
C. CORTE DE BAJOS/PLANO
Este conmutador selecciona el filtro de corte de bajos. El filtro de corte de bajos provee
atenuación progresiva de baja frecuencia, que ayuda a minimizar los ruidos no deseados
(movimiento de micrófonos, golpes en la mesa, etc.). La atenuación progresiva comienza a
100 Hz (–3 dB). Es un filtro de 6 dB por octava.
D. DESACTIVADO/+48
Cuando este interruptor está en la posición +48, se suministran +48 V de alimentación
fantasma a los terminales ± del micrófono. Esto provee alimentación para los micrófonos
electrostáticos. Se debe desactivar al utilizar micrófonos dinámicos o entradas no
equilibradas.
19
Panel Interno
4. CONTROL DE SEÑAL DE MUESTRA AUXILIAR
Controla el nivel de la señal enviada al bus auxiliar. El nivel enviado al bus auxiliar también
es afectado si se modifica el control de ganancia del canal.
5. LED ACTIVIDAD/RECORTE DE SEÑAL
Este control configura la ganancia de entrada a cada canal. La cantidad es ajustable de +25 a
+60 dB (entrada de micrófono).
6. ACTIVITY/CLIPPING LED ACTIVITY
En el modo automático, el LED indicador se enciende de color verde para indicar que
el canal es el predominante en la mezcla (modo automático). Si el canal está en modo
manual, el LED indicador continúa encendido si el control de nivel del panel frontal está en
la posición de las 12:00 horas o más allá. El LED indicador verde también es un aviso del
estado de la salida: si está encendido, el estado de la salida es alto (+5 V); si está apagado,
el estado es bajo (0 V).
RECORTE DE SEÑAL
Si el canal está a 1 dB o menos del recorte de la señal, el LED indicador se enciende
de color rojo.
7. PRIORIDAD (SÓLO EN LOS CANALES 1 y 2)
Al girar el control de prioridad hacia la derecha, se permite que el canal predomine
sobre los otros en la mezcla. Para ello, “engaña” a los circuitos de cómputo de ganancia
haciéndolos creer que este canal tiene mayor intensidad sonora que los otros. Se dispone
de hasta 9 dB de prioridad.
8. CONTROL DE NIVEL MAESTRO AUXILIAR
Este control configura el nivel de la señal que se envía a la salida auxiliar. El nivel se debe
graduar después de configurar los niveles individuales de los canales.
9. EXPANSOR DESCENDENTE
El expansor descendente se puede utilizar para atenuar la ganancia del sistema cuando
todas las señales de entrada son bajas. Esto se puede aprovechar para evitar que el ruido
ambiente de fondo sea amplificado.
CONFIGURACIÓN DEL EXPANSOR DESCENDENTE
Pida a otra persona que hable frente a un micrófono al nivel más bajo que se espera
utilizar. Gire lentamente el expansor descendente hacia la derecha, hasta que se atenúe
el ruido ambiente de fondo entre las palabras. Tenga cuidado de no excederse. Cuanto
más expansor descendente se utilice, menos “natural” será el sonido del sistema. Este
método brinda un buen punto de partida para el ajuste, pero la mejor manera de configurar
el expansor descendente es durante la actuación o evento real. Esto permite ajustar
el expansor descendente para obtener el mejor sonido. Si debe trabajar con eventos
muy ruidosos o muy silenciosos, deberá lograr un equilibrio entre el sonido natural y la
anulación del ruido ambiente.
10. RECORTE DE GANANCIA MAESTRO
Este control establece la máxima ganancia general del sistema y se debe configurar
con el control de ganancia maestro del panel frontal girado totalmente a la derecha y el
amplificador externo activado, con los controles fijos en la configuración operacional.
Al recortar la ganancia a un nivel seguro por debajo de la retroalimentación, ninguna
combinación de controles del usuario podrá generar esa perturbación. El control de recorte
de señal provee hasta 25 dB de atenuación de ganancia del sistema.
11. CONTROL DE NIVEL DE FILTRO DE MUESCA
El control de nivel de filtro de muesca ajusta la magnitud de recorte a la frecuencia
seleccionada mediante el correspondiente control de frecuencia (12). El recorte es ajustable
de 0 a 15 dB.
20
12. CONTROL DE FRECUENCIA DE FILTRO DE MUESCA
Panel Interno
El control de frecuencia de filtro de muesca se utiliza para seleccionar la frecuencia central
del filtro. El filtro inferior tiene una banda de 40 a 925 Hz; el filtro central tiene una banda
de 260 Hz a 6 kHz; el filtro superior tiene una banda de 500 Hz a 12 kHz.
13. LED DE ALIMENTACIÓN
Indica que la alimentación de línea de CA está conectada y que el interruptor de
alimentación está activado.
24
23
18
22
19
17
15
16
25
Panel Posterior
20
14
21
14. ENTRADAS DE MICRÓFONO
Para utilizar con micrófonos de baja impedancia o fuentes de bajo nivel. Es una entrada
equilibrada por transformador, con una impedancia de 2000 Ω. La sensibilidad de la
entrada para la salida nominal es de –56 a –19 dBu.
ENTRADAS DE LÍNEA
Permiten utilizar entradas con nivel de línea. Son entradas equilibradas por transformador a
través de un atenuador resistivo de 30 dB. La impedancia de entrada es >20 kΩ.
15. ENTRADA/SALIDA DE INSERCIÓN
Es un circuito de señal que permite insertar un dispositivo externo, tal como un ecualizador,
en el camino de la señal de los canales individuales (consulte el diagrama más abajo).
16. INTERRUPTOR DE DERIVACIÓN DE SEÑAL
Cuando no se utiliza ningún procesador de señal o se desea evitar el procesador de señal,
este interruptor debe estar hacia adentro. Si se utiliza un procesador de señal, debe estar
afuera.
21
Panel Posterior
17. SALIDAS DIRECTAS
Cada canal tiene terminales de salida directa que se pueden utilizar para grabación o
cuando se necesite la salida de un canal individual. La señal es independiente de la
ganancia del mezclador Automix™ Control 8. El nivel de salida nominal es 2,21 dBu (1 V).
SILENCIADO DE SONIDO
Los canales se pueden silenciar individualmente conectando este terminal a tierra. Provee
aproximadamente 45 dB de atenuación.
ESTADO DE SALIDA
El estado de la salida es una salida lógica de CC que está en condición alta (+5 V) cuando el
canal está activo, y baja (0 V) cuando está inactivo. El voltaje de CC se puede utilizar para
excitar videocámaras o disparar luces indicadoras en micrófonos activos.
NOTA: Cada canal puede generar un máximo de 10 mA.
18. SALIDA PRINCIPAL
Es una salida de 600 Ω equilibrada por transformador, que se puede utilizar con un
amplificador de potencia externo. Éste es el punto en que se accede a la salida mezclada
automática o manualmente. La salida nominal es 2,21 dBu (1V).
19. SALIDA AUXILIAR
Es una salida de 600 Ω equilibrada por transformador, que se puede utilizar como una
salida adicional no mezclada automáticamente. La salida nominal es 2,21 dBu (1V).
20. VOLUMEN REMOTO
El nivel maestro puede ser controlado a distancia con una simple conexión en la parte
posterior de la unidad. Un potenciómetro de 10 kΩ provee aproximadamente 0 a 25 dB de
atenuación, en tanto que un potenciómetro de 100 kΩ provee de 0 a 45 dB. Si se desea, se
puede insertar un voltaje de control para controlar la atenuación de 0 a 70 dB. El recorte de
ganancia interno debe estar configurado completamente hacia la derecha, para lograr la
gama de atenuación máxima del volumen remoto (consulte el diagrama más abajo).
NOTA: El voltaje de control no debe nunca exceder 13 VCC.
21. BUS DE SILENCIADO
EL bus de silenciado es un puerto de control que, cuando se conecta a tierra, silencia 45 dB
aproximadamente en todos los canales asignados. Los canales a silenciar se asignan al bus
de silenciado utilizando el interruptor interno “OFF/MBUS” (desactivado/bus de silenciado).
Consulte las FUNCIONES DEL PANEL INTERNO en la página 15 y el diagrama de la página 18.
22
Panel Posterior
22. PUERTO DE ENLACE
Para aumentar la cantidad de entradas disponibles, se pueden interconectar entre sí
varios mezcladores Automix, mediante un procedimiento muy sencillo. Sólo se requiere
un destornillador de punta plana pequeño y un tramo corto de cable blindado de cuatro
conductores. El diagrama y los procedimientos que siguen aseguran un enlace apropiado.
1. Prepare un cable de enlace.
2. Conecte los mezcladores según el diagrama de más arriba.
3. Seleccione el mezclador a ser utilizado como maestro y coloque su conmutador de
enlace en la posición “master” (maestro).
4. Todos los otros mezcladores del sistema deben tener sus conmutadores de enlace
en la posición “slave” (esclavo).
Ahora usted cuenta con un mezclador automático de 16 canales o más. Los controles
maestros de la unidad elegida como “maestra” se utilizarán para controlar el sistema.
23. CONMUTADOR DE ENLACE
El conmutador de enlace se utiliza para colocar la unidad en el modo de operación maestro
o en el modo esclavo. Siempre debe haber una unidad autónoma en el modo maestro.
Consulte PUERTO DE ENLACE (No. 22).
24. INTERRUPTOR DE ALIMENTACIÓN
Para encender el equipo, colóquelo en “I”.
25. RECEPTÁCULO DE ENTRADA IEC (CA)
Con el interruptor de alimentación en la posición de apagado (“O”), enchufe el cable de
alimentación en este conector antes de enchufarlo en la fuente de alimentación de CA.
Asegúrese de utilizar siempre voltaje de CA y prácticas de conexión a tierra apropiados. (El
voltaje adecuado está indicado bajo el receptáculo.)
23
AUTOMIX™ CONTROL 8 ESPECIFICAIONES
Salida Nominal = 2.21 dBu = 1 voltio
Especificaciones de la Entrada:
Función
(ohmios)
Entrada z
Aplicaciones
Min
Entrada de Ganancias
(para bal. salidas)
Micrófono
(150 ohmios)
2k
Linea
(10K ohmios)
>20k
Entrada de Volumen
Min*
Nominal**
Ganancia Max
(60 dB)
-64 dBu
(0.5mV)
-43 dBu
(5.5mV)
Ganancia Max
(30 dB)
-35 dBu
13.7mV
Bal./
Inbal.
Conector
Bal.
Mic In (+)
Mic In (-)
Tierra
Bal.
Linea In (+)
Linea In (-)
Tierra
Max
-2 dBu
(615mV)
-14 dBu
(155mV)
+27 dBu
(17.4V)
* Mínimo nivel de entrada (Sensibilidad) es la señal más pequeña que producirá una salida nominal (2.21 dBu) con controles
de canal y master en la máxima ganancia.
** Aplicaciones Nominales definidas s, todo control instalado a 0 dB (o 50% rotación para pots).
-122 dBu (Max ganancia, terminado 150 ohmios)
+48 voltios a Mic ± terminado
0 dB to 9 dB
-3 dB @ 100 Hz (6 dB por octava)
>65 dB @ 20 Hz — 20 kHz
>85 dB @ 1 kHz
EIN:
Potencia Phantom:
Prioridad (Canales 1 y 2):
Corte de Filtrode Baja:
Modo Común:
Radio de Eliminación:
Especificaciones de Salida:
Función
Salida Master
Mínimo
Load Z
(Ohmios)
Niveles de Salida
Nominal
600
+2.21 dBu
(1V)
Salida Aux.
600
+2.21 dBu
(1V)
Bal./
Unbal.
Conector
Salida Master (=)
Bal.
Salida Master (+)
Max
+20 dBu
+16 dBm
(7.75V)
(6.44V)
(Hi Z load)
(600Ω load)
+20 dBu
+16 dBm
(Hi Z load)
(600Ω load)
Salida Master (-)
Tierra
Bal.
Salida Aux. (+)
Salida Aux. (-)
Tierra
Distorción:
Entrada Micro a Salida Master:
<0.2% a nominal (20 Hz a 20 kHz)
Respuesta de Frecuencia:
Entrada Micro Salida Master:
Entrada Micro a Salida Aux:
20 Hz a 20 kHz +0/-1 dB a nominal
20 Hz a 20 kHz +0/-1 dB a nominal
24
AUTOMIX™ CONTROL 8 ESPECIFICAIONES
Zumbido y Ruido:
Salida
Ruido Residual
Ref: 0 dBu
Radio S/N
Ref: 2:21 dBu
Condiciones de Test
Salida Master
-85 dBu
87 dB
-84 dBu
86 dB
Un canal nominal,
Nivel Master nominal
-85 dBu
87 dB
Todos los controles bajos
-80 dBu
82 dB
Un canal de final nominal,
Monitor master nominal
Bajando todos los controles
Salida Aux
(Medidas de Zumbido y ruido: 22 Hz a 22 kHz BW)
SPECIFICACIONES GENERALES:
Rango del Volumen Remoto:
0 dB a 70 dB de atenuación
Atenuación de canal apagado:
0 dB a 70 dB
Muteado:
Canal atenuado 45 dB cuando conectado del Muteado a Tierra.
Muteado Bus:
Canales múltiples pueden ser de atenuación 45 dB cuando
conectado del Muteado Bus a Tierra.
Salida Estatus:
El estatus es alto (5V) cuando el canal está activo. Es bajo (0V)
cuando el canal no está activo.
Consumo de Potencia:
AC 120 voltios, 60 Hz, Domestico
AC 230 voltios, 50/60 Hz Export
15 vatios
Peso:
11 lbs. (4.9 kg)
Dimensiones:
Ancho: 19" (48.26 cm)
Fondo: 9 1/4" (23.49 cm)
Alto: 3 1/2" (8.89 cm)
25
26
AUTOMIX™ CONTROL 8 BLOQUES
AUTOMIX™ CONTROL 8
Setting up the Automix Control 8 (Ajuste de la Automix)
1. Cableado de entradas y salidas:
Para los mejores resultados, se recomienda usar cable blindado de dos conductores para todas las conexiones de
las entradas y salidas. Recuerda observar la polaridad correcta al hacer las conexiones. El largo recomendado de la
punta desnuda del cable para las conexiones terminales de tornillo es de 1.27 cm.
2. Ajustes iniciales de los controles:
Niveles de canal
Recortes de ganancia de canal
Aux Send Controls
Prioridad
Controles de muesca
Expansor descendente
Aux Master Level
Nivel maestro
Nivel Maestro de Recorte de ganancia
Todos los canales en modo automático
(Placa frontal)
(Interno)
(Interno)
(Interno)
(Interno)
(Interno)
(Interno)
(Placa frontal)
(Interno)
—
—
—
—
—
—
—
—
—
Todo a la izquierda
Todo a la izquierda
Todo a la izquierda
Todo a la izquierda
Todo a la izquierda
Todo a la izquierda
Todo a la izquierda
Todo a la derecha
Todo a la izquierda
3. Ajuste del Nivel de canal:
Ajusta el control del tablero frontal (del canal que se está ajustando) a la posición intermedia (12 en punto). Conecta
una entrada de micrófono o línea a un canal. Mientras que alguien está hablando en el micrófono (de la misma
manera en que se usaría normalmente), aumenta lentamente el recorte de ganancia hasta que sea audible un ligero
zumbido agudo (retroalimentación). Baja lentamente el recorte de ganancia hasta que el zumbido agudo deje de
oírse. Éste es el nivel máximo al que debe ajustarse el recorte de ganancia. Baja el control de ganancia interno (todo
a la izquierda).
NOTA: Es posible que sea necesario subir el recorte de ganancia maestro interno (a la derecha) si se puede hacer que
el canal se sobrecargue fácilmente, o que no se pueda obtener retroalimentación en la gama de operación normal del
control de recorte de ganancia interno.
Repite este paso con los canales restantes.
Vuelva a poner todos los controles externos de volumen de canal en su posición intermedia (12 en punto).
4. Ajuste del Filtro de Muesca:
El filtro de muesca puede ajustarse en un par de maneras. Puede ajustarse usando equipo de pruebas para localizar
las frecuencias que tiendan a retroalimentarse, o puede ajustarse “de oído.” Para el propósito de este manual, sólo
será descrito el método “de oído.”:
A. Incrementa lentamente el recorte de ganancia maestro (interno) hasta que se oiga un ligero zumbido agudo.
B. Selecciona la gama de frecuencia apropiada y gira el control correspondiente hacia la derecha hasta alrededor de
la posición de las 12 en punto.
C. Gira lentamente el control de frecuencia hacia derecha e izquierda hasta que ya no se oiga el zumbido agudo.
D. De nuevo, aumenta lentamente el recorte de ganancia maestro hasta que se oiga el zumbido agudo. Si esta es una
frecuencia diferente, repite los pasos b y c. Si no lo es, prueba girando el control de frecuencia mientras escuchas
la retroalimentación. Deténte cuando se reduzca la frecuencia que se está retroalimentando. Si la
retroalimentación aún es audible, gira el control de nivel hacia la derecha hacia el -15 hasta que desaparezca la
retroalimentación.
5. Ajustando el Nivel Global:
Fija el Control de nivel maestro (externo) al nivel de salida global deseado. Los niveles de la mezcladora ya están
ajustados y las demás funciones de la mezcladora (expansor descendente, corte de graves y prioridad) pueden
ajustarse como se desee para la aplicación.
6. Adjuntando el Panel de Seguridad:
Sujeta el plexiglás de seguridad con los ocho tornillos incluidos. Esto evitará cualquier manipulación no autorizada
de los ajustes.
27
FRANÇAIS
AUTOMIX™ CONTROL 8
Introduction
Nous vous félicitons pour l’achat de cet Automix control 8. L’Automix control 8 Architectural
Acoustics est un mixeur automatique haute qualité possédant huit entrées micro/ligne symétriques
(transformateur). Chaque canal possède un contrôle de gain, une alimentation phantom 48 Volt
(entrées micro), une filtre coupe-bas, une LED d’activité/écrêtage, un contrôle Aux send et le choix
entre une opération manuelle ou automatique. Chaque canal est par ailleurs équipé d’un insert
assignable, d’une sortie “statut” 5 Volt TTL et peut être rendu muet individuellement ou en groupe
grâce à un bus Mute. De plus, les canaux 1 et 2 disposent d’un contrôle de priorité ajustable.
La section master possède un contrôle de gain, trois notch filters 1/9 d’octave à fréquence réglable,
un expandeur, des sorties symétrisées par transformateur (main et aux) et des connexions pour le
contrôle de volume à distance. L’Automix control 8 a été conçu pour être relié à d’autres unités afin
de constituer un mixeur possédant un plus grand nombre d’entrées (16, 24, 32...). Il est par ailleurs
équipé d’un panneau plexiglass transparent afin d’éviter toute modification accidentelle des réglages
de l’installateur.
Un Mot De
Theorie
L’Automix de Peavey est un «mélangeur automatique» classique qui réunit des techniques éprouvées
délivrant un gain maximum avant retour, dans une configuration de mise en oeuvre et d’utilisation
faciles.
Pour chacun des canaux, l’Automix utilise des VCA (amplificateurs contrôlés en tension) et des
circuits de calcul de gain permettant de diminuer celui-ci au fur et à mesure que le nombre de
microphones actifs augmente. En diminuant le gain de 3 dB chaque fois que ce nombre double,
le gain global du système est maintenu à la valeur unité, qui est le gain avant retour idéal pour la
performance.
Un rectificateur de précision et un convertisseur logarithmique calculant en temps réel, pour chacun
des canaux, l’amplitude du signal audio de chaque microphone. L’amplitude du canal, mesurée
en décibels, est alors comparée à celle de la somme de tous les canaux, également mesurée en
décibels. Un circuit élémentaire calcule la différence mathématique entre ces deux amplitudes, et
fournit au VCA le résultat qui sert de signal de contrôle de gain.
Pour mieux comprendre comment cela fonctionne, prenons quelques exemples. Lorsqu’une
personne parle dans un microphone, l’amplitude du canal est quasiment identique à celle de «la
somme de tous les canaux». La différence entre ces deux amplitudes égales est «0». Si l’entrée de
commande du VCA est alimentée par 0 dB, le résultat est un gain unité pour ce canal. L’amplitude
de tous les autres canaux est beaucoup plus faible, puisque personne d’autre ne parle. En effet, la
comparaison de leur amplitude (nulle) à celle de la «somme», qui contient un signal nominal, produit
des nombres négatifs. Ceux-ci, présentés aux VCA des canaux inactifs, imposent une atténuation
supplémentaire du bruit et des parasites présents sur ces canaux.
Un deuxième exemple, plus intéressant, est celui de deux personnes parlant simultanément.
Pour simplifier cet exemple, supposons qu’elles parlent aussi fort l’une que l’autre. Puisque ces
deux sources ne sont pas cohérentes (c’est-à-dire pas identiques), l’amplitude totale est la racine
carrée de la somme des carrés de leurs amplitudes, soit exactement 3 dB de plus que chacune des
amplitudes prises séparément. Lorsque l’amplitude de chacun de ces deux canaux est comparée
à cette somme, leur VCA commande une atténuation de 3 dB. Comme précédemment, les canaux
inactifs subissent une atténuation supplémentaire.
Ce n’est que dans le cas suivant que l’élégance de cette approche se révèle pleinement : supposons
qu’une personne soit située à égale distance de deux microphones. Un signal identique arrive dans
les deux canaux ; ces signaux étant cohérents, la sommation linéaire de tous les canaux vaut 6 dB
de plus que l’amplitude de chaque canal. Il en résulte une atténuation de +6 dB pour chaque canal.
Atténués de 6 dB, la somme de ces deux signaux identiques produit un gain unité.
Ces relations de gains restent vraies, quel que soit le nombre de microphones actifs, que les signaux
soient cohérents ou non. Tous les calculs étant effectués dans le domaine logarithmique, les
amplitudes absolues des signaux importent peu; seules comptent leurs amplitudes relatives.
28
1
2
1. NIVEAU DU CANAL
Mode Manuel: Dans ce mode, les contrôles de niveau permettent un contrôle de gain de +6 dB à
PANNEAU AVANT
-50 dB.
Mode Automatique: En mode Automatique, le contrôle fournit toujours jusqu’à 50 dB
d’atténuation mais n’augmentera pas le gain du canal. Cependant, lorsqu’il est réglé au dessus de
“0”, le gain des autres canaux est atténué afin de rendre le canal concerné plus fort dans le mix mais
sans augmenter le gain général.
2. NIVEAU MASTER
Il contrôle le niveau général de sortie. Sa plage de réglage s’étend de +10dB à -40 dB.
8
3
PANNEAU INTERNE
9
12
10 13
11
4
5
6
7
3. DIP SWITCHES
Chaque canal possède quatre DIP switchs gérant les fonctions suivantes.
A. MAN/AUTO
Ce sélecteur détermine le mode du canal: automatique ou manuel.
B. OFF/MBUS
Ce sélecteur connecte le canal au bus Mute . Cela permet de rendre muets plusieurs canaux
simultanément grâce à un contrôle externe. Voir MUTEBUS, page 24.
C. LO CUT/FLAT
Ce sélecteur actionne le filtre coupe-bas. Ce filtre atténue les fréquences graves afin de
minimiser les bruits indésirables (manipulation du micro, etc...). La fréquence de coupure
est fixée à 100 Hz (-3 dB) et la pente du filtre est de 6 dB par octave.
D. OFF/+48
Lorsque ce sélecteur est en position +48, une alimentation Phantom de +48 Volt est
présente aux bornes + et - de l’entrée micro. Cela permet l’alimentation des micros passifs
mais devra être désactivé lors de l’utilisation de micros dynamiques ou asymétriques.
29
PANNEAU INTERNE
4. CONTRÔLE AUX SEND
Détermine le niveau du signal envoyé au bus AUX. Ce niveau sera par ailleurs affecté par le
contrôle de gain du canal correspondant.
5. GAIN
Détermine le gain d’entrée. La plage de réglage s’étend de +25dB à +60dB (entrée Micro).
6. LED D’ÉCRÊTAGE/ACTIVITÉ
En mode automatique, la LED s’allumera en vert pour indiquer quel canal est prédominant
dans le mix (mode auto). Si le canal est en mode manuel, la LED restera allumée si le
contrôle de niveau du paneau avant est réglé au dessus de 12h00. La LED indique par
ailleurs l’état du canal concerné: si elle s’allume (+5 Volt), un signal est présent; si elle est
éteinte (0 Volts), alors aucun signal n’est présent.
ECRÊTAGE
La LED s’allumera en rouge si le canal est à 1dB de son point d’écrêtage.
7. PRIORITÉ (CANAUX 1 ET 2 UNIQUEMENT)
En tournant le contrôle dans le sens horaire, le canal concerné devient prédominant dans le
mix. Jusqu’à 9 dB de gain sont disponibles.
8. CONTRÔLE DE NIVEAU MASTER AUX
Ce contrôle détermine le niveau du signal envoyé à la sortie Aux Out. Ce contrôle doit être
ajusté aprés que les niveaux individuels des canaux aient été réglés.
9. EXPANDEUR
L’expandeur permet de diminuer le gain des canaux lorsque leurs signaux sont bas. Ceci
permet de ne pas amplifier les bruits de fond.
RÉGLAGE DE L’EXPANDEUR EXPANDEUR
Parlez dans le micro au niveau le plus faible nécessitant d’être entendu à travers le
système . Tournez lentement le contrôle de l’expandeur dans le sens des aiguilles d’une
montre jusqu’à ce que le bruit de fond présent entre les paroles disparaîsse. Ne poussez
pas ce contrôle trop loin. Plus l’expandeur est sollicité, moins le résultat sera naturel.
Cette méthode vous donne un bon point de départ mais la meilleure manière de régler
l’expandeur est de le faire en situation. L’expandeur sera ainsi ajusté pour le meilleur rendu
possible. Si il doit être utilisé dans des applications bruyantes, il vous faudra trouver un
équilibre entre bruit ambient et bruit de fond.
10. GAIN MASTER
Ce contrôle détermine le gain général du système et doit être réglé avec le gain master
du panneau avant sur sa position maximum, tous les canaux au niveau nominal et les
amplificateurs de puissance en marche et à leur niveau d’utilisation normale. Lorsque le
niveau est établi en dessous du niveau de feedback, aucune manipulation en face avant
n’entraînera de larsen. Ce réglage permet jusqu’à 25 dB d’atténuation du gain du système.
11. NIVEAU DU NOTCH FILTER
Ce réglage détermine l’intensité de la coupure du filtre à la fréquence sélectionnée par le
contrôle no. 12. Il est ajustable de 0dB à 15dB de coupure.
30
PANNEAU INTERNE
12. FRÉQUENCE DU NOTCH FILTER
Ce contrôle permet de déterminer la fréquence centrale du notch filter. La fréquence de
centrage du filtre Graves peut varier de 40Hz à 925Hz, celle du filtre Médiums de 260Hz à
6kHz et celle du filtre Aigus de 500Hz à 12kHz.
13. LED D’ALIMENTATION
Indique que l’appareil est branché et que l’interrupteur de mise sous tension est en position
“ON”.
24
23
18
22
19
17
15
16
25
PANNEAU ARRIÈRE
20
14
21
14. ENTRÉES MICRO
Cette entrée est destinée aux micros basse impédance et aux sources à faible niveau. Ces
entrées sont symétrisées par transformateur est possèdent une impédance d’entrée de 2
kΩ. Un niveau d’entrée de -56 dBu à -19 dBu produit un niveau de sortie nominal.
ENTRÉES LIGNES
Elles permettent l’utilisation de source au niveau ligne. Ces entrées sont symétrisées
par transformateur est équipée d’un atténuateur de 30dB. Leur impédance d’entrée est
supérieure à 20kΩ.
15. INSERT IN/OUT
Cette boucle permet d’insérer dans un canal un processeur externe tel un équaliseur
(reportez-vous au diagrame ci-dessous).
16. INSERT COMMUTATEUR BYPASS
Lorsqu’aucun processeur externe n’est utilisé ou qu’il doit être shunté, placez le
commutateur en position “in”. Dans le cas contraire, placez-le en position “out”.
31
PANNEAU ARRIÈRE
17. SORTIES DIRECT
Chaque canal possède une sortie direct pour l’enregistrement ou lorsque il est nécessaire
de récupérer le signal d’un canal individuel. Ce signal est indépendant des manipulation de
gain automatiques. Son niveau de sortie nominal est de 2.21dBu (1 Volt).
MUTE
Les canaux peuvent être mis en sourdine individuellement en mettant cette borne à la
masse. L’atténuation est de l’ordre de 45dB.
ETAT DE SORTIE
Cette sortie est une sortie logique en état haut (+5 Volts) lorsque le canal est actif, et en
état bas dans le cas contraire (0 Volts). Cette tension peut permettre de contrôler des
caméras ou des lumières dirigées sur les micros actifs.
NOTE: Chaque canal peut fournir un maximum de 10 mA.
18. SORTIE MAIN
Cette sortie d’une impédance de 600Ω est symétrisée par transformateur et peut être
utilisée pour alimenter un amplificateur de puissance. Le signal est constitué du mix
automatique ou manuel. La sortie nominale est de 2.21 dBu (1 Volt).
19. SORTIE AUX
Cette sortie d’une impédance de 600Ω est symétrisée par transformateur et peut être
utilisée comme sortie auxiliaire pour le mix (non-automatique). La sortie nominale est de
2.21 dBu (1 Volt).
20. CONTROLE DU VOLUME A DISTANCE
Le niveau master du mixeur peut être contrôlé à distance par ces bornes. En connectant
un potentiomètre de 10kOhm, une atténuation de 0 à 25 dB peut être effectuée.
Unpotentiomètre de 100k permettra une attébuation de 0 à 45 dB. Une tension de contrôle
peut par ailleurs être appliquée pour une atténuation de 0 à 70 dB. Le contrôle de gain
interne doit être réglé à son maximum pour une plage d’atténuation optimale.
NOTE: LA TENSION DE CONTRÔLE NE DOIT PAS EXCEDER 13 VOLTS DC.
21. MUTEBUS
Les canaux assignés au MuteBus peuvent être mis en sourdine globalement en mettant
cette borne à la masse. L’atténuation est de l’ordre de 45 dB. Les canaux doivent être
affectés au Mute bus avec le sélecteur OFF/MBUS. Voir CONTROLE DU PANNEAU INTERNE.
32
PANNEAU ARRIÈRE
22. PORT LINK
Pour augmenter le nombre d’entrées, plusieurs Automix peuvent être reliés ensembles.
Pour cela, vous avez besoin d’un simple tourne-vis et d’une petite longueur de câble 4
conducteurs blindé. Suivez unes à unes les étapes ci-dessous:
1.
2.
3.
4.
Confectionnez un câble adéquat.
Reliez les mixeurs comme indiqué par le schémas ci-dessus.
Choisissez le mixeur master et placez son sélecteur Link sur la position “Master”.
Tous les autres mixeurs du système devront être configurés en esclave (position
“slave” du sélecteur Link)
Vous avez à présent un mixeur automix de 16 canaux (ou plus). Le contrôle Master du
mixeur maître pourra être utilisé pour contrôler le système.
23. SELECTEUR LINK
Ce sélecteur permet de configurer l’appareil en maître ou esclave. Un appareil utilisé seul
devra être configuré en maître. Voir Port Link (no. 22).
24. INTERRUPTEUR D’ALIMENTATION
Placez cet interrupteur en position I pour mettre sous tension.
25. CONNEXION IEC (ALIMENTATION)
L’interrupteur no. 24 étant en position O, connectez ici un cordon d’alimentation avant de
le connecter à la source de courant. Assurez-vous toujours que la tension d’alimentation
correspond à la valeur indiquée sur l’appareil et que la connexion à la masse est
correctement établie.
33
AUTOMIX™ CONTROL 8 SPECIFICATIONS
Sortie Nominale = 2.21 dBu = 1 volt
Specifications d’entrée:
Fonction
(ohms)
Entree z
Setting
Min
Entrée Gains
(to bal. sorties)
Niveaux entrees
Min*
Nominal**
-43 dBu
(5.5mV)
Microphone
(150 ohms)
2k
Gain Max
(60 dB)
-64 dBu
(0.5mV)
Ligne
(10K ohms)
>20k
Gain Max
(30 dB)
-35 dBu
13.7mV
Bal./
Unbal.
Connecteurr
Bal.
Mic In (+)
Mic In (-)
Terre
Bal.
Line In (+)
Line In (-)
Terre
Max
-2 dBu
(615mV)
-14 dBu
(155mV)
+27 dBu
(17.4V)
* Le niveau d’entrée minimum (Sensibilité) est le plus faible signal qui produira une sortie nominale (2.21 dBu) avec les
contrôles de gain des canaux ou du master au maximum.
** Les réglages nominaux sont définis avec tous les contrôles réglés sur 0 (potentiomètres tournés à 50%)
-122 dBu (gain Max , terminaison 150 ohms)
+48 volts sur Mic ± terminaison
0 dB à 9 dB
-3 dB à 100 Hz (6 dB par octave)
>65 dB @ 20 Hz — 20 kHz
>85 dB @ 1 kHz
EIN:
Alimantation Phantom :
Prioritées (canaux 1 et 2):
Filtre coupe bas:
Mode commun:
Ratio de Rejection:
Specifications Sorties:
Function
Main Out
Minimum
Load Z
(Ohms)
Niveaux De Sorties
Nominal
600
+2.21 dBu
(1V)
Bal./
Unbal.
Connecteurr
Main Out (=)
Bal.
Main Out (+)
Max
+20 dBu
+16 dBm
(7.75V)
(6.44V)
Main Out (-)
(Charge HZ) (Charge 600Ω)
Aux Out
600
+2.21 dBu
(1V)
+20 dBu
+16 dBm
(Charge HZ) (Charge 600Ω)
Ground
Bal.
Aux Out (+)
Aux Out (-)
Ground
Distortion:
Entrée Micro vers Sorties principales:
<0.2% en nominal (20 Hz a 20 kHz)
Réponses en fréquences:
Mic Input vers Main Output:
Mic Input vers Aux Output:
20 Hz a 20 kHz +0/-1 dB en nominal
20 Hz a 20 kHz +0/-1 dB en nominal
34
AUTOMIX™ CONTROL 8 SPECIFICATIONS
Bruit et ronflement:
Sorties
Bruit Résiduel
Ref: 0 dBu
Ratio signal/Bruit
Ref: 2:21 dBu
Conditions de test
Main Out
-85 dBu
87 dB
Tous les contrôles baissés
-84 dBu
86 dB
Un canal nominal,
Niveau master(principal)
nominal
-85 dBu
87 dB
Tous les contrôles baissés
-80 dBu
82 dB
Fin d’un canal nominal,
Moniteur principal
nominal
Aux Out
(mesures de bruits et parasites: 22 Hz à 22 kHz BW)
SPECIFICATIONS GENERALES:
Gamme commande de volume:
0 dB to 70 dB of attenuation
Attenuation des canaux Off:
0 dB to 70 dB
Mute:
Le canal est atténué de 45 dB quand la connection
Mute/Ground est éffectuée
MuteBus:
Plusieurs canaux pourront s’attenuer de 45 dB connection
Mute/Ground est éffectuée
Status Sortie :
Status élevé (5V) lorsque canal actif. Il est bas (0V) lorsque
le canal est inactif.
Consommation électrique:
AC 120 volts, 60 Hz, Domestique
AC 230 volts, 50/60 Hz Export
15 watts
Poids:
11 lbs. (4.9 kg)
Dimensions:
Largeur: 19" (48.26 cm)
Profondeur: 9 1/4" (23.49 cm)
Hauteurt: 3 1/2" (8.89 cm)
35
36
AUTOMIX™ CONTROL 8 BLOCKS
AUTOMIX™ CONTROL 8
Installation de l’Automix Control 8
1. Câblage des entrées et des sorties:
Pour obtenir des résultats optimaux, il est conseillé d’utiliser des câbles blindés à deux conducteurs pour toutes les
connexions d’entrée et de sortie. Lorsque vous effectuez des branchements, n’oubliez pas de respecter les polarités.
La longueur de fil dénudé recommandée pour la fixation sur les bornes à vis est de 1,25 cm (1/2 po.).
2. Réglage initial des commandes:
Niveau des canaux
(panneau avant)
Ordre gain des canaux
(panneau interne)
Contrôles d’envois auxiliaires
(panneau interne)
Priorité
(panneau interne)
Cran de Contrôles
(panneau interne)
Sur-atténuateur des niveaux bas (panneau interne)
Niveau Général Aux
(panneau interne)
Niveau Général
(panneau avant)
Ordre Gain master
(panneau interne)
Tous les canaux en mode automatique
—
—
—
—
—
—
—
—
—
complètement à gauche
complètement à gauche
complètement à gauche
complètement à gauche
complètement à gauche
complètement à gauche
complètement à gauche
complètement à droite
complètement à gauche
3. Réglage du niveau des canaux:
Placez la mollette située sur le panneau avant (correspondant au canal à régler) en position médiane (à 12 heures).
Connectez une entrée ligne ou micro sur un canal. Tandis que quelqu’un parle dans le micro (de la même manière que
dans une situation réelle), augmentez lentement le gain du canal (panneau interne), jusqu’à ce qu’un léger sifflement
se fasse entendre (rétroaction parasite). Diminuez alors lentement ce gain jusqu’à ce que ce sifflement devienne
inaudible. C’est le niveau de gain maximum acceptable pour ce canal. Ramenez alors la mollette de niveau externe
complètement à gauche.
REMARQUE: Il peut être nécessaire d’augmenter le gain du panneau interne (en tournant la mollette vers la droite),
si les canaux atteignent rapidement le niveau d’écrêtage, ou s’il ne se produit jamais de rétroaction parasite dans la
plage de fonctionnement normal de la commande de gain du panneau interne.
Répétez cette étape pour les autres canaux.
Ramenez toutes les mollettes de réglage de niveau de canal du panneau avant à leur position médiane (0).
4. Réglage du filtre coupe-bande:
Il existe deux manières de régler le filtre coupe-bande. Une méthode consiste à utiliser un équipement de test pour
déterminer précisément les fréquences sujettes à la rétroaction parasite; l’autre méthode est le réglage «à l’oreille».
C’est celle-ci qui est décrite dans ce manuel:
A. Augmentez lentement le gain master (mollette du panneau interne) jusqu’à ce qu’un léger sifflement soit audible.
B. Sélectionnez la bande de fréquences concernée, et amenez la mollette de réglage de niveau à la position médiane
(12 heures).
C. Ajustez lentement la fréquence vers la droite ou vers la gauche jusqu’à ce que le sifflement devienne inaudible.
D. Augmentez à nouveau lentement le gain master (mollette du panneau interne) jusqu’à ce que le sifflement
devienne audible. S’il est de fréquence différente, répétez les étapes 2 et 3. Si c’est la même fréquence, essayez
d’ajuster la commande de réglage de fréquence tout en écoutant la rétroaction. Arrêtez lorsque cette rétroaction
est réduite. Si elle reste audible, tournez la mollette de réglage de niveau vers la droite en direction de la marque
-15, jusqu’à ce que la rétroaction disparaisse.
E. Réglez la mollette de niveau master du panneau avant pour obtenir le niveau de sortie global désiré. Les niveaux
du mélangeur sont maintenant réglés ; les autres fonctions du mélangeur peuvent maintenant être réglées (le suratténuateur des niveaux bas, le filtre de coupure bas et la priorité) pour adapter le système à l’application.
F. Fixez le panneau de plexiglas à l’aide des quatre vis fournies. Cela permet d’éviter les modifications de réglage non
désirées.
37
DEUTSCH
AUTOMIX™ CONTROL 8
Automatisches 8-Kanal-Mischpult
Einleitung
Wir möchten uns bei Ihnen dafür bedanken, dass Sie sich für den Automix Control 8 entschieden
haben! Der Automix Control 8 von Architectural Acoustics ist ein hochwertiges automatisches
Mischpult mit acht trafosymmetrierten Mic-/Line-Eingängen. Jeder Kanal ist mit Gain-Regelung,
48-Volt-Phantomspeisung (Mikroeingänge), Tiefpassfilter, Betriebs-/Clipping-LED, Aux-Send-Regler
und Wahlmöglichkeit zwischen manuellem oder automatischem Betrieb ausgestattet. Jeder Kanal
verfügt zudem über einen deaktivierbaren Insert-Punkt und 5-Volt-TTL-Statusausgabe. Zudem ist die
Stummschaltung eines einzelnen Kanals oder mehrerer Kanäle über einen zuweisbaren Mute-Bus
möglich. Daneben verfügen die Kanäle 1 und 2 über eine einstellbare Prioritätsregelung.
Die Master-Stufe ist mit einem Gain-Regler, drei stufenlosen 1/9-Oktave-Kerbfiltern, DownwardExpander, trafosymmetrierten Ausgängen (Main und Aux) sowie Anschlüssen zur LautstärkeFernregelung ausgestattet. Der Automix Control 8 ist so konstruiert, dass mehrere Geräte problemlos
verknüpft werden können, um ein einziges Mischpult mit wesentlich mehr Eingängen (16, 24, 32 usw.)
einrichten zu können. Der Automix Control 8 wird mit transparenter Plexiglas-Schutzblende geliefert,
um versehentliche Änderungen der Einstellungen des Technikers zu verhindern.
Funktionsweise
Der Automix Control 8 von Peavey ist ein klassisches „automatisches“ Mischpult, das mehrere
erprobte Techniken vereint, sodass es maximalen Gain liefert, bevor Feedback ertönt. Dabei ist
seine Konfiguration einfach einzurichten und zu bedienen. Der Automix arbeitet in allen Kanälen
mit spannungsgeregelten Verstärkern (VCA) und Schaltungen zur Gain-Berechnung, um den Gain
herunterzuregeln, je mehr Mikrofone aktiv sind. Jedes Mal, wenn die Zahl der aktiven Mikros
verdoppelt wird, wird der Gain um 3 dB gesenkt. So bleibt die Gesamtlautstärke des Systems auf
Leistungsverstärkung, der idealen Eingangsverstärkung, bevor Feedback eintritt.
Ein Präzisionsgleichrichter und ein logarithmischer Wandler in jedem Kanal berechnen in Echtzeit
die Amplitude des Audiosignals, das an jedem Mikro vorliegt. Diese Kanalamplitude (in Dezibel)
wird dann mit der Amplitude der Summe aller Kanäle (ebenfalls in Dezibel) verglichen. Ein einfacher
Rechenschaltkreis berechnet die mathematische Differenz zwischen diesen beiden Amplituden und
übermittelt das Ergebnis an die VCA als Signal zur Gain-Regelung.
Um diese Funktionsweise besser verständlich zu machen, hier einige Beispiele. Spricht etwa eine Person
in ein Mikrofon, ist die Amplitude in diesem Kanal nahezu identisch mit der Amplitude der „Summe
aller Kanäle“. Die Differenz zwischen diesen beiden gleichen Amplituden beträgt „0“. Werden 0 dB an
den VCA-Regleranschluss übermittelt, ist das Ergebnis für diesen Kanal die Leistungsverstärkung. Alle
anderen Kanäle, über die ja keiner spricht, weisen wesentlich niedrigere Amplituden auf. Verglichen
mit der „Summe“, die ein Nennsignal enthält, ergeben sich negative Zahlen. Werden diese negativen
Zahlen an die VCA nicht aktiver Kanäle übermittelt, erfolgt der Befehl, an diesen nicht aktiven Kanälen
vorliegendes Rauschen und Kriechverlust noch mehr zu dämpfen.
Ein zweites, interessanteres Beispiel ist, wenn zwei Personen gleichzeitig sprechen. Um es einfacher
zu machen, wird angenommen, dass beide mit der gleichen Lautstärke sprechen. Da es sich um zwei
inkohärente, d.h. nicht identische Quellen handelt, ergeben sie als Summe die Quadratwurzel der
Summe der Quadrate bzw. 3 dB mehr als jede Quelle einzeln genommen. Wird die Amplitude des
jeweiligen Kanals mit dieser Summe von +3 dB verglichen, erhält sein VCA den Befehl, um 3 dB zu
dämpfen. Wie oben beschrieben, werden die nicht aktiven Kanäle noch mehr gedämpft. Wie klar
und einfach dieses Verfahren ist, zeigt sich im nächsten Beispiel. Angenommen, eine Person hat sich
genau gleich weit von zwei Mikrofonen aufgestellt. Das identische Signal kommt an beiden Kanälen
an, und da es kohärent ist, ergibt es eine lineare Summe von +6 dB als Summe aller Kanäle. Aus
diesem Grund werden die beiden Kanäle um 6 dB gedämpft. Da sie kohärent sind, ergibt sich durch
Addition der Summe dieser beiden identischen Signale von -6 dB eine Leistungsverstärkung. Diese
Zusammenhänge bezüglich der Eingangsverstärkung gelten unabhängig davon, wie viele Mikros aktiv
sind und ob die Signale kohärent sind oder nicht. Da alle Berechnungen im Log-Bereich durchgeführt
werden, ist unwichtig, wie hoch die jeweiligen Amplituden sind; wichtig sind nur die relativen
Amplituden zwischen den Signalen.
38
1
2
1. KANALPEGEL
Manual Mode: In diesem Modus bieten die Kanal Pegelregler 6 dB Gain und 50 dB Dämpfung.
Auto Mode: In diesem Modus bietet der Regler immerhin noch eine Dämpfung von 50 dB, jedoch
Front Panel
keine Verstärkung für den Haupsystempegel. Stattdessen werden die anderen Kanäle, sobald der
Pegel über „0“ justiert wird gedämpft, damit der zu justierende Kanal im Mix lauter klingt ohne dem
System Gain hinzugefügt zu werden.
2. HAUPTPEGELREGLER (Master Level)
Dieser regelt den Hauptausgangspegel. Die Bereichseinstellung liegt oberhalb bei 10 dB und 40 dB
Dämpfung.
8
3
Internal Panel
9
12
10 13
11
4
5
6
7
3. DIP SWITCHES
Jeder Kanal verfügt über 4 DIP-Schalter, die folgende Funktionen kontrollieren/steuern.
A. MAN/AUTO
Dieser Schalter legt fest, ob der Kanal in der Betriebsart Auto oder Manuell seinen Dienst
verrichtet.
B. OFF/MBUS
Dieser Schalter wird benutzt, um den Kanal mit dem Mutebus des Systems zu verbinden.
Unter externer Kontrolle lassen sich mehrere Eingänge (Inputs) gleichzeitig stummschalten.
Siehe MUTEBUS, Seite 30.
C. LO CUT/FLAT
Hiermit wird der Low Cut Filter gewählt. Der Low Cut Filter bietet eine abrollende
Niederfrequenz die ungewollte Störgeräusche zu minimalisieren hilft (Mikrofonhandling,
versehentliche Tischaneckung, etc. ...). Der Rolloff beginnt bei 100 Hz (-3 dB) und beträgt 6
dB pro Oktave Filter.
D. OFF/+48
In der Position „+48“ wird eine Phantomspeisung von +48 Volt auf die Mikrofonterminals
± gelegt. Dies sichert Kondensatormikrofonen die Spannungsversorgung und sollte bei
Einsatz von dynamischen Mikrofonen oder asymmetrischen Eingängen gedämpft werden.
39
Internal Panel
4. AUX SEND REGLER
Regelt den an den AUX Bus übermittelten Signalpegel. Dieser wird auch beeinflußt, wenn der
Gain Regler im Kanal geändert wird.
5. GAIN TRIM
Dieser Regler legt die Eingangsverstärung (Input Gain) in jedem Kanal fest. Die Gain Größe
läßt sich von +25 dB bis +60 dB variieren. (Mic Input.)
6. AKTIVITÄT DER AKTIVITÄTS-/CLIP-LED
Im Auto Modus leuchtet die LED grün, und zeigt damit den Prioritätskanal im Mix an (Auto
Mode). Befindet sich der Kanal in der Betriebsart „Manuell“, bleibt die LED erleuchtet, wenn
sich der Front Panel Pegelregler auf oder über die 12:00 Uhr Position befindet. Die grüne
LED dient auch als Anzeige des Ausgangsstatus Der Ausgangsstatus ist hoch (+5 Volt),
wenn die LED grün Leuchtet und nied rig (0 Volt), wenn die LED erloschen ist.
CLIPPING
Diese LED leuchtet rot, wenn sich der Kanal in einem Clipping-Bereich von 1 dB
befindet.
7. PRIORITY (NUR CHANNEL 1 und 2 )
Drehung im Uhrzeigersinn ermöglicht, daß sich ein Kanal über weitere Kanäle im Mix hin
wegsetzt. Erreicht wird dies durch Austricksen der Gain Computerschaltkreise, wobei sie
annehmen, daß dieser Kanal lauter ist als die anderen. Es steht ein Prioritätsbereich von 9
dB zur Verfügung.
8. AUX MASTER PEGELREGLER
Dieser Regler stellt den zum Aux Out zu sendenden Signalpegel ein. Dieser Pegel sollte
nach Einstellung der individuellen Kanalpegeleinstellung justiert werden.
9. DOWNWARD EXPANDER
Dieser Expander kann zur Dämpfung des System Gains benutzt werden, wenn alle
Eingangssignale niedrig sind. Läßt sich einsetzen, um eine Verstärkung räumlichen
Hintergrundrauschens zu vermeiden.
EINSTELLUNG DES DOWNWARD EXPANDER
Lassen Sie jemanden mit dem sanftesten zu erwartenden Pegel in ein Mikrofon sprechen.
Drehen Sie den Downward Expander langsam im Uhrzeigersinn (nach rechts), bis das
Hintergrundrauschen zwischen Worten gedämpft ist. Seien Sie vorsichtig nicht zu weit
zu gehen. Je mehr Downward Expander Sie benutzen, um so „unnatürlicher“ klingt das
System. Anhand dieser Methode erhalten Sie eine gute Ausgangsposition. Die beste
Einstellmethode des Downward Expander ist jedoch während einem eigentlichen Meeting
oder Event. Auf diese Weise läßt sich der Downward Expander für den besten Sound
einstellen. Haben Sie es mit lauten und leisen Events zu tun, dann müssen Sie zwischen
natürlichem Klanginhalt und Hintergrundrauschen unterscheiden.
10. MASTER GAIN TRIM
Dieser Regler stellt den übergeordneten, maximalen System Gain ein und sollte so
eingestellt werden, daß am Front Panel Master Gain ganz nach rechts (im Uhrzeigersinn)
gedreht ist, alle Kanäle neutral und externe Leistungsverstärker aufgedreht und auf
deren Betriebseinstellungen festgesetzt sind. Wenn auf eine sichere Stufe unter Feedback
getrimmt, kann keine Kombination User Controls ein Feedback verursachen. Diese
Trimmung bietet eine System Gain-Dämpfung bis zu 25 dB.
11. NOTCH FILTER PEGELREGLER
Dieser Regeler justiert die Menge an Cut bei entsprechender Frequenz laut
korrespondierenden Frequenzregler (12). Dieser ist von 0 dB bis 15 dB Cut regelbar.
40
12. NOTCH FILTER FREQUENZREGLER
Internal Panel
Dieser wird zur Selektierung der Mittenfrequenz des Notch Filter benutzt. Der untere
Filterbereich reicht von 40 Hz bis 925 Hz. Der mittlere Filterbereich reicht von 260 Hz bis 6
kHz. Der obere Filterbereich reicht von 500 Hz bis 12 kHz.
13. NETZ/SPANNUNGS-LED
Dient der Anzeige, daß Spannung anliegt und sich der Netzschalter in der Position „ON“
befindet.
24
23
18
22
19
17
15
16
25
GERÄTERÜCKSEITE
20
14
21
14. MIKROFONEINGÄNGE (MIC INPUTS)
Dient dem Anschluß von Mikrofonen mit niedriger Impedanz oder Quellen niedriger
Pegel. Dies ist ein trafogeregelter Eingang mit einer Impedanz von 2000 Ohm. Die
Eingangssensitivität für nominalen Output beträgt -56 dBu bis -19 dBu.
LINE EINGÄNGE
Diese erlauben den Einsatz von Line Level Eingängen. Hierbei handelt es sich um einen
trafogeregelten Eingang durch ein resistives 30 dB Pad. Die Eingangsimpedanz ist >20kΩ.
15. INSERT IN/OUT
Hierbei handelt es sich um eine Signalschleife, die es einem externen Gerät, wie z.B. einem
EQ erlaubt in den Signalpfad individueller Kanäle eingeschliffen zu werden (siehe Abb.
unten).
16. INSERT BYPASS SCHALTER
Wenn kein Signalprozessor benutzt wird, oder es nicht erforderlich ist den Signalprozessor
zu umgehen, sollte sich dieser Schalter in der Position „In“ befinden. Wird dagegen ein
Signalprozessor benutzt, dann sollte sich der Schalter in der Position „Out“ befinden.
41
GERÄTERÜCKSEITE
17. DIREKTAUSGÄNGE
Jeder Kanal verfügt über direkte Output Terminals, die für Aufzeichnungen benutzt werden
können oder jederzeit wenn der Ausgang eines individuellen Kanals erforderlich ist. Dieses
Signal ist von der „Automix“ Gain Manipulation unabhängig. Der nominale Ausgangspegel
beträgt 2.21dBu (1 Volt).
MUTE
Kanäle lassen sich individuell stummschalten, indem dieses Terminal mit Masse
kurzgeschlossen wird. Eine Dämpfung von 45 dB ist erreichbar.
STATUS OUTPUT
Hierbei handelt es sich um einen logischen Gleichspannungsausgang der bei aktiviertem
Kanal hoch (+5 Volt) und inaktiviertem Kanal niedrig (0 Volt) ist. Diese Gleichspannung
läßt sich zum Triggern von Videokameras undSchlüsselleuchten auf aktiven Mikrofonen
benutzen.
ANMERKUNG: Jeder Kanal kann maximal 10 mA speisen.
18. HAUPTAUSGANG (MAIN OUT)
Der Hauptausgang ist ein 600Ω, trafogeregelter Ausgang zur Speisung externer
Leistungsverstärker (Power Amps). Hier wird auf dem automatisch oder manuell gemixten
Output zugegriffen. Der Nominalausgang beträgt 2.21 dBu (1 volt).
19. AUX OUT
Der Hilfsausgang ist ein 600Ω, trafogeregelter Ausgang, der sich als zusätzlicher nicht
autogemixter Ausgang benutzen läßt. Der Nominalausgang beträgt 2.21 dBu (1 volt).
20. REMOTE VOLUME
Der Hauptpegel des Mixers läßt sich mit einer einfachen Verbindung auf der Geräterückseite
fernsteuern. Ein 10k Poti bietet eine annähernde Dämpfung von 0-25 dB. Ein 100k Poti bietet
eine Dämpfung von 0-45 dB. Wenn erforderlich, läßt sich für einen Dämpfungsbefehl eine
Steuerspannung von 0-70 dB einrichten. Die interne Gain Trimmung muß ganz nach rechts
(im Uhrzeigersinn) eingestellt sein, um den maximalen Dämpfungsbereich der Remote
Lautstärke (Volume) zu erreichen. (Siehe Abb. unten)
ANMERKUNG: DIE STEUERSPANNUNG SOLLTE NIEMALS 13 VOLT (DC) ÜBERSCHREITEN.
21. MUTEBUS
Der Mutebus ist ein Steuerport der, wenn mit Masse kurzgeschlossen alle dem Mutebus
zugewiesenen Kanäle um etwa 45dB verstummen läßt. Die stumm zu schaltenden Kanäle
müssen dem Mutebus zugewiesen sein, was mit dem internen mit OFF/MBUS markierten
Schalter geschieht. Siehe INTERNE PANEL FEATURES, Seite 27 und Abbildung Seite 30.
42
GERÄTERÜCKSEITE
22. LINK PORT
Um die Anzahl verfügbarer Eingänge zu erhöhen, lassen sich mehrere Automixer
miteinander vebinden. Die nötige Vorgehensweise ist denkbar einfach. Dazu benötigen Sie
einen Schraubendreher und ein abgeschirmtes 4-Leiter Kabel. Folgende Abbildung und
Vorgehensweise versichern einen ordnungsgemäßen Link.
1. Stellen Sie ein Verbindungskabel her.
2. Verbinden Sie die Mixer gemäß obiger Abbildung.
3. Selektieren Sie den Mixer der als Master in Frage kommt und bringen seinen LinkSchalter in die „Master“ Position.
4. Die Link-Schalter aller anderen Mixer im System sollten sich in der „Slave“ Position
befinden.
Sie haben nun einen 16 (oder mehr) Kanal Auto-Mixer. Benutzen Sie für die
Systemsteuerung die Master Regler der gewählten Master Einheit.
23. LINK SCHALTER
Dieser Schalter wird benutzt, um die Einheit auf die Betriebsart Master oder Slave
einzustellen. Eine Stand-Alone-Einheit sollte sich im Master Mode befinden.
Siehe Link Port (#22).
24. NETZSCHALTER
Switch to “I” position to turn on.
25. NETZANSCHLUßBUCHSE
Stecken Sie das Netzkabel bei ausgeschaltetem Netzschalter (#24) zuerst in diese
Buchse und dann erst in die örtliche Netzsteckdose. Sorgen Sie immer dafür, daß die
Gerätespannung immer mit der Netzspannung des örtlichen EVUs übereinstimmt und die
jeweiligen Schutzmaßnahmen eingehalten werden (entsprechende Spannungsangabe(n)
finden Sie in unmittelbarer Nähe der Anschlußbuchse).
43
AUTOMIX™ CONTROL 8 - TECHNISCHE DATEN
Nennleistung = 2,21 dBu = 1 Volt
Technische Daten - Eingang:
Funktion
(ohms)
Eingangsimpedanz Eingangs-Gain
Einstellung
(an sym. Ausgänge)
Min
Min*
Mikrofon
(150 ohms)
2k
Max Gain
(60 dB)
-64 dBu
(0,5mV)
Line
(10K ohms)
>20k
Max Gain
(30 dB)
-35 dBu
13,7mV
Eingangspegel
Nenneinst**
-43 dBu
(5,5mV)
Sym./
Unsym.
Stecker
Sym.
Mic In (+)
Mic In (-)
Erde
Sym.
Line In (+)
Line In (-)
Erde
Max
-2 dBu
(615mV)
-14 dBu
(155mV)
+27 dBu
(17,4V)
* Mindesteingangspegel (Empfindlichkeit) ist das kleinste Signal, das eine Nennleistung (2,21 dBu) erzeugt, wobei Kanal- und
Master-Regler auf maximalen Gain eingestellt sind.
** Nenneinstellungen werden als Einstellung aller Regler auf 0 dB (bzw. Drehregler um 50% gedreht) bezeichnet.
Äquivalentes Eingangsrauschen:
Phantomspeisung:
Priorität (Kanäle 1 und 2):
Tiefpassfilter:
Gleichtakt:
Unterdrückungsverhältnis:
-122 dBu (max. Gain, mit 150 Ohm abgeschlossen)
+48 Volt bei Mic ± abgeschlossen
0 dB bis 9 dB
-3 dB bei 100 Hz (6 dB pro Oktave)
>65 dB bei 20 Hz bis 20 kHz
>85 dB bei 1 kHz
Technische Daten - Ausgang:
Funktion
Main Out
Mindestlastimpedanz
(Ohms)
600
Ausgangspegel
Nennpegel
+2,21dBu
(1V)
Sym./
Unsym.
Stecker
Main Out (=)
Sym.
Main Out (+)
Max
+20dBu
+16dBm
(7,75V)
(6,44V)
Main Out (-)
(Hochohmige Last) (600Ω Last)
Aux Out
600
+2,21dBu
(1V)
+20dBu
+16dBm
(Hochohmige Last) (600Ω Last)
Erde
Sym.
Aux Out (+)
Aux Out (-)
Erde
Verzerrung:
Mic-Eingang an Main-Ausgang: <0,2% bei Nennleistung (20 Hz bis 20 kHz)
Frequenzverhalten:
Mic-Eingang an Main-Ausgang: 20 Hz bis 20 kHz +0/-1 dB bei Nennleistung
Mic-Eingang an Aux-Ausgang: 20 Hz bis 20 kHz +0/-1 dB bei Nennleistung
44
AUTOMIX™ CONTROL 8 - TECHNISCHE DATEN
Brummen und Rauschen:
Ausgang
Restrauschen
Ref.: 0 dBu
Rauschabstand
Ref.: 2,21 dBu
Testbedingungen
Main Out
-85 dBu
87 dB
-84 dBu
86 dB
-85 dBu
87 dB
Alle Regler heruntergedreht
-80 dBu
82 dB
Ein Kanal-Send Nennwert,
Monitor-Master Nennwert
Alle Regler heruntergedreht
Ein Kanal Nennwert,
Master-Pegel Nennwert
Aux Out
(Messungen von Brummen und Rauschen: 22 Hz bis 22 kHz BW)
ALLGEMEINE TECHNISCHE DATEN:
Lautstärke-Fernregelungsbereich:
0 dB bis 70 dB Dämpfung
Aus-Kanaldämpfung:
0 dB bis 70 dB
Stummschaltung:
Kanal wird um 45 dB gedämpft, wenn die
Stummschaltung an die Masse angeschlossen wird.
MuteBus:
Mehrere Kanäle können um 45 dB gedämpft werden, wenn der
MuteBus an die Masse angeschlossen wird.
Statusausgabe:
Status ist hoch (5 V), wenn Kanal aktiv ist. Status ist niedrig
(0 V), wenn Kanal nicht aktiv ist.
Leistungsaufnahme:
Wechselstrom 120 Volt, 60 Hz, USA
Wechselstrom 230 Volt, 50/60 Hz, Export
15 Watt
Gewicht:
4,9 kg
Abmessungen:
Breite: 48,26 cm
Tiefe: 23,49 cm
Höhe: 8,89 cm
45
AUTOMIX™ CONTROL 8
Einrichten des Automix Control 8
1. Verdrahtung von Eingängen und Ausgängen:
Um die besten Ergebnisse zu erzielen, wird empfohlen, für alle Eingangs- und Ausgangsanschlüsse zweiadriges
geschirmtes Kabel zu verwenden. Beim Anschließen muss die korrekte Polarität beachtet werden. Die empfohlene
Leistenlänge für die abnehmbaren Schraubklemmen beträgt 1,27 cm (0,5").
2. Ausgangseinstellungen der Regler:
Kanalpegel
Kanal-Gain-Regler
Aux-Send-Regler
Priorität
Stufenregler
Downward-Expander
Aux-Master-Pegel
Master-Pegel
Master-Gain-Regler
Alle Kanäle im „Auto“-Modus.
(Frontblende)
(Intern)
(Intern)
(Intern)
(Intern)
(Intern)
(Intern)
(Frontblende)
(Intern)
—
—
—
—
—
—
—
—
—
Ganz im entgegengesetzten Uhrzeigersinn
Ganz im entgegengesetzten Uhrzeigersinn
Ganz im entgegengesetzten Uhrzeigersinn
Ganz im entgegengesetzten Uhrzeigersinn
Ganz im entgegengesetzten Uhrzeigersinn
Ganz im entgegengesetzten Uhrzeigersinn
Ganz im entgegengesetzten Uhrzeigersinn
Ganz im Uhrzeigersinn
Ganz im entgegengesetzten Uhrzeigersinn
3. Einstellen des Kanalpegels:
Stellen Sie den Frontregler für den Kanal, den Sie einstellen wollen, auf die mittlere Position (12 Uhr). Schließen
Sie einen Mikro- oder Line-Eingang an den ersten Kanal an. Während jemand ins Mikro spricht (und zwar so, wie
es üblich ist), drehen Sie den Gain-Regler für den Kanal langsam auf, bis ein leises Pfeifen (Feedback) zu hören ist
oder bis die Clip-LED ab und zu rot zu blinken beginnt. Drehen Sie den Kanal-Gain-Regler langsam herunter, bis das
Pfeifen nicht mehr zu hören ist. Dies ist der Pegel, auf den der Gain-Regler maximal eingestellt werden sollte. Drehen
Sie den externen Kanalpegelregler herunter (ganz im entgegengesetzten Uhrzeigersinn).
HINWEIS: Der interne Master-Gain-Regler (Nr. 10) muss eventuell hochgedreht werden (im Uhrzeigersinn), wenn die
Kanäle leicht ins Clipping übersteuert werden können. Andernfalls kann im normalen Betriebsbereich des internen
Gain-Reglers kein Feedback erzielt werden.
Wiederholen Sie diesen Schritt für die restlichen Kanäle.
Stellen Sie alle externen Kanalpegelregler auf ihre mittlere Position (12 Uhr).
4. Einstellen des Kerbfilters:
Es gibt mehrere Möglichkeiten, den Kerbfilter einzustellen. Er kann mithilfe der Testausrüstung eingestellt werden,
um Frequenzen zu ermitteln, die anfällig für Feedback sind, oder er kann „nach Gehör“ eingestellt werden. In dieser
Bedienungsanleitung wird das Einstellen „nach Gehör“ beschrieben:
A. Drehen Sie den (internen) Master-Gain-Regler langsam herauf, bis ein leises Pfeifen zu hören ist.
B. Wählen Sie den geeigneten Frequenzbereich aus, und drehen Sie den entsprechenden Pegelregler im
Uhrzeigersinn etwa auf die mittlere Position (12 Uhr).
C. Drehen Sie den Frequenzregler langsam herauf und herunter, bis das Pfeifen nicht mehr zu hören ist.
D. Drehen Sie den Master-Gain-Regler nochmals langsam herauf, bis das Pfeifen zu hören ist. Ist die Frequenz
unterschiedlich, wiederholen Sie die Schritte B und C. Ist die Frequenz nicht unterschiedlich, drehen Sie den
Frequenzregler, und hören Sie dabei auf das Feedback. Hören Sie auf zu drehen, wenn das Feedback am leisesten
ist. Ist das Feedback noch immer zu hören, drehen Sie den entsprechenden Pegelregler im Uhrzeigersinn auf die
Einstellung -15, bis kein Feedback mehr zu hören ist.
5. Einstellen des Gesamtpegels:
Stellen Sie den (externen) Master-Pegelregler für den gewünschten Gesamtausgangspegel ein. Die Pegel des
Mischpults sind eingestellt, und nun können Sie die anderen Funktionen des Mischpults (Downward-Expander,
Tiefpassfilter und Prioritäten) wie für den jeweiligen Einsatzzweck gewünscht einstellen.
6. Anbringen der Schutzblende:
Bringen Sie die Plexiglas-Schutzblende mit den acht beiliegenden Schrauben an. Dadurch wird vermieden, dass Ihre
Einstellungen versehentlich geändert werden.
46
WARRANTY
Architectural Acoustics®
PEAVEY ELECTRONICS CORPORATION LIMITED WARRANTY
Effective Date: July 1, 1998
What This Warranty Covers
Your Peavey Warranty covers defects in material and workmanship in Peavey products purchased and serviced in the U.S.A. and
Canada.
What This Warranty Does Not Cover
The Warranty does not cover: (1) damage caused by accident, misuse, abuse, improper installation or operation, rental, product
modification or neglect; (2) damage occurring during shipment; (3) damage caused by repair or service performed by persons
not authorized by Peavey; (4) products on which the serial number has been altered, defaced or removed; (5) products not
purchased from an Authorized Peavey Dealer.
Who This Warranty Protects
This Warranty protects only the original retail purchaser of the product.
How Long This Warranty Lasts
The Warranty begins on the date of purchase by the original retail purchaser. The duration of the Warranty is as follows:
Product Category
Duration
MediaMatrix® DPU (Excluding Frames), Cinema Processors,
Power Amplifiers, Pre-Amplifiers, Mixers,
Electronic Crossovers and Equalizers
5 years
Loudspeakers
5 years
Microphones
2 years
Frames
1 year
Speaker Components (incl. speakers, baskets, drivers,
diaphragm replacement kits and passive crossovers)
and all Accessories
1 year
What Peavey Will Do
We will repair or replace (at Peavey's discretion) products covered by warranty at no charge for labor or materials. If the product or component must be shipped to Peavey for warranty service, the consumer must pay initial shipping charges.
If the repairs are covered by warranty, Peavey will pay the return shipping charges.
How To Get Warranty Service
(1) Take the defective item and your sales receipt or other proof of date of purchase to your Authorized Peavey Dealer or
Authorized Peavey Service Center.
OR
(2) Ship the defective item, prepaid, to Peavey Electronics Corporation, International Service Center, 412 Highway 11 & 80 East,
Meridian, MS 39301 or Peavey Canada Ltd., 95 Shields Court, Markham, Ontario, Canada L3R 9T5. Include a detailed description of the problem, together with a copy of your sales receipt or other proof of date of purchase as evidence of warranty coverage. Also provide a complete return address.
OR
(3) All MediaMatrix® Frames needing repair, should be shipped prepaid to Peavey Electronics Corporation, International Service
Center, 412 Highway 11 & 80 East, Meridian, MS 39301
Limitation of Implied Warranties
ANY IMPLIED WARRANTIES, INCLUDING WARRANTIES OF MERCHANTABILITY AND FITNESS FOR A PARTICULAR PURPOSE, ARE
LIMITED IN DURATION TO THE LENGTH OF THIS WARRANTY.
Some states do not allow limitations on how long an implied warranty lasts, so the above limitation may not apply to you.
Exclusions of Damages
PEAVEY'S LIABILITY FOR ANY DEFECTIVE PRODUCT IS LIMITED TO THE REPAIR OR REPLACEMENT OF THE PRODUCT, AT
PEAVEY'S OPTION. IF WE ELECT TO REPLACE THE PRODUCT, THE REPLACEMENT MAY BE A RECONDITIONED UNIT. PEAVEY
SHALL NOT BE LIABLE FOR DAMAGES BASED ON INCONVENIENCE, LOSS OF USE, LOST PROFITS, LOST SAVINGS, DAMAGE
TO ANY OTHER EQUIPMENT OR OTHER ITEMS AT THE SITE OF USE, OR ANY OTHER DAMAGES WHETHER INCIDENTAL,
CONSEQUENTIAL OR OTHERWISE, EVEN IF PEAVEY HAS BEEN ADVISED OF THE POSSIBILITY OF SUCH DAMAGES.
Some states do not allow the exclusion or limitation of incidental or consequential damages, so the above limitation or exclusion may not apply to you.
This Warranty gives you specific legal rights, and you may also have other rights which vary from state to state.
If you have any questions about this warranty or service received or if you need assistance in locating an Authorized Service
Center, please contact the Peavey International Service Center at (601) 483-5365 / Peavey Canada Ltd. at (905) 475-2578.
Features and specifications subject to change without notice.
47
Features and specifications subject to change without notice.
Logo referenced in Directive 2002/96/EC Annex IV
(OJ(L)37/38,13.02.03 and defined in EN 50419: 2005
The bar is the symbol for marking of new waste and
is applied only to equipment manufactured after
13 August 2005
Peavey Electronics Corporation
5022 Hartley Peavey Drive • Meridian • MS • 39305
(601) 483-5376 • FAX (601) 486-1678 • www.peavey.com
©2005
80305127
10/05