1
CT03 – REMOTE CONTROLLED RACING CAR
1. Introduction & Features
At the end of its life cycle, dispose of this product in accordance with local and national disposal regulations.
Thank you for buying the CT03! Please read the manual thoroughly before bringing this device into service.
If the device was damaged in transit, don't use it and contact your dealer.
2. General Guidelines
• Damage caused by user modifications or disregard of certain guidelines in this manual is not covered by the
warranty and the dealer will not accept responsibility for any ensuing defects or problems.
• A qualified technician should service this device.
• Avoid brute force when operating the device. Keep the device away from unauthorised users.
• All modifications of the device are forbidden for safety reasons.
3. Installing Batteries
a. Remote Control
Open the battery compartment cover on the bottom of the remote control. Insert a 9V battery respecting the polarity.
Close the battery compartment cover.
b. Race Car
Make sure to charge the 9.6V battery pack completely beforehand. The battery compartment is located at the bottom
of the car. Open the locking levers and remove the battery compartment cover. Insert and correctly connect the 9.6V
battery pack. Close the battery compartment cover and lock it with the levers.
! If you switch the remote control on but the operation LED does not light up, check the polarity and connections of
the battery. If polarity and connections are OK, the battery is probably drained. Install a new one.
! Remove the batteries when the device is not being used.
! Do not attempt to recharge non-rechargeable batteries.
4. Operation
a. The Remote Control
1.
2.
3.
4.
5.
6.
7.
8.
9.
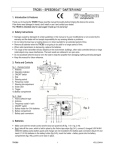
ON/OFF switch
car lights button (only works when accelerating)
power LED
steering wheel
antenna: pull the antenna out when the remote control is going
to be used. To collapse the antenna, pull it in bit by bit ; do not
push at the top of the antenna as this may cause it to bend.
steering trim
throttle trim
speed control trigger
bottom side: battery compartment
CT03
1
Fig.1
PEREL
b. Switching the Devices On
Always switch the devices on in this order:
1. Screw the antenna into the remote control, fully extend it and switch the remote control on (fig.1 #1).
2. Slide the plastic tube over the car antenna wire, put it upright and switch the race car on (on the bottom side).
Switching on the car before switching on the remote control may result in a runaway car.
To switch the devices off, follow the inverse order: switch the car off first, then the remote control.
c. Car Alignment
If the car does not drive straight ahead when the steering wheel (fig.1 #4) is not being turned, regulate the alignment
of the wheels by turning the steering trim (fig.1 #6).
If the car moves forward or backward while you are not operating the remote control trigger (fig.1 #8), adjust the
throttle trim (fig.1 #7).
d. Driving the Car
Pull the speed control trigger (fig.1 #8) towards the handle to make the car go forward. Push it out to make the car go
backward. The acceleration is proportional: the harder you push or pull, the faster the car goes.
Turn the steering wheel (fig.1 #4) to make the car turn to the left or the right. The steering is proportional: turning the
wheel a little will result in a wide turn ; turning the wheel all the way will result in a sharp turn.
5. Cleaning and Maintenance
1.
2.
3.
4.
Moving mechanic parts must not show any signs of wear and tear.
Wipe the device regularly with a moist, lint-free cloth. Do not use alcohol or solvents.
There are no user-serviceable parts.
Contact your dealer for spare parts if necessary.
6. Troubleshooting
Check if both remote control and car are switched on.
Check if the car battery is charged and correctly connected.
Check if the remote control battery is not drained and correctly connected.
Check if the car antenna is still upright
Short control radius / poor performance
Check the car and remote control batteries. Replace or recharge them.
Car does not run
7. Technical Specifications
car battery
AC charger
battery for remote
top speed
turning circle
autonomy
charging time
dimensions car
weight
9.6V/800mAh rechargeable battery pack (incl.)
included
9V (incl.)
15km/h
1m
± 20min.
2 hours (the first time it can take up to 4 hours)
450 x 185 x 105mm
1.5kg
The information in this manual is subject to change without prior notice.
CT03
2
PEREL
CT03 – AFSTANDSBEDIENDE RACEWAGEN
1. Inleiding en kenmerken
Wanneer dit product het einde van zijn levensduur heeft bereikt, ontdoe er u dan van volgens de plaatselijke en
nationale regelgeving inzake verwijdering.
Dank u voor uw aankoop! Lees deze handleiding grondig voor u het toestel in gebruik neemt. Ga na of het toestel
niet werd beschadigd tijdens het transport. Zo ja, stel dan de installatie van het toestel uit en raadpleeg uw dealer.
2. Veiligheidsinstructies
• De garantie geldt niet voor schade door wijzigingen die de gebruiker heeft aangebracht of voor schade door het
negeren van bepaalde richtlijnen in deze handleiding en uw dealer zal de verantwoordelijkheid hiervoor afwijzen.
• Laat dit toestel onderhouden door een geschoolde technicus.
• Vermijd brute kracht tijdens de bediening van dit toestel. Hou dit toestel uit de buurt van onbevoegden.
• Om veiligheidsredenen mag de gebruiker geen wijzigingen aanbrengen aan het toestel.
3. Batterijen plaatsen
a. Afstandsbediening
Open het deksel van het batterijcompartiment aan de onderzijde van de afstandsbediening. Plaats een 9V batterij let op de polariteit. Sluit het deksel van het batterijcompartiment.
b. Racewagen
Zorg dat het 9.6V batterijpack op voorhand volledig geladen is. Het batterijvak zit onderaan de wagen. Open de
sluitklemmen en verwijder het deksel van het batterijvak. Plaats het batterijpack en sluit het juist aan. Plaats het
deksel terug en sluit het batterijvak af met de sluitklemmen.
! Als de afstandsbediening aan staat maar de stroomLED licht niet op, controleer dan of de polariteit klopt en of de
batterij goed contact maakt. Als dat het geval is, is de batterij waarschijnlijk leeg. Plaats een nieuwe batterij.
! Verwijder de batterijen wanneer het toestel niet wordt gebruikt.
! Probeer niet om niet-oplaadbare batterijen op te laden.
4. Bediening
a. De afstandsbediening (zie fig.1 blz.1)
1.
2.
3.
4.
5.
6.
7.
8.
9.
ON/OFF schakelaar
knop voor autolichten (werkt alleen wanneer er gas gegeven wordt)
voedingLED
stuurwiel
antenne: trek de antenne uit wanneer u de afstandsbediening gaat gebruiken. Om ze terug in te schuiven trekt u
ze best segment per segment naar beneden. Duw niet op de top van de antenne: zo kunt u ze plooien.
fijnregeling stuur
fijnregeling snelheidsregelaar
snelheidsregelaar
onderaan: batterijvak
CT03
3
PEREL
b. De toestellen aanzetten
Zet de toestellen altijd in deze volgorde aan:
1. Trek de antenne van de afstandsbediening volledig uit en zet de afstandsbediening aan (fig.1 #1).
2. Schuif het plastic buisje over de antennekabel van de auto, zet het recht en schakel de racewagen in (onderaan).
Als u eerst de wagen aanzet kan deze oncontroleerbaar worden.
Om de toestellen uit te zetten volgt u de omgekeerde volgorde: eerst de wagen en dan de afstandsbediening.
c. Uitlijning wielen
Als u niet aan het stuurwiel (fig.1 #4) draait en de wagen rijdt niet recht vooruit, kunt u de uitlijning van de wielen
bijregelen met de fijnregeling van het stuur (fig.1 #6).
Als de wagen vooruit of achteruit rijdt terwijl u de snelheidsregelaar (fig.1 #8) niet aanraakt, kunt u deze bijregelen
door middel van zijn fijnregeling (fig.1 #7).
d. Rijden met de wagen
Trek aan de snelheidsregelaar (fig.1 #8) om de wagen vooruit te laten rijden. Duw de regelaar weg om de wagen
achteruit te laten rijden. De regelaar werkt proportioneel: hoe harder u duwt of trekt, hoe sneller de wagen gaat.
Draai aan het stuurwiel (fig.1 #4) om de wagen naar links of rechts te laten draaien. Het stuur werkt proportioneel:
lichtjes draaien resulteert in een grote bocht ; tot op het einde draaien resulteert in een scherpe bocht.
5. Reiniging en onderhoud
1.
2.
3.
4.
Mechanisch bewegende delen mogen geen sporen van slijtage vertonen en mogen niet onregelmatig bewegen.
Maak het toestel geregeld schoon met een vochtige, niet pluizende doek. Gebruik geen alcohol of solvent.
De gebruiker mag geen onderdelen vervangen.
Bestel eventuele reserveonderdelen bij uw dealer.
6. Problemen en suggesties
Auto rijdt niet
Klein bereik / zwakke prestaties
Ga na of zowel de auto als de afstandsbediening ingeschakeld zijn.
Ga na of het batterijpack opgeladen en correct aangesloten is.
Ga na of de 9V-batterij nog voldoende krachtig en juist aangesloten is.
Ga na of de antenne van de auto nog rechtop staat.
Controleer het batterijpack en de 9V-batterij. Vervang of herlaad ze.
7. Technische specificaties
autobatterij
AC-lader
Batterij afstandsbediening
topsnelheid
draaicirkel
autonomie
laadtijd
afmetingen auto
gewicht
9.6V/800mAh oplaadbaar batterijpack (meegel.)
meegeleverd
9V (meegel.)
15km/h
1m
± 20min.
2 uren (de eerste keer kan dit tot 4 uren duren)
450 x 185 x 105mm
1.5kg
De informatie in deze handleiding kan te allen tijde worden gewijzigd zonder voorafgaande kennisgeving.
CT03
4
PEREL
CT03 – VOITURE DE COURSE TELECOMMANDE
1. Introduction et caractéristiques
A la fin de sa durée de vie, débarrassez-vous de ce produit en respectant la législation d'élimination locale et
nationale.
Nous vous remercions de votre achat ! Lisez le présent manuel attentivement avant la mise en service de l'appareil.
Vérifiez l’état de l’appareil. S'il a été endommagé pendant le transport, consultez votre revendeur.
2. Prescriptions de sécurité
• La garantie ne s'applique pas aux dommages survenus par de modifications de l'utilisateur ou en négligeant
certaines directives de ce manuel et votre revendeur déclinera toute responsabilité pour ces dommages.
• Un technicien qualifié doit s'occuper de l’entretien.
• Soyez prudent avec votre CT03 pendant l'opération. Gardez-le hors de la portée de personnes non qualifiées.
• Toute modification de l’appareil est interdite pour des raisons de sécurité.
3. Installer les piles
a. Télécommande
Ouvrez le compartiment de piles à la face inférieure de la télécommande. Insérez une pile 9V en respectant la
polarité. Refermez le couvercle du compartiment de piles.
b. Voiture de course
Chargez le pack d'accus de 9.6V d'avance. Le compartiment de piles se trouve à la face inférieure de la voiture.
Ouvrez les leviers de fermeture et enlevez le couvercle du compartiment de piles. Insérez et connectez le pack
d'accus. Remettez le couvercle et fermez le compartiment de piles avec les leviers de fermeture.
! Si vous allumez la télécommande mais la LED de puissance ne s'allume pas, vérifiez la polarité et les connexions
de la pile. Si elles sont bonnes, la pile est probablement épuisée. Installez une nouvelle pile.
! Enlevez les piles et accus quand vous n'utilisez pas l'appareil.
! N'essayez pas de charger des piles non rechargeables.
4. Opération
a. La télécommande (voir fig.1 à la p.1)
1. interrupteur ON/OFF
2. touche pour feux avant de la voiture (fonctionne uniquement pendant que la gâchette est tirée)
3. LED d'alimentation
4. volant
5. antenne: étirez l'antenne quand vous allez utiliser la télécommande. Pour replier l'antenne, retirez les segments
un par un ; ne poussez pas sur le bout de l'antenne comme ceci peut causer l'antenne à plier.
6. réglage fin du volant
7. réglage fin de la gâchette d'accélération
8. gâchette d'accélération
9. à la face inférieure: compartiment de pile
CT03
5
PEREL
b. Allumer les appareils
Allumez toujours les appareils dans cet ordre:
1. Vissez l'antenne dans la télécommande, étirez-la et allumez la télécommande (fig.1 #1).
2. Mettez le tube en plastique sur le câble d'antenne de la voiture, mettez-le debout et allumez la voiture (en bas).
Allumer la voiture avant la télécommande peut causer la voiture à devenir incontrôlable.
Pour éteindre les appareils: suivez l'ordre inverse: éteignez d'abord la voiture et puis la télécommande.
c. Equilibrer la voiture
Si la voiture ne roule pas tout droit quand vous ne touchez pas au volant (fig.1 #4), vous pouvez corriger l'équilibrage
des roues avec le réglage fin du volant sur la télécommande (fig.1 #6).
Si la voiture avance ou recule sans que vous touchiez la gâchette d'accélération (fig.1 #8), vous pouvez corriger
l'équilibrage de la gâchette avec son réglage fin sur la télécommande (fig.1 #7).
d. Conduire la voiture
Tirez la gâchette de vitesse (fig.1 #8) pour faire avancer la voiture. Poussez la gâchette pour reculer. L'accélération
est proportionnelle: si vous tirez/poussez plus fort, la voiture ira plus vite.
Tournez le volant (fig.1 #4) pour faire tourner la voiture à droite ou à gauche. La conduite est proportionnelle: tourner
le volant légèrement causera une courbe large ; tourner le volant à fond causera une courbe aigue.
5. Nettoyage et entretien
1.
2.
3.
4.
Les parties mécaniques mobiles ne peuvent pas être usées ou bouger de manière irrégulière.
Essuyez l'appareil régulièrement avec un chiffon humide non pelucheux. Evitez l'usage d'alcool et de solvants.
Il n’y a pas de parties maintenables par l’utilisateur.
Commandez des pièces de rechange éventuelles chez votre revendeur.
6. Problèmes et suggestions
Vérifiez si la voiture et la télécommande sont allumées.
Vérifiez si le pack d'accus de la voiture est chargé et bien connecté.
Vérifiez si la pile de la télécommande n'est pas épuisée et si elle est correctement connectée.
Portée limitée /
Vérifiez si l'antenne de la voiture est encore debout.
performance médiocre Contrôlez les piles de la voiture et de la télécommande. Remplacez ou rechargez-les.
Voiture ne réagit pas
7. Spécifications techniques
accu voiture
chargeur CA
pile pour télécommande
vitesse de pointe
rayon de braquage
autonomie
temps de charge
dimensions voiture
poids
9.6V/800mAh pack d'accus rechargeable (inclus)
inclus
9V (inclus)
15km/h
1m
± 20min.
2 heures (la première fois peut durer jusqu'à 4 heures)
450 x 185 x 105mm
1.5kg
Toutes les informations présentées dans ce manuel peuvent être modifiées sans notification préalable.
CT03
6
PEREL
CT03 – COCHE DE CARRERAS TELEDIRIGIDO
1. Introducción & Características
Tire las muestras inservibles en los correspondientes depósitos de eliminación de residuos según las leyes
locales y nacionales.
¡Gracias por haber comprado el CT03! Lea cuidadosamente las instrucciones del manual antes de utilizarlo.
Si el aparato ha sufrido algún daño en el transporte no lo instale y póngase en contacto con su distribuidor.
2. Instrucciones de seguridad
• Daños causados por descuido de las instrucciones de seguridad de este manual o por modificaciones no
autorizadas invalidarán su garantía y su distribuidor no será responsable de ningún daño ni de otros problemas
resultantes.
• El mantenimiento debe ser realizado por un técnico cualificado.
• Evite usar excesiva fuerza durante el uso del CT03. Manténgalo lejos del alcance de personas no cualificadas.
• Por razones de seguridad, las modificaciones no autorizadas del aparato están prohibidas.
3. Instalar las pilas
a. Mando a distancia
Abra el compartimiento de pilas en la parte inferior del mando a distancia. Introduzca una pila de 9V. Respete la
polaridad. Vuelva a cerrar la tapa del compartimiento de pilas.
b. Coche de carreras
Asegúrese de que el pack de baterías de 9.6V esté cargado de antemano. El compartimiento de pilas está en la
parte inferior del coche. Abra las palancas de cierre y saque la tapa del compartimiento de pilas. Introduzca el pack
de baterías y conéctelo. Vuelva a poner la tapa y cierre el compartimiento de pilas con las palancas de cierre.
¡Si el LED de potencia no se ilumina al activar el mando a distancia, controle la polaridad y las conexiones de la pila!
Si todo ha sido conectado correctamente, la pila está probablemente agotada. Instale una nueva pila.
¡Quite las pilas y las baterías si no utiliza el aparato!
¡No intente cargar pilas no recargables!
4. Funcionamiento
a. El mando a distancia (véase fig.1 en la p.1)
1. interruptor ON/OFF
2. tecla para los faros del coche (funciona sólo mientras al dar gas)
3. LED de alimentación
4. volante
5. antena: Extienda la antena si va a utilizar el mando a distancia. Para plegar la antena, recoja los segmentos uno a
uno ; no empuje en el extremo de la antena porque de esta manera podría plegarla.
6. ajuste fino del volante
7. ajuste fino del gatillo de velocidad
8. gatillo de velocidad
9. en la parte inferior: compartimiento de pilas
CT03
7
PEREL
b. Activar los aparatos
Active siempre los aparatos en el siguiente orden:
1. Atornille la antena en el mando a distancia, extiéndala y active el mando a distancia (fig.1 #1).
2. Coloque el tubo de plástico sobre el cable de la antena del coche, póngalo derecho y active el coche (en la parte
inferior).
El coche podría volverse incontrolable si lo activa antes del mando a distancia.
Para desactivar los aparatos: desactívelos en orden inverso: primero active el coche y luego el mando a distancia.
c. Alinear el coche
Si el coche no avanza completamente en línea recta al no tocar el volante (fig.1 #4), puede corregir el alineamiento
de las ruedas con el ajuste fino del volante en el mando a distancia (fig.1 #6).
Si hace avanzar o dar marcha atrás el coche sin tocar el gatillo de velocidad (fig.1 #8), puede corregir el
alineamiento con el gatillo en el mando a distancia (fig.1 #7).
d. Conducir el coche
Tire del gatillo de velocidad (fig.1 #8) para hacer avanzar el coche. Apriete el gatillo para dar marcha atrás. La
aceleración funciona de forma proporcional: cuanto más tire del gatillo o lo apriete, más aumentará la velocidad.
Gire el volante (fig.1 #4) para hacer girar el coche hacia la derecha o la izquierda. El volante funciona de forma
proporcional: al girar el volante ligeramente puede tomar una curva abierta ; al girar el volante completamente puede
tomar una curva cerrada.
5. Limpieza y mantenimiento
1.
2.
3.
4.
Las partes móviles no pueden mostrar ningún rastro de desgaste y deben estar bien equilibradas.
Limpie el aparato regularmente con un paño húmedo y sin pelusas. Evite el uso de alcohol y de disolventes.
El mantenimiento debe ser realizado por personal especializado.
Contacte con su distribuidor si necesita piezas de recambio.
6. Solución de problemas
Verifique que el coche y el mando a distancia estén activados.
Verifique que el pack de baterías del coche esté cargado y conectado correctamente.
El coche no reacciona
Verifique que la pile del mando a distancia no esté agotada y que esté conectada
correctamente.
Alcance limitado /
Verifique que la antena del coche esté todavía derecha.
rendimiento débil
Verifique las pilas del coche y del mando a distancia. Reemplácelas o recárguelas.
7. Especificaciones
batería del coche
9.6V/800mAh pack de baterías recargable (incl.)
cargador CA
incl.
pila para el mando a distancia 9V (incl.)
velocidad máx
15km/h
círculo de giro
1m
autonomía
± 20min.
tiempo de carga
2 horas (la primera vez puede durar hasta 4 horas)
dimensiones del coche 450 x 185 x 105mm
peso
1.5kg
Se pueden modificar las especificaciones y el contenido de este manual sin previo aviso.
CT03
8
PEREL
CT03 – FERNGESTEUERTER RENNWAGEN
1. Einführung & Eigenschaften
Wenn der Lebenszyklus dieses Produktes zur Ende ist, entsorgen Sie dieses Produkt gemäß der örtlichen und
nationalen Gesetzgebung bezüglich Entsorgung.
Danke für Ihren Ankauf ! Lesen Sie Ihre Bedienungsanleitung sorgfältig durch. Überprüfen sie, ob Transportschäden
vorliegen. Sollte dies der Fall sein, verwenden Sie das Gerät nicht und wenden Sie sich an Ihren Händler.
2. Sicherheitsvorschriften
• Bei Schäden, die durch Nichtbeachtung der Bedienungsanleitung verursacht werden, erlischt der
Garantieanspruch. Für daraus resultierende Folgeschäden übernimmt der Hersteller keine Haftung.
• Das Gerat durch einen qualifizierten Techniker warten lassen.
• Vermeiden Sie Erschütterungen und brutale Kraft während der Bedienung dieses Gerätes. Das Gerät nicht fallen lassen.
• Aus Sicherheitsgründen sind eigenmächtige Änderungen verboten. Bei Schäden verursacht durch eigenmächtige
Änderungen erlischt der Garantieanspruch.
3. Batterien einlegen
a. Fernbedienung
Öffnen Sie den Deckel des Batteriefachs an der Unterseite der Fernbedienung. Legen Sie eine 9V-Batterie ein –
achten Sie auf die Polarität. Schließen Sie das Batteriefach.
b. Rennwagen
Sorgen Sie dafür, dass der 9.6V-Batteriepack im Voraus völlig aufgeladen is. Das Batteriefach befindet sich an der
Unterseite des Wagens. Öffnen Sie die Klemmen und entfernen Sie den Deckel. Legen Sie den Batteriepack ein und
schließen Sie ihn korrekt an. Machen Sie den Deckel wieder zu und verriegeln Sie das Batteriefach mit den
Klemmen.
! Wenn die Fernsteueranlage eingeschaltet ist aber die Strom-LED nicht aufleuchtet, überprüfen Sie dann, ob die
Polarität stimmt und es einen guten Kontakt gibt. Wenn das der Fall ist, dann ist die Batterie wahrscheinlich leer.
Legen Sie eine neue ein.
! Entfernen Sie die Batterien wenn das Gerat nicht verwendet wird.
! Versuchen Sie nie, nicht-aufladbare Batterien aufzuladen.
4. Bedienung
a. Die Fernsteueranlage (siehe Abbildung 1 Seite 1)
1.
2.
3.
4.
5.
6.
7.
8.
9.
EIN/AUS-Schalter
Taste für Scheinwerfer (funktioniert nur wenn Gas gegeben wird)
StromverorgungsLED
Lenkrad
Antenne: ziehen Sie die Antenne aus wenn Sie die Fernsteueranlage verwenden wollen. Wenn Sie die Antenne
schließen wollen, ziehen Sie am besten die Antenne Segment für Segment nach unten. Drücken Sie nicht auf die
Spitze der Antenne, sie könnte biegen.
Feinabstimmung Lenkrad
Feinabstimmung Geschwindigkeitsregler
Geschwindigkeitsregler
Unterseite: Batteriefach
CT03
9
PEREL
b. Gerät einschalten
Schalten Sie die Geräte immer in dieser Reihenfolge ein:
1. Ziehen Sie die Antenne der Fernsteueranlage völlig aus und schalten Sie die Fernsteueranlage ein (Abb.1 #1).
2. Schieben Sie das Plastikröhrchen über die Antenne des Rennwagens, stellen Sie die Antenne aufrecht und
schalten Sie den Rennwagen ein (Unterseite).
Wenn Sie zuerst den Wagen einschalten, kann er unkontrollierbar werden.
Wenn Sie die Geräte ausschalten wollen, müssen Sie umgekehrt vorgehen: zuerst den Wagen und nachher die
Fernsteueranlage ausschalten.
c. Räder auswuchten
Wenn Sie nicht am Lenkrad (Abb. 1 #4) drehen und der Wagen nicht geradeaus fährt, können Sie die Räder mit der
Feinabstimmung des Lenkrades (Abb.1 #6) auswuchten.
Wenn der Wagen nach vorne oder nach hinten fährt wenn Sie den Geschwindigkeitsregler (Abb.1 #8) nicht
berühren, können Sie das mit der Feinabstimmung des Geschwindigkeitsreglers (Abb. 1 #7) korrigieren.
d. den Wagen fahren
Ziehen Sie den Geschwindigkeitsregler (Abb.1 #8) nach hinten um den Wagen geradeaus fahren zu lassen. Drücken
Sie den Regler in die andere Richtung um den Wagen rückwärts fahren zu lassen. Der Geschwindigkeitsregler
funktioniert proportional: je härter Sie drücken oder ziehen, desto schneller wird der Wagen fahren. Drehen Sie am
Lenkrad (Abb. 1 #4) um den Wagen nach links oder nach rechts drehen zu lassen. Die Lenkung ist proportional: leicht
drehen bedeutet eine große Kurve; wenn Sie stark drehen, wird der Wagen scharfe Kurven nehmen.
5. Reinigung und Wartung
1. Mechanisch bewegende Teile dürfen keine Verschleißerscheinungen aufweisen oder unregelmäßig bewegen.
2. Reinigen Sie regelmäßig das Gerät mit einem feuchten, flusenfreien Tuch. Verwenden Sie keinen Alkohol oder
kein Lösungsmittel.
3. Der Benutzer darf keine Teile ersetzen.
4. Bestellen Sie Ersatzteile bei Ihrem Händler.
6. Probleme und Hinweise
Rennwagen fährt nicht
kurze Reichweite /
schwache Leistung
Überprüfen Sie, ob die Fernsteueranlage und der Wagen eingeschaltet sind.
Überprüfen Sie, ob der Batteriepack aufgeladen und korrekt angeschlossen ist.
Überprüfen Sie, ob die 9V-Batterie noch genügend stark und richtig angeschlossen ist.
Überprüfen Sie, ob die Antenne des Wagens noch aufrecht steht.
Kontrollieren Sie den Batteriepack und die 9V-Batterie. Batterien wechseln oder aufladen.
7. Technische Daten
Autobatterie
AC-Ladegerät
Batterie Fernsteueranlage
Höchstgeschwindigkeit
Wendekreis
Autonomie
Ladezeit
Abmessungen Wagen
Gewicht
9.6V/800mAh aufladbarer Batteriepack (mitgeliefert)
mitgeliefert
9V (mitgeliefert)
15km/h
1m
± 20Min.
2 Stunden (das erste Mal kann es bis zu 4 Stunden dauern)
450 x 185 x 105mm
1.5kg
Alle Änderungen vorbehalten.
CT03
10
PEREL