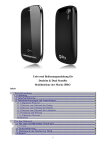
1
Inhaltsangabe
Technische Daten --------------------------------------- DE-01
Tastenfunktionen ---------------------------------------- DE-02
Einlegen der SIM- und Micro-SD-Karte ---------- DE-03
• SIM-Karte einlegen ----------------------------------------------DE-03
• Micro-SD-Karte einlegen --------------------------------------DE-04
Batteriefach öffnen/schließen---------------------- DE-05
Aufladen und Datenübertragung ------------------- DE-05
• Aufladen -------------------------------------------------------------DE-05
• Datenübertragung -----------------------------------------------DE-05
Benutzung der Funktionen---------------------------- DE-06
• Hauptfunktionsoberfläche-------------------------------------DE-06
• Telefon-Funktion--------------------------------------------------DE-07
• Messaging-Funktion --------------------------------------------DE-08
• Call-Center-Funktion -------------------------------------------DE-09
• Menüoberfläche --------------------------------------------------DE-10
- Telefonbucheinstellungen ----------------------------------------- DE-11
- Einstellungen ---------------------------------------------------------- DE-12
- Multimedia -------------------------------------------------------------- DE-13
- Sport ---------------------------------------------------------------------- DE-14
- Benutzerprofile -------------------------------------------------------- DE-15
- Bluetooth ---------------------------------------------------------------- DE-16
- Datei-Manager -------------------------------------------------------- DE-17
• Einführung in die Klingelton-Funktion --------------------DE-17
• Einführung in die Kurzwahlliste -----------------------------DE-18
• SOS: Notrufnummern wählen ------------------------- DE-18
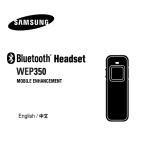
Bluetooth-Headset Bedienungsanleitung ----- DE-19
DE
Technische Daten
Bluetooth-Version:
V.2.1
Betriebsfrequenz:
2.4 GHz
Ladespannung:
110-240V
Ladedauer:
etwa 2 Stunden
Stand-by-Dauer:
etwa 100 Stunden
Sprechdauer:
etwa 2 Stunden
Display-Größe:
1,5 Zoll, Auflösung 128*128
System:
GSM850/ 900/ GSM1800/ PCS 1900’
DE
Tastenbefehle
A-Taste: Sofern nicht im Stand-by-Modus, einmal drücken,
um die Auswahl zu bestätigen.
B-Taste: SOS Notruf.
C-Taste: Im Stand-by-Modus, einmal drücken, um Lautstärke zu erhöhen.
Im Optionen-Modus, einmal drücken, um nach oben zu
gehen oder Wert zu erhöhen.
D-Taste: Im Stand-by-Modus, einmal drücken,
um die Lautstärke zu verringern.
Im Optionen-Modus, einmal drücken, um nach unten zu
gehen oder den Wert zu reduzieren.
M-Taste: In allen Modi, gedrückt halten (3 Sekunden),
um ein- oder auszuschalten.
In allen Modi, einmal drücken, um Startbildschirm aufzurufen.
Kamera
A-Taste
Eingabestift
USB-Anschluss
B-Taste
C-Taste
D-Taste
Touchscreen
DE-01
Lautsprecher
M-Taste
DE-02
Einlegen der SIM- und Micro-SD-Karte
SIM-Karte einlegen
1. Batterie
entfernen.
2. SIM-KartenMetallabdeckung
öffnen.
Batterie
Einlegen der SIM- und Micro-SD-Karte
Micro-SD-Karte einlegen
1.Die rückseitige
und die
SIM-Kartenöffnen.
4.Metallabdeckung
bzw.
schließen und
Micro-SD-Karte
sicherstellen, dass
einlegen.
die SIM-Karte fest
eingelegt ist.
DE-03
Batterie
Abdeckung der Uhr
Metallabdeckung
3. SIM-Karte
DE
3. Die
Micro-SD-KartenAbdeckung
schließen;
sicherstellen, dass
2. Auf die
Micro-SDKartenabdeckung
drücken, bis sie
sich öffnet, und
die
Micro-SD-Karte
einlegen.
sie fest
geschlossen ist.
Hinweis: 1. Achten Sie darauf, dass die Uhr ausgeschaltet ist,
bevor Sie die Karten einlegen.
2. Stellen Sie sicher, dass die Rückabdeckung
korrekt eingesetzt und befestigt ist.
DE-04
Batteriefach öffnen/schließen
Die Zunge anheben,
um das Batteriefach
zu öffnen, und nach
unten legen, um es zu
schließen.
DE
Benutzung der Funktionen
Hauptfunktionsoberfläche
Benutzen Sie den Eingabestift auf dem Touchscreen, um zur
Hauptfunktionsoberfläche zu wechseln. Die Oberfläche
umfasst die Symbole für: Telefonwähler („Telefon“),
SMS-Messaging („Msgs“), Call-Center („Log“), Menü, Ton und
Kurzwahlliste.
Aufladen und Datenübertragung
USB
Konfiguration
Massenspeicher
COM. Port
Aufladen
Zum Aufladen der Uhr können Sie das
USB-Kabel entweder mit einem Computer
verbinden oder direkt mit dem USB-Port des
Ladegerätes.
Datenübertragung
DE-05
Übertragen Sie mithilfe des USB-Kabels der
Uhr Daten auf und von einem Computer.
Nach Verbindung mit einem Computer
erscheint das links abgebildete
Dialogfenster. Option „Massenspeicher“
wählen, um in den
Datenübertragungsmodus zu gehen.
Hauptbildschirm
Hauptfunktionsoberfläche
DE-06
DE
Messaging-Funktion
Telefon-Funktion
Zu den Funktionen gehören: Mitteilung schreiben, Posteingang,
Entwürfe, Postausgang, Gesendete Mitteilungen und
1.
2.Gewünschte
anklicken,
Rufnummer
um die
eingeben und
Wählerober
dann
fläche zu
anklicken oder
öffnen.
einmal A-Taste
Hauptfunktionsoberfläche
Wähleroberfläche drücken,
um anzurufen.
Hinweis: Wenn die Wähleroberfläche
geöffnet ist, das
Symbol
anklicken, um das Telefonbuch zu
öffnen.
DE-07
SMS-Einstellungen
1.
2.
anklicken,
wählen, um den
um die
Message-Editor
Messaging-
zu öffnen.
Oberfläche
zu öffnen.
Hauptfunktionsoberfläche
3. Um die
Tastatursprach
e zu ändern,
klicken Sie auf
Optionen >
Eingabemetho
de und wählen
Sie eine der
Tastaturoption
en aus.
Messaging-Oberfläche
Um die
Tastatur
anzuzeigen,
drücken Sie
auf
.
Um die
Tastatur
auszublenden,
drücken Sie
auf
DE-08
DE
Call-Center-Funktion
Menüoberfläche
Funktionen umfassen: Verpasste Anrufe, Eingewählte
Funktionen umfassen: SMS („Msgs“), Anrufprotokoll,
Anrufe, Erhaltene Anrufe, Anrufprotokoll löschen,
Einstellungen, Multimedia, Sport, Benutzerprofile, Bluetooth
Anruf-Timer und Anrufdauer
und weitere Funktionen
1.
2.
1.
anklicken,
anklicken,
anklicken, um
um die
um die
die
Call-Center-
Anrufverlauf-
Menüoberfläche
Oberfläche
oberfläche
zu öffnen.
zu öffnen.
aufzurufen.
Hauptfunktionsoberfläche
Verlaufoberfläche
DE-09
Call-Center-Oberfläche
Anmerkung: Das
mitgelieferte Headset
unterstützt nicht die
„Beliebige Taste“Antwortfunktion.
Wählen Sie diese
Option nur, wenn Ihr
Anrufeinstellungen- Headset über diese
Fähigkeit verfügt.
Oberfläche
Hauptfunktionsoberfläche
Menüoberfläche
Telefon-buch
Nachr.
Einstellungen
Multimedia
Sport
Bluetooth
DateiManager
Benutzerprofile
Call - Center
DE-10
DE
Einstellungen
Telefonbucheinstellungen
Umfasst Organisator, Stiftkalibrierung, Telefon-, Netzwerk-,
Sicherheits- sowie Netzwerkeinstellungen und Konnektivität.
1.
2. „Neuen
anklicken,
Kontakt
um das
hinzufügen“
Telefonbuch
anklicken,
zu öffnen.
um die
1.
anklicken, um
die
Einstellungenoberfläche zu
öffnen.
EditorTelefonbuch
Menüoberfläche
Oberfläche
Menüoberfläche
Einstellungenoberfläche
zu öffnen.
3. Auf- und AbSchaltfläche
anklicken, um
neue Kontakte
einzugeben.
Oberfläche bearbeiten
DE-11
Neuer Eintrag
DE-12
DE
Multimedia
Umfasst Kamera, Bildbetrachter, Videorekorder, Videoplayer
und Audio-Player.
1.
Sport
Benutzerinformationen eingeben
Der Benutzer muss die folgenden Informationen eingeben und
in der Uhr speichern.
Falls Sie keine Benutzerinformationen eingeben, werden
manchmal sportbezogene Daten nicht auf Sie anwendbar sein.
anklicken, um die
2.
1.
Multimedia-oberfläche zu öffnen.
anklicken,
um die
anklicken,
Sport-
um Ihre
oberfläche
persönlichen
Einstellungen
zu öffnen.
Menüoberfläche
Anmerkung: Um eine im
Menüoberfläche
Sportoberfläche
zu öffnen.
Aufnahmegerät gespeicherte Datei
abzuspielen, scrollen Sie nach unten
und wählen Sie Aufnahmegerät >
Optionen > Liste. Wählen Sie die
Datei und drücken Sie Start.
Multimediaoberfläche
DE-13
Größe Gewicht Alter
Anmerkung:
Leise (L), Medium (M),
Laut (H)
Geschlecht Trainingsstufe Schrittlänge
DE-14
DE
Sport
Benutzerprofile
Benutzung der Sportfunktion
Sie können zwischen Allgemein, Lautlos, Besprechung
und Draußen wählen.
1.
anklicken, um
die
Sportfunktion
zu starten und
die Oberfläche
für Schritte
und
Laufstrecke zu
öffnen.
3. Über das
2. „LAUFEN“
Schaltfläche
berühren, um
den
Bewegungsmodus
auszuwählen.
zu wechseln.
anklicken, um
Benutzerprofile
gleiten, um zur
zu öffnen.
Anzeige für
die Kalorien
und
Durchschnittsgeschwindigkeit
Hinweis:
Das „Schritte“ Symbol anklicken, um die Schrittlänge einzustellen.
Das
Symbol anklicken, um die aktuellen Sportdaten auf die
Plattform hochzuladen
DE-15
1.
Display
Menüoberfläche
Benutzerprofile
Anmerkung: Um
ein Benutzerprofil
anzupassen,
müssen Sie
Speichern
auswählen, damit
das neue Profil
gespeichert wird.
Bluetooth
Das „Bluetooth aktivieren“ Symbol anklicken, um Bluetooth zu
aktivieren oder deaktivieren.
1.
anklicken, um
die
BluetoothEinstellungen
zu öffnen.
Menüoberfläche
Bluetooth
DE-16
Verwalten des internen Speichers und der Speicherkarte.
um
anklicken, um
Kurzwahl zu
den
Datei-Manager
zu öffnen.
Menüoberfläche
Einführung in die Klingelton-Funktion
anklicken und
in den Stillen
öffnen.
Hauptfunktionsoberfläche
Datei-Manager
1.
1.
anklicken,
1.
Datei-Manager
Hinweis: Sie können die Kurzwahl nur benutzen, wenn Sie
Rufnummern vom Telefonbuch hinzugefügt haben.
SOS: Notrufnummern wählen
Klicken Sie die SOS-Taste für 1 bis 2 Sekunden an, um
den Notruf-Modus zu aktivieren
klicken Sie
Wählen Sie
Modus
dann das
die
wechseln.
Telefonsymbol
Notrufnummer
an, um die
Hauptfunktionsoberfläche
DE-17
DE
Einführung in die Kurzwahlliste
Datei-Manager
oder brechen
Wähler-
Sie den Anruf
Oberfläche zu
ab.
öffnen.
DE-18
DE
Bluetooth-Headset Bedienungsanleitung
Aufladen der Batterie
Die Batterie muss vor der ersten Benutzung vollständig
aufgeladen werden!
a. Verbinden Sie das Kabel des Ladegerätes mit der Ladebuchse
des Headsets.
b. Verbinden Sie das Ladegerät mit einer Wandsteckdose (AC).
c. Zunächst leuchtet die Anzeige rot. Wenn die Batterie
vollständig aufgeladen ist, erlischt das Licht.
d. Ziehen Sie die Stecker des Ladegerätes aus dem Headset und
der Wandsteckdose.
Ein- und Ausschalten des Headsets
a. Verbinden Sie die Ohrhörer mit dem Bluetooth-Gerät.
b. Um einzuschalten: Halten Sie die Start-/Beenden-Taste
gedrückt und schieben Sie sie nach oben. Die blauen Lichter
leuchten.
c. Um auszuschalten: Halten Sie die Start-/Beenden-Taste
gedrückt und schieben Sie sie nach unten. Ein rotes Licht blinkt,
bis das Headset sich ausschaltet.
Verbindungsaufbau zwischen Headset und
Bluetooth-fähigem Telefon
a. Schalten Sie das Headset in den Stand-by-Modus.
b. Stellen Sie das Telefon so ein, dass es nach
Bluetooth-Geräten sucht.
c. Wenn das Telefon das Headset findet, bestätigen Sie, indem
Sie das Headset (HM3500) auf der Liste markieren.
d. Geben Sie den Code 0000 ein, wenn Sie dazu vom Telefon
aufgefordert werden.
e. Wiederholen Sie die Schritte, falls der Verbindungsaufbau
fehlgeschlagen ist. Sie müssen die Verbindung nur einmal
aufbauen.
f. Wenn der Verbindungsaufbau erfolgreich war, beginnt das
Headset blau zu blinken, um zu signalisieren, dass es im
Stand-by-Modus ist und jetzt Anrufe tätigen/annehmen kann.
Annehmen/Beenden eines Anrufs
a. Drücken Sie die Anruf-Taste an Ihrem Telefon, oder
b. drücken Sie einmal kurz die Anruf-/Beenden-Taste an dem
Headset.
DE-19
DE-20
DE
Ablehnen eines Anrufs
a. Drücken Sie die Beenden-Taste an Ihrem Telefon, oder
b. halten Sie die Anruf-/Beenden-Taste für 1 Sekunde
gedrückt, wenn das Telefon klingelt.
Ausführen eines Anrufs
WICHTIGE UMWELTINFORMATIONEN
Diese Uhr entspricht der Richtlinie 2002/1 O8/EG zur
elektromagnetischen Verträglichkeit.
Entsorgung von Batterien und Altgeräten
a. Wählen Sie die Rufnummer mit Ihrem Telefon, drücken Sie
dann die Anruf-Taste an Ihrem Telefon, um den Anruf
automatisch an das Headset weiterzuleiten.
Diese Uhr enthält eine Batterie, die der europäischen
Richtlinie 2006166IEG unterliegt und nicht mit dem
normalen Haushaltsmüll entsorgt werden darf. Bitte
entsorgen Sie die verbrauchte Batterie ordnungsgemäß.
Bitte informieren Sie sich über die örtlichen
Bestimmungen zur ordnungsgemäßen Entsorgung von
Batterien.
Anrufen der zuletzt gewählten Rufnummer
a. Drücken Sie zweimal die Anruf-/Beenden-Taste (2-mal kurz
drücken), wenn das Headset im Stand-by-Modus ist.
Einstellen der Lautstärke des Headsets
a. Halten Sie die Lautstärke-Taste des Headsets gedrückt, um
die Lautstärke einzustellen.
Aufbewahren des Headsets
a. Schalten Sie das Headset aus.
b. Bewahren Sie es innerhalb eines Temperaturbereichs von
-10 °C/14 °F bis 60 °C/134 °F auf.
c. Setzen Sie das Headset keinem Regen oder anderen
Flüssigkeiten aus.
DE-21
DE60270219
Befindet sich das Symbol einer durchgestrichenen
Abfalltonne auf Rädern auf der Uhr oder der Verpackung,
so bedeutet dies, dass diese Uhr der Europäischen
Richtlinie 2002/96/EG unterliegt.
Entsorgen Sie solche Uhren nie mit dem Haushaltsabfall.
Bitte informieren Sie sich über die örtlichen
Bestimmungen zur ordnungsgemäßen Entsorgung von
elektrischen und elektronischen Produkten.
Durch die korrekte Entsorgung von Altgeräten und Batterien
werden Umwelt und Menschen vor möglichen negativen Folgen
geschützt und Sie leisten einen entscheidenden Beitrag zum
Umweltschutz.
DE-22
Index.
Specifications --------------------------------------------- GB-01
Button Commands -------------------------------------- GB-02
Installation of SIM and Micro SD Cards --------- GB-03
• SIM Card Installation -------------------------------------- GB-03
• Micro SD Card Installation ------------------------------- GB-04
Unlock/Lock the Battery Case ----------------------- GB-05
Charging and Data Transfer ------------------------- GB-05
• Charging ----------------------------------------------------- GB-05
• Data Transfer ----------------------------------------------- GB-05
Using the Functions ------------------------------------- GB-06
• Main Function Interface Instructions------------------------GB-06
• Telephone Dialler Function Instructions --------------- GB-07
• Messaging Function Instructions ------------------------ GB-08
• Call Centre Function Instructions ----------------------- GB-09
• Menu Interface Instructions ------------------------------ GB-10
- Phonebook ------------------------------------------------ GB-11
- Settings ---------------------------------------------------- GB-12
- Multimedia ------------------------------------------------- GB-13
- Sports ---------------------------------------------------------------------- GB-14
- User Profiles ----------------------------------------------- GB-16
- Bluetooth --------------------------------------------------- GB-16
- File Manager ----------------------------------------------- GB-17
• Introduction to Ringtone Function ---------------------- GB-17
• Introduction to Speed Dial List --------------------------------GB-18
• SOS: Calling Emergency Numbers--------------------------GB-18
Bluetooth Headset Manual --------------------------- GB-19
GB
Specifications
GB
Button Commands
Bluetooth version:
V.2.1
Operating frequency:
2.4 GHz
Charging voltage:
110-240V
Charging time:
about 2 hours
Standby time:
about 100 hours
Talk time:
about 2 hours
Screen dimensions:
1.5", resolution 128*128
System:
GSM850/ 900/ GSM1800/ PCS 1900
Button A: If not in standby mode, short press for confirmation of selection.
Button B: For SOS emergency call.
Button C: In standby mode, short press for volume up.
If in options mode, short press to move up or increase.
Button D: In standby mode, short press for volume down.
If in options mode, short press to move down or decrease.
Button M: In all modes, long press (3 seconds) for power on or off.
In all modes, short press for home screen.
Camera
Button A
USB Connector
Stylus
Button B
Button C
Touchscreen
GB-01
Loudspeaker
Button D
Button M
GB-02
Installation of SIM and Micro SD Cards
SIM Card Installation
1. Remove
2. Open the metal
the Battery
SIM card cover
BATTERY
Installation of SIM and Micro SD Cards
GB
Micro SD Card Installation
1. Remove the
Battery and the
BATTERY
metal SIM card
cover
2.Push on the
Micro SD card
cover until it
opens, and then
GB-03
3. Install the
4. Close the
SIM card or
metal cover and
micro SIM
ensure that the
card with the
SIM card is firmly
card adaptor
installed
3. Replace the
Micro SD card
insert the Micro
SD card
cover, ensuring that
it firmly in place
Note: 1. Ensure that the watch is first turned off before performing the
above installation.
2. Ensure that the Battery is properly replaced and attached.
GB-04
Unlock/Lock the Battery Case
GB
Using the Functions
Lift the latch up to
Main Function Interface Instructions
unlock the battery
Use the stylus on the touchscreen to switch to the main
case and down to
function interface. The interface includes telephone dialler
lock it.
('Phone'), SMS messaging ('Msgs'), call centre ('Log'), menu,
sound and speed dial list function icons.
Charging and Data Transfer
USB
Config
Mass Storage
COM port
Charging
To charge the watch, you may either use
the special USB cable connection to charge
it via a computer, or directly connect the
USB cable to the charger's USB port.
Data Transfer
Main Screen
Main Function Interface
Use the watch's special USB cable to
transfer data to and from a computer.After
the watch is connected to a computer, the
dialogue screen shown on the left appears.
Select the "Mass Storage" option to enter
into data transfer mode.
GB-05
GB-06
GB
Messaging Function Instructions
Telephone Dialler Function Instructions
Features include message composition ('write message'), inbox,
drafts, outbox, sent messages and SMS setting functions.
2. Select
1.Click
2.Enter the
1.Click
to launch
desired
to launch the
the dialler
number and
messaging
to enter the
interface
then click
interface
message
editing
or short
interface
press the A
Main Function Interface
Dialler Interface
button to
Main Function Interface
call
Message Interface
3. To change
To display the
the keyboard
keyboard,
Note: When the dialler interface is
language click
press on
open, click on the
Options>Input
To hide
method and
keyboard,
select one of
press on
icon to
open the telephone directory.
the keyboard
options
GB-07
GB-08
GB
Call Centre Function Instructions
Menu Interface Instructions
Features include missed calls, dialled calls, received calls,
Features include phonebook, SMS ('Msgs'), call log, settings,
delete call logs, call timer, and call time functions
multimedia, sports, user profiles, Bluetooth and additional
functions
1.Click
1. Click
2. Click
to enter call
to enter Menu
centre
to enter call
interface
history
Interface
interface
Main Function Interface
History Interface
GB-09
Call Centre Interface
Call Settings Interface
Note: The
headset
supplied does
not support the
Any Key
answer
function. Only
select this
option if your
headset has
this capability.
Main Function Interface
Menu Interface
Phone book
Msgs
Call Center
Settings
Multimedia
Sports
User Profiles
Bluetooth
File Manager
GB-10
GB
Settings
Phonebook
Includes Organizer, pen calibration, phone settings,
network settings, security settings and connectivity
1. Click
2. Click “Add
to open the
new contact”
phonebook
to open the
1. Click
to
enter Settings
interface
editing
interface
Menu Interface
Phone Book
Menu Interface
Settings Interface
3. Click Up
and Down
button to fill
in new
contact
details
Editing Interface
GB-11
New Contact
GB-12
Multimedia
Includes camera, image viewer, video recorder, video player
and audio player.
1.Click
GB
Sports
Enter User Information
The user must enter the following information and save it
in the watch;
Should you choose not to set up your user information,
sports-related data will sometimes not apply to you.
2. Click
1. Click
to enter
to open the
Multimedia Interface
Sports
Interface
to open your
personal
settings
Menu Interface
Menu Interface
Sports Interface
Note: To playback a file saved in the
Sound Recorder, scroll down and
select Sound Recorder>Options>List.
Height Weight Age
Select file and press Play
Gender
Multimedia Interface
GB-13
Note:
Low (L), Medium (M),
High (H)
Exercise
level Step length
GB-14
GB
Sports
User Profiles
Using the Sports Function
You can choose from general, silent, meeting and outdoor.
1. Click
to start the
sports
function and
launch the
interface for
steps and
mileage
3. Slide the
screen to
switch to the
user profile,
you must
select save
average
velocity
to keep the
Menu Interface
new profile.
Click the “Activate Bluetooth” logo to open or close Bluetooth
1. Click
to enter the
mode of
Bluetooth
movement
settings
interface
Note: Click the“Steps” icon to modify step length settings.
icon to upload the current sports data
User Profiles
Bluetooth
select the
GB-15
customise a
Profiles
calories and
button to
to the platform
Note: To
to enter User
interface for
2. Tap “RUN”
Click the
1. Click
Menu Interface
Bluetooth
GB-16
GB
Introduction to Speed Dial List
File Manager
Manage both internal memory and memory card
1. Click
to open the
1. Click
Speed Dial
to enter the
file manager
Menu Interface
File Manager
Introduction to Ringtone Function
1. Click
and switch to
Silent Mode
Main Function Interface
File Manager
Note: You can only speed dial after you have added numbers
from the phonebook
SOS: Calling Emergency Numbers
Click the red SOS key for 1-2 sec for auto dialling to the
local emergency number. If failure to do so, emergency
calling mode is opened.
then click
Dial
the phone
emergency
icon
number or
open the
Main Function Interface
GB-17
to
abort call
dialler
interface
GB-18
GB
Bluetooth Headset Manual
Charging the Battery
Battery must be fully charged prior to first use!
a. Connect the charger cable to the headset's charging socket
b. Plug the charger into a wall (AC) outlet
c. At first the indicator light will be red. When the battery is
fully charged, the light turns off
d. Disconnect the charger from the headset and the wall outlet
Switching the Headset Power On and Off
a. Connect the earphones to the Bluetooth unit.
b. To turn power on: Hold down the start/end button
and push up. Blue lights turn on.
c. To turn power off: Hold down the start/end button and push
down. A red light will flash until the headset is turned off.
Pairing the Headset with a Bluetooth-Enabled Phone
a. Turn on the headset in standby mode
b. Set the phone to search for Bluetooth device
c. When phone finds the headset, confirm by selecting the
headset (HM3500) from list
d. Enter pass code 0000 when prompted by phone
e. Repeat steps if the pairing is unsuccessful. You only need
to pair once.
f. When the pairing is successful, it starts to flash blue,
indicating that is in standby mode and is ready to
make/receive calls
GB-19
Answering a Call / Ending a Call
a. Press the answer/end key on your phone, or
b. Quickly press the answer/end key on the headset
Declining a Call
a. Press the end key on your phone, or
b. Press and hold the answer/end key for about 1 second
when phone is ringing
Making a Call
a. Use your phone to dial the number, then press the
answer/call key on your phone to automatically transfer the
call to the headset
Redialling the Last Called Number
a. Single press the answer/end key twice (2 short presses)
when the headset is in standby mode
Adjusting the Volume of the Headset
a. Hold down the headset volume keys to adjust volume
Storing the Headset
a. Power off the headset
b. Keep within a temperature range of -10°C/14°F to 60°C/134°F
c. Do not expose the headset to rain or any other liquids
GB-20
DISPOSAL
Dear customer,
Please observe at all costs:
Dry batteries and storage batteries must not be thrown away
with household rubbish. Every consumer is legally obliged to
dispose of batteries of all kinds, whether they contain harmful
substances or not, by handling them in to their local collection
point or returning them to the place of purchase so that they
can be disposed of properly without causing any harm to the
environment.
Please only hand in or return spent
dry and storage batteries.
BATTERIES
Old appliances are not to be thrown away with household
rubbish. If an appliance has become unserviceable, every
consumer is obliged by law to dispose of it separately from
household rubbish, e.g. at the local council’s collection point.
This properly, avoiding harm to the environment.
For this reason electrical appliances
bear the symbol shown on the left.
GB-21
目錄
TC
規格 ----------------------------------------------------------- TC-01
按鍵指令 ----------------------------------------------------- TC-02
安裝SIM卡和Micro SD卡------------------------------- TC-03
• SIM卡安裝 --------------------------------------------------- TC-03
• Micro SD卡安裝 -------------------------------------------- TC-04
打開/關上電池盒----------------------------------------- TC-05
充電和資料傳送 -------------------------------------------- TC-05
• 充電 ---------------------------------------------------------- TC-05
• 資料傳送 ----------------------------------------------------- TC-05
使用電話功能 ----------------------------------------------- TC-06
• 主要功能界面說明---------------------------------------------------TC-06
• 電話撥打功能說明 ------------------------------------------ TC-07
• 訊息功能說明 ------------------------------------------------ TC-08
• 通話資料功能說明 ------------------------------------------ TC-09
• 目錄界面說明 ------------------------------------------------ TC-10
- 電話簿 ------------------------------------------------------ TC-11
- 設定 --------------------------------------------------------- TC-12
- 多媒體 ------------------------------------------------------ TC-13
- 運動 ------------------------------------------------------------------------- TC-14
- 使用模式 ---------------------------------------------------- TC-16
- 藍牙 --------------------------------------------------------- TC-16
- 檔案管理 ---------------------------------------------------- TC-17
• 鈴聲功能介紹 ------------------------------------------------ TC-17
• 快速撥打清單介紹---------------------------------------------------TC-18
• 求助:撥打緊急救助電話 -----------------------------------------TC-18
藍牙耳機說明書 -------------------------------------------- TC-19
規格
TC
按鍵指令
藍牙版本:
V.2.1
操作頻率:
2.4 GHz
充電電壓:
110-240V
充電時間:
約 2 小時
備用時間:
約 100 小時
通話時間:
約 2 小時
螢幕大小:
1.5", 解像度 128*128
系統:
GSM850/ 900/ GSM1800/ PCS 1900
A 鍵:
在非備用模式中輕按以確認選項。
B 鍵:
撥打緊急救助電話
C 鍵:
在備用模式中輕按以調高音量。
在選項模式中輕按以上移或增加。
D 鍵:
在備用模式中輕按以調低音量。
在選項模式中輕按以下移或減少。
M 鍵:
在所有模式中長按3秒以開啟或關閉電源。
在所有模式中輕按以瀏覽主畫面。
相機
A鍵
USB 連接埠
輕觸筆
B鍵
C鍵
D鍵
觸控螢幕
TC-01
揚聲器
M鍵
TC-02
Micro SD 卡安裝
SIM卡安裝
1. 拆除電池
TC
安裝SIM卡和Micro SD卡
安裝SIM卡和Micro SD卡
2. 揭開金屬SIM卡
蓋
1. 拆除電池和金屬
SIM卡蓋
電池
電池
2.按著Micro SD
卡蓋至開啟為止,
然後插入Micro
SD卡
3. 安裝SIM卡
4. 蓋上金屬蓋,確
或用卡座安裝
保SIM卡妥善安裝
micro SIM卡
3. 重新蓋上Micro
SD卡蓋,確保卡蓋
安裝妥當
附註: 1. 進行以上安裝前,確保先關上手錶。
2. 確保電池已更換並妥善安裝。
TC-03
TC-04
打開/關上電池盒
TC
使用手機功能
主要功能界面說明
揭起電池蓋以打開電池
盒,向下按則可關上電
池盒。
利用輕觸筆輕點觸控螢幕,以切換到主要功能界面。界面載有電話
撥打 ('Phone')、短訊 ('Msgs')、通話資料 ('Log')、目錄、音量和
快速撥打清單等功能圖示。
充電和資料傳送
充電
為手錶充電時,可使用隨附的USB電線連接至
USB 配置
大容量儲存器
電腦連接埠
電腦充電,或將USB電線連接至充電器的USB
連接埠。
資料傳送
主畫面
主要功能界面
使用手錶隨附的USB電線來連線電腦,以傳送
資料。
手錶連接至電腦後,便會出現左圖的文字畫面。
選擇「大容量儲存器」選項以進入資料傳送模
式。
TC-05
TC-06
電話撥打功能說明
TC
訊息功能說明
功能包括編寫訊息('write message')、收件匣、草稿、寄件匣、訊息
備份和短訊設定功能
1.點擊
2.輸入電話號
以開啟撥打
碼,然後點擊
1.點擊
或輕按
界面
2. 選取
以開啟訊息界
面
按鈕A以進行
進入訊息編輯
界面
撥號
主要功能界面
撥打界面
附註:開啟撥打界面後,點擊
以打開電話簿
主要功能界面
圖示
訊息界面
3. 如要更改
按下
鍵盤語言,
以開展鍵盤,
點擊選項>
並按下
輸入方式,
以收起鍵盤
然後選取鍵
盤選項
TC-07
TC-08
TC
通話中心功能說明
目錄界面說明
功能包括未接來電、已撥打電話、已接來電、刪除通話記錄、通
功能包括電話簿、短訊 ('Msgs')、通話記錄、設定、多媒體、
話計時和通話時間功能
運動、使用模式、藍牙和其他功能
1.點擊
1. 點擊
2. 點擊
界面
to
進入目錄界面
進入通話資料
進入通話記錄界
面
主要功能界面
主要功能界面
通話中心
目錄界面
附註:隨附耳機
並不支援任何按
鍵通話功能。倘
若你的耳機支援
電話簿
短訊
通話資料
設定
多媒體
運動
情景模式
藍牙
此功能,方可選
取此選項。
通話記錄界面
TC-09
文件管理
通話設置界面
TC-10
TC
設置
電話簿
包括手帳、筆觸校正、電話設定、網路設定、安全設定和連接
設定
1. 點擊
2. 點擊「添加
以開啟電話簿
聯繫人」以開
1. 點擊
進入設定界面
啟編輯界面
Phone Book
目錄界面
目錄界面
設置界面
3. 按上下鍵以
填寫新聯絡人
的資料
編輯界面
TC-11
新建聯繫人
TC-12
TC
多媒體
運動
包括相機、圖片檢視、錄影機、影片播放和音訊播放。
輸入用戶資料
用戶需要輸入以下資料,然後儲存在手錶上。
倘若你選擇不設定用戶資料,與運動有關的數據或有機會不適
用。
1.點擊
附註:如要
進入多媒體
重播錄音機
界面
內儲存的檔
1. 點擊
以開啟運動界
面
案,向下滾
動頁面,然
後選擇錄音
目錄界面
多媒體界面
機>選項>清
目錄界面
運動界面
單。選取檔
案,然後按
下播放鍵
身高
體重
年齡
附註:輕鬆(輕)、
中等(中)、繁重(重)
性別
TC-13
運動量
步幅
TC-14
運動
使用運動功能
TC
情景模式
你可選擇一般、靜音、會議和戶外模式。
附註:設定情
1. 點擊
以開啟運動功
能,並進入步
數和距離的界
面。
3. 在螢幕上滑
景模式時,必
動,以切換到卡
須選取儲存以
路里和平均速度
保存新模式。
的界面。
情景模式
目錄界面
2. 輕點
「跑」按鍵以
藍牙
點擊「啟動藍牙」圖標以開啟或關閉藍牙
選擇活動模式
1. 點擊
。
進入藍牙設定
界面interface
附註: 點擊「走」圖示以更改步幅設定。
點擊
TC-15
圖示以上載現有運動數據至手機
目錄界面
藍牙
TC-16
TC
快速撥打清單介紹
文件管理
1.點擊
管理內部記憶體和記憶卡
以開啟快速撥
打功能
1. 點擊
進入檔案管理
主要功能界面
檔案管理
附註: 將電話號碼加入電話簿後方能進行快速撥打
目錄界面
文件管理
鈴聲功能介紹
1. 點擊
求助:撥打緊急救助電話
長按紅色求助按鍵1-2秒後,手錶會自動撥打致當地的緊急救助
電話,如未能成功撥打,緊急撥號模式將會開啟。
以切換至靜音模
然後按電話
撥打緊急求
式
圖示
助電話或終
以開
啟撥打界面
止通話
主要功能界面
TC-17
TC-18
藍牙耳機說明書
替電池充電
於首次使用前,必須完全充電!
a. 連接充電線至耳機充電槽
b. 將充電器插入交流電源插座
c. 指示燈會先亮起紅色,待充電完畢便會熄掉
d. 將充電器拔離耳機及交流電源插座
TC
接聽來電/終止通話
a. 按下接聽/終止鍵,或
b. 快速按下耳機的接聽/終止鍵
拒絕接聽來電
a. 按下電話終止鍵,或
b. 電話響起時,長按接聽/終止鍵約1秒
耳機電源開關
撥打電話
a. 將耳機連接至藍牙裝置。
b. 開機:按下開關鍵再向上推,令藍燈亮起。
c. 關機:按下開關鍵再向下推。紅燈開始閃爍,直至耳機
關掉為止。
a. 利用電話撥號,再按下電話的接聽/撥打鍵,通話便會
自動轉由耳機進行。
將耳機配接至具有藍牙功能的電話
a. 將耳機開啟為備用模式
b. 將電話設定為搜尋藍牙裝置
c. 電話搜尋到耳機後,從清單挑選耳機(HM3500)以確認配對
d. 電話上出現密碼欄時,輸入0000
e. 如配對失敗,重覆以上步驟。配對只需進行一次。
f. 配對成功後,藍燈便會閃爍,代表耳機進入備用模式,可以
撥打/接聽電話。
TC-19
重撥最後撥出電話
a. 耳機處於備用模式時,快速連按兩下接聽/終止鍵
調整耳機音量
a. 長按耳機的音量鍵以調整音量
存放耳機
a. 關掉耳機
b. 存放於溫度界乎-10°C/14°F與60°C/134°F的環境下
c. 別讓耳機接觸到雨水或任何其他液體
TC-20
棄置處理
尊敬的顧客,
請務必遵守以下事項:
請勿將乾電池和充電池與生活垃圾一同扔棄。每位顧客都有責任合
法處理所有種類的電池,無論電池是否含有有害物質。將電池交至
當地廢物收集點或者返還至購買點,以便電池可以得到正確處理,
而不會對環境造成任何損害。
嚴禁丟入垃圾桶,請遞交或返還使用過
的乾電池或充電池。
電池
請勿將舊電器與生活垃圾一同扔棄。如果電器不能再使用,每位消
費者依法有責任將其區別於生活垃圾單獨棄置處理,例如將其棄置
到當地政府的廢物收集點。這樣,可以避免對環境造成損害。
因此,電器上載有左側所示的符號。
售後服務熱線:+86 20 28065366
TC-21
International hotline: +852 2739 1326
Índice
Especificaciones ---------------------------------------- ES-01
Controles --------------------------------------------------- ES-02
Instalación de las tarjetas SIM y Micro SD ---- ES-03
• Instalación de la tarjeta SIM ----------------------------- ES-03
• Instalación de la tarjeta Micro SD ---------------------- ES-04
Apertura y cierre de la cubierta de la batería --- ES-05
Carga y transferencia de datos -------------------- ES-05
• Carga -------------------------------------------------------- ES-05
• Transferencia de datos ----------------------------------- ES-05
Uso de las funciones ----------------------------------- ES-06
• Interfaz de funciones principales ----------------------------ES-06
• Funciones del marcador de teléfono ------------------ ES-07
• Funciones de mensajería -------------------------------- ES-08
• Funciones de registro de llamadas -------------------- ES-09
• Interfaz del menú ----------------------------------------- ES-10
- Agenda telefónica ---------------------------------------- ES-11
- Configuración ---------------------------------------------- ES-12
- Multimedia ------------------------------------------------- ES-13
- Deportes ------------------------------------------------------------------ ES-14
- Perfiles de usuario --------------------------------------- ES-16
- Bluetooth --------------------------------------------------- ES-16
- Administrador de archivos ------------------------------- ES-17
• Función de tono de llamada ----------------------------- ES-17
• Función de marcación rápida ---------------------------------ES-18
• Emergencias: Lista de números de emergencia -------ES-18
Modo de empleo de los auriculares Bluetooh ------ ES-19
ES
Especificaciones
ES
Controles
Versión Bluetooth:
V.2.1
Frecuencia operativa:
2.4 GHz Voltaje
de carga:
110-240V Tiempo
de recarga:
unas 2 horas
Autonomía en modo de espera: unas 100 horas
Tiempo de conversación:
unas 2 horas
Dimensiones de la pantalla:
1,5"; resolución: 128*128
Sistema:
GSM850/ 900/ GSM1800/ PCS 1900
Botón A: Si no está en el modo de espera, pulse para confirmar o seleccionar.
Botón B: Para hacer llamadas de emergencia.
Botón C: En el modo de espera, pulse para aumentar el volumen. En el modo
de opciones, pulse para moverse hacia arriba o incrementar un parámetro.
Botón D: En el modo de espera, pulse para disminuir el volumen. En el modo
de opciones, pulse para moverse hacia abajo o disminuir un parámetro.
Botón M: En cualquier modo, mantenga pulsado (3 segundos) para encender o
apagar la unidad. En cualquier modo, pulse para ir a la pantalla de inicio.
Cámara
Botón A
Conector USB
Lápiz táctil
Botón B
Botón C
Pantalla táctil
ES-01
Altavoz
Botón D
Botón M
ES-02
Instalación de las tarjetas SIM y Micro SD
Instalación de la tarjeta SIM
1. Extraiga
la batería.
Instalación de las tarjetas SIM y Micro SD
ES
Instalación de la tarjeta Micro SD
2. Abra la cubierta
metálica de la
tarjeta SIM.
1. Extraiga la
batería y la
BATERÍA
cubierta metálica
BATERÍA
de la tarjeta SIM.
2.Empuje la
cubierta de la
tarjeta micro SD
hasta que se
3. Instale la
4. Cierre la
tarjeta SIM
cubierta metálica
o Micro SD
y asegúrese de
con el
que la tarjeta
adaptador
SIM está bien
de tarjetas.
instalada.
3. Vuelva a colocar
la cubierta de la
tarjeta.
tarjeta Micro SD y
compruebe que
está bien cerrada.
Nota :
ES-03
abra e inserte la
1. Asegúrese primero de que el reloj esté apagado antes de
realizar la instalación anterior.
2. Asegúrese de que la batería está bien instalada.
ES-04
Apertura y cierre de la cubierta de la batería
ES
Uso de las funciones
Levante el cierre para
Interfaz de funciones principales
abrir la cubierta de la
Utilice el lápiz táctil con la pantalla táctil para cambiar al
batería y bájelo para
interfaz de funciones principales. El interfaz incluye un
cerrarla.
marcador de teléfono (Teléfono), mensajes SMS (Mensajes),
registro de llamadas (Llamadas), menú, sonidos e iconos de la
función de marcación rápida.
Carga y transferencia de datos
USB
Config
Mass Storage
COM port
Carga
Para cargar el reloj, conecte el cable USB
a su ordenador o directamente al puerto
USB del cargador.
Transferencia de datos
Utilice el cable USB para transferir los
datos entre el ordenador y el reloj. Una vez
conectado el reloj al ordenador, aparecerá
la pantalla de diálogo que se muestra a la
izquierda. Seleccione la opción "Dispositivo
de memoria" para acceder al modo de
transferencia de datos.
ES-05
Pantalla principal
Interfaz de funciones
principales
ES-06
Incluye funciones de composición de mensajes
(Escribir mensaje), buzón de correo, borradores,
mensajes enviados y ajustes de mensajes SMS.
2.Seleccione
1.Toque
2.Introduzca
1.Toque
para iniciar
el número y
para iniciar
el interfaz
toque
el interfaz de
para acceder
del marcador
o pulse el
mensajería.
al interfaz de
de teléfono.
botón A
edición de
mensajes.
para llamar.
Interfaz de funciones
principales
Interfaz de
marcador de
teléfono
Nota: Cuando el interfaz del
marcador está abierto, toque el
icono
para abrir el directorio
de teléfonos.
ES-07
ES
Funciones de mensajería
Funciones del marcador de teléfono
Interfaz de funciones
principales
3. Para
cambiar el
idioma del
teclado, toque
en Opciones >
Método de
entrada, y
seleccione uno
de los teclados
disponibles.
Interfaz de mensajería
Para mostrar
el teclado,
toque
.
Para ocultar el
teclado toque
.
ES-08
ES
Funciones de registro de llamadas
Interfaz del menú
Incluye llamadas perdidas, llamadas realizadas, llamadas
Incluye agenda telefónica, SMS (Mensajes), registro de
recibidas, borrar registro de llamadas, temporizador de
llamadas, configuración, multimedia, deportes, perfiles de
llamada y función de tiempo de llamada.
usuario, Bluetooth y funciones adicionales.
1.Toque
para acceder
al registro de
llamadas.
Interfaz de funciones
principales
Interfaz de historial
ES-09
1. Toque
para acceder
al interfaz del
menú.
2. Toque
para acceder
al interfaz de
registro de
llamadas.
Interfaz de registro
de llamadas
Nota: Los
auriculares no
son compatibles
con la función de
respuesta con
cualquier botón.
Seleccione
solamente esta
opción si sus
Interfaz de ajuste auriculares
disponen de esta
de llamadas
función.
Interfaz de funciones
principales
Interfaz del menú
Agenda
Mensajes
Registro de
Ajustes
Multimedia
Deportes
Perfiles de
Bluetooth
Administrador
ES-10
ES
Configuración
Agenda telefónica
Incluye organizador, calibración del lápiz, configuración
del teléfono, configuración de red, configuración de
seguridad y conectividad.
2. Toque en
"Añadir
contacto
nuevo" para
abrir el
interfaz de
edición.
1. Toque
para abrir la
agenda
telefónica.
Interfaz del menú
Interfaz de edición
ES-11
Agenda telefónica
3. Toque
las flechas
arriba y
abajo para
rellenar los
datos de
los nuevos
contactos.
1. Toque
para acceder
al interfaz de
configuración.
Interfaz del menú
Interfaz de ajustes
Contacto nuevo
ES-12
ES
Multimedia
Incluye cámara, visor de imágenes, grabación de vídeos,
reproducción de vídeos y reproducción de audio.
Deportes
Introducir la información de usuario
El usuario debe introducir la información siguiente y
guardarla en el reloj.
Si elige no configurar la información de usuario, los datos relacionados
con las actividades deportivas no serán aplicables a usted.
1.Toque
para abrir el
Interfaz de
interfaz de
multimedia.
Interfaz del menú
2. Toque
1. Toque
para acceder.
para acceder
a los ajustes
de su perfil.
deportes.
Interfaz del menú
Interfaz de deportes
Nota: Para reproducir un archivo
guardado en la grabación de sonidos,
desplácese hacia abajo de la pantalla
Peso
Sexo
Nivel de Longitud
actividad de zancada
y seleccione Grabación de sonido >
Opciones > Lista. Seleccione un
archivo y pulse Reproducir.
Interfaz de multimedia
ES-13
Edad
Nota:
Bajo (L), Medio (M),
Alto (H)
Altura
ES-14
ES
Deportes
Perfiles de usuario
Uso de la función de deportes
Usted puede elegir entre general, silencioso, reunión y exteriores.
1. Toque
para iniciar la
función de
deportes y
abrir el
interfaz de
pasos y
distancia
recorrida.
3. Deslice la
1. Toque
pantalla para
para acceder
cambiar al
a los perfiles
interfaz de
de usuario.
calorías y
velocidad
media.
2. Toque el
botón
“CORRER”
para
seleccionar
el tipo de
actividad.
Nota: Toque en el icono de “Pasos” para modificar la longitud
de la zancada.
Toque el icono
para subir los datos actuales del
ejercicio a la plataforma.
ES-15
Nota: Para
personalizar
el perfil de
usuario,
debe
seleccionar
primero
guardar para
guardar el
nuevo perfil.
Interfaz del menú
Perfiles de
usuario
Bluetooth
Toque en el icono de “Activar Bluetooth” para activar o
desactivar la función Bluetooth.
1. Toque
para acceder
al interfaz del
Bluetooth.
Interfaz del menú
Bluetooth
ES-16
Gestiona la memoria interna y la tarjeta de memoria.
1. Toque
para acceder al
administrador
de archivos.
1. Toque
para
acceder a la
función de
marcación
rápida.
Interfaz de funciones principales
Interfaz del menú
Administrador de archivos
Función de tono de llamada
1. Toque
y cambie al
modo
silencioso.
Interfaz de funciones
principales
ES-17
ES
Lista de marcación rápida
Administrador de archivos
Administrador de archivos
Nota: Solo se puede utilizar la función de marcación rápida cuando
haya añadido algún número de teléfono de la agenda telefónica.
Emergencias: Números de teléfono de emergencias
Pulse la tecla de emergencia roja durante 1 o 2 segundos para
llamar automáticamente al número de emergencias local. De no
marcar la llamada se activará el modo de llamada de emergencia.
Toque el
Marca el
icono del
número de
teléfono
emergencia
para acceder
o cancela
al interfaz del
la llamada.
marcador.
ES-18
Modo de empleo de los auriculares Bluetooth
Carga de la batería
¡La batería debe estar totalmente recargada antes de usar por
primera vez!
a. Conecte el cable del cargador a la toma de alimentación
de los auriculares.
b. Enchufe el cargador a una toma de corriente (AC).
c. El testigo se iluminará con una luz roja y se apagará
cuando la batería se haya recargado por completo.
d. Desconecte el cargador de los auriculares y de la toma de corriente.
Cómo encender y apagar los auriculares
a. Conecte los auriculares a la unidad Bluetooth.
b. Para encenderlos: mantenga pulsando el botón de
encendido/apagado hacia abajo y súbalo. La luz azul se enciende.
c. Para apagarlos: mantenga pulsado el botón de
encendido/apagado y bájelo. Una luz roja parpadeará hasta
que los auriculares se hayan apagado.
Emparejamiento de los auriculares con el teléfono con
función Bluetooth
a. Encienda los auriculares.
b. Realice una búsqueda de dispositivos Bluetooth con su teléfono.
c. Cuando su teléfono encuentre los auriculares, seleccione los
auriculares (HM3500) en la lista para confirmar el emparejamiento.
d. Introduzca la contraseña “0000” si se lo pide el teléfono.
e. Repita los pasos de emparejamiento si no consigue
emparejarlos. Solo es necesario emparejarlos una vez.
ES-19
ES
f. Cuando empareje los dispositivos con éxito, el testigo
empezará a parpadear con una luz azul para indicar que está
en el modo de espera y puede hacer o recibir llamadas.
Responder una llamada / Finalizar una llamada
a. Pulse el botón de respuesta/finalización de llamada de su teléfono.
b. O bien, pulse el botón de respuesta/finalización de llamada de
sus auriculares.
Rechazar la llamada
a. Pulse el botón de finalizar la llamada de su teléfono.
b. O bien, mantenga pulsado el botón de respuesta/finalización
de llamada durante 1 segundo cuando el teléfono esté sonando.
Hacer una llamada
a. Utilice su teléfono para marcar un número y pulse el botón
de respuesta/llamada de su teléfono para transferir la
llamada automáticamente a sus auriculares.
Rellamada del último número llamado
a. Pulse 2 veces el botón de respuesta/finalización de llamada
cuando los auriculares están en el modo de espera.
Ajuste del volumen de los auriculares.
a. Mantenga pulsado el botón del volumen de los auriculares
para ajustar el volumen.
Almacenamiento de los auriculares
a. Apague los auriculares.
b. Mantenga a una temperatura de -10°C/14°F a 60°C/134°F.
c. No deje los auriculares expuestos a la lluvia o a otros líquidos.
ES-20
ELIMINACIÓN
Estimado cliente,
Tenga siempre presente lo siguiente:
Las pilas consumibles o recargables no deben ser desechadas
en el cubo de la basura doméstica. Cada consumidor está
legalmente obligado a deshacerse de cualquier tipo de pilas,
tanto si contienen sustancias peligrosas como si no,
entregándolas en un punto de recogida local o devolviéndolas
al lugar de compra, de manera que sean eliminadas
apropiadamente y sin ocasionar daños al medioambiente.
Por favor, entregue únicamente pilas
consumibles o recargables gastadas.
BATERÍAS
Los aparatos desechables no deben arrojarse con el resto de
la basura doméstica. Si el aparato ha llegado al final de su
vida útil, el consumidor está obligado por la ley a desecharlo
por separado (p.ej. en un punto limpio del municipio). De esta
manera se evitan daños en el medioambiente.
Esta es la razón por la que los aparatos
llevan el símbolo mostrado a la izquierda.
ES-21