1
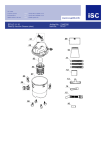
Anleitung_BT_VC_1450_SA_SPK1:_ 13.01.2010 8:22 Uhr Seite 12 GB To extend the suction hose (9) you can attach one or more of the elements which make up the 2-part suction tube (17) to the suction hose (9). Air regulator (Fig. 3/29) The air regulator (29) can be fitted between the suction hose (9) and the suction tube (17). The suction power of the nozzle can be infinitely adjusted using the air regulator (29). 5.5 Suction nozzles Dual-purpose nozzle (Fig. 3/14) The dual-purpose nozzle (14) is for vacuuming solids and liquids over medium to large areas. Various attachments can be fitted to the combination nozzle depending on what you sort of work you wish to carry out: Wet vacuuming Use the attachment for wet vacuuming (Fig. 3/26). Vacuuming smooth flooring Use the attachment for smooth floors (Fig. 3/27). Vacuuming carpets Use the attachment for carpets (Fig. 3/28). Fit the appropriate attachment into the combination nozzle (14) from underneath and secure it to the combination nozzle (14) using the side lugs (fig. 15). Ensure that the attachments are perfectly secure. Crevice nozzle (Fig. 3/23) The crevice nozzle (23) is designed for vacuuming solids and liquids in corners, edges and other areas that are difficult to access. 6. Operation 6.1 ON/OFF switch (Fig. 2/7) Switch position 0: Off Switch position I: Normal operation Switch position II: Automatic mode 6.2. Dry vacuuming Use the pleated filter (24) for dry vacuuming (see point 5.2). The tank bag (35) can also be fitted for removal particular heavy dirt (see point 5.3). Always ensure that the filters are perfectly secure. 6.3 Wet vacuuming For wet-vacuuming, use the foam filter (25) (see point 5.2). Check that the filter is securely fitted at all times. 12 Water drain screw (Fig. 1/11) To make the tank (10) easier to empty after wet vacuuming, it is fitted with a water drain screw (11). Open the water drain screw (11) by turning it anticlockwise and drain the liquid. Important! When wet vacuuming, the floating safety switch (21) turns off the wet and dry vacuum cleaner automatically when the maximum level is reached. Important! The wet and dry vacuum cleaner is not suitable for the vacuuming of combustible liquids. For wet vacuuming, use only the supplied foam filter. 6.4 Automatic mode Connect the power cable on your electric tool to the automatic socket-outlet (4) and connect the suction hose (9) to the extractor connector on your electric tool. Check that the connections are secure and airtight. You can use the supplied electric tool adaptor (22) to connect the suction hose (9) to the electric tool. To do so, fit it between the suction hose and the extractor port on the electric tool. Set the switch (7) on the wet and dry vacuum cleaner to position II, automatic mode. The moment you switch on the electric tool, the wet and dry vacuum cleaner switches on as well. When you switch off the electric tool, the wet and dry vacuum cleaner switches off as well after a pre-set delay. 6.5 Blowing Connect the suction hose (9) to the blow connector (19) on the wet and dry vacuum cleaner. 7. Cleaning, maintenance and ordering of spare parts Important! Always pull out the mains power plug before starting any cleaning work. 7.1 Cleaning Keep all safety devices, air vents and the motor housing free of dirt and dust as far as possible. 쎲 We recommend that you clean the appliance immediately after you use it. 쎲