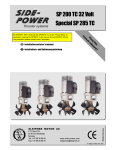
1
SP 30 S2i
SP 40 S2i
SP 55 Si
Thruster systems
m
GB
Installation and user's manual
D
Installations- und Bedienungsanleitung
N
Installasjons og brukermanual
F
Manuel d'installation et d'utilisation
I
Manuale d'istallazione e d'uso
FI
Asennusohje ja käyttäjän käsikirja
SLEIPNER MOTOR AS
P.O. Box 519
N-1612 Fredrikstad
Norway
Tel: +47 69 30 00 60
Fax:+47 69 30 00 70
www.side-power.com
[email protected]
an Ke
ua ep
l o th
nb is
oa
rd
!
Made in Norway
SIDEPOWER
© Sleipner Motor AS 2005
GB
Contents
Installation instructions
Technical specifications ......................................................... 4
Planning & important precautions ......................................... 6
Tunnel installation
Positioning of the tunnel / thruster ....................................... 10
How to shape the tunnel ends ............................................. 12
How to prevent drag from tunnel installation ....................... 14
Possible tunnel installation in sailboats ............................. 16
Tunnel installation in a GRP boat ................................... 18/20
Thruster installation
Gearhouse and motorbracket .............................................. 22
Oil tank & propeller .............................................................. 24
Electromotor .......................................................................... 26
Electrical installation ............................................................. 28
Control panel and control-leads .......................................... 30
Visual wiring diagram ........................................................... 32
Technical wiring diagram ..................................................... 33
Checklist for control of the installation ................................. 34
User's manual
Important user precautions .................................................. 36
How to use Sidepower thrusters ......................................... 38
Maintenance & service .......................................................... 40
Troubleshooting .................................................................... 42
Warranty statement ............................................................ 48
Spareparts list & drawing .............................................. 50/52
Service centres .................................................................... 56
DECLARATION OF CONFORMITY
We, Sleipner Motor AS
P.O. Box 519
N-1612 Fredrikstad, Norway
declare that this product with accompanying
standard remote control systems complies with
the essential health and safety requirements
according to the Directive 89/336/EEC of 23
May 1989 amended by 92/31/EEC and
93/68/EEC.
Inhalt
D
Hinweise zur Installation
Technische Daten .................................................................... 4
Planungs- & Vorsichtshinweise ............................................. 6
Tunnelinstallation
Positionierung von Tunnel / Thruster ................................... 10
Formgebung der Tunnelenden ............................................ 12
Optimaler Strömungsverlauf am Rumpf .............................. 14
Mögliche Tunnelinstallation in Segelbooten ....................... 16
Tunnelinstallation bei Glasfiberrumpf ............................ 18/20
Thrusterinstallation
Getriebe und Motorhalterung ................................................ 22
Ölvorratsbehälter & Propeller ............................................... 24
Elektromotor .......................................................................... 26
Installation der Elektrik ......................................................... 28
Steuerpanel und -kabel ........................................................ 30
Schaltplan - Übersicht .......................................................... 32
Schaltplan - Technisch ......................................................... 33
Checkliste zur Kontrolle der Installation .............................. 34
Bedienungsanleitung
Benutzerhinweise ................................................................. 36
Benutzung von Sidepower Thrustern ................................... 38
Wartung & Service ................................................................ 40
Fehlerbeseitigung ................................................................ 43
Garantieerklärung ................................................................ 48
Ersatzteileliste & -zeichnung ......................................... 50/52
Service Partner ................................................................... 56
KONFORMITÄTSERKLÄRUNG
Das von Sleipner Motor AS
P.O. Box 519
N-1612 Fredrikstad, Norwegen
gelieferte Produkt sowie die standard Bedienelemente erfüllen die Gesundheits- und Sicherheitsanforderungen entsprechend der Verordnung 89/
336/EEC vom 23 Mai 1989, Ergänzung 92/31/
EEC und 93/68/EEC.
Innhold
N
Installasjons instruksjoner
Tekniske spesifikasjoner ........................................................ 4
Planlegning og viktige forbehold ............................................. 7
Tunnel installasjon
Plassering av tunnel/thruster ................................................ 10
Utforming av tunnelåpninger ................................................. 12
Hvordan unngå turbulens rundt tunnelåpninger .................. 14
Forslag til tunnelinstallasjon på seilbåt ............................... 16
Tunnel installasjon i glassfiberbåter ............................... 18/20
Thruster installasjon
Gearhus og motorbraket ....................................................... 22
Oljebeholder og propeller ..................................................... 24
Elektromotor ........................................................................... 26
Elektrisk installasjon ............................................................. 28
Kontrollpanel og kontrollkabler ............................................. 30
Koblingsskjema elektrisk ...................................................... 32
Koblingsskjema ..................................................................... 33
Sjekkpunktliste for kontroll av installasjon ........................... 34
2
Brukermanual
Viktige forbehold .................................................................... 36
Hvordan operere Sidepower thrustere ................................. 38
Vedlikehold og servise ........................................................... 40
Problemer og løsninger ........................................................ 44
Garantierklæring ................................................................... 48
Reservedelsliste .............................................................. 50/52
Servise sentere .................................................................... 56
SP 30 S2i / SP 40 S2 i/ SP 55 Si
SAMSVARS ERKLÆRING
Sleipner Motor AS
Postboks 519
N-1612 Fredrikstad, Norge
Erklærer at dette produktet med tilhørende
standard kontrollsystemer er i samsvar med helse,
og sikkerhetskravene i henhold til Direktiv 89/
336/EEC FRA 23 Mai 89, korrigert av 92/31/
EEC og 93/68/EEC.
3.4 - 2005
F
Sommaire
Instructions de montage
Caractéristiques techniques ................................................... 4
Procédure et précautions importantes ................................... 8
Montage du tunnel
Positionnement du tunnel par rapport au propulseur ......... 10
Quelle forme donner aux extrémités du tunnel .................... 12
Prévention des traînées d’eau du tunnel ............................. 14
Montage possible du tunnel sur des voiliers ....................... 16
Montage du tunnel sur des bateaux en GRP .................. 18/20
Montage du propulseur
Embase et support moteur ................................................... 22
Réservoir à huile et hélice ..................................................... 24
Moteur électrique ................................................................... 26
Installation électrique ............................................................ 28
Panneau de contrôle et câblage ........................................... 30
Schéma visuel de branchement ........................................... 32
Schéma technique de branchement .................................... 33
Liste de vérifications pour contrôle de l’installation ............. 35
I
DECLARATION OF CONFORMITY
We, Sleipner Motor AS
P.O. Box 519
N-1612 Fredrikstad, Norway
declare that this product with accompanying
standard remote control systems complies with
the essential health and safety requirements
according to the Directive 89/336/EEC of 23 May
1989 amended by 92/31/EEC and
93/68/EEC.
Indice
Istruzioni per l’installazione
Caratteristiche tecniche ........................................................... 4
Pianificazione dell’installazione e precauzioni importanti ..... 8
Installazione del tunnel
Posizionamento del tunnel / del propulsore ........................ 10
Come sagomare le estremità del tunnel ............................. 12
Come prevenire la resistenza al moto dovuta all’installazione
del tunnel ................................................................................ 14
Possibile installazione del tunnel in imbarcazioni a vela .... 16
Installazione del tunnel in un’imbarcazione in vetroresina . 18/20
Installazione del propulsore
Piede e staffa del motore ...................................................... 22
Serbatoio dell’olio ed elica .................................................... 24
Motore elettrico ....................................................................... 26
Installazione parte elettrica ................................................... 28
Quadro comandi e cavi di controllo ...................................... 30
Schema di connessione visivo ............................................. 32
Schema di connessione tecnico .......................................... 33
Punti da controllare per l’installazione ................................. 35
FI
Manuel utilisateur
Précautions d’utilisation importantes ................................... 37
Comment utiliser les propulseurs Sidepower ..................... 38
Entretien et service ................................................................ 40
Recherche de pannes .......................................................... 45
Garantie ................................................................................. 49
Liste des pièces détachées et schémas ...................... 50/52
Service centres .................................................................... 56
Manuale d’uso
Importanti precauzioni ........................................................... 37
Come utilizzare i propulsori Sidepower ................................ 38
Manutenzione e servizio ........................................................ 40
Problemi e soluzioni .............................................................. 46
Garanzia ................................................................................. 49
Lista parti di ricambio e disegno .................................... 50/52
Centri di assistenza ............................................................. 56
DICHIARAZIONE DI CONFORMITÀ
La Sleipner Motor AS, P.O. Box 519, N-1612
Fredrikstad, Norvegia, dichiara che questo
prodotto, con gli annessi sistemi standard di
comando, è conforme ai requisiti essenziali di
igiene e sicurezza previsti dalla Direttiva 89/336/
EEC del 23 maggio 1989 e relative modifiche
contenute nella 92/31/EEC e nella 93/68/EEC.
Sisältö
Asennus ohjeet
Tekniset tiedot .......................................................................... 4
Suunnittelu ja tärkeitä varotoimenpiteitä ................................ 9
Tunnelin asennus
Tunnelin/keulapotkurin sijoitus ............................................. 10
Miten muotoilla tunnelin päät ................................................ 12
Miten välttyä tunnelin vastuksesta ......................................... 14
Tunnelin asennus purjeveneissä ......................................... 16
Tunnelin asennus lasikuituveneessä ............................. 18/20
Keulapotkurin asennus
Vaihteisto ja moottorilaippa .................................................. 22
Öljysäiliö ja potkuri ................................................................. 24
Sähkömoottori ........................................................................ 26
Sähköasennus ....................................................................... 28
Käyttöpaneeli ja käyttökaapelit .............................................. 30
”Visuaalinen” kytkentäkaava .................................................. 32
Tekninen kytkentäkaava ........................................................ 33
Asennuksen varmistuslista ................................................... 35
Käyttäjän käsikirja
Tärkeitä varotoimenpiteitä käyttäjälle ................................... 37
Miten Sidepower keulapotkuria käytetään ............................ 38
Ylläpito ja huolto .................................................................... 40
Vianetsintä ............................................................................. 47
Takuuehdot ............................................................................ 49
Varaosaluettelo ................................................................ 50/52
Huoltopisteet ........................................................................ 56
KIRJALLINEN
VAATIMUSTENMUKAISUUSVAKUUTUS
SP 30 S2i / SP 40 S2i / SP 55 Si
Me, Sleipner Motor AS
P.O. Box 519
N-1612 Fredrikstad, Norja
ilmoitamme tämän tuotteen liitettynä vakio
käyttöjärjestelmään, täyttävän terveys ja
turvallisuus direktiivit 89/336/EEC ,23 toukokuuta
1989, muutettu 92/31/EEC ja 93/68/EEC.
3.4 - 2005
3
Waterline
C
A
F
SP55Si
SP30S2i SP40S2i
Thrust [kg]
30
40
55
A [mm]
125
125
185
B [mm]
234
234
265
Cmin. [mm]
125
125
150
D [mm]
92
92
117
D recommended [mm] 184
184
234
Emin. [mm]
4
4
4
Emax. [mm]
5
5
6
Motor output [kW]
1,5
2,2
3,1
Voltage [V]
12
12
12/24
Weight [kg]
9,5
10
16
Gear oil capacity [ml]
50
Note: Emin.: wall thickness of a standard Sidepower tunnel
Emax.: maximum wall thickness when using other GRP,
steel or aluminium tunnels
GB
Technical specifications
IMPERIAL
METRIC
SP30S2i SP40S2i
SP55Si
Thrust [lbs]
66
88
121
A [in]
4,92
4,92
7,28
B [in]
9,2
9,2
10,4
Cmin. [in]
4,92
4,92
5,91
D [in]
3,6
3,6
4,6
D recommended [mm] 7,25
7,25
9,2
Emin. [in]
0,16
0,16
0,16
Emax. [in]
0,20
0,20
0,24
Motor output [Hp]
2
3
4
Voltage [V]
12
12
12/24
Weight [lbs]
21
22
35
Gear oil capacity [fl.oz]
1,69
Note: Emin.: wall thickness of a standard Sidepower tunnel
Emax.: maximum wall thickness when using other GRP,
steel or aluminium tunnels
Technische Daten
D
Motor:
Custom made reversible DC-motor.
Motor:
Gleichstrommotor
Gearhouse:
Seawater resistant bronze. Ballbearing at
propellershaft and combination of ballbearing and
slide bearing at driveshaft. Pre-filled and sealed
for life (SP30S2i and SP40S2i only).
Getriebegeh.:
Seewasserbeständige Bronze. Kugellager an
der Propellerachse, Kombination von Kugelund Gleitlager an der Antriebsachse.
Motor bracket: SP 30 S2i / SP 40 S2i / SP 55 Si
Glassfibre reinforced composite material.
Brass thread inserts.
Tunnel:
Cross spun with rowing G.R.P tunnel
Steel & aluminum tunnels available at request.
Propeller:
Symmetrical 4 blade kaplan propeller, fibreglass
reinforced composite.
Batteries:
Minimum recommended battery capacity
(cold crank capacity by DIN standard)
SP 30 S2i 12V : 200 CCA DIN
SP 40 S2i 12V : 300 CCA DIN
SP 55 Si 12V : 350 CCA DIN / 24V :175 CCA DIN
Max. use:
S2 = 3 min. or appr. 7-10% within a limited time
frame.
Safety:
Electronic time-lapse device protects against
sudden change of drive direction. Electric thermal
cut-off switch in electromotor protects against over
heating (auto reset when electro motor cools down).
Motorhalterung: SP 30 Si / SP 40 Si / SP 55 Si:
Glasfiberverbundmaterial. Eingegossene
Gewindehülsen aus Messing.
Tunnel:
Glasfibertunnel (Kreuzgewebe)
Stahl- & Aluminiumtunnel auf Anfrage.
Propeller:
Symmetrischer, 4 flügeliger Kaplanpropeller aus
Glasfiberverbundmaterial.
Batterie:
Empfohlene mind. Batteriekapazität
(Kaltstartkapazität nach DIN)
SP 30 Si 12V : 200 CCA DIN
SP 40 Si 12V : 300 CCA DIN
SP 55 Si 12V : 350 CCA DIN / 24V :175 CCA DIN
Betriebszeit:
S2 = 3 min. oder ca. 7-10% innerhalb eines
beliebigen Zeitraumes.
Sicherheit:
Elektronische Zeitverzögerung zum Schutz des
Getriebes bei plötzlichem Wechsel der Drehrichtung. Elektrischer Thermoschalter zum Schutz
des Motors gegen Überhitzung (erneute Betriebsbereitschaft nach Abkühlung).
Shearpin between electro-motor and driveshaft
protects electromotor and gearsystem if
propeller gets jammed.
If original Sidepower panel is used, the panel
shuts off automatically 6 minutes after last use.
Integrated microprocessor monitors solenoids,
reducing wear and risk of solenoid lock-in. Autostop of thruster in case of accidental solenoid
lock-in or if run signal is continous for more than
3 minutes.
4
SP 30 S2i / SP 40 S2 i/ SP 55 Si
Scherstift zwischen Elektromotor und Getriebeachse als Schutz, wenn der Propeller blockiert
ist. Nach der letzten Benutzung schaltet das
Original Side-Power Panel automatisch nach 6
Minuten ab. Der integrierte Mikroprozessor
überwacht das Relais und reduziert sowohl
Verschleiß, als auch Relaisblockade. Das
Bustrahlruder stoppt automatisch bei RelaisBlockade, oder bei Betrieb des Bugstrahlruders
von mehr als 3 Minuten.
3.4 - 2005
Tekniske spesifikasjoner
N
Caractéristiques techniques
F
Motor:
Spesialutviklet reversibel DC-motor.
Moteur:
Girhus:
Sjøvannsbestandig bronsje. Kulelagre på
propellaksel. Kule og glidelager komb. på
drivaksel.
Motorbraket:
SP 30 Si / SP 40 Si / SP 55 Si
Glassfiberforsterket komposit materiale. Kobber
tråd forsterket.
Embase: Bronze résistant à l’eau de mer. Roulements à billes
au niveau de l’arbre d’hélice et combinaison de
roulements à billes et de roulements à aiguilles au
niveau de l’arbre d’entraînement.
Tunnel:
Kryssvevet glassfiber.
Aluminium og ståltunnel på forespørsel.
Propell:
4-Blads kaplan propell i kompositmateriale.
Batterier:
Minimum anbefalt batteri størrelse.
(Kaldstart kapasitet etter DIN std.)
SP 30 Si 12V : 200 CCA DIN
SP 40 Si 12V : 300 CCA DIN
SP 55 Si 12V: 350 CCA DIN / 24V: 175 CCA DIN
Drift tid:
S2 = 3 min. Eller gjennomsnittlig 7-10% innen
en begrenset tidsperiode.
Temps d’utilisation maximum:
S2=3 mn ou ~7 - 10 % du temps sur une période limitée
Sikkerhet:
Elektronisk tidsforsinkelse forhindrer motorskade
ved rask retningsendring.
Motoren stanser automatisk ved overopphetning
(slår seg automatisk på etter nedkjøling).
Sécurité: Une temporisation électronique préserve l’embase
contre les brusques changements de direction. Un
disjoncteur thermique protège contre les surchauffes
(réinitialisation automatique lorsque le moteur
électrique a refroidi).
Brytepinne mellom drivaksel og motor beskytter
gir hvis propell blir blokkert.
Support moteur:
SP 30 Si / SP 40 Si / SP 55 Si: Matériel composite
renforcé en fibre de verre Inserts bronze
Tunnel:
Polyester renforcé fibre de verre. Tunnel en acier et en
aluminium disponible sur demande
Hélice:
Hélice 4 pales symétriques en fibre de verre renforcée
Batteries: Capacité batterie minimum recommandée
SP 30 Si 12V : 200 CCA DIN
SP 40 Si 12V : 300 CCA DIN
SP 55 Si 12V : 350 CCA DIN / 24V :175 CCA DIN
La goupille de cisaillement située entre le moteur et
l’arbre d’entraînement protège le moteur et l’embase en
cas de blocage de l’hélice. Si le panneau de
commande Sidepower d’origine est utilisé, il se
désactive automatiquement 6 minutes après la
dernière utilisation. Un microprocesseur intégré
surveille le relais de puissance, reduisant ainsi
l’usure et les risques de blocage. Le propulseur est
automatiquement stoppé en cas de blocage du relais
ou après 3 minutes de fonctionnement en continu.
Om orginalt Side-Power panel blir brukt så vil
dette slås av automatisk etter 6 minutter etter
siste gang trøsteren ble brukt.
Integrerte microprossessor føler hele tiden på
releet, reduserer slitasje og risk for ”heng” på
relé. Trøsteren vil stoppe automatisk etter 3
minutter om det oppstår ”heng” på relé, eller
om trøsteren går kontinuerlig i 3 minutter.
I
Caratteristiche tecniche
Motore:
Motore c.c. reversibile realizzato specificamente.
Piede:
In bronzo resistente all’acqua del mare. Cuscinetto a
sfere in corrispondenza dell’albero dell’elica e
combinazione di cuscinetto a sfere / supporto a slitta
in corrispondenza dell’albero di comando.
Moteur DC réversible d’origine.
Tekniset tiedot
FI
Moottori:
Erikoisvalmistettu molempiin suuntiin pyörivä
DC-moottori
Vaihteisto:
Meriveden kestävää pronssia. Kuulalaakeroitu
potkuriakseli, yhdistetty kuulalaakerointi ja
liukulaakerointi vetoakselissa.
Staffa del motore: SP 30 Si / SP 40 Si / SP 55 Si:
materiale composito rinforzato con fibra di vetro.
Inserti filettati in ottone.
Moottorilaippa: SP 30 Si / SP 40 Si / SP 55 Si:
Lasikuituvahvistettu komposiitti. Kierteet
pronssia.
Tunnel:
Tunneli:
In vetroresina filata trasversalmente in grosso, con
tunnel in G.R.P. “rowing”. Sono disponibili a richiesta
tunnel in acciaio e in alluminio.
Elica:
Elica in kaplan, simmetrica, a 4 pale, in materiale
composito rinforzato con fibra di vetro.
Batterie:
Capacità minima delle batterie raccomandata
(capacità avviamento a freddo secondo norma DIN)
SP 30 Si 12V : 200 CCA DIN
SP 40 Si 12V : 300 CCA DIN
SP 55 Si 12V : 350 CCA DIN / 24V :175 CCA DIN
Utilizzo max.: S2 3D 3 min. o 7-10% circa per un periodo di
tempo limitato.
Sicurezza: Un dispositivo elettronico di ritardo protegge da
danneggiamenti dovuti all’improvviso cambiamento
del senso di marcia. Un disgiuntore termico nel
motore elettrico protegge dal surriscaldamento (tale
dispositivo viene resettato automaticamente quando
il motore elettrico si raffredda).Una spina di sicurezza
inserito tra il motore elettrico e l’albero di comando
protegge il motore elettrico e il piede nel caso che
l’elica si blocchi. Un pannello originale Side Power si
spegnerà automaticamente dopo 6 minuti dall’ultimo
utilizzo. Un microprocessore integrato monitorizza i
solenoidi riducendo l’usura ed il rischio di
‘incollamento’.Blocco automatico del thruster in caso
di ‘incollamento’ accidentale dei contatti del
solenoide o se il segnale di comando persiste per
più di 3 minuti continui.
Ristikudottu lasikuitutunneli
Teräs ja alumiinitunneleita saatavana.
Potkuri:
Symmetrinen 4 lapa potkuri,
lasikuituvahvistettu komposiitti.
Akut:
Pienin suositeltu akkukapasiteetti
(CCA DIN normit)
SP 30 Si 12V : 200 CCA DIN
SP 40 Si 12V : 300 CCA DIN
SP 55 Si 12V : 350 CCA DIN / 24V :175 CCA DIN
Max. käyttö:
S2 = 3 min. Tai noin 7-10% rajoitetusta ajasta.
Turvallisuus:
Elektroninen aikaviive suojaa äkkinäisiltä
suunnanmuutoksilta. Elektroninen lämpörele
suojaa sähkömoottoria ylikuumenemiselta
(nollautuu automaattisesti moottorin jäähdettyä).
SP 30 S2i / SP 40 S2i / SP 55 Si
Sokka tai joustokytkin sähkömoottorin ja
vetoakselin välissä suojaavat sähkömoottoria ja
vaihteistoa jos potkuri jumittuu. Jos käytetään
alkuperäistä SidePower käyttöpaneelia, se
sammuu automaattisesti 6 minuutin kuluttua.
Sisäänrakennettu mikroprosessori valvoo
solenoidia, vähentäen kulumista ja solenoidin
lukkiutumisen riskiä. Keulapotkuri sammuu
automaattisesti jos solenoidi vahingossa
lukkiutuu tai jos keulapotkurin käyttösignaali on 3
minuuttia pidempi.
3.4 - 2005
5
GB
Planning and important precautions
Prior to installation, it is important that the installer reads this guide to ensure necessary acquaintance with this product.
The thruster must NOT be installed in compartments that require ignition proof electric equipment. If necessary, make a seperate
compartment.
The electromotor will generate some carbon dust so that any storage compartment must be separated from the thruster to prevent
the stored items from becoming dusty/dirty.
If you are installing the Sidepower in a small room /compartment, it should be ventilated to ensure cooling of the electromotor.
If the height in the room you are installing the Sidepower is limited, the Sidepower can be installed horizontally or at any angle in between.
If the electro motor is positioned more than 30o off vertical, it must be supported separately.
The electromotor must be handled carefully. Do not lift it by the internal connections or put it down on the driveshaft.
Beware to keep installation within adviced measurements. No part of the propeller or gearhouse must be outside the tunnel.
The electromotor, its components, contacts / plugs or other joints in the control cables must be mounted so that they will keep dry at
all times.
We advice to paint the gearhouse and propellers with antifouling. PS! Do not paint the zinc anodes, sealings or propellershafts.
Do not finish the inside of the tunnel with a layer of gelcoat / topcoat or similiar. It is only room for a thin layer of primer and two layers of
anti-fouling between the tunnel and the props.
With the boat on land, only run the thruster for a fraction of a second, as without resistance it will accelerate very fast to a damaging rpm.
Also, while the thruster is in air, make sure to avoid direction changes while the thruster is still running, as it might cause damage to
the thruster.
This manual is intended to support educated / experienced staff and is therefore not sufficient in all details for the correct installation.
Don't install the electromotor at close range to easily flammable objects as it will reach over 100oC before the temp. switch is
activated.
Do not store items close to the thruster motor as it gets hot as well as any loose items near the thruster motor can cause
problems with electrical wiring coming loose and shortcircuiting.
When installed in boats approved or classified according to international or special national rules, the installer is responsible for
following the demands in accordance with these regulations / classification rules. The instructions in this guide can not be guaranteed
to comply with all different regulations / classification rules.
NB ! Faulty installation of the tunnel, thruster or panel will render all warranty given by Sleipner Motor AS void.
Planungs- und Vorsichtshinweise
D
Dieses Manual vor der Installation lesen, um ausreichende Kenntnisse über das Produkt zu erlangen.
Der Thruster darf nicht in Räumen installiert werden, die funkenflugfrei sein müssen. Falls nötig ein eigenes Abteil schaffen.
Der Elektromotor verursacht Karbonstaub, deshalb sollte jeder Lagerraum vom Thruster abgetrennt werden, damit gelagerte
Gegenstände nicht verschmutzt/staubig werden.
Wird der Sidepower in einem kleinen Raum / Abteil installiert, so ist dieser zur ausreichenden Kühlung zu ventilieren.
Wenn die verfügbare Höhe begrenzt ist, kann der Sidepower in jedem Winkel bis zur Horizontalen eingebaut werden.
Wird der Motor mehr als 30o außerhalb der Vertikalen eingebaut, so muß dieser abgestützt werden.
Mit dem Elektromotor vorsichtig umgehen. Nicht an den Anschlüssen anheben oder auf die Antriebswelle absetzen.
Die Installation innerhalb der vorgegebenen Maße halten. Es darf kein Teil des Systems aus dem Tunnel herausstehen.
Der Elektromotor, Kontakte, Stecker und andere Verbindungen müssen so installiert werden, daß sie stets trocken bleiben.
Auf Getriebegehäuse und Propeller Antifouling auftragen. PS ! Zinkanoden, Dichtungen, Propellerachse nicht bemalen.
Die Innenseite des Tunnels nicht mit Gelcoat / Topcoat o.ä. behandeln. Nur eine dünne Schicht Primer und zwei Schichten Antifouling
auftragen, da zwischen dem Tunnel und den Propellern nur ein geringer Zwischenraum besteht.
Den Thruster an Land nur weniger als eine Sekunde betreiben, da ohne den Wasserwiderstand der Elektromotor beschädigt wird.
Vermeiden Sie, auch wenn die Bugschraube ausserhalb des Wassers ist, plötzliche Schubrichtungswechsel während der Thruster
noch läuft da dies den Elektromotor beschädigen kann.
Dieses Manual ist für Fachleute ausgelegt. Es sind daher nicht alle notwendigen Details für eine korrekte Installation enthalten.
Da der Motor über 100oC erreichen kann, darf dieser nicht in der Nähe von leicht entflammbaren Objekten installiert werden.
Da der Elektromotor sehr heiß werden kann, keine Gegenstände in dessen Nähe lagern. Auch lose Gegenstände in der Nähe
des Elektromotors können zu Problemen mit elektrischen Leitungen bis hin zu Kurzschlüssen führen.
Bei Abnahmepflicht nach nationalen oder internationalen Bestimmungen, ist der Installateur für die Einhaltung dieser
Bestimmungen verantwortlich. In diesem Leitfaden können zwangsläufig nicht alle weltweit geltenden Bestimmungen
berücksichtigt werden.
NB ! Bei falscher Installation von Tunnel, Thruster oder Kontrollpanel besteht keinerlei Garantieanspruch.
6
SP 30 S2i / SP 40 S2 i/ SP 55 Si
3.4 - 2005
N
Viktige forholdsregler og planlegning
Før installasjon må instruksjonsmanualen leses gjennom, og bruker må gjøre seg kjent med produktet.
Thrusteren må ikke installeres i rom som der gnister og høy varme medfører brannfare.
Elektromotoren vil produsere karbon støv fra børstene under drift slik att en lagringsplass må fysisk avskilles fra thrusteren for å
unngå att det man lagrer blir støvete / møkkete.
Elektromotoren er avhengig av god kjøling, sørg derfor for ventilasjon eller god plass rundt motoren ved montering.
Elektromotoren kan monteres i alle vinkeler i fra vertikalt til horisontalt der hvor plassutnyttelsen krever det.
Hvis elektromotoren monteres i en vinkel på mer en 30o, må den støttes opp separat.
Elektromotoren må håndteres forsiktig. Den må ikke bæres etter kontaktpunktene, og motoren må ikke settes ned på drivakselen.
Følg de anbefalte målene som er oppgitt i manualen, propell eller girhus må ikke stikke ut av tunnelen.
Elektromotoren, tilhørende komponenter, kontakter eller åpne ledd i strømkabler må monteres så de ikke utsettes for vann.
Vi anbefaler å male girhuset med bunnstoff. PS sinkanoder, pakninger og propellaksel skal ikke påføres bunnstoff.
Ikke påfør gelcoat / topcoat eller lignende inne i tunellen. Det er bare plasee til ett lag primer og to lag bunnstoff mellom tunellen og
propellene.
Når båten ligger på land har ikke elektromotoren den motstanden den har i vann. Motoren bruker derfor ekstremt kort tid før den
oppnår ødeleggende høyt turtall. Med båten på land, unngå hurtig bytte av driftsretning da det kan forårsake skade på truster.
Denne manualen er beregnet som støttemateriell for montører med erfaring / utdanning, og har derfor ikke all informasjon nødvendig
for å oppnå en korrekt installasjoner.
Installer ikke elektromotoren i nærheten av lett brennbart materiale, da motoren oppnår temperaturer over 100oC ved før den stopper
automatisk.
Området intill thrusteren må ikke benyttes som lagringsplass da motoren vil bli varm samt att dette vil medføre en fare for att elektriske
koblinger blir løse eller kortslutter
I de tilfeller båter skal godkjennes eller klassifiseres i henhold til internasjonal, eller spesielle standarder, er montør ansvarlig for at de
gjeldende lover og regelverk følges. Sleipner Motor AS kan ikke garantere at instruksjonene i denne manualen er i henhold til alle
gjeldende regelverk og standarder.
NB ! Ved feilaktig installasjon av panel, thruster eller tunnel frafaller all garanti stilt av Sleipner Motor AS.
SIDEPOWER
Thruster systems
SP 30 S2i / SP 40 S2i / SP 55 Si
3.4 - 2005
7
Procédure et précautions importantes
F
Avant de procéder au montage, il est important de lire ce guide de montage afin d’acquérir les connaissances nécessaires sur
ce produit.
Le propulseur NE DOIT PAS être installé dans un compartiment où l’équipement électrique nécessite qu’un témoin d’allumage soit
visible. Si nécessaire, le placer dans un compartiment individuel.
Si le Sidepower est installé dans une petite pièce, le compartiment devra être ventilé pour assurer un bon refroidissement de l’électromoteur.
Si la hauteur de la pièce dans laquelle le Sidepower est installé est limitée, celui-ci peut être monté horizontalement ou à n’importe quel
angle dans l’intervalle.
Si l’électromoteur est situé à plus de 30o à la verticale, il peut être supporté séparément.
Si l’électromoteur est monté en position horizontale, le connecteur du boîtier de contrôle électronique sur les relais doit être placé face
en dessous.
Le moteur électrique doit être manipulé avec précaution. Ne pas le soulever par les branchements internes ou le poser sur l’arbre
d’entraînement.
Bien respecter les dimensions recommandées pour l’installation de l’appareil. Aucune partie de l’hélice ou de l’embase ne doit se
trouver en dehors du tunnel.
Le moteur électrique, ses composants électriques ou autres joints dans les câbles de contrôle doivent être installés en hauteur de façon
à ce qu’ils restent au sec en permanence.
Nous recommandons d’entretenir l’embase et les hélices avec de l’antifouling. Par contre, ne pas peindre les anodes zinc, les joints
d’étanchéité et les arbres d’hélices.
Lorsque le bateau est au sec, le propulseur n’est pas freiné par la résistance de l’eau : ne pas le faire fonctionner plus qu’une
fraction de seconde et attendre qu’il s’arrête avant d’effectuer un renversement de marche, au risque de l’endommager.
Ce manuel a été conçu pour guider un professionnel expérimenté et n’est par conséquent pas suffisamment explicite pour une
parfaite installation.
Ne pas installer le moteur électrique trop près d’objets facilement inflammables étant donné que l’alarme température ne se
déclenche que lorsque la température atteint 100oC.
Lorsque le propulseur est monté dans des bateaux approuvés ou classés selon des règles internationales ou nationales spéciales,
l’installateur est responsable du suivi des demandes par rapport à ces réglementations, ces règles de classification. Les instructions de
ce manuel ne garantissent pas une parfaite harmonisation avec les différentes réglementations.
NB: Une installation non conforme du tunnel, du propulseur ou du panneau de contrôle annulera toute prise en garantie de la
part du fabricant (Sleipner Motor AS).
Pianificazione dell'installazione e precauzioni importanti
I
È importante che l’installatore, prima di procedere all’installazione, legga questa guida per familiarizzarsi con il prodotto.
Il propulsore NON deve essere installato in vani per i quali sono prescritti apparati elettrici a prova di scintilla. Se necessario, creare
un vano separato.
Se si sta installando il Sidepower in un locale o un vano piccolo, tale locale o vano deve essere aerato per assicurare il
raffreddamento del motore elettrico.
Se il vano o il locale nel quale si sta installando il Sidepower ha un’altezza limitata, è possibile installare il Sidepower
orizzontalmente, o con qualsiasi angolazione intermedia.
Se il motore elettrico è posizionato con un angolo superiore a 30o rispetto alla verticale, esso deve avere un apposito sostegno.
Se il motore elettrico è installato in posizione orizzontale, il connettore del scatola di comando elettronica situato sulle elettrovalvole
dev’essere rivolto verso il basso.
Occorre maneggiare con cura il motore elettrico. Non sollevarlo afferrandolo per i collegamenti interni e non appoggiarlo sull’albero di
comando.
Fare attenzione ad effettuare l’installazione nel rispetto delle misure consigliate. Nessuna parte dell’elica o del piede deve sporgere dal
tunnel.
Il motore elettrico, i suoi componenti, i contatti / le prese o altri punti di giunzione nei cavi di controllo devono essere montati in modo
che rimangano sempre asciutti.
Si raccomanda di verniciare il piede e le eliche con vernice antivegetativa. N.B.: non verniciare gli anodi di zinco, le sigillature e gli alberi
delle eliche.
Con l’imbarcazione fuori dall’acqua provare il thruster solo per frazioni di secondo; senza alcuna resistenza il motore tenderà ad
accelerare raggiungendo molto velocemente un numero di giri dannoso per l’unità. In queste condizioni evitare assolutamente di
effettuare cambi di direzione repentini mentre il motore è ancora in rotazione poichè si rischia di
danneggiare il thruster
Questo manuale è destinato ad essere utilizzato da personale già esperto, per cui in esso non viene spiegato in modo esauriente
come eseguire un’installazione corretta.
Non installare il motore elettrico in prossimità di oggetti facilmente infiammabili, perché esso può raggiungere temperature superiori
a 100oC prima che il termico venga attivato.
Quando l’installazione avviene in imbarcazioni di tipo approvato o classificate in base alle norme internazionali o a norme nazionali
speciali, l’installatore deve soddisfare i requisiti previsti in accordo con tali norme / regole di classificazione. Non si garantisce che le
istruzioni contenute in questa guida siano conformi a tutte le varie norme / regole di classificazione.
N.B.: l’installazione non corretta del tunnel, del propulsore o del pannello fa decadere ogni garanzia fornita da Sleipner Motor AS.
8
SP 30 S2i / SP 40 S2 i/ SP 55 Si
3.4 - 2005
FI
Suunnittelu ja tärkeitä varotoimenpiteitä
Ennen asennusta, on tärkeää, että asentaja lukee nämä ohjeet tunteakseen tuotteen riittävästi.
Keulapotkuria EI saa asentaa tilaan, johon vaaditaan kipinäsuojattuja laitteita. Jos kuitenkin asennetaan, on tehtävä erillinen lokero
keulapotkurille.
Jos asennat Sidepower-keulapotkurin pieneen tilaan, täytyy tilan olla ilmastoitu, jotta sähkömoottorin vaadittava jäähdytys varmistuu.
Jos tilassa mihin olet asentamassa Sidepoweria on rajoitettu korkeus, voidaan Sidepower asentaa vaakatasoon tai mihin tahansa
kulmaan tältä väliltä.
Jos sähkömoottori on enemmän kuin 30o pois pystyasennosta, se täytyy erikseen tukea.
Jos sähkömoottori on asennettu vaakatasoon, täytyy solenoidissa olevan käyttörasian liittimet osoittaa alaspäin.
Sähkömoottoria on käsiteltävä varoen. Älä nosta sitä kytkennöistä tai laita sitä vetoakselin päälle.
Pitäkää huolta siitä, että asennus on annettujen mittojen rajoissa. Potkuri ja vaihteisto täytyy olla kokonaan tunnelin sisällä.
Sähkömoottori, sen komponentit, liittimet ja muut liitokset käyttökaapeleissa on asennettava niin että ne pysyvät kuivina koko ajan.
Suosittelemme, että vaihteisto ja potkurit maalataan antifouling-maalilla. HUOM! Älä maalaa sinkkejä, tiivisteitä tai potkuriakselia.
Kun vene on maissa käytä keulapotkuria ainoastaan sekunnin murto-osia, koska ilman vastusta sen kierrosnopeus nousee
nopeasti haitalliseksi. Vältä myös suunnanvaihdoksia potkurin pyöriessä ilmassa, tämä voi vahingoittaa keulapotkuria.
Tämä käsikirja on tarkoitettu tueksi koulutetuille / kokeneille asentajille, eikä siksi ole jokaista yksityiskohtaa käsittelevä
asennusopas.
Älä asenna sähkömoottoria helposti syttyvien aineiden läheisyyteen, sillä se saavuttaa yli 100o lämpötilan ennen kuin lämpörele
aktivoituu.
Asennettaessa veneisiin, jotka ovat hyväksyttyjä tai luokiteltuja kansainväilisiin tai erityisiin kansallisiin sääntöihin, on asentajan
vastuu seurata näiden sääntöjen vaatimuksia. Tämän käsikirjan ohjeiden ei voida luvata täyttävän kaikkien maiden säännöksiä.
HUOM ! Tunnelin, keulapotkurin tai käyttöpaneelin väärä asennus katkaisee Sleipner Motor AS:n antaman takuun kokonaan.
SIDEPOWER
Thruster systems
SP 30 S2i / SP 40 S2i / SP 55 Si
3.4 - 2005
9
Fig. 1
Pivot
point
A
Fig. 3
B
B = 10,0m
A = 11,0m
min.
1/2Ø
Fig. 2
30 - 35 cm*
1/1 Ø
☺ ☺
3/4Ø
☺
Fig. 4
min.
1/3Ø
mi n
1/3 .
Ø
Ø
GB
Positioning of the tunnel / thruster
D
Positionierung von Tunnel / Thruster
The Thruster should be as far forward as possible (Fig. 1)
Because of the leverage effect around the boats pivot point, it is very
important for the thrusters actual effect in the boat to get it as far forward as possible. The relative distance change from the boats pivot
point to the thruster will be the change of actual thrust for the boat.
Tunnelplazierung soweit vorne wie möglich (Fig. 1)
Um einen möglichst großen Abstand vom Drehpunkt des Schiffes zu
erreichen, ist der Sidepower möglichst weit vorne einzubauen.
Eine Vergrößerung des Abstandes vom Drehpunkt des Schiffes
hat eine direkte Auswirkung auf die verfügbare Schubkraft.
Example :
A: 55kg thrust x11m leverage = 605kgm torque to rotate the boat
B: 55kg thrust x10m leverage = 550kgm torque to rotate the boat
In position A you will get 10% more thrust to turn the boat around.
Beispiel :
A: 55kg Schubkraft x 11m = 605kgm zum Wenden des Bootes
B: 55kg Schubkraft x 10m = 550kgm zum Wenden des Bootes
In Beispiel A stehen damit 10% mehr Schubkraft zur Verfügung.
The thruster should be placed as deep as possible (Fig. 2)
The tunnel should be placed as deep as possible for two reasons:
1. So that it does not suck down air from the surface which will
destroy the thrust completely.
2. To get as high as possible a water pressure to get maximum
efficiency from the propeller.
Generally the top of the tunnel should be a minimum of ½ x the
tunnel diameter below the waterline. This is an absolute minimum
and we recommend that it is at least ¾ x tunnel diameter (☺) below
the waterine. A really good distance is about 1/1 x tunnel diameter
(☺☺) below the waterline.
When you get the top of the tunnel 30-35 cm* / 1 feet below the
surface, other factors should be considered more important, i.e.
moving the thruster further forward.
Den Tunnel so tief wie möglich positionieren (Fig. 2)
Den Tunnel aus zwei Gründen so tief wie möglich positionieren:
1. Damit nicht Luft mitangesaugt wird, die die Schubkraft
vollständig herabsetzt.
2. Um einen möglichst hohen Wasserdruck zu erhalten, um die
maximale Effizienz des Propellers erreichen.
Die Oberkante des Tunnels muß mind. einen halben Tunneldurchmesser unterhalb der Wasserlinie liegen. Dieser Wert ist ein
absolutes Minimum. Besser ist ein Wert von ca. ¾ des
Tunneldurchmessers (☺). Optimal ist eine Abstand von 1/1 x
Tunneldurchmesser (☺☺) zur Wasserlinie.
Liegt die Oberkante des Tunnels 30-35cm* / 1fuß unterhalb der
Wasserlinie, können andere Faktoren berücksichtigt werden.
Optimal tunnel length
If the tunnel gets to long, the friction inside will reduce the water
speed and thereby the thrust.
If the tunnel gets to short (normally only in the bottom section of the
tunnel) you can get cavitation problems as the water will not have
had time to “straigthen” itself before reaching the propeller (Fig. 3&4).
This caviation will reduce performance as well as creating a lot of
noise.
The optimal tunnel length is 2 to 4 x tunnel diameter and you
should avoid tunnels longer than 6 to 7 times the tunnel diameter
as the performance reduction is then clearly noticeable.
10
Optimale Tunnellänge
Bei einem zu langem Tunnel reduziert der Reibungsverlust die
Wassergeschwindigkeit und damit die Schubkraft.
Bei einem zu kurzem Tunnel (häufig im unteren Bereich des
Tunnels) können Kavitationsprobleme entstehen, da sich das
Wasser nicht gerade auszurichten kann (Fig. 3&4). Diese Kavitation ist leistungsreduzierend und kann starken Lärm verursachen.
Die optim. Tunnellänge ist das 2-4 fache des Tunneldurchmessers.
Tunnellängen von mehr als dem 6-7 fachen des Tunneldurchmessers sollten vermieden werden, da dadurch die Leistung
reduziert wird.
SP 30 S2i / SP 40 S2 i/ SP 55 Si
3.4 - 2005
N
Plassering av
tunnel og thruster
Tunnelen bør plasseres lengst mulig frem i baugen (Fig. 1)
For å oppnå mest mulig moment rundt båtens dreiepunkt, er det
meget viktig å plassere tunnelen så langt fremme som mulig.
Avstanden fra båtens dreiepunkt til thruster vil ha stor betydning på
thrusterens effekt.
Eks.:
A: 55kg skyvekraft x 11m moment = 605kgm skyvekraft
B: 55kg skyvekraft x 10m moment = 550kgm skyvekraft
Posisjon A vil gi 10% mer skyvekraft til rotasjon.
Tunnelen skal plasseres dypest mulig (Fig. 2)
Tunnelen skal plasseres så dypt som mulig av to grunner:
1. Så luft ikke suges ned i tunnelen å ødelegger skyvekraften.
2. Ved å øke vanntrykket jobber propellen mer effektivt.
Hovedregelen er at tunnelen skal plasseres minimum ½ x tunnelen
dia. under vannlinje. Anbefalt dybde er minst ¾ x dia. under
vannlinje (☺). Når tunnelen er plassert 33-35 cm under vannlinjen
bør andre faktorer vurderes som viktigere, d.v.s. å plassere
tunnelen lengre frem.
Optimal tunnel lengde
Dersom tunellen blir for lang vil friksjonen i tunellen reduser
vannhastigheten og derved effekten.
Dersom tunellen blir for kort (normalt bare i nedre del av tunellen)
kan det oppstå kavitasjons problemer da vannet ikke har tid / avstand til å «rette opp strømningsretningen» før det treffer propellen
(Fig. 3&4). Denne kavitasjonen vil redusere effekten og lage mye
støy.
Den optimale tunell lengden er 2 til 4 ganger tunell diameteren og
dersom tunellen blir så mye som 6 til 7 ganger diameteren i lengde
vil effekt tapet bli klart merkbart.
I
Posizionamento del tunnel/propulsore
Il propulsore dev’essere posizionato il più a prora possibile (Fig. 1)
Dato che l’effetto di leva aumenta all’aumentare della distanza dal
punto di leva dell’imbarcazione, è molto importante che i propulsori
siano installati il più possibile verso prora. La variazione della
distanza tra il punto di leva dell’imbarcazione e il propulsore provoca
una variazione proporzionale della spinta effettiva dell’imbarcazione.
Esempio:
A: spinta di 55 kg x braccio di 11 m = coppia di 605 kgm, utilizzabile
per far ruotare l’imbarcazione.
B: spinta di 55 kg x braccio di 10 m = coppia di 550 kgm, utilizzabile
per far ruotare l’imbarcazione.
Nella posizione A si ha il 10% di spinta in più, utilizzabile per far
ruotare l’imbarcazione.
Il propulsore deve essere installato alla massima profondità
possibile (Fig. 2)
Il tunnel deve essere installato alla massima profondità possibile, per
due motivi:
1. in modo che non venga aspirata dell’aria dalla superficie (ciò
distruggerebbe completamente la spinta);
2. per avere la massima pressione dell’acqua, onde ottenere la
massima efficienza dall’elica.
In genere la parte superiore del tunnel deve trovarsi a una distanza
minima di almeno ½ x diametro del tunnel al di sotto della linea di
galleggiamento. Tale distanza è un valore minimo assoluto; si
raccomanda di adottare una distanza pari ad almeno ¾ x diametro
del tunnel al di sotto del linea di galleggiamento. Risultati ancora
migliori si otterranno con una distanza corrispondente a circa 1/1 x
diametro del tunnel al di sotto della linea di galleggiamento.
Quando la parte superiore del tunnel si trova a 30-35 cm* (1 piede)
sotto la superficie, occorre considerare altri fattori più importanti, per
esempio lo spostamento del propulsore ancora più verso prora.
Lunghezza ottimale del tunnel
Se il tunnel è troppo lungo, l’attrito al suo interno riduce la velocità
dell’acqua e, di conseguenza, la spinta. La lunghezza ottimale del
tunnel è pari a 2-4 volte il diametro del tunnel.
Tuttavia ciò non ha alcuna influenza quando la lunghezza del tunnel
è inferiore a 6-7 volte il diametro del tunnel.
F
Positionnement du tunnel par
rapport au propulseur
Le propulseur devra être placé le plus possible à l’avant du
bateau (voir schéma n° 1)
En raison de l’effet levier produit autour du point pivot des bateaux,
il est très important, pour la performance réelle des propulseurs de
bateau, qu’ils soient placés le plus possible à l’avant du bateau. Le
couple de rotation dépendra directement de la distance entre le
propulseur et le point pivot du bateau.
Exemple :
A è 55 kgf de poussée x 11 m = 605 m.kgf de couple de rotation
B è 55 kgf de poussée x 10 m = 550 m.kgf de couple de rotation
Dans le cas de la position A, vous obtiendrez 10 % de plus de
couple de rotation.
Le propulseur devra être placé le plus possible en profondeur
(voir schéma n° 2)
Le propulseur devra être placé le plus possible en profondeur pour
2 raisons :
1. De manière à ne pas aspirer l’air en surface ce qui fait chuter
totalement la poussée.
2. Pour avoir une pression d’eau aussi élevée que possible afin
que le rendement de l’hélice soit maximum.
Généralement, la partie supérieure du tunnel sera au minimum
égale à ½ fois le diamètre du tunnel situé sous la ligne de
flottaison. C’est le strict minimum autorisé et nous conseillons qu’il
soit au moins égal au ¾ du diamètre. La distance idéale sera une
fois le diamètre du tunnel sous la ligne de flottaison.
Lorsque la partie supérieure du tunnel est à plus de 30/35* cm sous
la flottaison, il est souhaitable de déplacer le propulseur plus avant.
Longueur optimale du tunnel
Si le tunnel est trop long, les frictions à l’intérieur de celui-ci réduiront
la vitesse de l’eau et par conséquent la poussée.
La longueur optimale du tunnel varie entre 2 et 4 fois le diamètre
du tunnel. Jusqu’à 6 à 7 fois le diamètre du tunnel, les frottements
sont acceptables.
FI
Tunnelin / keulapotkurin sijoitus
Keulapotkuri pitäisi asentaa niin eteen kuin mahdollista (Kuva 1)
Veneen kääntöpisteen vipuvaikutuksen ansiosta, on erittäin
tärkeätä keulapotkurin todellista työntövoimaa ajatellen, että se
asennetaan niin eteen kuin mahdollista. Relatiivinen etäisyys
veneen kääntöpisteestä keulapotkuriin on suoraan verrattavissa
keulapotkurin todelliseen työntövoimaan.
Esimerkki:
A: 55kg työntö x 11m etäisyys = 605kgm työntövoima veneen
kääntämiseen
B: 55kg työntö x 10m etäisyys = 550kgm työntövoima veneen
kääntämiseen
Vaihtoehdossa A saat 10% enemmän voimaa veneen kääntämiseen.
Keulapotkuri pitäisi asentaa niin syvälle kuin mahdollista
(Kuva 2)
Tunneli pitäisi olla mahdollisimman syväällä kahdesta syystä:
1. Ettei se imaise ilmaa pinnasta, jolloin työntövoima katoaa.
2. Saadakseen suurimman mahdollisen vedenpaineen, jolloin
potkurista saadaan maksimi teho.
Yleisesti ottaen pitäisi tunnelin yläreunan olla ½ x tunnelin
halkaisijan verran vesilinjan alapuolella. Tämä on ehdottomasti
minimi ja suosittelemme vähintään ¾ x tunnelin halkisijan verran
vesilinjan alla. Oikein hyvässä asennuksessa tunnelin yläreuna on
1 x tunnelin halkaisija vedenpinnan alapuolella.
Jos saat tunnelin yläreunan 30-35 cm* vedenpinnan alapuolelle,
muita tekijöitä pitäisi pitää tärkeämpinä, ja siirtää keulapotkuria
eteenpäin.
Optimaalinen tunnelin pituus
Jos tunneli on liian pitkä, vähentää vastus vedenvirtausta ja näin
ollen myös työntövoimaa.
Optimaalinen tunnelin pituus on 2-4 x tunnelin halkaisija.
Tällä vastuksella on kuitenkin erittäin pieni merkitys, kun tunnelin
pituus on alle 6-7 x tunnelin halkaisija.
SP 30 S2i / SP 40 S2i / SP 55 Si
3.4 - 2005
11
Fig. 2
Fig. 1
R = 0,1 x D (10%)
D
R = 0,1 x D (10%)
☺
Fig. 4
Fig. 3
Tunnel ends
GB
Formgebung der Tunnelenden
D
Rounded tunnel ends will maximize thrust and minimize
noise.
Abgerundete Tunnelenden erhöhen die Schubkraft und
reduzieren das Geräuschniveau.
We recommend to round the tunnel connection to the hull-side as
much as possible.
The optimum rounding has a radius of 10% of the tunnels diameter.
Der Bereich Tunnelende / Außenseite des Rumpfes ist soweit
möglich abzurunden. Der optimale Wert für den Radius dieser
Rundung beträgt 10% des Tunneldurchmessers.
Important advantages over sharp tunnel to hull connections are:
Vorteile gegenüber einer scharfen Tunnel / Rumpfverbindung sind:
1. The rounded tunnel end will prevent creation of turbulence /
cavitation that will come from a sharp tunnel end when water
passes by fast, thereby preventing a double negative impact on
the thrust and noise level (Fig. 1 & 2 ).
- The turbulence / cavitation blocks the outer area of the tunnel
and thereby reduces the effective tunnel diameter and thrust.
- The turbulence / cavitation hits the propeller and thereby
reduce the propellers performance and creates noise.
1. Abgerundete Tunnelenden verhindern Turbulenzen / Kavitation,
wie sie an scharfenkantigen Tunnelenden auftreten. Damit
werden zwei negative Auswirkungen auf Schubkraft und
Geräuschentwicklung vermieden (Fig. 1 & 2).
- Turbulenz / Kavitation blockieren den äußeren Tunnelbereich.
Dadurch werden effektiver Tunneldurchmesser und Schubkraft reduziert.
- Die Turbulenz / Kavitation trifft auf den Propeller und reduziert
dessen Effektivität und führt zu zusätzl. Geräuschentwicklung.
2. The curved tunnel end makes the thruster take water also from
along the hull-side, creating a vacuum that will suck the boat
sideways and thereby give additional thrust (Fig. 3 & 4).
With a sharp tunnel end, the thruster will be unable to take water
from along the hull-side, and you will not get the desired vacuum
and additional thrust.
This "free" additional thrust can in optimal installations be as
much as 30 - 40% of the total thrust.
NB!
NB!
A Sidepower thruster propeller does not cavitate at working
speed so that all cavitation and cavitation noise in the tunnel
will be caused by the tunnel installation.
Even if it is not possible to make the perfect rounding, it is
very important to round the tunnel end as much as possible.
An angled tunnel to hull connection will also do much of the
same job as a rounded connection (see page 20, Fig. 1b & 1d).
12
2. Abrundungen ermöglichen, daß Wasser entlang der Rumpfaußenseite angesaugt werden kann. Dadurch entsteht ein
Vakuum ("zusätzliche" Schubkraft"), das das Schiff seitwärts
bewegt (Fig. 3 & 4). Bei scharfkantigen Enden kann kein
Wasser entlang der Rumpfaußenseite angesaugt werden,
wodurch das benötigte Vakuum nicht zustande kommt.
Diese Schubkraft kann bei optimaler Installation bis zu 30-40%
der absoluten Schubkraft betragen.
NB !
NB !
Sidepower Propeller sind so ausgelegt, daß sie nicht
kavitieren, sodaß die Geräuschentwicklung aufgrund von
Kavitation durch die Tunnelinstallation bedingt ist.
Ist eine optimale Abrundung nicht möglich, so sind die
Tunnelenden soweit möglich abzurunden. Angeschrägte
Tunnel / Rumpfverbindungen sind zu einem gewissen Grad
ebenfalls mit ähnlich positiven Auswirkungen wie eine
Abrundung verbunden (siehe Seite 20, Fig. 1b & 1d).
SP 30 S2i / SP 40 S2 i/ SP 55 Si
3.4 - 2005
N
Tunnelåpninger
Avrundede åpninger vil minke støy, og maksimere effekt.
Vi anbefaler å avrunde tunnelåpningene mest mulig.
Den optimale avrundingen har en radie som er 10% av tunnelens
diameter.
Hvorfor er en avrundet tunnelåpning så viktig?
1. En avrundet tunnelåpning vil forhindre at det oppstår turbulens /
kavitasjon, noe som vil oppstå ved en installasjon med skarpe
kanter. Turbulensen forårsaker mer støy, og begrenser
skyvekraften.
- Turbulensen / kavitasjonen blokkerer tunnelen og svekker
skyvekraften.
- I det kavitasjon og turbulens når propellen påvirkes ytelsen til
denne og øker støyen.
2. En avrundet tunnelåpning gjør også at thrusteren suger vann
langs skroget på båten. Dermed oppstår det et lavtrykk som vil
hjelpe å suge båten i dreieretningen. Med skarpe åpninger
klarer ikke thrusteren å suge vann langs skroget, og lavtrykket
uteblir. Så mye som 40% av skyvekraften har blitt målt til å ligge
her på noen installasjoner.
NB! Propellene til Sidepower thrustere kaviterer ikke på arbeidshastighet, så kavitasjon og støy som oppstår som følge av
kavitasjon, skapes av tunnel installasjonen.
NB! Selv der en perfekt avrunding ikke er mulig er det viktig å
runde av kantene så mye som mulig, en tunnelåpning med
skråkant vil ha stor effekt fremfor en med skarpkant (se side
20, ill. 1b & 1d).
D
Estremità del tunnel
F
Extrémités du tunnel
Un tunnel dont les extrémités sont arrondies favorisera
au maximum la poussée et minimisera le bruit.
Nous conseillons d’arrondir autant que possible les raccords du
tunnel sur les côtés de la coque.
Le rayon de l’arrondi optimum représente 10% du diamètre du tunnel.
Avantages importants d’un tunnel aux extrémités arrondies:
1. Une extrémité du tunnel arrondie évite la création de turbulences/
cavitations provenant d’une vitesse d’eau trop grande sur une
arête vive et évite par conséquent un double impact négatif sur
la poussée et le niveau sonore (voir schémas n° 1 et 2).
- les turbulences/cavitations bloquent le passage extérieur du
tunnel et réduisent par conséquent le diamètre efficace du
tunnel et la poussée.
- les turbulences/cavitations atteignent l’hélice et par conséquent
réduisent ses performances et provoquent du bruit.
2. Les extrémités arrondies du tunnel permettent au propulseur de
prendre également de l’eau le long des côtés de la coque, créant
un vide qui aspirera le bateau latéralement et donnera par conséquent une poussée supplémentaire (voir schémas n° 3 et 4).
Avec une extrémité en arête vive, le propulseur ne sera pas
capable de prendre l’eau le long des côtés de la coque, et vous
n’obtiendrez pas le vide et la poussée supplémentaire escomptés.
Le surplus de poussée peut être au plus de 30-40 % de la
poussée totale, dans le cas d’une installation optimale.
NB : L’hélice d’un propulseur Sidepower ne cavite pas en
fonctionnement, toute cavitation et bruit de cavitation seront
causés par une installation non conforme.
NB : Même s’il n’est pas possible de faire un arrondi parfait, il est
très important d’arrondir l’extrémité du tunnel au maximum.
Un raccordement biseauté entre le tunnel et la coque jouera
également en grande partie le même rôle qu’un raccord
arrondi (voir page 20, schéma n° 1b et 1d).
Tunnelin päät
FI
L’arrotondamento delle estremità del tunnel consente di
avere la massima spinta e ridurre al minimo la rumorosità.
Pyöristetyt tunnelin päät antavat suurimman
työntövoiman ja vähentävät melua.
Si raccomanda di arrotondare il più possibile il raccordo del tunnel
alla fiancata dello scafo. L’arrotondamento ottimale corrisponde a
un raggio di curvatura pari al 10% del diametro del tunnel.
L’arrotondamento delle estremità del tunnel implica degli importanti
vantaggi:
Suosittelemme, että tunnelin liitosta veneen kylkeen pyöristetään
niin paljon kuin mahdollista.
Optimaalinen pyöristyksen säde on 10% tunnelin halkaisijasta.
1. Le estremità arrotondate del tunnel impediscono la creazione di
turbolenze e la cavitazione (che viene invece provocata dalle
estremità a spigolo vivo del tunnel quando l’acqua passa ad
alta velocità); in tal modo si evita un doppio effetto negativo,
sulla spinta e sulla rumorosità (Figg. 1 e 2).
- La turbolenza / cavitazione blocca l’area esterna del tunnel e
in tal modo riduce il diametro efficace del tunnel e la spinta.
- La turbolenza / cavitazione colpisce l’elica, riducendone in tal
modo le prestazioni e creando rumore.
1. Pyöristetty tunnelin pää estää turbulenssin / kavitaation
syntymistä, joka syntyy kun vesi virtaa korkealla nopeudella
terävän reunan ohi, näin ollen estäen negatiivisen vaikutuksen
työntövoimaan ja meluun (Kuvat 1 & 2).
- Turbulenssi / kavitaatio sulkee tunnelin ulkopuolisen alueen ja
näin ollen vähentää tunnelin tehokasta halkaisijaa ja
työntövoimaa.
- Turbulenssi / kavitaatio osuu potkuriin ja vähentää potkurin
tehoa ja lisää melua.
2. L’estremità ricurva del tunnel fa sì che il propulsore aspiri l’acqua
anche dalle fiancate dello scafo, creando una depressione che
sposta lateralmente l’imbarcazione (si tratta in definitiva di una
spinta aggiuntiva) (Figg. 3 & 4).
Quando le estremità del tunnel sono a spigolo vivo, il propulsore
non è in grado di aspirare l’acqua dalle fiancate, per cui non si
ha l’aspirazione desiderata e la spinta aggiuntiva.
Questa spinta aggiuntiva, nelle installazioni ottimali, può
raggiungere il 30 - 40% del spinta totale.
2. Pyöristetyt tunnelin päät sallivat myös keulapotkurin ottavan
vettä veneen kylkeä pitkin, jolloin syntyy alipaine joka ”imee”
venettä sivuttain ja näin antaa lisää työntövoimaa (Kuvat 3 & 4).
Terävällä tunnelin reunalla, keulapotkuri ei pysty ottamaan vettä
veneen kylkeä pitkin, ja haluttua alipainetta ja lisävoimaa ei
saavuteta.
Tämä ”ilmainen” lisä työntövoimaan voi olla jopa 30 - 40%
todellisesta työntövoimasta.
N.B.: l’elica del propulsore Sidepower non cavita alle velocità di
regime, per cui tutta la cavitazione, e tutto il rumore da essa
prodotto, saranno provocati dall’installazione del tunnel.
N.B.: anche se non è possibile ottenere un arrotondamento
perfetto, è tuttavia molto importante arrotondare il più
possibile le estremità del tunnel. Una connessione angolata
tra tunnel e scafo è efficace quanto una connessione
arrotondata (v. a pag. 20, Figg. 1b e 1d).
Hyvän tunneli/runko -liitoksen etuja on:
HUOM! Sidepowerin potkuri ei kavitoi työnopeuksissa, joten kaikki
kavitaatio ja kavitaatiomelu johtuvat tunnelin väärästä
asennuksesta.
HUOM! Jos ei ole mahdollista tehdä täydellistä pyöristystä, on
erittäin tärkeää, että tunnelin päät pyöristetään niin paljon
kuin mahdollista. Tunnelin ja kyljen välinen kulmaliitos
ajaa suuren osan samasta asiasta kuin pyöristetty liitos
(katso sivu 20, kuvat 1b & 1d).
SP 30 S2i / SP 40 S2i / SP 55 Si
3.4 - 2005
13
Fig. 1
Fig. 2
Fig. 3
☺
☺
GB
Prevent drag from tunnel
D
Optimaler Strömungsverlauf am Rumpf
A possible problem in sailboats or fast powerboats, is that they get
a drag from the back face of the tunnel, as this becomes a “flat”
area facing the water flow (Fig. 1).
Segelboote und sehr schnelle Booten können gelegentlich durch
auf die rückseitige Fläche des Tunnels auftreffendes Wasser
gebremst werden (Fig. 1).
This can also create problems with the thruster spinning (passive)
and making noise while sailing or driving the boat with water being
pushed through the tunnel at high speed.
Dies kann dazu führen, daß sich der Thruster durch den permanenten Wasserdurchfluß hörbar passiv zu drehen beginnt.
This can be solved in two different ways, depending on what is
possible or easier to do.
1. The best solution which normally reduces the drag most, is to
make a recess in the hull at the back of the tunnel.
Thereby the back face is gone and about all the drag (Fig. 2).
The depth and shape of this recess will depend on the boat.
Basically you should not see the back face of the tunnel when
standing directly in front of the tunnel at the angle of the boats
centreline.
The angle up or down backwards of the insert in the hull,
depends on the hullshape, but normally it is angled slightly
down because of the water flow on this area of the hull.
2. The drag will also be reduced a lot, especially in fast power
boats, by making a deflector / spoiler in front of the tunnel.
This will push the water flow out from the hull so that most of it
passes by the back face of the tunnel (Fig. 3).
The shape and size of this deflector will depend on the hull
shape. Basically you should not see the back face of the tunnel
when standing directly in front of the tunnel at the angle of the
boats centreline.
The easiest way of making this is to let a part of the tunnel stick
out in the lower forward area of the hole, and use this as a
support to mould a soft curve / spoiler shape.
Remember to still round the tunnel ends as much as possible to
get optimum thruster performance and minimum noise.
More information on how to practially do this on page 20.
14
Das Problem kann je nach Möglichkeit auf zwei Arten beseitigt
werden.
1. Der störende Effekt wird am deutlichsten reduziert, indem man
im Rumpfbereich hinter dem Tunnel eine Aussparung vornimmt.
Dadurch werden Auftreffläche und störender Effekt eliminiert
(Fig. 2).
Tiefe und Form dieser Aussparung hängen vom Boot ab.
Die Innenseite des Tunnels sollte von vorne prinzipiell nicht
sichtbar sein.
Der mögliche Winkel der Aussparung hängt meist von der
Rumpfform ab. Bedingt durch die Wasserströmung in diesem
Bereich sollte dieser Winkel leicht nach unten gerichtet sein.
2. Der Geschwindigkeitsverlust kann speziell bei schnellen Booten
durch einen Abweiser bzw. Spoiler vor dem Tunnel deutlich
reduziert werden.
Das Wasser wird so beeinflußt, daß es größtenteils an der
frontalen Fläche vorbei geleitet wird (Fig. 3).
Form und Größe des Abweisers hängen von der Rumpfform ab.
Prinzipiell sollte auch hier die Innenseite des Tunnels von vorne
nicht sichtbar, sondern durch den Abweiser verdeckt sein.
Dieser läßt sich einfach realisieren, indem man den Tunnel ein
Stück aus dem Rumpf herausstehen läßt und darauf einen
geschwungenen Abweiser / Spoiler formt.
Die Tunnelenden sind zur vollen Leistung und minimalen
Geräuschentwicklung des Thrusters weitgehend abzurunden.
Weitere Informationen siehe Seite 20.
SP 30 S2i / SP 40 S2 i/ SP 55 Si
3.4 - 2005
N
Motstand forårsaket av tunnel
F
Prévention des traînées d'eau du tunnel
Et mulig problem for seilbåter eller meget hurtiggående båter er
motstand i tunnelen. Aktre ende på tunnelen vil være en liten
loddrett flate mot vannstrømmen som skaper uønsket motstand.
Sur les voiliers ou les vedettes rapides, il est possible d’être confronté
au problème de traînées sur la face arrière du tunnel étant donné que
cela provoque une surface plate face au flux de l’eau (voir schéma n° 1).
Denne flaten kan også forårsake problemer med at vann føres inn i
tunnelen under seilas, eller kjøring i høy fart og får da propellen til
å rotere, dette skaper uønsket støy.
Cela peut également créer des problèmes d’entraînement d’hélice et
engendrer du bruit pendant la navigation ou dévier le bateau en
raison de l’eau qui entre à grande vitesse dans le tunnel.
Det er to mulige løsninger på problemet, avhengig av hva som er
enklest å få til på båten.
Ce problème peut être résolu de 2 manières, selon les difficultés de
mise en œuvre:
1. Den løsningen som vanligvis reduserer motstanden mest er å
lage en fordypning i skroget i aktre ende av tunnelåpningen.
Den loddrette flaten vil da forsvinne og dermed motstanden.
Hovedregelen å følge er at bakkanten av tunnelen ikke skal
synes når man står rett foran båten å titter akterover langs båten
senterlinje. Dybden, utformingen og vinkling av fordypningen
avhenger av båttypen, og hvordan vannet følger skroget, men
de fleste båter vil være tjent en fordypning som vinkler lett
nedover (Fig. 2).
1. La meilleure solution, qui réduira normalement au mieux les
traînées, est de faire un décrochement dans la coque à l’arrière
du tunnel. De ce fait, la face arrière est éliminée ainsi que toutes
les traînées. La profondeur et la forme de ce décrochement seront
fonction du bateau. Normalement, on ne pourra pas voir la face
arrière du tunnel lorsqu’on se trouvera face au tunnel.
L’inclinaison verticale, à l’arrière de l’entrée de la coque, dépend
de la forme de la coque ; mais l’inclinaison s’effectue généralement légèrement vers le bas en raison du flux de l’eau à cet endroit.
2. Les traînées seront également réduites de beaucoup, et spécialement sur les vedettes rapides, à l’aide d’un déflecteur à l’avant du
tunnel. Cela repoussera le flux de l’eau en dehors de la coque et
ainsi la majeure partie de l’eau passera par la face arrière du
tunnel (voir schéma n° 3).
La forme et la taille de ce déflecteur dépendront de la forme de la
coque. Normalement, on ne pourra pas voir la face arrière du
tunnel lorsqu’on se trouvera face au tunnel.
Le moyen le plus facile pour obtenir ce déflecteur consiste à
laisser dépasser le tunnel de la coque sur la partie la plus avant et
à utiliser celui-ci comme support de moulage.
2. Motstanden vil også reduseres av en spoiler i forkant av
tunnelen. Spoileren fører det meste av vannstrømmen rundt og
forbi tunnelen. Størrelsen og utformingen på spoileren avhenger
av båten. Hovedregelen er at bakkanten av tunnelen ikke skal
synes når man står rett foran båten å titter akterover langs båten
senterlinje. Den enkleste måten å lage spoileren på er å la
tunnelen stikke ut i forkant av tunnelen, og forme spoileren opp
mot den (Fig. 3).
Det er alltid viktig å avrunde tunnelåpningene mest mulig for å
motvirke støy og for å få mest mulig effekt av thrusteren.
Mer informasjon om dette på side 20.
I
Come prevenire la resistenza provocata
dall'installazione del tunnel
Un problema che si può presentare nelle imbarcazioni a vela o nelle
imbarcazioni a motore veloci, è la resistenza al moto provocata dalla
faccia posteriore del tunnel, in quanto essa diventa un’area “piatta”
prospiciente il flusso d’acqua (Fig. 1).
Ciò può creare problemi anche con il propulsore rotante (passivo) e
generare rumore quando si naviga a vela o a motore con l’acqua che
viene sospinta nel tunnel ad alta velocità.
Tale problema può essere risolto in due modi diversi; la scelta del
metodo dipenderà da ciò che è possibile o più agevole fare.
1. La soluzione migliore che di norma provoca la massima riduzione
del resistenza al moto, è quella che consiste nel praticare una
rientranza nello scafo nella parte posteriore del tunnel. In tal modo
la faccia posteriore sparisce e così quasi tutta la resistenza al moto
(Fig. 2). La profondità e la forma di questa rientranza dipenderanno
dall’imbarcazione. In sostanza, un osservatore posto davanti al
tunnel, con un’angolazione identica a quella del mezzeria
dell’imbarcazione, non deve vedere la faccia posteriore del tunnel.
L’angolazione verso l’alto o verso il basso del parte posteriore
dell’inserto nello scafo dipende dalla sagoma dello scafo; di solito si
ha una leggera angolazione verso il basso, a causa del flusso
d’acqua su questa area dello scafo.
2. La resistenza al moto viene inoltre ridotta di molto, in particolare
nelle imbarcazioni a motore veloci, realizzando un deflettore o un
baffo davanti al tunnel. In tal modo il flusso d’acqua viene deviato e
allontanato dallo scafo, per cui la maggior parte di esso passa per
la faccia posteriore del tunnel (Fig. 3).
La sagoma e le dimensioni di questo deflettore dipendono dalla
sagoma dello scafo. In sostanza un osservatore posto davanti al
tunnel, con un’angolazione identica a quella della mezzeria
dell’imbarcazione, non deve vedere la faccia posteriore del tunnel.
Il modo più semplice per far ciò è quello che consiste nel far sì che
una parte del tunnel sporga nell’area inferiore verso prora del foro,
e utilizzarla come supporto per stampare una sagoma di un baffo
dalle linee morbide.
Si rammenti che occorre comunque arrotondare il più possibile le
estremità del tunnel per ottenere prestazioni ottimali del propulsore e
ridurre al minimo la rumorosità. Per maggiori informazioni su come
effettuare in pratica tale operazione, vedere a pag. 20.
Ne pas oublier qu’il est très important de garder les extrémités du
tunnel aussi arrondies que possible pour que les performances du
propulseur soient optimales et le niveau sonore réduit au minimum
(voir page 20 pour plus de détails).
Välty tunnelin
vastuksesta
FI
Mahdollinen ongelma purjeveneissä tai nopeissa moottoriveneissä
on, että tunnelin takasivu antaa vastuksen (tunneli laahaa), koska
siitä tulee suora pinta veden virtausta vastaan (Kuva 1).
Tämä voi myös aiheuttaa ongelmia keulapotkurin pyöriessä
(passiivisesti) ja aiheuttaa melua purjehdittaessa tai veneellä
ajettaessa, kun vettä työntyy suurella nopeudella putken läpi.
Tämä ongelma voidaan ratkaista kahdella tavalla, riippuen siitä
kumpi on helpompi tai mahdollista tehdä.
1. Paras ratkaisu tähän, mikä normaalisti vähentää vastusta eniten,
on syvennyksen tekeminen tunnelin takaosaan. Näin vastusta
aiheuttava suora pinta on poistettu ja myös vastus (Kuva 2).
Tämän syvennyksen muoto ja syvyys on venekohtainen.
Voidaankin sanoa, että tunnelin takaseinää ei pitäisi nähdä, kun
seisoo tunnelin edessä ja katsoo veneen keskiviiva pitkin.
Syvennyksen kulma ylös tai alas, riippuu rungon muodosta,
mutta normaalisti sen kulma on hieman alaspäin
vedenvirtauksista johtuen.
2. Vastusta voidaan myös vähentää, erityisesti nopeissa
moottoriveneissä, tekemällä spoileri tunnelin eteen. Tämä
työntää vesivirran ulos kyljestä ja suurin osa siitä ohittaa
takaseinän suoran pinnan (Kuva 3).
Tämän suojalevyn /spoilerin muoto ja koko riippu rungon
muodosta. Voidaankin sanoa, että tunnelin takaseinää ei pitäisi
nähdä, kun seisoo tunnelin edessä ja katsoo veneen keskiviiva
pitkin. Helpoin tapa tehdä tämä, on jättää tunnelin reuna
(etuosan alaosa) hieman rungon ulkopuolelle, ja käyttää tätä
tukena spoilerin muodostamisessa.
Muista kuitenkin aina pyöristää tunnelin päät niin paljon kuin
mahdollista saadaksesi mahdollisimman paljon työntövoimaa ja
vähiten melua.
Enemmän ohjeita tämän toteuttamisesta sivulla 20.
SP 30 S2i / SP 40 S2i / SP 55 Si
3.4 - 2005
15
Fig. 1
Min
☺
Pos. A
Pos. B
☺
GB
Tunnel installation in sailboats
D
Installation in Segelbooten
Many sailboats have a racing type hull which means that it is very
flat bottomed and has a very shallow draft in the bow section. It is
thereby very difficult not to say impossible to fit a tunnel thruster the
usual way, at least as far forward in the hull as a thruster should be
(Fig. 1).
Segelboote weisen häufig einen Rumpf in Rennform auf, was
einen sehr flachen Rumpf im Bugbereich bedeutet. Es ist daher
schwierig oder fast unmöglich, den Tunnel an der gewünschten
(effektivsten) Stelle, also möglichst weit vorne im Bug zu plazieren
(Fig. 1).
However, it is possible to install a tunnel thruster in most sailboats,
even when the hull does not directly support the fitting of a tunnel.
Trotzdem ist es vielfach möglich unter diesen Bedingungen eine
Bugschraube einzubauen, auch wenn der Tunnel damit nicht völlig
vom ursprünglichen Rumpf umgeben ist.
This is done by fitting the tunnel halfway into and halfway underneath the exisiting hull and then strengthen it and smoothening the
waterflow by moulding a bulb around / underneath the tunnel.
This will allow installation in good position on the boat, maintaining
the reliability and space advantages of a tunnel thruster.
This installation is being used by some of the worlds largest
sailboat builders, and have been proven to give little to no speed
loss for normal cruising.
This can also be a good installation method for flat bottomed
barges to avoid extremely long tunnels and huge oval tunnel
openings in the hull.
16
Der Tunnel wird zur Hälfte in den bestehenden Rumpf integriert,
die andere Hälfte geht über diesen hinaus. Der Tunnel muß nur
noch verstärkt und strömungsgünstig abgerundet werden.
Dies erlaubt eine Installation in geeigneter Position bei Nutzung
der Zuverlässigkeits- und Platzvorteile einer Tunnelschraube.
Diese Installationsart wird von einigen der weltweit führenden
Segelboothersteller verwendet und führt meistens nur zu einem
äußerst geringen bzw. gar keinem Geschwindigkeitsverlust.
Diese Bauweise ist auch für Barkassen (z.B. Flußboote) mit
flachem Bug geeignet, um einen zu langen Tunnel und große
ovale Tunnelöffnungen im Rumpf zu vermeiden.
SP 30 S2i / SP 40 S2 i/ SP 55 Si
3.4 - 2005
N
Tunnel installasjon på seilbåter
Mange seilbåtskrog er bygget for å oppnå høy fart. De har
brede skrog som ikke stikker dypt i baugen. Skrogtypen gjør det
vanskelig å installere en thrustertunnel på vanlig måte, spesielt
med tanke på å plassere den langt nok frem (Fig. 1).
Thrustertunneler kan allikevel installeres i de fleste seilbåter.
Dette gjøres ved å la en del av tunnelen stikke ut i underkant av
skroget. Tunnelen er sterk nok til dette, og thrusteren blir
plassert lav nok og langt nok fremme.
Dette gjøres ved at øvre halvdel av tunnelen støpes inn i
skroget, tunnelen styrkes i underkant ved å støpe en kul rundt
tunnelen og jevne den ut mest mulig.
Denne metoden brukes av noen av de helt største seilbåtprodusentene i verden, de viser til at den ikke gir utslag på fart
under normal seilas.
Denne installasjonen kan også være gunstig for båter med flate
bunner, for å unngå ekstremt lange tunneler og store ovale
tunnelåpninger.
I
Installazione del tunnel in imbarcazioni a vela
F
Montage du tunnel sur les voiliers
La plupart des voiliers ont une coque étudiée pour la compétition,
ce qui signifie une étrave plate et peu profonde. Il est par conséquent très difficile, pour ne pas dire impossible, de monter un
tunnel de propulseur normalement, en tout cas d’essayer de
monter le propulseur le plus à l’avant possible de la coque (voir
schéma n° 1). Cependant, il sera possible de monter un tunnel de
propulseur sur la plupart des voiliers, même lorsque la coque ne
supportera pas directement le montage du tunnel.
Pour cela, il suffit de monter le tunnel pour partie à l’extérieur de la
coque, puis de le renforcer et de limiter la traînée en
confectionnant un bulbe autour du tunnel.
Cela permettra de bien positionner l’installation à bord, en
maintenant la fiabilité et le gain de place du tunnel du propulseur.
Cette installation a été adoptée par quelques grands constructeurs
de gros voiliers et a permis de démontrer qu’elle génère très peu
de perte de vitesse en navigation normale.
Ce système peut également s’avérer être une bonne méthode
d’installation pour des barges d’étrave plate afin d’éviter des
longueurs de tunnel extrêmement importantes et d’énormes
ouvertures ovales de tunnel dans la coque.
FI
Tunnelin asennus purjeveneissä
Molte imbarcazioni a vela hanno uno scafo da regata, molto piatto
nella parte inferiore, e una sezione di prua con pescaggio molto
ridotto. Pertanto è molto difficile, per non dire impossibile, montare
un propulsore a tunnel nel modo consueto, o quanto meno
installarlo a prora quanto lo si desidererebbe (Fig. 1).
Monessa purjeveneessä on kilpaveneille tyyppillinen runko, mikä
tarkoittaa, että se on erittäin lattea ja matalapohjainen keulasta.
Siksi on erittäin vaikeata, jollei mahdotonta asentaa keulapotkuri
normaaliin tapaan, ainakin niin paljon eteen kuin keulapotkurin
pitäisi olla (Kuva 1).
Tuttavia è possibile installare ugualmente un propulsore a tunnel
nella maggior parte delle imbarcazioni a vela, anche quando lo
scafo in sé non si presterebbe all’installazione di una tunnel.
On kuitenkin mahdollista asentaa keulapotkuri melkein kaikkiin
purjeveneisiin, jopa silloin kuin veneen runko ei suoraan salli
tunnelin asentamista.
Ciò viene effettuato montando il tunnel per metà all’interno e per
metà sotto lo scafo esistente e successivamente rinforzandolo;
inoltre si rende uniforme il flusso d’acqua stampando un bulbo
attorno al tunnel.
Tämä onnistuu asentamalla tunneli puoliksi rungon sisäpuolelle,
jättäen puolet tunnelista rungon alapuolelle. Rungon ulkopuolista
osaa vahvistetaan ja tasataan paremman vedenvirtauksen
saamiseksi laminoimalla rungon ja tunnelin liitos kuten kuvassa
näytetty.
Ciò consentirà di effettuare un’installazione in una buona
posizione, conservando l’affidabilità e i vantaggi in termini di spazio
offerti da un propulsore a tunnel.
Tale tipo di installazione viene adottato da alcuni dei maggiori
cantieri navali dove si costruiscono imbarcazioni a vela, e si è visto
che provoca poca o nessuna perdita di velocità nella navigazione
normale.
Esso può essere un buon metodo di installazione anche per lance
dal fondo piatto, evitando tunnel estremamente lunghi ed enormi
aperture ovali del tunnel nello scafo.
Tämä mahdollistaa keulapotkurin asennuksen tarpeeksi eteen,
säilyttäen kuitenkin tunnelikeulapotkurin luotettavuuden ja tlaedut.
Tätä asennus menetelmää käyttää osa maailman suurimmista
purjevenetekijöistä, sillä menetelmän vaikutus nopeuteen on
todettu minimaaliseksi tai olemattomaksi.
Tämä voi myös olla sopiva ratkaisu litteäpohjaisiin proomuihin,
jotta vältetäänn erittäit pitkät tunnelit ja suurt soikeat tunnelin reiät
veneen rungossa.
SP 30 S2i / SP 40 S2i / SP 55 Si
3.4 - 2005
17
Fig. 2
R
D
Fig. 1
Fig. 3
GB
Tunnel installation
We recomend that a professional does the fibreglass fitting of
the tunnel. These instructions are only general, and do not
explain in any way the details of fibreglass work. Problems
caused by faulty installation of the tunnel, are the installers full
responsibility.
Find the position in the boat considering the information given
earlier in this manual and the applicable measurements for the
thruster model you are installing.
Mark the centre of the tunnel on both sides. Drill a 6mm hole
horizontally in these marks (Fig. 1) .
Bend a ø 5mm steel bar as shown with the "tip" bent back at the
tunnel radius and mark the circle for the tunnel opening (outside
diameter of the tunnel). Cut the hole with a jigsaw (Fig. 2).
Grind off the gelcoat and polyester so that you are down in the
“real fibreglass” in an area of 12cm around the hole both inside and
outside in the hull to cast the tunnel to the hull. (Fig. 3).
Insert the tunnel and mark its shape to fit the hull (Fig. 4). (if you
are installing with a deflector/spoiler, leave a part or the tunnel of
the front- and underside of the tunnel to have a base for this (see
page 20, Fig. 2). Cut the tunnel ends to the desired shape and
lightly sand its surface and clean with aceton or similar where you
are going to apply fibreglass.
NB! Do not cast/glass on the area were the thruster will be placed.
Fig. 4
D
Tunnelinstallation
Wir empfehlen, die Glasfiberarbeiten von einem Fachmann ausführen zu lassen. Dieses Handbuch beinhaltet nicht alle notwendigen Details für diese Arbeit. Der Installateur trägt die volle
Verantwortung für eine sachgemäße Installation des Tunnels.
Zunächst ist die Position des Tunnels aufgrund der vorangegangenen Informationen und der Maße des einzubauenden Thrusters zu
bestimmen.
Das Zentrum auf beiden Seiten des Tunnels anreißen. Dort jeweils
ein horizontales Loch (ø 6mm) bohren (Fig. 1).
Durch beide Löcher eine Stahlstange (ø 5mm) führen und die
Tunnelöffnung anzeichnen (Außendurchmesser des Tunnels).
Diese Fläche mit einer Stichsäge ausschneiden (Fig. 2).
Den Rumpf auf der Innenseite 12cm um das Tunnelloch frei von
Gelcoat und Polyester machen, bis Fiberglas sichtbar wird (Fig. 3).
Den Tunnel einsetzen und die Schnittlinie mit dem Rumpf anzeichnen (Fig. 4). Wird ein Abweiser / Spoiler benötigt, lassen Sie den
Tunnel etwas aus dem Rumpf stehen (Vorder- und Unterseite des
Tunnels), um einen Grundträger zu erhalten (siehe Seite 20, Fig. 2).
Die Tunnelenden auf die gewünschte Form abschneiden und die
Enden leicht anschleifen. Danach mit Aceton o.ä. dort reinigen, wo
Fiberglas aufgetragen werden soll.
NB! Nicht im Bereich des Thrusters laminieren.
Then cast the tunnel to the inside of the hull, use at least 8 layers of
300 g glass and resin, preferrably alternating mat and rowing types
of fibreglass (see page 20, Fig. 1). If you are rounding the tunnel
ends to the perfect 10% radius you may in some cases have to
make further layers inside to preserve the desired hull thickness.
Den Tunnel im Rumpfinneren einlaminieren. Dazu mind. 8 Schichten zu je 300 g Glasfiber und Ployesterharz verwenden; vorzugsweise verschiedene Matten und Gewebearten (siehe Seite 20,
Fig. 1). Sollen die Tunnelenden später den optimalen 10% Radius
aufweisen, müssen gelegentlich zusätzliche Schichten aufgetragen werden um eine ausreichende Rumpfstärke zu erhalten.
NB ! Make sure that any gap between the tunell and the hull are
completely filled with resin/fibreglass. In areas where you can not
access to make normal layers of resin/fibreglass, a resin/ fibreglass
mixture must be filled in that area.
NB ! Jede Öffnung zwischen Tunnel und Rumpf muß vollständig
mit Poyesterharz/Glasfiber ausgefüllt sein. An schlecht zugänglichen Stellen, wo normale Schichten nicht möglich sind, muß zumindest eine Polyesterharz / Glasfiber Mischung eingefüllt werden.
18
SP 30 S2i / SP 40 S2 i/ SP 55 Si
3.4 - 2005
N
Tunnel installering
Sleipner Motor anbefaler at innstøping av glassfibertunnelen
utføres av kyndig personell. Denne instruksjons manualen gir
ikke detaljerte opplysninger om glassfiberstøpning. Problemer
som skyldes installering er installatørens fulle ansvar.
Bestem plassering av tunnelen ut i fra informasjonen gitt tidligere
i manualen, og de angitte mål for thrusteren du skal installere.
Merk av senter på tunnelen på babord og styrbord side. Bor et 6
m.m. vannrett hull, på begge sider (Fig. 1).
Bøy til og tilpass en 5 m.m. stålstang, som vist på fig. 2 der den
tilbakebøyde enden skal markere tunnelens radius. Stikk enden
inn å marker tunnelens ytre diameter, skjær ut hullet med en
stikksag (Fig. 2).
Puss av gelcoat og polyester så glassfiberen ligger bar i et 12 cm
stort område rundt tunnel hullet. Dette må gjøres på innsiden og
utsiden av skroget, før tunnelen støpes fast i skroget (Fig. 3).
Sett inn tunnelen å marker hvor det skal kappes for å passe i
skroget (Fig. 4). Hvis det skal støpes en spoiler i forkant av
tunnelen bør en del av tunnelen stikke ut i for og underkant av
skroget for å støpe spoileren mot (Side 20, Fig. 2). Kapp tunnelen
i ønsket størrelse. Slip lett med slipepapir, og vask med aceton
der hvor det skal støpes med glassfiber.
NB ! Det må ikke støpes der hvor thrusteren skal monteres.
Støp fast tunnelen først på innsiden av skroget, bruk minst 8 lag
med 300 g Glassfibermatte, og polyester. Ved bruk av alternative
materialer, glassfiber matter eller rovingtyper (Se s. 20, Fig. 1).
Hvis tunnelåpningene avrundes til den optimale 10% radius må
ofte legge ekstra lag med polyester glassfibermatte på innersiden av
tunnelen, for å oppnå riktig tykkelse i forhold til skrogtykkelsen.
NB ! Forsikre deg om at overgangene mellom tunel og skrog er
nøye sammenstøpt. På steder en ikke kommer til med vanlige lag
med polyester/glassfiber matte, sørg for og lage en blanding av
polyester og glassfiber, som fylles i dette.
I
Installazione del tunnel
Si raccomanda di affidare a un professionista il lavoro di
montaggio della fibra di vetro del tunnel. Queste istruzioni
sono generiche, e non illustrano in alcun modo i dettagli delle
operazioni con fibra di vetro. In caso di eventuali problemi
provocati da un’installazione difettosa del tunnel, ne
risponderà in pieno l’installatore.
Trovare la posizione opportuna dell’imbarcazione tenendo conto delle
indicazioni fornite nella parte precedente di questo manuale e delle
misure applicabili per il modello di propulsore che si sta installando.
Contrassegnare il centro del tunnel su entrambi i lati. In corrispondenza di tali contrassegni praticare un foro orizzontale da 6 mm (Fig. 1).
Piegare una barra di acciaio ø 5 mm come mostrato in figura, con la
“punta” ripiegata in corrispondenza del raggio di curvatura del tunnel,
e contrassegnare la circonferenza per l’apertura del tunnel (diametro
esterno del tunnel). Incidere il foro con una sega da traforo (Fig. 2).
Asportare con carta vetrata il gelcoat e il poliestere in modo da
mettere a nudo la “fibra di vetro vera e propria” in un’area di 12 cm
attorno al foro, sia all’interno che all’esterno dello scafo, per unire il
tunnel allo scafo (Fig. 3).
Inserire il tunnel e contrassegnarne la sagoma per montarla sullo
scafo (Fig. 4). (Se la si sta installando con un deflettore o un baffo,
lasciare libera una parte del tunnel, o la parte frontale e inferiore del
tunnel, per avere una base per il deflettore (v. Pag. 20, Fig. 2).
Tagliare le estremità del tunnel secondo la forma de-siderata e
carteggiare delicatamente la superficie; pulire con ace-tone o solvente
simile nel punto in cui si applicherà la fibra di vetro.
N.B.: non gettare fibra di vetro sull’area nella quale sarà posizionato
il propulsore.
A questo punto saldare il tunnel all’interno dello scafo, utilizzando
almeno 8 strati da 300 g di fibra di vetro e resina, preferibilmente
alternando i tipi mat e “rowing” di fibra di vetro (v. pag. 20, Fig. 1).
Se si stanno arrotondando le estremità del tunnel utilizzando il
raggio di curvatura ideale del 10%; è possibile in taluni casi che
occorra creare ulteriori strati all’interno per preservare lo
spessore desiderato dello scafo.
N.B.: accertarsi che eventuali spazi vuoti tra il tunnel e lo scafo
siano completamente riempiti con resina/fibra di vetro. Nelle zone
in cui non è possibile accedere per applicare strati normali di resina/
fibra di vetro, occorre iniettare una miscela resina/ fibra di vetro.
F
Montage du tunnel
Nous préconisons qu’un professionnel effectue le montage du
tunnel en fibre de verre. Les instructions qui suivent sont
d’ordre général et non exhaustives en ce qui concerne la
complexité à travailler la fibre de verre. Les problèmes causés
par une mauvaise installation du tunnel sont sous l’entière
responsabilité de l’installateur.
Le positionnement du tunnel sera déterminé en fonction des
instructions mentionnées dans ce manuel et des dimensions
correspondant au type de propulseur installé.
Marquer le centre du tunnel de chaque côté de la coque. Faire un
trou à l’horizontale de 6 mm à l’intérieur de ce marquage (voir
schéma n° 1).
Plier une barre d’acier de 5 mm de diamètre comme indiqué avec
l’extrémité repliée vers le tunnel et tracer des cercles représentant
les ouvertures du tunnel (diamètre extérieur du tunnel). Effectuer
les trous avec une scie sauteuse (voir schéma n° 2).
Meuler le gelcoat et le polyester de façon à être réellement dans la
fibre de verre, dans un périmètre de 12 cm autour du trou, à
l’intérieur et à l’extérieur de la coque, pour mouler le tunnel à la
coque (voir schéma n° 3).
Insérer le tunnel et tracer la découpe (voir schéma n° 4) [si l’installation est réalisée avec un déflecteur, laisser une partie du tunnel à
l’extérieur des deux côtés afin de servir de base au déflecteur (voir
page 20, schéma n° 2)]. Couper les extrémités du tunnel à la
forme désirée, puis décaper légèrement sa surface et nettoyer
avec de l’acétone ou un produit équivalent lorsque la fibre de
verre sera sur le point d’être appliquée.
NB : Ne pas appliquer la fibre de verre sur la surface où le
propulseur sera situé (pour l’étanchéité).
Puis, mouler le tunnel à l’intérieur de la coque; pour cela, passer au
moins 8 couches de fibre de verre et de résine (300 gr), de préférence
en alternant la fibre de verre de type mat, puis de type rowing (voir
page 20, schéma n° 1). Si les extrémités du tunnel sont arrondies
à un rayon d’exactement 10 %, il sera alors nécessaire, dans
certains cas, d’appliquer des couches supplémentaires à l’intérieur
afin de préserver l’étanchéité souhaitée de la coque.
NB : S’assurer que tout espace entre le tunnel et la coque soit parfaitement comblé avec de la résine / de la fibre de verre. Dans les
zones où l’accès n’est pas possible pour appliquer normalement
des couches de résine / fibre de verre, un mélange résine / fibre de
verre compact doit y être appliqué.
FI
Tunnelin asennus
Suosittelemme, että ammattilainen tekee tunnelin lasikuitutyöt.
Nämä ohjeet ovat vain yleisiä, eivätkä missään tapauksessa
selitä lasikuitutyön yksityiskohtia. Ongelmat, jotka ovat
aiheutneet väärin asennetusta tunnelista, ovat täysin
asentajan vastuulla.
Etsi oikea sijoitus veneessä tässä kirjassa aikaisemmin
annettujen tietojen perusteella ja käytä oikeita mittoja
asennettavasta keulapotkurista riippuen.
Merkkaa tunnelin keskikohta molemmin puolin. Poraa näihin
merkkeihin 6 mm reikä vaakasuoraan (Kuva 1).
Taivuta ø 5mm teräs kuten kuvassa ja merkkaa tunnelin halkaisija
(tunnelin ulkohalkaisija). Leikkaa tunnelin reikä kuviosahalla (Kuva 2).
Poista gelcoat pinta ja polyesteri hiomalla niin, että olet ”puhtaassa
lasikuidussa”, pinta-alalta, joka peittää 12 cm reiän ympäriltä sekä
sisä- että ulkopuolelta kiinnittääksesi tunnelin runkoon (Kuva 3).
Asenna tunneli ja merkka sen muoto sopivaksi runkoon nähden
(Kuva 4). (jos olet asentamassa ”spoilerilla”, jätä tunnelia etu- ja
alapuolelta hiukan rungon ulkopuolelle tämän tueksi) (katso sivu
20, kuva 2). Leikkaa tunnelin päät haluttuun muotoon, hio kevyesti
ja puhdista asetoonilla tai vastaavalla aineella ne pinnat, joihon
aiot lisätä lasikuitua.
HUOM ! Älä lisää lasikuitua alueeseelle,johon itse keulapotkuri
asennetaan.
Laminoi tunneli rungon sisäpuolelle, käytä ainakin 8 kerrosta 300 g
lasikuitua ja hartsia, mieluimmin vuorotellen mattoa ja lasikuitua
(katso sivu 20, kuva 1). Jos aiot pyöristää tunnelin päät
parhaaseen 10% säteeseen voit joissakin tapauksissa joutua
lisäämään kerroksia sisäpuolelle säilyttääksesi halutun
seinävahvuuden rungossa.
HUOM ! Varmista, että kaikki kolot tunnelin ja rungon välistä ovat
täytetty lasikuidulla. Alueet, joihon ette ylety pistämään
lasikuitukerroksia, täytyy täyttää hartsi/lasikuitu seoksella.
SP 30 S2i / SP 40 S2i / SP 55 Si
3.4 - 2005
19
Fig. 1a
Fig. 1c
Fig. 1b
Fig. 1d
Fig. 1
Fig. 2
D
Fig. 3
x
0,
1-
0,
1
R = D x 0,1
5
D
R = D x 0,1
D
GB
Tunnel installation
D
x
,15
-0
0,1
Tunnelinstallation
Soften the edges with a radius of 10% of the tunnel diameter (Fig.
1a) or make a slope with a length of 10-15% of the tunnel diameter
(Fig. 1c). If this is not possible, atleast round the tunnel end as
much as possible.
Runden Sie die Kanten mit einem Radius (10% des Tunneldurchmessers) ab (Fig. 1a) oder machen Sie eine Schräge mit einer
Länge von 10-15% des Tunneldurchmessers (Fig. 1c). Ist beides
nicht möglich, sind die Tunnelenden soweit möglich abzurunden.
We advice to also cast two layers on the outside of the tunnel/ hull
for an area 6-8cm (Fig. 1c & 1d).
Auf der Außenseite zusätzlich zwei Schichten im Bereich Rumpf /
Tunnel auf einer Fläche von 6-8cm auftragen (Fig. 1c & 1d).
You must apply gelcoat/topcoat/epoxy on the areas outside where
you have grounded or moulded to again make these waterproof.
Danach auf den äußeren, angeschliffenen oder laminierten Flächen
Gelcoat/Topcoat/Epoxy zur wasserdichten Versiegelung aufbringen.
NB ! All original Sidepower tunnels are fully waterproof when
they are delivered.
NB ! Original Sidepower tunnel sind in ausgeliefertem
Zustand absolut wasserdicht.
This means that unless you want, because of special reasons, to
have another colour on it, you do not have to apply Gelcoat/Topcoat
or the several layers of primer that is necessary on the boats' hull
to make it waterresistant.
Wird nicht eine spezielle Farbe gewünscht, so sind keinerlei
Gelcoat, Topcoat oder Primer nötig, die ansonsten zur
Wasserdichtigkeit benötigt werden.
Sand it very lightly and apply one layer of primer to make the
antifouling sit.
The original Sidepower tube itself is fully waterresistant without
treatment exceptin the areas where you have bonded it to the hull.
Apply gelcoat/topcoat/epoxy paint and primer on the areas where
you have grounded or moulded as these areas give the water
access to the hull which normally is not waterproof without these
applications outside.
PS ! Avoid all casting where the motor-bracket is to be
placed, as this will cause misfit and possible failure of
the gearhouse.
20
Empfehlenswert ist ein leichtes anschleifen und aufbringen einer
Primerschicht zur besseren Haftung des Antifouling.
Original Sidepowertunnel sind auch ohne Behandlung absolut
wasserdicht.
Auf laminierten oder angeschliffenen Flächen ist Gelcoat / Topcoat /
Epoxy und Primer aufzubringen, da diese Bereiche ohne
entsprechende Behandlung nicht wasserdicht sind.
PS ! Im Bereich der Motorhalterung darf nicht laminiert werden, da dies zu Ungenauigkeiten bei der Montage und
damit einem möglichen Getriebeschaden führen kann.
SP 30 S2i / SP 40 S2 i/ SP 55 Si
3.4 - 2005
N
Tunnel installering
Rund av tunnelendene med en radius 10% av tunneldiameter (Fig.
1a), eller lag en skråkant 10-15% av tunneldiameter (Fig. 1c). Der
dette ikke er mulig skal tunnel kantene rundes av mest mulig.
Vi anbefaler å støpe to lag utenpå tunnellavrundingen og over et
område på 6-8cm (Fig. 1c & 1d).
Gelcoat eller lignende må påføres på områdene der det har blitt
pusset eller støpt for å gjøre glassfiberen vanntett.
NB ! Alle originale Sidepower tunneler er vanntette ved levering!
Så fremt man ikke ønsker en annen farge er det ikke nødvendig å
påføre Gelkoat, Topkoat og flere lag med primer for å gjøre
tunnelen vanntett.
Puss tunnelen med fint slipepapir og påfør et lag primer for å få
bunnstoff til å sitte.
Sidepowertunnelen er helt vanntett uten behandling med unntak av
de områder det som er støpt fast i skroget.
Påfør Gelcoat/Topcoat/epoxy og primer på de områder som er
pusset ned eller støpt. Vann skal ikke ha direkte kontakt med
glassfiberen i skroget fordi dette normalt ikke er vanntett.
PS ! Det må ikke støpes der brakketen til thrusteren skal stå.
Passformen er nøyaktig tilpasset, og en feilplassert braket
kan forårsake svikt i girhus.
F
Montage du tunnel
Réduire les angles à un rayon égale à 10 % du diamètre du tunnel
(voir schéma n° 1a) ou faire un chanfrein dont la longueur
représente 10 à 15 % du diamètre du tunnel (voir schéma n° 1c).
Si ces deux hypothèses ne sont pas possibles, arrondir dans la
mesure du possible l’extrémité du tunnel.
Nous recommandons également d’appliquer deux couches à
l’extérieur du tunnel / coque sur un périmètre de 6-8 cm (voir
schémas n° 1c et 1d).
Il est nécessaire d’appliquer du gelcoat / topcoat / epoxy sur les
zones extérieures ayant été meulées ou moulées de façon à
refaire une étanchéité.
NB : Tous les tunnels Sidepower d’origine sont parfaitement
étanches lorsqu’ils sont livrés.
Cela signifie que si pour une raison particulière le changement de
couleur est souhaité, il ne sera pas nécessaire de passer du
gelcoat / topcoat ou plusieurs couches de primer nécessaires à la
coque d’un bateau pour qu’elle soit résistante à l’eau.
La sabler très légèrement et passer une couche de primer pour
appliquer l’antifouling.
Le tunnel Sidepower d’origine est de lui-même totalement résistant
à l’eau sans traitement particulier excepté dans des zones où il a
été sellé à la coque.
Appliquer une peinture gelcoat / topcoat / epoxy et du primer dans
les zones ayant été meulées ou moulées de façon à rendre la
coque totalement étanche.
PS : Evitez tout meulage à l’endroit où le support moteur
devra être placé, cela pourrait engendrer un montage
défectueux et une éventuelle défaillance de l’embase.
I
Installazione del tunnel
FI
Tunnelin asennus
Smussare i bordi con un raggio di curvatura pari al 10% del
diametro del tunnel (Fig. 1a), o creare una pendenza con una
lunghezza pari al 10-15% del diametro del tunnel (Fig. 1c). Se ciò
non è possibile, arrotondare il più possibile l’estremità del tunnel.
Pyöristä reunat säteellä joka on 10% tunnelin halkaisijasta (Kuva 1a)
tai kaltevuudelle joka on 10-15% tunnelin halkaisijasta (Kuva 1c).
Jos tämä ei ole mahdollista, pyöristä ainakin reunat niin paljon kuin
mahdollista.
Si raccomanda inoltre di gettare due strati sull’esterno del tunnel /
dello scafo per un’area di 6-8 cm (Figg. 1c e 1d).
Suosittelemme myös laitettavaksi kaksi kerrosta tunnelin/rungon
ulkopuolelle, 6-8cm alueelle (Kuvat 1c & 1d).
Occorre applicare gelcoat/topcoat/epoxy sulle zone esterne in cui
si è carteggiato o si è stampato, per renderle di nuovo impermeabili.
Pinnat, jotka olet käsitellyt täytyy uudestaan pinnoittaa gelcoatilla
tai epoksilla, jotta ne saadaan uudestaan vesitiiviiksi.
N.B.: tutti i tunnel Sidepower originali sono assolutamente
impermeabili quando vengono consegnati.
HUOM ! Kaikki alkuperäiset Sidepower-tunnelit ovat täysin
vesitiiviitä.
Ciò significa che, a meno che non si desideri, per motivi speciali,
avere il tunnel in un altro colore, non è necessario applicare
gelcoat/topcoat o i vari strati di primer che di norma si applicano
sullo scafo delle imbarcazioni per impermeabilizzarlo.
Tämä tarkoittaa, että ellet itse jostain erityisistä syistä halua
tunnelia jonkun muun väriseksi, sinun ei tarvitse laittaa gelcoat/
topcoatia pintaan tai useita pohjamaalikerroksia saadaksesi sen
vesitiiviiksi.
Carteggiare molto delicatamente e applicare uno strato di primer
per far aderire l’antivegetativa.
Saadaksesi antifouling-maalin pysymään, hio tunnelia kevyesti ja
laita yksi kerros pohjamaalia.
Il tubo Sidepower originale in quanto tale è del tutto impermeabile
all’acqua senza essere trattato, salvo nelle zone nelle quali è stato
saldato allo scafo.
Alkuperäinen Sidepower-tunneli on itsessään täysin vesitiivis ilman
käsittelyä, paitsi paikoista, joista olet liittänyt sen runkoon.
Applicare gelcoat/topcoat/epoxy e primer sulle zone in cui si è
carteggiato o si è stampato, in quanto da queste zone l’acqua può
penetrare nello scafo, che di norma non è impermeabile senza
questi trattamenti sulla superficie esterna.
N.B.: evitare di gettare nella zona in cui si posizionerà la staffa
del motore, perché ciò causerà un disallineamento ed
eventualmente procurerà un guasto al piede.
Laita gelcoat/topcoat/epoksi -pohjamaalia ja pintamaalia näihin
alueisiin, joista olet kiinnittänyt tunnelin runkoon, sillä nämä alueet
päästävät veden runkoon, mikä ei normaalisti ole vesitiivis ilman
näitä suojauksia.
PS ! Vältä kaikkea lasikuitutyötä kohdassa, mihin
moottorilaippa asennetaan, sillä se voi aiheuttaa
epäsopivuutta ja mahdollisesti vaihteiston vioiuttumisen.
SP 30 S2i / SP 40 S2i / SP 55 Si
3.4 - 2005
21
Fig. 1
Fig. 4
SP55Si
only
EIP
NE
1
O IL
AR
GE
90
EP
R
Starboard
SL
Port
2
3
4
Fig. 5
BOW
BOATS
CENTRELINE
Fig. 2
SP30S2i
SP40S2i
TUNNELS
CENTRELINE
A
Ø 8,5mm
0,33"
20,5mm
0,81"
Ø 27,5mm
1,08"
Fig. 6
Bolt tightening forces (2x):
DIN 931 - M 8x55 A2 =
17 Nm (12,4 lb/ft)
BOW
BOATS
CENTRELINE
Fig. 3
SP55Si
TUNNELS
CENTRELINE
Ø 8,5mm
0,33"
Ø 28,5mm
1,1"
GB
Fig. 7
23,0mm
0,91"
Fitting gearhouse and motor bracket
D
Getriebe und Motorhalterung
1. Mark the centreline of the tunnel and the boats centreline.
The gearhouse and propeller must be fitted as shown above
for the thrust direction to correspond with the controlpanel (Fig. 1).
1. Die Mittellinie von Tunnel und Boot markieren. Damit Schubrichtung und Kontrollpanel übereinstimmen, Getriebege-häuse
und Propeller wie oben gezeigt einbauen (Fig.1).
2. Use the gasket (A) to mark the centre of the holes and double
check the measurements.
NB ! The thruster should be placed with the bolt hole as the
centre (Fig. 2&3). All holes must be in-line with the tunnels'
centreline for precise installation, as the clearance between
the propeller and the tunnel is minimal.
2. Die Löcher mit der Dichtung (A) markieren. Maße überprüfen!
NB ! Der Thruster sollte mit dem Bolzenloch als Zentrum
plaziert werden (Fig. 2&3). Da der Abstand zwischen Propeller
und Tunnel minimal ist, müssen für eine präzise Installation alle
Löcher auf der Mittellinie des Tunnels liegen.
3. There must be no casting where the motor bracket is to be
placed, as this will cause possible failure of the gearhouse.
The motor bracket must fit steady on the tunnel, if the tunnel is
not smooth, all bumps or uneven parts must be grinded smooth.
4. Drill the main-hole and then the two screw-holes.
5. For SP55Si, prefill the gearhouse with gear oil type EP90
through the oildrain screw (4). Make sure to get the copper
gasket (3) on again (SP55Si only).
6. Try the lower-unit in the tunnel (without the propeller) by using
the gasket inside the tunnel. Try on the propeller to make sure
it is in the middle of the tunnel and turns freely with the same
clearing from each blade to the tunnel. If the tunnel is not plain,
use e.g. some Sikaflex to ensure that no leakages occur.
PS ! Make sure that no sealant gets in to the oil-holes (2).
7. Make sure that there is some oil or grease on the O-rings
(SP55Si only) in the motor bracket before mounting it together
with the gearhouse.
8. Push the gearhouse through the main hole in the tunnel and
push the gearhouse and motor-bracket gently together.
9. Screw the lower unit and the motor-bracket together with the
two provided bolts. Tighten with 17 Nm / 12,4 lb/ft.
10. SP55SI only, if the unit is installed in a horizontal angle, the
feed pipe in the motor bracket has always to show upwards to
ensure that the oil flows freely into the gearhouse.
11. Use the enclosed template to measure that the drifeshaft has
come through the motorbracket with the correct height (Fig. 7).
22
3. Im Bereich der Motorhalterung darf kein Laminat auf dem
Tunnel sein, da dies zu einem Getriebeschaden führen kann.
Liegt die Motorhalterung nicht eben auf dem Tunnel auf, so
sind sämtliche Unebenheiten in diesem Bereich abzuschleifen.
4. Erst das Hauptloch, dann die beiden Bolzenlöcher bohren.
5. Das Getriebegehäuse mit Getriebeöl EP90 durch die Öffnung
der Ölablaßschraube (4) befüllen. Kupferdichtung (3) einsetzen.
6. Das Getriebegehäuse (ohne Propeller) unter Verwendung der
Dichtung in den Tunnel einpassen. Den Propeller auf die
Achse stecken; dieser muß sich frei bewegen lassen und jedes
Propellerblatt muß den gleichen Abstand zum Tunnel
aufweisen. Ist die Tunnelinnenseite ungleichmäßig, etwas
Sikaflex o.ä. auf-tragen, damit keine undichte Stelle auftritt.
PS ! Die Durchgänge für das Öl (2) von Dichtmasse freihalten.
7. Etwas Öl oder Fett auf die O-ringe der Motorhalterung geben,
da diese sonst beim Montieren beschädigt werden können.
8. Das Getriebegehäuse durch das Hauptloch im Tunnel führen
und vorsichtig mit der Motorhalterung zusammenschieben.
9. Das Getriebegehäuse und die Motorhalterung mit Hilfe der beiden Bolzen verschrauben (Anzugsmoment 17 Nm / 12,4 lb/ft).
10. Wird die Einheit außerhalb der Horizontalen eingebaut, muß
der Nippel an der Motorhalterung immer nach oben zeigen, damit das Öl ungehindert in das Getriebegehäuse fließen kann.
11. Mit beiliegender Schablone messen, ob die Antriebsachse in
korrekter Höhe zur Motorhalterung steht (Fig. 7).
SP 30 S2i / SP 40 S2 i/ SP 55 Si
3.4 - 2005
N
Montering av girhus og brakett
1. For å plassere girhuset riktig må du først markere tunnelens,
og båtens senterlinje på tunnelen. Propellen og girhuset må
plasseres i henhold til fig. 1 ovenfor for at styreretning og
kjøreretning skal korrespondere
2. Bruk pakningen til å markere midten av hullet (A) og for å
dobbeltsjekke målene.
NB ! Thrusteren skal plasseres med boltehullet som
senterlinjen i midten av båten (Fig. 2&3). Alle hull må være på
tunnelens senterlinje for å får til en presis installasjon. Dette
skyldes at det er meget liten klaring mellom tunnelveggen og
propellen.
3. Tunnelen må ha en jevn overflate der braketen skal festes, all
støp, evt glassfiber eller epoxy rester må pusses ned så
braketen passer jevnt på tunnelen. Ujevnheter her vil kunne
resultere i skade girhuset.
4. Bor de to boltehullene, og hovedhullet til girhuset.
5. Fyll girolje (EP90) på girhuset, gjennom tappeskruen (4).
Pass på at kobbertetningen (3) kommer på plass igjen.
6. Prøv girhuset i tunnelen sammen med pakning 1m.m. Monter
propell å sjekk at den er i midten av tunnelen. Hvis tunnelen
ikke har en jevn overflate så kan Sikafleks, eller lignende
tetningsmateriale brukes for å sikre mot lekkasje. Pass på at
det ikke kommer tetningsmasse i oljehullene (2).
7. Pass på at det finns olje eller fett på O-ringene i motorbraketten
før det monteres sammen med girhus. O-ringene kan ta skade
av montering hvis de ikke er smurt.
8. Før girhuset gjennom hovedhullet i tunnelen og monter
braketten og girhuset forsiktig sammen.
9. Skru sammen motorbraketten og girhuset med orginalbolter.
Skru til med moment 17 Nm / 12,4 lb/ft.
10. Hvis thrusteren installeres i horisontal vinkel må oljenippelen
vende oppover for at oljen skal komme til.
11. Bruk den inkluderte distansebrikken for å sjekke at
drivakselen stikker opp av braketten i riktig høyde (Fig. 7).
I
Motaggio piede e staffa del motore
1. Contrassegnare la mezzeria del tunnel e la mezzeria
dell’imbarcazione. Il piede e l’elica devono essere montati
come mostrato sopra, in modo che la direzione della spinta
corrisponda a quella indicata sul quadro di comando (Fig. 1).
2. Utilizzare la guarnizione (A) per contrassegnare il centro dei fori
e ricontrollare le misure.
N.B.: il propulsore dev’essere posizionato centrato rispetto al
foro del bullone (Fig. 2&3). Tutti i fori devono essere allineati
con precisione con la mezzeria del tunnel, in quanto la
tolleranza tra l’elica e il tunnel è minima.
3. Non si deve gettare nella zona in cui si posizionerà la staffa del
motore, perché ciò potrebbe provocare il guasto del piede. La
staffa del motore dev’essere montata saldamente sul tunnel; se
la superficie del tunnel non è liscia, occorre asportare con carta
vetrata tutte le protuberanze o le parti disuniformi, fino a
renderla perfettamente liscia.
4. Praticare il foro principale e poi i due fori delle viti.
5. Riempire il piede con olio per ingranaggi tipo Motorex EP90
tramite il tappo filettato di scarico dell’olio (4). Rammentarsi di
rimontare la guarnizione di rame (3).
6. Provare a far funzionare il gruppo inferiore nel tunnel (senza
l’elica) utilizzando la guarnizione all’interno del tunnel. Provare
a far girare l’elica, accertandosi che sia centrata rispetto al
tunnel e giri liberamente con la stessa distanza tra ogni pala e il
tunnel. Se il tunnel non è liscio, utilizzare (per esempio) del
Sikaflex per far sì che non vi siano perdite.
N.B.: accertarsi che il sigillante non entri nei fori dell’olio (2).
7. Verificare che vi sia dell’olio o del grasso sugli O-ring nella
staffa del motore prima di montarla assieme al piede.
8. Spingere il piede attraverso il foro principale del tunnel e spingere
il piede e la staffa del motore delicatamente l’una verso l’altra.
9. Avvitare il gruppo inferiore alla staffa del motore con i due
bulloni in dotazione. Serrare con una coppia di 17 Nm / 12,4 lb/ft.
10. Se l’unità è installata con un angolo orizzontale, il tubo di alimentazione situato nella staffa del motore deve essere sempre rivolto
verso l’alto, per far sì che l’olio defluisca liberamente nel piede.
11. Fig. 7
F
Montage de l'embase et du support moteur
1. Déterminer l’axe central du tunnel et celui du bateau. L’embase
doit être montée avec l’hélice bâbord de façon à ce que la direction
de la poussée corresponde avec le panneau de contrôle.
2. Utiliser le joint (A) pour marquer le centre des orifices et
vérifier par deux fois les dimensions.
NB : Le propulseur devra être situé à tribord avec comme
repère pour le centre l’orifice du boulon (voir schémas n° 2 et
3). Tous les trous doivent être alignés avec l’axe central du
tunnel pour un montage précis, de façon à ce que l’hélice soit
parfaitement centrée dans le tunnel.
3. Ne pas meuler là où le support moteur doit être installé car cela
entraînerait une éventuelle défaillance de l’embase. Le support
moteur doit être solidement fixé au tunnel; si ce dernier n’est pas
stable, toute protubérance ou toute autre pièce qui ne sera pas
de niveau devra être meulée pour assurer une bonne assise.
4. Faire le trou principal, puis les deux trous pour les vis.
5. Pré-remplir l’embase avec de l’huile type EP90 par la vis de purge
(4). Ne pas oublier de remettre le joint cuivre sur la vis de purge (3).
6. Présenter l’embase dans le tunnel en utilisant le joint d’étanchéité
d’1 mm à l’intérieur du tunnel. Placer l’hélice sur le propulseur
qu’elle soit au milieu du tunnel. Si ce n’est pas le cas, l’ajuster en
utilisant l’autre joint, voire les deux. Utiliser au moins un joint. Si le
tunnel n’est pas lisse, utiliser du Sikaflex ou un autre joint
d’étanchéité pour éviter toute fuite. PS : S’assurer qu’il n’y a pas de
pâte à joint d’étanchéité dans les orifices d’arrivée d’huile (2).
7. S’assurer qu’il y a bien de la graisse ou de l’huile sur les joints toriques sur le support moteur avant de les monter ensemble sur l’embase car l’absence de graissage peut détériorer les joints toriques.
8. Pousser l’embase vers l’orifice principal dans le tunnel et pousser
ensemble l’embase et le support moteur avec précaution.
9. Visser ensemble l’embase et le support moteur à l’aide des
deux boulons fournis. Serrer à 1.7 m.Kg*.
10. Utiliser le gabarit fourni pour vérifier que l’arbre vertical de
d’embase se situe à la bonne hauteur par rapport au support
moteur (voir schéma n° 7). S’il se situe hors tolérances, il
faudra ôter / ajouter ou changer le joint à l’intérieur du tunnel
pour le réajuster. Ceci est plus important que le fait d’avoir
l’hélice au centre du tunnel.
FI
Vaihteiston ja moottorilaipan asennus
1. Merkkaa tunnelin ja veneen keskilinjat. Vaihteisto ja potkuri on
asennettava kuin yllä olevassa kuvassa, jotta työntövoiman
suunta vastaa käyttöpaneelin suuntaa (Kuva 1).
2. Käytä vaihteiston tiivistettä (A) merkataksesi reikien
keskipisteet ja tarkista mitat uudelleen.
HUOM ! Keulapotkuri pitäisi asentaa niin, että pulttireikä on
veneen keskilinjassa (Kuvat 2 ja 3). Kaikki reiät täytyy olla tunnelin
keskilinjassa, sillä potkurin ja tunnelin välys on minimaalinen.
3. Pisteessä, johon moottorilaippa asennetaan ei saa olla yhtään
laminaattia, koska tämä voi aiheuttaa vahinkoa vaihteistolle.
Moottorilaippa täytyy sopia tukevasti tunnelin päälle, jollei
tunneli ole tasainen, on kaikki epätasaisuudet hiottava pois.
4. Poraa vaihteiston reikä ja sitten molemmat ruuvireiät.
5. Täytä vaihtesto EP90 vaihteistoöljyllä öljytulpasta (4). Varmista,
että kuparitiiviste (3) on öljytulpassa ennen takaisin laittamista.
6. Kokeile vaihteistoa tunneliin (ilman potkuria), aseta myös
vaihteiston ja tunnelin välinen tiiviste paikoilleen. Aseta potkuri
paikolleen ja varmista, että se on tunnelin keskellä ja pyörii
vapaasti pitäen saman välin tunneliin jokaisesta lavasta. Jos
tunnelin sisäpinta ei ole tasainen, käytä esim. Sikaflexiä
varmistaaksesi, ettei vuotoja ilmenee.
PS ! Varmista, ettei tiivistemassaa tule öljykanaviin (2).
7. Tarkista, että moottorilaipan o-renkaissa on rasvaa tai öljyä
ennen asentamista yhteen vaihteiston kanssa.
8. Työnnä vaihteisto tunnelin läpi ja varovasti aseta moottorilaippa
ja vaihteisto yhteen.
9. Ruuvaa vaihteisto ja moottorilaippa yhteen kahdella mukana
tulevalla ruuvilla. Kiristä 17 Nm / 12,4 lb/ft momenttiin.
10. Jos laite on asennettu vaakatasoon, täytyy öljyletkun karan
osoittaa aina suoraan ylöspäin, jotta öljy saa vapaasti valua
vaihteistoon.
11. Kuva 7
SP 30 S2i / SP 40 S2i / SP 55 Si
3.4 - 2005
23
Fig. 1
0,2
Fig. 2
SP30S2i
SP40S2i
Fig. 3
SP55Si
5
2
3
4
1
1
Locktite
GB
2
4
3
7
6
Fitting oil tank & propeller(s)
D
Ölvorratsbehälter & Propeller
1. SP55Si only, fit the oil tank above the waterline by atleast 20%
of the distance from the waterline to the centre of the tunnel.
This is for ensuring enough overpressure of oil in the
gearhouse.
1. Um genügend Öldruck im Getriebegehäuse zu gewährleisten,
muß der Vorratsbehälter für das Getriebeöl oberhalb der
Wasserlinie montiert sein. Der Abstand muß hierbei mind. 20%
der Distanz von Wasserline zum Zentrum des Tunnels sein.
2. SP55Si only, fit the oil tube to the tank and the feed pipe in the
motor bracket. Tighten the two tube clamp screws. Make sure
that the oil-tube has no loops that makes an airlock to stop the
oil flow and has a good angle to allow the oil to flow freely into
the gearhouse.
2. Den Schlauch für das Öl am Vorratsbehälter und am vorgesehenen Nippel der Motorhalterung befestigen. Die beiden
Schlauchklemmen anziehen. Sicherstellen, daß das Öl ungehindert und direkt in das Getriebegehäuse fließen kann.
3. SP55Si only, fill the oil tank with gear oil type EP90.
4. SP55Si only, if you did not prefill the gearhouse, open the oil
drain screw (6) until oil comes through, then tighten it securely
and make sure that the copper gasket (7) is present.
5. SP55Si only, turn the propeller shaft so that the drivepin (5) is in
a horizontal position and ensure that it is centred in the
propellershaft.
6. SP55Si only, push the propeller onto the shaft with the track for
the drivepin in an horizontal position (same direction as you
set the drivepin), all the way in. There should be almost no
gap between the propeller hub and the gearhouse.
7. SP30S2i and SP40S2i only, push the propeller on to the shaft
and turn until the internal spline in the propeller hub alignes
with the external spline on the propeller shaft.
8. Place the washer (4) on the prop.shaft and then tighten the
lock-nut (3) on the propeller shaft.
9. Place the zinkanode (2) in its designated position and tighten
the zincanodes holding screw (1). Apply a thread glue (Locktite
or similar) to ensure that the zincanodes holding screw does
not un-screw itself from the propellers rotation.
Parts description:
1 : Screw for zincanode
5 : Drivepin for propeller
2 : Zincanode
6 : Oil drain screw
3 : Propeller lock nut
7 : Copper washer/seal for
4 : Washer
24
3. Den Vorratsbehälter mit Getriebeöl EP90 füllen.
4. Wenn das Getriebegehäuse nicht schon vorher befüllt wurde,
die Ölablaßschraube (6) öffnen, bis Öl austritt, dann sicher
festziehen. Immer die Kupferdichtung (7) verwenden.
5. Die Propellerachse so drehen, daß der Mitnahmestift (5) in
horizontaler, zentrierter Position steht.
6
Den Propeller auf die Achse stecken und bis zum Anschlag
schieben. Die Aussparung für den Mitnahmestift muß ebenfalls in horizontaler Position stehen. Zwischen Propellernabe
und Getriebegehäuse darf kein Abstand sein.
7. Befestigungsschraube (3) inkl. Scheibe (4) bis zum Anschlag
anziehen.
8. Die Zinkanode (2) mit der Befestigungsschraube (1) anbringen. Locktite o.ä. verwenden, damit sich die Schraube durch
die Rotation des Propellers nicht löst.
Teile:
1 : Schraube für Zinkanode
5 : Mitnahmestift
2 : Zinkanode
6 : Ölablaßcschraube
3 : Propellermutter
7 : Kupferscheibe / Dichtung
4 : Scheibe
oil drain screw
SP 30 S2i / SP 40 S2 i/ SP 55 Si
3.4 - 2005
N
Montering av oljetank og propeller
1. Monter oljetanken over vannlinja. Høyden over vannlinja må
være minst 20% av lengden fra vannlinja og til senter av
tunnelen. Dette vil sikre overtrykk i girhuset.
2. Fest slangen til oljetanken og strekk den ned til braketten. Pass
på at slangen ikke er i klem, og at det ikke dannes luftlåser inne
i slangen p.g.a. løkker. Fest slangen med slangeklemmer.
3. Fyll oljetanken med girolje type EP90.
4. Hvis du ikke forhåndsfyllte girhuset må du nå løsne tappeskruen (6) helt til olje kommer renende ut. Da e girhuset fylt
med olje. Stram skruen igjen, og pass på at kobbertettningen
(7) er på plass.
5. Vri propellakselen så drivpinnen (5) står loddrett. Pinnen må stå
midt i propellakselen.
6. Vri propellen så sporet for driv pinnen er loddrett, eller i lik
vinkel som du har stilt drivpinnen. Skyv propellen inn på
propellakselen. Det skal nesten ikke være klaring mellom
propellen og girhuset.
7. Sett på skiven (4) på propellakselen, deretter strammes
låsemutteren (3).
8. Plasser sinkanoden (2) i sporet sitt. Fest den med skruen til
sinkanoden (1). Bruk locktight eller lignende for at skruen ikke
skal skrus ut av propellrotasjonen.
Delebeskrivelse:
1: Skrue til sinkanode
5: Drivpinne for propell
2: Sinkanode
6: Tappeskrue
3: Låsemutter til propell
7: Kobbertetning
4: Skive til propell
F
Montage du réservoir à huile des hélices
1. Monter le réservoir à huile au-dessus de la ligne de flottaison à
au moins 20 % de distance en partant de la ligne de flottaison
vers le centre du tunnel (minimum 200 mm). Ceci dans le but
d’assurer suffisamment de surpression d’huile dans l’embase.
2. Raccorder le tuyau à huile au réservoir et le tuyau d’alimentation
dans le support moteur. Serrer les vis et les brides de fixation
des deux tubes. Veiller à ce que la pente du tube soit constante
afin de ne pas créer une poche d’air qui stopperait le flux
d’arrivée d’huile et qu’elle soit suffisamment raide pour une
bonne circulation à l’intérieur de l’embase.
3. Remplir le réservoir à huile avec de l’huile type EP90.
4. Si l’embase n’a pas été pré-remplie, ouvrir la vis de purge (6)
jusqu’à ce que l’huile s’écoule, puis la serrer doucement (et
vérifier que le joint de cuivre (7) soit en place).
5. Tourner l’arbre d’hélice afin que la goupille d’entraînement (5) soit
en position horizontale et centrée par rapport à l’axe sur l’arbre.
6. Pousser l’hélice en alignant à l’horizontal le logement prévu
pour recevoir la goupille d’entraînement. Il ne devrait pratiquement pas y avoir de jeu entre le moyeu de l’hélice et l’embase.
7. Positionner la rondelle (4) sur l’arbre d’hélice puis serrer l’écrou
(3) sur l’arbre d’hélice.
8. Mettre en place l’anode en zinc (2) et serrer sa vis de fixation
après avoir appliqué du frein filet (locktite ou similaire) sur son
pas de vis afin de s’assurer que la vis de fixation de l’anode en
zinc ne se desserrera pas toute seule pendant la rotation des
hélices.
Description des pièces détachées :
1 = vis pour anode en zinc 5 = goupille d’entraînement pour l’hélice
2 = anode en zinc
6 = vis de purge
3 = écrou d’hélice
7 = rondelle en cuivre /
4 = rondelle
I
Montaggio serbatoio dell'olio ed elica o eliche
FI
joint pour vis de purge
Öljysäiliön ja potkurien asennus
1. Montare il serbatoio dell’olio al di sopra del linea di galleggiamento di un tratto pari ad almeno il 20% del distanza tra la linea
di galleggiamento e il centro del tunnel. Ciò per assicurare che
vi sia una sovrappressione sufficiente dell’olio nel piede.
2. Collegare il tubo dell’olio al serbatoio e il tubo di alimentazione
nella staffa del motore. Avvitare le due viti serratubo. Accertarsi
che il tubo dell’olio non formi delle anse (per cui si formino delle
bolle d’aria che interrompono il flusso dell’olio) e abbia
un’angolazione corretta, in modo di consentire all’olio di defluire
liberamente nelil piede.
3. Riempire il serbatoio dell’olio con olio per ingranaggi tipo
Motorex EP90.
4. Se non è stato effettuato il riempimento preventivo del piede,
svitare il tappo filettato dello scarico dell’olio (6) finché l’olio
defluisce, quindi serrarlo saldamente e controllare che la
guarnizione di rame (7) sia presente.
5. Far ruotare l’albero dell’elica in modo che il perno di
trasmissione (5) sia in posizione orizzontale e verificare che sia
centrato nell’albero dell’elica.
6. Spingere l’elica sull’albero con la sede del perno di trasmissione
in posizione orizzontale (stessa direzione del perno di trasmissione), completamente rientrata. Il mozzo dell’elica e il
piede devono essere quasi a contatto, senza spazio intermedio.
7. Posizionare la rondella (4) sull’albero dell’elica e poi serrare il
dado di bloccaggio (3) sull’albero dell’elica.
8. Installare l’anodo di zinco (2) nella posizione prevista e avvitare
la vite di ritenuta dell’anodo di zinco (1). Applicare una colla per
filetti (Locktite o simile) per far sì che la suddetta vite di ritenuta
non si sviti a causa del rotazione dell’elica.
1. Sijoita öljysäiliö vedenpinnan yläpuolelle etäisyydelle, joka on
ainakin 20% vedenpinnan ja tunnelin keskustan välisestä
etäisyydestä . Tämä siksi, että varmistetaan, että vaihteistoon
tulee tarpeeksi öljypainetta.
Descrizione delle parti:
Osa luettelo:
2. Asenna öljyletku öljysäiliöön ja letkukaraan moottorilaipassa.
Kiristä molemmat letkukiristimet. Varmista, ettei letkussa ole
yhtään silmukkaa, johon syntyisi ilmalukkoja ja että letku on
hyvässä kulmassa antaen öljyn vapaasti virrata vaihteistoon.
3. Täytä öljypurkki vaihteistoöljyllä EP90.
4. Jos et täyttänyt vaihteistoa ennen asentamista, avaa öljytulppa
(6) kunnes öljyä tulee läpi, sitten kiristä tulppa kunnolla
varmistaen myös, että kuparitiiviste (7) on paikalla.
5. Käännä potkuriakselia niin, että potkurisokka (5) on
vaakatasossa ja varmista, että se on keskellä potkuriakselia.
6. Työnnä potkuri akselille potkurisokan uran ollessa vaakatasossa
(saman suuntaisena, johon asetit potkurinsokan), aina pohjaan
asti. Potkurin ja vaihteiston välinen etäisyys pitäisi olla melkein
olematon.
7. Aseta aluslevy (4) potkuriakselille ja kiristä sitten lukkomutteria
(3) potkuriakselille.
8. Aseta sinkki (2) sille tarkoitettuun paikkaan ja kiristä sinkin
kiinnitysruuvi (1). Käytä kierreliimaa (Locktite tai vastaava)
varmistaaksesi, että sinkin kiinnitysruuvit eivät aukea potkurin
pyörimisestä johtuen.
1: vite per anodo di zinco
5: perno di trasmissione per l’elica
1 : Sinkin kiinnitysruuvi
5 : Potkurisokka
2: anodo di zinco
6: tappo filettato di scarico dell’olio
2 : Sinkkianodi
6 : Öljytulppa
3: dado di bloccaggio dell’elica 7: rondella di rame/guarnizione per
3 : Potkurin lukkomutteri
7 : Öljytulpan kuparitiiviste
4: rondella
4 : Aluslevy
tappo filettato di scarico dell’olio
SP 30 S2i / SP 40 S2i / SP 55 Si
3.4 - 2005
25
Fig. 1
Fig. 2
Bolt tightening force (M 8):
SP 30/40 S2i (2x) / SP 55 Si
(4x) 17 Nm (12,4 lb/ft)
GB
Fitting the electromotor
1. Turn the driveshaft in the gearhouse and the motorshaft so that
the track for the shearpin have a corresponding direction with
the shearpin in the motor shaft.
2. Slide the motor gently onto the driveshaft and motor bracket.
You might have to jiggle it a bit to get it on as the fitting is tight.
The electromotor can sit in all directions on the bracket. Ensure
that the cable terminals are available for electric installation later.
3. Fasten the motor loosely to the bracket with the provided bolts.
4. If you are installing the motor in an angle of more than 30o off a
vertical position, the electromotor needs a separate/additional
support. See illustration in the measurements drawings.
5. Tighten the bolts holding the motor to the motorbracket with
17Nm / 12,4 lb/ft as shown in Fig. 1.
6. Check the system by turning the propeller, it will be a little hard
to turn (because of the gear reduction and the motor), but you
should be able to turn it by hand.
7. Check if the springs for the brushes sit correctly on the brushes
(see through the metal web around the top of the electromotor).
In some cases (shallow installation or workboat / fishingboat only)
we recommend to protect the propeller by mounting a grid in the
tunnel opening (Fig. 2). It is important to keep a grid to a minimum
and as streamlined for the thrusters waterflow as possible, as it will
decrease the effect of the thruster.
NB ! Paint the gearhouse and propeller with antifouling made for
propellers. Do not paint the propeller shaft, the zincanodes or the
end face of the gearhouse.
NB ! Do not run the thruster for more than very short bursts
without being in the water.
NB ! If the boat is still being built when the electromotor is installed,
it must be covered up to avoid dust from the building going into the
motor and the solenoids. This cover must be removed before the
thruster is being used.
26
D
Einbau des Elektromotors
1. Getriebeachse und Motorachse so drehen, daß beide eine
gemeinsame Richtung für den Scherstift aufweisen und dieser
in der Motorachse Aufnahme findet.
2. Den Motor vorsichtig auf die Motorhalterung aufsetzen (evtl.
durch leichtes hin und her bewegen). Den Motor so plazieren,
daß die Leitungsanschlüsse für die spätere elektrische
Installation zugänglich sind.
3. Motor und Halterung mit den 4 Bolzen vormontieren.
4. Wird der Motor mehr als 30o außerhalb der Vertikalen eingebaut, so muß er ausreichend abgestützt werden. Siehe dazu
die Illustration in den Maßzeichnungen.
5. Motor mit Motorhalterung verschrauben (Anzugsmoment
17Nm) (Fig. 1).
6. Den Propeller zur Überprüfung drehen. Dieser sollte aufgrund
von Übersetzungsverhältnis und Motorwiderstand etwas
schwergängig sein, sich jedoch von Hand drehen lassen.
7. Durch das Metallgitter am oberen Motorende prüfen, ob die
Federn für die Bürsten korrekt sitzen.
In manchen Fällen, z.B. bei flachem Rumpf oder im gerwerblichen
Einsatz (z.B. Fischfang) empfehlen wir, den Propeller durch ein Gitter vor der Tunnelöffnung zu schützen (Fig. 2). Dieses sollte auf ein
Minimum beschränkt und so stromlinienförmig wie möglich sein, da
die sonst die Leistung des Thrusters reduziert wird.
NB ! Wir empfehlen, auf das Getriebegehäuse Anti-Fouling
aufzutragen. Nicht auf die Propellerachse, Zinkanoden oder den
Verschluß des Getriebegehäuses auftragen.
NB ! Den Thruster nur für den Bruchteil einer Sekunde betätigen
wenn dieser nicht im Wasser ist.
NB ! Wird der Elektromotor eingebaut, falls das Boot noch in Bau
ist, so muß dieser abgedeckt werden, um eine Verschmut-zung
von Relais und Motor zu verhindern. Diese Abdeckung muß vor
Benutzung des Thrusters entfernt werden.
SP 30 S2i / SP 40 S2 i/ SP 55 Si
3.4 - 2005
N
Montering av elektromotor
1. Vri drivakselen i girhuset og akslelen i elektromotoren så sporet
for brytepinnen i drivakselen korresponderer med brytepinnen i
motor akselen.
2. Sett motoren forsiktig ned på motorbraketten og drivakselen.
P.g.a. nøyaktig tilpasning kan det være vanskelig å treffe sporet
for brytepinnen med brytepinnen. Elektromotoren kan stå i alle
retninger på brakketen.
3. Fest motoren løst til braketten med bolter.
4. Hvis motoren er vinklet med mer en 30o trenger motoren
separat oppstøtting.
5. Stram boltene med 17Nm/12,4 lb/ft som vist i fig. 1.
6. Sjekk systemet ved å vri på propellen. P.g.a. utvekslingen i girhuset vil dette være tungt, men det skal være mulig å vri den
for hånd.
7. Sjekk at børstefjærene sitter korrekt på børstene (gjøres ved å
se gjennom gitteret på siten av motoren).
I visse tilfeller (ved grunne installasjoner, fiske/arbeidsfartøy fartøy)
anbefaler vi å beskytte propell og girhus ved å montere et gitter
foran tunnelåpningene (Fig. 2). Det er da meget viktig å beholde
strømlinjeformen, og å begrense gitteret til et minimum. Feil
installasjon kan begrense skyvekraften med 10%.
NB ! Påfør bunnstoff på girhus og propell for å unngå vekst som
kan svekke thrusterens effekt. Sinkanoder propellaksling og
tetninger skal ikke stoffes.
NB ! Thrusteren må kun kjøres i meget korte perioder når den
ligger på land.
NB ! Hvis båten fortsatt er under bygging når thrusteren blir montert
må motoren dekkes til for å unngå at støv og lignende trenger inn i
girhus og elektromotor. Dekket må fjernes før motoren tas i bruk.
I
Montaggio motore elettrico
1. Ruotare l’albero di comando nel piede e ruotare l’albero del motore
elettrico, in modo che la sede del spina di sicurezza abbia una
direzione corrispondente a quella del spina di sicurezza nell’albero
del motore elettrico.
2. Far scorrere delicatamente il motore elettrico sull’albero di comando
e la staffa del motore. Può essere necessario muoverlo un po’ da una
parte e dall’altra per farlo entrare, perché fa una certa resistenza. Il
motore elettrico può essere posizionato in tutte le direzioni sulla
staffa. Verificare che i morsetti dei cavi siano disponibili per la
successiva installazione elettrica.
3. Fissare il motore elettrico alla staffa mediante i bulloni in dotazione,
senza stringere.
4. Se si sta installando il motore con un angolo superiore a 30o rispetto
alla verticale, occorre un sostegno separato per il motore elettrico.
Vedere la figura nei disegni quotati.
5. Stringere i bulloni per il fissaggio del motore elettrico alla staffa del
medesimo, con una coppia di 17 Nm / 12,4 lb/ft (v. Fig. 1).
6. Verificare il funzionamento del sistema facendo girare l’elica. Ci
vorrà una certa forza per farla girare (a causa degli ingranaggi di
riduzione e del mo-tore elettrico), ma comunque dovrebbe essere
possibile farla girare a mano.
7. Verificare se le molle per le spazzole sono alloggiate corretta-mente
sulle spazzole stesse (osservare attraverso la rete metallica che
circonda la parte superiore del motore elettrico).
In alcuni casi (installazione poco al di sotto del linea di galleggiamento
oppure barca da lavoro / peschereccio) si raccomanda di proteggere
l’elica montando una griglia nell’apertura del tunnel (Fig. 2). È
importante che la griglia sia il più possibile a maglie larghe e con un
profilo tale da rallentare il meno possibile il flusso d’acqua dei
propulsori, in quanto essa farà diminuire l’effetto del propulsore.
N.B.: verniciare il piede e l’elica con antivegetativa per eliche. Non verniciare l’albero dell’elica, gli anodi di zinco o la faccia esterna del piede.
N.B.: non azionare il propulsore se non per qualche attimo quando
l’imbarcazione è tirata a secco.
N.B.: se la barca è ancora in costruzione quando viene installato il
motore elettrico, essa, dev’essere coperta per evitare che la polvere
generata nelle operazioni di costruzione penetri nel motore elettrico e
nelle elettrovalvole. Tale protezione dev’essere rimossa prima che
venga utilizzato il propulsore.
F
Montage du moteur électrique
1. Tourner l’arbre d’entraînement dans l’embase ainsi que l’arbre
moteur de manière à aligner la clavette de cisaillement avec celle
de l’arbre moteur.
2. Glisser doucement le moteur à l’intérieur de l’arbre d’entraînement et du support moteur. Il sera éventuellement nécessaire
d’avoir à le secouer légèrement un peu pour le mettre en place
étant donné que le montage est serré. Les moteurs peuvent être
placés dans n’importe quelle direction sur le support. Mais bien
penser à orienter le boîtier relais vers le bas et vérifier que le moteur soit en appui s’il est monté en position verticale à plus de 30o.
3. Assembler le moteur au support avec les boulons fournis, sans
les serrer.
4. Serrer les 4 écrous de fixation du moteur au support moteur avec
1.7 m.Kg comme indiqué sur le schéma n° 1.
5. Vérifier l’installation en tournant l’hélice, ce sera d’ailleurs un petit
peu difficile à tourner (en raison de la transmission et du moteur),
mais il sera possible de la tourner manuellement.
6. Vérifier si les ressorts pour les balais sont correctement en place
sur les balais (regarder à travers le grillage de protection du moteur).
Dans certains cas (montage peu profond ou sur des bateaux de
pêche / bateaux utilitaires uniquement) nous conseillons de protéger
l’hélice en installant une grille de part et d’autre du tunnel (voir
schéma n° 2). Il est important de réduire au minimum le frein
occasionné par cette grille qui peut décroître la poussée de 10 %.
NB : Peindre l’embase et l’hélice avec un antifouling pour hélices pour
éviter la prolifération de petits coquillages qui pourraient réduire sérieusement les performances de l’appareil. Par contre, ne pas peindre
l’arbre d’hélice, les anodes en zinc ou la face arrière de l’embase.
NB : Ne pas faire fonctionner le propulseur davantage que par
petites impulsions hors de l’eau.
NB : Si le bateau est toujours en construction lors de l’installation du
moteur, il devra être recouvert de façon à éviter que de la poussière,
provenant de la construction, s’introduise dans le moteur et dans les
relais. Cette protection doit être retirée avant d’utiliser le propulseur.
FI
Sähkömoottorin asennus
1. Pyöritä vaihteiston vetoakselia ja moottorin akselia niin, että
murtosokan ura on vastaavassa suunnassa kuin
moottoriakselissa oleva murtosokka.
2. Aseta varovasti moottori vetoakselin ja moottorilaipan päälle.
Moottoria voi hiukan joutua sovittamaan, koska liitos on tiivis.
Sähkömoottori sopii joka suuntaan moottorilaipassa. Tarkista,
että kytkentäterminaalit ovat hyvin ylettyvillä myöhempää
kytkentää varten.
3. Kiinnitä moottori kevyesti moottorilaippaan mukana tulevilla
pulteilla.
4. Jos olet asentamassa moottoria kulmaan, joka on yli 30o pois
pystysuorasta, sähkömoottori tarvitsee erikseen oman
kannattimen. Katso kuva mittapiirustuksissa.
5. Kiristä moottorin kiinnityspultit 17Nm / 12,4 lb/ft momentilla
kuten kuvassa 1.
6. Tarkista järjestelmä pyörittämällä potkuria, se on hiukan raskas
pyöritettävä (vaihteiston alennussuhteen ja moottorin takia),
mutta sitä pitäisi käsin pystyä pyörittämään.
7. Tarkista, että hiilien jouset istuvat oikein hiilessä (katso verkon
läpi / sähkömoottorin yläosassa).
Joissakin tapauksissa (matala asennus tai työvene / kalastusvene)
suosittelemme, että potkuri suojataan asentamalla verkko tunnelin
päätyihin (Kuva 2). On tärkeää pitää verkko minimaalisena ja niin
virtaviivaisena kuin mahdollista potkurin vesivirtauksia vastaan,
ettei se vähennä keulapotkurin työntövoimaa.
HUOM ! Maalaa vaihteisto ja potkuri potkureille tarkoitetulla
antifouling-maalilla. Älä maalaa potkuriakselia, sinkkianodeja tai
vaihteiston päätyä.
HUOM ! Älä käytä keulapotkuria kuin ainoastaan lyhyitä
silmänräpäyksiä, jollei se ole vedessä.
HUOM ! Jos venettä vielä rakennetaan kun sähkömoottori on jo
asennettu, se on peitettävä jottei pölyä pääse moottoriin ja
solenoideihin. Tämä suoja on poistettava ennen kuin keulapotkuri
otetaan käyttöön.
SP 30 S2i / SP 40 S2i / SP 55 Si
3.4 - 2005
27
*C
*D
-
+
Battery
12V or 24V
M
+
SP 30 S2i
SP 40 S2i
SP 55 Si
-
Fig. 1
Fig. 2
Table for s election of m ain cable,
battery, fus e and m ain-s witch
s izes .
SP 55 Si
SP40S2i SP30S2i
M ode l
GB
•
•
•
•
•
•
•
V oltage
12 V
Curre nt
draw
195 A DIN
up to 7m total + &
-
8 - 11m total
25 mm2
200 C C A D in
380 CC A SA E
AWG 2
12 V
280 A DIN
24 V
330 A DIN
35 mm2
35 mm2
AWG 1
160 A DIN
-
25 mm2
AWG 4
35 mm2
200 C C A D in
380 C CA SA E
AWG 1
300 C C A D in
570 CC A SA E
AWG 2
12 V
+&
12 - 15m total + &
-
16 - 19m total + &
50 mm2
200 C C A D in
380 CC A SA E
60 mm2
AWG OO
25 mm2
AWG 4
200 C C A Din
380 C C A SA E
A WG 0
300 C C A D in
570 C CA SA E
AWG O
350 C C A D in
665 CC A SA E
50 mm2
350 C C A D in
665 C CA SA E
200 C C A D in
380 C CA SA E
60 mm2
200 C C A D in
380 C C A SA E
AWG 0
70 mm2
300 C C A Din
570 C C A SA E
A WG OO
95 mm2
AWG OOO
35 mm2
20 - 23m total + &
-
24 - 27m total
+&
-
Electrical installation
350 C C A Din
665 C C A SA E
D
•
•
•
•
•
•
•
95 mm2
300 C C A D in
570 C C A SA E
AWG 2
N/ A
225 CC A din
428 CA SA E
95 mm2
300 CC A D in
570 C C A SA E
AWG 0000
400 C C A D in
95 mm2
A WG OOOO 760 C C A SA E
35 mm2
70 mm2
AWG 00
AWG OOO
200 C C A Din
380 C C A SA E
A WG 2
Explanation of electrical table
- All cable lengths are the total of + and - (to and from).
- Battery size is stated as minimum cold crank capacity, not Ah.
- Use slow fuse rated to hold stated Amp-Draw for min. 5 minutes.
* Cable size and main battery size when an extra bow battery
with minimum the CCA mentioned as A is installed.
It is important that you use a good cable size and batteries with
a high cranking capacity to feed the thruster, because it is the
actual voltage at the motor while running the thruster that decides
the output rpm of the motor and thereby the actual thrust. Please
see the list below for advised min. sizes of cables and batteries.
You can of course use larger cables for even better results.
A main switch (*C) that can take the load without noticable
voltage drop must be installed in the main positive lead so the
power for the thruster can be turned off independent of the rest
when not on board or in emergencies. This should be placed in
an easy accessible place and the boats instructions should inform
that this should be turned off like the boat's other main switches.
We also advice to install a fuse (*D) in the positive lead for
protection agains short circuiting of the main cables. This fuse
should be of a adequate quality which normally means that it is
physically large as these have less voltage drop than the simple /
small ones. It should be of the slow type and sized to take the
amperage draw for atleast 5 minutes.
A circuit breaker can be used instead of the fuse and main power
switch as long as the functionality is the same.
The cable ends must be fitted with terminals and these must be
well isolated against contact with anything but the proper
connection point.
Terminals must be properly tightened. Secure/hold inner nut
when tightening (Fig. 2). Tighten with max: 15 Nm / 11 lb/ft.
The negative / minus cable (*A) connects to the A1 (-) terminal.
The positive / plus cable (*B) connects to the "+" terminal.
SP30/40: ø8mm / 5/16" bolt. Tighten with 15 Nm / 11 lb/ft.
SP 55: ø10mm / 3/8" bolt. Tighten with 15 Nm / 11 lb/ft.
250 C C A D in
475 C C A SA E
120 mm2
AWG 0000
50 mm2
AWG 1
95 mm2
350 C CA D in
665 CC A SA E
A WG 0000
400 CC A D in
760 C C A SA E
200 CC A D in
380 C C A SA E
400 C CA D in
120 mm2
2xAWG 0000 760 CC A SA E
50 mm2
AWG 1
200 C CA D in
380 CC A SA E
Elektrische Installation
Übersicht:
- Leitungslängen beziehen sich auf die Gesamtlänge von + und - Batterieangabe ist min. Kaltstartkapazität, nicht Ah.
- Sicherung: träge Ausführung; angeg. Stomverbrauch min. 5 Min.
* Kabel- und Batteriegröße, falls eine zusätzliche Batterie, mit min.
der Kaltstartkapazität (mit A angegeben), im Bug installiert ist.
Da die am laufenden Motor anliegende Spannung die Umdrehungszahl und damit die Leistungskraft bestimmt, sind Kabel mit
ausreichendem Querschnitt und Batterien mit hoher Stromkapazität zu verwenden. Bitte die unten angegebenen Mindestgrößen für Kabelquerschnitt und Batterien berücksichtigen.
Natürlich können für noch bessere Leistung überdimensionierte
Bauteile verwendet werden.
Auf der positiver Hauptseite muß ein Hauptschalter (*C) mon-tiert
werden, der die Leistung ohne größeren Spannungsverlust
weiterleitet. Damit kann die Spannung für den Thruster in Notfällen abgeschaltet werden, ohne die übrige Bordelektrik zu beeinflussen. Dieser sollte an einer leicht zugänglichen Stelle pla-ziert
sein und die Anleitung darauf hinweisen, daß dieser wie die andere
Bordelektrik bei Nichtbetrieb abgeschaltet werden sollte.
Zum Schutz gegen Kurzschlüsse empfehlen wir, in der positiven
Leitung eine Sicherung (*D) zu installieren. Es sollte eine
Qualitätssicherung von ausreichender Größe verwendet werden.
Die Sicherung sollte in "träger" Ausführung sein und die
angegebene Amperezahl mindestens 5 Minuten aushalten.
Statt Sicherung und Hauptschalter kann ein Sicherungsautomat
verwendet werden, falls die gleiche Funktionalität gewährleistet ist.
Die Leitungsenden müssen so mit Kabelschuhen versehen und
isoliert sein, daß sie nur mit dem Terminal Verbindung haben.
Die Kabelschuhe müssen korrekt angezogen werden. Die innere
Mutter sichern (Fig. 2). Anzugsmoment max. 15 Nm / 11 lb/ft.
Das Minus-Kabel (Negativ) (*A) am A1 (-) Terminal anschließen.
Das Plus-Kabel (Positiv) (*B) am "+" Terminal anschließen
SP30/40: ø8mm Bolzen. Anzugsmoment 15 Nm / 11 lb/ft.
SP 55: ø10mm Bolzen. Anzugsmoment 15 Nm / 11 lb/ft.
NB! Very important to check the following with mainswitch in
off position:
After all electrical connections has been completed check with
a ohm meter that there is no electrical connection between
electromotor body and positive terminal on the motor and
between the electromotor body and the negative (A1) terminal
on the motor. If you feel unsure on how to perform this check,
contact skilled personell for guidance.
28
-
M in. Cable M in.Batte ry M in. Cable M in.Batte ry M in. Cable M in.Batte ry M in. Cable M in.Batte ry M in. Cable M in.Battery M in. Cable M in.Batte ry
dim e ns ion CCA by DIN dim e nsion CCA by Din dim e ns ion CCA by DIN dim e ns ion CCA by Din dim e ns ion CCA by DIN dim ens ion CCA by Din
SP 30 S2i / SP 40 S2 i/ SP 55 Si
3.4 - 2005
N
•
•
•
•
•
•
•
Forklaring til elektrisk tabell
- Kabellengder tilsvarer + kabelen, og - kabelen (Frem og tilbake).
- Min. batterikap. som kaldstartkapasitet (CCA), ikke Ampere.
- Bruk trege sikringer for å forebygge spenningsfall.
Det er viktig å bruke kabler som er store nok, og et batteri med
god kaldstartkapasitet for å drive thrusteren. Det er Volten som
kommer frem til motoren under kjøring som bestemmer turtallet til
motoren og dermed også skyvekraften. Vær vennlig og jamfør
listen over for minimum anbefalte kabel, og batteristørrelse.
En hovedstrømbryter (*C) som ikke medfører stor spenningsfall
må installeres på thrusterens plusskabel. Det bør være mulig å
skru av strømmen til thruster uavhengig av resten av det elektriske
systemet, når man ikke er om bord, eller i et nødstilfelle. Bryteren
bør plasseres på et tilgjengelig sted, og båtens instruksmanual må
ta for seg at denne skal skrus av slik som de andre hovedbrytere.
Det må installeres sikring på pluss strømkabelen for å beskytte
mot kortslutning av hovedstrømkablene. Sikringen bør være av
høy kvalitet, noe som vanligvis betyr at de er fysisk store, for å
unngå spenningsfall som ofte er resultatet av å bruke mindre,
enklere sikringer. Sikringen skal være en treg type som tåler
amper trekket til elektromotoren i minimum 5 min.
En kretsbryter kan erstatte sikringen og hovedstrømbryteren hvis
den har de samme funksjonene.
Kabelendene kan må påmonteres terminaler og disse må
isoleres mot alt som ikke er riktig kontaktpunkt.
Det er viktig att kabelsko trekkes korrekt fast på koblingsbolt.
Kontra mutter på koblingsbolt må holdes fast ved tiltrekking (Fig. 2).
Minus kabelen (*A) tilkobles A1 (-) terminalen.
Pluss kabelen (*B) tilkobles "+" terminalen.
SP 30/40: ø8mm / 5/16’’ dra til med 15 Nm.
SP 55: ø10mm / 3/8’’på motoren dra til med 15 Nm.
I
•
•
•
•
•
•
•
Elektrisk installasjon
F
•
•
•
•
•
•
Installazione elettrica
Spiegazione del tabella elettrica
- Tutte le lunghezze dei cavi sono il totale di + (positivo) e (negativo) - (“da” e “a”).
- La capacità delle batterie è espressa come capacità minima di
avviamento a freddo, non in Ah.
- Utilizzare fusibili lenti, in grado di tenere al passaggio del corrente
nominale per almeno 5 minuti.
* Dimensioni dei cavi e dimensioni del batteria principale quando si
installa una batteria di prora supplementare con un CCA minimo
precisato come “A”.
È importante utilizzare cavi adeguatamente dimensionati e batterie
con un’elevata capacità a freddo per l’alimentazione del propulsore,
perché è la tensione effettiva che si ha in corrispondenza del motore
quando viene azionato il propulsore che determina il numero di giri
del motore e pertanto la spinta effettiva. L’elenco seguente riporta le
dimensioni raccomandate per cavi e batterie. Ovviamente è possibile
utilizzare cavi di dimensioni maggiori, ottenendo risultati ancora migliori.
Un interruttore generale (*C) in grado di portare il carico senza
caduta di tensione apprezzabile deve essere installato sul positivo
principale, in modo che sia possibile escludere il propulsore indipendentemente dal resto del carico1 quando non c’è nessuno a bordo
o in caso di emergenza. Esso dev’essere installato in un posto
facilmente accessibile; nelle istruzioni dell’imbarcazione dev'essere
spiegato che esso dev’essere spento al pari degli altri interruttori
generali dell’imbarcazione.
Si raccomanda inoltre di installare un fusibile (*D) sul positivo, come
protezione contro i cortocircuiti dei cavi principali. Tale fusibile
dev’essere di qualità adeguata, il che di norma significa che le sue
dimensioni fisiche sono notevoli, in quanto tale tipo di fusibile ha
una caduta di tensione minore rispetto a quelli più semplici / piccoli.
Il fusibile dev’essere di tipo lento e dimensionato in modo tale da
tenere al passaggio del corrente nominale per almeno 5 minuti.
È possibile utilizzare un interruttore automatico invece del fusibile e
dell’interruttore generale, purché le funzionalità siano identiche.
Le estremità del cavo devono essere dotate di morsetti e questi
devono essere ben isolati,, escludendo il contatto con qualsiasi
cosa che non sia l’opportuno punto di collegamento.
Il cavo negativo (-) (*A) viene collegato al morsetto A1 (-).
Il cavo positivo (+) (*B) viene collegato al morsetto “+”.
SP 30/40: bullone ø8mm. Serrare con una coppia da 15Nm-11lb/ft.
SP 55: bullone ø10mm. Serrare con una coppia da 15Nm- 11lb/ft.
Il est important d’utiliser un câble de bonne taille et des batteries
de forte capacité de démarrage pour alimenter le propulseur, car
c’est la tension actuelle au moteur pendant le fonctionnement du
propulseur qui détermine la vitesse de sortie du moteur et par conséquent la poussée. Merci de consulter la liste ci-dessus pour
utiliser les tailles et capacités minimum recommandées pour les
câbles et les batteries. Il est bien entendu possible d’utiliser des
câbles de plus forte section pour des résultats encore meilleurs.
Un disjoncteur (*C) doit être installé sur le câble positif principal
pour couper indépendamment l’alimentation du propulseur en
cas de non-utilisation ou en cas d’urgence. Celui-ci devra être
d’excellente qualité afin d’éviter les chutes de tension. Il devra
être installé dans un endroit facilement accessible et les
instructions de bord devront comporter des informations de
façon à pouvoir le couper de la même manière que les autres
interrupteurs principaux dans le bateau.
Nous conseillons également d’installer un fusible (*D) sur le
câble positif afin de protéger les câbles principaux contre les
courts-circuits. La qualité du fusible devra être fonction de
l’usage qu’on veut en faire ce qui signifie normalement qu’il soit
bien dimensionné afin d’éviter toute chute de tension. Il devra
être de type lent et sa taille devra permettre de supporter les
baisses d’ampérage pendant au moins 5 mn.
Un disjoncteur peut être utilisé à la place du fusible ainsi qu’un
disjoncteur principal, tant que le fonctionnement reste le même.
Les extrémités des câbles doivent être équipées de terminaisons
et ceux-ci devront être bien isolés afin de ne pas être en contact
avec quoi que ce soit d’autre que leur point de branchement.
Le câble négatif (*A) est branché à la borne A1 (-).
Le câble positif (*B) est branché à la borne "+".
SP 30/40: ø8mm / 5/16" borne. 15 Nm / 11 lb/ft.
SP 55: ø10mm / 3/8" borne. 15 Nm / 11 lb/ft.
FI
•
•
•
•
•
•
Installation électrique
Sähkökytkentä
Sähkötaulukon selitys
- Kaikki kaapelipituudet ovat kokonaismitat + ja -.
- Akun koko on annettu minimi CCA (kylmäkäynnistysvirta DIN),
ei Ah.
- Käytä hitaita sulakkeita, jotka kestävät annetun ampeerimäärän
min. 5 minuuttia.
* Kaapelikoko ja käynnistys akun koko, kun erillinen akku
annetulla CCA mitoituksella on asennettu keulapotkurille.
On tärkeätä, että käytät tarpeeksi suuria kaapeli kokoja ja
akkuja, joissa korkea CCA DIN (kylmäkäynnistysvirta), koska
käytössä todellinen volttimäärä moottorissa määrittelee moottorin
kierrokset ja näin ollen myös työntövoiman. Katso taulukosta
suositellut minimi koot kaapeleille ja akuille. Voit tietysti käyttää
suurempia kaapeleita saadaksesi vielä paremmat arvot.
Pääkatkaisija (*C), joka kestä vaadittavan kuormituksen ilman
jännitehäviöitä on asennettava päävirran plussakaapeliin, jotta
keulapotkurin virta voidaan erikseen katkaista veneestä poistuttaessa tai hätätapauksissa. Tämä pitäisi asentaa paikkaan, johon
on helppo ylettyä ja veneen käsikirjaan pitäisi liittää informaatio
tästä ja että se täytyy sulkea kuten muut pääkatkaisijat.
Suosittelemme myös, että sulake (*D) asennetaan päävirran
plussakaapeliin, estämään päävirtakaapelien oikosulun. Tämä
sulake pitäisi olla riittävän laadukas, mikä yleensä tarkoittaa sitä,
että se on fyysisesti iso, koska näissä on vähemmän virtahäviötä
kuin pienemmissä. Se pitäisi olla hidas ja kestää annettun
ampeerimäärän vähintään 5 minuuttia.
Automaattikatkaisijaa voidaan käyttää sulakkeen ja pääkatkaisijan
tilalla, mikäli se täyttää vaatimukset.
Kaapelipäissä on käytettävä liittimiä ja ne on suojattava kosketukselta kaikesta muusta kun oikeasta kytkentäterminaalista.
Miinuskaapeli (*A) kytketään A1 (-) terminaaliin.
Plussakaapeli (*B) kytketään «+» terminaaliin.
SP 30/40: ø8mm / 5/16" pultti. Kiristä 15 Nm / 11 lb/ft momenttiin.
SP 55: ø10mm / 3/8" pultti. Kiristä 15 Nm / 11 lb/ft momenttiin.
SP 30 S2i / SP 40 S2i / SP 55 Si
3.4 - 2005
29
Pin 2
3
4
4
3
1
2
2
1
Pin 3
M
Pin 3
ON
TH R USTER
OFF
ON
SLEIPNER
Control panel and control-leads
Control panel installation:
• All standard Sidepower control panels of 1999 models and later
can be used in any combination as well as any two way switching
device when installed with an ON/OFF switch that breaks control
power to this switch.
• You can install as many panels as you wish by using optional Yconnectors. If two or more panels are operated at the same time
in opposite directions, the electronic controlbox will stop the
thruster until it only receives a signal to go in one direction.
• When using original Sidepower equipment it is all "plug & go".
• If the drive direction of the thruster is the opposite of what
expected, the blue and grey wire must be changed on the
thruster solenoid. You must turn the electronic controlbox 180o
around in its clip to do this.
• All controls must have spring load for automatic return to neutral
position.
• The mechanical installation of the panel is described in the
manual following the panel.
• The thruster control should be placed in a position were it is easy
to use, and it is very common to use the thruster at the same
time as your gear / throttle lever so it is normally a user friendly
solution to be able to access these with one hand for each control.
Pin configuration of 4 pole AMP contact:
Pin1: BLACK = Ground
Pin2: BLUE = Engages thruster SB solenoid
Pin3: GREY = Engages thruster Port solenoid
Pin4: RED
= Positive voltage for control panel
D
Pin 4
SIDEPOWER
TH R USTER
ON
30
Pin 2
SIDEPOWER
12 or 24V
GB
Pin 4
ON
OFF
SLEIPNER
Steuerpanel und -kabel
Kontrollpanelinstallation:
• Alle Sidepower-Panels der Modellreihe 1999 und später können
in beliebiger Kombination, sowie mit einem 2 Wege Schalter,
falls ein Ein/Aus Schalter installiert ist, der den Steuer-strom zu
diesem Schalter unterbricht, verwendet werden.
• Es können beliebig viele Panels mit Hilfe des Y-Verbinders
verwendet werden. Werden gleichzeitig zwei oder mehr Panels
in unterschiedlicher Richtung betätigt, so stoppt die Kontrollbox
den Thruster, bis dieser nur ein Richtungssignal erhält.
• Bei Verwendung von original Sidepower Komponenten ist das
gesamte elektrische Systeme "plug & go".
• Läuft der Thruster entgegengesetzt zum Kontrollpanel, so müssen
die blaue und graue Leitung an den Hauptrelais gegeneinander
getauscht werden. Hierbei muß die elektronische Kontrollbox um
180o gedreht werden.
• Alle Schalter müssen über eine automatische Rückstellung
(Federmechanismus) in Nullposition verfügen.
• Die mechanische Installation des Panels ist in der dem Panel
beiliegenden Anleitung beschrieben.
• Das Panel sollte in einer Position montiert werden, wo es leicht
zu bedienen ist. Da Thruster und Hauptantrieb oft zusammen
verwendet werden, ist es benutzerfreundlich, das Panel so zu
postionieren, daß mit je einer Hand gesteuert werden kann.
Pin-Belegung des 4 poligen AMP Kontakts:
Pin1: SCHWARZ = Masse
Pin2: BLAU
= Steuert Thruster SB Relais
Pin3: GRAU
= Steuert Thruster BB Relais
Pin4: ROT
= Positive Spannung für Kontrollpanel
SP 30 S2i / SP 40 S2 i/ SP 55 Si
3.4 - 2005
N
Kontrollpanel og kontrollkabler
Kontrollpanel installasjon:
• Alle standard ”Sidepower” panel for 1999 modeller og senere
kan brukes i enhver kombinasjon med hverandre.
• Alle fireleders, toveis kontrollbrytere kan også brukes hvis de er
utstyrt med en ”av og på” bryter for som bryter strømmen til
bryteren.
• Det er mulig å installere så mange kontrollpanel som ønskelig
ved å bruke ”Sidepower” Y-stykker.
• Hvis thrusteren skulle motta flere forskjellige signaler samtidig så
kutter den til den mottar kun et signal fra et kontrollpanel.
• Ved bruk av Sidepower originalutstyr er alle elektriske kontakter
klare til å plugges i sammen.
• Hvis kjøreretningen ikke stemmer overens med forventningene
må blå og grå ledning på Thruster-releet byttes om. For å få til
dette må den elektroniske kontrollboksen snus 180o i braketten.
• Alle paneler må ha et fjær oppheng som gjør at de automatisk
hopper til nøytral posisjon etter bruk.
• Monteringsveiledning for panelet følger panelet.
• Thrusterpanelet bør monteres et sted det er lett å bruke. Siden
gass og gir ofte brukes samtidigt som thrusteren, er det ofte en
god løsning å ha muligheten å operere disse med hver sin hånd.
Pinne konfigurasjon for fireleder AMP kontakt:
Pinne 1: Svart = Jord
Pinne 2: Blå
= Aktiverer thruster rele Styrbord
Pinne 3: Grå
= Aktiverer thruster rele Babord
Pinne 4: Rød
= Pluss til kontrolpanel
I
F
Montage du panneau de contrôle
• Tous les panneaux de contrôle Sidepower standards, modèle
1999 et à suivre, peuvent être utilisés dans toutes les situations
tout comme les contacteurs à deux positions, lorsqu’ils sont
montés avec un interrupteur ON/OFF qui stoppe l’arrivée vers
cet interrupteur.
• Il est possible d’installer autant de panneaux que souhaité en
utilisant des connecteurs en «Y» en option. Si deux panneaux
ou plus fonctionnent en même temps dans des directions
opposées, le boîtier de contrôle électronique stoppera le
propulseur jusqu’à ce qu’il reçoive un signal pour aller dans une
seule direction.
• Lors de l’utilisation d’un équipement Sidepower d’origine, celui-ci
est totalement «plug & go» (branchez et partez).
• Si la direction d’entraînement du propulseur est l’opposée de ce
qui est souhaité, les fils bleu et gris devront être changés sur le
relais du propulseur. Il faut tourner le boîtier de contrôle
électronique de 180o autour de ses clips pour faire cela.
• Tous les joysticks doivent être du type à retour automatique
position neutre dès qu’ils sont relâchés (momentané bâbord/
OFF/momentané tribord).
• Le montage mécanique du panneau est décrit dans ce manuel
après la rubrique «Panneau de contrôle».
• Le panneau de contrôle du propulseur devra être placé dans une
position où il sera facile à utiliser, le plus simple consiste à le
positionner près de la commande moteur.
Configuration à 4 fils :
Fil 1 Noir
= terre
Fil 2 Bleu = commande relais tribord
Fil 3 Gris
= commande relais bâbord
Fil 4 Rouge = tension positive pour panneau de contrôle
Pannello di comando
Installazione del pannello di comando:
• È possibile utilizzare tutti i pannelli di controllo Sidepower
standard dei modelli 1999 e successivi in qualsiasi
combinazione, nonché due qualsiasi dispositivi di commutazione
a due vie installati con un interruttore ON/OFF che escluda
questo dispositivo.
• È possibile utilizzare tutti i pannelli che si desidera utilizzando
connettori a “Y” (opzionali). Se si azionano ontemporaneamente
due o più pannelli in direzioni opposte, l’elettronica di comando
arresta il propulsore finché esso riceve solo un segnale di
movimento in un’unica direzione.
• Quando si utilizzano apparati Sidepower originali, basta collegare
gli apparati e il sistema è pronto a entrare in funzione ("plug&go").
• Se il propulsore gira in senso opposto rispetto a quanto ci si
aspettava, occorre cambiare il filo blu e grigio sull’elettrovalvola
del propulsore. Per far ciò, occorre ruotare l’elettronica di
comando di 180o nel suo fermaglio.
• Tutti i controlli devono avere una molla di contrasto, per il ritorno
automatico alla posizione neutra.
• L’installazione meccanica del pannello di comando è descritta
nel manuale, dopo il quadro di comando.
• Il comando del propulsore dev’essere installato in una posizione
in cui sia facilmente utilizzabile. È molto comune utilizzare il
propulsore mentre contemporaneamente si agisce sulla leva
dell’acceleratore, per cui di solito è preferibile dare la possibilità
di utilizzare una mano per ciascun comando.
Configurazione dei piedini di un contatto AMP quadripolare:
Piedino 1: NERO Terra
Piedino 2: AZZURRO Innesto elettrovalvola propulsore di dritta
Piedino 3: GRIGIO Innesto elettrovalvola propulsore di sinistra
Piedino 4: ROSSO Tensione positiva per quadro di comando
Panneau de contrôle et câbalage
FI
Käyttöpaneeli ja käyttökaapelit
Käyttöpaneelin asennus:
• Kaikkia alkuperäisiä Sideower-käyttöpaneeleita, (1999 tai
•
•
•
•
•
•
uudemmat) voidaan käyttää missä tahansa yhdistelmässä
(hipaisupaneeli ja joystickpaneeli sopivat keskenään). Jos
tavallista 2-tie katkaisijaa käytetään täytyy tälle asentaa erillinen
on/off katkaisija.
Voit käyttää niin monta paneelia kuin haluat y-liitoksia
käyttämällä. Jos kahta tai useampaa paneelia käytetään yhtä
aikaa vastakkaisiin suuntiin, pysäyttää elektronikka keulapotkurin
kunnes se vastaanottaa ainoastaan yhden signaalin.
Käytettäessä alkuperäisiä Sidepower-tarvikkeita, ovat kaikki
kytkennät pikaliittimillä.
Jos keulapotkurin työntö on vastakkaiseen suuntaan mitä
odotettu, täytyy sinisen ja harmaan johdon paikka vaihtaa
solenoidissa. Jotta tämä onnistuisi täytyy sähköboksi kääntää
180o ympäri pidikkeessä.
Kaikki katkaisijat täytyy olla nolla asentoon palautuvia.
Paneelin mekaaninen asennus kuvataan paneelin mukana
tulevassa oppaassa.
Keulapotkurin käyttöpaneeli tulisi sijoittaa niin, että sitä on helppo
käyttää. On tavallista, että keulapotkuria käytetään samalla kuin
vaihde/kaasuvipua, joten yleensä on käyttäjäystävällinen
ratkaisu jos ylettyy näihin yhdellä kädellä.
4 napaisen AMP liittimen kytkentä:
Napa 1: MUSTA
= Maadoitus
Napa 2: SININEN
= Käynnistää styyrpuuri solenoidin
Napa 3: HARMAA
= Käynnistää paapuuri solenoidin
Napa 4: PUNAINEN = Positiivinen virta käyttöpaneelille
SP 30 S2i / SP 40 S2i / SP 55 Si
3.4 - 2005
31
GB
"Visual" wiring diagram
F
Schéma visuel de branchement
D
Schaltplan - Übersicht
I
Schema di connessione visivo
N
Koblingsskjema elektrisk
FI
Visualinen kytkentäkaava
red
3.4 - 2005
Battery
main
switch
black
Thermal
switch
SP 30 S2i / SP 40 S2 i/ SP 55 Si
Battery
12V
or
24V
brown
M
A2
A1
32
Fuse
blue
red
red
white
grey
6 1230i
Electronic
control box
75 3 4 21 86 9
red
grey
blue
black
4
3
2
1
NB! Make sure to not use
any electronic interface
box (delay box) older than
the 6 1230i (ex. 6 122x)
on SP30S2i, SP40S2i,
and SP55Si.
Schaltplan
I
Schema di connessione tecnico
N
Koblingsskjema
FI
Tekninen kytkentäkaava
NB! Make sure to not use
any electronic interface
box (delay box) older than
the 6 1230i (ex. 6 122x)
on SP30S2i, SP40S2i,
and SP55Si.
6
grey
(sig +)
black (-)
2
blue
(sig +)
SP 30 S2i / SP 40 S2i / SP 55 Si
3.4 - 2005
Battery
main
switch
A1
M
A2
On Motor
Thermal
switch
red
brown
Fuse
black
5
1
grey
(sig -)
red
white 7
3
Electronic
interface box
6 1230i
8
red (+)
Fused 9
inside 1A
4
blue
(sig -)
3
D
1
Schéma technique de branchement
2
F
4
Technical wiring diagram
4 pin
AMP
connector
GB
33
GB
Checklist
Checkliste
D
F Propeller is fastened correctly to the shaft.
F Der Propeller ist korrekt auf der Achse befestigt.
F Propeller turns freely in tunnel.
F Der Propeller läßt sich frei im Tunnel drehen.
F Lower-unit is filled with gearoil (SP55Si only).
F Das Getriebegehäuse ist mit Getriebeöl gefüllt.
F Oil-drain screw is tightened and the copper seal is present
F Die Ölablaßschraube ist (inkl. Kupferdichtung) angezogen.
F
F
F
F
F
F
F
F
F
(SP55Si only).
The zinc-anode holding screw is tightened well with thread
glue.
Anti-fouling have been applied to the gearhouse and propeller
but NOT on the zincanode or the gearhouse lid where the
propeller is fastened.
Oil tank is fitted above the waterline as required and filled with
gearoil (SP55Si only).
The brush springs are fitted correctly on the brushes in the
electromotor (check through the grill around the top end of the
motor).
Correct drive direction as per controlpanel.
All electrical connections are clean, dry and tight, and the
correct cable, fuse and main switch sizes have been used.
With a ohm meter check that there is no electrical connection
between electromotor body and positive terminal on the motor
and between the electromotor body and the negative (A1)
terminal on the motor.
The bolts holding the gearhouse and motorbracket together
are tightened correctly.
The bolts holding the electromotor to its bracket are tightened
correctly.
The thruster has been installed as per the instructions in this
manual and all points in checklist above have been controlled.
Signed: ................................................. Date: ................................
Extra pre-delivery tests by installer / yard who does not use
other quality control systems !
F Die Befestigungsschraube der Zinkanode ist mit Locktite o.ä.
versehen und angezogen.
F Antifouling ist auf Getriebegehäuse und Propeller aufgetragen,
F
F
F
F
F
F
NICHT auf Zinkanode oder den Verschluß des Getriebegehäuses, wo der Propeller anliegt.
Der Vorratsbehälter für das Öl ist oberhalb der Wasserlinie
montiert und wie vorgeschrieben mit Getriebeöl gefüllt.
Die Bürstenfedern sitzen korrekt auf den Bürsten im Elektromotor (durch das Gitter am oberen Motorende prüfen).
Kontrollpanel und Thruster funktionieren in gleicher Richtung.
Alle elektrischen Verbindungen sind sauber, trocken und fest.
Die richtige Leitungs-, Sicherungs- und Haupschaltergröße sind
verwendet worden.
Die Bolzen, die Getriebegehäuse und Motorhalterung
zusammen halten, sind korrekt angezogen.
Die Bolzen, die Elektromotor und Motorhalterung zusammen
halten sind korrekt angezogen.
Der Thruster ist wie in diesem Manual vorgeschrieben installiert
und alle Punkte der obigen Checkliste sind kontrolliert worden.
Unterschrift: ................................................... Datum: ......................
Zusätzlicher Test vor Auslieferung durch den Installateur/Werft,
falls nicht andere Qualitätskontrollpanel-Systeme verwenden !
Thruster Typ: .................................................... Spannung: ...............
Seriennummer: .................................... Lieferdatum: .........................
Thruster type: .................................................. Voltage: ....................
Kontrollpanel und Thruster funkt. in gleicher Richtung: ....................
Serial number: ................................. Date of delivery: .......................
Spannung am laufenden Thruster: ....................................................
Correct drive direction as per controlpanel: .......................................
Querschnitt der verwendeten Batteriekabel: .....................................
Voltage at thruster when running: ......................................................
Das Abteil für den Thruster ist von Kielraumwasser abgeschirmt
und ohne offensichtliches Risiko der Überflutung.
Battery cable size used: .....................................................................
The compartment where the thruster is fitted is isolated from general
bilge water and has no obvious or suspected risks for flooding.
Anmerkungen des Installateurs:
Other comments by installer:
Sjekkliste
N
F
F
F
F
F
F
F
F
F
F
F
F
Propellen er festet til akselen på korrekt vis.
Propellen roterer fritt i tunnel.
Under vannshuset er fyllt med olje.
Det er tett ved tappeskruen, og kobbertettningen er på plass
Festeskruen til sinkanoden er festet med gjengelim.
Bunnstoff er påført girhus og propell, men ikke på sinkanode,
tetninger eller propelaksel.
Oljetanken er montert over vannlinja, i henhold med
instruksjonene gitt i denne manualen.
Børstefjærene er riktig plassert mot børstene. Dette sjekkes
ved å se gjennom gitteret på siden av motoren.
Kontrollpanel gir korrekt kjøreretning på thrusteren.
Alle elektriske koblinger er rene, tørre og tette. Korrekte kabler,
sikringer og hovedstrømsbryter er brukt.
Boltene som festet braket til girhus er festet korrekt.
Boltene som festet motor til braket er festet korrekt.
Thrusteren er installert i henhold til instuksene gitt i denne
manualen, og alle punkter i sjekklisten er kontrolert.
34
Signatur: ...............................................
Dato: ................................
Anbefalt før leverings test for installør / verft som ikke bruker
andre kvalitetskontroll systemer!
Thrustertype: ................................................ Volt: .............................
Serienummer: .....................................................................................
Leveringsdato: ....................................................................................
Korrekt kjørerettning per kontrollpanel: ..............................................
Spenning målt på thruster under kjøring: ...........................................
Strømkabler: .......................................................................................
Skottet hvor thrusteren er montert er isolert fra kjølvann og har
ingen åpenbar risiko for lekkasje.
Kommentar fra installør:
SP 30 S2i / SP 40 S2 i/ SP 55 Si
3.4 - 2005
A vérifier
F
I
F L’hélice est correctement fixée sur l’arbre
Punti da controllare
Le propulseur a été installé suivant les instructions de ce manuel et
tous les points de la liste de contrôles ci-dessus ont été vérifiés.
L’elica è fissata correttamente all’albero.
L’elica gira liberamente nel tunnel.
L’olio per ingranaggi è stato introdotto nel gruppo inferiore.
Il tappo filettato di scarico dell’olio è serrato e la guarnizione di
rame è presente.
F La vite di bloccaggio dell’anodo di zinco è ben stretta e
bloccata con la colla speciale per filetti.
F La vernice antivegetativa è stata applicata al piede e all’elica
ma NON all’anodo di zinco o al coperchio del piede al quale
l’elica è fissata.
F Il serbatoio dell’olio è installato al disopra della linea di galleggiamento, come richiesto, ed è stato riempito con olio per ingranaggi.
F Le molle per le spazzole sono montate correttamente sulle
spazzole del motore elettrico (controllare osservando attraverso
la griglia che circonda l’estremità superiore del motore elettrico).
F La direzione di avanzamento è quella corretta (corrisponde a
quella indicata sul quadro di comando).
F Tutti i collegamenti elettrici sono puliti, asciutti e ben stretti;
sono stati inoltre utilizzati cavi, fusibili e interruttori generali
correttamente dimensionati.
F I bulloni di fissaggio del piede e del staffa del motore sono
serrati correttamente.
F I bulloni di fissaggio del motore elettrico alla rispettiva staffa
sono serrati correttamente.
Il propulsore è stato installato secondo le istruzioni contenute in
questo manuale e tutti i punti sopra elencati sono stati controllati.
Signature: ............................................... Date: ................................
Firma: ......................................................... Data: ............................
Tests conseillés avant livraison par l’installateur / le chantier
qui n’utilise pas d’autres systèmes de contrôle qualité.
Prove ulteriori prima del consegna, eseguite da installatore /
cantiere navale che non utilizza altri sistemi di controllo qualità.
Type de propulseur: ....................................
Tipo di propulsore: ..................................
F
F
F
F
F L’hélice tourne librement dans le tunnel
F Le plein d’huile de l’embase est effectué
F La vis de purge est serrée et les joints cuivre en place
F Du frein filet a été appliqué sur la vis de fixation de l’anode zinc;
cette dernière est bien serrée
F L’antifouling a été appliqué sur l’embase et l’hélice mais PAS
sur l’anode en zinc NI sur le couvercle de l’embase du côté hélice
F Le réservoir à huile est installé au-dessus de la ligne de
F
F
F
F
F
flottaison comme demandé et rempli avec de l’huile
Les ressorts de balais sont correctement positionnés sur les
balais dans le moteur (vérifier à travers la grille autour de
l’extrémité du moteur)
Correction de la direction à partir du panneau de contrôle
Tous les branchements électriques sont propres, secs et serrés
et un dimensionnement correct des câbles, fusibles et coupecircuits a été respecté
Les boulons de fixation de l’embase et du support moteur sont
correctement serrés
Les boulons servant à fixer le moteur sur son support sont
correctement serrés
N° de série: .......................................
Tension: ...................
Tensione: .....................
Date de livraison: .................
Numero di matricola: .......................... Data di consegna: ...............
Direction d’entraînement correcte
à partir du panneau de contrôle : .......................................................
Direzione di avanzamento corretta
(corrispondente al quadro di comando): ............................................
Tension propulseur en marche: ......... Taille câble batterie utilisé: .......
Tensione in corrispondenza del
propulsore durante l’azionamento: .....................................................
Le compartiment où le propulseur est monté a été isolé de la
pompe de cale générale et ne présente pas de risques, cachés ou
apparents, d’inondation.
Autres commentaires par l’installateur:
Dimensioni del cavo batteria utilizzato: ..............................................
Il vano nel quale il propulsore è installato è stato isolato dall’acqua
di sentina e non c’è alcun rischio, evidente o sospetto, di
allagamento di tale vano.
Altre osservazioni dell’installatore:
Varmistuslista
FI
Keulapotkuri on asennettu tämän kirjan ohjeitten mukaan ja kaikki
varmistuslistan kohdat on tarkistettu.
F Potkuri on oikein asennettu akseliin.
F Potkuri pyörii vapaasti tunnelissa.
F Vaihteisto on täytetty öljyllä.
F Öljytulppa on kiristetty ja kuparitiiviste on paikalla.
F Sinkin kiinnitysruuvi on hyvin kiristetty kierreliimalla.
Allekirjoitus: .............................................
Päiväys: ........................
F Antifouling-maalia on laitettu vaihteiston ja potkurin päälle,
Lisätestit, jotka asentaja/telakka, jotka eivät käytä muita
laadunvalvonta järjestelmiä, on tehnyt ennen toimitusta!
F
Keulapotkuri: ..............................................
Jännite: ......................
Sarjanumero: .............................................
Toimituspäivä: ............
F
F
F
F
F
mutta EI sinkin tai vaihteistokannen (potkurin takana) päälle.
Öljysäiliö on vedenpinnan yläpuolella kuten vaadittu ja täytetty
öljyllä.
Hiilen jouset ovat kunnolla asennettu sähkömoottorissa
(tarkista verkon läpi sähkömoottorin yläosassa).
Työntövoima on samansuuntainen kun käyttöpaneelissa.
Kaikki sähkökytkennät ovat puhtaita, kuivia ja kireitä, oikeaa
kaapelia, sulaketta ja päävirtakatkaisijaa on käytetty.
Moottorilaippaa ja vaihteistoa kiinnittävät pultit ovat kiristetty
oikeaan momenttiin.
Sähkömoottoria kiinnittävät pultit ovat kiristetty oikeaan
momenttiin.
Oikea työntösuunta paneelin nähden: ...............................................
Laitteen jännite pyöriessä: ............... Käytetty virtakaapeli: ...............
Tila, johon keulapotkuri on asennettu on eristetty pilssivedeltä eikä
sisällä mitään näkyvää riskiä tulvaan.
Muita asentajan mielipiteitä:
SP 30 S2i / SP 40 S2i / SP 55 Si
3.4 - 2005
35
GB
Important user precautions
• Ensure that you know the location of the main battery switch that
disonnects the thruster from all power sources (batteries) so that
the thruster can be turned off in case of a malfunction.
• Always turn the main power switch off before touching any part
of the thruster, as an incidental start while touching moving parts
can cause serious injuries.
• Always turn the control device off when the thruster is not in use.
• The maximum continues usage time of the electrical thruster is
approximately 3 minutes. The electromotor has a built in thermal
cut-off switch that will shut off the electromotor if it is overheating
and re-engage it when it has cooled down some. This should be
considered when planning your manouvering.
• This also means that the thruster will limit its total running time
per time period so that you can not count on the thruster to hold
you in a current and sidewind for extensive time periods.
Depending on the surrounding temperatures etc. the thruster will
be able to run approximately 10 % of the time.
• Never use a thruster close to somebody in the water, as the
thruster will draw objects close by into the tunnel and contact
with the rotating propellers will cause serious injuries.
• Never run a thruster for more that one second when the boat is
not in the water, as this can damage the electromotor seriously.
• If the thruster stops giving thrust while the electromotor is running,
chances are that there is a problem in the drive-system. You must
then immediately stop trying to run it, and turn it off, as running the
electromotor for more than a few seconds without resistance from
the propeller, can cause serious damage to the electromotor.
• When leaving the boat always turn off the main power switch for
the thruster.
• We advice to always keep the main engine(s) running while
using a thruster. This will keep the batteries in a good charge
condition. This will also give better performance to the thruster,
as a higher voltage at the thruster results in a higher torque
(power) in the electromotor.
• Please note that the performance of a thruster strongly depends
on the voltage available at the electromotor. This voltage will
decrease by time because aging batteries have a reduction of
capacity. By installing new batteries the effect of the thruster
should be back at the original level.
• Make sure that only one control is used at the same time, if two
panels are operated in opposite directions at the same time the
thruster will not run at all. If they are operated in the same
direction the thruster will run in this direction.
• If the thruster is not performing or functioning as usual, the cause
for this must be found and corrected as soon as possible so to
avoid causing any other or further dammage to the equipment.
You must also turn off the main battery switch immedately in
case the problem is of electric origin.
•
•
•
•
•
•
•
•
•
•
•
•
Wichtige Benutzerhinweise
• Vergewissern Sie sich, wo der Hauptschalter für die Batterien ist,
damit der Thruster im Notfall abgeschaltet werden kann.
• Vor Arbeiten am Thruster oder in dessen Umgebung immer den
Hauptschalter ausschalten, da ein unbeabsichtigter Start durch
die rotierenden Teile zu Verletzungen führen kann.
• Immer die Kontrolleinheit ausschalten, wenn der Thruster nicht
benutzt wird.
• Die maximale Dauer bei kontinuielicher Benutzung beträgt ca. 3
Minuten. Der Elektromotor verfügt über einen Thermoschalter,
der den Thruster bei Überhitzung abschaltet und den Betrieb
nach entsprechender Abkühlung wieder zuläßt. Dies sollte vor
entsprechenden Manövern berücksichtigt werden.
• D.h., daß der Thruster in seiner Laufzeit per Zeiteinheit eingeschränkt ist, sodaß eine bestimmte Position nicht für längere Zeit
gehalten werden kann. Abhängig von der Umgebungstemperatur
etc. kann der Thruster ca. 10 % innerhalb eines beliebigen
Zeitraumes betrieben werden.
• Den Thruster nicht verwenden, wenn sich eine Person im
Wasser in der Nähe befindet, da der Thruster Objekte in der
Umgebung in den Tunnel zieht und dies zu schwerwiegenden
Verletzungen führen kann.
• Den Thruster außerhalb des Wassers nie länger als eine Sekunde betreiben, da dies den Elektromotor beschädigen kann.
• Ist keine Schubkraft vorhanden, obwohl der Thruster läuft, kann
ein Getriebeproblem vorliegen. Der Thruster muß dann sofort
ausgeschaltet werden, da der Elektromotor nach kurzer Laufzeit
ohne den Widerstand des Propellers schwer beschädigt werden
kann.
• Bei Verlassen des Schiffes immer den Thruster über den Hauptschalter ausschalten.
• Es ist vorteilhaft, die Hauptaggregate zu betreiben, wenn der
Thruster benutzt wird. Dies garantiert einen guten Ladezustand
und führt zu höherer Leistung des Thrusters, da die Spannung
am Thruster mehr Rotationskraft im Elektromotor bewirkt.
• Bitte berücksichtigen Sie, daß die Leistung des Thrusters stark
von der anliegenden Spannung abhängt. Diese ist bei gealterten
Batterien geringer, sodaß die volle Leistung mit neuen Batterien
wieder zur Verfügung steht.
• Sicherstellen, daß jeweils nur ein Kontrollpanel verwendet wird,
da der Thruster bei zwei Panels mit unterschiedlicher Richtungsvorgabe nicht reagiert. Sollten diese beide in die gleicher Richtung betätigt werden, so läuft der Thruster in entsprechender
Richtung.
• Funktioniert der Thruster nicht korrekt, so muß die Ursache
hierfür unverzüglich gefunden und behoben werden, um
weiteren Schaden für die Gerätschaften zu vermeiden. Im Falle
eines elektrischen Problems ist der Hauptschalter für die
Batterien sofort auszuschalten.
Viktige bruker forebehold
N
•
D
Forviss deg om at du kjenner plasseringen av hovedstrømsbryteren til baugthrusteren, som kutter all strøm til thrusteren, så thrusteren
kan skrus av i nødstilfelle.
Før berøring av noen del av thrusteren må alltid strømmen skrus av. En tilfeldig start kan volde stor fysisk skade.
Skru alltid av kontrollpanelet etter bruk.
Den maksimale sammenhengende kjøretiden for en elektrisk thruster er ca. 3 min. da vil en føler automatisk skru av motoren når den
når en viss varme. Dette må tas i betraktning når en manøver planlegges.
Dette betyr at ved manøvere som tar lang tid vil ikke thrusteren kunne brukes hele kontinuerlig. Ved manøvere som tar lang tid kan
man bruke thrusteren i ca 10 % av tiden, avhengig av tempraturen i vannet.
Bruk aldri thrusteren når noen er i vannet, thrusteren vil trekke gjenstander til seg og kontakt med propellen vil volde alvorlig skade.
Kjør aldri thrusteren i mer enn 1 sek. når båten er på land. Uten motstand fra vannet vil thrusteren nå ødelegende turtall svært fort.
Hvis thrusterne stopper å gi skyvekraft mens motoren er i gang, er det trolig oppstått problemer i girsystemet. Stopp umiddelbart å
kjøre motoren, og skru den av. Uten motstand fra vannet vil thrusteren nå ødelegende turtall svært fort.
Når man forlater båten skal alltid hovedstrømsbryteren slås av.
Vi anbefaler å ha motoren i gang når thrusteren kjøres. Da vil batterien vedlikeholdes, og det vil være høyere spenning til
elektromotoren. Høyere spenning gir høyere turtall og bedre ytelse.
Ytelsen til en baugthruster avhenger av hvilken spenning motoren mottar under kjøring. Kapasiteten til batterier avtar etter hvert som
de blir eldre, og dermed også ytelsen til thrusteren. Ved å installere nye batterier vil thrusteren yte maksimalt igjen.
Kun en kontroll skal brukes av gangen, hvis to kontroller brukes motsatt vei vil thrusteren stoppe automatisk. Hvis to paneler opereres
samme vei vil ikke dette skje.
Hvis thrusteren ikke fungerer tilfredsstillende må feilen lokaliseres og rettes så snart som mulig, for at ikke thrusteren skal ta ytterligere
skade, skru av hovestrømsbryteren hvis feilen er av elektrisk art.
36
SP 30 S2i / SP 40 S2 i/ SP 55 Si
3.4 - 2005
F
Précautions d'utilisation importantes
• S’assurer de bien savoir où se trouve le coupe-batterie principal qui
isole le propulseur des sources de puissance (batteries) de façon à
pouvoir couper le propulseur en cas de dysfonctionnement.
• Toujours stopper le coupe-batterie principal avant de toucher aux
pièces du propulseur, quelles qu’elles soient, étant donné qu’un
démarrage accidentel lors du toucher de certaines pièces peut
causer de graves blessures.
• Toujours couper le panneau de contrôle lorsque le propulseur n’est
pas utilisé.
• Le temps maximum d’utilisation en continu d’un propulseur
électrique est approximativement de 3 mn. Le moteur électrique est
équipé d’une sécurité thermique qui va couper le moteur s’il est en
surchauffe et le remettre en service lorsqu’il aura un peu refroidi.
Cela doit être pris en considération lors de la manœuvre.
• Cela signifie également que le propulseur va gérer son temps total
de fonctionnement par période de temps donc il ne faudra pas
compter sur le propulseur pour tenir le cap dans les courants et les
vents latéraux pendant trop longtemps. En fonction des
températures environnantes, etc… le propulseur sera capable de
fonctionner approximativement 10 % du temps.
• Ne jamais utiliser le propulseur trop près de quelqu’un dans l’eau,
étant donné que le propulseur va projeter des objets contenus dans
le tunnel et si ceux-ci sont en contact avec les hélices en marche,
cela pourrait blesser quelqu’un très grièvement.
• Ne jamais faire fonctionner un propulseur pendant plus d’une
seconde lorsque le bateau n’est pas à l’eau car cela
endommagerait sérieusement le moteur.
• Si le propulseur s’arrête en donnant des poussées alors que le
moteur est en marche, il y a des chances qu’il y ait un problème au
niveau du système d’entraînement. Il faut alors immédiatement
arrêter d’essayer de le mettre en route et le couper car le fait de faire
tourner le moteur pendant plus de quelques secondes sans résistance
au niveau de l’hélice pourrait très sérieusement l’endommager.
• Lorsque personne n’est à bord du bateau, toujours isoler le
propulseur à l’aide du coupe-batterie.
• Nous recommandons de toujours laisser tourner le moteur principal
pendant l’utilisation du propulseur. Cela permettra de garder les
batteries bien chargées. Cela donnera également au propulseur de
meilleures performances car une très bonne tension au niveau du
propulseur conduit à un meilleur couple moteur.
• Merci de noter que la performance d’un propulseur dépend en
grande partie de la tension disponible au niveau du moteur. Cette
tension va diminuer avec le temps car des batteries anciennes ont
une capacité réduite. En installant de nouvelles batteries, l’efficacité
du propulseur redeviendra normale.
• N’utiliser qu’un seul panneau de contrôle à la fois ; si deux panneaux
fonctionnent en même temps dans des directions opposées, le propulseur ne fonctionnera plus. Si les panneaux fonctionnent dans la
même direction, le propulseur fonctionnera dans cette même direction.
• Si le propulseur n’est plus aussi performant ou s’il ne fonctionne plus
aussi bien qu’à l’habitude, la cause doit en être trouvée et rectifiée
dès que possible de façon à éviter de causer d’autres ou de plus gros
problèmes à l’équipement. Stopper également le coupe-batterie
principal immédiatement en cas de problème d’origine électrique.
FI
I
Importanti precauzioni che l'utente deve adottare
• Accertarsi di conoscere la posizione dell’interruttore generale del
batteria che consente di scollegare il propulsore da tutte le
alimentazioni elettriche (batterie), in modo che sia possibile
disattivare il propulsore in caso di malfunzionamento.
• Disinserire sempre l’interruttore generale prima di toccare qualsiasi
parte del propulsore, in quanto l’avviamento involontario mentre si
toccano delle parti in movimento può provocare gravi lesioni.
• Disinserire sempre il dispositivo di controllo quando il propulsore
non viene utilizzato.
• Il tempo massimo di utilizzo continuativo del propulsore elettrico è di
circa 3 minuti. Il motore elettrico è dotato di un termico di protezione
incorporato, che disattiva il motore stesso in caso di surriscaldamento
e lo fa ripartire quando si è raffreddato. Di ciò occorre tenere conto
quando si pianificano le manovre da effettuare.
• Ciò significa anche che il tempo totale di funzionamento del propulsore
è limitato, per cui non si può fare affidamento sul propulsore per
lunghi periodi di tempo quando, per esempio, si deve manovrare in
presenza di corrente e vento al traverso. Tale tempo, che varierà a
seconda delle temperature in gioco ecc., sarà circa pari al 10 % del
tempo totale.
• Non utilizzare mai il propulsore quando c’è una persona vicina in
acqua, in quanto il propulsore aspira gli oggetti nel tunnel e il
contatto con le eliche ruotanti provoca gravi ferite.
• Non azionare mai il propulsore per più di un secondo quando
l’imbarcazione è tirata a secco, perché ciò può danneggiare
gravemente il motore elettrico.
• Se il propulsore cessa di fornire la spinta mentre il motore elettrico
gira, è probabile che vi sia un problema nel sistema di trasmissione.
In tal caso occorre immediatamente desistere dal tentativo e disattivarlo, perché se il motore elettrico gira per più di qualche secondo
senza la resistenza prodotta dall’elica, esso può subire gravi danni.
• Quando si scende a terra, ricordarsi di portare su OFF l’interruttore
generale del propulsore.
• Si suggerisce di tenere sempre in moto il motore principale
(o i motori principali) quando si utilizza il propulsore. In tal modo
verrà preservato il buono stato di carica delle batterie. Inoltre le
prestazioni del propulsore saranno migliori, perché una tensione più
alta fornita al propulsore si traduce in una coppia (potenza)
maggiore al livello del motore elettrico.
• Si noti che le prestazioni del propulsore dipendono molto dalla
tensione disponibile al motore elettrico. Tale tensione diminuisce col
passare del tempo, perché le batterie invecchiando subiscono una
riduzione del loro capacità. Installando nuove batterie, il propulsore
dovrebbe recuperare le prestazioni originarie.
• Accertarsi che venga utilizzato solo un comando per volta; se due
quadri di comando vengono azionati simultaneamente in direzione
opposta, il propulsore non verrà azionato. Se vengono azionati
simultaneamente nella stessa direzione, il propulsore girerà in
questa direzione.
• Se le prestazioni o il funzionamento del propulsore sono diverse dal
solito, occorre individuare la causa di ciò e porvi rimedio, non appena
possibile, per evitare di provocare altri danni agli apparati. Occorre
inoltre portare immediatamente su OFF l’interruttore generale delle
batterie, perché il problema potrebbe essere di origine elettrica.
Tärkeitä käyttäjän varotoimenpiteitä
• Varmista, että tiedät päävirtakatkaisijan sijainnin, jotta voit kytkeä sen pois kaikista virtalähteistä vahingon sattuessa.
• Sammuta aina päävirtakatkaisija ennen kuin kosket mihinkään osaan keulapotkurissa, käynnistys vahingossa jos kädet ovat liikkuvissa osissa
voi aiheuttaa vakavia vammoja.
• Sammuta aina käyttöyksikkö, kun laite ei ole käytössä.
• Sähkökeulapotkurin suurin jatkuva käyttö on noin 3 minuuttia. Sähkömoottorissa on sisäänrakennettu lämpörele, joka sammuttaa sen jos se
ylikuumenee liikaa ja käynnistää tämän uudelleen kun se on jäähtynyt. Tämä pitäisi ottaa huomioon laitetta käytettäessä.
• Tämä tarkoittaa myös sitä, että keulapotkuri ajallisesti rajoittaa käyntiaikaansa, joten ei voida luottaa siihen, että keulapotkuri pitää veneen
virtauksissa ja sivutuulessa pitkään paikallaan. Mm ympäröivästä lämpötilasta riippuen keulapotkuri pystyy käymään noin 10% ajasta.
• Älä koskaan käytä keulapotkuria jonkun ollessa lähellä vedessä, sillä keulapotkuri vetää lähettyvillä olevat kohteet tunneliin ja kosketus
pyörivän potkurin kanssa aiheuttaa suuria vammoja.
• Älä koskaan käytä keulapotkuria sekuntia kauimmin, jollei se ole vedessä, sillä tämä voi aiheuttaa suuria vahinkoja sähkömoottorille.
• Jos keulapotkurin työntövoima loppuu vaikka sähkömoottori pyörii, on mahdollista että vetojärjestelmässä on ongelmia. Tässä tapauksessa
täytyy heti keskeyttää sen käyttö ja sammuttaa keulapotkuri, sillä sähkömoottorin käyttö ilman potkurin vastusta voi vaurioittaa sähkömoottoria.
• Veneestä poistuessa, sammuta aina keulapotkurin päävirtakatkaisija.
• Suosittelemme, että pääkonetta käytetään aina samalla kun keulapotkuria. Tämä pitää akkujen varauksen hyvässä kunnossa. Se antaa myös
paremman suorituskyvyn keulapotkurille, koska korkeampi jännite johtaa parempaan voimaan moottorissa.
• Pane merkille, että keulapotkurin suorituskyky riippu paljon sähkömoottorin saamasta virrasta. Tämä jännite putoaa ajan mittaan sillä
vanhenevien akkujen suorituskyky laskee. Asentamalla uudet akut pitäisi keulapotkurin suorituskyvyn palautua ennalleen.
• Varmista, että ainoastaan yhtä käyttöpaneelia käytetään kerralla. Jos kahta paneelia käytetään yhtä aikaa eri suuntiin, keulapotkuri ei toimi
ollenkaan. Jos kahta käyttöpaneelia käytetään samaan suntaan keulapotkuri pyörii tähän suuntaan.
• Jos keulapotkuri ei toimi kuten normaalisti, täytyy syy tähän selvittää heti ja korjata niin pian kuin mahdollista, jotta estetään muiden vaurioiden
syntyminen laitteelle. Sinun täytyy myös heti sammuttaa päävirtakatkaisija, jos vika on sähköön liittyvää.
SP 30 S2i / SP 40 S2i / SP 55 Si
3.4 - 2005
37
To turn panel ON
To turn panel OFF
GB
Turn boat to port
Turn boat to starboard
How to use Sidepower thrusters
How to use a bowthruster
1. Turn main power switch for the bowthruster on. (Always turn off
the main power switch when not onboard.)
2. Please take some time to exercise thruster usage in open
water to avoid damages to your boat.
3. Turn the controlpanel on by pushing both "ON" buttons on the
original Sidepower panel simultaneously. If another type of control is
installed, engage the On/Off switch for the bowthruster.
4. Turn the bow in the desired direction by pushing the red button
for port movement or the green button for starboard movement.
If you have a joystick control, move it in the direction you wish
the bow to move. Other controls like footswitches or toggleswitches on the throttle can be used. These are normally
logically installed, so by engaging the port control, the bow goes
port etc. In case of any doubts, try in open waters first.
5. Depending on the sideways speed of the bow, you must disengage the control device shortly before the bow is in the desired
direction, as the boat will continue to move after stopping the
bowthruster.
How to use a single stern thruster
Some boats might however have installed a single stern
thruster because of space limitation in the bow. In this case the
stern thruster is used in the same way as a single bow thruster
(see above) for moving the boat's stern.
How to use a bow and stern thruster combined
The combination of a bow and stern thruster offers total
manouverability to the boat and the opportunity to move the
bow and the stern separately from each other. This enables
you to move the boat sideways in both directions and to turn
the boat around it's own axis staying at the same place.
• Again, if in doubt, try in open water first!
38
Bow+Stern
Thruster
D
Benutzung von Sidepower Thrustern
Benutzung einer Bugschraube
1. Die Bugschraube über deren Hauptschalter einschalten. Den
Hauptschalter immer ausschalten, wenn niemand an Bord ist.
2. Nehmen Sie sich etwas Zeit, um sich auf offenem Gewässer
mit der Steuerung der Bugschraube vertraut zu machen.
3. Original Sidepower Panels durch gleichzeitiges Drücken der
"ON" Knöpfe einschalten. Falls eine anderes Panel verwendet
wird, den On/Off Schalter für die Bugschraube einschalten.
4. Den Bug in die gewünschte Richtung bewegen; rot / Backbord
Knopf für Richtung Backbord, grün / Steuerbord Knopf für
Richtung Steuerbord. Bei Verwendung eines Joystick Panels,
dieses in die gewünschte Richtung bewegen. Kontrollpanels
wie Fuß- und Kippschalter können ebenfalls verwendet werden.
Diese sind normalerweise logisch installiert, d.h. der Bug folgt
der entsprechenden Panelvorgabe. Bei Unklarheit, zunächst
auf offenem Gewässer ausprobieren.
5. Abhängig von der Geschwindigkeit, mit der sich der Bug seitwärts bewegt, muß die Steuerung bereits vor Erreichen des
Endpunktes aufhören, da sich der Bug noch etwas in die
entsprechende Richtung "nachbewegt".
Benutzung einer Heckschraube
Einige Schiffe haben aufgrund von Platzmangel im Bug stattdessen eine Heckschraube installiert. In diesem Fall ist die
Heckschraube wie eine Bugschraube (siehe oben) zu verwenden, um das Heck zu bewegen.
Gemeinsame Benutzung von Bug- und Heckschraube
Die Kombination von Bug- und Heckschraube bietet die unabhängige Manövrierbarkeit von Bug und Heck. Dies eröffnet die
Möglichkeit, das Boot seitwärts in beiden Richtungen oder auf
der Stelle um die eigene Achse zu bewegen.
• Bei Unklarheit, zunächst auf offenem Gewässer ausprobieren.
SP 30 S2i / SP 40 S2 i/ SP 55 Si
3.4 - 2005
N
Hvordan bruke Sidepower thruster
Hvordan bruke en baugthruster
1. Skru på hovedstrømmen (skru alltid av hovedstrømmen når du
ikke er om bord i båten).
2. Det er fordel om de prøver baugthrusteren på åpent vann den
første gangen.
3. Skru på kontrollpanelet ved å trykke inn begge ”on” knappene
på Sidepower panelet. Hvis annet en originalt panel brukes må
dette skrus på.
4. Snu baugen i ønsket retning ved å trykke rød knapp for babord,
og grønn knapp for styrbord. Hvis du har joystickpanel så må
stikka dyttes i den retning baugen skal vendes.
Andre kontrollenheter som fotbrytere, eller brytere på gass
hendel kan også brukes. Disse er vanligvis logisk installert og
lette og operere. Ved tvil lønner det seg og prøve på åpent
vann først.
5. Avhengig av hvor stor fart baugen får sideveis må thrusteren
stoppes før baugen er i riktig posisjon, dette fordi baugen vil
fortsette sideveis litt etter thrusteren skruses av.
Hvordan bruke en enkel hekkthruster
Enkelte båter vil av plassmessige, eller andre hensyn bare
installere en hekkthruster. I disse tilfeller brukes hekkthrusteren
på samme måte som baugthrusteren.
Hvordan bruke hekk og baugthruster kombinert
Kombinasjonen av baug og hekkthruster gir en total kontroll
over båtens bevegelser p.g.a. muligheten til å bevege hakken
og baugen uavhengig av hverandre. Båten kan skyves
sidelengs og dreies rundt sin egen akse.
• Det er også her fordel å prøve ut systemet på åpent vann.
I
Come utilizzare i propulsori Sidepower
Come utilizzare un propulsore di prora
1. Portare su ON l’interruttore generale per il propulsore di prora.
(Tale interruttore deve essere sempre su OFF quando non c’è
nessuno a bordo.)
2. Esercitarsi a utilizzare il propulsore in acque libere, per evitare di
danneggiare l’imbarcazione con manovre avventate.
3. Accendere il pannello di comando premendo contemporaneamente entrambi i pulsanti “ON” del quadro Sidepower originale.
Se è installato un altro tipo di quadro di comando, azionare
l’interruttore ON/OFF per il propulsore di prora.
4. Girare la prora nella direzione desiderata premendo sul pulsante
rosso per il movimento a dritta, o su quello verde per il movimento
a sinistra. Se si dispone di un controllo a joystick, muoverlo nella
direzione nella quale si desidera muovere la prua. È possibile
utilizzare altri comandi, per esempio interruttori a pedale o
interruttori a leva posti sull’acceleratore. Di norma essi sono installati in modo logico, per cui azionando il comando di dritta la prora
va a dritta ecc. In caso di dubbi, fare delle prove in acque libere.
5. Occorre disinserire il dispositivo di controllo un po’ prima che la
prora assuma la direzione desiderata (quanto prima, dipenderà
dalla velocità laterale della prora), in quanto l’imbarcazione continuerà a muoversi anche dopo aver arrestato il propulsore di prora.
Come utilizzare un singolo propulsore di poppa
A causa di limiti di spazio nella prora, in alcune imbarcazioni si
installerà un singolo propulsore di poppa. In questo caso, tale
propulsore viene utilizzato nello stesso modo in cui si utilizzerebbe
un singolo propulsore di prora (vedere sopra) per muovere la
poppa dell’imbarcazione.
Come utilizzare un propulsore di prora e un propulsore di
poppa combinati
La combinazione di un propulsore di prora e un propulsore di
poppa offre la massima manovrabilità dell’imbarcazione e dà la
possibilità di muovere la prora e la poppa indipendentemente
l’una dall’altra. Ciò consente di muovere l’imbarcazione
lateralmente in entrambe le direzioni e di far girare l’imbarcazione
attorno al proprio asse, rimanendo nella medesima posizione.
• Anche in questo caso è opportuno, in caso di dubbi, fare delle
prove in acque libere!
F
Comment utiliser les propulseurs Sidepower
Comment utiliser un propulseur d’étrave
1. Mettre sous tension le propulseur à l’aide du coupe-batterie
(toujours couper le coupe-batterie principal lorsque personne
n’est à bord).
2. Merci de prendre le temps de s’exercer à cela en pleine mer
pour éviter d’endommager le bateau.
3. Mettre sous tension en appuyant simultanément sur les 2
touches «ON» du panneau de contrôle Sidepower. Si un autre
modèle de contrôle est installé, enclencher le bouton ON/OFF
pour le propulseur d’étrave.
4. Tourner l’étrave dans la direction souhaitée en appuyant sur le
bouton rouge pour un mouvement à bâbord ou sur le bouton
vert pour un mouvement à tribord. S’il s’agit d’un joystick,
actionner le levier dans la direction où vous voulez voir aller
l’étrave. D’autres manettes, telles que les commandes à pied
ou interrupteurs à bascule sur l’accélération, peuvent être
utilisées. Celles-ci sont normalement installées de façon à
déplacer l’étrave vers tribord lorsqu’elles sont déplacées vers la
droite. En cas de doute, essayer d’abord en plein mer.
5. Selon la vitesse latérale de l’étrave, désactiver le panneau de
contrôle rapidement avant que l’étrave soit dans la direction
souhaitée car le bateau va continuer à bouger après l’arrêt du
propulseur d’étrave.
Comment utiliser un propulseur de poupe seul
Certains bateaux peuvent cependant avoir installé un
propulseur de poupe seul en raison du manque de place dans
l’étrave. Dans ce cas, le propulseur de poupe est utilisé de la
même manière qu’un propulseur d’étrave seul (voir ci-dessus)
pour le déplacement de la poupe du bateau.
Comment utiliser un propulseur d’étrave et de poupe combinés
La combinaison d’un propulseur d’étrave et de poupe offre une
complète manœuvrabilité du bateau car il est possible de
bouger l’étrave et la poupe séparément l’une de l’autre. Cela
permet de manœuvrer le bateau latéralement dans les deux
directions et de faire tourner le bateau autour de son propre
axe tout en restant au même endroit.
• Pareil, en cas de doute, essayer d’abord en pleine mer.
FI
Miten Sidepoweria käytetään
Miten keulapotkuria käytetään
1. Käännä keulapotkurin päävirtakatkaisija päälle. (Sammuta aina
päävirtakatkaisija kun et ole veneessä)
2. Harjoittele keulapotkurin käyttöä avoimilla vesillä välttääksesi
vaurioiden syntymistä veneellesi.
3. Käynnistä käyttöpaneeli painamalla molemmat «ON» napit
alkuperäisessä Sidepower-paneelissa yhtäaikaa. Jos
toisentyylinen käyttöyksikkö on asennettu, käynnistä On/Off
kytkin keulapotkurille.
4. Ohjaa keulaa haluttuun suuntaan painamalla punaista nappia
styyrpuuriin ja vihreätä nappia paapuuriin. Jos sinulla on
joystickpaneeli, käännä se suuntaan johon haluat keulan
kääntyvän. Muita käyttönappeja kuten jalkakytkimiä tai
painonappeja kaasuhallintalaitteessa voidaan myös käyttää.
Nämät ovat yleensä loogisesti asennettu, joten käyttämällä
styyrpuurin kontrollia, keula kääntyy styyrpuuriin jne. Mikäli on
pienintäkin epäilystä, kokeile aina ensin avoimilla vesillä.
5. Riippuen keulan sivuttaisnopeudesta, sinun täytyy sammuttaa
keulapotkuri hiukan ennen kuin keula on halutussa suunnassa,
sillä vene jatkaa liikkumista hiukan keulapotkurin sammuttua.
Miten käyttää peräpotkuria
Joissakin veneissä saattaa olla ainoastaan peräpotkuri keulan
tilanpuutteen takia. Tässä tapauksessa peräpotkuria käytetään
kuten keulapotkuria (katso yllä) siirtämällä veneen perää
sivuttaissuunnassa.
Miten käyttää keula- ja peräpotkuri yhdistettynä
Yhdistelmä keula- ja peräpotkuri tarjoaa täydellisen hallinnan ja
mahdollisuuden siirtää keulaa ja perää toisistaan riippumatta.
Tämä sallii sinun ajavan venettä sivuttain molempiin suuntiin
sekä pyöräyttää venettä oman akselin ympäri.
• Taas, jos pienintäkään epäilystä, kokeile ensin avoimilla vesillä!
SP 30 S2i / SP 40 S2i / SP 55 Si
3.4 - 2005
39
SP30S2i
SP40S2i
SP55Si
1
2
3
4
1
2
2
2
1
5
1
6
3
4
7
4
3
3
5
5
5
6
4
7
SP30S2i
SP40S2i
7
6
Electromotor
Directional solenoids
Motorbracket for holding motor and
gearhouse together on the tunnel.
Breakpin or flexible coupling secures the
electromotor if propeller is jammed.
Changeable from inside the boat.
Glassfibre reinforced lexan propeller for
ultimate performance.
Oil-filled gearhouse.
Changeable zincanode protects gearhouse from corrosion in seawater.
7
1
2
3
4
5
6
7
6
Fastening screw for zincanode
Zincanode
Propeller lock nut
Washer
Drivepin for propeller
Oil drain screw
Copper washer/seal for oil drain screw
SP55Si
2
3
5
4
1
Locktite
1
GB
2
4
7
6
3
Maintenance
Wartung
D
» There must always be oil in the oil reservoir. Refill if necessary
with gear oil EP90 (SP55Si only).
» Im Vorratsbehälter muß immer Öl vorhanden sein. Falls nötig
mit Getriebeöl EP90 nachfüllen.
» Change the gear oil a minimum of every second year. Check the
gearoil quality in the gearhouse every time the boat is out of the
water (SP55Si only).
» Das Getriebeöl mindestens alle zwei Jahre wechseln. Die
Qualität des Getriebeöls immer überprüfen, wenn das Boot auf
Land liegt.
» Retighten the bolts holding the gearhouse to the motorbracket
during the first on-land service with the specified bolt tightening
force (see page 26).
» Die Bolzen, die das Getriebegehäuse mit der Motorhalterung
verbinden, beim ersten Service an Land mit dem angegebenen
Anzugsmoment (s. Seite 26) entsprechen nachziehen.
» Keep the propeller and gearhouse clean from growth by painting
with antifouling before every season.
PS ! The zinc anode, sealing and propeller shafts must absolutely not be painted. Be careful that you don't fill paint in the
"tracks" in the gearhouse that the propeller hub moves in.
» Vor jeder Saison auf Propeller und Getriebegehäuse
Antifouling aufbringen.
PS ! Zinkanode, Dichtungen und Propellerachse frei von
Antifouling halten. Die Aussparungen im Getriebegehäuse
nicht mit Anti-Fouling "füllen", da hier die Propellernabe
läuft.
» Change the zinc anode before every season, or when about half
the anode is gone. Always use a sealant on the screw holding
the zincanode to ensure that it does not fall off. Please observe
that in some waterconditions it can be necessary to install an
extra zincanode to ensure that it lasts for the whole period
between regular service lifts of the boat. Consult your dealer for
information on how to do this.
» As a part of the seasonal service of your boat, and before every
season, always check that:
• The propeller is securely fastened
• The bolts holding the electric motor to the motorbracket are
fastened correctly.
• The area where the thruster is installed is clean and dry. If there are
signs of water you must try to find the source and eliminate it.
• All electrical connections are clean and fastened firmly.
• Make sure that your batteries are in a good condition so that the
thruster gets a good voltage. Old or bad batteries will give a
reduced performance from the thruster.
40
» Die Zinkanode vor jeder Saison oder wenn diese zur Hälfte abgenutzt ist ersetzen. Zur Sicherung der Befestigungsschraube
der Zinkanode immer Locktite o.ä. verwenden. Bitte beachten
Sie, daß unter bestimmten Milieubedingungen eine zusätzliche
Zinkanode nötig sein kann, damit der Korrosionsschutz
gewährleistet ist, solange sich das Boot im Wasser befindet.
Hierzu kann Ihnen Ihr Händler nähere Informationen geben.
» Bei jedem Service und vor jeder Saison sollte folgendes
überprüft werden:
• Der Propeller ist sicher befestigt.
• Die Bolzen, die den Motor auf der Motorhalterung befestigen
sind korrekt angezogen.
• Die Umgebung des Thrusters ist sauber und trocken. Bei
Wassereinbruch, muß der Grund dafür beseitigt werden.
• Alle elektrischen Verbindungen sind sauber und fest.
• Sicherstellen, daß am Thruster ausreichend Spannung anliegt.
Alte oder mangelhafte Batterien reduzieren die Leistung und
sollten ausgetauscht werden.
SP 30 S2i / SP 40 S2 i/ SP 55 Si
3.4 - 2005
N
Vedlikehold
Entretien
F
» Det må alltid være olje i oljebeholderen, etterfyll med girolje type
EP90 hvis nødvendig.
» Il doit toujours y avoir de l’huile dans le réservoir à huile. Reremplir si nécessaire avec de l’huile type EP90.
» Skift olje minst annenhvert år. Sjekk giroljekvaliteten i girhuset
hver gang båten er på land.
» Changer l’huile tous les deux ans minimum. Vérifier la qualité de
l’huile dans l’embase à chaque fois que le bateau est au sec.
» Etterstram boltene som holder girhuset sammen med braketten
ved første på-land servicen med oppgitt moment (s. 26).
» Entretenir l’hélice et l’embase en les peignant avec de l’antifouling avant chaque saison pour éviter la prolifération de
l’environnement marin.
» Hold propellen og girhuset fritt for algevekst ved å påføre bunnstoff før hver sesong.
PS ! Sinkanoder, tetninger og propellaksel skal ikke påføres
bunnstoff, pass på så det ikke kommer bunnstoff i gjengesporene til propellmutteren.
» Skift sinkanode før hver sesong, eller når ca. halvparten av sinkanoden har tæret bort. Bruk Locktite eller lignende på skruen til
sinkanoden for at den ikke skal falle av. Ta i betraktning at under
noen vannforhold er det nødvendig å montere en ekstra sinkanode for å være sikker på at de skal vare i hele perioden mellom
vedlikehold. Ta kontakt med din forhandler for informasjon om
hvordan å gjøre dette.
» Som en del av det periodiske vedlikeholdet av din båt, og før
hver sesong må følgende ting sjekkes:
• Propellen sitter godt festet.
PS : L’anode en zinc, le système d’étanchéité et l’arbre
d’hélice ne doivent ABSOLUMENT pas être peints.
Attention à ne pas peindre entre l’hélice et l’embase au
risque d’endommager le joint spi et le moyeu d’hélice.
» Changer l’anode en zinc avant chaque saison ou lorsque la
moitié de l’anode est usée. Toujours monter la vis de fixation de
l’anode en zinc au frein filet pour s’assurer qu’elle ne tombe pas.
Dans certaines eaux, il peut être nécessaire d’installer une anode
en zinc supplémentaire pour être certain qu’elle tiendra toute la
saison jusqu’aux entretiens réguliers du bateau. Consulter votre
revendeur pour avoir des informations sur la procédure à suivre.
» Dans le cadre de l’entretien saisonnier du bateau, et avant
chaque saison, toujours vérifier les points suivants :
• L’hélice est fixée avec sécurité
• Boltene som holder elektromotoren til braketten sitter.
• Les boulons fixant le moteur électrique au support moteur sont
correctement vissés
• Skottet der baugpropellen er montert skal være rent, og tørt.
Hvis det er vann i skottet må lekkasjen finnes og tettes.
• La zone dans laquelle le propulseur est installé est propre et
sèche. Si des traces d’eau sont présentes,
• Alle elektriske tilkoblingspunkter er rene, og godt festet.
• Pass på at Deres batterier er i god stand så det kan gi høy
spenning til thrusteren. Redusert spenning vil gi redusert effekt
på thrusteren.
I
Manutenzione
» Dev’essere sempre presente dell’olio nel serbatoio dell’olio. Se
necessario, rabboccare con olio per ingranaggi Motorex EP90.
» Sostituire l’olio almeno ogni due anni. Controllare la qualità
dell’olio per ingranaggi nel piede ogni volta che l’imbarcazione è
tirata a secco.
» Durante la prima manutenzione a terra, serrare i bulloni che
fissano il piede alla staffa del motore con la coppia specificata
per i bulloni (v. alle pagg. 26).
» Tenere l’elica e il piede puliti, verniciando con antivegetativa
prima di ogni stagione.
N.B.: non bisogna assolutamente verniciare l’anodo di
zinco, il sigillante e gli alberi dell’elica. Fare attenzione a
non far penetrare la vernice nelle “piste” del piede nelle
quali si muove il mozzo dell’elica.
» Sostituire l’anodo di zinco prima di ogni stagione, o quando si è
consumato per circa la metà. Utilizzare sempre un sigillante
sulla vite di fissaggio dell’anodo di zinco per fare in modo che
non cada. Tenere presente che in alcune condizioni marittime
può essere necessario installare un secondo anodo di zinco per
avere la certezza che duri per l’intero periodo compreso tra due
manutenzioni a terra dell’imbarcazione. Consultare il proprio
rivenditore per informarsi su come eseguire quest’operazione.
» Durante la manutenzione stagionale dell’imbarcazione, e prima
di ogni stagione, controllare sempre che:
• l’elica sia ben fissata;
• i bulloni di fissaggio del motore elettrico alla staffa del motore
siano ben stretti;
• la zona in cui è installato il propulsore sia pulita e asciutta (se vi
sono segni di acqua, occorre individuare la fonte per eliminarla);
• tutti i collegamenti elettrici siano puliti e fissati saldamente;
• Accertarsi che le batterie siano in buone condizioni, in modo che
il propulsore riceva una tensione adeguata. Le batterie vecchie
o difettose provocano un calo delle prestazioni del propulsore.
il faut essayer de trouver la source et l’éliminer
• Toutes les connexions électriques sont propres et sûres
• S’assurer que les batteries soient bien chargées de façon à ce que
le propulseur ait la bonne tension. Des batteries anciennes ou
de mauvaise qualité réduiraient les performances du propulseur.
Ylläpito
FI
» Öljysäiliössä on kaiken aikaa oltava öljyä. Jos tarpeen täytä
vaihteistoöljyllä EP90.
» Vaihda vaihteiston öljy vähintään joka toinen vuosi. Tarkista
vaihteistoöljyn laatu aina kun vene on maissa.
» Kiristä moottorilaippaan vaihteistoa kiinnittävät pultit
ensimmäisen maissa pidettävän huollon yhteydessä oikeaan
kiristysmomenttiin (katso sivu 26).
» Pidä vaihteisto ja potkuri puhtaana vesikasvustosta
maalamalla nämät antifouling-maalilla ennen jokaista kautta.
PS ! Sinkkiä, tiivistettä tai potkuriakselia ei missään nimessä
saa maalata. Varo ettet täytä maalilla vaihteistossa olevia
uria, joissa potkurin keskiö liukuu.
» Vaihda sinkkianodi ennen jokaista kautta, tai silloin kun noin
puolet sinkistä on hävinnyt. Käytä aina kierreliimaa sinkin
kiristysruuvissa varmistaen, ettei tämä putoa pois. Huomaa, että
joissakin vesiolosuhteissa voi olla tarpeen lisätä toinen sinkkianodi,
jotta se kestäisi koko kauden veneen huoltonostojen välillä. Ota
yhteyttä jälleenmyyjääsi saadaksesi tietoa miten tämä tehdään.
» Jokaisen kausihuollon yhteydessä, ja ennen jokaista kautta,
tarkista aina että:
• Potkuri on hyvin kiinnitetty
• Pultit, jotka pitävät sähkömoottorin moottorilaipassa ovat
kiristetty oikein.
• Tila, johon keulapotkuri on asennettu, on puhdas ja kuiva. Jos
siinä on merkkejä vedestä, sinun täytyy löytää sen lähde ja
eliminoida se.
• Kaikki sähkökytkennät ovat puhtaita ja hyvin kinnitetty.
• Akkusi ovat hyvässä kunnossa, jotta keulapotkuri saa tarpeeksi
jännitettä. Vanhat tai huonot akut antavat keulapotkurille
huonomman suorituskyvyn.
SP 30 S2i / SP 40 S2i / SP 55 Si
3.4 - 2005
41
Trouble shooting
GB
Before seeking assistance at the help desk of your Sidepower dealer / distributor please perform these tests and make notes
of all measurements to ensure that they have as much information as possible to work on.
NB! All check points and solutions must be carried out after consulting the relevant information elsewhere in this manual to understand how the system is intended to work. If you are unable to understand what to check, you must consult a professional.
Check
»
»
»
»
Solution
The electromotor runs, but there is no thrust.
If the flexible coupling between the motor and
driveshaft is not fitted correct inside the boat
Check the flexible coupling and the motor installation to ensure correct
connection of the flexible coupling before re-fitting the electromotor
Are the propellers in the tunnel fastened correctly on
the prop-shaft (key present)
Re-fasten or replace the propeller and/or key.
With the motor removed, turn the driveshaft from
inside the boat to feel if the gears are engaging and
turning the prop-shaft.
In case of a failure inside the gearhouse, we advice to get a replacement gearhouse instead of attempting to repear the internal gear and bearing system.
The thruster does not start at all or works only in one direction.
Check that the voltage of the electromotor are
correct for your installation by their labels.
If wrong, contact your dealer or distributor to obtain parts with the correct voltage.
Check the voltage at the thruster between main minus
input (A1 on motor) and main plus input point:
The no load voltage should be:
12V system =12,7V / 24V system = 25,4 V. If below 12,3V / 24,6V your batteries
are not in a good charge state or worn out and must be recharged or replaced
before trying to run the thruster.
Check the voltage at the thruster while you are trying
to run it. Keep main engine(s) running to have
continous charge to the batteries.
If less than 8,5V at the thruster the voltage is to low for the thruster to operate
correctly. In a 24V boat the thruster will operate down to approx. 12V, but the
performance will be very bad. Find and correct the reason for this low voltage
which will probably be one or more of these points: main battery cable sizes and
connections, battery size and condition, fuse and main power switch performance.
If the main solenoids on the thruster are not even
trying to engage (clicking) they are probably not
getting a "run" signal from the control system. Try to
run the thruster without the panel by directly connecting the red and the blue or the red and the grey wires
in the controlcable contact coming from the thruster.
If the thruster runs in both directions, try the same in the connector that goes
into the back of the control panel. If it also works in this position, check the
contact and wires on the back of the panel and try to engage this again by
pushing both ON buttons simultaneously. If the panel does not turn on (see
control light), measure the voltage between the Red and the Black in the
contact going into the thruster. If the voltage is good, chances are that the
panel is not working.
If it works by the thruster, and not by the panel there is a bad contact or a
broken lead the controlcables between these two test points.
Measure that you have the correct voltage between the Red (+) and all the
other colours in the contact. If you do not get a reading.
If the thruster does not run at all, or only in one direction
in the above tests, check the internal wiring on the
thruster motor, solenoids and electronic motor interface box to be in accordance with the wiring diagram
and ensure that all connections are clean and tight.
Between main minus (A1 on motor) and the blue and the grey wire
connected to the sides of the main solenoids you should have the same
voltage as between the main battery cables on the thruster.
If not, check that the internal wiring on the solenoid is ok and measure that
there is contact through the magnetising spools of each side of the solenoid
(measure between the red and blue on one side, and red and grey on the
other side with an Ohm meter.). If there are no contact between these, the
solenoid is broken and needs replacing.
The thruster has an unexpected low performance.
Check voltage at thruster when running
If less than 10,5 V / 21V the thruster will not perform at specified effect.
Check that all the brush-springs sits correctly on the
brushes in the electromotor.
If one or more brushes are loose/has no tension from the brush-spring, the
performance will be low.
Check that the propeller, gearhouse and tunnel is
free from growth / barnacles etc.
If there are growth in the tunnel, this will disturb / block the waterflow and
especially barnacles on the propeller will greatly reduce performance.
The thruster runs for approximately 0,5 seconds every 4 seconds.
Solenoid flapping, most probable cause: low
voltage.
»
Re-charge battery(ies), if this is not sufficient, replace battery(ies).
Check for bad cable connections, if necessary tighten/re-adjust connections.
Check cable size in accordance to manual.
The thruster runs for approximately 0,5 seconds every 10 seconds.
Solenoid lock-in, auto stop of thruster, auto retry
every 10 seconds.
42
Shut off thruster main switch, tap slightly on the solenoid to see if it will
release. Turn on thruster main switch. If solenoid is still in lock-in mode,
replace solenoid.
SP 30 S2i / SP 40 S2 i/ SP 55 Si
3.4 - 2005
Fehlerbeseitigung
D
Bitte führen Sie bevor Sie mit dem zuständigen Sidepower-Händler / Importeur Kontakt aufnehmen die folgenden Tests
durch. Dabei bitte alle Messergebnisse und nützlichen Informationen notieren.
NB! Die Tests erst dann durchführen, wenn Sie die dazugehörigen Informationen in diesem Manual nachgelesen haben. Bei
Unklarheiten muß ein Fachmann mit der Durchführung beauftragt werden.
Überprüfen
»
»
»
»
Problemlösung
Der Elektromotor läuft, jedoch ist keine Schubkraft vorhanden.
Ist der Scherstift zwischen Motor und Getriebeachse
gebrochen?
Den Scherstift ersetzen, anschließend die Motorinstallation überprüfen bevor
der Elektromotor wieder montiert wird.
Ist der Propeller korrekt auf der Propellerachse
befestigt; Mitnahmestift vorhanden?
Fixieren oder Ersetzen von Propeller und / oder Mitnahmestift.
Bei demontiertem Motor die Getriebeachse drehen
um zu prüfen, ob das Getriebe funktioniert und sich
die Propellerachse dreht.
Bei fehlerhaftem Getriebe die komplette Getriebeeinheit ersetzen.
Der Thruster läuft nicht oder nur in einer Richtung.
Die Spannung am Elektromotor überprüfen, diese
muß mit dem Etikett am Motor übereinstimmen.
Bei Abweichung mit dem zuständigen Händler oder Importeur Kontakt
aufnehmen, um passende Teile zu erhalten.
Die anliegende Spannung am Thruster zwischen
Minus (A1 am Motor) und Plus direkt am Motor
überprüfen.
Die Ruhespannung sollte betragen:
12V System = 12,7V / 24V System = 25,4 V.
Falls diese unter 12,3V / 24,6V liegt, sind die Batterien zu laden oder zu
ersetzen.
Die Spannung am laufendem Thruster überprüfen.
Der (Die) Antriebsmotor(en) sollte(n) in Betrieb sein,
um eine kontinuierliche Ladung der Batterien zu
gewährleisten.
Bei weniger als 8,5V funktioniert der Thruster nicht korrekt. In einem 24V System
funktioniert dieser bis ca. 12V, allerdings mit sehr schlechtem Wirkungs-grad. Die
Ursache der niedrigen Spannung finden und beseitigen. Es handelt sich meist
um: Querschnitt der Hauptkabel und Kontaktflächen, Batteriegröße und zustand, Sicherung und Hauptschalter.
Wenn die Hauptrelais am Thruster nicht anziehen
(klicken), erhalten diese vermutlich kein Steuersignal. Versuchen Sie den Thruster ohne das Panel
zu betreiben, indem Sie die rote und blaue oder die
rote und graue Leitung am Thruster miteinander
verbinden.
Läuft der Thruster in beiden Richtungen, selbiges auf der Rückseite des
Panels vornehmen. Falls auch hier eine Funktion erfolgt, die Verbindungen
und Leitungen am Schalterblock überprüfen und anziehen und danach
nochmals auf Funktion prüfen. Dabei beide ON Knöpfe gleichzeitig drücken.
Schaltet sich das Panel nicht ein (siehe Kontrollicht), so ist die Spannung
zwischen roter und schwarzer Leitung am Eingang des Thrusters zu messen.
Bei ausreichender Spannung liegt vermutlich ein defektes Panel vor.
Bei Funktion am Thruster, nicht aber am Panel, liegt ein unzureichender
Kontakt oder ein Leitungsbruch zwischen den beiden Punkten vor.
Messen, ob die korrekte Spannung zwischen roter (+) und allen anderen
Leitungen im Kontaktblock vorliegt.
Funktioniert der Thruster in den oben beschriebenen Tests nicht oder nur in einer Richtung, die interne
Verkabelung am Thrustermotor, am Relais und der
elektronischen Kontrollbox überprüfen und sicherstellen, daß diese mit dem Schaltplan übereinstimmen und alle Verbindungen sauber und fest sind.
Zwischen Minus (A1 am Motor) und der blauen sowie grauen Leitung an den
beiden Seiten des Hauptrelais sollte die gleiche Spannung anliegen wie am
Thruster zwischen den von der Batterie kommenden Leitungen.
Falls nicht, überprüfen, ob die interne Verkabelung am Relais korrekt ist und
messen, ob Kontakt durch die Spulen auf den Relaisseiten besteht (mit einem
Widerstandsmessgerät zwischen der roten und blauen auf der einen Seite sowie der roten und grauen Leitung auf der anderen Seite messen). Ist zwischen
diesen kein Kontakt, so ist das Relais beschädigt und muß ersetzt werden.
Der Thruster hat eine unzureichende Leistung.
Die Spannung am laufenden Thruster messen.
Unter 10,5 V / 21V erreicht der Thruster die angegebene Schubkraft nicht.
Überprüfen, ob die Bürstenfedern korrekt auf den
Bürsten im Elektromotors sitzen.
Falls eine oder mehrere Bürsten locker sind / die Bürstenfedern keine Spannung aufweisen, ist Motorleistung deutlich reduziert.
Überprüfen ob Propeller, Getriebegehäuse und
Tunnel frei von Bewuchs etc. sind.
Bewuchs im Tunnel beeinträchtigt / behindert die Wasserströmung und
reduziert die Leistung beträchtlich.
Das Bugstrahlruder läuft alle 4 Sekunden für ungefähr 0,5 Sekunden.
Relais-Flattern, häufigste Ursache: Unterspannung.
»
Batterie(n) aufladen, sofern nicht erfolgreich, Batterie(n) wechseln.
Prüfen der Kabelanschlüsse, falls notwendig nachziehen oder auswechseln
der Anschlüsse.
Überprüfen des Kabelquerschnittes gemäss Bedienungsanleitung.
Das Bugstrahlruder läuft alle 10 Sekunden für ungefähr 0,5 Sekunden.
Relais-Blockade, Auto-Stop der Anlage,
automatischer Startversuch alle 10 Sekunden.
Schalten Sie den Hauptschalter des Bugstrahlruders aus, klopfen Sie
vorsichtig auf das Relais um festzustellen, ob es sich wieder löst. Schalten
Sie den Hauptschalter wieder ein. Wenn das Relais sich immer noch im
Blockademodus befindet, muss es ausgewechselt werden.
SP 30 S2i / SP 40 S2i / SP 55 Si
3.4 - 2005
43
Problemer og løsninger
N
Før De søker hjelp hos din forhandler kan du foreta noen tester, og notere ned resultatet for at forhandleren skal ha mest
mulig informasjon til rådighet.
NB ! Alle sjekkpunktene på listen må sammenlignes med informasjon gitt tidligere i manualen for å forstå hvordan systemet
skal fungere. Hvis du ikke forstår sjekklisten eller de relevante opplysningene gitt i manualen så må De ta kontakt med
profesjonell hjelp.
Kontroller
»
»
»
»
Løsning
Elektromotoren går, men det er ingen skyvekraft.
Brytepinnen mellom motoren og drivakselen kan
være ha blitt brutt av.
Sett i ny brytepinne og sjekk motorinstallasjonen.
Er propellen festet til propellakselen, og er drivpinne
på plass.
Fest eller erstatt propellen og drivpinnen.
Med elektromotoren avmontert, kan drivakselen vris
for hånd for å sjekke om gir, og lager er i orden.
I tilfelle girhuset er skadet anbefaler vi skifte girhus, fremfor å prøve å reparere
innvendige gir og lagre.
Thrusteren går bare i en retning, eller ikke i det hele tatt.
Kontroller at elektromotoren er beregnet for riktig
spenning i forhold til din installasjon.
Kontakt din forhandler for å skaffe deler beregnet for riktig spenning.
Sjekk spenningen mellom positiv og negative
koblingene på motoren.
Spenningen skal være 12,7 V / 25,4 V når thrusteren ikke kjøres.
Hvis spenningen er under 12,3 V / 24,6 V må batteriene lades, eller skiftes ut
før thrusteren kjøres.
Sjekk spenningen mellom motorens negative og
positive koblinger under kjøring av thrusteren. Hold
hovedmotoren i gang for å sikre kontinuerlig ladning
av batteriene.
Ved 8,5 V spenning, eller lavere vil ikke motoren kunne kjøres. En 24 V
thruster vil kunne kjøres med så lav spenning som 12 V, men skyvekraften vil
ikke være merkbar. Finn og rett opp feilen som skaper lav spenning. Feilen vil
ofte være hovedstrømkablene og koblingene, Spenningsfall over sikring eller
hovedstrømsbryter, batteriets størrelse/tilstand.
Hvis hovedreleet på thrusteren ikke slår inn i det
hele tatt (det skal klikke når du prøver å kjøre
thrusteren), så er det et tegn på at det ikke får signal
fra kontrollpanelet. Prøv da å kjøre thrusteren uten
panelet ved å koble Rød og Blå, eller Rød og Grå
kabel sammen på kontrolpanelkabelen som kommer
fra thrusteren.
Hvis thrusteren kjører i begge retninger prøv samme framgangsmåte på
koblingen som går inn bak på kontrollpanelet. Hvis thrusteren fungerer må
koblingene og kontaktpunktene på kontrollpanelet sjekkes. Prøv panelet igjen
ved å trykke inn begge ON knappene samtidig. Hvis panelet ikke fungerer
(sjekk kontroll lyset mellom ON knappene) må spenningen mellom Rød og
Svart ledning som går inn i panelet. Hvis spenningen er bra er trolig panelet
defekt.
Hvis du får motoren til å kjøre ved thrusteren men ikke ved panelet så er
problemet dårlig kontakt, eller ledningsbrudd.
I tilfelle thrusteren ikke går i det hele tatt, eller bare i
en retning i de tidligere testene. Sjekk at koblinger
gjort på elektromotoren, rele og forsinkelsesrele er i
henhold til koblingskjema, og at alle kontakter sitter
godt, og er rene.
Spenningen målt mellom hovedstrøms minus (A1 på motor), og blå eller grønn
ledning på releet skal være lik spenningen mellom de to hoved batterikablene
på thrusteren. Hvis spenningen ikke er riktig, må det kontroleres at det er
kontakt mellom de magnetiske spolene på hver side av releet (mål mellom rød
og blå på motsatte sider, og rød og grå på motsatte sider, med et OHM-Meter).
Hvis det ikke er kontakt mellom disse må releet skiftes ut.
Thrusteren yter mindre en ventet.
Mål spenningen på motoren under kjøring.
Er spenningen lavere en 10,5V / 21V vil thrusteren sunke i turtall og
skyvekraften senkes.
Sjekk at alle børstefjærene ligger riktig an mot
børstene.
Thrusteren vil ha lav skyvekraft hvis en eller flere børster ikke får trykk fra
fjærene.
Kontroller propell, girhus og tunnel, og fjern eventuell
algevekst og lignende.
Algevekst i tunnelen vil redusere vannstrømmen, algevekst på propellen kan
redusere ytelsen betydelig.
Trøsteren kjører i ca. 0,5 sekunder hvert 4 sekund.
Relé ”slår / klapprer” – forårsakes som oftest av for
lav spenning .
»
Batterilading er nødvendig – eventuelt bytt ut defekte batterier.
Kontroller alle kabeltilkoblinger for dårlig kontakt – sørg for god kontakt.
Kontroller at kabler har riktig tverrsnitti henhold til manual.
Trøsteren kjører i ca. 0,5 sekunder hvert 10 sekund.
Relèet er brent fast – Automatisk stopp av trøster.
Forsøker reststart av trøster hvert 10 sekund for å
se om feilen er rettet.
44
Bryt hovedstrømmen til trøster med hovedstrømsbryteren og dunk forsiktig på
relé for å se om kontaktflatene slipper. Slå på hovedstrømbryter og se om
feilen er fikset. Om den vedvarer må relé byttes.
SP 30 S2i / SP 40 S2 i/ SP 55 Si
3.4 - 2005
Recherche de pannes
F
Avant de faire appel à un revendeur en cas de panne du propulseur, merci d’effectuer les tests suivants et de prendre
des notes afin qu’il puisse avoir un maximum d’informations en main pour rechercher la panne.
NB : Tous les points de vérifications et les solutions doivent être effectués après avoir consulté les informations de ce
manuel, afin de connaître le fonctionnement du matériel. En cas de non-compréhension des vérifications, faire appel à
un professionnel.
Check
»
Solution
Le moteur fonctionne mais il n’y a pas de poussée
Si la goupille de cisaillement, entre le moteur et l’arbre
d’entraînement à l’intérieur du bateau, est cassée.
Remplacer la goupille de cisaillement, aligner l’arbre du moteur pour assurer
son installation.
L’hélice est-elle dans le tunnel et correctement fixée
à l’arbre d’hélice (goupille d’entraînement présente) ?
Resserrer ou remplacer l’hélice et /ou la goupille.
Une fois le moteur déposé, tourner l’arbre d’entraîne- En cas de défaillance à l’intérieur de l’embase, il est recommandé de procéder
ment de l’intérieur afin de s’assurer de la rotation des à son remplacement au lieu de tenter de réparer le mécanisme interne et les
pignons et de l’entraînement de l’arbre d’hélice.
roulements.
»
»
Le propulseur ne démarre pas du tout ou fonctionne dans une seule direction
Vérifier que la tension du moteur corresponde à
votre installation.
Si elle est mauvaise, contacter un revendeur pour obtenir les pièces avec une
bonne tension.
Vérifier la tension au propulseur entre l’entrée
principale négative (A1 sur moteur) et le point
d’entrée principale positif.
La tension à vide devrait être: Système en 12V=12,7V / Système en 24V=25,4V.
Si elle est en dessous de 12,3V / 24,6V vos batteries n’ont pas un bon état de
charge ou elles sont complètement usées et doivent être rechargées ou
remplacées avant d’essayer de mettre en route le propulseur.
Vérifier la tension au propulseur lors de sa mise en
route. Laisser tourner les moteurs principaux pour
que les batteries soient alimentées en continu.
Si la tension au propulseur est < à 8,5V, elle est trop basse pour que le propulseur fonctionne correctement. Sur un bateau équipé en 24V, lorsque la tension
chutera vers 12V, les performances seront très mauvaises. Trouver et corriger
la raison de cette basse tension: taille du câble de la batterie principale et branchements, capacité batterie et condition, performance des fusibles et coupe-batterie.
Si les relais de puissance du propulseur ne s’enclenchent même pas (cliquetis), ils n’ont probablement
pas reçu de signal de démarrage de la part du
panneau de contrôle. Essayer de lancer le
propulseur sans le panneau de contrôle en shuntant
directement les fils rouge et bleu ou les fils rouge et
gris au niveau du connecteur provenant du
propulseur.
Si le propulseur fonctionne dans les deux directions, essayer la même
opération dans le connecteur situé à l’arrière du panneau de contrôle. S’il
fonctionne également dans cette position, vérifier le contact et les
branchements à l’arrière du panneau et essayer de l’enclencher de nouveau
en appuyant sur les 2 boutons ON simultanément. Si le panneau ne s’allume
pas (voir voyant de contrôle), mesurer la tension entre le Rouge et le Noir dans
le contacteur allant au propulseur. Si la tension est bonne, il y a des chances
que le panneau soit défectueux. S’il fonctionne sur le propulseur et non à l’aide
du panneau, il y a un mauvais contact ou une rupture du câble de contrôle
entre ces 2 points de vérification. Vérifier la présence du 12V entre le fil rouge
du contact et tous les autres fils de couleur différente.
Si le propulseur ne fonctionne pas du tout, ou
seulement dans une seule direction après les tests
ci-dessus, vérifier le branchement interne sur le
moteur du propulseur, les relais et le moteur du
boîtier électronique pour être en accord avec le
schéma de branchement et s’assurer que tous les
branchements soient propres et serrés.
Entre le négatif principal (A1 du moteur) et les fils bleu et gris branchés sur les
côtés des relais principaux, la tension doit être la même que la tension
d’alimentation du propulseur. Dans le cas contraire, vérifier que les branchements du relais sont corrects et mesurer la continuité des bobines des relais
(dans un 1er temps, mesurer entre le Rouge et le Bleu, puis entre le Rouge et
le Gris à l’aide d’un Ohm mètre). S’il n’y a pas de continuité, le relais est hors
service et nécessite d’être remplacé.
Le propulseur n’est pas efficace
Vérifier la tension du propulseur lorsqu’il est en marche. Si elle est < à 10,5V / 21V, le propulseur n’obtiendra pas les performances
affichées.
Vérifier que les ressorts de balais du moteur soient
correctement positionnés.
Si un ou plusieurs balais ne sont pas suffisamment en pression, les
performances seront très mauvaises.
Vérifier que l’hélice, l’embase et le tunnel ne soient
pas souillés par l’environnement marin.
Si tel est le cas dans le tunnel, cela va perturber/bloquer le flux de l’eau ; en ce
qui concerne l’hélice, les coquillages vont tout particulièrement réduirent de
beaucoup ses performances.
»
Le propulseur marche environ 0.5 seconde toutes les 4 secondes
Battement du relais, cause la plus probable :
Recharger les batteries, si insuffisant, les remplacer.
tension basse.
Vérifier le câblage, si nécessaire resserrer les connexions.
Vérifier les sections de câble conformément au manuel.
»
Le propulseur marche environ 0.5 seconde toutes les 10 secondes
Couper l’alimentation du propulseur, tapper légèrement sur le relais pour voir
Blocage du relais, arrêt auto du propulseur,
s’il se débloque. Remettre sous tension. Si le relais est toujours bloqué, le
tentatives toutes les 10 secondes.
remplacer
SP 30 S2i / SP 40 S2i / SP 55 Si
3.4 - 2005
45
Problemi e soluzioni
I
Prima di chiedere aiuto al vostro rivenditore / distributore Sidepower, La preghiamo di effettuare questi test, prendendo nota di
tutte le misure, in modo che costoro dispongano di quante più informazioni possibili su cui lavorare.
N.B.! Controllare tutti i punti e cercare delle soluzioni dopo aver consultato questo manuale, per comprendere in che modo il
sistema dovrebbe funzionare. Se non si riesce a capire che cosa si deve controllare, si consulti un professionista.
»
Controllo
Soluzione
Il motore elettrico gira, ma non c’è spinta.
La spina di sicurezza tra il motore e l’albero di comando Sostituire la spina di sicurezza e controllare l’installazione del motore elettrico
all’interno dell’imbarcazione potrebbe essere rotta
verificando che la spina di sicurezza sia collegata correttamente prima di
procedere al rimontaggio del motore elettrico.
L’elica all’interno del tunnel è fissata correttamente
sull’albero dell’elica (il perno di trasmissione è
Serrare di nuovo o sostituire l’elica e/o il perno di trasmissione.
presente).
Avendo rimosso il motore, far girare l’albero di comando In caso di guasto all’interno del piede, si suggerisce di sostituirla anziché
dall’interno dell’imbarcazione per verificare che gli
tentare di riparare il sistema di ingranaggi e cuscinetti interni.
ingranaggi siano innestati e che l’albero dell’elica giri.
»
Il thruster non viene avviato, o funziona in un’unica direzione.
Controllare che le tensioni del motore elettrico siano Se il voltaggio non è corretto, contattare il proprio rivenditore o distributore per
corrette per l’installazione, osservando le etichette.
procurarsi parti con il voltaggio corretto.
»
Controllare la tensione in corrispondenza del
propulsore tra il punto di ingresso principale (A1 sul motore) e il punto di ingresso principale + :
Il voltaggio in assenza di carico dovrebbe essere il seguente:
Sistema a 12 V 12,7 V / Sistema a 24 V 25,4 V
Se il voltaggio è inferiore a 12,3 V / 24,6 V, vuol dire che lo stato di carica delle
batterie non è adeguato e che le batterie devono essere caricate o sostituite
prima di effettuare un nuovo tentativo di mettere in moto il propulsore.
Controllare la tensione in corrispondenza del
propulsore mentre si cerca di farlo funzionare.
Tenere in moto il motore o i motori principali
dell’imbarcazione, in modo che le batterie vengano
caricate continuamente.
Se la tensione è inferiore a 8,5 V in corrispondenza del propulsore, la
tensione è insufficiente a consentire il funzionamento corretto del propulsore.
In un’imbarcazione con impianto elettrico a 24 V, il propulsore può funzionare
anche con una tensione di soli 12V circa, ma le prestazioni saranno molto
mediocri. Individuare ed eliminare la causa di questa bassa tensione.
Probabilmente la bassa tensione sarà dovuta a una o più delle seguenti
cause: dimensioni e connessioni dei cavi principali delle batterie, dimensioni
e stato delle batterie, prestazioni del fusibile e dell’interruttore generale.
Se le elettrovalvole principali situate sul propulsore
non danno il minimo segno di innescarsi (non si
sente il clic), probabilmente esse non ricevono il
segnale di “run” dal sistema di controllo. Provare a
far girare il propulsore senza il quadro comandi,
collegando direttamente il filo rosso e quello azzurro,
o il filo rosso e quello grigio, nel contatto del cavo di
controllo che proviene dal propulsore.
Se il propulsore gira in entrambe le direzioni, ripetere l’operazione nel
connettore che entra nella parte posteriore del quadro di comando. Se
funziona anche in questa posizione, controllare il contatto e i fili nella parte
posteriore del quadro di comando e cercare di reinnescare premendo
contemporaneamente su entrambi i pulsanti ON. Se il quadro di comando
non si accende (vedere la luce di controllo), misurare la tensione tra il rosso
e il nero nel contatto che entra nel propulsore. Se la tensione è corretta, è
probabile che il quadro non funzioni. Se funziona mediante il propulsore, e
non mediante il quadro, vuol dire che c’è un cattivo contatto o un filo rotto nei
cavi di controllo tra questi due punti di prova. Verificare che vi sia la d.d.p. corretta
tra il rosso (+) e tutti gli altri colori del contatto.
Se nei suddetti test il propulsore non gira, o gira in
un’unica direzione, controllare il cablaggio interno
sul motore elettrico del propulsore; elettrovalvole e
interfaccia elettronica del motore elettrico devono
essere conformi allo schema di connessione; inoltre
tutte le connessioni devono essere pulite e affidabili.
Se lo strumento non dà risposta, tra il “meno” principale (A1 sul motore
elettrico) e il filo azzurro e grigio collegati ai lati delle elettrovalvole principali si
dovrebbe avere la stessa d.d.p. che c’è tra i cavi principali del batteria sul
propulsore.
In caso contrario, verificare che il cablaggio interno dell’elettrovalvola sia
corretto e verificare che vi sia contatto tra le bobine magnetiche di ciascun lato
dell’elettrovalvola (misurare con un ohmetro tra il rosso e l’azzurro su un lato,
e tra il rosso e il grigio sull’altro lato.). Se non c’è contatto tra questi punti, vuol
dire che l’elettrovalvola è rotta e dev’essere sostituita.
Il thruster ha inaspettatamente delle prestazioni mediocri.
Controllare la tensione in corrispondenza del
propulsore mentre gira.
Se la tensione è inferiore a 10,5 V / 21V, le prestazioni del propulsore non
producono l’effetto specificato.
Verificare che tutte le molle delle spazzole poggino
correttamente sulle spazzole nel motore elettrico.
Se una o più spazzole sono allentate / non sono messe in tensione dalla
molla, le prestazioni saranno scadenti.
Verificare che l’elica, il piede e il tunnel siano prive di Se nel tunnel vi sono delle incrostazioni, ciò disturberà o impedirà il flusso
d’acqua; in particolare la crescita di molluschi sull’elica provoca una notevole
da alghe / molluschi ecc.
riduzione delle prestazioni.
»
Il thruster si mette in funzione per circa 0,5 secondi ogni 4 secondi.
Oscillazione del contatto del solenoide, causa più Ricaricare la/e batteria/e, se ciò non fosse sufficiente sostituire la/e batteria/e.
Controllare eventuali cablaggi fatti male, se necessario stringere/rifare la
frequente: bassa tensione.
connessione.
Verificare che la sezione dei cavi sia in accordo con le specifiche nel manuale.
»
Il thruster si mette in funzione per circa 0,5 secondi ogni 10 secondi.
Incollamento del contatto solenoide, blocco Staccare l’interruttore principale del thruster, picchiettare sul solenoide per
automatico del thruster, rimessa in funzione automatica verificare se i contatti vengono rilasciati.
Inserire l’interruttore principale del thruster. Se il solenoide persiste in blocco
ogni 10 secondi.
sostituire il solenoide.
46
SP 30 S2i / SP 40 S2 i/ SP 55 Si
3.4 - 2005
Vianetsintä
FI
Ennen kun haet apua Sidepower-jälleenmyyjältäsi, käy nämä tarkistukset läpi ja kirjoita ylös tulokset, jotta heillä on niin
paljon tietoja kuin mahdollista vian etsimiseen.
HUOM! Kaikki tarkistukset ja ratkaisut on käytävä läpi sen jälkeen kun vastaavat kohdat muualla tässä kirjassa on käyty läpi,
jotta ymmärtää, miten laite pitäisi toimia. Mikäli jää epäselväksi mitä pitäisi tarkistaa, ota yhteyttä ammattilaiseen.
Tarkistus
»
»
Ratkaisu
Sähkömoottori pyörii, mutta ei yhtään työntövoimaa.
Jos murtosokka moottorin ja vetoakselin välissä on
katkennut
Vaihda murtosokka ja tarkista moottorin asennus varmistaaksesi muortosokan
oikea asento ennen sähkömoottorin asentamista
Onko potkuri asennettu tunnelissa oikein
potkuriakselille (potkurisokka paikalla)
Kiinnitä tai vaihda potkuri ja/tai potkurisokka.
Kun sähkömoottori on nostettu pois, pyöritä
vetoakselia veneen sisällä, jotta tunnet, että rattaat
toimivat ja pyörittävät potkuria.
Mikäli vaihteistossa on vikaa, suosittelemme ”vaihtoalapään” hankkimista, sen
sijaan että yritetään korjata rattaita ja laakerointia vaihteistossa.
Keulapotkuri ei käynnisty ollenkaan tai toimii vain toiseen suuntaan.
Tarkista, että sähkömoottorin kilvessä on sama
volttimäärä kun veneessä.
Jos väärin, ota yhteyttä jälleenmyyjääsi saadaksesi osia oikealle jännitteelle.
Tarkista volttimäärä keulapotkurin päävirran
miinuskaapelin (A1 moottorissa) ja päävirran
plussakaapelin välistä:
Lepojännite pitäisi olla:
12V järjestelmä =12,7V / 24V järjestelmä = 25,4 V. Jos alle 12,3V / 24,6V
akkusi eivät ole hyvässä kunnossa tai ne ovat kuluneita ja täytyy ladata tai
vaihtaa uusiin ennen keulapotkurin käynnistämistä.
Tarkista keulapotkurin jännite yritettäessä käynnistää Mikäli alle 8,5V, keulapotkurissa on jännite liian matala jotta keulapotkuri toimisi
sitä. Pidä pääkone käynnissä jotta jatkuva akkujen
oikein. 24V veneissä keulapotkuri toimii niinkin alhaisemmalla jännitteellä kuin
lataus on varmistettu.
12V, mutta sen suorituskyky on huono. Paikallista tämän matalan jännitteen
syy ja korjaa se. Syy on luultavasti yksi tai enempi seuraavista: päävirtakaapelien
koko ja kunto, akkujen koko ja kunto, sulakkeen ja päävirtakatkaisijan toimivuus.
»
»
Jos keulapotkurin pääsolenoidit eivät edes yritä
käynnistyä (naksahtaa), nämät eivät luultavasti saa
käynnistys signaalia käyttöjärjestelmästä. Yritä
käyttää keulapotkuria ilman käyttöpaneelia
yhdistämällä punainen ja sininen tai punainen ja
harmaa johto keulapotkurin käyttökaapelissa.
Jos keulapotkuri toimii molempiin suuntiin, kokeile sama myös liittimessä, joka
tulee käyttöpaneelin taakse. Jos sekin toimii tässä asennossa, tarkista
kytkennät ja johdot käyttöpaneeliin ja kokeile uudestaan käynnistää tämä
painamalla molemmat ON-napit yhtäaikaa. Mikäli paneeli ei käynnisty (katso
merkkivalo), mittaa jännite punaisen ja mustan johdon välistä keulapotkuriin
menevästä liittimestä. Jos jännite on hyvä, on luultavasti käyttöpaneeli viallinen.
Jos se toimii keulapotkurissa, mutta ei liittimessä käyttöpaneelin takana, on
näitten kahden pisteen välissä huono liitäntä tai katkennut johto.
Mittaa, että punaisen (+) ja kaikkien muiden johtojen välisissä liittimessä on
oikea jännite.
Jos keulapotkuri ei toimi ollenkaan, tai ainoastaan
yhteen suuntaan yllä olevan testin aikana, tarkista
keulapotkurin sisäinen kytkentä, solenoidin ja
sähkömoottorin kytkentä täytyy vastata
kytkentäkaaviota ja kaikki liitännät täytyy olla
puhtaita ja kireitä.
Päävirran miinuskaapelin (A1 moottorissa) ja solenoidin sivuun kytkettyjen
sinisen ja harmaan johtojen välissä pitäisisi olla sama jännite kun keulapotkurin
päävirtakaapelien välissä.
Jos ei, tarkista että solenoidin sisäinen kytkentä on kunnossa ja mittaa onko
magneettipuolien yli kytkentä solenoidin molemmin puolin (mittaa vastus
mittarilla sinisen ja punaisen välistä yhdellä sivulla, ja punaisen ja harmaan
välistä toisellä sivulla.). Jollei näitten välissä ole kytkentää, solenoidi on
viallinen ja täytyy vaihtaa.
Keulapotkurissa on odottamattoman huono suorituskyky.
Tarkista jännite keulapotkurin pyöriessä
Mikäli alle 10,5 V / 21V keulapotkuri ei toimi odotetulla tavalla.
Tarkista, että jouset istuvat oikein sähkömoottorin
hiilissä.
Jos yksi tai useampi hiili on irti/ei saa tarpeeksi jännitystä jousesta, on
suorituskyky matalampi.
Tarkista, ettei potkurissa ole näkkiä tai vastaavaa
kasvustoa.
Jos tunnelissa on kasvustoa, tämä häiritsee / tukkii vedenvirtauksen ja
erityisesti näkki potkurissa vähentää suuresti suorituskykyä.
Keulapotkuri käy noin puoli sekuntia 4:n sekunnin välein.
Solenoidi pätkii, todennäköisin syy: matala jännite
»
Lataa akut uudestaan, mikäli tämä ei riitä, vaihda akut.
Tarkista akkuliitokset, kiristä/säädä tarpeen mukaan.
Tarkista kaapelikoot ohjekirjan antamien tietojen mukaan.
Keulapotkuri käy noin puoli sekuntia 10:n sekunnin välein.
Solenoidi on lukkiutunut, keulapotkuri sammuu
automaattisesti ja yrittää käynnistyä 10:n sekunnin
välein.
Sammuta keulapotkurin päävirtakatkaisija, koputa varovasti solenoidia
tarkistaaksesi vapautuuko se. Käännä keulapotkurin päävirtakatkaisin päälle.
Mikäli solenoidi on vielä lukittuna, vaihda solenoidi.
SP 30 S2i / SP 40 S2i / SP 55 Si
3.4 - 2005
47
GB
Warranty statement
1. The equipment manufactured by Sleipner Motor AS (The “Warrantor”) is warranted to be free from defects in workmanship and materials under normal use and service.
2. This Warranty is in effect for of two years from the date of purchase by the user. Proof of purchase must be included, to establish that it is inside the warranty period.
3. This Warranty is transferrable and covers the product for the specified time period.
4. In case any part of the equipment proves to be defective, other than those parts excluded in paragraph 5 below, the owner should do the following:
(a) prepare a detailed written statement of the nature and circumstances of the defect, to the best of the Owner's knowledge, including the date of
purchase, the place of purchase, the name and address of the installer, and the Purchaser’s name, adress and telephone number;
(b) the Owner should return the defective part or unit along with the statement referenced in the preceding paragraph to the warrantor, Sleipner Motor AS
or an authorized Service Centre, postage/shipping prepaid and at the expense of the Purchaser;
(c) if upon the Warrantor’s or Authorized Service Centre’s examination, the defect is determined to result from defective material or workmanship, the
equipment will be repaired or replaced at the Warrantor’s option without charge, and returned to the Purchaser at the Warrantor’s expense;
(d) no refund of the purchase price will be granted to the Purchaser, unless the Warrantor is unable to remedy the defect after having a reasonable
number of opportunities to do so. Prior to refund of the purchase price, Purchaser must submit a statement in writing from a professional boating
equipment supplier that the installation instructions of the Installation and Operation Manual have been complied with and that the defect remains;
(e) warranty service shall be performed only by the Warrantor, or an authorized Service Centre, and any attempt to remedy the defect by anyone else
shall render this warranty void.
5. There shall be no warranty for defects or damages caused by faulty installation or hook-up, abuse or misuse of the equipment including exposure to
excessive heat, salt or fresh water spray, or water immersion except for equipment specifically designed as waterproof.
6. No other express warranty is hereby given and there are no warranties which extend beyond those described in section 4 above. This Warranty is
expressly in lieu of any other expressed or implied warranties, including any implied warranty of merchantability, fitness for the ordinary purposes for which such
goods are used, or fitness for a particular purpose, and any other obligations on the part of the Warrantor or its employees and representatives.
7. There shall be no responsibility or liability whatsoever on the part of the Warrantor or its employees and representatives for injury to any person or
persons, or damage to property, loss of income or profit, or any other consequential or resulting damage or cost which may be claimed to have been
incurred through the use or sale of the equipment, including any possible failure or malfunction of the equipment, or part thereof.
8. The Warrantor assumes no liability for incidental or consequential damages of any kind including damages arising from collision with other vessels or objects.
9. This warranty gives you specific legal rights, and you may also have other rights which vary from country to country.
Garantieerklärung
D
1. Sleipner Motor AS (im folgenden “Hersteller” genannt) garantiert bei ordnungs- und sachgemäßer Benutzung des hergestellten Produkts für Materialund Fabrikationsfehler.
2. Die Garantie wird für die Dauer von zwei Jahren ab Verkaufsdatum übernommen. Die Garantieleistung setzt voraus, daß ein gültiger Kaufbeleg
vorgelegt wird.
3. Die Garantie ist übertragbar.
4. Zur Inanspruchnahme von Garantieleistungen (ausschließlich der unter Abschnitt 5 aufgeführten Fehler und Beschädigungen) ist folgendes erforderlich:
(a) eine detaillierte Fehlerbeschreibung, einschließlich Kaufdatum, Kaufort und Anschrift von Installateur, Verkäufer und Kunde.
(b) der Käufer muß das beanstandete Produkt und die detaillierte Fehlerbeschreibung an den Hersteller oder einen autorisierten Servicepartner
senden. Der Käufer muß hierbei die Fracht im voraus bezahlen.
(c) wenn die Untersuchung durch den Hersteller oder einen autorisierten Servicepartner ergibt, daß ein Material- oder Fabrikationsfehler vorliegt, wird
das Produkt repariert oder nach Maßgabe des Herstellers kostenfrei ersetzt und an den Käufer auf Kosten des Herstellers gesendet.
(d) der Kaufpreis wird nur erstattet, wenn der Hersteller den Fehler nicht in angemessener Zeit beheben kann. Zusätzlich muß der Käufer eine
schriftliche Bestätigung, ausgestellt durch einen gewerblichen Bootsausrüster, einreichen, aus der hervorgeht, daß die Anweisungen des
Installations-, Service- und Benutzerhandbuches erfüllt wurden, der Fehler jedoch bestehen bleibt.
(e) Garantieleistungen können nur durch den Hersteller oder einen autorisierten Servicepartner durchgeführt werden. Die Garantie wird nicht
gewährt, wenn Reparaturen, Adaptierungen oder Modifikationen am Produkt von Personen ohne entsprechende Befugnis vorgenommen wurden.
5. Die Garantie wird bei Fehlern oder Beschädigungen durch mangelhafte Installation, Abschleppen des Bootes, fehlerhafte Bedienung oder Benutzung
einschließlich Schäden durch äußere Einflüsse (z.B. große Hitze, Einwirkung von Salz- oder Frischwasser außer wenn das Produkt/ -teil hierfür
vorgesehen ist) nicht gewährt.
6. Es wird keine weitergehende Garantie als die in Abschnitt 4 beschriebene gewährt. Diese Garantie ersetzt jede andere gegebene Garantie.
7. Der Hersteller, dessen Angestellte und dessen Repräsentanten sind nicht haftbar für Verletzungen von Personen, die Beschädigung von Eigentum,
Einkommens- oder Gewinnverlust, Unfallschäden oder Folgeschäden jeglicher Art, Kosten die durch den Kauf oder die Benutzung des Produkts
enstehen einschließlich aller möglichen Fehler oder Fehlfunktionen, die durch das Produkt oder Teilen davon entstehen.
8. Der Hersteller ist nicht haftbar für Unfallschäden oder Folgeschäden jeglicher Art einschließlich Schäden durch Kollision mit anderen Booten oder Objekten.
9. Diese Garantie spricht bestimmte Rechte zu. Weitere Rechte können von Staat zu Staat unterschiedlich sein.
Garantierklæring
N
1. The equipment manufactured by Sleipner Motor AS (The “Warrantor”) is warranted to be free from defects in workmanship and materials under normal use and service.
2. This Warranty is in effect for of two years from the date of purchase by the user. Proof of purchase must be included, to establish that it is inside the warranty period.
3. This Warranty is transferrable and covers the product for the specified time period.
4. In case any part of the equipment proves to be defective, other than those parts excluded in paragraph 5 below, the owner should do the following:
(a) prepare a detailed written statement of the nature and circumstances of the defect, to the best of the Owner's knowledge, including the date of
purchase, the place of purchase, the name and address of the installer, and the Purchaser’s name, adress and telephone number;
(b) the Owner should return the defective part or unit along with the statement referenced in the preceding paragraph to the warrantor, Sleipner Motor AS
or an authorized Service Centre, postage/shipping prepaid and at the expense of the Purchaser;
(c) if upon the Warrantor’s or Authorized Service Centre’s examination, the defect is determined to result from defective material or workmanship, the
equipment will be repaired or replaced at the Warrantor’s option without charge, and returned to the Purchaser at the Warrantor’s expense;
(d) no refund of the purchase price will be granted to the Purchaser, unless the Warrantor is unable to remedy the defect after having a reasonable
number of opportunities to do so. Prior to refund of the purchase price, Purchaser must submit a statement in writing from a professional boating
equipment supplier that the installation instructions of the Installation and Operation Manual have been complied with and that the defect remains;
(e) warranty service shall be performed only by the Warrantor, or an authorized Service Centre, and any attempt to remedy the defect by anyone else
shall render this warranty void.
5. There shall be no warranty for defects or damages caused by faulty installation or hook-up, abuse or misuse of the equipment including exposure to
excessive heat, salt or fresh water spray, or water immersion except for equipment specifically designed as waterproof.
6. No other express warranty is hereby given and there are no warranties which extend beyond those described in section 4 above. This Warranty is
expressly in lieu of any other expressed or implied warranties, including any implied warranty of merchantability, fitness for the ordinary purposes for which such
goods are used, or fitness for a particular purpose, and any other obligations on the part of the Warrantor or its employees and representatives.
7. There shall be no responsibility or liability whatsoever on the part of the Warrantor or its employees and representatives for injury to any person or
persons, or damage to property, loss of income or profit, or any other consequential or resulting damage or cost which may be claimed to have been
incurred through the use or sale of the equipment, including any possible failure or malfunction of the equipment, or part thereof.
8. The Warrantor assumes no liability for incidental or consequential damages of any kind including damages arising from collision with other vessels or objects.
9. This warranty gives you specific legal rights, and you may also have other rights which vary from country to country.
r
e
d
Un
48
n
o
i
t
uc
r
t
s
n
o
c
SP 30 S2i / SP 40 S2 i/ SP 55 Si
3.4 - 2005
F
Garantie
1. L’équipement fabriqué par Sleipner Motor AS (le «Garant») est garanti sans défaut de fabrication et sans défaut au niveau des matériaux s’il fait l’objet d’une
installation et d’une utilisation normales.
2. Cette garantie est valable 2 ans à compter de la date d’achat par l’installateur. Une preuve de l’achat devra être fournie pour vérifier que le matériel entre dans la
période de garantie.
3. Cette garantie est transmissible et couvre le produit pour la période de temps spécifiée.
4. Dans le cas où la preuve serait apportée qu’une pièce est défectueuse, le propriétaire devra faire ce qui suit, excepté pour les pièces énumérées au paragraphe 5 ci-dessous :
a) Préparer un rapport écrit détaillé sur la nature et les circonstances du défaut, sur les connaissances du propriétaire du propulseur, en spécifiant sa date d’achat,
son emplacement, les nom et adresse de l’installateur, les nom, adresse et n° de téléphone de l’acheteur ;
b) Le propriétaire devra retourner l’appareil ou la pièce défectueux(se) avec le rapport ci-dessus cité au garant, Sleipner Motor AS ou un service-après-vente
autorisé, frais de poste ou d’envoi prépayés par l’acheteur ;
c) Si après contrôle par le garant, ou le service-après-vente autorisé, le défaut résulte d’un matériau défectueux ou défaut de fabrication, l’équipement sera réparé
ou remplacé puis réexpédié à l’acheteur aux frais du garant ;
d) Aucun remboursement du prix d’achat ne sera consenti à l’acheteur, excepté dans le cas où le garant ne serait pas capable de remédier au défaut après avoir
tout essayé pour remettre le matériel en état. Avant de procéder à quel que remboursement que ce soit, l’acheteur doit fournir un rapport écrit de la part du
fournisseur d’équipement de bateaux professionnels attestant que les instructions de montage du manuel d’installation et de mise en marche ont été bien suivies
et que malgré cela le défaut persiste ;
e) Le service de garantie sera assuré uniquement par le garant, ou par un service-après-vente autorisé, et toute tentative, pour remédier au défaut, entreprise par
qui que ce soit d’autre annulera cette garantie.
5. La garantie ne s’appliquera pas pour les défauts ou dommages dus à une mauvaise installation ou environnement, à des emplois abusifs ou à une mauvaise
utilisation de l’équipe-ment incluant une exposition à une chaleur excessive, au sel ou aux vaporisations d’eau salée, ou aux immersions d’eau sauf pour les
équipements spécifiquement prévus étanches.
6. Aucune autre garantie express n’est accordée et aucune garantie ne s’étend au-delà de ce qui est décrit au point n° 4. Cette garantie fait foi sur toute autre garantie,
même tacite, y compris toute garantie commerciale tacite, expliquant les raisons pour lesquelles telle ou telle marchandise est utilisée, ou expliquant un usage
particulier et toute autre obligation de la part du garant ou de ses employés ou représentants.
7. Il n’y aura aucune responsabilité, totale ou partielle, de la part du garant ou de ses employés ou représentants en cas de blessures sur quelqu’un ou sur plusieurs
personnes, ou en cas de dommages de propriété, de perte de revenus ou de profits, ou toute autre conséquence ou dommage en résultant ou de coût pouvant être
réclamé, découlant de l’utilisation ou de la vente de l’équipement, y compris toute défaillance possible ou mauvais fonctionnement de l’équipement ou partie de celui-ci.
8. Le garant n’assure aucune responsabilité en ce qui concerne des dommages accidentels ou conséquents de toute sorte y compris des dommages survenant suite à
une collision avec d’autres bateaux ou objets.
9. Cette garantie vous accorde des droits légaux spécifiques et vous pouvez également avoir d’autres droits qui varieront en fonction des pays.
I
Garanzia
1. Gli apparati fabbricati da Sleipner Motor AS (il “Garante”) sono garantiti esenti da difetti di lavorazione e materiali nelle condizioni normali di utilizzo e servizio.
2. Questa garanzia è valida per due anni dalla data di acquisto da parte dell’utente. Occorre fornire la prova d’acquisto, che consente di stabilire che il prodotto è
ancora in garanzia.
3. Questa garanzia è trasferibile e copre il prodotto per il periodo di tempo specificato.
4. Nel caso che una qualsiasi parte dell’apparato si riveli difettosa, fatta eccezione per le parti escluse nel successivo paragrafo 5, il proprietario farà quanto segue:
a) preparare una descrizione scritta dettagliata del natura e delle circostanze del difetto, al meglio delle conoscenze del Proprietario, comprendente la data e il luogo
d’acquisto, il nome e l’indirizzo dell’installatore, e il nome, indirizzo e numero di telefono dell’acquirente;
b) il Proprietario dovrà restituire la parte o l’unità difettosa insieme con la dichiarazione di cui al paragrafo precedente al garante, a Sleipner Motor AS, o a un centro
di assistenza autorizzato, con spese postali/spese di spedizione prepagate e a carico dell’acquirente;
c) se in seguito a esame del garante o del centro di assistenza autorizzato si stabilisce che il difetto deriva da difetti di materiale o di lavorazione, l’apparato sarà
riparato o sostituito, a discrezione del garante, gratuitamente, e restituito all’acquirente a spese del garante;
d) il prezzo d’acquisto non sarà rimborsato all’acquirente, a meno che il garante non sia in grado di rimediare al difetto dopo aver avuto un numero ragionevole di
opportunità per far ciò. Prima del rimborso del prezzo d’acquisto, l’acquirente dovrà presentare una dichiarazione scritta di un fornitore professionale di apparati
per imbarcazioni nella quale si afferma che le istruzioni relative all’installazione contenute nel Manuale d’installazione e d’uso sono state seguite fedelmente e che
il difetto sussiste;
e) il servizio di garanzia sarà fornito unicamente dal garante, o da un servizio di assistenza autorizzato, e qualsiasi tentativo di rimediare al difetto compiuto da
chiunque altro farà decadere questa garanzia.
5. Non è prevista alcuna garanzia per difetti o danni provocati da installazione o collegamento non corretti, uso cattivo o improprio degli apparati, in particolare l’esposizione
a eccessivo calore, a spruzzi di acqua di mare o acqua fresca, o l’immersione in acqua, fatta eccezione per gli apparati progettati appositamente come impermeabili.
6. Non viene fornita nessun’altra garanzia esplicita e non vi sono garanzie che si estendono oltre quelle descritte nella precedente sezione 4. Questa garanzia è
esplicitamente in sostituzione di qualsiasi altra garanzia esplicita o implicita, in particolare qualsiasi garanzia implicita di commerciabilità, idoneità per gli scopi ordinari
per cui tali merci vengono utilizzate, o idoneità per un particolare scopo, e qualsiasi altra obbligazione da parte del garante o dei suoi dipendenti e rappresentanti.
7. Il garante o i suoi dipendenti e rappresentanti non si assumono alcuna responsabilità civile o penale per infortuni subiti da qualsiasi persona, o danni a beni, perdita
di introiti o utili, o qualsiasi altro danno o costo consequenziale o causato che altri possano sostenere essere stato provocato tramite l’utilizzo o la vendita
dell’apparato, compreso qualsiasi possibile guasto o malfunzionamento dell’apparato o di parte di esso.
8. Il garante non si assume alcuna responsabilità per danni incidentali o consequenziali di qualsiasi genere, compresi i danni derivanti da collisioni con altre
imbarcazioni o altri oggetti.
9. Questa garanzia conferisce all’acquirente diritti legali specifici. È possibile che l’acquirente goda anche di altri diritti, che possono variare da un paese all’altro.
FI
Takuuehdot
1. Sleipner Motor AS (“Takaaja”) takaa tämän tuotteen valmistusmateriaalien ja työn virheettömyyden, jos laite on normaalikäytössä ja huollettu normaalein aikavälein.
2. Tämä takuu on voimassa kaksi vuotta ostopäivästä. Ostokuitti on esitettävä, jotta osoitetaan, että en että laite on takuuajan sisällä.
3. Tämä takuu on siirrettävissä ( jos omistaja vaihtuu ) ja kattaa tuotteen annetun ajan.
4. Siinä tapauksessa, että jokin osa laitteesta on viallinen, muut kuin ne osat, jotka on listattu kappaleessa 5 alla, pitäisi omistajan menetellä seuraavasti:
a) tehdä kirjallinen lausunto vian luonteesta ja olosuhteista, omistajan parhaiden tietojen mukaan, sisältäen ostopäivämäärän, ostopaikan, asentajan
nimen ja osoitteen, ostajan nimen, osoitteen ja puhelinnumeron;
b) Omistajan pitäisi palauttaa viallinen osa ja liittää kirjallinen lausunto yllä olevilla tiedoilla takaajalle, Sleipner Motor AS tai valtuutetulle huoltopisteelle,
rahtikustannukset omistajan maksamina;
c) jos takaajan tai huoltopisteen tarkistuksen mukaan, vika on syntynyt valmitusmateriaalin tai työn puutteista, laite korjataan tai vaihdetaan uuteen
Takaajan ehdoilla, ja palautetaan ostajalle Takaajan kustannuksella;
d) mitään takaisinmaksua ostohinnasta ei suoriteta ostajalle, paitsi jos Takaaja ei onnistu löytää vialle parannuskeinoa, vaikka sitä olisi yritetty kohtuullisen
monta kertaa. Ennen ostohinnan takaisinmaksua Ostajan on esitettävä kirjallinen todistus venealan tarvikkeiden toimittaja-ammattilaiselta, että
asennusohjeita Asennusohje ja Käyttäjän käsikirjasta on seurattu tarkkaan ja että vika kuitenkin jatkuu;
e) takuukorjausta saa suorittaa ainoastaan Takaaja, tai valtuutettu huoltopiste, ja kaikkien muiden yritys korjata vikaa mitätöi tämän takuun .
5. Mitään takuuta ei myönnetä vikoihin, jotka aiheutuvat väärästä asennuksesta tai kiinnityksestä, laitteen väärästä käyttöstä sisältäen altistumisen liialliselle
kuumuudelle, suola tai makeavesi suihkua, tai vesivahinkoja paitsi laitteissa, jotka ovat nimenomaan suunniteltu vesitiiviiksi.
6. Mitään muuta takuuta ei näin ollen anneta eikä ole mitään takuuta, joka ylittää yllä olevan 4 kappaleessa mainitun. Tässä luetellut takuut ja korjaukset ovat
yksinomaisia, ja ne poissulkevat kaikki aiemmin mainitut takuut mukaan lukien takuut myyntikelpoisuudesta ja sopivuudesta tiettyyn käyttötarkoitukseen.
7. Takaajalla, sen työntekijöillä tai edustajilla ei ole mitään velvollisuutta tai vastuuta minkään henkilön tai henkilöiden loukkaantumiselle, tai vahingoittuneelle
omaisuudelle, tuoton tai ansion menetykselle, tai mihinkään muuhun tapahtumaan, vaurioon tai kustannukseen joiska voidaan syyttää tämän laitteen
käyttöä tai myyntiä, sisältäen myös mahdolliset viat tai toimintahäiriöt laitteessa, tai sen osassa.
8. Takaajalla ei ole vastuuta tapaturmista tai siitä johtuvista vahingoista, sisältäen vahingot jotka ovat syntyneet toisen veneen tai kohteen kolaroimisesta.
9. Tämä takuu antaa laillisia oikeuksia, jotka kuitenkin voivat vaihdella maakohtaisesti.
SP 30 S2i / SP 40 S2i / SP 55 Si
3.4 - 2005
49
50
28
17
16
Original model
Model period
25
24
23
22
21
21
19
18
3.4 - 2005
10
Com plete electric m otor assem bly
Nut for solenoid cover
Solenoid cover
Complete solenoid kit
Solenoid
Internal w iring loom
Electronic control box
Solenoid bracket kit
Shear pin for electric motor shaft
Retaining ring
Electric motor
Brush springs for electric motor (kit)
Brushes for electric motor (kit)
Oil container w ith holder
Oil hose w ith hose clam ps
Com plete m otor bracket
O-ring seals in motor bracket
Com plete gearleg
Gearleg bolt
Drive shaft seal
Propeller shaft seal
Gasket
Oil drain screw w ith gasket
Zinc anode
Locknut
Propeller w asher
Propeller drive pin
Propeller
SP 30 S2i
2 0101 12
6 8810
3 2024
2 0131 12
41571123
6 1200B
6 1230i
2 0135
3 2050
3 1143
2 1012
2 0170 12*
2 0180 12*
N/A
N/A
3 0501
N/A
3 0601
3 1080
N/A
N/A
3 1310 10
N/A
3 1180
3 1250
3 1365
N/A
3 1260A
SP 30 S2i
SP 30 S2i / SP 40 S2 i/ SP 55 Si
26
10
02/05 <
Part #
12V
Ref:
27
13
11
7
28.
27.
26.
25.
24.
23.
22.
21.
20.
19.
18.
17.
16.
15.
14.
13.
12.
11.
10.
9.
8.
7.
6.
5.
4.
3.
2.
1.
Other comments:
* Please provide thruster serial number
4 3 1
w hen ordering brushes and brush springs.
5
27
28
26
25
24
23
SP 30 S2i / SP 40 S2i / SP 55 Si
3.4 - 2005
21
4 3 1
11
22
10
13
21
17
19
16
5
7
10
18
02/05 <
Model period
3 0101 12
6 8807
3 2026
3 0131 12
41472123
6 1226B
6 1230i
3 0135
3 2050
3 1143
3 1012
3 0170 12*
3 0180 12*
N/A
N/A
3 0501
N/A
3 0601
3 1080
N/A
N/A
3 1310 10
N/A
3 1180
3 1250
3 1365
N/A
3 1260A
Ref:
28.
27.
26.
25.
24.
23.
22.
21.
20.
19.
18.
17.
16.
15.
14.
13.
12.
11.
10.
9.
8.
7.
6.
5.
4.
3.
2.
1.
w hen ordering brushes and brush springs.
* Please provide thruster serial number
Other comments:
Part #
12V
Com plete electric m otor assem bly
Nut for solenoid cover
Solenoid cover
Complete solenoid kit
Solenoid
Internal w iring loom
Electronic control box
Solenoid bracket kit
Shear pin for electric motor shaft
Retaining ring
Electric motor
Brush springs for electric motor (kit)
Brushes for electric motor (kit)
Oil container w ith holder
Oil hose w ith hose clam ps
Com plete m otor bracket
O-ring seals in motor bracket
Com plete gearleg
Gearleg bolt
Drive shaft seal
Propeller shaft seal
Gasket
Oil drain screw w ith gasket
Zinc anode
Locknut
Propeller w asher
Propeller drive pin
Propeller
SP 40 S2i
Original model
SP 40 S2i
51
52
15
27
28
Gear Oil EP 90
26
11
14
1
24 23 22
5 4 3
25
SP 30 S2i / SP 40 S2 i/ SP 55 Si
3.4 - 2005
8
2
10
21
17
7
12
6
20
13
16
9
19
10
18
w hen ordering brushes and brush
springs.
Other comments:
* Please provide thruster serial number
24V
4 0101 24
6 8807
4 2026
4 0131 24
41471243
6 1226B
6 1230i
4 0135
4 2050
6 1061
4 2010 24
4 0170 24*
4 0180 24*
20 0300
20 0400
4 0500
4 2340
4 0600
6 1080
7 1350
6 1350
4 0610
6 1220
7 1190
4 1260
7 1181
6 1241
7 1260
12V
4 0101 12
6 8807
4 2026
4 0131 12
41472123
6 1226B
6 1230i
4 0135
4 2050
6 1061
4 2010 12
4 0170 12*
4 0180 12*
20 0300
20 0400
4 0500
4 2340
4 0600
6 1080
7 1350
6 1350
4 0610
6 1220
7 1190
4 1260
7 1181
6 1241
7 1260
Com plete electric m otor assem bly
Nut for solenoid cover
Solenoid cover
Complete solenoid kit
Solenoid
Internal w iring loom
Electronic control box
Solenoid bracket kit
Shear pin for electric motor shaft
Gasket
Electric motor
Brush springs for electric motor (kit)
Brushes for electric motor (kit)
Oil container w ith holder
Oil hose w ith hose clam ps
Com plete m otor bracket
O-ring seals in motor bracket
Com plete gearleg
Gearleg bolt
Drive shaft seal
Propeller shaft seal
Gaskets
Oil drain screw w ith gasket
Zinc anode
Locknut
Propeller w asher
Propeller drive pin
Propeller
28.
27.
26.
25.
24.
23.
22.
21.
20.
19.
18.
17.
16.
15.
14.
13.
12.
11.
10.
9.
8.
7.
6.
5.
4.
3.
2.
1.
Part #
12/04 <
SP 55 Si
Ref:
Model period
Original model
SP 55 Si
SERVICE
SIDEPOWER
Thruster systems
SP 30 S2i / SP 40 S2i / SP 55 Si
3.4 - 2005
53
SERVICE
SIDEPOWER
Thruster systems
54
SP 30 S2i / SP 40 S2 i/ SP 55 Si
3.4 - 2005
SERVICE
SIDEPOWER
Thruster systems
SP 30 S2i / SP 40 S2i / SP 55 Si
3.4 - 2005
55
Service Centres
Argentina
Trimer SA
Buenos Aires
Tel: +54 11 4580 0444
Fax: +54 11 4580 0440
www.trimer.com.ar
[email protected]
Australia
AMI Sales
Freemantle, WA
Tel: +61 89 337 3266
Fax: +61 89 314 2929
[email protected]
Austria
G. Ascherl GmbH
Hard, Bregenz
Tel: +43 5574 899000
Fax: +43 5574 89900-10
www.ascherl.at
[email protected]
Benelux
ASA Boot Electro
Watergang
Tel: +31 20 436 9100
Fax: +31 20 436 9109
[email protected]
[email protected]
Canada
Imtra Corporation
New Bedford, MA
Tel: +1 508 995 7000
Fax: +1 508 998 5359
www.imtra.com
[email protected]
Croatia
AC Yacht & nautical support
Icici
Tel: +385 51 704 500
Fax: +385 51 704 600
[email protected]
Denmark
Gertsen & Olufsen AS
Hørsholm
Tel: +45 4576 3600
Fax: +45 4576 1772
www.gertsen-olufsen.dk
[email protected]
Finland
Nautikulma OY
Turku
Tel: +358 2 2503 444
Fax: +358 2 2518 470
www.nautikulma.fi
[email protected]
France
Kent Marine Equipment
Nantes
Tel: +33 240 921 584
Fax: +33 240 921 316
www.kent-marine.com
[email protected]
Malta
S & D Yachts Ltd.
Cali
Tel: +356 21 339 908
Fax: +356 21 332 259
www.sdyachts.com
[email protected]
Germany
Jabsco GmbH
Norderstedt
Tel: +49 40 535 373-0
Fax: +49 40 535 373-11
New Zealand
Lusty & Blundel Ltd.
Auckland
Tel: +64 9 415 8303
Fax: +64 9 415 8304
www.lusty-blundell.co.nz
[email protected]
Greece
Amaltheia Marine
Athens
Tel: +30 210 2588 985
Fax: +30 210 2588 986
www.amaltheiamarine.com
[email protected]
Iceland
Merkur HF
Reykjavik
Tel: +354 594 6000
Fax: +354 594 6001
www.merkur.is
[email protected]
Ireland
Metalcove Marine
Dublin
Tel: +353 1 668 6046
Fax: +353 1 668 6827
www.metalcove.com
Israel
Atlantis Marine Ltd.
Tel Aviv
Tel: +972 3 522 7978
Fax: +972 3 523 5150
www.atlantis-marine.com
[email protected]
Italy
Saim S.P.A.
Assago-Milan
Tel: +39 02 488 531
Fax: +39 02 488 254 5
www.saim-group.com
Japan
Global Marine Inc.
Hyogo
Tel: +81 798 347 345
Fax: +81 798 347 346
www.global-marine.co.jp
[email protected]
Sweden
Sleipner AB
Strömstad
Tel: +46 526 629 50
Fax: +46 526 152 95
www.sleipnerab.se
Switzerland
Marineparts Heimgartner
Volketswil
Tel: +41 1 997 40 90
Fax: +41 1 997 40 94
www.marineparts.ch
[email protected]
Norway
Sleipner Motor AS
Fredrikstad
Tel: +47 69 30 00 60
Fax: +47 69 30 00 70
www.side-power.com
[email protected]
Singapore/Malaysia/
Indonesia
Alquest Marketing
Singapore
Tel: +65 6749 9359
Fax: +65 6749 9360
www.alquest.com.sg
[email protected]
Poland
Taurus Sea Power SP. Z.O.O
Gdansk
Tel: +48 58 344 30 50
Fax: +48 58 341 67 62
Taiwan
Mercury Marine Supply
Kaohsiung
Tel: +886 7 3317 293
Fax: +886 7 3314 232
Portugal
Krautli Portugal Lda.
Lisboa
Tel: +351 21 953 56 00
Fax: +351 21 953 56 01
www.krautli.com
[email protected]
Turkey
Denpar Ltd.
Istanbul
Tel: +90 212 285 0334
Fax: +90 212 285 0311
[email protected]
Russia
Standarte
Starbeyevo
Tel: +7 095 575 67 23
Fax: +7 095 575 39 77
www.standarte.ru
[email protected]
Spain
Imnasa Marine Products
Girona
Tel: +34 972 820210
Fax: +34 972 325116
www.imnasa.com
[email protected]
UK
Sleipner AB (UK)
Hayling Island
Tel: +44 2392 637 337
Fax: +44 2392 466 111
[email protected]
United Arab Emirates
Teignbridge Propulsion
Dubai
Tel: +971 4 324 0084
Fax: +971 4 324 0153
[email protected]
USA
Imtra Corporation
New Bedford, MA
Tel: +1 508 995 7000
Fax: +1 508 998 5359
www.imtra.com
[email protected]
All other:
Sleipner Motor AS
Sleipner Motor AS, P. O. Box 519, N-1612 Fredrikstad, Norway
Tel: +47 69 30 00 60 Fax: +47 69 30 00 70
[email protected] www.side-power.com
56
SP 30 S2i / SP 40 S2i / SP 55 Si
3.4 - 2005