1
09.10.2013
14:11 Uhr
Seite 1
Bedienungsanleitung
Instruction manual
Mode d’emploi
Instrucciones de uso
Gebruiksaanwijzing
Istruzioni per l'uso
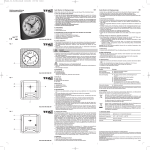
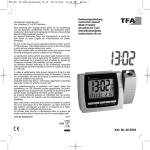
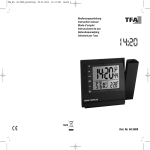
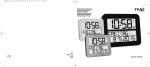
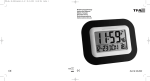
stilisierte Darstellung / stylized illustration
TFA_No. 60.5009_Anleitung
RoHS
Kat. Nr. 60.5009
TFA_No. 60.5009_Anleitung
09.10.2013
14:11 Uhr
Seite 2
Fig. 1
Fig. 2
C1
A1
C3
C2
B1
2
B2 B3
B4
B5
B6
3
TFA_No. 60.5009_Anleitung
09.10.2013
14:11 Uhr
Seite 3
HOLOclock - Funkuhr mit 3D-Effekt
Vielen Dank, dass Sie sich für dieses Gerät aus dem Hause TFA entschieden haben.
Durch eine patentierte Optik wird die Uhrzeit, das Datum oder die Temperatur über die Beamsplitter-Linse projiziert. Dadurch schwebt die Anzeige praktisch in der Luft.
Aufgrund physikalischer Gesetzmäßigkeiten ist der Effekt nur in einem bestimmten Ablesewinkel
zu sehen.
1. Bevor Sie mit dem Gerät arbeiten
• Lesen Sie sich bitte die Bedienungsanleitung genau durch. So werden Sie mit Ihrem neuen Gerät
vertraut, lernen alle Funktionen und Bestandteile kennen, erfahren wichtige Details für die Inbetriebnahme und den Umgang mit dem Gerät und erhalten Tipps für den Störungsfall.
• Durch die Beachtung der Bedienungsanleitung vermeiden Sie auch Beschädigungen des Gerätes
und die Gefährdung Ihrer gesetzlichen Mängelrechte durch Fehlgebrauch.
• Für Schäden, die aus Nichtbeachtung dieser Bedienungsanleitung verursacht werden, übernehmen wir keine Haftung.
• Ebenso haften wir nicht für inkorrekte Messwerte und Folgen, die sich aus solchen ergeben
können.
• Beachten Sie besonders die Sicherheitshinweise!
• Bewahren Sie diese Bedienungsanleitung gut auf!
2. Lieferumfang
•
•
•
•
Funkuhr
Bedienungsanleitung
Batterien
Netzadapter
3. Einsatzbereich und alle Vorteile Ihres neuen Gerätes auf einen Blick
•
•
•
•
•
Neuartige patentierte 3D-Anzeige
Funkuhr mit höchster Genauigkeit und manueller Einstellmöglichkeit
Anzeige des Datums
Anzeige der Innentemperatur
Automatischer Wechsel des Displays einstellbar
4. Zu Ihrer Sicherheit
• Das Produkt ist ausschließlich für den oben beschriebenen Einsatzbereich geeignet. Verwenden
Sie das Produkt nicht anders, als in dieser Anleitung dargestellt wird.
• Das eigenmächtige Reparieren, Umbauen oder Verändern des Gerätes ist nicht gestattet.
• Dieses Gerät ist nicht zur öffentlichen Information geeignet und nur für den privaten Gebrauch
bestimmt.
Vorsicht!
Lebensgefahr durch Stromschlag!
• Schließen Sie das Gerät nur an eine vorschriftsmäßig installierte Steckdose mit einer Netzspannung von 230V an!
4
HOLOclock - Funkuhr mit 3D-Effekt
• Das Gerät und das Netzteil dürfen nicht mit Wasser oder Feuchtigkeit in Kontakt kommen. Nur
für den Betrieb in trockenen Innenräumen geeignet.
• Benutzen Sie das Gerät nicht, wenn Gehäuse oder Netzteil beschädigt sind.
• Bewahren Sie das Gerät außerhalb der Reichweite von Personen (auch Kindern) auf, die mögliche Gefahren im Umgang mit elektrischen Geräten nicht richtig einschätzen können.
• Ziehen Sie sofort den Stecker aus der Steckdose, wenn eine Störung auftritt oder das Gerät für
längere Zeit nicht benutzt wird.
• Verwenden Sie ausschließlich das mitgelieferte Netzteil.
• Ziehen Sie den Netzstecker nicht am Kabel aus der Steckdose.
• Verlegen Sie das Netzkabel so, dass es nicht mit scharfkantigen oder heißen Gegenständen in
Berührung kommt.
Vorsicht!
Verletzungsgefahr:
• Bewahren Sie die Batterien und das Gerät außerhalb der Reichweite von Kindern auf.
• Batterien nicht ins Feuer werfen, kurzschließen, auseinander nehmen oder aufladen. Explosionsgefahr!
• Batterien enthalten gesundheitsschädliche Säuren. Um ein Auslaufen der Batterien zu vermeiden, sollten schwache Batterien möglichst schnell ausgetauscht werden. Verwenden Sie nie
gleichzeitig alte und neue Batterien oder Batterien unterschiedlichen Typs.
• Beim Hantieren mit ausgelaufenen Batterien chemikalienbeständige Schutzhandschuhe und
Schutzbrille tragen!
Wichtige Hinweise zur Produktsicherheit!
• Setzen Sie das Gerät keinen extremen Temperaturen, Vibrationen und Erschütterungen aus.
• Stellen Sie keine Gegenstände auf das Gerät.
5. Bestandteile
5.1 Funktionen
A: 3D-Anzeige
A 1: Uhrzeit / Datum / Innentemperatur
B: Tasten
B 1: MODE Taste
B 2: SET Taste
B 3: WAVE Taste
B 4: + Taste
B 5: – Taste
B 6: LIGHT Taste
C: Gehäuse
C 1: Batteriefach
C 2: Netzsteckeranschluss
C 3: Lichtsensor
5
TFA_No. 60.5009_Anleitung
09.10.2013
HOLOclock - Funkuhr mit 3D-Effekt
14:11 Uhr
Seite 4
6. Inbetriebnahme
• Ziehen Sie die Schutzfolie vom Display.
• Stecken Sie den Anschlussstecker in den Anschluss und schließen Sie das Gerät mit dem Netzstecker am Stromnetz an. Das Gerät ist jetzt betriebsbereit.
Wichtig! Stellen Sie sicher, dass Ihre Netzspannung nicht mehr als 230 V beträgt! Andere Netzspannungen können zur Beschädigung des Instrumentes führen.
• Öffnen Sie das Batteriefach und entfernen Sie den Batterieunterbrechungsstreifen. Schließen Sie
das Batteriefach wieder.
• Die zwei Batterien 1,5 V AAA erhalten bei Stromausfall die Funktion der Uhrzeit aufrecht, damit
keine Neueinstellung vorgenommen werden muss.
• Auf der 3D-Anzeige erscheint das DCF Empfangssymbol (Punkt).
• Die Uhr versucht nun, das Funksignal zu empfangen.
• Wenn der Zeitcode nach einigen Minuten empfangen wurde, wird die funkgesteuerte Zeit auf
der Anzeige angezeigt.
• Das DCF Empfangssymbol (Punkt) verschwindet.
• Der DCF-Signalempfang findet täglich um 3:15 Uhr morgens statt. Ist der Empfang um 3:15 Uhr
nicht erfolgreich, so finden bis 5:15 Uhr früh weitere Empfangsversuche statt.
• Ist kein Funkempfang möglich (auf der Anzeige blinkt 00:00), können Sie den DCF-Empfang auch
manuell starten.
• Drücken Sie die WAVE Taste.
• Auf der 3D-Anzeige erscheint wieder das DCF-Signalempfangszeichen (Punkt).
• Falls die Funkuhr kein DCF-Signal empfangen kann (z.B. wegen Störungen, Übertragungsdistanz,
etc.), kann die Zeit manuell eingestellt werden. Die Uhr arbeitet dann wie eine normale QuarzUhr (siehe Manuelle Einstellungen).
Empfang der Funkzeit DCF
Die Zeitübertragung erfolgt von einer Cäsium Atom-Funkuhr, die von der Physikalisch Technischen
Bundesanstalt in Braunschweig betrieben wird. Die Abweichung beträgt weniger als 1 Sekunde in
einer Million Jahren. Die Zeit ist kodiert und wird von Mainflingen in der Nähe von Frankfurt am
Main durch ein DCF-77 (77,5 kHz) Frequenzsignal übertragen mit einer Reichweite von ca. 1.500
km. Ihre Funkuhr empfängt das Signal, wandelt es um und zeigt immer die exakte Zeit an. Auch die
Umstellung von Sommer- und Winterzeit erfolgt automatisch. Der Empfang hängt hauptsächlich
von der geographischen Lage ab. Im Normalfall sollten innerhalb des Radius von 1.500 km ausgehend von Frankfurt bei der Übertragung keine Probleme auftauchen.
Bitte beachten Sie folgende Hinweise:
• Es wird empfohlen, einen Abstand von mindestens 1,5 – 2 Metern zu eventuell störenden Geräten wie Computerbildschirmen und Fernsehgeräten einzuhalten.
• In Stahlbetonbauten (Kellern, Aufbauten) ist das empfangene Signal natürlicherweise schwächer.
In Extremfällen wird empfohlen, das Gerät in Fensternähe zu platzieren und/oder durch Drehen
das Funksignal besser zu empfangen.
• Nachts sind die atmosphärischen Störungen meist geringer und ein Empfang ist in den meisten
Fällen möglich. Ein einziger Empfang pro Tag genügt, um die Genauigkeit zu gewährleisten und
Abweichungen unter 1 Sekunde zu halten.
6
HOLOclock - Funkuhr mit 3D-Effekt
7. Bedienung
• Halten Sie die + oder – Taste im Einstellmodus gedrückt, gelangen Sie in den Schnelllauf.
• Das Gerät verlässt automatisch den Einstellmodus, wenn länger als 20 Sekunden keine Taste
gedrückt wird.
HINWEIS:
Bei aktiviertem DCF-Empfang können keine Einstellungen (Uhrzeit, Datum und Temperatur-Einheit) vorgenommen werden. Standardgemäß ist der DCF-Empfang aktiviert und nach erfolgreichem Empfang des DCF-Signals ist keine manuelle Einstellung erforderlich.
Um manuelle Einstellungen vorzunehmen, müssen Sie den DCF-Empfang deaktivieren.
Dies ist beispielsweise erforderlich, wenn Sie die Temperatureinheit ändern oder die Zeit manuell einstellen müssen.
7.1 Manuelle Einstellungen
• Halten Sie die SET Taste für drei Sekunden gedrückt. Auf der 3D-Anzeige erscheint „On” (Voreinstellung). Stellen Sie die Anzeige mit der + oder – Taste von „On” nach „OFF” um. Der DCFEmpfang ist deaktiviert.
• Drücken Sie die SET Taste noch einmal und Sie können nun nacheinander die Stunden, die Minuten, den Monat, den Tag, das Jahr und die Temperaturanzeige ansteuern und mit der + oder –
Taste einstellen.
• Bei Fahrenheit als Temperaturanzeige wechselt automatisch die Datumsanzeige von der europäischen Anzeige (erst der Tag, dann der Monat) auf die amerikanische Anzeige (erst der Monat,
dann der Tag).
• Bestätigen Sie die Eingaben mit der SET Taste.
HINWEIS:
Wenn Sie den DCF Empfang nun wieder aktivieren, wird die manuell eingestellte Zeit bei erfolgreichem Empfang des DCF-Signals zu einem späteren Zeitpunkt überschrieben (nachts ist der
Empfang oft besser).
7.2 DCF-Empfang wieder aktivieren
• Halten Sie die SET Taste für drei Sekunden gedrückt.
• Ist der DCF-Empfang deaktiviert, wird „OFF” angezeigt. Stellen Sie die Anzeige mit der + oder –
Taste von „OFF” nach „On” um. Der DCF-Empfang ist aktiviert.
• Drücken Sie noch einmal die SET Taste, startet das Gerät einen Empfangsversuch (Punkt).
• Um sofort in die Normalanzeige zurückzukehren, drücken Sie die WAVE Taste.
7.3 Displayanzeige
• Mit der MODE Taste können Sie im Normalmodus zwischen der Uhrzeit, Datum, Jahr und Innentemperatur als ständige Anzeige wählen.
• Drücken und halten Sie die MODE Taste, um einen automatischen Wechsel der Anzeige einzustellen.
7
TFA_No. 60.5009_Anleitung
09.10.2013
14:11 Uhr
Seite 5
HOLOclock - Funkuhr mit 3D-Effekt
• M0 (Voreinstellung) blinkt auf der 3D-Anzeige. Drücken Sie die + oder – Taste, um zwischen den
nachfolgenden Modi zu wechseln:
M0:
M1:
M2:
M3:
In diesem Modus erscheint die zuletzt ausgewählte Anzeige dauerhaft aktiv.
Uhrzeit und Innentemperatur im Wechsel
Uhrzeit und Datum im Wechsel
Uhrzeit, Datum und Innentemperatur im Wechsel
HOLOclock - Funkuhr mit 3D-Effekt
Batterien und Akkus dürfen keinesfalls in den Hausmüll!
Als Verbraucher sind Sie gesetzlich verpflichtet, gebrauchte Batterien und Akkus zur
umweltgerechten Entsorgung beim Handel oder entsprechenden Sammelstellen
gemäß nationaler oder lokaler Bestimmungen abzugeben.
Die Bezeichnungen für enthaltene Schwermetalle sind:
Cd=Cadmium, Hg=Quecksilber, Pb=Blei
• Bestätigen Sie die Eingabe mit der MODE Taste oder drücken Sie keine Taste innerhalb von
5 Sekunden.
• Um den automatischen Anzeigewechsel zu beenden, drücken und halten Sie die MODE Taste
noch einmal und wählen Sie mit der + oder – Taste M0 aus.
7.4 Beleuchtung
• Mit der LIGHT Taste wird die 3D-Anzeige aus- oder angeschaltet.
• Drücken Sie die + oder – Taste im Normalmodus, und Sie können manuell bis zu vier Helligkeitsstufen einstellen.
• Die Stärke der Beleuchtung wird zusätzlich automatisch der Lichtintensität im Raum angepasst.
8. Pflege und Wartung
• Reinigen Sie das Gerät mit einem weichen, leicht feuchten Tuch. Keine Scheuer- oder Lösungsmittel verwenden!
• Achtung: Entfernen Sie bitte die Batterien, wenn Sie das Gerät längere Zeit vom Netz nehmen
oder dauerhaft deaktivieren möchten.
• Bewahren Sie Ihr Gerät an einem trockenen Platz auf.
10. Entsorgung
Dieses Produkt wurde unter Verwendung hochwertiger Materialien und Bestandteile hergestellt, die
recycelt und wiederverwendet werden können.
Dieses Gerät ist entsprechend der EU-Richtlinie über die Entsorgung von Elektro- und
Elektronik-Altgeräten (WEEE) gekennzeichnet.
Dieses Produkt darf nicht mit dem Hausmüll entsorgt werden. Der Nutzer ist verpflichtet, das Altgerät zur umweltgerechten Entsorgung bei einer ausgewiesenen Annahmestelle für die Entsorgung von Elektro- und Elektronikgeräten abzugeben.
11. Technische Daten
Spannungsversorgung:
Netzstecker (inklusive) und Batterien 2 x 1,5 V AAA (inklusive)
Messbereich Temperatur: -5°…+50°C / +23°…+122°F
Anzeige LL/HH:
Messung liegt außerhalb des Messbereichs
Gehäusemaße:
165 x 84 x 35 mm
Gewicht:
162 g (nur das Gerät)
8.1 Batteriewechsel
• Wechseln Sie bitte alle 3 Jahre die Backup - Batterien.
• Öffnen Sie das Batteriefach und legen Sie zwei neue Batterien 1,5 V AAA polrichtig ein.
• Achtung: Beim Batteriewechsel nur neue Batterien verwenden.
• Schließen Sie das Batteriefach wieder.
9. Fehlerbeseitigung
Problem
Lösung
Keine Anzeige
➜ Netzstecker überprüfen
➜ LIGHT Taste drücken
Kein DCF Empfang
➜
➜
➜
➜
➜
➜
➜
DCF Empfang einschalten (siehe Manuelle Einstellungen)
WAVE Taste drücken, um den Empfang zu aktivieren
Anderen Aufstellort für das Gerät wählen
Empfangsversuch in der Nacht abwarten
Beseitigen der Störquellen
Neuinbetriebnahme des Gerätes gemäß Anleitung
Uhrzeit manuell einstellen
Wenn Ihr Gerät trotz dieser Maßnahmen immer noch nicht funktioniert, wenden Sie sich an den
Händler, bei dem Sie das Produkt gekauft haben.
8
3D Effekt geschützt durch ein Patent der 3Daround GmbH
TFA Dostmann GmbH & Co.KG, Zum Ottersberg 12, D-97877 Wertheim.
Diese Anleitung oder Auszüge daraus dürfen nur mit Zustimmung von TFA Dostmann veröffentlicht werden. Die technischen
Daten entsprechen dem Stand bei Drucklegung und können ohne vorherige Benachrichtigung geändert werden.
EU-KONFORMITÄTSERKLÄRUNG
Wir erklären hiermit, dass diese Funkanlage die wesentlichen Anforderungen der R&TTE Direktive 1999/5/EG erfüllt.
Eine Kopie der unterschriebenen und mit Datum versehenen Konformitätserklärung erhalten Sie auf Anfrage unter
[email protected].
www.tfa-dostmann.de
10/2013
9
TFA_No. 60.5009_Anleitung
09.10.2013
14:11 Uhr
Seite 6
HOLOclock - Radio controlled clock with 3-D effect
Thank you for choosing this instrument from TFA.
Through patented optics, the time, date and temperature will be projected by means of the beam
splitter lens. In this way, the display appears in midair.
Because of the laws of physics, this effect can only be seen from a certain viewing angle.
1. Before you start using it
• Please make sure to read the instruction manual carefully. This information will help you to
familiarise yourself with your new device, to learn all of its functions and parts, to find out
important details about its first use and how to operate it, and to get advice in the event of
faults.
• Following and respecting the instructions in your manual will prevent damage to your instrument and loss of your statutory rights arising from defects due to incorrect use.
• We shall not be liable for any damage occurring as a result of non following of these instructions.
• Likewise, we take no responsibility for any incorrect readings and for any consequences which
may result from them.
• Please take particular note of the safety advice!
• Please keep this instruction manual for future reference.
2. Scope of delivery
• Radio-controlled clock
• Instruction manual
• Batteries
• Power adaptor
3. Field of operation and all the benefits of your new instrument at a glance
• New patented 3-D display
• Radio-controlled clock with highest precision and manual setting option
• Indication of the date
• Indication of the indoor temperature
• Automatic change of the display is adjustable
4. For your safety
• This product is exclusively intended for the field of application described above. It should only be
used as described within these instructions.
• Unauthorized repairs, modifications or changes to the product are prohibited.
• This product is not be used for public information, it is only intended for home use.
Caution!
Risk of electrocution!
• Plug the instrument only into a socket installed in regulation manner and with a mains voltage
of 230V!
• The instrument and the mains adapter must not come into contact with water or moisture. Only
suitable for operation in dry interiors.
10
HOLOclock - Radio controlled clock with 3-D effect
• Do not use the unit if the housing or the mains adapter are damaged.
• Keep the unit out of reach of persons (including children) who cannot fully appreciate the
potential risks of handling electrical equipment.
• Pull the plug out of the socket immediately if any fault occurs or if the unit is not used for a
longer period of time.
• Only use the supplied mains adapter.
• Do not pull the plug out of the socket by its lead.
• Route the mains lead so that it does not come into contact with sharp-edged or hot objects.
Caution!
Risk of injury:
• Keep this instrument and the batteries out of the reach of children.
• Batteries must not be thrown into a fire, short-circuited, taken apart or recharged. Risk of explosion!
• Batteries contain harmful acids. Low batteries should be changed as soon as possible to prevent
damage caused by leaking. Never use a combination of old and new batteries together, nor batteries of different types.
• Wear chemical-resistant protective gloves and safety glasses when handling leaking batteries.
Important information on product safety!
• Do not place your product near extreme temperatures, vibrations or shocks.
• Do not place any objects on the unit.
5. Elements
5.1 Functions
A: 3-D Display
A 1: Time / date / indoor temperature
B: Buttons
B 1: MODE button
B 2: SET button
B 3: WAVE button
B 4: + button
B 5: – button
B 6: LIGHT button
C: Housing
C 1: Battery compartment
C 2: Power socket
C 3: Light sensor
6. Getting started
• Remove the protective film from the display.
• Insert the adapter into the jack. Connect the power adapter to a wall socket. The unit is ready
for use.
11
TFA_No. 60.5009_Anleitung
09.10.2013
14:11 Uhr
HOLOclock - Radio controlled clock with 3-D effect
•
•
•
•
•
•
•
•
•
•
•
Seite 7
Important! Make sure that your household voltage is 230V! Otherwise your clock may be damaged.
Open the battery compartment and remove the battery insulation strip. Close the battery compartment again.
The two batteries 1,5 V AAA are back-up batteries to maintain the clock operation in the event
of blackout or other power failure.
The DCF reception symbol (dot) appears on the 3-D display.
The clock will now scan the DCF frequency signal.
When the time code is received successfully after a few minutes, the radio-controlled time
appears.
The DCF reception symbol (dot) disappears.
The DCF reception always takes place at 3:15 o'clock in the morning. If the DCF signal is not
successfully received at 3:15 clock, it shall be held further attempts until 5:15 clock.
If there is no reception possible (on the display appears 00:00), manual initialization of the DCF
reception can be helpful.
Press the WAVE button.
On the 3-D display appears again the DCF reception symbol (dot).
If the clock cannot detect the DCF-signal (for example due to disturbances, transmitting distance,
etc.), the time can be set manually. The clock will then work as a normal quartz clock. (see: Manual settings).
Radio-controlled time reception
The time base for the radio-controlled time is a caesium atomic clock operated by the Physikalisch
Technische Bundesanstalt Braunschweig. It has a time deviation of less than one second in one million years. The time is coded and transmitted from Mainflingen near Frankfurt via frequency signal
DCF-77 (77.5 kHz) and has a transmitting range of approximately 1,500 km. Changeover from summer time or winter time is automatic. The quality of the reception depends mainly on the geographic location. Normally there should be no reception problems within a 1,500 km radius around
Frankfurt.
Please take note of the following:
• The recommended distance to any interfering sources like computer monitors or TV sets is at
least 1.5 - 2 metres.
• Inside ferro-concrete rooms (basements, superstructures), the received signal is naturally weakened. In extreme cases, please place the unit close to a window to improve the reception.
• During nighttime, the atmospheric interference is are usually less severe and reception is possible
in most cases. A single daily reception is adequate to keep the accuracy deviation under 1 second.
7. Operation
• Press and hold + or – button in the setting mode for fast running.
• The instrument will automatically quit the setting mode if no button is pressed within 20 seconds.
NOTE:
If the DCF reception is enabled, no settings (time, date and temperature unit) can be made.
By default, the DCF reception is activated and after successful reception of the DCF signal no
manual adjustment is necessary.
12
HOLOclock - Radio controlled clock with 3-D effect
To make manual settings, you have to disable the DCF reception.
This is necessary, for example if you need to change the temperature unit or to set the time
manually.
7.1 Manual settings
• Press and hold SET button for three seconds. “On” (default) appears on the 3-D display. Set the
display with the + or – button from “On” to “OFF”. The DCF reception is deactivated.
• Press the SET button again and make the settings in the following sequence: Hours, minutes,
month, day, year and temperature unit. Press the + or – button to adjust it.
• If the temperature unit is Fahrenheit the date display automatically moves from the European
format (at first the day then the month) to the American format (at first the month then the
day).
• Confirm the setting with the SET button.
NOTE:
If you enable the DCF reception again, the manually set time will be overwritten as soon as the
reception of the DCF signal is successful (at night the reception is often better).
7.2 Activate DCF reception again
• Press and hold SET button for three seconds.
• If the DCF reception is deactivated, on the display appears “OFF”. Set the display with the + or button from “OFF” to “On”. The DCF reception is activated.
• Press the SET button again. The instrument starts to scan the DCF frequency signal (dot).
• Press the WAVE button to return directly to normal mode.
7.3 Display
• With the MODE button in normal mode you can select between time, date, year and temperature unit as permanent display.
• Press and hold the MODE button to set an automatic change of the display.
• M0 (default) will be flashing on the 3-D display. Press the + or – button to change between the
following modes:
M0:
M1:
M2:
M3:
In this mode the last selected display is permanently active.
Time and indoor temperature in sequence
Time and date in sequence
Time, date and indoor temperature in sequence
• Confirm the setting with the MODE button or press no button within 5 seconds.
• To stop the automatic display change, press and hold the MODE button again and select M0 with
the + or – button.
7.4 Backlight
• With the LIGHT button, the 3-D display can be turned off or on.
• Press the + or – button in normal mode and you can select between up to four levels of brightness.
• The intensity of the backlight will automatically adjusted to the light intensity in the room.
13
TFA_No. 60.5009_Anleitung
09.10.2013
14:11 Uhr
Seite 8
HOLOclock - Radio controlled clock with 3-D effect
HOLOclock - Radio controlled clock with 3-D effect
8. Care and maintenance
11. Specifications
• Clean your instrument with a soft damp cloth. Do not use solvents or scouring agents.
• Attention: Please remove the batteries if you pull the plug out of the socket for a longer time or
if you want to disable the instrument permanently.
• Keep the instrument in a dry place.
Power consumption:
Batteries 2 x 1,5 V AAA (included) and AC/DC power adaptor (included)
Temperature range:
-5°…+50°C / +23°…+122°F
Indication LL / HH:
Measurement is outside the measuring range
8.1 Battery replacement
• Please change the back-up batteries every 3 years.
• Open the battery compartment and insert two new batteries 1,5 V AAA. Ensure that the battery
polarities are correct.
• Attention: When replacing batteries, only use new batteries.
• Close the battery compartment again.
Housing dimension:
165 x 84 x 35 mm
Weight:
162 g (instrument only)
9. Troubleshooting
Problems
Solution
No display
➜ Control the power adapter
➜ Press the LIGHT button
No DCF reception
➜
➜
➜
➜
➜
➜
➜
Activate the DCF reception (see Manual settings)
Press the WAVE button to activate the reception
Choose another place for your product
Wait for attempted reception during the night
Check if there is any source of interference
Restart the device according to the manual
Manual clock setting
If your device fails to work despite these measures contact the supplier from whom you purchased it.
10. Waste disposal
This product has been manufactured using high-grade materials and components which can be recycled and reused.
Never dispose of empty batteries and rechargeable batteries in household waste.
As a consumer, you are legally required to take them to your retail store or to an
appropriate collection site depending on national or local regulations in order to protect the environment.
The symbols for the heavy metals contained are:
Cd=cadmium, Hg=mercury, Pb=lead
This instrument is labeled in accordance with the EU Waste Electrical and Electronic
Equipment Directive (WEEE).
Please do not dispose of this instrument in household waste. The user is obligated to
take end-of-life devices to a designated collection point for the disposal of electrical
and electronic equipment, in order to ensure environmentally-compatible disposal.
14
3-D effect protected by a patent of 3Daround GmbH
TFA Dostmann GmbH & Co.KG, Zum Ottersberg 12, D-97877 Wertheim.
No part of this manual may be reproduced without written consent of TFA Dostmann. The technical data are correct at the
time of going to print and may change without prior notice.
DECLARATION OF CONFORMITY
Herewith we declare, that this wireless transmission device does comply with the essentials requirements of R&TTE Directive
1999/5/EC.
A copy of the signed and dated Declaration of Conformity is available on request via [email protected].
www.tfa-dostmann.de
10/2013
15
TFA_No. 60.5009_Anleitung
09.10.2013
14:11 Uhr
Seite 9
HOLOclock - Horloge radio-pilotée avec effet 3D
Nous vous remercions d'avoir choisi l'appareil de la Société TFA.
Grâce à une optique brevetée, la date, l'heure ou la température sont projetée sur la lentille diviseur de faisceau. Cet affichage est pratiquement en l'air.
A cause de la loi physique l'effet n'est observé que dans un certain angle de vue.
1. Avant d'utiliser l'appareil
• Veuillez lire attentivement le mode d'emploi. Vous vous familiariserez ainsi avec votre nouvel
appareil, vous découvrirez toutes les fonctions et tous les éléments qui le composent, vous noterez les détails importants relatifs à sa mise en service et vous lirez quelques conseils en cas de disfonctionnement.
• En respectant ce mode d'emploi, vous éviterez d'endommager votre appareil et de perdre vos
droits résultant d'un défaut pour cause d'utilisation non-conforme.
• Nous n'assumons aucune responsabilité pour des dommages qui auraient été causés par le nonrespect du présent mode d'emploi.
• De même, nous n’assumons aucune responsabilité pour des relevés incorrects et les conséquences qu’ils pourraient engendrer.
• Suivez bien toutes les consignes de sécurité!
• Conservez soigneusement le mode d'emploi!
2. Contenu de la livraison
• Horloge radio-pilotée
• Mode d'emploi
• Piles
• Adaptateur secteur
3. Aperçu du domaine d'utilisation et tous les avantages de votre nouvel appareil
• Nouvel affichage 3D breveté
• Horloge radio-pilotée de grande précision avec option de réglage manuel
• Affichage du calendrier
• Affichage de la température ambiante
• Changement automatique de l'affichage réglable
4. Pour votre sécurité
• L'appareil est destiné uniquement à l'utilisation décrite ci-dessus. Ne l'utilisez jamais à d'autres
fins que celles décrites dans le présent mode d'emploi.
• Vous ne devez en aucun cas réparer, démonter ou modifier l'appareil par vous-même.
• Cet appareil ne convient pour l'information publique, il est destiné uniquement à un usage privé.
Attention!
Danger de choc électrique!
• Branchez seulement l'appareil à une prise de courant réglementaire ayant une tension de secteur de 230V!
• L'appareil et l'adaptateur secteur ne doivent pas entrer en contact avec de l'eau ou de l'humidité. L'appareil doit être utilisé uniquement en intérieur dans un environnement sec.
16
HOLOclock - Horloge radio-pilotée avec effet 3D
• N'utilisez pas l'appareil si le boitier ou l'adaptateur secteur sont endommagés.
• Conservez le produit hors de la portée de personnes (enfants compris) inaptes à évaluer les risques possibles liés au maniement d'appareils électriques.
• Retirez immédiatement la fiche de la prise en cas de défaut ou si l'appareil n'est pas utilisé pendant une longue période.
• Utilisez uniquement l'adaptateur secteur fourni.
• Pour débrancher, tirez sur la fiche et non sur le cordon de la prise.
• Placez le cordon d'alimentation de sorte qu'il n'entre pas en contact avec des objets tranchants
ou chauds.
Attention!
Danger de blessure:
• Gardez l'appareil et les piles hors de la portée des enfants.
• Ne jetez jamais les piles dans le feu, ne les court-circuitez pas, ne les démontez pas et ne les
rechargez pas. Risques d'explosion!
• Les piles contiennent des acides nocifs pour la santé. Une pile faible doit être remplacée le plus
rapidement possible afin d'éviter une fuite. N'utilisez jamais des piles anciennes avec des piles
neuves simultanément ou bien encore des piles de types différents.
• Pour manipuler des piles qui ont coulé, utilisez des gants de protection chimique spécialement
adaptés et portez des lunettes de protection !
Conseils importants de sécurité du produit!
• Évitez d’exposer l’appareil à des températures extrêmes, à des vibrations ou à des chocs.
• Ne placez aucun objet sur votre appareil
5. Composants
5.1 Fonctions
A: Affichage 3D
A 1: Horloge / date / température ambiante
B: Touches
B 1: Touche MODE
B 2: Touche SET
B 3: Touche WAVE
B 4: Touche +
B 5: Touche –
B 6: Touche LIGHT
C: Boîtier
C 1: Compartiment à piles
C 2: Prise pour adaptateur secteur
C 3: Capteur de lumière
17
TFA_No. 60.5009_Anleitung
09.10.2013
14:11 Uhr
Seite 10
HOLOclock - Horloge radio-pilotée avec effet 3D
6. Mise en service
• Enlevez le film de protection de l'écran.
• Mettez le connecteur dans la prise de l’horloge et branchez-le au secteur avec l'adaptateur.
Votre appareil est maintenant prêt à fonctionner.
Important! Une tension de réseau de plus de 230 V pourrait endommager votre appareil.
• Ouvrez le compartiment à piles. Enlevez le film de protection des piles. Refermez le compartiment à piles.
• Les deux piles 1,5 V AAA sont des piles de soutien qui servent à maintenir le fonctionnement de
l’horloge lors d’une panne soudaine d’alimentation.
• Le symbole de réception DCF (dot) apparaît sur l'affichage 3D.
• L’horloge cherche le signal radio.
• Lorsque le code horaire a été reçu après quelques minutes, l'heure radio-pilotée est affichée sur
l'affichage 3D.
• Le symbole de réception DCF (dot) disparaît.
• La réception du signal DCF a lieu fois par jour à 3 heures 15 du matin. Au cas où la réception à 3
heures 15 du matin n'aurait pas de succès, un nouvel essai de réception sera effectué à 5 heures
15 ou bien toutes les heures jusqu'à ce qu'il réussisse.
• Si aucune réception n'est possible (00 :00 clignote sur l’écran), vous pouvez activer manuellement
la réception DCF.
• Appuyez sur la touche WAVE.
• Le symbole de réception DCF (dot) apparaît de nouveau sur l’écran.
• Si votre horloge radio-pilotée ne peut pas recevoir le signal DCF (par exemple en raison de la
présence de perturbations, d’une distance de transmission excessive etc.), vous pouvez procéder
à un paramétrage manuel. Dans ce cas, l’horloge fonctionne comme une horloge à quartz normale (voir Réglages manuels).
Réception de l'heure radio
La transmission de l’heure radio-pilotée s’effectue via une horloge atomique au césium, exploitée
par la Physikalisch Technische Bundesanstalt de Braunschweig (Institut Fédéral Physico-Technique
de Braunschweig). L’écart de précision de cette horloge est d' 1 seconde pour un million d’années.
L’heure est diffusée à partir de Mainflingen, près de Francfort sur le Main, grâce à un signal DCF-77
(77,5 kHz), d'une une portée d’environ 1500 km. Le passage de l'heure d'hiver à l'heure d'été et
vice-et-versa s'effectue également en mode automatique. La réception est essentiellement en fonction de votre position géographique. En règle générale, dans un rayon de 1 500 km autour de
Francfort, aucun problème de transmission ne devrait apparaître.
Nous vous prions de respecter les consignes suivantes:
• Nous vous recommandons de respecter une distance de 1,5 - 2 m entre l'appareil et d’éventuelles
sources de signaux parasites, comme les écrans d'ordinateurs et les postes de télévision.
• Dans les bâtiments en béton armé (caves, greniers aménagés), le signal reçu est affaibli. Dans les
cas extrêmes, nous vous conseillons de placer l’appareil près d’une fenêtre de manière à améliorer la réception du signal radio.
• La nuit, les perturbations s’affaiblissent en règle générale et la réception est possible dans la plupart des cas. Un seul signal par jour suffit pour garantir la précision de l’affichage de l’heure, et
pour maintenir d’éventuels écarts en dessous d' 1 seconde.
18
HOLOclock - Horloge radio-pilotée avec effet 3D
7. Utilisation
• Maintenez la touche + ou – appuyée au mode de réglage pour accéder au défilement rapide.
• L'appareil quitte automatiquement le mode de programmation lorsqu’aucune touche n’est
appuyée pour 20 secondes.
REMARQUE:
Lorsque la réception DCF est activée, aucun réglage (heure, date et unité de température) ne
peut être fait. Par défaut, la réception DCF est activée et après une réception réussie du signal
DCF, aucun réglage manuel n’est nécessaire.
Pour effectuer des réglages manuels, vous devez désactiver la réception DCF.
Ceci est nécessaire, si vous changez par exemple l'unité de température ou réglez l’heure
manuellement.
7.1 Réglages manuels
• Maintenez la touche SET appuyée pendant 3 secondes. Sur l’écran apparaît «On» (par défaut).
Vous pouvez passer de «On» à «OFF» sur l’écran avec la touche + ou –.
• La réception DCF est désactivée.
• En appuyant sur la touche SET vous pouvez alors ajuster les heures, les mois, les jours, l’an et
l’unité de la température. Vous pouvez régler ces valeurs à l'aide des touches + ou –.
• Lorsque l’affichage de la température est en Fahrenheit, l’affichage de la date en mode européen (seulement le jour puis le mois) est remplacé automatiquement par l’affichage de la date
en mode américain (le mois puis le jour).
• Validez au moyen de la touche SET.
REMARQUE:
Si vous activez à nouveau la réception DCF, l'heure réglée manuellement sera remplacée lors
d’une bonne réception du signal DCF à une date ultérieure (de nuit, la réception est souvent
meilleure).
7.2 Nouvelle activation de la réception DCF
• Maintenez la touche SET appuyée pendant 3 secondes.
• Si la réception DCF est désactivée, «OFF» apparaît sur l’écran. Vous pouvez passer de «OFF» à
«On» sur l’écran avec la touche + ou –. La réception DCF est activée.
• Appuyez encore sur la touche SET l'appareil démarre une opération de réception (dot).
• Appuyez sur la touche WAVE afin de retourner au mode normal tout de suite.
7.3 Indication de l'écran
• Avec la touche MODE en mode normal vous pouvez choisir l'heure, la date, l'année et la température intérieure en affichage permanent.
• Maintenez la touche MODE appuyée pour régler un changement automatique de l'écran.
• M0 (par défaut) clignote à l’écran 3D. Appuyez sur la touche + ou – pour basculer entre les
modes suivants:
M0:
M1:
Cet affichage montre le dernier mode d'affichage sélectionné en permanence
Temps et température intérieure interchangeables
19
TFA_No. 60.5009_Anleitung
09.10.2013
14:11 Uhr
Seite 11
HOLOclock - Horloge radio-pilotée avec effet 3D
M2:
M3:
Temps et date interchangeables
Temps, date et température interchangeables
• Validez au moyen de la touche MODE ou n’appuyez sur aucune touche dans les 5 secondes.
• Pour arrêter le changement automatique de l'affichage, maintenez encore une fois la touche
MODE appuyée et sélectionnez M0 avec la touche + ou –.
HOLOclock - Horloge radio-pilotée avec effet 3D
10. Traitement des déchets
Ce produit a été fabriqué avec des matériaux de construction de haute qualité qui peuvent être recyclés et réutilisés.
Les piles et accus usagés ne peuvent en aucun cas être jetés dans les ordures ménagères!
En tant qu'utilisateur, vous avez l'obligation légale de rapporter les piles et accus usagés à votre revendeur ou de les déposez dans une déchetterie proche de votre domicile
conformément à la réglementation nationale et locale.
Les métaux lourds sont désignés comme suit: Cd=cadmium, Hg=mercure, Pb=plomb
7.4 Éclairage de fond
• Avec la touche LIGHT, l'affichage 3D est activé ou désactivé.
• Appuyez sur la touche + ou – en mode normal, vous pouvez régler manuellement jusqu'à quatre
niveaux de luminosité.
• L'intensité de l'éclairage est automatiquement adaptée à l'intensité de la lumière dans la chambre.
Cet appareil est conforme aux normes de l'UE relatives au traitement des déchets électriques et électroniques (WEEE).
L'appareil usagé ne doit pas être jeté dans les ordures ménagères. L’utilisateur s’engage, pour le respect de l’environnement, à déposer l’appareil usagé dans un centre de
traitement agréé pour les déchets électriques et électroniques.
8. Entretien et maintenance
• Pour le nettoyage de l'appareil, utilisez un chiffon doux et humide. N’utilisez pas de solvants ou
d´agents abrasifs!
• Attention: Veuillez retirer les piles si vous utilisez votre appareil sur réseau pendant une longue
période ou si vous voulez le désactiver de façon permanente.
• Conservez votre appareil dans un endroit sec.
11. Caractéristiques techniques
Affichage LL / HH:
Hors de portée de la gamme de mesure
8.1 Remplacement des piles
Mesure de boîtier:
165 x 84 x 35 mm
• Veuillez changer les piles de sauvegarde tous les 3 ans.
• Ouvrez le compartiment à piles et insérez deux nouvelle piles 1,5 V AAA, en respectant la polarité +/-.
• Attention: Utilisez uniquement des piles neuves pour remplacer les piles.
• Refermez le compartiment à piles.
Poids:
162 g (appareil seulement)
Alimentation:
Piles 2 x 1,5 V AAA (incluses) et adaptateur secteur (incluse)
Plage de mesure température: -5°…+50°C / +23°…+122°F
9. Dépannage
Problème
Solution
Aucun affichage
➜ Vérifiez l'adaptateur secteur
➜ Appuyez sur la touche LIGHT
Pas de réception DCF
➜
➜
➜
➜
➜
➜
➜
Activez la réception DCF (voir: Réglages manuels)
Appuyez sur la touche WAVE pour activer la réception.
Sélectionnez une autre position pour votre l'appareil
Attendez la réception du signal de nuit
Éliminez les éventuelles sources de parasitage.
Remettez l'appareil en service, conformément aux instructions
Réglage de l'heure manuellement
Si votre appareil ne fonctionne toujours pas malgré ces mesures, adressez-vous au vendeur auquel
vous avez acheté votre appareil.
20
Effet 3D protégé par un brevet de 3Daround GmbH
TFA Dostmann GmbH & Co.KG, Zum Ottersberg 12, D-97877 Wertheim.
La reproduction, même partielle du présent mode d'emploi est strictement interdite sans l'accord explicite de TFA Dostmann.
Les spécifications techniques de ce produit ont été actualisées au moment de l'impression et peuvent être modifiées, sans
avis préalable.
EU-DECLARATION DE CONFORMITE
Nous déclarons que cet appareil émetteur récepteur d'ondes radio répond aux exigences essentielles de la directive R&TTE
1999/5/CE.
Une copie signée et datée de la déclaration de conformité est disponible sur demande auprès de [email protected].
www.tfa-dostmann.de
10/2013
21
TFA_No. 60.5009_Anleitung
09.10.2013
14:11 Uhr
Seite 12
HOLOclock - Orologio radiocontrollato con effetto 3D
Vi ringraziamo per aver scelto l'apparecchio della TFA.
L'ora, la data o la temperatura sono proiettate sulla lente beam-splitter, una lente che divide in
due il fascio di luce, attraverso una fibra ottica brevettata. La visualizzazione è quindi praticamente in aria.
In base ad alcune leggi fisiche, l'effetto si vede solo da un certo angolo di visione.
1. Prima di utilizzare l'apparecchio
• Leggete attentamente le istruzioni per l'uso. Avrete così modo di familiarizzare con il vostro
nuovo apparecchio, di scoprirne tutte le funzioni e le componenti, di apprendere importanti dettagli sulla sua messa in funzione, di acquisire dimestichezza nel suo utilizzo e di usufruire di alcuni validi consigli da seguire in caso di guasti.
• Seguendo le istruzioni per l'uso, eviterete anche di danneggiare il dispositivo e di pregiudicare,
a causa di un utilizzo scorretto, i diritti del consumatore che vi spettano per legge.
• Decliniamo ogni responsabilità per i danni derivanti dal mancato rispetto delle presenti istruzioni per l'uso.
• Allo stesso modo, non siamo responsabili per eventuali misurazioni errate e per le conseguenze
che ne possono derivare.
• Prestate particolare attenzione alle misure di sicurezza!
• Conservate con cura queste istruzioni per l'uso!
2. La consegna include
• Orologio radiocontrollato
• Istruzioni per l'uso
• Batterie
• Alimentatore
3. Tutte le applicazioni e tutti i vantaggi del vostro nuovo apparecchio
• Nuovo display 3D brevettato
• Orologio radiocontrollato della massima precisione e con possibilità di impostazione manuale
• Indicatore della data
• Indicatore della temperatura interna
• Cambio automatico del display impostabile
4. Per la vostra sicurezza
• Il prodotto è adatto esclusivamente agli utilizzi di cui sopra. Non utilizzate il prodotto in maniera
diversa da quanto descritto in queste istruzioni.
• Non sono consentite riparazioni, alterazioni o modifiche non autorizzate del dispositivo.
• Questo apparecchio non è adatto a dimostrazioni pubbliche ma è destinato esclusivamente ad
un uso privato.
Attenzione!
Pericolo di morte per scossa elettrica!
• Collegare il dispositivo esclusivamente a una presa di corrente a norma che fornisca corrente a
una tensione di 230V!
22
HOLOclock - Orologio radiocontrollato con effetto 3D
• Il dispositivo e l’alimentatore non devono venire a contatto con acqua o umidità. Il dispositivo è
adatto esclusivamente all’utilizzo interno in ambienti asciutti.
• Non utilizzate il dispositivo qualora la struttura esterna o l’alimentatore risultino danneggiati.
• Conservate il dispositivo fuori dalla portata di persone (per esempio i bambini) che potrebbero
non riconoscere adeguatamente il rischio derivante dall’uso di apparecchi elettrici.
• Estraete immediatamente la spina dalla presa di corrente qualora rileviate un guasto o nel caso
in cui non utilizziate il dispositivo per un periodo prolungato.
• Utilizzate esclusivamente l'adattatore in dotazione.
• Quando estraete la spina dalla presa di corrente, non tiratela per il cavo.
• Proteggete il cavo di alimentazione in modo che oggetti appuntiti o caldi non vi entrino in contatto.
Attenzione!
Pericolo di lesioni:
• Tenete il dispositivo e le batterie lontano dalla portata dei bambini.
• Non gettare le batterie nel fuoco, non polarizzarle in maniera scorretta, non smontarle e non
cercare di ricaricarle. Pericolo di esplosione!
• Le batterie contengono acidi nocivi per la salute. Sostituite quanto prima le batterie quasi scariche, in modo da evitare che si scarichino completamente. Non utilizzate mai contemporaneamente batterie usate e batterie nuove né batterie di tipi diversi.
• Quando si maneggiano batterie esaurite indossare sempre guanti resistenti alle sostanze chimiche e occhiali di protezione.
Avvertenze sulla sicurezza del prodotto!
• Non esporre l'apparecchio a temperature estreme, vibrazioni e urti.
• Non appoggiare alcun oggetto sopra l'apparecchio.
5. Componenti
5.1 Funzioni
A: Display 3D
A 1: Orologio / data / temperatura intern
B: Tasti
B 1: Tasto MODE
B 2: Tasto SET
B 3: Tasto WAVE
B 4: Tasto +
B 5: Tasto –
B 6: Tasto LIGHT
C: Struttura esterna
C 1: Vano batteria
C 2: Presa di alimentazione
C 3: Sensore luminoso
23
TFA_No. 60.5009_Anleitung
09.10.2013
14:11 Uhr
Seite 13
HOLOclock - Orologio radiocontrollato con effetto 3D
6. Messa in funzione
• Rimuovere il foglio protettivo dal display.
• Inserire l'adattatore nella presa e collegarlo ad una presa a terra. L'apparecchio è pronto per
l'uso.
•
•
•
•
•
•
•
•
•
•
•
Avvertenza importante! Controllare che il voltaggio della vostra abitazione sia 230V, perché
altrimenti il dispositivo potrebbe essere danneggiato. Tensioni diverse possono danneggiare lo
strumento.
Aprire il vano batteria e rimuovere la striscia d´interruzione dalle batterie. Richiudere il vano batteria.
Le due batterie 1,5 V AAA sono batterie tampone che mantengono in funzione l'orologio in caso
di interruzione di energia.
Sul display 3D appare il simbolo di ricezione DCF (punto).
L'orologio inizia a ricevere il segnale radio.
Se il codice dell'ora è stato ricevuto entro 10 minuti, viene visualizzata l'ora radiocontrollata.
Il simbolo della ricezione DCF (punto) scompare.
La ricezione del segnale DCF avverrà alle 3.15 del mattino. Se la ricezione non è avvenuta con
successo alle 3.15, verranno eseguiti altro tentativo ad ogni ora, fino alle 5.15.
In caso di mancata ricezione del segnale (sul display inizia a lampeggiare 00:00), è possibile
avviare l'inizializzazione manuale.
Premere il tasto WAVE.
Sul display 3D appare di nuovo il simbolo di ricezione DCF (punto).
Nel caso in cui l’orologio non riesca a ricevere il segnale DCF (a causa di guasti, della distanza di
trasmissione, ecc.), l'ora può essere impostata manualmente. L'orologio funziona come un normale orologio al quarzo (vedi: Impostazione manuale).
Informazioni sull'ora radiocontrollata DCF
L'ora viene trasmessa da un orologio atomico al cesio gestito dal Physikalisch Technische Bundesanstalt di Braunschweig. La deviazione è inferiore a 1 secondo in un milione di anni. L'ora è codificata
e trasmessa da Mainflingen, vicino Francoforte, con un segnale a frequenza DCF - 77 (77,5 kHz)
entro un raggio di 1.500 km. Anche il passaggio tra ora solare e ora legale è automatico. La qualità
della ricezione dipende molto dalla posizione geografica. In circostanze normali e in assenza di
problemi di ricezione, dovrebbe avvenire entro il raggio di 1.500 km da Francoforte.
Rispettate le norme elencate qui di seguito:
• La distanza raccomandata da qualsiasi fonte d’interferenza come monitor di computer o televisori deve essere di almeno 1.5 - 2m.
• All'interno di strutture in cemento armato (seminterrati, sovrastrutture) la ricezione del segnale
è naturalmente più debole. In casi estremi si consiglia di sistemare l'unità vicino ad una finestra
per ottenere una migliore ricezione del segnale.
• Durante le ore notturne, le interferenze dovute ad agenti atmosferici sono normalmente meno
influenti, e la ricezione è possibile nella maggior parte dei casi. Una singola ricezione giornaliera
è sufficiente a garantire la precisione e a mantenere la deviazione al di sotto di un secondo.
7. Uso
• Tenere premuto il tasto + o – in modalità impostazione per procedere velocemente.
• L'apparecchio esce automaticamente dalla modalità impostazione se non si preme alcun tasto
per più di 20 secondi.
24
HOLOclock - Orologio radiocontrollato con effetto 3D
SUGGERIMENTO:
Quando la ricezione DCF è abilitata, non può essere fatta alcuna impostazione (ora, data e unità
di temperatura). La ricezione DCF è attiva per impostazione predefinita. Dopo l'avvenuta ricezione del segnale DCF non è necessaria alcuna regolazione manuale.
Per effettuare impostazioni manuali è necessario disattivare la ricezione DCF.
Ciò è necessario ad esempio per modificare l'unità di temperatura o impostare l'ora manualmente.
7.1 Impostazione manuale
• Tenere premuto per 3 secondi il tasto SET. Sul display 3D appare “On” (predefinito). Impostare il
display con il tasto + o – da “On” su “OFF”. La ricezione DCF è disattivata.
• Premendo il tasto SET è adesso possibile modificare l'una dopo l'altra le impostazioni per ore,
minuti, mese, giorno, anno, la visualizzazione della temperatura e installare con il tasto + o –.
• Quando l'indicazione della temperatura è impostata su “Fahrenheit” la visualizzazione della
data cambia automaticamente da europea (giorno, mese, anno) a americana (prima il mese, poi
il giorno)
• Confermare con il tasto SET.
SUGGERIMENTO:
Se si attiva di nuovo la ricezione DCF, l'ora impostata manualmente viene sovrascritta all'avvenuta ricezione del segnale DCF (di notte la ricezione è spesso migliore).
7.2 Attivare di nuovo la ricezione DCF
• Tenere premuto per 3 secondi il tasto SET.
• Se la ricezione DCF è disattivata, viene visualizzato “OFF”. Impostare il display con il tasto + o –
da “OFF” su “On”. La ricezione DCF è attivata.
• Premendo nuovamente il tasto SET, l'apparecchio inizia un'operazione di ricezione (punto).
• Per tornare immediatamente alla visualizzazione normale, premere il tasto WAVE.
7.3 Display
• Con il tasto MODE in modalità normale, è possibile visualizzare ora, data, anno e temperatura
interna in modo permanente.
• Tenere premuto il tasto MODE per impostare un cambio automatico del display.
• M0 (predefinita) inizia a lampeggiare sul display 3D. Premere il tasto + o – per passare tra le
seguenti modalità:
M0:
M1:
M2:
M3:
In questa modalità è sempre attiva l'ultima visualizzazione selezionata.
Ora e temperatura interna a turno
Tempo e data a turno
Tempo, data e temperatura interna a turno
• Confermare con il tasto MODE o non premere alcun tasto entro 5 secondi.
• Per annullare la modalità di cambio automatico del display, tenere premuto nuovamente il tasto
MODE e selezionare M0 con il tasto + o –.
25
TFA_No. 60.5009_Anleitung
09.10.2013
14:11 Uhr
Seite 14
HOLOclock - Orologio radiocontrollato con effetto 3D
HOLOclock - Orologio radiocontrollato con effetto 3D
7.4 Illuminazione
• Con il tasto LIGHT, il display 3D è spento o acceso.
• Premendo il tasto + o – in modalità normale è possibile impostare manualmente fino a quattro
livelli di luminosità.
• L'intensità della luce del display è regolata automaticamente in base all'intensità della luce nella
stanza.
Questo apparecchio è etichettato in conformità alla Direttiva UE sullo smaltimento
delle apparecchiature elettriche ed elettroniche (WEEE).
Questo prodotto non deve essere smaltito insieme ai rifiuti domestici. Il consumatore è
tenuto a consegnare il vecchio apparecchio presso un punto di raccolta per lo smaltimento di apparecchiature elettriche ed elettroniche ai fini di uno smaltimento ecologico.
11. Dati tecnici
8. Cura e manutenzione
• Per pulire l'apparecchio utilizzare solo un panno morbido leggermente inumidito. Non usare solventi o abrasivi.
• Attenzione: Si prega di rimuovere le batterie se si stacca il dispositivo per un lungo periodo di
tempo dalla rete elettrica o si disattiva in modo permanente.
• Collocare il dispositivo in un luogo asciutto.
8.1 Sostituzione delle batterie
• Per favore cambiare ogni 3 anni le batterie tampone.
• Aprire il vano batteria e inserire due batterie nuove tipo 1,5 V AAA, rispettando le corrette polarità.
• Attenzione: utilizzare solo batterie nuove quando si procede alla sostituzione delle batterie.
• Richiudere il vano batteria.
9. Guasti
Problema
Alimentazione:
2 batterie AAA da 1,5 V (fornite) e alimentatore (fornito)
Campo di misura
Temperatura:
-5°…+50°C / +23°…+122°F
Indicazione LL/HH:
Fuori dal campo di misura
Dimensioni esterne:
165 x 84 x 35 mm
Peso:
162 g (solo apparecchio)
Risoluzione del problema
Nessuna indicazione
➜ Verificare l'alimentatore
➜ Premere il tasto LIGHT
Nessuna ricezione DCF
➜ Accendere la ricezione DCF (vedi: Impostazione manuale)
➜ Per attivare la ricezione del segnale radio manualmente premere il
tasto WAVE
➜ Cercare nuove posizioni per il dispositivo
➜ Attendere il tentativo notturno di ricezione
➜ Eliminare fonti di interferenza
➜ Riavviare il dispositivo secondo le istruzioni
➜ Inserire l'orologio manualmente
Qualora il vostro apparecchio continui a non funzionare nonostante queste procedure, rivolgetevi al
rivenditore presso il quale lo avete acquistato.
10. Smaltimento
Questo prodotto è stato realizzato utilizzando materiali e componenti di alta qualità che possono
essere riciclati e riutilizzati.
È assolutamente vietato gettate le batterie tra i rifiuti domestici.
In qualità di consumatori, siete tenuti per legge a consegnare le batterie usate al negoziante o ad altri enti preposti al riciclaggio in conformità alle vigenti disposizioni nazionali o locali, ai fini di uno smaltimento ecologico.
Le sigle dei metalli pesanti contenuti sono: Cd=cadmio, Hg=mercurio, Pb=piombo
26
Effetto 3D protetto da un brevetto de 3Daround GmbH
TFA Dostmann GmbH & Co.KG, Zum Ottersberg 12, D-97877 Wertheim.
È vietata la pubblicazione delle presenti istruzioni o di parti di esse senza una precedente autorizzazione della TFA
Dostmann. I dati tecnici corrispondono allo stato del prodotto al momento della stampa e possono cambiare senza preavviso.
DICHIARAZIONE DI CONFORMITÀ ’UE
Con la presente dichiariamo che questo impianto radio adempie alle prescrizioni sostanziali della direttiva R&TTE 1999/5/CE.
Una copia firmata e datata della Dichiarazione di Conformità è disponibile, su richiesta all'indirizzo [email protected].
www.tfa-dostmann.de
10/2013
27
TFA_No. 60.5009_Anleitung
09.10.2013
14:11 Uhr
Seite 15
HOLOclock - Radiografische klok met 3D-effect
Hartelijk dank dat u voor dit apparaat van de firma TFA hebt gekozen.
Door middel van een gepatenteerde optiek wordt de tijd, de datum of de temperatuur geprojecteerd op de beam splitter lens. Deze display is praktisch in de lucht.
Op basis van fysische wetten, wordt het effect alleen gezien bij een bepaalde kijkhoek.
1. Voor u met het apparaat gaat werken
• Leest u a.u.b. de gebruiksaanwijzing aandachtig door. Zo raakt u vertrouwd met uw nieuw
apparaat en leert u alle functies en onderdelen kennen, komt u belangrijke details te weten met
het oog op het in bedrijf stellen van het apparaat en de omgang ermee en krijgt u tips voor het
geval van een storing.
• Door rekening te houden met wat er in de handleiding staat, vermijdt u ook beschadigingen
van het apparaat en riskeert u niet dat uw wettelijke rechten door verkeerd gebruik niet meer
gelden.
• Voor schade die wordt veroorzaakt doordat u geen rekening houdt met de handleiding aanvaarden wij geen aansprakelijkheid.
• Ook zijn wij niet verantwoordelijk voor verkeerde metingen en de mogelijke gevolgen die daaruit voortvloeien.
• Neem in elk geval acht op de veiligheidsinstructies !
• Bewaar deze gebruiksaanwijzing a.u.b. goed!
2. Levering
•
•
•
•
Radiografische klok
Gebruiksaanwijzing
Batterijen
Stroomadapter
3. Hoe u uw nieuw apparaat kunt gebruiken en alle voordelen ervan in één oogopslag
•
•
•
•
•
Nieuwe gepatenteerde 3D-weergave
Radiografische tijd met hoge precisie en handmatige tijdsinstelling mogelijk
Weergave van de datum
Weergave van de binnentemperatuur
Automatische wisseling van de weergave regelbaar
4. Voor uw veiligheid
• Het produkt is uitsluitend geschikt voor de hierboven beschreven doeleinden. Gebruik het produkt niet anders dan in deze handleiding is aangegeven.
• Het eigenmachtig repareren, verbouwen of veranderen van het apparaat is niet toegestaan.
• Het apparaat is niet geschikt voor openbare informatie, maar bestemd voor particulier gebruik.
Voorzichtig!
Levensgevaar door elektrocutie!
• Sluit het apparaat uitsluitend aan op een volgens de voorschriften geïnstalleerd stopcontact met
een netspanning van 230V!
28
HOLOclock - Radiografische klok met 3D-effect
• Apparaat en netvoeding mogen niet met water of vocht in aanraking komen. Ze zijn alleen
geschikt voor gebruik in droge binnenruimten.
• Gebruik het apparaat niet wanneer de behuizing of de netvoeding beschadigd is.
• Bewaar het apparaat buiten de reikwijdte van personen (ook kinderen) die de mogelijke gevaren van de omgang met elektrische apparaten zouden kunnen onderschatten.
• Trek onmiddellijk de oplader uit het stopcontact als er een storing optreedt of wanneer het
apparaat gedurende langere tijd niet zal worden gebruikt.
• Gebruik uitsluitend de bijbehorende netvoeding.
• Trek de stekker niet aan de kabel uit het stopcontact.
• Leg het snoer zo neer dat het niet met scherpe of hete voorwerpen in aanraking komt.
Voorzichtig!
Kans op letsel:
• Bewaar het apparaat en de batterijen buiten de reikwijdte van kinderen.
• Batterijen niet in het vuur gooien, niet kortsluiten, niet uit elkaar halen of opladen. Kans op
explosie!
• Batterijen bevatten zuren die de gezondheid schaden. Zwakke batterijen moeten zo snel mogelijk worden vervangen om lekkage van de batterijen te voorkomen. Gebruik nooit tegelijkertijd
oude en nieuwe batterijen of batterijen van een verschillend type.
• Draag handschoenen die bestand zijn tegen chemicaliën en een beschermbril wanneer u met uitgelopen batterijen hanteert!
Belangrijke informatie over de produktveiligheid!
• Stel het apparaat niet bloot aan extreme temperaturen, trillingen en schokken.
• Geen voorwerpen op het apparaat plaatsen.
5. Onderdelen
5.1 Functies
A: 3D weergave
A 1: Tijd / datum / binnentemperatuur
B: Toetsen
B 1: MODE toets
B 2: SET toets
B 3: WAVE toets
B 4: + toets
B 5: – toets
B 6: LIGHT toets
C: Behuizing
C 1: Batterijvak
C 2: Adapter aansluiting
C 3: Lichtsensor
29
TFA_No. 60.5009_Anleitung
09.10.2013
14:11 Uhr
HOLOclock - Radiografische klok met 3D-effect
Seite 16
6. Inbedrijfstelling
• Trek de beschermfolie van het display af.
• Steek de verbindingsstekker in de adapter en de stekker van de adapter in een stopcontact. Het
apparaat is nu bedrijfsklaar.
Belangrijk! Zorg ervoor dat de spanning van het stroomnet onder 230 V ligt! Andere netspanningen kunnen het toestel beschadigen.
• Open het batterijvak en verwijder de isolatiestrook van de batterij. Sluit het batterijvak weer.
• De twee 1.5 V AAA batterijen behouden, na stroomuitval, de tijdfunctie, zodat er geen aanpassing moet worden gedaan.
• Op de 3D weergave verschijnt het DCF ontvangstsymbool (punt).
• Het apparaat probeert het radiosignaal voor de tijd te ontvangen.
• Zodra de tijdcode na enkele minuten ontvangen word, verschijnt de radiogestuurde tijd.
• Het DCF ontvangstsymbool (punt) verdwijnt.
• Het DCF-Signaal wordt dagelijks om 3:15 uur ontvangen. Is de ontvangst om 3:15 uur niet
geslaagd, zo zal tot 5:15 uur een ontvangstpoging worden gedaan.
• Wanneer er geen ontvangst mogelijk (op het display knippert 00:00) is, kunt u de initiatie ook
handmatig starten.
• Druk op de WAVE toets.
• Op de 3D weergave verschijnt weer het DCF ontvangstsymbool (punt).
• Als de klok geen DCF-signaal ontvangt (wegens storingen, afstand, enz.), kunt u de tijd ook
handmatig instellen. De klok werkt dan als een gewone kwartsklok (zie: Manuele instellingen).
Radiografische tijdsignaal DCF
De tijdbasis voor de radiografisch bestuurde tijd is een cesium-atoomklok van het Physikalisch Technische Bundesanstalt Braunschweig. Met een afwijking van minder dan 1 seconde in een miljoen
jaar. De tijd is gecodeerd en wordt vanuit Mainflingen in de buurt van Frankfurt aan de Main door
een DCF-77 (77,5 kHz) frequentiesignaal uitgezonden met een bereik van ongeveer 1500 km. Zelfs
de overgang van zomer- naar wintertijd gebeurt automatisch. Die kwaliteit van de ontvangst
hangt in belangrijke mate af van de geografische ligging. Normaliter zouden er binnen een straal
van 1.500 km rondom Frankfurt geen ontvangstproblemen mogen zijn.
Let alstublieft op het volgende:
• De afstand van mogelijke storingsbronnen zoals computerbeeldschermen of tv-toestellen dient
tenminste 1,5 à 2 meter te zijn.
• In ruimten met gewapend beton (kelders, torenflats) wordt het signaal uiteraard verzwakt ontvangen. In extreme gevallen, plaatst u het apparaat in de buurt van een raam en / of draait u het
apparaat om een beter ontvangst te verkrijgen.
• 's Nachts zijn atmosferische storingen over het algemeen minder ernstig en is ontvangst in de
meeste gevallen wel mogelijk. Een enkele ontvangst per dag is voldoende om de tijdsafwijking
onder 1 seconde te houden.
7. Bediening
• Houdt de + of – toets in de overeenkomstige instelmodus ingedrukt en u komt in de snelloop.
• Het apparaat verlaat automatisch de instelmodus, als er langer dan 20 seconden geen toets
wordt ingedrukt.
30
HOLOclock - Radiografische klok met 3D-effect
OPMERKING:
Als de DCF-ontvangst is ingeschakeld, kunnen geen instellingen (tijd, datum en temperatuur
eenheid) worden gemaakt. Volgens standaard wordt de DCF-ontvangst geactiveerd en na succesvolle ontvangst van het DCF-signaal is er geen handmatige aanpassing nodig.
Om handmatige instellingen te maken, dient u de DCF-ontvangst uit te schakelen.
Dit is nodig als u bijvoorbeeld als u de temperatuur eenheid wijzigen wil, of de tijd handmatig
instellen wil.
7.1 Manuele instelling
• Houd de SET toets drie seconden lang ingedrukt. Op de 3D weergave verschijnt „On” (voorinstelling). Stel de display met de + of – toets van „On” naar „OFF” om. De DCF-ontvangst is uitgeschakeld.
• Druk nog éénmaal op de SET toets en U kunt met de + of – toets de uren, de minuten, de
maand,de dag, het jaar en de temperatuur eenheid instellen.
• Bij een Fahrenheit temperatuur weergave wordt automatisch gewisseld van de datumweergave
van een Europese indicator (eerst de dag, daarna de maand) naar de Amerikaanse display (eerst
de maand, dan de dag).
• Bevestig elke instelling met de SET toets.
OPMERKING:
Als u de DCF-ontvangst weer activeert, wordt de handmatig ingestelde tijd bij succesvol ontvangst van het DCF-signaal op een later tijdstip (’s nachts is de receptie vaak beter) overschreven.
7.2 Opnieuw activeren DCF-ontvangst
• Houd de SET toets drie seconden lang ingedrukt.
• De DCF-ontvangst is uitgeschakeld, op het display verschijnt „OFF”. Stel het display met de + of –
toets van „OFF” naar „On” om. De DCF-ontvangst is geactiveerd.
• Druk nog eens op de SET toets het apparaat start een ontvangstoperatie (punt).
• Druk op de WAVE toets om onmiddellijk naar de normaalmodus terug te keren.
7.3 Weergavescherm
• Met de MODE toets kunt u in de normaalmodus tussen tijd, datum, jaar en binnentemperatuur
kiezen en het als een permanente weergave bepalen.
• Houd de MODE toets ingedrukt, om een automatische verandering van het display in te stellen.
• M0 (standaardinstelling) verschijnt op het 3D weergave. Druk op de + of – toets, om te schakelen
tussen de volgende modi:
M0:
M1:
M2:
M3:
In deze modus is de laatst geselecteerde weergavemodus permanent actief.
Tijd en binnentemperatuur afwisselend
Tijd en alarm afwisselend
Tijd, datum en binnentemperatuur afwisselend
• Bevestig elke instelling met de MODE toets of druk op een willekeurige toets binnen 5 seconden.
• Om de automatische wisseling van de weergave te stoppen, houdt u opnieuw de MODE toets
ingedrukt en kies met de + of – toets de MO uit.
31
TFA_No. 60.5009_Anleitung
09.10.2013
14:11 Uhr
Seite 17
HOLOclock - Radiografische klok met 3D-effect
HOLOclock - Radiografische klok met 3D-effect
7.4 Verlichting
• Met de LIGHT toets wordt de 3D-weergave in-of uitgeschakeld.
• Druk op de + of – toets in de normale modus en u kunt handmatig vier niveaus van helderheid
instellen.
• De intensiteit van de verlichting wordt ook automatisch aangepast aan de lichtintensiteit in de
kamer.
8. Schoonmaken en onderhoud
• Maak het apparaat met een zachte, enigszins vochtige doek schoon. Geen schuur- of oplosmiddelen gebruiken!
• Let op: Verwijder de batterijen als u het toestel een lange tijd van het net neemt of het permanent uit schakelen wil.
• Bewaar het apparaat op een droge plaats.
11. Technische gegevens
8.1 Batterijwissel
• Gelieve elk 3e jaar de backup – batterijen te wisselen.
• Maak het batterijvak open en plaats er twee batterijen 1,5 V AAA in.
• Let op: Gebruik alleen nieuwe batterijen wanneer u de batterijen vervangt.
• Sluit het batterijvak weer.
9. Storingswijzer
Probleem
Dit apparaat is gemarkeerd in overeenstemming met de EU-richtlijn (WEEE) over het
verwijderen van elektrisch en elektronisch afval.
Dit produkt mag niet met het huisvuil worden weggegooid. De gebruiker is verplicht
om de apparatuur af te geven bij een als zodanig erkende plek van afgifte voor het
verwijderen van elektrisch en elektronisch apparatuur om een milieuvriendelijk verwijderen te garanderen.
Spanningsvoorziening:
Batterijen 2 x 1,5 V AAA (inclusief) en stroomadapter (inclusief)
Meetbereik temperatuur: -5°…+50°C / +23°…+122°F
Indicatie LL / HH:
Meting buiten het meetbereik
Afmetingen behuizing:
165 x 84 x 35 mm
Gewicht:
162 g (alleen het apparaat)
Oplossing
Geen indicatie
➜ Stroomadapter controleren
➜ Op LIGHT toets drukken
Geen DCF ontvangst
➜
➜
➜
➜
➜
➜
➜
DCF ontvangst inschakelen (zie: Manuele instelling)
Voor activeren van het ontvangst druk op de WAVE toets
Zoek een nieuwe opstellingsplaats voor het apparaat
Ontvangstpoging in de nacht afwachten
Verwijder stoorbronnen
Apparaat opnieuw volgens de handleiding in bedrijf stellen
Manueel instellen van de tijd
Neem contact op met de dealer bij wie u dit produkt gekocht heeft als uw apparaat ondanks deze
maatregelen nog steeds niet werkt.
10. Verwijderen
Dit produkt is vervaardigd van hoogwaardige materialen en onderdelen, die kunnen worden gerecycled en hergebruikt.
Batterijen en accu's mogen niet met het huisvuil worden weggegooid.
Als consument bent u wettelijk verplicht om gebruikte batterijen en accu's bij uw dealer af te geven of naar de daarvoor bestemde containers volgens de nationale of lokale
bepalingen te brengen om een milieuvriendelijk verwijderen te garanderen.
De benamingen van de zware metalen zijn:
Cd=cadmium, Hg=kwikzilver, Pb=lood
32
Effect 3D beschermd door een octrooi van 3Daround GmbH
TFA Dostmann GmbH & Co.KG, Zum Ottersberg 12, D-97877 Wertheim.
Deze gebruiksaanwijzing of gedeelten eruit mogen alleen met toestemming van TFA Dostmann worden gepubliceerd. De
technische gegevens van dit apparaat zijn actueel bij het ter perse gaan en kunnen zonder voorafgaande informatie worden
gewijzigd.
EU-CONFORMITEITSVERKLARING
Hiermee verklaren wij, dat deze radiografische installatie voldoet aan de belangrijkste eisen van de R&TTE richtlijn
1999/5/EG.
Een kopie van de getekende en gedateerde Conformiteitsverklaring is op verzoek beschikbaar via [email protected].
www.tfa-dostmann.de
10/2013
33
TFA_No. 60.5009_Anleitung
09.10.2013
14:11 Uhr
Seite 18
HOLOclock - Reloj radiocontrolado con efecto 3D
Muchas gracias por haber adquirido este dispositivo de TFA.
A través de un sistema patentado de óptica, la hora, la fecha o la temperatura se proyectan en la
lente del beamsplitter. Por lo tanto la pantalla está prácticamente en el aire.
Debido a las leyes físicas, el efecto se observa sólo en un cierto ángulo de visión.
1. Antes de utilizar el dispositivo
• Lea detenidamente las instrucciones de uso. De este modo se familiarizará con su nuevo dispositivo, conocerá todas las funciones y componentes, así como información relevante para la puesta
de funcionamiento el manejo del dispositivo y recibirá consejos sobre cómo actuar en caso de
avería.
• Si sigue las instrucciones de uso, evitará que se produzcan daños en el dispositivo y no comprometerá a sus derechos por vicios, prevista legalmente debido a un uso incorrecto.
• No asumimos responsabilidad alguna por los daños originados por el incumplimiento de estas
instrucciones de uso.
• Del mismo modo, no nos hacemos responsables por cualquier lectura incorrecta y de las consecuencias que pueden derivarse de tales.
• Tenga en cuenta ante todo las advertencias de seguridad.
• Guarde estas instrucciones de uso en un sitio seguro.
2. Entrega
• Reloj radiocontrolado
• Instrucciones de uso
• Pilas
• Adaptador de red
3. Ámbito de aplicación y ventajas de su nuevo dispositivo
• Nueva pantalla 3D patentada
• Reloj radiocontrolado de alta precisión y posibilidad de ajuste manual
• Indicación de la fecha
• Indicación de la temperatura interior
• Cambio automático de pantalla ajustable
4. Para su seguridad
• El producto solo es adecuado para el ámbito de aplicación descrito anteriormente. No emplee el
dispositivo de modo distinto al especificado en estas instrucciones.
• No está permitido realizar reparaciones, transformaciones o modificaciones por cuenta propia en
el dispositivo.
• Este dispositivo no está indicado para información pública, sino que está destinado únicamente
para uso privado.
¡Precaución!
¡Peligro de muerte por descarga eléctrica!
• Conecte el dispositivo únicamente a una toma de corriente instalada según las prescripciones con
una tensión de alimentación de 230 V. De otra manera puede producir daño a su instrumento.
34
HOLOclock - Reloj radiocontrolado con efecto 3D
• El dispositivo y la fuente de alimentación no debe tener contacto con agua ni humedad. Sólo
para el uso en lugares secos bajo techo.
• No utilice el dispositivo si la carcasa o la fuente de alimentación están dañadas.
• Mantenga el dispositivo fuera de alcance de las personas (también niños) que no puedan evaluar
los riesgos con el manejo de dispositivos eléctricos.
• Extraiga el enchufe inmediatamente de la toma de corriente si se produce perturbación o si no
va a utilizar el dispositivo por un largo periodo de tiempo.
• Utilice únicamente la fuente de alimentación suministrada.
• No tire del cable de alimentación para extraer el enchufe de la toma de corriente.
• Coloque el cable de alimentación de forma que no entre en contacto con objetos de cantos afilados o calientes.
¡Precaución!
Riesgo de lesiones:
• Mantenga el dispositivo y las pilas fuera del alcance de los niños.
• No tire las pilas al fuego, no las cortocircuite, desmonte ni recargue, ya que existe riesgo de
explosión.
• Las pilas contienen ácidos nocivos para la salud. Las pilas con un estado de carga bajo deben
cambiarse lo antes posible para evitar fugas. No utilice simultáneamente pilas nuevas y usadas o
pilas de diferente tipo.
• Utilice guantes protectores resistentes a productos químicos y gafas protectoras si manipula pilas
con fugas de líquido!
¡Advertencias importantes sobre la seguridad del producto !
• No exponga el dispositivo a temperaturas extremas, vibraciones ni sacudidas extremas.
• No coloque objetos sobre el dispositivo.
5. Componentes
5.1 Funciones
A: Pantalla 3D
A 1: Hora / fecha / temperatura interna
B: Teclas
B 1: Tecla MODE
B 2: Tecla SET
B 3: Tecla WAVE
B 4: Tecla +
B 5: Tecla –
B 6: Tecla LIGHT
C: Cuerpo
C 1: Compartimiento de las pilas
C 2: Conexión de enchufe
C 3: Sensor de luz
35
TFA_No. 60.5009_Anleitung
09.10.2013
14:11 Uhr
HOLOclock - Reloj radiocontrolado con efecto 3D
Seite 19
6. Puesta en marcha
• Despegue la película protectora de la pantalla.
• Ponga el enchufe de conexión en la toma y conecte el dispositivo con el cable de alimentación a
la red eléctrica. El dispositivo está ahora listo para funcionar.
¡Importante! Asegúrese de que el voltaje de la línea no es más de 230 V! Otras tensiones pueden
dañar el instrumento.
• Abra el compartimiento de las pilas. Quite la tira de interrupción de las pilas. Cierre de nuevo el
compartimiento de las pilas.
• Las dos pilas AAA de 1,5 V mantienen en el fallo de corriente la función del tiempo, asín no hay
que hacer un nuevo reajuste.
• En la pantalla 3D aparece el símbolo de recepción DCF (punto).
• El reloj intenta de recibir la señal de radio.
• Cuando se recibe el código de tiempo después de varios minutos, el tiempo controlado de radio
se muestra en la pantalla.
• El símbolo de recepción DCF (punto) desaparece.
• La recepción de la señal DCF se llevará a cabo diariamente a las 3.15 de la mañana. Si la recepción del reloj a las 3.15 no tiene éxito, se llevará a cabo hasta las 5.15 de la mañana nuevos intentos de recepción.
• Si no ha recibido ninguna señal DCF (en la pantalla aparece 00:00), también puede comenzar la
inicialización manualmente.
• Pulse la tecla WAVE.
• En la pantalla 3D aparece de nuevo el símbolo de recepción DCF (punto).
• Si su reloj radiocontrolado no es capaz de recibir la señal DCF (p. ej, debido a interferencias, distancia de transmisión, etc.), puede ajustar la hora manualmente. El reloj funciona como un reloj
normal de cuarzo (véase Ajustes manuales).
Recepción de la hora controlada por radio DCF
La transmisión de la hora se realiza por medio de un reloj atómico de cesio radiocontrolado a través de, por el instituto técnico físico de Braunschweig. La desviación es menor a 1 segundo en un
millón de años. La hora viene codificada y es transmitida desde Mainflingen en las proximidades de
Frankfurt am Main por una señal de frecuencia DCF-77 (77,5 kHz) con un alcance de aprox. 1.500
km. Incluso el cambio de la hora de verano e invierno se produce automáticamente. La recepción
depende básicamente de la situación geográfica. Generalmente éste debería funcionar de forma
óptima en un radio de 1.500 km en torno a Frankfurt.
Siga por favor las indicaciones siguientes:
• Es recomendable mantener una distancia de como mínimo 1,5 – 2 metros de posibles aparatos
perturbadores tales como pantallas de ordenadores y televisores.
• En construcciones de hormigón armado (sótanos, superestructuras), la señal recibida es evidentemente más débil. En casos extremos se aconseja de emplazar el dispositivo cerca de una ventana
para obtener una mejor recepción.
• Por las noches las perturbaciones atmosféricas suelen ser reducidas y se dispone de recepción en
la mayoría de los casos. Si además se recibe como mínimo una vez al día, es suficiente para
garantizar la precisión y mantener desviaciones inferiores a 1 segundo.
36
HOLOclock - Reloj radiocontrolado con efecto 3D
7. Manejo
• Mantenga pulsada la tecla + o – en el modo de ajuste, accederá a la pasada rápida.
• El dispositivo sale automáticamente del modo de ajuste si no se pulsa ninguna tecla durante más
de 20 segundos.
NOTA:
Si la recepción DCF está habilitada, no se pueden realizar ajustes (hora, fecha y la unidad de
temperatura). De manera predeterminada, la recepción DCF se activa y después de la recepción
exitosa de la señal DCF no es necesario un ajuste manual.
Para realizar los ajustes manuales, debe desactivar la recepción DCF.
Esto es necesario, por ejemplo, si usted necesita cambiar la unidad de temperatura, o ajustar la
hora manualmente.
7.1 Ajustes manuales
• Mantenga pulsada la tecla SET durante 3 segundos. En la pantalla 3D aparece “On” (nivel preseleccionado). Ajuste la pantalla con la tecla + o – para seleccionar “OFF”. La recepción DCF está
desactivada.
• Pulse otra vez la tecla SET y puede sucesivamente dirigir la hora, el minuto, el mes, el día, el año
y la visualización de la temperatura y puede ajustar con la tecla + o –.
• La indicación de temperatura Fahrenheit cambia automáticamente la indicación de la fecha a la
de europea (primero el día después del mes) en la pantalla américana (primero el mes después el
día).
• Confirme todas las entradas con la tecla SET.
NOTA:
Si activa de nuevo la recepción DCF y la recepción es exitosa la hora ajustada manualmente se
sobreescribe en un momento posterior (por la noche la recepción es a menudo mejor).
7.2 Activar de nuevo la recepción DCF
• Mantenga pulsada la tecla SET durante 3 segundo
• Si la recepción DCF está desactivada, en la pantalla aparece “OFF”. Ajuste la pantalla con la tecla
+ o – para seleccionar ”On”. La recepción DCF está activada.
• Pulse otra vez la tecla SET, el dispositivo inicia una operación de recepción (punto).
• Pulse la tecla WAVE, para volver al modo normal enseguida.
7.3 Indicación
• Con la tecla MODE puede en el modo normal seleccionar entre la hora, la fecha, el año y la temperatura interna como una exposición permanente.
• Mantenga pulsada la tecla MODE para configurar el cambio automático de la pantalla.
• M0 (nivel preseleccionado) parpadea en la pantalla 3D. Pulse la tecla + o – para cambiar entre los
siguientes modos:
M0:
M1:
M2:
M3:
en este modo aparece la última indicación seleccionada permanentemente activada
Hora y temperatura interna en cambio
Hora y fecha en cambio
Hora, fecha y temperatura interna en cambio
37
TFA_No. 60.5009_Anleitung
09.10.2013
14:11 Uhr
Seite 20
HOLOclock - Reloj radiocontrolado con efecto 3D
HOLOclock - Reloj radiocontrolado con efecto 3D
• Confirme la entrada con la tecla MODE o no pulse ninguna tecla en 5 segundos.
• Para terminar el cambio de la indicación automática, mantenga pulsada otra vez la tecla MODE y
seleccione M0 con la tecla + o –.
7.4 Iluminación
• Con la tecla LIGHT, la pantalla 3D está apagada o encendida.
• Pulse la tecla + o – en el modo normal, puede configurar manualmente hasta cuatro niveles de
brillo.
• La intensidad de la iluminación también se ajusta automáticamente a la intensidad de la luz en
la habitación.
8. Cuidado y mantenimiento
• Limpie el dispositivo con un paño suave, ligeramente humedecido. ¡No utilice medio abrasivo ni
disolventes!
• Precaución: Elimine las pilas si se extrae el enchufe por un largo periodo de tiempo o desea desactivar el dispositivo permanente.
• Mantenga el dispositivo en un lugar seco.
8.1 Cambio de las pilas
• Cambie las pilas cada 3 años.
• Abra el compartimiento de las pilas y introduzca dos pilas nuevas 1,5 V AAA. Asegúrese que las
pilas estén colocadas con la polaridad correcta.
• Precaución: Cuando cambie las pilas, utilice únicamente pilas nuevas.
• Cierre de nuevo el compartimiento de la pila.
9. Averías
Problema
Ninguna indicación
Las pilas y baterías no pueden desecharse en ningún caso junto con la basura doméstica.
Como consumidor, está obligado legalmente a depositar las pilas y baterías usadas de
manera respetuosa con el medio ambiente en el comercio especializado o bien en los
centros de recogida y reciclaje previstos para ello según el reglamento nacional o local.
Las denominaciones de los metales pesados que contienen son:
Cd=cadmio, Hg=mercurio, Pb=plomo
Este dispositivo está identificado conforme a la Directiva de la UE sobre residuos de
aparatos eléctricos y electrónicos (WEEE).
No deseche este producto junto con la basura doméstica. El usuario está obligado a llevar el dispositivo usado a un punto de recogida de aparatos eléctricos y electrónicos
acreditado para que sea eliminado de manera respetuosa con el medio ambiente.
11. Datos técnicos
Alimentación de tensión: Pilas 2 x 1,5 V AAA (incluidas) y enchufe de alimentación de red (incluida)
Rango de temperatura:
-5°…+50°C / +23°…+122°F
Indicación LL / HH:
Temperatura está fuera del rango
Dimensiónes de cuerpo:
165 x 84 x 35 mm
Peso:
162 g (solo dispositivo)
Solución
➜ Compruebe el enchufe de la red
➜ Pulse la tecla LIGHT
Ninguna recepción de DCF ➜
➜
➜
➜
➜
➜
Activar la recepción DCF (ver Ajustes manuales)
Para activar la función de la recepción, pulse la tecla WAVE
Elegir otro lugar para el dispositivo
Intentar la recepción de noche
Elimine las fuentes de interferencias.
Vuelva a la puesta en marcha del dispositivo de acuerdo a las
instrucciones
➜ Ajustar la hora manualmente
Efecto 3D protegido por una patente de 3Daround GmbH
Si a pesar de haber seguido estos pasos, el dispositivo no funciona, diríjase al establecimiento donde
adquirió el producto.
TFA Dostmann GmbH & Co.KG, Zum Ottersberg 12, D-97877 Wertheim.
Estas instrucciones o extractos de las mismas no pueden ser publicados sin la autorización de la TFA Dostmann. Los datos
técnicos de este producto corresponden al estado en el momento de la impresión y pueden ser modificados sin previo aviso.
10. Eliminación
Este producto ha sido fabricado con materiales y componentes de máxima calidad que pueden ser
reciclados y reutilizados.
UE-DECLARACIÓN DE CONFORMIDAD
Declaramos que esta instalación de radio cumple con los requisitos fundamentales de la directiva R&TTE 1999/5/CE.
Tiene a su disposición una copia firmada y sellada de la Declaración de Conformidad, solicítela al [email protected].
www.tfa-dostmann.de
10/2013
38
39