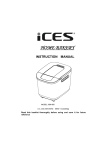
1
Fax +32 2 359 95 50
Copies of the I/B. Please reproduce them without any
changes except under special instruction from Team
International BELGIUM. The pages must be reproduced
and folded in order to obtain a booklet A5 (+/- 148.5 mm
width x 210 mm height). When folding, make sure you
keep the good numbering when you turn the pages of
the I/B. Don’t change the page numbering. Keep the
language integrity.
Duo-Fritteuse
Double Deep Fat Fryer
Double friteuse
Dubbele Frituurpan
Freidora doble
Fritadeira dupla
Friggitrice doppia
Frytownica dwukomorowa
Friteuză dubla
TKG FT 1005
I/B Version
110331
230V~ 50Hz 4400W (2x2200W)
Front cover page (first page)
Assembly page 1/52
Fax +32 2 359 95 50
Copies of the I/B. Please reproduce them without any
changes except under special instruction from Team
International BELGIUM. The pages must be reproduced
and folded in order to obtain a booklet A5 (+/- 148.5 mm
width x 210 mm height). When folding, make sure you
keep the good numbering when you turn the pages of
the I/B. Don’t change the page numbering. Keep the
language integrity.
2
Assembly page 2/52
TKG FT 1005 - 110331
Fax +32 2 359 95 50
D
1.
2.
3.
4.
5.
6.
7.
8.
9.
10.
11.
12.
13.
GB
1.
2.
3.
4.
5.
6.
7.
8.
9.
10.
11.
12.
13.
F
1.
2.
3.
4.
5.
6.
7.
8.
9.
10.
11.
12.
13.
Copies of the I/B. Please reproduce them without any
changes except under special instruction from Team
International BELGIUM. The pages must be reproduced
and folded in order to obtain a booklet A5 (+/- 148.5 mm
width x 210 mm height). When folding, make sure you
keep the good numbering when you turn the pages of
the I/B. Don’t change the page numbering. Keep the
language integrity.
NL
1.
2.
3.
4.
5.
6.
7.
Deckel
Frittierkorb
Betriebsleuchte
Temperatur-Kontrollleuchte
Thermostat
Gehäuse
Kabelfach (nicht auf dem Bild sichtbar)
Griff
Abnehmbare Frittierwanne
Bedienelement
Griff des Frittierkorbes
Griff des Deckels
RESET-Knopf (nicht auf dem Bild zu
sehen)
8.
9.
10.
11.
12.
13.
Deksel
Mand
Aan-/uit-controlelampje
Temperatuur-controlelampje
Thermostaat
Behuizing
Snoeropbergvak ( niet zichtbaar op de
afbeelding)
Handvat
Afneembare kuip
Bedieningspaneel
Handvat van de mand
Handvat van het deksel
RESET-knop (niet zichtbaar op de
afbeelding)
Lid
Basket
Power light
Pilot light
Thermostat
Housing
Cable storage (invisible on the picture)
Handle
Removable bowl
Control panel
Handle of the basket
Handle of the lid
RESET button (invisible on the picture)
SP
1.
2.
3.
4.
5.
6.
7.
8.
9.
10.
11.
12.
13.
Tapadera
Cesta
Testigo luminoso de funcionamiento
Testigo luminoso de temperatura
Termostato
Cuerpo del aparato
Recogecables (invisible en la foto)
Asa
Cubeta amovible
Panel de mandos
Mango de la cesta
Asa de la tapadera
Botón RESET (invisible en la foto)
Couvercle
Panier
Témoin lumineux de fonctionnement
Témoin lumineux de température
Thermostat
Corps de l’appareil
Rangement de câble (invisible sur la
photo)
Poignée
Cuve amovible
Panneau de contrôle
Poignée du panier
Poignée du couvercle
Bouton RESET (invisible sur la photo)
P
1.
2.
3.
4.
5.
6.
7.
8.
9.
10.
11.
12.
13.
Tampa
Cesto
Sinalizador luminoso do funcionamento
Sinalizador luminoso da temperatura
Termóstato
Corpo do aparelho
Recolha do cabo (invisível na foto)
Pega
Cuba amovível
Painel de comandos
Pega do cesto
Pega da tampa
Botão RESET (invisível na foto)
3
Assembly page 3/52
TKG FT 1005 - 110331
Fax +32 2 359 95 50
Copies of the I/B. Please reproduce them without any
changes except under special instruction from Team
International BELGIUM. The pages must be reproduced
and folded in order to obtain a booklet A5 (+/- 148.5 mm
width x 210 mm height). When folding, make sure you
keep the good numbering when you turn the pages of
the I/B. Don’t change the page numbering. Keep the
language integrity.
4
Assembly page 4/52
TKG FT 1005 - 110331
Fax +32 2 359 95 50
I
1.
2.
3.
4.
5.
6.
7.
8.
9.
10.
11.
12.
13.
PL
1.
2.
3.
4.
5.
6.
7.
8.
9.
10.
11.
12.
13.
Copies of the I/B. Please reproduce them without any
changes except under special instruction from Team
International BELGIUM. The pages must be reproduced
and folded in order to obtain a booklet A5 (+/- 148.5 mm
width x 210 mm height). When folding, make sure you
keep the good numbering when you turn the pages of
the I/B. Don’t change the page numbering. Keep the
language integrity.
RO
1.
2.
3.
4.
5.
6.
7.
Coperchio
Cestello
Spia luminosa di funzionamento
Spia luminosa di temperatura
Termostato
Corpo dell’apparecchio
Alloggiamento del cavo (non
disponibile sulla foto)
Maniglia
Vasca amovibile
Pannello di controllo
Impugnatura amovibile del cestello
Maniglia del coperchio
Pulsante RESET (non disponibile sulla
foto)
8.
9.
10.
11.
12.
13.
Capac
Coş
Lumina de pornire
Indicator luminos
Termostat
Carcasa
Compartiment depozitare cablu (nu e
vizibil in poza)
Maner
Vas detasabil
Panou control
Maner cos
Maner capac
Buton repornire (nu e vizibil in poza)
Pokrywa
Kosz
Lampka zasilania
Lampka kontrolna
Termostat
Obudowa
Schowek na przewód (nie widoczny na
zdjęciu)
Uchwyt
Ruchomy pojemmnik
Panel sterowania
Uchwyt kosza
Uchwyt pokrywy
Przycisk RESET (niewidoczny na zdjęciu)
5
Assembly page 5/52
TKG FT 1005 - 110331
Copies of the I/B. Please reproduce them without any
changes except under special instruction from Team
International BELGIUM. The pages must be reproduced
and folded in order to obtain a booklet A5 (+/- 148.5 mm
width x 210 mm height). When folding, make sure you
keep the good numbering when you turn the pages of
the I/B. Don’t change the page numbering. Keep the
language integrity.
Fax +32 2 359 95 50
WICHTIGE SICHERHEITSVORSCHRIFTEN
Lesen Sie aufmerksam die Gebrauchsanleitung, bevor Sie Ihr Gerät benutzen, und befolgen Sie
immer die Sicherheitsvorschriften und die Gebrauchsanweisung.
Wichtig: Personen (einschließlich Kinder), die aufgrund ihrer physischen, sensorischen oder
geistigen Fähigkeiten oder ihrer Unerfahrenheit oder Unkenntnis nicht in der Lage sind, das
Gerät sicher zu benutzen, sollten dieses Gerät nicht ohne Aufsicht oder Anweisung durch eine
verantwortliche Person benutzen. Kinder sollten beaufsichtigt werden, um sicherzustellen, dass
sie nicht mit dem Gerät spielen.
Kontrollieren Sie, ob die Netzspannung mit der auf dem Gerät vermerkten Spannung
übereinstimmt, bevor Sie das Gerät benutzen.
Lassen Sie Ihr Gerät niemals beim Gebrauch unbeaufsichtigt.
Überprüfen Sie regelmäßig, dass das Gerät nicht beschädigt ist. Bei Beschädigung der
Anschlussleitung oder des Gerätes, letzteres nicht benutzen, sondern von einem
Fachmann (*) überprüfen bzw. reparieren lassen. Eine beschädigte Anschlussleitung muss
von einem Fachmann (*) ausgewechselt werden.
Benutzen Sie das Gerät nur zu Haushaltszwecken, wie in der Bedienungsanleitung
angegeben.
Benutzen Sie das Gerät nicht in der Nähe einer Wärmequelle.
Entfernen Sie den Stecker aus der Steckdose, bevor Sie das Gerät reinigen.
Benutzen Sie das Gerät nicht im Freien und bewahren Sie es an einem trockenen Platz auf.
Benutzen Sie nur Zubehör, welches vom Lieferanten empfohlen wurde. Anderes Zubehör
stellt eine Gefahr für den Benutzer dar und das Gerät könnte dadurch beschädigt
werden.
Ziehen Sie niemals an der Anschlussleitung, um das Gerät zu bewegen. Achten Sie darauf,
dass die Anschlussleitung nicht irgendwo hängen bleibt und dies zum Fall des Gerätes
führen könnte. Wickeln Sie die Anschlussleitung nicht um das Gerät oder knicken Sie diese
nicht. Verwenden Sie das Kabelfach am hinteren Teil des Gerätes.
Stellen Sie das Gerät auf eine stabile ebene Fläche damit es nicht umfallen kann.
Benutzen Sie das Gerät nur zum Frittieren von Nahrungsmitteln, die zum Frittieren und zum
Verzehr geeignet sind.
Das Gehäuse, die Frittierwannen, die Deckel, die Frittierkörbe und die Griffe können mit
einem feuchten Tuch gereinigt werden. Tauchen Sie das Gerät und dessen
Bedienelemente niemals in Wasser oder andere Flüssigkeiten, weder zum Reinigen, noch
zu einem anderen Zweck. Geben Sie das Gerät niemals in die Spülmaschine (siehe
Abschnitt "Reinigung").
Warten Sie bis die Fritteuse vollständig erkaltet ist, bevor Sie sie reinigen oder wegräumen.
Benutzen Sie stets die Griffe. Ziehen Sie immer den Stecker aus der Steckdose, bevor Sie
das Gerät irgendwo anders hinstellen.
Schalten Sie die Fritteuse niemals ein bevor Sie Öl eingefüllt haben. Füllen Sie die Fritteuse
mit Öl zwischen der Minimum- und der Maximummarkierung, die an der Innenseite der
Frittierwanne angegeben ist. Füllen Sie den Behälter nicht über die Maximummarkierung!
Verbrennungsgefahr durch Ölspritzer!
Sie sollten das Gerät sauber halten, da es in direktem Kontakt mit Nahrungsmitteln ist.
Achten Sie darauf, dass die Anschlussleitung niemals heiße Teile des Gerätes berührt und
dass auch Sie die heißen Teile nicht berühren.
Achten Sie darauf, dass die heißen Teile nicht mit leicht entflammbarem Material, wie
Gardinen, Tischdecken, usw. in Berührung kommen. Brandgefahr!
Decken Sie das Gerät nicht ab und legen Sie nichts auf das Gerät.
Fügen Sie dem Öl nie Wasser hinzu.
Vergewissern Sie sich, dass die Nahrungsmittel möglichst trocken sind.
6
Assembly page 6/52
TKG FT 1005 - 110331
Copies of the I/B. Please reproduce them without any
changes except under special instruction from Team
International BELGIUM. The pages must be reproduced
and folded in order to obtain a booklet A5 (+/- 148.5 mm
width x 210 mm height). When folding, make sure you
keep the good numbering when you turn the pages of
the I/B. Don’t change the page numbering. Keep the
language integrity.
Fax +32 2 359 95 50
Es ist verboten, die Fritteuse mit dem Deckel zu schließen, da sonst das Öl überkochen und
Feuer entstehen könnte. Benutzen Sie Ihren Deckel nur zum Abdecken der Fritteuse, wenn
Sie diese wegstellen (nachdem sie abgekühlt ist) oder transportieren.
ACHTUNG: Beim Frittieren können hohe Temperaturen entstehen. Öl- und
Fettzubereitungen können bei Überhitzung brennen. Seien Sie äußerst vorsichtig!
Vergessen Sie nicht die Fritteuse auszuschalten, wenn Sie die Fritteuse nicht mehr
benötigen. Bevor Sie den Stecker ziehen, stellen Sie den Thermostat auf die niedrigste
Temperatur (Min).
Bei Gebrauch den Raum durchlüften.
Achtung: Wenn Sie die beiden Fritteusen gleichzeitig benutzen, beläuft sich der
Verbrauch auf etwa 19,5 Ampere. Demzufolge empfehlen wir Ihnen jede Fritteuse an
einen unterschiedlichen Stromkreis anzuschließen. Bevor Sie die Fritteusen anschließen,
vergewissern Sie sich, dass die Stromkreise den obengenannten Verbrauch ertragen
können. Schließen Sie die Fritteusen niemals an eine Multi-Steckdose an.
Ihr Gerät darf niemals über eine externe Zeitschaltuhr oder irgendein anderes, separates
Fernbedienungssystem eingeschaltet werden.
(*) Fachmann: anerkannter Kundendienst des Lieferanten oder des Importeurs, der für derartige
Reparaturen zuständig ist. Für eventuelle Reparaturen wenden Sie sich bitte an diesen
Kundendienst.
VOR DEM GEBRAUCH
•
•
•
Entfernen Sie die Verpackung.
Entfernen Sie die Deckel, die Frittierkörbe, die Griffe und alle Zubehörteile.
Vor dem ersten Gebrauch empfehlen wir die Deckel, die Frittierwannen, Frittierkörbe,
Griffe und das Gehäuse mit warmem Wasser zu spülen.
AUSEINANDERNEHMEN DER FRITTEUSE
•
•
•
Entfernen Sie das Bedienelement aus der Fritteuse, indem Sie es nach oben ziehen.
Halten Sie die Frittierwanne an beiden Seiten fest und ziehen Sie diese langsam nach
oben.
Gehen Sie für die zweite Frittierwanne auf dieselbe Weise vor.
ZUSAMMENSETZEN DER FRITTEUSE
•
•
•
•
•
Stellen Sie das Gehäuse auf eine horizontale, ebene Fläche.
Setzen Sie die Behälter in das Gehäuse ein und drücken Sie diese langsam nach unten.
Bringen Sie die Bedienelemente und die Zubehörteile an. Hierzu führen Sie die
Bedienelemente in die Einkerbungen hinten am Gehäuse ein bis sie einrasten.
BEMERKUNG: Das Gerät kann nur dann funktionieren, wenn das Bedienelement, das Sie
benutzen möchten, korrekt eingeführt wurde.
Schwenken Sie den Griff des Frittierkorbes nach außen bis zum Anschlag, damit Sie den
Korb einfach aus dem Gerät herausnehmen können.
Drücken Sie die Anschlussleitung in das Kabelfach an der Rückseite des Gerätes.
BEIM ERSTEN GEBRAUCH
•
•
Füllen Sie Öl bis zur Markierung in die Fritteuse. Achten Sie darauf, dass der Ölstand sich
zwischen der Füllmarkierung MIN/MAX befindet.
Wir empfehlen den Gebrauch von flüssigem Öl. Achten Sie auf die Etikettierung beim
Kaufen des Öls. Möchten Sie dennoch Speisefett benutzen, stellen Sie den Thermostat auf
die niedrigste Position, und fügen Sie das Fett in kleinen Mengen hinzu. Ist das Fett
geschmolzen, stellen Sie den Thermostat auf die gewünschte Temperatur ein. ACHTUNG :
BEI NICHTBEACHTUNG DIESER VORSCHRIFT KANN IHRE FRITTEUSE BESCHÄDIGT WERDEN.
7
Assembly page 7/52
TKG FT 1005 - 110331
Fax +32 2 359 95 50
Copies of the I/B. Please reproduce them without any
changes except under special instruction from Team
International BELGIUM. The pages must be reproduced
and folded in order to obtain a booklet A5 (+/- 148.5 mm
width x 210 mm height). When folding, make sure you
keep the good numbering when you turn the pages of
the I/B. Don’t change the page numbering. Keep the
language integrity.
BEMERKUNG: Jede Frittierwanne funktioniert separat. Wenn Sie die beiden Frittierwannen
benutzen möchten, müssen Sie die beiden Anschlussleitungen in die Steckdose stecken.
VORWÄRMUNG
Wenn Sie das Gerät angeschaltet haben, stellen Sie den Thermostat auf die gewünschte
Temperatur ein.
Um eine beständige und angemessene Gebrauchstemperatur zu erreichen, brauchen Sie 10
bis 15 Minuten zu warten. Inzwischen geht die Temperaturkontrollleuchte mehrere Male an
und aus.
Falls Sie das Gerät richtig vorheizen, bekommen Sie knusprig braune Pommes Frites.
GEBRAUCH
•
•
•
•
•
•
•
•
Stecken Sie den Stecker in die Steckdose und setzen Sie den Thermostat auf die
gewünschte Temperatur. Die Betriebsleuchte und die Kontrollleuchte gehen an. Sobald
die gewünschte Temperatur erreicht ist, erlischt die Kontrollleuchte . Der Thermostat wird
an- und ausgehen, damit die Temperatur beim Frittieren konstant bleibt. Die
Kontrollleuchte wird sich ebenfalls ein- und ausschalten.
Schließen Sie nicht den Deckel während des Gebrauches. Schließen Sie ihn erst, wenn das
Gerät abgekühlt ist, um zu vermeiden, dass Staub eintritt.
Wenn die Fritteuse die eingestellte Temperatur erreicht hat, heben Sie den Frittierkorb mit
Hilfe des Griffes und hangen Sie den Korb am Rand der Wanne.
Legen Sie vorsichtig die zu frittierende Nahrung in den Korb und lassen Sie den Frittierkorb
vollständig in das Öl sinken.
Wenn die Nahrung nach Wunsch frittiert ist, heben Sie den Korb mit Hilfe des Griffes hoch,
und hangen Sie den Korb am Rand der Wanne um die frittierte Nahrung kurz abtropfen zu
lassen.
Wenn nötig können Sie den Korb aus dem Gerät entfernen.
Achten Sie darauf, dass die Nahrung sowohl innen als auch außen genug frittiert ist.
Diese Fritteuse hat keinen separaten Ein-/Ausschalter. Setzen Sie nach dem Gebrauch
deshalb den Thermostat auf der „Min“-Stellung und ziehen Sie den Stecker. Bewegen Sie
das Gerät nicht solange das Öl oder das Fett nicht vollständig erkaltet hat.
FÜR OPTIMALE ERGEBNISSE
•
•
•
•
•
Tupfen Sie die zu frittierende Nahrung ab bevor Sie diese in die Fritteuse geben. Bei
“nasser” Nahrung spritzt das Öl und kann es überkochen.
Achten Sie darauf, dass die Nahrungsstücke möglichst die gleiche Größe haben, so dass
sie gleichmäßig frittiert werden.
Bestimmte Nahrung wird paniert oder in Teig gerollt.
Warten Sie immer bis die Fritteuse die gewünschte Temperatur erreicht hat und die
Kontrollleuchte erlischt, bevor Sie die Nahrung in die Fritteuse geben.
Achten Sie darauf, dass Sie den Frittierkorb nicht zu sehr füllen.
ACHTUNG: Ihre Fritteuse ist mit einem Sicherheitssystem ausgestattet, das das Gerät
ausschaltet, falls es überhitzt (z.B. wegen eines Fehlbetriebes des Thermostats).
Stellen Sie den Thermostat in diesem Fall sofort auf „Min“ und ziehen Sie den Stecker aus der
Steckdose. Die Fritteuse sollte vollkommen abgekühlt sein (etwa 15 Minuten). Drücken Sie dann
auf den “RESET-Knopf” , der sich am hinteren Teil des Gerätes im Kabelfach befindet. Jede
Frittierwanne besitzt einen eigenen RESET-Knopf.
Die Fritteuse kann erneut benutzt werden. Lesen Sie sorgfältig die Gebrauchsanleitung, damit
dieses Problem nicht mehr auftritt.
8
Assembly page 8/52
TKG FT 1005 - 110331
Fax +32 2 359 95 50
Copies of the I/B. Please reproduce them without any
changes except under special instruction from Team
International BELGIUM. The pages must be reproduced
and folded in order to obtain a booklet A5 (+/- 148.5 mm
width x 210 mm height). When folding, make sure you
keep the good numbering when you turn the pages of
the I/B. Don’t change the page numbering. Keep the
language integrity.
REZEPTE
Frische Pommes frites
•
•
•
•
•
•
•
•
Frische Pommes frites werden am besten zweimal gebacken.
Benutzen Sie “alte” Kartoffeln (keine ‘neuen’ Kartoffeln). Schneiden Sie die Kartoffeln in
gleichgroße längliche Stücke.
Überschreiten Sie das empfohlene Gewicht nicht. Geben Sie die Pommes frites in den
Frittierkorb wenn das Öl 180°C erreicht hat und tauchen Sie den Korb langsam in das Öl.
500 g Pommes frites sollten ungefähr 6 Minuten bei 180°C frittiert werden. Heben Sie die
Pommes frites aus dem Öl.
Warten Sie bis die Temperaturleuchte erneut ausgeht, tauchen Sie den Korb wiederum in
das Öl und frittieren Sie die ‘vorgebackenen’ Pommes frites noch ca. 2 Minuten.
Heben Sie den Frittierkorb hoch und lassen Sie die Pommes frites abtropfen.
Wollen Sie ein optimales Ergebnis erzielen, dann tupfen Sie die Pommes frites mit
Küchenkrepp ab.
Die Frittierzeit kann je nach Kartoffelsorte und je nach Dicke der Pommes frites variieren.
Zwiebelringe
•
•
•
•
•
Frittierzeit ungefähr 4 bis 5 Minuten bei 175°C.
Schälen Sie die Zwiebel und schneiden Sie sie in Scheiben, danach in Ringe.
Tauchen Sie die Zwiebelringe in gewürzte Milch.
Wenden Sie sie dann in Mehl.
Legen Sie die panierten Ringe nebeneinander in den Frittierkorb und frittieren Sie sie.
Panierte Champignons
•
•
•
•
Frittierzeit: 4 bis 5 Minuten bei 175°C.
Wenden Sie die Champignons in Eigelb.
Wenden Sie die Champignons in Paniermehl.
Legen Sie die panierten Champignons nebeneinander in den Frittierkorb und frittieren Sie sie.
Seezunge
•
•
•
•
Frittierzeit: 3 bis 4 Minuten bei 160°C.
Schneiden Sie die Seezunge in schmale Streifen und bestreuen Sie sie mit Mehl.
Wenden Sie die Streifen in Eigelb und rollen Sie sie in Paniermehl.
Legen Sie die panierten Seezungenstreifen nebeneinander in den Frittierkorb und frittieren
Sie sie.
BACKZEITTABELLE
NAHRUNG
Panierte Fischfilets
Scampis
Hähnchenbrust
Panierte Hähnchenstückchen
Zwiebelringe
Panierte Champignons
Broccoli
Zucchini
Sellerie
Pommes-Frites (vorgebacken)
Pommes-Frites
(fertiggebacken)
TEMPERATUR
170°C
170°C
175°C
170°C
180°C
180°C
185°C
185°C
180°C
170°C
MINUTEN (Ca.)
6-7
4-6
4-5
12-15
4
3-4
3-4
3-4
3-4
8
180°C
3
9
Assembly page 9/52
TKG FT 1005 - 110331
Fax +32 2 359 95 50
Copies of the I/B. Please reproduce them without any
changes except under special instruction from Team
International BELGIUM. The pages must be reproduced
and folded in order to obtain a booklet A5 (+/- 148.5 mm
width x 210 mm height). When folding, make sure you
keep the good numbering when you turn the pages of
the I/B. Don’t change the page numbering. Keep the
language integrity.
REINIGUNG
•
•
•
•
•
•
•
•
Achtung: Tauchen Sie die Fritteuse niemals in Wasser oder irgendwelche Flüssigkeit.
Ziehen Sie den Stecker aus der Steckdose. Vergewissern Sie sich, dass beide Stecker aus
den Steckdosen gezogen worden sind.
Warten Sie bis das Gerät völlig erkaltet ist, bevor Sie es reinigen. Achtung! Das Heizelement
nicht anfassen, da dieses selbst nach einiger Zeit, nachdem Sie das Gerät ausgeschaltet
haben, noch heiß sein kann! TAUCHEN SIE DIE BEDIENELEMENTE NIEMALS IN WASSER ODER
ANDERE FLÜSSIGKEITEN!
Siehe Abschnitt "Auseinandernehmen der Fritteuse".
Benutzen Sie keine Scheuermittel oder Topfkratzer, da Ihre Fritteuse dadurch beschädigt
werden könnte.
Reinigen Sie die Außenseite der Fritteuse mit einem feuchten Tuch und trocknen Sie das
Gerät gut ab.
Wechseln Sie das Öl regelmäßig.
Um die Fritteuse wieder zusammenzusetzen, siehe Abschnitt "Zusammensetzen der
Fritteuse".
AUFBEWAHRUNG
•
•
Warten Sie bis die Fritteuse vollständig abgekühlt ist, bevor Sie diese wegstellen.
Zur Aufbewahrung kann das Öl in der Fritteuse bleiben. Achten Sie darauf, dass die Deckel
gut geschlossen bleiben, damit kein Staub in die Fritteuse dringen kann.
UMWELTSCHUTZ – RICHTLINIE 2002/96/EG
Zum Schutz unserer Umwelt und unserer Gesundheit sind Elektro- und Elektronik-Altgeräte nach
bestimmten Regeln zu entsorgen. Dies fordert den Einsatz sowohl des Herstellers bzw.
Lieferanten als auch des Verbrauchers.
Aus diesem Grund darf dieses Gerät, wie das Symbol
auf dem Typenschild bzw. auf der
Verpackung zeigt, nicht in den unsortierten Restmüll gegeben werden. Der Verbraucher hat
das Recht, dieses Gerät über kommunale Sammelstellen zu entsorgen; von dort aus wird die
spezifische Behandlung, Verwertung bzw. das Recycling gem. den Erfordernissen der Richtlinie
sichergestellt.
10
Assembly page 10/52
TKG FT 1005 - 110331
Fax +32 2 359 95 50
Copies of the I/B. Please reproduce them without any
changes except under special instruction from Team
International BELGIUM. The pages must be reproduced
and folded in order to obtain a booklet A5 (+/- 148.5 mm
width x 210 mm height). When folding, make sure you
keep the good numbering when you turn the pages of
the I/B. Don’t change the page numbering. Keep the
language integrity.
IMPORTANT SAFEGUARDS
Please read these instructions carefully before using the appliance, and always follow the
safety and operating instructions.
Important: People (including children) who are not able to use the appliance in a safe way,
due to their physical, sensorial or mental capacity or their lack of experience or knowledge,
must never use the appliance except if they are supervised by a person responsible for their
safety or if they previously received instructions concerning the safe use of the appliance.
Close supervision is necessary to prevent children from using the appliance as a toy.
Check that your mains voltage corresponds to that stated on the appliance.
Never leave the appliance unsupervised when in use.
From time to time check the cord for damages. Never use the appliance if cord or
appliance shows any signs of damage. Should the cord be damaged, it must be
replaced by a competent qualified electrician(*). All repairs should be made by a
competent qualified electrician(*).
Only use the appliance for domestic purposes and in the way indicated in these
instructions.
Never use the appliance near hot surfaces.
Before cleaning, always unplug the appliance from the power supply.
Never use the appliance outside and always place it in a dry environment.
Never use accessories that are not recommended by the producer. They could constitute
a danger to the user and risk to damage the appliance.
Never move the appliance by pulling the cord. Make sure the cord cannot get caught in
any way. Do not wind the cord around the appliance and do not bend it. Use the cord
storage at the back of the appliance.
Stand the appliance on a flat surface to prevent it from falling.
Only use the appliance for deep-frying. Only cook friable and consumable foodstuff.
Housing, inner bowls, lids, baskets and handles can be washed by hand. Never immerse
the appliance or its control panels in water or any other liquid for cleaning or for any
reason whatsoever (see "Cleaning" section).
Wait until the appliance is completely cool before moving, cleaning or storing it. Always
take the appliance by the carrying handles. Always unplug the appliance before
handling it.
Never operate the appliance without oil or fat in it. Ensure that the oil or fat level is always
between the minimum and maximum marks inside the bowl. Never overfill as hot oil or fat
might be ejected.
It is absolutely necessary to keep this appliance clean at all times as it comes into direct
contact with food.
Make sure the cord never comes in contact with the hot parts of the appliance. Be aware
never to touch these hot parts.
Make sure the hot parts of the appliance are not exposed to inflammable materials, such as
curtains, tablecloth,... as a fire might occur.
Never cover the appliance with any kind of material.
Never add water to the oil.
It is forbidden to place the lid on the deep fat fryer when it is in use, as this could cause fire
or oil overflow. For this kind of fryer the lid should only be used for storing and moving (as
soon as the deep fat fryer has cooled down).
CAUTION: the deep fryer can reach high temperatures when in use. Oil and fat
preparations might catch fire if overheated. Be extremely cautious never to leave your
deep fryer in use for long periods. Do not forget to switch off the appliance once your
preparation is ready and the fryer is no longer in use. Before pulling the mains plug, switch
the temperature selector to the lowest position (“Min”).
11
Assembly page 11/52
TKG FT 1005 - 110331
Fax +32 2 359 95 50
Copies of the I/B. Please reproduce them without any
changes except under special instruction from Team
International BELGIUM. The pages must be reproduced
and folded in order to obtain a booklet A5 (+/- 148.5 mm
width x 210 mm height). When folding, make sure you
keep the good numbering when you turn the pages of
the I/B. Don’t change the page numbering. Keep the
language integrity.
Provide proper ventilation when using the appliance.
Caution: When both deep fat fryers are connected to the power outlet, the
consumption amounts to approximately 19.5 Amperes. As a consequence, we strongly
advise you to connect each deep fat fryer to a different electric circuit. Before
connecting the deep fat fryer to the power outlet, make sure the electric circuit can bear
the consumption mentioned above. Never connect the deep fat fryer to any kind of
adapter.
Your appliance must never be switched on through an external timer or any kind of
separate remote control system.
Competent qualified electrician: after-sales department of the producer or importer or any
person who is qualified, approved and competent to perform this kind of repairs in order to
avoid all danger. In case of need you should return the appliance to this electrician.
(*)
BEFORE USE
•
•
•
Remove all packaging from the unit.
Remove the lids, baskets, handles and any accessory from the appliance.
Before you use the deep fat fryer for the first time, we recommend that you clean the lids,
bowls, baskets, handles and housing of the deep fat fryer with warm soapy water with a
soft cloth.
DISASSEMBLING THE DEEP FAT FRYER
•
•
•
Remove the control panels from the appliance. To do this, gently pull the control panel
upwards until it is released.
Take the interior bowl with your two hands and pull it up gently.
Proceed in the same way for the second bowl.
ASSEMBLING THE DEEP FAT FRYER
•
•
•
•
•
•
Stand the appliance on a dry horizontal surface.
Place each bowl back in the housing and push it downwards.
Replace the control panel and the accessories on both bowls. To replace the control
panels, firmly slide them downward into the location grooves on the back of the housing
until they are locked.
NOTE: The appliance will only operate when the control panel you want to use is correctly
fitted to the outer jacket.
Unfold the handle of the basket until it is locked to allow rising the basket easily.
Put the remaining power cord length in the cord storage in the back of the appliance.
FIRST USE
•
•
When using the appliance for the first time, pour the required amount of oil in the bowl,
making sure that the level is between the MIN and MAX marks indicated inside the bowl.
We recommend that you use a liquid oil that is suitable for deep fat frying. Check the
label on the bottle. If you wish to use a solid fat, cut the fat in small pieces. Plug in the
appliance, put the thermostat on the minimum position and add the pieces of fat slowly.
When the fat has melted, set the thermostat to the desired temperature. WARNING:
FAILURE TO OBSERVE THIS WILL DAMAGE YOUR DEEP FAT FRYER.
NOTE: the bowls operate independently. If you want to use both bowls simultaneously, you
have to put both plugs in a power socket.
12
Assembly page 12/52
TKG FT 1005 - 110331
Fax +32 2 359 95 50
Copies of the I/B. Please reproduce them without any
changes except under special instruction from Team
International BELGIUM. The pages must be reproduced
and folded in order to obtain a booklet A5 (+/- 148.5 mm
width x 210 mm height). When folding, make sure you
keep the good numbering when you turn the pages of
the I/B. Don’t change the page numbering. Keep the
language integrity.
PREHEATING
When the appliance has been switched on, set the thermostat on the desired temperature.
To reach a stable and correct temperature for use, it is necessary to wait 10 to 15 minutes.
During this time, the temperature control light will go on and off several times.
A good preheating will allow you to have browned and crispy fries.
USE
•
•
•
•
•
•
•
•
Plug in the appliance and set the thermostat to the desired temperature. The power light
and the pilot light will illuminate. As soon as the desired temperature is reached, the pilot
light will go out. When the temperature falls, the thermostat will be activated again, and
the pilot light will illuminate. It will go out again as soon as the temperature is reached.
It is forbidden to place the lid on the deep fat fryer when it is in use. Only put the lid on the
appliance when the appliance has cooled down to avoid dust getting into the oil.
When the fryer has reached the desired temperature, raise the basket using the handle
and attach it to the edge of the fryer.
Place the food into the basket slowly to avoid splashes and lower the basket fully into the
oil or fat.
When the food is ready, raise the basket by lifting the handle and attach it to the edge of
the fryer in order to let the food drain.
If necessary you can take the basket out of the appliance.
Ensure the food is thoroughly cooked inside and out.
Your deep fat fryer does not have a separate ON/OFF switch. After use, turn the
thermostat to its “Min” position and unplug the appliance. Never move the appliance as
long as the oil or fat is still hot.
FOR BEST RESULTS
•
•
•
•
•
Always dry food well before frying. Very ‘wet’ food can cause the oil to ‘foam’ and may
overflow.
Foodstuffs for frying should be roughly of the same size to ensure the food cooks evenly
and thoroughly.
Many types of food may need to be coated before frying - typical coatings are batter or
breadcrumbs.
Always wait until the fryer has reached the desired temperature and the pilot light has
gone out, before adding the food.
Do not overfill the basket.
CAUTION: This fryer has a built-in safety cut-off switch that triggers if the unit accidentally
overheats (e.g. temperature control fails to function). Should this happen, firstly turn the
thermostat to “Min” and unplug the deep fat fryer. Wait until the element cools down (about
15 minutes). Then press the RESET button situated in the back of the appliance, in the cord
storage . Each bowl has its own RESET button. This will reset the deep fat fryer. Your deep fat
fryer is now ready to use. To make sure this does not happen again, please read the instruction
manual thoroughly.
13
Assembly page 13/52
TKG FT 1005 - 110331
Fax +32 2 359 95 50
Copies of the I/B. Please reproduce them without any
changes except under special instruction from Team
International BELGIUM. The pages must be reproduced
and folded in order to obtain a booklet A5 (+/- 148.5 mm
width x 210 mm height). When folding, make sure you
keep the good numbering when you turn the pages of
the I/B. Don’t change the page numbering. Keep the
language integrity.
RECIPES
Fresh Chips
•
•
•
•
•
•
•
•
Fresh chips are best fried in two stages.
Use ‘old’ potatoes (no ‘new’ potatoes). Cut the potatoes into equal sizes. Rinse the
chipped potatoes under running water to reduce the starch level. Dry thoroughly and
separate the pieces.
Do not exceed the recommended weight. When the temperature has reached 180°C,
place the chips in the basket and slowly lower the basket into the oil.
For 500g of chips, fry for 6 minutes on 180°C then raise the basket.
Wait until the temperature light goes out again, lower the basket and fry for a further 2
minutes.
Raise the basket and let the chips drain.
For best results, before serving gently dab the chips with absorbent paper to remove
excess oil.
Frying times may vary slightly on the type of potatoes used and the thickness of the chips.
Onion Rings
•
•
•
•
•
Frying temperature - 175°C for 4 to 5 minutes.
Peel the onions and slice. Separate the slices into rings.
Dip the rings into a bowl of seasoned milk.
Then dust the rings in plain flour.
Place the rings separately in the frying basket and fry a few at a time.
Breaded Mushrooms
•
•
•
•
Frying temperature - 175°C for 4 to 5 minutes.
Beat 1 egg and dip the mushrooms into the egg.
Then coat the mushrooms with breadcrumbs.
Place separately into the frying basket and fry a few at a time.
Goujons of Sole
•
•
•
•
Frying temperature - 160°C for 3-4 minutes.
Cut the sole fillet into small strips. Coat the strips in some seasoned plain flour.
Then dip the strips into beaten egg and coat with breadcrumbs.
Place separately into the frying basket and fry a few at a time.
TEMPERATURE GUIDE FOR BEST RESULTS
FOOD
Breaded Fillet of fish
Scampi
Chicken Breast
Breaded Chicken pieces
Onion Rings
Breaded Mushrooms
Broccoli Fritters
Courgette Fritters
Celery in batter
Chips First Stage
Chips Second Stage
TEMPERATURE (°C)
170
170
175
170
180
180
185
185
180
170
180
14
Assembly page 14/52
MINUTES (approximately)
6-7
4-6
4-5
12-15
4
3-4
3-4
3-4
3-4
8
3
TKG FT 1005 - 110331
Fax +32 2 359 95 50
Copies of the I/B. Please reproduce them without any
changes except under special instruction from Team
International BELGIUM. The pages must be reproduced
and folded in order to obtain a booklet A5 (+/- 148.5 mm
width x 210 mm height). When folding, make sure you
keep the good numbering when you turn the pages of
the I/B. Don’t change the page numbering. Keep the
language integrity.
CLEANING
•
•
•
•
•
•
•
•
•
Caution: never immerse the appliance in water or any other liquid.
Unplug the deep fat fryer. Make sure both plugs have been removed from the power
socket.
Wait until the unit is completely cool before cleaning. Be careful when touching the
heating element as it might stay hot for quite some time after you have unplugged the
appliance. NEVER IMMERSE THE CONTROL PANELS IN WATER OR ANY OTHER LIQUID FOR
ANY REASON WHATSOEVER.
Follow the section ‘Disassembling the deep fat fryer’.
Do not use strong detergents or abrasive cloths/liquid, as this will damage the deep fat
fryer.
Clean the fryer with warm soapy water. It may help to soak the parts for a short time.
Thoroughly dry all parts of the appliance.
Change the oil regularly.
To assemble, follow the section ‘Assembling the deep fat fryer’.
STORING
•
•
Wait until the deep fat fryer is completely cool before storing.
The unit can be stored with the oil inside. Ensure the lids are tightly closed to avoid dust
getting into the oil.
PROTECTION OF THE ENVIRONMENT – DIRECTIVE 2002/96/EC
In order to preserve our environment and protect human health, the waste electrical and
electronic equipment should be disposed of in accordance with specific rules with the
implication of both suppliers and users. For this reason, as indicated by the symbol
on the
rating label or on the packaging, your appliance should not be disposed of as unsorted
municipal waste. The user has the right to bring it to a municipal collection point performing
waste recovery by means of reuse, recycling or use for other applications in accordance with
the directive.
15
Assembly page 15/52
TKG FT 1005 - 110331
Fax +32 2 359 95 50
Copies of the I/B. Please reproduce them without any
changes except under special instruction from Team
International BELGIUM. The pages must be reproduced
and folded in order to obtain a booklet A5 (+/- 148.5 mm
width x 210 mm height). When folding, make sure you
keep the good numbering when you turn the pages of
the I/B. Don’t change the page numbering. Keep the
language integrity.
POUR VOTRE SECURITE
Lisez attentivement cette notice avant toute utilisation, et respectez bien à la fois les consignes
de sécurité et d'usage.
Important : Votre appareil n’est pas prévu pour être utilisé par des personnes ( y compris les
enfants ) dont les capacités physiques, sensorielles ou mentales sont réduites, ou des personnes
dénuées d’expérience ou de connaissance, sauf si elles ont pu bénéficier, par l’intermédiaire
d’une personne responsable de leur sécurité, d’une surveillance ou d’instructions préalables
concernant son utilisation en toute sécurité.
Il convient de surveiller les enfants pour s’assurer qu’ils ne jouent pas avec l’appareil.
Avant d'utiliser l'appareil, vérifiez que la tension du réseau correspond bien à celle de
l'appareil.
Ne laissez jamais votre appareil sans surveillance lorsque celui-ci est en fonctionnement ou
sous tension.
Vérifiez régulièrement l’état de votre appareil et s’il est endommagé de quelque façon que
ce soit, ne l'utilisez pas mais faites-le vérifier et réparer par un service qualifié compétent(*). Si
le câble est endommagé, il doit être obligatoirement remplacé par un service qualifié
compétent(*).
Utilisez l'appareil uniquement pour des usages domestiques et de la manière indiquée dans
la notice.
N'utilisez pas l'appareil près de sources de chaleur.
La prise doit être retirée avant de nettoyer l'appareil.
Veillez à ne pas utiliser l'appareil à l'extérieur et entreposez-le dans un endroit sec.
Ne pas utiliser d’accessoires non recommandés par le fabricant, cela peut présenter un
danger pour l’utilisateur et risque d’endommager l’appareil.
Ne déplacez jamais l’appareil en tirant sur le câble. Veillez à ce que le cordon
d’alimentation ne puisse être accidentellement accroché et ce, afin d’éviter toute chute
de l’appareil. Evitez d’enrouler le cordon autour de l’appareil et ne le tordez pas. Utilisez le
rangement de cordon à l'arrière de l'appareil.
Posez cet appareil sur une table ou un support suffisamment stable pour éviter à tout prix
sa chute.
N’utilisez cet appareil que pour sa fonction de friteuse. Ne faites cuire que des aliments
appropriés à la cuisson et propres à la consommation.
La paroi extérieure, les cuves intérieures, les couvercles, les paniers et les poignées
peuvent être lavés à la main. Ne pas plonger l'appareil ni les panneaux de commande
dans l’eau ou dans tout autre liquide pour son nettoyage ou toute autre raison (voir
rubrique "Nettoyage").
Attendez que votre appareil soit complètement froid avant de le déplacer, le nettoyer ou
le ranger. Toujours porter l’appareil par les poignées. Toujours débrancher l’appareil avant
de le manipuler.
Ne faites jamais fonctionner votre appareil sans huile ou graisse. Cette friteuse doit être
remplie d’un minimum et d’un maximum d’huile ou de graisse, pour cela se référer aux
niveaux indiqués à l’intérieur de la cuve. Ne pas dépasser ce niveau, des projections
d’huile ou de graisse pourraient vous brûler.
Il est indispensable de garder cet appareil propre étant donné qu’il est en contact direct
avec la nourriture.
Veillez à ce que le cordon n’entre pas en contact avec des surfaces chaudes de
l’appareil. Vous-même, veillez à ne pas toucher les surfaces chaudes de l’appareil.
Veillez à ce que les parties chaudes de l’appareil ne rentrent pas en contact avec des
matériaux facilement inflammables comme les rideaux, la nappe,... lorsqu’il est en
fonctionnement car le feu pourrait se déclarer.
Ne couvrez pas cet appareil avec quoi que se soit.
N’ajoutez jamais d’eau dans votre huile.
16
Assembly page 16/52
TKG FT 1005 - 110331
Fax +32 2 359 95 50
Copies of the I/B. Please reproduce them without any
changes except under special instruction from Team
International BELGIUM. The pages must be reproduced
and folded in order to obtain a booklet A5 (+/- 148.5 mm
width x 210 mm height). When folding, make sure you
keep the good numbering when you turn the pages of
the I/B. Don’t change the page numbering. Keep the
language integrity.
Assurez-vous que les aliments sont le plus secs possible.
Il est interdit de mettre en place le couvercle sur la friteuse lors de son utilisation, cela
pourrait causer un risque d’incendie ou de débordement de la friteuse. Dans ce cas, le
couvercle ne sert que pour le rangement et pour le transport (une fois la friteuse refroidie).
ATTENTION: La friteuse peut atteindre une température élevée pendant son utilisation. Les
préparations à l'huile ou à la graisse peuvent s'enflammer si elles sont surchauffées. Veillez
donc à ne jamais laisser votre friteuse allumée pour de longues périodes. Avant de
débrancher l’appareil, positionnez le réglage thermostatique sur sa température la plus
faible (“Min”).
Veillez à ventiler la pièce durant le fonctionnement.
Attention si vous utilisez les deux friteuses en même temps, la consommation sera
d'environ 19,5 ampères. Par conséquent il est fortement conseillé de brancher chaque
friteuse sur un circuit différent. Avant de brancher la friteuse, assurez-vous que le circuit sur
lequel vous allez la brancher peut supporter la consommation indiquée. Ne branchez
aucune des friteuses sur une prise multiple.
Votre appareil ne doit jamais être mis en fonctionnement par le biais d’une minuterie
extérieure ou d’un autre système de commande à distance séparé.
Service qualifié compétent: service après-vente du fabricant ou de l'importateur ou une
personne qualifiée, reconnue et habilitée à faire ce genre de réparation afin d'éviter tout
danger. Dans tous les cas, veuillez retourner l'appareil auprès de ce service.
(*)
AVANT LE PREMIER USAGE
•
•
•
Retirez tout matériel d'emballage de l'appareil.
Retirez les couvercles, les paniers, les poignées et tous les accessoires de l’appareil.
Avant le premier usage il est recommandé de laver soigneusement les couvercles, les
cuves, les paniers, les poignées et l'extérieur de l'appareil à l’eau chaude savonneuse à
l’aide d’un chiffon doux.
DEMONTAGE DE LA FRITEUSE
•
•
•
Retirez la résistance et le panneau de commande de l’appareil en faisant coulisser ce
dernier vers le haut.
Prenez la cuve des deux côtés et soulevez-la doucement.
Procédez de la même manière pour la seconde cuve.
MONTAGE DE LA FRITEUSE
•
•
•
•
•
Posez la partie extérieure sur une surface horizontale et sèche.
Placez chacune des cuves intérieures dans la partie extérieure et descendez-les
doucement.
Replacez le panneau de commande et les accessoires sur chacune des deux cuves. Pour
replacer le panneau de commande, faites-le glisser dans les rainures au dos de la partie
extérieure jusqu'à ce que le panneau soit bien fixé.
NOTE: L’appareil ne sera opérationnel que si le panneau de commande de la cuve que
vous souhaitez utiliser est bien positionné.
Fixez la poignée du panier en la faisant basculer vers l’arrière jusqu'à venir en butée afin
de pouvoir remonter le panier lors de l'utilisation.
Poussez la partie trop longue du cordon dans le logement à l’arrière de l’appareil.
PREMIERE UTILISATION
•
Lors de la première utilisation, remplissez la cuve d’huile entre le niveau minimum et le
niveau maximum indiqué dans la cuve.
17
Assembly page 17/52
TKG FT 1005 - 110331
Fax +32 2 359 95 50
•
Copies of the I/B. Please reproduce them without any
changes except under special instruction from Team
International BELGIUM. The pages must be reproduced
and folded in order to obtain a booklet A5 (+/- 148.5 mm
width x 210 mm height). When folding, make sure you
keep the good numbering when you turn the pages of
the I/B. Don’t change the page numbering. Keep the
language integrity.
Utilisez de préférence de l’huile spéciale pour fritures. Vérifiez l’étiquette sur la bouteille. Si
néanmoins vous préférez utiliser des pains de graisse, coupez-les en petits morceaux.
Branchez l’appareil, mettez le thermostat sur la position minimale et ajoutez la graisse petit
à petit. Quand la graisse est fondue, actionnez le thermostat jusqu'à la température
désirée. ATTENTION: LE NON-RESPECT DE CETTE PRESCRIPTION PEUT ENDOMMAGER
SÉRIEUSEMENT VOTRE FRITEUSE.
NOTE: Chacune des deux cuves fonctionne indépendamment. Si vous souhaitez utiliser les
deux cuves simultanément, vous devrez brancher les deux cordons d’alimentation.
PRECHAUFFAGE
Une fois l'appareil mis en fonctionnement, placez le thermostat sur la température désirée.
Pour atteindre une température d’utilisation correcte et stable, il faut patienter de 10 à 15
minutes. Pendant cette période le témoin lumineux de contrôle de la température s'allumera
et s'éteindra à plusieurs reprises.
Un bon préchauffage vous permettra d'obtenir des frites dorées et croustillantes.
UTILISATION
•
•
•
•
•
•
•
•
Branchez l’appareil et placez le thermostat sur la température désirée. Le témoin lumineux
de fonctionnement et le témoin de chauffe s'allument. Dès que la température désirée
est atteinte, le témoin lumineux de chauffe s'éteint. Lorsque la température baisse, le
thermostat se réenclenche ainsi que ce témoin lumineux, qui s’éteint de nouveau dès que
la température requise est atteinte.
Ne mettez pas le couvercle sur la friteuse pendant son utilisation. Ne le mettez que lorsque
celle-ci a refroidi, afin d'éviter que de la poussière n'y pénètre.
Quand la friteuse a atteint la température requise, sortez le panier de l'huile à l'aide de la
poignée et accrochez-le au rebord de la friteuse.
Placez les aliments dans le panier et faites redescendre le panier dans l'huile.
Dès que les aliments sont cuits, sortez le panier de l’huile et accrochez-le au rebord de la
friteuse pour laisser égoutter les aliments.
Si nécessaire, vous pouvez sortir le panier de l'appareil.
Assurez-vous que les aliments sont bien cuits à l’intérieur ainsi qu’à l’extérieur.
Votre friteuse ne possède pas d'interrupteur marche/arrêt séparé. Après utilisation, veuillez
donc remettre le thermostat sur la position “Min” et débrancher la friteuse. Ne manipulez
pas l'appareil avant que l'huile ou la graisse ait totalement refroidi.
OBTENIR LE MEILLEUR RÉSULTAT
•
•
•
•
•
Séchez vos aliments avant de les mettre dans la friteuse. Des aliments trop humides
peuvent faire bouillonner l’huile et éventuellement la faire déborder.
Veillez à ce que les aliments aient environ les mêmes dimensions pour permettre une
cuisson homogène.
Certains aliments peuvent être panés ou enrobés de pâte pour frire.
Attendez que le préchauffage soit terminé et que le témoin s’éteigne avant de mettre les
aliments dans le panier.
Ne remplissez pas trop le panier.
ATTENTION: Votre friteuse est munie d'un système de sécurité qui arrête l'appareil s'il surchauffe
accidentellement (par exemple en cas de dysfonctionnement du thermostat). Si ceci devait
arriver, positionnez tout d’abord le thermostat sur “Min” puis débranchez la prise de courant.
Attendez alors le refroidissement de votre friteuse (environ 15 minutes). Appuyez sur le bouton
RESET qui se trouve à l’intérieur du rangement de câble à l'arrière de l'appareil. Chaque cuve
est dotée d’un bouton RESET.
18
Assembly page 18/52
TKG FT 1005 - 110331
Fax +32 2 359 95 50
Copies of the I/B. Please reproduce them without any
changes except under special instruction from Team
International BELGIUM. The pages must be reproduced
and folded in order to obtain a booklet A5 (+/- 148.5 mm
width x 210 mm height). When folding, make sure you
keep the good numbering when you turn the pages of
the I/B. Don’t change the page numbering. Keep the
language integrity.
Votre friteuse est de nouveau opérationnelle. Pour éviter que ceci ne se reproduise plus, lisez
attentivement les instructions d’utilisation.
RECETTES
Frites fraîches
•
•
•
•
•
•
•
•
Il est recommandé de cuire les frites en deux fois.
Utilisez de vieilles pommes de terre (pas des nouvelles). Coupez-les en morceaux égaux.
Rincez les morceaux sous l’eau pour les débarrasser de leur amidon. Essuyez-les
soigneusement.
Ne dépassez pas le poids recommandé. Mettez les frites dans le panier quand la
température atteint les 180°C et descendez le panier lentement dans l’huile.
Le temps de friture requis pour 500 g de frites est de 6 minutes à 180°C. Enlevez ensuite le
panier de l’huile.
Attendez que le témoin s’éteigne de nouveau, redescendez le panier et faites cuire
encore pendant environ deux minutes.
Soulevez le panier et laissez égoutter les frites.
Pour obtenir le meilleur résultat, séchez les frites avec de l’essuie-tout pour absorber la
graisse.
Le temps de friture peut varier légèrement selon la qualité des pommes de terre et
l’épaisseur des frites.
Rondelles d’oignons
•
•
•
•
•
Temps de friture: 4 à 5 minutes à 175°C.
Epluchez et coupez les oignons. Divisez les morceaux en rondelles.
Plongez les rondelles dans du lait épicé.
Saupoudrez de farine.
Mettez les rondelles les unes à côté des autres dans le panier et faites-en cuire quelquesunes à la fois.
Champignons panés
•
•
•
•
Temps de friture: 4 à 5 minutes à 175°C.
Plongez les champignons dans un oeuf battu.
Enroulez-les dans la chapelure.
Mettez les champignons les uns à côté des autres dans le panier et faites-en cuire
quelques-uns à la fois.
Bâtonnets de sole
•
•
•
•
Temps de friture: 3 à 4 minutes à 160°C.
Coupez le filet de sole en bâtonnets. Saupoudrez de farine.
Plongez-les dans un oeuf battu et enroulez-les dans la chapelure.
Mettez les bâtonnets les uns à côté des autres dans le panier et faites-en cuire quelquesuns à la fois.
19
Assembly page 19/52
TKG FT 1005 - 110331
Fax +32 2 359 95 50
Copies of the I/B. Please reproduce them without any
changes except under special instruction from Team
International BELGIUM. The pages must be reproduced
and folded in order to obtain a booklet A5 (+/- 148.5 mm
width x 210 mm height). When folding, make sure you
keep the good numbering when you turn the pages of
the I/B. Don’t change the page numbering. Keep the
language integrity.
QUELQUES CONSEILS D'UTILISATION:
ALIMENTS
Filets de poissons
Scampi
Blanc de poulet
Poulet pané
Oignons
Champignons
Brocoli
Courgettes
Céleri
Frites (1ère cuisson)
Frites (2ème cuisson)
TEMPERATURE
170°C
170°C
175°C
170°C
180°C
180°C
185°C
185°C
180°C
170°C
180°C
MINUTES
(approximativement)
6-7
4-6
4-5
12-15
4
3-4
3-4
3-4
3-4
8
3
NETTOYAGE
•
•
•
•
•
•
•
•
Mise en garde: Ne pas immerger votre appareil assemblé dans l'eau ou tout autre liquide.
Retirez la fiche de la prise. Assurez-vous que les deux fiches sont débranchées.
Laissez refroidir l’appareil avant de commencer le nettoyage. Attention: la résistance peut
rester chaude longtemps une fois l'appareil débranché. NE PLONGEZ JAMAIS LES
PANNEAUX DE COMMANDE DANS L'EAU OU DANS TOUT AUTRE LIQUIDE.
Voir chapitre "Démontage de la friteuse".
Evitez d’utiliser des détergents agressifs ou des éponges trop dures qui abîmeraient la
friteuse.
Séchez soigneusement toutes les parties de l’appareil.
Remplacez votre huile régulièrement.
Pour assembler votre friteuse, voir paragraphe “Montage de la friteuse”.
RANGEMENT
•
•
Attendez que la friteuse ait complètement refroidi.
L’huile peut rester dans l’appareil. Fermez bien les couvercles pour éviter la rentrée de
poussière.
PROTECTION DE L’ENVIRONNEMENT – DIRECTIVE 2002/96/CE
Afin de préserver notre environnement et notre santé, l’élimination en fin de vie des appareils
électriques et électroniques doit se faire selon des règles bien précises et nécessite
l’implication de chacun, qu’il soit fournisseur ou utilisateur. C’est pour cette raison que votre
appareil, tel que le signale le symbole
apposé sur sa plaque signalétique ou sur
l'emballage, ne doit en aucun cas être jeté dans une poubelle publique ou privée destinée
aux ordures ménagères. L'utilisateur a le droit de déposer l'appareil gratuitement dans des lieux
publics de collecte procédant à un tri sélectif des déchets pour être soit recyclé, soit réutilisé
pour d’autres applications conformément à la directive.
20
Assembly page 20/52
TKG FT 1005 - 110331
Fax +32 2 359 95 50
Copies of the I/B. Please reproduce them without any
changes except under special instruction from Team
International BELGIUM. The pages must be reproduced
and folded in order to obtain a booklet A5 (+/- 148.5 mm
width x 210 mm height). When folding, make sure you
keep the good numbering when you turn the pages of
the I/B. Don’t change the page numbering. Keep the
language integrity.
BELANGRIJKE VEILIGHEIDSVOORSCHRIFTEN
Lees de gebruiksaanwijzing aandachtig alvorens u uw toestel gebruikt, en respecteer altijd de
veiligheids- en de gebruiksvoorschriften.
Belangrijk: Personen (kinderen inbegrepen) die wegens hun fysieke, sensoriële of mentale
capaciteiten, of wegens hun gebrek aan ervaring of kennis, het toestel niet veilig kunnen
gebruiken, mogen dit toestel niet zonder toezicht of instructies van een verantwoordelijke
persoon gebruiken. Hou kinderen goed in het oog om te vermijden dat ze met het toestel
spelen.
Controleer of de netspanning overeenkomt met deze van het toestel vooraleer u het
gebruikt.
Laat uw toestel tijdens het gebruik nooit zonder toezicht.
Controleer regelmatig of het toestel niet beschadigd is en gebruik het niet indien het
enige beschadiging zou vertonen maar laat het nakijken en herstellen door een
bekwame gekwalificeerde dienst (*). Een beschadigd snoer dient te worden vervangen
door een bekwame gekwalificeerde dienst (*).
Gebruik het toestel enkel voor huishoudelijk gebruik en op de wijze zoals vermeld in de
gebruiksaanwijzing.
Gebruik het toestel niet in de nabijheid van warmtebronnen.
Verwijder de stekker uit het stopcontact vooraleer u het toestel reinigt.
Gebruik het toestel niet buiten en berg het op in een droge plaats.
Gebruik geen accessoires die niet door de fabrikant aanbevolen werden. Dit kan het
toestel beschadigen en gevaarlijk zijn voor de gebruiker.
Trek nooit aan het snoer om het toestel te verplaatsen. Zorg ervoor dat het
elektriciteitssnoer nergens kan achterhaken en daardoor de val van het toestel
veroorzaken. Draai het snoer niet rond het toestel en plooi het niet. Gebruik het
snoeropbergvak aan de achterkant van het toestel om het snoer op te bergen.
Zet het toestel op een tafel of op een voldoende stabiel oppervlak zodat het niet valt.
Gebruik dit toestel enkel om te frituren. Frituur enkel etenswaren geschikt om te frituren en
voor consumptie.
De behuizing, de kuipen, de deksels, de manden en de handvaten kunnen met een
vochtige doek gereinigd worden. Dompel het bedieningspaneel nooit onder in water of
in een andere vloeistof voor de reiniging of om welke reden ook (zie paragraaf
"Reiniging").
Wacht tot de frituurpan volledig is afgekoeld alvorens ze te verplaatsen, af te wassen of
op te bergen. Draag het toestel altijd bij de handvaten en haal steeds de stekker uit het
stopcontact vooraleer u het toestel verplaatst.
Schakel de frituurpan nooit aan voordat u er olie in gegoten heeft. Vul de frituurpan met
olie tussen het minimum- en het maximumpeil, die aangeduid zijn aan de binnenkant van
de kuip. Overschrijd het maximumpeil niet om brandwonden ten gevolge van oliespatten
te vermijden.
Het is absoluut noodzakelijk om dit toestel proper te houden vermits het in direct contact
komt met etenswaren.
Zorg ervoor dat het snoer niet in aanraking komt met de warme onderdelen van het
toestel en dat u evenmin de warme onderdelen aanraakt.
Zorg ervoor dat de warme onderdelen van het toestel in gebruik niet in aanraking komen
met gemakkelijk ontvlambare materialen, zoals gordijnen, een tafelkleed,… en dergelijke
vermits deze in brand zouden kunnen vliegen.
Bedek het toestel nooit en leg er niets op.
Voeg nooit water toe aan de olie.
Zorg ervoor dat de voedingsmiddelen zo droog mogelijk zijn.
21
Assembly page 21/52
TKG FT 1005 - 110331
Fax +32 2 359 95 50
Copies of the I/B. Please reproduce them without any
changes except under special instruction from Team
International BELGIUM. The pages must be reproduced
and folded in order to obtain a booklet A5 (+/- 148.5 mm
width x 210 mm height). When folding, make sure you
keep the good numbering when you turn the pages of
the I/B. Don’t change the page numbering. Keep the
language integrity.
Het is verboden de frituurpan met het deksel te sluiten, daar de olie zou kunnen
overstromen en brand veroorzaken. Gebruik het deksel enkel om de frituurpan bij het
opbergen af te sluiten om te vermijden dat stof in het toestel binnendringt.
OPGELET: de frituurpan kan hoge temperaturen bereiken tijdens het frituren. Olie- of
vetbereidingen kunnen in brand vliegen bij oververhitting.
Zorg er dus zeker voor dat uw frituurpan niet gedurende een lange periode
aangeschakeld blijft. Vergeet zeker niet om ze uit te zetten als uw bereiding klaar is en de
frituurpan niet meer in gebruik is. Alvorens de stekker uit het stopcontact te trekken dient u
de thermostaatknop op de laagste temperatuur te zetten (“Min”).
Verlucht de ruimte tijdens het frituren.
Opgelet: indien u de twee frituurpannen tegelijkertijd gebruikt, zal het verbruik
ongeveer 19,5 ampères bedragen. Dientengevolge raden wij u sterk aan elke frituurpan
op een verschillend stroomcircuit aan te sluiten. Vooraleer u de frituurpan aansluit, moet u
controleren of het stroomcircuit waarop u de frituurpan gaat aansluiten het aangeduide
verbruik kan verdragen. Sluit de frituurpan nooit op een meervoudig stopcontact aan.
Uw toestel mag nooit worden aangezet door middel van een externe timer of een
separaat systeem met afstandsbediening.
(*) Bekwame gekwalificeerde dienst: klantendienst van de fabrikant of de invoerder, die erkend
en bevoegd is om dergelijke herstellingen te doen zodat elk gevaar vermeden wordt. Gelieve
het toestel bij problemen naar deze dienst terug te brengen.
VOOR GEBRUIK
•
•
•
Haal het verpakkingsmateriaal van het toestel.
Pak de deksels, de frituurmanden, de handgrepen en alle accessoires uit.
Alvorens u de frituurpan voor de eerste maal gebruikt, raden wij u aan de deksels, de
behuizing, de handgrepen en de kuipen in een warm sopje met een zachte doek te
reinigen.
DE FRITUURPAN DEMONTEREN
•
•
•
Haal de bedieningspanelen uit het apparaat. Doe dit voorzichtig, door de
bedieningspanelen zachtjes naar boven te trekken totdat ze loskomen.
Neem de kuip met uw twee handen vast en trek deze voorzichtig naar boven.
Ga op dezelfde manier te werk voor de tweede kuip.
DE FRITUURPAN MONTEREN
•
•
•
•
•
•
Zet het toestel op een horizontaal en droog oppervlak.
Plaats de kuipen in het toestel en druk deze langzaam naar beneden.
Plaats de bedieningspanelen en de accessoires. Schuif de bedieningspanelen zachtjes in
de daartoe voorziene gleuven aan de achterzijde van de behuizing tot ze goed
vastzitten.
OPGELET: Het apparaat werkt alleen als de bedieningspanelen correct geplaatst zijn.
Zwenk de handgreep van de mand naar buiten tot de handgreep vastklikt zodat u de
mand uit de frituurpan kunt halen.
Duw het te lange snoer in het opbergvak aan de achterkant van het toestel.
22
Assembly page 22/52
TKG FT 1005 - 110331
Fax +32 2 359 95 50
Copies of the I/B. Please reproduce them without any
changes except under special instruction from Team
International BELGIUM. The pages must be reproduced
and folded in order to obtain a booklet A5 (+/- 148.5 mm
width x 210 mm height). When folding, make sure you
keep the good numbering when you turn the pages of
the I/B. Don’t change the page numbering. Keep the
language integrity.
EERSTE GEBRUIK
•
•
Vul de kuip met de nodige hoeveelheid olie. Zorg ervoor dat het oliepeil zich tussen het
minimum- en het maximumpeil bevindt die aan de binnenkant van de kuip aangeduid
zijn.
Het is aan te bevelen gebruik te maken van vloeibare frituurolie. Dit staat op het etiket
van de fles vermeld. Indien u toch vast frituurvet wenst te gebruiken, steek dan de stekker
in het stopcontact, plaats de thermostaat op zijn minimumstand en voeg het vet
langzaam in kleine blokjes toe. Als het vet gesmolten is, kunt u de thermostaat op de
gewenste temperatuur zetten. OPGELET: HET NIET NALEVEN VAN DIT VOORSCHRIFT KAN UW
FRITUURPAN ERNSTIG BESCHADIGEN.
OPMERKING: De kuipen werken onafhankelijk van elkaar. Indien u de twee kuipen
tegelijkertijd wilt gebruiken, moet u de twee stekkers in een stopcontact steken.
VOORVERHITTING
Wanneer het toestel is aangeschakeld, zet dan de thermostaat op de gewenste
temperatuurstand.
Om een stabiele en geschikte gebruikstemperatuur te bereiken is het nodig 10 tot 15 minuten
te wachten. Gedurende deze periode zal het temperatuurcontrolelampje meerdere keren
aan- en uitgaan.
Dankzij een goede voorverhitting krijgt u mooi bruingebakken en krokante frieten.
GEBRUIK
•
•
•
•
•
•
•
•
Steek de stekker in het stopcontact en zet de thermostaat op de gewenste temperatuur.
Het aan-/uit-controlelampje en het temperatuur-controlelampje zullen branden. Zodra
de gewenste temperatuur bereikt is, zal het temperatuur-controlelampje uitgaan.
Wanneer de temperatuur daalt, zal de thermostaat weer in werking treden en zal het
controlelampje weer branden. Wanneer de temperatuur weer bereikt is, zal het
controlelampje weer uitgaan.
Plaats het deksel niet op de friteuse tijdens het gebruik. Gebruik het deksel enkel wanneer
de friteuse afgekoeld is om te vermijden dat stof in het toestel dringt.
Wanneer de gewenste temperatuur bereikt is, kunt u de mand omhoog halen met behulp
van het handvat. Hang de mand aan de rand van het toestel.
Leg het voedsel voorzichtig in de mand en laat de mand voorzichtig in de olie zakken.
Als de etenswaren klaar zijn, haalt u de mand omhoog door het handvat op te heffen en
hangt u de mand aan de rand van het toestel om de etenswaren even te laten uitlekken.
Desnoods kunt u de mand uit de frituurpan halen.
Zorg ervoor dat de etenswaren zowel aan de binnen- als aan de buitenkant goed gaar
zijn.
Deze frituurpan is niet met een aparte aan- en uitschakelaar uitgerust. Gelieve na gebruik
de thermostaat op zijn uit-stand (“Min”) te plaatsen en de stekker uit het stopcontact te
trekken. Verplaats het toestel niet zolang de olie of het vet nog warm is.
OM EEN OPTIMAAL RESULTAAT TE BEHALEN
•
•
•
•
Droog uw etenswaren af alvorens ze in de frituurpan te zetten. Te natte etenswaren
zouden de olie kunnen doen schuimen en overborrelen.
De etenswaren dienen ongeveer dezelfde afmetingen te hebben zodat ze gelijkmatig en
grondig bakken.
Sommige etenswaren worden gepaneerd of in een deegmantel gewikkeld om ze te
bakken.
Wacht steeds tot de frituurpan de gewenste temperatuur bereikt heeft en het lampje
uitgaat alvorens de etenswaren in de mand te leggen.
23
Assembly page 23/52
TKG FT 1005 - 110331
Copies of the I/B. Please reproduce them without any
changes except under special instruction from Team
International BELGIUM. The pages must be reproduced
and folded in order to obtain a booklet A5 (+/- 148.5 mm
width x 210 mm height). When folding, make sure you
keep the good numbering when you turn the pages of
the I/B. Don’t change the page numbering. Keep the
language integrity.
Fax +32 2 359 95 50
•
Zorg dat de mand niet te vol is.
OPGELET: De frituurpan is voorzien van een beveiliging die uw toestel zal uitschakelen in geval
van oververhitting (bv. ten gevolge van een defect van de thermostaat). Als dit zich voordoet,
zet dan de thermostaat op“Min” en haal de stekker uit het stopcontact. Wacht tot het toestel
afgekoeld is (ongeveer15 minuten). Duw op het RESET-knopje dat zich aan de achterkant van
het toestel in het snoeropbergvak bevindt. Elke kuip heeft een eigen RESET-knop. De frituurpan
kan nu weer gebruikt worden. Om te vermijden dat dit opnieuw voorkomt, gelieve deze
gebruiksaanwijzing grondig door te nemen.
RECEPTEN
Verse frieten
•
•
•
•
•
•
•
•
Verse frieten worden best in twee keer gebakken.
Gebruik "oude" aardappelen (geen nieuwe). Snijd de aardappelen in gelijke reepjes.
Spoel de gesneden aardappelen onder lopend water af om het zetmeel te verwijderen.
Droog zorgvuldig af en scheid de reepjes.
Overschrijd het aanbevolen gewicht niet. Leg de frieten in de mand als de temperatuur
180°C bereikt en laat de mand langzaam in de olie zakken.
500 g frieten dienen ongeveer 6 minuten op 180°C gebakken te worden. Haal daarna de
mand uit de olie.
Wacht tot het temperatuurlampje opnieuw uitgaat, laat de mand opnieuw zakken en
frituur nog ongeveer 2 minuten.
Haal de mand omhoog en laat de frieten uitlekken.
Om een optimaal resultaat te behalen kunt u de frieten even met een absorberend
papier afdeppen om de overtollige olie te verwijderen.
De frituurtijd kan lichtjes variëren naargelang het soort aardappel en de dikte van de
frieten.
Uienringen
•
•
•
•
•
Frituurtijd: ongeveer 4 à 5 minuten op 175°C.
Pel en snijd de uien. Verdeel de stukken in ringen.
Dompel de uienringen in gekruide melk.
Bestrooi ze met bloem.
Leg de ringen naast elkaar in de frituurmand en frituur er telkens een paar.
Gepaneerde champignons
•
•
•
•
Frituurtijd: 4 à 5 minuten op 175°C.
Klop 1 ei en dompel de champignons hierin.
Rol ze door paneermeel.
Leg ze naast elkaar in de frituurmand en frituur er telkens een paar.
Tongreepjes
•
•
•
•
Frituurtijd: 3 à 4 minuten op 160°C.
Snijd de tongfilet in smalle reepjes. Bestrooi ze met bloem.
Dompel de reepjes in geklopt ei en rol ze door paneermeel.
Leg ze naast elkaar in de frituurmand en frituur er telkens een paar.
24
Assembly page 24/52
TKG FT 1005 - 110331
Fax +32 2 359 95 50
Copies of the I/B. Please reproduce them without any
changes except under special instruction from Team
International BELGIUM. The pages must be reproduced
and folded in order to obtain a booklet A5 (+/- 148.5 mm
width x 210 mm height). When folding, make sure you
keep the good numbering when you turn the pages of
the I/B. Don’t change the page numbering. Keep the
language integrity.
TEMPERATUURGIDS VOOR DE BESTE RESULTATEN
VOEDSEL
TEMPERATUUR
MINUTEN (ongeveer)
170°C
170°C
175°C
170°C
180°C
180°C
185°C
185°C
180°C
170°C
180°C
6-7
4-6
4-5
12-15
4
3-4
3-4
3-4
3-4
8
3
Gepaneerde filet of vis
Garnalen
Kippenborst
Gepaneerde stukken kip
Uienringen
Gepaneerde champignons
Broccolibeignets
Courgettebeignets
Selderij
Frieten voorbakken
Frieten afbakken
REINIGING
•
•
•
•
•
•
•
•
Opgelet: Dompel het toestel nooit onder in water of enige andere vloeistof.
Haal de stekker uit het stopcontact. Zorg ervoor dat u de twee stekkers uit het
stopcontact hebt gehaald.
Wacht tot het toestel volledig is afgekoeld vooraleer u het reinigt. Wees voorzichtig bij het
aanraken van het verwarmingselement daar het nog enige tijd warm kan zijn nadat u het
toestel hebt uitgeschakeld. DOMPEL DE BEDIENINGSPANELEN NIET ONDER IN WATER OF
EEN ANDERE VLOEISTOF.
Zie paragraaf "De frituurpan demonteren".
Gebruik geen agressieve afwasmiddelen of schuursponsjes vermits dit de frituurpan kan
beschadigen.
Droog alle delen van het toestel goed af.
Vervang de olie regelmatig.
Om de frituurpan weer in elkaar te steken, zie paragraaf "De frituurpan monteren".
BEWARING
•
•
Wacht tot de frituurpan volledig afgekoeld is alvorens ze op te bergen.
Tijdens de opberging mag de olie in het toestel blijven. Let erop dat de deksels goed
gesloten zijn, zodat er geen stof in het toestel kan komen.
MILIEUBESCHERMING – RICHTLIJN 2002/96/EG
Om ons milieu en onze gezondheid te beschermen, moet afgedankte elektrische en
elektronische apparatuur in overeenstemming met welbepaalde regels weggegooid worden.
Dit vergt zowel de inzet van de leveranciers als van de gebruikers. Om deze reden mag uw
apparaat, zoals op het typeplaatje of op de verpakking aangegeven door het symbool
,
niet met het gewone huisvuil weggegooid worden. De gebruiker heeft het recht het toestel
gratis naar een gemeentelijk centrum van gescheiden inzameling te brengen waar het
overeenkomstig de richtlijn hergebruikt, gerecycleerd of voor andere doeleinden gebruikt zal
worden.
25
Assembly page 25/52
TKG FT 1005 - 110331
Fax +32 2 359 95 50
Copies of the I/B. Please reproduce them without any
changes except under special instruction from Team
International BELGIUM. The pages must be reproduced
and folded in order to obtain a booklet A5 (+/- 148.5 mm
width x 210 mm height). When folding, make sure you
keep the good numbering when you turn the pages of
the I/B. Don’t change the page numbering. Keep the
language integrity.
CONSEJOS DE SEGURIDAD
Lea detenidamente el modo de empleo antes de utilizar el aparato, y siempre siga las
medidas de seguridad y el modo de funcionamiento.
Importante: Las personas (incluidos niños) con incapacidades físicas, sensoriales o mentales, o
sin experiencia o conocimiento nunca deben utilizar el aparato, salvo si están bajo la
vigilancia de una persona responsable de su seguridad o si recibieron previamente
instrucciones con respecto al uso seguro del aparato.
Es necesario vigilar a los niños para que no jueguen con el aparato.
Antes de utilizar el aparato, compruebe que el voltaje de la red eléctrica coincide con el
aparato.
No deje nunca su aparato sin vigilancia cuando esté en marcha.
Compruebe de vez en cuando que el aparato no esté dañado y no utilice su aparato si el
cable o el aparato están dañados por el motivo que sea. Cualquier reparación debe ser
realizada por un servicio cualificado competente(*). Si el cable está dañado, debe ser
reemplazado por un servicio cualificado competente(*).
Utilice el aparato sólo para usos domésticos y de la manera indicada en el modo de
empleo.
No utilice el aparato cerca de fuentes de calor.
La clavija eléctrica debe ser desenchufada antes de limpiar el aparato.
Procure no utilizar el aparato en el exterior y colóquelo en un sitio seco.
No utilice accesorios no recomendados por el fabricante, ello puede conllevar un riesgo
para el usuario y dañar el aparato.
No mueva nunca el aparato estirando del cable. Coloque el aparato sobre una mesa o
un soporte lo suficiente estable y procure que el cable no se enganche en alguna parte,
a fin de evitar posibles caídas del mismo. Evite enrollar el cable alrededor del aparato y
no lo tuerza. Utilice el recogecables en la trasera del aparato.
Coloque el aparato sobre una mesa o un soporte estable para evitar su caída.
Utilice este aparato sólo para freír alimentos. Cocine sólo alimentos apropiados a la
cocción y al consumo culinario.
La pared externa, las cubetas interiores, las tapas, las cestas y los mangos se pueden
lavar a mano. No sumerja nunca el aparato, ni los paneles de mandos en el agua o en
cualquier otro líquido ni para su limpieza ni por cualquier otra razón (véase párrafo
"Limpieza").
Deje enfriar el aparato antes de desplazarlo, limpiarlo o recogerlo. Utilice siempre el asa
para agarrar el aparato. Desenchufe siempre la clavija eléctrica antes de manipular el
aparato.
El aparato no debe nunca funcionar sin aceite. Cuando rellene las cubetas, respete los
niveles mínimo y máximo indicados en ellas. No supere nunca el nivel máximo, pues
podría provocar una ebullición del aceite y quemarle.
Es indispensable guardar el aparato limpio, ya que está en contacto directo con los
alimentos.
Procure que el cable no entre en contacto con las superficies calientes del aparato.
Procure no tocar las superficies calientes.
Procure que el aparato no entre en contacto con materiales fácilmente inflamables
como cortinas, tejidos, etc. cuando esté en funcionamiento, ya que podría provocar un
incendio.
No cubra nunca este aparato.
No añada nunca agua en el aceite.
Compruebe que los alimentos están lo más seco posible.
No coloque la tapa en la freidora durante el uso, pues podría provocar un incendio o
desbordamientos del aceite. Para este aparato, la tapa sirve sólo cuando lo guarde y lo
trasporte (una vez la freidora enfriada).
26
Assembly page 26/52
TKG FT 1005 - 110331
Fax +32 2 359 95 50
Copies of the I/B. Please reproduce them without any
changes except under special instruction from Team
International BELGIUM. The pages must be reproduced
and folded in order to obtain a booklet A5 (+/- 148.5 mm
width x 210 mm height). When folding, make sure you
keep the good numbering when you turn the pages of
the I/B. Don’t change the page numbering. Keep the
language integrity.
ATENCIÓN: La freidora puede volverse muy caliente durante el funcionamiento. Los
preparados con aceite o grasa pueden inflamarse si alcanzan mucha temperatura.
Entonces tenga mucho cuidado y procure no dejar el aparato encendido por largos
periodos. Antes de desconectar el aparato, coloque el termóstato en la posición mínima.
Ventile la estancia durante el funcionamiento.
¡Cuidado! Cuando se utilicen las dos freidoras al mismo tiempo, el consumo será de
unos 19,5 amperios. Por eso, aconsejamos a que enchufe cada freidora en un circuito
diferente. Antes de enchufar la freidora, asegúrese de que el circuito puede soportar el
consumo indicado. No enchufe ninguna freidora en una toma múltiple.
Su aparato nunca debe ser puesto en marcha mediante un minutero externo o un
sistema de mando a distancia separado.
(*) Servicio
técnico cualificado: servicio técnico del fabricante o del importador o una persona
cualificada, reconocida y habilitada a fin de evitar cualquier peligro. En cualquier caso
devuelva el aparato al servicio técnico.
INSTRUCCIONES ANTES DE LA PRIMERA UTILIZACIÓN
•
•
•
Quite el embalaje del aparato.
Quite las tapas, las cestas, los mangos y todos los accesorios del aparato.
Antes de su primer uso, se recomienda limpiar cuidadosamente las tapaderas, las
cubetas, las cestas, los mangos y el cuerpo del aparato con un paño humedecido y
agua tibia jabonosa.
DESMONTAJE DE LA FREIDORA
•
•
•
Quite la resistencia y el panel de mandos del aparato deslizándolo hacia arriba.
Coja la cubeta por ambos lados y levántela despacio.
Proceda de la misma manera para la segunda cubeta.
MONTAJE DE LA FREIDORA
•
•
•
•
•
Coloque el cuerpo del aparato en una superficie horizontal y seca.
Coloque las cubetas interna sen el cuerpo del aparato y bájelas lentamente.
Vuelva a colocar el panel de mandos y los accesorios en cada una de las cubetas. Para
volver a colocar el panel de mandos, deslícelo en las ranuras en la parte trasera del
revestimiento externo hasta que esté bien fijado.
NOTA: El aparato funcionará sólo si el panel de mandos de la cubeta que quiere utilizar
está colocado correctamente.
Acople el mango con la cesta volcándolo hacia atrás hasta su bloqueo. El mango le
permitirá levantar la cesta durante el uso.
Coloque la parte demasiado larga del cable en el alojamiento atrás del aparato.
PRIMERA UTILIZACIÓN
•
•
Llene la cubeta de aceite entre el nivel mínimo y máximo indicado en el interior de la
cubeta.
Utilice preferentemente aceite especial para freír, compruebe la etiqueta de la botella. Si
prefiere utilizar grasa, incorpórela a la cubeta en pequeñas porciones. Enchufe el
aparato, ponga el termostato en la posición mínima y añada la grasa poco a poco.
Cuando la grasa esté fundida, accione el termostato hasta la temperatura deseada.
CUIDADO: SI NO RESPETA ESTA INSTRUCCIÓN, PUEDE DAÑAR SERIAMENTE SU FREIDORA.
NOTA: Cada cubeta funciona independientemente. Para utilizar las dos cubetas
simultáneamente, tiene que enchufar los dos cables de alimentación.
27
Assembly page 27/52
TKG FT 1005 - 110331
Fax +32 2 359 95 50
Copies of the I/B. Please reproduce them without any
changes except under special instruction from Team
International BELGIUM. The pages must be reproduced
and folded in order to obtain a booklet A5 (+/- 148.5 mm
width x 210 mm height). When folding, make sure you
keep the good numbering when you turn the pages of
the I/B. Don’t change the page numbering. Keep the
language integrity.
PRECALENTAMIENTO
Una vez encendido el aparato, ponga el termóstato en la temperature deseada. Para
alcanzar una temperatura de uso correcta y estable, hay que esperar de 10 a 15 minutos.
Durante ese tiempo, el testigo luminoso de control de la temperatura se encendirá y se
apagará varias veces.
Un buen precalentamiento le permitirá obtener fritas doradas y crujientes.
USO
•
•
•
•
•
•
•
•
Enchufe el aparato y ponga el termostato en la posición deseada. El testigo luminoso de
funcionamiento y el de temperatura se encienden. Una vez alcanzada la temperatura
deseada, el testigo luminoso de temperatura se apaga. Cuando la temperatura baje, el
termostato vuelve a ponerse en marcha y el testigo luminoso se enciende, vuelve a
apagarse una vez alcanzada la temperatura deseada.
No coloque la tapadera en la freidora durante el uso. Póngala sólo cuando la freidora
haya enfriado, para evitar que el polvo penetre.
Cuando la freidora alcance la temperatura deseada, saque la cesta del aceite
levantando el mango y engánchela en el borde de la freidora.
Meta los alimentos en la cesta y sumerja la cesta en el aceite.
En cuanto los alimentos estén cocidos, saque la cesta del aceite y engánchela en el
borde de la freidora para que los alimentos escurren.
Si es necesario, puede sacar la cesta del aparato.
Asegúrese de que los alimentos queden bien cocinados tanto por dentro como por
fuera.
Su aparato no lleva interruptor encendido / apagado. Por eso, ponga el termostato en la
posición “Min” y desenchufe el aparato. No manipule el aparato antes de que el aceite
o la grasa haya totalmente enfriado.
PARA OBTENER LOS MEJORES RESULTADOS
•
•
•
•
•
Seque los alimentos antes de freírlos. Los alimentos muy húmedos pueden provocar una
ebullición del aceite y hacerlo desbordar de la cubeta.
Procure que todos los alimentos tengan aproximadamente el mismo tamaño para
permitir una fritura uniforme.
Ciertos alimentos tienen que ser empanados o rebozados.
Espere siempre que la freidora alcance la temperatura deseada y el testigo luminoso de
temperatura se apague antes de añadir los alimentos.
No llene en exceso la cesta.
CUIDADO: Su freidora cuenta con un sistema de seguridad que para automáticamente la
freidora si el aparato empieza a sobrecalentarse (en caso de avería en el termostato por
ejemplo). Si ocurriera, ponga primero el termostato en “Min” y desenchufe el aparato.
Espere que la freidora se enfríe (unos 15 minutos). Pulse el botón RESET que se encuentra
dentro del recogecables en la trasera del aparato. Cada cubeta tiene un botón RESET.
Puede volver a utilizar su freidora. Para que no vuelva a ocurrir, lea detenidamente las
instrucciones de uso.
28
Assembly page 28/52
TKG FT 1005 - 110331
Fax +32 2 359 95 50
Copies of the I/B. Please reproduce them without any
changes except under special instruction from Team
International BELGIUM. The pages must be reproduced
and folded in order to obtain a booklet A5 (+/- 148.5 mm
width x 210 mm height). When folding, make sure you
keep the good numbering when you turn the pages of
the I/B. Don’t change the page numbering. Keep the
language integrity.
RECETAS
Patatas fritas (no congeladas)
•
•
•
•
•
•
•
•
Se recomienda cocer las patatas en dos veces.
Utilice unas patatas viejas (no de nueva cosecha). Córtelas en trozos iguales. Pase los
trozos por agua para quitarles el almidón. Séquelas cuidadosamente.
No supere el peso recomendado. Cuando la temperatura haya alcanzado los 180°C,
coloque las patatas en la cesta y baje la cesta en el aceite.
El tiempo de cocción necesario para 500 g de patatas fritas es de 6 minutos a 180°C.
Luego, saque la cesta del aceite.
Espere que el testigo luminoso se apague y vuelva a bajar la cesta; deje cocer todavía
durante unos dos minutos.
Suba la cesta y deje escurrir las patatas.
Para obtener el mejor resultado, seque las patatas fritas con papel de cocina para
absorber el exceso de grasa.
El tiempo de fritura puede variar ligeramente según la calidad de las patatas y su
espesor.
Aros de cebolla
•
•
•
•
•
Tiempo de fritura: 4 - 5 minutos a 175°C.
Pele las cebollas y córtelas en rodajas. Sumerja las rodajas en leche sazonada.
Sumerja las rodajas en leche sazonada.
Espolvoree luego con harina.
Ponga las rodajas una al lado de otra en la cesta y fría pocas a la vez.
Champiñones empanados
•
•
•
•
Tiempo de fritura: 4 - 5 minutos a 175°C.
Pase los champiñones en un huevo batido.
Páselos en pan rallado.
Póngalos en la cesta unos al lado de otros y fríalos, pocos a la vez.
Bastoncitos de lenguado
•
•
•
•
Tiempo de fritura: 3 - 4 minutos a 160°C.
Corte el filete de lenguado en bastoncitos. Espolvoréelos de harina. Espolvoree luego con
harina.
Páselos en un huevo batido y, luego, en pan rallado.
Coloque los bastoncitos unos al lado de otros en la cesta y fría pocos a la vez.
ALGUNOS CONSEJOS DE UTILIZACIÓN:
ALIMENTOS
Filetes de pescados
Gambas
Pollo
Pollo empanado
Cebollas
Champiñones
Brécoles
Calabacines
Apio
Patatas fritas (1ª cocción)
Patatas fritas (2ª cocción)
TEMPERATURA
170°C
170°C
175°C
170°C
180°C
180°C
185°C
185°C
180°C
170°C
180°C
29
Assembly page 29/52
MINUTOS (aproximados)
6-7
4-6
4-5
12-15
4
3-4
3-4
3-4
3-4
8
3
TKG FT 1005 - 110331
Fax +32 2 359 95 50
Copies of the I/B. Please reproduce them without any
changes except under special instruction from Team
International BELGIUM. The pages must be reproduced
and folded in order to obtain a booklet A5 (+/- 148.5 mm
width x 210 mm height). When folding, make sure you
keep the good numbering when you turn the pages of
the I/B. Don’t change the page numbering. Keep the
language integrity.
LIMPIEZA
•
•
•
•
•
•
•
•
Advertencia: No sumerja nunca el aparato montado en el agua o en cualquier otro
líquido.
Retire la clavija de la toma de corriente. Asegúrese de que las dos clavijas están
desenchufadas.
Deje enfriar el aparato antes de limpiarlo. CUIDADO: la resistencia puede estar todavía
caliente mucho tiempo después de desenchufar el aparato. NO SUMERJA NUNCA LOS
PANELES DE MANDOS EN EL AGUA O EN CUALQUIER OTRO LÍQUIDO.
Véase párrafo "Desmontaje de la freidora".
No utilice esponjas o productos abrasivos que podrían dañar la freidora.
Seque cuidadosamente todas las partes del aparato.
Cambie el aceite con regularidad.
Para montar su freidora, véase el párrafo “Montaje de la freidora”.
RECOGER EL APARATO
•
•
Espere que su freidora esté del todo enfriada antes de recogerla.
El aceite puede guardarse en el mismo aparato. Cierre las dos tapaderas para que no
pueda entrar polvo en el aceite.
PROTECCIÓN DEL MEDIO AMBIENTE – DIRECTIVA 2002/96/CE
Para poder preservar nuestro medio ambiente y proteger la salud humana, los residuos
eléctricos y equipos electrónicos deberían ser destruidos de acuerdo con unas normas
especificas con la implicación de ambos proveedores y consumidores. Por esta razón, como
en la placa de datos técnicos, su aparato no debería ser tirado en un
indica el símbolo
contenedor municipal sino que debería ser devuelto a la tienda, o dejado en un punto de
recolección para ser reciclado o usado para otras aplicaciones conforme a la directiva.
30
Assembly page 30/52
TKG FT 1005 - 110331
Fax +32 2 359 95 50
Copies of the I/B. Please reproduce them without any
changes except under special instruction from Team
International BELGIUM. The pages must be reproduced
and folded in order to obtain a booklet A5 (+/- 148.5 mm
width x 210 mm height). When folding, make sure you
keep the good numbering when you turn the pages of
the I/B. Don’t change the page numbering. Keep the
language integrity.
PARA A SUA SEGURANÇA
Antes de utilizar o aparelho leia com sentido de responsabilidade as instruções de
funcionamento e respeite sempre as orientações de segurança e de utilização dadas no
manual das instruções.
Importante: As pessoas (incluídas as crianças) com incapacidades físicas, sensoriais ou
mentais, ou sem experiência ou conhecimento não devem utilizar o aparelho excepto se
estiverem a ser vigiadas por uma pessoa responsável pela sua segurança ou se receberam
previamente instruções relativas ao uso seguro do aparelho.
Convém vigiar as crianças para que elas não brinquem com o aparelho.
Antes de ligar a ficha do cabo da alimentação à tomada eléctrica certifique-se que esta
é igual à indicada na placa sinalética do aparelho.
Mantenha o aparelho sob vigilância quando em funcionamento.
Verifique com regularidade o estado do aparelho e em caso de danos leve-o a um
serviço técnico competente para o analisar e reparar(*). Se o cabo da alimentação
estiver danificado este tem de ser obrigatoriamente substituído pelo que deve levar o
aparelho a um serviço técnico competente(*).
O aparelho destina-se ao uso doméstico e tem de respeitar as instruções de utilização.
Não ponha o aparelho próximo de fontes de calor.
O aparelho ao ser limpo tem de ter a ficha do cabo da alimentação retirada da tomada
eléctrica.
O aparelho não deve ser utilizado fora de casa e deve ser guardado em locais secos.
Use sempre os acessórios recomendados pelo fabricante.
Não retire o cabo da alimentação da tomada puxando pelo mesmo pois danifica o
aparelho e pode provocar a queda do aparelho. Verifique se o cabo da alimentação
não se encontra preso em alguma coisa. Nunca enrole o cabo à volta do aparelho e
não o torça. Utilize a recolha do cabo na parte traseira do aparelho.
O aparelho tem de trabalhar em cima de uma mesa ou numa superfície plana que evite
a sua queda.
Respeite as funções do aparelho. Utilize-o apenas para cozer alimentos indicados para a
fritadeira.
Pode lavar à mão o exterior da fritadeira, as tampas, os cestos de fritar e as pegas.
Nunca mergulhe os painéis de comandos na água ou em outros líquidos para a limpeza
ou por qualquer outra razão (veja parágrafo “Limpeza”).
Na limpeza e para guardar o aparelho, tem de desligar o aparelho, deixá-lo arrefecer
totalmente e ter a ficha do cabo da alimentação retirada da tomada eléctrica.
Nunca ponha a funcionar o aparelho sem óleo. Os níveis mínimo e máximo são para
serem respeitados. Nunca ultrapasse o nível máximo, poderia queimar-se com salpicos
de óleo ou de grassa.
Tem de manter o aparelho limpo já que está em contacto directo com os alimentos.
Não deixe que o cabo de alimentação toque nas superfícies quentes do aparelho.
Nunca toque as superfícies quentes do aparelho. Evite queimaduras.
Verifique antes de ligar a ficha do cabo da alimentação à tomada eléctrica que
nenhuma parte do aparelho se encontra em contacto com coisas que tenham a
possibilidade de se inflamarem e originarem focos de incêndio - por exemplo os
cortinados e panos. Nunca permita os contactos com as fontes de calor do aparelho.
Nunca cubra o aparelho seja por que motivo for.
Nunca junte água ao óleo.
Certifique-se que os alimentos a fritar se encontram enxutos.
É expressamente proibido colocar a tampa na fritadeira quando esta está a ser utilizada
já que pode provocar incêndio ou derrame de óleo. A tampa apenas serve para manter
as gorduras limpas das impurezas como sejam o pó e para a deslocação (sempre com a
31
Assembly page 31/52
TKG FT 1005 - 110331
Fax +32 2 359 95 50
Copies of the I/B. Please reproduce them without any
changes except under special instruction from Team
International BELGIUM. The pages must be reproduced
and folded in order to obtain a booklet A5 (+/- 148.5 mm
width x 210 mm height). When folding, make sure you
keep the good numbering when you turn the pages of
the I/B. Don’t change the page numbering. Keep the
language integrity.
fritadeira desligada, fria e com a ficha do cabo da alimentação retirada da tomada
eléctrica).
CUIDADO: como a fritadeira pode alcançar temperaturas bastante elevadas tenha
cuidado com as substâncias inflamáveis que utilizar. Seja prudente e não faça uso muito
prolongado do aparelho. Assim que der por terminada as operações, ponha a
regulação do termóstato na temperatura mínima e retire a ficha do cabo da
alimentação da tomada eléctrica.
O aparelho tem de funcionar em locais ventilados.
Atenção: Se utilizar as duas fritadeiras simultaneamente, o consumo será de cerca
19,5 amperes. Por isso, aconselhamos ligar cada uma das fritadeiras num circuito
diferente. Antes de ligar a fritadeira, certifique-se que o circuito no qual vai ligá-la pode
suportar o consumo indicado. Não ligue nenhuma das fritadeiras a uma tomada múltipla.
O aparelho nunca deve ser ligado mediante um temporizador externo ou outro sistema
de comando a distância separado.
(*) Serviço técnico habilitado: serviço técnico do fabricante ou do importador ou a pessoas
qualificadas, reconhecidas e habilitadas para efectuar reparações e evitarem qualquer
perigo na reutilização do aparelho. Em qualquer situação anormal leve sempre o aparelho ao
serviço técnico.
ANTES DA PRIMEIRA UTILIZAÇÄO
•
•
•
Retire todos os materiais da embalagem do aparelho.
Retire as tampas, os cestos, as pegas e todos os acessórios do aparelho.
Antes da primeira utilização lave muito bem as tampas, as cubas, os cestos, as pegas e o
exterior do aparelho com água quente em sabonária e com a ajuda de um esfregão
não abrasivo.
DESMONTAGEM
•
•
•
Para retirar o painel de comandos e a resistência do aparelho, faça-o deslizar para cima
de forma suave.
Pegue por ambos os lados na cuba e levante-a suavemente.
Proceda da mesma forma para o segundo cesto.
MONTAGEM
•
•
•
•
•
Ponha a cuba exterior numa superfície horizontal e seca.
Coloque cada uma das cubas interiores na cuba exterior e desça-a suavemente.
Coloque o painel de comandos e os acessórios em cada uma das cubas. Aquele
deslizará pelas ranhuras da cuba exterior.
NOTA: Caso o painel de comandos da cuba que quiser utilizar não esteja bem
posicionado o aparelho não funciona.
Fixe a pega do cesto, movimentando-o de diante para trás até ficar bloqueado, para
que possa levantar o cesto.
Ponha o restante do cabo na recolha que se encontra na parte traseira do aparelho.
PRIMEIRA UTILIZAÇÃO
•
•
Encha a cuba com óleo, de modo a que fique acima do nível mínimo e abaixo do nível
máximo, níveis que se encontram marcados na cuba.
Utilize sempre óleos aconselhados para fritar. Verifique a etiqueta da garrafa. Caso
prefira gordura sólida, corte-a em pequenos pedaços e derrete-a. Com a ficha do cabo
da alimentação do aparelho ligada à tomada eléctrica, rode o botão da temperatura
na posição mínima, vá deitando a gordura na cuba até esta se derreter. Quando isso
32
Assembly page 32/52
TKG FT 1005 - 110331
Fax +32 2 359 95 50
Copies of the I/B. Please reproduce them without any
changes except under special instruction from Team
International BELGIUM. The pages must be reproduced
and folded in order to obtain a booklet A5 (+/- 148.5 mm
width x 210 mm height). When folding, make sure you
keep the good numbering when you turn the pages of
the I/B. Don’t change the page numbering. Keep the
language integrity.
acontecer, escolha a temperatura desejada. ATENÇÃO: O NÃO CUMPRIMENTO DESTE
CONSELHO PODE DANIFICAR MUITO O APARELHO.
NOTA: Cada uma das cubas funciona independentemente. Se quiser utilizar as duas cubas
simultaneamente, terá que ligar as duas fichas do cabo da alimentação a uma tomada
eléctrica.
AQUECIMENTO PRÉVIO
Com o interruptor do aparelho na posião ON-ligado, desloque o termostato para a
temperatura desejada.
Para obter a temperatura estável e correcta de utilização do aparelho, espere 10 a 15
minutos. Durante este tempo o sinalizador do controlo da temperatura acender-se-à e
apagar-se-à várias vezes.
Um pré aquecimento perfeito permitirá obter batatas frita estaladiças e douradas.
USO
•
•
•
•
•
•
•
•
Ligue a ficha do cabo da alimentação à tomada eléctrica. Regule o botão da
temperatura para a temperatura desejada. O sinalizador do funcionamento e da
temperatura acende-se. Assim que a temperatura escolhida seja atingida o sinalizador
da temperatura apaga-se. Este volta a acender quando o termóstato voltar a ligar e
apaga-se quando a temperatura voltar a ser alcançada.
Não use a tampa durante a cozedura. Deixe o aparelho arrefecer antes de pôr a tampa,
a fim de evitar o pó.
Quando a temperatura for alcançada, retire o cesto do óleo com a pega e enganche-a
ao bordo da fritadeira.
Coloque os alimentos no cesto e desça o cesto para dentro do óleo.
Assim que os alimentos estejam fritos, tire o cesto do óleo com a pega e enganche-a ao
bordo da fritadeira para deixar escorrer o óleo dos alimentos.
Caso necessite pode retirar o cesto do aparelho.
Certifique-se que os alimentos estão bem fritos (no interior e exterior).
O aparelho não tem um interruptor separado par ligar e desligar. Sempre que terminar a
preparação dos alimentos tem de rodar o termóstato para a posição “Min”, retirar a
ficha do cabo de alimentação da tomada eléctrica e deixar a tampa aberta para que
o arrefecimento se faça mais rápido.
CUIDADOS ADICIONAIS E RENTABILIDADE NA FRITURA
•
•
•
•
•
Seque bem os alimentos antes de os colocar a fritar. Os alimentos muito húmidos podem
provocar salpicos de óleo quente ou originar o derrame do óleo.
Para que tenha uma fritura homogénea prepare os alimentos com a mesma dimensão,
espessura e do mesmo tipo.
Alguns alimentos podem ser enfarinhados ou panados.
Antes de colocar os alimentos a fritar, espere que a temperatura seja alcançada e que o
sinalizador se apague.
Nunca encha o cesto em demasia.
ATENÇÃO: O aparelho está munido de um sistema de segurança que o desliga em caso de
sobre aquecimento acidental (Exemplos: uma avaria no termostato, fritadeira sem óleo ou
óleo abaixo do nível mínimo).
Se tal acontecer, ponha o termóstato na posição “Min” e retire a ficha do cabo da
alimentação da tomada eléctrica.
Espere que a fritadeira arrefeça totalmente (15 minutos). Pressione o botão RESET que
encontra-se dentro da recolha do cabo na parte traseira do aparelho. Cada cuba está
dotada de um botão RESET.
33
Assembly page 33/52
TKG FT 1005 - 110331
Fax +32 2 359 95 50
Copies of the I/B. Please reproduce them without any
changes except under special instruction from Team
International BELGIUM. The pages must be reproduced
and folded in order to obtain a booklet A5 (+/- 148.5 mm
width x 210 mm height). When folding, make sure you
keep the good numbering when you turn the pages of
the I/B. Don’t change the page numbering. Keep the
language integrity.
A fritadeira fica pronta a ser utilizada. Para que isso não volte a acontecer leia atentamente
as instruções de utilização do aparelho.
RECEITAS
Batatas fritas
•
•
•
•
•
•
•
•
Coze as batatas fritas por duas vezes.
Use batatas velhas, corte-as em tiras iguais e ponha-as em água para libertarem o
amido, enxugue-as muito bem.
Nunca ultrapasse o peso recomendado. Coloque as tiras de batatas no cesto quando a
temperatura atingir os 180ºC e desça o cesto lentamente no óleo.
O tempo de fritura para 500g de tiras de batatas é de 6 minutos com a temperatura nos
180ºC. Levante o cesto do óleo.
Espere que o sinalizador da temperatura se acenda de novo. Baixe de novo o cesto no
óleo mais dois minutos.
Levante o cesto e deixe escorrer as batatas fritas.
Aconselhamos para as enxugar bem da gordura que as coloque em papel absorvente.
O tempo da fritura varia com a qualidade das batatas e com a espessura das tiras.
Rodelas de cebola
•
•
•
•
•
Tempo da fritura é de 4 a 5 minutos à temperatura de 175ºC.
Descasque e corte a cebola às rodelas.
Mergulhe as rodelas em leite com especiarias.
Salpique-as com farinha.
Coloque as rodelas no cesto, umas ao lado das outras, e frite-as. Repita o procedimento
até acabar com as rodelas.
Cogumelos panados
•
•
•
•
Tempo de fritura é de 4 a 5 minutos à temperatura de 175ºC.
Mergulhe os cogumelos em ovo batido.
Cubra-os com pão ralado.
Coloque os cogumelos no cesto, uns ao lado dos outros, e frite-os. Repita o
procedimento até estarem todos fritos.
Panados de solha
•
•
•
•
Tempo de fritura é de 3 a 4 minutos à temperatura de 160ºC.
Corte a solha em pedaços. Salpique-os com farinha.
Mergulhe-os num ovo batido e cubra-os com pão ralado.
Coloque os pedaços no cesto, uns ao lado dos outros, e frite-os. Repita o procedimento
até acabar com os pedaços.
34
Assembly page 34/52
TKG FT 1005 - 110331
Fax +32 2 359 95 50
Copies of the I/B. Please reproduce them without any
changes except under special instruction from Team
International BELGIUM. The pages must be reproduced
and folded in order to obtain a booklet A5 (+/- 148.5 mm
width x 210 mm height). When folding, make sure you
keep the good numbering when you turn the pages of
the I/B. Don’t change the page numbering. Keep the
language integrity.
ALGUNS CONSELHOS NA FRITURA
ALIMENTOS
Filetes de peixe
Camarão
Peito de frango
Panado de frango
Cebola
Cogumelo
Brócolos
Curgete
Aipos panados
Batatas fritas 1ªfritura
Batatas fritas 2ª fritura
TEMPERATURA
170°C
170°C
175°C
170°C
180°C
180°C
185°C
185°C
180°C
170°C
180°C
MINUTOS (APROXIMADOS)
6-7
4-6
4-5
12-15
4
3-4
3-4
3-4
3-4
8
3
LIMPEZA
•
•
•
•
•
•
•
•
Tenha em atenção que nunca pode mergulhar o aparelho na água ou em outros líquidos.
Retire a ficha do cabo da alimentação da tomada. Verifique que as duas fichas estão
retiradas.
Deixe arrefecer totalmente o aparelho antes de proceder à limpeza. NOTA : Mesmo com
o aparelho desligado a resistência fica quente e demora a arrefecer. NÃO MERGULHE OS
PAINEIS DE COMANDOS NA AGUA OU EM QUALQUER OUTRO LIQUIDO.
Releia o parágrafo da «DESMONTAGEM».
Nunca utilize abrasivos pois estes danificam o aparelho.
Após a limpeza seque muito bem a fritadeira.
Substitua com regularidade o óleo.
Para colocar as peças da fritadeira leia o parágrafo «MONTAGEM».
GUARDAR O APARELHO
•
•
Só o pode fazer com o aparelho totalmente frio.
O óleo pode ficar na fritadeira. Feche muito bem as tampas para evitar a entrada de
poeiras.
PROTECÇÃO DO MEIO AMBIENTE – DIRECTIVA 2002/96/CE
Para a preservação do ambiente e da nossa saúde, a eliminação no fim da vida útil dos
aparelhos eléctricos e electrónicos, deve-se efectuar no cumprimento das legislações em
vigor e pela participação de todos quer sejam produtores ou utilizadores. É por esta razão que
o vosso aparelho tem na placa sinalética o símbolo
, informando que em caso algum o
aparelho deve ser colocado no caixote do lixo camarário ou privado para que não vá para
as lixeiras comuns mas sim devolvido ao revendedor ou depositado nos locais apropriados e
identificados para a recolha destes aparelhos para que uma vez recolhidos sejam reciclados,
reutilizados ou lhe sejam dados outras aplicações.
35
Assembly page 35/52
TKG FT 1005 - 110331
Fax +32 2 359 95 50
Copies of the I/B. Please reproduce them without any
changes except under special instruction from Team
International BELGIUM. The pages must be reproduced
and folded in order to obtain a booklet A5 (+/- 148.5 mm
width x 210 mm height). When folding, make sure you
keep the good numbering when you turn the pages of
the I/B. Don’t change the page numbering. Keep the
language integrity.
AVVERTENZE
Vi invitiamo a leggere attentamente le istruzioni prima di utilizzare l’apparecchio, e vi
preghiamo di seguire sempre attentamente le istruzioni di sicurezza e di utilizzo.
Importante: Le persone (inclusi i bambini) che non sono capaci di utilizzare l’apparecchio, sia
per incapacità fisiche, sensoriali o mentali, sia per mancanza di esperienza o di conoscenze,
non devono per niente utilizzare l’apparecchio tranne se sono sorvegliati da una persona
responsabile per la loro sicurezza o se hanno previamente ricevuto istruzioni relative all’uso
sicuro dell’apparecchio.
Sorvegliare i bambini perché non utilizzino l’apparecchio come un giocattolo.
Prima di mettere in funzione l’apparecchio, controllare che la tensione sia conforme a
quella dell’apparecchio.
Non lasciare l’apparecchio incustodito durante il funzionamento.
Verificare regolarmente che l'apparecchio non sia danneggiato. Non accendere
l’apparecchio qualora il cavo o l’apparecchio stesso dovessero presentare un qualsiasi
danneggiamento. Tutte le riparazioni devono essere eseguite da un servizio qualificato(*).
Un cavo danneggiato deve essere sostituito da un servizio qualificato(*).
Quest'apparecchio dovrà essere destinato solo all’uso domestico e nella maniera
indicata in queste istruzioni.
Non usare l’apparecchio in prossimità di sorgenti di calore.
Togliere la spina dalla presa di corrente prima di pulire l’apparecchio.
Non usare l’apparecchio all’aperto e riporlo sempre in un luogo asciutto.
Non utilizzare accessori se non quelli consigliati dal fabbricante: può essere pericoloso per
l’utente e potrebbe danneggiare l’apparecchio.
Non tirare il cavo per spostare l’apparecchio. Assicurarsi che il cavo elettrico non possa
impigliarsi per evitare che l’apparecchio cada. Non avvolgere il cavo intorno
all’apparecchio e non storcerlo. Utilizzare l’alloggiamento per il cavo nella parte
posteriore dell’apparecchio.
Mettere l’apparecchio su di un tavolo o un supporto abbastanza stabile per evitare
eventuali cadute.
Usare quest’apparecchio solo per friggere. Friggere soltanto alimenti adeguati per la
frittura e per il consumo.
La parete esterna, le vasche interne, i coperchi, i cestelli e le impugnature possono essere
lavati a mano. Non immergere mai né l’apparecchio né i pannelli di controllo in acqua o
in qualsiasi altro liquido al fine di ripulirlo o per qualsiasi altra ragione (consultare il capitolo
“Pulizia”).
Prima di spostare, pulire o riporre l’apparecchio aspettare che si sia completamente
raffreddato. Prima di spostarlo scollegare sempre la spina ed utilizzare le apposite
maniglie.
Non accendere la friggitrice prima di aver versato olio o grasso. Prestate attenzione agli
indicatori di livello d’olio minimo o massimo posti all’interno della vasca. Non superare il
livello massimo poiché gli schizzi potrebbero bruciarvi.
E’ assolutamente necessario tenere sempre pulito l’apparecchio poiché direttamente in
contatto con i prodotti alimentari.
Tenere il cavo elettrico a debita distanza dalle parti calde dell’apparecchio poiché non
ne deve entrare in contatto. Allo stesso modo, per evitare scottature non toccare le
superfici calde.
Assicurarsi che le parti calde dell’apparecchio non entrino in contatto con materiali
facilmente infiammabili come tende, tovaglie...poiché durante il funzionamento
potrebbero incendiarsi.
Non coprire mai l’apparecchio con alcun oggetto.
Non aggiungere mai acqua all’olio.
Assicurarsi che gli alimenti siano molto asciutti.
36
Assembly page 36/52
TKG FT 1005 - 110331
Fax +32 2 359 95 50
Copies of the I/B. Please reproduce them without any
changes except under special instruction from Team
International BELGIUM. The pages must be reproduced
and folded in order to obtain a booklet A5 (+/- 148.5 mm
width x 210 mm height). When folding, make sure you
keep the good numbering when you turn the pages of
the I/B. Don’t change the page numbering. Keep the
language integrity.
E vietato mettere il coperchio sulla friggitrice durante l’uso, ciò potrebbe provocare un
incendio o far traboccare l’olio dalla friggitrice. In questo caso, il coperchio serve solo per
sistemare e spostare l’apparecchio (una volta raffreddato).
AVVERTIMENTO: la friggitrice può raggiungere temperature molto elevate durante
l’utilizzo. I preparati composti con olio o grassi possono prendere fuoco se troppo
surriscaldati. Assicurarsi dunque che la friggitrice non rimanga in funzione per un periodo
troppo lungo. Prima di togliere la spina dalla presa di corrente, ruotare la manopola del
termostato fino a raggiungere la posizione corrispondente alla temperatura più bassa.
Ventilare la stanza durante la frittura.
Attenzione: se si utilizzano simultaneamente le due friggitrici, il consumo sarà di più o
meno 19,5 ampère. Perciò, consigliamo di collegare ognuna delle friggitrici ad un circuito
diverso. Prima di collegare la friggitrice, assicurarsi che il circuito sul quale sarà collegata
può sopportare il consumo indicato. Non collegare nessuna delle friggitrici ad una presa
multipla.
L’apparecchio non deve mai essere accesso tramite un timer esterno o un altro sistema di
comando a distanza separato.
(*) Servizio qualificato: Servizio Assistenza del fabbricante o dell'importatore o una persona
qualificata, riconosciuta e autorizzata ad effettuare riparazioni, per evitare ogni pericolo.
Inviate in ogni caso, l’apparecchio a questo servizio.
PRIMA DELL’UTILIZZO
•
•
•
Togliere tutti gli imballi dall’apparecchio e dai suoi accessori.
Togliere i coperchi, i cestelli, le impugnature e tutti gli accessori dell’apparecchio.
Si raccomanda di pulire bene la friggitrice e tutti gli accessori prima del primo utilizzo:
usare acqua e un normale detergente per stoviglie. Quest’operazione toglierà tutti gli
eventuali residui di lavorazione.
SMONTAGGIO DELLA FRIGGITRICE
•
•
•
Togliere la resistenza ed il pannello di controllo dall'apparecchio facendo scorrere
lentamente il pannello verso l'alto.
Prendere la vasca dai due lati e sollevarla lentamente.
Procedere nello stesso modo per la seconda vasca.
ASSEMBLAGGIO DELLA FRIGGITRICE
•
•
•
•
•
Posizionare il contenitore esterno su una superficie orizzontale ed asciutta.
Posizionare le due vasche dentro del contenitore esterno ed abbassarle lentamente.
Posizionare il pannello di controllo e gli accessori su ogni vasca. Per posizionare
correttamente il pannello di controllo, farlo scorrere nelle fessure situate sul retro del
contenitore esterno fino al bloccaggio.
NOTA: l'apparecchio non è operativo se il pannello di controllo della vasca che si vuole
utilizzare non è posizionato correttamente.
Fissare l’impugnatura del cestello spostandola indietro fino al bloccaggio per poter
sollevare il cestello durante l’uso.
Se il cavo di alimentazione è troppo lungo, spingerlo nell'apposito alloggiamento situato
dietro l'apparecchio.
PRIMO UTILIZZO
•
•
Quando si usa l’apparecchio per la prima volta, versare la quantità di olio desiderata nel
contenitore, assicurandosi che il livello sia tra il minimo e il massimo indicato.
Si consiglia di usare un olio idoneo alla frittura. Verificare l’etichetta sulla bottiglia. Se si
vogliono utilizzare grassi solidi, tagliarli in piccoli pezzi. Collegare l’apparecchio, regolare il
37
Assembly page 37/52
TKG FT 1005 - 110331
Fax +32 2 359 95 50
Copies of the I/B. Please reproduce them without any
changes except under special instruction from Team
International BELGIUM. The pages must be reproduced
and folded in order to obtain a booklet A5 (+/- 148.5 mm
width x 210 mm height). When folding, make sure you
keep the good numbering when you turn the pages of
the I/B. Don’t change the page numbering. Keep the
language integrity.
termostato sul minimo e aggiungere poco a poco il grasso. Dopo che il grasso si è sciolto,
azionare il termostato alla temperatura desiderata. ATTENZIONE: LA MANCATA
OSSERVANZA DELLE PRESENTI ISTRUZIONI POTREBBE DANNEGGIARE GRAVEMENTE
L’APPARECCHIO.
NOTA: ciascuna delle vasche funziona indipendentemente. Se si vogliono utilizzare
simultaneamente entrambe le vasche, bisogna collegare i due cavi d’alimentazione.
PRERISCALDAMENTO
Accendere la friggitrice e regolare il termostato sulla temperatura desiderata.
Attendere circa 10- 15 minuti affinché l’olio raggiunga la temperatura corretta.
In questi minuti la spia si accenderà e si spegnerà più volte.
Con un buon preriscaldamento dell’olio si otterranno fritture croccanti e dorate.
UTILIZZO
•
•
•
•
•
•
•
•
Inserire la spina nella presa di corrente e regolare il termostato alla temperatura
desiderata. La spia luminosa di funzionamento e quella di temperatura si accendono.
Quando si raggiunge la temperatura desiderata, la spia di temperatura si spegne.
Quando la temperatura si abbassa, il termostato si riavvia e la spia si accende
nuovamente, e così via.
Non mettere il coperchio sull'apparecchio durante l’uso. Può solo essere messo quando la
friggitrice abbia raffreddato per evitare che polveri entrino nella vasca.
Una volta raggiunta la temperatura impostata, sollevare il cestello dall’olio con
l’impugnatura ed agganciarlo sul bordo del contenitore.
Mettere il cibo nel cestello e poi immergerlo nell’olio.
Una volta cotto il cibo, rimontare il cestello e agganciarlo sul bordo del contenitore per
lasciare sgocciolare il cibo.
Se necessario, si può tirare fuori il cestello.
Assicurarsi che il cibo sia ben cotto dentro e fuori.
Questa friggitrice non è dotata di un interruttore acceso/spento separato. Dopo l’uso,
posizionare il termostato sulla posizione “Min” e staccare la spina dalla presa di corrente.
Non maneggiare l’apparecchio, prima che l’olio o il grasso si siano totalmente raffreddati.
PER MIGLIORI RISULTATI
•
•
•
•
•
Asciugare bene il cibo prima di metterlo nella friggitrice. Se il cibo è troppo umido
possono esserci schizzi d’olio bollente ed rischio che l’olio fuoriesca.
Il cibo dovrebbe essere tagliato in pezzi con dimensioni uguali per una cottura uniforme.
Alcuni cibi possono essere impanati o ricoperti di pasta per friggere.
Prima di mettere il cibo nel cestello, aspettare che il preriscaldamento sia terminato e che
la spia luminosa si spenga.
Non riempire troppo il cestello.
ATTENZIONE: La friggitrice è munita di un sistema di sicurezza che blocca l’apparecchio se si
surriscalda accidentalmente (per esempio in caso di guasto del termostato o di
funzionamento senz’olio o grassi solidi). Qualora ciò succedesse, innanzitutto mettere il
termostato sulla posizione “Min” poi staccare la spina dalla presa di corrente.
Aspettare quindi che la friggitrice si sia raffreddata (circa 15 minuti). Premere il pulsante RESET
che si trova nell’alloggiamento del cavo sul retro dell’apparecchio. Ogni vasca è dotata di
un pulsante RESET.
L'apparecchio è nuovamente pronto per l'uso. Per evitare che tale situazione occorra di
nuovo, leggere attentamente le istruzioni prima di utilizzare l'apparecchio.
38
Assembly page 38/52
TKG FT 1005 - 110331
Fax +32 2 359 95 50
Copies of the I/B. Please reproduce them without any
changes except under special instruction from Team
International BELGIUM. The pages must be reproduced
and folded in order to obtain a booklet A5 (+/- 148.5 mm
width x 210 mm height). When folding, make sure you
keep the good numbering when you turn the pages of
the I/B. Don’t change the page numbering. Keep the
language integrity.
RICETTE
Patatine fritte
•
•
•
•
•
•
•
•
Si raccomanda di cuocere le patatine in due tempi.
Usare delle vecchie patate (non nuove). Tagliarle in pezzi di uguali dimensioni. Sciacquare
i pezzi sotto l’acqua per toglierne l’amido. Asciugarli bene.
Non superare il peso consigliato.Quando la temperatura ha raggiunto i 180°C mettere le
patate nel cestello, calare lentamente il cestello nell’olio.
Il tempo necessario per la frittura di 500 g di patate è di circa 6 minuti a 180°C. Sollevare il
cestello dall’olio e appoggiarlo sul bordo del contenitore.
Attendere che la spia si spenga nuovamente, calare ancora una volta il cestello e
lasciare friggere per altri due minuti circa.
Sollevare il cestello e lasciare sgocciolare le patate.
Per ottenere un risultato migliore, far asciugare le patate su un panno assorbente per
assorbire il grasso.
I tempi di frittura possono variare leggermente a seconda della qualità e delle dimensioni
delle patate.
Fettine di cipolla
•
•
•
•
•
Tempo di frittura: a 175°C per 4/5 minuti.
Sbucciare e tagliare le cipolle a fettine.
Immergere le cipolle in una bacinella di latte condito.
Passarle nella farina.
Mettere le fettine una accanto all’altra nel cestello e farne cuocere qualcuna allo stesso
tempo.
Funghi impanati
•
•
•
•
Tempo di frittura: a 175°C per 4/5 minuti.
Immergere i funghi in un uovo sbattuto.
Ricoprirli di pan grattato.
Mettere i funghi l’uno accanto all’altro nel cestello e farne cuocere qualcuno allo stesso
tempo.
Bastoncini di sogliola
•
•
•
•
Tempo di frittura: a 160°C per 3/4 minuti.
Tagliare il filetto di sogliola in bastoncini. Passarli nella farina.
Immergerli in un uovo sbattuto e ricoprirli di pan grattato.
Mettere i bastoncini l’uno accanto all’altro nel cestello e farne cuocere qualcuno allo
stesso tempo.
ALCUNI CONSIGLI D’USO:
ALIMENTI
Filetti di pesce
Scampi
Pollo
Pollo impanato
Cipolle
Funghi
Broccoli
Zucchine
Sedano
Patate fritte (1ª cottura)
Patate fritte (2ª cottura)
TEMPERATURA
TEMPO (MIN.)
170°C
170°C
175°C
170°C
180°C
180°C
185°C
185°C
180°C
170°C
180°C
6-7
4-6
4-5
12-15
4
3-4
3-4
3-4
3-4
8
3
39
Assembly page 39/52
TKG FT 1005 - 110331
Fax +32 2 359 95 50
Copies of the I/B. Please reproduce them without any
changes except under special instruction from Team
International BELGIUM. The pages must be reproduced
and folded in order to obtain a booklet A5 (+/- 148.5 mm
width x 210 mm height). When folding, make sure you
keep the good numbering when you turn the pages of
the I/B. Don’t change the page numbering. Keep the
language integrity.
PULIZIA
•
•
•
•
•
•
•
•
Attenzione: NON IMMERGERE L’APPARECCHIO IN ACQUA O IN ALCUN ALTRO LIQUIDO.
Staccare la spina dalla presa di corrente. Controllare che le due spine siano staccate.
Attendere che l’apparecchio si sia completamente raffreddato prima di iniziare a pulirlo.
Attenzione la resistenza rimane calda per molto tempo anche dopo aver spento
l'apparecchio. NON IMMERGERE MAI I PANNELLI DI CONTROLLO NELL'ACQUA O IN
QUALUNQUE ALTRO LIQUIDO.
Consultare il capitolo “Smontaggio della friggitrice”.
Non usare detergenti troppo forti o materiali/prodotti abrasivi troppo duri che
rovinerebbero la friggitrice.
Asciugare accuratamente tutte le parti dell’apparecchio.
Cambiare l’olio regolarmente.
Per assemblare la friggitrice, consultare il paragrafo: “Assemblaggio della friggitrice”.
SISTEMAZIONE
•
•
Attendere che la friggitrice si sia completamente raffreddata.
L'olio può rimanere nell'apparecchio. Chiudere bene i coperchi per evitare che entri la
polvere.
DIRETTIVA 2002/96/CE PER
ELETTRONICHE
LO SMALTIMENTO DELLE
APPARECCHIATURE
ELETTRICHE
ED
Per preservare l'ambiente e la nostra salute, l'eliminazione dei vecchi apparecchi elettrici ed
elettronici non più utilizzati, va fatta secondo la direttiva sopra citata che impone l'obbligo al
costruttore, al commerciante ed all'utilizzatore di consegnare gli apparecchi ai centri di
raccolta specializzati, i quali saranno in grado di smaltire e riciclare i vecchi prodotti come la
legge prescrive.
Per questa ragione troverete apposto sull’etichetta segnaletica il simbolo
che indica di
non gettare il vecchio apparecchio non più utilizzato, in pattumiera o nel cassonetto delle
immondizie.
Potrete smaltire il vecchio apparecchio consegnandolo direttamente al rivenditore dove
andrete ad acquistarne uno nuovo, o direttamente nei centri di raccolta specializzati messi a
disposizione dal vostro comune di residenza.
40
Assembly page 40/52
TKG FT 1005 - 110331
Fax +32 2 359 95 50
Copies of the I/B. Please reproduce them without any
changes except under special instruction from Team
International BELGIUM. The pages must be reproduced
and folded in order to obtain a booklet A5 (+/- 148.5 mm
width x 210 mm height). When folding, make sure you
keep the good numbering when you turn the pages of
the I/B. Don’t change the page numbering. Keep the
language integrity.
ZASADY BEZPIECZNEGO UŻYTKOWANIA
Zanim zaczniesz używać urządzenie przeczytaj uważnie instrukcję i postępuj wyłącznie z jej
wskazaniami.
Ważne: Osoby (w tym dzieci), które ze względów zdrowotnych lub innych mających wpływ na
bezpieczne użytkowanie urządzenia, nie mogą należycie obsługiwać urządzenia nie powinny
użytkować czajnika. Użytkowanie urządzenia może stanowić dla niech niebezpieczeństwo
skaleczenia lub poparzeń. Szczególnie dotyczy to dzieci, które mogą uznać urządzenie za
zabawkę.
Zanim włączysz urządzenie sprawdź czy napięcie sieciowe zgadza się z parametrami
podanymi na tabliczce znamionowej urządzenia.
Pod czas użycia nie zostawiaj urządzenia bez nadzoru. Trzymaj z dala od dzieci i osób
niepowołanych.
Regularnie sprawdzaj czy kabel zasilający nie jest uszkodzony. Nie używaj urządzenia z
uszkodzonym kablem zasilającym.
Urządzenie służy tylko do użytku domowego i powinno być używane zgodnie ze
wskazaniami niniejszej instrukcji.
Nie używaj w pobliżu źródeł ciepła.
Przed czyszczeniem wyłącz przewód zasilający z gniazda.
Nie używaj na zewnątrz, zadbaj, aby urządzenie pracowało w suchym otoczeniu.
Nigdy nie używaj urządzeń ani części nieposiadających rekomendacji producenta,
ponieważ może to być niebezpieczne dla użytkownika. Mogą one również wpłynąć na
wadliwe działanie urządzenia lub jego uszkodzenie.
Nigdy nie ciągnij, nie podnoś itp. urządzenia za kabel ani nie wyłączaj wtyczki z sieci w ten
sposób. Nie owijaj kabla wokół urządzenia, nie zginaj go, nie skręcaj.
Ustaw urządzenie na płaskiej stabilnej powierzchni.
Urządzenie wykorzystuj tylko do smażenia w głębokim tłuszczu. Przyrządzaj tylko produkty
nadające się do smażenia i spożycia.
Obudowa, pojemniki na tłuszcz, pokrywy, kosze i uchwyty czyść ręcznie. Nie zanurzaj
paneli sterowania i innych części elektrycznych w wodzie ani żadnym innym płynie
(zobacz dział "CZYSZCZENIE I KONSERWACJA").
Przed czyszczeniem, przenoszeniem lub przechowywaniem wyłącz urządzenie z sieci i
poczekaj aż całkowicie ostygnie. Przenoś wyłącznie za pomocą uchwytów.
Nie używaj frytownicy bez oleju. Upewnij się, czy poziom oleju znajduje się między
znacznikami minimum i maksimum w środku pojemnika na tłuszcz. Nigdy nie przepełniaj
naczynia, gdyż gorący olej może wyprysnąć.
Ze względu na kontakt z żywnością urządzenie powinno być zawsze czyste.
Uważaj żeby przewód zasilający nie stykał się z gorącymi elementami urządzenia.
Upewnij się, że gorące części urządzenia nie stykają się z materiałami łatwopalnymi jak:
firanki, zasłony, obrus, ubrania itp.
Nie przykrywaj urządzenia.
Ze względu na ryzyko wzniecenia pożaru podczas użycia nie zakładaj pokrywy. W
urządzeniu tym pokrywy służą tylko do zamknięcia w czasie przenoszenia lub
przechowywania (po wcześniejszym ostygnięciu).
UWAGA: Frytkownica może osiągać wysokie temperatury w trakcie używania. Olej i tłuszcz
mogą zapalić się po osiągnięciu zbyt wysokich temperatur. Zawsze bardzo uważaj, by nie
włączać frytkownicy na zbyt długo. Nie zapomnij wyłączyć urządzenia, gdy skończyłeś
przygotowanie potraw i frytkownica nie jest już używana. Przed wyjęciem wtyczki z
kontaktu, ustaw przełącznik temperatury na najniższą możliwą pozycję.
Zapewnij odpowiednia wentylację pomieszczenia, w którym pracuje urządzenie.
Uwaga: Przy dwóch podłączonych komorach zapotrzebowanie na prąd wzrasta do
około 19.5 Ampera. Zalecamy podłączenie każdej części do osobnego obwodu
41
Assembly page 41/52
TKG FT 1005 - 110331
Fax +32 2 359 95 50
Copies of the I/B. Please reproduce them without any
changes except under special instruction from Team
International BELGIUM. The pages must be reproduced
and folded in order to obtain a booklet A5 (+/- 148.5 mm
width x 210 mm height). When folding, make sure you
keep the good numbering when you turn the pages of
the I/B. Don’t change the page numbering. Keep the
language integrity.
elektrycznego. Przed podłączeniem upewnij się, że gniazdo zasilające sprosta
zapotrzebowaniu urządzenia na prąd. Nie podłączaj do żadnego rodzaju adapterów i
przedłużaczy.
Nie wolno włączać urządzenia za pomocą zewnętrznego timera lub innego
dodatkowego urządzenia sterującego.
(*) Uprawniony elektryk: Osoba wskazana przez dział sprzedaży producenta lub importera lub
każda osoba posiadająca niezbędne kwalifikacje umożliwiające dokonywanie tego typu
napraw bez stwarzania zagrożenia. W każdym przypadku urządzenie należy przekazywać tym
osobom.
PRZED UŻYCIEM
•
•
•
Zdejmij wszelkiego rodzaju materiały w które zapakowane jest urzadzenie.
Zdejmij pokrywy, kosze, uchwyty i wszystkie akcesoria urządzenia.
Przed pierwszym użyciem wyczyść za pomoca ciepłej wody i płynu do mycia naczyń
pokrywy, pojemniki na tłuszcz, kosze, uchwyty i obudowę.
DEMONTAŻ URZĄDZENIA
•
•
•
Zdejmij panel sterowania. Delikatnie pociągnij w górę.
Pojemnik wyjmuj oburącz, delikatnie pociągając do gory.
W ten sam sposób demontuj drugi pojemnik.
MONTAŻ URZĄDZENIA
•
•
•
•
•
•
Ustaw frytownicę na suchej poziomej powierzchni.
Umieść każdy z pojemników na tłuszcz w obudowie (pojedynczo) I delikatnie dociśnij.
Umieść panele sterowania I inne akcesoria nad każdym z pojemników. Panel sterowania
umieść w otworze do tego przeznaczonym i delikatnie dociśnij, aż do zablokowania.
UWAGA: Urządzenie działa wyłacznie jeśli panel sterowania jest prawidłowo założony.
Załóż uchwyt na kosz.
Ze schowka wyjmij odpowiednią długość przewodu zasilającego.
PRZED PIERWSZYM UŻYCIEM
•
•
Wlej wymaganą ilość oleju do zbiornika, upewniając się, czy poziom znajduje się między
wskaźnikami minimum i maksimum.
Zalecamy użycie ciekłego oleju, który jest odpowiedni do smażenia w głębokim tłuszczu.
Sprawdź etykietę na opakowaniu oleju. Jeżeli chcesz użyć oleju w postaci stałej podłącz
frytkownicę do sieci elektrycznej, włącz ją i ustaw pokrętło termostatu na najniższą
temperaturę i powoli dodawaj tłuszcz w małych kawałkach. Kiedy tłuszcz się roztopi,
ustaw pokrętło termostatu na właściwym poziomie. Ostrzeżenie: nie przestrzegając
powyższych uwag, uszkodzisz frytkownicę.
UWAGA: obie części frytownicy działają niezależnie. Jeżeli chcesz używać dwóch komór na
raz podłącz obie części do gniazda zasilającego.
ROZGRZEWANIE
Po włączeniu urządzenia ustaw termostat w żądanej temperaturze.
Aby urządzenie rozgrzało się do odpowiedniej temperatury potrzeba od 10 do 15 minut.
Podczas procesu lampka kontrolna temperatury będzie na zmiane zapalać się i gasnąć.
Prawidłowe rozgrzanie urządzenia pozwoli usmażyć chrupkie i rumiane frytki.
42
Assembly page 42/52
TKG FT 1005 - 110331
Fax +32 2 359 95 50
Copies of the I/B. Please reproduce them without any
changes except under special instruction from Team
International BELGIUM. The pages must be reproduced
and folded in order to obtain a booklet A5 (+/- 148.5 mm
width x 210 mm height). When folding, make sure you
keep the good numbering when you turn the pages of
the I/B. Don’t change the page numbering. Keep the
language integrity.
UŻYTKOWANIE
•
•
•
•
•
•
•
Włącz urzadzenie do gniazda zasilającego I ustaw za pomoca pokrętła termostatu
rządaną temperaturę smażenia. Zapalą się lampki zasilania i kontrolna . Kiedy urządzenie
rogrzeje olej do ustawionej temperatury lampka kontrolna zgaśnie. Urządzenie stale
będzie dogrzewac dolej co zasygnalizuje zapalaniem I gaśnięciem lampki.
Po rozgrzaniu oleju, zanurz za pomoca uchwytu kosz w oleju sprawdzając czy całkowicie
się zanurza.
Umieść produkty do smażenia w koszu i delikatnie opóść kosz w dół. Uważaj aby nie
rozchlapywac tłuszczu.
Po usmażeniu produktów podnieś kosz i zaczep go na krawędzi urządzenia. Poczekaj aż
tłuszcz ocieknie.
Jeśli to konieczne możesz wyjąć kosz całkowicie.
Upewnij się, że produkty są usażone zarówno wewnątrz jak i na zewnątrz.
Frytownica nie posiada oddzielnego wyłacznika. Po uzyciu przekręć pokrętło termostatu
w pozycję “Min” I wyłacz urządzenie z sieci. Nie przenoś urzadzenia jeżeli olej znajduje się
wewnątrz.
ABY UZYSKAĆ NAJLEPSZE EFEKTY
•
•
•
•
•
Zawsze wysusz produkty przed włożeniem do frytkownicy. Bardzo „mokre” jedzenie
może spowodować, że olej będzie się „pienił” i może zacząć wyciekać.
Produkty do smażenia powinny być mniej więcej tej samej wielkości, by potrawy były
dokładnie i równomiernie usmażone.
Produkty mogą być również panierowane przed smażeniem.
Przed włożeniem produktów zawsze odczekaj aż frytkownica osiągnie pożądaną
temperaturę i zgaśnie lampka kontrolna.
Nie przepełniaj koszyka.
UWAGA: Urządzenie posiada automatyczny wyłącznik bezpieczeństwa działający w
przypadku przegrzania. Jeśli wyłacznik unierruchomi urzadzenie, ustaw pokrętło termostatu w
pozycji “Min” I wyłącz z sieci. Poczekaj aż urzadzenie ostygnie (ok. 15 minut), a następnie
naciśnij przycisk RESET znajdujący się z tyłu urzadzenia w schowku na przewód . Każda komora
posiada oddzielny przycisk RESET. Urządzenie ponownie jest gotowe do użycia. Aby nie
przegrzac urzadzenia stosuj się do zasad użytkowania.
PRZEPISY
Frytki
•
•
•
•
•
•
Najlepiej przyrządza się frytki w dwóch etapach.
Użyj „starych” (nie „młodych”) ziemniaków. Potnij je w równej wielkości kawałki.
Opłucz pokrojone ziemniaki pod bieżącą wodą, by zmniejszyć zawartość poziom
skrobi i dokładnie wysusz.
Nie przekrocz zalecanej wagi. Kiedy temperatura osiągnie 180°C, umieść frytki w
koszyku, zamknij pokrywę i powoli opuść koszyk do oleju.
Ok. 500g frytek należy smażyć przez około 6 minut w temperaturze 180°C, a potem
podnieść koszyk. Nie otwieraj pokrywy.
Poczekaj, aż światełko oznaczające temperaturę znowu zgaśnie, potem opuść koszyk
i nadal smaż je przez ok. 2 min.
Podnieś koszyk i pozwól ociec frytkom.
43
Assembly page 43/52
TKG FT 1005 - 110331
Fax +32 2 359 95 50
Copies of the I/B. Please reproduce them without any
changes except under special instruction from Team
International BELGIUM. The pages must be reproduced
and folded in order to obtain a booklet A5 (+/- 148.5 mm
width x 210 mm height). When folding, make sure you
keep the good numbering when you turn the pages of
the I/B. Don’t change the page numbering. Keep the
language integrity.
Krążki cebuli
•
•
•
•
•
Temperatura smażenia - 180°C przez 4-5 minut.
Obierz cebule i pokrój na plasterki, oddzielając na pierścienie.
Zamocz krążki w mleku.
Następnie przyprósz krążki mąką.
Umieść krążki osobno w koszyku i smaż po kilka na raz.
Grzyby panierowane
•
•
•
•
Temperatura smażenia - 180°C przez 3-4 minuty.
Rozbij 1 jajko i zanurz grzyby w jajku.
Potem otocz grzyby bułką tartą.
Umieść osobno w koszyku i smaż po kilka na raz.
Goujons z soli
•
•
•
•
Temperatura smażenia - 160°C przez 3-4 minuty.
Potnij filet z soli na małe paski. Otocz paski w mące.
Następnie zanurz paski w rozbitym jajku i otocz bułką tartą.
Umieść osobno w koszyku i smaż po kilka na raz.
WSKAŹNIK NAJLEPSZYCH TEMPERATUR SMAŻENIA
PRODUKT
Filet ryby panierowany
Scampi
Pierś kurczaka
Panierowany kawałki
kurczaka
Krążki cebuli
Panierowane grzyby
Brokuły zasmażane
Zasmażane Courgette
Seler w panierce
Frytki pierwszy etap
Frytki drugi etap
TEMPERATURA (°C)
170
170
175
170
180
180
185
185
180
170
180
PRZYBLIŻONY CZAS w
minutach
6-7
4-6
4-5
12-15
4
3-4
3-4
3-4
3-4
8
3
CZYSZCZENIE I KONSERWACJA
•
•
•
•
•
•
•
•
•
UWAGA: nigdy nie zanurzaj w wodzie ani żadnym innym płynie.
Odłącz urządzenie z sieci.
Poczekaj, aż urządzenie całkowicie ostygnie zanim zaczniesz czyszczenie.
Rozmontuj urządzenie zgodnie z zasadami działu “DEMONTAŻ URZĄDZENIA”.
Nie używaj silnych detergentów i ścierających materiałów/płynów gdyż może to
spowodować uszkodzenie urządzenia.
Oczyść urządzenie ciepłą wodą z płynem. Pomocne może okazać się wymoczenie
elementów przez krótki okres czasu.
Dokładnie wytrzyj wszystkie części. Sprawdź czy wtyczki i kontakty są całkowicie suche.
Regularnie zmieniaj olej.
Czyść frytkownicę regularnie. To wydłuży okres jej przydatności.
PRZECHOWYWANIE
•
•
Odczekaj aż urządzenie całkowicie wystygnie.
Można przechowywać urządzenie z olejem w środku. Upewnij się, że pokrywa jest mocno
zamknięta, aby na oleju nie osiadał kurz.
44
Assembly page 44/52
TKG FT 1005 - 110331
Fax +32 2 359 95 50
Copies of the I/B. Please reproduce them without any
changes except under special instruction from Team
International BELGIUM. The pages must be reproduced
and folded in order to obtain a booklet A5 (+/- 148.5 mm
width x 210 mm height). When folding, make sure you
keep the good numbering when you turn the pages of
the I/B. Don’t change the page numbering. Keep the
language integrity.
OCHRONA ŚRODOWISKA NATURALNEGO
Symbol
na tabliczce znamionowej urządzenia oznacza, że produktu nie wolno wyrzucać
razem z innymi odpadami z gospodarstw domowych. Polskie prawo zabrania pod karą
grzywny łączenia zużytego sprzętu elektrycznego i elektronicznego wraz z innymi odpadami.
Dbając o pozbycie się produktu w należyty sposób, można zapobiec potencjalnym
negatywnym skutkom dla środowiska naturalnego i zdrowia ludzkiego, jakie mogłyby wyniknąć
z niewłaściwego postępowania z odpadami powstałymi ze zużytego sprzętu elektronicznego.
System zbierania zużytego sprzętu jest zgodny z obowiązującymi na terenie Rzeczpospolitej
Polskiej normami prawnymi, ( Ustawa z dnia 29 lipca 2005, Dziennik Ustaw Nr 180 poz.1494 i
1495) obowiązki wynikające z ustawy przejęła w imieniu przedsiębiorcy Organizacja Odzysku.
Gospodarstwo domowe pełni istotną rolę w przyczynianiu się do ponownego użycia i odzysku,
w tym recyklingu, zużytego sprzętu elektrycznego. Przestrzeganie zasad selektywnej zbiórki
sprzętu ma zapewnić właściwy poziom ochrony zdrowia ludzkiego i środowiska naturalnego.
Waga netto urządzenia- 6.05 kg
45
Assembly page 45/52
TKG FT 1005 - 110331
Fax +32 2 359 95 50
Copies of the I/B. Please reproduce them without any
changes except under special instruction from Team
International BELGIUM. The pages must be reproduced
and folded in order to obtain a booklet A5 (+/- 148.5 mm
width x 210 mm height). When folding, make sure you
keep the good numbering when you turn the pages of
the I/B. Don’t change the page numbering. Keep the
language integrity.
MASURI DE SIGURANTA
Vă rugăm citiţi cu atenţie aceste instrucţiuni înainte de a folosi aparatul si intotdeauna urmati
instructiunile de siguranta si operare.
Important: persoanele ( inclusiv copii) care nu sunt capabile sa folosească produsul in
siguranţa, datorita capacitaţii lor fizice, senzoriale sau mentale, sau datorita lipsei de
experienţa sau cunoaştere, nu trebuie niciodată sa folosească produsul decât daca sunt
supravegheaţi de o persoana responsabila cu siguranţa lor sau daca ei anterior au primit
instrucţiuni privind folosirea aparatului.
Supravegherea îndeaproape este necesara pentru a împiedica copiii sa folosească aparatul
ca pe o jucărie.
Verificati daca tensiunea la care conectati aparatul corespunde cu tensiunea
recomandata.
Nu lasati aparatul nesupravegheat in timpul folosirii.
Verificati periodic starera aparatului si in cazul in care se observa semne de deteriorare a
acestuia nu-l mai utilizati; repararea aparatului poate fi facuta doar de o persoana
calificata si competenta. In cazul in care cablul de alimentare este deteriorat, trebuie sa
fie inlocuit obligatoriu de catre o persoana calificata (*).
Utilizaţi aparatul numai in scopuri casnice si conform cu instrucţiunile de folosire.
Nu utilizaţi aparatul pe /sau lângă suprafeţe fierbinţi.
Întotdeauna deconectaţi de la priza aparatul înainte de a-l curăţa.
Nu folosiţi aparatul in exterior. Depozitaţi-l intr-un mediu uscat.
Nu utilizaţi accesorii care nu sunt recomandate de producător. Folosirea lor poate
constitui un risc pentru dvs. si integritatea aparatului.
Nu mutaţi aparatul trăgând de cordon. Asiguraţi-vă ca acesta nu este prins de ceva. Nu
înfăşuraţi cordonul in jurul aparatului si nu îl îndoiţi. Folositi compartimentul de stocare a
cablului din spatele aparatului.
Plasaţi aparatul pe o masa sau o suprafaţa plana.
Gătiţi numai alimente pentru prăjit şi consumabile.
Carcasa, vasele, capacele, cosurile si manerele pot fi spalate de mana. Niciodata nu
imersati aparatul sau panoul de de comanda in apa sau altfel de lichide pentru spalare
sau alte ratiuni (vezi sectiunea "Curatare").
Aşteptaţi până când aparatul s-a răcit complet înainte de a-l muta, curăţare sau
depozitare. Întotdeauna apucaţi aparatul de mânerele prevăzute pentru aceasta.
Întotdeauna deconectaţi aparatul de la priza de curent electric înainte de curăţare.
Nu folosiţi aparatul fără ulei în el. Asiguraţi-vă că nivelul uleiului este între marcajele minim
şi maxim aflate în interiorul vasului. Nu umpleţi prea mult vasul deoarece uleiul încins
poate da pe dinafară.
Nu puneţi apă peste ulei.
Este absolut necesar să păstraţi întotdeauna aparatul curat deoarece acesta este în
contact direct cu alimentele.
Temperatura suprafeţelor accesibile poate fi foarte ridicată când aparatul este în
funcţiune. Aveţi grijă să nu atingeţi aceste suprafeţe.
Asiguraţi-vă că niciodată cablul de alimentare nu este în contact cu suprafeţele fierbinţi.
Asiguraţi-vă că părţile fierbinţi nu ajung în contact cu materiale inflamabile cum ar fi
perdele, cârpe de vase … puteţi provoca un incendiu.
Niciodată nu acoperiţi aparatul cu vreun material.
Este interzis sa amplasati capacul pe friteuza, in timpul functionarii, deaoarece apare
pericolul de incendiu sau de varsare a uleiului. Pentru acest model de friteuza capacul va
fi folosit numai pentru depozitare sau mutare (in momentul in care friteuza s-a racit
complet).
46
Assembly page 46/52
TKG FT 1005 - 110331
Fax +32 2 359 95 50
Copies of the I/B. Please reproduce them without any
changes except under special instruction from Team
International BELGIUM. The pages must be reproduced
and folded in order to obtain a booklet A5 (+/- 148.5 mm
width x 210 mm height). When folding, make sure you
keep the good numbering when you turn the pages of
the I/B. Don’t change the page numbering. Keep the
language integrity.
ATENŢIE: friteuza poate atinge temperaturi ridicate în timpul folosirii. Uleiul şi grăsimile pot
lua foc dacă sunt prea încălzite. Fiţi foarte precauţi nu lăsaţi aparatul în funcţiune pentru
perioade lungi. Nu uitaţi să scoateţi aparatul din priză odată ce aţi terminat de preparat
mâncarea. Înainte de a scoate aparatul din priză puneţi selectorul de temperatură pe
poziţia minimă.
Asiguraţi o ventilaţie propice în timpul funcţionării.
Atentie: Cand ambele friteuze sunt conectate la priza, curentul consumat este de
aproximativ 19,5 A. Ca atare va safatuim sa conectati fiecare unitate a friteuzei la circuite
electrice diferite. Inainte de a conecta friteuza la priza asigurati-va ca circuitul electric
suporta sarcina mentionata mai sus. Nu conectati niciodata friteuza la un triplu stecher
sau prelungitor.
Aparatul dvs. nu trebuie sa fie pornit print-un comutator cu ceas sau orice altfel de
comutator.
Electrician calificat: departmental de vanzari al producatorului sau imporatorului sau orice
persoana care este calificata, competenta si aprobata de acestia sa execute astfel de
reparatii in scopul de a evita orice fel de pericol. In orice caz trebuie sa returnati aparatul
acestui electrician.
(*)
INAINTE DE PRIMA FOLOSIRE
•
•
•
Indepartati toate husele dupa aparat.
Indepartati capacele, cosurile, manerele si orice alte accesorii din friteuza.
Inainte de prima folosire, va recomandam sa curatati capacele, vasele, cosurile,
manerele si carcasa friteuzei cu apa calda cu sapun folosind o carpa moale.
DEMONTAREA FRITEUZEI
•
•
•
Indepartati panourile de control ale aparatului. Pentru a face aceasta trageti usor panoul
de control pana ncand acesta se elibereaza.
Trageti usor vasul din interior cu ambele maini.
Procedati in acelasi mod cu cel de al doilea vas.
MONTAREA APARATULUI
•
•
•
•
•
•
Asezati aparatul pe o suprafata plana uscata.
Amplasati fiecare vas la loc in carcasa si apasati in jos.
Puneti la loc panoul de control si accesoriile in ambele vase. Pentru a pune la loc panoul
de control, impingeti-l in jos in gaurile, prevazute pe spatele carcasei, pana cand pana
cand acestea sunt blocate.
NOTA: Aparatul va functiona numai cand este pus correct in locasurile sale.
Deblocati manerul cosului pana cand este fixat ca sa permiteti ridicarea cosului mai usor.
Puneti ce mai ramane din cablu, dupa ce l-ati conectat la priza in compartimentul de
depozitare.
PRIMA UTILIZARE
•
•
Pentru prima utilizarea a aparatului, puneti cantitaea dorita de ulei in bolul interior.
Verificati daca nivelul de ulei se incadreaza intre MIN si MAX gradat pe bol.
Se recomanda folosirea uleiului lichid. Daca doriti sa folositi grasime solida, taiati-o in
bucatele mici. Conectati la priza aparatul, setati termostatul pe nivelul inferior de
temperatura si adaugati bucatelele de grasime. Dupa ce grasimea s-a topit, setati
termostatul pentru temperatura dorita. ATENTIE: DACA PROCEDATI IN ALT MOD DECAT
CEL RECOMANDAT PUTETI DETERIORA APARATUL.
47
Assembly page 47/52
TKG FT 1005 - 110331
Fax +32 2 359 95 50
Copies of the I/B. Please reproduce them without any
changes except under special instruction from Team
International BELGIUM. The pages must be reproduced
and folded in order to obtain a booklet A5 (+/- 148.5 mm
width x 210 mm height). When folding, make sure you
keep the good numbering when you turn the pages of
the I/B. Don’t change the page numbering. Keep the
language integrity.
NOTA: vasele opereaza independent. Daca vreti sa le folositi simultan trebuie sa conectati
ambele vase la priza de current.
PREINCALZIRE
Cand aparatul a pornit, reglati termostatul la temperatura dorita.
Pentru a obtine o temperatura corecta si stabile, este necesar sa asteptati intre 10-15 minute.
In timpul acesta, lampa indicatoare se va aprinde sis tinge repetat.
O preincalzire corecta va va ajuta sa obtineti cartofi prajiti rumeniti si crocanti.
UTILIZARE
•
•
•
•
•
•
•
Conectati la priza aparatul si reglati temperatura dorita din thermostat. Lampa
indicatoare si lampa se aprind. In momentul atingerii temperaturii reglate, lampa se
stinge. Cand temperature scade temostatul incepe sa lucreze din nou si lampa se va
aprinde din nou. Se va stinge din nou can va fi atinsa temperature reglata.
Cand friteuza a atins temperature dorita, ridicati cosul folosind manerul si agatati-o de
varful friteuzei.
Puneti preparatele in cos usor sa evitati stropirea si lasati usor cosul in totalitate in ului sau
grasime.
Cand prepararea este gata, ridicati cosul de maner si agatat-il de varful friteuzei ca sa se
scurga grasimea.
Daca este necesar puteti indeparta cosul din aparat.
Asiguraţi-vă ca mâncarea este preparată exterior şi interior.
Friteuza nu este prevăzută cu buton PORNIT/OPRIT. După terminarea preparării puneţi
termostatul pe pozitie “Min” şi scoateţi aparatul din priză. Nu mutaţi aparatul atâta timp
cât uleiul sau grăsimea este încă încinsă.
SFATURI PRACTICE
•
•
•
•
•
Scurgeti bine hrana inainte de a o praji. Apa in exces poate forma spuma care se poate
revarsa din aparat.
Bucatile de hrana trebuie sa fie de marimi similare pentru o prajire completa si uniforma.
Multe tipuri de mâncare trebuie să fie acoperite cu diverse produse înainte de prăjire –
exemplu şniţelele sau friganelele.
Asteptati intodeauna sa se atinga temperatura necesara si sa se stinga indicatorul luminos
si dupa accea adaugati hrana.
Nu umpleti cosul complet.
ATENTIE: Aceasta friteuza are un intrerupator automat de siguranta care lucreaza daca
aparatul se supraincalzeste (ex. controlul automat al temperaturii se defectea). Daca
intrerupatorul actioneaza , pentru inceput rotiti termostatul in pozitia “Min” si scoateti din priza
friteuza. Asteptati pana cand aparatul se raceste (aproximativ 15 minute). Apoi apasati
butonul RESET situat in tspatele aparatului, in in compartimentul stocare cablu. Fiecare vas are
propriul lui buton RESET. Acesta va reseta friteuza. Acum friteuza dvs. este gata de o noua
folosire. Pentru ca acest lucru sa nu se mai intample inca odata va rugam citit din nou
manualul cu atentie.
48
Assembly page 48/52
TKG FT 1005 - 110331
Copies of the I/B. Please reproduce them without any
changes except under special instruction from Team
International BELGIUM. The pages must be reproduced
and folded in order to obtain a booklet A5 (+/- 148.5 mm
width x 210 mm height). When folding, make sure you
keep the good numbering when you turn the pages of
the I/B. Don’t change the page numbering. Keep the
language integrity.
Fax +32 2 359 95 50
RETETE
Cartofi prajiti
•
•
•
•
•
•
•
•
Se recomanda prepararea in 2 trepte.
Folositi cartofi „vechi” (nu cartofi „noi”). Taiati cartofii in bucati egale. Clatiti apoi sub apa
rece pentrua a reduce nivelul de amidon. Uscati.
Respectati greutatea recomandata. Cand temperatura atinge 180°C, puneti cartofii in
cos si coborati usor cosul in ulei.
Pentru 500g de cartofi, prajiti timp de 6 minute la 180°C, apoi ridicati cosul.
Astepatai ca termostatul sa intre in functiune si dupa ce indicatorul luminos se stinge,
coborati cosul pentru inca 2 minute.
Ridicati cosul si lasati la scurs.
Pentru bune rezultate puteti inlatura excesul de grasime cu ajutorul hartiei absorbante.
Timpul de prajire poate varia usor in functie de tipul de cartofi folositi si de grosimea
acestora.
Rondele de ceapa
•
•
•
•
•
Temperatura de prajire - 175°C pentru 4 sau 5 minute.
Taiati 2 cepe si le decojiti. Formati rondele din ceapa taiata.
Scufundati rondelele de ceapa in lapte si condimente.
Scurgeti si dati prin faina.
Introduceti rondelele in cos si prajitile.
Ciuperci pane
•
•
•
•
Temperatura de prajire - 175°C pentru 4 sau 5 minute.
Bateti 1 ou si scufundati ciupercile in continut.
Tavaliti ciupercile prin pesmet.
Prajiti cateva bucati odata.
Goujons of peste, pui
•
•
•
•
Temperatura de prajire - 160°C pentru 3 sau 4 minute.
Taiati fileul de peste sau pieptul de pui in rondele mici. Dati prin faina si condimente.
Apoi dati prin ou batut si pesmet.
Puneti in cos separate si prajiti cateva conform timpului recomandat.
TABEL DE GHIDAJ PENTRU TEMERATURI
HRANA
Peste
Creveti
Piept de pui
Bucati de pui pane
Rondele de ceapa
Ciuperci pane
Broccoli prajit
Dovlecei prajiti
Telina
Cartofi prima treapta
Cartofi a 2-a treapta
TEMPERATURA (°C)
170
170
175
170
180
180
185
185
180
170
180
49
Assembly page 49/52
MINUTE (aproximativ)
6-7
4-6
4-5
12-15
4
3-4
3-4
3-4
3-4
8
3
TKG FT 1005 - 110331
Fax +32 2 359 95 50
Copies of the I/B. Please reproduce them without any
changes except under special instruction from Team
International BELGIUM. The pages must be reproduced
and folded in order to obtain a booklet A5 (+/- 148.5 mm
width x 210 mm height). When folding, make sure you
keep the good numbering when you turn the pages of
the I/B. Don’t change the page numbering. Keep the
language integrity.
CURATARE
•
•
•
•
•
•
•
•
•
Atentie: nu scufundati aparatul in apa sau alte lichide.
Deconectati de la priza. Asigurati-va ca ambele cabluri au fost scoase din priza.
Asteptati sa se raceasca complet. Fiti atenti cand atingeti elementele de incalzire
deoarece acestea se mentin calde mult timp dup ace apartul a fost scos din priza.
NICIODATA NU IMERSATI TABLOUL DE CONTROL IN APA SAU ORICE LICHID PENTRU NICI UN
MOTIV.
Demontati aparatul.
Nu folositi detergenti concentrati sau substante abrazive ce por deteriora aparatul.
Curatati aparatul cu apa calduta si detergent.
Uscati complet toate accesoriile.
Schimbati regulat uleiul.
Pentru asamblare – vezi capitolul „Montarea aparatului”.
DEPOZITARE
•
•
Asteptati pana se raceste complet.
Aparatul poate fi depozitat cu ulei in interior. Asigurati-va ca ati pus capacul bine pentru
a evita patrunderea prafului in ulei.
PROTECTIA MEDIULUI – DIRECTIVA 2002/96/EC
Simbolul
de pe tăbliţa cu datele tehnice înseamnă că produsul nu se poate arunca
împreună cu alte reziduuri menajere. Legea pedepseşte cu amendă persoanele care aruncă
aparatele electrice şi electronice împreună cu alte reziduuri.
Debarasarea corespunzătoare a produselor uzate previne formarea unor efecte negative
pentru mediul natural şi sănătatea umană, care pot fi produse de manipularea nepotrivită a
reziduurilor rămase din uzarea aparatelor electronice.
50
Assembly page 50/52
TKG FT 1005 - 110331
Fax +32 2 359 95 50
Copies of the I/B. Please reproduce them without any
changes except under special instruction from Team
International BELGIUM. The pages must be reproduced
and folded in order to obtain a booklet A5 (+/- 148.5 mm
width x 210 mm height). When folding, make sure you
keep the good numbering when you turn the pages of
the I/B. Don’t change the page numbering. Keep the
language integrity.
51
Assembly page 51/52
TKG FT 1005 - 110331
Copies of the I/B. Please reproduce them without any
changes except under special instruction from Team
International BELGIUM. The pages must be reproduced
and folded in order to obtain a booklet A5 (+/- 148.5 mm
width x 210 mm height). When folding, make sure you
keep the good numbering when you turn the pages of
the I/B. Don’t change the page numbering. Keep the
language integrity.
Fax +32 2 359 95 50
TKG FT 1005
Deutsch
6
English
11
Français
16
Nederlands
21
Español
26
Português
31
Italiano
36
Polska
41
Română
46
Back cover page (last page)
Assembly page 52/52