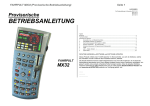
1
• AUTORISIERTER SERVICE
• AUTHORIZED SERVICE
• CENTRES D’ENTRETIEN
AUTORISÉS
Bei unsachgemäßer Wartung wird ihre
Garantie ungültig. Um fachgerechte
Reparaturleistungen zu erhalten, wenden
sie sich an ihren Fachhändler oder an die
LGB-Service-Abteilung:
Improper service will void your warranty.
For quality service, contact your
authorized retailer or one of the following
LGB factory service stations:
Un entretien inadéquat rendra la garantie
nulle et non avenue. Veuillez entrer en
contact avec votre revendeur ou avec
l’un des centres d’entretien ci-dessous:
Ernst Paul Lehmann
Patentwerk
Reparatur-Abteilung
Saganer Straße 1-5
D-90475 Nürnberg
DEUTSCHLAND
Tel.: (0911) 83707 0
Telefax: (0911) 83707 70
• Die Einsendung erfolgt zu Ihren
Lasten.
• Informationen zu autorisierten
LGB-Werkstätten in aller Welt finden
sie im Internet unter www.lgb.de.
8.869110.212
Ernst Paul Lehmann
Patentwerk
Reparatur-Abteilung
Saganer Strasse 1-5
D-90475 Nürnberg
GERMANY
Telephone: (0911) 83707 0
Fax: (0911) 83707 70
Ernst Paul Lehmann
Patentwerk
Reparatur-Abteilung
Saganer Strasse 1-5
D-90475 Nuremberg
ALLEMAGNE
Téléphone : (0911) 83707 0
Fax : (0911) 83707 70
LGB of America
Repair Department
6444 Nancy Ridge Drive
San Diego, CA 92121
USA
Telephone: (858) 535-9387
Fax: (858) 535-1091
LGB of America
Repair Department
6444 Nancy Ridge Drive
San Diego, CA 92121
États-Unis
Téléphone : (858) 535-9387
Fax : (858) 535-1091
•
You are responsible for any
shipping costs, insurance and
customs fees.
•
L’expéditeur est responsable des frais
d’expédition, de l’assurance et des
frais de douane.
•
Information on LGB products and
LGB representatives around the world
is available online at www.lgb.com
•
Conseil: Pour des renseignements
au sujet des produits et des
représentants LGB dans le monde,
consultez le site web à www.lgb.com
➜ 55015
Universal-Handy · Universal Remote · Télécommande universelle
1
© DiskArt™ 1988
© DiskArt™
Wir garantieren 2 Jahre Fehlerfreiheit auf Material und
Funktion. Berechtigte Beanstandungen innerhalb eines Jahres
nach Kaufdatum werden kostenlos nachgebessert.
Das beanstandete Produkt, zusammen mit dem Kaufbeleg,
Ihrem Händler übergeben oder, ausreichend frankiert, an
eine der beiden untenstehenden Serviceabteilungen
einschicken:
All of us at Ernst Paul Lehmann Patentwerk are very proud
of this product. Ernst Paul Lehmann Patentwerk warrants
it against defects in material or workmanship for two full
years from the date of original consumer purchase. To receive
warranty service, please return this product, along with the
original purchase receipt, to an authorized retailer or to one
of the LGB service stations listed here:
Matériel et fonction sont entièrement garantis pour la période
de deux an à partir de la date d’achat. Toutes les réclamations
justifiées faites au cours de cette période, feront l’objet d’une
réparation gratuite. Retourner le produit faisant l’objet de la
réclamation, avec preuve de paiement, à votre distributeur,
ou le renvoyer - en veillant à ce que l’affranchissement soit
suffisant - à l’un des services après-vente ci-dessous:
Das Universal-Handy
The Universal Remote
La télécommande universelle
2
Anschluss des Universal-Handys an Ihre Mehrzugsteuerung
Connecting the Universal Remote to your Multi-Train System
Raccordement de la télécommande
universelle au système multitrain
6
Anschluss des Universal-Handys an den analogen Fahrregler 51070
Connecting the Universal Remote to the 51070 Analog Throttle
Raccordement de la télécommande universelle
à la commande analogique 51070
8
ERNST PAUL LEHMANN PATENTWERK
Service-Abteilung
Saganer Str. 1-5 · D-90475 Nürnberg
Tel: (0911) 83 707 0
ERNST PAUL LEHMANN PATENTWERK
Saganer Str. 1-5 · D-90475 Nürnberg
GERMANY
Telephone: (0911) 83 707 0
Einsetzen des LGB-Funkfernsteuerung-Senders und LGB-Empfängers
Inserting the LGB Wireless Sender / Receiver
Installation de l’ensemble émetteur/récepteur sans fil LGB
10
Betrieb mit dem Mehrzugsystem
Operation with the Multi-Train System
Utilisation avec le système multitrain
14
LGB OF AMERICA
6444 Nancy Ridge Drive
San Diego, CA 92121 · USA
Tel.: (858) 535-9387
LGB OF AMERICA
6444 Nancy Ridge Drive
San Diego, CA 92121 · USA
Telephone: (858) 535-9387
ERNST PAUL LEHMANN PATENTWERK
Service-Abteilung
Saganer Str. 1-5 · D-90475 Nürnberg
ALLEMAGNE
Tel: (0911) 83 707 0
Betrieb mit dem Analogfahrregler 51070
Operation with the 51070 Analog Throttle
Utilisation avec la commande analogique 51070
40
Programmieren mit dem Universal-Handy
Programming with the Universal Remote
Programmation avec la télécommande universelle
48
Für Schäden durch unsachgemäße Behandlung oder
Fremdeingriff besteht kein Garantieanspruch.
This product will be repaired without charge for parts or
labor. You are responsible for any shipping costs, insurance
and customs fees. This warranty does not apply to products
that have been damaged after purchase, misused or modified.
Transformers and controls are subject to strict CE and UL
regulations and may only be opened and repaired by the
manufacturer. This warranty gives you specific legal rights,
and you may also have other rights which vary from state
to state. This warranty only applies to products purchased
from authorized retailers. To find an authorized retailer,
contact one of the LGB service stations listed here.
LGB OF AMERICA
Service Department
6444 Nancy Ridge Drive
San Diego, CA 92121 · USA
Tel: (858) 535-9387
Autorisierter Service
Authorized Service
Centres d’entretien autorisés
54
Transformatoren und Regler unterliegen strengen CE-ULVorschriften und dürfen nur vom Hersteller geöffnet und
repariert werden. Zuwiderhandlungen bewirken zwingend
Garantieverlust und generelle Reparaturverweigerung. Neben
unserer Garantie, die wir zusätzlich gewähren, verbleiben
selbstverständlich nach eigener Wahl die gesetzlichen Rechte.
Viel Freude am Spiel mit unserem gemeinsamen Hobby.
La garantie est nulle et non avenue en cas d’utilisation
inadéquate ou d’intervention faite par une personne non
autorisée.
Les transformateurs et régulateurs sont conformes aux
rigoureuses normes CE-UL et ne peuvent être ouverts et
réparés que par le fabricant. Toute violation à cet égard
entraînera la perte impérative de tous les droits de garantie
et un refus de toutes réparations quelles qu’elles soient.
Nous vous souhaitons des heures d’amusement inoubliables
avec votre hobby qui est également le nôtre.
➜
LGB, LEHMANN und der LEHMANN TOYTRAIN-Schriftzug sind eingetragene
Warenzeichen der Firma Ernst Paul Lehmann Patentwerk, Nürnberg, Deutschland.
Andere Warenzeichen sind ebenfalls geschützt. © 2001 Ernst Paul Lehmann
Patentwerk.
LGB, LEHMANN and the LEHMANN TOYTRAIN logotype are registered
trademarks of Ernst Paul Lehmann Patentwerk, Nürnberg, Germany. Other
trademarks are the property of their owners. Products and specifications are
subject to change without notice. © 2001 Ernst Paul Lehmann Patentwerk.
LGB, LEHMANN et le logo LEHMANN TOYTRAIN sont des marques déposées
de Ernst Paul Lehmann Patentwerk, Nuremberg, Allemagne. Les autres marques
déposées sont la propriété de leurs détenteurs respectifs. Les produits et
spécifications sont sujets à modifications sans préavis. © 2001 Ernst Paul
Lehmann Patentwerk.
2
Das Universal-Handy
The Universal Remote
Le télécommande universelle
3
© DiskArt™ 1988
Das Universal-Handy bietet einen optimalen Bedienkomfort zur Steuerung Ihrer gesamten Mehrzugsteuerung.
Das Universal-Handy kann auf Ihrer Mehrzugsteuerungsanlage und mit Einsatz der LGB-Funkfernsteuerung 55050/55055 auch an den analogen
Fahrregler 51070 angeschlossen werden.
Vom Universal-Handy aus können Sie folgende
Funktionen steuern:
Innerhalb der Mehrzugsteuerung:
• Fahrtrichtung und Geschwindigkeit mit einstellbarem
Regelbereich.
• Direktes Auslösen der Zusatzfunktionen und des
Lichts bei entsprechend ausgestatteten Loks.
• Programmieren der Lokadressen 00-22.
• Schalten und Programmieren von LGB-Weichendecodern.
• Steuern und Programmieren von Fahrstrassen
• Steuern und Programmieren von Doppeltraktionen
• Wahlweise zur Funkfernsteuerung ausbaubar mit
der LGB-Funkfernsteuerung 55050/55055.
The Universal Remote offers convenient operation of
your entire Multi-Train System.
You can use the Universal Remote on your Multi-Train
System layout or on a traditional analog layout, where
you can connect it to the 51070 Analog Throttle (with
55050/55055 LGB radio control).
With the Universal Remote, you can control the
following functions:
With the Multi-Train System, you can:
• control direction and speed with adjustable
throttle range
• directly activate MTS functions and lights with
MTS function-equipped locos
• program decoder addresses 00-22
• operate and program LGB Switch Decoders.
• operate and program switch routes.
• operate and program doubleheading.
• optional: operate your trains with wireless control
with LGB radio control 55050/55055.
La télécommande universelle est un moyen pratique
de commande du système multitrain dans son
ensemble.
La télécommande universelle peut être utilisée sur un
réseau numérique géré par le système multitrain ou
sur un réseau analogique traditionnel où elle peut être
raccordée à la commande analogique 51070 (avec
l’ensemble émetteur/récepteur sans fil 55050/55055).
La télécommande universelle permet de contrôler les
fonctions suivantes :
• Avec le système multitrain :
• commande de la vitesse et du sens de la marche
sur une plage réglable,
• activation directe des fonctions SMT et de l’éclairage
sur les locomotives équipées de ces fonctions,
• programmation des adresses de décodeur 00-22
• commande et programmation des décodeurs
d’aiguillage LGB,
• commande et programmation des sections de réseau
avec aiguillages,
• commande et programmation de la double traction,
• en option, configuration du réseau en commande
sans fil par l’utilisation des ensembles émetteur/
récepteur sans fil 55050/55055.
➜
4
Das Universal-Handy
The Universal Remote
Le télécommande universelle
5
© DiskArt™ 1988
In Verbindung mit dem analogen Fahrregler 51070:
• Nur in Verbindung mit der LGB-Funkfernsteuerung
55050/55055 betriebsbereit.
• Fahrtrichtung und Geschwindigkeit mit einstellbarem Regelbereich.
Mit dem Universal-Handy können Sie alle LGBLokdecoder, den LGB-Funktiondecoder und den LGBWeichendecoder programmieren.
With the Analog Throttle 51070, you can:
• operate only with LGB radio control 55050/55055.
• control direction and speed with adjustable
throttle range
With the Universal Remote, you can program all LGB
loco decoders, the LGB function decoder and the LGB
switch decoder.
Avec la commande analogique 51070 :
• fonctionnement uniquement avec l’ensemble
émetteur/récepteur sans fil 55050/55055,
• commande de la vitesse et du sens de la marche
sur une plage réglable.
La télécommande universelle permet de programmer
tous les décodeurs pour locomotive LGB, le décodeur
de fonction LGB et le décodeur d’aiguillage LGB.
➜
6
Anschluß an Mehrzugsteuerung
Connect to Multi-Train System
Raccordement au système multitrain
7
© DiskArt™ 1988
Anschluss des Universal-Handys
an Ihre Mehrzugsteuerung
An Ihrem Universal-Handy befindet sich ein
Anschlusskabel mit einem viereckigen Westernstecker
am losen Kabelende.
Diesen Westernstecker schließen Sie an der mit
LGB-Bus markierten Buchse Ihrer MZS-Zentrale Typ 2
55005 an.
Bei einem größeren Bedarf an Steckplätzen können
Sie diese mit dem LGB-Adapter/Verteiler 55110
erweitern.
Zum direkten Anschluss an Ihre Zentrale Typ 1 55000
verwenden Sie bitte den beigelegten Adapter für
Westernstecker auf DIN Stecker (rund).
Falls Sie hier noch andere Eingabegeräte verwenden
möchten, verwenden Sie das Y-Kabel, das der Packung
ebenfalls beigepackt wurde.
Connecting the Universal Remote to your Multi-Train
System
A cable with a phone-style connector is attached to
the Universal Remote. Plug the connector into an
"LGB-Bus" socket on your 55005 MTS Central Station,
Type 2.
If you need more sockets, you can use the 55110
MTS Remote Adapter.
To directly connect the remote to the 55000 Central
Station, Type 1, please use the included adapter for
DIN plugs (round).
If you would like to use other input devices as well,
use the Y cable, which also was included in the
package.
Raccordement de la télécommande universelle au
système multitrain
Un câble avec connecteur de type téléphone est
branché sur la télécommande. Enficher le connecteur
dans une prise identifiée «LGB Bus» sur le poste
central type 2 55005.
Si vous avez besoin de prises supplémentaires, vous
pouvez utiliser l’adapteur SMT 55110.
Pour raccorder directement la télécommande à un
poste central type 1 55000, utiliser l’adapteur pour
prises DIN (rondes) fourni.
Pour raccorder d’autres dispositifs d’entrée, utiliser
le câble en Y, également fourni.
➜
8
51070 und 55050
51070 and 55050
51070 et 55050
9
© DiskArt™ 1988
Anschluss des Universal-Handys an den analogen
Fahrregler 51070
Um das Universal-Handy hier einsetzen zu können
benötigen Sie zwingend die LGB-Funkfernsteuerung
55050/55055.
Lesen Sie hierzu den folgenden Abschnitt.
1
Einsetzen des LGB-FunkfernsteuerungSenders 55050
Für den Einsatz mit Funkfernsteuerung müssen Sie
Ihr Universal-Handy mit einem RC-Sender 55050
ausrüsten.
1 Drücken Sie auf die beiden geriffelten Laschen
am Kopfteil des Universal-Handys und ziehen Sie
das Kunststoffteil mit Kabel vorsichtig heraus.
2 Setzen Sie in das nun offene Kopfteil den RCSender 55050 ein.
Beschädigen Sie dabei nicht die Antenne.
Connecting the Universal Remote
to the 51070 Analog Throttle
To use the Universal Remote in this setting, you must
obtain the LGB radio control 55050/55055.
For more information, read the following paragraph.
Raccordement de la télécommande universelle à la
commande analogique 51070
Vous devez utiliser l’ensemble émetteur/récepteur
sans fil 55050/55055 pour pouvoir utiliser la
télécommande universelle avec la commande
analogique 51070. Pour de plus amples
renseignements, se reporter au paragraphe suivant.
Inserting the 55050/55051 LGB Wireless
Transmitter
For wireless operation, you have to equip your Universal
Remote with a 55050/55051 Wireless Transmitter.
1 Press both textured clips at the top of the remote
inward and carefully pull out the plastic insert.
2 Slide the 55050/55051 Wireless Transmitter into
the remote.
Do not damage the antenna while doing this.
Installation de l’émetteur sans fil LGB 55050/55051
Pour la configuration commande sans fil, il est impératif
d’installer un émetteur sans fil 55050/55051 sur la
télécommande universelle.
1 Déplacer les deux boutons en relief situés à la
partie supérieure de la télécommande vers l’intérieur
et sortir l’insert plastique avec précaution.
2 Enficher l’émetteur sans fil 55050/55051 dans la
télécommande.
Faire très attention à ne pas endommager l’antenne
pendant l’opération.
2
➜
10
55050
55050
55050
11
© DiskArt™ 1988
3 Öffnen Sie das Batteriefach am Schnappverschluss
an der Unterseite Ihres Universal-Handys und legen
Sie vier Mignon (AA) Batterien nach Aufdruck in das
Batteriefach. Verwenden Sie hochwertige Batterien,
z.B. Alkali Batterien.
Schließen Sie das Batteriefach.
Eingeschaltet wird das Universal-Handy durch
längeres Drücken der Taste F auf dem Tastaturfeld
Ihres Universal-Handys.
Wenn bei Betrieb die obere Kontrollleuchte blinkt,
dann ist dies ein Zeichen dafür, dass Sie Ihre Batterien
wechseln sollen. Entsorgen Sie verbrauchte Batterien
bitte umweltgerecht.
Um beim Betrieb Strom zu sparen, können Sie durch
Drücken der Taste F und gleichzeitiges Drücken der
Taste 9 das konstant leuchtende Anzeigendisplay auf
einen 3 Sec. Modus einstellen (gleiches Vorgehen,
wenn Sie wieder auf konstante Anzeige umschalten
wollen).
Nach längerer Phase ohne Eingabe schaltet sich das
Handy selbstständig ab.
3 Open the battery compartment using the clip on
the underside of the remote and insert 4 ”AA” batteries,
as shown on the battery cover. Use high-quality
batteries, like "alkaline" batteries.
Close the battery compartment.
Turn on the Universal Remote by pressing the ”F”
button on the button pad of your Universal Remote
for a significant period of time.
If during operation, the upper LED is flashing, you
should change the batteries. Please dispose of used
batteries with consideration to the environment.
To save energy during operations, you can change the
constantly illuminated display to a 3 second mode by
simultaneously pressing buttons ”F” and ”9”. (Use
the same method to switch back to constant display.)
After a significant time without inputs, the remote
switches off automatically.
3 Utiliser le bouton situé sous la télécommande pour
ouvrir le couvercle du logement des piles et installer
4 piles de type «AA», comme il est indiqué sur le
couvercle. N’utiliser que des piles de qualité supérieure,
comme les piles «alcalines».
Remettre le couvercle du logement des piles en place.
Mettre la télécommande sous tension en enfonçant
le bouton «F» du clavier de la télécommande et en le
maintenant enfoncé pendant un bon moment.
Si pendant l’utilisation de la télécommande, la DEL
supérieure clignote, c’est qu’il faut remplacer les piles.
Se débarrasser des piles en suivant les réglementations
en vigueur. Pour économiser l’énergie pendant
l’utilisation de la télécommande, vous pouvez ramener
la durée d’allumage de l’afficheur, qui est normalement
toujours allumé, à 3 secondes en appuyant
simultanément sur les boutons «F» et «9» (Répéter
l’opération pour revenir en mode d’allumage
permanent).
La télécommande passe automatiquement hors tension
après une période d’inactivité assez longue.
➜
3
12
55050 und 55055
55050 and 55055
© DiskArt™ 1988
Nach Beendigung des Spielens, können Sie durch
Drücken der Taste F und gleichzeitiges Drücken der
Taste 0 das Universal-Handy wieder ausschalten.
Wenn Sie über einen längeren Zeitraum nicht spielen
möchten, empfiehlt es sich die Batterien aus dem
Batteriefach zu nehmen.
Bitte beachten Sie, dass Ihre Funkfernsteuerung
nur eine einseitige Befehlrichtung hat, und Sie deshalb
keine Rückantwort erhalten.
4 Ihr Universal-Handy ist nun für den jeweiligen
Einsatz bereit.
After you have finished playing, you can turn off
the Universal Remote by simultaneously pressing the
buttons ”F” and ”0.”
If you don’t plan to play for a significant period of
time, it is recommended to take the batteries out of
the battery compartment.
Please note that your radio control system has a
one-way command direction. Therefore, you don’t get
confirmations.
4 Now your Universal Remote is ready for
operation.
5 Anschluss des RC-Empfängers 55055
Lesen Sie hierzu die Bedienungsanleitung des RCEmpfängers 55055.
5
Connecting the 55055/55056 Wireless Receiver
You’ll find this information in the instructions for the
55055/55056 Wireless Receiver.
55050 et 55055
13
4
Vous pouvez mettre la télécommande hors tension
après utilisation en appuyant simultanément sur les
boutons «F» et «0».
Nous recommandons de sortir les piles lorsque la
télécommande n’est pas utilisée pendant une longue
période.
Il ne faut pas oublier que le système de commande
par radio fonctionne de manière unidirectionnelle, il
n’y a donc pas de confirmation des instructions de
commande.
4 La télécommande est maintenant prête pour être
utilisée.
5
5 Installation du récepteur sans fil 55055/55056
Les instructions d’installation du récepteur sans fil
55055/55056 figurent sur la fiche d’instructions de
l’accessoire.
➜
14
Betrieb mit dem MZS
Operation with the MTS
Utilisation avec le SMT
15
© DiskArt™ 1988
Betrieb mit dem Mehrzugsystem
Auf der Tastatur Ihres Universal-Handy finden Sie
einer jeden Zahl ein Symbol zugeordnet. Jedes dieser
Symbole entspricht einer gewissen Funktion. Um
zwischen diesen Funktionen agieren zu können,
müssen Sie über die Taste “F” und dem jeweiligen
Symbol auswählen. Sie bedienen als erstes die Taste
“F” dann eine Taste von “1-8”. Nachdem Sie die Taste
“F” gedrückt haben, zeigt Ihnen eine gelbe
Kontrollleuchte über der Taste “F” das Sie im
Funktionswechsel sind.
Ebenso werden durch Blinken des Kennbuchstaben
in der Anzeige die jeweiligen Schaltvorgänge
dargestellt.
Operation with the Multi-Train System
On the button pad of your Universal Remote, you find
a symbol next to each number. Each of these symbols
represents a certain function. To select one of these
functions, press the ”F” button and the corresponding
symbol button. First press the ”F” button and then
one of the numbered buttons ”1-8.” After you have
pressed the ”F” button, the yellow LED above the ”F”
button shows that you are now in the ”function
changing mode.”
In the same manner, a flashing of the letter in the
display indicates each command.
Utilisation avec le système multitrain
Un symbole figure sur le clavier de la télécommande
universelle, à côté de chaque numéro. Chaque symbole
représente une fonction particulière. Pour sélectionner
l’une de ces fonctions, appuyer sur le bouton «F» et
sur le bouton avec le symbole correspondant. Appuyer
tout d’abord sur le bouton «F» et ensuite sur l’un des
boutons numérotés «1-8». Appuyer sur le bouton
«F», la DEL jaune située au-dessus du bouton «F»
s’allume pour indiquer que la télécommande est
maintenant en «mode de changement de fonction».
De la même manière, le clignotement de la lettre sur
l’afficheur indique chaque commande.
➜
16
17
© DiskArt™ 1988
1
Weichen und andere EPL-Antriebe oder Zubehör
schalten.
Sobald Sie das Universal-Handy einschalten oder
über die Taste “F” und “1” gedrückt haben, erscheint
in der Anzeige S - .
Durch weitere Eingabe der Weichennummer (oder
Antriebs bzw. Zubehör Nummer) wählt man den
jeweiligen Artikel an.
Über die Pfeil-Tasten in der unteren Hälfte des
Bedienfeldes schaltet man je nach Artikel auf geradeaus
oder abzweigen, rot oder grün, ein oder aus.
Wechselt man auf eine ungültige Adresse springt
die Anzeige zurück auf S - und man beginnt erneut.
1
Setting switches and other EPL drives or accessories
After the remote is plugged in or after you have
pressed the buttons ”F” and ”1,” the display shows
S -.
Enter the switch number (or number of drive or
accessory) you want to set.
Press the arrow buttons in the lower half of the
button pad to set the item to straight or diverging,
red or green, on or off.
If you select an invalid address, the display shows
S - . Start anew.
1
Réglage des aiguillages et autres dispositifs
d’entraînement ou accessoires EPL
Brancher la télécommande ou appuyer sur les
boutons «F» et «1», l’afficheur indique S - .
Entrer le numéro de l’aiguillage (ou du dispositif
d’entraînement ou de l’accessoire) à régler.
Appuyer sur les boutons fléchés situés à la moitié
inférieure du clavier pour régler l’aiguillage ou le
dispositif d’entraînement ou l’accessoire : la position
de l’aiguille, droite ou virage, rouge ou vert, marche
ou arrêt.
L’afficheur indiquera S - en cas de sélection
d’adresse incorrecte. Recommencer l’opération.
➜
02-55015 RZ_1. Teil S. 02-21 19.10.2001 11:25 Uhr Seite 9
18
19
© DiskArt™ 1988
2
Loks Steuern
Drücken Sie die Taste “F” und die Taste “2”.
In der Anzeige erscheint dann die letzte eingestellte
Loknummer L xx .
Um die Loknummer zu wechseln, drücken Sie die
Taste “0”, es erscheint
L - - auf der Anzeige, geben Sie dann die neue
Loknummer zweistellig ein (00 – 22).
Bei einer zu hohen Loknummer springt die Anzeige
wieder auf L - - .
Falls die gewählte Lokadresse von einem Mitspieler
belegt wird, erlischt die rote Kontrollleuchte über der
Anzeige. Der Mitspieler muss dann entweder seine
Lok frei geben, in dem er die Adresse bei sich wechselt,
oder er den Regler ca. 4 sec auf Null stellt.
Über die Pfeiltasten im unteren Bedienfeld können
Sie Ihre Loks fahren lassen. Die rechte Pfeiltaste lässt
Ihre Loks vorwärts fahren, die linke Pfeiltaste lässt
Ihre Loks rückwärts fahren.
2
Controlling locomotives
Press the buttons ”F” and ”2.”
The last selected loco number is displayed:
L xx .
To change the loco number, press ”0,” now the
display shows L -- , then input the new two-digit
loco address (00-22).
If your loco number is too high, the display shows
L -- again.
If the new address is already in use by another
player, the red LED above the display goes dark. The
other player must either release the loco by selecting
a different address on their MTS throttle or by setting
the throttle to zero for about 4 seconds.
By pressing the arrow buttons in the lower half
of the button pad you can run your loco’s. The right
arrow button is used to run the loco foreward, the left
arrow button is used to run backwards.
2
Commande des locomotives
Appuyer sur les boutons «F» et «2».
La dernière adresse de locomotive sélectionnée
apparaît sur l’afficheur sous la forme L xx .
Pour changer le numéro de la locomotive, appuyer
sur le bouton «O», l’afficheur indique maintenant
L -- , entrer les deux chiffres de la nouvelle adresse
de la locomotive (00-22).
En cas de sélection d’une adresse incorrecte
(supérieure à 22), la télécommande passe
automatiquement en mode de sélection d’adresse :
L -- .
Si la nouvelle adresse est déjà utilisée par un autre
joueur, la DEL rouge située au-dessus de l’afficheur
s’assombrit. L’autre joueur doit libérer la locomotive
en sélectionnant une adresse différente sur sa
commande SMT ou en ramenant la commande au
zéro pendant environ 4 secondes.
Vous pouvez faire fonctionner la locomotive en
utilisant les boutons flèchés à la partie inférieure du
clavier. Le button flèche à droite fait déplacer la locomotive vers l’avant et le bouton flèche à gauche la fait
déplacer vers l’arrière.
➜
20
21
© DiskArt™ 1988
2
Lokbeleuchtung
Über die Taste “9” können Sie die Beleuchtung
Ihrer Lok ein und auch wieder ausschalten.
Vorrausetzung ist, dass Ihre Lok digitalisiert ist und
dabei das Licht auf den richtigen Schaltausgang
installiert wurde.
Sonderfunktionen
Über die Tasten “1” bis “8” können Sie die
Sonderfunktionen Ihrer Loks aufrufen.
Vorrausetzung ist, dass Ihre Lok digitalisiert ist und
Sonderfunktionen hat.
2
Loco lights
Using button ”9,” you can switch on and off the
lights of your loco.
This works only if your loco is digitalized and if the
lights were installed on the correct terminal.
Special functions
Using buttons ”1” through ”8,” you can trigger
special functions of your locos.
This works only if your loco is digitalized and equipped
with special functions.
2
Feux des locomotives
Appuyer sur le bouton «9» pour allumer et éteindre
les feux de la locomotive.
Ce bouton ne peut être utilisé que si la locomotive est
numérisée et que les feux sont raccordés à la broche
appropriée.
Fonctions spéciales
Les boutons «1» à «8» servent pour la commande
des fonctions spéciales des locomotives.
Ces boutons ne peuvent être utilisés que si la
locomotive est numérisée et équipée des fonctions
spéciales.
➜
22
23
© DiskArt™ 1988
3
Fahrstrassen schalten
Hier können Sie die von Ihnen selbst zusammengestellten
Fahrstrassen schalten. Fahrstrassen sind eine Reihe von
Artikeln, vorwiegend Weichen (Signale können mit
berücksichtigt werden), welche miteinander beschaltet
einen bestimmten Fahrweg für Loks herstellen.
Sie haben die Auswahl aus bis zu 10 Fahrstrassen (0-9).
Wie immer drücken Sie die Taste “F”, dann die
Taste “3”.
In der Anzeige erscheint F Geben Sie dann die Nummer der Fahrstrasse ein,
welche Sie stellen wollen.
Auch hier gilt, bei falscher Eingabe springt die
Anzeige auf F - zurück.
Beachten Sie bitte, dass Ihre Fahrstrasse nur einen Befehl
nach dem Anderen abarbeitet. D.h. bei längeren Fahrstrassen (max. 15 Schaltvorgänge) kann es etwas Dauern
bis alles gestellt ist. Während dieser Zeit dürfen Sie nicht
die Taste “F” drücken, da sonst der Vorgang abgebrochen
wird. Ebenfalls wird bei einem zwischenzeitlichen Nothalt
der Stellvorgang unterbrochen und erst wieder bei deaktivieren des Nothalts fortgesetzt.
3
Setting switch routes
In this mode, you can set your own switch routes,
which you have compiled. Switch routes are a number
of items, mostly switches (signals can be considered
as well), which are set together to create a route for
the loco.
You have a selection of up to 10 switch routes
(0-9).
As usual, press the ”F” button, then the ”3” button.
The display shows F Enter the number of the switch route you want
to set.
Here, too, the following holds true: With an invalid
input, the remote selects F - .
Please note that the switch route is processed one
element at a time. For long switch routes (up to 15
commands to individual elements), this can take a
while. Don’t press the ”F” button while setting a switch
route, otherwise the process is terminated. The same
applies for an emergency stop: The setting process
is interrupted and will be continued only after the
emergency stop has been deactivated.
3
Établissement des sections de réseau avec aiguillages
Ce mode permet d’établir des sections de réseau avec
aiguillages. Les sections de réseau avec aiguillages
représentent un nombre d’éléments, en particulier
des aiguillages (le principe est le même pour les
signaux), regroupés pour créer un itinéraire pour une
locomotive.
Le nombre de sections de réseau avec aiguillages
peut atteindre 10 (0-9).
Appuyer sur le bouton «F», puis sur le bouton
«3».
L’afficheur indique F - .
Entrer le numéro de la section de réseau avec
aiguillages sélectionnée.
En cas d’entrée incorrecte, la télécommande
repasse en mode de sélection F - .
Bien se rappeler que les éléments sont traités les uns
après les autres, ce qui veut dire que pour les sections
de réseau avec aiguillages de grande longueur (jusqu’à
15 commandes vers les éléments individuels),
l’opération peut prendre du temps.
Ne pas appuyer sur le bouton «F» tant que l’opération
n’est pas terminée, car cela désactive le processus.
Le même raisonnement s’applique en cas d’arrêt
d’urgence. Le processus est interrompu et ne reprendra
qu’après la désactivation de l’arrêt d’urgence.
➜
24
25
© DiskArt™ 1988
4
Doppeltraktion ansteuern
Eine Doppeltraktion ist ein Verbund von zwei
Lokomotiven, welcher gerne für besonders lange Züge
oder auch für Steigungen eingesetzt wird.
Sie sollten jedoch darauf achten, dass die von Ihnen
ausgewählten Loks von den Geschwindigkeiten her
ungefähr gleich sind. Unterschiedliche Tempos können
Getriebeschäden hervorrufen. Achten Sie auch darauf,
dass beide Loks in der von Ihnen programmierten
Richtung auf dem Gleis stehen, da Sie sonst
gegeneinander fahren.
Wie immer rufen Sie diese Funktion über die Taste
“F” auf, und ergänzen die Taste “4”.
Dann erhalten Sie die Anzeige d x .
Auch hier haben Sie die Auswahl von 0-9.
Falls Sie eine ungültige Traktionsnummer aufgerufen
haben wechselt die Anzeige wieder auf d - .
Mit den Pfeiltaste steuern Sie nun den aufgerufenen
Lokverbund als eine Traktionsnummer, wobei die
Sonderfunktionen dann von beiden Loks ausgeführt
werden.
4
Controlling doubleheading
Doubleheading means connecting two locomotives
to a train. This is used for especially long trains and
also for uphill grades.
However, you should make sure that the locos you
have selected are approximately the same as far as
their speed is concerned. Different speeds can cause
gearbox damage. Also make sure that the locos are
oriented in the programmed direction. Otherwise, they
will run in opposite directions.
As always, you call up this function by pressing
”F” and add the button ”4.”
The display shows d x .
Here, too, you have a choice between 0-9.
If you select an invalid number, the remote displays
d - again.
Now use the arrow buttons to control both locos
together as one traction number. Special functions
are executed by both locos.
4
Commande de la double traction
La double traction signifie que deux locomotives sont
raccordées au même train. Cette technique est utilisée
en particulier pour tirer les longs convois et également
pour monter les fortes pentes.
Il faut toutefois s’assurer que les locomotives choisies
possèdent des caractéristiques identiques, en
particulier en ce qui concerne la vitesse, car il y a un
risque d’endommagement de la boîte de vitesses dans
le cas contraire. Il ne faut pas non plus oublier de
vérifier que les locomotives sont orientées suivant le
sens de la marche programmé, sinon elles se
déplaceront dans des sens contraires.
Appuyer sur le bouton «F», puis sur le bouton «4».
L’afficheur indique d - .
Entrer un numéro compris entre «0» et «9».
En cas d’entrée incorrecte, la télécommande
repasse en mode de sélection d - .
Utiliser les boutons fléchés pour commander les deux
locomotives comme un seul ensemble de traction.
Les fonctions spéciales seront exécutées par les deux
locomotives.
➜
26
27
© DiskArt™ 1988
5
Identifikationsnummer = ID#
Jedes Gerät, welches mit dem LGB-Daten-Bus verbunden ist. Bekommt eine sogenannte ID#. Auch Ihr
Universal-Handy. Bei Auslieferung ist Ihr UniversalHandy auf ID 1 eingestellt. So sollte es eigentlich auch
bleiben. Sie sollten jedem Gerät Ihrer Mehrzugsteuerung eine ID# zuweisen, sofern es einstellbar
ist. Sie haben die Möglichkeit von ID 1 bis ID 7, wobei
die ID 1 und die ID 2 öfters auf Befehle abgerufen
werden als folgende (besitzen Sie noch eine ältere
Zentrale aus der ersten Generation, können nur ID 1
und ID 2 behandelt werden). Sollten Sie Probleme
haben beim Weichenschalten, ist meist die ID# Ihres
Universal-Handy verstellt.
Um die ID# einzustellen, drücken Sie die Taste
“F” und dann die Taste “5”.
In der Anzeige erscheint dann P - .
Geben Sie dann Ihre ausgewählte ID# ein, die
Anzeige wechselt automatisch in die davor eingestellte
Funktion.
5
Identification Number = ID#
Each device connected to the LGB Data BUS. Receives
an ID Number. Same for your Universal Remote. At
the factory, your Universal Remote is programmed
to ID 1. And it should remain that way. You should
assign each device of your Multi-Train System an ID#,
if it is adjustable. You can choose from ID 1 through
ID 7, but ID 1 and ID 2 are more often checked for
commands than the following (if you own an older
Central Station from the first generation, only ID 1
and ID 2 can be covered). If you have problems setting
switches, usually the ID# of your remote has been
changed.
To program the ID#, press the ”F” button and then
the ”5” button.
The display shows P - .
Enter your selected ID#, the display automatically
changes to the previously selected function.
5
Numéro d’identification – ID #
Chaque dispositif raccordé au bus de données LGB
reçoit un numéro d’identification. C’est la même chose
pour la télécommande universelle. Le numéro
d’identification attribué en usine à la télécommande
universelle est ID1, et il doit le rester. Chaque élément
du système multitrain doit avoir un numéro
d’identification, s’il est possible de le changer. Le
choix va de ID1 à ID7, mais ID1 et ID2 sont les plus
souvent utilisés pour les commandes (en ce qui
concerne le poste central de première génération,
seuls ID1 et ID2 peuvent être utilisés). En cas de
difficultés pour le réglage des aiguillages, vérifier que
le numéro d’identification de la télécommande n’a pas
été changé.
Pour programmer le numéro d’identification,
appuyer sur le bouton «F», puis sur le bouton «5».
L’afficheur indique P - .
Entrer le numéro d’identification choisi, l’afficheur
repasse automatiquement à la fonction sélectionnée
précédemment.
➜
28
29
© DiskArt™ 1988
6
Reaktionszeit der Pfeiltasten programmieren
Mit Ihren Pfeiltasten, im unteren Bereich des UniversalHandy, können Sie die Geschwindigkeit Ihrer Lok Ihrer
Lok erhöhen, indem Sie mehrmals auf die rechte
Pfeiltaste drücken oder konstant darauf bleiben. Um
Ihren Loks somit eine Anfahrverzögerung zu geben,
können Sie den Zeitwert zwischen den einzelnen
Impulsen des Handy verändern. Von schneller
Beschleunigung (0,3 sec zwischen den Impulsen), bis
langsamer Beschleunigung (1,2 sec zwischen den
Impulsen).
Die Werte hierfür sind von 1 bis 7. Um die Loks
abzubremsen, gilt der selbe wert für die linke Pfeiltaste.
Der runde Knopf in der Mitte bremst die Loks auch
mit selben Verzögerung bis Stillstand.
Zum Programmieren drückt man die Taste “F” und
die Taste “6”.
Die Anzeige zeigt P - .
Danach gibt man seinen Wert von 1 bis 7 ein, und
die Anzeige wechselt von selbst in die davor eingestellte
Funktion.
6
Programming the reaction time of the
arrow buttons
With your arrow buttons, located in the lower part of
the Universal Remote, you can increase the speed of
your loco of your loco by pressing the right arrow
button several times or holding it constantly. Thus, to
give your loco a starting delay, you can program the
time value between the individual impulses of the
remote. From fast acceleration (0.3 sec. between
impulses) to slow acceleration (1.2 sec. between
impulses). The values for this are 1 through 7. To slow
the locos, the same value applies for the left arrow
button. The round button in the center brakes the
locos, also with the same deceleration, until they stop.
To program, one presses the ”F” button and the
”6” button.
The display shows P - .
After that, one inputs one’s value between 1 and
7, and the display changes to the previously selected
function.
6
Programmation du temps de réaction des boutons
fléchés
Les boutons fléchés situés à la partie inférieure de la
télécommande universelle permettent d’augmenter la
vitesse de la locomotive. Pour ce faire, appuyer plusieurs fois sur le bouton de droite ou le maintenir
enfoncé. Donc, pour programmer une temporisation
au démarrage, programmer la durée entre les impulsions de la télécommande. Pour une accélération
rapide, utiliser 0,3s entre impulsions et pour une
accélération lente, utiliser 1, 2s entre impulsions. Cette
plage correspond aux chiffres 1 à 7. Le même principe
s’applique avec le bouton de gauche pour ralentir la
locomotive. Le bouton rond au centre déclenche le
freinage, avec la même décélération, jusqu’à l’arrêt.
Pour programmer, appuyer sur le bouton «F»,
puis sur le bouton «6».
L’afficheur indique P - .
Entrer le numéro choisi, entre 1 et 7, l’afficheur
repasse automatiquement à la fonction sélectionnée
précédemment.
➜
30
31
© DiskArt™ 1988
7
Fahrstrassen programmieren
Hier können Sie die von Ihnen selbst zusammengestellten Fahrstrassen programmieren. Es besteht
die Möglichkeit bis zu 10 Fahrstrassen anzulegen.
Eine jede der Fahrstrassen kann bis zu 15 Elemente
(Weichen, Signale, etc.) beinhalten. Beispiele für
Fahrstrassen sind einzelne Bahnsteige, bestimmte
Wege um von einem äußeren in einen inneren Kreis
zu fahren usw.
Um zu Programmieren drücken Sie die Taste “F”
und die Taste “7”.
In der Anzeige erscheint P - .
Geben Sie nun die Nummer der Fahrstrasse ein
(0 bis 9).
Die Anzeige zeigt wieder P - .
Geben Sie die Nummer des ersten Elements ein-,
zwei- oder dreistellig ein (1 bis 128)
7
Programming switch routes
Here you can program your switch routes which you
have assembled. You can assemble up to 10 switch
routes. Each switch route can contain up to 15 elements
(switches, signals, etc.). Examples for switch routes
are individual platforms, certain paths to go from an
outer circle into an inner circle, etc.
To program, press the ”F” button and the ”7”
button.
The display shows P - .
Enter the switch route number (0 through 9).
The display shows P - again.
Enter the number of the first element of the switch
route (one, two or three digits, 1 through 128)
7
Programmation des sections de réseau
avec aiguillages
Vous pouvez programmer les sections de réseau avec
aiguillages qui ont été constituées. Le nombre de
sections de réseau avec aiguillages peut atteindre 10,
et chaque section peut comporter jusqu’à 15 éléments
(aiguillages, signaux, etc.). Parmi les sections de
réseau courantes, citons les quais individuels, les
passages d’un cercle extérieur à un cercle intérieur,
etc.
Pour programmer, appuyer sur le bouton «F» et
sur le bouton «7».
L’afficheur indique P - .
Entrer le numéro de la section de réseau (0 à 9).
L’afficheur indique de nouveau P - .
Entrer le numéro du premier élément de la section
de réseau avec aiguillages (un, deux, ou trois chiffres
de 1 à 128 inclus).
➜
32
33
© DiskArt™
7
Fahrstrassen programmieren
Eine der Pfeiltasten für die Stellrichtung drücken,
dabei müssen Sie folgendes beachten:
< Linksweiche abzweigen
Rechtsweiche gerade
Signal grün
> Linksweiche gerade
Rechtsweiche abzweigen
Signal rot
Die Anzeige zeigt wieder P - .
Dies können Sie nun für 15 Elemente wiederholen,
dann springt die Anzeige wieder auf die voreingestellte
Funktion zurück.
Bei weniger als 15 Elementen drücken Sie die Tast
“F” und eine andere Funktion und haben damit die
Programmierung abgeschlossen.
7
Programming switch routes
Press one of the arrow buttons for the direction,
in which the element is switched:
< for: left switch diverging,
right switch straight
signal green
> for: left switch straight,
right switch diverging,
signal red
The display shows P - again.
Now you can repeat this for 15 elements. Then
the display returns to the previously selected function.
If the switch route has less than 15 elements,
press the ”F” button and another function to end the
programming.
If the switch route has 15 elements, the remote
automatically re-selects the previous mode.
7
Programmation des sections de réseau
avec aiguillages
Appuyer sur l’un des boutons fléchés
correspondant à la direction du trafic suivant la position
de l’aiguillage :
< aiguillage à gauche en position de virage,
aiguillage à droite en position tout droit,
feu au vert,
> aiguillage à gauche en position tout droit,
aiguillage à droite en position de virage,
feu au rouge.
L’afficheur indique de nouveau P - .
Répéter l’opération pour tous les 15 éléments de
la section de réseau,
L’afficheur revient à la fonction sélectionnée
précédemment.
Si la section de réseau comporte moins de 15
éléments, appuyer sur le bouton «F» et sur un autre
bouton de fonction pour terminer la programmation.
Si la section de réseau comporte 15 éléments, la
télécommande sélectionne automatiquement le mode
précédent.
➜
34
35
© DiskArt™
8
Doppeltraktion programmieren
Sie können bis zu 10 Lokkombinationen aus je zwei
Loks programmieren.
Sie drücken wieder die Taste “F” und dann die
Taste “8”.
Die Anzeige zeigt P - .
Sie geben die Nummer der Kombination ein
(0 bis 9).
Die Anzeige zeigt nun P - - .
Jetzt geben Sie die Adresse der 1.Lok zweistellig
ein (00 – 22).
Die Anzeige zeigt wieder P - - .
Jetzt folgt die Adresse der 2. Lok wieder zweistellig
(00 – 22).
Die Anzeige zeigt P - .
8
Programming doubleheading
You can program up to 10 loco combinations with 2
loco addresses each.
Press the ”F” button again and then the ”8” button.
The display shows P - .
Enter the loco combination number
(0 through 9).
The display now shows P - - .
Enter the first two-digit loco address (00 - 22).
The display shows P - - .
Enter the second loco address, also with two
digits (00 - 22).
The display shows P - .
8
Programmation de la double traction
Vous pouvez, au maximum, programmer 10
combinaisons de locomotives, chaque combinaison
ayant 2 adresses.
Appuyer sur le bouton «F», puis sur le
bouton «8».
L’afficheur indique P - .
Sélectionner le numéro de combinaison (0-9).
L’afficheur indique maintenant P - - .
Sélectionner l’adresse à deux chiffres de la
première locomotive (00-22).
L’afficheur indique de nouveau P - - .
Sélectionner l’adresse de la deuxième locomotive,
également à deux chiffres (00-22).
➜
36
37
© DiskArt™
8
Doppeltraktion programmieren
Jetzt müssen Sie die Fahrtrichtung der Loks
zueinander bestimmen. Sie haben dafür vier
Auswahlmöglichkeiten (0 – 3).
0 beide Loks fahren in gleicher Richtung.
1 die 1. Lok fährt in umgekehrter Fahrtrichtung
2 die 2. Lok fährt in umgekehrter Fahrtrichtung
3 beide Loks fahren in gleicher Fahrtrichtung aber
andersherum.
8
Programming doubleheading
Now you have to determine the direction of travel.
You have four choices (0-3):
0 Both locos go in the same direction.
1 Loco 1 goes in the opposite direction.
2 Loco 2 goes in the opposite direction.
3 Both locos go in the same direction,
but the other way.
8
Programmation de la double traction
L’afficheur indique «P-» une fois les adresses
sélectionnées. Choisir maintenant le sens de la marche
des locomotives, vous avez quatre choix (0-3) :
0 les deux locomotives se déplacent dans
la même direction.
1 La locomotive n°1 se déplace dans la direction opposée.
2 La locomotive n°2 se déplace dans la direction opposée.
3 Les deux locomotives se déplacent dans
la direction opposée.
➜
38
39
© DiskArt™
Nothalt
Mit Ihrem Universal-Handy können Sie über die
“STOP” Taste einen Nothalt oder eine Pause auslösen.
Drücken Sie die “STOP” Taste und Ihre Schienen sind
sofort stromlos.
Dies wird Ihnen durch Blinken der oberen
Kontrollleuchte am Universal-Handy signalisiert (nicht
mit Fernbedienung).
Ein weiteres Drücken auf die “STOP” Taste hebt die
Unterbrechung wieder auf. Falls Sie sich verdrückt
haben, muss die Kontrollleuchte mindestens dreimal
geblinkt haben um die Unterbrechung wieder zu
deaktivieren.
Um einen Unfall auf Ihrer Anlage vorzubeugen,
falls zwei Loks auf Kollisionskurs waren, drücken Sie
auf Ihrer Zentrale die Reset-Taste bevor Sie den Nothalt
wieder deaktivieren.
Emergency Stop
With your Loco Remote, you can use the ”STOP”
button to trigger an emergency stop or a pause.
Press the ”STOP” button, and track power to your
layout is switched off immediately. Now the red LED
at the top of the remote flashes (not with wireless
operation).
Press the ”STOP” button once more to restart. If you
have pressed the button in error, the LED has to flash
at least three times to deactivate the interruption.
To prevent an accident if two trains were about
to collide, press the ”Reset” button on the Central
Station before you deactivate the emergency stop.
Arrêt d’urgence
Appuyer sur le bouton «STOP» de la
télécommande universelle pour déclencher un arrêt
d’urgence ou une pause.
Appuyer sur le bouton «STOP» et l’alimentation
électrique de la voie est coupée immédiatement. La
DEL rouge située à la partie supérieure de la
télécommande clignote (ce n’est pas le cas en
configuration commande sans fil).
Appuyer de nouveau une fois sur le bouton «STOP»
pour remettre en route après un arrêt d’urgence. Si
vous appuyez sur le bouton par erreur, la DEL doit
clignoter au moins trois fois avant de pouvoir remettre
en route.
Pour éviter une collision imminente entre deux
trains, appuyer sur le bouton «Reset» du poste central
avant de faire repartir les locomotives.
➜
40
Betrieb mit 51070
Operation with 51070
Utilisation avec 51070
41
© DiskArt™
Betrieb mit dem Analogfahrregler 51070
Um das Universal-Handy hier einsetzen zu können
benötigen Sie zwingend die LGB-Funkfernsteuerung
55050/ 55055 (siehe vorhergehende Kapitel). Falls
beim Anschluss des Universal-Handys, an den analogen Fahrregler, keine Anzeige im Display sichtbar
ist, muss das Handy über die Taste “F” eingeschaltet
werden. Da Sie die Möglichkeit haben, mehrere analoge
Fahrregler 51070 anzusteuern, müssen Sie nach dem
Einschalten Ihren Stromkreis auswählen. Wenn Sie
nur einen Stromkreis haben, und die Grundeinstellungen Ihres RC-Empfängers 55055 nicht verändert
haben, ist Ihr zu wählender Stromkreis die Nummer
1. Der letzt angewählte Stromkreis wird in der Anzeige
als L xx (XX ist die Nummer des Stromkreises)
dargestellt. Um den Stromkreis zu ändern, drücken
Sie bitte die Taste “0”, dann erscheint L - - in der
Anzeige. Geben Sie die neue Nummer ( 01 bis 08)
zweistellig ein. Der neugewählte Stromkreis wird in
der Anzeige dann dargestellt.
Operation with 51070 Analog Throttle
To use the Universal Remote in this application, you
must obtain the LGB radio control 55050/55055 (see
previous chapter). If after connecting the Universal
Remote to the Analog Throttle, no display is visible,
you must switch on the remote using button ”F.”
Because you can control several 51070 Analog
Throttles, you have to select your track block after
the power is turned on. If you have only one throttle,
and you have not changed the settings of your
55055/55056 Wireless Receiver, select track block
No. 1. The last track block you selected is displayed
as L xx (xx is the number of the track block).
To change the track block, please press button ”O,”
then the display shows L - - . Input the new two-digit
number (01 through 08). Then the newly selected
track block is displayed.
Utilisation avec la commande analogique 51070
Pour utiliser la télécommande universelle avec la
commande analogique 51070, il est nécessaire
d’utiliser l’ensemble émetteur/récepteur sans fil LGB
55050/55055 (se reporter au chapitre précédent).
Si aucune indication n’apparaît sur l’afficheur après
raccordement de la télécommande à la commande
analogique, mettre la télécommande sous tension en
utilisant le bouton «F».
La télécommande permettant de commander plusieurs
commandes analogiques 51070, vous devez
sélectionner la partie de réseau à contrôler après la
mise sous tension du système. S’il n’y a qu’une
commande et que les réglages du récepteur
55055/55056 n’ont pas été modifiés, sélectionnez la
partie de réseau n°1. La dernière partie de réseau
sélectionnée est affichée sous le format L xx
(xx est le numéro de la partie du réseau).
Pour changer le numéro de la partie de réseau, appuyer
sur le bouton «0», l’afficheur indique L - - . Entrer
le nouveau numéro à deux chiffres (01 à 08), le
nouveau numéro de partie de réseau sélectionnée
s’affiche.
➜
42
43
© DiskArt™
Fahrtrichtung und Geschwindigkeit
Über die Pfeiltasten im unteren Bedienfeld können Sie
Ihre Loks fahren lassen. Die rechte Pfeiltaste lässt Ihre
Loks vorwärts fahren, die linke Pfeiltaste lässt Ihre Loks
rückwärts fahren.
Direction of travel and speed
Using the arrow buttons in the lower button pad, you
can operate your locos. Press the right arrow button
to move the loco forward, the left arrow button to
move it backwards.
Reaktionszeit der Pfeiltasten programmieren
Mit Ihren Pfeiltasten, im unteren Bereich des UniversalHandy, können Sie die Geschwindigkeit Ihrer Lok Ihrer
Lok erhöhen, indem Sie mehrmals auf die rechte
Pfeiltaste drücken oder konstant darauf bleiben. Um
Ihren Loks somit eine Anfahrverzögerung zu geben,
können Sie den Zeitwert zwischen den einzelnen
Impulsen des Handy verändern. Von schneller Beschleunigung (0,3 sec zwischen den Impulsen), bis
langsamer Beschleunigung (1,2 sec zwischen den
Impulsen). Die Werte hierfür sind von 1 bis 7. Um die
Loks abzubremsen, gilt der selbe Wert für die linke
Pfeiltaste. Der runde Knopf in der Mitte bremst die
Loks auch mit selben Verzögerung bis Stillstand.
Programming the reaction time of the arrow buttons
With your arrow buttons, located in the lower part of the
Universal Remote, you can increase the speed of your
loco by pressing the right arrow button several times or
howlding it constantly. Thus, to give your loco a starting
delay, you can program the time value between the
individual impulses of the remote. From fast acceleration
(0.3 sec. between impulses) to slow acceleration (1.2 sec.
between impulses). The values for this are 1 through 7.
To slow the locos, the same value applies for the left arrow
button. The round button in the center brakes the locos
also with the same deceleration until they stop.
To program, one presses the ”F” button and the ”6”
button.
The display shows ”P -.”
After that, one inputs one’s value between 1 and 7,
and the display changes to the previously selected function.
Sens de la marche et vitesse
Utiliser les boutons fléchés à la partie inférieure du
clavier pour faire fonctionner les locomotives. Appuyer
sur le bouton flèche droite pour déplacer la locomotive
vers l’avant et sur le bouton flèche gauche pour
déplacer la locomotive vers l’arrière.
Programmation du temps de réaction
des boutons fléchés
Les boutons fléchés situés à la partie inférieure de la
télécommande universelle permettent d’augmenter la
vitesse de la locomotive. Pour ce faire, appuyer
plusieurs fois sur le bouton de droite ou le maintenir
enfoncé. Donc, pour programmer une temporisation
au démarrage, programmer la durée entre les
impulsions de la télécommande.
Pour une accélération rapide, utiliser 0,3s entre
impulsions et pour une accélération lente, utiliser 1,
2s entre impulsions. Cette plage correspond aux
chiffres 1 à 7. Le même principe s’applique avec le
bouton de gauche pour ralentir la locomotive. Le
bouton rond au centre déclenche le freinage, avec la
même décélération, jusqu’à l’arrêt.
Pour programmer, appuyer sur le bouton «F»,
puis sur le bouton «6».
L’afficheur indique «P-».
Entrer le numéro choisi, entre 1 et 7, l’afficheur
repasse automatiquement à la fonction sélectionnée
précédemment.
➜
44
45
© DiskArt™ 1988
Stop-Taste
Mit Ihrem Universal-Handy können Sie über die “STOP”
Taste einen Nothalt oder eine Pause auslösen.
Drücken Sie die “STOP” Taste und Ihre Schienen sind
sofort stromlos. Ein weiteres Drücken auf die “STOP”
Taste hebt die Unterbrechung wieder auf. Falls Sie die
“STOP” Taste versehentlich gedrückt haben, müssen
Sie ca. 3 bis 4 sec. Warten bis Sie über nochmaliges
Drücken den Nothalt wieder deaktivieren können.
Stop button
With your Universal Remote, you can use the ”STOP”
button to trigger an emergency stop or a pause.
Press the ”STOP” button, and track power to your
layout is switched off immediately. Press the ”STOP”
button once more to restart. If you have pressed the
button in error, you have to wait for 3 to 4 seconds
until you can deactivate the emergency stop by
pressing the button again.
Bouton d’arrêt
Vous pouvez utiliser le bouton «STOP» de la
télécommande universelle pour déclencher un arrêt
d’urgence ou une pause.
Appuyer sur le bouton «STOP» et l’alimentation
électrique de la voie est coupée immédiatement.
Appuyer de nouveau une fois sur le bouton «STOP»
pour remettre en route après un arrêt d’urgence. Si
vous appuyez sur le bouton par erreur, vous devez
attendre de 3 à 4 secondes avant de pouvoir désactiver
l’arrêt d’urgence en appuyant de nouveau sur le bouton.
➜
46
Programmieren mit dem Universal-Handy
Programming with the Universal Remote
Programmaton avec le télécommande universelle
47
© DiskArt™ 1988
Programmieren mit dem Universal-Handy
Sie können mit Ihrem Universal-Handy auch
Lokdecoder , MZS-Funktionsdecoder für Wagen und
LGB-Weichendecoder programmieren.
Um mit dem Universal-Handy programmieren zu
können, entfernen Sie aus dem Kopfteil des Handy
den Einsatz mit dem schwarzen Kabel bzw. den LGBRC-Sender.
Drücken Sie auf die beiden geriffelten Laschen am
Kopfteil des Universal-Handys und ziehen Sie das
Kunststoffteil vorsichtig heraus.
Setzen Sie in das nun offene Kopfteil den mitgelieferten
Programmiereinsatz ein.
Programming with the Universal Remote
You can also use your Universal Remote to program
loco decoders, MTS Rolling Stock Decoders and LGB
Switch Decoders.
To be able to program with the Universal Remote,
remove the insert with the black cable or the LGB
Wireless Transmitter from the top of the remote.
Press both textured clips at the top of the remote
inward and carefully pull out the plastic insert.
Now slide the enclosed programming insert into the
remote.
Programmation avec la télécommande universelle
La télécommande universelle peut également être
utilisée pour programmer les décodeurs pour
locomotive, les décodeurs pour matériel roulant SMT
et les décodeurs d’aiguillage SMT.
Pour pouvoir programmer avec la télécommande
universelle, enlever l’insert avec le câble noir ou
l’émetteur sans fil LGB de la partie supérieure de la
télécommande.
Déplacer les deux boutons en relief situés à la partie
supérieure de la télécommande vers l’intérieur et sortir
avec précaution l’insert en plastique.
Enficher l’insert de programmation fourni dans la
télécommande.
➜
48
49
© DiskArt™ 1988
Am Programmiereinsatz finden Sie vier
verschiedenfarbige Kabel.
Diese vier Kabel teilen sich auf in zwei Kabel (grün
und gelb) die Sie mit dem Trafo verbinden, und zwei
Kabel (braun und weiß) die Sie direkt mit dem LGBWeichendecoder oder über ein stromloses
Programmiergleis mit den Loks und Wagen verbinden.
Der Trafo sollte min. 2A haben. Am besten eignet sich
Ihr Trafo, den Sie zur Steuerung Ihr Mehrzuganlage
verwenden. Wir empfehlen den Wechselstromtrafo
50110.
Erst wenn Sie den Aufbau komplett haben, verbinden
Sie den Trafo mit dem Netz.
On the programming insert, you will see four colorcoded wires. These four wires are split into two wires
(green and yellow), which you’ll connect to the transformer, and two wires (brown and white), which you’ll
connect directly to the LGB switch decoder or via an
unpowered programming track to the locos and cars.
The transformer should have at least 2 amps. Best is
your transformer which you use to control your MultiTrain System layout. We recommend the 50110/50111
AC transformer.
7
Only after you have completed the setup, connect the
transformer to a house current outlet.
6
L’insert de programmation comporte quatre fils de
couleur différente. Les fils vert et jaune doivent être
connectés au transformateur et les fils brun et blanc
doivent être connectés directement au décodeur
d’aiguillage LGB ou par l’intermédiaire d’une voie de
programmation non alimentée électriquement aux
locomotives et voitures ou wagons.
Le transformateur doit avoir une sortie minimum de
2A. Le meilleur transformateur est celui utilisé pour
le système multitrain. Nous recommandons les
modèles à courant alternatif 50110/50111.
La préparation est maintenant terminée, brancher le
transformateur dans une prise de courant dans la
maison.
➜
50
51
© DiskArt™
Die Programmierung geht dann immer den selben
Schritt.
Aus der Bedienungsanleitung der jeweiligen Decoder
suchen Sie sich die Register oder CV´s (CV = Configuration Variable) heraus, die Sie ändern wollen.
Als Beispiel die Adresse der Lok oder des Wagens
oder des Weichendecoders.
Dieses Register ist bei allen gleich, es ist Register
(oder CV) 1.
Sie haben in der Anzeige P - - .
Sie geben das Register ein. Hier 1.
Die Anzeige zeigt P - 1 .
Dann geben Sie den neuen Wert ein. Bei der
Lokadresse z.B. 05
Die Anzeige zeigt dann P - 5 .
Um die Programmierung zu speichern drücken
Sie dann die rechte Pfeiltaste .
Falls Sie sich unsicher sind bei der Werteingabe,
können Sie mit der linken Pfeiltaste die
Programmierung abrechen. Starten Sie dann wieder
von Vorn.
Jeder einzelne Programmiervorgang eines Register
funktioniert wie unser kleines Beispiel.
The programming then always happens according to
these steps.
Look in the instructions for the decoder and find the
register or CV (CV - Configuration Variable) you would
like to change.
For example, the address of the loco or the car or the
switch decoder.
This register is the same for all, it is register
(or CV) 1.
You see the display showing P - - .
Enter the register number. Here 1.
The display shows P - 1 .
Then enter the new value. For the loco address,
e.g., 05.
Press the right arrow button ">" to save the
programming.
If you are not sure about the value you have
input, you can use the left arrow button "<" to abort
programming. Restart from the beginning.
Each individual programming of a register works like
our little example.
La programmation se fait toujours dans l’ordre suivant.
Consulter la fiche d’instructions du décodeur et trouver
le registre ou la variable de configuration (CV) que
vous voulez changer.
Par exemple, l’adresse de la locomotive, de la voiture
ou du wagon ou du décodeur d’aiguillage.
Ce registre est le même pour tous, il s’agit du registre
(ou du CV) 1.
L’afficheur indique P - - .
Entrer le numéro du registre, ici 1.
L’afficheur indique P - 1 .
Entrer maintenant la nouvelle valeur, 05, par
exemple pour une adresse de locomotive.
Appuyer sur le bouton flèche droite «>» pour
sauvegarder la programmation.
En cas de doute sur la valeur entrée, utiliser la
flèche gauche «<» pour arrêter la programmation et
recommencer l’opération depuis le début.
L’exemple illustré est valable pour la programmation
individuelle de chaque registre.
➜
52
© DiskArt™
Weitere Informationen über das LGB-Mehrzugsystem wie
z.B. Einbauvorschläge für Decoder, finden Sie in der LGBDepesche und im LGB-Telegram, sowie unter www.lgb.de
Achtung! Um Sicherheit und Zuverlässigkeit zu
gewährleisten, betreiben sie das Produkt nur mit LGBTrafos und Fahrreglern. Bei Verwendung von anderen
Trafos wird ihre Garantie ungültig. Weitere
Informationen über die LGB-Trafos und Fahrregler zur
Verwendung im Haus oder im Freien und über das
Mehrzugsystem finden sie im LGB-Katalog.
Dieses Produkt ist nicht für Kinder unter 8 Jahren
geeignet. Bewahren sie Verpackung und Bedienungsanleitung auf.
In the LGB Depesche and LGB Telegram magazines,
as well as online at www.lgb.de, you find additional
information about the LGB Multi-Train System, such
as installation suggestions for decoders.
Attention! For safety and reliability, operate this product
with LGB power supplies (transformers, power packs
and controls) only. The use of non-LGB power supplies
will void your warranty. For more information on LGB
power supplies for indoor, outdoor and multi-train
operation, see the LGB catalog.
This product is not for children under 8 years of age.
Save the supplied packaging and instructions.
Les magazines LGB Depesche et LGB Telegram, ainsi
que le site Internet de LGB .de contiennent des
renseignements supplémentaires au sujet du système
multitrain de LGB, comme par exemple des suggestions
d’installation pour les décodeurs.
Attention ! Pour des raisons de sécurité et de fiabilité,
n'utiliser que les blocs d’alimentation LGB
(transformateurs, groupes d’alimentation et
commandes) pour faire fonctionner ce produit.
L’utilisation de blocs d’alimentation autres que les
blocs d’alimentation LGB rendra la garantie nulle et
non avenue. Se reporter au catalogue général LGB
pour des renseignements complémentaires au sujet
des blocs d’alimentation LGB pour utilisation à
l’intérieur, à l’extérieur et pour le système multitrain.
Ce produit n’est pas pour les enfants en dessous de
8 ans. Conserver l’emballage et les instructions.