1
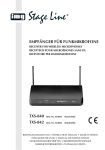
AKTIV-LAUTSPRECHERBOX
MIT FUNKMIKROFON
ACTIVE SPEAKER SYSTEM WITH WIRELESS MICROPHONE
TXA-400
Best.-Nr. 17.1080
BEDIENUNGSANLEITUNG
INSTRUCTION MANUAL
MODE D’EMPLOI
ISTRUZIONI PER L’USO
VEILIGHEIDSVOORSCHRIFTEN
CONSEJOS DE SEGURIDAD
SIKKERHEDSOPLYSNINGER
SÄKERHETSFÖRESKRIFTER
TURVALLISUUDESTA
®
D
A
CH
F
B
CH
Bevor Sie einschalten ...
GB
We wish you much pleasure with your new
units by MONACOR. With these operating
instructions you will be able to get to know all
functions of the units. By following these instructions false operations will be avoided,
and possible damage to yourself and your
units due to improper use will be prevented.
Den deutschen Text finden Sie auf den Seiten
4 – 7.
You will find the English text on pages 8 – 11.
Avant toute mise en service ...
I
Nous vous remercions d’avoir choisi des appareils MONACOR et vous souhaitons beaucoup de plaisir à les utiliser. Cette notice a
pour objectif de vous aider à mieux connaître
les multiples facettes des appareils. En outre,
en respectant les conseils donnés, vous éviterez toute mauvaise manipulation de sorte
que vous-même et vos appareils soient protégés de tout dommage.
B
DK
FIN
Voordat u inschakelt ...
Il testo italiano lo potete trovare alle pagine
16 – 19.
E
Antes de cualquier instalación ...
Wij wensen u veel plezier met uw nieuwe aparatuur van MONACOR. Lees de veiligheidsvoorschriften, alvorens de aparatuur in gebruik
te nemen. Door de veiligheidsvoorschriften op
te volgen zal een slechte werking vermeden
worden, en zal een eventueel letsel aan uzelf
en schade aan de toestellen tengevolge van
onzorgvuldig gebruik worden voorkomen.
Tenemos de agradecerle el haber adquirido
un sistema MONACOR y le deseamos un
agradable uso. Por favor lee las instrucciones
de seguridad antes del uso. La observación
de las instrucciones de seguridad evita operaciones erróneas y protege Vd. y vuestros
aparatos contra todo daño posible por cualquier uso inadecuado.
U vindt de veiligheidsvoorschriften op de pagina 20.
Las instrucciones de seguridad se encuentran en la página 21.
Inden De tænder for apparatet ...
S
Förskrift
Vi ønsker Dem god fornøjelse med Deres nye
MONACOR system. Læs oplysningerne for
en sikker brug af apparaterne før ibrugtagning. Følg sikkerhedsoplysningerne for at
undgå forkert betjening og for at beskytte
Dem og apparaterne mod skade på grund af
forkert brug.
Vi önskar dig mycket nöje med dina nya enheter från MONACOR. Läs gärna säkerhetsinstruktionerna innan du använder enheterna.
Genom att följa säkerhetsinstruktionerna kan
många problem undvikas, vilket annars kan
skada enheterna.
Sikkerhedsoplysningerne finder De på side 22.
Du finner säkerhetsinstruktionerna på sidan 23.
Ennen virran kytkemistä ...
Toivomme, että uusi MONACOR-laitteesi tuo
sinulle paljon iloa ja hyötyä. Ole hyvä ja lue
käyttöohjeet ennen laitteen käyttöönottoa.
Luettuasi käyttöohjeet voit käyttää laitetta
turvallisesti ja vältyt laitteen väärinkäytöltä.
Käyttöohjeet löydät sivulta 24.
2
Prima di accendere ...
Vi auguriamo buon divertimento con i Vostri
apparecchi nuovi MONACOR. Le istruzioni
per l’uso Vi possono aiutare a conoscere tutte
le possibili funzioni. E rispettando quanto
spiegato nelle istruzioni, evitate di commettere degli errori, e così proteggete Voi stessi,
ma anche gli apparecchio, da eventuali rischi
per uso improprio.
La version française se trouve pages 12 – 15.
NL
Before you switch on ...
Wir wünschen Ihnen viel Spaß mit Ihren neuen Geräten von MONACOR. Dabei soll Ihnen
diese Bedienungsanleitung helfen, alle Funktionsmöglichkeiten kennenzulernen. Die Beachtung der Anleitung vermeidet außerdem
Fehlbedienungen und schützt Sie und Ihre
Geräte vor eventuellen Schäden durch unsachgemäßen Gebrauch.
1
2 3
4
5
6
7
PL
RF ON
I
8
0
POWER
MIC1/TS
MIC2
9
MIC1
MIC2
AUX
BASS
TREBLE
11
AUX
REC. OUT
12
®
10
14
OFF
15
16
➀
➁
13
17
18
“A A“Size 6F22
Recharge Recharge
L
24
DC 12-15V
R
19
L R
SUM-3
or Size “AA“
6F22
or S-006PE
20
25
21
MAXIMUM
CONSUMPTION
POWER 40VA
22
AC
FUSE
LINE
Size “D”
SUM-1 x 8PCS
U S
E
F
TXA-400
LIFIER
WIRELESS AMP
23
➂
3
D
A
Bitte klappen Sie die Seite 3 heraus. Sie sehen
dann immer die beschriebenen Bedienelemente
und Anschlüsse.
CH
1
Übersicht der Bedienelemente und
Anschlüsse
1.1 Frontseite der Aktivbox
1 Betriebsanzeige
2 Lautstärkeregler für ein an der Buchse MIC1 (9) angeschlossenes Mikrofon oder – wenn kein Mikrofon
an der Buchse MIC1 angeschlossen ist – für das
Funkmikrofon
3 Empfangsanzeige; leuchtet beim Empfang eines
Signals vom Funkmikrofon
4 Lautstärkeregler für ein an der Buchse MIC2 (10)
angeschlossenes Mikrofon
5 Lautstärkeregler für ein an der Buchse AUX (12)
angeschlossenes Gerät
6 Höhenregler (TREBLE) und Tiefenregler (BASS)
7 Teleskopantenne
8 Ein-/Ausschalter
9 Eingangsbuchse MIC1 (6,3-mm-Klinke, mono) zum
Anschluß eines Mikrofons, das anstelle des Funkmikrofons verwendet werden soll
(Bei Anschluß des Mikrofons wird das Signal des
Funkmikrofons stummgeschaltet.)
10 Eingangsbuchse MIC2 (6,3-mm-Klinke, mono) zum
Anschluß eines zusätzlichen Mikrofons
11 Ausgangsbuchse REC (6,3-mm-Klinke, mono) zum
Anschluß eines Aufnahmegerätes oder eines weiteren Verstärkers
12 Eingangsbuchse AUX (6,3-mm-Klinke, mono) zum
Anschluß eines Gerätes mit Line-Pegel-Ausgang
(z. B. tragbarer CD-Spieler, Kassettenrecorder)
13 M8-Gewindebuchse für die Montage auf ein Stativ
1.2 Funkmikrofon
14 Betriebsanzeige; leuchtet sie nicht bei eingeschaltetem Mikrofon, ist die Batterie bzw. der Akku verbraucht
15 Ein-/Ausschalter
untere Position: Mikrofon ist ausgeschaltet
mittlere Position: Mikrofon ist eingeschaltet, sendet jedoch kein Funksignal aus
obere Position: Mikrofon ist eingeschaltet und
sendet ein Funksignal aus
16 Schraubkappe des Batteriefachs
1.3 Rückseite der Aktivbox (Abdeckplatte entfernt)
17 Ladeanzeige für einen 9-V-Blockakku
18 Ladeanzeigen für Akkus der Größe Mignon (AA):
Leuchte L für den Akku in der linken Hälfte des
Ladefachs (20), Leuchte R für den Akku in der
rechten Hälfte des Fachs
4
19 Ladefach für einen 9-V-Blockakku (6F22):
zum Aufladen den Akku auf die Druckknopfkontakte (21) stecken und in das Fach einsetzen
20 Ladefach für bis zu 2 Akkus der Größe Mignon (AA):
zum Aufladen die Akkus polrichtig (siehe Aufdruck
im Fach) in das Fach einsetzen
21 Druckknopfkontakte zum Anschluß des aufzuladenden 9-V-Blockakkus
22 Netzsicherung; eine durchgebrannte Sicherung
nur durch eine gleichen Typs ersetzen
23 Netzkabel zum Anschluß an 230 V~/50 Hz
24 Kleinspannungsbuchse (Mittelkontakt = Minuspol)
für den Anschluß an eine externe 12-V-Gleichstromversorgung, z. B. Autobatterie;
benötigt wird ein Kleinspannungsstecker mit einem
Außendurchmesser von 5 mm oder 5,5 mm und
einem Innendurchmesser von 2,1 mm
25 Batteriefach für acht 1,5-V-Batterien der Größe
Mono (D)
2
Hinweise für den sicheren Gebrauch
Die Geräte (Aktivbox und Funkmikrofon) entsprechen
der EMV-Richtlinie 89/336/EWG für elektromagnetische Verträglichkeit. Die Aktivbox entspricht zusätzlich
der Niederspannungsrichtlinie 73/23/EWG.
Die Aktivbox wird mit lebensgefährlicher Netzspannung (230 V~) versorgt. Nehmen Sie deshalb niemals selbst Eingriffe in diesem Gerät vor. Durch unsachgemäßes Vorgehen besteht die Gefahr eines
elektrischen Schlages. Außerdem erlischt beim Öffnen der Aktivbox oder des Funkmikrofons jeglicher
Garantieanspruch.
Beachten Sie auch unbedingt folgende Punkte:
● Schützen Sie die Geräte vor Feuchtigkeit und Hitze
(zulässiger Einsatztemperaturbereich 0 – 40 °C).
● Nehmen Sie die am Netz angeschlossene Aktivbox
nicht in Betrieb und ziehen Sie sofort den Netzstecker aus der Steckdose, wenn:
1. sichtbare Schäden an der Aktivbox oder an der
Netzanschlußleitung vorhanden sind,
2. nach einem Sturz oder ähnlichem der Verdacht
auf einen Defekt besteht.
3. Funktionsstörungen auftreten.
Lassen Sie das Gerät in jedem Fall in einer Fachwerkstatt reparieren.
● Eine beschädigte Netzanschlußleitung darf nur durch
den Hersteller oder durch eine autorisierte Fachwerkstatt ersetzt werden.
● Ziehen Sie den Netzstecker nie an der Zuleitung aus
der Steckdose.
● Werden die Geräte zweckentfremdet, nicht richtig
angeschlossen, falsch bedient oder nicht fachgerecht repariert, kann für eventuelle Schäden keine
Haftung übernommen werden.
● Verwenden Sie für die Reinigung nur ein trockenes,
weiches Tuch, auf keinen Fall Chemikalien oder
Wasser.
● Bei längerem Nichtgebrauch der Geräte (z. B. länger als eine Woche) sollten eingesetzte Batterien
herausgenommen werden. So bleiben die Geräte
bei einem eventuellen Auslaufen der Batterien unbeschädigt.
●
●
3
Werfen Sie verbrauchte Batterien oder defekte Akkus nicht in den Hausmüll, sondern geben Sie sie
nur in den Sondermüll (z. B. Sammelbehälter bei
Ihrem Einzelhändler).
Sollen die Geräte endgültig aus dem Betrieb genommen werden, übergeben Sie sie zur Entsorgung
einem örtlichen Recyclingbetrieb.
Anwendungsmöglichkeiten
Das drahtlose Beschallungssystem TXA-400 besteht
aus einem Funk-Handmikrofon, das auf der Frequenz
433,05 MHz sendet, und einer Aktivbox mit integriertem Mikrofon-Empfangsteil. Die Aktivbox kann wahlweise mit 230-V-Netzspannung, mit einer extern zugeführten Gleichspannung von 12 – 15 V (z. B. von einer
Autobatterie) oder mit Batterien betrieben werden.
Das System eignet sich somit optimal für den Einsatz
an wechselnden Standorten, z. B. für Vorträge oder
Verkaufsveranstaltungen.
Die Aktivbox verfügt außerdem über zwei Eingänge
für kabelgebundene Mikrofone, einen Aux-Eingang für
ein Audiogerät mit Line-Ausgangspegel (z. B. Kassettenrecorder, Radiorecorder, tragbarer CD-Spieler) und
einen Ausgang zum Anschluß eines Aufnahmegerätes
oder weiteren Verstärkers. Über eine integrierte Ladevorrichtung bietet das Gerät zusätzlich die Möglichkeit, verbrauchte Akkus (1 x 9-V-Block, 2 x Mignon)
wieder aufzuladen.
3.1 Zulassung
Die Zulassung für das drahtlose Beschallungssystem
TXA-400 ist nach der R + TTE-Richtlinie (Radio and
Telecommunication Technical Equipment) in den Staaten der Europäischen Union gültig. Für den Betrieb in
Staaten außerhalb der EU fragen Sie bitte Ihren Fachhändler oder die MONACOR-Niederlassung des entsprechenden Landes.
In der Bundesrepublik Deutschland ist der Frequenzbereich um 433 MHz für den Betrieb von drahtlosen Audio-Übertragungssystemen freigegeben. Da
dieser Frequenzbereich in anderen Ländern der EU
für diesen Anwendungszweck möglicherweise nicht
zur Verfügung steht, informieren Sie sich bei Betrieb
des Systems außerhalb Deutschlands bitte bei Ihrem
Fachhändler oder bei der entsprechenden Behörde
des Landes.
4
Inbetriebnahme
4.1 Aufstellung der Aktivbox
Die Aktivbox kann frei aufgestellt oder über die Gewindebuchse auf der Unterseite auf ein Stativ mit
M8-Gewinde montiert werden. Bei Stativmontage die
Schutzkappe der Gewindebuchse [(13) in Abb. 1] entfernen, und die Aktivbox über diese Buchse auf das
Stativ schrauben.
4.2 Stromversorgung der Aktivbox
Das Gerät kann wahlweise über das 230-V-Netz, über
eine externe Gleichspannungsquelle, die eine Speisespannung von 12 – 15 V liefert, oder über Batterien betrieben werden.
D
A
CH
4.2.1 Netzanschluß
Bei Netzbetrieb wird das Batteriefach (25) des Gerätes abgeschaltet.
1) Die Netzanschlußleitung ist hinter der abnehmbaren Abdeckplatte auf der Geräterückseite verstaut:
Die beiden Schnappverschlüsse oben an der Abdeckplatte nach unten drücken, die Abdeckplatte
nach vorne klappen und abnehmen.
2) Die Netzleitung (23) herausnehmen, und den Kabelbinder entfernen.
3) Die Abdeckplatte wieder aufsetzen, und dabei die
Netzleitung durch den Kabeldurchlaß unten an der
Abdeckplatte führen. Die Schnappverschlüsse der
Abdeckplatte einrasten lassen.
4) Den Stecker der Netzleitung in eine Netzsteckdose
(230 V~/50 Hz) stecken.
4.2.2 Externe Gleichspannungsquelle
Zum netzunabhängigen Betrieb kann das Gerät über
eine 12-V-Batterie (z. B. 12-V-Autobatterie) versorgt
werden. Für den Anschluß der Stromversorgung an die
Kleinspannungsbuchse (24) auf der Geräterückseite
wird ein Kleinspannungsstecker mit einem Außendurchmesser von 5 mm oder 5,5 mm und einem Innendurchmesser von 2,1 mm benötigt. Dabei unbedingt
auf die richtige Polarität achten: Den Minuspol an den
Innenkontakt des Steckers anlegen.
Bei Anschluß einer externen Gleichspannungsquelle
wird das Batteriefach (25) des Gerätes abgeschaltet.
4.2.3 Einsetzen von Batterien
1) Das Batteriefach befindet sich hinter der abnehmbaren Abdeckplatte auf der Geräterückseite: Die
beiden Schnappverschlüsse oben an der Abdeckplatte nach unten drücken, die Abdeckplatte nach
vorne klappen und abnehmen.
2) Acht 1,5-V-Mono-Batterien (Größe D) in das Batteriefach (25) legen. Dabei auf die richtige Polarität
achten: die Batterien so herum wie im Fach aufgedruckt einsetzen.
3) Die Abdeckplatte aufsetzen und einrasten lassen.
4.3 Audioanschlüsse
1) Soll anstelle des Funkmikrofons ein kabelgebundenes Mikrofon eingesetzt werden, dieses an die
6,3-mm-Mono-Klinkenbuchse MIC1 (9) anschließen. (Sobald das Anschlußkabel des Mikrofons in
diese Buchse gesteckt wird, ist das Funkmikrofon
stummgeschaltet.)
2) Soll zusätzlich zum Funkmikrofon bzw. zum Mikrofon an der Buchse MIC1 ein kabelgebundenes Mikrofon verwendet werden, dieses an die 6,3-mmMono-Klinkenbuchse MIC2 (10) anschließen.
3) Ein Audiogerät mit Line-Ausgangspegel (z. B. Kassettenrecorder, tragbarer CD-Spieler) kann an die
6,3-mm-Mono-Klinkenbuchse AUX (12) angeschlos-
5
D
A
CH
sen werden. Den Line-Ausgang des Gerätes – ggf.
über Adapter – mit der Buchse AUX verbinden.
4) Über den Ausgang REC. OUT (11) kann das Audiosignal an ein Tonaufnahmegerät oder an einen weiteren Verstärker weitergeleitet werden. Die 6,3-mmMono-Klinkenbuchse REC. OUT mit einem LineEingang am Tonaufnahmegerät bzw. Verstärker
verbinden.
abgesenkt werden. Stehen die Regler in Mittelstellung, findet keine Frequenzgangbeeinflussung statt.
6) Tritt ein Rückkopplungspfeifen auf, zunächst den
Höhenregler TREBLE zurückstellen. Ist die Rückkopplung dann immer noch nicht beseitigt, den
Lautstärkeregler des jeweiligen Mikrofons entsprechend zurückdrehen.
7) Bei schlechtem Empfang des Funkmikrofons überprüfen, ob:
a die Batterie bzw. der Akku des Mikrofons leer ist
oder, wenn die Aktivbox mit Batterien betrieben
wird, diese verbraucht sind.
4.4 Stromversorgung des Funkmikrofons
Das Funkmikrofon wird über eine 9-V-Blockbatterie
(Trockenbatterie oder wiederaufladbare Batterie) betrieben. Die Stromversorgung wird durch die Betriebsanzeige (14) angezeigt. Leuchtet sie nicht, wenn sich
der Schalter (15) in der oberen oder mittleren Position
befindet, ist keine Batterie eingesetzt bzw. ist die eingesetzte Batterie verbraucht.
1) Die Schraubkappe (16) am unteren Ende des Mikrofons durch Drehen gegen den Uhrzeigersinn
abschrauben.
2) Eine 9-V-Blockbatterie bzw. einen 9-V-Blockakku,
mit den Plus- und Minusanschlüssen wie im Batteriefach aufgedruckt, einsetzen.
3) Die Kappe wieder aufschrauben.
5
c sich der Empfang durch Schwenken der Teleskopantenne verbessern läßt.
d der Empfang z. B. durch Gegenstände in der
Übertragungsstrecke gestört ist.
8) Nach dem Betrieb die Aktivbox mit dem Schalter
POWER ausschalten. Nicht vergessen, auch das
Funkmikrofon auszuschalten [Schalter (15) ganz
nach unten schieben, Betriebsanzeige (14) erlischt], sonst ist bei dem nächsten Betrieb die Batterie bzw. der Akku des Mikrofons verbraucht.
Hinweis bei Netzbetrieb der Aktivbox:
Wird das Beschallungssystem längere Zeit nicht
gebraucht, sollte nach dem Betrieb auch der Netzstecker der Aktivbox aus der Steckdose gezogen
werden, weil das Gerät, selbst wenn es ausgeschaltet ist, noch einen geringen Strom verbraucht.
Bedienung
Vor dem Einschalten der Aktivbox die Lautstärkeregler
(2, 4 und 5) auf Minimum stellen, und die Klangregler
(6) in die mittlere Position drehen.
1) Die Aktivbox mit dem Schalter POWER (8) einschalten. Die rote Betriebsanzeige PL (1) leuchtet.
2) Bei Verwendung des Funkmikrofons die Teleskopantenne (7) ganz herausziehen.
3) Die jeweilige verwendete Signalquelle einschalten.
Zum Einschalten des Funkmikrofons den Schalter (15) ganz nach oben schieben. Bei eingeschaltetem Mikrofon leuchtet die Betriebsanzeige (14).
(In der Mittelstellung ist das Mikrofon im Stand-ByBetrieb, d. h. es ist eingeschaltet, sendet jedoch
kein Funksignal aus.) Zur Anzeige des Empfangs
eines Funksignals leuchtet die grüne Anzeige RF
ON (3) an der Aktivbox.
4) Mit dem Lautstärkeregler der verwendeten Signalquelle die gewünschte Lautstärke einstellen:
Regler MIC1/TS (2)
für das Funkmikrofon oder ein an der Buchse
MIC1 (9) angeschlossenes Mikrofon (dieses Mikrofon hat Vorrang vor dem Funkmikrofon, d. h.
bei Anschluß eines Mikrofons an die Buchse
MIC1, wird das Funkmikrofon stummgeschaltet)
Regler MIC2 (4)
für ein an der Buchse MIC2 (10) angeschlossenes Mikrofon
Regler AUX (5)
für ein an der Buchse AUX (12) angeschlossenes Gerät
5) Mit den Klangreglern (6) das gewünschte Klangbild
einstellen: Die Höhen (Regler TREBLE) und Tiefen
(Regler BASS) können bis zu 5 dB angehoben bzw
6
b der Abstand zwischen Aktivbox und Mikrofon zu
groß ist (Reichweite 15 – 25 m, abhängig von
den örtlichen Gegebenheiten).
6
Akkus aufladen
Mit der Aktivbox können ein 9-V-Blockakku (6F22) und
bis zu zwei 1,2-V-Akkus der Größe Mignon (AA) aufgeladen werden.
Wichtig: Die Aufladung von Akkus ist nur bei Netzbetrieb der Aktivbox möglich.
●
Vorsicht! Es können nur Nickel-Cadmium-Akkus
aufgeladen werden. Trockenbatterien sind nicht
wieder aufladbar und können beim Versuch, sie
aufzuladen, auslaufen oder explodieren!
1) Die Abdeckplatte auf der Geräterückseite abnehmen.
2) Zum Aufladen eines 9-V-Blockakkus die Pole des
Akkus auf die Druckknopfkontakte (21) stecken,
und den Akku in das rechte Ladefach (19) setzen.
Zum Aufladen von Akkus der Größe Mignon die
Akkus in das linke Ladefach (20) legen. Dabei auf
die richtige Polarität achten: die Akkus so herum
wie im Fach aufgedruckt einsetzen. (Auch das Aufladen eines einzelnen Akkus ist möglich: den Akku
in die linke oder rechte Hälfte des Fachs legen.)
3) Die Abdeckplatte wieder anbringen, und die Aktivbox mit dem Schalter POWER (8) einschalten. Das
Gerät kann auch während der Aufladung von Akkus
weiterhin für die Beschallung verwendet werden.
4) Während der Aufladung leuchtet die jeweilige Ladeanzeige:
Kontrolleuchte „6F22 Recharge“ (17)
für den 9-V-Blockakku
Kontrolleuchten „AA Size Recharge“ (18)
für den linken (Leuchte L) und rechten (Leuchte R) Akku der Größe Mignon
5) Erlischt die jeweilige Ladeanzeige, ist der Ladevorgang beendet. Die Abdeckplatte entfernen, und
den/die Akku(s) herausnehmen.
7
D
A
CH
Technische Daten
Allgemeine Daten
Trägerfrequenz: . . . . . . 433,05 MHz
Modulation: . . . . . . . . . FM, ±40 kHz
Frequenzstabilität: . . . . ±0,005 %/25 °C, quarzgesteuert
Audiobereich: . . . . . . . . 50 – 15 000 Hz
Reichweite: . . . . . . . . . 15 – 25 m
Einsatztemperatur: . . . 0 – 40 °C
Mitgeliefertes Zubehör: 1 Umhängetasche
Aktivbox
Zulassungsnummer
des Empfangsteils: . . .
Ausgangsleistung: . . . .
2 x Mic-Eingang: . . . . .
1 x Aux-Eingang: . . . . .
1 x Rec-Ausgang: . . . .
Klangregelung: . . . . . .
ETS G000 257L
20 W max./4 Ω
1,5 mV/1 kΩ
110 mV/10 kΩ
280 mV/100 kΩ
±5 dB/10 kHz (Höhen)
±5 dB/200 Hz (Tiefen)
Ladestrom
Mignonakkus . . . . . . 70 – 150 mA
9-V-Blockakku . . . . . 5 – 60 mA
Stromversorgung: . . . . 230 V~/50 Hz/40 VA oder
12 – 15 V /1,8 A max. oder
8 x 1,5-V-Monobatterie
Abmessungen: . . . . . . . 220 x 290 x 145 mm
Gewicht: . . . . . . . . . . . . 3 kg
Funkmikrofon
Zulassungsnummer: . . ETS G000 258L
Sendeleistung: . . . . . . . 8 mW
Stromversorgung: . . . . 9-V-Blockbatterie bzw.
9-V-Blockakku, Stromaufnahme 38 mA
Abmessungen: . . . . . . . Ø 56/36 mm x 245 mm
Gewicht: . . . . . . . . . . . . 205 g
Laut Angaben des Herstellers.
Änderungen vorbehalten.
7
GB
Please unfold page 3. Thus you will always be able
to see the operating elements and connections
described.
1
Operating Elements and Connections
1.1 Front side of the active speaker system
1 Power LED
2 Volume control for a microphone connected to the
jack MIC1 (9) or – if no microphone is connected to
the jack MIC1 – for the wireless microphone
3 Reception LED; lights up when a signal is received
from the wireless microphone
4 Volume control for a microphone connected to the
jack MIC2 (10)
5 Volume control for a unit connected to the jack AUX
(12)
6 TREBLE control and BASS control
7 Telescopic antenna
19 Recharge compartment for a 9 V rechargeable battery (6F22):
to recharge the battery, attach it to the snap-on
contacts (21) and insert it into the compartment
20 Recharge compartment for up to two rechargeable
batteries of size AA:
to recharge the batteries, insert them into the compartment making sure the polarity is correct (see
inprint in the compartment)
21 Snap-on contacts to connect the 9 V battery to be
recharged
22 Mains fuse; replace a blown fuse by one of the
same type only
23 Mains cable to connect the unit to 230 V~/50 Hz
24 Low voltage jack (centre contact = negative pole)
to connect the unit to an external 12 V DC supply,
e. g. car battery;
a low voltage plug with an outside diameter of
5 mm or 5.5 mm and an inside diameter of 2.1 mm
is required
25 Battery compartment for eight 1.5 V batteries of
size D
8 Power switch
9 Input jack MIC1 (6.3 mm jack, mono) to connect a
microphone to be used instead of the wireless
microphone
(When the microphone is connected, the signal of
the wireless microphone is muted.)
10 Input jack MIC2 (6.3 mm jack, mono) to connect an
additional microphone
11 Output jack REC (6.3 mm jack, mono) to connect a
recording unit or another amplifier
12 Input jack AUX (6.3 mm jack, mono) to connect a
unit with line level output (e. g. portable CD player,
cassette recorder)
13 M8 thread jack for mounting the unit on a stand
1.2 Wireless microphone
14 Power LED; if it does not light up when the microphone is switched on, the (rechargeable) battery is
exhausted
15 On/off switch
lower position: microphone is switched off
mid-position:
microphone is switched on, however, it does not transmit any radio
signal
upper position: microphone is switched on and
transmits a radio signal
16 Screw cap of the battery compartment
1.3 Rear side of the active speaker system
(cover plate removed)
17 Recharge LED for a 9 V rechargeable battery
18 Recharge LEDs for rechargeable batteries of size
AA: LED L for the battery in the left half of the
recharge compartment (20), LED R for the battery
in the right half of the compartment
8
2
Safety Notes
The units (active speaker system and wireless microphone) correspond to the directive for electromagnetic
compatibility 89/336/EEC. The active speaker system
additionally corresponds to the low voltage directive
73/23/EEC.
The active speaker system is supplied with hazardous mains voltage (230 V~). Leave servicing to
skilled personnel only. Inexpert handling may cause
an electric shock hazard. Furthermore, any guarantee claim will expire if the active speaker system or
the wireless microphone has been opened.
Please observe the following items in any case:
● Protect the units against humidity and heat (admissible ambient temperature range 0 – 40 °C).
● Do not operate the active speaker system connected to the mains supply and immediately disconnect the plug from the mains socket
1. if there is visible damage to the active speaker
system or to the mains cable,
2. if a defect might have occurred after the unit was
dropped or suffered a similar accident,
3. if malfunctions occur.
In any case the unit must be repaired by skilled personnel.
● A damaged mains cable must be replaced by the
manufacturer or by skilled personnel only.
● Never pull the mains cable to disconnect the mains
plug from the socket.
● If the units are used for other purposes than originally intended, if they are not correctly connected or
operated or not repaired in an expert way, no liability
for any damage will be accepted.
● For cleaning only use a dry, soft cloth, by no means
chemicals or water.
● If the units are not used for a longer period (e. g.
more than a week), inserted batteries should be
●
●
●
3
removed to prevent damage to the unit in case of
battery leakage.
Exhausted dry batteries or defective rechargeable
batteries do not belong in the household rubbish: Always take them to a special waste disposal (e. g.
waste container at your retailer).
If the units are to be put out of operation definitively,
take them to a local recycling plant for disposal.
Important for U. K. Customers!
The wires in this mains lead are coloured in accordance with the following code:
green/yellow = earth
blue = neutral
brown = live
As the colours of the wires in the mains lead of this
appliance may not correspond with the coloured
markings identifying the terminals in your plug, proceed as follows:
1. The wire which is coloured green and yellow must
be connected to the terminal in the plug which is
marked with the letter E or by the earth symbol ,
or coloured green or green and yellow.
2. The wire which is coloured blue must be connected to the terminal which is marked with the
letter N or coloured black.
3. The wire which is coloured brown must be connected to the terminal which is marked with the
letter L or coloured red.
Warning - This appliance must be earthed.
Applications
The wireless PA system TXA-400 consists of a wireless hand-held microphone transmitting on the frequency of 433.05 MHz and an active speaker system
with integrated microphone receiver. It is possible to
operate the active speaker system alternatively via a
230 V mains voltage, via a DC voltage of 12 – 15 V
supplied externally (e. g. from a car battery), or via batteries. Thus, the system is ideally suited for application
at varying locations, e. g. for lectures or sales events.
The active speaker system is also provided with
two inputs for cable-connected microphones, an Aux
input for an audio unit with line output level (e. g. cassette recorder, radio cassette recorder, portable CD
player) and an output to connect a recording unit or
another amplifier. By means of an integrated recharge
facility, the unit also allows to recharge exhausted
rechargeable batteries (1 x 9 V battery, 2 x battery of
size AA).
3.1 Approval
According to the R + TTE regulation (Radio and Telecommunication Technical Equipment), the approval of
the wireless PA system TXA-400 is valid in the countries of the European Union. For operation in countries
outside the EU, please contact your retailer or the
MONACOR subsidiary in the country where this system will be operated.
In the Federal Republic of Germany, the frequency
range around 433 MHz has been approved for the
operation of wireless audio transmission systems. As it
is possible that this frequency range for this field of
application is not available in other countries of the
EU, please contact your retailer or the corresponding
authorities of the particular country if the system is
operated outside the Federal Republic of Germany.
4
GB
Setting the System into Operation
4.1 Setting up the active speaker system
The active speaker system can be placed as desired
or mounted on a stand with M8 thread by means of the
thread jack on its lower side. When mounting the unit
on a stand, remove the protective cover of the thread
jack [(13) in fig. 1] and screw the active speaker system on the stand via this jack.
4.2 Power supply of the active speaker system
It is possible to operate the unit alternatively via the
230 V mains supply, via an external DC voltage source
supplying a voltage of 12 V to 15 V, or via batteries.
4.2.1 Mains connection
In case of mains operation, the battery compartment
(25) of the unit is switched off.
1) The mains cable is stowed behind the removable
cover plate on the rear side of the unit: Press down
the two snap locks at the top of the cover plate, fold
down the cover plate and remove it.
2) Take out the mains cable (23) and remove the
cable tie.
3) Put the cover plate back in place, while doing so
lead the mains cable through the cable outlet at the
bottom of the cover plate. Snap in the locks of the
cover plate.
4) Connect the plug of the mains cable to a mains
socket (230 V~/50 Hz).
4.2.2 External DC voltage source
For an operation independent of the mains supply, it is
possible to operate the unit via a 12 V battery (e. g.
12 V car battery). To connect the power supply to the
low voltage jack (24) on the rear side of the unit, a low
voltage plug with an outside diameter of 5 mm or
5.5 mm and an inside diameter of 2.1 mm is required.
It is essential to observe the correct polarity: Apply the
negative pole to the inner contact of the plug.
When connecting an external DC voltage source,
the battery compartment (25) of the unit is switched off.
4.2.3 Inserting batteries
1) The battery compartment is situated behind the
removable cover plate on the rear side of the unit:
Press down the two snap locks at the top of the
cover plate, fold down the cover plate and remove it.
2) Insert eight 1.5 V batteries of size D into the battery
compartment (25). Observe the correct polarity:
insert the batteries as printed in the battery compartment.
3) Put the cover plate back in place and snap in the
locks.
9
GB
4.3 Audio connections
1) If a cable-connected microphone is to be used instead of the wireless microphone, connect this microphone to the 6.3 mm mono jack MIC1 (9). (As soon
as the cable of the microphone has been connected
to this jack, the wireless microphone is muted.)
2) If a cable-connected microphone is to be used in
addition to the wireless microphone or microphone
at the jack MIC1, connect it to the 6.3 mm mono
jack MIC2 (10).
3) It is possible to connect an audio unit with line
output level (e. g. cassette recorder, portable CD
player) to the 6.3 mm mono jack AUX (12). Connect
the line output of the unit to the jack AUX. Use an
adapter, if required.
4) Via the output REC. OUT (11), the audio signal can
be passed on to an audio recording unit or another
amplifier. Connect the 6.3 mm mono jack REC. OUT
to a line input on the audio recording unit or amplifier.
5)
6)
7)
4.4 Power supply of the wireless microphone
The wireless microphone is operated via a 9 V battery
(dry battery or rechargeable battery). The power supply is indicated via the power LED (14). If the LED
does not light up with the switch (15) in the upper position or mid-position, no battery is inserted or the inserted battery is exhausted.
1) Unscrew the screw cap (16) at the lower end of the
microphone by turning it counterclockwise.
2) Insert a 9 V (rechargeable) battery with the positive
and negative poles as printed in the battery compartment.
3) Screw the cap on again.
5
Operation
Prior to switching on the active speaker system, set
the volume controls (2, 4, and 5) to minimum, and turn
the tone controls (6) to mid-position.
1) Switch on the active speaker system with the
POWER switch (8). The red power LED PL (1)
lights up.
2) When using the wireless microphone, extract the
telescopic antenna (7) to its full length.
3) Switch on the respective signal source.
To switch on the wireless microphone, slide the
switch (15) upwards to the stop. When the microphone is switched on, the power LED (14) lights up.
(In mid-position, the microphone is in stand-by
mode, i. e. it is switched on but it does not transmit
any radio signal). To indicate the reception of a
radio signal, the green LED RF ON (3) on the active
speaker system lights up.
4) Adjust the desired volume with the volume control
of the signal source used:
control MIC1/TS (2)
for the wireless microphone or a microphone
connected to the jack MIC1 (9) (this microphone
has priority over the wireless microphone, i. e.
when connecting a microphone to the jack MIC1,
the wireless microphone is muted)
10
8)
6
control MIC2 (4)
for a microphone connected to the jack MIC2
(10)
control AUX (5)
for a unit connected to the jack AUX (12)
Adjust the desired sound with the tone controls (6):
The high frequencies (TREBLE control) and low
frequencies (BASS control) can be boosted or
attenuated by 5 dB. With the controls in mid-position, the frequency response is not affected.
If a howlback occurs, turn back the TREBLE control
first. If the howlback continues, turn back the volume
control of the respective microphone accordingly.
In case of poor reception of the wireless microphone, check
a if the battery of the microphone is exhausted or,
in case the active speaker system is operated by
batteries, if the batteries are exhausted.
b if the distance between the active speaker system and the microphone is too long (range 15 m
to 25 m, depending on the local conditions).
c if the reception can be improved by turning the
telescopic antenna.
d if the reception is disturbed e. g. by objects in the
transmission path.
After operation, switch off the active speaker system with the POWER switch. Remember to switch
off the wireless microphone as well [slide the switch
(15) downwards to the stop, power LED (14) will be
extinguished], otherwise the (rechargeable) battery
will be exhausted the next time the microphone is
used.
Note concerning mains operation of the active
speaker system:
If the PA system is not used for a longer period, it is
recommended to disconnect the mains plug of the
active speaker system from the socket after operation as the unit has a low current consumption even
when it is switched off.
Recharging of Batteries
It is possible to recharge a 9 V rechargeable battery
(6F22) and up to two 1.2 V rechargeable batteries of
size AA with the active speaker system.
Important: Recharging the batteries is only possible
with a mains operated active speaker system.
● Caution! Only rechargeable nickel cadmium batteries can be recharged. Dry batteries are not rechargeable and charging them may result in leakage or explosion!
1) Remove the cover plate on the rear side of the unit.
2) To recharge a 9 V battery, attach the poles of the
battery to the snap-on contacts (21), and insert the
battery into the right-hand recharge compartment
(19).
To recharge batteries of size AA, insert the batteries into the left-hand recharge compartment (20).
Observe the correct polarity: insert the batteries as
printed in the battery compartment. (It is also pos-
sible to recharge a single battery: insert the battery
into the left or right half of the compartment.)
3) Put the cover plate back in place and switch on the
active speaker system with the POWER switch (8).
While batteries are recharged, PA application of the
unit is still possible.
4) During recharging, the respective recharge LED
lights up:
LED “6F22 Recharge” (17)
for the 9 V battery
LEDs “AA Size Recharge” (18)
for the left (LED L) and right (LED R) battery of
size AA
5) If the respective LED is extinguished, recharging is
completed. Remove the cover plate and take out
the battery/batteries.
7
GB
Specifications
General information
Carrier frequency: . . . . 433.05 MHz
Modulation: . . . . . . . . . FM, ±40 kHz
Frequency stability: . . . ±0.005 %/25 °C,
quartz-controlled
Audio range: . . . . . . . . 50 – 15 000 Hz
Range: . . . . . . . . . . . . . 15 m to 25 m
Ambient temperature: . 0 – 40 °C
Supplied accessory: . . 1 shoulder bag
Active speaker system
Approval number
of the receiver: . . . . . . . ETS G000 257L
Output power: . . . . . . . 20 W max./4 Ω
2 x Mic input: . . . . . . . . 1,5 mV/1 kΩ
1 x Aux input: . . . . . . . . 110 mV/10 kΩ
1 x Rec output: . . . . . . 280 mV/100 kΩ
Tone control: . . . . . . . . ±5 dB/10 kHz (high frequencies)
±5 dB/200 Hz (low frequencies)
Charging current
batteries of size AA: . 70 – 150 mA
9 V battery: . . . . . . . 5 – 60 mA
Power supply: . . . . . . . 230 V~/50 Hz/40 VA or
12 – 15 V /1.8 A max. or
8 x 1.5 V battery of size D
Dimensions: . . . . . . . . . 220 x 290 x 145 mm
Weight: . . . . . . . . . . . . 3 kg
Wireless microphone
Approval number: . . . . ETS G000 258L
Transmitting power: . . . 8 mW
Power supply: . . . . . . . 9 V (rechargeable) battery,
current consumption 38 mA
Dimensions: . . . . . . . . . Ø 56/36 mm x 245 mm
Weight: . . . . . . . . . . . . 205 g
According to the manufacturer.
Subject to technical change.
11
F
B
Ouvrez le présent livret page 3 de manière à visualiser les éléments et branchements.
CH
1
Eléments et branchements
1.1 Face avant de l’enceinte active
1 Témoin de fonctionnement
2 Réglage de volume pour un micro relié à la prise
MIC1 (9) ou, si aucun micro n’est relié à la prise
MIC1, pour le micro sans fil
3 Témoin de réception: s’allume lorsque le signal du
micro sans fil est reçu
4 Réglage de volume pour un micro relié à la prise
MIC2 (10)
5 Réglage de volume pour un appareil relié à la prise
AUX (12)
6 Réglages des aigus (TREBLE) et des graves
(BASS)
7 Antenne télescopique
8 Interrupteur Marche/Arrêt
9 Prise d’entrée MIC1 (prise jack 6,35 mm, mono)
pour brancher un micro devant fonctionner à la
place du micro sans fil
(Si le micro est branché, le micro sans fil reste
muet.)
10 Prise d’entrée MIC2 (jack 6,35 mm, mono) pour
brancher un autre micro
11 Prise d’entrée REC (jack 6,35 mm, mono) pour
brancher un enregistreur ou un autre amplificateur
12 Prise d’entrée AUX (jack 6,35 mm, mono) pour
brancher un appareil à sortie niveau Ligne (p. ex.
lecteur CD portable, magnétophone à cassette)
13 Filetage M8 pour une installation sur un pied
1.2 Micro sans fil
14 LED, témoin de fonctionnement: si elle ne brille
pas lorsque le micro est allumé, la batterie ou l’accumulateur est épuisé
15 Interrupteur Marche/Arrêt:
position inférieure: micro déconnecté
position médiane: micro allumé mais n’émettant
pas de signal
position supérieure: micro allumé et émettant un
signal
16 Couvercle à visser du compartiment batterie
1.3 Face arrière de l’enceinte
(après retrait du panneau)
17 Témoin de charge pour un accu 9 V
18 Témoins de charge pour des accumulateurs de
type R6: LED L pour l’accu dans la partie gauche
du compartiment (20), LED R pour l’accu dans la
partie droite
19 Compartiment de charge pour un accu 9 V (type
6F22): pour le charger, fixez-le aux contacts pression (21) puis placez-le dans le compartiment
12
20 Compartiment de charge pour jusqu’à 2 accus de
type R6: pour les charger, placez-les dans le compartiment en respectant la polarité (voir indication
dans le compartiment)
21 Contacts pression pour relier l’accu 9 V à charger
22 Fusible; tout fusible fondu doit être remplacé par
un fusible de même type
23 Cordon secteur à relier au secteur 230 V~/50 Hz
24 Prise basse tension (contact médian: pôle moins)
pour le branchement à une alimentation externe
12 V , par exemple une batterie de voiture;
un adaptateur basse tension avec un diamètre extérieur de 5 mm ou 5,5 mm et un diamètre intérieur
de 2,1 mm est nécessaire
25 Compartiment batterie pour 8 batteries 1,5 V de
type R20
2
Conseils de sécurité
Les appareils (enceinte active + micro sans fil) répondent à la norme européenne 89/336/CEE relative à la
compatibilité électromagnétique; l’enceinte active répond supplémentairement à la norme 73/23/CEE portant sur les appareils à basse tension.
L’enceinte active est alimentée par une tension dangereuse en 230 V~. Ne touchez jamais l’intérieur de
cet appareil car en cas de mauvaise manipulation
vous pourriez subir une décharge électrique mortelle. En outre, l’ouverture de l’enceinte active ou du
micro sans fil rend tout droit à la garantie caduque.
Respectez en tout cas les points suivants:
● Protégez les appareils de l’humidité et de la chaleur
(température d’utilisation admissible 0 – 40 °C).
● Ne faites jamais fonctionner l’enceinte active branchée au secteur et débranchez immédiatement le
cordon secteur lorsque:
1. des dommages sur l’enceinte active ou le cordon
secteur apparaissent,
2. après une chute ou un accident similaire, vous
avez un doute sur l’état de l’appareil,
3. des défaillances apparaissent.
Dans tous les cas, les dommages doivent être
réparés par un technicien spécialisé.
● Tout cordon secteur défectueux doit être remplacé
par le fabricant ou un technicien spécialisé.
● Ne débranchez pas l’enceinte active en tirant sur le
cordon secteur.
● Nous déclinons toute responsabilité en cas de dommage si les appareils sont utilisés dans un but autre
que celui pour lequel ils ont été conçus, s’ils ne sont
pas correctement branchés ou utilisés ou ne sont
pas réparés de manière appropriée.
● Pour le nettoyage, utilisez un chiffon sec et souple,
en aucun cas de produits chimiques ou d’eau.
● En cas de non utilisation prolongée des appareils
(p. ex. supérieure à une semaine), retirez les batteries ou accumulateurs insérés; ils pourraient couler
et endommager les appareils.
● Toute batterie usagée ou accu défectueux ne doit
pas être jeté dans la poubelle domestique, ne rap-
●
3
portez-les qu’aux déchets spéciaux (p. ex. collecteur
à votre revendeur)
Lorsque les appareils sont définitivement retirés du
service, vous devez les déposer dans une usine de
recyclage adaptée.
Possibilités d’utilisation
Le TXA-400 se compose d’un micro main sans fil,
émettant sur la fréquence 433,05 MHz, et d’une enceinte active avec récepteur micro intégré. L’enceinte
active peut fonctionner au choix sur le secteur 230 V~,
avec une tension continue externe de 12 – 15 V (par
exemple d’une batterie de voiture) ou par batteries.
Ainsi le système est bien adapté à une utilisation mobile, p. ex. pour la conférence ou la vente-exposition.
En outre, l’enceinte active dispose de deux entrées
pour des micros fonctionnant à fil, d’une entrée Aux
pour un appareil audio à sortie niveau Ligne (p. ex.
magnétophone à cassette, radiocassette, lecteur CD
portable) et d’une sortie pour brancher un enregistreur
ou un autre amplificateur. De plus, sa fonction Charge
intégrée permet supplémentairement de recharger les
accus déchargés (1 x 9 V, 2 x R6).
3.1 Autorisation
L’autorisation du système PA sans fil TXA-400 est valable selon la directive R+TTE (Radio and Telecommunication Technical Equipment) au sein de l’union européenne. Pour un fonctionnement hors de l’union européenne, demandez conseil auprès de votre revendeur
ou la succursale de MONACOR du pays correspondant.
Dans la République fédérale d’Allemagne, la gamme des fréquences autour de 433 MHz a été autorisée
pour le fonctionnement de systèmes de transmission
audio sans fil. Comme il est possible que cette gamme
des fréquences ne soit pas disponible pour ce domaine
d’application dans les autres pays UE, veuillez contacter votre revendeur ou l’autorité correspondante de ce
pays en cas d’un fonctionnement du système dans un
pays autre que la République fédérale d’Allemagne.
4
Mise en fonctionnement
4.1 Installation de l’enceinte active
L’enceinte active peut être posée à votre convenance
ou installée sur un pied grâce au filetage M8 de la face
inférieure. Dans ce cas, retirez le couvercle de protection du filetage [(13) en fig. 1] et vissez l’enceinte active via ce filetage sur le pied.
4.2 Alimentation de l’enceinte active
L’enceinte active peut fonctionner soit sur le secteur
230 V~, soit via une source de tension continue externe de 12 – 15 V, soit via des batteries.
4.2.1 Branchement secteur
Si vous optez pour un fonctionnement secteur, le compartiment batterie (25) de l’enceinte active est déconnecté.
1) Le cordon d’alimentation se trouve derrière le panneau amovible de la face arrière de l’appareil: enfoncez vers le bas les deux fermetures du panneau qui
se trouvent dans la partie supérieure du panneau,
poussez le panneau vers l’avant et retirez-le.
2) Sortez le cordon secteur (23) et retirez la fixation du
cordon.
3) Replacez le panneau, faites passer le cordon secteur dans l’encoche prévue à cet effet en bas du panneau; faites verrouiller les fermetures du panneau.
4) Reliez maintenant le cordon à une prise secteur
230 V~/50 Hz.
F
B
CH
4.2.2 Source d’alimentation externe
Pour un fonctionnement indépendant du secteur, le
système peut être alimenté via une batterie 12 V (par
exemple batterie de voiture). Pour relier l’alimentation
à la prise basse tension (24) de la face arrière, un
adaptateur basse tension avec un diamètre extérieur
de 5 mm ou 5,5 mm et un diamètre intérieur de 2,1 mm
est nécessaire. Veillez à respecter la polarité; placez
le pôle moins au contact intérieur de la fiche.
Si vous reliez une source de tension continue externe, le compartiment batterie (25) de l’appareil est
déconnecté.
4.2.3 Insertion des batteries
1) Le compartiment batterie se trouve derrière le panneau amovible de la face arrière. Enfoncez vers le
bas les deux fermetures du panneau qui se trouvent dans la partie supérieure du panneau, poussez le panneau vers l’avant et retirez-le.
2) Placez 8 batteries 1,5 V de type R20 dans le compartiment batterie (25); veillez à respecter la polarité indiquée dans le compartiment pile.
3) Remettez et faites verrouiller le panneau.
4.3 Branchements audio
1) Si vous souhaitez utiliser un micro fonctionnant à
câble à la place du micro sans fil, reliez-le à la prise
jack 6,35 mm, mono MIC1 (9). (Une fois le cordon
de connexion du micro est branché à cette prise, le
micro sans fil reste muet.)
2) Si en plus du micro sans fil ou du micro relié à la
prise MIC1, un autre micro fonctionnant à câble doit
être utilisé, reliez-le à la prise jack 6,35 mm, mono
MIC2 (10).
3) Vous pouvez relier un appareil audio à sortie niveau Ligne (par exemple magnétophone à cassette, lecteur CD portable) à la prise jack 6,35 mm,
mono AUX (12). Reliez la sortie Ligne de l’appareil
à la prise AUX, si besoin utilisez un adaptateur.
4) Le signal audio peut être dirigé via la sortie REC.
OUT (11) sur un enregistreur audio ou un autre
amplificateur. Reliez la prise jack 6,35 mm, mono
REC. OUT à une entrée Ligne de l’enregistreur ou
de l’amplificateur.
4.4 Alimentation du micro sans fil
Le micro sans fil est alimenté par une batterie 9 V (batterie sèche ou rechargeable). L’alimentation est signalée par la LED (14). Si elle ne brille pas lorsque l’inter-
13
F
B
CH
rupteur (15) est sur la position supérieure ou médiane,
aucune batterie n’est insérée ou bien elle est usagée.
1) Dévissez le couvercle (16) dans la partie inférieure
du micro en le tournant dans le sens inverse des
aiguilles d’une montre.
2) Insérez une batterie 9 V ou un accu 9 V en respectant les connexions plus et moins, comme indiqué
dans le compartiment batterie.
3) Revissez le couvercle.
5
Utilisation
Avant d’allumer l’enceinte active, mettez les réglages
de volume (2, 4 et 5) sur le minimum et les réglages de
tonalité (6) sur la position médiane.
1) Allumez l’enceinte active avec l’interrupteur POWER
(8). La LED PL rouge (1), témoin de fonctionnement,
brille.
2) Si vous utilisez le micro sans fil, dépliez l’antenne
télescopique (7) complètement.
3) Allumez la source de signal utilisée dans ce cas.
Pour allumer le micro sans fil, poussez l’interrupteur (15) vers la position supérieure. Lorsque le
micro est allumé, la LED (14) brille (en position
médiane, le micro est en veille: c’est-à-dire il est
allumé mais n’émet aucun signal). Pour l’indication
qu’un signal est reçu, la LED verte RF ON (3) de
l’enceinte active s’allume.
4) Réglez le volume souhaité avec le réglage de
volume de la source utilisée:
Réglage MIC1/TS (2)
pour le micro sans fil ou le micro relié à la prise
MIC1 (9) (ce micro a la priorité sur le micro sans
fil: c’est-à-dire, quand un micro est branché à la
prise MIC1, le micro sans fil est muet)
Réglage MIC2 (4)
pour un micro relié à la prise MIC2 (10)
Réglage AUX (5)
pour un appareil relié à la prise AUX (12)
5) Utilisez les réglages de tonalité (6) pour régler
l’image sonore souhaitée: vous pouvez augmenter
ou diminuer les aigus (réglage TREBLE) ou les graves (réglage BASS) jusqu’à 5 dB. Si les réglages
sont en position médiane, il n’y a pas de modification des fréquences.
6) En cas de bruit fort à la réaction acoustique, d’abord
diminuez les aigus avec le réglage TREBLE; si la
réaction acoustique persiste, diminuez le réglage
de volume du micro respectif correspondamment.
7) En cas de mauvaise réception du micro sans fil,
vérifiez:
a si la batterie ou l’accu du micro est épuisée ou, si
l’enceinte active fonctionne sur batteries, si elles
sont épuisées.
14
b si la distance entre l’enceinte active et le micro
est trop grande (portée 15 – 25 m, dépendant
des conditions de lieu)
c si la réception peut être améliorée lorsque vous
orientez l’antenne télescopique.
d si la réception n’est pas gênée par des objets
dans la route de transmission.
8) Après fonctionnement, éteignez l’enceinte active
avec l’interrupteur POWER; n’oubliez pas d’éteindre également le micro sans fil [poussez interrupteur (15) entièrement sur le bas, la LED de fonctionnement (14) s’éteint]. Dans le cas contraire, la
batterie ou l’accu du micro sera épuisé pour l’opération prochaine.
Note en cas de fonctionnement secteur de l’enceinte active:
En cas de non utilisation prolongée du système PA,
veillez à débrancher également le cordon secteur
de l’enceinte active de la prise secteur, car l’appareil, même éteint, a une faible consommation du
courant.
6
Charge des accus
L’enceinte active permet de charger un accu 9 V (type
6F22) et jusqu’à deux accus 1,2 V de type R6.
Important: la charge des accumulateurs n’est possible
que si l’enceinte active est en fonctionnement secteur.
● Attention: Seuls les accumulateurs nickel-cadmium
peuvent être rechargés. Les batteries sèches ne
peuvent pas être rechargées; en cas de tentative de
chargement, elles pourraient exploser ou couler!
1) Retirez le panneau de la face arrière.
2) Pour charger un accu 9 V, reliez les pôles de l’accu
aux contacts pression (21) et placez l’accu dans le
compartiment de charge droit (19).
Pour charger des accus de type R6, mettez-les
dans le compartiment de charge gauche (20). Veillez à respecter la polarité et placez-les comme indiqué dans le compartiment. (Il est aussi possible de
charger un seul accu; vous pouvez le placer dans
le compartiment au choix à droite ou à gauche.)
3) Replacez le panneau et allumez l’enceinte active
avec l’interrupteur POWER (8). L’appareil peut être
utilisé pour la sonorisation même pendant la charge
des accus.
4) Pendant la charge, le témoin correspondant de
charge s’allume:
LED „6F22 Recharge” (17)
pour l’accu 9 V
LEDs „AA Size Recharge” (18)
pour l’accu de type R6 à gauche (LED L) et à
droite (LED R)
5) Lorsque la LED correspondante de charge s’éteint,
le processus de charge est terminé; retirez le panneau et ôtez l’accu/les accus.
7
Caractéristiques techniques
Généralités
Fréquence porteuse: . . 433,05 MHz
Modulation: . . . . . . . . . FM, ± 40 kHz
Stabilité de fréquence: . ± 0,005 %/25 °C, réglage à
quartz
Plage audio: . . . . . . . . . 50 – 15 000 Hz
Portée: . . . . . . . . . . . . . 15 – 25 m
Température ambiante: 0 – 40 °C
Accessoire livré: . . . . . 1 sacoche de transport
Enceinte active
Numéro d’autorisation
du récepteur micro: . . .
Puissance de sortie: . .
2 x entrée Mic: . . . . . . .
1 x entrée Aux: . . . . . .
1 x sortie Rec: . . . . . . .
Egaliseur: . . . . . . . . . . .
F
B
CH
ETS G000 257L
20 W max./4 Ω
1,5 mV/1 kΩ
110 mV/10 kΩ
280 mV/100 kΩ
±5 dB/10 kHz (aigus)
±5 dB/200 Hz (graves)
Courant de charge
accus type R6: . . . . . 70 – 150 mA
accu 9 V: . . . . . . . . . 5 – 60 mA
Alimentation: . . . . . . . . 230 V~/50 Hz/40 VA
ou 12 – 15 V /1,8 A max.
ou 8 x batterie 1,5 V R20
Dimensions: . . . . . . . . . 220 x 290 x 145 mm
Poids: . . . . . . . . . . . . . . 3 kg
Micro sans fil
Numéro d’autorisation: ETS G000 258L
Puissance émetteur: . . 8 mW
Alimentation: . . . . . . . . batterie 9 V ou accu 9 V,
consommation 38 mA
Dimensions: . . . . . . . . . Ø 56/35 mm x 245 mm
Poids: . . . . . . . . . . . . . . 205 g
D’après les données du constructeur.
Tout droit de modification réservé.
15
I
Vi preghiamo di aprire completamente la pagina 3.
Così vedrete sempre gli elementi di comando e i
collegamenti descritti.
1
Elementi di comando e collegamenti
1.1 Pannello frontale della cassa attiva
1 Spia di funzionamento
2 Regolatore volume per un microfono collegato alla
presa MIC1 (9) oppure – in mancanza del microfono – per il radiomicrofono
3 Spia di ricezione; è accesa durante la ricezione di
un segnale del radiomicrofono
4 Regolatore volume per un microfono collegato alla
presa MIC2 (10)
5 Regolatore volume per un apparecchio collegato
alla presa AUX (12)
19 Vano di carica per la batteria ricaricabile 9 V
(6F22): collegare la batteria con i contatti a pressione (21) e inserirla nel vano
20 Vano di carica per fino a 2 batterie ricaricabili del
tipo mignon (AA): inserire le batterie nel vano rispettando la corretta polarità (vedi sovrastampa nel
vano)
21 Contatti a pressione per collegare la batteria ricaricabile 9 V
22 Fusibile di rete; sostituire un fusibile bruciato solo
con uno dello stesso tipo
23 Cavo rete per il collegamento con 230 V~/50 Hz
24 Presa per piccole tensioni (contatto centrale = negativo) per il collegamento con un’alimentazione
12 V esterna, per es. con la batteria di un’auto;
la spina per piccole tensioni deve aver un diametro
esterno di 5 mm o 5,5 mm ed uno interno di 2,1 mm
25 Vano batterie per otto batterie 1,5 V del tipo mono
(D)
6 Regolatori alti (TREBLE) e bassi (BASS)
7 Antenna telescopica
2
8 Interruttore on/off
Gli apparecchi (cassa attiva e radiomicrofono) corrispondono alle direttive CE 89/336/CEE sulla compatibilità elettromagnetica. La cassa attiva corrisponde
inoltre alla direttiva 73/23/CEE per apparecchi a bassa tensione.
La cassa attiva funziona con tensione di rete di
230 V~. Non intervenire mai al suo interno; la manipolazione scorretta può provocare delle scariche
pericolose. Se la cassa attiva o il radiomicrofono
viene aperto, cessa ogni diritto di garanzia.
Si devono osservare assolutamente anche i seguenti
punti:
● Proteggere gli apparecchi dall’umidità e dal calore
(temperatura d’impiego ammessa fra 0 °C e 40 °C).
● Non mettere in funzione la cassa collegata con la
rete e staccare subito la spina rete se:
1. la cassa o il cavo rete presentano dei danni visibili;
2. dopo una caduta o dopo eventi simili sussiste il
sospetto di un difetto;
3. l’apparecchio non funziona correttamente.
Per la riparazione rivolgersi sempre ad un’officina
competente.
● Il cavo rete, se danneggiato, deve essere sostituito
solo dal costruttore o da un laboratorio autorizzato.
● Staccare il cavo rete afferrando la spina, senza tirare il cavo.
● Nel caso d’uso improprio, di collegamenti sbagliati,
d’impiego scorretto o di riparazione scorretta non si
assume nessuna responsabilità per eventuali danni.
● Per la pulizia usare solo un panno morbido, asciutto;
non impiegare in nessun caso prodotti chimici o
acqua.
● Nel caso di non utilizzo per un periodo prolungato
(p. es. oltre una settimana) conviene togliere le batterie per evitare che perdano, danneggiando gli apparecchi.
● Non gettare le batterie scariche o difettose nelle
immondizie di casa bensì negli appositi contenitori
(p. es. presso il vostro rivenditore).
9 Presa d’ingresso MIC1 (jack 6,3 mm, mono) per il
collegamento di un microfono da impiegare al
posto del radiomicrofono
(Se si collega il microfono, il segnale del radiomicrofono diventa muto.)
10 Presa d’ingresso MIC2 (jack 6,3 mm, mono) per il
collegamento di un microfono supplementare
11 Presa d’uscita REC (jack 6,3 mm, mono) per il collegamento di un registratore o di un altro amplificatore
12 Presa d’ingresso AUX (jack 6,3 mm, mono) per il
collegamento di un apparecchio con uscita Line
(p. es. lettore CD portatile, registratore a cassette)
13 Presa filettata M8 per il montaggio su un treppiede
1.2 Radiomicrofono
14 Spia di funzionamento; se non rimane accesa
mentre il microfono è acceso, significa che la batteria è scarica
15 Interruttore on/off
posizione inferiore:
posizione centrale:
microfono spento
microfono acceso, ma non
trasmette nessun segnale
posizione superiore: microfono acceso, sta trasmettendo un segnale
16 Cappuccio a vite del vano batteria
1.3 Pannello posteriore della cassa attiva
(coperchio tolto)
17 Spia dello stato di carica della batteria ricaricabile
9V
18 Spie dello stato di carica delle batterie ricaricabili
del tipo mignon (AA): L per la batteria nella parte
sinistra del vano (20), R per la batteria nella parte
destra del vano
16
Avvertenze di sicurezza
●
3
Se si desidera eliminare gli apparecchi definitivamente, consegnarli per lo smaltimento ad un’istituzione locale per il riciclaggio.
Possibilità d’impiego
Il sistema di sonorizzazione senza fili TXA-400 è composto da un radiomicrofono che trasmette sulla frequenza 433,05 MHz e da una cassa attiva con ricevitore integrato per il microfono. La cassa attiva funziona a scelta con tensione di rete 230 V oppure con
una tensione continua esterna di 12 –15 V (p. es. da
una batteria per auto) oppure anche con delle batterie.
Il sistema è quindi ottimale per l’impiego laddove si
cambia spesso il posto, p. es. per conferenze o campagne di vendite.
La cassa attiva è equipaggiata inoltre con due
ingressi per microfoni funzionanti con cavi, con un ingresso Aux per un apparecchio audio con uscita Line
(p. es. registratore per cassette, radioregistratore, lettore CD portatile) e con un’uscita per il collegamento di
un registratore o di un altro amplificatore. Il caricatore
integrato offre la possibilità di ricaricare le batterie ricaricabili (1 x 9 V, 2 x mignon).
3.1 Omologazione
Secondo la direttiva R+TTE (Radio and Telecommunication Technical Equipment), l’omologazione per il sistema di sonorizzazione senza fili TXA-400 è valida nei
paesi dell’Unione europea. Per l’impiego nei paesi extra
UE rivolgersi al rivenditore o alla filiale MONACOR.
In Germania, le frequenze intorno a 433 MHz sono
state liberalizzate per le trasmissioni audio senza fili.
Dato che queste frequenze potrebbero anche non essere libere in altri paesi dell’UE, si consiglia di informarsi presso il proprio rivenditore o presso le autorità
competenti se si desidera mettere in funzione il sistema al di fuori della Germania.
4
Messa in funzione
4.1 Collocamento della cassa attiva
La cassa attiva può essere collocata liberamente; grazie alla filettatura M8 sul lato inferiore può essere montata anche su un treppiede. In questo caso togliere il
cappuccio di protezione dalla presa filettata [(13) della
fig. 1] e avvitare la cassa sul treppiede.
4.2 Alimentazione della cassa attiva
Lo strumento funziona a scelta con la rete 230 V, con
una sorgente esterna di tensione continua di 12 –15 V
oppure con delle batterie.
4.2.1 Collegamento alla rete
Durante il funzionamento a rete, il vano batterie (25)
viene disattivato.
1) Il cavo rete si trova dietro il coperchio staccabile sul
retro. Spingere in basso le due chiusure nella parte
alta del coperchio, ribaltare il coperchio e toglierlo.
2) Sfilare il cavo (23) e togliere il fermacavo.
3) Rimettere il coperchio facendo passare il cavo attraverso il passacavo sul bordo inferiore del coperchio. Quindi chiudere il coperchio con lo scatto delle due chiusure.
I
4) Inserire la spina del cavo in una presa di rete
(230 V~/50 Hz).
4.2.2 Sorgente di tensione esterna
Per un funzionamento indipendente dalla rete, la cassa può essere alimentata da una batteria 12 V (p. es.
dell’auto). Per l’alimentazione attraverso la presa per
piccole tensioni (24) sul retro è richiesto uno spinotto
per piccole tensioni con diametro esterno di 5 mm o
5,5 mm e con diametro interno di 2,1 mm. Rispettare
assolutamente la corretta polarità: il negativo si deve
trovare sul contatto interno dello spinotto.
Se è collegata la sorgente DC esterna, il vano batterie (25) viene disattivato.
4.2.3 Inserimento delle batterie
1) Il vano batterie si trova dietro il coperchio sul retro.
Spingere in basso le due chiusure nella parte alta
del coperchio, ribaltare il coperchio e toglierlo.
2) Inserire nel vano batterie (25) otto batterie mono
1,5 V (D) rispettando la corretta polarità come
illustrato dalla sovrastampa nel vano batterie.
3) Rimettere il coperchio e chiuderlo a scatto.
4.3 Collegamenti audio
1) Se al posto del radiomicrofono si desidera impiegare un microfono con cavo, collegarlo con la presa
jack 6,3 mm mono MIC1 (9). (Non appena il cavo
del microfono è inserito nella presa, il radiomicrofono è disattivato.)
2) Se oltre al radiomicrofono o al microfono collegato
con MIC1 si vuole impiegare un altro microfono con
cavo occorre collegarlo con la presa jack 6,3 mm
mono MIC2 (10).
3) Alla presa jack 6,3 mm mono AUX (12) si può collegare un apparecchio audio con uscita Line (p. es.
registratore a cassette, lettore CD portatile). Collegare l’uscita Line dell’apparecchio – eventualmente
tramite un adattatore – con la presa AUX.
4) Con l’uscita REC. OUT (11) è possibile portare il
segnale audio su un registratore o un altro amplificatore. Collegare la presa jack 6,3 mm mono
REC. OUT con un ingresso Line del registratore o
dell’amplificatore.
4.4 Alimentazione del radiomicrofono
Il radiomicrofono viene alimentato da una batteria 9 V
(ricaricabile o no). L’alimentazione è indicata dalla spia
di funzionamento (14). Se non è accesa quando l’interruttore (15) si trova in posizione centrale o superiore, significa che la batteria manca o è scarica.
1) Svitare cappuccio inferiore (16) del microfono, girandolo in senso antiorario.
2) Inserire una batteria 9 V con i contatti positivo e negativo come indicato nel vano batteria.
3) Riavvitare il cappuccio.
17
I
5
Funzionamento
Prima di accendere la cassa attiva portare i regolatori
del volume (2, 4 e 5) sul minimo e i regolatori dei toni
(6) in posizione centrale.
1) Accendere la cassa con l’interruttore POWER (8).
Si accende la spia rossa PL (1).
2) Se si utilizza il radiomicrofono sfilare completamente l’antenna telescopica (7).
3) Attivare la sorgente.
Per attivare il radiomicrofono spostare l’interruttore (15) completamente in alto. Con il microfono
acceso, la spia (14) rimane accesa. (In posizione
centrale, il microfono è in stand-by e quindi non
emette nessun segnale). La spia verde RF ON (3)
della cassa si accende per indicare la ricezione di
un segnale.
4) Impostare il volume della sorgente con il rispettivo
regolatore del volume:
Regolatore MIC1/TS (2)
per il radiomicrofono o per un microfono collegato con la presa MIC1 (9) (questo microfono ha la
priorità rispetto al radiomicrofono, vuol dire che
se è collegato alla presa MIC1, il radiomicrofono
è disattivato)
Regolatore MIC2 (4)
per un microfono collegato con la presa MIC2
(10)
Regolatore AUX (5)
per un apparecchio collegato con la presa AUX
(12)
5) Impostare il suono con i regolatori toni (6): gli alti
(TREBLE) e i bassi (BASS) possono essere abbassati o alzati fino a 5 dB. Se i regolatori si trovano in
posizione centrale, la frequenza non viene influenzata.
6) Se si verifica il fischio di retroazione, abbassare
dapprima il regolatore TREBLE. Se questo non
basta, ridurre il volume del relativo microfono.
7) Se la ricezione dal radiomicrofono non è buona,
conviene verificare se:
a la batteria del microfono è scarica oppure se le
batterie della cassa – se alimentata da batterie –
sono scariche.
b la distanza fra cassa e microfono è troppo grande (portata 15 – 25 m, a seconda delle circostanze locali).
c la ricezione può migliorare muovendo l’antenna
telescopica.
d la ricezione è disturbata, per esempio da oggetti
fra microfono e cassa.
8) Dopo l’uso spegnere la cassa attiva con l’interruttore POWER. Non dimenticare di spegnere anche il
radiomicrofono [interruttore (15) in basso, la spia
(14) si spegne]; altrimenti, alla prossima occasione
la batteria sarà scarica.
N.B.: Funzionamento a rete della cassa attiva
Se il sistema di sonorizzazione non viene usato per
un tempo prolungato conviene staccare anche la
spina dalla presa di rete perché l’apparecchio,
anche se è spento, consumo un po’ di corrente.
18
6
Ricaricare le batterie ricaricabili
Con la cassa attiva si possono ricaricare le batterie
ricaricabili 9 V (6F22) e fino a 2 batterie del tipo mignon (AA) di 1,2 V.
Importante: La ricarica è possibile solo durante il funzionamento a rete della cassa.
● Attenzione! Si possono ricaricare solo batteria al
NiCd. Le batterie non ricaricabili possono perdere
di acide o esplodere se si cerca di ricaricarle!
1) Togliere il coperchio sul retro.
2) Per ricaricare una batteria 9 V inserire i contatti della batteria sui contatti a pressione (21) ed inserire la
batteria nel vano di destra (19).
Per ricaricare le batterie del tipo mignon inserirle nel vano di sinistra (20) rispettando la corretta
polarità come illustrato dalla sovrastampa nel vano
stesso. (Si può ricaricare anche una sola batteria
mettendola indifferentemente o a sinistra o a destra
del vano).
3) Rimettere il coperchio ed accendere la cassa attiva
con l’interruttore POWER (8). Durante la ricarica, la
cassa può essere impiegata per la normale sonorizzazione.
4) Durante la ricarica si accende la relativa spia di
carica:
spia “6F22 Recharge” (17)
per la batteria 9 V
spie “AA Size Recharge” (18)
per la batteria di sinistra (spia L) e di destra (spia
R) del tipo mignon
5) Se la spia di carica si spegne, la carica è terminata.
Aprire il coperchio e togliere la batteria/le batterie.
7
Dati tecnici
I
Dati generali
Frequenza portante: . . 433,05 MHz
Modulazione: . . . . . . . . FM, ±40 kHz
Stabilità frequenza: . . . ±0,005 %/25 °C comandata
dal quarzo
Frequenza audio: . . . . . 50 – 15 000 Hz
Portata: . . . . . . . . . . . . 15 – 25 m
Temperatura d’impiego: 0 – 40 °C
Accessori in dotazione: 1 borsa a tracollo
Cassa attiva
Numero omologazione
ricevitore: . . . . . . . . . . .
Potenza d’uscita: . . . . .
2 x ingresso Mic: . . . . .
1 x ingresso Aux: . . . . .
1 x uscita Rec: . . . . . . .
Regolazione toni: . . . . .
ETS G000 257L
20 W max./4 Ω
1,5 mV/1 kΩ
110 mV/10 kΩ
280 mV/100 kΩ
±5 dB/10 kHz (alti)
±5 dB/200 Hz (bassi)
Corrente di carica
batterie ricar. mignon: 70 – 150 mA
batteria ricar. 9 V. . . . 5 – 60 mA
Alimentazione: . . . . . . . 230 V~/50 Hz/40 VA opp.
12 – 15 V /1,8 A max. opp.
8 batterie mono 1,5 V
Dimensioni: . . . . . . . . . 220 x 290 x 145 mm
Peso: . . . . . . . . . . . . . . 3 kg
Radiomicrofono
Numero omologazione: ETS G000 258L
Potenza: . . . . . . . . . . . 8 mW
Alimentazione: . . . . . . . batteria 9 V ricaricabile o
non, assorbimento 38 mA
Dimensioni: . . . . . . . . . Ø 56/36 mm x 245 mm
Peso: . . . . . . . . . . . . . . 205 g
Dati forniti dal produttore.
Con riserva di modifiche tecniche.
19
NL
B
Actieve luidsprekerkast met
zendmicrofoon
Lees aandachtig de onderstaande veiligheidsvoorschriften, alvorens de toestellen in gebruik te nemen.
Mocht u bijkomende informatie over de bediening van
de toestellen nodig hebben, lees dan de Duitse, Engelse, Franse, of Italiaanse tekst in deze handleiding.
Veiligheidsvoorschriften
De toestellen (actieve luidspreker en zendmicrofoon)
zijn in overeenstemming met de EU-richtlijn voor elektromagnetische compatibiliteit 89/336/EEG. De actieve
luidspreker is bovendien in overeenstemming met EUrichtlijn voor toestellen op laagspanning 73/23/EEG.
De netspanning (230 V~) waarmee de actieve luidspreker gevoed wordt is levensgevaarlijk. Open het
toestel niet, want door onzorgvuldige ingrepen loopt
u het risico van een elektrische schok. Bovendien
vervalt elke garantie bij het eigenhandig openen van
de apparatuur.
Let eveneens op het volgende:
● Bescherm de toestellen tegen vochtigheid en hitte
(toegelaten omgevingstemperatuur 0 – 40 °C).
● Met de batterijlader van de actieve luidspreker mogen enkel oplaadbare nikkel-cadmiumbatterijen geladen worden. Droge batterijen zijn niet oplaadbaar
en kunnen uitlopen of ontploffen, wanneer men ze
probeert te laden!
● Schakel de op het elektriciteitsnet aangesloten actieve luidspreker niet in resp. trek onmiddellijk de
stekker uit het stopcontact, wanneer:
1. de actieve luidspreker of het netsnoer zichtbaar
beschadigd zijn,
2. er een defect zou kunnen optreden nadat het toestel bijvoorbeeld gevallen is,
3. het toestel slecht functioneert.
Het toestel moet in elk geval hersteld worden door
een gekwalificeerd vakman.
● En beschadigd netsnoer mag enkel door de fabrikant of door een gekwalificeerd persoon hersteld
worden.
● Trek de netstekker nooit met het snoer uit het stopcontact.
● Gebruik voor de reiniging uitsluitend een droge, zachte doek. Gebruik in geen geval chemicaliën of water.
● In geval van ongeoorloofd of verkeerd gebruik, verkeerde aansluiting, foutieve bediening of herstelling
door een niet-gekwalificeerd persoon vervalt de
garantie bij eventuele schade.
20
●
●
●
●
Gebruik van het actieve systeem op het lichtnet:
Indien het systeem langere tijd niet gebruikt wordt, is
het raadzaam de netsteker uit te trekken. Zelfs in uitgeschakelde toestand verbruikt het apparaat een
geringe hoeveelheid stroom.
Indien u de toestellen voor een langere periode (bijvoorbeeld langer dan een week) niet gebruikt, dient
u de batterijen uit te nemen. Zo blijven de toestellen
onbeschadigd bij eventueel uitlopen van de batterijen.
Geef lege batterijen of defecte accu’s niet met het
gewone huisvuil mee, maar verwijder het als KCA
(bijvoorbeeld inzamelbox bij uw winkelier).
Wanneer de toestellen definitief uit bedrijf genomen
wordt, bezorg ze dan voor verwerking aan een
plaatselijk recyclagebedrijf.
Altavoz activo con
micrófono sin hilo
E
Por favor, antes del uso de los aparatos observar en
todo caso las instrucciones de seguridad siguientes.
Si informaciones adicionales son necesarias para la
operación de los aparatos, estas se encuentran en el
texto alemán, inglés, francés o italiano de estas instrucciones.
Consejos de seguridad
Los aparatos (altavoz activo y micrófono sin hilo) responden a la norma 89 / 336 / CEE referente a la compatibilidad electromagnética. El altavoz activo responde adicionalmente a la norma 73 / 23 / CEE relativa a
los aparatos de baja tensión.
El altavoz activo está alimentado por una tensión
muy peligrosa de 230 V~. No tocar nunca el interior
del alimentador ya que en caso de una mala manipulación podría sufrir una descarga eléctrica mortal.
Igualmente, la abertura de uno de los aparatos
anula cualquier tipo de garantía.
Respetar los siguientes puntos en todo caso:
● Proteger los aparatos de la humedad y del calor
(temperatura ambiente admisible 0 – 40 °C).
● El cargador integrado del altavoz activo permite cargar únicamente los acumuladores Niquel-Cadmio.
¡En ningún caso, debe intentarse cargar las baterías
secas ya que podrían explotar o derramar!
● No conectar el altavoz activo conectado a la red y
desconectarlo inmediatamente de la red cuando:
1. daños aparecen sobre el aparato o sobre el cable
de red,
2. después una caída o accidente parecido, el aparato pueda tener un defecto,
3. disfunciones aparecen.
Sólo un técnico habilitado puede efectuar las reparaciones.
● Solamente el fabricante o un técnico habilitado pueden reemplazar el cordón de red dañado.
● No desconectar el altavoz activo tirando del cable
de red.
● Para limpiar, utilizar un trapo seco y suave, en
ningún caso productos químicos o agua.
● Declinamos cualquier responsabilidad en caso de
daños si los aparatos se utilizan por cualquier otro
fin que no sea el adecuado, no se conectan y utilizan correctamente o no están reparados de manera profesional.
●
●
●
●
Nota en caso de alimentación a la red del altavoz
activo:
Si el sistema PA no está usado durante un largo periodo, después la operación debería también desenchufar el altavoz activo, porque tiene un consumo
de corriente débil aun cuando el aparato esté desconectado.
Si los aparatos no son usados durante un largo periodo (p. ej. más de una semana), deberá quitar las
baterías; se evitará así cualquier desperfecto causado a los aparatos en caso las baterías derraman.
No tirar nunca las baterías usadas o los acumuladores defectuosos a las basuras domiciliarias. Deben
depositarlos solamente a las basuras especiales
(p. ej. depósito colector de su vendedor).
Una vez los aparatos son retirados definitivamente
del servicio, deben depositarlos en una fábrica de
reciclaje adaptada.
21
DK
Aktiv højttalerenhed med
trådløs mikrofon
Læs nedenstående sikkerhedsoplysninger opmærksomt igennem før ibrugtagning af enhederne. Bortset
fra sikkerhedsoplysningerne henvises til den engelske,
tyske, franske eller italienske tekst.
Vigtige sikkerhedsoplysninger
Enhederne (aktiv højttaler og trådløs mikrofon) overholder direktivet vedrørende elektromagnetisk kompatibilitet 89/336/EØF. Den aktive højttaler overholder
desuden lavspændingsdirektivet 73/23/EØF.
Den aktive højttaler benytter livsfarlig netspænding
(230 V~). For at undgå fare for elektrisk stød må kabinettet ikke åbnes. Overlad servicering til autoriseret personel. Desuden bortfalder enhver reklamationsret, hvis enhederne har været åbnet.
Vær altid opmærksom på følgende:
● Beskyt enhederne mod fugt og varme (tilladt omgivelsers temperatur 0 – 40 °C).
● Kun genopladelige batterier af typen nikkel-kadmium må oplades med den integrerede lader i den
aktive højttaler. Tørbatterier må ikke genoplades og
kan lække eller eksplodere, hvis der gøres forsøg på
at genoplade dem!
● Tag ikke den aktive højttaler i brug, når den er tilsluttet til lysnettet, og træk straks netstikket ud af kontakten i følgende tilfælde:
1. hvis der er synlig skade på apparatet eller netkablet,
2. hvis der kan være opstået skade, efter at apparatet er tabt eller lignende,
3. hvis der forekommer fejlfunktion.
Apparatet skal altid repareres af autoriseret personel.
● Et beskadiget netkabel må kun repareres af producenten eller af autoriseret personel
● Tag aldrig stikket ud af stikkontakten ved at trække i
netkablet, tag fat i selve stikket.
● Til rengøring må kun benyttes en tør, blød klud; der
må under ingen omstændigheder benyttes kemikalier eller vand.
● Hvis enhederne benyttes til andre formål, end de
oprindeligt er beregnet til, hvis de ikke er tilsluttet
korrekt, hvis de betjenes forkert, eller hvis de ikke
repareres af autoriseret personel, omfattes eventuelle skader ikke af garantien.
22
●
●
●
●
Henvisning angående strømforsyning af den aktive
højttaler via netspænding:
Hvis PA-systemet ikke anvendes i en længere periode, anbefales det at tage den aktive højttalers
netstik ud af stikkontakten, da enheden selv i slukket
tilstand har et lille strømforbrug.
Batterierne bør tages ud, hvis enhederne ikke benyttes i en længere periode (f. eks. mere end en
uge). Dette sikrer, at enhederne ikke bliver beskadiget af eventuelt lækkende batterier.
Brugte batterier, eller defekte genopladelige må ikke
smides i almindelig husholdnings affald, men skal
bortskaffes i specielle battericontainer (evt. hos din
forhandler).
Hvis enhederne skal tages ud af drift for bestandigt,
skal de bringes til en lokal genbrugsstation for bortskaffelse.
Aktiv högtalare med
trådlöst mikrofon
S
Innan enheterna tas i bruk, läs först igenom säkerhetsföreskrifterna. Om ytterligare information önskas, läs
igenom den tyska, engelska, franska eller den italienska texten som medföljer.
Säkerhetsföreskrifter
Enheterna (aktiv högtalare och trådlöst mikrofon) uppfyller EG direktiv 89/336/EWG avseende elektromagnetiska störfält. Den aktiva högtalaren uppfyller dessutom EG-direktiv 73/23/EWG avseende lågspänningsapplikationer.
Den aktiva högtalaren använder hög spänning internt (230 V~). Öppna aldrig denna på egen hand
utan överlåt all service till auktoriserad verkstad.
Oförsiktig hentering kan ge elskador på person och
materiel för vilka inget ansvar tas. Dessutom upphör
garantin för enheterna att gälla om egna eller oauktoriserade ingrepp görs i enheterna.
Ge även akt på följande:
● Enheterna skall skyddas mot hög fuktighet och hög
värme (tillåten omgivningstemperatur 0 – 40 °C).
● Endast laddbara Ni-Cad batterier avses att laddas i
den integrerade laddaren i huvudenheten. Torrbatterier är inte lämpliga för återladdning då dessa kan
läcka eller explodera då de återladdas!
● Använd inte den aktiva högtalaren ansluten till elnätet och ta omedelbart kontakten ur elurtaget om
något av följande fel uppstår:
1. Enheten eller elsladden har synliga skador.
2. Enheten är skadad av fall e. d.
3. Enheten har andra felfunktioner.
Enheten skall alltid lagas på verkstad av utbildad
personal.
● En skadad elsladd skall endast bytas på verkstad
eller på tillverkaren.
● Drag aldrig ut kontakten genom att dra i elsladden
utan ta tag i kontaktkroppen.
● Rengör endast med en mjuk och torr trasa, använd
aldrig kemikalier eller vatten vid rengöring.
● Om enheterna används för andra ändamål än vad
de är avsedd för, felkopplad, ej handhavd på korrekt
sätt gäller inte garantin, detsamma om egna eller
oauktoriserade ingrepp görs i enheterna.
●
●
●
●
Note angående strömförsörjning av den aktiva högtalaren via nätspänning:
Om inte PA systemet skall användas under en längre period rekommenderas att dra ur kontakt till el
uttag då enheten i avslaget tillstånd konsumerar en
låg spänning.
Om enheterna inte skall användas på längre tid
(t. ex. mer än 1 vecka) bör batterierna tas ur enheterna för att undvika skador av läckande batterier.
Batterierna bör inte betraktas som hushållsavfall.
Skadade eller förbrukade laddbara batterier skall
alltid slängas i särskild behållere för återvinning
Om enheterna skall kasseras bör de lämnas in till
återvinning.
23
FIN
Aktiivikaiutin langattomalla
mikrofonilla
Ole hyvä ja huomioi aina seuraavat turvallisuutta
koskevat ohjeet ennen laitteen käyttöön ottoa. Katso
käyttöön liittyviä ohjeita Saksan, Englannin, Ranskan
tai Italian kielisistä ohjeista, jos tarvitset lisää tietoa
laitteen käytöstä.
Turvallisuudesta
Tämä laitteisto (sisältäen aktiivikaiuttimen ja langattoman mikrofonin) vastaa direktiiviä 89/336/EEC sähkömagneettisesta yhteensopivuudesta ja aktiivikaiutin
vastaa myös matalajännitedirektiiviä 73/23/EEC.
Aktiivikaiutin toimii myös vaarallisella (230 V~) jännitteellä. Asiaa tuntematon käsittely voi aiheuttaa
sähköiskun vaaran. Jätä asennus- ja huoltotyöt aina
yksinomaan valtuutetun, ammattitaitoisen huoltoliikkeen tehtäväksi. Takuu raukeaa, jos muu kuin maahantuojan valtuuttama huolto on huoltanut laitteita.
Ole hyvä ja noudata aina seuraavia ohjeita:
● Suojele laitteita kosteudelta ja kuumuudelta (sallittu
käyttölämpötila 0 – 40 °C).
● Aktiivikaiuttimessa saa käyttää ainoastaan ladattavia
nikkeli-kadmium –akkuja (NiCd) kaiuttimen sisäänrakennetun laturin vuoksi. Normaaliparistot eivät ole
latauskelpoisia, ja saattavat ladattaessa vuotaa tai
räjähtää!
● Poista laite heti verkkovirrasta äläkä kytke sitä verkkovirtaan jos:
1. virtajohdossa on havaittava vaurio.
2. putoaminen tai muu vastaava vahinko on saattanut aiheuttaa vaurion.
3. laitteessa esiintyy toimintahäiriöitä.
Kaikissa näissä tapauksissa laite tulee huollattaa
valtuutetussa huollossa.
● Vahingoittunut virtajohto tulee vaihdattaa valtuutetussa huoltoliikkeessä.
● Älä koskaan irrota virtajohtoa pistorasiasta johdosta
vetämällä.
● Käytä puhdistamiseen pelkästään kuivaa, pehmeää
kangasta. Veden ja kemikaalien käyttö puhdistamiseen on kielletty.
● Jos laitteita käytetään muuhun tarkoitukseen kuin
mihin ne ovat alunperin tarkoitettu, jos niitä käytetään väärin taikka niitä ei ole huollettu tai korjattu
valtuutetussa huoltoliikkeessä, ei takuu ole voimassa, eikä valmistaja, maahantuoja tai myyjä ota vastuuta aiheutuneesta vahingosta.
24
●
●
●
●
Laitetta verkkovirralla käytettäessä huomioitava
seuraavaa:
Jos laitteisto on käyttämättä pidemmän aikaa, on
suositeltavaa poistaa laite verkkovirrasta. Aktiivikaiutin kuluttaa hieman virtaa, vaikka laite olisikin
OFF –asennossa.
Jos laitetta ei käytetä pitkiin aikoihin (esim. yli viikkoon) patterit tulisi irroittaa. Laite ei kuitenkaan vahingoitu vaikka patterit vuotaisivatkin.
Loppuun kuluneet paristot tai vialliset ladattavat
paristot tulee toimittaa aina niiden keräyspisteeseen, esim. jälleenmyyjän luona. Käytöstä poistettuja paristoja tai akkuja ei missään tapauksessa saa
laittaa talousjätteisiin.
Kun laite poistetaan lopullisesti käytöstä, huolehdi,
että laite hävitetään asianmukaisesti jätteen käsittelylaitoksessa.
Copyright © by MONACOR ® INTERNATIONAL GmbH & Co. KG, Bremen, Germany
All rights reserved. www.monacor.com
04.01.01