1
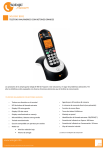
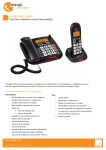
SOLOGIC B901 COMBO
UK The features described in this manual are published with reservation to modifications.
NL De in deze handleiding beschreven mogelijkheden worden gepubliceerd onder voorbehoud van
wijzigingen.
FR Les possibilités décrites dans ce manuel sont publiées sous réserve de modifications.
DE Die in dieser Bedienungsanleitung umschriebenen Möglichkeiten, werden vorbehaltlich
Änderungen publiziert.
ES Las características descritas en este manual pueden ser objeto de futuras modificaciones.
SE Funktionerna i denna bruksanvisning publiceras med reservation för ändringar.
IT Le caratteristiche descritte nel presente manuale vengono pubblicate con riserva di modifica.
PT As características descritas neste manual são publicadas sob reserva de modificação.
CZ Možnost úpravy funkcí popsaných v této píruce vyhrazena.
GR , .
PL Waciwoci opisane w niniejszej instrukcji obsugi s! publikowane z zatrze"eniem prawa
wprowadzenia zmian.
UK
NL
FR
DE
ES
SE
IT
PT
CZ
GR
PL
SHORT USER GUIDE / BEKNOPTE HANDLEIDING
NOTICE D'UTILISATION / KURZANLEITUNG
GUÍA DEL USUARIO ABREVIADA / KORT ANVÄNDARHANDBOK
BREVE GUIDA DELL'UTENTE / GUIA RESUMIDO DO UTILIZADOR
KRÁTKÝ NÁVOD PRO UŽIVATELE / KRÓTKA INSTRUKCJA OBSUGI
V 1.0 - 08/10
To be connected to the public analogue telephone network.
Geschikt voor aansluiting op het openbare analoog geschakelde telefoonnetwerk.
Il est destiné à être raccordé au réseau de télécommunication public.
Kompatibel für den analogen Telefonanschluss.
Conexión a la red telefónica analógica
For anslutning til det analoga nätverket.
Destinato ad essere collegato alla rete telefonica analogica pubblica.
Para efectuar a ligação com a rede pública analógica.
Pipojit k veejné analogové telefonní síti.
#$ % $ & & &
.
Do pod!czenia do publicznej analogowej sieci telefonicznej.
This product is in compliance with the essential requirements and other relevant provisions of the R&TTE directive 89/336/EEC.
The Declaration of conformity can be found on :
http://www.topcom.be/cedeclarations.asp
UK The CE symbol indicates that the unit complies with the essential requirements of the R&TTE
directive.
NL Het toestel voldoet aan de basiseisen van de R&TTE-richtlijn. Dit wordt bevestigd door de CEmarkering.
FR La conformité de l’appareil avec les exigences fondamentales de la directive européenne R&TTE
relative aux terminaux, est confirmée par le label CE.
DE Die Übereinstimmung des Gerätes mit den grundlegenden Anforderungen der R&TTE-Directive
ist durch das CE-Kennzeichen bestätigt.
ES El sello CE corrobora la conformidad del equipo con los requerimientos básicos de la directiva
R&TTE.
SE CE-märket bekräftar att apparaten uppfyller de grundläggande kraven i R&TTE direktivet.
IT Il simbolo CE indica che l’unità è conforme ai requisiti fondamentali della direttiva R&TTE.
PT O símbolo CE indica que esta unidade cumpre com os requisitos essenciais da directiva R&TTE.
CZ Symbol CE znamená, že jednotka spl(uje základní požadavky sm)rnice R&TTE.
GR * + CE / +&$ R&TTE.
PL Symbol CE oznacza, "e urz!dzenie spenia istotne wymogi dyrektywy R&TTE.
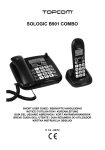
A
C
14
13
11
10
B
1
12
OK
Figure 1
2
R
3
ESC/
INT
A
4
9
5
B901
+
8
6
B
7
+
Figure 2
Figure 3
15 16 17 18 19
33
20
21
32
OK
ESC
31
22
R
23
++
30
24
-
29
DEL
25
28
34
27 26
Figure 4
UK This product works with rechargeable batteries only. If you put non-rechargeable
batteries in the handset and place it on the base, the handset will be damaged and this in
NOT covered under the warranty conditions.
NL Dit product werkt alleen op herlaadbare batterijen. Als u niet herlaadbare batterijen in de
handset stopt en deze op de basis plaatst, zal de handset beschadigd raken. Deze beschadiging wordt
NIET gedekt door de garantie.
FR Ce produit fonctionnement uniquement avec des piles rechargeables. Si vous mettez des piles non
rechargeables dans le combiné et si vous le placez sur la base, le combiné sera endommagé et ceci
ne sera PAS couvert par la garantie.
DE Dieses Gerät darf nur mit Akkus betrieben werden. Wenn Sie das Mobilteil mit nicht
wiederaufladbaren Batterien bestücken und es auf die Basisstation stellen, wird das Mobilteil
beschädigt und fällt nicht unter die Garantie.
ES Este producto solo funciona con pilas recargables. Si pone pilas no recargables en el terminal y lo
pone en la base, el terminal se dañará, lo que NO está incluido en la garantía.
SE Den här produkten fungerar endast med uppladdningsbara batterier. Om du sätter i ickeuppladdningsbara batterier i handenheten och placerar den på basenheten, kommer handenheten att
skadas. Sådana skador täcks INTE av garantin.
IT Questo prodotto funziona solo con batterie ricaricabili. Se si inseriscono batterie non ricaricabili nel
ricevitore portatile e lo si ripone sulla sua base, il portatile subirà dei danni e questi NON saranno
coperti dalla garanzia.
PT Este produto trabalha apenas com baterias recarregáveis. Se colocar baterias não recarregáveis
no portátil e o colocar sobre a base, este ficará danificado. Estes danos não são cobertos pelas
condições da garantia.
CZ Tento výrobek je uren pro použití pouze s dobíjecími bateriemi. Pokud vložíte do telefonu
nedobíjecí baterie a položíte telefon do základny, dojde k poškození telefonu a na tuto škodu se záruka
NEVZTAHUJE.
GR * 0 1 . 2 1 &
& & % +, &
& % ++ 324 & .
PL Urz!dzenie to dziaa tylko z akumulatorkami nadaj!cymi si5 do adowania. W przypadku wo"enia
do suchawki zwykych, nienadaj!cych si5 do adowania baterii, a nast5pnie poo"enia jej na bazie,
suchawka ulegnie uszkodzeniu i NIE bedzie to obj5te przez gwarancj5.
HL_Sologic B901 eco.book Page 3 Friday, August 6, 2010 1:38 PM
Getting started
Thank you for purchasing this TOPCOM product. This product has
been designed and assembled with utmost care for you and the
environment. Because we at TOPCOM like to think of the future of our
planet and our children, we aim to do our best to help saving the
environment. This is why we decided to reduce the number of pages
of our user guides and product manuals. If you keep in mind that it
takes up to 24 trees to produce 1 ton of paper, publishing product
manuals in 11 languages costs our planet a lot of trees. In this short
manual provided with your TOPCOM device you can find a brief
explanation of how to install and use your TOPCOM device.
If you would still like to discover all the features of your new TOPCOM
device, please visit our website (www.topcom.net) where you can
download the complete user manual in your language. By doing this
TOPCOM hopes to do its share to make our planet a better place,
but we can only succeed with your help!
2 First steps
2.1 How to use this User Guide
The following method is used in this User Guide to clarify instructions:
Text ....... „Display“.
Text that appears on the telephone display
Key to be pressed
2.2 Installing the base station
Install the base station as follows:
1 Connect the mains adapter to the base station first and then to
a socket.
2 Connect one end of the telephone cable to the telephone socket
on the wall and the other to the connector on the back of the
base station.
3 The telephone and power cables should be connected as
shown in figure 1.
2.3 Handset charger
1
Plug the mains adapter into a power socket.
3
English
1 Getting started
HL_Sologic B901 eco.book Page 4 Friday, August 6, 2010 1:38 PM
First steps
2.4 Handset
1
2
3
4
Open the battery compartment as shown in figure 2.
Insert the rechargeable batteries. Make sure the polarity is
correct (+ and -).
Close the battery compartment.
Place the handset in the charger and charge it for 16 hours. The
charging LED is illuminated
2.5 Keys/Display
Cordless handset
1.
2.
3.
4.
5.
6.
7.
8.
Redial / up
Phone book
Mute / delete
Hang up
Alphanumeric keys
Key lock
Pause
Ringer on/off
9. Calls list / down
10. Answer call / hands free / call
button
11. INT / escape
12. Menu / OK / flash
13. Display
14. Red LED, flashes during a call
Base station
15.
16.
17.
18.
19.
20.
21.
22.
23.
24.
Escape
Menu / OK
Left
Redial / up
Right
Display
Phone book
Calls list / flash
Down
Abbreviated dialling
(M1 - M2 - M3)
25. Hands free
26. Alphanumeric keys
27. Red LED on the base
station, flashes during a call
4
28. Paging / call diversion /
internal call
29. Mute / delete
30. Volume control
31. Loudspeaker
32. Receiver holder for wall
mounting
33. Lug: for putting down the
receiver briefly during a call
when the phone is wall-mounted
Charger
34. LED: handset charging in
progress.
HL_Sologic B901 eco.book Page 5 Friday, August 6, 2010 1:38 PM
First steps
English
2.6 Handset display
HANDSET X
x = handset number
Other numbers or scroll
left through the menu
Find or create phone book
entries
Other numbers or scroll right
through the menu
Ringer off
Hands free mode on
Key lock on
New voicemail message
Call created
Microphone muted
New numbers in the calls
list
The antenna indicates the
strength of the reception
signal. The antenna flashes
when the handset is out of
range.
Battery status display
Internal call
2.7 Base station display
Other numbers or scroll left
through the menu
Other numbers or scroll right
through the menu
Ringer off
New voicemail message
CLIP New numbers in the calls list
04
Item number in the calls list
Find or create phone book
entries
Hands free mode on
Call created
Microphone muted
Internal call
Time and date
5
HL_Sologic B901 eco.book Page 6 Friday, August 6, 2010 1:38 PM
Operating the telephone
2.8 Navigating through the menu
The Sologic B901 has an easy-to-use menu system. Every menu
consists of a series of options.
A summary of the menus on the handset and base station can be
found below.
OK
1
2
OK
ESC
3
4
Press the Menu/OK key to open the main menu.
Scroll to the required menu option.
Press the Menu/OK key to open more options or to
confirm the displayed setting.
Press the Escape key to go back to the previous
menu level
2.9 Using the alphanumeric keys
You can use the alphanumeric keys to enter text. Press the
appropriate alphanumeric key to select a letter 26 . For example , if you
press the 5 numeric key, the letter 'j' appears in the display first. Press
the key several times to select the other letters.
Press the 2 key once to select the letter "a". If you want to enter the
letters "a" and "b" in succession, first press the 2 key once to select
the letter "a". Wait 2 seconds until the cursor has moved to the next
position. Now press the 2 key twice to select "b". You can use the
29 to delete letters that have been entered incorrectly.
delete key
The letter before the cursor is deleted.
Use the Left/Right key
17 /
19 to move the cursor.
3 Operating the telephone
Info
This section only describes the functions of the base
station! Information on using the handset can be
found in „4 Using the cordless handset“.
3.1 Setting the display language
OK
1
OK 2
3
OK
6
4
Press the Menu / OK key.
Select "LANGUAGE" and confirm.
Now select the language.
Press OK to confirm.
HL_Sologic B901 eco.book Page 7 Friday, August 6, 2010 1:38 PM
Operating the telephone
Info
If caller ID (CLIP) is activated on your telephone line
and the provider transmits the date and time, the
clock is set automatically when an incoming call is
received.
When you have set the time, it will be adopted by all
handsets registered to the base station.
1
OK
OK 2
OK 3
4 5 6
J
K
L
G
H
I
M
N
O
4 5 6
J
K
L
G
H
I
M
N
O
OK 4
OK 5
4 5 6
OK 6
OK 7
4 5 6
8
OK
9
4 5 6
J
K
L
G
H
I
J
K
L
G
H
I
J
K
L
G
H
I
M
N
O
M
N
O
M
N
O
Press the Menu / OK key.
Select "TIME" and confirm.
Select "DATE/TIME" and confirm.
Enter the year and confirm.
Enter the month and confirm.
Enter the day and confirm.
Enter the hours and confirm.
Enter the minutes.
Press OK to confirm.
Important The date and time will be lost in the event of a base
station power failure.
3.3 Setting the time format
1
OK
OK 2
OK 3
4
OK
Press the Menu / OK key.
Select "TIME" and confirm.
Select "FORMAT" and confirm.
Select the time format as "24 HOUR" or
"12 HOUR" and confirm.
3.4 Outgoing calls
Making a call
Lift the receiver or press the hands free key.
2 Enter the telephone number.
3 Hang up the receiver or press the hands free key
again to end the call.
OR
1
4 5 6
G
H
I
J
K
L
M
N
O
7
English
3.2 Setting the date and time
HL_Sologic B901 eco.book Page 8 Friday, August 6, 2010 1:38 PM
Operating the telephone
1
4 5 6
G
H
I
J
K
L
M
N
O
2
3
Enter the telephone number.
Lift the receiver or press the hands free key.
Hang up the receiver or press the hands free key
again to end the call.
Redialling the last telephone number called
1 Lift the receiver or press the hands free key.
2 Press the redial key.
The last telephone number is automatically dialled.
Redialling one of the last 3 telephone numbers called
1 Press the redial key.
2 Select one of the last 3 numbers dialled.
3 Lift the receiver or press the hands free key.
Calling a number in the phone book
1 Press the phone book key.
4 5 6 2 Scroll to the required name or enter the initial
letters of the name.
3 Press the Menu / OK key to display the telephone
number.
OK
4 Lift the receiver or press the hands free key.
The telephone number is automatically dialled.
G
H
I
J
K
L
M
N
O
3.5 Activating/deactivating hands free mode
You can use this function to answer a call without having to lift the
receiver or if the receiver has already been lifted.
1 Press the hands free key to activate the function.
2 Press the hands free key again to switch the call
back to the receiver.
3.6 Phone book
50 telephone numbers and names can be stored in the phone book.
Names may be up to 16 characters long and numbers up to 24 digits
long.
Adding a new name and number
1 Press the phone book key.
2 Press OK.
OK
8
HL_Sologic B901 eco.book Page 9 Friday, August 6, 2010 1:38 PM
Operating the telephone
G
H
I
J
K
L
M
N
O
4 5 6
G
H
I
J
K
L
M
N
O
OK 5
6
Select "NEW ENTRY" and confirm.
Enter the name and confirm.
Enter the telephone number and confirm.
A confirmation tone is now sounded.
English
4 5 6
OK 3
OK 4
Editing the name and telephone number
1 Press the phone book key.
2 Select the name using the up and down keys.
OR
Enter the initial letters of the name.
3 Press OK.
OK
OK 4 Select "EDIT ENTRY" and confirm.
DEL
5 Press the delete key to delete the letters.
4 5 6 OK 6 Enter the name and confirm.
4 5 6 OK 7 Enter the telephone number and confirm.
8 A confirmation tone is now sounded.
G
H
I
J
K
L
M
N
O
G
H
I
J
K
L
M
N
O
Deleting one entry or all entries in the phone book
1 Press the phone book key.
2 Select the name using the up and down keys.
OR
Enter the initial letters of the name.
4 5 6
3 Press OK.
OK
4 Select "DELETE ENTRY" or "DELETE ALL" and
confirm.
OK
ESC 5 Press OK to confirm or press the Escape key to go
OK
back.
G
H
I
J
K
L
M
N
O
3.7 Abbreviated dialling keys
You can store 3 direct abbreviated numbers M1, M2 and M3 (each up
to 24 digits) in the base station.
Saving direct abbreviated dialling numbers (M1 - M2 - M3)
M1-M2-M3 1 Press one of the abbreviated dialling keys.
2 Press OK.
OK
OK 3 Select "NEW ENTRY" and confirm.
4 5 6 OK 4 Enter the name and confirm.
G
H
I
J
K
L
M
N
O
9
HL_Sologic B901 eco.book Page 10 Friday, August 6, 2010 1:38 PM
Operating the telephone
4 5 6
G
H
I
J
K
L
M
N
O
Enter the telephone number and confirm.
A confirmation tone is now sounded.
OK 5
Dialling an abbreviated number
1 Lift the receiver or press the hands free key.
M1-M2-M3 2 Press the abbreviated dialling key.
The telephone number is automatically dialled.
3 Hang up the receiver or press the hands free key
again to end the call.
3.8 The call list
Incoming calls are stored in a calls list (max. 30 numbers) on the base
station and the handsets.
The number of missed calls is shown by "X MISSED"
(X = number of missed calls) and the flashing CLIP symbol. Briefly
press the calls list key
to display the last call.
Important The "caller ID" (CLIP) feature is only available if it is
activated for your line. Contact your telephone line
provider for additional information.
The telephone number and name of the last caller appear in the
display. If the telephone number is longer than 12 digits, you can show
the remaining digits by pressing the key. If the calls list is empty, the
word "EMPTY" appears in the display.
The date and time of the incoming call are displayed at the top right for
every call.
1 Press the up and down keys to scroll through the
list.
The position number of the call in the calls list
appears next to the CLIP symbol.
2 Press the left and right keys to display the name or
number.
Info
10
The phone reverts to standby mode if neither the up
or down key
is pressed within 15 seconds.
When a call is received, the caller's number is
shown in the display for another 5-8 seconds after
the last ring.
HL_Sologic B901 eco.book Page 11 Friday, August 6, 2010 1:38 PM
Calling a number in the call list
1 Press the calls list key.
2 Press the up and down keys to scroll through the
list.
3 Pick up the receiver or press the hands free key
again to make the call.
3.9 Making an internal call to a handset and forwarding a
call to the cordless handset
You can forward a call from the base station to the handset or talk to
the external subscriber and a second subscriber on the cordless
handset at the same time (conference call).
1
4 5 6
G
H
I
J
K
L
M
N
O
2
3
4
Hold down the INT key 28 for 3 seconds until you
hear an audio signal, then release the key. "INT"
appears in the display.
Enter the number of the handset. Once the call has
been set up with the handset, you can talk
internally.
Put the receiver down to transfer the call to the
cordless handset.
OR
Hold down the INT key 28 for 3 seconds to set up a
conference call.
4 Using the cordless handset
Info
This section only describes the functions of the
cordless handset! Information on using the base
station can be found in „3 Operating the telephone“.
4.1 Changing the language
OK
1
OK 2
OK 3
ESC
OK 4
5
Press the Menu / OK key.
Select "HANDSET" and confirm.
Select "LANGUAGE" and confirm.
Select the desired language and confirm.
Press the Esc key to return to standby mode.
11
English
Using the cordless handset
HL_Sologic B901 eco.book Page 12 Friday, August 6, 2010 1:38 PM
Using the cordless handset
4.2 Outgoing calls
Making a call
1
4 5 6
G
H
I
J
K
L
M
N
O
2
3
Press the call button.
Enter the telephone number.
Press the hang up key to end the call.
Call preparation
1 Enter the telephone number.
4 5 6
You can correct a wrong number using the mute key.
If you do not press any key for 10 seconds, the
number disappears and the handset reverts to
standby mode.
2 Press the call button.
The telephone number is automatically dialled.
3 Press the hang up key to end the call.
G
H
I
J
K
L
M
N
O
Redialling the last telephone number called
Press the call button.
2 Press the redial button.
The last telephone number is automatically dialled.
3 Press the hang up key to end the call.
1
4.3 Incoming calls
When an incoming call is received, the handset and the base station
ring and the "Visual call signal" LED (see point 14 in figure 3 and
point 27 in figure 4) flashes on the handset and base station.
1
2
Press the answer call key to answer the call.
Press the hang up key to end the call.
4.4 Activating/deactivating hands free mode
During the call:
1
2
12
Press the hands free key to activate the function.
Press the hands free key again to switch the call
back to the handset.
HL_Sologic B901 eco.book Page 13 Friday, August 6, 2010 1:38 PM
Using the cordless handset
When the key lock is on, pressing any key in standby mode has no
effect (with the exception of the key lock key).
1 Press and hold the key lock key.
The symbol appears in the display.
2 Press the key lock key again to deactivate key lock.
When key lock is activated, you can still answer
incoming calls by pressing the answer call key . The
keypad functions as usual during the call. Key lock is
activated again after the call.
4.6 Phone book
You can store 50 entries in the phone book. Names may be up to
16 characters long and telephone numbers up to 24 digits long.
Adding a phone book entry
1 Press the phone book key.
OK 2 Press the OK key twice.
OK
4 5 6 OK 3 Enter the name and confirm.
4 5 6 OK 4 Enter the desired telephone number and confirm.
A confirmation tone is now sounded.
G
H
I
J
K
L
M
N
O
G
H
I
J
K
L
M
N
O
Dialling an abbreviated number
1 Press the phone book key.
2 Scroll to the required name or enter the initial letters
of the name.
4 5 6
3 Press the phone book key to display the telephone
number.
4 Now press the call key.
The telephone number is automatically dialled.
5 Press the hang up key to end the call.
G
H
I
J
K
L
M
N
O
Editing a phone book entry
1 Press the phone book key.
2 Scroll to the required name or enter the initial letters
of the name.
4 5 6
3 Press the phone book key to display the telephone
number.
G
H
I
J
K
L
M
N
O
13
English
4.5 Key lock
HL_Sologic B901 eco.book Page 14 Friday, August 6, 2010 1:38 PM
Using the cordless handset
OK
4
4 5 6
OK 5
OK 6
4 5 6
OK 7
G
H
I
G
H
I
J
K
L
J
K
L
M
N
O
M
N
O
Press the Menu / OK key.
Select "EDIT ENTRY" and confirm.
Enter the name and confirm.
Enter or edit the telephone number and confirm.
4.7 Caller ID (CLIP)
The Sologic B901 displays the telephone number of incoming calls.
This function can only be used if you are registered for this service with
your telephone line provider. Contact your provider for more
information.
When you receive a call, the telephone number is stored in a calls list.
This list can hold up to 30 numbers (each of up to 23 digits).
If the telephone number consists of more than
12 digits, you can scroll to the right in the display to
see the other digits.
New calls
When there is a new call received in the calls list, the
CLIP symbol flashes in the display.
Opening the calls list
Press the calls list key.
The last call received is displayed. If the calls list is
empty, the word "EMPTY" appears in the display.
2 Press the phone book key to skip the number.
3 Press the phone book key to skip the date and time.
4 Press the up and down keys to scroll through the list.
5 Press the Esc key to exit the calls list.
1
ESC
Calling a number in the call list
Press the calls list key.
2 Scroll through the calls list until the telephone
number you want is displayed.
3 Press the call key to start the call.
The telephone number is automatically dialled.
4 Press the hang up key to end the call.
1
14
HL_Sologic B901 eco.book Page 15 Friday, August 6, 2010 1:38 PM
Deleting a number from the call list
1 Press the calls list key.
2 Scroll through the calls list until the telephone
number you want is displayed.
3 Press the Menu / OK key.
OK
4 Select "DELETE" to delete the current telephone
number and confirm.
OK
OR
5 Select "DELETE ALL" to delete all phone book
entries and confirm.
OK
ESC 6 Press to confirm or press the Esc key to return.
OK
5 Call forwarding and internal calls from one handset
to another
5.1 Call forwarding and conference calls during an
external call
4 5 6
G
H
I
During an external call, press the INT key and then
the number of the handset (1-5, select "0" for the
base station).
The other handset will ring.
If the call was set up with the other handset, you can
talk internally. When you hang up, the external call
will be forwarded to the other handset.
2 Hold down the INT key for 3 seconds. You can now
talk to the second handset and the external call at
the same time (conference call).
3 Press the INT key again to switch back to the
external call.
4 Press the hang up key to end the call.
1
INT
J
K
L
M
N
O
INT
INT
5.2 Internal call (house phone function)
Info
You can conduct a call between the base station and
the cordless handset.
The base station has the internal number "0".
15
English
Call forwarding and internal calls from one
HL_Sologic B901 eco.book Page 16 Friday, August 6, 2010 1:38 PM
Call forwarding and internal calls
4 5 6
G
H
I
16
In standby mode, press the INT key and then the
number of the handset (1-5, select "0" for the base
station).
The handset or base station you have called will now
ring.
2 Press the call key or pick up the receiver on the
base station.
You can now talk internally.
1
INT
J
K
L
M
N
O
HL_Sologic B901 eco.book Page 17 Friday, August 6, 2010 1:38 PM
Van start gaan
Hartelijk dank voor de aankoop van dit TOPCOM-toestel. Dit product
is met de uiterste zorg voor u en het milieu ontworpen en gemonteerd.
Bij TOPCOM zijn we begaan met de toekomst van onze planeet en
onze kinderen, en daarom doen we ons uiterste best om het milieu te
sparen. Daarom hebben we besloten het aantal pagina's van onze
gebruikershandleidingen en producthandleidingen te beperken. Er zijn
namelijk wel 24 bomen nodig om 1 ton papier te produceren. Dat
betekent dat er heel wat bomen moeten worden gekapt om onze
producthandleidingen in 11 talen uit te geven. In deze korte
handleiding die bij uw TOPCOM-toestel wordt geleverd, wordt kort
uitgelegd hoe u uw TOPCOM-toestel moet installeren en gebruiken.
Als u alle eigenschappen van uw nieuwe TOPCOM-toestel wilt
ontdekken, raden wij u aan om naar onze website te gaan
(www.topcom.net); daar kunt u de volledige gebruikershandleiding in
uw taal downloaden. Op deze manier hoopt TOPCOM zijn bijdrage
aan een betere planeet te leveren,maar dat kan alleen met uw hulp!
2 De eerste stappen
2.1 Deze gebruikershandleiding gebruiken
De volgende methode wordt gebruikt in deze handleiding om de
instructies te verduidelijken:
Tekst....... "Display".
Tekst die op de display van de telefoon verschijnt
Toets die ingedrukt moet worden
2.2 Het basisstation installeren
Installeer het basisstation als volgt:
1 Sluit de netadapter eerst aan op het basisstation en vervolgens
op een stopcontact.
2 Steek één uiteinde van de telefoonkabel in de wandcontactdoos
van de telefoonaansluiting en het andere uiteinde in de
aansluiting aan de achterkant van het basisstation.
3 De telefoon- en stroomkabels moeten worden aangesloten
zoals aangegeven in figuur 1.
2.3 Lader van handset
1
Steek de stekker van de netadapter in een stopcontact.
17
Nederlands
1 Van start gaan
HL_Sologic B901 eco.book Page 18 Friday, August 6, 2010 1:38 PM
De eerste stappen
2.4 Handset
1
2
3
4
Open het batterijvak zoals aangegeven in figuur 2.
Plaats de oplaadbare batterijen. Zorg ervoor dat de polariteit
juist is (+ en -).
Sluit het batterijvak.
Plaats de handset in de lader en laat hem 16 uur laden.
Het laadlampje zal branden.
2.5 Toetsen/Display
Draadloze handset
1.
2.
3.
4.
5.
6.
7.
8.
Nummerherhaling/omhoog
Telefoonboek
Geluid uit/wissen
Ophangen
Alfanumerieke toetsen
Toetsvergrendeling
Pauze
Beltoon aan/uit
9. Oproeplijst/omlaag
10. Antwoorden/handsfree/
oproepen
11. INT/Escape
12. Menu/OK/flash
13. Display
14. Rood lampje, knippert
tijdens een oproep
Basisstation
15.
16.
17.
18.
19.
20.
21.
22.
23.
24.
Escape
Menu/OK
Links
Nummerherhaling/omhoog
Rechts
Display
Telefoonboek
Oproeplijst/flash
Omlaag
Verkort kiezen
(M1 - M2 - M3)
25. Handsfree
26. Alfanumerieke toetsen
27. Rood lampje op het
basisstation, knippert tijdens
een oproep
18
28. Paging/doorschakeling/
interne oproep
29. Geluid uit/wissen
30. Volumeregeling
31. Luidspreker
32. Hoornhouder voor
wandmontage
33. Lip: om de hoorn tijdens een
oproep korte tijd neer te
leggen wanneer de telefoon
aan de wand hangt
Lader
34. Lampje: de handset wordt
geladen
HL_Sologic B901 eco.book Page 19 Friday, August 6, 2010 1:38 PM
De eerste stappen
HANDSET X
x = nummer van handset
Andere nummers of naar
links schuiven in het menu
Invoeren in het
telefoonboek zoeken
of aanmaken
Andere nummers of naar
rechts schuiven in het menu
Beltoon uit
Handsfreemodus aan
Toetsvergrendeling aan
Nieuw voicemailbericht
Oproep aangemaakt
Microfoon uit
Nieuwe nummers in de
oproeplijst
De antenne geeft de sterkte
van de ontvangst aan. De
antenne knippert wanneer de
handset buiten bereik is.
Indicatie laadniveau batterij
Interne oproep
2.7 Display basisstation
CLIP
Andere nummers of naar links
schuiven in het menu
Andere nummers of naar
rechts schuiven in het menu
Beltoon uit
Nieuw voicemailbericht
Nieuwe nummers in de
oproeplijst
Invoeren in het telefoonboek
zoeken of aanmaken
Oproep aangemaakt
Interne oproep
04
Volgnummer in de oproeplijst
Handsfreemodus aan
Microfoon uit
Tijd en datum
19
Nederlands
2.6 Display handset
HL_Sologic B901 eco.book Page 20 Friday, August 6, 2010 1:38 PM
De telefoon bedienen
2.8 Door het menu bladeren
De Sologic B901 heeft een eenvoudig menusysteem. Elk menu
bestaat uit een aantal opties.
Hieronder wordt een kort overzicht van de menu's op de handset en
het basisstation gegeven.
OK
1
2
OK
ESC
3
4
Druk op de Menu/OK-toets om het hoofdmenu te openen.
Blader naar de gewenste menuoptie.
Druk op de Menu/OK-toets om meer opties te tonen of
de getoonde instelling te bevestigen.
Druk op de Escape-toets om terug te gaan naar het
vorige menuniveau.
2.9 De alfanumerieke toetsen gebruiken
U kunt de alfanumerieke toetsen gebruiken om tekst in te voeren. Druk
op de relevante alfanumerieke toets om een letter te selecteren 26 .
Voorbeeld: wanneer u op de numerieke toets 5 drukt, verschijnt eerst
de letter "j" op de display. Druk herhaaldelijk op de toets om de andere
letters te selecteren.
Druk één keer op toets 2 om de letter "a" te selecteren. Om
achtereenvolgens de letters "a" en "b" in te voeren, drukt u toets 2
eerst één keer in om de letter "a" te selecteren. Wacht vervolgens
2 seconden totdat de cursor naar de volgende positie is gegaan. Druk
nu twee keer op toets 2 om "b" te selecteren. U kunt de wistoets
29 gebruiken om foutief ingevoerde letters te wissen. Hierbij wordt de
letter links van de cursor gewist.
17 /
19 om de cursor te
Gebruik de Links/Rechts-toets
verplaatsen.
3 De telefoon bedienen
Info
Dit gedeelte beschrijft alleen de functies van het
basisstation! Informatie over het gebruik van de handset
is te vinden in „4 De draadloze handset gebruiken“.
3.1 De displaytaal instellen
OK
1
OK 2
3
OK
20
4
Druk op de Menu/OK-toets..
Selecteer "TAAL" (LANGUAGE) en bevestig.
Selecteer nu de taal.
Druk op OK om te bevestigen.
HL_Sologic B901 eco.book Page 21 Friday, August 6, 2010 1:38 PM
De telefoon bedienen
Info
Wanneer nummerweergave (CLIP) op uw
telefoonlijn is geactiveerd en de
telefoonmaatschappij de datum en tijd verstuurt,
wordt de klok automatisch ingesteld wanneer er een
oproep binnenkomt.
Wanneer u de tijd hebt ingesteld, wordt deze
overgenomen door alle handsets die bij het
basisstation zijn aangemeld.
1
OK
OK 2
OK 3
4 5 6
J
K
L
G
H
I
M
N
O
4 5 6
J
K
L
G
H
I
M
N
O
OK 4
OK 5
4 5 6
OK 6
OK 7
4 5 6
8
OK
9
4 5 6
J
K
L
G
H
I
J
K
L
G
H
I
J
K
L
G
H
I
M
N
O
M
N
O
M
N
O
Druk op de Menu/OK-toets..
Selecteer "TIJD" (TIME) en bevestig.
Selecteer "DAG/TIJD" (DATE/TIME) en bevestig.
Voer het jaar in en bevestig.
Voer de maand in en bevestig.
Voer de dag in en bevestig.
Voer het uur in en bevestig.
Voer de minuten in.
Druk op OK om te bevestigen.
Belangrijk De datum en tijd zullen worden gewist wanneer de
stroom naar het basisstation wordt onderbroken.
3.3 Het tijdformaat instellen
1
OK
OK 2
3
OK
4
OK
Druk op de Menu/OK-toets..
Selecteer "TIJD" (TIME) en bevestig.
Selecteer "TIJDFORMAAT" (FORMAT) en
bevestig.
Selecteer het tijdformaat als "24 H" (24 HOUR) of
"12 H" (24 HOUR) en bevestig.
21
Nederlands
3.2 Datum en tijd instellen
HL_Sologic B901 eco.book Page 22 Friday, August 6, 2010 1:38 PM
De telefoon bedienen
3.4 Uitgaande oproepen
Een oproep maken
1 Neem de hoorn op of druk op de handsfreetoets.
2 Voer het telefoonnummer in.
4 5 6
3 Hang de hoorn op of druk opnieuw op de
handsfreetoets om de oproep te beëindigen.
OF
1 Voer het telefoonnummer in.
4 5 6
2 Neem de hoorn op of druk op de handsfreetoets.
3 Hang de hoorn op of druk opnieuw op de
handsfreetoets om de oproep te beëindigen.
G
H
I
J
K
L
M
N
O
G
H
I
J
K
L
M
N
O
Het laatst gekozen telefoonnummer opnieuw kiezen
1 Neem de hoorn op of druk op de handsfreetoets.
2 Druk op de nummerherhalingstoets.
Het laatste telefoonnummer wordt automatisch
gekozen.
Een van de 3 laatstgekozen telefoonnummers opnieuw kiezen
1 Druk op de nummerherhalingstoets.
2 Selecteer een van de 3 laatstgekozen nummers.
3 Neem de hoorn op of druk op de handsfreetoets.
Een oproep maken naar een nummer uit het telefoonboek
1 Druk op de telefoonboektoets.
4 5 6 2 Blader naar de gewenste naam of voer de
beginletters van de naam in.
3 Druk op Menu/OK-toets om het telefoonnummer
weer te geven.
OK
4 Neem de hoorn op of druk op de handsfreetoets.
Het telefoonnummer wordt automatisch gekozen.
G
H
I
22
J
K
L
M
N
O
HL_Sologic B901 eco.book Page 23 Friday, August 6, 2010 1:38 PM
De telefoon bedienen
U kunt deze functie gebruiken om een oproep te beantwoorden zonder
de hoorn op te nemen of wanneer u de hoorn al hebt opgenomen.
1 Druk op de handsfreetoets om de functie in te
schakelen.
2 Druk opnieuw op de handsfreetoets om de oproep
terug te schakelen naar de hoorn.
3.6 Telefoonboek
50 telefoonnummers en namen kunnen in het telefoonboek worden
opgeslagen. Namen kunnen maximaal 16 tekens bevatten en
nummers kunnen maximaal 24 cijfers bevatten.
Een nieuwe naam en nummer toevoegen
1 Druk op de telefoonboektoets.
2 Druk op OK.
OK
OK 3 Selecteer "NIEUWE" (NEW ENTRY) en bevestig.
4 5 6 OK 4 Voer de naam in en bevestig.
4 5 6 OK 5 Voer het telefoonnummer in en bevestig.
6 Er klinkt nu een bevestigingstoon.
G
H
I
J
K
L
M
N
O
G
H
I
J
K
L
M
N
O
Een naam en telefoonnummer bewerken
1 Druk op de telefoonboektoets.
2 Selecteer de naam met behulp van de omhoog- en
omlaag-toetsen.
OF
Voer de eerste letters van de naam in.
3 Druk op OK.
OK
OK 4 Selecteer "BEWERK" (EDIT ENTRY) en bevestig.
DEL
5 Druk op de wistoets om de letters te wissen.
4 5 6 OK 6 Voer de naam in en bevestig.
4 5 6 OK 7 Voer het telefoonnummer in en bevestig.
8 Er klinkt nu een bevestigingstoon.
G
H
I
J
K
L
M
N
O
G
H
I
J
K
L
M
N
O
23
Nederlands
3.5 De handsfreemodus inschakelen/uitschakelen
HL_Sologic B901 eco.book Page 24 Friday, August 6, 2010 1:38 PM
De telefoon bedienen
Eén of alle invoeren in het telefoonboek wissen
1 Druk op de telefoonboektoets.
2 Selecteer de naam met behulp van de omhoog- en
omlaag-toetsen.
OF
Voer de eerste letters van de naam in.
4 5 6
3 Druk op OK.
OK
4 Selecteer "WIS" (DELETE ENTRY) of "WIS
ALLES" (DELETE ALL) en bevestig.
OK
ESC 5 Druk op OK om te bevestigen of druk op de
OK
Escape-toets om terug te gaan.
G
H
I
J
K
L
M
N
O
3.7 Verkorte kiestoetsen
U kunt 3 rechtstreeks te kiezen verkorte kiesnummers (elk met
maximaal 24 cijfers) opslaan onder M1, M2 en M3 op het basisstation.
Rechtstreeks te kiezen verkorte kiesnummers opslaan
(M1 - M2 - M3)
M1-M2-M3 1 Druk op een van de toetsen voor verkort kiezen.
2 Druk op OK.
OK
OK 3 Selecteer "NIEUWE" (NEW ENTRY) en bevestig.
4 5 6 OK 4 Voer de naam in en bevestig.
4 5 6 OK 5 Voer het telefoonnummer in en bevestig.
Er klinkt nu een bevestigingstoon.
G
H
I
J
K
L
M
N
O
G
H
I
J
K
L
M
N
O
Een verkort kiesnummer kiezen
1 Neem de hoorn op of druk op de handsfreetoets.
M1-M2-M3 2 Druk op de toets voor verkort kiezen.
Het telefoonnummer wordt automatisch gekozen.
3 Hang de hoorn op of druk opnieuw op de
handsfreetoets om de oproep te beëindigen.
3.8 De oproeplijst
Inkomende oproepen worden opgeslagen in een oproeplijst (max.
30 nummers) in het basisstation en de handsets.
Het aantal gemiste oproepen wordt weergegeven met behulp van "X
GEMIST" (X MISSED)
(X = het aantal gemiste oproepen) en een knipperend CLIP-symbool.
24
HL_Sologic B901 eco.book Page 25 Friday, August 6, 2010 1:38 PM
De telefoon bedienen
Druk kort op de oproeplijsttoets
geven.
om de laatste oproep weer te
Het telefoonnummer en de naam van de laatste beller worden op de
display weergegeven. Als het telefoonnummer uit meer dan 12 cijfers
bestaat, kunt u de andere cijfers weergeven door op de toets te
drukken. Wanneer de oproeplijst leeg is, verschijnt het woord "LEEG"
(EMPTY) op de display.
De datum en tijd van inkomende oproepen wordt rechtsboven
weergegeven voor elke oproep.
1 Gebruik de omhoog- en omlaag-toetsen om door
de lijst te bladeren.
Het volgnummer van de oproep in de oproeplijst
wordt naast het CLIP-symbool getoond.
2 Gebruik de links- en rechts-toetsen om de naam of
het nummer weer te geven.
Info
De telefoon keert terug naar de stand-bymodus
wanneer de omhoog- of omlaag-toets
gedurende 15 seconden niet is ingedrukt.
Bij ontvangst van een oproep blijft het nummer van
de beller na de laatste beltoon nog 5-8 seconden
zichtbaar op de display.
Een nummer uit de oproeplijst bellen
1
2
3
Druk op de oproeplijsttoets.
Gebruik de omhoog- en omlaag-toetsen om door
de lijst te bladeren.
Neem de hoorn op of druk opnieuw op de
handsfreetoets om de oproep te maken.
25
Nederlands
Belangrijk De functie "nummerweergave" (CLIP) is alleen
beschikbaar als deze voor uw telefoonlijn is
geactiveerd. Neem contact op met uw
telefoonmaatschappij voor meer informatie.
HL_Sologic B901 eco.book Page 26 Friday, August 6, 2010 1:38 PM
De draadloze handset gebruiken
3.9 Een interne oproep naar een handset maken en een
oproep doorschakelen naar de draadloze handset
U kunt een oproep vanaf het basisstation doorschakelen naar de
handset of gelijktijdig bellen met een gesprekspartner op de buitenlijn
en een tweede gesprekspartner op de draadloze handset
(conferentiegesprek).
1
4 5 6
G
H
I
J
K
L
M
N
O
2
3
4
Houd te INT-toets 28 3 seconden ingedrukt totdat u
een geluidssignaal hoort; laat de toets dan los.
"INT" (INT) verschijnt op de display.
Voer het nummer van de handset in. Zodra de
oproep met de handset tot stand is gebracht, kunt u
intern met elkaar praten.
Leg de hoorn op de haak om de oproep door te
schakelen naar de draadloze handset.
OF
Houd de INT-toets 28 3 seconden ingedrukt om een
conferentiegesprek te starten.
4 De draadloze handset gebruiken
Info
Dit gedeelte beschrijft alleen de functies van de
draadloze handset! Informatie over het gebruik van
het basisstation is te vinden in „3 De telefoon
bedienen“.
4.1 De taal wijzigen
OK
1
OK 2
OK 3
OK 4
5
ESC
Druk op de Menu/OK-toets.
Selecteer "HANDSET" en bevestig.
Selecteer "TAAL" (LANGUAGE) en bevestig.
Selecteer de gewenste taal en bevestig.
Druk op de Escape-toets om terug te keren naar de
stand-bymodus.
4.2 Uitgaande oproepen
Een oproep maken
1 Druk op de oproeptoets.
2 Voer het telefoonnummer in.
4 5 6
3 Druk op de ophangtoets om de oproep te beëindigen.
G
H
I
26
J
K
L
M
N
O
HL_Sologic B901 eco.book Page 27 Friday, August 6, 2010 1:38 PM
De draadloze handset gebruiken
Een oproep voorbereiden
1 Voer het telefoonnummer in.
4 5 6
U kunt een foutief nummer corrigeren door de Geluid
uit-toets te gebruiken.
Het nummer zal verdwijnen wanneer u gedurende
10 seconden niet op een toets hebt gedrukt. De
handset keert dan terug naar de stand-bymodus.
2 Druk op de oproeptoets.
Het telefoonnummer wordt automatisch gekozen.
3 Druk op de ophangtoets om de oproep te
beëindigen.
J
K
L
M
N
O
Het laatst gekozen telefoonnummer opnieuw kiezen
1 Druk op de oproeptoets.
2 Druk op de nummerherhalingstoets.
Het laatste telefoonnummer wordt automatisch
gekozen.
3 Druk op de ophangtoets om de oproep te
beëindigen.
4.3 Inkomende oproepen
Wanneer een inkomende oproep wordt ontvangen, klinkt er op de
handset en op het basisstation een beltoon en zal het lampje "Visueel
oproepsignaal" (zie punt 14 in figuur 3 en punt 27 in figuur 4)
knipperen op de handset en op het basisstation.
1
2
Druk op de antwoordtoets om de oproep te
accepteren.
Druk op de ophangtoets om de oproep te
beëindigen.
4.4 De handsfreemodus inschakelen/uitschakelen
Tijdens de oproep:
1
2
Druk op de handsfreetoets om de functie in te
schakelen.
Druk opnieuw op de handsfreetoets om het
gesprek terug te schakelen naar de handset.
27
Nederlands
G
H
I
HL_Sologic B901 eco.book Page 28 Friday, August 6, 2010 1:38 PM
De draadloze handset gebruiken
4.5 Toetsvergrendeling
Als de toetsvergrendeling is ingeschakeld, zal er niets gebeuren bij het
indrukken van een willekeurige toets in de stand-bymodus (behalve bij
het indrukken van de toetsvergrendelingstoets).
1 Houd de toetsvergrendelingtoets ingedrukt.
Het symbool verschijnt op de display.
2 Druk de toetsvergrendelingstoets opnieuw in om de
toetsvergrendeling uit te schakelen.
Als de toetsvergrendeling is ingeschakeld, kunt u
inkomende oproepen nog steeds beantwoorden door
op de antwoordtoets te drukken . Het toetsenbord
functioneert normaal tijdens het gesprek. De
toetsvergrendeling wordt na het gesprek weer
ingeschakeld.
4.6 Telefoonboek
U kunt 50 invoeren opslaan in het telefoonboek. Namen kunnen
maximaal 16 tekens bevatten en telefoonnummers kunnen maximaal
24 cijfers bevatten.
Een invoer in het telefoonboek toevoegen
1 Druk op de telefoonboektoets.
OK 2 Druk twee keer op de OK-toets .
OK
4 5 6 OK 3 Voer de naam in en bevestig.
4 5 6 OK 4 Voer het relevante telefoonnummer in en bevestig.
Er klinkt nu een bevestigingstoon.
G
H
I
J
K
L
M
N
O
G
H
I
J
K
L
M
N
O
Een verkort kiesnummer kiezen
1 Druk op de telefoonboektoets.
2 Blader naar de gewenste naam of voer de
beginletters van de naam in.
4 5 6
3 Druk op telefoonboektoets om het telefoonnummer
weer te geven.
4 Druk nu op de oproeptoets.
Het telefoonnummer wordt automatisch gekozen.
5 Druk op de ophangtoets om de oproep te
beëindigen.
G
H
I
28
J
K
L
M
N
O
HL_Sologic B901 eco.book Page 29 Friday, August 6, 2010 1:38 PM
De draadloze handset gebruiken
Een invoer in het telefoonboek bewerken
1 Druk op de telefoonboektoets.
2 Blader naar de gewenste naam of voer de
beginletters van de naam in.
4 5 6
3 Druk op telefoonboektoets om het telefoonnummer
weer te geven.
4 Druk op de Menu/OK-toets.
OK
OK 5 Selecteer "BEWERK" (EDIT ENTRY) en bevestig.
4 5 6 OK 6 Voer de naam in en bevestig.
4 5 6 OK 7 Voer het telefoonnummer in of bewerk het nummer
en bevestig.
G
H
I
J
K
L
M
N
O
G
H
I
J
K
L
M
N
O
J
K
L
M
N
O
4.7 Nummerweergave (CLIP)
De Sologic B901 geeft bij inkomende oproepen het telefoonnummer
van de beller weer. Deze functie kan alleen worden gebruikt als u zich
voor deze dienst hebt aangemeld bij uw telefoonmaatschappij. Neem
contact op met uw telefoonmaatschappij voor meer informatie.
Als u een oproep ontvangt, wordt het telefoonnummer opgeslagen in
de oproeplijst. Deze lijst kan maximaal 30 telefoonnummers bevatten
(elk met maximaal 23 cijfers).
Als het telefoonnummer uit meer dan 12 cijfers
bestaat, kunt u in de display naar rechts schuiven
om de andere cijfers te zien.
Nieuwe oproepen
Als er een nieuwe oproep in de oproeplijst is
ontvangen, knippert het CLIP-symbool op de
display.
De oproeplijst openen
Druk op de oproeplijsttoets.
De laatst ontvangen oproep wordt weergegeven.
Wanneer de oproeplijst leeg is, verschijnt het woord
"LEEG" (EMPTY) op de display.
2 Druk op de telefoonboektoets om het nummer over
te slaan.
3 Druk op de telefoonboektoets om de datum en de
tijd over te slaan.
1
29
Nederlands
G
H
I
HL_Sologic B901 eco.book Page 30 Friday, August 6, 2010 1:38 PM
Een oproep doorschakelen en
4
5
ESC
Gebruik de omhoog- en omlaag-toetsen om door de
lijst te bladeren.
Druk op de Escape-toets om de oproeplijst te
verlaten.
Een nummer uit de oproeplijst bellen
Druk op de oproeplijsttoets.
2 Blader door de oproeplijst totdat het gewenste
telefoonnummer verschijnt.
3 Druk op de oproeptoets om de oproep te starten.
Het telefoonnummer wordt automatisch gekozen.
4 Druk op de ophangtoets om de oproep te
beëindigen.
1
Een nummer uit de oproeplijst wissen
1
2
3
OK
4
OK
5
OK
ESC 6
OK
Druk op de oproeplijsttoets.
Blader door de oproeplijst totdat het gewenste
telefoonnummer verschijnt.
Druk op de Menu/OK-toets.
Selecteer "WIS" (DELETE) om het getoonde
telefoonboeknummer te wissen en bevestig.
OF
Selecteer "WIS ALLES" (DELETE ALL) om alle
invoeren in het telefoonboek te wissen en bevestig.
Druk op om te bevestigen of druk op de Escapetoets om terug te keren.
5 Een oproep doorschakelen en interne oproepen
tussen twee handsets
5.1 Oproepdoorschakeling en conferentiegesprekken
tijdens een externe oproep
INT
30
Druk tijdens een externe oproep op de INT-toets en
vervolgens op het nummer van de handset
(1-5, selecteer "0" voor het basisstation).
Op de andere handset klinkt een beltoon.
1
4 5 6
G
H
I
J
K
L
M
N
O
HL_Sologic B901 eco.book Page 31 Friday, August 6, 2010 1:38 PM
Als de oproep met de andere handset tot stand is
gebracht, kunt u intern met elkaar praten. Als u
ophangt, zal de externe oproep worden
doorgeschakeld naar de andere handset.
2 Houd de INT-toets 3 seconden ingedrukt. Nu kunt
u gelijktijdig praten met de tweede handset en de
externe oproep (conferentiegesprek).
3 Druk opnieuw op de INT-toets om terug te keren
naar het externe gesprek.
4 Druk op de ophangtoets om de oproep te
beëindigen.
INT
INT
5.2 Interne oproep (huistelefoonfunctie)
Info
Druk in de stand-bymodus op de INT-toets en
vervolgens op het nummer van de handset (1-5,
selecteer "0" voor het basisstation).
Op het toestel (handset of basisstation) dat u hebt
opgeroepen, klinkt nu een beltoon.
2 Druk op de oproeptoets of neem de hoorn van het
basisstation op.
Nu kunt u intern met elkaar praten.
1
INT
4 5 6
G
H
I
U kunt een oproep tot stand brengen tussen het
basisstation en de draadloze handset.
Het basisstation heeft het interne nummer "0".
J
K
L
M
N
O
31
Nederlands
Een oproep doorschakelen en interne
HL_Sologic B901 eco.book Page 32 Friday, August 6, 2010 1:38 PM
Avant de commencer
1 Avant de commencer
Nous vous remercions d'avoir choisi ce produit TOPCOM. Cet appareil
a été conçu et monté avec le plus grand soin pour répondre à vos
besoins et dans le respect de l'environnement. Soucieux de l'avenir de
notre planète et de nos enfants, nous tentons de faire le maximum
pour préserver l'environnement. C'est la raison pour laquelle nous
avons réduit le nombre de pages de nos manuels d'utilisation et de nos
guides de produits. Si l'on considère qu'il faut jusqu'à 24 arbres pour
produire 1 tonne de papier, la publication de guides de produits en 21
langues coûte à notre planète de nombreux arbres. Dans ce petit
manuel fourni avec votre appareil TOPCOM, vous trouverez un
résumé du mode d'installation et d'utilisation de celui-ci.
Toutefois, si vous souhaitez découvrir toutes les fonctionnalités de
votre nouvel appareil TOPCOM, vous pouvez visiter notre site web
(www.topcom.net) et télécharger le manuel d'utilisation complet dans
votre langue. De cette manière, TOPCOM espère contribuer à la
préservation de notre planète, mais nous ne pouvons y arriver sans
votre aide !
2 Premiers pas
2.1 Comment utiliser ce mode d'emploi
Le présent mode d'emploi utilise la méthode suivante pour expliquer
les instructions :
Texte ....... «Ecran ».
Texte apparaissant à l'écran du téléphone
Touche à enfoncer
2.2 Installer la base
Installez la base comme suit :
1 Commencez par brancher l'adaptateur secteur à la base, puis à
la prise murale.
2 Branchez une extrémité du câble téléphonique à la prise
téléphonique murale et l'autre extrémité à la prise située à
l'arrière de la base.
3 Raccordez le câble du téléphone et de l'alimentation comme
indiqué sur l'illustration 1.
32
HL_Sologic B901 eco.book Page 33 Friday, August 6, 2010 1:38 PM
Premiers pas
2.3 Station de charge du combiné
1
Branchez l'adaptateur secteur à la prise murale.
2.4 Combiné
2
3
4
Ouvrez le compartiment à piles comme indiqué sur
l'illustration 2.
Insérez les piles. Respectez la polarité (+ et -).
Refermez le compartiment à piles.
Laissez le combiné se charger sur la station pendant 16 heures.
Le témoin de charge s'allume sur la station.
2.5 Touches/écran
Combiné sans fil
1. Recomposition d'un numéro/
vers le haut
2. Répertoire
3. Couper le son/effacer
4. Raccrocher
5. Touches alphanumériques
6. Verrouillage du clavier
7. Pause
8. Marche/arrêt de la sonnerie
9. Journal des appels/vers le bas
10.Décrocher/mains libres/
appeler
11. INT/Echap
12.Menu/OK/Flash
13.Écran
14. Témoin rouge ; clignote
pendant un appel
Base
27.Témoin rouge de la base ;
clignote pendant un appel
15.Echap
28.Paging/transfert d'appel/
16.Menu/OK
appel interne
17.Vers la gauche
18.Recomposition d'un numéro/ 29.Couper le son/effacer
30.Réglage du volume
vers le haut
31.Haut-parleur
19.Vers la droite
32.Porte-combiné en cas de
20.Écran
montage mural
21.Répertoire
33.Crochet : pour poser
22.Journal des appels/Flash
temporairement le combiné
23.Vers le bas
pendant une conversation en
24.Touches de numérotation
cas de montage mural
abrégée (M1-M2-M3)
25.Mains libres
Station de charge
26.Touches alphanumériques
34. LED : combiné en cours de charge
33
Français
1
HL_Sologic B901 eco.book Page 34 Friday, August 6, 2010 1:38 PM
Premiers pas
2.6 Écran du combiné
COMBINÉ X
x = numéro du combiné
Autres numéros ou faire
défiler le menu vers la
gauche
Rechercher ou créer des
entrées de répertoire
Autres numéros ou faire
défiler le menu vers la
droite
Témoin de charge des
piles
Sonnerie désactivée
Mode Mains libres activé
Verrouillage clavier
activé
Nouveau message
Liaison téléphonique
Micro coupé
Nouveaux numéros
dans le journal des
appels
L'antenne indique
l'intensité du signal de
réception. L'antenne
clignote lorsque le combiné
est hors de portée.
Appel interne
2.7 Écran de la base
CLIP
34
Autres numéros ou faire
défiler le menu vers la
gauche
Autres numéros ou faire
défiler le menu vers la
droite
Sonnerie désactivée
Nouveau message
Nouveaux numéros dans
le journal des appels
04
Emplacement dans le
journal des appels
HL_Sologic B901 eco.book Page 35 Friday, August 6, 2010 1:38 PM
Premiers pas
Rechercher ou créer des
entrées de répertoire
Mode Mains libres activé
Liaison téléphonique
Micro coupé
Appel interne
Date et
heure
2.8 Naviguer dans le menu
L'appareil Sologic B901 propose un système de menus facile à utiliser.
Chaque menu se compose d'une série d'options.
Vous trouverez ci-après une vue d'ensemble des menus du combiné
et de la base.
1
2
OK
ESC
3
4
Pour ouvrir le menu principal, appuyez sur la
touche Menu/OK.
Faites défiler jusqu'à l'option de menu de votre
choix.
Appuyez sur la touche Menu/OK pour afficher
d'autres options ou valider le réglage affiché.
Pour revenir au niveau de menu précédent,
appuyez sur la touche Echap.
Français
OK
2.9 Utiliser le clavier alphanumérique
Vous pouvez saisir du texte sur le clavier alphanumérique. Pour
sélectionner une lettre, appuyez sur la touche alphanumérique
correspondante 26 . Si vous appuyez p. ex. sur la touche
alphanumérique 5, la première lettre « j » s'affiche à l'écran. Appuyez
plusieurs fois pour sélectionner les autres lettres de cette touche.
Appuyez une fois sur la touche 2 pour sélectionner la lettre « a ». Si
vous souhaitez saisir les lettres « a » et « b » l'une derrière l'autre,
appuyez une fois sur la touche 2 pour sélectionner « a ». Patientez
2 secondes, le temps que le curseur se place à l'emplacement suivant,
puis appuyez deux fois sur la touche 2 pour sélectionner « b ». La
touche d'effacement
29 vous permet d'effacer les lettres saisies
par inadvertance. La lettre précédant le curseur est effacée.
Déplacez le curseur avec la touche de défilement vers la gauche et
vers la droite
17 /
19 .
35
HL_Sologic B901 eco.book Page 36 Friday, August 6, 2010 1:38 PM
Utilisation du téléphone
3 Utilisation du téléphone
Info
Ce chapitre décrit le fonctionnement de la base
uniquement ! Pour plus d'informations sur l'utilisation
du combiné, reportez-vous à „4 Utilisation du
combiné sans fil“.
3.1 Régler la langue d'affichage
1
OK
OK 2
3
4
OK
Appuyez sur la touche Menu/OK.
Sélectionnez LANGUE (LANGUAGE) et validez.
Sélectionnez maintenant la langue de votre choix.
Pour valider, appuyez sur OK.
3.2 Réglage de la date et l'heure
Info
Si vous avez activé l'affichage du numéro de
l'appelant (CLIP) sur votre ligne téléphonique et si
votre opérateur vous transmet la date et l'heure,
l'heure se règle automatiquement lors d'un appel
entrant.
Une fois l'heure réglée, celle-ci est automatiquement
reprise sur tous les combinés de la base.
1
OK
OK 2
3
OK
4 5 6
G
H
I
J
K
L
M
N
O
4 5 6
G
H
I
J
K
L
M
N
O
OK 4
OK 5
4 5 6
OK 6
OK 7
4 5 6
8
OK
9
4 5 6
G
H
I
G
H
I
G
H
I
J
K
L
J
K
L
J
K
L
M
N
O
M
N
O
M
N
O
Appuyez sur la touche Menu/OK.
Sélectionnez HEURE (TIME) et validez.
Sélectionnez JOUR/HEURE (DATE TIME) et
validez.
Saisissez l'année et validez.
Saisissez le mois et validez.
Saisissez le jour et validez.
Saisissez les heures et validez.
Saisissez les minutes.
Pour valider, appuyez sur OK.
Important En cas de coupure de courant, la date et l'heure
sont perdues.
36
HL_Sologic B901 eco.book Page 37 Friday, August 6, 2010 1:38 PM
Utilisation du téléphone
3.3 Régler le format horaire
1
OK
OK 2
OK 3
4
OK
Appuyez sur la touche Menu/OK.
Sélectionnez HEURE (TIME) et validez.
Sélectionnez FORMAT (FORMAT) et validez.
Sélectionnez le format horaire « 24 HEURES » (24
hour) ou « 12 HEURES » (12 hour) et validez.
3.4 Appels sortants
Passer un appel
Décrochez le combiné ou appuyez sur la touche
Mains libres.
2 Saisissez le numéro de téléphone.
3 Raccrochez le combiné ou appuyez à nouveau sur
la touche Mains libres pour mettre fin à la
conversation.
OU
1 Saisissez le numéro de téléphone.
2 Décrochez le combiné ou appuyez sur la touche
Mains libres.
3 Raccrochez le combiné ou appuyez à nouveau sur
la touche Mains libres pour mettre fin à la
conversation.
4 5 6
G
H
I
J
K
L
M
N
O
4 5 6
G
H
I
J
K
L
M
N
O
Recomposer le dernier numéro
1 Décrochez le combiné ou appuyez sur la touche
Mains libres.
2 Appuyez sur la touche de recomposition.
Le dernier numéro de téléphone se compose
automatiquement.
Recomposer l'un des 3 derniers numéros saisis
1 Appuyez sur la touche de recomposition.
2 Sélectionnez l'un des 3 derniers numéros saisis.
3 Décrochez le combiné ou appuyez sur la touche
Mains libres.
37
Français
1
HL_Sologic B901 eco.book Page 38 Friday, August 6, 2010 1:38 PM
Utilisation du téléphone
Appeler un numéro du répertoire
1 Appuyez sur la touche Répertoire.
4 5 6 2 Faites défiler jusqu'au nom de votre choix ou
saisissez les premières lettres du nom.
3 Appuyez sur la touche Menu/OK pour afficher le
numéro de téléphone.
OK
4 Décrochez le combiné ou appuyez sur la touche
Mains libres.
Le numéro de téléphone se compose
automatiquement.
G
H
I
J
K
L
M
N
O
3.5 Activer/désactiver le mode Mains libres
Cette fonction vous permet de prendre un appel sans décrocher le
combiné ou bien lorsque le combiné est déjà décroché.
1 Appuyez sur la touche Mains libres pour activer la
fonction.
2 Appuyez à nouveau sur la touche Mains libres pour
rebasculer la conversation sur le combiné.
3.6 Répertoire
Vous pouvez enregistrer 50 numéros de téléphone et noms dans le
répertoire. Les noms ne doivent pas contenir plus de 16 caractères et
les numéros plus de 24 chiffres.
Ajouter un nouveau nom et un nouveau numéro de téléphone
1 Appuyez sur la touche Répertoire.
2 Appuyez sur OK.
OK
OK 3 Sélectionnez AJOUTE (NEW ENTRY) et validez.
4 5 6 OK 4 Saisissez le nom et validez.
4 5 6 OK 5 Saisissez le numéro de téléphone et validez.
6 Un bip de confirmation retentit.
G
H
I
J
K
L
M
N
O
G
H
I
J
K
L
M
N
O
Éditer un nom et un numéro de téléphone
1 Appuyez sur la touche Répertoire.
38
HL_Sologic B901 eco.book Page 39 Friday, August 6, 2010 1:38 PM
Utilisation du téléphone
3
OK
OK 4
5
DEL
4 5 6
G
H
I
J
K
L
M
N
O
4 5 6
G
H
I
J
K
L
M
N
O
OK 6
OK 7
8
Sélectionnez le nom avec la touche de défilement
vers le haut ou vers le bas.
OU
Saisissez les premières lettres du nom.
Appuyez sur OK.
Sélectionnez MODIFIE (EDIT ENTRY) et validez.
Appuyez sur la touche d'effacement pour effacer
les lettres.
Saisissez le nom et validez.
Saisissez le numéro de téléphone et validez.
Un bip de confirmation retentit.
Effacer une ou toutes les entrées du répertoire
1 Appuyez sur la touche Répertoire.
2 Sélectionnez le nom avec la touche de défilement
vers le haut ou vers le bas.
OU
Saisissez les premières lettres du nom.
4 5 6
3 Appuyez sur OK.
OK
4 Sélectionnez EFFACE (DELETE ENTRY) ou
EFFACE TOUT (DELETE ALL) et validez.
OK
ESC 5 Appuyez sur OK pour valider ou bien appuyez sur
OK
la touche Echap pour annuler.
G
H
I
J
K
L
M
N
O
3.7 Touches de numérotation abrégée
Vous pouvez mémoriser 3 numéros abrégés M1, M2 et M3 (de
24 chiffres chacun max.) dans la base.
Mémoriser des numéros abrégés (M1 à M3)
M1-M2-M3 1 Appuyez sur l'une des touches de numérotation
abrégée.
2 Appuyez sur OK.
OK
OK 3 Sélectionnez AJOUTE (NEW ENTRY) et validez.
4 5 6 OK 4 Saisissez le nom et validez.
4 5 6 OK 5 Saisissez le numéro de téléphone et validez.
Un bip de confirmation retentit.
G
H
I
J
K
L
M
N
O
G
H
I
J
K
L
M
N
O
39
Français
2
HL_Sologic B901 eco.book Page 40 Friday, August 6, 2010 1:38 PM
Utilisation du téléphone
Composer un numéro abrégé
1 Décrochez le combiné ou appuyez sur la touche
Mains libres.
M1-M2-M3 2 Appuyez sur la touche de numérotation abrégée.
Le numéro de téléphone se compose
automatiquement.
3 Raccrochez le combiné ou appuyez à nouveau sur
la touche Mains libres pour mettre fin à la
conversation.
3.8 Journal des appels
Les appels entrants sont mémorisés individuellement dans le journal
des appels (30 numéros max.) de la base et des combinés.
Le nombre d'appels manqués est indiqué par X PERDU
(X MISSED) (X = nombre d'appels manqués) et le clignotement de
l'icône CLIP. Appuyez brièvement sur la touche du journal des appels
pour consulter le dernier appel.
Important Vous disposez de la fonction « Affichage du numéro
de l'appelant (CLIP) » uniquement si elle est activée
sur votre ligne téléphonique. Adressez-vous à votre
opérateur pour de plus amples informations.
Le numéro de téléphone et le nom du dernier appelant s'affichent à
l'écran. Si le numéro de téléphone contient plus de 12 chiffres,
appuyez sur la touche pour afficher les autres chiffres. Si le journal
des appels est vide, VIDE (EMPTY) s'affiche à l'écran.
La date et l'heure de l'appel entrant s'affichent en haut à droite pour
chaque appel.
1 Appuyez sur la touche de défilement vers le haut
ou vers le bas pour faire défiler la liste.
L'emplacement de l'appel dans le journal des appels
s'affiche à côté de l'icône CLIP.
2 Appuyez sur la touche de défilement vers la
gauche ou vers la droite pour afficher le nom ou le
numéro.
40
HL_Sologic B901 eco.book Page 41 Friday, August 6, 2010 1:38 PM
Utilisation du téléphone
Si vous n'appuyez sur aucune des touches de
défilement vers le haut ou vers le bas
pendant
15 secondes, le téléphone repasse en mode veille.
Lors d'un appel entrant, le numéro de l'appelant
reste affiché à l'écran pendant encore 5-8 secondes
après la dernière sonnerie.
Appeler un numéro enregistré dans le journal des appels
1 Appuyez sur la touche du journal des appels.
2 Appuyez sur la touche de défilement vers le haut
ou vers le bas pour faire défiler la liste.
3 Décrochez le combiné ou appuyez sur la touche
Mains libres pour parler.
3.9 Appeler un combiné en interne ou transférer un appel
au combiné sans fil
Vous pouvez transférer un appel de la base au combiné ou bien parler
simultanément à un correspondant externe et à un deuxième
correspondant sur le combiné sans fil (mode conférence) :
1
4 5 6
G
H
I
J
K
L
M
N
O
2
3
4
Maintenez la touche d'appel interne 28 enfoncée
pendant 3 secondes jusqu'à ce qu'un bip
retentisse, puis relâchez la touche. INTERNE (INT)
s'affiche.
Saisissez le numéro du combiné. Vous pouvez
avoir une conversation en interne une fois la liaison
établie avec le combiné.
Raccrochez le combiné pour transférer l'appel sur
le combiné sans fil.
OU
Maintenez la touche d'appel interne 28 enfoncée
pendant 3 secondes pour passer en mode
conférence.
41
Français
Info
HL_Sologic B901 eco.book Page 42 Friday, August 6, 2010 1:38 PM
Utilisation du combiné sans fil
4 Utilisation du combiné sans fil
Info
Ce chapitre décrit le fonctionnement du combiné
sans fil uniquement ! Pour plus d'informations sur
l'utilisation de la base, reportez-vous à
„3 Utilisation du téléphone“.
4.1 Modifier la langue
1
OK
OK 2
OK 3
4
OK
5
ESC
Appuyez sur la touche Menu/OK.
Sélectionnez COMBINE (HANDSET) et validez.
Sélectionnez LANGUE (LANGUAGE) et validez.
Sélectionnez la langue de votre choix et validez
votre sélection.
Appuyez sur la touche Esc (Echap) pour repasser
en mode veille.
4.2 Appels sortants
Passer un appel
1 Appuyez sur la touche d'appel.
2 Saisissez le numéro de téléphone.
4 5 6
3 Appuyez sur la touche Raccrocher pour mettre fin
à la conversation.
G
H
I
J
K
L
M
N
O
Prénumérotation
1 Saisissez le numéro de téléphone.
4 5 6
Vous pouvez corriger une erreur de saisie avec la
touche de coupure du micro.
Si vous n'appuyez sur aucune touche pendant
10 secondes, le numéro disparaît et le combiné
repasse en mode veille.
2 Appuyez sur la touche d'appel.
Le numéro de téléphone se compose
automatiquement.
3 Appuyez sur la touche Raccrocher pour mettre fin
à la conversation.
G
H
I
42
J
K
L
M
N
O
HL_Sologic B901 eco.book Page 43 Friday, August 6, 2010 1:38 PM
Utilisation du combiné sans fil
Recomposer le dernier numéro
1 Appuyez sur la touche d'appel.
2 Appuyez sur la touche de recomposition.
Le dernier numéro de téléphone se compose
automatiquement.
3 Appuyez sur la touche Raccrocher pour mettre fin
à la conversation.
Lors d'un appel entrant, le combiné et la base sonnent, tandis que le
témoin de signal d'appel visuel (cf. numéro 14 sur l'illustration 3 et
numéro 27 sur l'illustration 4) du combiné et de la base clignote.
1 Appuyez sur la touche Décrocher pour parler.
2 Appuyez sur la touche Raccrocher pour mettre fin
à la conversation.
4.4 Activer/désactiver le mode Mains libres
Pendant la conversation :
1 Appuyez sur la touche Mains libres pour activer la
fonction.
2 Appuyez à nouveau sur la touche Mains libres pour
rebasculer la conversation sur le combiné.
4.5 Verrouillage du clavier
Lorsque le clavier est verrouillé, les touches ne fonctionnent pas en
mode veille (sauf la touche de verrouillage du clavier).
1 Maintenez la touche de verrouillage du clavier
enfoncée.
L'icône
s'affiche à l'écran.
2 Maintenez à nouveau la touche de verrouillage du
clavier enfoncée pour déverrouiller le clavier.
Lorsque le clavier est verrouillé, vous pouvez
continuer à prendre les appels entrants en appuyant
sur la touche Décrocher . Le clavier fonctionne
normalement pendant la conversation. Le clavier se
verrouille à nouveau à la fin de la conversation.
43
Français
4.3 Appels entrants
HL_Sologic B901 eco.book Page 44 Friday, August 6, 2010 1:38 PM
Utilisation du combiné sans fil
4.6 Répertoire
Vous pouvez enregistrer 50 entrées dans le répertoire. Les noms ne
doivent pas contenir plus de 16 caractères et les numéros plus de
24 chiffres.
Ajouter une entrée dans le répertoire
1 Appuyez sur la touche Répertoire.
OK 2 Appuyez deux fois sur la touche OK.
OK
4 5 6 OK 3 Saisissez le nom et validez.
4 Saisissez le numéro de téléphone de votre choix et
4 5 6
validez.
OK
Un bip de confirmation retentit.
G
H
I
J
K
L
M
N
O
G
H
I
J
K
L
M
N
O
Composer un numéro abrégé
1 Appuyez sur la touche Répertoire.
2 Faites défiler jusqu'au nom de votre choix ou
saisissez les premières lettres du nom.
4 5 6
3 Appuyez sur la touche Répertoire pour afficher le
numéro de téléphone.
4 Appuyez maintenant sur la touche d'appel.
Le numéro de téléphone se compose
automatiquement.
5 Appuyez sur la touche Raccrocher pour mettre fin à
la conversation.
G
H
I
J
K
L
M
N
O
Éditer une entrée du répertoire
1 Appuyez sur la touche Répertoire.
2 Faites défiler jusqu'au nom de votre choix ou
saisissez les premières lettres du nom.
4 5 6
3 Appuyez sur la touche Répertoire pour afficher le
numéro de téléphone.
4 Appuyez sur la touche Menu/OK.
OK
OK 5 Sélectionnez MODIFIE (EDIT ENTRY) et validez.
4 5 6 OK 6 Saisissez le nom et validez.
4 5 6 OK 7 Saisissez ou modifiez le numéro de téléphone et
validez.
G
H
I
44
G
H
I
J
K
L
M
N
O
G
H
I
J
K
L
M
N
O
J
K
L
M
N
O
HL_Sologic B901 eco.book Page 45 Friday, August 6, 2010 1:38 PM
Utilisation du combiné sans fil
4.7 Affichage du numéro (CLIP)
Nouveaux appels
Si le journal des appels contient un nouvel appel,
l'icône CLIP clignote à l'écran.
Afficher le journal des appels
Appuyez sur la touche du journal des appels.
Le dernier appel reçu s'affiche. Si le journal des
appels est vide, VIDE (EMPTY) s'affiche à l'écran.
2 Appuyez sur la touche Répertoire pour afficher le
numéro.
3 Appuyez sur la touche Répertoire pour afficher la
date et l'heure.
4 Appuyez sur la touche de défilement vers le haut ou
vers le bas pour faire défiler la liste.
5 Appuyez sur la touche Esc (Echap) pour quitter le
journal des appels.
1
ESC
Appeler un numéro enregistré dans le journal des appels
Appuyez sur la touche du journal des appels.
2 Faites défiler le journal des appels jusqu'à ce que
le numéro de votre choix s'affiche.
3 Appuyez sur la touche d'appel pour parler.
Le numéro de téléphone se compose
automatiquement.
4 Appuyez sur la touche Raccrocher pour mettre fin
à la conversation.
1
45
Français
L'appareil Sologic B901 affiche le numéro de téléphone des appels
entrants. Cette fonction n'est disponible que si vous avez souscrit à ce
service auprès votre opérateur téléphonique. Pour de plus amples
informations, consultez votre opérateur.
Lorsque vous recevez un appel, le numéro de téléphone est enregistré
dans un journal des appels. Ce journal peut contenir jusqu'à
30 numéros de téléphone (de 23 chiffres chacun max.).
Si le numéro de téléphone contient plus de
12 chiffres, faites défiler l'écran vers la droite pour
afficher les autres chiffres.
HL_Sologic B901 eco.book Page 46 Friday, August 6, 2010 1:38 PM
Transfert d'appels et appels
Effacer un numéro enregistré dans le journal des appels
1 Appuyez sur la touche du journal des appels.
2 Faites défiler le journal des appels jusqu'à ce que
le numéro de votre choix s'affiche.
3 Appuyez sur la touche Menu/OK.
OK
4 Sélectionnez EFFACE (DELETE) pour supprimer
le numéro de téléphone sélectionné, puis validez.
OK
OU
5 Sélectionnez EFFACE TOUT (DELETE ALL) pour
supprimer toutes les entrées, puis validez.
OK
ESC 6 Appuyez pour valider ou appuyez sur la touche Esc
OK
(Echap) pour annuler.
5 Transfert d'appels et appels internes entre
combinés
5.1 Transférer un appel et activer le mode conférence au
cours d'une conversation externe
4 5 6
G
H
I
INT
INT
46
Pendant une conversation externe, appuyez sur la
touche INT, puis sélectionnez le numéro du
combiné (1-5, 0 pour la base).
L'autre combiné sonne.
Vous pouvez avoir une conversation en interne une
fois la liaison établie avec le combiné. Lorsque vous
raccrochez, la conversation externe est transférée à
l'autre combiné.
2 Maintenez la touche INT enfoncée pendant
3 secondes. Vous pouvez maintenant parler
simultanément avec le deuxième combiné et le
correspondant externe (mode conférence).
3 Appuyez à nouveau sur la touche INT pour
rebasculer sur l'appel externe.
4 Appuyez sur la touche Raccrocher pour mettre fin
à la conversation.
1
INT
J
K
L
M
N
O
HL_Sologic B901 eco.book Page 47 Friday, August 6, 2010 1:38 PM
Transfert d'appels et appels internes entre
5.2 Appeler en interne (téléphone de maison)
Info
En mode veille, appuyez sur la touche INT, puis
sélectionnez le numéro du combiné (1-5, 0 pour la
base).
Le combiné appelé ou la base sonne.
2 Appuyez sur la touche d'appel ou retirez le
combiné de la base.
Vous pouvez maintenant discuter en interne.
4 5 6
J
K
L
M
N
O
Français
1
INT
G
H
I
Vous pouvez téléphoner entre la base et le combiné
sans fil.
La base porte le numéro interne « 0 ».
47
HL_Sologic B901 eco.book Page 48 Friday, August 6, 2010 1:38 PM
Erste Schritte
1 Erste Schritte
Vielen Dank, dass Sie sich zum Kauf dieses Produkts von TOPCOM
entschieden haben. Dieses Produkt wurde mit der höchsten Sorgfalt
für Sie und die Umwelt entwickelt und hergestellt. Da wir uns bei
TOPCOM über die Zukunft unseres Planeten und unserer Kinder
Gedanken machen, tun wir unser Bestes, um die Umwelt zu schützen.
Daher haben wir uns entschieden, die Seitenzahl unserer
Bedienungsanleitungen und Produkthandbücher zu reduzieren. Wenn
Sie bedenken, dass bis zu 24 Bäume für 1 Tonne Papier gefällt
werden müssen, dann kostet ein Produkthandbuch in 21 Sprachen
unseren Planeten eine Menge Holz. In dem kurzen Handbuch, das
Ihrem TOPCOM-Gerät beiliegt, finden Sie eine kurze Anleitung zur
Installation und Bedienung Ihres TOPCOM-Gerätes. Wenn Sie gerne
mehr über die Funktionen Ihres neuen TOPCOM-Gerätes erfahren
möchten, besuchen Sie uns bitte im Internet (www.topcom.net). Dort
können Sie die vollständige Bedienungsanleitung in Ihrer Sprache
herunterladen. Auf diese Weise hofft TOPCOM, einen Beitrag zu
leisten, unseren Planeten zu schützen und unsere Welt zu verbessern,
aber dazu brauchen wir Ihre Hilfe!
2 Erste Schritte
2.1 Zum Gebrauch dieser Bedienungsanleitung
In dieser Bedienungsanleitung wird folgende Methode angewendet,
um die Anweisungen zu verdeutlichen:
Text ....... „Display“.
Text, der auf dem Telefon-Display erscheint
Zu drückende Taste
2.2 Basisstation installieren
Basisstation wie folgt installieren:
1 Netzadapter erst an die Basisstation und dann an eine
Steckdose anschließen.
2 Das eine Ende des Telefonkabels an den
Telefonwandanschluss und das andere Ende an den Anschluss
auf der Rückseite der Basisstation anschließen.
3 Das Telefon- und das Stromkabel wie in Abbildung 1 gezeigt
anschließen.
48
HL_Sologic B901 eco.book Page 49 Friday, August 6, 2010 1:38 PM
Erste Schritte
2.3 Mobilteil-Ladegerät
1
Stecken Sie den Netzadapter in die Steckdose.
2.4 Mobilteil
1
2
3
4
Öffnen Sie das Akkufach wie in Abbildung 2 dargestellt.
Legen Sie die Akkus ein. Achten Sie dabei auf richtige Polarität
(+ und -).
Schließen Sie das Akkufach.
Laden Sie das Mobilteil 16 Stunden im Ladegerät auf. Die
Lade-LED am Ladegerät leuchtet auf.
Schnurloses Mobilteil
1. Wahlwiederholung / Nach
oben
2. Telefonbuch
3. Stummschalten / Löschen
4. Auflegen
5. Alphanumerische Tasten
6. Tastatursperre
7. Pause
8. Rufton EIN/AUS
9. Anrufliste / Nach unten
10.Gespräch annehmen /
Freisprechen / Anruftaste
11. INT / Escape
12.Menü / OK / Flash
13.Display
14.Rote LED-Anzeige; blinkt
während eines Anrufs
Basisstation
15.Escape
16.Menü/OK
17.Nach links
18.Wahlwiederholung / Nach
oben
19.Nach rechts
20.Display
21.Telefonbuch
22.Anrufliste/Flash
23.Nach unten
24.Kurzwahltasten (M1-M2-M3)
25.Freisprechen
26.Alphanumerische Tasten
27.Rote LED-Anzeige,
blinkt während eines Anrufs
28.Paging/Rufumleitung/
interner Anruf
29.Stummschalten/Löschen
30.Lautstärkeregelung
31.Lautsprecher
32.Hörerhalterung bei
Wandmontage
33.Rastnase: Um dem Hörer bei
Wandmontage kurzfristig
während eines Gespräches
abzulegen
Deutsch
2.5 Tasten/Display
Ladegerät
34.LED: Mobilteil wird geladen
49
HL_Sologic B901 eco.book Page 50 Friday, August 6, 2010 1:38 PM
Erste Schritte
2.6 Mobilteil-Display
MOBILTEIL X
x = Mobilteil-Nummer
Weitere Nummern oder
Menü nach links
durchblättern
Telefonbucheinträge
finden oder erstellen
Weitere Nummern oder
Menü nach rechts
durchblättern
Akkuzustandsanzeige
Freisprechmodus
eingeschaltet
Rufton ausgeschaltet
Tastatursperre
eingeschaltet
Telefonverbindung
besteht
Neue Nummern in der
Anrufliste
Neue Voicemail-Nachricht
Mikrofon stummgeschaltet
Die Antenne gibt die Stärke
des Empfangssignals an.
Die Antenne blinkt, wenn
sich das Mobilteil außer
Reichweite befindet.
Interner Anruf
2.7 Basisstation-Display
CLIP
50
Weitere Nummern oder
Menü nach links
durchblättern
Weitere Nummern oder
Menü nach rechts
durchblättern
Rufton ausgeschaltet
Neue Voicemail-Nachricht
Neue Nummern in der
Anrufliste
04
Positionsnummer der
Anrufliste
HL_Sologic B901 eco.book Page 51 Friday, August 6, 2010 1:38 PM
Erste Schritte
Telefonbucheinträge
finden oder erstellen
Freisprechmodus
eingeschaltet
Telefonverbindung besteht
Mikrofon stummgeschaltet
Interner Anruf
Uhrzeit und
Datum
2.8 Durch das Menü navigieren
OK
1
2
OK
ESC
3
4
Zum Öffnen des Hauptmenüs die Menü/OK-Taste
drücken.
Blättern Sie zur gewünschten Menüoption.
Drücken Sie die Menü/OK-Taste zum Aufrufen
weiterer Optionen oder zum Bestätigen der
angezeigten Einstellung.
Um zur vorherigen Stufe des Menüs
zurückzugehen, drücken Sie die Escape-Taste.
2.9 Die alphanumerischen Tasten verwenden
Mit den alphanumerischen Tasten können Sie Text eingeben. Zum
Auswählen eines Buchstabens drücken Sie die entsprechende
alphanumerische Taste 26 . Wenn Sie z. B. die alphanumerische
Taste 5 drücken, wird der erste Buchstabe „j“ im Display angezeigt.
Durch mehrmaliges Drücken wählen Sie die anderen Buchstaben
dieser Taste aus.
Drücken Sie einmal die Taste 2, um den Buchstaben „a“
auszuwählen. Wenn Sie die Buchstaben „a“ und „b“ nacheinander
auswählen möchten, drücken Sie die Taste 2 einmal, um „a“
auszuwählen. Warten Sie 2 Sekunden, bis der Cursor an die nächste
Position gerückt ist, und drücken Sie die Taste 2 nun zweimal, um „b“
auszuwählen. Mit der Löschtaste
29 können Sie versehentlich
eingegebene Buchstaben löschen. Es wird der Buchstabe vor dem
Cursor gelöscht.
Mit der Nach-links- und der Nach-rechts-Taste
17 /
19 können Sie
den Cursor verschieben.
51
Deutsch
Das Sologic B901 verfügt über ein leicht zu bedienendes Menüsystem.
Jedes Menü besteht aus einer Reihe von Optionen.
Nachstehend finden Sie eine Übersicht über die Menüs des Mobilteils
und der Basis.
HL_Sologic B901 eco.book Page 52 Friday, August 6, 2010 1:38 PM
Bedienung des Telefons
3 Bedienung des Telefons
Info
Dieser Abschnitt beschreibt nur die Funktionsweise
der Basisstation! Informationen zur Verwendung des
Mobilteils finden Sie unter „4 Verwendung des
schnurlosen Mobilteils“.
3.1 Display-Sprache einstellen
1
OK
2
OK
3
4
OK
Menü-/OK-Taste drücken.
„SPRACHE“ (LANGUAGE) wählen und
bestätigen.
Nun die gewünschte Sprache auswählen.
Zur Bestätigung OK drücken.
3.2 Datum und Uhrzeit einstellen
Info
Wenn die Anruferkennung (CLIP) für Ihren Telefonanschluss aktiviert ist und der Anbieter Datum und
Uhrzeit übermittelt, wird die Uhr automatisch bei
einem eingehenden Anruf eingestellt.
Wenn Sie die Uhrzeit eingestellt haben, wird diese
bei allen Mobilteilen der Basisstation automatisch
übernommen.
1
OK
OK 2
3
OK
4 5 6
G
H
I
J
K
L
M
N
O
4 5 6
G
H
I
J
K
L
M
N
O
OK 4
OK 5
4 5 6
OK 6
OK 7
4 5 6
8
OK
9
4 5 6
G
H
I
G
H
I
G
H
I
J
K
L
J
K
L
J
K
L
M
N
O
M
N
O
M
N
O
Wichtig
52
Die Menü-/OK-Taste drücken.
„UHR“ (TIME) wählen und bestätigen.
„DATUM/UHR“ (DATE TIME) wählen und
bestätigen.
Das Jahr eingeben und bestätigen.
Den Monat eingeben und bestätigen.
Den Tag eingeben und bestätigen.
Die Stunde eingeben und bestätigen.
Die Minuten eingeben.
Zur Bestätigung OK drücken.
Datum und Uhrzeit gehen bei Stromausfall der
Basisstation verloren.
HL_Sologic B901 eco.book Page 53 Friday, August 6, 2010 1:38 PM
Bedienung des Telefons
3.3 Zeitformat einstellen
1
OK
OK 2
OK 3
4
OK
Die Menü-/OK-Taste drücken.
„UHR“ (TIME) wählen und bestätigen.
„FORMAT“ (FORMAT) wählen und bestätigen.
Das Zeitformat „24-STUNDEN“ oder
„12-STUNDEN“ wählen und bestätigen.
3.4 Abgehende Anrufe
Einen Anruf tätigen
Den Hörer abnehmen oder die Freisprechtaste
drücken.
2 Die Telefonnummer eingeben.
3 Den Hörer wieder auflegen oder die Freisprechtaste
erneut drücken, um das Gespräch zu beenden.
ODER
1 Die Telefonnummer eingeben.
2 Den Hörer abnehmen oder die Freisprechtaste
drücken.
3 Den Hörer wieder auflegen oder die Freisprechtaste
erneut drücken, um das Gespräch zu beenden.
4 5 6
G
H
I
J
K
L
M
N
O
4 5 6
G
H
I
J
K
L
M
N
O
Die letzte Telefonnummer erneut wählen
1 Den Hörer abnehmen oder die Freisprechtaste
drücken.
2 Die Wahlwiederholungstaste drücken.
Die letzte Telefonnummer wird automatisch gewählt.
Eine der letzten 3 gewählten Nummern erneut wählen
1 Die Wahlwiederholungstaste drücken.
2 Eine der letzten 3 gewählten Nummern auswählen.
3 Den Hörer abnehmen oder die Freisprechtaste
drücken.
53
Deutsch
1
HL_Sologic B901 eco.book Page 54 Friday, August 6, 2010 1:38 PM
Bedienung des Telefons
Eine Nummer im Telefonbuch anrufen
1 Die Telefonbuch-Taste drücken.
4 5 6 2 Zum gewünschten Namen blättern oder die
Anfangsbuchstaben des Namens eingeben.
3 Die Menü/OK-Taste drücken, um die
Telefonnummer anzuzeigen.
OK
4 Den Hörer abnehmen oder die Freisprechtaste
drücken.
Die Telefonnummer wird automatisch gewählt.
G
H
I
J
K
L
M
N
O
3.5 Freisprechmodus ein-/ausschalten
Mit dieser Funktion kann man einen Anruf annehmen, ohne den Hörer
abheben zu müssen, oder wenn der Hörer bereits abgenommen
wurde.
1 Die Freisprechtaste drücken, um die Funktion zu
aktivieren.
2 Erneut die Freisprechtaste drücken, um das
Gespräch wieder auf den Hörer zu schalten.
3.6 Telefonbuch
Im Telefonbuch können 50 Telefonnummern und Namen gespeichert
werden. Namen dürfen bis zu 16 Zeichen und Nummern bis zu
24 Ziffern lang sein.
Neuen Namen und neue Telefonnummer hinzufügen
1 Die Telefonbuch-Taste drücken.
2 OK drücken.
OK
OK 3 „NEUER“ (NEW ENTRY) wählen und bestätigen.
4 5 6 OK 4 Den Namen eingeben und bestätigen.
4 5 6 OK 5 Die Telefonnummer eingeben und bestätigen.
6 Nun ertönt ein Bestätigungston.
54
G
H
I
J
K
L
M
N
O
G
H
I
J
K
L
M
N
O
HL_Sologic B901 eco.book Page 55 Friday, August 6, 2010 1:38 PM
Bedienung des Telefons
G
H
I
J
K
L
M
N
O
G
H
I
J
K
L
M
N
O
Einen oder alle Einträge im Telefonbuch löschen
1 Die Telefonbuch-Taste drücken.
2 Den Namen mit der Nach-oben- bzw. der Nachunten-Taste auswählen.
ODER
Den Anfangsbuchstaben des Namens eingeben.
4 5 6
3 OK drücken.
OK
4 „LOESCHEN“ (DELETE ENTRY) oder „ALLE
LOESCH“ (DELETE ALL) wählen und bestätigen.
OK
ESC 5 Zum Bestätigen OK drücken oder die EscapeOK
Taste drücken, um zurückzugehen.
G
H
I
J
K
L
M
N
O
3.7 Kurzwahltasten
Sie können 3 direkte Kurzwahlnummern M1, M2 und M3 (jede
maximal 24 Ziffern) in der Basisstation speichern.
Direkte Kurzwahlnummer speichern (M1 bis M3)
M1-M2-M3 1 Eine der Kurzwahltasten drücken.
2 OK drücken.
OK
OK 3 „NEUER“ (NEW ENTRY) wählen und bestätigen.
4 5 6 OK 4 Den Namen eingeben und bestätigen.
4 5 6 OK 5 Die Telefonnummer eingeben und bestätigen.
Nun ertönt ein Bestätigungston.
G
H
I
J
K
L
M
N
O
G
H
I
J
K
L
M
N
O
55
Deutsch
Name und Telefonnummer bearbeiten
1 Die Telefonbuch-Taste drücken.
2 Den Namen mit der Nach-oben- bzw. der Nachunten-Taste auswählen.
ODER
Den Anfangsbuchstaben des Namens eingeben.
3
OK drücken.
OK
OK 4 „BEARB“ (EDIT ENTRY) wählen und bestätigen.
DEL
5 Zum Löschen der Buchstaben die Löschtaste
drücken.
4 5 6 OK 6 Den Namen eingeben und bestätigen.
4 5 6 OK 7 Die Telefonnummer eingeben und bestätigen.
8 Nun ertönt ein Bestätigungston.
HL_Sologic B901 eco.book Page 56 Friday, August 6, 2010 1:38 PM
Bedienung des Telefons
Eine Kurzwahlnummer wählen
1 Den Hörer abnehmen oder die Freisprechtaste
drücken.
M1-M2-M3 2 Die Kurzwahltaste drücken.
Die Telefonnummer wird automatisch gewählt.
3 Den Hörer wieder auflegen oder die Freisprechtaste
erneut drücken, um das Gespräch zu beenden.
3.8 Die Anrufliste
Die eingegangenen Anrufe werden einzeln in der Anrufliste (max.
30 Nummern) der Basisstation und der Mobilteile gespeichert.
Die Anzahl der verpassten Anrufe wird durch „X VERPASST“
(X MISSED) (X = Anzahl der verpassten Anrufe) und das blinkende
CLIP-Symbol angezeigt. Drücken Sie kurz die Taste für die Anrufliste
, um den letzten Anruf anzuzeigen.
Wichtig
Das Leistungsmerkmal “Rufnummernanzeige
(CLIP)“ steht Ihnen nur zur Verfügung, wenn er für
Ihren Anschluss freigeschaltet ist. Wenden Sie sich
an Ihren Netzanbieter für weitere Informationen.
Im Display erscheinen Telefonnummer und Name des letzten
Anrufers. Ist die Telefonnummer länger als 12 Ziffern, können Sie mit
der Taste die restlichen Ziffern anzeigen lassen. Ist die Anrufliste
leer, meldet das Display „LEER“ (EMPTY).
Datum und Uhrzeit des eingegangenen Anrufs werden oben rechts für
jeden Anruf angezeigt.
1 Die Nach-oben- bzw. die Nach-unten-Taste
drücken, um die Liste zu durchblättern.
Neben dem CLIP-Symbol erscheint die
Positionsnummer des Anrufs in der Anrufliste.
2 Die Nach-links- bzw. die Nach-rechts-Taste
drücken, um den Namen oder die Nummer
anzuzeigen.
56
HL_Sologic B901 eco.book Page 57 Friday, August 6, 2010 1:38 PM
Bedienung des Telefons
Info
Wird die Nach-oben- oder die Nach-unten-Taste
15 Sekunden lang nicht gedrückt, kehrt das
Telefon in den Standby-Modus zurück.
Nach dem Eingang eines Anrufs wird die Nummer
des Anrufers noch 5-8 Sekunden nach dem letzten
Klingelzeichen im Display angezeigt.
Eine Nummer aus der Anrufliste anrufen
1 Die Taste für die Anrufliste drücken.
2 Die Nach-oben- bzw. die Nach-unten-Taste
drücken, um die Liste zu durchblättern.
3 Den Hörer abnehmen oder die Freisprechtaste
drücken, um das Gespräch zu beginnen.
Sie können einen Anruf von der Basisstation an das Mobilteil
weiterleiten oder auch gleichzeitig mit dem externen Teilnehmer und
einem zweiten Teilnehmer am schnurlosen Mobilteil sprechen
(Konferenzschaltung):
1
4 5 6
G
H
I
J
K
L
M
N
O
2
3
4
Die interne Ruftaste 28 3 Sekunden gedrückt
halten, bis ein Signalton ertönt, dann die Taste
loslassen. Die Anzeige „INTERN“ (INT) erscheint.
Die Nummer des Mobilteils eingeben. Nachdem die
Verbindung mit dem Mobilteil hergestellt wurde,
können Sie intern sprechen.
Legen Sie den Hörer auf, um das Gespräch zum
schnurlosen Mobilteil zu übertragen.
ODER
Halten Sie die interne Ruftaste 28 3 Sekunden lang
gedrückt, um eine Konferenzschaltung herzustellen.
57
Deutsch
3.9 Intern ein Mobilteil anrufen und einen Anruf an das
schnurlose Mobilteil weiterleiten
HL_Sologic B901 eco.book Page 58 Friday, August 6, 2010 1:38 PM
Verwendung des schnurlosen
4 Verwendung des schnurlosen Mobilteils
Info
Dieser Abschnitt beschreibt nur die Funktionsweise
des schnurlosen Mobilteils! Informationen zur
Verwendung der Basisstation finden Sie unter
„3 Bedienung des Telefons“.
4.1 Sprache ändern
1
OK
2
OK
3
OK
4
OK
5
ESC
Die Menü/OK-Taste drücken.
„MOBILTEIL“ (HANDSET) wählen und
bestätigen.
„SPRACHE“ (LANGUAGE) wählen und
bestätigen.
Wählen Sie die gewünschte Sprache aus, und
bestätigen Sie die Auswahl.
Drücken Sie die Esc-Taste, um in den StandbyModus zurückzukehren.
4.2 Abgehende Anrufe
Einen Anruf tätigen
1 Drücken Sie die Anruftaste.
2 Die Telefonnummer eingeben.
4 5 6
3 Drücken Sie die Auflegen-Taste, um das Gespräch
zu beenden.
G
H
I
J
K
L
M
N
O
Wahlvorbereitung
1 Die Telefonnummer eingeben.
4 5 6
Sie können eine falsche Nummer mit der
Stummschalttaste korrigieren.
Wenn Sie 10 Sekunden lang keine Taste drücken,
verschwindet die Nummer, und das Mobilteil kehrt in
den Standby-Modus zurück.
2 Drücken Sie die Anruftaste.
Die Telefonnummer wird automatisch gewählt.
3 Drücken Sie die Auflegen-Taste, um das Gespräch
zu beenden.
G
H
I
58
J
K
L
M
N
O
HL_Sologic B901 eco.book Page 59 Friday, August 6, 2010 1:38 PM
Verwendung des schnurlosen Mobilteils
Die letzte Telefonnummer erneut wählen
1 Drücken Sie die Anruftaste.
2 Drücken Sie die Wahlwiederholungstaste.
Die letzte Telefonnummer wird automatisch gewählt.
3 Drücken Sie die Auflegen-Taste, um das Gespräch
zu beenden.
4.3 Ankommende Anrufe
Bei einem ankommenden Anruf klingelt das Mobilteil und Basisstation,
und die LED „Visuelles Anrufsignal“ (siehe Punkt 14 in Abbildung 3
und Punkt 27 in Abbildung 4) an der Mobilteil und der Basisstation
blinken.
1
2
Drücken Sie die Gespräch-annehmen-Taste, um
das Gespräch zu beginnen.
Drücken Sie die Auflegen-Taste, um das Gespräch
zu beenden.
Während des Gesprächs:
1
2
Die Freisprechtaste drücken, um die Funktion zu
aktivieren.
Erneut die Freisprechtaste drücken, um das
Gespräch wieder zum Mobilteil zu schalten.
4.5 Tastatursperre
Wenn die Tastatursperre aktiviert ist, haben die Tasten im StandbyModus keine Funktion (mit Ausnahme der Tastatursperrtaste).
1 Halten Sie die Tastatursperrtaste gedrückt.
Das Symbol erscheint im Display.
2 Die Tastatursperrtaste erneut gedrückt halten, um
die Tastatursperre zu deaktivieren.
59
Deutsch
4.4 Freisprechmodus ein-/ausschalten
HL_Sologic B901 eco.book Page 60 Friday, August 6, 2010 1:38 PM
Verwendung des schnurlosen
Wenn die Tastatursperre aktiviert ist, können Sie
trotzdem ankommende Anrufe annehmen, in dem
Sie die Gespräch-annehmen-Taste drücken. Die
Tastatur funktioniert während des Gesprächs wie
gewohnt. Die Tastatursperre wird nach dem
Gespräch erneut aktiviert.
4.6 Telefonbuch
Sie können 50 Einträge im Telefonbuch speichern. Namen können bis
zu 16 Zeichen und Telefonnummern bis zu 24 Ziffern lang sein.
Einen Telefonbucheintrag hinzufügen
1 Die Telefonbuch-Taste drücken.
OK 2 Drücken Sie zweimal die OK-Taste.
OK
4 5 6 OK 3 Den Namen eingeben und bestätigen.
4 Die gewünschte Telefonnummer eingeben und
4 5 6
bestätigen.
OK
Nun ertönt ein Bestätigungston.
G
H
I
J
K
L
M
N
O
G
H
I
J
K
L
M
N
O
Eine Kurzwahlnummer wählen
1 Die Telefonbuch-Taste drücken.
2 Zum gewünschten Namen blättern oder die
Anfangsbuchstaben des Namens eingeben.
4 5 6
3 Die Telefonbuchtaste drücken, um die
Telefonnummer anzuzeigen.
4 Drücken Sie nun die Anruftaste.
Die Telefonnummer wird automatisch gewählt.
5 Drücken Sie die Auflegen-Taste, um das Gespräch
zu beenden.
G
H
I
J
K
L
M
N
O
Einen Telefonbucheintrag bearbeiten
1 Die Telefonbuch-Taste drücken.
2 Zum gewünschten Namen blättern oder die
Anfangsbuchstaben des Namens eingeben.
4 5 6
3 Die Telefonbuchtaste drücken, um die
Telefonnummer anzuzeigen.
4 Die Menü/OK-Taste drücken.
OK
G
H
I
60
J
K
L
M
N
O
HL_Sologic B901 eco.book Page 61 Friday, August 6, 2010 1:38 PM
Verwendung des schnurlosen Mobilteils
4 5 6
OK 5
OK 6
4 5 6
OK 7
G
H
I
G
H
I
J
K
L
J
K
L
M
N
O
M
N
O
„BEARB“ (EDIT ENTRY) wählen und bestätigen.
Den Namen eingeben und bestätigen.
Die Telefonnummer eingeben oder ändern und
bestätigen.
4.7 Anruferkennung (CLIP)
Das Sologic B901 zeigt die Telefonnummer ankommender Anrufe an.
Diese Funktion kann nur benutzt werden, wenn Sie sich für diesen
Dienst bei Ihrem Netzanbieter angemeldet haben. Weitere
Informationen erhalten Sie von Ihrem Netzanbieter.
Wenn Sie einen Anruf erhalten, wird die Telefonnummer in einer
Anrufliste gespeichert. Diese Liste kann bis zu 30 Telefonnummern
(jede mit maximal 23 Ziffern) enthalten.
Wenn die Telefonnummer aus mehr als 12 Ziffern
besteht, können Sie im Display nach rechts gehen,
um die restlichen Ziffern zu sehen.
Wenn ein neuer Anruf in der Anrufliste ist, blinkt das
CLIP-Symbol im Display.
Anrufliste aufrufen
Die Taste für die Anrufliste drücken.
Der zuletzt empfangene Anruf wird angezeigt. Ist die
Anrufliste leer, meldet das Display „LEER“ (EMPTY).
2 Auf die Telefonbuchtaste drücken, um die Nummer
zu überspringen.
3 Auf die Telefonbuchtaste drücken, um Datum und
Uhrzeit zu überspringen.
4 Die Nach-oben- bzw. die Nach-unten-Taste
drücken, um die Liste zu durchblättern.
5 Drücken Sie die Esc-Taste, um die Anrufliste zu
verlassen.
1
ESC
61
Deutsch
Neue Anrufe
HL_Sologic B901 eco.book Page 62 Friday, August 6, 2010 1:38 PM
Anrufweiterleitung und interne
Eine Nummer aus der Anrufliste anrufen
1 Die Taste für die Anrufliste drücken.
2 Durchsuchen Sie die Anrufliste, bis die
gewünschte Telefonnummer angezeigt wird.
3 Drücken Sie die Anruftaste, um das Gespräch zu
beginnen.
Die Telefonnummer wird automatisch gewählt.
4 Drücken Sie die Auflegen-Taste, um das Gespräch
zu beenden.
Eine Nummer aus der Anrufliste löschen
1 Die Taste für die Anrufliste drücken.
2 Durchsuchen Sie die Anrufliste, bis die
gewünschte Telefonnummer angezeigt wird.
3 Die Menü/OK-Taste drücken.
OK
4 „LOESCHEN“ (DELETE) wählen, um die aktuelle
Telefonnummer zu löschen, und bestätigen.
OK
ODER
5 „ALLE LOESCH“ (DELETE ALL) wählen, um alle
Telefonbucheinträge zu löschen, und bestätigen.
OK
ESC 6 Zur Bestätigung drücken oder die Esc-Taste
OK
drücken, um zurückzukehren.
5 Anrufweiterleitung und interne Anrufe von einem
Mobilteil zum anderen
5.1 Anrufweiterleitung und Konferenzschaltung während
eines externen Gesprächs
4 5 6
G
H
I
62
Drücken Sie während eines externen Gesprächs
die INT-Taste und anschließend die Nummer des
Mobilteils (1-5, für die Basisstation „0“ wählen).
Das andere Mobilteil klingelt
Wenn die Verbindung mit dem anderen Mobilteil
hergestellt wurde, können Sie intern sprechen.
Wenn Sie auflegen, wird das externe Gespräch an
das andere Mobilteil weitergeleitet.
1
INT
J
K
L
M
N
O
HL_Sologic B901 eco.book Page 63 Friday, August 6, 2010 1:38 PM
Anrufweiterleitung und interne Anrufe von
INT
2
INT
3
4
Halten Sie die INT-Taste 3 Sekunden lang
gedrückt. Jetzt können Sie mit dem zweiten
Mobilteil und der externen Verbindung gleichzeitig
sprechen (Konferenzschaltung).
Drücken Sie die INT-Taste erneut, um zum
externen Anruf zurückzuschalten.
Drücken Sie die Auflegen-Taste, um das Gespräch
zu beenden.
5.2 Interner Anruf (Haustelefon-Funktion)
Info
Drücken Sie im Standby-Modus die INT-Taste und
anschließend die Nummer des Mobilteils (1-5, für
die Basisstation „0“ wählen).
Nun klingelt das angerufene Mobilteil bzw. die
Basisstation.
2 Drücken Sie die Anruftaste, oder nehmen Sie den
Hörer der Basisstation ab.
Jetzt können Sie intern sprechen.
4 5 6
J
K
L
M
N
O
63
Deutsch
1
INT
G
H
I
Sie können ein Gespräch zwischen der Basisstation
und dem schnurlosen Mobilteil führen.
Die Basisstation hat die interne Nummer „0“.
HL_Sologic B901 eco.book Page 64 Friday, August 6, 2010 1:38 PM
Introducción
1 Introducción
Gracias por adquirir este producto de TOPCOM. Este producto ha sido
diseñado y montado teniendo el máximo cuidado para con usted y el
medio ambiente. En TOPCOM, nos gusta pensar en el futuro de
nuestro planeta y nuestros hijos, por lo que hacemos lo que está en
nuestras manos para ayudar a conservar el medio ambiente. Por esta
razón, hemos decidido reducir el número de páginas de nuestras
guías del usuario, así como de nuestros manuales de producto. Si
tenemos en cuenta que se requieren hasta 24 árboles para producir 1
tonelada de papel, publicar manuales de producto en 11 idiomas
constituye un precio elevado para nuestro planeta. En este pequeño
manual que se le facilita junto con su dispositivo de TOPCOM, podrá
encontrar una breve descripción de cómo instalarlo y utilizarlo.
No obstante, si desea conocer todas las características de su nuevo
dispositivo de TOPCOM, visite nuestra página web (www.topcom.net),
donde podrá descargar el manual del usuario completo en su idioma.
Con ello, TOPCOM espera contribuir a convertir este mundo en un
lugar mejor, lo cual solo será posible con su ayuda.
2 Primeros pasos
2.1 Cómo utilizar este manual del usuario
En este manual del usuario, se utiliza el método que se indica a
continuación para presentar las instrucciones de una forma clara:
Texto... «Pantalla» (Display).
Texto que aparece en la pantalla del teléfono
Tecla que debe pulsarse
2.2 Instalación de la estación base
Para instalar la estación base, siga estos pasos:
1 Conecte el adaptador de red primero a la estación base y
después a una toma de corriente.
2 Conecte un extremo del cable de teléfono a la toma de teléfono
de la pared y el otro extremo al conector que encontrará en la
parte posterior de la estación base.
3 El teléfono y los cables de alimentación deben conectarse como
se indica en la imagen 1.
64
HL_Sologic B901 eco.book Page 65 Friday, August 6, 2010 1:38 PM
Primeros pasos
2.3 Cargador del terminal
Conecte el adaptador de red a la toma de corriente.
1
2.4 Terminal
1
2
3
4
Abra el compartimento de las pilas tal y como se muestra en la
figura 2.
Coloque las pilas recargables. Compruebe que la polaridad
sea la correcta (+ y -).
Cierre el compartimento de las pilas.
Coloque el terminal en el cargador y deje que cargue durante
16 horas. El LED de se iluminará.
2.5 Teclas / Pantalla
Terminal inalámbrico
1.
2.
3.
4.
5.
6.
7.
Rellamada / Subir
Agenda
Silencio / Borrar
Colgar
Teclas alfanuméricas
Bloqueo de teclas
Pausa
8. Encendido / apagado de timbre
9. Lista de llamadas / Bajar
10. Tecla de aceptación de llamadas /
Manos libres / Llamar
11. Interna / Escape
12. Menú / Aceptar (OK) / Flash
13. Pantalla
14. LED rojo (parpadea durante
una llamada)
15.
16.
17.
18.
19.
20.
21.
22.
23.
24.
27. LED rojo de la estación base
(parpadea durante una llamada)
Escape
28. Búsqueda / Desvío de llamada /
Menú / Aceptar (OK)
Llamada interna
Izquierda
29. Silencio / Borrar
Rellamada / Subir
30. Control de volumen
Derecha
31. Altavoz
Pantalla
32. Soporte del auricular para el
Agenda
montaje en pared
Lista de llamadas / Flash
33.
Orejeta: para apoyar el auricular
Abajo
brevemente
durante una llamada
Marcación abreviada
si el teléfono está montado en la
(M1 - M2 - M3)
pared
Manos libres
25.
26. Teclas alfanuméricas
Cargador
34. LED: el terminal se está cargando.
65
Español
Estación base
HL_Sologic B901 eco.book Page 66 Friday, August 6, 2010 1:38 PM
Primeros pasos
2.6 Pantalla del terminal
TERMINAL X
x = número de terminal
Otros números o
desplazarse hacia la
izquierda por el menú
Buscar o crear entradas
en la agenda
Otros números o desplazarse
hacia la derecha por el menú
Visualización del estado de la
batería
Sin sonido
Modo manos libres activado
Bloqueo de teclas
activado
Nuevo mensaje de voz
Llamada creada
Micrófono silenciado
Números nuevos en la
lista de llamadas
La antena indica la intensidad
de la señal de recepción y
parpadea si el terminal está
fuera de cobertura
Llamada interna
2.7 Pantalla de la estación base
CLIP
Otros números o desplazarse
hacia la izquierda por el menú
Otros números o desplazarse
hacia la derecha por el menú
Sin sonido
Nuevo mensaje de voz
Números nuevos en la lista
de llamadas
Buscar o crear entradas en la
agenda
Llamada creada
Llamada interna
66
04
Número de elemento en la
lista de llamadas
Modo manos libres activado
Micrófono silenciado
Fecha y hora
HL_Sologic B901 eco.book Page 67 Friday, August 6, 2010 1:38 PM
Uso del teléfono
2.8 Navegación por el menú
El sistema del menú del Sologic B901 es muy fácil de manejar. Cada
menú consiste en una serie de opciones.
Encontrará a continuación un resumen de los menús del terminal y la
estación base.
1
OK
2
3
OK
4
ESC
Pulse la tecla de Menú / Aceptar (OK) para abrir el
menú principal.
Desplácese hasta la opción del menú deseada.
Pulse la tecla Menú / Aceptar (OK) para ver más
opciones o para confirmar el ajuste mostrado.
Pulse la tecla Escape para regresar al nivel de
menú anterior.
Puede utilizar las teclas alfanuméricas para introducir texto. Pulse la
tecla alfanumérica correspondiente para seleccionar una letra 26 . Por
ejemplo , si pulsa la tecla numérica 5, aparecerá en la pantalla el
primer carácter, «j». Pulse la tecla varias veces para seleccionar las
otras letras.
Pulse la tecla 2 una vez para elegir la letra «a». Si desea introducir las
letras «a» y «b» sucesivamente, pulse primero la tecla 2 una vez para
seleccionar la letra «a». Espere 2 segundos hasta que el cursor se
haya desplazado hasta la posición siguiente. Ahora pulse la tecla 2
dos veces para seleccionar «b». Las letras que se hayan introducido
29 . Se
erróneamente se pueden borrar con la tecla de borrado
eliminará la letra situada delante del cursor.
Utilice la tecla izquierda / derecha
17 /
19 para mover el cursor.
3 Uso del teléfono
Información Este apartado explica únicamente las funciones de
la estación base. Encontrará la información sobre
el uso del terminal en «4 Funcionamiento del
terminal inalámbrico».
3.1 Configuración del idioma de la pantalla
1
OK
2
OK
Pulse la tecla Menú / Aceptar (OK).
Seleccione «IDIOMA» (LANGUAGE) y confirme la
selección.
67
Español
2.9 Uso de las teclas alfanuméricas
HL_Sologic B901 eco.book Page 68 Friday, August 6, 2010 1:38 PM
Uso del teléfono
3
4
OK
Ahora ya puede seleccionar el idioma.
Pulse Aceptar (OK) para confirmar.
3.2 Ajustar la fecha y la hora
Información Si dispone del servicio de identificación de
llamada (CLIP) en su línea de teléfono y el
operador transmite información sobre la fecha y la
hora, el reloj se ajusta automáticamente al recibir
una llamada.
Una vez haya configurado la hora, la adoptarán
todos los terminales registrados en la estación
base.
1
OK
2
OK
3
OK
4 5 6
J
K
L
G
H
I
M
N
O
4 5 6
J
K
L
G
H
I
M
N
O
OK 4
OK 5
4 5 6
OK 6
OK 7
4 5 6
8
OK
9
4 5 6
J
K
L
G
H
I
J
K
L
G
H
I
J
K
L
G
H
I
M
N
O
M
N
O
M
N
O
Pulse la tecla Menú / Aceptar (OK).
Seleccione «HORA» (TIME) y confirme la
selección.
Seleccione «FECHA/HORA» (DATE/TIME) y
confirme la selección.
Escriba el año y confírmelo.
Escriba el mes y confírmelo.
Escriba el día y confírmelo.
Escriba la hora y confírmela.
Escriba los minutos.
Pulse OK para confirmar.
Importante La fecha y la hora se borrarán si la base se
queda sin alimentación.
3.3 Ajustar el formato de hora
1
OK
2
OK
3
OK
4
OK
68
Pulse la tecla Menú / Aceptar (OK).
Seleccione «HORA» (TIME) y confirme la
selección.
Seleccione «FORMATO» (FORMAT) y confirme la
selección.
Seleccione el formato de hora de «24 HORAS» (24
HOUR) o «12 HORAS» (12 HOUR) y confirme la
selección.
HL_Sologic B901 eco.book Page 69 Friday, August 6, 2010 1:38 PM
Uso del teléfono
3.4 Llamadas salientes
Realización de una llamada
1 Levante el auricular o pulse la tecla de manos
libres.
2 Introduzca el número de teléfono.
4 5 6
3 Cuelgue el auricular o vuelva a pulsar la tecla de
manos libres para finalizar la llamada.
O
1 Introduzca el número de teléfono.
4 5 6
2 Levante el auricular o pulse la tecla de manos
libres.
3 Cuelgue el auricular o vuelva a pulsar la tecla de
manos libres para finalizar la llamada.
G
H
I
J
K
L
M
N
O
G
H
I
J
K
L
M
N
O
Rellamada a uno de los 3 últimos números marcados
1 Pulse la tecla Rellamada.
2 Seleccione uno de los 3 últimos números
marcados.
3 Levante el auricular o pulse la tecla de manos
libres.
Llamar a un número de la agenda
1 Pulse la tecla Agenda.
4 5 6 2 Desplácese hasta el nombre deseado o introduzca
sus primeras letras.
3 Pulse la tecla Menú / Aceptar (OK) para ver el
número de teléfono.
OK
4 Levante el auricular o pulse la tecla de manos
libres.
El número de teléfono se marca automáticamente.
G
H
I
J
K
L
M
N
O
69
Español
Rellamada al último número de teléfono marcado
1 Levante el auricular o pulse la tecla de manos
libres.
2 Pulse la tecla Rellamada.
Se vuelve a llamar automáticamente al último
número de teléfono marcado.
HL_Sologic B901 eco.book Page 70 Friday, August 6, 2010 1:38 PM
Uso del teléfono
3.5 Activar / desactivar la función de manos libres
Puede utilizar esta función para responder a una llamada sin tener que
descolgar el auricular o si ya tiene el auricular en la mano.
1 Pulse la tecla de manos libres para activar la
función.
2 Vuelva a pulsar la tecla de manos libres para
atender la llamada con el auricular.
3.6 Agenda
50 números de teléfono y nombres es el máximo que puede
almacenar la agenda. Los nombres pueden tener un máximo de
16 caracteres, y los números pueden contener hasta 24 dígitos.
Adición de un nuevo nombre y número
1 Pulse la tecla Agenda.
2 Pulse Aceptar (OK).
OK
3 Seleccione «NUEVO» (NEW ENTRY) y confirme
la selección.
OK
4 5 6 OK 4 Escriba el nombre y confírmelo.
4 5 6 OK 5 Teclee el número de teléfono y confírmelo.
6 Se oirá un tono de confirmación.
G
H
I
J
K
L
M
N
O
G
H
I
J
K
L
M
N
O
Modificación de un nombre y un número de teléfono
1 Pulse la tecla Agenda.
2 Seleccione el nombre con las teclas arriba y abajo.
O
Introduzca las primeras letras del nombre.
3 Pulse Aceptar (OK).
OK
4 Seleccione «EDITAR» (EDIT ENTRY) y confirme
la selección.
OK
DEL
5 Pulse la tecla Borrar para borrar las letras.
4 5 6 OK 6 Escriba el nombre y confírmelo.
4 5 6 OK 7 Teclee el número de teléfono y confírmelo.
8 Se oirá un tono de confirmación.
G
H
I
J
K
L
M
N
O
G
H
I
J
K
L
M
N
O
Eliminación de una o todas las entradas de la agenda
1 Pulse la tecla Agenda.
70
HL_Sologic B901 eco.book Page 71 Friday, August 6, 2010 1:38 PM
Uso del teléfono
2
4 5 6
G
H
I
J
K
L
M
N
O
3
OK
4
OK
ESC 5
OK
Seleccione el nombre con las teclas arriba y abajo.
O
Introduzca las primeras letras del nombre.
Pulse Aceptar (OK).
Seleccione «BORRAR» (DELETE ENTRY) o
«BORRAR TODO» (DELETE ALL) y confirme la
selección.
Pulse Aceptar (OK). para confirmar o pulse la
tecla Escape para volver atrás.
3.7 Teclas de marcación abreviada
G
H
I
J
K
L
M
N
O
G
H
I
J
K
L
M
N
O
Marcación de un número abreviado
1 Levante el auricular o pulse la tecla de manos
libres.
M1-M2-M3 2 Pulse la tecla de marcación abreviada.
El número de teléfono se marca automáticamente.
3 Cuelgue el auricular o vuelva a pulsar la tecla de
manos libres para finalizar la llamada.
3.8 Lista de llamadas
Las llamadas entrantes se guardan en una lista de llamadas (máx.
30 números) en la estación base y los terminales.
El número de llamadas perdidas se indica con el aviso «X PERDIDA»
(X MISSED) (X = número de llamadas perdidas) y el símbolo CLIP
71
Español
Puede almacenar los 3 números de marcación abreviada M1, M2 y M3
(cada uno de hasta 24 dígitos) en la estación base.
Guardar números de marcación abreviada directa
(M1 - M2 - M3)
M1-M2-M3 1 Pulse una de las teclas de marcación abreviada.
2 Pulse Aceptar (OK).
OK
3 Seleccione «NUEVO» (NEW ENTRY) y confirme
la selección.
OK
4 5 6 OK 4 Escriba el nombre y confírmelo.
4 5 6 OK 5 Teclee el número de teléfono y confírmelo.
Se oirá un tono de confirmación.
HL_Sologic B901 eco.book Page 72 Friday, August 6, 2010 1:38 PM
Uso del teléfono
parpadeando. Pulse brevemente la tecla de la lista de llamadas
para visualizar la última llamada.
Importante La función «identificación de llamada» (CLIP) solo
está disponible si está activada para su línea de
teléfono. Si desea más información, póngase en
contacto con su operador de telefonía.
Aparecerán en la pantalla el nombre y el número de la última persona
que ha llamado. Si el número de teléfono tiene más de 12 dígitos,
puede mostrar los demás dígitos pulsando la tecla . Si la lista de
llamadas está vacía, aparecerá «VACIO» (EMPTY) en la pantalla.
Arriba a la derecha se muestran la fecha y la hora de cada llamada
entrante.
1 Pulse la tecla arriba y abajo para desplazarse por
la lista.
El número de ubicación de la llamada en la lista de
llamadas aparece cerca del símbolo CLIP.
2 Pulse la tecla izquierda y derecha para mostrar el
nombre o el número.
Información El teléfono vuelve al modo en espera si no se
pulsa la tecla arriba o abajo
en 15 segundos.
Cuando se recibe una llamada, el número de la
persona que llama permanecerá en la pantalla
durante 5-8 segundos después del último timbre.
Llamada a un número de la lista de llamadas
1
2
3
Pulse la tecla de lista de llamadas.
Pulse la tecla arriba y abajo para desplazarse por
la lista.
Descuelgue el auricular o vuelva a pulsar la tecla
de manos libres para realizar la llamada.
3.9 Realización de una llamada interna a un terminal y
transferencia de una llamada a un terminal inalámbrico
Puede transferir una llamada de la estación base al terminal o hablar
con el teléfono externo y con un segundo terminal inalámbrico al
mismo tiempo (teleconferencia).
72
HL_Sologic B901 eco.book Page 73 Friday, August 6, 2010 1:38 PM
Funcionamiento del terminal inalámbrico
1
2
4 5 6
G
H
I
J
K
L
M
N
O
3
4
Mantenga pulsada la tecla de llamada interna 28
durante 3 segundos hasta que oiga una señal de
audio. A continuación, suelte la tecla. En la
pantalla aparecerá «INTERNA» (INT).
Introduzca el número del terminal. Cuando se
establezca la llamada con el terminal, puede hablar
internamente.
Cuelgue el auricular para transferir la llamada al
terminal inalámbrico.
O
Mantenga pulsada la tecla de llamada interna 28
durante 3 segundos para establecer una
teleconferencia.
4 Funcionamiento del terminal inalámbrico
Información Este apartado describe únicamente las funciones
del terminal inalámbrico. Encontrará la
información sobre el uso de la estación base en
«3 Uso del teléfono».
1
OK
2
OK
3
OK
4
OK
5
ESC
Pulse la tecla Menú / Aceptar (OK).
Seleccione «TERMINAL» (HANDSET) y confirme
la selección.
Seleccione «IDIOMA» (LANGUAGE) y confirme la
selección.
Seleccione el idioma deseado y confirme la
selección.
Pulse la tecla Escape para regresar al modo de
espera.
4.2 Llamadas salientes
Realización de una llamada
1 Pulse el botón de llamada.
2 Introduzca el número de teléfono.
4 5 6
3 Pulse la tecla de colgar para finalizar la llamada.
G
H
I
J
K
L
M
N
O
73
Español
4.1 Cambiar el idioma
HL_Sologic B901 eco.book Page 74 Friday, August 6, 2010 1:38 PM
Funcionamiento del terminal
Preparar la marcación
1 Introduzca el número de teléfono.
4 5 6
Puede corregir un número incorrecto con la tecla de
silencio.
Si no pulsa ninguna tecla durante 10 segundos, el
número desaparece y el terminal vuelve al modo en
espera.
2 Pulse el botón de llamada.
El número de teléfono se marca automáticamente.
3 Pulse la tecla de colgar para finalizar la llamada.
G
H
I
J
K
L
M
N
O
Rellamada al último número de teléfono marcado
1 Pulse el botón de llamada.
2 Pulse el botón de rellamada.
Se vuelve a llamar automáticamente al último
número de teléfono marcado.
3 Pulse la tecla de colgar para finalizar la llamada.
4.3 Llamadas entrantes
Cuando se recibe una llamada entrante, el terminal y la estación base
suenan y el LED de «señal visual de llamada» (consulte el punto 14
de la imagen 3 y el punto 27 de la imagen 4) parpadea en el terminal
y en la estación base.
1
2
Pulse la tecla de aceptación de llamadas para
responder a la llamada.
Pulse la tecla de colgar para finalizar la llamada.
4.4 Activar / desactivar la función de manos libres
Durante la llamada:
1 Pulse la tecla de manos libres para activar la
función.
2 Vuelva a pulsar la tecla de manos libres para
atender la llamada con el auricular.
74
HL_Sologic B901 eco.book Page 75 Friday, August 6, 2010 1:38 PM
Funcionamiento del terminal inalámbrico
4.5 Bloqueo de teclas
Con el bloqueo de teclas activado, no podrá hacer nada si pulsa las
teclas en el modo en espera (salvo la tecla de bloqueo de teclas).
1 Mantenga presionada la tecla de bloqueo de
teclas.
Aparecerá el símbolo
en la pantalla.
2 Pulse de nuevo la tecla de bloqueo de teclas para
desactivar el bloqueo.
Aunque el bloqueo de teclas esté activado, puede
responder a las llamadas entrantes pulsando la tecla
de aceptación de llamadas. Las funciones del teclado
funcionan normalmente durante la llamada. Tras
finalizarla, el bloqueo de teclas vuelve a activarse.
4.6 Agenda
G
H
I
J
K
L
M
N
O
G
H
I
J
K
L
M
N
O
Marcación de un número abreviado
1 Pulse la tecla Agenda.
2 Desplácese hasta el nombre deseado o introduzca
sus primeras letras.
4 5 6
3 Pulse la tecla Agenda para ver el número de
teléfono.
4 Pulse ahora la tecla de llamada.
El número de teléfono se marca automáticamente.
5 Pulse la tecla de colgar para finalizar la llamada.
G
H
I
J
K
L
M
N
O
75
Español
Puede almacenar 50 entradas en la agenda. Los nombres pueden
tener un máximo de 16 caracteres, y los números pueden contener
hasta 24 dígitos.
Añadir una entrada en la agenda
1 Pulse la tecla Agenda.
OK 2 Pulse la tecla Aceptar (OK) dos veces.
OK
4 5 6 OK 3 Escriba el nombre y confírmelo.
4 Teclee el número de teléfono deseado y
4 5 6
confírmelo.
OK
Se oirá un tono de confirmación.
HL_Sologic B901 eco.book Page 76 Friday, August 6, 2010 1:38 PM
Funcionamiento del terminal
Editar una entrada de la agenda
1 Pulse la tecla Agenda.
2 Desplácese hasta el nombre deseado o introduzca
sus primeras letras.
4 5 6
3 Pulse la tecla Agenda para ver el número de
teléfono.
4 Pulse la tecla Menú / Aceptar (OK).
OK
5 Seleccione «EDITAR» (EDIT ENTRY) y confirme la
selección.
OK
4 5 6 OK 6 Escriba el nombre y confírmelo.
4 5 6 OK 7 Teclee o modifique el número de teléfono y
confírmelo.
G
H
I
G
H
I
J
K
L
M
N
O
G
H
I
J
K
L
M
N
O
J
K
L
M
N
O
4.7 Identificación de llamada (CLIP)
El Sologic B901 muestra en pantalla los números de teléfono desde
los que se realizan las llamadas entrantes. Esta función solo está
disponible si tiene contratado este servicio con su operador de
telefonía. Si desea más información, póngase en contacto con su
operador.
Cuando recibe una llamada, el número de teléfono se guarda en la
lista de llamadas. Esta lista puede almacenar un máximo de
30 números (de hasta 23 dígitos cada uno).
Si el número de teléfono consta de más de
12 dígitos, puede desplazarse a la derecha de la
pantalla para ver el resto de dígitos.
Llamadas nuevas
Cuando hay una llamada nueva en la lista de
llamadas, parpadea el símbolo CLIP en la pantalla.
Consulta de la lista de llamadas
Pulse la tecla de lista de llamadas.
Aparecerá en pantalla la última llamada recibida. Si
la lista de llamadas está vacía, aparecerá «VACIO»
(EMPTY) en la pantalla.
2 Pulse la tecla Agenda para saltarse el número de
teléfono.
1
76
HL_Sologic B901 eco.book Page 77 Friday, August 6, 2010 1:38 PM
Funcionamiento del terminal inalámbrico
3
4
5
ESC
Presionar la tecla Agenda para saltarse la fecha y la
hora.
Pulse la tecla arriba y abajo para desplazarse por la
lista.
Pulse la tecla Escape para salir de la lista de
llamadas.
Llamada a un número de la lista de llamadas
1 Pulse la tecla de lista de llamadas.
2 Desplácese por la lista de llamadas hasta que
aparezca el número de teléfono deseado.
3 Pulse la tecla de llamada para iniciar la llamada.
El número de teléfono se marca automáticamente.
4 Pulse la tecla de colgar para finalizar la llamada.
1
2
3
OK
4
OK
5
OK
OK
ESC 6
Pulse la tecla de lista de llamadas.
Desplácese por la lista de llamadas hasta que
aparezca el número de teléfono deseado.
Pulse la tecla Menú / Aceptar (OK).
Seleccione «BORRAR» (DELETE) para borrar el
número de teléfono actual y confirme la selección.
O
Seleccione «BORRAR TODO» (DELETE ALL)
para borrar todas las entradas de la agenda y
confirme la selección.
Pulse para confirmar o pulse la tecla Escape para
regresar.
77
Español
Eliminación de un número de la lista de llamadas
HL_Sologic B901 eco.book Page 78 Friday, August 6, 2010 1:38 PM
Transferencia de llamadas y
5 Transferencia de llamadas y llamadas internas de un
terminal a otro
5.1 Transferencia de llamadas y teleconferencia durante
una llamada externa
INT
4 5
G
H
I
J
K
L
6
M
N
O
INT
INT
Pulse la tecla INT seguida del número del terminal
(1-5, «0» para la estación base) durante una
llamada externa.
Sonará el otro terminal.
Si se ha establecido la llamada con el otro terminal,
puede hablar internamente. Cuando cuelgue, se
transferirá la llamada externa al otro terminal.
2 Mantenga pulsada la tecla INT durante
3 segundos. De esta forma, podrá hablar con el
segundo terminal y con la llamada externa al
mismo tiempo (teleconferencia).
3 Pulse de nuevo la tecla INT para volver a la
llamada externa.
4 Pulse la tecla de colgar para finalizar la llamada.
1
5.2 Llamada interna (función centralita)
Información Se pueden mantener conversaciones entre la
estación base y el terminal inalámbrico.
La estación base tiene «0» como número interno.
INT
4 5
G
H
I
78
J
K
L
6
M
N
O
Pulse la tecla INT seguida del número del terminal
(1-5, 0 para la estación base) en el modo en
espera.
La estación base o el terminal al que ha llamado
sonarán.
2 Pulse la tecla de llamada o descuelgue el auricular
en la estación base.
Ahora puede hablar internamente.
1
HL_Sologic B901 eco.book Page 79 Friday, August 6, 2010 1:38 PM
Komma igång
1 Komma igång
Tack för att du köpt den här TOPCOM-produkten. Denna produkt har
utformats och monterats med största omsorg om dig och om miljön.
Eftersom vi på TOPCOM är måna om vår planets framtid och våra
barn strävar vi efter att göra vårt bästa för att hjälpa till att rädda miljön.
Det är därför vi har beslutat att minska antalet sidor i våra
bruksanvisningar och produkthandböcker. Om du tänker på att det
behövs upp till 24 träd för att tillverka ett ton papper kostar det vår
planet en hel del träd för att publicera produkthandböcker på 11 språk.
I denna korta bruksanvisning som följer med din TOPCOM-enhet hittar
du en kort beskrivning av hur du installerar och använder din
TOPCOM-enhet.
Om du ändå vill upptäcka alla funktioner i din nya TOPCOM-enhet kan
du besöka vår webbplats (www.topcom.net) där du kan ladda ner den
fullständiga användarhandboken på ditt språk. TOPCOM hoppas på
detta sätt dra vårt strå till stacken för att göra vår planet till en bättre
plats, men vi kan bara lyckas med din hjälp!
2 De första stegen
2.1 Så här används bruksanvisningen
I den här bruksanvisningen används följande metod för att förtydliga
instruktionerna:
Text ....... „Display“.
Text som visas på telefonens display.
Knapp som ska tryckas ned.
Installera basenheten enligt följande anvisningar:
1 Anslut först adaptern till basenheten och sedan till ett uttag.
2 Anslut ena änden av telefonsladden till väggtelefonjacket och
den andra änden till uttaget på basenhetens nedre del.
3 Telefonen och strömkablarna ska anslutas på det sätt som visas
på bild 1.
2.3 Laddare till handenheten
1
Koppla adaptern till ett eluttag.
79
Svenska
2.2 Installera basenheten
HL_Sologic B901 eco.book Page 80 Friday, August 6, 2010 1:38 PM
De första stegen
2.4 Handenhet
1
2
3
4
Öppna batterifacket såsom visas på bild 2.
Sätt i de laddningsbara batterierna. Kontrollera att du sätter i
batterierna åt rätt håll (+ och -).
Stäng batterifacket.
Placera handenheten i laddaren och ladda den i 16 timmar.
Laddningslampan tänds.
2.5 Knappar/Display
Sladdlös handenhet
1.
2.
3.
4.
5.
6.
7.
8.
Återuppringning / upp
Telefonbok
Tyst / Radera
Lägg på
Knappsats (alfanumerisk)
Knapplås
Paus
Ringsignal på/av
9.
10.
11.
12.
13.
14.
Samtalslista / ner
Svara / handsfree / ring
Internt samtal /escape
Meny / OK / flash
Display
Röd lysdiod, blinkar
under samtalet
Basenhet
15.
16.
17.
18.
19.
20.
21.
22.
23.
24.
Escape
Meny / OK
Vänster
Återuppringning / upp
Höger
Display
Telefonbok
Samtalslista / flash
Ned
Snabbuppringning
(M1 - M2 - M3)
25. Handsfree
26. Knappsats (alfanumerisk)
27. Röd lysdiod på basenheten,
blinkar under ett samtal
80
28. Sökning / vidarekoppling /
internt samtal
29. Tyst / Radera
30. Volymkontroll
31. Högtalare
32. Hållare för väggmontering
33. Hållare: där du tillfälligt kan
placera mottagaren under
ett samtal när telefonen är
väggmonterad
Laddare
34. Lysdiod: handenheten
laddas.
HL_Sologic B901 eco.book Page 81 Friday, August 6, 2010 1:38 PM
De första stegen
2.6 Handenhet display
HANDENHET X
x = handenhetens
nummer
Andra nummer eller
bläddra åt vänster genom
menyn
Hitta eller skapa nya
poster i telefonboken
Andra nummer eller bläddra
åt höger genom menyn
Ringsignal av
Handsfreeläge på
Knapplås på
Nytt röstmeddelande
Samtal upprättat
Mikrofon avstängd
Nya nummer i
samtalslistan
Antennen anger
mottagningssignalens styrka.
Antennen blinkar när
handenheten är utom
räckvidd.
Internt samtal
Batteristatusindikator
2.7 Basenhet display
Andra nummer eller bläddra
åt vänster genom menyn
Andra nummer eller bläddra
åt höger genom menyn
Ringsignal av
Nytt röstmeddelande
04
Nummerplacering i
samtalslistan
Hitta eller skapa nya poster i
telefonboken
Handsfreeläge på
Samtal skapat
Mikrofon avstängd
Internt samtal
Svenska
CLIP Nya nummer i samtalslistan
Tid och datum
81
HL_Sologic B901 eco.book Page 82 Friday, August 6, 2010 1:38 PM
Använda telefonen
2.8 Navigera i menyn
Sologic B901 har ett menysystem som är lätt att använda. I varje meny
finns en lista med alternativ.
En sammanfattning av handenhetens och basenhetens menyer finns
nedan.
OK
1
2
OK
ESC
3
4
Tryck på knappen Meny/OK för att öppna
huvudmenyn.
Bläddra till önskat menyalternativ.
Tryck på Meny/OK för att visa fler alternativ eller för
att bekräfta den visade inställningen.
Tryck på Escape-knappen för att återgå till
föregående menyalternativ
2.9 Använda de alfanumeriska knapparna
Du kan använda de alfanumeriska knapparna för att skriva in text.
Tryck på en alfanumerisk knapp för att välja en bokstav 26 . Om du till
exempel trycker på knappen 5, visas först bokstaven "j" på displayen.
Tryck på knappen upprepade gånger för att välja någon av de andra
bokstäverna.
Tryck på knappen 2 en gång för att välja bokstaven a. Om du vill skriva
in bokstäverna "a" och "b" i följd, tryck först en gång på knappen 2 för
att välja bokstaven "a". Vänta 2 sekunder tills markören har flyttats till
nästa position. Tryck sedan på knappen 2 två gånger för att välja
bokstaven "b". Du kan använda knappen delete
29 för att radera
bokstäver som slagits in av misstag. Bokstaven framför markören
raderas.
Använd knappen Vänster/Höger
17 /
19 för att flytta markören.
3 Använda telefonen
Info
82
Det här avsnittet beskriver endast hur basenheten
fungerar! Information om användning av
handenheten finns i „4 Använda den sladdlösa
handenheten“.
HL_Sologic B901 eco.book Page 83 Friday, August 6, 2010 1:38 PM
Använda telefonen
3.1 Ställa in språk på displayen
1
OK
OK 2
3
4
OK
Tryck på Meny / OK.
Välj"SPRÅK" (LANGUAGE) och bekräfta.
Välj sedan språk.
Tryck på OK för att bekräfta.
3.2 Ställa in datum och tid
Info
Om nummerpresentationen (CLIP) är aktiverad på din
telefon och operatören sänder datum och tid, kommer
din klocka att ställas in automatiskt vid ett inkommande
samtal.
När du har ställt in tiden gäller den för alla handenheter
och registreras i basenheten.
1
OK
OK 2
OK 3
4 5 6
J
K
L
G
H
I
M
N
O
4 5 6
J
K
L
G
H
I
M
N
O
OK 4
OK 5
4 5 6
OK 6
OK 7
4 5 6
8
OK
9
4 5 6
J
K
L
G
H
I
J
K
L
G
H
I
J
K
L
G
H
I
M
N
O
M
N
O
M
N
O
Viktigt!
Tryck på Meny / OK.
Välj "TID" (TIME) och bekräfta.
Välj "DATUM/TID" (DATE/TIME) och bekräfta.
Ange år och bekräfta.
Ange månad och bekräfta.
Ange dag och bekräfta.
Ange timmar och bekräfta.
Ange minuter.
Tryck på OK för att bekräfta.
Datum och tid måste ställas in igen efter
strömavbrott i basenheten.
3.3 Ställa in tidsformatet
OK 2
OK 3
4
OK
Tryck på knappen Meny / OK.
Välj "TID" (TIME) och bekräfta.
Välj "TIDSFORMAT" (FORMAT) och bekräfta.
Välj tidsformat t.ex. "24 T" (24 HOUR) eller
"12 T" (12 HOUR) och bekräfta.
Svenska
1
OK
83
HL_Sologic B901 eco.book Page 84 Friday, August 6, 2010 1:38 PM
Använda telefonen
3.4 Utgående samtal
Ringa ett samtal
1 Lyft på luren eller tryck på handsfreeknappen.
2 Ange telefonnumret.
4 5 6
3 Lägg på luren eller tryck på handsfreeknappen igen
för att avsluta samtalet.
ELLER
1 Ange telefonnumret.
4 5 6
2 Lyft på luren eller tryck på handsfreeknappen.
3 Lägg på luren eller tryck på handsfreeknappen igen
för att avsluta samtalet.
G
H
I
J
K
L
M
N
O
G
H
I
J
K
L
M
N
O
Ring upp det senast uppringda telefonnumret
1 Lyft på luren eller tryck på handsfreeknappen.
2 Tryck på återuppringningsknappen.
Det senast uppringda telefonnumret rings upp
automatiskt.
Återuppringning av ett av de 3 senast slagna telefonnumren
1 Tryck på återuppringningsknappen.
2 Välj ett av de 3 senast slagna numren.
3 Lyft på luren eller tryck på handsfreeknappen.
Ringa ett nummer ur telefonboken
1 Tryck på telefonboksknappen.
4 5 6 2 Bläddra fram till önskat namn eller skriv in de första
bokstäverna i namnet.
3 Tryck på knappen Meny/OK för att visa
telefonnumret.
OK
4 Lyft på luren eller tryck på handsfreeknappen.
Telefonnumret rings upp automatiskt.
G
H
I
J
K
L
M
N
O
3.5 Aktivera/inaktivera handsfree-läget
Du kan använda denna funktion för att svara på ett samtal utan att
behöva lyfta på luren eller om luren redan har lyfts.
1 Tryck på handsfreeknappen för att aktivera
funktionen.
84
HL_Sologic B901 eco.book Page 85 Friday, August 6, 2010 1:38 PM
Använda telefonen
2
Tryck på handsfreeknappen igen för att koppla
tillbaka samtalet till luren.
3.6 Telefonbok
50 telefonnummer och namn kan lagras i telefonboken. Namn kan
vara upp till 16 tecken långa och nummer upp till 24 siffror.
Lägga till ett nytt namn och nummer
1 Tryck på telefonboksknappen.
2 Tryck på OK.
OK
OK 3 Välj "NY" (NEW ENTRY) och bekräfta.
4 5 6 OK 4 Ange namnet och bekräfta.
4 5 6 OK 5 Skriv in telefonnumret och bekräfta.
6 En bekräftelseton hörs nu.
G
H
I
J
K
L
M
N
O
G
H
I
J
K
L
M
N
O
Redigera namn och telefonnummer
1 Tryck på telefonboksknappen.
2 Välj namn med hjälp av upp- och nedknapparna.
ELLER
Ange den första bokstaven i namnet.
3 Tryck på OK.
OK
OK 4 Välj "REDIGERA" (EDIT ENTRY) och bekräfta.
DEL
5 Tryck på delete för att radera bokstäverna.
4 5 6 OK 6 Ange namnet och bekräfta.
4 5 6 OK 7 Skriv in telefonnumret och bekräfta.
8 En bekräftelseton hörs nu.
G
H
I
J
K
L
M
N
O
G
H
I
J
K
L
M
N
O
Radera en eller alla poster i telefonboken
1 Tryck på telefonboksknappen.
2 Välj namn med hjälp av upp- och nedknapparna.
ELLER
Ange den första bokstaven i namnet.
4 5 6
3 Tryck på OK.
OK
4 Välj "RADERA" (DELETE ENTRY) eller
"RADERA ALLA"(DELETE ALL) och bekräfta.
OK
ESC 5 Tryck på OK för att bekräfta eller tryck på EscapeOK
knappen för att gå tillbaka.
J
K
L
M
N
O
85
Svenska
G
H
I
HL_Sologic B901 eco.book Page 86 Friday, August 6, 2010 1:38 PM
Använda telefonen
3.7 Snabbuppringningsknappar
Du kan lagra 3 snabbnummer M1, M2 och M3 (upp till 24 siffror) i
basenheten.
Spara snabbnummer (M1-M2-M3)
M1-M2-M3 1 Tryck på en av snabbknapparna.
2 Tryck på OK.
OK
OK 3 Välj "NY" (NEW ENTRY) och bekräfta.
4 5 6 OK 4 Ange namnet och bekräfta.
4 5 6 OK 5 Skriv in telefonnumret och bekräfta.
En bekräftelseton hörs nu.
G
H
I
J
K
L
M
N
O
G
H
I
J
K
L
M
N
O
Ring ett snabbnummer
1 Lyft på luren eller tryck på handsfreeknappen.
M1-M2-M3 2 Tryck på snabbknappen.
Telefonnumret rings upp automatiskt.
3 Lägg på luren eller tryck på handsfreeknappen igen
för att avsluta samtalet.
3.8 Samtalslistan
Inkommande samtal lagras i en samtalslista (max. 30 nummer) i
basenheten och i handenheterna.
Antalet missade samtal visas med "X MISSADE" (X MISSED)
(X = antalet missade samtal) och den blinkade CLIP-symbolen. Tryck
på samtalslisteknappen
för att visa det senaste samtalet.
Viktigt!
Nummerpresentation (CLIP) är endast tillgänglig
om den har aktiverats på din linje. Kontakta din
telefonoperatör för mer information.
Telefonnumret och namnet på den senaste uppringaren visas på
displayen. Om telefonnumret är längre än 12 siffror kan du trycka på
knappen för att se resten av siffrorna. Om samtalslistan är tom,
visas ordet "TOM" (EMPTY) på displayen.
Datum och tid för det inkomna samtalet visas i det övre högra hörnet,
för varje samtal.
1 Tryck på upp- och nedknapparna för att bläddra
genom listan.
86
HL_Sologic B901 eco.book Page 87 Friday, August 6, 2010 1:38 PM
Använda den sladdlösa handenheten
Turordningen på samtalet i samtalslistan visas vid
sidan av CLIP-symbolen.
2 Tryck på Vänster och Höger för att visa namn eller
nummer.
Info
Telefonen återgår till vänteläge om du inte trycker
på upp- eller nedknappen
inom 15 sekunder.
När ett samtal har tagits emot, visas uppringarens
nummer på displayen i 5-8 sekunder efter den sista
signalen.
Ringa ett nummer i samtalslistan
1
2
3
Tryck på samtalslisteknappen.
Tryck på upp- och nedknapparna för att bläddra
genom listan.
Lyft luren eller tryck på handsfreeknappen igen för
att ringa samtalet.
3.9 Ringa ett internt samtal till en handenhet eller
vidarekoppla ett samtal till den sladdlösa handenheten
1
4 5 6
G
H
I
J
K
L
M
N
O
2
3
4
Hål knappen INT nedtryckt 28 i 3 sekunder tills du
hör en ljudsignal, släpp sedan knappen. "INT"
visas på displayen.
Ange numret på handenheten. När samtalet har
kopplats till handenheten, kan ni prata internt.
Lägg på luren för att koppla samtalet till den
sladdlösa handenheten.
ELLER
Håll knappen INT nedtryckt 28 i 3 sekunder för att
påbörja ett konferenssamtal.
4 Använda den sladdlösa handenheten
Info
Det här avsnittet beskriver hur den sladdlösa
handenheten fungerar! Information om användning
av basenheten finns i „3 Använda telefonen“.
87
Svenska
Du kan vidarekoppla ett samtal från basenheten till handenheten eller
tala i den externa mottagaren och ytterligare en mottagare på den
sladdlösa handenheten på samma gång (konferenssamtal).
HL_Sologic B901 eco.book Page 88 Friday, August 6, 2010 1:38 PM
Använda den sladdlösa
4.1 Byta språk
OK
1
OK 2
OK 3
OK 4
5
ESC
Tryck på knappen Meny / OK.
Välj "HANDENHET" (HANDSET) och bekräfta.
Välj "SPRÅK" (LANGUAGE) och bekräfta.
Välj önskat språk och bekräfta.
Tryck på Escape-knappen för att återgå till
vänteläge.
4.2 Utgående samtal
Ringa ett samtal
1 Tryck på Ring-knappen.
2 Ange telefonnumret.
4 5 6
3 Tryck på knappen "lägg på" för att avsluta
samtalet.
G
H
I
J
K
L
M
N
O
Samtalsförberedelse
1 Ange telefonnumret.
4 5 6
Skriver du fel kan du rätta till numret genom att
trycka på tyst-knappen (mute).
Om du inte trycker på någon knapp inom 10
sekunder, försvinner numret och handenheten
återgår automatiskt till vänteläge.
2 Tryck på Ring-knappen.
Telefonnumret rings upp automatiskt.
3 Tryck på knappen "lägg på" för att avsluta
samtalet.
G
H
I
J
K
L
M
N
O
Ring upp det senast uppringda telefonnumret
Tryck på Ring-knappen.
2 Tryck på återuppringningsknappen.
Det senast uppringda telefonnumret rings upp
automatiskt.
3 Tryck på knappen "lägg på" för att avsluta
samtalet.
1
88
HL_Sologic B901 eco.book Page 89 Friday, August 6, 2010 1:38 PM
Använda den sladdlösa handenheten
4.3 Inkommande samtal
När ett inkommande samtal mottags, ringer handenheten och
basenheten och lampan "Visuell ringsignal" (Visual call signal) (se
punkt 14 på bild 3 och punkt 27 på bild 4) blinkar på handenheten och
basenheten.
1
2
Tryck på Svara-knappen för att besvara samtalet.
Tryck på knappen "lägg på" för att avsluta
samtalet.
4.4 Aktivera/inaktivera handsfree-läget
Under samtalet:
1
2
Tryck på handsfreeknappen för att aktivera
funktionen.
Tryck på handsfreeknappen igen för att koppla
tillbaka samtalet till handenheten.
4.5 Knapplås
När knappsatsen är låst händer ingenting om du trycker på någon
knapp i vänteläget (förutom om du håller knappen för knapplås
nedtryckt).
1 Tryck på och håll ned knapplåsknappen.
Symbolen visas på displayen.
2 Tryck på knapplåsknappen igen för att inaktivera
knapplåset.
När knapplåset är aktiverat kan du fortfarande svara
på ett inkommande samtal genom att trycka på
Svara-knappen . Knappsatsen fungerar som vanligt
under samtalet. Knapplåset aktiveras igen efter
samtalet.
4.6 Telefonbok
G
H
I
J
K
L
Svenska
Du kan lagra 50 poster i telefonboken. Namn kan vara upp till 16
tecken långa och telefonnummer upp till 24 siffror långa.
Lägga till en telefonbokspost
1 Tryck på telefonboksknappen.
OK 2 Tryck på knappen OK två gånger.
OK
4 5 6 OK 3 Ange namnet och bekräfta.
M
N
O
89
HL_Sologic B901 eco.book Page 90 Friday, August 6, 2010 1:38 PM
Använda den sladdlösa
Skriv in det önskade telefonnumret och bekräfta.
En bekräftelseton hörs nu.
OK 4
4 5 6
G
H
I
J
K
L
M
N
O
Ring ett snabbnummer
1 Tryck på telefonboksknappen.
2 Bläddra fram önskat namn eller skriv in de första
bokstäverna i namnet.
4 5 6
3 Tryck på knappen Meny/OK för att visa
telefonnumret.
4 Tryck sedan på Ring-knappen.
Telefonnumret rings upp automatiskt.
5 Tryck på knappen "lägg på" för att avsluta samtalet.
G
H
I
J
K
L
M
N
O
Redigera en telefonbokspost
1 Tryck på telefonboksknappen.
2 Bläddra fram till önskat namn eller skriv in de första
bokstäverna i namnet.
4 5 6
3 Tryck på telefonboksknappen för att visa
telefonnumret.
4 Tryck på knappen Meny / OK.
OK
OK 5 Välj "REDIGERA" (EDIT ENTRY) och bekräfta.
4 5 6 OK 6 Ange namnet och bekräfta.
4 5 6 OK 7 Ange eller redigera telefonnumret och bekräfta.
G
H
I
G
H
I
J
K
L
M
N
O
G
H
I
J
K
L
M
N
O
J
K
L
M
N
O
4.7 Nummerpresentation(CLIP)
Sologic B901 visar de inkommande samtalens telefonnummer. Denna
funktion kan endast användas om du har registrerats för tjänsten hos
din telefonleverantör. Kontakta din telefonleverantör för mer
information.
När du tar emot ett samtal sparas telefonnumret i en samtalslista.
Listan kan innehålla upp till 30 nummer (vart och ett med max 23
siffror).
Om telefonnumret är längre än 12 siffror kan du
bläddra till höger på displayen för att se resten av
siffrorna.
90
HL_Sologic B901 eco.book Page 91 Friday, August 6, 2010 1:38 PM
Använda den sladdlösa handenheten
Nya samtal
När det finns ett nytt obesvarat samtal i samtalslistan
kommer symbolen CLIP att blinka på displayen.
Öppna samtalslistan
Tryck på samtalslisteknappen.
Det senast mottagna samtalet visas. Om
samtalslistan är tom, visas ordet "TOM" (EMPTY) på
displayen.
2 Tryck på telefonboksknappen för att hoppa över
numret.
3 Tryck på telefonboksknappen för att hoppa över
datum och tid.
4 Tryck på upp- och nedknapparna för att bläddra
genom listan.
5 Tryck på Escape-knappen för att lämna
samtalslistan.
1
ESC
Ringa ett nummer i samtalslistan
1 Tryck på samtalslisteknappen.
2 Bläddra genom samtalslistan tills det önskade
telefonnumret visas.
3 Tryck på Svara-knappen för påbörja samtalet.
Telefonnumret rings upp automatiskt.
4 Tryck på knappen "lägg på" för att avsluta
samtalet.
Svenska
Radera ett nummer från samtalslistan
1 Tryck på samtalslisteknappen.
2 Bläddra genom samtalslistan tills det önskade
telefonnumret visas.
3 Tryck på knappen Meny / OK.
OK
4 Välj "RADERA" (DELETE) för att radera det
aktuella numret.
OK
ELLER
5 Välj "RADERA ALLA" (DELETE ALL) för att
radera alla telefonboksposter och bekräfta.
OK
91
HL_Sologic B901 eco.book Page 92 Friday, August 6, 2010 1:38 PM
Vidarekoppla och ringa interna
ESC 6
OK
Tryck för att bekräfta eller Escape-knappen för att
gå tillbaka.
5 Vidarekoppla och ringa interna samtal från en
handenhet till en annan.
5.1 Vidarekoppling och konferenssamtal under ett externt
samtal
4 5 6
G
H
I
Under ett externt samtal trycker du på INTknappen och sedan handenhetens nummer (1-5,
välj "0" för basenheten).
Den andra handenheten börjar nu att ringa.
Om samtalet har kopplats till handenheten, kan ni
prata internt. När du lägger på kommer det externa
samtalet att vidarekopplas till den andra
handenheten.
2 Håll knappen INT nedtryckt i 3 sekunder. Nu kan
du tala med den andra handenheten och den
externa linjen samtidigt (konferenssamtal).
3 Tryck på INT-knappen igen för att återgå till det
externa samtalet.
4 Tryck på knappen "lägg på" för att avsluta
samtalet.
1
INT
J
K
L
M
N
O
INT
INT
5.2 Internt samtal (intercom-funktion)
Info
INT
92
I vänteläge, tryck på INT-knappen och sedan
numret på handenheten (1-5, välj "0" för
basenheten).
Handenheten eller basenheten som du har ringt upp
ringer nu.
2 Tryck på Ring-knappen eller ta upp luren på
basenheten.
Nu kan du tala internt.
1
4 5 6
G
H
I
Du kan föra ett samtal mellan basenheten och den
sladdlösa handenheten.
basenheten har internnumret "0".
J
K
L
M
N
O
HL_Sologic B901 eco.book Page 93 Friday, August 6, 2010 1:38 PM
Inizializzazionei
Grazie per aver acquistato questo prodotto TOPCOM. Questo
prodotto è stato ideato e fabbricato con la massima cura per l’utente e
l’ambiente. Poiché a noi di TOPCOM ci piace pensare al futuro del
nostro pianeta e dei nostri bambini, cerchiamo di fare del nostro meglio
per contribuire a salvare l’ambiente.Ecco perché abbiamo deciso di
ridurre il numero di pagine delle nostre guide e dei manuali sui prodotti.
Se pensate che occorrono fino a 24 alberi per produrre 1 tonnellata di
carta, la pubblicazione di manuali sui prodotti in 21 lingue costa al
nostro pianeta moltissimi alberi. In questo piccolo manuale fornito
insieme al prodotto TOPCOM, potete trovare una breve spiegazione di
come installare e usare il vostro prodotto TOPCOM. Se desiderate
scoprire ancora tutte le caratteristiche del vostro nuovo prodotto
TOPCOM, visitate il nostro sito web (www.topcom.net) dove potete
scaricare il manuale dell’utente completo nella vostra lingua. Così
facendo, TOPCOM spera di contribuire a rendere il nostro pianeta un
posto migliore, ma possiamo riuscirci soltanto con il vostro aiuto!
2 Operazioni iniziali
2.1 Utilizzo delle presenti istruzioni d'uso
Nelle presenti istruzioni d'uso le indicazioni vengono spiegate come
illustrato di seguito:
Testo ....... „Display“.
Testo che appare sul display
Tasto da premere
2.2 Installazione della stazione di base
Installare la stazione di base come indicato di seguito:
1 Collegare l'adattatore di rete prima alla stazione di base e
successivamente ad una presa.
2 Collegare un'estremità del cavo telefonico alla presa telefonica
a parete e l'altra estremità alla presa sul lato posteriore della
stazione di base.
3 Collegare il cavo telefonico e il cavo elettrico come illustrato
nell'immagine 1.
93
Italiano
1 Inizializzazionei
HL_Sologic B901 eco.book Page 94 Friday, August 6, 2010 1:38 PM
Operazioni iniziali
2.3 Stazione di ricarica del portatile
1
Inserire l'adatattore di rete nella presa.
2.4 Portatile
1
2
3
4
Aprire il vano batterie come illustrato nell'immagine 2.
Inserire le batterie. Prestare attenzione alla corretta polarità
(+ e -).
Chiudere il vano batterie.
Lasciare il portatile in carica nella stazione per 16 ore. Il LED di
ricarica sulla stazione di ricarica si accende.
2.5 Tasti/display
Telefono portatile
1. Ripetizione di chiamata /
freccia in alto
2. Rubrica del telefono
3. Disattiva microfono /
Elimina
4. Riaggancia
5. Tasti alfanumerici
6. Blocco tastiera
7. Pausa
8. Suoneria ACCESA/SPENTA
9. Registro chiamate / Freccia in
basso
10.Accetta chiamata / Vivavoce /
Tasto chiamata
11. INT / Escape
12.Menu / OK / Tasto R
13.Display
14. LED rosso; lampeggia durante
una chiamata
Stazione di base
27.LED rosso sulla stazione di base;
lampeggia durante una chiamata
28.Paging/Deviazione chiamata/
Chiamata interna
29.Disattiva microfono / Elimina
30.Regolazione volume
31.Altoparlante
32.Supporto ricevitore per
montaggio a parete
33.Gancio: Per riporre brevemente il
ricevitore durante una
conversazione in caso di
montaggio a parete.
15.Escape
16.Menu /OK
17.Freccia in alto
18.Ripetizione di selezione /
Freccia in alto
19.Freccia a destra
20.Display
21.Rubrica del telefono
22.Registro chiamate /Tasto R
23.Freccia in basso
24.Tasti di selezione rapida
(M1-M2-M3)
25.Vivavoce
26.Tasti alfanumerici
94
Stazione di ricarica
34.LED: Il portatile è in ricarica
HL_Sologic B901 eco.book Page 95 Friday, August 6, 2010 1:38 PM
Operazioni iniziali
Italiano
2.6 Display del portatile
PORTATILE X
x = numero del portatile
Scorri a sinistra per
visualizzare gli altri
numeri o il menu
Cerca o crea voci della
rubrica telefonica
Scorri a destra per
visualizzare gli altri numeri
o il menu
Visualizzazione livello di
batteria
Suoneria disattivata
Vivavoce attivo
Blocco tastiera attivo
Nuovo messaggio vocale
Connesso
Microfono disattivato
Nuovi numeri nel
registro chiamate
L'antenna mostra la
potenza del segnale di
ricezione. L'antenna
lampeggia quando il
portatile si trova fuori dalla
portata.
Chiamata interna
2.7 Display della stazione di base
CLIP
Scorri a sinistra per
visualizzare gli altri numeri
o il menu
Scorri a destra per
visualizzare gli altri numeri
o il menu
Suoneria disattivata
Nuovo messaggio vocale
Nuovi numeri nel registro
chiamate
04
Numero di posizione del
registro chiamate
95
HL_Sologic B901 eco.book Page 96 Friday, August 6, 2010 1:38 PM
Operazioni iniziali
Cerca o crea voci della
rubrica telefonica
Vivavoce attivo
Connesso
Microfono disattivato
Chiamata interna
Ora e
data
2.8 Navigazione menu
Il telefono Sologic B901 dispone di una struttura menu di semplice
utilizzo. Ogni menu è composto da una serie di opzioni.
Di seguito è illustrata una panoramica dei menu del portatile e della
base.
OK
1
2
OK
ESC
3
4
Per aprire il menu principale premere menu/tasto
OK.
Scorrere fino all'opzione menu desiderata.
Premere menu/tasto OK per richiamare altre
opzioni oppure per confermare le impostazioni
visualizzate.
Per tornare al livello precedente del menu premere
il tasto Escape .
2.9 Utilizzo della tastiera alfanumerica
Attraverso i tasti alfanumerici è possibile digitare un testo. Per
selezionare una lettera premere il tasto alfanumerico
corrispondente 26 . Ad es. premendo il tasto alfanumerico 5, sul
display appare la prima lettera „j“. Premendo ripetutamente
selezionare le altre lettere di questo tasto. Premere una volta il tasto 2
per selezionare la lettera „a“. Per inserire consecutivamente le lettere
„a“ e „b“, premere prima una sola volta il tasto 2 per selezionare „a“.
Attendere 2 secondi fino a che il cursore si sia spostato nella posizione
successiva e ora premere due volte il tasto 2 per selezionare „b“. E'
possibile eliminare le lettere inserite erroneamente con il tasto di
cancellazione
29 . Il carattere che precede il cursore viene
cancellato. Muovere il cursore con il tasto freccia a sinistra / freccia a
17 /
19 .
destra
96
HL_Sologic B901 eco.book Page 97 Friday, August 6, 2010 1:38 PM
Utilizzo del telefono
Info
Italiano
3 Utilizzo del telefono
Questo paragrafo descrive il funzionamento della
stazione di base! Per informazioni relative al
funzionamento del portatile leggere il capitolo „4
Utilizzo del telefono portatile senza fili“.
3.1 Impostazione della lingua del display
1
OK
2
OK
3
4
OK
Premere menu/tasto OK.
Selezionare „LINGUA“ (LANGUAGE) e
confermare.
Ora selezionare la lingua desiderata.
Permere OK per confermare.
3.2 Impostazione data e ora
Info
Se è attivo il riconoscimento di chiamata (CLIP) per
la propria linea telefonica e l'operatore trasmette
data e ora, l'ora viene automaticamente impostata al
momento della ricezione di una chiamata.
Dopo essere stata impostata l'ora viene
automaticamente registrata in tutti i portatili della
stazione di base.
1
OK
OK 2
3
OK
4 5 6
G
H
I
J
K
L
M
N
O
4 5 6
G
H
I
J
K
L
M
N
O
OK 4
OK 5
4 5 6
OK 6
OK 7
4 5 6
8
OK
9
4 5 6
G
H
I
G
H
I
G
H
I
J
K
L
J
K
L
J
K
L
M
N
O
M
N
O
M
N
O
Premere menu/tasto OK.
Selezionare„ORA“ (TIME) e confermare.
Selezionare„DATA/ORA“ (DATE TIME) e
confermare.
Inserire l'anno e confermare.
Inserire il mese e confermare.
Inserire il giorno e confermare.
Inserire l'ora e confermare.
Inserire i minuti.
Permere OK per confermare.
Importante In caso di mancanza di corrente nella stazione di
base la data e l'ora vanno perse.
97
HL_Sologic B901 eco.book Page 98 Friday, August 6, 2010 1:38 PM
Utilizzo del telefono
3.3 Impostazione del formato dell'ora
1
OK
OK 2
3
OK
4
OK
Premere menu/tasto OK.
Selezionare„ORA“ (TIME) e confermare.
Selezionare„FORMATO“ (FORMAT) e
confermare.
Selezionare il formato dell'ora „24 ORE“ o
„12ORE“ e confermare.
3.4 Chiamate in uscita
Effettuare una telefonata
Sollevare il ricevitore o premere il tasto vivavoce.
2 Inserire il numero di telefono.
3 Riagganciare il ricevitore o premere nuovamente il
tasto vivavoce per terminare la conversazione.
OPPURE
1 Inserire il numero di telefono.
2 Sollevare il ricevitore o premere il tasto vivavoce.
3 Riagganciare il ricevitore o premere nuovamente il
tasto vivavoce per terminare la conversazione.
1
4 5 6
G
H
I
J
K
L
M
N
O
4 5 6
G
H
I
J
K
L
M
N
O
Selezionare l'ultimo numero chiamato
1 Sollevare il ricevitore o premere il tasto vivavoce.
2 Premere il tasto di ripetizione di chiamata.
L'ultimo numero chiamato viene selezionato
automaticamente.
Selezionare uno degli ultimi 3 numeri chiamati
1 Premere il tasto di ripetizione di chiamata.
2 Selezionare uno degli ultimi 3 numeri chiamati.
3 Sollevare il ricevitore o premere il tasto vivavoce.
Chiamare un numero della rubrica del telefono
1 Premere il tasto rubrica del telefono.
4 5 6 2 Scorrere fino al nome desiderato oppure inserire la
prima lettera del nome.
G
H
I
98
J
K
L
M
N
O
HL_Sologic B901 eco.book Page 99 Friday, August 6, 2010 1:38 PM
Utilizzo del telefono
Premere menu/tasto OK per visualizzare il numero
di telefono.
4 Sollevare il ricevitore o premere il tasto vivavoce.
Il numero telefonico viene selezionato
automaticamente.
OK
3.5 Attivazione/disatttivazione della modalità vivavoce
Questa funzione permette di accettare una chiamata senza dover
sollevare il ricevitore oppure se il ricevitore è già stato sollevato.
1 Premere il tasto vivavoce per attivare la funzione.
2 Premere nuovamente il tasto vivavoce per
riattivare la conversazione sul ricevitore.
3.6 Rubrica del telefono
Nella rubrica del telefono è possibile memorizzare fino a 50 numeri
telefonici e nomi. I nomi possono avere una lunghezza di 16 caratteri
e i numeri possono essere lunghi fino a 24 cifre.
Aggiungere nuovi nomi e numeri di telefono
1 Premere il tasto rubrica del telefono.
2 Premere OK.
OK
3 Selezionare„NUOVO“ (NEW ENTRY) e
confermare.
OK
4 5 6 OK 4 Inserire il nome e confermare.
4 5 6 OK 5 Inserire il numero di telefono e confermare.
6 Ora l'apparecchio emette un tono di conferma.
G
H
I
J
K
L
M
N
O
G
H
I
J
K
L
M
N
O
Modificare nome e numero di telefono
1 Premere il tasto rubrica del telefono.
2 Selezionare il nome spostandosi con la freccia in
alto e la freccia in basso.
OPPURE
Inserire la prima lettera del nome.
3 Premere OK.
OK
4 Selezionare „EDIT ENTRY“ (EDIT ENTRY) e
confermare.
OK
99
Italiano
3
HL_Sologic B901 eco.book Page 100 Friday, August 6, 2010 1:38 PM
Utilizzo del telefono
DEL
5
4 5 6
G
H
I
J
K
L
M
N
O
4 5 6
G
H
I
J
K
L
M
N
O
OK 6
OK 7
8
Per eliminare le lettere premere il tasto di
cancellazione.
Inserire il nome e confermare.
Inserire il numero di telefono e confermare.
Ora l'apparecchio emette un tono di conferma.
Cancellare una o tutte le voci della rubrica del telefono
1 Premere il tasto rubrica del telefono.
2 Selezionare il nome spostandosi con la freccia in
alto e la freccia in basso.
OPPURE
Inserire la prima lettera del nome.
4 5 6
3 Premere OK.
OK
4 Selezionare„DELETE ENTRY“ (DELETE ENTRY)
oppure „CANC TUTTI“ (DELETE ALL) e
confermare.
OK
5 Per confermare premere OK oppure premere il
ESC
OK
tasto Escape per tornare indietro.
G
H
I
J
K
L
M
N
O
3.7 Tasti di selezione rapida
E' possibile memorizzare nella stazione di base 3 numeri di selezione
rapida diretta M1, M2 e M3 (ogni numero può avere al massimo
24 cifre).
Memorizzare il numero di selezione rapida (da M1 fino a M3)
M1-M2-M3 1 Premere uno dei tasti di selezione diretta.
2 Premere OK.
OK
3 Selezionare„NUOVO“ (NEW ENTRY) e
confermare.
OK
4 5 6 OK 4 Inserire il nome e confermare.
4 5 6 OK 5 Inserire il numero di telefono e confermare.
Ora l'apparecchio emette un tono di conferma.
G
H
I
J
K
L
M
N
O
G
H
I
J
K
L
M
N
O
Selezionare un numero di selezione rapida
1 Sollevare il ricevitore o premere il tasto vivavoce.
M1-M2-M3 2 Premere il tasto di selezione rapida.
100
HL_Sologic B901 eco.book Page 101 Friday, August 6, 2010 1:38 PM
Il numero telefonico viene selezionato
automaticamente.
3 Riagganciare il ricevitore o premere nuovamente il
tasto vivavoce per terminare la conversazione.
3.8 Registro chiamate
Le chiamate ricevute vengono memorizzate singolarmente nel registro
chiamate (max. 30 numeri) della stazione di base e dei portatili.
Il numero delle chiamate perse viene visualizzato con il messaggio „X
PERSE“ (X MISSED) (X = numero delle chiamate perse) e con il
simbolo CLIP lampeggiante. Premere brevemente il tasto del registro
chiamate
, per visualizzare l'ultima chiamata.
Importante Il servizio di "visualizzazione numeri chiamanti
(CLIP)" è disponibile soltanto se abilitato sulla
propria linea telefonica. Per maggiori informazioni
a riguardo rivolgersi al proprio operatore di rete.
Sul display viene visualizzato il numero di telefono e il nome dell'ultimo
chiamante. Se il numero di telefono è più lungo di 12 cifre, premere il
tasto per visualizzare le ultime cifre. Se il registro chiamate è vuoto,
sul display appare il messaggio „VUOTO“ (EMPTY).
La data e l'ora di ogni chiamata ricevuta vengono visualizzate in alto a
destra.
1 Premere il tasto freccia in alto o freccia in basso per
scorrere l'elenco.
Vicino al simbolo CLIP appare il numero di posizione
della chiamata all'interno del registro chiamate.
2 Premere il tasto freccia a sinistra o freccia a destra
per visualizzare il nome o il numero.
Info
Se per
15 secondi non viene premuto il tasto
freccia in alto o freccia in basso, il telefono torna alla
modalità standby.
Al termine di una chiamata il numero chiamante
rimane visualizzato sul display per circa 5-8 secondi
dopo l'ultimo squillo.
101
Italiano
Utilizzo del telefono
HL_Sologic B901 eco.book Page 102 Friday, August 6, 2010 1:38 PM
Utilizzo del telefono portatile
Chiamata di un numero del registro chiamate
1 Premere il tasto del registro chiamate.
2 Premere il tasto freccia in alto o freccia in basso per
scorrere l'elenco.
3 Sollevare il ricevitore o premere il tasto vivavoce
per iniziare la conversazione.
3.9 Chiamata interna di un portatile e inoltro chiamata al
telefono portatile
E' possibile inoltrare una chiamata dalla stazione di base al portatile
oppure parlare contemporaneamente con l'interlocutore esterno e un
secondo interlocutore al telefono portatile (conferenza telefonica):
1
2
4 5 6
G
H
I
J
K
L
M
N
O
3
4
Tenere premuto il tasto di chiamata interna per 28
3 secondi fino al segnale acustico e
successivamente lasciare il tasto. Sul display
appare il messaggio „INTERNO“ (INT).
Inserire il numero del portatile. Una volta stabilita la
comunicazione con il portatile, si può iniziare la
conversazione interna.
Riagganciare il ricevitore per trasmettere la
conversazione al telefono portatile.
OPPURE
Tenere premuto il tasto di chiamata interna per 28
3 secondi per avviare una conferenza telefonica.
4 Utilizzo del telefono portatile senza fili
Info
Questo paragrafo descrive il funzionamento del
telefono portatile! Per informazioni relative al
funzionamento della stazione di base leggere il
capitolo „3 Utilizzo del telefono“.
4.1 Modifica della lingua
1
OK
2
OK
3
OK
102
Premere menu/tasto OK.
Selezionare„PORTATILE“ (HANDSET) e
confermare.
Selezionare „LINGUA“ (LANGUAGE) e
confermare.
HL_Sologic B901 eco.book Page 103 Friday, August 6, 2010 1:38 PM
4
OK
5
ESC
Selezionare la lingua desiderata e confermare la
selezione.
Premere il tasto Esc per tornare alla modalità
standby.
4.2 Chiamate in uscita
Effettuare una telefonata
1 Premere il tasto di chiamata.
2 Inserire il numero di telefono.
4 5 6
3 Premere il tasto di fine chiamata per terminare la
conversazione.
G
H
I
J
K
L
M
N
O
Preselezione
4 5 6
G
H
I
J
K
L
M
N
O
Inserire il numero di telefono.
E' possibile correggere un numero errato con il tasto
di disattivazione microfono.
Se per 10 secondi non viene premuto alcun tasto, il
numero scompare e il portatile torna
automaticamente alla modalità standby.
2 Premere il tasto di chiamata.
Il numero telefonico viene selezionato
automaticamente.
3 Premere il tasto di fine chiamata per terminare la
conversazione.
1
Selezionare l'ultimo numero chiamato
Premere il tasto di chiamata.
2 Premere il tasto di ripetizione di selezione.
L'ultimo numero chiamato viene selezionato
automaticamente.
3 Premere il tasto di fine chiamata per terminare la
conversazione.
1
4.3 Chiamate in arrivo
Durante una chiamata in arrivo il portatile e la stazione di base
suonano, inoltre sul portatile e sulla stazione di base lampeggia il LED
103
Italiano
Utilizzo del telefono portatile senza fili
HL_Sologic B901 eco.book Page 104 Friday, August 6, 2010 1:38 PM
Utilizzo del telefono portatile
„Segnale visivo di chiamata“ (vedi punto 14 nell'immagine 3 e
punto 27 nell'immagine 4) .
1
2
Premere il tasto di accettazione di chiamata per
iniziare la conversazione.
Premere il tasto di fine chiamata per terminare la
conversazione.
4.4 Attivazione/disattivazione della modalità vivavoce
Durante la conversazione:
1
2
Premere il tasto vivavoce per attivare la funzione.
Premere nuovamente il tasto vivavoce per
riattivare la conversazione sul portatile.
4.5 Blocco tastiera
Quando il blocco tastiera è attivato, i tasti in modalità standby non
hanno alcuna funzione (ad eccezione del tasto di blocco tastiera).
1 Tenere premuto il tasto di blocco tastiera.
Sul display appare questo simbolo.
2 Premere nuovamente il tasto di blocco tastiera per
disattivare il blocco tastiera.
Con il blocco tastiera attivato è comunque possibile
accettare le chiamate in arrivo, premendo il tasto di
accettazione chiamata . Durante la conversazione la
tastiera funziona normalmente. Al termine della
conversazione il blocco tastiera si attiva nuovamente.
4.6 Rubrica del telefono
E' possibile memorizzare fino a 50 voci nella rubrica del telefono. I
nomi possono avere una lunghezza di 16 caratteri e i numeri possono
essere lunghi fino a 24 cifre.
104
HL_Sologic B901 eco.book Page 105 Friday, August 6, 2010 1:38 PM
Utilizzo del telefono portatile senza fili
G
H
I
J
K
L
M
N
O
G
H
I
J
K
L
M
N
O
Italiano
Aggiungere una voce nella rubrica telefonica
1 Premere il tasto rubrica del telefono.
OK 2 Premere due volte il tasto OK .
OK
4 5 6 OK 3 Inserire il nome e confermare.
4 Inserire il numero di telefono desiderato e
4 5 6
confermare.
OK
Ora l'apparecchio emette un tono di conferma.
Selezionare un numero di selezione rapida
1 Premere il tasto rubrica del telefono.
2 Scorrere fino al nome desiderato oppure inserire la
prima lettera del nome.
4 5 6
3 Premere il tasto rubrica per visualizzare il numero di
telefono.
4 Ora premere il tasto di chiamata.
Il numero telefonico viene selezionato
automaticamente.
5 Premere il tasto di fine chiamata per terminare la
conversazione.
G
H
I
J
K
L
M
N
O
Modificare una voce della rubrica telefonica
1 Premere il tasto rubrica del telefono.
2 Scorrere fino al nome desiderato oppure inserire la
prima lettera del nome.
4 5 6
3 Premere il tasto rubrica per visualizzare il numero di
telefono.
4 Premere menu/tasto OK.
OK
5 Selezionare „MODIFICA“ (EDIT ENTRY) e
confermare.
OK
4 5 6 OK 6 Inserire il nome e confermare.
4 5 6 OK 7 Inserire o modificare il numero di telefono e
confermare.
G
H
I
G
H
I
J
K
L
M
N
O
G
H
I
J
K
L
M
N
O
J
K
L
M
N
O
105
HL_Sologic B901 eco.book Page 106 Friday, August 6, 2010 1:38 PM
Utilizzo del telefono portatile
4.7 Riconoscimento chiamate (CLIP)
Il telefono Sologic B901 permette di visualizzare i numeri delle
chiamate in arrivo. Per poter utilizzare questa funzione è necessario
richiedere l'abilitazione del servizio presso il proprio operatore di rete.
Per ulteriore informazioni rivolgersi al proprio operatore di rete.
Al momento della ricezione di una chiamata, il numero di telefono
viene memorizzato nel registro chiamate. Il registro può contenere fino
a 30 numeri telefonici (di un massimo di 23 cifre l'uno).
Se il numero di telefono è più lungo di 12 cifre, è
possibile scorrere verso il lato destro del display per
visualizzare anche le ultime cifre.
Nuove chiamate
Quando il registro chiamate contiene una nuova
chiamata, sul display lampeggia il simbolo CLIP.
Richiamare il registro chiamate
1 Premere il tasto del registro chiamate.
L'ultima chiamata ricevuta viene visualizzata. Se il
registro chiamate è vuoto, sul display appare il
messaggio „VUOTO“ (EMPTY).
2 Premere il tasto rubrica per ignorare il numero.
3 Premere il tasto rubrica per ignorare la data e l'ora.
4 Premere il tasto freccia in alto o freccia in basso per
scorrere l'elenco.
5 Premere il tasto Esc per uscire dal registro
ESC
chiamate.
Chiamare un numero del registro chiamate
1 Premere il tasto del registro chiamate.
2 Cercare all'interno del registro chiamate il numero
telefonico desiderato.
3 Premere il tasto di chiamata per iniziare la
conversazione.
Il numero telefonico viene selezionato
automaticamente.
4 Premere il tasto di fine chiamata per terminare la
conversazione.
106
HL_Sologic B901 eco.book Page 107 Friday, August 6, 2010 1:38 PM
Cancellare un numero dal registro chiamate
1 Premere il tasto del registro chiamate.
2 Cercare all'interno del registro chiamate il numero
telefonico desiderato.
3 Premere menu/tasto OK.
OK
4 Selezionare „CANCELLA“ (DELETE) per
cancellare il numero attuale e confermare.
OK
OPPURE
5 Selezionare„CANC TUTTI“ (DELETE ALL) per
cancellare tutte le voci della rubrica e confermare.
OK
ESC 6 Per confermare premere oppure premere il tasto
OK
Esc per tornare indietro.
5 Inoltro chiamata e chiamate interne da un portatile
all'altro
5.1 Inoltro chiamata e conferenza telefonica durante una
conversazione esterna
4 5 6
G
H
I
INT
INT
Durante una conversazione esterna premere il
tasto INT e successivamente il numero del portatile
(1-5, per la stazione di base selezionare „0“).
L'altro portatile suona
Una volta stabilita la comunicazione con l'altro
portatile, si può iniziare la conversazione interna.
Riagganciando il telefono, la conversazione esterna
viene trasferita sull'altro portatile.
2 Tenere premuto il tasto INT per 3 secondi. Ora è
possibile parlare contemporaneamente con il
secondo portatile e con l'interlocutore esterno
(conferenza telefonica).
3 Premere nuovamente il tasto INT per ritornare alla
chiamata esterna.
4 Premere il tasto di fine chiamata per terminare la
conversazione.
1
INT
J
K
L
M
N
O
107
Italiano
Inoltro chiamata e chiamate interne da un
HL_Sologic B901 eco.book Page 108 Friday, August 6, 2010 1:38 PM
Inoltro chiamata e chiamate
5.2 Chiamata interna (funzione telefono interno)
Info
4 5 6
108
In modalità standby premere il tasto INT e
successivamente il numero del portatile (1-5, per la
stazione di base selezionare „0“).
Ora il portatile o la stazione di base chiamata inizia a
suonare.
2 Premere il tasto di chiamata oppure sollevare il
ricevitore dalla stazione di base.
Ora può avere inizio la conversazione interna.
1
INT
G
H
I
E' possibile mettere in comunicazione la stazione di
base con il portatile.
La stazione di base ha il numero „0“.
J
K
L
M
N
O
HL_Sologic B901 eco.book Page 109 Friday, August 6, 2010 1:38 PM
Como começar
Obrigado por ter adquirido este novo produto da TOPCOM. Este
produto foi concebido e montado tendo em conta o maior dos
cuidados para consigo e para com o planeta. Porque nós na TOPCOM
nos preocupamos com o futuro do planeta e dos nossos filhos,
procuramos fazer o nosso melhor para proteger o ambiente. É por
esta razão que decidimos reduzir o número de páginas dos nossos
guias do utilizador e dos nossos manuais. Se tiver em conta que são
necessárias 24 árvores para produzir uma tonelada de papel, a
publicação de manuais do produto em 21 idiomas causa a destruição
de muitas árvores. Neste curto manual fornecido com o seu dispositivo
TOPCOM encontra uma breve explicação sobre como instalá-lo e
utilizá-lo. Caso queira explorar todas as características do seu novo
dispositivo TOPCOM, visite o nosso Website (www.topcom.net), a
partir do qual pode descarregar o manual de utilizador completo no
seu idioma. Ao tomar esta decisão, a TOPCOM espera estar a
contribuir para tornar o nosso planeta num lugar melhor, mas apenas
pode ter sucesso com a sua ajuda!
2 Primeiros passos
2.1 Acerca da utilização deste manual de instruções
Neste manual de instruções, é utilizado o seguinte método para
explicar as instruções:
Texto ....... „Visor“.
Texto apresentado no visor do telefone
Tecla a premir
2.2 Instalar a estação de base
Instale a estação de base da seguinte forma:
1 Ligue o adaptador de rede primeiro à estação de base e depois
a uma tomada.
2 Ligue uma extremidade do cabo de telefone à tomada de
telefone na parede e a outra à entrada na parte de trás da
estação de base.
3 Ligue o cabo de telefone e o cabo de corrente conforme
mostrado na figura 1.
109
Português
1 Como começar
HL_Sologic B901 eco.book Page 110 Friday, August 6, 2010 1:38 PM
Primeiros passos
2.3 Estação de carregamento do telefone portátil
1
Ligue o adaptador de rede à tomada.
2.4 Telefone portátil
1
2
3
4
Abra o compartimento das pilhas conforme mostrado na
figura 2.
Insira as pilhas recarregáveis. Observe, se a polaridade está
correcta (+ e -).
Feche o compartimento das pilhas.
Carregue o telefone portátil durante 16 horas na estação de
carregamento. O LED de carregamento na estação de
carregamento acende.
2.5 Teclas/visor
Telefone portátil sem fios
1. Remarcação / Para cima
2. Lista telefónica
3. Silenciar / Eliminar
4. Terminar chamada
5. Teclas alfanuméricas
6. Bloqueio de teclado
7. Pausa
8. Toque activar/desactivar
9. Lista de chamadas / Para
baixo
10.Atender chamada / Mãoslivres / Tecla de chamada
11. INT / Sair
12.Menu / OK / Rechamada
13.Visor
14.Indicador LED vermelho;
intermitente durante uma
chamada
110
Estação de base
15.Sair
16.Menu / OK
17.Para a esquerda
18.Remarcação / Para cima
19.Para a direita
20.Visor
21.Lista telefónica
22.Lista de chamadas / Rechamada
23.Para baixo
24.Teclas de marcação rápida (M1M2-M3)
25.Mãos-livres
26.Teclas alfanuméricas
27.Indicador LED vermelho, intermitente durante uma chamada
28.Paging/ Desvio de chamada /
Chamada interna
29.Silenciar / Eliminar
30.Regulação do volume
31.Altifalante
HL_Sologic B901 eco.book Page 111 Friday, August 6, 2010 1:38 PM
Primeiros passos
Português
32.Suporte do auscultador para Estação de carregamento
montagem na parede
34.LED: telefone portátil em
33.Apoio de descanso: para
carregamento
pousar o auscultador
brevemente durante uma
chamada em caso de
montagem na parede
2.6 Visor do telefone portátil
HANDSET X
x = número do telefone
portátil
Outros números ou
avançar no menu para
a esquerda
Encontrar ou criar
entradas na lista telefónica
Toque desactivado
Bloqueio de teclado
activado
Ligação telefónica
estabelecida
Novos números na
lista de chamadas
Chamada interna
Outros números ou avançar
no menu para a direita
Indicador do estado das
pilhas recarregáveis
Modo de mãos-livres
activado
Nova mensagem de correio
de voz
Microfone silenciado
A antena indica a força do
sinal de recepção.
A antena fica intermitente
quando o telefone portátil se
encontra fora de alcance.
111
HL_Sologic B901 eco.book Page 112 Friday, August 6, 2010 1:38 PM
Primeiros passos
2.7 Visor da estação de base
Outros números ou
avançar no menu para a
esquerda
Toque desactivado
CLIP
Novos números na lista de
chamadas
Encontrar ou criar
entradas na lista telefónica
Ligação telefónica
estabelecida
04
Chamada interna
Outros números ou
avançar no menu para a
direita
Nova mensagem de
correio de voz
Número da posição da
lista de chamadas
Modo de mãos-livres
activado
Microfone silenciado
Hora e
data
2.8 Navegar no menu
O Sologic B901 dispõe de um sistema de menu simples de utilizar.
Cada menu é composto por uma série de opções.
A seguir, encontra-se uma síntese dos menus do telefone portátil e da
base.
OK
1
2
OK
ESC
3
4
Prima a tecla Menu/OK para abrir o menu principal.
Vá para a opção de menu pretendida.
Prima a tecla Menu/OK para chamar outras opções
ou para confirmar a definição apresentada.
Para voltar ao nível anterior do menu, prima a tecla
Sair.
2.9 Utilizar as teclas alfanuméricas
É possível introduzir texto através das teclas alfanuméricas. Para
seleccionar uma letra, prima a tecla alfanumérica correspondente 26 .
Se premir p. ex. a tecla alfanumérica 5, será apresentada no visor a
primeira letra „j“. Para seleccionar as outras letras, prima a tecla
várias vezes.
112
HL_Sologic B901 eco.book Page 113 Friday, August 6, 2010 1:38 PM
Prima uma vez a tecla 2, para seleccionar a letra „a“. Caso pretenda
seleccionar as letras „a“ e „b“ sucessivamente, prima uma vez a tecla
2, para seleccionar „a“. Espere 2 segundos, até que o cursor avance
para a posição seguinte e, em seguida, prima a tecla 2 duas vezes,
29 , pode eliminar
para seleccionar „b“. Com a tecla de eliminação
letras introduzidas inadvertidamente. Será eliminada a letra antes do
cursor.
É possível deslocar o cursor com as teclas Para a esquerda e Para a
direita
17 /
19 .
3 Utilização do telefone
Informação Esta secção descreve apenas o modo de
funcionamento da estação de base! Informações
sobre a utilização do telefone portátil encontramse em „4 Utilização do telefone portátil sem fios“.
3.1 Definir idioma do visor
OK
1
OK 2
3
4
OK
Prima a tecla Menu/OK.
Seleccione „LANGUAGE“ e confirme.
Seleccione o idioma pretendido.
Prima OK para confirmar.
3.2 Definir data e hora
Informação Se a identificação de chamadas (CLIP) estiver
activada para a sua linha telefónica e o operador
transmitir a data e hora, o relógio será definido
automaticamente quando for recebida uma
chamada.
Caso tenha definido a hora, esta será assumida
automaticamente em todos os telefones portáteis
da estação de base.
OK
1
OK 2
OK 3
4 5 6
G
H
I
J
K
L
M
N
O
4 5 6
G
H
I
J
K
L
M
N
O
OK 4
OK 5
Prima a tecla Menu/OK.
Seleccione „TIME“ e confirme.
Seleccione „DATE TIME“ e confirme.
Introduza o ano e confirme.
Introduza o mês e confirme.
113
Português
Utilização do telefone
HL_Sologic B901 eco.book Page 114 Friday, August 6, 2010 1:38 PM
Utilização do telefone
4 5 6
OK 6
OK 7
4 5 6
8
OK
9
4 5 6
J
K
L
G
H
I
J
K
L
G
H
I
J
K
L
G
H
I
M
N
O
M
N
O
M
N
O
Introduza o dia e confirme.
Introduza a hora e confirme.
Introduza os minutos.
Prima OK para confirmar.
Importante Em caso de falha de corrente da estação de
base, a data e hora serão perdidas.
3.3 Definir o formato da hora
1
OK
OK 2
OK 3
4
OK
Prima a tecla Menu/OK.
Seleccione „TIME“ e confirme.
Seleccione „FORMAT“ e confirme.
Seleccione o formato da hora „24 HORAS“ ou
„12 HORAS“ e confirme.
3.4 Chamadas de saída
Efectuar uma chamada
1 Levante o auscultador ou prima a tecla de mãoslivres.
2 Introduza o número de telefone.
4 5 6
3 Pouse o auscultador ou prima novamente a tecla de
mãos-livres para terminar a chamada.
OU
1 Introduza o número de telefone.
4 5 6
2 Levante o auscultador ou prima a tecla de mãoslivres.
3 Pouse o auscultador ou prima novamente a tecla de
mãos-livres para terminar a chamada.
G
H
I
J
K
L
M
N
O
G
H
I
J
K
L
M
N
O
Marcar novamente o último número de telefone
1 Levante o auscultador ou prima a tecla de mãoslivres.
2 Prima a tecla de remarcação.
O último número de telefone será marcado
automaticamente.
114
HL_Sologic B901 eco.book Page 115 Friday, August 6, 2010 1:38 PM
Utilização do telefone
Marcar um número da lista telefónica
1 Prima a tecla da lista telefónica.
4 5 6 2 Vá para o nome pretendido ou introduza a letra
inicial do nome.
3 Prima a tecla Menu/OK para visualizar o número
de telefone.
OK
4 Levante o auscultador ou prima a tecla de mãoslivres.
O número de telefone será marcado
automaticamente.
G
H
I
J
K
L
M
N
O
3.5 Activar/desactivar o modo de mãos-livres
Com esta função é possível atender uma chamada, sem que seja
necessário levantar o auscultador ou quando o auscultador já foi
levantado.
1 Prima a tecla de mãos-livres, para activar a função.
2 Prima outra vez a tecla de mãos-livres, para mudar
a chamada novamente para o auscultador.
3.6 Lista telefónica
A lista telefónica permite guardar 50 números de telefone e nomes. Os
nomes podem ter até 16 caracteres e os números até 24 dígitos de
comprimento.
Adicionar um nome e um número de telefone novos
1 Prima a tecla da lista telefónica.
2 Prima OK.
OK
OK 3 Seleccione „NEW ENTRY“ e confirme.
4 5 6 OK 4 Introduza o nome e confirme.
4 5 6 OK 5 Introduza o número de telefone e confirme.
6 Será emitido um sinal sonoro de confirmação.
G
H
I
J
K
L
M
N
O
G
H
I
J
K
L
M
N
O
115
Português
Marcar novamente um dos últimos 3 números marcados
1 Prima a tecla de remarcação.
2 Seleccione um dos últimos 3 números marcados
3 Levante o auscultador ou prima a tecla de mãoslivres.
HL_Sologic B901 eco.book Page 116 Friday, August 6, 2010 1:38 PM
Utilização do telefone
Editar um nome e um número de telefone
1 Prima a tecla da lista telefónica.
2 Seleccione o nome com a tecla Para cima ou Para
baixo.
OU
Introduza a letra inicial do nome.
3 Prima OK.
OK
OK 4 Seleccione „EDIT ENTRY“ e confirme.
DEL
5 Prima a tecla de eliminação para eliminar as letras.
4 5 6 OK 6 Introduza o nome e confirme.
4 5 6 OK 7 Introduza o número de telefone e confirme.
8 Será emitido um sinal sonoro de confirmação.
G
H
I
J
K
L
M
N
O
G
H
I
J
K
L
M
N
O
Eliminar uma ou todas as entradas da lista telefónica
1 Prima a tecla da lista telefónica.
2 Seleccione o nome com a tecla Para cima ou Para
baixo.
OU
Introduza a letra inicial do nome.
4 5 6
3 Prima OK.
OK
4 Seleccione „DELETE ENTRY“ ou „DELETE
ALL“ e confirme.
OK
ESC 5 Prima OK para confirmar ou a tecla Sair para
OK
voltar para trás.
G
H
I
J
K
L
M
N
O
3.7 Teclas de marcação rápida
É possível guardar 3 números directos de marcação rápida M1, M2 e
M3 (cada um com 24 dígitos no máximo) na estação de base.
Guardar número directo de marcação rápida (M1 a M3)
M1-M2-M3 1 Prima uma das teclas de marcação rápida.
2 Prima OK.
OK
OK 3 Seleccione „NEW ENTRY“ e confirme.
4 5 6 OK 4 Introduza o nome e confirme.
4 5 6 OK 5 Introduza o número de telefone e confirme.
Será emitido um sinal sonoro de confirmação.
116
G
H
I
J
K
L
M
N
O
G
H
I
J
K
L
M
N
O
HL_Sologic B901 eco.book Page 117 Friday, August 6, 2010 1:38 PM
Marcar um número de marcação rápida
1 Levante o auscultador ou prima a tecla de mãoslivres.
M1-M2-M3 2 Prima a tecla de marcação rápida.
O número de telefone será marcado
automaticamente.
3 Pouse o auscultador ou prima novamente a tecla de
mãos-livres para terminar a chamada.
3.8 A lista de chamadas
As chamadas recebidas são guardadas individualmente na lista de
chamadas (máx. 30 números) da estação de base e dos telefones
portáteis.
O número de chamadas perdidas é indicado através de „X MISSED“
(X = número de chamadas perdidas) e do símbolo CLIP intermitente.
Prima brevemente a tecla para a lista de chamadas
, para visualizar
a última chamada.
Importante A característica “Identificação de chamadas
(CLIP)“ apenas está disponível, se estiver
activada para a sua extensão. Para mais
informações, entre em contacto com o seu
operador de rede.
No visor, será apresentado o número de telefone e o nome do último
chamador. Se o número de telefone tiver mais de 12 algarismos,
poderá visualizar os algarismos restantes com a tecla . Se a lista de
chamadas estiver vazia, será apresentado „EMPTY“ no visor.
A data e a hora da chamada recebida são apresentadas no canto
superior direito para cada chamada.
1 Prima a tecla Para cima ou Para baixo, para passar
pela lista.
Ao lado do símbolo CLIP, é apresentado o número
da posição da chamada na lista de chamadas.
2 Prima a tecla Para a esquerda ou Para a direita,
para visualizar o nome ou o número.
117
Português
Utilização do telefone
HL_Sologic B901 eco.book Page 118 Friday, August 6, 2010 1:38 PM
Utilização do telefone
Informação Se a tecla Para cima ou Para baixo
não for
premida durante 15 segundos, o telefone volta ao
modo de standby.
Após a recepção de uma chamada, o número do
chamador é apresentado no visor durante mais 58 segundos após o último toque.
Marcar um número da lista de chamadas
1 Prima a tecla para a lista de chamadas.
2 Prima a tecla Para cima ou Para baixo, para
passar pela lista.
3 Levante o auscultador ou prima a tecla de mãoslivres para iniciar a chamada.
3.9 Efectuar uma chamada interna para um telefone
portátil e reencaminhar uma chamada para o telefone
portátil sem fios
É possível reencaminhar uma chamada da estação de base para o
telefone portátil ou falar simultaneamente com o participante externo
e um segundo participante no telefone portátil sem fios
(teleconferência):
1
4 5 6
G
H
I
J
K
L
M
N
O
2
3
4
118
Mantenha a tecla de chamada interna 28 premida
durante 3 segundos, até que seja emitido um sinal
sonoro e, em seguida, solte a tecla. Será
apresentada a indicação „INT“.
Introduza o número do telefone portátil. Depois que
tenha sido estabelecida a ligação com o telefone
portátil, poderá falar internamente.
Pouse o auscultador, para transferir a chamada
para o telefone portátil sem fios.
OU
Mantenha a tecla de chamada interna 28 premida
durante 3 segundos, para estabelecer uma
teleconferência.
HL_Sologic B901 eco.book Page 119 Friday, August 6, 2010 1:38 PM
Utilização do telefone portátil sem fios
4 Utilização do telefone portátil sem fios
4.1 Alterar o idioma
1
OK
OK 2
OK 3
4
OK
5
ESC
Prima a tecla Menu/OK.
Seleccione „HANDSET“ e confirme.
Seleccione „LANGUAGE“ e confirme.
Seleccione o idioma pretendido e confirme a
selecção.
Prima a tecla Sair, para voltar ao modo de standby.
4.2 Chamadas de saída
Efectuar uma chamada
1 Prima a tecla de chamada.
2 Introduza o número de telefone.
4 5 6
3 Prima a tecla Desligar, para terminar a chamada.
G
H
I
J
K
L
M
N
O
Preparação de marcação
1 Introduza o número de telefone.
4 5 6
É possível corrigir um número incorrecto com a tecla
de silêncio.
Se não premir qualquer tecla durante 10 segundos,
o número desaparece e o telefone portátil volta ao
modo de standby.
2 Prima a tecla de chamada.
O número de telefone será marcado
automaticamente.
3 Prima a tecla Desligar, para terminar a chamada.
G
H
I
J
K
L
M
N
O
119
Português
Informação Esta secção descreve apenas o modo de
funcionamento do telefone portátil sem fios!
Informações sobre a utilização da estação de base
encontram-se em „3 Utilização do telefone“.
HL_Sologic B901 eco.book Page 120 Friday, August 6, 2010 1:38 PM
Utilização do telefone portátil sem
Marcar novamente o último número de telefone
1 Prima a tecla de chamada.
2 Prima a tecla de remarcação.
O último número de telefone será marcado
automaticamente.
3 Prima a tecla Desligar, para terminar a chamada.
4.3 Chamadas recebidas
Quando recebe uma chamada, o telefone portátil e a estação de base
tocam, e o LED „Sinal de chamada visual“ (ver ponto 14 na figura 3
e ponto 27 na figura 4) no telefone portátil e na estação de base fica
intermitente.
1
2
Prima a tecla Atender chamada, para iniciar a
chamada.
Prima a tecla Desligar, para terminar a chamada.
4.4 Activar/desactivar o modo de mãos-livres
Durante a chamada:
1 Prima a tecla de mãos-livres, para activar a função.
2 Prima outra vez a tecla de mãos-livres, para mudar
a chamada novamente para o telefone portátil.
4.5 Bloqueio de teclado
Se o bloqueio de teclado estiver activado, as teclas em modo de
standby não têm função (com excepção da tela de bloqueio de
teclado).
1 Mantenha a tela de bloqueio de teclado premida.
O símbolo será apresentado no visor.
2 Mantenha novamente a tela de bloqueio de teclado
premida, para desactivar o bloqueio de teclado.
Se o bloqueio de teclado estiver activado, pode,
apesar disso, atender chamadas recebidas,
premindo a tecla Atender chamada . Durante uma
chamada, o teclado funciona como de costume.
Após a chamada, o bloqueio de teclado é novamente
activado.
120
HL_Sologic B901 eco.book Page 121 Friday, August 6, 2010 1:38 PM
Utilização do telefone portátil sem fios
4.6 Lista telefónica
É possível guardar 50 entradas na lista telefónica. Os nomes podem
ter até 16 caracteres e os números de telefone até 24 dígitos de
comprimento.
G
H
I
J
K
L
M
N
O
G
H
I
J
K
L
M
N
O
Português
Adicionar uma entrada na lista telefónica
1 Prima a tecla da lista telefónica.
OK 2 Prima duas vezes a tecla OK .
OK
4 5 6 OK 3 Introduza o nome e confirme.
4 Introduza o número de telefone pretendido e
4 5 6
confirme.
OK
Será emitido um sinal sonoro de confirmação.
Marcar um número de marcação rápida
1 Prima a tecla da lista telefónica.
2 Vá para o nome pretendido ou introduza a letra
inicial do nome.
4 5 6
3 Prima a tecla da lista telefónica, para visualizar o
número de telefone.
4 Em seguida, prima a tecla de chamada.
O número de telefone será marcado
automaticamente.
5 Prima a tecla Desligar, para terminar a chamada.
G
H
I
J
K
L
M
N
O
Editar uma entrada da lista telefónica
1 Prima a tecla da lista telefónica.
2 Vá para o nome pretendido ou introduza a letra
inicial do nome.
4 5 6
3 Prima a tecla da lista telefónica, para visualizar o
número de telefone.
4 Prima a tecla Menu/OK.
OK
OK 5 Seleccione „EDIT ENTRY“ e confirme.
4 5 6 OK 6 Introduza o nome e confirme.
4 5 6 OK 7 Introduza ou altere o número de telefone e
confirme.
G
H
I
G
H
I
J
K
L
M
N
O
G
H
I
J
K
L
M
N
O
J
K
L
M
N
O
121
HL_Sologic B901 eco.book Page 122 Friday, August 6, 2010 1:38 PM
Utilização do telefone portátil sem
4.7 Identificação de chamadas (CLIP)
O Sologic B901 apresenta o número de telefone das chamadas
recebidas. Esta função apenas pode ser utilizada, caso esteja
registado nesse serviço junto do operador de rede. Poderá obter mais
informações, junto do seu operador de rede.
Quando recebe uma chamada, o número de telefone é guardado
numa lista de chamadas. Essa lista pode conter até 30 números de
telefone (cada um com 23 dígitos no máximo).
Se o número de telefone tiver mais de 12 dígitos,
poderá avançar no visor para a direita, para
visualizar os dígitos restantes.
Novas chamadas
Se existir uma nova chamada na lista de chamadas,
o símbolo CLIP fica intermitente no visor.
Chamar a lista de chamadas
Prima a tecla para a lista de chamadas.
Será apresentada a última chamada recebida. Se a
lista de chamadas estiver vazia, será apresentado
„EMPTY“ no visor.
2 Prima a tecla da lista telefónica, para ignorar o
número.
3 Prima a tecla da lista telefónica, para ignorar a data
e a hora.
4 Prima a tecla Para cima ou Para baixo, para passar
pela lista.
5 Prima a tecla Sair, para sair da lista de chamadas.
1
ESC
Marcar um número da lista de chamadas
Prima a tecla para a lista de chamadas.
2 Passe pela lista de chamadas, até que seja
apresentado o número de telefone pretendido.
3 Prima a tecla de chamada, para iniciar a chamada.
O número de telefone será marcado
automaticamente.
4 Prima a tecla Desligar, para terminar a chamada.
1
122
HL_Sologic B901 eco.book Page 123 Friday, August 6, 2010 1:38 PM
Eliminar um número da lista de chamadas
1 Prima a tecla para a lista de chamadas.
2 Passe pela lista de chamadas, até que seja
apresentado o número de telefone pretendido.
3 Prima a tecla Menu/OK.
OK
4 Seleccione „DELETE“, para eliminar o número de
telefone actual, e confirme.
OK
OU
5 Seleccione „DELETE ALL“, para eliminar todas as
entradas da lista telefónica, e confirme.
OK
ESC 6 Prima OK para confirmar ou a tecla Sair para voltar
OK
para trás.
5 Reencaminhamento de chamadas e chamadas
internas de um telefone portátil para outro
5.1 Reencaminhamento de chamadas e teleconferência
durante uma chamada externa
4 5 6
G
H
I
INT
INT
Prima a tecla INT durante uma chamada externa e,
em seguida, o número do telefone portátil (1-5,
marque „0“ para a estação de base).
O outro telefone portátil toca
Depois que tenha sido estabelecida a ligação com o
outro telefone portátil, poderá falar internamente.
Quando desligar, a chamada externa será
reencaminhada para o outro telefone portátil.
2 Mantenha a tecla INT premida durante
3 segundos. Em seguida, poderá falar em
simultâneo com o segundo telefone portátil e a
ligação externa (teleconferência).
3 Prima novamente a tecla INT, para mudar
novamente para a chamada externa.
4 Prima a tecla Desligar, para terminar a chamada.
1
INT
J
K
L
M
N
O
123
Português
Reencaminhamento de chamadas e
HL_Sologic B901 eco.book Page 124 Friday, August 6, 2010 1:38 PM
Reencaminhamento de
5.2 Chamada interna (função de intercomunicação)
Informação É possível efectuar uma chamada entre a estação
de base e o telefone portátil sem fios.
A estação de base tem o número interno „0“.
4 5 6
G
H
I
124
Prima a tecla INT em modo de standby e, em
seguida, o número do telefone portátil (1-5,
marque „0“ para a estação de base).
O telefone portátil ou a estação de base, para a qual
ligou, tocará.
2 Prima a tela de chamada ou levante o auscultador
da estação de base.
Em seguida, poderá falar internamente.
1
INT
J
K
L
M
N
O
HL_Sologic B901 eco.book Page 125 Friday, August 6, 2010 1:38 PM
Zaínáme
D)kujeme Vám, že jste si zakoupili produkt TOPCOM. Tento produkt
byl navržen a smontován s maximální péi pro vás i životní prostedí.
Protože my u TOPCOM u rádi myslíme na budoucnost naší planety a
našich d)tí, snažíme se ze všech sil pomáhat životnímu prostedí.
Proto jsme se také rozhodli snížit poet stran našich uživatelských
píruek a píruek k produkt~m. Uv)domíte-li si, že na výrobu 1 tuny
papíru se spotebuje 24 strom~, vydávání píruek k produkt~m v
11 jazycích stojí naši planetu spoustu strom~. V této krátké píruce k
zaízení TOPCOM najdete struné vysv)tlení, jak zaízení TOPCOM
instalovat a používat.
Pokud byste si dále páli odhalit všechny vlastnosti vašeho nového
zaízení TOPCOM, navštivte laskav) naši webovou stránku
(www.topcom.net), kde si m~žete stáhnout kompletní uživatelskou
píruku ve vašem jazyce. TOPCOM doufá, že takto pisp)je k tomu,
aby naše planeta byla lepším místem, ale usp)t m~žeme jen s vaší
pomocí!
2 První kroky
2.1 Jak používat tuto Uživatelskou píruku
Pro objasn)ní pokyn~ je v této uživatelské píruce používána
následující metoda:
Text....... „Display“.
Text objevující se na displeji telefonu
Tlaítko, které musí být stisknuto
2.2 Instalace základny
Instalujte základnu podle následujících pokyn~:
1 Pipojte síový adaptér k základn) a potom do síové zásuvky.
2 Pipojte jeden konec telefonního kabelu do telefonní zásuvky ve
zdi a druhý ke konektoru na zadní stran) základny.
3 Telefonní a síový kabel se musí pipojit, jak ukazuje obrázek 1.
2.3 Nabíjeka sluchátka
1
Zasu(te adaptér do elektrické zásuvky.
2.4 Sluchátko
1
Otevete schránku baterií, tak jak ukazuje obrázek 2.
125
esky
1 Zaínáme
HL_Sologic B901 eco.book Page 126 Friday, August 6, 2010 1:38 PM
První kroky
2
3
4
Vložte dobíjecí baterie. Ujist)te se, že polarita je správná (+ a -).
Zavete prostor pro baterie.
Vložte sluchátko do nabíjeky a nabíjejte 16 hodin. LED
nabíjení svítí
2.5 Tlaítka/Displej
Bezdrátové sluchátko
1.
2.
3.
4.
5.
6.
7.
8.
Opakovaná volba/nahoru
Telefonní seznam
Ztlumit / Smazat
Zav)sit
Alfanumerická tlaítka
Zámek klávesnice
Pauza
Zap./vyp. vyzván)ní
9. Seznam hovoru / dol~
10. Pijmout hovor / hlasitý
odposlech / tlaítko volání
11. INT / odejít
12. Menu / OK / pepojení
13. Displej
14. Pi hovoru bliká ervená LED
Základna
15.
16.
17.
18.
19.
20.
21.
22.
23.
24.
Odejít
Menu / OK
Doleva
Opakovaná volba/nahoru
Doprava
Displej
Telefonní seznam
Seznam hovor~ / pepnutí
Dol~
Zrychlené volání
(M1 - M2 - M3)
25. Hlasitý odposlech
26. Alfanumerická tlaítka
27. Pi hovoru bliká ervená LED
na základn).
126
28. Stránkování / pesm)rování
hovoru / interní hovor
29. Ztlumit / Smazat
30. Nastavení hlasitosti
31. Reproduktor
32. Držák sluchátka pro montáž
na ze
33. Ploška: ke krátkému
odložení sluchátka b)hem
hovoru pi uchycení telefonu
na zdi
Nabíjeka
34. LED: probíhá nabíjení
sluchátka.
HL_Sologic B901 eco.book Page 127 Friday, August 6, 2010 1:38 PM
První kroky
2.6 Displej sluchátka
x = íslo sluchátka
Další ísla nebo pohyb v
menu doleva
Nalezení nebo vytvoení
záznamu v seznamu
Další ísla nebo pohyb v
menu doprava
Zobrazení stavu baterií
Vypnuté zvon)ní
Zapnutý režim hlasitého
odposlechu
Zapnutý zámek
klávesnice
Nová zpráva na záznamníku
Sestavený hovor
Ztlumený mikrofon
Nová ísla v seznamu
hovor~
Anténa ukazuje sílu
pijímaného signálu. Anténa
bliká, když je telefon mimo
dosah.
Interní hovor
2.7 Displej základny
Další ísla nebo pohyb v
menu doleva
Další ísla nebo pohyb v
menu doprava
Vypnuté vyzván)ní
Nová zpráva na záznamníku
Nalezení nebo vytvoení
záznamu v seznamu
íslo položky v seznamu
hovor~
Zapnutý režim hlasitého
odposlechu
Sestavený hovor
Ztlumený mikrofon
CLIP Nová ísla v seznamu hovor~
Interní hovor
04
as a datum
127
esky
HANDSET X
HL_Sologic B901 eco.book Page 128 Friday, August 6, 2010 1:38 PM
Obsluha telefonu
2.8 Navigace v menu
Sologic B901 má jednoduchý systém menu. Každé menu obsahuje
n)kolik možností.
Seznam menu sluchátka a základny najdete níže.
OK
1
2
OK
ESC
3
4
Ke vstupu do hlavního menu stiskn)te tlaítko
Menu/OK.
V menu pejd)te na požadovanou možnost.
Stisknutím tlaítka Menu/OK zobrazíte další
možnosti nebo potvrdíte zobrazené nastavení.
Stiskn)te tlaítko Escape pro návrat do pedchozí
nabídky
2.9 Použití alfanumerické klávesnice
Alfanumerická tlaítka m~žete použít k zadání textu. Stiskn)te
píslušné alfanumerické tlaítko pro výb)r písmena 26 . Napíklad ,
pokud stisknete numerické tlaítko 5, objeví se na displeji nejprve
písmeno„j“. K výb)ru ostatních písmen stiskn)te tlaítko vícekrát.
Chcete-li zadat písmeno „a“, stiskn)te jednou tlaítko „2“. Chcete-li
zadat písmena „a“ a „b“ za sebou, nejdíve jednou stiskn)te tlaítko
2 pro výb)r písmena „a“. Pokejte 2 sekundy na pesunutí kurzoru do
další polohy. Nyní stiskn)te dvakrát tlaítko 2 pro zadání „b“.
K vymazání nesprávn) zadaných písmen m~žete použít tlaítko
mazání
29 . Písmeno ped kurzorem se smaže.
Použijte tlaítko Dopravo/doleva
17 /
19 k pesunutí kurzoru.
3 Obsluha telefonu
Informace V této sekci jsou popsány pouze funkce základny!
Informace k používání sluchátka najdete v ásti
„4 Použití bezdrátového sluchátka“.
3.1 Nastavení jazyka displeje
OK
1
OK 2
3
OK
128
4
Stiskn)te tlaítko Menu / OK
Vyberte „LANGUAGE“ a potvrte.
Nyní vyberte jazyk.
Potvrte tlaítkem OK
HL_Sologic B901 eco.book Page 129 Friday, August 6, 2010 1:38 PM
Obsluha telefonu
3.2 Nastavení data a asu
Informace Má-li vaše telefonní linka aktivovánu identifikaci
volajícího (CLIP) a poskytovatel penáší datum a
as, hodiny se automaticky nastaví pi píjmu
píchozího hovoru.
Po nastavení asu jej pevezmou všechna sluchátka
zaregistrovaná k základn).
OK 2
OK 3
4 5 6
J
K
L
G
H
I
M
N
O
4 5 6
J
K
L
G
H
I
M
N
O
OK 4
OK 5
4 5 6
OK 6
OK 7
4 5 6
8
OK
9
4 5 6
J
K
L
G
H
I
J
K
L
G
H
I
J
K
L
G
H
I
M
N
O
M
N
O
M
N
O
Dležité
Stiskn)te tlaítko Menu / OK
Vyberte „TIME“ a potvrte.
Vyberte „DATE/TIME“ a potvrte.
Zadejte rok a potvrte.
Zadejte m)síc a potvrte.
Zadejte den a potvrte.
Zadejte hodiny a potvrte.
Zadejte minuty.
Potvrte tlaítkem OK.
esky
1
OK
V pípad) perušení napájení základny budou
datum a as ztraceny.
3.3 Nastavení formátu asu
1
OK
OK 2
OK 3
4
OK
Stiskn)te tlaítko Menu / OK
Vyberte „TIME“ a potvrte.
Vyberte „FORMÁT“ a potvrte.
Vyberte formát asu jako „24HOUR“ nebo
„12HOUR“ a potvrte.
3.4 Odchozí hovory
Volání
Zvedn)te sluchátko, nebo stiskn)te tlaítko
hlasitého odposlechu.
2 Zadejte telefonní íslo.
3 K ukonení hovoru zav)ste sluchátko, nebo
stiskn)te znovu tlaítko hlasitého odposlechu.
NEBO
1
4 5 6
G
H
I
J
K
L
M
N
O
129
HL_Sologic B901 eco.book Page 130 Friday, August 6, 2010 1:38 PM
Obsluha telefonu
1
4 5 6
G
H
I
J
K
L
M
N
O
2
3
Zadejte telefonní íslo.
Zvedn)te sluchátko, nebo stiskn)te tlaítko
hlasitého odposlechu.
K ukonení hovoru zav)ste sluchátko, nebo
stiskn)te znovu tlaítko hlasitého odposlechu.
Opakované vytoení posledního volaného ísla
1 Zvedn)te sluchátko, nebo stiskn)te tlaítko
hlasitého odposlechu.
2 Stiskn)te tlaítko opakování vytáení.
Poslední telefonní íslo se vytoí automaticky.
Opakované vytoení posledních 3 volaných telefonních ísel
1 Stiskn)te tlaítko opakování vytáení.
2 Vyberte vytoení jednoho ze 3 posledních volaných
ísel.
3 Zvedn)te sluchátko, nebo stiskn)te tlaítko
hlasitého odposlechu.
Volání ísla z telefonního seznamu
1 Stiskn)te tlaítko telefonního seznamu
4 5 6 2 Vyberte požadované jméno, nebo zadejte první
písmena jména.
3 K zobrazení telefonního ísla stiskn)te tlaítko
Menu / OK.
OK
4 Zvedn)te sluchátko, nebo stiskn)te tlaítko
hlasitého odposlechu.
Telefonní íslo se vytoí automaticky.
G
H
I
J
K
L
M
N
O
3.5 Aktivace/deaktivace režimu hlasitého odposlechu
Tuto funkci m~žete použít pro pijetí hovoru bez nutnosti zvednutí
sluchátka anebo jestliže už držíte sluchátko v ruce.
1 Funkci aktivujte stisknutím tlaítka hlasitého
odposlechu.
2 Stiskn)te znovu tlaítko hlasitého odposlechu a
pepojte hovor zp)t do sluchátko.
130
HL_Sologic B901 eco.book Page 131 Friday, August 6, 2010 1:38 PM
Obsluha telefonu
3.6 Telefonní seznam
G
H
I
J
K
L
M
N
O
G
H
I
J
K
L
M
N
O
Editování jména a telefonního ísla
1 Stiskn)te tlaítko telefonního seznamu
2 Vyberte jméno pomocí tlaítek nahoru a dol~.
NEBO
Zadejte poátení písmena jména.
3 Stiskn)te OK.
OK
OK 4 Vyberte „EDIT ENTRY“ a potvrte.
DEL
5 Stiskn)te tlaítko vymazat pro smazání písmen.
4 5 6 OK 6 Zadejte jméno a potvrte.
4 5 6 OK 7 Zadejte telefonní íslo a potvrte.
8 Nyní zazní potvrzující tón.
G
H
I
J
K
L
M
N
O
G
H
I
J
K
L
M
N
O
Smazání jednoho nebo všech záznam v telefonním
seznamu.
1 Stiskn)te tlaítko telefonního seznamu
2 Vyberte jméno pomocí tlaítek nahoru a dol~.
NEBO
Zadejte poátení písmena jména.
4 5 6
3 Stiskn)te OK.
OK
4 Vyberte „DELETE ENTRY“ nebo „DELETE ALL“
a potvrte.
OK
ESC 5 Stiskn)te OK pro potvrzení, nebo stiskn)te tlaítko
OK
ESC pro návrat.
G
H
I
J
K
L
M
N
O
131
esky
50 telefonních ísel se jmény m~že být uloženo do telefonního
seznamu. Jména mohou obsahovat až 16 znak~ a ísla až 24 íslic.
Pidání nového jména a ísla
1 Stiskn)te tlaítko telefonního seznamu
2 Stiskn)te OK.
OK
OK 3 Vyberte „NEW ENTRY“ a potvrte.
4 5 6 OK 4 Zadejte jméno a potvrte.
4 5 6 OK 5 Zadejte telefonní íslo a potvrte.
6 Nyní zazní potvrzující tón.
HL_Sologic B901 eco.book Page 132 Friday, August 6, 2010 1:38 PM
Obsluha telefonu
3.7 Tlaítka zrychleného volání
M~žete uložit 3 ísl zrychleného volání M1, M2 a M3 (každé až 24
íslic) do základny.
Uložení ísel zrychleného volání (M1 - M2 - M3)
M1-M2-M3 1 Stiskn)te jedno z tlaítek zrychleného volání.
2 Stiskn)te OK.
OK
OK 3 Vyberte „NEW ENTRY“ a potvrte.
4 5 6 OK 4 Zadejte jméno a potvrte.
4 5 6 OK 5 Zadejte telefonní íslo a potvrte.
Nyní zazní potvrzující tón.
G
H
I
J
K
L
M
N
O
G
H
I
J
K
L
M
N
O
Vytáení ísla zrychleného volání
1 Zvedn)te sluchátko, nebo stiskn)te tlaítko
hlasitého odposlechu.
M1-M2-M3 2 Stiskn)te tlaítko zrychleného volání.
Telefonní íslo se vytoí automaticky.
3 K ukonení hovoru zav)ste sluchátko, nebo
stiskn)te znovu tlaítko hlasitého odposlechu.
3.8 Seznam volání
Píchozí hovory se ukládají do seznamu volání (max. 30 ísel) na
základn) a ve sluchátkách.
Poet zmeškaných hovor~ se zobrazuje pomocí "X MISSED"
(X = poet zmeškaných hovor~) a blikajícího symbolu CLIP. K
zobrazení posledního hovoru stiskn)te krátce tlaítko seznamu
hovor~
.
Dležité
Funkce „identifikace volajícího“ (CLIP) je k
dispozici, jen pokud ji má vaše linka aktivovanou.
Další informace získáte u svého telefonního
operátora.
Na displeji se zobrazí telefonní íslo a jméno posledního volajícího.
Pokud íslo obsahuje více než 12 íslic, m~žete zobrazit zbývající
íslice stisknutím tlaítka . Jestliže je seznam prázdný, na displeji se
objeví nápis „EMPTY“.
Datum a as je u každého píchozího hovoru zobrazen vpravo nahoe.
132
HL_Sologic B901 eco.book Page 133 Friday, August 6, 2010 1:38 PM
Obsluha telefonu
K procházení seznamu stiskn)te tlaítka nahoru a
dol~.
Poadové íslo hovoru v seznamu hovor~ se
objevuje vedle symbolu CLIP.
2 Stiskn)te levé a pravé tlaítko k zobrazení jména
nebo ísla.
1
Volání ísla ze seznamu hovor
1 Stiskn)te tlaítko seznamu hovor~.
2 K procházení seznamu stiskn)te tlaítka nahoru a
dol~.
3 K volání zvedn)te sluchátko, nebo stiskn)te znovu
tlaítko hlasitého odposlechu.
3.9 Uskutenní interního hovoru na sluchátko a
pesmrování hovoru na bezdrátové sluchátko.
M~žete pepojit hovor ze základny na bezdrátové sluchátko, nebo
hovoit s externím volajícím a druhým volajícím na bezdrátovém
sluchátku souasn) (konferenní hovor).
1
4 5 6
G
H
I
J
K
L
M
N
O
2
3
4
Podržte stisknuté tlaítko INT 28 na 3 sekundy,
dokud neuslyšíte zvukový signál, poté tlaítko
uvoln)te. Na displeji se zobrazí „INT“.
Zadejte íslo sluchátka. Jestliže byl hovor sestaven
s jiným sluchátkem, m~žete volat ve vnitním
okruhu.
Položte sluchátko k pepojení hovoru na bezdrátové
sluchátko.
NEBO
Podržte stisknuté tlaítko INT 28 na 3 sekundy k
sestavení konferenního hovoru.
133
esky
Informace Telefon se vrátí do pohotovostního režimu, pokud
tlaítko nahoru nebo dol~
nestisknete do
15 sekund.
Po pijetí hovoru z~stane íslo volajícího na displeji
po dobu 5-8 sekund po posledním zvon)ní.
HL_Sologic B901 eco.book Page 134 Friday, August 6, 2010 1:38 PM
Použití bezdrátového sluchátka
4 Použití bezdrátového sluchátka
Informace V této sekci jsou popsány pouze funkce
bezdrátového sluchátka! Informace k používání
základny v ásti „3 Obsluha telefonu“.
4.1 Zmna jazyka
OK
1
OK 2
OK 3
OK 4
5
ESC
Stiskn)te tlaítko Menu / OK.
Vyberte "HANDSET" a potvrte.
Vyberte „LANGUAGE“ a potvrte.
Vyberte požadovaný jazyk a potvrte.
Stisknutím tlaítka Esc pejd)te zp)t do
pohotovostního režimu.
4.2 Odchozí hovory
Volání
1
4 5 6
G
H
I
J
K
L
M
N
O
2
3
Stiskn)te tlaítko volání.
Zadejte telefonní íslo.
Hovor ukonete op)tovným stisknutím tlaítka
zav)šení.
Píprava volání
1 Zadejte telefonní íslo.
4 5 6
Nesprávné íslo m~žete opravit pomocí tlaítka
ztlumení.
Jestliže po dobu 10 sekund nestisknete žádné
tlaítko, íslo zmizí a sluchátko se vrátí do
pohotovostního režimu.
2 Stiskn)te tlaítko volání.
Telefonní íslo se vytoí automaticky.
3 Hovor ukonete op)tovným stisknutím tlaítka
zav)šení.
G
H
I
J
K
L
M
N
O
Opakované vytoení posledního volaného ísla
1 Stiskn)te tlaítko volání.
2 Stiskn)te tlaítko opakování vytáení.
Poslední telefonní íslo se vytoí automaticky.
134
HL_Sologic B901 eco.book Page 135 Friday, August 6, 2010 1:38 PM
Použití bezdrátového sluchátka
3
Hovor ukonete op)tovným stisknutím tlaítka
zav)šení.
4.3 Píchozí hovory
Pi píchozím hovoru vyzvání sluchátko a základna a LED „vizuálního
signálu volání“(viz bod 14 v obrázku 3 a bod 27 v obrázku 4) na
sluchátku a základn) blikají.
1
2
Hovor pijm)te stisknutím pijímacího tlaítka
hovoru.
Hovor ukonete op)tovným stisknutím tlaítka
zav)šení.
4.4 Aktivace/deaktivace režimu hlasitého odposlechu
1
2
Funkci aktivujte stisknutím tlaítka hlasitého
odposlechu.
Stiskn)te znovu tlaítko hlasitého odposlechu a
pepojte hovor zp)t do sluchátka.
4.5 Zámek klávesnice
Když je zámek klávesnice aktivní, stisknutí jakéhokoliv tlaítka v
pohotovostním režimu nebude mít žádný efekt (s výjimkou tlaítka
zámku klávesnice).
1 Stiskn)te a pidržte tlaítko zámku klávesnice.
Na displeji se zobrazí symbol
.
2 Zámek klávesnice zrušte op)tovným pidržením
tlaítka zámku klávesnice.
Když je zámek tlaítek aktivní, m~žete pesto pijímat
píchozí hovory, a to stisknutím tlaítka hovoru .
B)hem hovoru je možné normáln) využívat funkce
klávesnice. Zámek tlaítek se op)t aktivuje po
ukonení hovoru.
4.6 Telefonní seznam
Do telefonního seznamu m~žete uložit 50 záznam~. Jména mohou
obsahovat až 16 znak~ a telefonní ísla až 24 íslic.
Pidání záznamu do telefonního seznamu
1 Stiskn)te tlaítko telefonního seznamu.
135
esky
B)hem hovoru:
HL_Sologic B901 eco.book Page 136 Friday, August 6, 2010 1:38 PM
Použití bezdrátového sluchátka
Stiskn)te dvakrát tlaítko OK.
Zadejte jméno a potvrte.
4 Zadejte požadované telefonní íslo a potvrte.
Nyní zazní potvrzující tón.
4 5 6
OK 2
OK 3
4 5 6
OK
OK
G
H
I
G
H
I
J
K
L
J
K
L
M
N
O
M
N
O
Vytáení ísla zrychleného volání
1 Stiskn)te tlaítko telefonního seznamu
2 Vyberte požadované jméno, nebo zadejte
poátení písmena jména.
4 5 6
3 K zobrazení telefonního ísla stiskn)te tlaítko
telefonního seznamu.
4 Nyní stiskn)te tlaítko hovoru.
Telefonní íslo se vytoí automaticky.
5 Hovor ukonete op)tovným stisknutím tlaítka
zav)šení.
G
H
I
J
K
L
M
N
O
Editování záznamu telefonního seznamu
1 Stiskn)te tlaítko telefonního seznamu
2 Vyberte požadované jméno, nebo zadejte
poátení písmena jména.
4 5 6
3 K zobrazení telefonního ísla stiskn)te tlaítko
telefonního seznamu.
4 Stiskn)te tlaítko Menu / OK.
OK
OK 5 Vyberte „EDIT ENTRY“ a potvrte.
4 5 6 OK 6 Zadejte jméno a potvrte.
4 5 6 OK 7 Zadejte nebo editujte telefonní íslo a potvrte.
G
H
I
G
H
I
J
K
L
M
N
O
G
H
I
J
K
L
M
N
O
J
K
L
M
N
O
4.7 ID volajícího ( CLIP)
Sologic B901 zobrazuje telefonní ísla píchozích hovor~. Tato funkce
m~že být použita jen v pípad), že ji máte registrovanou u svého
poskytovatele telefonních služeb. Další informace získáte u svého
telefonního operátora.
Když pijmete hovor, telefonní íslo se uloží do seznamu hovor~. Tento
seznam má kapacitu 30 ísel (každé z nich m~že mít až 23 íslic).
Jestliže se telefonní íslo skládá z více než
12 íslic, m~žete pejet (rolovat) na pravou stranu
displeje, aby se zobrazily i ostatní íslice.
136
HL_Sologic B901 eco.book Page 137 Friday, August 6, 2010 1:38 PM
Použití bezdrátového sluchátka
Nové hovory
Jestliže je do seznamu pijato nové íslo, bliká na
displeji symbol CLIP.
Otevení seznamu hovor
Stiskn)te tlaítko seznamu hovor~.
Zobrazí se poslední pijatý hovor. Jestliže je seznam
prázdný, na displeji se objeví slovo„EMPTY“.
2 Chcete-li íslo peskoit, stiskn)te tlaítko
telefonního seznamu.
3 Datum a as peskoíte stisknutím tlaítka
telefonního seznamu.
4 K procházení seznamu stiskn)te tlaítka nahoru a
dol~.
5 Seznam hovor~ opustíte stisknutím tlaítka Esc.
ESC
Volání ísla ze seznamu hovor
1 Stiskn)te tlaítko seznamu hovor~.
2 Listujte seznamem hovor~, až se objeví telefonní
íslo, které potebujete.
3 Hovor zahájíte stisknutím tlaítka hovoru.
Telefonní íslo se vytoí automaticky.
4 Hovor ukonete op)tovným stisknutím tlaítka
zav)šení.
Vymazání ísla ze seznamu hovor
1 Stiskn)te tlaítko seznamu hovor~.
2 Listujte seznamem hovor~, až se objeví telefonní
íslo, které potebujete.
3 Stiskn)te tlaítko Menu / OK.
OK
4 Stiskn)te „DELETE“ pro smazání aktuálního
telefonního ísla a potvrte.
OK
NEBO
5 Vyberte „DELETE ALL“ pro smazání všech
záznam~ telefonního seznamu a potvrte.
OK
ESC 6 Stiskn)te pro potvrzení nebo Esc pro návrat.
OK
137
esky
1
HL_Sologic B901 eco.book Page 138 Friday, August 6, 2010 1:38 PM
Pedávání hovoru a interní
5 Pedávání hovoru a interní hovory z jednoho
sluchátka do druhého
5.1 Pedávání hovoru a konferenní hovory bhem hovoru
zvenku
4 5 6
G
H
I
B)hem hovoru zvenku stiskn)te tlaítko INT a
následn) íslo sluchátka (1-5, pro základnu
zvolte „0“).
Jiné sluchátko zane zvonit.
Jestliže byl hovor sestaven s jiným sluchátkem,
m~žete volat ve vnitním okruhu. Když zav)síte,
bude hovor zvenku pedán jinému sluchátku.
2 Pidržte tlaítko INT po dobu 3 sekund. Nyní
m~žete mluvit s úastníkem u druhého sluchátka a
souasn) pijímat i hovor zvenku (konferenní
hovor).
3 Zp)t na hovor zvenku pepnete op)tovným
stisknutím tlaítka INT.
4 Hovor ukonete op)tovným stisknutím tlaítka
zav)šení.
1
INT
J
K
L
M
N
O
INT
INT
5.2 Interní hovor (funkce domácího telefonu)
Informace M~žete vést hovor mezi základnou a bezdrátovým
sluchátkem.
Základna má interní íslo „0“.
4 5 6
G
H
I
138
V pohotovostním režimu stiskn)te tlaítko INT a
následn) íslo sluchátka (1-5, pro základnu
zvolte „0“).
Volané sluchátko nebo základna zane nyní
vyzván)t.
2 Stiskn)te tlaítko volání, nebo zvedn)te sluchátko
na základn).
Nyní m~žete hovoit ve vnitním okruhu.
1
INT
J
K
L
M
N
O
HL_Sologic B901 eco.book Page 139 Friday, August 6, 2010 1:38 PM
&/
0 TOPCOM.
0 $ & % +
+ & & . 2 TOPCOM
%$
& $ & /
, &
, & +
+.
/
% & 0 . 2 + 1 $ 24 $ ,
$& 0 11 / &1 $. && $ 1 &
TOPCOM, + & & &
TOPCOM.
2 %$ $ &
TOPCOM, &% % web
(www.topcom.net), & / . TOPCOM 1 % & $
& $, 1 +% !
2 # $
2.1 %&* + , , +
& /, 1 $%:
....... "Display".
1 % /
#& $ 2.2 , : $
2& % + :
1 #/ $ & % + & + 1.
2
$ $ + & &
1
/
& +& $ % +.
139
1 HL_Sologic B901 eco.book Page 140 Friday, August 6, 2010 1:38 PM
#/ +
* &/ /
& % $ %
&1 1.
3
2.3 ; , ,
& 1.
1
2.4 < ,&
1
2
3
4
/ 2.
*% 1 . +%
& (+ & -) .
*% &
/ %$ .
*% &
& & 16 /. && LED % $
2.5 #/:&
< ,&
:& $
1.
2.
3.
4.
5.
6.
7.
8.
15.
16.
17.
18.
19.
20.
21.
22.
23.
24.
9.
10.
11.
12.
13.
14.
140
2& / 2
/ %& &
&
#
2/
&
& / &
& / &
/
&
INT / &
/ OK / flash
%
&& && LED, ++ & & &
25.
26.
27.
28.
&
/
2& / 3
%
2
& / flash
* &
(M1 - M2 - M3)
& %& &
&& && LED % +,
++ & &
&
1 / & &
/ & &
HL_Sologic B901 eco.book Page 141 Friday, August 6, 2010 1:38 PM
#/ +
/ ;
$ 34. 2&& LED:
&
& $.
&
&, $ 33.
: &
& & &
&, +
$ 29.
30.
31.
32.
HANDSET X
x = % &
&
% & $ 2 &
&
&
$
% &
$ &
& &
$
4$ & # &
&/
4$ % &
* & & $ +
. * & &
++, &
& & +$.
2& &
141
2.6 :& , ,
HL_Sologic B901 eco.book Page 142 Friday, August 6, 2010 1:38 PM
#/ +
2.7 :& : $
% &
$
&
4$ % CLIP
&
2 & % &
$ 4$ & 04
# &
$ % &
&
& $
&/
2& &
&
2.8 # = * Sologic B90 %$ $ . % / /.
#& &
% & &
& & % +.
OK
1
2
OK
ESC
3
4
& , & /OK.
+ %$.
$ ++/ % 1 %, & /OK.
# & & $
.
2.9 > ?: *>
%& &, &. # & %& & $ $ 26 .
, %& & 5, % % / 'j'.
142
HL_Sologic B901 eco.book Page 143 Friday, August 6, 2010 1:38 PM
/
$ & &
,
& $ 1.
# & 2 $ "a". 2
%$ & "a" & "b", /
& 2 $ "a".
$, $ 2 $ $
&% %$. , & 2 $ $ "b". & 29 & & %. &% &
,
+& $.
# & 17 /
19 &
$.
3 & , ?,
3.1 @: :&
OK
1
OK 2
3
OK
4
# & / OK.
2$ "LANGUAGE" & & ++/.
$, $ /.
# ++.
3.2 @: Q #?Q 2 / & (CLIP)
$ & & % & /, %1 + &.
% /, &
& $
%
% +.
143
#?Q , % +! # &
& 4, “ &
&”.
HL_Sologic B901 eco.book Page 144 Friday, August 6, 2010 1:38 PM
/
1
OK
OK 2
OK 3
4 5 6
J
K
L
G
H
I
M
N
O
4 5 6
J
K
L
G
H
I
M
N
O
OK 4
5
OK
6
4 5 6
J
K
L
G
H
I
M
N
O
OK
7
4 5 6
J
K
L
G
H
I
M
N
O
OK
4 5 6
8
OK
9
J
K
L
G
H
I
M
N
O
# & / OK.
2$ "TIME" & & ++/.
2$ "DATE/TIME" & & ++/.
#& $ & & ++/.
#& & &
++/.
#& $ & &
++/.
#& / & &
++/.
#& .
# ++.
& % & / % % & %
+.
3.3 @: ? 1
OK
OK 2
OK 3
4
OK
# & / OK.
2$ "TIME" & & ++/.
2$ "FORMAT" & & ++/.
2$ "24 HOUR" "12 HOUR" /
& & ++/.
3.4 [+& #*Q 1
4 5 6
G
H
I
J
K
L
M
N
O
2
3
&/ &
& & & .
#& & %.
&, &+ &
& &
& .
4 5 6
G
H
I
144
J
K
L
M
N
O
1
#& & %.
HL_Sologic B901 eco.book Page 145 Friday, August 6, 2010 1:38 PM
/
2
3
&/ &
& & & .
&, &+ &
& &
& .
* & *& , 3 ,Q, : *,
Q+ =
1 # & &.
2 $ $ 3 % &$.
3 &/ &
& & & .
\ : *& ,
1 # & .
4 5 6 2 &% $ & / .
3 # & / OK, % /
%.
OK
4 &/ &
& & & .
& % % &% .
G
H
I
J
K
L
M
N
O
145
* , ,Q, ?> : *,
=
1 &/ &
& & & .
2 # & &.
& % % &%
.
HL_Sologic B901 eco.book Page 146 Friday, August 6, 2010 1:38 PM
/
3.5 *Q/**Q ,Q
+ ,Q
, & 1 &/ &
& $ &/.
1 # & .
2
++ & &
&, & &
.
3.6 ,
, %& $ & 50 %
/
& . * $
& $ &
16 & & % $ 24 .
#: =, & :
1 # & .
2 # OK.
OK
3 2$ "NEW ENTRY" & &
++/.
OK
4 #& & &
4 5 6
++/.
OK
5 #& & % &
4 5 6
& ++/.
OK
6 *, % &
$ ++.
G
H
I
J
K
L
M
N
O
G
H
I
J
K
L
M
N
O
*[Q & ?> :
1 # & .
2 +% & /&,
$ %
.
#& / .
3 # OK.
OK
4 2$ "EDIT ENTRY" & &
++/.
OK
146
HL_Sologic B901 eco.book Page 147 Friday, August 6, 2010 1:38 PM
/
DEL
5
6
4 5 6
J
K
L
M
N
O
OK
7
4 5 6
G
H
I
J
K
L
M
N
O
OK
8
]? Q + &> > +>>
*& ,
1 # & .
2 +% & /&,
$ %
.
#& / 4 5 6
.
3 # OK.
OK
4 2$ "DELETE ENTRY" "DELETE ALL" &
& ++/.
OK
ESC 5 # OK ++ &
OK
& + +.
G
H
I
J
K
L
M
N
O
3.7 # +Q %& 3 % & & M1, M2 & M3 (&%$ & $ & 24 ), % +.
<*:, : +Q (M1 - M2 - M3)
M1-M2-M3 1 # $ & &.
2 # OK.
OK
3 2$ "NEW ENTRY" & &
++/.
OK
4 #& & &
4 5 6
++/.
OK
5 #& & % &
4 5 6
& ++/.
OK
*, % &
$ ++.
G
H
I
J
K
L
M
N
O
G
H
I
J
K
L
M
N
O
147
G
H
I
# &
.
#& & &
++/.
#& & % &
& ++/.
*, % &
$ ++.
HL_Sologic B901 eco.book Page 148 Friday, August 6, 2010 1:38 PM
/
\ : +Q 1 &/ &
& & & .
M1-M2-M3 2 # & &.
& % % &% .
3
&, &+ &
& &
& .
3.8 ^Q >
& %& & (
30 % ) % + & &
&.
% & 1 % $ "X MISSED" (X = % &) /
+ CLIP ++.
&, &
&
.
& / & (CLIP) %$ ' $ % .
,
& %
.
& % & &
1 %. & % $
12 , & . 2 & &,
% % $ "EMPTY".
& / &% & 1 %.
1
&% $ , & /&.
%$ &% & $ &
1 + CLIP.
2
%, & /.
148
HL_Sologic B901 eco.book Page 149 Friday, August 6, 2010 1:38 PM
/
#?Q 2 & & &
15 $, $ % $%
& .
% &, % & 1 % 58 &
.
\ : *& Q >
1
2
3
# & &.
&% $ , & /&.
&, &/ &
& &
& .
% & % + &
& & &
& (&).
1
4 5 6
G
H
I
J
K
L
M
N
O
2
3
4
# & & $ & INT
28 3 , $ & $
, & & . *, % %
$ "INT".
#& % %
&
&. &% &
&, &.
++ & &
&, &+ &
&.
&,
& & $ & INT 28
3 .
149
3.9 #*Q > ,& *: ,&
HL_Sologic B901 eco.book Page 150 Friday, August 6, 2010 1:38 PM
&
&
4 , , ,
#?Q
, &
&!
# % +
3, “ /
”.
4.1 < 1
OK
OK 2
3
OK
4
OK
5
ESC
# & / OK.
2$ "HANDSET" & & ++/.
2$ "LANGUAGE" & &
++/.
2$ / %$ & &
++/.
$ & ,
& &.
4.2 [+& #*Q 1 # &
&.
2 #& & %.
4 5 6
3
&, &
& .
G
H
I
J
K
L
M
N
O
#Q **Q 1 #& & %.
4 5 6
%/ $ % %,
& .
2 &$ & 10 , % + %
& &
& $ & .
2 # &
&.
& % % &% .
3
&, &
& .
G
H
I
150
J
K
L
M
N
O
HL_Sologic B901 eco.book Page 151 Friday, August 6, 2010 1:38 PM
&
&
* , ,Q, ?> : *,
=
1 # &
&.
2 # &
&.
& % % &% .
3
&, &
& .
4.3 +& 4.4 *Q/**Q ,Q
+ ,Q
& &:
1 # & .
2
++ & &
&, & &
.
4.5 \Q
> *>
&/ & $, &
& (
& &/ &) $ &$
$.
1 # & & $ &
&/ &.
*, % % +
.
2
& &,
& &/ &.
151
+ &, &
&
& % + &
1
, / && LED
"& $ &" (+. 14 3 & 27
4) ++ &
& &
% +.
1
&, &
&.
2
&, &
& .
HL_Sologic B901 eco.book Page 152 Friday, August 6, 2010 1:38 PM
&
&
&/ & $, & & & . & &, & &&. $ &, &/ &
.
4.6 ,
, %& $ & 50 &.
* $
& $ & 16 & & & % $ & 24 .
#: + ,
1 # & .
OK 2 # & OK $.
OK
3 #& & &
4 5 6
++/.
OK
4 #& %
&
4 5 6
% & & ++/.
OK
*, % &
$ ++.
G
H
I
J
K
L
M
N
O
G
H
I
J
K
L
M
N
O
\ : +Q 1 # & .
2 &% $ & / .
4 5 6
3 # & , % /
%.
4 $, & &.
& % % &% .
5
&, &
& .
G
H
I
J
K
L
M
N
O
*[Q + ,
1 # & .
2 &% $ & / .
4 5 6
G
H
I
152
J
K
L
M
N
O
HL_Sologic B901 eco.book Page 153 Friday, August 6, 2010 1:38 PM
&
&
3
OK
4
4 5 6
OK 5
OK 6
4 5 6
OK 7
G
H
I
G
H
I
J
K
L
J
K
L
M
N
O
M
N
O
# & , % /
%.
# & / OK.
2$ "EDIT ENTRY" & & ++/.
#& & ++/.
#& &
% & & ++/.
4.7 < (CLIP)
2 $ & % $ & 12 , &% % .
_= $ & &, + CLIP ++ %.
` Q >
# & &.
*, % % &. 2
& &, % %
$ "EMPTY".
2 # & , %.
3 # & , & /.
4
&% $ , & /&.
5
+ &, & &.
1
ESC
153
* Sologic B901 1 & % &. % ' % $ .
, & % .
+ &, % /
%& &.
$ & 30 % (
&%$ 23 ).
HL_Sologic B901 eco.book Page 154 Friday, August 6, 2010 1:38 PM
#/% & & &$
\ : *& Q >
1 # & &.
2 &% $ & $ %
& % %.
3
& &, &
&.
& % % &% .
4
&, &
& .
]? : *& Q >
1
2
3
OK
4
OK
5
OK
ESC 6
OK
# & &.
&% $ & $ %
& % %.
# & / OK.
2$ "DELETE", $ & % & &
++/.
2$ "DELETE ALL" & & &
++/.
# ++ &
& .
5 #: > >= [
> ,
5.1 #: > { [> 4 5 6
G
H
I
154
& & &, & INT & & & % &
& (1-5 &
& "0" % +).
*, &
& % &
1.
1
INT
J
K
L
M
N
O
HL_Sologic B901 eco.book Page 155 Friday, August 6, 2010 1:38 PM
#/% & & &$ & &% &
&, &. &+ &
&, & % % &
&.
2 # & & $ & INT 3 . $, % &
& & & &
(&).
3
$ & &, & INT.
4
&, &
& .
INT
INT
#?Q &
% + & &
&.
% + $ & "0".
4 5 6
G
H
I
& , & INT
& & & % &
& (1-5 &
& "0" % +).
*, &
& % +
&$ % &
1.
2 # & & &/ &
& % +.
$, &.
1
INT
J
K
L
M
N
O
155
5.2 > ([ ,)
HL_Sologic B901 eco.book Page 156 Friday, August 6, 2010 1:38 PM
Rozpocz5cie pracy
1 Rozpocz|cie pracy
Dzi5kujemy za zakup niniejszego produktu firmy TOPCOM. Produkt
ten zosta zaprojektowany i wykonany z najwi5ksz! trosk! o
u"ytkownika oraz rodowisko. Poniewa" w firmie TOPCOM mylimy o
przyszoci naszej planety oraz naszych dzieci, naszym celem jest
zrobi wszystko, aby pomóc ratowa rodowisko naturalne. Dlatego
zdecydowalimy o zmniejszeniu liczby stron naszych przewodników
dla u"ytkownika oraz instrukcji obsugi. Je"eli wemiemy pod uwag5,
"e na wyprodukowanie 1 tony papieru potrzebne s! okoo 24 drzewa,
wydrukowanie podr5cznika w 11 j5zykach b5dzie kosztowa "ycie
wielu drzew rosn!cych na naszej planecie. W tym krótkim podr5czniku
dostarczonym z urz!dzeniem firmy TOPCOM mo"na znale zwi5ze
wyjanienie dotycz!ce jego instalacji oraz u"ytkowania.
Je"eli chcesz dowiedzie si5 wi5cej o wszystkich funkcjach swojego
nowego urz!dzenia firmy TOPCOM, prosimy odwiedzi nasz! stron5
internetow! (www.topcom.net), gdzie mo"na pobra kompletn!
instrukcj5 obsugi w swoim j5zyku. Dzi5ki temu w TOPCOM mamy
nadziej5, "e przyczynimy si5 do stworzenia z naszej planety lepszego
miejsca do "ycia, ale cakowity sukces odniesiemy tylko z Wasz!
pomoc!!
2 Pierwsze kroki
2.1 Jak korzysta} z niniejszej instrukcji
W tej instrukcji u"ytkownika zastosowano nast5puj!c! metod5, aby
poprawi jej czytelno:
Tekst....... „Display”.
Tekst pojawiaj!cy si5 na wywietlaczu telefonu
Klawisz, który nale"y nacisn!
2.2 Instalacja stacji bazowej
Zainstaluj stacj5 bazow! w nast5puj!cy sposób:
1 Pod!cz zasilacz sieciowy najpierw do stacji bazowej, a
nast5pnie do gniazda.
2 Pod!cz kabel telefoniczny do gniazda w cianie i do gniazda w
tylnej cz5ci stacji bazowej.
3 Kable telefoniczny i zasilaj!cy powinny zosta pod!czone
zgodnie z rysunkiem 1.
156
HL_Sologic B901 eco.book Page 157 Friday, August 6, 2010 1:38 PM
Pierwsze kroki
2.3 adowarka s~uchawki
Pod!cz zasilacz sieciowy do gniazda sieciowego.
1
2.4 S~uchawka
2
3
4
Otwórz komor5 akumulatorów, jak pokazano na rysunku 2.
Wó" akumulatory. Upewnij si5, "e zostaa zachowana
waciwa biegunowo (oznaczenia + i –).
Zamknij komor5 akumulatorów.
Umie suchawk5 w adowarce i aduj j! przez 16 godzin.
W tym czasie b5dzie si5 wieci dioda adowania.
2.5 Klawisze/wywietlacz
S~uchawka bezprzewodowa
1.
2.
3.
4.
5.
6.
7.
8.
Ponowne wybieranie numeru
/ do góry
Ksi!"ka telefoniczna
Wyciszenie / usuni5cie
Zakoczenie rozmowy
Klawisze alfanumeryczne
Blokada klawiszy
Pauza
W!czenie/wy!czenie
dzwonka
9. Lista po!cze / w dó
10. Odebranie po!czenia / tryb
gonomówi!cy / przycisk
rozmowy
11. INT / wyjcie
12. Menu / OK / Flash
13. Wywietlacz
14. Czerwona dioda, miga podczas
po!czenia
Stacja bazowa
15.
16.
17.
18.
19.
20.
21.
22.
23.
24.
25.
26.
27.
Wyjcie
Menu / OK
W lewo
Ponowne wybieranie numeru /
do góry
W prawo
Wywietlacz
Ksi!"ka telefoniczna
Lista po!cze / Flash
W dó
Szybkie wybieranie
(M1 - M2 - M3)
Tryb gonomówi!cy
Klawisze alfanumeryczne
Czerwona dioda na stacji
bazowej, miga podczas
28.
29.
30.
31.
32.
33.
po!czenia
Przywoanie / przekierowanie
po!czenia / po!czenie
wewn5trzne
Wyciszenie / usuni5cie
Regulacja gonoci
Gonik
Uchwyt suchawki do
monta"u na cianie
Wypust: umo"liwia chwilowe
odo"enie suchawki podczas
po!czenia, je"eli telefon jest
zamontowany na cianie
adowarka
34. Dioda: trwa adownie
suchawki.
157
Polski
1
HL_Sologic B901 eco.book Page 158 Friday, August 6, 2010 1:38 PM
Pierwsze kroki
2.6 Wywietlacz s~uchawki
HANDSET X
x = numer suchawki
Inne numery lub
przewini5cie menu w lewo
Znajdowanie lub
tworzenie wpisów ksi!"ki
telefonicznej
Inne numery lub przewini5cie
menu w prawo
Wy!czanie dzwonka
W!czony tryb gonomówi!cy
W!czona blokada
klawiszy
Nowa wiadomo gosowa
Nawi!zano po!czenie
Mikrofon wyciszony
Nowe numery na licie
po!cze
Ikona anteny wskazuje si5
sygnau. Gdy suchawka jest
poza zasi5giem, ikona anteny
miga.
Wywietlanie stanu akumulatora
Po!czenie wewn5trzne
2.7 Wywietlacz stacji bazowej
CLIP
Inne numery lub przewini5cie
menu w lewo
Inne numery lub przewini5cie
menu w prawo
Wy!czanie dzwonka
Nowa wiadomo gosowa
Nowe numery na licie
po!cze
Znajdowanie lub tworzenie
wpisów ksi!"ki telefonicznej
Nawi!zano po!czenie
Po!czenie wewn5trzne
158
04
Numer pozycji na licie
po!cze
W!czony tryb
gonomówi!cy
Mikrofon wyciszony
Godzina i data
HL_Sologic B901 eco.book Page 159 Friday, August 6, 2010 1:38 PM
Obsuga telefonu
2.8 Poruszanie si| po menu
Telefon Sologic B901 ma atwy w u"yciu system menu. W ka"dym
menu dost5pna jest lista opcji.
Poni"ej przedstawiono podsumowanie opcji menu suchawki oraz
stacji bazowej.
OK
1
2
OK
ESC
3
4
Nacinij klawisz Menu/OK, aby otworzy menu gówne.
Przejd do wybranej opcji menu.
Nacinij klawisz Menu/OK, aby wywietli dalsze opcje
lub potwierdzi wywietlone ustawienia.
Nacinij klawisz wyjcia, aby powróci do poprzedniego
poziomu menu.
2.9 Uywanie klawiszy alfanumerycznych
3 Obs~uga telefonu
Informacje W tym rozdziale opisano tylko funkcje stacji
bazowej! Informacje dotycz!ce u"ywania suchawki
mo"na znale w rozdziale „4 U"ywanie suchawki
bezprzewodowej“.
3.1 Ustawianie j|zyka wywietlacza
OK
1
OK 2
3
OK
4
Nacinij klawisz Menu / OK.
Wybierz opcj5 „LANGUAGE” i potwierd.
Nast5pnie wybierz j5zyk.
Nacinij klawisz OK, aby potwierdzi.
159
Polski
Klawisze alfanumeryczne umo"liwiaj! wprowadzanie tekstu. Nacinij
odpowiedni klawisz alfanumeryczny, aby wybra liter5 26 . Na przykad ,
je"eli naciniesz klawisz numeryczny 5, na wywietlaczu pojawi si5
najpierw litera „j”. Nacinij klawisz kilkakrotnie, aby wybra inne litery.
Nacinij raz klawisz 2, aby wybra liter5 „a”. Je"eli chcesz wprowadzi
litery „a” i „b” bezporednio po sobie, najpierw nacinij raz klawisz 2,
aby wybra liter5 „a”. Odczekaj 2 sekundy, a" kursor przejdzie do
nast5pnej pozycji. Nast5pnie nacinij dwukrotnie klawisz 2, aby
29 , aby usun!
wybra liter5 „b”. Mo"esz u"y klawisza usuwania
wprowadzone b5dnie litery. W ten sposób usuniesz liter5 przed
kursorem.
17 /
19 , aby przesun!
Nacinij klawisz „W lewo” lub „W prawo”
kursor.
HL_Sologic B901 eco.book Page 160 Friday, August 6, 2010 1:38 PM
Obsuga telefonu
3.2 Ustawianie daty i godziny
Informacje Jeli na linii telefonicznej dost5pna jest usuga
identyfikacji rozmówcy (CLIP), a operator przesya
informacje o dacie i godzinie, po odebraniu rozmowy
przychodz!cej zostanie automatycznie ustawiony
zegar.
Po ustawieniu godziny zostanie ona przekazana do
wszystkich suchawek zarejestrowanych w stacji
bazowej.
1
OK
OK 2
OK 3
4 5 6
J
K
L
G
H
I
M
N
O
4 5 6
J
K
L
G
H
I
M
N
O
OK 4
OK 5
4 5 6
OK 6
OK 7
4 5 6
8
OK
9
4 5 6
J
K
L
G
H
I
J
K
L
G
H
I
J
K
L
G
H
I
M
N
O
M
N
O
M
N
O
Wane
Nacinij klawisz Menu / OK.
Wybierz opcj5 „TIME” i potwierd.
Wybierz opcj5 „DATE/TIME” i potwierd.
Wprowad rok i potwierd.
Wprowad miesi!c i potwierd.
Wprowad dzie i potwierd.
Wprowad godzin5 i potwierd.
Wprowad minuty.
Nacinij klawisz OK, aby potwierdzi.
Data i godzina i zostan! usuni5te w przypadku
braku zasilania stacji bazowej.
3.3 Ustawianie formatu godziny
1
OK
OK 2
OK 3
4
OK
Nacinij klawisz Menu / OK.
Wybierz opcj5 „TIME” i potwierd.
Wybierz opcj5 „FORMAT” i potwierd.
Wybierz format godziny „24 HOUR” lub
„12 HOUR” i potwierd.
3.4 Rozmowy wychodzce
Nawizywanie po~czenia
1 Ponie suchawk5 lub nacinij klawisz trybu
gonomówi!cego.
2 Wprowad numer telefonu.
4 5 6
G
H
I
160
J
K
L
M
N
O
HL_Sologic B901 eco.book Page 161 Friday, August 6, 2010 1:38 PM
Obsuga telefonu
Odwie suchawk5 lub nacinij ponownie klawisz
trybu gonomówi!cego w celu zakoczenia
rozmowy.
LUB
1 Wprowad numer telefonu.
2 Ponie suchawk5 lub nacinij klawisz trybu
gonomówi!cego.
3 Odwie suchawk5 lub nacinij ponownie klawisz
trybu gonomówi!cego w celu zakoczenia
rozmowy.
3
4 5 6
G
H
I
J
K
L
M
N
O
Ponowne wybieranie ostatniego numeru
1 Ponie suchawk5 lub nacinij klawisz trybu
gonomówi!cego.
2 Nacinij klawisz ponownego wybierania.
Ostatni numer telefonu zostanie wybrany
automatycznie.
czenie z numerem z ksiki telefonicznej
1 Nacinij klawisz ksi!"ki telefonicznej.
4 5 6 2 Przejd do wybranej nazwy lub wprowad
pierwsze litery tej nazwy.
3 Nacinij klawisz Menu / OK, aby wywietli numer
telefonu.
OK
4 Ponie suchawk5 lub nacinij klawisz trybu
gonomówi!cego.
Numer telefonu zostanie wybrany automatycznie.
G
H
I
J
K
L
M
N
O
161
Polski
Ponowne wybieranie jednego z trzech ostatnich numerów
1 Nacinij klawisz ponownego wybierania.
2 Wybierz jeden z ostatnich trzech numerów.
3 Ponie suchawk5 lub nacinij klawisz trybu
gonomówi!cego.
HL_Sologic B901 eco.book Page 162 Friday, August 6, 2010 1:38 PM
Obsuga telefonu
3.5 W~czanie i wy~czanie trybu g~onomówicego
Ta funkcja umo"liwia odbieranie po!czenia bez podnoszenia
suchawki lub w sytuacji, gdy suchawka zostaa ju" podniesiona.
1 Nacinij klawisz trybu gonomówi!cego w celu
w!czenia tej funkcji.
2 Nacinij ponownie klawisz trybu
gonomówi!cego, aby prze!czy rozmow5 z
powrotem na suchawk5.
3.6 Ksika telefoniczna
W ksi!"ce telefonicznej mo"na zapisa 50 numerów i nazwisk. Nazwy
mog! zawiera do 16 znaków, a numery do 24 cyfr.
Dodawanie nowej nazwy i numeru
1 Nacinij klawisz ksi!"ki telefonicznej.
2 Nacinij klawisz OK.
OK
OK 3 Wybierz opcj5 „NEW ENTRY” i potwierd.
4 5 6 OK 4 Wprowad nazw5 i potwierd.
4 5 6 OK 5 Wprowad numer telefonu i potwierd.
6 Usyszysz sygna potwierdzenia.
G
H
I
J
K
L
M
N
O
G
H
I
J
K
L
M
N
O
Edytowanie nazwy i numeru telefonu
1 Nacinij klawisz ksi!"ki telefonicznej.
2 Wybierz nazw5, u"ywaj!c klawiszy „W gór5” i „W
dó”.
LUB
Wprowad pocz!tkowe litery nazwy.
3 Nacinij klawisz OK.
OK
OK 4 Wybierz opcj5 „EDIT ENTRY” i potwierd.
DEL
5 Nacinij klawisz usuwania, aby usun! litery.
4 5 6 OK 6 Wprowad nazw5 i potwierd.
4 5 6 OK 7 Wprowad numer telefonu i potwierd.
8 Usyszysz sygna potwierdzenia.
162
G
H
I
J
K
L
M
N
O
G
H
I
J
K
L
M
N
O
HL_Sologic B901 eco.book Page 163 Friday, August 6, 2010 1:38 PM
Obsuga telefonu
Usuwanie jednego wpisu lub wszystkich wpisów z ksiki
telefonicznej
1 Nacinij klawisz ksi!"ki telefonicznej.
2 Wybierz nazw5, u"ywaj!c klawiszy „W gór5” i „W
dó”.
LUB
Wprowad pocz!tkowe litery nazwy.
4 5 6
3 Nacinij klawisz OK.
OK
4 Wybierz opcj5 „DELETE ENTRY” lub „DELETE
ALL” i potwierd.
OK
ESC 5 Nacinij klawisz OK, aby potwierdzi, lub klawisz
OK
wyjcia, aby powróci do poprzednich opcji.
G
H
I
J
K
L
M
N
O
3.7 Klawisze szybkiego wybierania
G
H
I
J
K
L
M
N
O
G
H
I
J
K
L
M
N
O
Szybkie wybieranie numeru
1 Ponie suchawk5 lub nacinij klawisz trybu
gonomówi!cego.
M1-M2-M3 2 Nacinij klawisz szybkiego wybierania.
Numer telefonu zostanie wybrany automatycznie.
3 Odwie suchawk5 lub nacinij ponownie klawisz
trybu gonomówi!cego w celu zakoczenia
rozmowy.
163
Polski
W stacji bazowej mo"na zapisa do 3 numerów szybkiego wybierania:
M1, M2 i M3 (ka"dy mo"e zawiera do 24 cyfr).
Zapisywanie numerów szybkiego wybierania (M1 - M2 - M3)
M1-M2-M3 1 Nacinij jeden z klawiszy szybkiego wybierania.
2 Nacinij klawisz OK.
OK
OK 3 Wybierz opcj5 „NEW ENTRY” i potwierd.
4 5 6 OK 4 Wprowad nazw5 i potwierd.
4 5 6 OK 5 Wprowad numer telefonu i potwierd.
Usyszysz sygna potwierdzenia.
HL_Sologic B901 eco.book Page 164 Friday, August 6, 2010 1:38 PM
Obsuga telefonu
3.8 Lista po~cze
Po!czenia przychodz!ce s! rejestrowane na licie po!cze
(maksymalnie 30 numerów) w stacji bazowej i suchawce.
Liczba nieodebranych po!cze jest wywietlana za pomoc!
komunikatu „X MISSED” (X = liczba nieodebranych po!cze) i
migaj!cego symbolu CLIP.
Nacinij i krótko klawisz listy po!cze
, aby wywietli ostatnie
po!czenie.
Wane
Funkcja identyfikacji rozmówcy (CLIP) jest
dost5pna, tylko je"eli zostaa aktywowana dla danej
linii. W celu uzyskania dalszych informacji nale"y
skontaktowa si5 z operatorem.
Na wywietlaczu zostanie wywietlony numer telefonu i nazwa
ostatniego rozmówcy. Jeli numer telefoniczny jest du"szy ni" 12 cyfr,
mo"esz wywietli pozostae cyfry, naciskaj!c klawisz . Jeli lista
po!cze jest pusta, na wywietlaczu pojawi si5 komunikat „EMPTY”.
W prawym górnym rogu wywietlana jest data i godzina ka"dej
rozmowy przychodz!cej.
1 Przewijaj list5 za pomoc! klawiszy „W gór5” i „W
dó”.
Numer pozycji na licie po!cze wywietlany jest
obok symbolu CLIP.
2 Nacinij klawisz „W lewo” i „W prawo”, aby
wywietli nazwisko lub numer.
Informacje Telefon powraca do trybu gotowoci, je"eli klawisz
„W gór5” lub „W dó”
nie zostanie nacini5ty
przez 15 sekund.
Po odebraniu po!czenia numer rozmówcy jest
widoczny na wywietlaczu przez 5–8 sekund od
ostatniego dzwonka.
Wybieranie numeru z listy po~cze
1
2
164
Nacinij klawisz listy po!cze.
Przewijaj list5 za pomoc! klawiszy „W gór5” i „W
dó”.
HL_Sologic B901 eco.book Page 165 Friday, August 6, 2010 1:38 PM
U"ywanie suchawki bezprzewodowej
3
Podnie suchawk5 lub nacinij ponownie klawisz
trybu gonomówi!cego w celu wykonania
rozmowy.
3.9 Nawizywanie po~czenia wewn|trznego ze s~uchawk
i przekazywanie rozmowy do s~uchawki
bezprzewodowej
Mo"esz przekaza po!czenie ze stacji bazowej do suchawki lub
rozmawia jednoczenie z rozmówc! zewn5trznym i osob! u"ywaj!c!
suchawki bezprzewodowej (po!czenie konferencyjne).
1
4 5 6
G
H
I
J
K
L
M
N
O
2
3
4
Przytrzymaj klawisz INT 28 przez 3 sekundy do
momentu, gdy usyszysz sygna dwi5kowy.
Nast5pnie zwolnij klawisz. Na wywietlaczu
zostanie wywietlony napis „INT”.
Wprowad numer suchawki. Po nawi!zaniu
po!czenia ze suchawk! mo"na wykona rozmow5
wewn5trzn!.
Odó" suchawk5, aby przekierowa rozmow5 na
suchawk5 bezprzewodow!.
LUB
Przytrzymaj klawisz INT 28 przez 3 sekundy w celu
nawi!zania po!czenia konferencyjnego.
Informacje W tym rozdziale opisano tylko funkcje suchawki
bezprzewodowej! Informacje dotycz!ce u"ywania
stacji bazowej mo"na znale w rozdziale
„3 Obsuga telefonu“.
4.1 Zmiana j|zyka
OK
1
OK 2
OK 3
ESC
OK 4
5
Nacinij klawisz Menu / OK.
Wybierz opcj5 „HANDSET” i potwierd.
Wybierz opcj5 „LANGUAGE” i potwierd.
Wybierz j5zyk i potwierd.
Nacinij klawisz wyjcia, aby powróci do trybu
gotowoci.
165
Polski
4 Uywanie s~uchawki bezprzewodowej
HL_Sologic B901 eco.book Page 166 Friday, August 6, 2010 1:38 PM
U"ywanie suchawki
4.2 Rozmowy wychodzce
Nawizywanie po~czenia
1 Nacinij przycisk rozmowy.
2 Wprowad numer telefonu.
4 5 6
3 Nacinij klawisz zakoczenia rozmowy, aby
zakoczy po!czenie.
G
H
I
J
K
L
M
N
O
Przygotowanie do nawizania po~czenia
1 Wprowad numer telefonu.
4 5 6
Mo"esz poprawi nieprawidowy numer za pomoc!
klawisza wyciszania.
Jeli przez 10 sekund nie zostanie nacini5ty "aden
klawisz, numer zniknie i suchawka powróci do trybu
gotowoci.
2 Nacinij przycisk rozmowy.
Numer telefonu zostanie wybrany automatycznie.
3 Nacinij klawisz zakoczenia rozmowy, aby
zakoczy po!czenie.
G
H
I
J
K
L
M
N
O
Ponowne wybieranie ostatniego numeru
Nacinij przycisk rozmowy.
2 Nacinij przycisk ponownego wybierania.
Ostatni numer telefonu zostanie wybrany
automatycznie.
3 Nacinij klawisz zakoczenia rozmowy, aby
zakoczy po!czenie.
1
4.3 Rozmowy przychodzce
W przypadku rozmowy przychodz!cej suchawka i stacja bazowa
dzwoni!. Migaj! tak"e ich diody wizualnego sygnau po!czenia
(patrz punkt 14 na rysunku 3 i punkt 27 na rysunku 4).
1
2
166
Nacinij klawisz odbierania po!czenia,
aby rozpocz! rozmow5.
Nacinij klawisz zakoczenia rozmowy,
aby zakoczy po!czenie.
HL_Sologic B901 eco.book Page 167 Friday, August 6, 2010 1:38 PM
U"ywanie suchawki bezprzewodowej
4.4 W~czanie i wy~czanie trybu g~onomówicego
W czasie rozmowy:
1 Nacinij klawisz trybu gonomówi!cego w celu
w!czenia tej funkcji.
2 Nacinij ponownie klawisz trybu
gonomówi!cego, aby prze!czy rozmow5 z
powrotem na suchawk5.
4.5 Blokada klawiszy
Przy w!czonej blokadzie klawiszy nacini5cie dowolnego klawisza w
trybie gotowoci nie b5dzie miao "adnego efektu (z wyj!tkiem
nacini5cia klawisza blokady).
1 Nacinij i przytrzymaj klawisz blokady klawiatury.
Na wywietlaczu pojawi si5 symbol.
2 Nacinij ponownie klawisz blokady w celu
odblokowania klawiatury.
Gdy klawiatura jest zablokowana, mo"esz odebra
po!czenie przychodz!ce przez nacini5cie klawisza
odbierania po!czenia . Klawiatura dziaa normalnie
podczas rozmowy. Blokada jest w!czana ponownie
po zakoczeniu rozmowy.
W pami5ci ksi!"ki telefonicznej mo"na zapisa 50 wpisów. Nazwy
mog! zawiera do 16 znaków, a numery telefoniczne do 24 cyfr.
Dodawanie wpisu do ksiki telefonicznej
1 Nacinij klawisz ksi!"ki telefonicznej.
OK 2 Nacinij dwukrotnie klawisz OK.
OK
4 5 6 OK 3 Wprowad nazw5 i potwierd.
4 5 6 OK 4 Wprowad numer telefonu i potwierd.
Usyszysz sygna potwierdzenia.
G
H
I
J
K
L
M
N
O
G
H
I
J
K
L
M
N
O
Szybkie wybieranie numeru
1 Nacinij klawisz ksi!"ki telefonicznej.
2 Przejd do wybranej nazwy lub wprowad pierwsze
litery tej nazwy.
4 5 6
G
H
I
J
K
L
M
N
O
167
Polski
4.6 Ksika telefoniczna
HL_Sologic B901 eco.book Page 168 Friday, August 6, 2010 1:38 PM
U"ywanie suchawki
Nacinij klawisz ksi!"ki telefonicznej, aby
wywietli numer telefonu.
4 Nacinij klawisz po!czenia.
Numer telefonu zostanie wybrany automatycznie.
5 Nacinij klawisz zakoczenia rozmowy, aby
zakoczy po!czenie.
3
Edytowanie wpisu w ksice telefonicznej
1 Nacinij klawisz ksi!"ki telefonicznej.
2 Przejd do wybranej nazwy lub wprowad pierwsze
litery tej nazwy.
4 5 6
3 Nacinij klawisz ksi!"ki telefonicznej, aby
wywietli numer telefonu.
4 Nacinij klawisz Menu / OK.
OK
OK 5 Wybierz opcj5 „EDIT ENTRY” i potwierd.
4 5 6 OK 6 Wprowad nazw5 i potwierd.
4 5 6 OK 7 Wprowad lub edytuj numer telefonu i potwierd.
G
H
I
G
H
I
J
K
L
M
N
O
G
H
I
J
K
L
M
N
O
J
K
L
M
N
O
4.7 Identyfikacja rozmówcy (CLIP)
Telefon Sologic B901 wywietla numery rozmów przychodz!cych. Ta
funkcja jest dost5pna wy!cznie, je"eli usuga zostaa udost5pniona
przez operatora linii telefonicznej. Aby uzyska wi5cej informacji na
ten temat, skontaktuj si5 z operatorem.
Gdy odbierasz rozmow5, numer telefonu jest zapisywany na licie
po!cze. Lista przechowuje do 30 numerów telefonicznych (ka"dy o
dugoci do 23 cyfr).
Je"eli numer telefoniczny jest du"szy ni" 12 cyfr,
mo"esz przewin! w prawo, aby wywietli
pozostae cyfry.
Nowe po~czenia
Je"eli na licie po!cze znajduje si5 nowa
rozmowa, na wywietlaczu miga symbol CLIP.
Otwieranie listy po~cze
1
168
Nacinij klawisz listy po!cze.
HL_Sologic B901 eco.book Page 169 Friday, August 6, 2010 1:38 PM
U"ywanie suchawki bezprzewodowej
Wywietli si5 ostatnia odebrana rozmowa. Jeli lista
po!cze jest pusta, na wywietlaczu pojawi si5
komunikat „EMPTY”.
2 Nacinij klawisz ksi!"ki telefonicznej, aby pomin!
numer.
3 Nacinij klawisz ksi!"ki telefonicznej, aby pomin!
dat5 i godzin5.
4 Przewijaj list5 za pomoc! klawiszy „W gór5” i „W
dó”.
5 Aby zamkn! list5 po!cze, nacinij klawisz
wyjcia.
ESC
Wybieranie numeru z listy po~cze
Nacinij klawisz listy po!cze.
2 Przewijaj list5 po!cze, a" zostanie wywietlony
"!dany numer.
3 Nacinij klawisz po!czenia, aby rozpocz!
rozmow5.
Numer telefonu zostanie wybrany automatycznie.
4 Nacinij klawisz zakoczenia rozmowy, aby
zakoczy po!czenie.
1
1
2
3
OK
4
OK
5
OK
OK
ESC 6
Nacinij klawisz listy po!cze.
Przewijaj list5 po!cze, a" zostanie wywietlony
"!dany numer.
Nacinij klawisz Menu / OK.
Wybierz opcj5 „DELETE”, aby usun! wybrany
numer, i potwierd.
LUB
Wybierz opcj| „DELETE ALL”, aby usun!
wszystkie wpisy w ksi!"ce telefonicznej, a
nast5pnie potwierd.
Nacinij klawisz , aby potwierdzi, lub klawisz
wyjcia, aby powróci do poprzednich opcji.
169
Polski
Usuwanie numeru z listy po~cze
HL_Sologic B901 eco.book Page 170 Friday, August 6, 2010 1:38 PM
Przekazywanie rozmów i
5 Przekazywanie rozmów i po~czenia wewn|trzne
pomi|dzy s~uchawkami
5.1 Przekazywanie rozmów i rozmowy konferencyjne
podczas rozmowy zewn|trznej
4 5 6
G
H
I
W czasie rozmowy zewn5trznej nacinij klawisz
INT, a nast5pnie wybierz numer suchawki
(1–5, „0” dla stacji bazowej).
Druga suchawka zacznie dzwoni.
Po nawi!zaniu po!czenia ze suchawk! mo"na
wykona rozmow5 wewn5trzn!. Gdy odwiesisz
suchawk5, linia zewn5trzna zostanie prze!czona
na drug! suchawk5.
2 Przytrzymaj klawisz INT przez 3 sekundy. Mo"esz
teraz jednoczenie rozmawia z osob!
obsuguj!c! drug! suchawk5 i lini! zewn5trzn!
(rozmowa konferencyjna).
3 Nacinij ponownie klawisz INT w celu powrotu do
rozmowy zewn5trznej.
4 Nacinij klawisz zakoczenia rozmowy, aby
zakoczy po!czenie.
1
INT
J
K
L
M
N
O
INT
INT
5.2 Po~czenie wewn|trzne (funkcja telefonu domowego)
Informacje Mo"esz nawi!za po!czenie pomi5dzy stacj!
bazow! a suchawk! bezprzewodow!.
Stacja bazowa ma numer wewn5trzny „0”.
4 5 6
G
H
I
170
W trybie gotowoci nacinij klawisz INT, a
nast5pnie wybierz numer suchawki
(1–5, „0”dla stacji bazowej).
Wybrana suchawka lub stacja bazowa zacznie
dzwoni.
2 Nacinij klawisz po!czenia lub podnie suchawk5
ze stacji bazowej.
Mo"esz teraz prowadzi rozmow5 wewn5trzn!.
1
INT
J
K
L
M
N
O
HL_Sologic B901 eco.book Page 171 Friday, August 6, 2010 1:38 PM
HL_Sologic B901 eco.book Page 172 Friday, August 6, 2010 1:38 PM
SOLOGIC B901 COMBO
visit our websites
www.topcom.net
www.sologic.info
MD19200362