Download HeartStart FRx Trainer - Active Canadian Emergency Training
Transcript
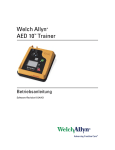
HeartStart FRx Trainer
INSTRUCTIONS FOR USE
MODE D’EMPLOI
BEDIENUNGSANLEITUNG
861306
Edition 4
Intentionally blank.
Page intentionnellement laissée vide.
Diese Seite bleibt frei.
Philips Medical Systems
HeartStart FRx Trainer
861306
INSTRUCTIONS FOR USE ...............................................
MODE D’EMPLOI
..........................................................
Philips Medical Systems
BEDIENUNGSANLEITUNG
..............................................
1
19
39
About this edition
The information in this guide applies to the model 861306
HeartStart FRx Trainer. This information is subject to change.
Please contact Philips at www.medical.philips.com/heartstart or
your local Philips representative for information on revisions.
informatique sous une forme quelconque ou par un moyen
quelconque sans le consentement du détenteur des copyrights.
La copie non autorisée de cette publication peut non seulement
enfreindre les lois sur les copyrights mais peut également réduire la
capacité de Philips Medical Systems à fournir des informations
exactes et actualisées aux utilisateurs et aux opérateurs.
Edition history
Edition 4
Publication date: March 2007
Assembly #: 012904-0004
Printed in the U.S.A.
Copyright
© 2007 Philips Electronics North America Corp.
No part of this publication may be reproduced, transmitted,
transcribed, stored in a retrieval system or translated into any
human or computer language in any form by any means without the
consent of the copyright holder.
Le simulateur HeartStart FRx est fabriqué par Philips Medical
Systems, Seattle, WA, USA.
Zu dieser Auflage
Die Informationen in dieser Anleitung gelten für den HeartStart
FRx Trainer, Modell 861306. Änderungen vorbehalten. Bitte
wenden Sie sich an Philips unter www.medical.philips.com/
heartstart oder an Ihren lokalen Vertreter von Philips, um
Informationen über Änderungen zu erhalten.
Bisherige Auflagen
Manufacturer
Auflage 4
Veröffentlichungsdatum: März 2007
Fertigungsnummer: 012904-0004
Gedruckt in den USA
The HeartStart FRx Trainer is manufactured by Philips Medical
Systems, Seattle, WA, USA.
Copyright
© 2007 Philips Electronics North America Corp.
À propos de cette édition
Les informations de ce guide s'appliquent au simulateur HeartStart
FRx, modèle 861306. Ces informations sont sujettes à modification.
Veuillez vous adresser à Philips à www.medical.philips.com/
heartstart ou composer le numéro de votre représentant
commercial Philips pour obtenir des informations sur les révisions.
Historique d'édition
Édition 4
Date de publication : Mars 2007
Numéro d'assemblage : 012904-0004
Imprimé aux États-Unis d'Amérique
Copyright
© 2007 Philips Electronics North America Corp.
Aucune partie de cette publication ne peut être reproduite,
transmise, transcrite, stockée dans un système de récupération
quelconque ni traduite dans une langue humaine ou un langage
Kein Teil dieser Publikation darf ohne Zustimmung des CopyrightInhabers in irgendeiner Form oder auf irgendeine Weise
reproduziert, übertragen, kopiert, gespeichert oder in eine
menschliche oder Computersprache übersetzt werden.
Nicht autorisierte Kopien dieser Publikation verletzen nicht nur
urheberrechtliche Bestimmungen, sondern hindern überdies Philips
Medical Systems daran, Benutzern und Bedienern genaue und
aktuelle Informationen bereitzustellen.
Hersteller
Der HeartStart FRx Trainer wird hergestellt von Philips Medical
Systems, Seattle, Washington, USA.
Philips Medical Systems
Unauthorized copying of this publication may not only infringe
copyright but also reduce the ability of Philips Medical Systems to
provide accurate and up-to-date information to users and
operators alike.
Fabricant
1
HeartStart FRx Trainer 861306
Intended use of the FRx Trainer ..............................................................................................
1
Features of the FRx Trainer ........................................................................................................
1
Overview of the FRx Trainer ....................................................................................................
3
To set up the FRx Trainer .............................................................................................................
6
To select a training scenario .......................................................................................................
9
To run a training scenario ............................................................................................................
9
Standard training scenarios ......................................................................................................... 10
FRx Trainer performance during use .................................................................................... 14
To change the FRx Trainer’s default configuration ........................................................ 14
To troubleshoot the FRx Trainer ............................................................................................. 16
Philips Medical Systems
Environmental Considerations .................................................................................................. 17
Intended use of the FRx Trainer
The HeartStart FRx Trainer is designed to prepare emergency responders
to use the FRx automated external defibrillator (AED). The HeartStart FRx
Trainer cannot be used to deliver defibrillation treatment.
The Trainer provides a variety of simulations, or training scripts, to help
responders become familiar with the FRx defibrillator and allow them to
practice the basic skills necessary to use the defibrillator in an emergency.
The default Trainer configuration can be adjusted to meet local protocol
requirements.
ENGLISH
Contents
2
Features of the FRx Trainer
•
•
•
•
•
WARNING: Do not store the Trainer with your defibrillator, or where it
could be confused with a defibrillator during an emergency.
FRx TRAINER 861306
Philips Medical Systems
•
The HeartStart FRx Trainer provides simulated shock delivery. It has
no high-voltage capabilities, ensuring safety during training.
The HeartStart FRx Trainer is designed for use with HeartStart
Training Pads II and training manikins when equipped with the External
Manikin Adapter M5089A provided with the Trainer. The FRx Trainer
and Training Pads II can also be used with Laerdal training manikins
when equipped with an Internal Manikin Adapter M5088A, available
separately from Philips.
Reusable HeartStart Training Pads II are available in a kit
(REF: 989803139271). The kit contains one set of Training Pads II
in a reusable training pads case, an adult pads placement guide,
Instructions for Use of the training pads, and an illustrated guide.
Replacement training pads (REF: 989803139291) are available for
use with the Training Pads II case.
The HeartStart FRx Trainer and Training Pads II can also be used with
an Infant/Child Pads Placement Guide and an Infant/Child Key, available
separately from Philips, for training in pediatric defibrillation.
The HeartStart FRx Trainer has eight training scenarios that simulate
realistic sudden cardiac arrest episodes. See “Standard Training
Scenarios” for scenario descriptions. These scenarios are compatible
with training programs developed by nationally recognized responder
programs.
The HeartStart FRx Trainer is powered by four standard AA alkaline
batteries.
3
Overview of the FRx Trainer
ENGLISH
Philips Medical Systems
back
The HeartStart FRx Trainer is designed to look similar to the HeartStart
FRx Defibrillator. However, the yellow center label identifies it as a training
device. In addition, some of the FRx defibrillator’s features are either
inactive in the FRx Trainer or behave differently from their counterparts in
the Trainer. The FRx Trainer’s physical features are described below.
A TRAINING PADS CONNECTOR PORT. The Training Pads II
connector is inserted in this port.
B
INFANT/CHILD KEY SLOT. The Infant/Child Key, available separately,
is inserted into this slot to simulate a defibrillation scenario for an
infant or child under 8 years old or 55 pounds.
C ON LIGHT. The FRx Trainer's green ON light is on solid when the
Trainer is on, and off otherwise. (In the FRx Defibrillator, the green
Ready light blinks when the defibrillator is in standby mode.)
D ON/OFF BUTTON. To turn on the FRx Trainer, press this green
button. To turn off the Trainer, press and hold the button down for one
(1) second.
4
E
INFORMATION-BUTTON. In the FRx Trainer, this blue “i-button”
flashes when scenario selection is available and at the beginning of a
patient care pause when CPR Coaching is available.
F
PADS ICONS. The pads icons flash as a guide to pads placement during
the training scenario. They turn off as soon as the pads are placed.
G CAUTION LIGHT. This light flashes during rhythm analysis and is on
solid when a shock is advised, as a reminder that no one should be
touching the patient.
H SHOCK BUTTON. This orange button flashes when the FRx Trainer
advises you to deliver a shock; press the Shock button to deliver the
simulated shock.
INFRARED (IR) COMMUNICATIONS PORT. This feature is not active
in the FRx Trainer. (In the FRx Defibrillator, this feature is used for data
transfer.)
J
SPEAKER. When the device is being used, its voice instructions come
from this speaker.
K BATTERY COMPARTMENT DOOR. This door is lifted off in order to
install or replace batteries. The Trainer is powered by four disposable
AA alkaline cells inserted in the recess on the back of the unit. (The
FRx Defibrillator is powered by a custom battery pack.)
L
CONFIGURATION SWITCHES. Located inside the battery
compartment well, these switches allow you to alter certain Trainer
parameter settings. See “Configuring the FRx Trainer” for details. (The
FRx Defibrillator does not have these switches.)
The HeartStart Training Pads II are provided in a gray case with a yellow
label to distinguish them from the HeartStart SMART Pads II case, which
has a gray label. The Training Pads II wires also have a red “NOT FOR
CLINICAL USE” flag around the pad wires near the connector plug.
WARNING: Do not store your Training Pads II with your FRx
defibrillator, or where it could be confused with defibrillator pads
during an emergency. Do not put the training pads on a person.
FRx TRAINER 861306
Philips Medical Systems
I
5
HeartStart FRx Trainer Kit contents
The FRx Trainer 861306 includes one each of the following:
HeartStart FRx Trainer
HeartStart Training Pads II
HeartStart FRx Trainer carry case
HeartStart FRx Defibrillator Quick Reference Guide
HeartStart FRx Trainer Instructions for Use
External Manikin Adapter
Check with your medical director or Emergency Medical Services provider
for additional training requirements, protocols, and materials.
Optional accessories
Philips Medical Systems
The following accessories are available from Philips separately:
•
•
•
•
•
•
•
•
•
•
•
FRx Trainer Instructions for Use [REF: 989803139401]
HeartStart Training Pads II (kit containing one set of Training Pads II in
training pads case, adult pads placement guide, Instructions for Use,
and illustrated guide) [REF: 989803139271]
Replacement Training Pads II (pair of training pads on disposable liner
for use in training pads case provided with HeartStart Training Pads II)
[REF: 989803139291]
Adult pads placement guide [REF: M5090A]
Infant/Child pads placement guide [REF: 989803139281]
Infant/Child Key [REF: 989803139311]
HeartStart FRx Defibrillator Instructor's Training Toolkit (NTSC)
[REF: 989803139321]
HeartStart FRx Defibrillator Instructor’s Training Toolkit (PAL)
[REF: 989803139331]
HeartStart FRx Defibrillator Training DVD (NTSC)
[REF: 989803139341]
HeartStart FRx Defibrillator Training DVD (PAL)
[REF: 989803139351]
External Manikin Adapter, 5 pack [REF: M5089A]
ENGLISH
•
•
•
•
•
•
6
•
•
Internal Manikin Adapter [REF: M5088A]
Replacement FRx Trainer carry case [REF: 989803139531]
To set up the FRx Trainer
To install or replace the batteries
The HeartStart Trainer is powered by four AA alkaline batteries (not
included). To install or replace the batteries, follow the steps below:
1. Press the latch on the battery compartment door on the back of the
FRx Trainer. Lift off the door and set it aside.
2. Remove the old batteries and recycle or dispose of in accordance with
your local regulations.
3. Insert four new AA alkaline batteries into the recess, oriented as
illustrated in the battery holder.
NOTE: It is recommended that you replace all four batteries at the
same time.
To connect or replace the Training Pads II
To connect the Training Pads II to the FRx Trainer, simply plug the Training
Pads II connector into the connector port of the FRx Trainer. Be sure the
connector clicks into place.
When the original training pads have reached the end of their service life,
you can order Replacement Training Pads for the training pads case.
To install replacement training pads in the reusable training pads case,
remove and discard the old pads from the case. Open the Replacement
Training Pads II package and remove each training pad from the disposable
liner. Repack the replacements pads in the reusable case according to the
following directions.
FRx TRAINER 861306
Philips Medical Systems
4. Replace the battery compartment door and press down to ensure the
latch holds it in place.
7
To repack the Training Pads II
1. Firmly press one pad into each side of the open training pads case.
3. Coil the pads wires inside the case with the connector plug exiting
through the hole in the pads case.
To use the FRx Trainer with Laerdal training manikins
Philips Medical Systems
To simulate the patient, use the Training Pads II on a CPR training manikin
equipped with a disposable External Manikin Adapter M5089A or an
Internal Manikin Adapter M5088A. Alternatively, you can use a Laerdal
Resusci Anne training manikin equipped with Laerdal Link technology and
an adapter available at most electronics stores. Contact Philips for
information.
To install the external manikin adapter
The M5089A External Manikin Adapter is provided with the FRx Trainer. It
can be applied to any training manikin as illustrated in steps 1 and 2 below.
(When the manikin is used in training, Training Pads II should be placed as
shown in step 3 below.)
Applying the External Manikin Adapter M5089A to an adult manikin.
NOTE: The M5089A External Manikin Adapter has a limited service life.
You can order replacement sets of five adapters.
ENGLISH
2. Untwist the pads wires if necessary.
8
To install the internal manikin adapter
The Internal Manikin Adapter M5088A, sold separately, works with Laerdal
Little Anne CPR and Laerdal Resusci Anne CPR Manikins.
To install the Internal Manikin Adapter on a Laerdal Little Anne CPR or
Laerdal Resusci Anne CPR Manikin, follow the steps below:
1. Remove the skin from the manikin.
2. Peel off the liner from the adhesive backing of the Internal Manikin
Adapter.
3. Place the Internal Manikin Adapter sections in the appropriate
locations on the underside of the manikin’s skin. See the Instructions
for Use provided with the Internal Manikin Adapter for detailed
placement illustrations.
Philips Medical Systems
Installing the Internal Manikin Adapter M5088A with the Laerdal Resusci Anne.
4. Replace the manikin skin.
5. Using the Trainer in a practice trial, check that the Internal Manikin
Adapter is located appropriately to teach proper pad placement.
FRx TRAINER 861306
9
To select a training scenario
2. Press the flashing i-button once. The FRx Trainer will tell you how to
select a scenario.
Philips Medical Systems
3. Press the i-button again to have the FRx Trainer identify the current
training scenario. If you want to use this scenario, briefly press the
On/Off button to run the scenario immediately.
4. To select a different scenario, press the flashing blue i-button to scroll
through each of the eight scenarios in sequence. When you reach the
scenario number you want, briefly press the On/Off button to run the
scenario immediately. Or, to simply select the scenario without running
it, press and hold the On/Off button until the Trainer turns off, or wait
for 10 seconds and it will automatically turn off.
The FRx Trainer will run the selected scenario every time until the
batteries are replaced or until a different scenario is selected. The Trainer
defaults to Scenario 1 each time the batteries are installed.
To run a training scenario
To run the selected training scenario, treat the FRx Trainer exactly as you
would the FRx Defibrillator.
1. Press the green On/Off button to turn on the FRx Trainer.
2. To practice defibrillation of an infant or child under 8 years or 55
pounds (25 kg), insert the Infant/Child Key in the Trainer’s Infant/Child
Key slot.
ENGLISH
1. Make sure the pads connector is plugged in and the FRx Trainer is
turned off. (Press and hold the On/Off button if necessary to turn off
the Trainer.)
10
NOTE: Inserting or removing the Infant/Child Key during a scenario will
restart the scenario.
3. Follow the FRx Trainer’s voice instructions.
4. If using a clothed manikin, remove the clothing as instructed.
5. Open the Training Pads II case and peel off one pad.
NOTE: Avoid touching the pad’s adhesive gel, because this may cause
the Trainer to begin analysis prematurely.
6. Place the pad on the manikin.
Press the pad down firmly. Then
peel and place the other pad.
7. Continue to follow the FRx
Trainer’s instructions for
remainder of scenario.
9. To repeat the same scenario, repack the pads as described in
“To repack the Training Pads II.” Then begin again by pressing the green
On/Off button. To select a different scenario, press the i-button.
NOTE: If battery power is depleted, the FRx Trainer will say REPLACE
BATTERY. The FRx Trainer will continue to operate for a short time.
Replace the batteries as soon as possible to ensure correct Trainer
behavior.
Standard training scenarios
The FRx Trainer provides eight training scenarios. When the Trainer
directs you to press the Shock button, the scenario will not advance unless
the button is pressed. When the Trainer detects a non-shockable rhythm,
it instructs you to provide CPR if needed.
In the Trainer scenarios, “conversion” means a change from a shockable to
a non-shockable rhythm.
FRx TRAINER 861306
Philips Medical Systems
8. When the scenario has been
completed, or to stop a scenario in process, press and hold the On/Off
button until the FRx Trainer turns off.
11
The legend below identifies the symbols used on the rear label of the FRx
Trainer and in the following scenario descriptions.
symbol
meaning
(Simulated) shockable rhythm detected by Trainer.
(Simulated) non-shockable rhythm detected by
Trainer.
Philips Medical Systems
(Simulated) pads problem detected by Trainer.
scenario number
Scenario 1
scenario description
Shockable rhythm detected, one shock needed for conversion
Details:
• Trainer detects a shockable rhythm, instructs user to deliver a
shock.
• Trainer detects a non-shockable rhythm.
Scenario 2
Shockable rhythm detected, multiple shocks needed for conversion
Details:
• Trainer detects a shockable rhythm, instructs user to deliver one
shock if configured for a one-shock series, or three shocks if
configured for a three-shock series.
• Trainer detects a shockable rhythm, instructs user to deliver a
shock.
• Trainer detects a non-shockable rhythm.
ENGLISH
NOTE: The shock series can be configured to either one or three
shocks. If configured for the default one-shock series, the Trainer
provides a pause after each shock.
12
scenario number
Scenario 3
scenario description
Troubleshooting pads, one shock needed for conversion
Details:
• Trainer detects poor pad contact, repeats pads placement
instructions.
• After one pad is removed and reapplied, Trainer detects a
shockable rhythm, instructs user to deliver a shock.
• Trainer detects a non-shockable rhythm.
Scenario 4
Shockable rhythm detected, conversion, return to shockable
rhythm, conversion
Scenario 5
Non-shockable rhythm detected
Details:
• Trainer detects a non-shockable rhythm throughout.
Scenario 6
Shockable rhythm detected, two shocks needed for conversion
Details:
• Trainer detects a shockable rhythm, instructs user to deliver a
shock.
• Trainer still detects a shockable rhythm, instructs user to deliver
another shock.
• Trainer detects a non-shockable rhythm.
FRx TRAINER 861306
Philips Medical Systems
Details:
• Trainer detects a shockable rhythm, instructs user to deliver a
shock.
• Trainer detects a non-shockable rhythm.
• Trainer detects refibrillation (return to a shockable rhythm),
instructs user to deliver a shock.
• Trainer detects a non-shockable rhythm.
13
scenario number
scenario description
Details:
• Trainer detects a shockable rhythm, instructs user to deliver a
shock.
• Trainer still detects a shockable rhythm, instructs user to deliver
another shock.
• Trainer detects a non-shockable rhythm.
• Trainer detects refibrillation (return to a shockable rhythm),
instructs user to deliver a shock.
• Trainer detects a non-shockable rhythm.
Troubleshooting pads, two shocks needed for conversion
Philips Medical Systems
Scenario 8
Details:
• Trainer detects poor pad contact, repeats pads placement
instructions.
• After one pad is removed and reapplied, Trainer detects a
shockable rhythm, instructs user to deliver a shock.
• Trainer still detects a shockable rhythm, instructs user to deliver
another shock.
• Trainer detects a non-shockable rhythm.
Not all scenarios are appropriate for all user training. Training scenario
number 1 is the default scenario and is most commonly used when
teaching how to use the FRx to treat a victim of sudden cardiac arrest. If
the training scenarios are used as part of a formal training course, the
instructor may wish to:
•
•
•
•
•
•
select only the scenarios appropriate for the training level goals,
create case histories and patient details for the selected scenarios,
highlight certain aspects of the defibrillator's performance,
assure that users conform to local protocols,
check pad placement, and
evaluate user knowledge on topics such as CPR and assessing the
patient.
ENGLISH
Shockable rhythm detected, two shocks needed for conversion,
return to shockable rhythm detected, one shock needed for
conversion
Scenario 7
14
FRx Trainer performance during use
The Philips HeartStart FRx Trainer is designed for use in an automated
external defibrillator training class taught by a qualified instructor.
When a training scenario is running, the FRx Trainer mimics the behavior
of the FRx Defibrillator during actual emergency use. It provides voice
instructions, guides the user through one or more simulated shocks,
provides pauses for CPR, offers CPR Coaching, etc. If there is no user
interaction (no buttons are pressed) for ten minutes, the Trainer turns off.
To change the FRx Trainer’s default configuration
The HeartStart FRx Trainer comes with a factory default configuration
designed to meet the needs of most users. The settings for certain
parameters, listed in the table below, can be altered by the user.
To change configurable Trainer parameters, remove the battery
compartment door from the Trainer and locate the switches in the bottom
of the battery compartment. Using a small implement, adjust the ON and
OFF switch settings as described in the following table.
FRx TRAINER 861306
Philips Medical Systems
IMPORTANT: Certain features of the actual HeartStart FRx
Defibrillator are not reproduced by the FRx Trainer.
• The FRx Trainer cannot be used with the (clinical) SMART Pads II. If
the SMART Pads II are installed, the FRx Trainer will repeatedly ask
you to install training pads.
• The FRx Trainer does not perform the battery insertion and periodic
self-tests.
• Inserting or removing the Infant/Child Key from the Trainer during a
scenario restarts the scenario.
• The FRx Trainer always uses a standard NSA pause.
15
-
ENGLISH
parameter
Philips Medical Systems
volume
NSA pause*
(minutes)
switch #
1
2&3
setting (default = OFF)
OFF:
ON:
high
low
switch #2
OFF
ON
OFF
ON
switch #3
OFF
OFF
ON
ON
CPR Coaching
compressions/
ventilations†
4
CPR Coaching
ventilations
5
OFF:
ON:
with ventilations
without ventilations
shock series
6
OFF:
ON:
1
3
protocol pause*
(minutes)
OFF:
ON:
7&8
adult
pediatric
adult
pediatric
switch #7
OFF
ON
OFF
ON
setting
2.0
1.0
1.5
3.0
30 compressions/2 ventilations
30 compressions/2 ventilations
30 compressions/2 ventilations
15 compressions/2 ventilations
switch #8
OFF
OFF
ON
ON
setting
2.0
1.0
1.5
3.0
* If the Trainer is configured for CPR Coaching with ventilations, and the user selects CPR Coaching by pressing the i-button,
the default pause and CPR Coaching settings (2 minutes pause, 30 compressions/2 ventilations) result in 5 cycles of CPR
Coaching. The number of cycles varies for other settings. For all settings, CPR Coaching begins and ends with compressions.
† The CPR Coaching compressions/ventilations selection (switch 4) is applicable only if the CPR Coaching ventilations
(switch 5) is set to OFF (with ventilations). Otherwise, the CPR Coaching compressions will be continuous, without breaks
for ventilations.
16
To troubleshoot the FRx Trainer
The following table provides troubleshooting tips.
behavior
Trainer says
ANALYZING before
pads are applied to
manikin.
possible cause
• User touched the adhesive gel
on the pads and activated the
sensing circuitry of the Trainer.
• Pad wires are twisted.
• Pad wires are not separated.
• Pads are touching each other.
• Pads placement is incorrect.
• Pads are old, damaged, or use
discontinued blue gel.
• Manikin adapter is broken.
• In scenarios 3 and 8, pad has not
been removed and repositioned.
• Pad wires are twisted.
• Avoid touching the adhesive gel
on the pads.
• Untwist the pad wires.
• Separate the pad wires between
the pads and the red label.
• Separate pads.
• Check for proper pad and
manikin adapter placement.
Remove and reposition pads or
adapter if indicated.
• Replace training pads.
• Replace manikin adapter.
• Remove and reapply one pad.
• Untwist the pad wires.
Trainer’s voice
instructions are
distorted.
• One of the batteries is installed
backwards.
• Reinstall batteries according to
the diagram in the battery
holder.
Battery depletes
prematurely.
• Trainer is stored so that On/Off
button is inadvertently pressed.
• Store the Trainer so as to
prevent inadvertent pressure on
the On/Off button.
• Reinstall batteries according to
the diagram in the battery
holder.
• One of the batteries is installed
backwards.
FRx TRAINER 861306
Philips Medical Systems
Trainer does not say
ANALYZING when pads
are applied to the
manikin adapter.
recommended action
17
Environmental considerations
Philips Medical Systems
The FRx Trainer contains electronic components. Do not dispose
of it as unsorted municipal waste. As a reminder, the Trainer bears
the following symbol as a reminder to collect such electronic waste
separately and dispose of it at an appropriate recycling facility according to
your country's regulations.
ENGLISH
By complying with your national regulations regarding disposal of electric,
electronic, and battery waste, you can make a positive contribution to our
shared environment. Such waste can introduce harmful elements into the
environment as a whole and may also endanger human health.
Notes
Philips Medical Systems
19
Simulateur HeartStart FRx 861306
Contenu
Utilisation prévue du simulateur FRx .................................................................................... 19
Fonctions du simulateur FRx ..................................................................................................... 20
Présentation du simulateur FRx ............................................................................................... 21
Pour configurer le simulateur FRx ............................................................................................ 24
Pour sélectionner un scénario de formation .................................................................... 27
Pour exécuter un scénario de formation ........................................................................... 28
Scénarios de formation standard ............................................................................................ 29
Pour changer la configuration par défaut du simulateur FRx .................................. 34
Dépannage du simulateur FRx ................................................................................................. 35
Philips Medical Systems
Protection de l'environnement ................................................................................................ 37
Utilisation prévue du simulateur FRx
Le simulateur HeartStart FRx est conçu pour préparer les intervenants des
soins d'urgence à utiliser le défibrillateur externe automatisé (AED) FRx.
Le simulateur HeartStart FRx ne peut pas être utilisé pour administrer la
défibrillation.
Le simulateur fournit une variété de simulations ou de scripts
d'entraînement afin d'aider les intervenants à se familiariser avec le
défibrillateur FRx et leur permettre de s'entraîner pour acquérir les
compétences fondamentales nécessaires à l'utilisation du défibrillateur en
situation d'urgence. La configuration par défaut du simulateur peut être
réglée conformément aux exigences du protocole local.
FRANÇAIS
Fonctionnement du simulateur FRx pendant l'utilisation .......................................... 33
20
Fonctions du simulateur FRx
•
•
•
•
•
AVERTISSEMENT : Ne rangez pas le simulateur avec le défibrillateur ni à
un endroit où, dans un cas d'urgence, il peut être confondu avec un
défibrillateur.
SIMULATEUR HEARTSTART FRx 861306
Philips Medical Systems
•
Le simulateur HeartStart FRx délivre des chocs simulés. Il n'a aucune
capacité de haute tension, ce qui garantit la sécurité pendant la
formation.
Le simulateur HeartStart FRx est conçu pour être utilisé avec les
électrodes de formation HeartStart II et les mannequins de formation
munis de l’adaptateur de mannequin externe M5089A fourni avec le
simulateur. Le simulateur FRx et les électrodes de formation II peuvent
aussi être utilisés avec les mannequins de formation Laerdal quand ils
sont munis d'un adaptateur de mannequin interne M5088A, en vente
séparément auprès de Philips.
Les électrodes de formation HeartStart II réutilisables sont proposées
dans un kit. (REF : 989803139271). Le kit contient un jeu d’électrodes
de formation II dans un étui d'électrodes de formation, un guide de
placement des électrodes pour adulte, le mode d'emploi des
électrodes de formation et un guide illustré. Des électrodes de
formation de remplacement (REF : 989803139291) disponibles pour
être utilisées avec l’étui d’électrodes de formation II.
Le simulateur HeartStart FRx et les électrodes de formation II peuvent
également être utilisés avec le guide de placement des électrodes pour
nouveau-né/enfant et une clé nouveau-né/enfant, en vente séparément
auprès de Philips pour l'apprentissage de la défibrillation pédiatrique.
Le simulateur HeartStart FRx contient huit scénarios de formation qui
simulent des situations d'arrêt cardiaque soudain proches de la réalité.
Voir la section « Scénarios de formation standard » qui contient la
description des scénarios. Ces scénarios sont compatibles avec les
programmes de formation mis au point par des programmes
d'intervenants reconnus au niveau national.
Le simulateur HeartStart FRx est alimenté par quatre batteries
alcalines AA standard.
21
Présentation du simulateur FRx
arrière
Philips Medical Systems
FRANÇAIS
Le simulateur HeartStart FRx est conçu pour apparaître pratiquement
identique au défibrillateur HeartStart FRx. Toutefois, l'étiquette centrale
jaune indique qu'il s'agit d'un appareil d'apprentissage. De plus, certaines
fonctions du défibrillateur FRx sont inactives sur le simulateur FRx ou ont
un comportement différent des fonctions correspondantes du simulateur.
Les fonctions matérielles du simulateur FRx sont décrites ci-dessous.
A PORT DE CONNECTEUR DES ÉLECTRODES DE FORMATION. Le
connecteur des électrodes de formation II est inséré dans ce port.
B
FENTE POUR CLÉ NOUVEA-NÉ/ENFANT. La clé pour nouveau-né/
enfant vendue séparément est insérée dans cette encoche pour
simuler une situation de défibrillation pour un nouveau-né/enfant de
moins de 8 ans ou de 25 kg.
C VOYANT ON (MARCHE). Le voyant vert ON (MARCHE) du
simulateur FRx est allumé en continu quand le simulateur est en
marche, sinon il est éteint. (Dans le défibrillateur FRx, le voyant vert de
l'état Prêt clignote quand le défibrillateur est en mode veille.)
22
D BOUTON MARCHE/ARRÊT. Pour mettre en marche le simulateur
FRx, appuyez sur ce bouton vert. Pour éteindre le simulateur, appuyez
sur le bouton vert et maintenez-le enfoncé pendant une (1) seconde.
E
BOUTON D’INFORMATIONS. Dans le simulateur FRx, le
« bouton-i » clignote quand il est possible de sélectionner un scénario
et au début d'une pause pour soins au patient quand la RCP est
disponible.
F
ICÔNES DES ÉLECTRODES. Les icônes des électrodes clignotent,
servant de guide pour le placement des électrodes lors d'un scénario
d'entraînement. Elles s'éteignent dès que les électrodes sont placées.
G VOYANT D'AVERTISSEMENT. Ce voyant clignote pendant l'analyse
du rythme. Il est allumé en continu quand un choc est conseillé, afin de
rappeler que personne ne doit toucher le patient.
I
PORT DE COMMUNICATION À INFRAROUGES (IR). Cette
fonction n'est pas active sur le simulateur FRx. (Cette fonction du
défibrillateur FRx est utilisée pour le transfert des données.)
J
HAUT-PARLEUR. Quand l'appareil est en utilisation, les instructions
vocales sont données via ce haut-parleur.
K VOLET DU LOGEMENT DE BATTERIE. Soulevez le couvercle pour
installer ou remplacer les batteries. Le simulateur est alimenté par
quatre cellules alcalines AA insérées dans le logement encastré à
l'arrière de l'appareil. (Le défibrillateur FRx est alimenté par une
batterie personnalisée.)
L
COMMUTATEURS DE CONFIGURATION. Situés à l'intérieur de
l'encoche du logement, ces commutateurs permettent de modifier
certains réglages des paramètres du simulateur. Voir la section
« Configuration du simulateur FRx » pour plus de détails. (Le
défibrillateur FRx n’est pas muni de ces commutateurs.)
SIMULATEUR HEARTSTART FRx 861306
Philips Medical Systems
H BOUTON DE CHOC. Ce bouton orange clignote quand le simulateur
FRx conseille de délivrer un choc ; appuyez sur le bouton de choc pour
délivrer le choc simulé.
23
Les électrodes de formation HeartStart II sont fournies dans un étui gris
avec une étiquette jaune pour les distinguer de l’étui d’électrodes
HeartStart SMART II avec une étiquette grise. Les fils des électrodes de
formation II ont également un indicateur rouge « NON DESTINÉ À
L’UTILISATION CLINIQUE » autour des électrodes près de la fiche du
connecteur.
AVERTISSEMENT : Ne rangez pas les électrodes de formation II avec le
défibrillateur FRx ni à un endroit où il peut être confondu avec un
défibrillateur en cas d'urgence. Ne placez pas les électrodes de
formation sur une personne.
Philips Medical Systems
Le simulateur FRx 861306 comprend un exemplaire de chacun des articles
mentionnés ci-dessous :
•
•
•
•
•
•
Simulateur HeartStart FRx
Électrodes de formation HeartStart II
Sacoche de transport du simulateur HeartStart FRx
Aide-mémoire du défibrillateur HeartStart FRx
Mode d'emploi du simulateur HeartStart FRx
Adaptateur de mannequin externe
Vérifiez avec votre directeur médical ou votre prestataire de services
médicaux d'urgence s'il existe d'autres exigences, protocoles ou
documents pour la formation.
Accessoires en option
Les accessoires suivants peuvent être achetés séparément auprès de
Philips :
•
•
Mode d'emploi du simulateur FRx [REF : 989803139401]
Électrodes de formation HeartStart II (kit contenant un jeu
d'électrodes de formation II dans un étui d'électrodes de formation, un
guide de placement des électrodes pour adulte, le mode d'emploi et un
guide illustré) [REF : 989803139271]
FRANÇAIS
Contenu du kit du simulateur HeartStart FRx
24
•
•
•
•
•
•
•
•
Pour configurer le simulateur FRx
Pour installer ou remplacer les batteries
Le simulateur HeartStart est alimenté par quatre batteries alcalines AA
standard. Pour installer ou remplacer les batteries, procédez comme suit :
1. Appuyez sur le loquet du volet du logement de la batterie à l'arrière du
simulateur FRx. Retirez le volet et mettez-le de côté.
2. Sortez les anciennes batteries et recyclez-les ou éliminez-les en
respectant les réglementations locales.
3. Insérez quatre batteries alcalines AA dans l'encastrement, orientées
dans le porte-batterie comme illustré.
4. Replacez le volet du logement de la batterie et appuyez dessus pour
que le loquet le maintienne en place.
SIMULATEUR HEARTSTART FRx 861306
Philips Medical Systems
•
•
•
Électrodes de formation de remplacement HeartStart II (paire
d'électrodes de formation sur doublure jetable à utiliser dans l'étui
d'électrodes de formation fourni avec les électrodes de formation
HeartStart II) [REF : 989803139291]
Guide de placement des électrodes pour adulte [REF : M5090A]
Guide de placement des électrodes pour nouveau-né/enfant
[REF : 989803139281]
Clé pour nouveau-né/enfant [REF : 989803139311]
Trousse d'outils de formation pour instructeur du défibrillateur
HeartStart FRx (NTSC) [REF : 989803139321]
Trousse d'outils de formation pour instructeur du défibrillateur
HeartStart FRx (PAL) [REF : 989803139331]
DVD de formation du défibrillateur HeartStart FRx (NTSC)
[REF : 989803139341]
DVD de formation du défibrillateur HeartStart FRx (PAL)
[REF : 989803139351]
Adaptateur externe de mannequin, paquet de 5 [REF : M5089A]
Adaptateur interne de mannequin [REF : M5088A]
Sacoche de transport du simulateur FRx de remplacement
[REF : 989803139531]
25
REMARQUE : Il est conseillé de remplacer les quatre piles en même
temps.
Pour raccorder ou remplacer les électrodes de formation II
Pour raccorder les électrodes de formation II au simulateur FRx, branchez
simplement le connecteur des électrodes de formation II dans le port du
connecteur du simulateur FRx. Le connecteur doit s'enclencher en place.
Philips Medical Systems
Pour installer des électrodes de formation de rechange dans leur étui
réutisable, sortez et éliminez les anciennes électrodes de l’étui. Ouvrez le
coffret des électrodes de formation de remplacement II et retirer chaque
électrode de formation de la doublure jetable. Remballez les électrodes de
remplacement conformément aux directives suivantes.
Pour remballer les électrodes de formation II
1. Appuyez fermement sur une électrode de chaque côté de l'étui ouvert
des électrodes de formation.
2. Au besoin, démêlez les fils des électrodes.
3. Enroulez les fils des électrodes à l'intérieur de l'étui, la fiche du
connecteur sortant par le trou de l'étui des électrodes.
Pour utiliser le simulateur FRx avec les mannequins de formation
Laerdal
Pour simuler le patient, utilisez les électrodes de formation II sur un
mannequin de formation de RCP muni d'un adaptateur de mannequin
externe M5089A ou d'un adaptateur de mannequin interne M5088A.
Une autre solution consiste à utiliser un mannequin de formation Laerdal
Resusci Anne muni de la technologie de liaison Laerdal et d’un adaptateur
FRANÇAIS
Une fois que les électrodes de formation ont atteint la fin de leur durée de
vie, vous pouvez commander des électrodes de formation de rechange à
placer dans l'étui des électrodes de formation.
26
en vente dans la plupart des magasins d’éléments électroniques. Veuillez
vous adresser à Philips pour d’autres renseignements.
Pour installer l'adaptateur externe de mannequin
L'adaptateur de mannequin externe M5089A est fourni avec le simulateur
FRx. Il peut être appliqué à tout mannequin de formation comme illustré
aux étapes 1 et 2 ci-dessous. (Quand le mannequin est utilisé pour la
formation, les électrodes de formation II doivent être placées
conformément à l’étape 3 ci-dessous.)
REMARQUE : La durée de vie de l'adaptateur externe de mannequin
M5089A est limitée. Vous pouvez commander un jeu de rechange de
cinq adaptateurs.
Pour installer l'adaptateur interne de mannequin
L'adaptateur de mannequin interne M5088A fonctionne avec les
mannequins de RCP Laerdal Little Anne et Laerdal Resusci Anne.
Pour installer les mannequins de RCP Laerdal Little Anne et Laerdal
Resusci Anne, procédez comme suit :
1. Retirez la peau du mannequin.
2. Détachez le revêtement de la protection adhésive de l'adaptateur
du mannequin interne.
SIMULATEUR HEARTSTART FRx 861306
Philips Medical Systems
Application de l’adaptateur de mannequin externe M5089A à un mannequin adulte.
27
3. Placez les sections de l'adaptateur du mannequin interne dans les
emplacements appropriés sur le revers de la peau du mannequin. Voir
le Mode d'emploi fourni avec l'adaptateur du mannequin interne pour
obtenir des illustrations détaillées de placement.
Philips Medical Systems
4. Replacez la peau du mannequin.
5. En utilisant le simulateur dans un essai d'entraînement, vérifiez que
l'adaptateur interne du mannequin est situé correctement pour
permettre l'enseignement du placement des électrodes.
Pour sélectionner un scénario de formation
1. Assurez-vous que la fiche des électrodes est insérée et que le
simulateur FRx est arrêté. (Au besoin, maintenez enfoncé le bouton
marche/arrêt pour arrêter le simulateur.)
2. Appuyez une fois sur le bouton-i clignotant. Le simulateur FRx vous
indique comment sélectionner un scénario.
3. Appuyez à nouveau sur le bouton-i afin que le simulateur FRx identifie
le scénario de formation actif. Si vous voulez utiliser ce scénario,
appuyez brièvement sur le bouton marche/arrêt pour le lancer
immédiatement.
4. Pour sélectionner un scénario différent, appuyez sur le bouton bleu en
i clignotant pour faire défiler la série des huit scénarios. Une fois que
vous avez atteint le numéro du scénario désiré, appuyez brièvement
FRANÇAIS
Installation de l'adaptateur du mannequin interne M5088A
avec le mannequin Laerdal Resusci Anne
28
sur le bouton marche/arrêt pour lancer immédiatement le scénario.
Ou bien, pour simplement sélectionner le scénario sans l'exécuter,
appuyez sur le bouton marche/arrêt jusqu'à ce que le simulateur
s'arrête ou patientez pendant 10 secondes et il s'arrêtera
automatiquement.
Le simulateur FRx exécutera le scénario sélectionné jusqu'à ce que les
batteries soient remplacées ou qu'un scénario différent soit sélectionné.
Chaque fois que les batteries sont installées, le simulateur passe
automatiquement au scénario 1.
Pour exécuter un scénario de formation
Pour exécuter un scénario de formation, traitez le simulateur FRx
exactement comme un défibrillateur FRx.
2. Pour pratiquer la défibrillation d'un nouveau-né ou d'un enfant de
moins de 8 ans ou de 25 kg, insérez la clé pour nouveau-né/enfant dans
l'encoche réservée à cet effet.
REMARQUE : L'insertion ou le retrait de la clé pour nouveau-né/enfant
au cours d'un scénario redémarre le scénario.
3. Suivez les instructions vocales du simulateur FRx.
4. Si vous utilisez un mannequin habillé, déshabillez-le conformément
aux directives.
5. Ouvrez l'étui des électrodes de formation II et décollez une électrode.
REMARQUE : Évitez de toucher le gel adhésif de l'électrode car
le simulateur pourrait commencer une analyse prématurément.
SIMULATEUR HEARTSTART FRx 861306
Philips Medical Systems
1. Appuyez sur le bouton marche/arrêt pour mettre en marche le
simulateur FRx.
29
6. Placez l'électrode sur le
mannequin. Appuyez fermement
sur l'électrode. Ensuite, détachez
et placez l'autre électrode.
7. Continuez à suivre les
instructions du simulateur FRx
pendant le reste du scénario.
8. Quand le scénario est complètement terminé ou si vous voulez arrêter
un scénario en cours, appuyez sur le bouton marche/arrêt et
maintenez-le enfoncé jusqu'à ce que le simulateur s'éteigne.
Philips Medical Systems
REMARQUE : Si la batterie est à plat, le simulateur FRx le signale par le
message REMPLACER BATTERIE . Le simulateur FRx continuera de
fonctionner pendant quelques instants. Remplacez les batteries dès que
possible pour assurer un comportement correct du simulateur.
Scénarios de formation standard
Le simulateur FRx fournit huit scénarios de formation. Quand le simulateur
vous demande d’appuyer sur le bouton de choc, vous devez appuyer sur
le bouton de choc pour que le scénario se poursuive. Quand le simulateur
détecte un rythme non propice aux chocs, il vous demande d’effectuer
la RCP au besoin.
Dans les scénarios du simulateur, le mot « conversion » indique le passage
d’un rythme propice aux chocs à un rythme non propice aux chocs.
Les légendes du tableau ci-dessous identifient les symboles utilisés sur
l'étiquette arrière du simulateur FRx et dans les descriptions des scénarios
suivantes.
REMARQUE : La série de chocs peut être configurée pour un ou trois
chocs. Si l'appareil est configuré pour une série d'un choc unique, le
simulateur fournit une pause après chaque choc.
FRANÇAIS
9. Pour répéter le même scénario, remballez les électrodes comme décrit
à la section « Pour remballer les électrodes de formation II ». Ensuite,
recommencez en appuyant sur le bouton vert marche/arrêt. Pour
sélectionner un scénario différent, appuyez sur le bouton-i.
30
symbole
signification
Rythme (simulé) propice aux chocs détecté par
le simulateur.
Rythme (simulé) non propice aux chocs détecté par
le simulateur.
Problème (simulé) d'électrodes détecté par
le simulateur.
nº du scénario
Scénario 1
description du scénario
Rythme propice aux chocs, un choc est nécessaire pour la
conversion
Scénario 2
SIMULATEUR HEARTSTART FRx 861306
Rythme propice aux chocs, plusieurs chocs nécessaires pour la
conversion
Détails :
• Le simulateur détecte un rythme propice aux chocs, indique
à l'utilisateur de délivrer un choc s'il est configuré pour une série
de un choc ou trois chocs s’il est configuré pour une série de
trois chocs.
• Le simulateur détecte un rythme propice aux chocs, indique
à l'utilisateur de délivrer un choc.
• Le simulateur détecte un rythme non propice aux chocs.
Philips Medical Systems
Détails :
• Le simulateur détecte un rythme propice aux chocs, indique
à l'utilisateur de délivrer un choc.
• Le simulateur détecte un rythme non propice aux chocs.
31
nº du scénario
description du scénario
Scénario 3
Correction du placement des électrodes, un choc nécessaire pour
la conversion
Détails :
• Le simulateur détecte un mauvais contact au niveau des
électrodes, répète les instructions de placement des électrodes.
• Une fois qu'une électrode est retirée et réappliquée, le
simulateur détecte un rythme propice aux chocs, indique
à l'utilisateur de délivrer un choc.
• Le simulateur détecte un rythme non propice aux chocs.
Rythme propice aux chocs, conversion, retour au rythme propice
aux chocs, conversion
Philips Medical Systems
Détails :
• Le simulateur détecte un rythme propice aux chocs, indique
à l'utilisateur de délivrer un choc.
• Le simulateur détecte un rythme non propice aux chocs.
• Le simulateur détecte une refibrillation (retour à un rythme
propice aux chocs), indique à l'utilisateur de délivrer un choc.
• Le simulateur détecte un rythme non propice aux chocs.
Scénario 5
Rythme non-propice aux chocs détecté
Détails :
• Le simulateur détecte un rythme non propice aux chocs pendant
tout le temps.
Scénario 6
Rythme propice aux chocs, deux chocs nécessaires pour la
conversion
Détails :
• Le simulateur détecte un rythme propice aux chocs, indique
à l'utilisateur de délivrer un choc.
• Le simulateur détecte un rythme propice aux chocs, indique
à l'utilisateur de délivrer un autre choc.
• Le simulateur détecte un rythme non propice aux chocs.
FRANÇAIS
Scénario 4
32
nº du scénario
description du scénario
Rythme propice aux chocs détectés, deux chocs nécessaires pour
la conversion, retour à un rythme propice aux chocs détecté, un
choc nécessaire pour la conversion
Scénario 7
Détails :
• Le simulateur détecte un rythme propice aux chocs, indique à
l'utilisateur de délivrer un choc.
• Le simulateur détecte un rythme propice aux chocs, indique à
l'utilisateur de délivrer un autre choc.
• Le simulateur détecte un rythme non propice aux chocs.
• Le simulateur détecte une refibrillation (retour à un rythme
propice aux chocs), indique à l'utilisateur de délivrer un choc.
• Le simulateur détecte un rythme non propice aux chocs.
Détails :
• Le simulateur détecte un mauvais contact au niveau des
électrodes, répète les instructions de placement des électrodes.
• Une fois qu'une électrode est retirée et réappliquée, le
simulateur détecte un rythme propice aux chocs, indique à
l'utilisateur de délivrer un choc.
• Le simulateur détecte un rythme propice aux chocs, indique à
l'utilisateur de délivrer un autre choc.
• Le simulateur détecte un rythme non propice aux chocs.
Les scénarios ne conviennent pas à tous les utilisateurs. Le numéro 1 est le
scénario de formation par défaut. C'est celui qui est le plus couramment
utilisé pour l'entraînement à l'utilisation du FRx pour le traitement d'une
victime d'un arrêt cardiaque soudain. Si les scénarios de formation sont
intégrés dans un cours de formation structuré, l'instructeur peut :
•
•
ne sélectionner que les scénarios appropriés aux objectifs du niveau de
formation,
créer des historiques de cas et des détails relatifs à des patients pour
présenter des scénarios sélectionnés,
SIMULATEUR HEARTSTART FRx 861306
Philips Medical Systems
Correction du placement des électrodes, deux chocs nécessaires
pour la conversion
Scénario 8
33
•
•
•
•
mettre en évidence certaines caractéristiques de fonctionnement
du défibrillateur,
s'assurer que les utilisateurs respectent les protocoles locaux,
vérifier le placement des électrodes et
évaluer les connaissances des stagiaires sur des sujets comme la RCP
et l'évaluation de l'état du patient.
Fonctionnement du simulateur FRx pendant l'utilisation
Philips Medical Systems
Quand un scénario de formation est en cours d'exécution, le simulateur
FRx imite le comportement du défibrillateur FRx au cours d'une utilisation
d'urgence réelle. Il fournit des instructions vocales, guide l'utilisateur dans
la délivrance d'un ou de plusieurs chocs simulés, fournit des pauses pour
la RCP, offre des directives sur la RCP, etc. Si l'utilisateur n'intervient pas
pendant dix minutes (c'est-à-dire s'il n'appuie pas sur l'un des boutons),
le simulateur s'éteint.
IMPORTANT : Certaines fonctions du défibrillateur FRx réel de
HeartStart ne sont pas reproduites par le simulateur FRx.
• Le simulateur FRx ne peut pas être utilisé avec les électrodes SMART
II (cliniques). Si des électrodes SMART II sont installées, le simulateur
FRx demande de façon répétée à l'utilisateur d'installer les
électrodes.
• Le simulateur FRx n'effectue pas le test automatique d'insertion de
la batterie ni le test automatique périodique.
• L'insertion ou le retrait de la clé nouveau-né/enfant au cours d'un
scénario redémarre le scénario.
• Le simulateur FRx utilise toujours une pause CD standard.
FRANÇAIS
Le simulateur HeartStart FRx de Philips est conçu pour être utilisé pendant
un cours de formation aux défibrillateurs externes automatisés sous la
direction d'un instructeur qualifié.
34
Pour changer la configuration par défaut du simulateur FRx
Le simulateur Philips HeartStart est livré avec une configuration par défaut
définie en usine répondant aux besoins de la plupart des utilisateurs. Les
réglages de certains paramètres figurant dans le tableau ci-dessous peuvent
être modifiés par l'utilisateur.
Pour changer les paramètres configurables du simulateur, retirez le volet
du logement de la batterie du simulateur et repérez les commutateurs
situés dans la partie inférieure de ce logement. À l'aide d'un petit outil,
ajustez les réglages des commutateurs sur marche (ON) et arrêt (OFF)
comme décrit dans le tableau suivant.-
Philips Medical Systems
paramètre
commutateur nº
volume
pause CD*
(minutes)
1
2&3
compression/
ventilations des
directives de la RCP†
4
paramètre (valeur par défaut = OFF)
OFF:
ON:
commutateur 2
OFF
ON
OFF
ON
OFF:
ON:
SIMULATEUR HEARTSTART FRx 861306
élevé
bas
commutateur 3
OFF
OFF
ON
ON
adulte
nouveauné/enfant
adulte
nouveauné/enfant
réglage
2,0
1,0
1,5
3,0
30 compressions/2 ventilations
30 compressions/2 ventilations
30 compressions/2 ventilations
15 compressions/2 ventilations
35
paramètre
commutateur nº
paramètre (valeur par défaut = OFF)
ventilations des
directives de la RCP
5
OFF:
ON:
avec ventilations
sans ventilations
série de chocs
6
OFF:
ON:
1
3
pause de protocole*
(minutes)
7&8
commutateur 7
OFF
ON
OFF
ON
commutateur 8
OFF
OFF
ON
ON
réglage
2,0
1,0
1,5
3,0
Philips Medical Systems
Dépannage du simulateur FRx
Le tableau suivant contient des conseils de dépannage.
comportement
Le simulateur émet le
message sonore
ANALYSE avant
l'application des
électrodes au
mannequin.
cause possible
• L'utilisateur a touché le gel
adhésif sur les électrodes et a
activé le circuit de détection du
simulateur.
• Les électrodes sont tordues.
• Les fils des électrodes ne sont
pas séparés.
• Les électrodes se touchent.
mesure conseillée
• Évitez de toucher le gel adhésif
des électrodes.
• Déroulez les fils pour les
détordre.
• Séparez les fils des électrodes
entre les électrodes et
l’étiquette rouge.
• Séparez les électrodes.
FRANÇAIS
* Si le simulateur est configuré pour les ventilations des directives de la RCP et que l’utilisateur sélectionne les instructions de RCP en appuyant
sur le bouton-i, les paramètres de pause par défaut et d’instructions de RCP (pause de 2 minutes, 30 compressions/2 ventilations) se soldent
par 5 cycles d’instructions de RCP. Le nombre de cycles varie pour les autres paramètres. Pour tous les paramètres, les instructions de RCP
commencent à la fin des compressions.
† La sélection des compressions/ventilations des directives de la RCP (commutateur 4) n'est applicable que si la ventilation des directives de
la RCP (commutateur 5) est réglée sur OFF (avec ventilations). Sinon, les compressions des directives de la RCP se poursuivront sans
coupure pour les ventilations.
36
comportement
cause possible
Le simulateur n'émet pas
le message sonore
ANALYSE quand les
électrodes sont
appliquées à l'adaptateur
du mannequin.
• Le placement des électrodes est
incorrect.
• Vérifiez le placement correct
des électrodes et de
l'adaptateur du mannequin.
Retirez et repositionnez les
électrodes ou l'adaptateur
suivant le besoin.
• Remplacez les électrodes de
formation.
• Remplacez l'adaptateur du
mannequin.
• Retirez et réappliquez une
électrode.
• Déroulez les fils pour les
détordre.
Le son des instructions
vocales du simulateur est
déformé.
• L'une des batteries est installée
à l'envers.
• Réinstallez les batteries selon
le diagramme figurant dans le
porte-batterie.
La batterie s'épuise
prématurément.
• Le simulateur est rangé d'une
façon telle que le bouton
marche/arrêt reste enfoncé.
• Rangez le simulateur pour
empêcher toute pression par
inadvertance sur le bouton
marche/arrêt.
• Réinstallez les batteries selon
le diagramme figurant dans le
porte-batterie.
• L'une des batteries est installée
à l'envers.
SIMULATEUR HEARTSTART FRx 861306
Philips Medical Systems
• Les électrodes sont trop
anciennes, endommagées ou la
couche de gel bleu est
irrégulière.
• L'adaptateur du mannequin est
cassé.
• Dans les scénarios 3 et 8, les
électrodes n'ont pas été retirées
et replacées.
• Les électrodes sont tordues.
mesure conseillée
37
Protection de l'environnement
En respectant les réglementations nationales et locales concernant
l'élimination des déchets des accessoires électriques, des accessoires
électroniques et des batteries, vous pouvez contribuer à protéger notre
environnement commun. Ces types de déchets peuvent introduire dans
l'environnement des éléments nocifs en général et présenter un danger
pour la santé humaine.
Philips Medical Systems
FRANÇAIS
Le simulateur FRx contient des composants électroniques. Ne le
mettez pas au rebut dans une décharge d'ordures ménagères non
triées. Rappel : le simulateur est muni du symbole suivant qui
rappelle que les déchets électroniques doivent être collectés et éliminés
dans une station de recyclage selon les réglementations en vigueur dans
chaque pays.
Remarques
Philips Medical Systems
39
HeartStart FRx Trainer 861306
Inhalt
Verwendungsgebiet des FRx Trainers .................................................................................. 39
Funktionen des FRx Trainers ..................................................................................................... 40
Übersicht über den FRx Trainer .............................................................................................. 41
So richten Sie den FRx Trainer ein.......................................................................................... 44
So wählen Sie ein Schulungsszenario aus ........................................................................... 47
So verwenden Sie ein Schulungsszenario ........................................................................... 48
Standard-Schulungsszenarien ..................................................................................................... 49
Funktionieren des FRx Trainers während des Einsatzes ............................................ 53
So ändern Sie die Standardkonfiguration des FRx Trainers ..................................... 53
So führen Sie eine Fehlersuche mit dem FRx Trainer durch .................................. 55
Philips Medical Systems
Umgebungsinformationen ........................................................................................................... 57
Der HeartStart FRx Trainer ist für die Vorbereitung von potentiell
Hilfeleistenden auf Notfallsituationen gedacht, in denen der automatisierte
externe FRx Defibrillator (AED) verwendet wird. Der HeartStart FRx
Trainer kann nicht zur Defibrillationsbehandlung verwendet werden.
Der Trainer enthält verschiedene Simulationen bzw. Schulungsskripte, um
Hilfeleistenden zu helfen, sich mit dem FRx Defibrillator vertraut zu
machen und die grundlegenden Schritte zu üben, die bei seiner
Verwendung in Notfällen erforderlich sind. Die Standardkonfiguration des
Trainers kann entsprechend den lokalen Anforderungen verändert
werden.
DEUTSCH
Verwendungsgebiet des FRx Trainers
40
Funktionen des FRx Trainers
•
•
•
•
•
WARNUNG: Bewahren Sie den Trainer nicht zusammen mit dem
Defibrillator bzw. an Orten auf, an denen er in einer Notsituation mit
einem Defibrillator verwechselt werden kann.
FRx TRAINER 861306
Philips Medical Systems
•
Der HeartStart FRx Trainer ermöglicht simulierte Schockauslösung.
Er hat keine Hochspannungselemente und gewährleistet Sicherheit bei
der Schulung.
Der HeartStart FRx Trainer ist für die Verwendung mit HeartStart
Schulungselektroden II und Übungspuppen bei Ausstattung mit dem
externen Puppenadapter M5089A, der mit dem Trainer geliefert wird,
konzipiert. Der FRx Trainer und die Schulungselektroden II können
auch mit Laerdal-Übungspuppen verwendet werden, die mit einem
separat bei Philips erhältlichen internen Puppenadapter M5088A
ausgestattet sind.
Wiederverwendbare HeartStart Schulungselektroden II sind in einem
Kit erhältlich (REF: 989803139271). Der Kit enthält einen Satz
Übungselektroden II in einer wiederverwendbaren Schulungselektrodenbox, eine Elektrodenplatzierungshilfe für Erwachsene, eine
Bedienungsanleitung für die Schulungselektroden und eine illustrierte
Anleitung. Ersatz-Schulungselektroden (REF: 989803139291) sind für
die Verwendung mit der Schulungselektrodenbox II verfügbar.
Der HeartStart FRx Trainer und die Schulungselektroden II können
mit einer Elektrodenplatzierungshilfe und einem Kinderschlüssel
(separat bei Philips erhältlich) auch für die Schulung in KinderDefibrillation verwendet werden.
Der HeartStart FRx Trainer umfasst acht Schulungsszenarien, in
denen realistische plötzliche Herzstillstände simuliert werden.
Beschreibungen der Szenarien finden Sie unter „Standardschulungsszenarien“. Diese Szenarien können mit Schulungsprogrammen verwendet werden, die von anerkannten Programmen
für Hilfeleistende entwickelt wurden.
Der HeartStart FRx Trainer wird mit vier AA/LR6 AlkalineStandardbatterien betrieben.
41
Übersicht über den FRx Trainer
Philips Medical Systems
Rückseite
A ANSCHLUSS FÜR SCHULUNGSELEKTRODEN. Der Stecker der
Schulungselektroden II wird hier angeschlossen.
B
SCHLITZ FÜR KINDERSCHLÜSSEL. Der separat erhältliche
Kinderschlüssel wird hier angeschlossen, um ein Defibrillationsszenario
für einen Säugling oder ein Kind unter 8 Jahren oder 25 kg zu
simulieren.
C EIN-LAMPE. Die grüne EIN-Lampe am FRx Trainer leuchtet stetig,
wenn er eingeschaltet ist, andernfalls leuchtet sie nicht. (Beim FRx
Defibrillator blinkt das grüne Bereitschaftslampe, wenn sich der
Defibrillator im Bereitschaftsmodus befindet.)
DEUTSCH
Der HeartStart FRx Trainer sieht dem HeartStart FRx Defibrillator sehr
ähnlich. Die gelbe Kennzeichnung in der Mitte weist jedoch darauf hin, dass
es sich um ein Übungsgerät handelt. Außerdem sind einige der Gerätfunktionen des FRx Defibrillators beim FRx Trainer entweder inaktiv, oder
sie funktionieren anders als ihre Entsprechungen beim Trainer. Die
Komponenten des FRx Trainers werden im Folgenden beschrieben.
42
D EIN-/AUS-TASTE. Drücken Sie diese grüne Taste, um den FRx Trainer
einzuschalten. Sie schalten den Trainer aus, indem Sie die Taste
drücken und eine Sekunde lang gedrückt halten.
E
INFORMATIONSTASTE. Beim FRx Trainer blinkt diese blaue i-Taste,
wenn die Szenarioauswahl verfügbar ist, und zu Beginn einer Pause bei
der Patientenbehandlung, wenn Herzdruckmassage- und BeatmungsAnweisungen verfügbar sind.
F
ELEKTRODENSYMBOLE. Die Elektrodensymbole blinken als Hilfe bei
der Platzierung der Elektroden während des Schulungsszenarios. Sie
schalten sich aus, wenn die Elektroden platziert sind.
G WARNLAMPE. Diese Lampe blinkt während der Rhythmusanalyse und
leuchtet stetig, wenn ein Schock empfohlen wird, um daran zu
erinnern, dass der Patient nicht berührt werden darf.
I
INFRAROT-KOMMUNIKATIONSANSCHLUSS (IR). Dieses Feature ist
beim FRx Trainer nicht verfügbar. (Beim FRx Defibrillator wird dieses
Feature für die Datenübertragung verwendet.)
J
LAUTSPRECHER. Wenn das Gerät in Verwendung ist, hören Sie die
Sprachanweisungen aus diesem Lautsprecher.
K BATTERIEFACHDECKEL. Dieser Deckel wird abgehoben, um
Batterien einzulegen oder auszuwechseln. Der Trainer wird mit vier
AA/LR6 Alkaline-Einwegbatterien betrieben, die in das Fach auf der
Rückseite des Geräts eingelegt werden. (Der FRx Defibrillator wird
mit einem speziellen Batteriesatz betrieben.)
L
FRx TRAINER 861306
KONFIGURATIONSSCHALTER. Diese Schalter befinden sich im
Batteriefach und ermöglichen das Ändern bestimmter
Parametereinstellungen des Trainers. Näheres finden Sie unter
„Konfigurieren des FRx Trainers“. (Diese Schalter sind beim FRx
Defibrillator nicht vorhanden.)
Philips Medical Systems
H SCHOCKTASTE. Diese orangefarbene Taste blinkt, wenn der FRx
Trainer die Verabreichung eines Schocks empfiehlt. Drücken Sie in
diesem Fall die Schocktaste, um den simulierten Schock auszulösen.
43
Die HeartStart Schulungselektroden II befinden sich in einer grauen
Box mit gelber Beschriftung, damit sie leicht von der HeartStart
SMART-Elektrodenbox II zu unterscheiden ist, die mit grauer Beschriftung
geliefert wird. Die Drähte der Schulungselektroden II sind darüber hinaus
im Bereich des Anschlusssteckers mit einem roten Band mit der Aufschrift
„NICHT FÜR KLINISCHEN EINSATZ“ umwickelt.
WARNUNG: Bewahren Sie die Schulungselektroden II nicht zusammen
mit dem FRx Defibrillator bzw. an Orten auf, an denen er in
Notsituationen mit einem Defibrillator verwechselt werden kann.
Die Schulungselektroden nicht an eine Person anlegen.
Inhalt des HeartStart FRx Trainer Kits
Philips Medical Systems
Der FRx Trainer 861306 enthält Folgendes:
•
•
•
•
•
•
HeartStart FRx Trainer
HeartStart Schulungselektroden II
HeartStart FRx Trainer Tragetasche
HeartStart FRx Defibrillator Kurzanleitung
HeartStart FRx Trainer Bedienungsanleitung
Externer Puppenadapter
Zubehör
Folgendes Zubehör ist separat bei Philips erhältlich:
•
•
•
FRx Trainer Bedienungsanleitung [REF: 989803139401]
HeartStart Schulungselektroden II (Kit mit einem Satz Schulungselektroden II in Schulungselektrodenbox, Elektrodenplatzierungshilfe
für Erwachsene, Bedienungsanleitung und illustrierte Anleitung)
[REF: 989803139271]
Ersatz-Schulungselektroden II (ein Paar Schulungselektroden auf
Einwegfolie zur Verwendung in der mit den HeartStart
Schulungselektroden II gelieferten Schulungselektrodenbox)
[REF: 989803139291]
DEUTSCH
Fragen Sie den zuständigen Arzt oder den Rettungsdienst nach weiteren
Schulungsanforderungen, Protokollen und Materialien.
44
•
•
•
•
•
•
•
•
•
•
Elektrodenplatzierungshilfe für Erwachsene [REF: M5090A]
Elektrodenplatzierungshilfe für Kinder [REF: 989803139281]
Kinderschlüssel [REF: 989803139311]
HeartStart FRx Defibrillator Schulungs-Toolkit für Ausbilder (NTSC)
[REF: 989803139321]
HeartStart FRx Defibrillator Schulungs-Toolkit für Ausbilder (PAL)
[REF: 989803139331]
HeartStart FRx Defibrillator Schulungs-DVD (NTSC)
[REF: 989803139341]
HeartStart FRx Defibrillator Schulungs-DVD (PAL)
[REF: 989803139351]
Externer Puppenadapter, 5er-Pack [REF: M5089A]
Interner Puppenadapter [REF: M5088A]
Tragetasche für den Ersatz-FRx Trainer [REF: 989803139531]
So legen Sie Batterien ein oder wechseln Batterien aus
Der HeartStart Trainer wird mit vier AA/LR6 Alkaline-Standardbatterien
(nicht enthalten) betrieben. Führen Sie zum Einlegen oder Auswechseln
der Batterien folgende Schritte durch:
1. Drücken Sie den Riegel am Batteriefachdeckel auf der Rückseite des
FRx Trainers. Nehmen Sie den Deckel ab und legen Sie ihn beiseite.
2. Entnehmen Sie die alten Batterien und entsorgen Sie sie entsprechend
den vor Ort geltenden Vorschriften.
3. Legen Sie vier neue AA/LR6 Alkaline-Batterien in das Fach ein, wie auf
der Batteriehalterung dargestellt.
4. Setzen Sie den Batteriefachdeckel wieder auf und drücken Sie ihn so
an, dass er einrastet.
HINWEIS: Es ist zu empfehlen, alle vier Batterien gleichzeitig zu
wechseln.
FRx TRAINER 861306
Philips Medical Systems
So richten Sie den FRx Trainer ein
45
So schließen Sie Schulungselektroden II an oder wechseln sie
Um die Schulungselektroden II am FRx Trainer anzuschließen, schieben
Sie den Stecker der Schulungselektroden II einfach in den Anschluss des
FRx Trainers. Achten Sie darauf, dass der Stecker einrastet.
Wenn die original Schulungselektroden das Ende ihrer Lebensdauer
erreicht haben, können Sie Ersatzschulungselektroden für die
Schulungselektrodenbox bestellen.
Philips Medical Systems
Zum Einlegen von Ersatzschulungselektroden in die wiederverwendbare
Schulungselektrodenbox entnehmen Sie zunächst die alten Elektroden.
Öffnen Sie die Verpackung der Ersatzschulungselektroden II und entfernen
Sie die einzelnen Schulungselektroden von der Einwegfolie. Verpacken Sie
die Ersatzelektroden entsprechend der folgenden Anleitung wieder in
der Box.
So verpacken Sie die Schulungselektroden II wieder
1. Drücken Sie je eine Elektrode fest an die Innenseiten der
Schulungselektrodenbox.
2. Drehen Sie die Drähte der Elektroden gegebenenfalls auseinander.
So verwenden Sie den FRx Trainer mit Laerdal-Übungspuppen
Verwenden Sie für die Schulungselektroden II anstelle eines Patienten eine
Herzdruckmassage- und Beatmungs-Übungspuppe, die mit einem externen
Einweg-Puppenadapter M5089A oder einem internen Puppenadapter
M5088A ausgestattet ist. Sie können auch eine Laerdal-Übungspuppe
„Resusci Anne“ verwenden, die mit Laerdal Link-Technik und einem
Adapter ausgestattet ist, der in den meisten Elektronikgeschäften erhältlich
ist. Bei Philips erhalten Sie weitere Informationen.
DEUTSCH
3. Wickeln Sie die Elektrodendrähte im Innern der Box auf und führen
Sie den Stecker durch die Öffnung in der Box.
46
So installieren Sie den externen Puppenadapter
Der externe Puppenadapter M5089A wird mit dem FRx Trainer geliefert.
Wie in Schritt 1 und 2 unten dargestellt, kann er mit beliebigen
Übungspuppen verwendet werden. (Wenn die Übungspuppe verwendet
wird, sollten die Schulungselektroden II positioniert werden, wie in Schritt
3 unten dargestellt.)
HINWEIS: Die Lebensdauer des externen Puppenadapters M5089A ist
begrenzt. Es können Ersatzsätze von fünf Adaptern bestellt werden.
So installieren Sie den internen Puppenadapter
Der separat erhältliche interne Puppenadapter M5088A ist für
die Laerdal-Übungspuppen „Little Anne CPR“ und „Resusci Anne CPR“
geeignet.
Führen Sie zum Installieren des internen Puppenadapters in einer
Laerdal-Übungspuppe „Little Anne CPR“ oder „Resusci Anne CPR“
folgende Schritte durch:
1. Entfernen Sie die Hülle von der Übungspuppe.
2. Ziehen Sie die Einwegfolie von der Klebefläche des internen
Puppenadapters ab.
FRx TRAINER 861306
Philips Medical Systems
Verwenden des externen Puppenadapters M5089A
mit einer Erwachsenen-Übungspuppe.
47
3. Platzieren Sie die Bereiche des internen Puppenadapters an den
geeigneten Stellen an der Unterseite der Hülle der Übungspuppe.
Anschauliche Darstellungen zum Platzieren finden Sie in der
Bedienungsanleitung zum internen Puppenadapter.
Philips Medical Systems
Installieren des internen Puppenadapters M5088A für die
Laerdal-Übungspuppe „Resusci Anne“
4. Ziehen Sie die Puppenhülle wieder auf.
5. Führen Sie eine Übungsanwendung mit dem Trainer durch, um zu
prüfen, ob der interne Puppenadapter zum Vorführen korrekter
Elektrodenplatzierung richtig platziert ist.
1. Stellen Sie sicher, dass der Elektrodenstecker eingesteckt und der FRx
Trainer ausgeschaltet ist. (Wenn nötig, drücken und halten Sie die
Ein-/Aus-Taste, um den Trainer auszuschalten.)
2. Drücken Sie die blinkende i-Taste einmal. Der FRx Trainer teilt Ihnen
mit, wie ein Szenario ausgewählt wird.
3. Drücken Sie die i-Taste erneut, so dass der FRx Trainer das aktuelle
Schulungsszenario erkennen kann. Möchten Sie dieses Szenario
verwenden, drücken Sie kurz die Ein-/Aus-Taste, um das Szenario
sofort auszuführen.
4. Zur Auswahl eines anderen Szenarios drücken Sie die blinkende
i-Taste, um die acht Szenarios nacheinander zu durchlaufen. Sind Sie
beim gewünschten Szenario angekommen, drücken Sie kurz die
DEUTSCH
So wählen Sie ein Schulungsszenario aus
48
Ein-/Aus-Taste, um das Szenario sofort auszuführen. Möchten Sie
jedoch das Szenario lediglich auswählen, ohne es auszuführen, drücken
und halten Sie die Ein-/Aus-Taste, bis der Trainer ausgeschaltet wird,
oder warten Sie 10 Sekunden, worauf er automatisch ausschaltet.
Der FRx Trainer führt das ausgewählte Szenario jedes Mal aus, bis die
Batterien gewechselt bzw. ein anderes Szenario ausgewählt wird. Nach
einem Batteriewechsel kehrt der Trainer standardgemäß zu Szenario 1
zurück.
So verwenden Sie ein Schulungsszenario
Gehen Sie mit dem FRx Trainer im ausgewählten Schulungsszenario genau
so um wie mit dem FRx Defibrillator.
1. Drücken Sie die Ein-/Aus-Taste, um den FRx Trainer einzuschalten.
HINWEIS: Durch das Einführen oder Entfernen des Kinderschlüssels
während eines Szenarios wird das Szenario neu gestartet.
3. Befolgen Sie dann die Sprachaufforderungen des FRx Trainers.
4. Falls die verwendete Puppe bekleidet ist, entfernen Sie die Kleidung auf
Anweisung.
5. Öffnen Sie die Box der Schulungselektroden II und ziehen Sie eine
Elektrode ab.
HINWEIS: Vermeiden Sie Berührungen der Klebeflächen der
Elektroden, da dies dazu führen kann, dass der Trainer zu früh mit der
Analyse beginnt.
FRx TRAINER 861306
Philips Medical Systems
2. Wenn Sie Defibrillation eines Säuglings oder Kindes unter 8 Jahren
oder 25 kg durchführen, führen Sie den Kinderschlüssel in den Schlitz
für den Kinderschlüssel ein.
49
6. Platzieren Sie die Elektrode an
der Übungspuppe. Drücken Sie
die Elektrode fest an. Ziehen Sie
dann die andere Elektrode ab
und platzieren Sie sie.
7. Befolgen Sie im weiteren Verlauf
des Szenarios die Anweisungen
des FRx Trainers.
Philips Medical Systems
8. Wenn das Szenario beendet ist oder angehalten werden soll, drücken
Sie die Ein/Aus-Taste, bis sich der FRx Trainer ausschaltet.
9. Wenn Sie das Szenario wiederholen möchten, verpacken Sie die
Elektroden gemäß „So verpacken Sie die Schulungselektroden II
wieder“. Beginnen Sie dann den Vorgang erneut, indem Sie die grüne
Ein/Aus-Taste drücken. Zur Auswahl eines anderen Szenarios drücken
Sie die i-Taste.
HINWEIS: Wenn die Batterie leer ist, weist der FRx Trainer darauf hin,
dass die BATTERIE ERSETZTEN. Der FRx Trainer bleibt noch kurze Zeit
funktionsfähig. Wechseln Sie die Batterien baldmöglichst aus, damit der
Trainer funktionsfähig bleibt.
Der FRx Trainer ermöglicht acht Schulungsszenarien. Wenn Sie vom
Trainer aufgefordert werden, die Schocktaste zu drücken, wird das
Szenario nur fortgesetzt, wenn die Taste gedrückt wird. Wenn der Trainer
einen nicht schockbaren Rhythmus erkennt, fordert er Sie dazu auf,
gegebenenfalls Herzdruckmassage und Beatmung durchzuführen.
In den Trainer-Szenarios bedeutet „Konvertierung“ eine Änderung von
einem schockbaren zu einem nicht schockbaren Rhythmus.
Unten sind die Symbole aufgeführt, die auf dem rückseitigen Etikett des
FRx Trainers und in den folgenden Szenariobeschreibungen verwendet
werden.
DEUTSCH
Standardschulungsszenarien
50
HINWEIS: Die Schockserie kann mit einem oder drei Schocks
konfiguriert werden. Bei der Konfiguration für die standardgemäße
Serie mit einem Schock legt der Trainer nach jedem Schock eine
Pause ein.
Symbol
Bedeutung
(Simulierter) schockbarer Rhythmus vom Trainer
erkannt.
(Simulierter) nicht schockbarer Rhythmus vom
Trainer erkannt.
(Simuliertes) Elektrodenproblem vom Trainer
erkannt.
Szenario 1
Szenariobeschreibung
Schockbarer Rhythmus erkannt, ein Schock erforderlich zur
Konvertierung
Nähere Angaben:
• Der Trainer erkennt einen schockbaren Rhythmus und fordert
den Benutzer zur Schockabgabe auf.
• Der Trainer erkennt einen nicht schockbaren Rhythmus.
Szenario 2
FRx TRAINER 861306
Schockbarer Rhythmus erkannt, mehrere Schocks erforderlich zur
Konvertierung
Nähere Angaben:
• Trainer erkennt schockbaren Rhythmus und weist den Benutzer
an, einen Schock (bei Konfiguration für eine Serie mit einem
Schock) bzw. drei Schocks (bei Konfiguration für eine Serie mit
drei Schocks) zu verabreichen.
• Der Trainer erkennt einen schockbaren Rhythmus und fordert
den Benutzer zur Schockabgabe auf.
• Der Trainer erkennt einen nicht schockbaren Rhythmus.
Philips Medical Systems
Szenario-Nummer
51
Szenario-Nummer
Szenario 3
Szenariobeschreibung
Elektroden-Fehlerbehebung, ein Schock erforderlich zur
Konvertierung
Nähere Angaben:
• Der Trainer erkennt schlechten Elektrodenkontakt und
wiederholt Elektrodenplatzierungsanweisungen.
• Wenn eine Elektrode entfernt und neu angebracht wurde,
erkennt der Trainer einen schockbaren Rhythmus und fordert
den Benutzer zur Schockabgabe auf.
• Der Trainer erkennt einen nicht schockbaren Rhythmus.
Szenario 4
Schockbarer Rhythmus erkannt, Konvertierung, Rückkehr in einen
schockbaren Rhythmus, Konvertierung
Philips Medical Systems
Nähere Angaben:
• Der Trainer erkennt einen schockbaren Rhythmus und fordert
den Benutzer zur Schockabgabe auf.
• Der Trainer erkennt einen nicht schockbaren Rhythmus.
• Der Trainer erkennt Refibrillation (Rückkehr zu schockbarem
Rhythmus) und fordert den Benutzer zur Schockabgabe auf.
• Der Trainer erkennt einen nicht schockbaren Rhythmus.
Nicht schockbarer Rhythmus erkannt
Nähere Angaben:
• Der Trainer erkennt einen durchgehend nicht schockbaren
Rhythmus.
Szenario 6
Schockbarer Rhythmus erkannt, zwei Schocks erforderlich zur
Konvertierung
Nähere Angaben:
• Der Trainer erkennt einen schockbaren Rhythmus und fordert
den Benutzer zur Schockabgabe auf.
• Der Trainer erkennt einen schockbaren Rhythmus und fordert
den Benutzer zu einer weiteren Schockabgabe auf.
• Der Trainer erkennt einen nicht schockbaren Rhythmus.
DEUTSCH
Szenario 5
52
Szenario-Nummer
Szenariobeschreibung
Szenario 7
Schockbarer Rhythmus erkannt, zwei Schocks erforderlich zur
Konvertierung, zurück zum erkannten schockbaren Rhythmus, ein
Schock zur Konvertierung erforderlich
Nähere Angaben:
• Der Trainer erkennt einen schockbaren Rhythmus und fordert
den Benutzer zur Schockabgabe auf.
• Der Trainer erkennt einen schockbaren Rhythmus und fordert
den Benutzer zu einer weiteren Schockabgabe auf.
• Der Trainer erkennt einen nicht schockbaren Rhythmus.
• Der Trainer erkennt Refibrillation (Rückkehr zu schockbarem
Rhythmus) und fordert den Benutzer zur Schockabgabe auf.
• Der Trainer erkennt einen nicht schockbaren Rhythmus.
Szenario 8
Elektroden-Fehlerbehebung, zwei Schocks erforderlich zur
Konvertierung
Nicht alle Szenarios eignen sich für alle Bedienerschulungen.
Schulungsszenario Nummer 1 ist das Standardszenario und wird am
häufigsten verwendet, um Bedienern die Behandlung eines Patienten mit
akutem Herzstillstand beizubringen. Falls die Schulungsszenarios als Teil
eines formellen Schulungskurses eingesetzt werden, kann der
Schulungsleiter Folgendes in Betracht ziehen:
•
•
•
FRx TRAINER 861306
nur Auswahl der Szenarios, die für die entsprechenden Schulungsziele
brauchbar sind,
Erstellung von Fallstudien und Patientendetails für die ausgewählten
Szenarios,
Hervorhebung bestimmter Funktionsmerkmale des Defibrillators,
Philips Medical Systems
Nähere Angaben:
• Der Trainer erkennt schlechten Elektrodenkontakt und
wiederholt Elektrodenplatzierungsanweisungen.
• Wenn eine Elektrode entfernt und neu angebracht wurde,
erkennt der Defibrillator einen schockbaren Rhythmus und
fordert den Benutzer zur Schockabgabe auf.
• Der Trainer erkennt einen schockbaren Rhythmus und fordert
den Benutzer zu einer weiteren Schockabgabe auf.
• Der Trainer erkennt einen nicht schockbaren Rhythmus.
53
•
•
•
Gewährleistung, dass Benutzer geltende Vorschriften einhalten,
Überprüfung der Platzierung der Elektroden, und
Beurteilung der Benutzerkenntnisse auf Gebieten wie
Herzdruckmassage und Beatmung und Patientenuntersuchung.
Funktionieren des FRx Trainers während des Einsatzes
Philips Medical Systems
Der Philips HeartStart FRx Trainer ist für die Verwendung in Schulungen
von automatisierten externen Defibrillatoren konzipiert, die von einem
qualifizierten Ausbilder gehalten werden.
Wenn ein Schulungsszenario ausgeführt wird, wird die Funktion des FRx
Defibrillators bei der Verwendung in Notfällen durch den FRx Trainer
nachgeahmt. Er gibt gesprochene Anweisungen, führt den Benutzer durch
einen oder mehrere simulierte Schocks, legt Pausen für Herzdruckmassage
und Beatmung ein, bietet Herzdruckmassage- und BeatmungsAnweisungen usw. Wenn zehn Minuten lang kein Benutzereingriff erfolgt
(kein Tastendruck), schaltet sich der Trainer aus.
So ändern Sie die Standardkonfiguration des FRx Trainers
Der HeartStart FRx Trainer wird mit einer werkseitigen Standardkonfiguration geliefert, die die Bedürfnisse der meisten Benutzer erfüllt.
Die Einstellungen für die in der folgenden Tabelle aufgeführten Parameter
können vom Benutzer geändert werden.
DEUTSCH
WICHTIG: Bestimmte Funktionen des echten HeartStart FRx
Defibrillators werden vom FRx Trainer nicht simuliert.
• Der FRx Trainer kann nicht mit den (klinischen) SMART
Elektroden II verwendet werden. Wenn die SMART Elektroden II
installiert sind, fordert der FRx Trainer Sie wiederholt dazu auf,
Elektroden zu installieren.
• Der FRx Trainer führt weder den Batterie-Einbau-Selbsttest noch
periodische Selbsttests durch.
• Durch das Einführen oder Entfernen des Kinderschlüssels während
eines Szenarios wird das Szenario neu gestartet.
• Der FRx Trainer verwendet immer eine KSE-Standardpause.
54
Wenn Sie konfigurierbare Trainer-Parameter ändern möchten, nehmen Sie
den Batteriefachdeckel des Trainers ab und suchen Sie die Schalter an der
Unterseite des Batteriefachs. Nehmen Sie die Einstellungen der Ein
(ON)-/Aus (OFF)-Taste, wie in der folgenden Tabelle gezeigt, mit einem
kleinen Stift vor.
-
Schalter-Nr.
Lautstärke
1
KSE-Pause*
(Minuten)
2 und 3
Einstellung (Standard = OFF)
OFF:
ON:
hoch
niedrig
Schalter-Nr. 2
OFF
ON
OFF
ON
Schalter-Nr. 3
OFF
OFF
ON
ON
Herzdruckmassage- und
Beatmungs-Anweisungen
Kompressionen/
Beatmungen†
4
Herzdruckmassage- und
Beatmungs-Anweisungen
mit Beatmungen
5
OFF:
ON:
mit Beatmungen
ohne Beatmungen
Schockserie
6
OFF:
ON:
1
3
FRx TRAINER 861306
OFF:
ON:
Erwachsene
Kinder
Erwachsene
Kinder
Einstellung
2,0
1,0
1,5
3,0
30 Kompressionen/2
30 Kompressionen/2
30 Kompressionen/2
15 Kompressionen/2
Beatmungen
Beatmungen
Beatmungen
Beatmungen
Philips Medical Systems
Parameter
55
Parameter
Protokollpause*
(Minuten)
Schalter-Nr.
7 und 8
Einstellung (Standard = OFF)
Schalter-Nr. 7
OFF
ON
OFF
ON
Schalter-Nr. 8
OFF
OFF
ON
ON
Einstellung
2,0
1,0
1,5
3,0
* Wenn der Trainer für Herzdruckmassage- und Beatmungs-Anweisungen mit Beatmungen konfiguriert ist und der Benutzer durch Drücken
der i-Taste Herzdruckmassage- und Beatmungs-Anweisungen auswählt, führen die Standardpause und die Herzdruckmassage- und
Beatmungs Anweisungen-Einstellungen (2 Minuten Pause, 30 Kompressionen/2 Beatmungen) zu 5 Durchläufen von Herzdruckmassage-und Beatmungs-Anweisungen. Die Zahl der Durchläufe variiert für andere Einstellungen. Bei allen Einstellungen beginnen und enden
Herzdruckmassage- und Beatmungs-Anweisungen mit Kompressionen.
† Die Auswahl Herzdruckmassage- und Beatmungs-Anweisungen mit Kompressionen/Beatmungen (Schalter 4) ist nur möglich, wenn
Herzdruckmassage- und Beatmungs-Anweisungen mit Beatmungen (Schalter 5) auf OFF (mit Beatmungen) eingestellt ist. Andernfalls erfolgen
die Kompressionen entsprechend Herzdruckmassage- und Beatmungs-Anweisungen durchgehend ohne Pausen für Beatmungen.
So führen Sie eine Fehlersuche mit dem FRx Trainer durch
Philips Medical Systems
Die folgende Tabelle enthält Tipps zur Fehlerbehebung.
Mögliche Ursache
Der Trainer meldet
ANALYSE, bevor die
Elektroden an der
Übungspuppe angebracht
sind.
• Der Benutzer hat die
Klebefläche der Elektroden
berührt und lebefläche der
Elektroden berührt und die
Messelektronik des Trainers
aktiviert.
• Die Elektrodendrähte sind
verdrillt.
• Die Elektrodendrähte sind nicht
getrennt.
• Die Elektroden berühren sich.
Empfohlenes Vorgehen
• Vermeiden Sie Berührung der
Klebeflächen der Elektroden.
• Lösen Sie die Verdrillung der
Drähte.
• Trennen Sie die Drähte
zwischen den Elektroden und
dem roten Etikett.
• Trennen Sie die Elektroden.
DEUTSCH
Verhalten
56
Verhalten
Der Trainer meldet nicht
ANALYSE, wenn die
Elektroden mit dem
Übungspuppenadapter
verbunden sind.
Mögliche Ursache
• Die Platzierung der Elektroden
ist nicht korrekt.
• Überprüfen Sie die Platzierung
der Elektroden und der
Übungspuppe. Entfernen Sie
Elektroden bzw. Adapter und
platzieren Sie sie/ihn neu, wenn
Sie dazu aufgefordert werden.
• Schulungselektroden ersetzen.
• Puppenadapter ersetzen.
• Entnehmen und ersetzen Sie
eine Elektrode.
• Lösen Sie die Verdrillung der
Drähte.
Die gesprochenen
Anweisungen des
Trainers sind verzerrt.
• Eine der Batterien ist umgekehrt
eingelegt.
• Legen Sie Batterien, wie auf dem
Diagramm in der Batteriehalterung dargestellt, ein.
Die Batterie entleert sich
zu schnell.
• Der Trainer wurde so
aufbewahrt, dass die
Ein-/Aus-Taste versehentlich
gedrückt wurde.
• Eine der Batterien ist umgekehrt
eingelegt.
• Lagern Sie den Trainer so, dass
nicht versehentlich Druck auf
die Ein-/Aus-Taste ausgeübt
wird.
• Legen Sie Batterien, wie auf dem
Diagramm in der Batteriehalterung dargestellt, ein.
FRx TRAINER 861306
Philips Medical Systems
• Elektroden sind alt, beschädigt
oder weisen keine
durchgehenden blauen
Klebeflächen auf.
• Der Puppenadapter ist defekt.
• In den Szenarien 3 und 8 wurde
die Elektrode nicht entfernt und
neu platziert.
• Die Elektrodendrähte sind
verdrillt.
Empfohlenes Vorgehen
57
Umgebungsinformationen
Durch Beachtung der landesweiten und örtlichen Vorschriften bezüglich
der Entsorgung elektrischen, elektronischen und Batterieabfalls können Sie
einen positiven Beitrag zum Umweltschutz leisten. Abfall dieser Art kann
die Umwelt schädigende Stoffe enthalten und außerdem eine
Gesundheitsgefahr bedeuten.
Philips Medical Systems
Der FRx Trainer enthält elektrische Komponenten. Diese
Komponenten dürfen nicht als unsortierter Normalmüll entsorgt
werden. Zur Erinnerung befindet sich am Trainer das folgende
Symbol, um darauf hinzuweisen, dass elektronische Teile dieser Art gemäß
den geltenden Recycling-Vorschriften getrennt gesammelt und entsorgt
werden müssen.
DEUTSCH
Anmerkungen
Philips Medical Systems
Philips Medical Systems
Intentionally blank.
Page intentionnellement laissée vide.
Diese Seite bleibt frei.
POWE R
TO
SAVE
A
L I FE
Philips Medical Systems is part of
Philips Medical Systems
Royal Philips Electronics
United States
Philips Medical Systems est une partie de
Philips Medical Systems
2301 Fifth Avenue, Suite 200
Seattle, WA, USA 98121
(800) 263-3342
Royal Philips Electronics
Philips Medical Systems ist Teil von
Royal Philips Electronics
Canada
Philips Medical Systems
281 Hillmount Road
Markham, Ontario
L6C 2S3
(800) 291-6743
Europe, Middle East, and Africa
Philips Medizin Systeme Boeblingen GmbH
Cardiac and Monitoring Systems
Hewlett-Packard Strasse 2
71034 Boeblingen, Germany
(+49) 7031 463-2254
Latin America
Philips Medical Systems
1550 Sawgrass Corporate Parkway, Suite 300
Sunrise, FL 33323, USA
(954) 835-2660
Asia Pacific
Philips Electronics Hong Kong Ltd.
30th Floor, Hopewell Centre,
17, Kennedy Road, Wanchai,
Hong Kong
(852) 2821 5888


