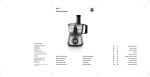
1
Soup’Master
Réf. : 18356-56
Mode d’emploi
2
Instructions
22
Bedienungsanleitung 40
Instructies
Instrucciones
Istruzioni per l’uso
60
79
98
A
A : Bouchon doseur
B : Couvercle en verre
B
C : Brasseur
D : Lames
H
C
E : Bol inox
F : Bloc Moteur
D
I
G : Panel de control
E
H : Crochet pour retirer les lames
I : Panier vapeur
J
J : Accessoire « Goupillon»
(pour le nettoyage du bol)
K : Accessoire « Mélangeur »
pour réaliser des confitures,
compotes, crèmes ou sauces.
K
F
G
B1 : Crochet de fixation
B2 : Système de fermeture
B1
2
B2
Image 2
Image 3
Image 4
Image 5
Image 6
Image 7
Image 8
Image 9
3
Mode d'emploi
Image 1
Notice d’utilisation du Soup’Master
Lisez le mode d’emploi et gardez-le. Si vous redonnez l’appareil à une tierce personne,
n’oubliez pas de lui transmettre la notice. Retirez l’appareil de l’emballage, mais gardezle le temps de vérifier l’état de l’appareil.
Caractéristiques techniques
Voltage
120V, 220 ~240V
Fréquence
50/60 Hz
Puissance
1000 W
Capacité bol
Min 1L - Max 1,5 L
Pour réduire tout risque d’incendie, d’électrocution ou de blessure, toujours suivre les
consignes de sécurité lors de l’utilisation d’appareils électriques, notamment les consignes
suivantes :
Précautions importantes
1. Cet appareil doit uniquement être utilisé par ou sous la surveillance d’un adulte
responsable.
Utilisez et rangez l’appareil hors de portée des enfants.
2. Cet appareil n’est pas un jouet. Ne laissez pas vos enfants jouer avec ce dernier.
3. N’immergez pas l’appareil, le bol, le cordon, la fiche ou le bloc moteur dans
l’eau ou autre liquide. N’utilisez pas l’appareil dans une salle de bains, à
proximité d’une source d’eau ou à l’extérieur.
4. Ne placez pas l’appareil dans un environnement humide ou mouillé et
tenez-le à l’écart des rayons du soleil.
5. Placez l’appareil sur une surface plane, stable, solide et sèche.
6. Ne soulevez pas ou ne déplacez pas l’appareil lorsqu’une préparation est en cours.
7. Ne soulevez pas l’appareil par le câble d’alimentation. Soulevez toujours l’appareil par
sa base.
8. N’utilisez pas l’appareil si le couvercle n’est pas en place.
9. Ne retirez pas le bol de cuisson du logement principal lorsque le moteur est en marche.
10. Le bol devient très chaud lors de la cuisson. Ne touchez pas les surfaces chaudes de
l'appareil. Ne retirez pas le couvercle du bol pendant la cuisson, vous pourriez vous
brûler. Utilisez un gant de cuisine pour retirer le couvercle.
11. De la vapeur peut s’échapper du bouchon doseur lors de la cuisson, prendre garde à
ne pas vous brûler.
12. Veillez à ce que le bol ne déborde pas. Ne remplissez pas le bol au-delà de la quantité
recommandée. Tout liquide qui se met sous le bloc moteur pourrait être absorbé par
le moteur et risquerait de l’endommager.
13. Ne mettez pas votre main dans le bol. Les lames sont tranchantes. Utilisez le crochet
pour retirer les lames.
4
14. Ne mettez aucun outil (cuillère, spatule, etc.) dans le bol. Utilisez les accessoires fournis.
15. Après avoir fait fonctionner le moteur en continu pendant un cycle, attendez au moins
5 minutes avant de lancer un nouveau cycle.
16. Ne faites pas fonctionner l’appareil à vide.
17. Veillez à ce que le cordon d’alimentation ne soit pas en surplomb et qu’on ne puisse
pas trébucher dessus ou l’accrocher.
18. Gardez l’appareil et le cordon à l’écart des plaques chauffantes, plans de cuisson et becs
de gaz.
19. Débranchez l’appareil quand vous ne l’utilisez pas et laissez-le refroidir avant de le
déplacer ou de le nettoyer.
20. Débranchez l'appareil avant de mettre ou d’enlever des pièces ou accessoires.
21. N’utilisez pas l’appareil à d’autres fins que celles décrites dans ce mode d’emploi.
22. Cet appareil ne doit pas être utilisé avec un minuteur externe ou un système de contrôle
à distance.
23. L’appareil doit uniquement être branché à une prise reliée à la terre.
24. N’utilisez pas l’appareil s’il est tombé ou endommagé ou s’il fonctionne mal.
25. Il est recommandé d’examiner régulièrement le câble d’alimentation pour déceler tout
signe de détérioration éventuelle, et l’appareil ne doit pas être utilisé si le câble est
endommagé.
26. Si le câble d’alimentation est endommagé, il doit nécessairement être remplacé par le
fabricant, son service après-vente ou un technicien agréé par le fabricant pour éviter
tout danger.
Usage ménager uniquement
Avant la première utilisation, reportez vous au paragraphe “soin et entretien” et nettoyez
soigneusement l’appareil et les accessoires pour retirer la poussière de fabrication.
N’immergez pas le bloc moteur (F) et le bol en inox (E) dans l’eau ou dans tout autre
liquide.
Ne placez pas le bloc moteur (F) et le bol en inox (E) dans un lave vaisselle.
PRISE EN MAIN DU PRODUIT
Choisir l’accessoire adapté à la recette.
Soupes et compotes : lames (D) et brasseur (C)
Sauces, crèmes, compotes, confitures : accessoire « mélangeur » (K)
Cuisson vapeur : panier vapeur
Comment fixer le couvercle (B) sur le bol inox (E)
Le couvercle (B) doit toujours être fixé sur le bol inox (E).
Un système de sécurité s’enclenche lorsque le couvercle n’est pas fixé, ou mal fixé, sur le
bol.
5
Placez le couvercle en verre (B) sur le bol comme décrit ci-dessous:
1. Fixez le crochet de fixation (B1) sur le rebord du bol en inox (E). (Image 1)
2. Abaissez le couvercle en verre (B) sur le bol en inox (E). Le système de fermeture (B2) du
couvercle doit se situer sur la droite de la poignée du bol. (Image 2)
3. Tournez le couvercle en verre (B) avec le pouce et l’index pour que le système de
fermeture (B2) du couvercle se place dans le prolongement de la poignée du bol.
(Image 3)
4. Placez sur le sommet du couvercle en verre (B) le bouchon doseur (A).
Comment fixer le bol inox (E) sur le bloc moteur (F)
1. Alignez la poignée du bol avec la fente prévue à cet effet dans le bloc moteur. Ainsi, les
pièces de raccordement situées sous le bol s’enclencheront avec les pièces de
raccordement situées sur le bloc moteur. (Image 4).
2. Appuyez légèrement sur le sommet du bol pour bien enclencher les pièces de
raccordement.
Si un écart est visible entre le bol (E) et le bloc moteur (F), cela signifie que votre bol
n’est pas correctement fixé sur le bloc moteur. (Image 5)
Si aucun espace n'est visible, le bol de cuisson est correctement fixé sur le bloc
moteur.
PANEL DE CONTRÔLE
8
9
10
11
1
7
2
6
3
5
4
6
1. Voyant lumineux de fonctionnement
2. Bouton START/STOP (Marche/Arrêt)
3. Bouton AUTO (Programme
Automatique)
4. Boutons pour réglage du temps
5. Bouton PROG (programmation départ
différé)
6. Bouton TEMP (Réglage température)
40 ℃, 80 ℃, 100 ℃, 120 ℃ et OFF
7. Bouton CHOP (Réglage vitesse de
mixage)
H (rapide), L (lent), S (mélange) et O
(OFF)
8. Cuisson en cours
9. Fonction PROG (programmation
départ différé) sélectionnée
10. Programme AUTO sélectionné
11. Affichage alternatif du temps restant
de cuisson, de la température
sélectionnée et de la vitesse de
mixage sélectionnée.
COMMENT FAIRE UNE SOUPE AVEC SOUP’MASTER
1. Nettoyez tous vos légumes, coupez-les en petits morceaux
2. Fixez dans le bol (E) les lames (D) (image 6) et le brasseur (C) (image 7)
3. Placez dans le bol en inox (E) vos légumes en morceaux
4. Ajoutez de l’eau dans le bol (E). Au minimum jusqu’à la marque “I”, au maximum jusqu’à
la marque « II ».
5. Placez le couvercle en verre (B) sur le bol (E)
*** Cuisson en mode automatique ***
1. Branchez l’appareil. Un signal sonore retentit. L’écran LCD s’allume et affiche [0 :30].
2. Appuyez sur le bouton AUTO pour sélectionner le programme automatique. Le mot AUTO
apparaît alors en haut à droite sur l’écran LCD.
3. Appuyez sur le bouton START/STOP pour commencer la cuisson. Sur l’écran LCD, la
mention
apparaît. L’écran LCD affiche de façon alternative [0﹕30] et 100. Le temps
de cuisson va diminuer au fur et à mesure.
4. Après 10 minutes de cuisson, l’appareil va automatiquement commencer à mixer
lentement. L’écran LCD affiche alors de façon alternative [L﹕19] et 100. « L » étant le mode
de mixage préenregistré, « 19 », le temps de cuisson restant.
5. Après 15 minutes, l’appareil va automatiquement commencer à mixer plus rapidement.
L’écran LCD affiche alors de façon alternative [H﹕4] et 100. « H » étant le mode de mixage
préenregistré, « 4», le temps de cuisson restant.
A la fin du programme automatique l’écran LCD affiche [00:00] et l’appareil sonne (6 bips).
Vous pouvez, si vous le souhaitez, ajouter du temps de cuisson ou un mixage
supplémentaire.
7
- Ajouter un temps de cuisson supplémentaire :
1. Appuyez plusieurs fois sur le bouton TEMP pour sélectionner la température de
cuisson.
2. Appuyez sur le bouton « + » ou « - » pour sélectionner le temps de cuisson ou de
préparation
3. Appuyez sur le bouton START/STOP pour lancer le programme sélectionné.
- Ajouter un mixage supplémentaire :
1. Appuyez plusieurs fois sur le bouton CHOP pour sélectionner la vitesse de mixage.
2. Appuyez sur le bouton « + » ou « - » pour sélectionner le temps de préparation.
3. Appuyez sur le bouton START/STOP pour lancer le programme sélectionné.
Remarque 1 : En activant le programme AUTO, la température de cuisson est de 100°C et
les vitesses de mixage sont automatiquement sélectionnées – L (Lent) en début de cuisson
et H (rapide) en fin de cuisson. Vous pouvez si vous le souhaitez, changer la vitesse de
mixage. Pour cela, appuyez sur le bouton CHOP plusieurs fois pour sélectionner votre vitesse
de départ et appuyez sur le bouton START/STOP. L’appareil commencera à cuire et
directement à mixer à la vitesse que vous avez sélectionnée.
Vous ne pouvez pas changer dans le programme AUTO la température de cuisson.
Remarque 2 : Pendant la cuisson en programme AUTO, vous pouvez ouvrir le couvercle
(B) et rajouter des aliments ou des épices. Quand vous ouvrez le couvercle (B), la cuisson
et la fonction de mixage s’arrêtent. Quand vous refermez le couvercle (B) sur le bol (E),
appuyez sur le bouton START/STOP pour réactiver la cuisson et le mixage du programme
AUTO.
Remarque 3 : Vous pouvez arrêter et annuler la cuisson automatique à tout moment. Pour
cela, appuyer sur le bouton START/STOP puis sur le bouton AUTO pour annuler le
programme automatique.
Astuce si votre recette inclut de l’ail, de l’oignon ou du gingembre : nous vous
conseillons de les faire cuire dans le bol avant de rajouter les autres aliments et
légumes.
1. Dans le bol en inox, fixez les lames (D) et le brasseur (C).
2. Ne mettez aucun ingrédient dans le bol en inox, fermez le couvercle en verre et placez
le bol sur le bloc moteur.
3. Placez sur le sommet du couvercle en verre (B) le bouchon doseur (A).
4. Branchez l’appareil. Un signal sonore retentit. L’écran LCD s’allume et affiche [0 :30].
5. Appuyez plusieurs fois sur le bouton TEMP pour sélectionner la température 120°C.
6. Appuyez sur le bouton START/STOP pour préchauffer le bol.
7. Après 1 minute, ouvrez le couvercle en verre et ajoutez de l’huile dans le bol ainsi que
votre ail, oignon ou gingembre (coupé finement).
8. Replacez le couvercle en verre et appuyez sur le bouton CHOP plusieurs fois. Sélectionnez
la vitesse S (mélange).
9. Appuyez sur le bouton ‘-‘ pour régler les temps de cuisson à 3 minutes.
8
10. Appuyez sur le bouton START/STOP.
11. Après 3 minutes, appuyer sur le bouton START/STOP pour arrêter la cuisson et ouvrez
le couvercle.
12. Ajoutez vos légumes (et ingrédients) et l’eau dans le bol.
13. Replacez le couvercle en verre et appuyez sur le bouton AUTO puis le bouton
START/STOP pour lancer le programme automatique de cuisson. Le mot AUTO
apparaît alors en haut à droite sur l’écran LCD et la mention
apparaît en haut à
gauche sur l’écran LCD.
*** Comment programmer un départ différé automatique***
1. Branchez l’appareil. Un signal sonore retentit, l’écran LCD s’allume et affiche [0 :30].
2. Appuyez sur le bouton AUTO pour sélectionner le programme automatique. Le mot AUTO
apparaît alors en haut à droite sur l’écran LCD.
3. Appuyez sur le bouton PROG. L’écran LCD affiche [04﹕00] (4 heures).
4. Appuyez sur les boutons ”+’’ ou ’’-’’ pour sélectionner le temps de départ (Max : 24 heures).
Si vous mettez par exemple [06﹕00], l’appareil se mettra en marche dans 6 heures.
Remarque : le réglage du temps se fait en minutes. Si vous appuyez une fois sur « + », vous
augmentez le temps d’une minute. Si vous appuyez plus longuement sur la touche « + »,
vous augmentez le temps de 10 minutes.
5. Appuyez sur le bouton START/STOP. Un compte à rebours avant le départ va s’enclencher.
Le temps va diminuer au fur et à mesure.
6. Lorsque le temps est écoulé, l’appareil se met en route automatiquement (cuisson 100°C
pendant 30 minutes et 2 vitesses de mixage (L et H))
Remarque : Vous pouvez arrêter la programmation en départ différé en appuyant une fois
sur le bouton START/STOP puis en appuyant une fois sur le bouton PROG. Sur l’écran LCD,
le mot PROG disparaît.
*** Cuisson en mode manuel ***
1. Branchez l’appareil. Un signal sonore retentit, l’écran LCD s’allume et affiche [0 :30].
2. Appuyez sur le bouton « + » ou « - » pour sélectionner la durée de cuisson (Max : 24
heures).
Remarque : le réglage du temps se fait en minutes. Si vous appuyez une fois sur « + », vous
augmentez le temps d’une minute. Si vous appuyez plus longuement sur la touche « + »,
vous augmentez le temps de 10 minutes.
3. Appuyez sur le bouton TEMP plusieurs fois pour sélectionner la température de
cuisson.
4. Appuyez sur le bouton CHOP plusieurs fois pour sélectionner la vitesse de mixage : S
(mélange), L (lent) ou H (rapide).
5. Appuyez sur le bouton START/STOP pour commencer la cuisson. Sur l’écran LCD, la
mention
apparaît. L’écran LCD affiche de façon alternative [VITESSE﹕TEMPS] et
[TEMPERATURE]. Le temps de cuisson va diminuer au fur et à mesure. Vous pouvez à tout
moment prolonger ou réduire le temps de cuisson ou de préparation en appuyant sur
les boutons « + » ou « - ».
9
NOTES COMPLEMENTAIRES :
1) Bouton CHOP (mixage). Lorsque vous branchez l’appareil, le mode de mixage n’est pas
sélectionné. Position O (OFF). Si vous appuyez sur le bouton START/STOP pour démarrer
la cuisson, la fonction mixage ne sera pas sélectionnée. L’appareil cuira vos aliments sans
les mixer. Une fois l’appareil en marche, vous ne pouvez pas rajouter un mixage en cours.
Si vous souhaitez rajouter cette fonction, appuyez sur le bouton START/STOP pour arrêter
le programme de cuisson en cours, et ensuite, appuyez sur le bouton CHOP plusieurs
fois pour sélectionner votre mixage. Appuyez ensuite sur le bouton START/STOP pour
lancer la cuisson et le mixage.
2) Bouton TEMP (température). Lorsque vous branchez l’appareil, la température n’est pas
sélectionnée. Position O (OFF). Si vous appuyez sur le bouton START/STOP, l’appareil ne
chauffera pas. Si vous souhaitez ajouter une cuisson, appuyez sur le bouton START/STOP
pour arrêter le programme en cours, et ensuite, appuyez sur le bouton TEMP plusieurs
fois pour sélectionner la température de cuisson. Appuyez ensuite sur le bouton
START/STOP pour lancer la cuisson.
3) Sélection du temps. Lorsque vous branchez l’appareil, le temps de cuisson ou de
préparation est automatiquement réglé à 30 minutes. Vous pouvez modifier le temps
de cuisson ou de préparation avant ou après avoir appuyé sur le bouton START/STOP.
Pour modifier le temps de cuisson ou de préparation, appuyez sur les boutons « + » ou
« - ».
4) Pendant le cuisson ou la préparation, vous pouvez appuyer sur le bouton START/STOP
pour arrêter la cuisson (ou préparation) et changer ainsi les fonctions CHOP (mixage)
et TEMP (température) si nécessaire.
5) Maintien au chaud : Une fois le temps de cuisson écoulé, l’appareil arrête de cuire et sur
l’écran LCD la mention
disparaît. L’appareil passe alors automatiquement en
fonction « maintien au chaud » pendant 60 minutes. La fonction « maintien au chaud »
garde votre soupe à basse température. Si vous avez sélectionné une température de
cuisson à 80°C ou plus, l’appareil gardera votre préparation à 75°C pendant 60 minutes.
Si vous avez sélectionné une température de cuisson à 40°C, l’appareil gardera votre
préparation à 40°C. Le mixage continuera par instants. Après 60 minutes, l’appareil
s’éteindra complètement.
*** Comment programmer une cuisson en mode manuel avec un départ différé ***
Après avoir sélectionné la température de cuisson (bouton TEMP), la vitesse de mixage
(bouton CHOP) et le temps de cuisson (boutons « + » ou « - »), appuyez sur le bouton PROG.
Sur l’écran LCD apparaît la mention [04﹕00] (4 heures). Appuyez sur les boutons « + » ou
« - » pour définir le temps de départ (Max : 24 heures). Si vous mettez par exemple
[06﹕00], l’appareil se mettra en marche dans 6 heures.
Remarque : le réglage du temps se fait en minutes. Si vous appuyez une fois sur « + », vous
augmentez le temps d’une minute. Si vous appuyez plus longuement sur la touche « + »,
vous augmentez le temps de 10 minutes.
Appuyez sur le bouton START/STOP. Un compte à rebours avant le départ va s’enclencher.
Le temps va diminuer au fur et à mesure. L’appareil se mettra en route automatiquement
une fois le temps écoulé.
10
CUISSON VAPEUR
1. Retirez les lames et le brasseur ou l’accessoire « Mélangeur »
2. Remplissez jusqu’à la marque « I » le bol avec de l’eau
3. Placez le bol sur le bloc moteur.
4. Placez à l’intérieur du bol le panier vapeur (Image 9)
5. Placez dans le panier vos aliments
6. Placez le couvercle en verre (B) sur le bol (E)
7. Placez le bol sur le bloc moteur.
8. Appuyez plusieurs fois sur le bouton TEMP pour sélectionner la température de
cuisson.
9. Appuyez sur le bouton « + » ou « - » pour sélectionner le temps de cuisson ou de
préparation.
10. Appuyez sur le bouton START/STOP pour lancer le programme sélectionné.
CUISSON SANS MIXAGE DE LA VIANDE ET DES LÉGUMES
DANS LE BOL INOX
1. Retirez les lames, le brasseur ou l’accessoire « Mélangeur » du bol en inox.
2. Placez les aliments que vous souhaitez cuire dans le bol inox et ajoutez de l’eau.
3. Fermez le couvercle en verre et placez le bol sur le bloc moteur.
4. Placez sur le sommet du couvercle en verre (B) le bouchon doseur (A).
5. Branchez l’appareil. Un signal sonore retentit, l’écran LCD s’allume et affiche [0 :30].
6. Appuyez plusieurs fois sur le bouton TEMP pour sélectionner la température de
cuisson.
7. Appuyez sur le bouton START/STOP pour commencer la cuisson. Le temps de cuisson
est réglé sur 30 minutes. Vous pouvez régler le temps de cuisson en appuyant sur les
boutons « + » ou « - »
COMMENT RÉALISER UNE CONFITURE AVEC SOUP’MASTER
1. Nettoyez tous vos fruits, coupez-les en petits morceaux
2. Placez l’accessoire « Mélangeur » (K) dans le bol (image 8)
3. Placez dans le bol en inox (E) vos fruits en morceaux et le sucre
4. Placez le couvercle en verre (B) sur le bol (E)
5. Placez le bol sur le bloc moteur.
6. Appuyez plusieurs fois sur le bouton TEMP pour sélectionner la température de
cuisson.
7. Appuyez plusieurs fois sur le bouton CHOP pour sélectionner la vitesse de mixage.
8. Appuyez sur le bouton « + » ou « - » pour sélectionner le temps de cuisson ou de
préparation.
9. Appuyez sur le bouton START/STOP pour lancer le programme sélectionné.
11
REMARQUES IMPORTANTES
Capacité d’eau ou de liquide insuffisante : Si le niveau de soupe dans le bol de cuisson
a diminué et est inférieur au niveau minimum (niveau « I ») la cuisson s’arrête
automatiquement. Le mixage continue et l’appareil émet un « bip » environ 20 fois (vous
pouvez appuyer sur n'importe quel bouton une fois pour arrêter le bip), le voyant lumineux
clignote pour vous avertir d'ajouter de l'eau. Après 4 minutes, la fonction mixage s’arrête
automatiquement. Pour continuer la cuisson, ajoutez de l’eau ou un liquide à votre
préparation et appuyez sur le bouton START/STOP.
Couvercle en verre non fixé ou mal fixé : Si le couvercle de verre n'est pas correctement
fixé au bol inox, l'appareil ne fonctionnera pas. L’appareil émet 3 "bip" et le voyant lumineux
clignote pour avertir l'utilisateur de fixer correctement le couvercle en verre dans le bol
en inox.
COMMENT NETTOYER VOTRE APPAREIL SOUP’MASTER
1. Débranchez l’appareil
2. Retirez le bol inox du bloc moteur.
3. Ouvrez le couvercle en verre en le tournant avec le pouce.
4. Versez la soupe ou votre préparation dans un récipient et retirer les lames et le
brasseur ou l’accessoire « mélangeur ».
Remarque : Pour retirer les lames, utilisez le crochet. Glissez le crochet sous les lames en
direction oblique et tirez le crochet pour dégager les lames.
5. Lavez les accessoires à l’eau avec du liquide vaisselle et rincez
6. Lavez les bols à l’eau avec du liquide vaisselle et rincez.
Remarque : Vous pouvez utiliser l’accessoire « goupillon » pour laver le bol. Pour cela, après
avoir débranché l’appareil et retiré les lames, le brasseur ou l’accessoire « mélangeur »,
installez l’accessoire « goupillon » dans le bol. Versez de l’eau et du liquide vaisselle dans
le bol inox et fixez le couvercle en verre sur le bol. Branchez l’appareil et appuyez sur le
bouton CHOP plusieurs fois pour sélectionner la vitesse L (lent), puis appuyez sur les
boutons "-" ou "+" pour régler le temps (sélectionnez 1 minute). Appuyez sur le bouton
START/STOP pour lancer le nettoyage. Après 1 minute, appuyez sur le bouton START/STOP
pour arrêter le nettoyage. Débranchez l’appareil, retirez le bol du bloc moteur, ouvrez le
couvercle en verre et retirez l’accessoire « goupillon ». Rincez le bol inox à l’eau claire et
séchez-le.
N’immergez pas le bloc moteur (F) et le bol en inox (E) dans l’eau ou dans tout autre
liquide.
Ne placez pas le bloc moteur (F) et le bol en inox (E) dans un lave vaisselle.
12
Ce symbole signifie que l’appareil ne doit pas être jeté avec les autres déchets
et qu’il fera l’objet d’une collecte sélective en vue de sa réutilisation, de son
recyclage ou de sa valorisation. S’il contient des substances susceptibles de
nuire à l’environnement, celles-ci seront éliminées ou neutralisées.
Recettes
SOUPE DE LÉGUMES
Cuisinez simplement et facilement vos soupes de légumes frais. Pour une entrée ou un
repas, vos délicieuses soupes sont pleines de vitamines.
Pour des soupes plus savoureuses cuisinez des légumes et produits de saison.
Une soupe maison se conserve 24h. Vous pouvez la préparer d’avance pour la réchauffer
au moment du repas. Il est également possible de congeler vos soupes.
1 blanc de poireau
1 petit navet
4 carottes
1 oignon
1 courgette
2 petites pommes de terre
Sel
1. Nettoyez tous vos légumes, coupez-les en petits morceaux
2. Fixez dans le bol les lames et le brasseur
3. Placez dans le bol en inox vos légumes en morceaux
4. Ajoutez de l’eau dans le bol. Au minimum jusqu’à la marque “I”, au maximum jusqu’à la
marque « II ».
6. Placez le couvercle en verre sur le bol
Vous pouvez sélectionner le mode automatique pour cuire et mixer votre soupe ou alors
sélectionner manuellement votre temps de cuisson, votre température de cuisson et la
vitesse de mixage.
Cuisson en mode automatique
7. Branchez l’appareil. Un signal sonore retentit. L’écran LCD s’allume et affiche [0 :30].
8. Appuyez sur le bouton AUTO pour sélectionner le programme automatique. Le mot AUTO
apparaît alors en haut à droite sur l’écran LCD.
9. Appuyez sur le bouton START/STOP pour commencer la cuisson.
En activant le programme AUTO, la température de cuisson est de 100°C et les vitesses de
mixage sont automatiquement sélectionnées – L (Lent) en début de cuisson et H (rapide)
en fin de cuisson.
13
Cuisson en mode manuel
7. Branchez l’appareil. Un signal sonore retentit, l’écran LCD s’allume et affiche [0 :30].
8. Appuyez sur le bouton « + » ou « - » pour sélectionner la durée de cuisson (Max : 24
heures).
Remarque : le réglage du temps se fait en minutes. Si vous appuyez une fois sur « + », vous
augmentez le temps d’une minute. Si vous appuyez plus longuement sur la touche « + »,
vous augmentez le temps de 10 minutes.
9. Appuyez sur le bouton TEMP plusieurs fois pour sélectionner la température de
cuisson.
10. Appuyez sur le bouton CHOP plusieurs fois pour sélectionner la vitesse de mixage : S
(mélange), L (lent) ou H (rapide).
11. Appuyez sur le bouton START/STOP pour commencer la cuisson. Sur l’écran LCD, la
mention
apparaît. L’écran LCD affiche de façon alternative [VITESSE﹕TEMPS] et
[TEMPERATURE]. Le temps de cuisson va diminuer au fur et à mesure. Vous pouvez à
tout moment prolonger ou réduire le temps de cuisson ou de préparation en
appuyant sur les boutons « + » ou « - ».
SOUPE DE TOMATES
6 tomates ou 2 boites de tomates pelées
4 pommes de terre
1 carottes
1 oignon
4 gousses d’ail
2 cuillères à soupe d’huile dolive
1 cube de bouillon de légumes
1 litre d’eau
Sel et poivre
Basilic
Dés de mozzarella ou de feta ou copeaux de parmesan
1. Nettoyez tous vos légumes, coupez-les en petits morceaux
2. Fixez dans le bol les lames et le brasseur
3. Placez dans le bol en inox vos légumes en morceaux, l’huile, le cube de bouillon, quelques
feuilles de basilic.
4. Ajoutez de l’eau dans le bol. Au minimum jusqu’à la marque “I”, au maximum jusqu’à la
marque « II ».
5. Placez le couvercle en verre sur le bol
6. Branchez l’appareil. Un signal sonore retentit, l’écran LCD s’allume et affiche [0 :30].
7. Appuyez sur le bouton « + » ou « - » pour sélectionner la durée de cuisson. Sélectionnez
15 minutes.
8. Appuyez sur le bouton TEMP plusieurs fois pour sélectionner la température de
cuisson. Sélectionnez 100°C.
9. Appuyez sur le bouton CHOP plusieurs fois pour sélectionner la vitesse de mixage.
Sélectionnez S (Mélange).
14
10. Appuyez sur le bouton START/STOP pour commencer la cuisson.
Après 10 minutes, l’appareil va biper.
11. Appuyez sur le bouton « + » ou « - » pour sélectionner la durée de cuisson. Sélectionnez
5 minutes.
12. Appuyez sur le bouton TEMP plusieurs fois pour sélectionner la température de cuisson.
Sélectionnez 100°C.
13. Appuyez sur le bouton CHOP plusieurs fois pour sélectionner la vitesse de mixage.
Sélectionnez H.
14. Appuyez sur le bouton START/STOP pour commencer la cuisson.
Après 5 minutes, l’appareil va biper. Votre soupe est prête. Servez votre soupe avec les dés
de mozzarella ou de feta ou des copeaux de parmesan.
GASPACHO
Le Gaspacho (gazpacho en espagnol) est une soupe froide de tomates servie avec des
légumes coupés en petits dés. Délicieusement rafraîchissantes, vous l’apprécierez l’été en
plat principal. Vous pouvez aussi la servir dans des petites verrines à l’apéritif.
1 concombre
1 poivron rouge
1 poivron vert
1 kg de tomates
4 gousses d'ail
1 oignon
250 g de mie de pain
1 dl d'huile d'olive
4 dl de bouillon de fond de volaille
1 dl de vinaigre de vin
sel
poivre
Piment de Cayenne ou Tabasco
1. Nettoyez tous vos légumes
2. Pelez les tomates après les avoir trempées quelques secondes dans une eau bouillante
3. Epépinez et taillez les tomates en petits morceaux
4. Nettoyez et coupez en petits morceaux les poivrons, les oignons et l’ail
5. Pelez, coupez en deux le concombre pour l’épépiner et taillez le en petits morceaux
6. Réservez une partie de chaque légume pour la garniture d'accompagnement
7. Fixez dans le bol les lames et le brasseur
8. Placez dans le bol en inox vos légumes en morceaux, salez et poivrez
9. Ajoutez l'huile d'olive.
15
10. Placez le couvercle en verre sur le bol
11. Appuyez plusieurs fois sur le bouton TEMP pour sélectionner OFF (pas de cuisson)
12. Appuyer sur le bouton « + » ou « - » pour sélectionner le temps de préparation.
Sélectionnez 10 minutes.
13. Appuyez plusieurs fois sur le bouton CHOP pour sélectionner la vitesse de mixage.
Sélectionnez « H » (Rapide).
14. Appuyez sur le bouton START/STOP pour lancer le programme.
Après 10 minutes, l’appareil va biper.
Dans un récipient à part, mélangez le fond de volaille froid avec le vinaigre de vin et ajoutez
la mie de pain. Mélangez.
15. Retirez le couvercle en verre.
16. Ajoutez la préparation fond de volaille / vinaigre / mie de pain.
17. Placez le couvercle en verre sur le bol
18. Appuyez plusieurs fois sur le bouton TEMP pour sélectionner OFF (pas de cuisson)
19. Appuyer sur le bouton « + » ou « - » pour sélectionner le temps de préparation.
Sélectionnez 10 minutes.
20. Appuyez plusieurs fois sur le bouton CHOP pour sélectionner la vitesse de mixage.
Sélectionnez « H » (Rapide).
21. Appuyez sur le bouton START/STOP pour lancer le programme.
Après 10 minutes, l’appareil va biper.
22. Versez le potage dans un récipient la préparation.
23. Assaisonnez et ajoutez des piments à votre convenance.
Servir glacé avec la brunoise de légumes. Vous pouvez aussi frottez des petits morceaux
de pain grillés avec de l’ail. On peut rajouter un glaçon dans la préparation au moment du
service pour conserver toute la fraîcheur.
SAUCE HOLLANDAISE
La sauce hollandaise est une émulsion chaude de jus de citron et de beurre. La sauce
Hollandaise sert de base à toute une catégorie de sauces.
Dégustez votre sauce avec des filets de poisson, du riz…
3 jaunes d’œufs
150 g de beurre
1 jus d’un ½ citron tiède
Sel/poivre
16
1. Placez l’accessoire « Mélangeur » dans le bol
2. Placez dans le bol en inox vos jaunes d’oeufs, un peu de sel et poivre et 20g de beurre
3. Placez le couvercle en verre sur le bol
4. Placez le bol sur le bloc moteur.
5. Appuyez plusieurs fois sur le bouton TEMP pour sélectionner la température de
cuisson. Sélectionnez 40°C.
6. Appuyez sur le bouton « + » ou « - » pour sélectionner le temps de cuisson. Sélectionnez
10 minutes.
7. Appuyez plusieurs fois sur le bouton CHOP pour sélectionner la vitesse de mixage.
Sélectionnez « S » (mélange).
8. Appuyez sur le bouton START/STOP pour lancer le programme.
Après 10 minutes, l’appareil va biper.
9. Appuyez sur le bouton START/STOP pour arrêter l’appareil.
10. Appuyez plusieurs fois sur le bouton TEMP pour sélectionner la température de cuisson.
Sélectionnez 80°C.
11. Appuyez sur le bouton « + » ou « - » pour sélectionner le temps de cuisson. Sélectionnez
5 minutes.
12. Appuyez plusieurs fois sur le bouton CHOP pour sélectionner la vitesse de mixage.
Sélectionnez « S » (mélange).
13. Appuyez sur le bouton START/STOP pour lancer le programme.
Pendant les 5 minutes de cuisson à 80°C ajouter le reste du beurre par l’ouverture au
sommet du couvercle (retirer le bouchon doseur).
Après 5 minutes, l’appareil va biper.
14. Appuyez sur le bouton START/STOP pour arrêter l’appareil.
15. Appuyez plusieurs fois sur le bouton TEMP pour sélectionner la température de cuisson.
Sélectionnez 40°C.
16. Appuyez sur le bouton « + » ou « - » pour sélectionner le temps de cuisson. Sélectionnez
5 minutes.
17. Appuyez plusieurs fois sur le bouton CHOP pour sélectionner la vitesse de mixage.
Sélectionnez « S » (mélange).
18. Appuyez sur le bouton START/STOP pour lancer le programme.
19. Versez le jus de citron tiède (un jus trop froid fait parfois virer la sauce).
Après 5 minutes, l’appareil va biper. Votre sauce est prête.
Sauce mousseline : Ajoutez à la sauce Hollandaise une part de crème fouettée juste avant
de servie. Comptez un quart du volume environ.
Sauce moutarde : Ajoutez à la sauce Hollandaise de la moutarde à votre convenance.
Sauce maltaise : Ajoutez à la sauce Hollandaise un jus et des zestes (taillés en julienne fine
et blanchis) d'orange sanguine.
17
CONFITURE DE FRAISE
Recette simple et rapide de confiture de fraise. Vous pouvez utiliser des gariguettes, des
charlottes ou toute autre variété de fraise. Pour obtenir une bonne confiture de fraise vous
devez trouver des fraises bien mûres, plus les fraises sont naturellement sucrées meilleure
sera votre confiture.
500g de fraises
500g de sucre
1. Nettoyez tous vos fraises, retirez les queues et coupez-les en petits morceaux
2. Placez l’accessoire « Mélangeur » dans le bol
3. Placez dans le bol en inox vos fraises en morceaux et le sucre
4. Placez le couvercle en verre sur le bol
5. Placez le bol sur le bloc moteur.
6. Appuyez plusieurs fois sur le bouton TEMP pour sélectionner la température de
cuisson. Sélectionnez 120°C.
7. Appuyez sur le bouton « + » ou « - » pour sélectionner le temps de cuisson. Sélectionnez
10 minutes.
8. Appuyez sur le bouton START/STOP pour lancer le programme.
Pendant 10 minutes, appareil va cuire vos fruits et le sucre. Après 10 minutes, l’appareil va
biper.
9. Appuyez sur le bouton START/STOP arrêter l’appareil.
10. Appuyez plusieurs fois sur le bouton TEMP pour sélectionner la température de cuisson.
Sélectionnez 80°C.
11. Appuyez sur le bouton « + » ou « - » pour sélectionner le temps de cuisson. Sélectionnez
30 minutes.
12. Appuyez plusieurs fois sur le bouton CHOP pour sélectionner la vitesse de mixage.
Sélectionnez « S » (mélange).
13. Appuyez sur le bouton START/STOP pour lancer le programme.
Pendant 30 minutes, l’appareil va cuire vos fraises et les mélanger.
Après 30 minutes, l’appareil va biper. Pour savoir si votre confiture est cuite, versez une
goutte dans une assiette froide, si la goutte se fige, votre confiture est cuite. Si elle ne se
fige pas, rajoutez un temps de cuisson à une température de 80°C avec une vitesse de
mixage « S ».
Préparation des pots : idéalement il faut ébouillanter les pots de confiture et les
couvercles puis les laisser sécher avant de mettre en pot. Versez la confiture dans les pots,
fermez les pots et les mettre à l'envers. Attendez que la confiture soit froide pour
remettre les pots à l'endroit.
18
CRÈME AU CHOCOLAT
Facile à réaliser, vous pouvez aussi préparer votre crème avec du chocolat au lait.
Dégustez vos petits pots de crème avec des biscuits, des fruits, des brioches…
1L de lait
120 g de chocolat noir
3 jaunes d’œufs
80 g de sucre
40 g de farine
1. Dans un récipient à part, battre les jaunes d’œufs, le sucre et la farine.
2. Placez l’accessoire « Mélangeur » dans le bol
3. Versez dans le bol en inox le lait
4. Placez le couvercle en verre sur le bol
5. Placez le bol sur le bloc moteur.
6. Appuyez plusieurs fois sur le bouton TEMP pour sélectionner la température de
cuisson. Sélectionnez 80°C.
7. Appuyez sur le bouton « + » ou « - » pour sélectionner le temps de cuisson. Sélectionnez
6 minutes.
8. Appuyez sur le bouton START/STOP pour lancer le programme.
Après 6 minutes, l’appareil va biper. Le lait doit bouillir. Si ce n’est pas le cas, rajoutez quelques
minutes de cuisson.
9. Appuyez sur le bouton START/STOP pour arrêter l’appareil.
10. Ajoutez le chocolat en morceau (par l’ouverture du dessus du couvercle)
11. Appuyez plusieurs fois sur le bouton TEMP pour sélectionner la température de cuisson.
Sélectionnez 80°C.
12. Appuyez sur le bouton « + » ou « - » pour sélectionner le temps de cuisson. Sélectionnez
5 minutes.
13. Appuyez plusieurs fois sur le bouton CHOP pour sélectionner la vitesse de mixage.
Sélectionnez « S » (mélange).
14. Appuyez sur le bouton START/STOP pour lancer le programme.
Après 5 minutes, l’appareil va biper.
15. Appuyez sur le bouton START/STOP pour arrêter l’appareil.
16. Ouvrez le couvercle du bol inox et ajoutez la préparation jaunes d’œufs / sucre / farine
dans le bol.
17. Refermez le couvercle sur le bol
18. Appuyez plusieurs fois sur le bouton TEMP pour sélectionner la température de cuisson.
Sélectionnez 100°C.
19. Appuyez sur le bouton « + » ou « - » pour sélectionner le temps de cuisson. Sélectionnez
5 minutes.
19
20. Appuyez plusieurs fois sur le bouton CHOP pour sélectionner la vitesse de mixage.
Sélectionnez « S » (mélange).
21. Appuyez sur le bouton START/STOP pour lancer le programme.
Après 5 minutes, l’appareil va biper. Versez votre crème dans des petits ramequins et laissez
refroidir dans votre réfrigérateur.
COMPOTE DE POIRES
Réalisez des compotes maison en moins de 30 minutes.
Dégustez vos compotes avec des yaourts, du pain d’épices, des gâteaux secs, un coulis de
fruits rouges…
5 poires
Sucre
Eau
1. Nettoyez vos poires, retirez la peau et le centre de vos poires, et coupez-les en petits
morceaux
2. Placez l’accessoire « Mélangeur » dans le bol
3. Placez dans le bol en inox vos poires en morceaux et sucrez à votre convenance
4. Placez le couvercle en verre sur le bol
5. Placez le bol sur le bloc moteur.
6. Appuyez plusieurs fois sur le bouton TEMP pour sélectionner la température de
cuisson. Sélectionnez 100°C.
7. Appuyez sur le bouton « + » ou « - » pour sélectionner le temps de cuisson. Sélectionnez
10 minutes.
8. Appuyez sur le bouton START/STOP pour lancer le programme.
Pendant 10 minutes, appareil va cuire vos poires et le sucre. Après 10 minutes, l’appareil
va biper.
9. Appuyez sur le bouton START/STOP arrêter l’appareil.
10. Appuyez plusieurs fois sur le bouton TEMP pour sélectionner la température de cuisson.
Sélectionnez 100°C.
11. Appuyez sur le bouton « + » ou « - » pour sélectionner le temps de cuisson. Sélectionnez
15 minutes.
12. Appuyez plusieurs fois sur le bouton CHOP pour sélectionner la vitesse de mixage.
Sélectionnez « S » (mélange).
13. Appuyez sur le bouton START/STOP pour lancer le programme.
Après 15minutes, l’appareil va biper. Votre compote est prête. Laissez refroidir avant de servir.
20
MILK-SHAKE MULTI FRUITS
Le milk-shake est une boisson mixée à base de fruit et de lait.
Facile et rapide à préparer c’est 100 % plaisir ! Adaptez les recettes à votre goût, mixez soja,
banane, kiwis, raisins, pêches, lait, yaourt, glace, miel…
8 fraises
5 kiwis
2 bananes
300 ml de lait froid
1. Nettoyez vos fruits, retirez la peau des kiwis et des bananes, équeutez les fraises et
coupez-les en petits morceaux
2. Fixez dans le bol les lames et le brasseur
3. Placez dans le bol en inox vos fruits en morceaux, et ajoutez le lait.
4. Placez le couvercle en verre sur le bol
5. Appuyez plusieurs fois sur le bouton TEMP pour sélectionner OFF (pas de cuisson)
6. Appuyer sur le bouton « + » ou « - » pour sélectionner le temps de préparation.
Sélectionnez 10 minutes.
7. Appuyez plusieurs fois sur le bouton CHOP pour sélectionner la vitesse de mixage.
Sélectionnez « H » (Rapide).
14. Appuyez sur le bouton START/STOP pour lancer le programme.
Après 10 minutes, l’appareil va biper. Ajustez de durée de mixage pour que les fruits soient
bien mixés. Sucrez à votre convenance.
21
A
A : Measuring cap
B: Glass cover
B
C: Stirrer
D: Blades
H
C
E: Stainless steel bowl
F: Motor unit
D
I
G: Control panel
E
H: Hook for removing blades
I: Basket steamer
J
J: Bottle brush (for cleaning the
bowl)
K: 'Blender' tool for making K
preserves, compotes, creams
and sauces.
F
G
B1 : Fastening catch
B2 : Closing system
B1
22
B2
Instructions
Image 1
Image 2
Image 3
Image 4
Image 5
Image 6
Image 7
Image 8
Image 9
23
Soup’Master Operating Instructions
Read the instructions and keep them safe. If you pass the appliance on, remember to pass
on the instructions too. Remove all packaging, but keep it until you know the appliance
works.
Technical specification
Voltage
120V, 220 ~240V
Frequency
50/60 Hz
Power
1000 W
Bowl capacity
Min 1L - Max 1,5 L
In order to reduce the risk of fire, électrocution and injury, always follow the safety advice
given when using electrical appliances, particularly the following:
Important precautions
1. This appliance should be used by, or under the supervision of, a responsible adult.
Use and store the appliance out of the reach of children.
2. This appliance is not a toy. Do not let children play with it.
3. Do not immerse the device, bowl, cable, plug or motor unit in water or any other
liquid and do not use the device in a bathroom, near sources of water or outside.
4. Do not place the appliance in a wet or damp environment and keep it
out of direct sunlight.
5. Place the appliance on a flat, stable, firm and dry surface.
6. Do not lift or move the appliance whilst in use.
7. Do not lift the appliance by the power cable. Always lift the appliance by its base.
8. Do not use the appliance unless the cover is firmly in place.
9. Do not remove the preparation bowl from the main unit when the motor is running.
10. The bowl will get very hot during cooking. Do not touch the hot surfaces of the
appliances. Do not remove the cover from the bowl during cooking as you could get
burnt. Use an oven glove to remove the cover.
11. Some steam may escape around the measuring cap during cooking, so take care not
to get burnt.
12. Ensure that the bowl does not overflow. Do not fill the bowl above the
recommended level. Any liquid which gets underneath the motor unit may be
absorbed into the motor and could damage it.
13. Do not put your hands in the bowl as the blades are very sharp. Use the hook
provided to remove the blades.
14. Do not put any utensils (spoon, spatula, etc.) into the bowl – use the accessories
provided.
15. Once you have run the appliance continuously for a full cycle, wait at least 5 minutes
before starting a new cycle.
24
16. Do not operate the device when empty.
17. Route the power cable so that it doesn't overhang and cannot be tripped over or
become caught on anything.
18. Keep the appliance and the cable away from hotplates, hobs and burners.
19. Unplug the appliance when not in use and allow to cool down fully before
cleaning or moving.
20. Unplug the appliance before attaching or removing parts or accessories.
21. Do not use the appliance for any purpose other than those outlined in these
instructions.
22. This appliance should not be used with an external timer or with a remote control
system.
23. The appliance must only be connected to an earthed power socket.
24. Do not use the appliance if it is dropped or damaged or if it malfunctions or does
not work properly.
25. It is recommended that the power cable be regularly inspected to detect any trace
of possible damage, and the appliance should not be used if the cable is damaged.
26. If the power cable is damaged, it must be replaced by the manufacturer, their aftersales service or a manufacturer-approved technician to avoid any danger.
Domestic use only
Refer to the "care & maintenance" section and clean the appliance and accessories
thoroughly before first use in order to remove any residues left behind by the
manufacturing process.
Do not immerse the motor unit (F) or the stainless steel bowl (E) in water or any other
liquid.
Do not put the motor unit (F) or stainless steel bowl (E) in the dishwasher.
USING THE PRODUCT
Choose the appropriate accessory for the recipe in question.
Soups and compotes: blades (D) and stirrer (C)
Sauces, creams, compotes and preserves: ‘blender’ tool (K)
Steam cooking: basket steamer
Attaching the cover (B) to the stainless steel bowl (E)
The cover (B) must always be attached to the stainless steel bowl (E).
A security system is triggered when the cover is not attached or is incorrectly attached
to the bowl.
Place the glass cover (B) onto the bowl as described below:
1. Attach the fastening catch (B1) to the edge of the stainless steel bowl (E). (Image 1)
2. Lower the glass cover (B) onto the stainless steel bowl (E). The cover’s closing system
(B2) must be positioned to the right of the bowl handle. (Image 2)
25
3. Turn the glass cover (B) with the thumb and index finger so that the closing system (B2)
is aligned with the bowl handle. (Image 3)
4. Place the measuring cap (A) in the top of the glass cover (B).
Attaching the stainless steel bowl (E) to the motor unit (F)
1. Align the bowl handle with the slot provided in the motor unit so that the connection
fittings located underneath the bowl engage with the connection fittings located on the
motor unit. (Image 4).
2. Press lightly on the top of the bowl to fully engage the connection fittings.
If there is a visible gap between the bowl (E) and the motor unit (F) the bowl is not
correctly attached to the motor unit. (Image 5)
If there is no visible space, the bowl is correctly attached to the motor unit.
CONTROL PANEL
8
9
10
11
1
7
2
6
3
5
4
1. Main on/off light
2. START/STOP button
3. AUTO button (Automatic programme)
4. Time adjustment buttons
5. PROG button (delayed start
programme)
6. TEMP button (temperature
adjustment)
40℃, 80℃, 100℃, 120℃ and OFF
7. CHOP button (mixing speed
adjustment)
H (high), L (low), S (stir) and O (OFF)
8. Cooking in progress
9. PROG function (delayed start
programme) selected
10. AUTO programme selected
11. Alternate display of remaining
cooking time, temperature selected
and mixing speed selected.
26
MAKING SOUPS WITH THE SOUP’MASTER
1. Clean and dice all your vegetables.
2. Attach the bowl (E), the blades (D) (image 6) and the stirrer (C) (image 7)
3. Place your diced vegetables into the stainless steel bowl (E)
4. Add water to the bowl (E) so that it reaches at least the 'I' mark and at most the 'II' mark.
5. Place the glass cover (B) on the bowl (E)
*** Cooking in automatic mode ***
1. Plug in the appliance. An alert will sound and the LCD screen will light up and display
[0:30].
2. Press the AUTO button to select the automatic programme. The word AUTO will then
appear in the top right-hand corner of the LCD screen.
3. Press the START/STOP button to start cooking.
will appear on the LCD screen. The
LCD screen will alternate between [0﹕30] and 100. Cooking time will decrease as time
goes on.
4. After 10 minutes’ cooking the appliance will automatically start to mix slowly. The LCD
screen then alternates between [L﹕19] and 100,‘L’ being the pre-set mixing mode and
‘19’ the remaining cooking time.
5. After 15 minutes’ cooking the appliance will automatically start to mix faster. The LCD
screen then alternates between [H﹕4] and 100, ‘H’ being the pre-set mixing mode and
‘4’ the remaining cooking time.
At the end of the automatic programme the LCD screen will display [00:00] and the
appliance will sound an alert (6 beeps).
You can, should you so wish, increase cooking time or add an additional mixture.
- Increasing cooking time:
Press the TEMP button several times to select the cooking temperature.
1. Press the ‘+’ or ‘-’ button to select cooking or preparation time
2. Press the START/STOP button to start the selected programme.
- Adding an additional mixture:
1. Press the CHOP button several times to select the mixing speed.
2. Press the ‘+’ or ‘-’ button to select preparation time.
3. Press the START/STOP button to start the selected programme.
Note 1: On activating the AUTO programme, cooking temperature will be 100°C and mixing
speeds are selected automatically - L (Low) at the beginning of the cooking process and
H (High) at the end. You can, should you so wish, change the mixing speed by pressing the
CHOP button several times to select your initial speed and pressing the START/STOP button.
The appliance will start cooking and mixing at the speed you have selected.
You cannot change the cooking temperature when using the AUTO programme.
27
Note 2: When using the AUTO programme, other foods and seasonings can be added
during cooking by opening the cover (B). Cooking and mixing will stop when you open
the cover (B). When you close the cover (B) onto the bowl (E), press the START/STOP button
to restart cooking and mixing in AUTO mode.
Note 3: You can stop and cancel automatic cooking at any time by pressing the
STOP/START button followed by the AUTO button to cancel the automatic programme.
Tip for recipes containing garlic, onion or ginger: we would recommend that you cook
them in the bowl before adding other foods and vegetables.
1. Position the blades (D) and stirrer (C) in the bowl.
2. Do not put any ingredients into the stainless steel bowl, close the glass cover and position
the bowl on the motor unit.
3. Place the measuring cap (A) in the top of the glass cover (B).
4. Plug in the appliance. An alert will sound and the LCD screen will light up and display
[0:30].
5. Press the TEMP button several times to select a temperature of 120°C.
6. Press the START/STOP button to preheat the bowl.
7. After 1 minute, open the glass cover and pour some oil into the bowl along with your
(finely chopped) garlic, onion or ginger.
8. Replace the glass cover and press the CHOP button several times. Select speed S (Stir).
9. Press the ‘-’ button to adjust cooking time to 3 minutes.
10. Press the START/STOP button.
11. After 3 minutes, press the START/STOP button to stop cooking and open the cover.
12. Add your vegetables (and other ingredients) and some water to the bowl.
13. Replace the glass cover and press the AUTO button followed by the START/STOP button
to start the automatic cooking programme. The word AUTO will then appear in the top
right-hand corner of the LCD screen and
will appear in the top left-hand corner of
the LCD screen.
*** Programming an automatic delayed start***
1. Plug in the appliance. An alert will sound and the LCD screen will light up and display
[0:30].
2. Press the AUTO button to select the automatic programme. The word AUTO will then
appear in the top right-hand side of the LCD screen.
3. Press the PROG button. The LCD screen will display [04﹕00] (4 hours).
4. Press the ‘+’ or ‘-’ button to select the start time (Max.: 24 hours). If you enter, for example,
[06﹕00], the appliance will turn itself on in 6 hours.
Note: the time is adjusted in minutes. Pressing ‘+’ once will increase the time by a minute.
Pressing and holding the ‘+’ key will increase the time by 10 minutes.
1. Press the START/STOP button. A countdown to the start will begin and the time remaining
will continue to decrease.
2. Once the time has run out, the appliance will turn itself on automatically (cooking at 100°C
for 30 minutes with 2 mixing speeds (L and H))
28
Note: You can stop the delayed start programme by pressing the START/STOP button once
before pressing the PROG button once. The word PROG will then disappear from the LCD
screen.
*** Cooking in manual mode ***
1. Plug in the appliance. An alert will sound and the LCD screen will light up and display
[0:30].
2. Press the ‘+’ or ‘-’ button to select cooking time (Max.: 24 hours).
Note: the time is adjusted in minutes. Pressing ‘+’ once will increase the time by a minute.
Pressing and holding the ‘+’ key will increase the time by 10 minutes.
3. Press the TEMP button several times to select the cooking temperature.
4. Press the CHOP button several times to select the mixing speed: S (stir), L (low) or H (high).
5. Press the START/STOP button to start cooking.
will appear on the LCD screen. The
LCD screen then alternates between [SPEED﹕TIME] and [TEMPERATURE]. The cooking
time will continue to decrease. You can extend or reduce the cooking and preparation
time at any time by pressing ‘+’ or ‘-’ buttons.
ADDITIONAL NOTES:
1) CHOP (mix) button. When you turn the appliance on, the mixing mode is not selected.
Position O (OFF). If you press the START/STOP button to start cooking, the mixing function
will not be selected. The appliance will cook your ingredients without mixing them. Once
the appliance is turned out you will not be able to add the mixing stage. If you need to
add this function, press the START/STOP button to stop the cooking programme before
pressing the CHOP button several times to select the mixing mode. Press the START/STOP
button to start cooking and mixing.
2) TEMP (temperature) button. When you plug in the device the temperature will not be
selected. Position O (OFF). If you press the START/STOP button the appliance will not heat
up. If you need to add the cooking function, press the START/STOP button to stop the
cooking programme before pressing the TEMP button several times to select the cooking
temperature. Press the START/STOP button to start cooking.
3) Selecting the time. When you plug in the appliance the cooking or preparation time is
automatically set to 30 minutes. You can adjust the cooking or preparation time before
or after pressing the START/STOP button by pressing the '+' or '-' buttons.
4) You can press the START/STOP button during cooking or preparation to stop cooking
(or preparation) and adjust the CHOP (mix) and TEMP (temperature) functions if
necessary.
5) 'Keep warm’ function: Once the cooking time has ended the appliance will stop
cooking and
will disappear from the LCD screen. The appliance will then
automatically switch to ‘keep warm’ mode, which will keep your soup at a low
temperature for 60 minutes. If you have selected a cooking temperature of 80°C or more
the appliance will keep your recipe at 75°C for 60 minutes. If you have selected a cooking
temperature of 40°C the appliance will keep your recipe at 40°C, stirring it periodically.
After 60 minutes the appliance will turn itself off completely.
29
*** Programming the appliance to cook in manual mode with a delayed start ***
After selecting the cooking temperature (TEMP button), the mixing speed (CHOP button)
and the cooking time (‘+’ or ‘-’ buttons), press the PROG button. The LCD screen will display
[04﹕00] (4 hours). Press the ‘+’ or ‘-’ button to select the start time (Max.: 24 hours). If you
enter, for example, [06﹕00], the appliance will turn itself on in 6 hours.
Note: the time is adjusted in minutes. Pressing ‘+’ once will increase the time by a minute.
Pressing and holding the ‘+’ key will increase the time by 10 minutes.
Press the START/STOP button. A countdown to the start will begin. The time will continue
to decrease and the appliance will turn itself on automatically once the time has run out.
STEAM COOKING
1. Remove the blades and the stirrer or ‘Blender’ tool.
2. Fill the bowl with water up to the ‘I’ mark.
3. Position the bowl on the motor unit.
4. Place the basket steamer in the bowl (Image 9).
5. Place your ingredients in the basket.
6. Place the glass cover (B) on the bowl (E).
7. Position the bowl on the motor unit.
8. Press the TEMP button several times to select the cooking temperature.
9. Press the ‘+’ or ‘-’ button to select cooking or preparation time.
10. Press the START/STOP button to start the selected programme.
COOKING MEAT AND VEGETABLES IN THE STAINLESS STEEL BOWL
WITHOUT MIXING THEM
1. Remove the blades and the stirrer or ‘Blender’ tool from the stainless steel bowl.
2. Place the ingredients you wish to cook in the stainless steel bowl and add water.
3. Close the glass cover and position the bowl on the motor unit.
4. Place the measuring cap (A) in the top of the glass cover (B).
5. Plug in the appliance. An alert will sound and the LCD screen will light up and display
[0:30].
6. Press the TEMP button several times to select the cooking temperature.
7. Press the START/STOP button to start cooking. The cooking time is set to 30 minutes. You
can adjust the cooking time by pressing the ‘+’ or ‘-’buttons.
MAKING PRESERVES WITH THE SOUP’MASTER
1. Clean and dice all your fruits.
2. Place the ‘Blender’ tool (K) in the bowl (image 8).
3. Place your diced fruit and sugar into the stainless steel bowl (E).
30
4. Place the glass cover (B) on the bowl (E).
5. Position the bowl on the motor unit.
6. Press the TEMP button several times to select the cooking temperature.
7. Press the CHOP button several times to select the mixing speed.
8. Press the ‘+’ or ‘-’ button to select cooking or preparation time.
9. Press the START/STOP button to start the selected programme.
IMPORTANT NOTES
Insufficient water or liquid capacity: If the level of soup in the bowl has decreased and
is now below the minimum level (‘I’ mark) cooking will stop automatically. Mixing will
continue and the appliance will beep around 20 times (you can stop the beeping by
pressing any button once) and the on/off light will flash to inform you that you need to
add water. The mixing function will stop automatically after 4 minutes. To resume
cooking, add water or another liquid to your recipe and press the START/STOP button.
Glass cover not properly attached: If the glass cover is not correctly attached to the
stainless steel bowl the appliance will not work. The appliance will beep 3 times and the
on/off light will flash to inform the user that the glass cover is not properly attached to the
stainless steel bowl.
CLEANING YOUR SOUP’MASTER
1. Unplug the appliance.
2. Remove the stainless steel bowl from the motor unit.
3. Open the glass cover by turning it with the thumb.
4. Pour your soup or other recipe into a container and remove the blades and the stirrer
or ‘Blender’ tool.
Note: Remove the blades by sliding the hook underneath the blades at an angle and
pulling the hook to release the blades.
5. Wash the accessories in water with washing-up liquid and rinse.
6. Wash the bowls in water with washing up liquid and rinse.
Note: The ‘bottle brush’ accessory can be used to wash the bowl. Before doing so, unplug
the appliance, remove the blades, the stirrer or the ‘blender’ tool and position the ‘bottle
brush’ accessory in the bowl. Pour some water and washing-up liquid into the stainless steel
bowl and attach the glass lid onto the bowl. Plug in the appliance and press the CHOP
button several times to select speed L (low), before pressing the "-" or "+" button to adjust
the time (select 1 minute). Press the START/STOP button to start cleaning. After 1 minute,
press the START/STOP button to stop cleaning. Unplug the appliance, remove the bowl from
the motor unit, open the glass cover and remove the ‘bottle brush’ accessory. Rinse the
stainless steel bowl in clean water and dry.
31
Do not immerse the motor unit (F) or the stainless steel bowl (E) in water or any other
liquid.
Do not put the motor unit (F) or stainless steel bowl (E) in the dishwasher.
To avoid environmental and health problems due to hazardous substances
in electrical and electronic goods, appliances marked with this symbol
mustn’t be disposed of with unsorted municipal waste, but recovered,
reused, or recycled.
Recipes
VEGETABLE SOUP
Cook fresh vegetable soups quickly and easily for a starter or meal which is full of vitamins.
For a more tasty soup, use seasonal vegetables and produce.
Homemade soup can be kept for up to 24 hours and can be prepared in advance and
heated up before serving. Soups can also be frozen.
1 white of leek
1 small turnip
4 carrots
1 onion
1 courgette
2 small potatoes
Salt
1. Clean and dice all your vegetables.
2. Position the blades and stirrer in the bowl.
3. Place your diced vegetables into the stainless steel bowl.
4. Add water to the bowl so that it reaches at least the 'I' mark and at most the 'II' mark.
2. Place the glass cover (B) on the bowl (E).
You can either select automatic mode to cook and mix your soup or manually select your
cooking time, cooking temperature and mixing speed.
Cooking in automatic mode
7. Plug in the appliance. An alert will sound and the LCD screen will light up and display
[0:30].
8. Press the AUTO button to select the automatic programme. The word AUTO will then
appear in the top right-hand side of the LCD screen.
9. Press the START/STOP button to start cooking.
On activating the AUTO programme, cooking temperature will be 100°C and mixing speeds
are selected automatically - L (Low) at the beginning of the cooking process and H (High)
at the end.
32
Cooking in manual mode
7. Plug in the appliance. An alert will sound and the LCD screen will light up and display
[0:30].
8. Press the ‘+’ or ‘-’ button to select cooking time (Max.: 24 hours).
Note: the time is adjusted in minutes. Pressing ‘+’ once will increase the time by a minute.
Pressing and holding the ‘+’ key will increase the time by 10 minutes.
9. Press the TEMP button several times to select the cooking temperature.
10. Press the CHOP button several times to select the mixing speed: S (stir), L (low) or H
(high).
11. Press the START/STOP button to start cooking.
will appear on the LCD screen. The
LCD screen then alternates between [SPEED﹕TIME] and [TEMPERATURE]. The cooking
time will continue to decrease. You can extend or reduce the cooking and preparation
time at any time by pressing ‘+’ or ‘-’ buttons.
TOMATO SOUP
6 tomatoes or 2 tins of peeled tomatoes
4 potatoes
1 carrot
1 onion
4 cloves of garlic
2 soup spoons olive oil
1 vegetable stock cube
1 litre water
Salt and pepper
Basil
Cubes of mozzarella or feta or parmesan shavings
1. Clean and dice all your vegetables.
2. Position the blades and stirrer in the bowl.
3. Place your diced vegetables, oil, stock cube and a few basil leaves into the stainless steel
bowl.
4. Add water to the bowl so that it reaches at least the 'I' mark and at most the 'II' mark.
5. Place the glass cover on the bowl.
6. Plug in the appliance. An alert will sound and the LCD screen will light up and display
[0:30].
7. Press the ‘+’ or ‘-’ button to select cooking time. Select 15 minutes.
8. Press the TEMP button several times to select the cooking temperature. Select 100°C.
9. Press the CHOP button several times to select the mixing speed. Select S (Stir).
10. Press the START/STOP button to start cooking.
The appliance will beep after 10 minutes.
11. Press the ‘+’ or ‘-’ button to select cooking time. Select 5 minutes.
33
12. Press the TEMP button several times to select the cooking temperature. Select 100°C.
13. Press the CHOP button several times to select the mixing speed. Select H.
14. Press the START/STOP button to start cooking.
The appliance will beep after 5 minutes. Your soup is now ready to be served with cubes
of mozzarella or feta or parmesan shavings.
GAZPACHO
Gazpacho is a deliciously refreshing cold tomato soup served with diced vegetables, often
in the summer as a main course. It can also be served in small glass as an appetizer.
1 cucumber
1 red pepper
1 green pepper
1kg tomatoes
4 cloves of garlic
1 onion
250g breadcrumbs
1dl olive oil
4dl poultry stock
1dl wine vinegar
Salt
Pepper
Cayenne or Tabasco pepper
1. Clean all your vegetables.
2. Dip your tomatoes into boiling water for a few seconds before peeling them.
3. Remove the seeds from the tomatoes and cut into small cubes
4. Clean and dice the peppers, onion and garlic.
5. Peel the cucumber and slice in half to remove pips before dicing.
6. Put part of each vegetable aside to use as a garnish later on.
7. Position the blades and stirrer in the bowl.
8. Place your diced vegetables into the stainless steel bowl and add salt and pepper.
9. Add the olive oil.
10. Place the glass cover on the bowl.
11. Press the TEMP button several times to select OFF (no cooking).
12. Press the ‘+’ or ‘-’ button to select preparation time. Select 10 minutes.
13. Press the CHOP button several times to select the mixing speed. Select ‘H’ (high).
14. Press the START/STOP button to start the programme.
The appliance will beep after 10 minutes.
Mix the poultry stock with the wine vinegar in a separate container, add the breadcrumbs
and stir.
34
15. Remove the glass cover.
16. Add the poultry stock/vinegar/breadcrumb mixture.
17. Place the glass cover on the bowl.
18. Press the TEMP button several times to select OFF (no cooking).
19. Press the ‘+’ or ‘-’ button to select preparation time. Select 10 minutes.
20. Press the CHOP button several times to select the mixing speed. Select ‘H’ (high).
21. Press the START/STOP button to start the programme.
The appliance will beep after 10 minutes.
22. Pour the soup into a separate container.
23. Season and add the peppers at your convenience.
Serve chilled with a vegetable brunoise. You could also rub some garlic into toasted bread
or slip an ice cube into the soup immediately before serving to keep it cool.
HOLLANDAISE SAUCE
Hollandaise sauce is a warm emulsion made of lemon juice and butter and is used as a base
for a whole range of sauces...
It is particularly suitable for serving with fish fillets, rice, etc.
3 egg yolks
150g butter
1 warm juice of ½ lemon
Salt/pepper
1. Place the ‘Blender’ tool in the bowl.
2. Place your eggs yolks, a little salt and pepper and 20g butter in the stainless steel bowl.
3. Place the glass cover on the bowl.
4. Position the bowl on the motor unit.
5. Press the TEMP button several times to select the cooking temperature. Select 40°C.
6. Press the ‘+’ or ‘-’ button to select cooking time. Select 10 minutes.
7. Press the CHOP button several times to select the mixing speed. Select S (stir).
8. Press the START/STOP button to start the programme.
The appliance will beep after 10 minutes.
9. Press the START/STOP button to stop the appliance.
10. Press the TEMP button several times to select the cooking temperature. Select 80°C.
11. Press the ‘+’ or ‘-’ button to select cooking time. Select 5 minutes.
12. Press the CHOP button several times to select the mixing speed. Select S (stir).
13. Press the START/STOP button to start the programme.
35
During the 5 minutes when the appliance is cooking at 80°C, add the remainder of the
butter through the opening in the top of the cover (remove the measuring cap).
The appliance will beep after 5 minutes.
14. Press the START/STOP button to stop the appliance.
15. Press the TEMP button several times to select the cooking temperature. Select 40°C.
16. Press the ‘+’ or ‘-’ button to select cooking time. Select 5 minutes.
17. Press the CHOP button several times to select the mixing speed. Select S (stir).
18. Press the START/STOP button to start the programme.
19. Pour in the warm lemon juice (the juice can cause the sauce to turn if it is too cold).
The appliance will beep after 5 minutes. Your sauce is now ready.
Mousseline sauce: Add some whipped cream to the Hollandaise sauce just before serving,
generally around 1 part cream to 4 parts Hollandaise sauce.
Mustard sauce: Add some mustard to the Hollandaise sauce to suit your taste.
Maltaise sauce: Add the juice and some zest (cut into fine strips and blanched) of blood
orange to the Hollandaise sauce.
STRAWBERRY PRESERVE
A quick and easy strawberry preserve recipe using gariguette, charlotte or any other variety
of strawberry. For a good strawberry preserve use very ripe strawberries as the sweeter the
strawberries are naturally, the better your preserve will be.
500g strawberries
500g sugar
1. Clean and dice all your strawberries, removing the stalks.
2. Place the ‘Blender’ tool in the bowl.
3. Place your diced strawberries and sugar into the stainless steel bowl.
4. Place the glass cover on the bowl.
5. Position the bowl on the motor unit.
6. Press the TEMP button several times to select the cooking temperature. Select 120°C.
7. Press the ‘+’ or ‘-’ button to select cooking time. Select 10 minutes.
8. Press the START/STOP button to start the programme.
The appliance will cook the fruit and sugar for 10 minutes. The appliance will beep after
10 minutes.
9. Press the START/STOP button to stop the appliance.
10. Press the TEMP button several times to select the cooking temperature. Select 80°C.
11. Press the ‘+’ or ‘-’ button to select cooking time. Select 30 minutes.
36
12. Press the CHOP button several times to select the mixing speed. Select S (stir).
13. Press the START/STOP button to start the programme.
The appliance will cook and mix the strawberries for 30 minutes.
The appliance will beep after 30 minutes. If you want to tell whether your preserve is cooked,
pour a drop onto a cold plate. If the drop congeals, your preserve is cooked. If the drop does
not congeal, cook the recipe for a little longer at 80°C and on the ‘S’ mixing speed setting.
Preparing jars: Preserve jars and lids should ideally be scalded and left to dry before use.
Pour the preserve into the jar, close the jar and turn upside down. Wait for the preserve to
cool completely before turning them the right way up.
CHOCOLATE SAUCE
This easy-to-make sauce can also be made using milk chocolate.
Serve in small pots with biscuits, fruit, brioche, etc.
1L milk
120g dark chocolate
3 egg yolks
80g sugar
40g flour
1. Beat the egg yolks, sugar and flour in a separate container.
2. Place the ‘Blender’ tool in the bowl.
3. Pour the milk into the stainless steel bowl.
4. Place the glass cover on the bowl.
5. Position the bowl on the motor unit.
6. Press the TEMP button several times to select the cooking temperature. Select 80°C.
7. Press the ‘+’ or ‘-’ button to select cooking time. Select 6 minutes.
8. Press the START/STOP button to start the programme.
The appliance will beep after 6 minutes. If the milk has not yet boiled, cook for a few more
minutes.
9. Press the START/STOP button to stop the appliance.
10. Break the chocolate into pieces and add to the bowl (through the opening in the top
of the cover).
11. Press the TEMP button several times to select the cooking temperature. Select 80°C.
12. Press the ‘+’ or ‘-’ button to select cooking time. Select 5 minutes.
13. Press the CHOP button several times to select the mixing speed. Select S (stir).
14. Press the START/STOP button to start the programme.
The appliance will beep after 5 minutes.
37
15. Press the START/STOP button to stop the appliance.
16. Open the cover of the stainless steel bowl and add the egg yolk/sugar/flour mixture
to the bowl.
17. Close the lid on the bowl.
18. Press the TEMP button several times to select the cooking temperature. Select 100°C.
19. Press the ‘+’ or ‘-’ button to select cooking time. Select 5 minutes.
20. Press the CHOP button several times to select the mixing speed. Select S (stir).
21. Press the START/STOP button to start the programme.
The appliance will beep after 5 minutes. Pour your sauce into small ramekin dishes and leave
to cool in the refrigerator.
PEAR COMPOTE
Home-made compotes in under 30 minutes.
Serve with yogurts, gingerbread, biscuits, red berry coulis, etc.
5 pears
Sugar
Water
1. Clean and dice your pears, removing the skin and core.
2. Place the ‘Blender’ tool in the bowl.
3. Place your diced pears into the stainless steel bowl and add sugar to taste.
4. Place the glass cover on the bowl.
5. Position the bowl on the motor unit.
6. Press the TEMP button several times to select the cooking temperature. Select 100°C.
7. Press the ‘+’ or ‘-’ button to select cooking time. Select 10 minutes.
8. Press the START/STOP button to start the programme.
The appliance will cook the pears and sugar for 10 minutes. The appliance will beep after
10 minutes.
9. Press the START/STOP button to stop the appliance.
10. Press the TEMP button several times to select the cooking temperature. Select 100°C.
11. Press the ‘+’ or ‘-’ button to select cooking time. Select 15 minutes.
12. Press the CHOP button several times to select the mixing speed. Select S (stir).
13. Press the START/STOP button to start the programme.
The appliance will beep after 15 minutes. Your compote is now ready. Allow to cool before
serving.
38
MULTI-FRUIT MILKSHAKE
Milkshake is a mixed fruit and milk-based drink.
Quick and easy to make yet 100% satisfying! Adapt recipes to suit your tastes, mixing in
soya beans, banana, kiwi, grape, peach, milk, yogurt, ice, honey, etc.
8 strawberries
5 kiwis
2 bananas
300ml cold milk
1. Clean and dice your fruit, removing the skin from kiwis and bananas and removing the
stalks from your strawberries.
2. Position the blades and stirrer in the bowl.
3. Place your diced fruit into the stainless steel bowl and add the milk.
4. Place the glass cover on the bowl.
5. Press the TEMP button several times to select OFF (no cooking).
6. Press the ‘+’ or ‘-’ button to select preparation time. Select 10 minutes.
7. Press the CHOP button several times to select the mixing speed. Select ‘H’ (high).
14. Press the START/STOP button to start the programme.
The appliance will beep after 10 minutes. Adjust the mixing time to ensure that the fruits
are mixed well. Add sugar to taste.
39
A
A : Stopfer zum Dosieren
B: Glasabdeckung
B
C: Rührer
D: Schneidmesser
H
C
E: Edelstahlbehälter
F: Motorblock
D
I
G: Bedienfeld
H: Haken zum Abnehmen der
Schneidmesser
E
J
I: Dampfeinsatz
J: Zubehörteil „Bürste“ (für die
Reinigung des Behälters)
K
K: Zubehörteil „Mixer“ zum
Zubereiten von Marmeladen,
Kompott, Cremes und Saucen.
F
G
B1 : Befestigungshaken
B2 : Verschlussvorrichtung
B1
40
B2
Abbildung 2
Abbildung 3
Abbildung 4
Abbildung 5
Abbildung 6
Abbildung 7
Abbildung 8
Abbildung 9
41
Bedienungsanleitung
Abbildung 1
Bedienungsanleitung für Soup’Master
Bitte lesen Sie diese Bedienungsanleitung sorgfältig und bewahren Sie sie auf. Wenn Sie
dieses Gerät an eine dritte Person weiter geben, denken Sie daran, der Person diese
Bedienungsanleitung zu geben. Entnehmen Sie das Gerät der Verpackung, aber bewahren
Sie sie solange auf, bis Sie den Zustand des Geräts überprüft haben.
Technische Daten
Netzspannung
120V, 220 ~240V
Frequenz
50/60 Hz
Leistung
1000 W
Fassungsvermögen des Behälters
Min. 1L - Max. 1,5 L
Um jegliche Art von Brandgefahr, Stromschlag- oder Verletzungsgefahr zu vermeiden,
befolgen Sie während des Gebrauchs elektrischer Geräte stets die Sicherheitsanweisungen
und insbesondere die folgenden Hinweise:
WICHTIGE VORSICHTSMAßNAHMEN
1. Dieses Gerät darf nur von Erwachsenen oder unter Aufsicht eines verantwortlichen
Erwachsenen verwendet werden.
Gebrauch und Lagerung des Geräts immer außerhalb der Reichweite von Kindern.
2. Dieses Gerät ist kein Spielzeug. Lassen Sie Ihre Kinder nicht mit dem Gerät spielen.
3. Tauchen Sie das Gerät, den Behälter, das Kabel, den Stecker oder den Motorblock nicht
in Wasser oder andere Flüssigkeiten. Benutzen Sie das Gerät nicht in einem
Badezimmer, in der Nähe eines Wasseranschlusses oder im Freien.
4. Stellen Sie das Gerät nie in feuchter oder nasser Umgebung auf und setzen Sie
es nie direkter Sonneneinstrahlung aus.
5. Stellen Sie das Gerät auf eine ebene, stabile, feste und trockene Unterlage.
6. Heben Sie das Gerät nie während des Betriebs an oder stellen es an eine andere Stelle.
7. Heben Sie das Gerät nie am Stromkabel an. Heben Sie das Gerät immer an seiner
Grundfläche an.
8. Nehmen Sie das Gerät nicht in Betrieb, wenn die Abdeckung nicht aufliegt.
9. Nehmen Sie den Garbehälter nicht von der Grundposition, solange der Motor an ist.
10. Der Behälter wird während der Garzeit sehr heiß. Berühren Sie nicht die heißen Flächen
des Geräts. Nehmen Sie während der Garzeit nicht die Abdeckung des Behälters ab, Sie
könnten sich Verbrennungen zufügen. Benutzen Sie einen Küchenhandschuh, um die
Abdeckung abzunehmen.
11. Während der Garzeit kann Dampf durch den Stopfer austreten, achten Sie darauf, dass
Sie sich nicht verbrennen.
12. Passen Sie auf, dass der Inhalt aus dem Behälter nicht überläuft. Füllen Sie den Behälter
nur mit der empfohlenen Menge. Flüssigkeit, die in den Motorblock gelangt, kann vom
Motor absorbiert werden und diesen beschädigen.
42
13. Geben Sie nicht Ihre Hand in den Behälter. Die Schneidmesser sind sehr scharf.
Verwenden Sie den Haken zum Abnehmen der Schneidmesser.
14. Geben Sie keinerlei Küchengeräte (Löffel, Spatel) in den Behälter. Verwenden Sie die
mitgelieferten Zubehörteile.
15. Wenn der Motor während eines Vorgangs dauerhaft in Betrieb war, warten Sie 5
Minuten, bevor Sie einen neuen Vorgang beginnen.
16. Nehmen Sie das Gerät nicht in Betrieb, wenn es leer ist.
17. Achten Sie darauf, dass das Stromkabel nicht herunterhängt und dass niemand
darüber stolpern oder daran hängen bleiben könnte.
18. Halten Sie das Gerät und das Kabel außer Reichweite von Heizplatten, Herdplatten oder
Gasbrennern.
19. Ziehen Sie nach dem Gebrauch den Stecker und lassen das Gerät abkühlen, bevor Sie
es wegstellen oder reinigen.
20. Ziehen Sie den Stecker, bevor Sie Zubehör oder andere Teile hinzufügen oder
entfernen.
21. Verwenden Sie das Gerät nur für die in dieser Bedienungsanleitung beschriebenen
Zwecke.
22. Dieses Gerät darf nicht mit einem externen Timer oder einer Fernbedienung verwendet
werden.
23. Dieses Gerät darf nur mit einer geerdeten Steckdose verbunden werden.
24. Benutzen Sie das Gerät nicht, wenn das Gerät runtergefallen, beschädigt oder defekt
ist.
25. Wir empfehlen Ihnen, das Stromkabel regelmäßig auf Beschädigungen zu überprüfen,
das Gerät darf auf keinen Fall mit beschädigtem Stromkabel verwendet werden.
26. Ist das Stromkabel beschädigt muss es vom Hersteller, seinem Kundendienst oder durch
einen vom Hersteller autorisierten Elektriker ausgetauscht werden, um Risiken zu
vermeiden.
Nur für den Haushaltsgebrauch bestimmt
Bitte lesen Sie sich vor dem ersten Gebrauch Ihres Geräts den Abschnitt „Pflege und
Wartung“ durch, und reinigen das Gerät und die Zubehörteile sorgfältig, um
Fertigungsrückstände zu entfernen.
Tauchen Sie den Motorblock (F) und den Edelstahlbehälter (E) nicht in Wasser oder
andere Flüssigkeiten.
Geben Sie den Motorblock (F) und den Edelstahlbehälter (E) nicht in eine
Geschirrspülmaschine.
ERSTE INBETRIEBNAHME DES GERÄTS
Wählen Sie das Zubehör, das für die Zubereitung erforderlich ist.
Suppen und Kompott: Schneidmesser (D) und Rührer (C)
Saucen, Cremes, Kompott, Marmeladen: Zubehörteil „Mixer“ (K)
Dampfgaren: Dampfeinsatz
43
Befestigung der Abdeckung (B) auf dem Edelstahlbehälter (E)
Die Abdeckung (B) muss immer auf dem Edelstahlbehälter (E) befestigt werden.
Ist die Abdeckung auf dem Behälter nicht richtig befestigt, wird ein Sicherheitssystem
ausgelöst.
Setzen Sie die Glasabdeckung (B) wie nachfolgend beschrieben auf den Behälter:
1. Setzen Sie den Befestigungshaken (B1) am Rand des Edelstahlbehälters (E) an.
(Abbildung 1)
2. Senken Sie die Glasabdeckung (B) auf den Edelstahlbehälter (E) ab. Die
Verschlussvorrichtung (B2) der Abdeckung muss sich rechts vom Handgriff befinden.
(Abbildung 2)
3. Drehen Sie die Glasabdeckung (B) mit Daumen und Zeigefinger, um die
Verschlussvorrichtung (B2) in Verlängerung des Handgriffs des Behälters zu positionieren.
(Abbildung 3)
4. Positionieren Sie den Stopfer (A) auf der Öffnung der Glasabdeckung (B).
Befestigung des Edelstahlbehälters (E) auf dem Motorblock (F)
1. Richten Sie den Handgriff des Behälters an der für diesen Zweck vorgesehenen
Einkerbung im Motorblock aus. Somit werden die Anschlüsse unter dem Behälter mit
den auf dem Motorblock befindlichen Anschlüssen verbunden. (Abbildung 4).
2. Drücken Sie leicht auf die Oberseite des Behälters, damit die Anschlüsse einrasten.
Ist zwischen dem Behälter (E) und dem Motorblock (F) ein Abstand zu sehen, bedeutet
das, dass Ihr Behälter nicht richtig auf dem Motorblock befestigt ist. (Abbildung 5)
Wenn kein Zwischenraum erkennbar ist, ist der Behälter richtig auf dem Motorblock
befestigt.
BEDIENFELD
8
9
10
11
1
7
2
6
3
5
4
44
1. Kontrollleuchte
2. START/STOP - Taste
3. Taste AUTO (Automatikprogramm)
4. Taste zur Zeitregulierung
5. Taste PROG (zeitlich versetzte
Programmierung)
6. Taste TEMP (Temperatureinstellung)
40 ℃, 80 ℃, 100 ℃, 120 ℃ und OFF
7. Taste CHOP (RührGeschwindigkeitseinstellung)
H (schnell), L (langsam), S (mittel) und
O (OFF)
8. Garmodus an
9. Gewählte Funktion PROG
(Programmierung der Zeitschaltung)
10. Gewähltes Programm AUTO
11. Anzeige der verbleibenden Garzeit,
der gewählten Temperatur und der
gewählten Rühr-Geschwindigkeit.
ZUBEREITUNG EINER SUPPE MIT DEM SOUP’MASTER
1. Waschen Sie Ihr Gemüse und schneiden es in kleine Stücke.
2. Befestigen Sie im Behälter (E) die Schneidmesser (D) (Abbildung 6) und den Rührer (C)
(Bild 7)
3. Geben Sie Ihr kleingeschnittenes Gemüse in den Edelstahlbehälter (E).
4. Geben Sie Wasser in den Behälter (E), mindestens bis zur Markierung „I“, maximal bis zur
Markierung „II“.
5. Setzen Sie die Glasabdeckung (B) auf den Behälter (E).
***Garen im Automatikmodus***
1. Schließen Sie das Gerät an. Es ertönt ein Signalton. Das LCD-Display leuchtet und zeigt
[0:30] an.
2. Drücken Sie die Taste AUTO, um das Automatikprogramm zu wählen. Das Wort AUTO wird
oben rechts im LCD-Display angezeigt.
3. Drücken Sie die START/STOP-Taste, um das Garen zu beginnen. Im LCD-Display wird
angezeigt. Im LCD-Display wird wechselweise [0﹕30] und 100 angezeigt. Die Garzeit wird
sich entsprechend verringern.
4. Nach 10 Minuten Garzeit beginnt das Gerät automatisch, leicht zu rühren. Im LCD-Display
wird wechselweise [L﹕19] und 100 angezeigt.„L“ ist der gespeicherte Mixer-Modus,„19“
die verbleibende Garzeit.
5. Nach 15 Minuten Garzeit beginnt das Gerät automatisch, schneller zu rühren. Im LCDDisplay wird wechselweise [H﹕4] und 100 angezeigt. „H“ ist der gespeicherte MixerModus,„4“ die verbleibende Garzeit.
Am Ende des Automatikprogramms wird im LCD-Display [00:00] angezeigt und das Gerät
piept 6 Mal.
Wenn Sie wünschen, können Sie die Garzeit verlängern oder zusätzliches Rühren
hinzufügen.
45
- Die Garzeit verlängern:
1. Drücken Sie mehrmals die Taste TEMP, um die Gartemperatur zu wählen.
2. Drücken Sie die Taste „+“ oder „-“, um die Garzeit oder Zubereitungszeit zu wählen.
3. Drücken Sie die START/STOP-Taste, um das gewählte Programm zu starten.
- Zusätzliches Rühren hinzufügen:
1. Drücken Sie mehrmals die CHOP-Taste, um die Rührgeschwindigkeit zu wählen.
2. Drücken Sie die Taste „+“ oder „-“, um die Zubereitungszeit zu wählen.
3. Drücken Sie die START/STOP-Taste, um das gewählte Programm zu starten.
Hinweis 1: Wird das Programm AUTO gestartet, beträgt die Gartemperatur 100°C und die
Rührgeschwindigkeit wird automatisch ausgewählt – L (Langsam) zu Beginn der Garzeit
und H (schnell) am Ende der Garzeit. Wenn Sie möchten, können Sie die
Rührgeschwindigkeit ändern. Drücken Sie dafür mehrmals die CHOP-Taste, um die
gewünschte Anfangsgeschwindigkeit zu wählen und drücken die START/STOP-Taste. Das
Gerät beginnt direkt mit dem Garen und Rühren in der von Ihnen gewählten
Geschwindigkeit.
Sie können im Programm AUTO nicht die Gartemperatur ändern.
Hinweis 2: Während der Garzeit im Programm AUTO können Sie die Abdeckung (b)
abnehmen und Zutaten oder Gewürze hinzufügen. Wenn Sie die Abdeckung (B) öffnen,
setzen die Garzeit und die Rührfunktion aus. Wenn Sie die Abdeckung (B) auf dem Behälter
(E) wieder schließen, drücken Sie die START/STOP-Taste, um die Garzeit und das Rühren
im Programm AUTO fortzusetzen.
Hinweis 3: Sie können die automatische Garzeit jederzeit anhalten und löschen. Drücken
Sie hierfür die START/STOP-Taste und anschließend die AUTO-Taste, um das
Automatikprogramm abzubrechen.
Tipp: Wenn Ihre Speise Knoblauch, Zwiebeln oder Ingwer enthält, empfehlen wir
Ihnen, dies im Behälter zu garen, bevor die anderen Zutaten und das Gemüse
hinzugegeben werden.
1. Befestigen Sie im Edelstahlbehälter die Schneidmesser (D) und den Rührer (C).
2. Geben Sie keine Zutaten in den Edelstahlbehälter, schließen die Glasabdeckung und
setzen den Behälter auf den Motorblock.
3. Positionieren Sie den Stopfer (A) auf der Öffnung der Glasabdeckung (B).
4. Schließen Sie das Gerät an. Es ertönt ein Signalton. Das LCD-Display leuchtet und zeigt
[0:30] an.
5. Drücken Sie mehrmals die Taste TEMP, um die Gartemperatur 120°C zu wählen.
6. Drücken Sie die START/STOP-Taste, um den Behälter vorzuheizen.
7. Öffnen Sie nach einer Minute die Abdeckung und geben Öl in den Behälter, sowie
Knoblauch, Zwiebeln oder Ingwer (fein geschnitten).
8. Setzen Sie die Glasabdeckung wieder auf den Behälter und drücken mehrmals die CHOPTaste. Wählen Sie die Geschwindigkeitsstufe S (Rühren).
9. Drücken Sie die Taste ‘-‘, um die Garzeit auf 3 Minuten einzustellen.
46
10. Drücken Sie die START/STOP-Taste.
11. Drücken Sie nach drei Minuten die START/STOP-Taste, um das Garen zu beenden und
öffnen Sie die Abdeckung.
12. Füllen Sie das Gemüse (und weitere Zutaten) und das Wasser in den Behälter.
13. Setzen Sie die Glasabdeckung wieder auf den Behälter, drücken die AUTO-Taste und
anschließend die START/STOP-Taste, um das das automatische Garprogramm zu
beginnen. Das Wort AUTO wird oben rechts im LCD-Display angezeigt und
wird
oben links im LCD-Display angezeigt.
***Programmierung der Zeitschaltung***
1. Schließen Sie das Gerät an. Es ertönt ein Signalton, das LCD-Display leuchtet und zeigt
[0:30] an.
2. Drücken Sie die Taste AUTO, um das Automatikprogramm zu wählen. Das Wort AUTO wird
oben rechts im LCD-Display angezeigt.
3. Drücken Sie die PROG-Taste. Das LCD-Display zeigt [04﹕00] (4 Stunden) an.
4. Drücken Sie die Taste „+’’ oder „-’’, um die Anfangszeit zu wählen (Max: 24 Stunden). Wenn
Sie zum Beispiel [06﹕00] eingeben, schaltet sich das Gerät in 6 Stunden ein.
Hinweis: Die Zeiteinstellung erfolgt in Minuten. Wenn Sie einmal „+“ drücken, erhöhen Sie
die Zeit um eine Minute. Wenn Sie die Taste „+“ länger gedrückt halten, erhöhen Sie die
Zeit um zehn Minuten.
5. Drücken Sie die START/STOP-Taste. Die Rückwärtszählung beginnt und die Zeit
verringert sich dementsprechend.
6. Wenn die Zeit abgelaufen ist, startet das Gerät automatisch (Garen 100°C für 30
Minuten und 2 Rührgeschwindigkeiten (L und H).
Hinweis: Sie können die Programmierung der Zeitschaltung anhalten, indem Sie ein Mal
die START/STOP-Taste drücken und anschließend die PROG-Taste. Im LCD-Display wird das
Wort PROG angezeigt.
***Garen im Manuellen Modus***
1. Schließen Sie das Gerät an. Es ertönt ein Signalton, das LCD-Display leuchtet und zeigt
[0:30] an.
2. Drücken Sie die Taste „+“ oder „-“, um die Garzeit zu wählen (Max.: 24 Stunden).
Hinweis: Die Zeiteinstellung erfolgt in Minuten. Wenn Sie einmal „+“ drücken, erhöhen Sie
die Zeit um eine Minute. Wenn Sie die Taste „+“ länger gedrückt halten, erhöhen Sie die
Zeit um zehn Minuten.
3. Drücken Sie mehrmals die Taste TEMP, um die Gartemperatur zu wählen.
4. Drücken Sie mehrmals die CHOP-Taste, um die Rührgeschwindigkeit zu wählen: H
(schnell), L (langsam), S (mittel).
5. Drücken Sie die START/STOP-Taste, um das Garen zu beginnen. Im LCD-Display wird
angezeigt. Im LCD-Display wird wechselweise [GESCHWINDIGKEIT:ZEIT] und
[TEMPERATUR] angezeigt. Die Garzeit wird sich entsprechend verringern. Sie können
jederzeit die Taste „+“ oder „-“ drücken, um die Garzeit oder Zubereitungszeit zu
verlängern oder zu verkürzen.
47
ZUSÄTZLICHE HINWEISE:
1) CHOP-Taste (Rühren) Wenn Sie das Gerät anschalten, ist der Rührmodus noch nicht
ausgewählt. Position O (OFF). Drücken Sie die START/STOP-Taste, um das Garen zu
beginnen. Das Gerät gart Ihre Lebensmittel, ohne zu rühren. Während des Vorgangs
können Sie keinen Rührvorgang hinzufügen. Wenn Sie diese Funktion hinzufügen
möchten, drücken Sie die START/STOP-Taste, um das laufende Garzeitprogamm zu
beenden und drücken anschließend mehrmals die CHOP-Taste, um die gewünschte
Rührfunktion zu wählen. Drücken Sie anschließend die START/STOP-Taste, um das Garen
und Rühren zu beginnen.
2) Taste TEMP (Temperatur): Wenn Sie das Gerät anschalten, ist die Temperatur noch nicht
ausgewählt. Position O (OFF). Wenn Sie die START/STOP-Taste drücken, erhitzt sich der
Behälter nicht. Wenn Sie eine Garfunktion hinzufügen möchten, drücken Sie die
START/STOP-Taste, um das laufende Garzeitprogamm zu beenden und drücken
anschließend mehrmals die Taste TEMP, um die gewünschte Gartemperatur zu wählen.
Drücken Sie anschließend die START/STOP-Taste, um das Garen zu beginnen.
3) Zeitauswahl: Wenn Sie das Gerät anschalten, ist die Gar- und Zubereitungszeit
automatisch auf 30 Minuten eingestellt. Durch Drücken der START/STOP-Taste können
Sie die Garzeit oder Zubereitungszeit ändern. Drücken Sie die Taste „+“ oder „-“, um die
Garzeit oder Zubereitungszeit zu ändern.
4) Während der Garzeit oder der Zubereitung können Sie die START/STOP-Taste drücken,
um das Garen (oder Zubereiten) anzuhalten und somit bei Bedarf die Funktionen CHOP
(Rühren) und TEMP (Temperatur) ändern.
5) Warmhalten: Ist die Garzeit abgelaufen, beendet das Gerät das Garen und auf dem LCDDisplay wird
angezeigt. Das Gerät wechselt jetzt automatisch für 60 Minuten in die
Funktion „Warmhalten“. Die Warmhalte-Funktion hält Ihre Suppe bei niedriger
Temperatur warm. Wenn Sie eine Gartemperatur von 80°C oder höher gewählt haben,
behält das Gerät für 60 Minuten eine Temperatur von 75°C für Ihre Speise bei. Wenn Sie
eine Gartemperatur von 40°C gewählt haben, behält das Gerät eine Temperatur von 40°C
für Ihre Speise bei. Das Rühren erfolgt von Zeit zu Zeit. Nach 60 Minuten schaltet sich
das Gerät ganz aus.
***Programmierung einer Garzeit im manuellen Modus mit Zeitschaltung***
Nachdem Sie die Gartemperatur (Taste TEMP), die Rührgeschwindigkeit (CHOP-Taste) und
die Garzeit ausgewählt haben (Taste „+“ oder „-“), drücken Sie die Taste PROG. Das LCDDisplay zeigt [04﹕00] (4 Stunden) an. Drücken Sie die Taste „+“ oder „-“, um die Anfangszeit
einzustellen (Max.: 24 Stunden). Wenn Sie zum Beispiel [06﹕00] eingeben, schaltet sich
das Gerät in 6 Stunden ein.
Hinweis: Die Zeiteinstellung erfolgt in Minuten. Wenn Sie einmal „+“ drücken, erhöhen Sie
die Zeit um eine Minute. Wenn Sie die Taste „+“ länger gedrückt halten, erhöhen Sie die
Zeit um zehn Minuten.
Drücken Sie die START/STOP-Taste. Die Rückwärtszählung beginnt und die Zeit verringert
sich dementsprechend. Wenn die Zeit abgelaufen ist, schaltet sich das Gerät automatisch
ein.
48
DAMPFGAREN
1. Entnehmen Sie die Schneidmesser und den Rührer bzw. das Zubehörteil „Mixer“.
2. Füllen Sie den Behälter bis zur Markierung „ I“ mit Wasser.
3. Positionieren Sie den Behälter auf dem Motorblock.
4. Setzen Sie den Dampfeinsatz in den Behälter (Abbildung 9).
5. Geben Sie Ihre Lebensmittel in den Dampfeinsatz.
6. Setzen Sie die Glasabdeckung (B) auf den Behälter (E).
7. Positionieren Sie den Behälter auf dem Motorblock.
8. Drücken Sie mehrmals die Taste TEMP, um die Gartemperatur zu wählen.
9. Drücken Sie die Taste „+“ oder „-“, um die Garzeit oder Zubereitungszeit zu wählen.
10. Drücken Sie die START/STOP-Taste, um das gewählte Programm zu starten.
GAREN OHNE VERRÜHREN VON FLEISCH UND GEMÜSE IM
EDELSTAHLBEHÄLTER
1. Nehmen Sie die Schneidmesser oder den Rührer bzw. das Zubehörteil „Mixer“ aus dem
Edelstahlbehälter heraus.
2. Geben Sie die Lebensmittel, die Sie garen möchten, in den Edelstahlbehälter und fügen
Wasser hinzu.
3. Schließen die Glasabdeckung und setzen den Behälter auf den Motorblock.
4. Positionieren Sie den Stopfer (A) auf der Öffnung der Glasabdeckung (B).
5. Schließen Sie das Gerät an. Es ertönt ein Signalton, das LCD-Display leuchtet und zeigt
[0:30] an.
6. Drücken Sie mehrmals die Taste TEMP, um die Gartemperatur zu wählen.
7. Drücken Sie die START/STOP-Taste, um das Garen zu beginnen. Die Garzeit ist auf 30
Minuten eingestellt. Durch Drücken der Tasten „+“ oder „-“ können Sie die Garzeit
einstellen.
ZUBEREITEN EINER MARMELADE MIT SOUP’MASTER
1. Waschen Sie Ihr Obst und schneiden es in kleine Stücke.
2. Setzen Sie das Zubehörteil „Mixer“ (K) im Behälter ein (Bild 8).
3. Geben Sie Ihr kleingeschnittenes Obst und Zucker in den Edelstahlbehälter (E).
4. Setzen Sie die Glasabdeckung (B) auf den Behälter (E).
5. Positionieren Sie den Behälter auf dem Motorblock.
6. Drücken Sie mehrmals die Taste TEMP, um die Gartemperatur zu wählen.
7. Drücken Sie mehrmals die CHOP-Taste, um die Rührgeschwindigkeit zu wählen.
8. Drücken Sie die Taste „+“ oder „-“, um die Garzeit oder Zubereitungszeit zu wählen.
9. Drücken Sie die START/STOP-Taste, um das gewählte Programm zu starten.
49
WICHTIGE HINWEISE:
Unzureichende Wasser- oder Flüssigkeitsmenge: Wenn sich die Flüssigkeitsmenge im
Garbehälter verringert oder unter dem Mindestniveau liegt (Markierung„I“), wird das Garen
automatisch beendet. Das Mixen wird fortgesetzt und das Gerät gibt ungefähr 20 Mal einen
Signalton von sich (Sie können den Signalton durch Drücken einer beliebigen Taste
ausschalten), die Kontrollleuchte blinkt, um Sie darauf hinzuweisen, Wasser hinzuzufügen.
Nach 4 Minuten schaltet sich die Mixer-Funktion automatisch ab. Um das Garen
fortzusetzen, müssen Sie Ihrer Speise Wasser oder eine andere Flüssigkeit hinzufügen und
die START/STOP-Taste drücken.
Nicht befestigte oder falsch aufgesetzte Glasabdeckung: Wenn die Glasabdeckung nicht
richtig auf dem Edelstahlbehälter befestigt ist, funktioniert das Gerät nicht. Das Gerät gibt
drei Signaltöne von sich und die Kontrollleuchte blinkt, um den Benutzer darauf
hinzuweisen, die Glasabdeckung richtig auf dem Edelstahlbehälter zu befestigen.
REINIGUNG IHRES SOUP’MASTER-GERÄTS
1. Schließen Sie das Gerät an.
2. Nehmen Sie den Edelstahlbehälter vom Motorblock ab.
3. Öffnen Sie die Glasabdeckung, indem Sie sie mit dem Daumen drehen.
4. Gießen Sie die Suppe oder andere Speisen in einen anderen Behälter und entnehmen
Sie die Schneidmesser und den Rührer bzw. das Zubehörteil „Mixer“.
Hinweis: Verwenden Sie den Haken zum Abnehmen der Schneidmesser. Schieben Sie den
Haken schräg unter die Schneidmesser und ziehen den Haken heraus, um die
Schneidmesser zu lösen.
5. Reinigen Sie die Zubehörteile mit Geschirrspülwasser und spülen sie mit klarem
Wasser ab.
6. Reinigen Sie die Behälter mit Geschirrspülwasser und spülen sie mit klarem Wasser ab.
Hinweis: Sie können das Zubehörteil „Bürste“ zum Reinigen des Behälters verwenden.
Montieren Sie hierfür das Zubehörteil„Bürste“ im Edelstahlbehälter, nachdem Sie das Gerät
ausgeschaltet und die Schneidmesser, den Rührer bzw. das Zubehörteil„Mixer“ entnommen
haben. Geben Sie Wasser und Geschirrspülmittel in den Edelstahlbehälter und befestigen
die Glasabdeckung auf dem Behälter. Schließen Sie das Gerät an und drücken mehrmals
die CHOP-Taste, um die Rührgeschwindigkeit L (langsam) zu wählen. Drücken Sie
anschließend die Taste „-“ oder „+“, um die Zeit einzustellen (Wählen Sie eine Minute).
Drücken Sie die START/STOP-Taste, um die Reinigung zu beginnen. Drücken Sie nach einer
Minute die START/STOP-Taste, um die Reinigung zu beenden. Schalten Sie das Gerät aus,
nehmen den Behälter vom Motorblock ab und öffnen die Glasabdeckung und entnehmen
das Zubehörteil „Bürste“. Spülen Sie den Edelstahlbehälter mit klarem Wasser ab und
trocknen ihn ab.
50
Tauchen Sie den Motorblock (F) und den Edelstahlbehälter (E) nicht in Wasser oder
andere Flüssigkeiten.
Geben Sie den Motorblock (F) und den Edelstahlbehälter (E) nicht in eine
Geschirrspülmaschine.
Um Umwelt- und Gesundheitsprobleme, hervorgerufen durch gefährliche
Stoffe in elektrischen und elektronischen Waren, zu vermeiden, dürfen
Geräte, die dieses Symbol tragen nicht mit dem normalen Hausmüll
entsorgt werden, sondern müssen wiederaufbereitet, weiter genutzt oder
recycled werden.
Rezepte
GEMÜSESUPPE
Kochen Sie Ihre Gemüsesuppe ganz einfach frisch. Ihre köstlichen Suppen enthalten als
Vorspeise oder Hauptgericht viele Vitamine.
Für noch schmackhaftere Suppen benutzen Sie Gemüse und Produkte der Saison.
Eine hausgemachte Suppe hält sich 24 Stunden. Sie können Sie im Voraus zubereiten und
Sie für die Mahlzeit aufwärmen. Sie können Ihre Suppen auch einfrieren.
1 Lauch (nur das Weiße)
1 kleine Rübe
4 Karotten
1 Zwiebel
1 Zucchino
2 kleine Kartoffeln
Salz
1. Waschen Sie Ihr Gemüse und schneiden es in kleine Stücke.
2. Montieren Sie das Schneidmesser und den Rührer im Behälter.
3. Geben Sie in das kleingeschnittene Gemüse in den Behälter.
4. Fügen Sie Wasser hinzu, mindestens bis zur Markierung „I“, maximal bis zur Markierung
„II“.
6. Setzen Sie die Glasabdeckung auf den Behälter.
Sie können den Automatikmodus wählen, um Ihre Suppe zu garen und zu mixen, oder die
Garzeit, Gartemperatur und Mixgeschwindigkeit manuell einstellen.
Garen im Automatikmodus
7. Schließen Sie das Gerät an. Es ertönt ein Signalton. Das LCD-Display leuchtet und zeigt
[0:30] an.
8. Drücken Sie die Taste AUTO, um das Automatikprogramm zu wählen. Das Wort AUTO wird
oben rechts im LCD-Display angezeigt.
51
9. Drücken Sie die START/STOP-Taste, um das Garen zu beginnen.
Wird das Programm AUTO gestartet, beträgt die Gartemperatur 100°C und die
Rührgeschwindigkeit wird automatisch ausgewählt – L (Langsam) zu Beginn der Garzeit
und H (schnell) am Ende der Garzeit.
Garen im Manuellen Modus
7. Schließen Sie das Gerät an. Es ertönt ein Signalton, das LCD-Display leuchtet und zeigt
[0:30] an.
8. Drücken Sie die Taste „+“ oder „-“, um die Zubereitungszeit zu wählen (Max.: 24
Stunden).
Hinweis: Die Zeiteinstellung erfolgt in Minuten. Wenn Sie einmal „+“ drücken, erhöhen Sie
die Zeit um eine Minute. Wenn Sie die Taste „+“ länger gedrückt halten, erhöhen Sie die
Zeit um zehn Minuten.
9. Drücken Sie mehrmals die Taste TEMP, um die Gartemperatur zu wählen.
10. Drücken Sie mehrmals die CHOP-Taste, um die Rührgeschwindigkeit zu wählen: H
(schnell), L (langsam), S (mittel).
11. Drücken Sie die START/STOP-Taste, um das Garen zu beginnen. Im LCD-Display wird
angezeigt. Im LCD-Display wird wechselweise [GESCHWINDIGKEIT﹕ZEIT] und
[TEMPERATUR] angezeigt. Die Garzeit wird sich entsprechend verringern. Sie können
jederzeit die Taste „+“ oder „-“ drücken, um die Garzeit oder Zubereitungszeit zu
verlängern oder zu verkürzen.
TOMATENSUPPE
6 Tomaten oder 2 Dosen geschälte Tomaten
4 Kartoffeln
1 Karotte
1 Zwiebel
4 Knoblauchzehen
2 Esslöffel Olivenöl
1 Suppenwürfel
1 Liter Wasser
Salz und Pfeffer
Basilikum
Mozarella- oder Fetawürfel oder gehobelter Parmesan
1. Waschen Sie Ihr Gemüse und schneiden es in kleine Stücke.
2. Montieren Sie das Schneidmesser und den Rührer im Behälter.
3. Geben Sie das kleingeschnittene Gemüse, das Öl, den Suppenwürfel und einige Blätter
Basilikum in den Behälter.
4. Fügen Sie Wasser hinzu, mindestens bis zur Markierung „I“, maximal bis zur Markierung
„II“.
5. Setzen Sie die Glasabdeckung auf den Behälter.
52
6. Schließen Sie das Gerät an. Es ertönt ein Signalton, das LCD-Display leuchtet und zeigt
[0:30] an.
7. Drücken Sie die Taste „+“ oder „-“, um die Zubereitungszeit zu wählen. Wählen Sie 15
Minuten aus.
8. Drücken Sie mehrmals die Taste TEMP, um die Gartemperatur zu wählen. Wählen Sie 100°C
aus.
9. Drücken Sie mehrmals die CHOP-Taste, um die Rührgeschwindigkeit zu wählen. Wählen
Sie S (mittel).
10. Drücken Sie die START/STOP-Taste, um das Garen zu beginnen.
Nach 10 Minuten beginnt das Gerät zu piepen.
11. Drücken Sie die Taste „+“ oder „-“, um die Zubereitungszeit zu wählen. Wählen Sie 5
Minuten aus.
12. Drücken Sie mehrmals die Taste TEMP, um die Gartemperatur zu wählen. Wählen Sie
100°C aus.
13. Drücken Sie mehrmals die CHOP-Taste, um die Rührgeschwindigkeit zu wählen.
Wählen Sie H aus.
14. Drücken Sie die START/STOP-Taste, um das Garen zu beginnen.
Nach 5 Minuten beginnt das Gerät zu piepen. Ihre Suppe ist fertig! Servieren Sie Ihre Suppe
mit den Mozarella- oder Fetawürfeln oder gehobeltem Parmesan.
GAZPACHO
Der Gazpacho (spanisch) ist eine kalte Tomatensuppe mit klein gewürfeltem Gemüse.
Herrlich erfrischend kann man ihn im Sommer als Hauptgericht genießen. Sie können ihn
auch in kleinen Gläsern als Aperitif anbieten.
1 Salatgurke
1 rote Paprikaschote
1 grüne Paprikaschote
1 kg Tomaten
4 Knoblauchzehen
1 Zwiebel
250 g gemahlenes Toastbrot/Weißbrot
1 DL Olivenöl
4 DL Geflügelfond
1 DL Weinessig
Salz
Pfeffer
Cayenne-Pfeffer oder Tabasco
53
1. Waschen Sie das Gemüse.
2. Übergießen Sie die Tomaten einige Sekunden mit kochendem Wasser und enthäuten
Sie sie anschließend.
3. Entkernen Sie die Tomaten und schneiden sie anschließend in kleine Stücke.
4. Waschen und schneiden Sie Paprikaschoten, Zwiebeln und Knoblauch klein.
5. Schälen Sie die Gurke und halbieren Sie sie der Länge nach, um sie zu entkernen und
schneiden Sie sie in kleine Stücke.
6. Behalten Sie für die Garnitur von jedem Gemüse einen kleinen Teil zurück
7. Montieren Sie das Schneidmesser und den Rührer im Behälter.
8. Geben Sie das kleingeschnittene Gemüse in den Behälter.
9. Geben Sie das Olivenöl hinzu.
10. Setzen Sie die Glasabdeckung auf den Behälter.
Drücken Sie mehrmals die Taste TEMP, um OFF auszuwählen (kein Garen).
Drücken Sie die Taste „+“ oder „-“, um die Zubereitungszeit zu wählen. Wählen Sie 10
Minuten aus.
13. Drücken Sie mehrmals die CHOP-Taste, um die Rührgeschwindigkeit zu wählen.
Wählen Sie „H“ (Schnell).
14. Drücken Sie die START/STOP-Taste, um das gewählte Programm zu starten.
Nach 10 Minuten beginnt das Gerät zu piepen.
Verrühren Sie in einem separaten Behälter den Geflügelfond mit Weinessig und geben Sie
das gemahlene Brot hinzu. Alles verrühren.
15. Nehmen Sie die Abdeckung ab.
16. Geben Sie den Mix aus Geflügelfond, Essig und Brot hinzu.
17. Setzen Sie die Glasabdeckung auf den Behälter.
18. Drücken Sie mehrmals die Taste TEMP, um OFF auszuwählen (kein Garen)
19. Drücken Sie die Taste „+“ oder „-“, um die Zubereitungszeit zu wählen. Wählen Sie 10
Minuten aus.
20. Drücken Sie mehrmals die CHOP-Taste, um die Rührgeschwindigkeit zu wählen.
Wählen Sie „H“ (Schnell).
21. Drücken Sie die START/STOP-Taste, um das gewählte Programm zu starten.
Nach 10 Minuten beginnt das Gerät zu piepen.
22. Gießen Sie die Suppe in einen anderen Behälter.
23. Mit Pfeffer abschmecken.
Eiskalt mit fein gewürfeltem Gemüse garniert servieren. Sie können die Suppe auch mit
kleinen getoasteten Brotwürfeln mit Knoblauch bestreuen. Man kann einen Eiswürfel vor
dem Servieren hinzugeben, dann ist die Suppe noch erfrischender.
54
SAUCE HOLLANDAISE
Die Sauce Hollandaise ist eine warme Emulsion aus Zitronensaft und Butter. Sie dient als
Grundlage für eine Reihe von Saucen.
Genießen Sie Ihre Sauce mit einem Fischfilet und Reis...
3 Eigelbe
150 g Butter
handwarmer Saft von 1/2 Zitrone
Salz/Pfeffer
1. Setzen Sie das Zubehörteil „Mixer“ im Behälter ein.
2. Geben Sie das die Eigelbe, etwas Salz und Pfeffer und 20g Butter in den Behälter.
3. Setzen Sie die Glasabdeckung auf den Behälter.
4. Positionieren Sie den Behälter auf dem Motorblock.
5. Drücken Sie mehrmals die Taste TEMP, um die Gartemperatur zu wählen. Wählen Sie 40°
C aus.
6. Drücken Sie die Taste „+“ oder „-“, um die Garzeit zu wählen. Wählen Sie 10 Minuten aus.
7. Drücken Sie mehrmals die CHOP-Taste, um die Rührgeschwindigkeit zu wählen. Wählen
Sie „S“ (mittel).
8. Drücken Sie die START/STOP-Taste, um das gewählte Programm zu starten.
Nach 10 Minuten beginnt das Gerät zu piepen.
9. Drücken Sie die START/STOP-Taste, um das Gerät anzuhalten.
10. Drücken Sie mehrmals die Taste TEMP, um die Gartemperatur zu wählen. Wählen Sie
80°C aus.
11. Drücken Sie die Taste „+“ oder „-“, um die Garzeit zu wählen. Wählen Sie 5 Minuten aus.
12. Drücken Sie mehrmals die CHOP-Taste, um die Rührgeschwindigkeit zu wählen.
Wählen Sie „S“ (mittel).
13. Drücken Sie die START/STOP-Taste, um das gewählte Programm zu starten.
Während der 5 Minuten Garzeit bei 80°C öffnen Sie die obere Öffnung der Abdeckung
(Stopfer abnehmen) und geben die restliche Butter hinzu.
Nach 5 Minuten beginnt das Gerät zu piepen.
14. Drücken Sie die START/STOP-Taste, um das Gerät anzuhalten.
15. Drücken Sie mehrmals die Taste TEMP, um die Gartemperatur zu wählen. Wählen Sie
40° C aus.
16. Drücken Sie die Taste „+“ oder „-“, um die Garzeit zu wählen. Wählen Sie 5 Minuten aus.
17. Drücken Sie mehrmals die CHOP-Taste, um die Rührgeschwindigkeit zu wählen.
Wählen Sie „S“ (mittel).
18. Drücken Sie die START/STOP-Taste, um das gewählte Programm zu starten.
55
19. Geben Sie den handwarmen Zitronensaft hinzu (wenn der Saft zu kalt ist, droht die
Sauce umzukippen).
http://www.recettesdecuisine.tv/recette-i60-f8/citrons/recette+citrons.html
Nach 5 Minuten beginnt das Gerät zu piepen. Ihre Sauce ist fertig!
Sauce Mousseline (Sauce Hollandaise mit Sahne): Geben Sie vor dem Servieren etwas
Schlagsahne unter die Sauce Hollandaise. Rechnen Sie ungefähr ein Viertel der Masse.
Senfsauce: Geben Sie Ihrer Sauce je nach Belieben Senf hinzu.
Sauce Maltaise: Geben Sie Blutorangensaft und -schale (in feine Streifen geschnitten und
blanchiert) zu der Sauce Hollandaise hinzu.
ERDBEERMARMELADE
Einfaches und schnelles Rezept für Erdbeermarmelade. Sie können hierfür GariguetteErdbeeren oder jede andere Erdbeersorte verwenden. Um eine gute Erdbeermarmelade
herzustellen, müssen die Erdbeeren reif sein, denn je mehr natürlichen Fruchtzucker die
Erdbeeren haben, desto besser wird Ihre Marmelade.
500 g Erdbeeren
500g g Zucker
1. Waschen und putzen Sie die Erdbeeren und schneiden sie in kleine Stücke.
2. Setzen Sie das Zubehörteil „Mixer“ in den Behälter.
3. Geben Sie die kleingeschnittenen Erdbeeren und den Zucker in den Behälter.
4. Setzen Sie die Glasabdeckung auf den Behälter.
5. Positionieren Sie den Behälter auf dem Motorblock.
6. Drücken Sie mehrmals die Taste TEMP, um die Gartemperatur zu wählen. Wählen Sie 120°C
aus.
7. Drücken Sie die Taste „+“ oder „-“, um die Garzeit zu wählen. Wählen Sie 10 Minuten aus.
8. Drücken Sie die START/STOP-Taste, um das gewählte Programm zu starten.
Erdbeeren und Zucker werden 10 Minuten lang im Gerät gekocht. Nach 10 Minuten beginnt
das Gerät zu piepen.
9. Drücken Sie die START/STOP-Taste, um das Gerät anzuhalten.
10. Drücken Sie mehrmals die Taste TEMP, um die Gartemperatur zu wählen. Wählen Sie
80°C aus.
11. Drücken Sie die Taste „+“ oder „-“, um die Garzeit zu wählen. Wählen Sie 30 Minuten aus.
12. Drücken Sie mehrmals die CHOP-Taste, um die Rührgeschwindigkeit zu wählen.
Wählen Sie „S“ (mittel).
13. Drücken Sie die START/STOP-Taste, um das gewählte Programm zu starten.
Erdbeeren und Zucker werden 30 Minuten lang im Gerät gekocht und gerührt.
56
Nach 30 Minuten beginnt das Gerät zu piepen. Um zu prüfen, ob Ihre Marmelade gar ist,
gießen Sie einen Tropfen auf einen kalten Teller. Wenn der Tropfen fest ist, ist Ihre
Marmelade gar. Wenn der Tropen nicht fest ist, verlängern Sie die Garzeit bei einer
Temperatur von 80°C und mittlerer Rührgeschwindigkeit „S“.
Vorbereitung der Gläser: Optimalerweise sollten die Marmeladengläser und Deckel in
kochendes Wasser gelegt werden und trocknen, bevor sie befüllt werden. Füllen Sie die
Marmelade in die Gläser, schließen sie und drehen sie auf den Kopf. Lassen Sie die
Marmelade abkühlen, bis Sie die Gläser wegräumen.
SCHOKOLADENCREME
Ein einfaches Rezept. Sie können diese Creme auch mit Milchschokolade herstellen.
Genießen Sie Ihre Schokoladencreme mit Keksen, Obst, Hefekuchen usw.
1L Milch
120 g dunkle Schokolade
3 Eigelbe
80 g Zucker
40 g Mehl
1. Schlagen Sie in einem separaten Behälter die Eigelbe mit Zucker und Mehl.
2. Setzen Sie das Zubehörteil „Mixer“ in den Behälter.
3. Geben Sie die Milch in den Edelstahlbehälter.
4. Setzen Sie die Glasabdeckung auf den Behälter.
5. Positionieren Sie den Behälter auf dem Motorblock.
6. Drücken Sie mehrmals die Taste TEMP, um die Gartemperatur zu wählen. Wählen Sie 80°C
aus.
7. Drücken Sie die Taste „+“ oder „-“, um die Garzeit zu wählen. Wählen Sie 6 Minuten aus.
8. Drücken Sie die START/STOP-Taste, um das gewählte Programm zu starten.
Nach 6 Minuten beginnt das Gerät zu piepen. Die Milch muss kochen. Ist dies nicht der Fall,
verlängern Sie die Garzeit um einige Minuten.
9. Drücken Sie die START/STOP-Taste, um das Gerät anzuhalten.
10. Geben Sie die Schokoladenstücke hinzu (durch die Öffnung auf der Abdeckung)
11. Drücken Sie mehrmals die Taste TEMP, um die Gartemperatur zu wählen. Wählen Sie
80°C aus.
12. Drücken Sie die Taste „+“ oder „-“, um die Garzeit zu wählen. Wählen Sie 5 Minuten aus.
13. Drücken Sie mehrmals die CHOP-Taste, um die Rührgeschwindigkeit zu wählen.
Wählen Sie „S“ (mittel).
14. Drücken Sie die START/STOP-Taste, um das gewählte Programm zu starten.
Nach 5 Minuten beginnt das Gerät zu piepen.
57
15. Drücken Sie die START/STOP-Taste, um das Gerät anzuhalten.
16. Öffnen Sie die Abdeckung des Edelstahlbehälters und geben die Masse aus Eigelb,
Zucker und Mehl hinzu.
Schließen die Glasabdeckung wieder.
18. Drücken Sie mehrmals die Taste TEMP, um die Gartemperatur zu wählen. Wählen Sie
100°C aus.
19. Drücken Sie die Taste „+“ oder „-“, um die Garzeit zu wählen. Wählen Sie 5 Minuten aus.
20. Drücken Sie mehrmals die CHOP-Taste, um die Rührgeschwindigkeit zu wählen.
Wählen Sie „S“ (mittel).
21. Drücken Sie die START/STOP-Taste, um das gewählte Programm zu starten.
Nach 5 Minuten beginnt das Gerät zu piepen. Füllen Sie die Creme in kleine Souffléformen
und stellen sie in den Kühlschrank zum Abkühlen.
BIRNENKOMPOTT
Bereiten Sie ein hausgemachtes Kompott in weniger als 30 Minuten zu.
Genießen Sie Ihr Kompott mit Joghurt, Honigkuchen, Keksen oder Roter Grütze.
5 Birnen
Zucker
Wasser
1. Die Birnen waschen, schälen, das Gehäuse entfernen und Birnen in kleine Stücke
schneiden.
2. Setzen Sie das Zubehörteil „Mixer“ in den Behälter.
3. Geben Sie die kleingeschnittenen Birnen und Zucker je nach Belieben in den Behälter.
4. Setzen Sie die Glasabdeckung auf den Behälter.
5. Positionieren Sie den Behälter auf dem Motorblock.
6. Drücken Sie mehrmals die Taste TEMP, um die Gartemperatur zu wählen. Wählen Sie 100°C
aus.
7. Drücken Sie die Taste „+“ oder „-“, um die Garzeit zu wählen. Wählen Sie 10 Minuten aus.
8. Drücken Sie die START/STOP-Taste, um das gewählte Programm zu starten.
Birnen und Zucker werden 10 Minuten lang im Gerät gekocht. Nach 10 Minuten beginnt
das Gerät zu piepen.
9. Drücken Sie die START/STOP-Taste, um das Gerät anzuhalten.
10. Drücken Sie mehrmals die Taste TEMP, um die Gartemperatur zu wählen. Wählen Sie
100°C aus.
11. Drücken Sie die Taste „+“ oder „-“, um die Garzeit zu wählen. Wählen Sie 15 Minuten aus.
12. Drücken Sie mehrmals die CHOP-Taste, um die Rührgeschwindigkeit zu wählen.
Wählen Sie „S“ (mittel).
13. Drücken Sie die START/STOP-Taste, um das gewählte Programm zu starten.
58
Nach 15 Minuten beginnt das Gerät zu piepen. Ihr Kompott ist fertig! Lassen Sie es vor dem
Servieren abkühlen.
OBST-MILCHSHAKE
Dieser Milchshake ist ein Getränk auf Basis von Obst und Milch.
Einfache und schnelle Zubereitung - 100% Genuss! Die Rezepte können Sie nach Ihrem
eigenen Geschmack variieren - mixen Sie Soja, Banane, Kiwis, Trauben, Pfirsiche, Milch,
Joghurt, Eis, Honig usw.
8 Erdbeeren
5 Kiwis
2 Bananen
300 ml kalte Milch
1. Die Früchte waschen, Kiwis und Bananen schälen, Erdbeeren säubern und klein
schneiden.
2. Montieren Sie das Schneidmesser und den Rührer im Behälter.
3. Geben Sie das kleingeschnittene Obst und die Milch in den Behälter.
4. Setzen Sie die Glasabdeckung auf den Behälter.
5. Drücken Sie mehrmals die Taste TEMP, um OFF auszuwählen (kein Garen).
6. Drücken Sie die Taste „+“ oder „-“, um die Zubereitungszeit zu wählen. Wählen Sie 10
Minuten aus.
7. Drücken Sie mehrmals die CHOP-Taste, um die Rührgeschwindigkeit zu wählen. Wählen
Sie „H“ (Schnell).
14. Drücken Sie die START/STOP-Taste, um das gewählte Programm zu starten.
Nach 10 Minuten beginnt das Gerät zu piepen. Passen Sie die Mixzeit an, damit die Früchte
gut vermischt werden. Süßen Sie nach Belieben.
59
A
A : Maatdop
B : Glazen deksel
B
C : Roerder
D : Messen
H
C
E : Roestvrije kom
F : Motorblok
D
I
G : Bedieningspaneel
H : Haak voor verwijdering van
de messen
E
J
I : Stoomkorf
J : « Kwasthulpstuk » (voor
reiniging van de kom)
K
F
K : « Menghulpstuk » voor de
bereiding van jam, moes,
room of sauzen.
G
B1 : Bevestigingshaak
B2 : Vergrendeling
B1
60
B2
Instructies
Afbeelding 1
Afbeelding 2
Afbeelding 3
Afbeelding 4
Afbeelding 5
Afbeelding 6
Afbeelding 7
Afbeelding 8
Afbeelding 9
61
Gebruiksaanwijzing van Soup’Master
Lees de gebruiksaanwijzing en bewaar ze. Als u het apparaat aan derden geeft, moet u hen
ook de gebruiksaanwijzing bezorgen. Verwijder het verpakkingsmateriaal, maar houd het
bij tot u de goede staat van het apparaat hebt gecontroleerd.
Technische kenmerken
Spanning
120V, 220 ~240V
Frequentie
50/60 Hz
Vermogen
1000 W
Inhoud van de kom
Min 1 l - Max 1,5 l
Om gevaar voor brand, elektrische schokken of letsels te verminderen, dient u zich tijdens
de bediening van elektrische apparaten altijd te houden aan de veiligheidsvoorschriften,
waaronder de volgende voorzorgsmaatregelen:
Belangrijke voorzorgsmaatregelen
1 Dit apparaat mag uitsluitend worden gebruikt door of onder toezicht van een
verantwoordelijke volwassene.
Gebruik en bewaar het apparaat buiten het bereik van kinderen.
2 Dit apparaat is geen speelgoed. Laat uw kinderen er niet mee spelen.
3 Dompel het apparaat, de kom, het snoer, de stekker of het motorblok niet onder in water
of een andere vloeistof. Gebruik het apparaat niet in een badkamer, in de
buurt van een waterbron of buitenshuis.
4 Plaats het apparaat niet in een vochtige of natte omgeving en stel het niet
bloot aan zonnestralen.
5. Plaats het apparaat op een vlak, stabiel, stevig en droog oppervlak.
6. Til het apparaat niet op of verplaats het niet wanneer het in werking is.
7. Neem het apparaat niet bij het netsnoer vast om het op te tillen. Houd het altijd aan de
onderkant vast om het op te tillen.
8. Gebruik het apparaat niet zonder het deksel.
9. Verwijder de bereidingskom niet uit de hoofdbehuizing wanneer de motor is
ingeschakeld.
10. De kom wordt heet tijdens het koken. Raak de hete oppervlakken van het apparaat niet
aan. Verwijder het deksel van de kom niet tijdens het koken, u kunt zich verbranden.
Gebruik een keukenhandschoen om het deksel te verwijderen.
11. Tijdens het koken kan er stoom ontsnappen via de maatdop; let op dat u zich niet
verbrandt.
12. Zorg dat de kom niet overloopt. Vul de kom niet boven de aanbevolen hoeveelheid.
Vloeistof die onder het motorblok terechtkomt kan door de motor worden
geabsorbeerd en deze beschadigen.
13. Steek uw hand niet in de kom. De messen zijn zeer scherp. Gebruik de haak om de
messen te verwijderen.
62
14. Gebruik geen keukengerei (lepel, spatel enz.) in de kom. Gebruik de meegeleverde
accessoires.
15. Nadat de motor continu heeft gedraaid tijdens een kookcyclus, wacht u ten minste 5
minuten alvorens een nieuwe cyclus te starten.
16. Schakel het apparaat niet in wanneer het leeg is.
17. Laat het netsnoer niet overhangen en zorg dat niemand erover kan struikelen of
erachter blijft haken.
18. Houd het apparaat en het snoer uit de buurt van verwarmingsplaten, kookvlakken en
gasbranders.
19. Trek de stekker van het apparaat uit wanneer u het niet gebruikt en laat het afkoelen
alvorens het te verplaatsen of te reinigen.
20. Trek de stekker van het apparaat uit alvorens onderdelen of accessoires aan te
brengen of te verwijderen.
21. Gebruik het apparaat niet voor andere doeleinden dan deze beschreven in de
gebruiksaanwijzing.
22. Dit apparaat mag niet worden gebruikt met een externe timer of afstandsbediening.
23. Het apparaat mag alleen worden aangesloten op een stopcontact met aarding.
24. Gebruik het apparaat niet wanneer het is gevallen, beschadigd is of niet goed
functioneert.
25. Het wordt aanbevolen om het netsnoer regelmatig te controleren op ieder teken van
mogelijke slijtage en het apparaat mag niet gebruikt worden indien het snoer
beschadigd is.
26. Indien het netsnoer beschadigd is, moet het vervangen worden door de fabrikant, de
dienst na of een technicus erkend door de fabrikant om ieder risico te vermijden.
Uitsluitend voor huishoudelijk gebruik
Lees vóór het eerste gebruik de paragraaf “zorg en onderhoud” en maak het apparaat en
de accessoires zorgvuldig schoon om fabrieksvuil te verwijderen.
Dompel het motorblok (F) en de roestvrije kom (E) niet onder in water of een andere
vloeistof.
Plaats het motorblok (F) en de roestvrije kom (E) niet in een vaatwasmachine.
KENNISMAKING MET HET PRODUCT
Het juiste accessoire voor elk recept kiezen.
Soepen en moes: messen (D) en roerder (C)
Sauzen, crèmes, moes, jam: menghulpstuk (K)
Koken met stoom: stoomkorf
Het deksel (B) op de roestvrije kom (E) bevestigen
Het deksel (B) moet altijd op de roestvrije kom (E) worden bevestigd.
Een veiligheidsmechanisme treedt in werking wanneer het deksel niet of niet goed op de
kom is bevestigd.
63
Plaats het glazen deksel (B) op de kom zoals hieronder wordt beschreven:
1. Maak de bevestigingshaak (B1) vast aan de rand van de roestvrije kom (E). (Afbeelding
1)
2. Laat het glazen deksel (B) neer op de roestvrije kom (E). De vergrendeling (B2) van het
deksel moet zich rechts van het handvat van de kom bevinden. (Afbeelding 2)
3. Draai het glazen deksel (B) met duim en wijsvinger tot de vergrendeling (B2) van het
deksel op een lijn staat met het handvat van de kom. (Afbeelding 3)
4. Plaats de maatdop (A) boven op het glazen deksel (B).
De roestvrije kom (E) op het motorblok (F) bevestigen
1. Lijn het handvat van de kom uit met de hiervoor voorziene uitsnijding in het motorblok.
Op deze manier zullen de verbindingsstukken op de onderkant van de kom en de
verbindingsstukken op het motorblok in elkaar grijpen. (Afbeelding 4).
2. Druk lichtjes op de bovenzijde van de kom zodat de verbindingsstukken goed in
elkaar grijpen.
Als er speling tussen de kom (E) en het motorblok (F) zichtbaar is, betekent dit dat de
kom niet correct op het motorblok bevestigd is. (Afbeelding 5)
Als geen speling zichtbaar is, is de bereidingskom correct op het motorblok
bevestigd.
BEDIENINGSPANEEL
8
9
10
11
1
7
2
6
3
5
4
64
1. Werkingscontrolelampje
2. Knop START/STOP (aan/uit)
3. Knop AUTO (automatisch programma)
4. Knoppen voor tijdinstelling
5. Knop PROG (programmering van
startvertraging)
6. Knop TEMP (temperatuurinstelling)
40 ℃, 80 ℃, 100 ℃, 120 ℃ en OFF
7. Knop CHOP (instelling van
mixsnelheid)
H (snel), L (langzaam), S (mengen) en O
(OFF)
8. Koken aan de gang
9. Functie PROG (programmering van
startvertraging) geselecteerd
10. Programma AUTO geselecteerd
11. Afwisselende weergave van
resterende kooktijd, geselecteerde
temperatuur en geselecteerde
mixsnelheid.
SOEP MAKEN MET DE SOUP’MASTER
1. Reinig alle groenten en snijd ze in stukjes.
2. Bevestig de messen (D) (afbeelding 6) en de roerder (C) (afbeelding 7) in de kom (E) .
3. Doe de in stukjes gesneden groenten in de roestvrije kom (E).
4. Voeg water aan de kom (E) toe tot minimaal markering « I » en maximaal markering «
II ».
5. Plaats het glazen deksel (B) op de kom (E).
*** Koken met de automatische modus ***
1. Schakel het apparaat in. U hoort een geluidssignaal. Het lcd-scherm licht op en toont
[0 :30].
2. Druk op de knop AUTO om het automatische programma te selecteren. Het woord AUTO
verschijnt rechtsboven in het lcd-scherm.
3. Druk op de knop START/STOP om het koken te starten. In het lcd-scherm verschijnt de
aanduiding
. Het lcd-scherm geeft afwisselend [0﹕30] en 100 weer. De kooktijd
neemt geleidelijk af.
4. Na 10 minuten koken begint het apparaat automatisch langzaam te mixen. Het lcdscherm geeft afwisselend [L﹕19] en 100 weer. « L » is de vooringestelde mixfunctie, « 19 »
is de resterende kooktijd.
5. Na 15 minuten begint het apparaat automatisch sneller te mixen. Het lcd-scherm geeft
afwisselend [H﹕4] en 100 weer. « H » is de vooringestelde mixfunctie, « 4 » is de
resterende kooktijd.
Na voltooiing van het automatische programma verschijnt [00:00] in het lcd-scherm en
geeft het apparaat een geluidssignaal (6 pieptonen).
Indien u dit wenst, kunt u kooktijd of een extra mixcyclus toevoegen.
65
- Extra kooktijd toevoegen:
1. Druk meerdere keren op de knop TEMP om de kooktemperatuur te selecteren.
2. Druk op de knop « + » of « - » om de kook- of bereidingstijd te selecteren.
3. Druk op de knop START/STOP om het geselecteerde programma te starten.
- Extra mixcyclus toevoegen:
1. Druk meerdere keren op de knop CHOP om de mixsnelheid te selecteren.
2. Druk op de knop « + » of « - » om de bereidingstijd te selecteren.
3. Druk op de knop START/STOP om het geselecteerde programma te starten.
Opmerking 1: bij inschakeling van het programma AUTO is de kooktemperatuur 100 °C
en zijn de mixsnelheden automatisch geselecteerd: L (langzaam) bij het begin van de
kookcyclus en H (snel) aan het einde van de kookcyclus. Indien u dit wenst, kunt u de
mixsnelheid wijzigen. Druk meerdere keren op de knop CHOP om de startsnelheid te
selecteren en druk op de knop START/STOP. Het apparaat begint te koken en onmiddellijk
te mixen met de snelheid die u hebt geselecteerd.
Het is niet mogelijk de kooktemperatuur te wijzigen in het programma AUTO.
Opmerking 2: tijdens het koken in het programma AUTO kunt u het deksel (B) openen
en voedingsmiddelen of kruiden toevoegen. Wanneer u het deksel (B) opent, worden de
kook- en mixfunctie gestopt. Nadat u het deksel (B) weer op de kom (E) hebt bevestigd,
moet u op de knop START/STOP drukken om de kook- en mixfunctie van het programma
AUTO opnieuw te starten.
Opmerking 3: u kunt het automatische kookprogramma op elk ogenblik stoppen en
annuleren. Druk op de knop START/STOP en vervolgens op de knop AUTO om het
automatische programma te annuleren.
Wenk voor recepten met knoflook, ui of gember: we raden u aan deze in de kom te
koken alvorens de andere voedingsmiddelen en groenten toe te voegen.
1. Bevestig de messen (D) en de roerder (C) in de roestvrije kom.
2. Doe geen ingrediënten in de roestvrije kom, sluit het glazen deksel en plaats de kom op
het motorblok.
3. Plaats de maatdop (A) boven op het glazen deksel (B).
4. Schakel het apparaat in. U hoort een geluidssignaal. Het lcd-scherm licht op en toont
[0 :30].
5. Druk meerdere keren op de knop TEMP om de temperatuur 120 °C te selecteren.
6. Druk op de knop START/STOP om de kom voor te verwarmen.
7. Open het glazen deksel na 1 minuut en doe de olie, de (fijngesneden) knoflook, ui of
gember in de kom.
8. Plaats het glazen deksel terug en druk meerdere keren op de knop CHOP. Selecteer de
snelheid S (mengen).
9. Druk op de knop ‘-‘ om de kooktijd in te stellen op 3 minuten.
10. Druk op de knop START/STOP.
11. Druk na 3 minuten op de knop START/STOP om het koken te stoppen en open het
deksel.
66
12. Voeg de groenten (en ingrediënten) en water toe aan de kom.
13. Plaats het glazen deksel terug en druk op de knop AUTO en vervolgens op de knop
START/STOP om het automatische kookprogramma te starten. Het woord AUTO
verschijnt rechtsboven in het lcd-scherm en de aanduiding
linksboven in het lcdscherm.
*** Een automatische startvertraging programmeren***
1. Schakel het apparaat in. U hoort een geluidssignaal, het lcd-scherm licht op en toont
[0 :30].
2. Druk op de knop AUTO om het automatische programma te selecteren. Het woord AUTO
verschijnt rechtsboven in het lcd-scherm.
3. Druk op de knop PROG. Het lcd-scherm toont [04﹕00] (4 uur).
4. Druk op de knop ”+’’ of ’’-’’ om de starttijd te selecteren (max: 24 uur). Als u bijvoorbeeld
[06﹕00] instelt, treedt het apparaat in werking na 6 uur.
Opmerking: de tijd wordt ingesteld in minuten. Als u eenmaal op « + » drukt, wordt de
tijdsaanduiding met een minuut verhoogd. Als u langer op de knop « + » drukt, wordt de
tijdsaanduiding verhoogd met 10 minuten.
5. Druk op de knop START/STOP. De timer begint af te tellen tot de start. De tijdsaanduiding
wordt geleidelijk verlaagd.
6. Wanneer de tijd verstreken is, treedt het apparaat automatisch in werking (koken op
100 °C gedurende 30 minuten en 2 mixsnelheden (L en H))
Opmerking: u kunt de geprogrammeerde startvertraging annuleren door eenmaal op de
knop START/STOP te drukken en vervolgens eenmaal op de knop PROG. Het woord PROG
in het lcd-scherm verdwijnt.
*** Koken in handmatige modus ***
1. Schakel het apparaat in. U hoort een geluidssignaal, het lcd-scherm licht op en toont
[0 :30].
2. Druk op de knop « + » of « - » om de kooktijd te selecteren (max: 24 uur).
Opmerking: de tijd wordt ingesteld in minuten. Als u eenmaal op « + » drukt, wordt de
tijdsaanduiding met een minuut verhoogd. Als u langer op de knop « + » drukt, wordt de
tijdsaanduiding verhoogd met 10 minuten.
3. Druk meerdere keren op de knop TEMP om de kooktemperatuur te selecteren.
4. Druk meerdere keren op de knop CHOP om de mixsnelheid te selecteren: S (mengen),
L (langzaam) of H (snel).
5. Druk op de knop START/STOP om het koken te starten. In het lcd-scherm verschijnt de
aanduiding
. Het lcd-scherm toont afwisselend [SNELHEID﹕TIJD] en [TEMPERATUUR].
De kooktijd neemt geleidelijk af. U kunt op elk ogenblik de kook- of bereidingstijd
verlengen of verkorten door op de knop « + » of « - » te drukken.
67
AANVULLENDE OPMERKINGEN:
1) Knop CHOP (mixen). Wanneer u het apparaat inschakelt, is de mixfunctie niet
geselecteerd. Stand O (OFF). Als u op de knop START/STOP drukt om het koken te starten,
wordt de mixfunctie niet geselecteerd. Het apparaat kookt uw voedingsmiddelen zonder
ze te mixen. Nadat u het apparaat in werking hebt gesteld, kunt u geen mixfunctie
toevoegen. Als u deze functie wilt toevoegen, drukt u op de knop START/STOP om het
huidige kookprogramma te stoppen, en vervolgens meerdere keren op de knop
CHOP om een mixfunctie te selecteren. Druk daarna op de knop START/STOP om het
koken en mixen te starten.
2) Knop TEMP (temperatuur). Wanneer u het apparaat inschakelt, is de temperatuur niet
geselecteerd. Stand O (OFF). Als u op de knop START/STOP drukt, zal het apparaat niet
verwarmen. Als u een kookfunctie wilt toevoegen, drukt u op de knop START/STOP om
het huidige programma te stoppen, en vervolgens meerdere keren op de knop TEMP
om de kooktemperatuur te selecteren. Druk daarna op de knop START/STOP om het
koken te starten.
3) Tijd instellen. Wanneer u het apparaat inschakelt, wordt de kook- of bereidingstijd
automatisch ingesteld op 30 minuten. U kunt de kook- of bereidingstijd wijzigen voor
of na het drukken op de knop START/STOP. Druk op de knop « + » of « - » om de kookof bereidingstijd te wijzigen.
4) Tijdens het koken of bereiden van voedingsmiddelen kunt u op de knop START/STOP
drukken om het koken (of de bereiding) te stoppen en de functies CHOP (mixen) en TEMP
(temperatuur) indien nodig te wijzigen.
5) Warm houden: nadat de kooktijd verstreken is, stopt het apparaat met koken en verdwijnt
de aanduiding
in het lcd-scherm. Het apparaat schakelt automatisch over naar de
«warmhoudfunctie» gedurende 60 minuten. De «warmhoudfunctie» bewaart uw soep
op een lage temperatuur. Als u een kooktemperatuur van 80 °C of meer hebt
geselecteerd, houdt het apparaat uw bereiding op 75 °C gedurende 60 minuten. Als u
een kooktemperatuur van 40 °C hebt geselecteerd, houdt het apparaat uw bereiding
op 40 °C. De mixfunctie wordt af en toe herhaald. Na 60 minuten wordt het apparaat
volledig uitgeschakeld.
*** Een handmatige kookcyclus met startvertraging programmeren ***
Nadat u de kooktemperatuur (knop TEMP), de mixsnelheid (knop CHOP) en de kooktijd
(knop « + » of « - ») hebt geselecteerd, drukt u op de knop PROG. In het lcd-scherm verschijnt
de aanduiding [04﹕00] (4 uur). Druk op de knop « + » of « - » om de starttijd te bepalen
(max: 24 uur). Als u bijvoorbeeld [06﹕00] instelt, treedt het apparaat in werking na 6 uur.
Opmerking: de tijd wordt ingesteld in minuten. Als u eenmaal op « + » drukt, wordt de
tijdsaanduiding met een minuut verhoogd. Als u langer op de knop « + » drukt, wordt de
tijdsaanduiding verhoogd met 10 minuten.
Druk op de knop START/STOP. De timer begint af te tellen tot de start. De tijdsaanduiding
wordt geleidelijk verlaagd. Het apparaat treedt automatisch in werking nadat de tijd
verstreken is.
68
KOKEN MET STOOM
1. Verwijder de messen en de roerder of het «menghulpstuk».
2. Vul de kom met water tot aan de markering « I ».
3. Plaats de kom op het motorblok.
4. Plaats de stoomkorf in de kom (Afbeelding 9).
5. Leg uw voedingsmiddelen in de stoomkorf.
6. Plaats het glazen deksel (B) op de kom (E).
7. Plaats de kom op het motorblok.
8. Druk meerdere keren op de knop TEMP om de kooktemperatuur te selecteren.
9. Druk op de knop « + » of « - » om de kook- of bereidingstijd te selecteren.
10. Druk op de knop START/STOP om het geselecteerde programma te starten.
VLEES EN GROENTEN IN DE ROESTVRIJE KOM KOKEN ZONDER TE
MIXEN
1. Verwijder de messen, de roerder of het «menghulpstuk» uit de roestvrije kom.
2. Plaats de voedingsmiddelen die u wilt koken in de roestvrije kom en voeg water toe.
3. Sluit het glazen deksel en plaats de kom op het motorblok.
4. Plaats de doseerdop (A) boven op het glazen deksel (B).
5. Schakel het apparaat in. U hoort een geluidssignaal, het lcd-scherm licht op en toont
[0 :30].
6. Druk meerdere keren op de knop TEMP om de kooktemperatuur te selecteren.
7. Druk op de knop START/STOP om het koken te starten. De kooktijd is ingesteld op 30
minuten. U kunt de kooktijd aanpassen door op de knop « + » of « - » te drukken.
JAM MAKEN MET DE SOUP’MASTER
1. Reinig alle vruchten en snijd ze in stukjes.
2. Plaats het «menghulpstuk» (K) in de kom (afbeelding 8).
3. Doe de stukjes fruit en de suiker in de roestvrije kom (E).
4. Plaats het glazen deksel (B) op de kom (E).
5. Plaats de kom op het motorblok.
6. Druk meerdere keren op de knop TEMP om de kooktemperatuur te selecteren.
7. Druk meerdere keren op de knop CHOP om de mixsnelheid te selecteren.
8. Druk op de knop « + » of « - » om de kook- of bereidingstijd te selecteren.
9. Druk op de knop START/STOP om het geselecteerde programma te starten.
BELANGRIJKE OPMERKINGEN
Te weinig water of vloeistof in de kom: als het niveau van de soep in de bereidingskom
daalt en zakt onder het minimumniveau (niveau « I »), stopt de kookfunctie automatisch.
De mixfunctie wordt voortgezet en het apparaat geeft ongeveer 20 keer een «pieptoon»
(u kunt de pieptoon uitschakelen door eenmaal op een willekeurige knop te drukken). Het
69
controlelampje knippert om u te waarschuwen dat u water moet toevoegen. Na 4 minuten
stopt de mixfunctie automatisch. Om verder te gaan met koken, voegt u water of een
andere vloeistof aan uw bereiding toe en drukt u op de knop START/STOP.
Glazen deksel niet of niet goed bevestigd: als het glazen deksel niet correct op de
roestvrije kom is bevestigd, werkt het apparaat niet. Het apparaat geeft 3 keer een
"pieptoon" en het controlelampje knippert om de gebruiker te waarschuwen dat het glazen
deksel correct op de roestvrije kom moet worden bevestigd.
UW SOUP’MASTER REINIGEN
1. Schakel het apparaat uit.
2. Neem de roestvrije kom van het motorblok.
3. Open het glazen deksel door het met de duim te draaien.
4. Giet de soep of uw bereiding in een kom en verwijder de messen en de roerder of het
«menghulpstuk».
Opmerking: verwijder de messen met de haak. Schuif de haak schuin onder de messen
en trek aan de haak om de messen te verwijderen.
5. Was de accessoires met water en een vloeibaar afwasmiddel en spoel ze af.
6. Was de kommen met water en een vloeibaar afwasmiddel en spoel ze af.
Opmerking: voor het wassen van de kom kunt u het «kwasthulpstuk» gebruiken.
Verwijder eerst de messen, de roerder of het «menghulpstuk» en plaats het «kwasthulpstuk»
in de kom. Giet water met een vloeibaar afwasmiddel in de roestvrije kom en bevestig het
glazen deksel op de kom. Schakel het apparaat in en druk meerdere keren op de knop CHOP
om de snelheid L (langzaam) te selecteren. Druk vervolgens op de knop "-" of "+" om de
tijd in te stellen (selecteer 1 minuut). Druk op de knop START/STOP om het reinigen te
starten. Druk na 1 minuut op de knop START/STOP om het reinigen te stoppen. Schakel
het apparaat uit, neem de kom van het motorblok, open het glazen deksel en verwijder
het «kwasthulpstuk». Spoel de roestvrije kom met schoon water en droog af.
Dompel het motorblok (F) en de roestvrije kom (E) niet onder in water of een andere
vloeistof.
Plaats het motorblok (F) en de roestvrije kom (E) niet in een vaatwasmachine.
Om milieu- en gezondheidsproblemen als gevolg van gevaarlijke stoffen
in elektrische en elektronische producten te vermijden, mogen apparaten
met dit symbool niet worden weggegooid met niet-gesorteerd
gemeentelijk afval, maar moeten ze worden teruggewonnen, opnieuw
gebruikt of gerecycled.
70
Recepten
GROENTESOEP
Bereid uw verse groentesoepen in een handomdraai. Serveer uw lekkere soepen
boordevol vitaminen als voorgerecht of hoofdmaaltijd.
Gebruik seizoengroenten en –producten om uw soepen nog beter te laten smaken.
Huissoepen kunnen 24 u worden bewaard. U kunt ze op voorhand bereiden en op het
ogenblik van de maaltijd opwarmen. Uw soepen kunnen eveneens worden ingevroren.
1 preiwit
1 kleine raap
4 wortelen
1 ui
1 courgette
2 kleine aardappelen
Zout
1. Reinig alle groenten en snijd ze in stukjes.
2. Bevestig de messen en de roerder in de kom.
3. Doe de stukjes groenten in de roestvrije kom.
4. Voeg water toe aan de kom tot minimaal markering “I” en maximaal markering « II ».
6. Plaats het glazen deksel op de kom.
U kunt de automatische modus selecteren om uw soep te koken en te mixen of
handmatig de kooktijd, kooktemperatuur en mixsnelheid instellen.
Koken in automatische modus
7. Schakel het apparaat in. U hoort een geluidssignaal. Het lcd-scherm licht op en toont
[0 :30].
8. Druk op de knop AUTO om het automatische programma te selecteren. Het woord AUTO
verschijnt rechtsboven in het lcd-scherm.
9. Druk op de knop START/STOP om het koken te starten.
Als u het programma AUTO inschakelt, is de kooktemperatuur 100 °C en zijn de
mixsnelheden automatisch geselecteerd: L (langzaam) bij het begin van de kookcyclus en
H (snel) aan het einde van de kookcyclus.
Koken in handmatige modus
7. Schakel het apparaat in. U hoort een geluidssignaal, het lcd-scherm licht op en toont
[0 :30].
8. Druk op de knop « + » of « - » om de kooktijd te selecteren (max: 24 uur).
Opmerking: de tijd wordt ingesteld in minuten. Als u eenmaal op « + » drukt, wordt de
tijdsaanduiding met een minuut verhoogd. Als u langer op de knop « + » drukt, wordt de
tijdsaanduiding verhoogd met 10 minuten.
71
9. Druk op de knop TEMP om de kooktemperatuur te selecteren.
10. Druk meerdere keren op de knop CHOP om de mixsnelheid te selecteren: S (mengen),
L (langzaam) of H (snel).
11. Druk op de knop START/STOP om het koken te starten. In het lcd-scherm verschijnt de
aanduiding
. Het lcd-scherm toont afwisselend [SNELHEID﹕ TIJD] en
[TEMPERATUUR]. De kooktijd neemt geleidelijk af. U kunt de kook- of bereidingstijd op
elk ogenblik verlengen of verkorten door op de knop « + » of « - » te drukken.
TOMATENSOEP
6 tomaten of 2 dozen gepelde tomaten
4 aardappelen
1 wortel
1 ui
4 teentjes knoflook
2 eetlepels olijfolie
1 groentebouillonblokje
1 liter water
Zout en peper
Basilicum
Blokjes mozzarella of feta of schilfers parmesan
1. Reinig alle groenten en snijd ze in stukjes.
2. Bevestig de messen en de roerder in de kom.
3. Doe de stukjes groenten, de olie, het bouillonblokje en enkele blaadjes basilicum in de
roestvrije kom.
4. Voeg water toe aan de kom tot minimaal markering “I” en maximaal markering « II ».
5. Plaats het glazen deksel op de kom.
6. Schakel het apparaat in. U hoort een geluidssignaal, het lcd-scherm licht op en toont
[0 :30].
7. Druk op de knop « + » of « - » om de kooktijd te selecteren. Selecteer 15 minuten.
8. Druk meerdere keren op de knop TEMP om de kooktemperatuur te selecteren. Selecteer
100 °C.
9. Druk meerdere keren op de knop CHOP om de mixsnelheid te selecteren. Selecteer S
(mengen).
10. Druk op de knop START/STOP om het koken te starten.
Na 10 minuten hoort u een pieptoon.
11. Druk op de knop « + » of « - » om de kooktijd te selecteren. Selecteer 5 minuten.
12. Druk meerdere keren op de knop TEMP om de kooktemperatuur te selecteren.
Selecteer 100 °C.
13. Druk meerdere keren op de knop CHOP om de mixsnelheid te selecteren. Selecteer H.
14. Druk op de knop START/STOP om het koken te starten.
Na 5 minuten hoort u een pieptoon. Uw soep is klaar. Serveer de soep met blokjes
mozzarella of feta of schilfers parmesan.
72
GASPACHO
Gaspacho (gazpacho in het Spaans) is een koude tomatensoep die wordt geserveerd met
in blokjes gesneden groenten. Heerlijk verfrissend als hoofdgerecht in de zomer of
geserveerd als kleine verrines bij het aperitief.
1 komkommer
1 rode paprika
1 groene paprika
1 kg tomaten
4 teentjes knoflook
1 ui
250 g broodkruim
1 dl olijfolie
4 dl gevogeltefond
1 dl wijnazijn
Zout
Peper
Cayennepeper of tabasco
1. Reinig alle groenten.
2. Pel de tomaten nadat u ze enkele minuten in kokend water hebt gelegd.
3. Ontpit de tomaten en snijd ze in stukjes.
4. Reinig de paprika’s, ui en knoflook en snijd ze in stukjes.
5. Pel de komkommer, snijd hem door om hem te ontpitten en snijd in stukjes.
6. Bewaar een portie van elke groente om als garnituur te gebruiken.
7. Bevestig de messen en de roerder in de roestvrije kom.
8. Doe de stukjes groenten in de kom, voeg zout en peper toe.
9. Voeg de olijfolie toe.
10. Plaats het glazen deksel op de kom.
11. Druk meerdere keren op de knop TEMP om OFF (niet koken) te selecteren.
12. Druk op de knop « + » of « - » om de bereidingstijd te selecteren. Selecteer 10 minuten.
13. Druk meerdere keren op de knop CHOP om de mixsnelheid te selecteren. Selecteer «
H » (snel).
14. Druk op de knop START/STOP om het programma te starten.
Na 10 minuten hoort u een pieptoon.
Meng in een afzonderlijke kom de koude gevogeltefond met de wijnazijn en voeg de
broodkruim toe. Meng goed.
15. Verwijder het glazen deksel.
16. Voeg het mengsel van gevogeltefond / azijn / broodkruim toe.
17. Plaats het glazen deksel op de kom.
73
18. Druk meerdere keren op de knop TEMP om OFF (niet koken) te selecteren.
19. Druk op de knop « + » of « - » om de bereidingstijd te selecteren. Selecteer 10 minuten.
20. Druk meerdere keren op de knop CHOP om de mixsnelheid te selecteren. Selecteer «
H » (snel).
21. Druk op de knop START/STOP om het programma te starten.
Na 10 minuten hoort u een pieptoon.
22. Giet de soep in een kom na de bereiding.
23. Voeg kruiden en peper toe naar eigen smaak.
Koel serveren met de groentebrunoise. U kunt ook stukjes geroosterd brood inwrijven met
knoflook. Voeg eventueel een ijsblokje aan de bereiding toe net voor het serveren voor
een heerlijk frisse soep.
HOLLANDSE SAUS
Hollandse saus is een warme emulsie van citroensap en boter. Hollandse saus wordt
gebruikt als basis voor talrijke saussoorten.
Uw saus smaakt heerlijk bij visfilets, rijst enz.…
3 eierdooiers
150 g boter
Sap van ½ citroen, lauw
Zout/peper
1. Plaats het «menghulpstuk» in de kom.
2. Doe de eierdooiers, een beetje zout en peper en 20 g boter in de roestvrije kom.
3. Plaats het glazen deksel op de kom.
4. Plaats de kom op het motorblok.
5. Druk meerdere keren op de knop TEMP om de kooktemperatuur te selecteren. Selecteer
40 °C.
6. Druk op de knop « + » of « - » om de kooktijd te selecteren. Selecteer 10 minuten.
7. Druk meerdere keren op de knop CHOP om de mixsnelheid te selecteren. Selecteer « S »
(mengen).
8. Druk op de knop START/STOP om het programma te starten.
Na 10 minuten hoort u een pieptoon.
9. Druk op de knop START/STOP om het apparaat te stoppen.
10. Druk meerdere keren op de knop TEMP om de kooktemperatuur te selecteren.
Selecteer 80 °C.
11. Druk op de knop « + » of « - » om de kooktijd te selecteren. Selecteer 5 minuten.
12. Druk meerdere keren op de knop CHOP om de mixsnelheid te selecteren. Selecteer «
S » (mengen).
13. Druk op de knop START/STOP om het programma te starten.
74
Voeg tijdens het 5 minuten koken op 80 °C de resterende boter toe via de bovenzijde van
het deksel (verwijder de doseerdop).
Na 5 minuten hoort u een pieptoon.
14. Druk op de knop START/STOP om het apparaat te stoppen.
15. Druk meerdere keren op de knop TEMP om de kooktemperatuur te selecteren.
Selecteer 40 °C.
16. Druk op de knop « + » of « - » om de kooktijd te selecteren. Selecteer 5 minuten.
17. Druk meerdere keren op de knop CHOP om de mixsnelheid te selecteren. Selecteer «
S » (mengen).
18. Druk op de knop START/STOP om het programma te starten.
19. Voeg het lauwe citroensap toe (als het sap te koud is, kan de saus schiften).
Na 5 minuten hoort u een pieptoon.
Mousselinesaus: voeg een portie slagroom toe aan de Hollandse saus net voor het
opdienen. Reken ongeveer een vierde van de inhoud.
Mosterdsaus: voeg mosterd toe aan de Hollandse saus naar eigen smaak.
Maltese saus: voeg het sap en de schil van bloedsinaasappel (in julienne gesneden en
geblancheerd) toe aan de Hollandse saus.
AARBEIENJAM
Eenvoudig en snel recept voor aarbeienjam. U kunt gariguettes, charlottes of elke andere
variëteit van aardbeien gebruiken. Voor uitstekende jam gebruikt u goed gerijpte
aardbeien. Hoe meer natuurlijke suikers de aardbeien bevatten, hoe lekkerder uw jam.
500 g aardbeien
500 g suiker
1. Reinig alle aardbeien, verwijder de steeltjes en snijd ze in stukjes.
2. Plaats het «menghulpstuk» in de kom.
3. Doe de stukjes aardbei en de suiker in de roestvrije kom.
4. Plaats het glazen deksel op de kom.
5. Plaats de kom op het motorblok.
6. Druk meerdere keren op de knop TEMP om de kooktemperatuur te selecteren. Selecteer
120 °C.
7. Druk op de knop « + » of « - » om de kooktijd te selecteren. Selecteer 10 minuten.
8. Druk op de knop START/STOP om het programma te starten.
Gedurende 10 minuten kookt het apparaat het fruit met de suiker. Na 10 minuten hoort
u een pieptoon.
75
9. Druk op de knop START/STOP om het apparaat te stoppen.
10. Druk meerdere keren op de knop TEMP om de kooktemperatuur te selecteren.
Selecteer 80 °C.
11. Druk op de knop « + » of « - » om de kooktijd te selecteren. Selecteer 30 minuten.
12. Druk meerdere keren op de knop CHOP om de mixsnelheid te selecteren. Selecteer «
S » (mengen).
13. Druk op de knop START/STOP om het programma te starten.
Gedurende 30 minuten kookt en mengt het apparaat de aardbeien.
Na 30 minuten hoort u een pieptoon. Om te weten of uw jam klaar is, giet u een druppel
in een koud bord. Als de druppel dik wordt, is de jam klaar. Als de druppel niet dik wordt,
voegt u kooktijd toe met een temperatuur van 80 °C en mixsnelheid «S».
De potten klaarmaken: idealiter kookt u de potten en de deksels en laat u ze drogen
alvorens ze te vullen. Giet de jam in de potten, sluit de potten en draai ze om. Wacht tot
de jam koud is om de potten weer rechtop te zetten.
CHOCOLADECRÈME
Eenvoudig recept, u kunt de crème ook bereiden met melkchocolade.
Uw potjes crème smaken heerlijk bij koekjes, fruit, luxebroodjes…
1 l melk
120 g pure chocolade
3 eierdooiers
80 g suiker
40 g bloem
1. Klop de eierdooiers, de suiker en de bloem in een aparte kom.
2. Plaats het «menghulpstuk» in de kom.
3. Giet de melk in de roestvrije kom.
4. Plaats het glazen deksel op de kom.
5. Plaats de kom op het motorblok.
6. Druk meerdere keren op de knop TEMP om de kooktemperatuur te selecteren. Selecteer
80 °C.
7. Druk op de knop « + » of « - » om de kooktijd te selecteren. Selecteer 6 minuten.
8. Druk op de knop START/STOP om het programma te starten.
Na 6 minuten hoort u een pieptoon. De melk moet koken. Als ze niet kookt, voegt u nog
enkele minuten kooktijd toe.
9. Druk op de knop START/STOP om het apparaat te stoppen.
10. Voeg de chocolade in stukjes toe (via de opening boven op het deksel).
11. Druk meerdere keren op de knop TEMP om de kooktemperatuur te selecteren.
Selecteer 80 °C.
76
12. Druk op de knop « + » of « - » om de kooktijd te selecteren. Selecteer 5 minuten.
13. Druk meerdere keren op de knop CHOP om de mixsnelheid te selecteren. Selecteer «
S » (mengen).
14. Druk op de knop START/STOP om het programma te starten.
Na 5 minuten hoort u een pieptoon.
15. Druk op de knop START/STOP om het apparaat te stoppen.
16. Open het deksel van de roestvrije kom en voeg het mengsel van eierdooiers / suiker
/ bloem toe aan de kom.
17. Sluit het deksel van de kom opnieuw.
18. Druk meerdere keren op de knop TEMP om de kooktemperatuur te selecteren.
Selecteer 100 °C.
19. Druk op de knop « + » of « - » om de kooktijd te selecteren. Selecteer 5 minuten.
20. Druk meerdere keren op de knop CHOP om de mixsnelheid te selecteren. Selecteer «
S » (mengen).
21. Druk op de knop START/STOP om het programma te starten.
Na 5 minuten hoort u een pieptoon. Giet de crème in kleine schaaltjes en laat afkoelen in
de koelkast.
PERENMOES
Maak zelf moes in 30 minuten.
De moes smaakt heerlijk bij yoghurt, kruidenkoek, droge taarten, saus van rode vruchten…
5 peren
Suiker
Water
1. Reinig de peren, schil ze, verwijder het klokhuis en snijd ze in stukjes.
2. Plaats het «menghulpstuk» in de kom.
3. Doe de stukjes peer in de roestvrije kom en voeg suiker naar eigen smaak toe.
4. Plaats het glazen deksel op de kom.
5. Plaats de kom op het motorblok.
6. Druk meerdere keren op de knop TEMP om de kooktemperatuur te selecteren. Selecteer
100 °C.
7. Druk op de knop « + » of « - » om de kooktijd te selecteren. Selecteer 10 minuten.
8. Druk op de knop START/STOP om het programma te starten.
Gedurende 10 minuten kookt het apparaat de peren met de suiker. Na 10 minuten hoort
u een pieptoon.
9. Druk op de knop START/STOP om het apparaat te stoppen.
77
10. Druk meerdere keren op de knop TEMP om de kooktemperatuur te selecteren.
Selecteer 100 °C.
11. Druk op de knop « + » of « - » om de kooktijd te selecteren. Selecteer 15 minuten.
12. Druk meerdere keren op de knop CHOP om de mixsnelheid te selecteren. Selecteer « S »
(mengen).
13. Druk op de knop START/STOP om het programma te starten.
Na 15 minuten hoort u een pieptoon. Uw moes is klaar. Laat afkoelen alvorens te
serveren.
MILKSHAKE MET DIVERSE VRUCHTEN
Milkshake is een gemixte drank op basis van fruit en melk.
Eenvoudig en snel klaar te maken voor 100 % genieten! Pas uw recepten aan naar eigen
smaak, en mix soja, banaan, kiwi, druiven, perziken, melk, yoghurt, ijs, honing…
8 aardbeien
5 kiwi’s
2 bananen
300 ml koude melk
1. Reinig de vruchten, schil de kiwi's en bananen, verwijder het steeltje van de aardbeien
en snijd het fruit in stukjes.
2. Bevestig de messen en de roerder in de kom.
3. Doe de stukjes fruit in de roestvrije kom en voeg de melk toe.
4. Plaats het glazen deksel op de kom.
5. Druk meerdere keren op de knop TEMP om OFF (niet koken) te selecteren.
6. Druk op de knop « + » of « - » om de bereidingstijd te selecteren. Selecteer 10 minuten.
7. Druk meerdere keren op de knop CHOP om de mixsnelheid te selecteren. Selecteer « H »
(snel).
14. Druk op de knop START/STOP om het programma te starten.
Na 10 minuten hoort u een pieptoon. Pas de mixtijd aan zodat de vruchten goed gemixt
worden. Voeg suiker toe naar eigen smaak.
78
A : Tapón dosificador
B: Tapadera de cristal
B
C: Revolvedor
D: Cuchillas
H
C
E: Jarra de acero inoxidable
F: Bloque del motor
D
I
G: Panel de control
H: Gancho para extraer las
cuchillas
E
J
I: Cesta de cocción al vapor
J: Accesorio “Escobilla” (para
limpiar la jarra)
K
F
K: Accesorio “Mezclador” para
realizar mermeladas,
compotas, cremas o salsas.
G
B1 : Enganche de fijación
B2 : Sistema de cierre
B1
79
B2
Instrucciones
A
Imagen 1
Imagen 2
Imagen 3
Imagen 4
Imagen 5
Imagen 6
Imagen 7
Imagen 8
Imagen 9
80
Manual de instrucciones de Soup’Master
Lea atentamente este manual de instrucciones y guárdelo en un lugar seguro. Si regala o
presta su aparato a otra persona, no olvide darle este manual de instrucciones. Retire el
embalaje y guárdelo hasta que esté seguro de que el aparato funciona correctamente.
Características técnicas
Voltaje
120V, 220 ~240V
Frecuencia
50/60 Hz
Potencia
1000 W
Capacidad de la jarra
Mín. 1 l - Máx. 1,5 l
A fin de reducir al máximo los riesgos de incendio, electrocución o heridas, siga en todo
momento las instrucciones de seguridad durante el uso de aparatos eléctricos, en
especial las siguientes:
Medidas de precaución importantes
1. Este aparato deberá ser utilizado sólo por o bajo la supervisión de un adulto responsable.
Utilice y mantenga el aparato fuera del alcance de los niños.
2. Este aparato no es un juguete. No permita que sus hijos pequeños jueguen con él.
3. No sumerja en agua o cualquier otro líquido el aparato, la jarra, el cable, el
enchufe o el bloque del motor. No utilice el aparato en el lavabo, cerca de
una fuente de agua o al aire libre.
4. No coloque el aparato en un entorno húmedo o mojado y manténgalo fuera
del alcance de rayos solares.
5. Coloque el aparato en una superficie plana, estable, sólida y seca.
6. No levante o desplace el aparato durante su funcionamiento.
7. No levante el aparato por el cable. Levántelo siempre por la base.
8. No utilice el aparato si la tapadera no está en su sitio.
9. No extraiga la jarra de cocción de su sitio cuando el motor esté en marcha.
10. La jarra se calienta mucho durante la cocción. No toque la superficie caliente del aparato.
No retire la tapadera de la jarra durante la cocción, corre el riesgo de quemarse. Utilice
un guante de cocina para extraer la tapadera.
11. Es posible que se libere vapor del tapón dosificador durante la cocción, procure no
quemarse.
12. Vigile que la jarra no rebose. No llene la jarra por encima de la cantidad recomendada.
Si se filtra algún líquido en el bloque del motor, éste podría estropearse.
13. No introduzca las manos en la jarra. Las cuchillas cortan. Utilice el gancho para extraerlas.
14. No introduzca ningún utensilio (cuchara, espátula, etc.) en la jarra. Utilice los accesorios
suministrados.
15. Cuando el motor haya trabajado continuadamente durante todo un ciclo, espere al
menos 5 minutos antes de iniciar un nuevo ciclo.
81
16. No haga funcionar el aparato vacío.
17. Procure que el cable de alimentación no cuelgue para evitar tropezarnos con él o
engancharnos involuntariamente.
18. Mantenga el aparato y el cable de alimentación lejos de placas eléctricas, placas de
cocción o fogones.
19. Desenchufe el aparato cuando no lo utilice y déjelo enfriar antes de desplazarlo o
limpiarlo.
20. Desenchufe el aparato antes de poner o extraer sus piezas o accesorios.
21. Utilice el aparato sólo para los fines descritos en este manual de instrucciones.
22. No conecte el aparato a un temporizador externo o a un sistema de control remoto.
23. Enchufe el aparato sólo en una toma de corriente con toma de tierra.
24. No utilice el aparato si se ha caído o dañado o si no funciona correctamente.
25. Se recomienda examinar regularmente el cable de alimentación para detectar
cualquier signo de posible deterioro. No deberá utilizar nunca el aparato si el cable
estuviera dañado.
26. Si el cable de alimentación está dañado, éste sólo podrá ser sustituido por el fabricante,
su servicio de postventa o un técnico autorizado por el fabricante para evitar
situaciones de peligro.
Sólo para uso doméstico
Antes de usar el aparato por primera vez, lea el apartado “cuidado y mantenimiento” y limpie
cuidadosamente el aparato y sus accesorios para eliminar el polvo de fabricación.
No sumerja en agua o cualquier otro líquido el bloque del motor (F) o la jarra de acero
inoxidable (E).
No ponga el bloque del motor (F) o la jarra de acero inoxidable (E) en el lavavajillas.
FAMILIARIZACIÓN CON EL APARATO
Escoger el accesorio que mejor se adapta a cada receta.
Sopas y compotas: cuchillas (D) y revolvedor (C)
Salsas, cremas, compotas, mermeladas: accesorio “mezclador” (K)
Cocción al vapor: cesta de cocción al vapor
Cómo fijar la tapadera (B) en la jarra de acero inoxidable (E)
Debe fijar siempre la tapadera (B) en la jarra de acero inoxidable (E).
Cuando la tapadera no está fijada o está mal fijada se activa un sistema de seguridad.
Coloque la tapadera de cristal (B) en la jarra como se describe a continuación:
1. Ajuste el enganche de fijación (B1) en el reborde de la jarra de acero inoxidable (E).
(Imagen 1)
2. Baje la tapadera de cristal (B) hasta la jarra de acero inoxidable (E). El sistema de cierre
(B2) de la tapadera debe situarse a la derecha del asa de la jarra. (Imagen 2)
3. Gire la tapadera de cristal (B) con los dedos pulgar e índice para que el sistema de cierre
(B2) de la tapadera se sitúe en la prolongación del asa de la jarra. (Imagen 3)
82
4. Coloque el tapón dosificador (A) en el vértice de la tapadera de cristal (B).
Cómo fijar la jarra de acero inoxidable (E) en el bloque del motor (F)
1. Aliñe el asa de la jarra con la ranura prevista a este propósito en el bloque del motor. De
esta manera, las piezas de sujeción situadas debajo de la jarra se acoplarán con las piezas
de sujeción situadas sobre el bloque del motor. (Imagen 4)
2. Presione ligeramente el vértice de la jarra hasta que las piezas de sujeción se acoplen
perfectamente.
Si observa una separación entre la jarra (E) y el bloque del motor (F), significa que la
jarra no está bien fijada sobre el bloque del motor. (Imagen 5)
Si no observa ninguna separación, significa que la jarra de cocción está
correctamente fijada sobre el bloque del motor.
PANEL DE CONTROL
8
9
10
11
1
7
2
6
3
5
4
1. Piloto luminoso de funcionamiento
2. Botón START/STOP
(Encendido/Apagado)
3. Botón AUTO (Programa Automático)
4. Botones para ajustar el tiempo
5. Botón PROG (programación inicio
diferido)
6. Botón TEMP (Ajuste de temperatura)
40 ℃, 80 ℃, 100 ℃, 120 ℃ y OFF
7. Botón CHOP (Ajuste de velocidad de
mezclado)
H (rápido), L (lento), S (mezclado) y O
(OFF)
8. Cocción en curso
9. Función PROG (programación inicio
diferido) seleccionada
10. Programa AUTO seleccionado
11. Visualización que alterna el tiempo
restante de cocción, la temperatura
seleccionada y la velocidad de
mezclado seleccionada.
83
CÓMO HACER UNA SOPA CON SOUP’MASTER
1. Limpie las verduras y córtelas en trozos pequeños.
2. Fije las cuchillas (D) (imagen 6) y el revolvedor (C) (imagen 7) en la jarra (E).
3. Coloque las verduras cortadas en la jarra de acero inoxidable (E)
4. Añada agua en la jarra (E). El mínimo es hasta la marca “l” y el máximo hasta la marca “II”.
5. Coloque la tapadera de cristal (B) sobre la jarra (E).
*** Cocción en modo automático ***
1. Enchufe el aparato. Escuchará una señal sonora. La pantalla LCD se encenderá y
mostrará [0:30].
2. Presione el botón AUTO para seleccionar el programa automático. La palabra AUTO
aparecerá arriba a la derecha de la pantalla LCD.
3. Presione el botón START/STOP para iniciar la cocción. En la pantalla LCD, aparecerá
.
La pantalla LCD mostrará alternadamente [0:30] y 100. El tiempo de cocción irá
disminuyendo.
4. De forma automática, pasados 10 minutos de cocción, el aparato empezará a batir
lentamente. La pantalla LCD mostrará alternadamente [L: 19] y 100. “L” indica el modo
de batido preprogramado y “19” indica el tiempo de cocción.
5. De forma automática, pasados 15 minutos, el aparato empezará a batir más rápidamente.
La pantalla LCD mostrará entonces alternadamente [H: 4] y 100.“H” es el modo de batido
preprogramado, “4” es el tiempo de cocción restante.
Al final del programa automático, la pantalla LCD mostrará [00:00] y el aparato hará sonar
6 tonos.
Si lo desea, puede añadir más tiempo de cocción o un ciclo de batido suplementario.
- Añadir más tiempo de cocción:
1. Presione varias veces el botón TEMP para seleccionar la temperatura de cocción.
2. Presione los botones “+” o “-“ para seleccionar el tiempo de cocción o de preparación.
3. Presione el botón START/STOP para iniciar el programa seleccionado.
- Añadir un ciclo de batido suplementario:
1. Presione varias veces el botón CHOP para seleccionar la velocidad de batido.
2. Presione los botones “+” o “-“ para seleccionar el tiempo de preparación.
3. Presione el botón START/STOP para iniciar el programa seleccionado.
Comentario 1: Si activa el programa AUTO, la temperatura de cocción será de 100°C y las
velocidades de batido se seleccionarán automáticamente – L (Lento) al inicio de la cocción
y H (rápido) al final de la cocción. Si lo desea, puede cambiar las velocidades de batido. Para
ello, presione el botón CHOP varias veces para seleccionar la velocidad de inicio y luego
presione el botón START/STOP. El aparato empezará a cocer y a batir a la velocidad
seleccionada.
El programa AUTO no le permite cambiar la temperatura de cocción.
84
Comentario 2: Durante la cocción en programa AUTO, puede abrir la tapadera (B) y agregar
alimentos o especias. Cuando abra la tapadera (B), la cocción y la función de batido se
detendrán. Cuando vuelva a fijar la tapadera (B) en la jarra (E), presione el botón
START/STOP para reactivar la cocción y el batido del programa AUTO.
Comentario 3: Puede detener y anular la cocción automática en cualquier momento. Para
ello, presione el botón START/STOP y luego el botón AUTO para anular el programa
automático.
Consejo para recetas que incluyan ajo, cebolla o jengibre: le recomendamos que los
cueza en la jarra antes de añadir más ingredientes.
1. Fije las cuchillas (D) y el revolvedor (C) en la jarra de acero inoxidable.
2. No introduzca ningún ingrediente en la jarra de acero inoxidable, cierre la jarra con la
tapadera y coloque la jarra sobre el bloque del motor.
3. Coloque el tapón dosificador (A) en el vértice de la tapadera de cristal (B).
4. Enchufe el aparato. Escuchará una señal sonora. La pantalla LCD se encenderá y
mostrará [0:30].
5. Presione varias veces el botón TEMP para seleccionar la temperatura 120°C.
6. Presione el botón START/STOP para precalentar la jarra.
7. Pasado 1 minuto, abra la tapadera de cristal y añada aceite en la jarra, así como el ajo,
la cebolla o el jengibre (cortado muy fino).
8. Vuelva a colocar la tapadera de cristal y presione el botón CHOP varias veces. Seleccione
la velocidad S (mezclado).
9. Presione el botón "-" para ajustar los tiempos de cocción a 3 minutos.
10. Presione el botón START/STOP.
11. Pasados 3 minutos, presione el botón START/STOP para detener la cocción y luego abra
la tapadera.
12. Añada las verduras (y demás ingredientes) y el agua en la jarra.
13. Vuelva a colocar la tapadera de cristal y presione el botón AUTO y luego el botón
START/STOP para iniciar el programa automático de cocción. La palabra AUTO
aparecerá arriba a la derecha de la pantalla LCD y
aparecerá arriba a la izquierda
de la pantalla LCD.
*** Cómo programar un inicio diferido automático ***
1. Enchufe el aparato. Escuchará una señal sonora y la pantalla LCD se encenderá y mostrará
[0:30].
2. Presione el botón AUTO para seleccionar el programa automático. La palabra AUTO
aparecerá arriba a la derecha de la pantalla LCD.
3. Presione el botón PROG. La pantalla LCD mostrará [04﹕00] (4 horas).
4. Presione los botones “+” o “-” para seleccionar el tiempo de inicio (Máx.: 24 horas). Si, por
ejemplo, introduce [06﹕00], el aparato se pondrá en marcha al cabo de seis horas.
Observación: el ajuste de tiempo se realiza en minutos. Si presiona una vez el botón “+”,
aumentará el tiempo en un minuto. Si oprime más tiempo el botón “+”, aumentará el tiempo
en 10 minutos.
85
5. Presione el botón START/STOP. Comenzará una cuenta atrás antes del inicio. El tiempo
irá disminuyendo.
6. Cuando el tiempo de agote, el aparato se pondrá en marcha automáticamente (cocción
a 100°C durante 30 minutos y 2 velocidades de batido (L y H).
Observación: Puede detener la programación de inicio diferido presionando una vez el
botón START/STOP y luego una vez el botón PROG. La palabra PROG desaparecerá de la
pantalla LCD.
*** Cocción en modo manual ***
1. Enchufe el aparato. Escuchará una señal sonora y la pantalla LCD se encenderá y mostrará
[0:30].
2. Presione el botón “+” o “-” para seleccionar la duración de la cocción (Máx.: 24 horas).
Observación: el ajuste de tiempo se realiza en minutos. Si presiona una vez el botón “+”,
aumentará el tiempo en un minuto. Si oprime más tiempo el botón “+”, aumentará el tiempo
en 10 minutos.
3. Presione varias veces el botón TEMP para seleccionar la temperatura de cocción.
4. Presione varias veces el botón CHOP para seleccionar la velocidad de batido: S
(mezclado), L (lento) o H (rápido).
5. Presione el botón START/STOP para iniciar la cocción. En la pantalla LCD, aparecerá
. La
pantalla LCD mostrará alternadamente [VELOCIDAD: TIEMPO] y [TEMPERATURA]. El
tiempo de cocción irá disminuyendo. En todo momento, podrá prolongar o reducir el
tiempo de cocción o de preparación presionando los botones “+” o “-”.
NOTAS COMPLEMENTARIAS:
1) Botón CHOP (mezclado). Cuando enchufe el aparato, no estará seleccionado el modo
de batido. Posición O (OFF). Si presiona el botón START/STOP para iniciar la cocción, la
función de batido no estará seleccionada. El aparato cocerá los alimentos sin batirlos.
Cuando el aparato esté en marcha, no podrá añadir un ciclo de batido. Si desea añadir
este función, presione el botón START/STOP para detener el programa de cocción en
curso, y luego, presione el botón CHOP varias veces para seleccionar el batido deseado.
Presione luego el botón START/STOP para iniciar la cocción y el batido.
2) Botón TEMP (temperatura). Cuando enchufe el aparato, la temperatura no estará
seleccionada. Posición O (OFF). Si presiona el botón START/STOP, el aparato no calentará.
Si desea añadir una cocción, presione el botón START/STOP para detener el programa
en curso, y luego, presione el botón TEMP varias veces para seleccionar la temperatura
de cocción. A continuación, presione el botón START/STOP para iniciar la cocción.
3) Selección del tiempo. Cuando enchufe el aparato, el tiempo se cocción o preparación
se ajustará automáticamente a 30 minutos. Puede modificar el tiempo de cocción o
preparación antes o después de haber presionado el botón START/STOP. Presione los
botones “+” o “-“ para modificar el tiempo de cocción o de preparación.
4) Durante la cocción o preparación, puede presionar el botón START/STOP para detener
la cocción (o preparación) y cambiar así las funciones CHOP (mezclado) y TEMP
(temperatura) si fuera necesario.
86
5) Mantenimiento de calor: En cuanto se agote el tiempo de cocción, el aparato dejará de
cocer y
desaparecerá de la pantalla LCD. El aparato pasará entonces automáticamente
a la función “mantenimiento de calor” durante 60 minutos. La función “mantenimiento
de calor” mantiene su sopa a baja temperatura. Si ha seleccionado una temperatura de
cocción de 80°C o más, el aparato mantendrá su preparación a 75°C durante 60 minutos.
Si ha seleccionado una temperatura de cocción de 40°C, el aparato mantendrá su
preparación a 40°C. El batido continuará a intervalos. Pasados 60 minutos, el aparato se
apagará completamente.
*** Cómo programar una cocción en modo manual con un inicio diferido ***
Después de haber seleccionado la temperatura de cocción (botón TEMP), la velocidad de
batido (botón CHOP) y el tiempo de cocción (botones “+” o “-”), presione el botón PROG.
En la pantalla LCD, aparecerá [04:00] (4 horas). Presione los botones “+” o “-” para definir el
tiempo de inicio (Máx.: 24 horas). Si, por ejemplo, introduce [06﹕00], el aparato se pondrá
en marcha al cabo de seis horas.
Observación: el ajuste de tiempo se realiza en minutos. Si presiona una vez el botón “+”,
aumentará el tiempo en un minuto. Si oprime más tiempo el botón “+”, aumentará el tiempo
en 10 minutos.
Presione el botón START/STOP. Comenzará una cuenta atrás antes del inicio. El tiempo irá
disminuyendo. El aparato se pondrá en marcha automáticamente en cuanto el tiempo se
agote.
COCCIÓN AL VAPOR
1. Extraiga las cuchillas y el revolvedor o el accesorio “Mezclador”.
2. Llene la jarra con agua hasta la marca “l”.
3. Coloque la jarra sobre el bloque del motor.
4. Coloque la cesta de cocción al vapor en el interior de la jarra ( Imagen 9).
5. Introduzca los ingredientes en la cesta de cocción al vapor.
6. Coloque la tapadera de cristal (B) sobre la jarra (E).
7. Coloque la jarra sobre el bloque del motor.
8. Presione varias veces el botón TEMP para seleccionar la temperatura de cocción.
9. Presione los botones “+” o “-“ para seleccionar el tiempo de cocción o de preparación.
10. Presione el botón START/STOP para iniciar el programa seleccionado.
COCCIÓN SIN BATIDO DE CARNE Y VERDURAS EN LA JARRA DE
ACERO INOXIDABLE
1. Extraiga las cuchillas y el revolvedor o el accesorio “Mezclador” de la jarra de acero
inoxidable.
2. Introduzca los alimentos que desee cocer en la jarra de acero inoxidable y añada agua.
3. Cierre la jarra con la tapadera de cristal y coloque la jarra sobre el bloque del motor.
4. Coloque el tapón dosificador (A) en el vértice de la tapadera de cristal (B).
87
5. Enchufe el aparato. Escuchará una señal sonora y la pantalla LCD se encenderá y mostrará
[0:30].
6. Presione varias veces el botón TEMP para seleccionar la temperatura de cocción.
7. Presione el botón START/STOP para iniciar la cocción. El tiempo de cocción está
ajustado a 30 minutos. Presione los botones “+” o “-“ para ajustar el tiempo de cocción.
CÓMO HACER UNA MERMELADA CON SOUP’MASTER
1. Limpie las frutas y córtelas en trozos pequeños.
2. Coloque el accesorio “Mezclador” (K) en la jarra (imagen 8).
3. Coloque la fruta cortada y el azúcar en la jarra de acero inoxidable (E).
4. Coloque la tapadera de cristal (B) sobre la jarra (E).
5. Coloque la jarra sobre el bloque del motor.
6. Presione varias veces el botón TEMP para seleccionar la temperatura de cocción.
7. Presione varias veces el botón CHOP para seleccionar la velocidad de batido.
8. Presione los botones “+” o “-“ para seleccionar el tiempo de cocción o de preparación.
9. Presione el botón START/STOP para iniciar el programa seleccionado.
OBSERVACIONES IMPORTANTES
Capacidad de agua o de líquido insuficiente: Si el nivel de sopa en la jarra de cocción
se ha reducido y es inferior al nivel mínimo (nivel “l”), la cocción se detendrá
automáticamente. El batido continuará y el aparato emitirá un mismo tono
aproximadamente 20 veces (puede presionar cualquier botón una vez para detener el
tono), el piloto luminosos parpadeará para avisarle de que debe añadir agua. Pasados 4
minutos, la función de batido de detendrá automáticamente. Para continuar la cocción,
añada agua o un líquido a su preparación y presione el botón START/STOP.
Tapadera de cristal no fijada o mal fijada: Si la tapadera de cristal no está correctamente
fijada a la jarra de acero inoxidable, el aparato no funcionará. El aparato emitirá 3 tonos y
el piloto luminoso parpadeará para avisarle de que debe fijar la tapadera de cristal en la
jarra de acero inoxidable correctamente.
CÓMO LIMPIAR SU APARATO SOUP’MASTER
1. Desenchufe el aparato.
2. Extraiga la jarra de acero inoxidable del bloque del motor.
3. Abra la tapadera de cristal girándola con el dedo pulgar.
4. Vierta la sopa o su preparación en un recipiente y extraiga las cuchillas y el revolvedor
o el accesorio “mezclador”.
Observación: Para extraer las cuchillas, utilice el gancho. Deslice el gancho por debajo las
cuchillas en dirección oblicua y tire del gancho para soltar las cuchillas.
88
5. Lave los accesorios con agua y jabón y enjuáguelos.
6. Lave la jarra con agua y jabón y enjuáguela.
Observación: Puede utilizar el accesorio “escobilla” para lavar la jarra. Para ello, después
de haber desenchufado el aparato y extraído las cuchillas, el revolvedor o el accesorio
“mezclador”, instale el accesorio “escobilla” en la jarra. Vierta agua y jabón en la jarra de acero
inoxidable y fije la tapadera de cristal en la jarra. Enchufe el aparato y presione el botón
CHOP varias veces para seleccionar la velocidad L (lento) y luego presione los botones “” ou “+” para ajustar el tiempo (seleccione 1 minuto). Presione el botón START/STOP para
iniciar el proceso de limpieza. Pasado 1 minuto, presione el botón START/STOP para iniciar
el proceso de limpieza. Desenchufe el aparato, extraiga la jarra del bloque del motor, abra
la tapadera de cristal y extraiga el accesorio “escobilla”. Enjuague la jarra de acero
inoxidable y séquela.
No sumerja en agua o cualquier otro líquido el bloque del motor (F) o la jarra de acero
inoxidable (E).
No ponga el bloque del motor (F) o la jarra de acero inoxidable (E) en el lavavajillas.
Para evitar problemas medioambientales y de salud debido a las substancias
nocivas con que se fabrican los productos eléctricos y electrónicos, los
aparatos con este icono no se deben desechar junto con el resto de residuos
domésticos, sino que se deben recuperar, reutilizar o reciclar.
Recetas
SOPA DE VERDURAS
Cocine de forma fácil y sencilla sopas de verduras frescas. Estas sopas, llenas de vitaminas,
son deliciosas como primer plato o para una comida completa.
Para obtener sopas más sabrosas, emplee verduras y productos de temporada.
Una sopa casera se conserva durante 24h. Puede prepararla de antemano para calentarla
en el momento de la comida. Asimismo, las puede congelar.
1 blanco de puerro
1 nabo pequeño
4 zanahorias
1 cebolla
1 calabacín
2 patatas pequeñas
Sal
1. Limpie las verduras y córtelas en trozos pequeños.
2. Fije las cuchillas y el revolvedor en la jarra.
89
3. Coloque las verduras cortadas en la jarra de acero inoxidable.
4. Añada agua en la jarra. El mínimo es hasta la marca “l” y el máximo hasta la marca “II”.
5. Coloque la tapadera de cristal sobre la jarra.
Puede seleccionar el modo automático para cocer y batir la sopa o bien seleccionar
manualmente el tiempo de cocción, la temperatura de cocción y la velocidad de batido.
Cocción en modo automático
6. Enchufe el aparato. Escuchará una señal sonora. La pantalla LCD se encenderá y
mostrará [0:30].
7. Presione el botón AUTO para seleccionar el programa automático. La palabra AUTO
aparecerá arriba a la derecha de la pantalla LCD.
8. Presione el botón START/STOP para iniciar la cocción.
Si activa el programa AUTO, la temperatura de cocción será de 100°C y las velocidades de
batido se seleccionan automáticamente – L (Lento) al inicio de la cocción y H (rápido) al
final de la cocción.
Cocción en modo manual
7. Enchufe el aparato. Escuchará una señal sonora y la pantalla LCD se encenderá y mostrará
[0:30].
8. Presione el botón “+” o “-” para seleccionar la duración de la cocción (Máx.: 24 horas).
Observación: el ajuste de tiempo se realiza en minutos. Si presiona una vez el botón “+”,
aumentará el tiempo en un minuto. Si oprime más tiempo el botón “+”, aumentará el tiempo
en 10 minutos.
9. Presione varias veces el botón TEMP para seleccionar la temperatura de cocción.
10. Presione varias veces el botón CHOP para seleccionar la velocidad de batido: S
(mezclado), L (lento) o H (rápido).
11. Presione el botón START/STOP para iniciar la cocción. En la pantalla LCD, aparecerá
.
La pantalla LCD mostrará alternadamente [VELOCIDAD: TIEMPO] y [TEMPERATURA]. El
tiempo de cocción irá disminuyendo. En todo momento, podrá prolongar o reducir el
tiempo de cocción o de preparación presionando los botones “+” o “-”.
SOPA DE TOMATES
6 tomates o 2 latas de tomates pelados
4 patatas
1 zanahoria
1 cebolla
4 dientes de ajo
2 cucharas soperas de aceite de oliva
1 cubito de caldo de verduras
1 litro de agua
Sal y pimienta
Albahaca
Dados de mozzarella o queso feta o virutas de parmesano
90
1. Limpie las verduras y córtelas en trozos pequeños.
2. Fije las cuchillas y el revolvedor en la jarra.
3. Introduzca en la jarra de acero inoxidable las verduras cortadas, el aceite, el cubito de
caldo y unas hojas de albahaca.
4. Añada agua en la jarra. El mínimo es hasta la marca “l” y el máximo hasta la marca “II”.
5. Coloque la tapadera de cristal sobre la jarra.
6. Enchufe el aparato. Escuchará una señal sonora y la pantalla LCD se encenderá y mostrará
[0:30].
7. Presione el botón “+” o “-” para seleccionar la duración de la cocción. Seleccione
15 minutos.
8. Presione varias veces el botón TEMP para seleccionar la temperatura de cocción.
Seleccione 100°C.
9. Presione varias veces el botón CHOP para seleccionar la velocidad de batido. Seleccione
S (Mezclado).
10. Presione el botón START/STOP para iniciar la cocción.
Pasados 10 minutos, escuchará unos tonos.
11. Presione el botón “+” o “-” para seleccionar la duración de la cocción. Seleccione
5 minutos.
12. Presione varias veces el botón TEMP para seleccionar la temperatura de cocción.
Seleccione 100°C.
13. Presione varias veces el botón CHOP para seleccionar la velocidad de batido.
Seleccione H.
14. Presione el botón START/STOP para iniciar la cocción.
Pasados 5 minutos, escuchará unos tonos. Su sopa ya está lista. Sirva la sopa con unos dados
de mozzarella o queso feta o virutas de parmesano.
GAZPACHO
El gazpacho es una sopa fría de tomates servida con verduras cortadas en daditos. Es
deliciosamente refrescante e ideal como plato principal en verano. También puede
servirse en pequeños tazones como aperitivo.
1 pepino
1 pimiento rojo
1 pimiento verde
1 Kg de tomates
4 dientes de ajo
1 cebolla
250 g de miga de pan
1 dl de aceite de oliva
4 dl de fondo de carne de ave
91
1 dl de vinagre de vino
sal
pimienta
Pimienta cayena o Tabasco.
1. Limpie las verduras.
2. Pele los tomates después de escaldarlos algunos segundos en agua hirviendo.
3. Despepite y corte los tomates en trozos pequeños.
4. Limpie y corte en trozos pequeños los pimientos, la cebolla y los dientes de ajo.
5. Pele, corte en dos el pepino para despepitarlo y córtelo en trozos pequeños.
6. Reserve una parte de cada verdura para el acompañamiento.
7. Fije las cuchillas y el revolvedor en la jarra.
8. Introduzca las verduras cortadas en la jarra de acero inoxidable y salpimiente.
9. Añada el aceite de oliva.
10. Coloque la tapadera de cristal sobre la jarra.
11. Presione varias veces el botón TEMP para seleccionar OFF (sin cocción).
12. Presione los botones “+” o “-” para seleccionar el tiempo de preparación. Seleccione 10
minutos.
13. Presione varias veces el botón CHOP para seleccionar la velocidad de batido. Seleccione
“H” (Rápido).
14. Presione el botón START/STOP para iniciar el programa.
Pasados 10 minutos, escuchará unos tonos.
En otro recipiente, mezcle el fondo de carne de ave frío con el vinagre de vino y añada la
miga de pan. Mezcle.
15. Retire la tapadera de cristal.
16. Añada la preparación fondo de carne de ave / vinagre / miga de pan.
17. Coloque la tapadera de cristal sobre la jarra.
18. Presione varias veces el botón TEMP para seleccionar OFF (sin cocción).
19. Presione los botones “+” o “-“ para seleccionar el tiempo de preparación. Seleccione 10
minutos.
20. Presione varias veces el botón CHOP para seleccionar la velocidad de batido. Seleccione
“H” (Rápido).
21. Presione el botón START/STOP para iniciar el programa.
Pasados 10 minutos, escuchará unos tonos.
22. Vierta la preparación en un recipiente.
23. Aliñe al gusto.
Sírvase frío con las verduras cortadas en daditos muy pequeños. También puede añadir
pequeños trozos de pan tostado frotado con ajo. En el momento de servir, se le puede
añadir un hielo par conservar todo su frescor.
92
SALSA HOLANDESA
La salsa holandesa es una emulsión caliente de zumo de limón y mantequilla. La salsa
holandesa sirve de base para cualquier tipo de salsa.
Deguste esta salsa con filetes de pescado, arroz, ...
3 yemas de huevo
150 g de mantequilla
1 zumo de medio limón templado
Sal/pimienta
1. Coloque el accesorio “Mezclador” en la jarra.
2. Introduzca en la jarra de acero inoxidable las yemas de huevo, un poco de sal y pimienta
y 20 g de mantequilla.
3. Coloque la tapadera de cristal sobre la jarra.
4. Coloque la jarra sobre el bloque del motor.
5. Presione varias veces el botón TEMP para seleccionar la temperatura de cocción.
Seleccione 40°C.
6. Presione los botones “+” o “-” para seleccionar el tiempo de cocción. Seleccione 10
minutos.
7. Presione varias veces el botón CHOP para seleccionar la velocidad de batido. Seleccione
“S” (Mezclado).
8. Presione el botón START/STOP para iniciar el programa.
Pasados 10 minutos, escuchará unos tonos.
9. Presione el botón START/STOP para detener el aparato.
10. Presione varias veces el botón TEMP para seleccionar la temperatura de cocción.
Seleccione 80°C.
11. Presione los botones “+” o “-” para seleccionar el tiempo de cocción. Seleccione 5
minutos.
12. Presione varias veces el botón CHOP para seleccionar la velocidad de batido. Seleccione
“S” (Mezclado).
13. Presione el botón START/STOP para iniciar el programa.
Durante los 5 minutos de cocción a 80°C, añada el resto de la mantequilla por la apertura
del vértice de la tapadera (para ello será necesario quitar el tapón dosificador).
Pasados 5 minutos, escuchará unos tonos.
14. Presione el botón START/STOP para detener el aparato.
15. Presione varias veces el botón TEMP para seleccionar la temperatura de cocción.
Seleccione 40°C.
16. Presione los botones “+” o “-” para seleccionar el tiempo de cocción. Seleccione 5
minutos.
93
17. Presione varias veces el botón CHOP para seleccionar la velocidad de batido. Seleccione
“S” (Mezclado).
18. Presione el botón START/STOP para iniciar el programa.
19. Vierta el zumo de limón templado (demasiado frío podría estropear la salsa).
Pasados 5 minutos, escuchará unos tonos. Su sopa ya está lista.
Salsa muselina: Añada a la salsa holandesa una parte de nata batida justo antes de servirla.
Aproximadamente una cuarta parte del volumen.
Salsa de mostaza: Añada mostaza al gusto a la salsa holandesa.
Salsa maltesa: Añada el zumo y la piel (escaldada y cortada en juliana) de una naranja
sanguina.
MERMELADA DE FRESA
Receta simple y rápida de mermelada de fresa. Puede emplear cualquier variedad de fresa.
Para obtener una buena mermelada de fresa, utilice fresas muy maduras, cuanto más azúcar
natural contengan mejor será la mermelada.
500 g de fresas
500 g de azúcar
1. Limpie las fresas, sáqueles los rabitos y córtelas en trozos pequeños.
2. Coloque el accesorio “Mezclador” en la jarra.
3. Introduzca la fresas cortadas y el azúcar en la jarra de acero inoxidable.
4. Coloque la tapadera de cristal sobre la jarra.
5. Coloque la jarra sobre el bloque del motor.
6. Presione varias veces el botón TEMP para seleccionar la temperatura de cocción.
Seleccione 120°C.
7. Presione los botones “+” o “-” para seleccionar el tiempo de cocción. Seleccione 10 minutos.
8. Presione el botón START/STOP para iniciar el programa.
Durante 10 minutos el aparato cocerá las fresas y el azúcar. Pasados 10 minutos, escuchará
unos tonos.
9. Presione el botón START/STOP para detener el aparato.
10. Presione varias veces el botón TEMP para seleccionar la temperatura de cocción.
Seleccione 80°C.
11. Presione los botones “+” o “-” para seleccionar el tiempo de cocción. Seleccione 30
minutos.
12. Presione varias veces el botón CHOP para seleccionar la velocidad de batido. Seleccione
“S” (Mezclado).
13. Presione el botón START/STOP para iniciar el programa.
94
Durante 30 minutos el aparato cocerá las fresas y las mezclará.
Pasados 30 minutos, escuchará unos tonos. Para saber si la mermelada ya está bien cocida,
vierta una gota en un plato frío, si la gota queda fija, la mermelada ya está lista. Si no se
queda fija, añada más tiempo de cocción a una temperatura de 80°C con una velocidad
de batido “S”.
Preparaciones de los botes: Lo ideal es hervir los botes y las tapas y dejarlos secar antes
de llenarlos de mermelada. Vierta la mermelada en los botes, cierre los botes y póngalos
del revés. Espere a que la mermelada se enfríe antes de guardar los botes.
CREMA DE CHOCOLATE
La crema de chocolate con leche es muy fácil de hacer.
Deguste sus pequeños botes de crema con galletas, frutas, bollos, ...
1 l de leche
120 g de chocolate negro
3 yemas de huevo
80 g de azúcar
40 g de harina
1. En otro recipiente, bata las yemas de huevo, al azúcar y la harina.
2. Coloque el accesorio “Mezclador” en la jarra.
3. Vierta la leche en la jarra de acero inoxidable.
4. Coloque la tapadera de cristal sobre la jarra.
5. Coloque la jarra sobre el bloque del motor.
6. Presione varias veces el botón TEMP para seleccionar la temperatura de cocción.
Seleccione 80°C.
7. Presione los botones “+” o “-” para seleccionar el tiempo de cocción. Seleccione 6 minutos.
8. Presione el botón START/STOP para iniciar el programa.
Pasados 6 minutos, escuchará unos tonos. La leche debe hervir. Si no hierve, añada algunos
minutos de cocción.
9. Presione el botón START/STOP para detener el aparato.
10. Añada los trozos de chocolate por la apertura del vértice de la tapadera.
11. Presione varias veces el botón TEMP para seleccionar la temperatura de cocción.
Seleccione 80°C.
12. Presione los botones “+” o “-” para seleccionar el tiempo de cocción. Seleccione 5
minutos.
13. Presione varias veces el botón CHOP para seleccionar la velocidad de batido. Seleccione
“S” (Mezclado).
14. Presione el botón START/STOP para iniciar el programa.
Pasados 5 minutos, escuchará unos tonos.
95
15. Presione el botón START/STOP para detener el aparato.
16. Abra la tapadera de la jarra de acero inoxidable y añada la preparación yemas de huevo
/ azúcar / harina en la jarra.
17. Vuelva a cerrar la jarra con la tapadera.
18. Presione varias veces el botón TEMP para seleccionar la temperatura de cocción.
Seleccione 100°C.
19. Presione los botones “+” o “-” para seleccionar el tiempo de cocción. Seleccione 5
minutos.
20. Presione varias veces el botón CHOP para seleccionar la velocidad de batido. Seleccione
“S” (Mezclado).
21. Presione el botón START/STOP para iniciar el programa.
Pasados 5 minutos, escuchará unos tonos. Vierta la crema en pequeños moldes y deje enfriar
en la nevera.
COMPOTA DE PERAS
Realice sus compotas caseras en menos de 30 minutos.
Deguste sus compotas con yogures, pan de especias, galletas, concentrado de frutas
silvestres, ...
5 peras
Azúcar
Agua
1. Limpie las peras, pélelas, sáqueles el centro y córtelas en trozos pequeños.
2. Coloque el accesorio “Mezclador” en la jarra.
3. Introduzca las peras cortadas y azúcar al gusto en la jarra de acero inoxidable.
4. Coloque la tapadera de cristal sobre la jarra.
5. Coloque la jarra sobre el bloque del motor.
6. Presione varias veces el botón TEMP para seleccionar la temperatura de cocción.
Seleccione 100°C.
7. Presione los botones “+” o “-” para seleccionar el tiempo de cocción. Seleccione 10 minutos.
8. Presione el botón START/STOP para iniciar el programa.
Durante 10 minutos el aparato cocerá las peras y el azúcar. Pasados 10 minutos, escuchará
unos tonos.
9. Presione el botón START/STOP para detener el aparato.
10. Presione varias veces el botón TEMP para seleccionar la temperatura de cocción.
Seleccione 100°C.
11. Presione los botones “+” o “-” para seleccionar el tiempo de cocción. Seleccione 15
minutos.
12. Presione varias veces el botón CHOP para seleccionar la velocidad de batido. Seleccione
“S” (Mezclado).
96
13. Presione el botón START/STOP para iniciar el programa.
Pasados 15 minutos, escuchará unos tonos. Su compota ya está lista. Déjela enfriar antes
de servir.
BATIDO MULTIFRUTAS
El batido es una bebida batida a base de fruta y leche.
Es fácil y rápido de preparar. ¡Y es una delicia! Adapte las recetas a su gusto, bata soja,
plátano, kiwi, uva, melocotón, leche, yogurt, helado, miel, ...
8 fresas
5 kiwis
2 plátanos
300 ml de leche fría
1. Limpie las frutas, pele los kiwis y los plátanos, quite el rabillo de las fresas y córtelas en
trozos pequeños.
2. Fije las cuchillas y el revolvedor en la jarra.
3. Introduzca la fruta cortada y el azúcar en la jarra de acero inoxidable.
4. Coloque la tapadera de cristal sobre la jarra.
5. Presione varias veces el botón TEMP para seleccionar OFF (sin cocción).
6. Presione los botones “+” o “-“ para seleccionar el tiempo de preparación. Seleccione 10
minutos.
7. Presione varias veces el botón CHOP para seleccionar la velocidad de batido. Seleccione
“H” (Rápido).
14. Presione el botón START/STOP para iniciar el programa.
Pasados 10 minutos, escuchará unos tonos. Añada más duración de batido para que las
frutas estén bien batidas. Endulce al gusto.
97
A
A : Tappo dosatore
B : Coperchio in vetro
B
C : Mixer
D : Lame
H
C
E : Recipiente in acciaio inox
F : Blocco Motore
D
I
G : Pannello di controllo
E
H : Gancio per togliere le lame
I : Cestello vapore
J
J : Accessorio « Scovolo» per
pulire il recipiente
K : Accessorio « Miscelatore »
per preparare confetture,
composte, creme o salse.
K
F
G
B1 : Gancio di fissaggio
B2 : Sistema di chiusura
B1
98
B2
Fig. 2
Fig. 3
Fig. 4
Fig. 5
Fig. 6
Fig. 7
Fig. 8
Fig. 9
99
Istruzioni per l’uso
Fig. 1
Manuale d’uso di Soup’Master
Leggere il manuale d’uso e conservarlo. Se si consegna l’apparecchio a terzi, non
dimenticare di consegnare anche il manuale d’uso. Togliere l’imballaggio, ma conservarlo
fino a quando si è verificato lo stato dell’apparecchio.
Caratteristiche tecniche
Voltaggio
120V, 220 ~240V
Frequenza
50/60 Hz
Potenza
1000 W
Capacità recipiente
Min 1l. - Max 1,5l.
Per ridurre i rischi di incendio, folgorazione o lesioni, seguire sempre le istruzioni di sicurezza
degli apparecchi elettrici,e, in particolar modo, le seguenti :
Precauzioni importanti
1. Questo apparecchio deve essere utilizzato soltanto da un adulto o sotto il controllo di
un adulto.
Usare e collocare l’apparecchio fuori dalla portata dei bambini.
2. Non si tratta di un gioco. Non permettere ai bambini di giocare con
l’apparecchio.
3. Non immergere l'apparecchio, il recipiente, il filo, la spina o il blocco
motore in acqua o in altro liquido. Non usare mai l’apparecchio in bagno,
vicino ad acqua o all'esterno.
4. Non collocare l’apparecchio in ambiente umido o bagnato e tenerlo al riparo dai raggi
del sole.
5. Collocare l’apparecchio su una superficie piana, stabile, solida e asciutta.
6. Non sollevare o spostare l’apparecchio durante il funzionamento.
7. Non sollevare l’apparecchio mediante il cavo di alimentazione. Sollevarlo sempre dalla
base.
8. Non utilizzarlo se il coperchio non è al suo posto.
9. Non togliere il recipiente di cottura dall’alloggio principale mentre il motore è in funzione.
10. Il recipiente diventa molto caldo durante la cottura. Non toccare le superfici calde
dell’apparecchio. Non togliere il coperchio del recipiente durante la cottura, potreste
bruciarvi. Utilizzare un guanto da cucina per togliere il coperchio.
11. Dal tappo dosatore potrebbe uscire vapore durante la cottura, attenti a non bruciarvi.
12. Fare in modo che il cibo non esca dal recipiente. Non riempire il recipiente al di sopra
della quantità raccomandata. Eventuali liquidi che vadano a finire sotto il blocco motore
potrebbero essere assorbiti dal motore e potrebbero danneggiarlo.
13. Non mettere le mani nel recipiente. Le lame sono taglienti. Utilizzare il gancio per togliere
le lame.
14. Non mettere alcun utensile (cucchiaio, spatola, etc.) nel recipiente. Utilizzare sempre gli
accessori forniti con l’apparecchio.
100
15. Dopo aver fatto funzionare il motore in continuo per un ciclo, attendere almeno 5 minuti
prima di iniziare un nuovo ciclo.
16. Non fare funzionare l’apparecchio a vuoto.
17. Stare attenti che il filo di alimentazione non sporga e collocarlo in modo tale che non
si inciampi o che non penda.
18. Tenere l’apparecchio e il filo lontano da piastre scaldanti, piani di cottura e bruciatori
a gas.
19. Scollegare l’apparecchio dalla presa di corrente quando non viene utilizzato e lasciarlo
raffreddare prima di spostarlo o di pulirlo.
20. Scollegare l’apparecchio dalla presa di corrente prima di mettere o togliere pezzi o
accessori.
21. Non utilizzarlo per scopi diversi da quelli descritti nel presente manuale.
22. L’apparecchio non deve essere utilizzato con un timer esterno o con un sistema di
controllo a distanza.
23. Deve essere collegato soltanto ad una presa di terra.
24. Non utilizzare l’apparecchio se è caduto, se si è danneggiato o se funziona male.
25. Si consiglia di controllare regolarmente il cavo di alimentazione per individuare
qualsiasi segno di eventuale usura; l'apparecchio non deve essere utilizzato se il cavo
è danneggiato.
26. Se il cavo dell'alimentazione è danneggiato, deve essere necessariamente sostituito dal
produttore, dal servizio assistenza post-vendita o da un tecnico certificato dal
produttore stesso per evitare qualsiasi pericolo.
Solo per uso domestico
Dopo il primo utilizzo, fare riferimento al paragrafo “cura e manutenzione” e pulire con cura
l’apparecchio e gli accessori per togliere la polvere di fabbricazione.
Non immergere il blocco motore (F) e il recipiente in acciaio inox (E) in acqua o in
qualsiasi altro liquido.
Non mettere il blocco motore (F) e il recipiente in acciaio inox (E) in lavastoviglie.
COME MONTARE IL PRODOTTO
Scegliere l’accessorio adatto alla ricetta.
Zuppe e composte: lame (D) e mixer (C)
Salse, creme, composte, confetture: accessorio « miscelatore » (K)
Cottura a vapore: cestello vapore
Come fissare il coperchio (B) sul recipiente in acciaio inox (E)
Il coperchio (B) deve essere sempre fissato sul recipiente in acciaio inox (E).
Un sistema di sicurezza si attiva quando il coperchio non è fissato, o se è fissato male sul
recipiente.
101
Collocare il coperchio in vetro (B) sul recipiente come indicato di seguito:
1. Bloccare il gancio di fissaggio (B1) sul bordo del recipiente in acciaio inox (E). (Fig. 1)
2. Abbassare il coperchio in vetro (B) sul recipiente in acciaio inox (E). Il sistema di
chiusura (B2) del coperchio deve trovarsi sul lato destro del manico delil recipiente. (Fig.2)
3. Girare il coperchio in vetro (B) con pollice e indice in modo da collocare il sistema di
chiusura (B2) del coperchio lungo il prolungamento del manico del recipiente. (Fig. 3)
4. Mettere il tappo dosatore (A) in cima al coperchio di vetro (B).
Come fissare il recipiente in acciaio inox (E) sul blocco motore (F)
1. Allineare il manico del recipiente con la fessura del blocco motore. In questo modo, i pezzi
di raccordo situati sul recipiente si incastrano con i pezzi di raccordo situati sul blocco
motore. (Fig. 4).
2. Premere leggermente sulla cima delil recipiente per fissare bene i pezzi di raccordo.
Se si nota uno scostamento tra il recipiente (E) e il blocco motore (F), il vostro
recipiente non è stata fissato in modo corretto sul blocco motore. (Fig. 5)
Se non è visibile nessuno spazio, il recipiente di cottura è fissato correttamente sul
blocco motore.
PANNELLO DI CONTROLLO
8
9
10
11
1
7
2
6
3
5
4
1. Spia luminosa di funzionamento
2. Pulsante START/STOP (Acceso/Spento)
3. Pulsante AUTO (Programma
Automatico)
4. Pulsanti per regolare il tempo
5. Pulsante PROG (programmazione
partenza differita)
6. Pulsante TEMP (Regolazione
temperatura)
40 ℃, 80 ℃, 100 ℃, 120 ℃ e OFF
102
7. Pulsante CHOP (Regolazione velocità
di mixaggio)
H (rapida), L (lenta), S (miscelazione) e
O (OFF)
8. Cottura in corso
9. Funzione PROG (programmazione
partenza differita) selezionata
10. Programma AUTO selezionato
11. Visualizzazione alternativa del tempo
di cottura rimanente, della
temperatura selezionata e della
velocità di mixaggio selezionata.
COME FARE UNA ZUPPA CON SOUP’MASTER
1. Pulire tutte le verdure e tagliarle a pezzetti
2. Montare il recipiente (E) le lame (D) (Fig. 6) e il mixer (C) (Fig. 7)
3. Mettere le verdure a pezzetti nel recipiente in acciaio inox (E)
4. Aggiungere dell’acqua nel recipiente (E). Livello minimo fino all’indicatore “I”, livello
massimo fino all’indicatore « II ».
5. Collocare il coperchio in vetro (B) sul recipiente (E)
*** Cottura in modalità automatica ***
1. Collegare l’apparecchio alla presa di corrente. Si accende un segnale acustico. Lo schermo
LCD si accende e visualizza [0 :30].
2. Premere il pulsante AUTO per selezionare il programma automatico. Sullo schermo LCD
in alto a destra appare la parola AUTO.
3. Premere il pulsante START/STOP per iniziare la cottura. Sullo schermo LCD, appare la scritta
. Lo schermo LCD visualizza alternativamente [0﹕30] e 100. Il tempo di cottura
diminuisce a poco a poco.
4. Dopo 10 minuti di cottura, l’apparecchio comincia automaticamente a mixare lentamente.
Lo schermo LCD visualizza alternativamente [L﹕19] e 100. « L » rappresenta la modalità
di mixaggio pre-impostata, « 19 », il tempo di cottura rimanente.
5. Dopo 15 minuti, l’apparecchio comincia automaticamente a mixare più rapidamente.
Lo schermo LCD visualizza alternativamente [H﹕4] e 100. « H » rappresenta la modalità
di mixaggio pre-impostata, « 4», il tempo di cottura rimanente.
Alla fine del programma automatico lo schermo LCD visualizza [00:00] e l’apparecchio
emette un segnale acustico (6 bip).
A questo punto, sarà possibile, se si vuole, aggiungere del tempo di cottura o un mixaggio
supplementare.
- Aggiungere un tempo di cottura supplementare:
1. Premere più volte il pulsante TEMP per selezionare la temperatura di cottura.
2. Premere il pulsante « + » o « - » per selezionare il tempo di cottura o di preparazione
3. Premere il pulsante START/STOP per avviare il programma selezionato.
- Aggiungere un mixaggio supplementare :
1. Premere più volte il pulsante CHOP per selezionare la velocità del mixer.
2. Premere il pulsante « + » o « - » per selezionare il tempo di preparazione.
3. Premere il pulsante START/STOP per avviare il programma selezionato.
Nota 1: Attivando il programma AUTO, la temperatura di cottura è di 100°C e vengono
selezionate automaticamente le velocità di mixaggio – L (Lenta) a inizio cottura e H (rapida)
a fine cottura. Se si vuole, è possibile cambiare la velocità di mixaggio. Per far ciò, premere
103
il pulsante CHOP più volte per selezionare la velocità iniziale e premere sul pulsante
START/STOP. L’apparecchio inizia direttamente a cuocere e a mixare alla velocità selezionata.
Nel programma AUTO non è possibile cambiare la temperatura di cottura.
Nota 2: Durante la cottura con il programma AUTO, è possibile aprire il coperchio (B) e
aggiungere alimenti o spezie. Una volta aperto il coperchio (B), la cottura e la funzione di
mixaggio si bloccano. Chiuso il coperchio (B) sul recipiente (E), premere il pulsante
START/STOP per riprendere la cottura e il mixaggio del programma AUTO.
Nota 3: È possibile bloccare e annullare la cottura automatica in qualsiasi momento. A tale
scopo, premere il pulsante START/STOP, poi il pulsante AUTO per annullare il programma
automatico.
Piccola astuzia se la vostra ricetta prevede aglio, cipolla o zenzero: vi consigliamo di
farli cuocere nel recipiente prima di aggiungere altri alimenti e verdure.
1. Nel recipiente in acciaio inox, montare le lame (D) e il mixer (C).
2. Non mettere alcun ingrediente nel recipiente in acciaio inox, chiudere il coperchio in vetro
e montare il recipiente sul blocco motore.
3. Mettere il tappo dosatore (A) in cima al coperchio in vetro (B).
4. Collegare l’apparecchio alla presa di corrente. Si attiva un segnale acustico. Lo schermo
LCD si accende e visualizza [0 :30].
5. Premere più volte il pulsante TEMP per selezionare la temperatura di 120°C.
6. Premere il pulsante START/STOP per pre-riscaldare il recipiente.
7. Dopo 1 minuto, aprire il coperchio in vetro e aggiungere nel recipiente olio, aglio, cipolla
o zenzero (tagliato finemente).
8. Rimettere il coperchio in vetro e premere il pulsante CHOP più volte. Selezionare la
velocità S (miscelazione).
9. Premere il pulsante ‘-‘ per regolare il tempo di cottura a 3 minuti.
10. Premere il pulsante START/STOP.
11. Dopo 3 minuti, premere il pulsante START/STOP per bloccare la cottura e aprire il
coperchio.
12. Aggiungere le verdure (e gli altri ingredienti) e l’acqua nel recipiente.
13. Rimettere il coperchio in vetro e premere il pulsante AUTO poi il pulsante START/STOP
per avviare il programma automatico di cottura. A questo punto, sullo schermo LCD in
alto a destra appare la parola AUTO e la dicitura
in alto a sinistra.
*** Come programmare una partenza differita in modalità automatica***
1. Collegare l’apparecchio alla presa di corrente. Si attiva un segnale acustico, lo schermo
LCD si accende e visualizza [0 :30].
2. Premere il pulsante AUTO per selezionare il programma automatico. Sullo schermo LCD
appare la parola AUTO in alto a destra.
3. Premere il pulsante PROG. Lo schermo LCD visualizza [04﹕00] (4 ore).
4. Premere i pulsanti ”+’’ o ’’-’’ per selezionare il tempo di inizio (Max: 24 ore). Se si imposta,
ad esempio, [06﹕00], l’apparecchio si accende dopo 6 ore.
104
Nota: la regolazione del tempo viene effettuata in minuti. Se si preme una volta « + », si
aumenta il tempo di un minuto. Se si preme più a lungo sul tasto « + », si aumenta il tempo
di 10 minuti.
5. Premere il pulsante START/STOP. Si avvia un conto alla rovescia. Il tempo diminuisce a
poco a poco.
6. Allo scadere del tempo, l’apparecchio inizia a funzionare automaticamente (cottura 100°C
per 30 minuti e 2 velocità di mixaggio (L e H))
Nota: È possibile arrestare la programmazione in partenza differita premendo una volta
sul pulsante START/STOP, poi premendo una volta il pulsante PROG. Sullo schermo LCD
sparisce la parola PROG.
*** Cottura in modalità manuale ***
1. Collegare l’apparecchio alla presa di corrente. Si attiva un segnale acustico, lo schermo
LCD si accende e visualizza [0 :30].
2. Premere il pulsante « + » o « - » per selezionare la durata di cottura (Max: 24 ore).
Nota: la regolazione del tempo viene effettuata in minuti. Se si preme una volta « + », si
aumenta il tempo di un minuto. Se si preme più a lungo sul tasto « + », si aumenta il tempo
di 10 minuti.
3. Premere il pulsante TEMP più volte per selezionare la temperatura di cottura.
4. Premere il pulsante CHOP più volte per selezionare la velocità di mixaggio: S
(miscelazione), L (lenta) o H (rapida).
5. Premere il pulsante START/STOP per iniziare la cottura. Sullo schermo LCD, appare la scritta
. Lo schermo LCD visualizza alternativamente [VELOCITÀ﹕TEMPO] e [TEMPERATURA].
Il tempo di cottura diminuisce a poco a poco. È possibile, in qualsiasi momento,
prolungare o ridurre il tempo di cottura o di preparazione premendo i pulsanti « + » o
« - ».
NOTE COMPLEMENTARI :
1) Pulsante CHOP (mixaggio). Quando l’apparecchio viene collegato alla presa di corrente,
la modalità di mixaggio non è selezionata. Posizione O (OFF). Premendo il pulsante
START/STOP per iniziare la cottura non viene selezionata la funzione di mixaggio.
L’apparecchio cuoce gli alimenti senza mixarli. Quando l’apparecchio è già in funzione,
non è più possibile mixare. Se si vuole utilizzare questa funzione, premere il pulsante
START/STOP per fermare il programma di cottura in corso, e poi, premere il pulsante CHOP
più volte per selezionare il mixaggio. Premere poi il pulsante START/STOP per avviare
cottura e mixaggio.
2) Pulsante TEMP (temperatura). Quando si collega l’apparecchio alla presa di corrente, non
viene selezionata la temperatura. Posizione O (OFF). Se si preme il pulsante START/STOP,
l’apparecchio non si riscalda. Se si vuole aggiungere del tempo di cottura, premere il
pulsante START/STOP per arrestare il programma in corso, e poi premere il pulsante TEMP
più volte per selezionare la temperatura di cottura. Prmere quindi il pulsante START/STOP
per avviare la cottura.
105
3) Selezione del tempo. Quando si collega l’apparecchio alla presa di corrente, il tempo di
cottura o di preparazione è automaticamente impostato a 30 minuti. È possibile
modificare il tempo di cottura o di preparazione prima o dopo aver premuto il
pulsante START/STOP. Per modificare il tempo di cottura o di preparazione, premere i
pulsanti « + » o « - ».
4) Durante la cottura o la preparazione, è possibile premere il pulsante START/STOP per
arrestare la cottura (o la preparazione) e cambiare le funzioni CHOP (mixaggio) e TEMP
(temperatura) se necessario.
5) Mantenimento al caldo: Una volta completato il tempo di cottura, l’apparecchio smette
di cuocere e sullo schermo LCD sparisce la scritta
. L’apparecchio passa
automaticamente in funzione « mantenimento al caldo » per 60 minuti. La funzione «
mantenimento al caldo » mantiene tiepida la vostra zuppa. Se è stata selezionata una
temperatura di cottura di 80°C o superiore, l’apparecchio mantiene la vostra preparazione
a 75°C per 60 minuti. Se è stata selezionata una temperatura di cottura di 40°C,
l’apparecchio mantiene la vostra preparazione a 40°C. Il mixaggio continua per qualche
istante. Dopo 60 minuti, l’apparecchio si spegne completamente.
*** Come programmare una cottura in modalità manuale con partenza differita ***
Dopo aver selezionato la temperatura di cottura (pulsante TEMP), la velocità di mixaggio
(pulsante CHOP) e il tempo di cottura (pulsante « + » o « - »), premere il pulsante PROG. Sullo
schermo LCD appare la scritta [04﹕00] (4 ore). Premere i pulsanti « + » o « - » per definire
il tempo di inizio (Max: 24 ore). Se si imposta, ad esempio, [06﹕00], l’apparecchio si accende
dopo 6 ore.
Nota: la regolazione del tempo viene effettuata in minuti. Se si preme una volta il pulsante
« + », si aumenta il tempo di cottura di un minuto. Se si preme più a lungo il tasto « + », si
aumenta il tempo di 10 minuti.
Premere il pulsante START/STOP. Si attiva un conto alla rovescia prima dell’inizio. Il tempo
diminuisce a poco a poco. L’apparecchio si mette in funzione automaticamente una volta
scaduto il tempo.
COTTURA A VAPORE
1. Togliere le lame e il mixer o l’accessorio « Miscelatore »
2. Riempire d’acqua il recipiente fino all’indicatore « I »
3. Collocare il recipiente sul blocco motore.
4. Mettere all’interno del recipiente il cestello vapore (Fig. 9).
5. Mettere nel cestello i vostri alimenti
6. Mettere il coperchio in vetro (B) sul recipiente (E)
7. Collocare il recipiente sul blocco motore.
8. Premere più volte il pulsante TEMP per selezionare la temperatura di cottura.
9. Premere il pulsante « + » o « - » per selezionare il tempo di cottura o di preparazione.
10. Premere il pulsante START/STOP per avviare il programma selezionato.
106
COTTURA SENZA MIXAGGIO DI CARNE E VERDURE NEL RECIPIENTE
IN ACCIAIO INOX
1. Togliere le lame, il mixer o l’accessorio « Miscelatore » dal recipiente in acciaio inox.
2. Mettere gli alimenti che si vogliono cuocere nel recipiente in acciaio inox e aggiungere
un po’ d’acqua.
3. Chiudere il coperchio in vetro e collocare il recipiente sul blocco motore.
4. Mettere il tappo dosatore (A) in cima al coperchio in vetro (B).
5. Collegare l’apparecchio alla presa di corrente. Si attiva un segnale acustico, lo schermo
LCD si accende e visualizza [0 :30].
6. Premere più volte il pulsante TEMP per selezionare la temperatura di cottura.
7. Premere il pulsante START/STOP per iniziare la cottura. Il tempo di cottura è impostato
a 30 minuti. È possibile regolare il tempo di cottura premendo i pulsanti « + » o « - »
COME PREPARARE UNA CONFETTURA CON SOUP’MASTER
1. Pulire bene la frutta e tagliarla a pezzetti
2. Inserire l’accessorio « Miscelatore » (K) nel recipiente (Fig. 8)
3. Mettere nel recipiente in acciaio inox (E) la frutta a pezzetti e lo zucchero
4. Mettere il coperchio in vetro (B) sul recipiente (E)
5. Collocare il recipiente sul blocco motore.
6. Premere più volte il pulsante TEMP per selezionare la temperatura di cottura.
7. Premere più volte il pulsante CHOP per selezionare la velocità di mixaggio.
8. Premere il pulsante « + » o « - » per selezionare il tempo di cottura o di preparazione.
9. Premere il pulsante START/STOP per avviare il programma selezionato.
NOTE IMPORTANTI
Quantità d’acqua o di liquido insufficiente: Se il livello di zuppa nel recipiente di cottura
diminuisce e diventa inferiore al livello minimo (livello « I ») la cottura si arresta
automaticamente. Il mixaggio continua e l’apparecchio emette un « bip » per circa 20 volte
(è possibile premere qualsiasi pulsante una volta per fermare il bip), la spia luminosa
lampeggia per avvertire che occorre aggiungere dell’acqua. Dopo 4 minuti, la funzione di
mixaggio si arresta automaticamente. Per continuare la cottura, aggiungere acqua o altro
liquido alla preparazione e premere il pulsante START/STOP.
Coperchio in vetro non fissato o fissato male: Se il coperchio in vetro non è fissato
correttamente al recipiente in acciaio inox, l'apparecchio non funziona. L’apparecchio
emette 3 "bip" e la spia luminosa lampeggia per avvertire l’utilizzatore di fissare in modo
corretto il coperchio in vetro sul recipiente in acciaio inox.
107
COME PULIRE SOUP’MASTER
1. Scollegare l’apparecchio.
2. Staccare il recipiente in acciaio inox dal blocco motore.
3. Aprire il coperchio in vetro facendolo girare con il pollice.
4. Versare la zuppa o il vostro preparato in un contenitore e togliere le lame e il mixer o
l’accessorio « miscelatore ».
Nota: Per togliere le lame, utilizzare l’apposito gancio. Fare scorrere il gancio sotto le lame
in direzione obliqua e tirarlo per sganciare le lame.
5. Lavare gli accessori con acqua e detersivo liquido per stoviglie e sciacquare.
6. Lavare i recipienti con acqua e detersivo liquido per stoviglie e sciacquare.
Nota: È possibile utilizzare lo « scovolo » per lavare il recipiente. A tale scopo, dopo aver
scollegato l’apparecchio e aver tolto le lame, il mixer o l’accessorio « miscelatore », montare
l’accessorio « scovolo » nel recipiente. Versare dell’acqua con detersivo liquido per
stoviglie nel recipiente in acciaio inox e coprire il recipiente con il coperchio in vetro.
Collegare l’apparecchio alla presa di corrente e premere il pulsante CHOP più volte per
selezionare la velocità L (lenta), poi premere i pulsanti "-" o "+" per regolare il tempo
(selezionare 1 minuto). Premere il pulsante START/STOP per iniziare la pulizia. Dopo 1
minuto, premere il pulsante START/STOP per arrestare la pulizia. Scollegare l’apparecchio,
togliere il recipiente dal blocco motore, aprire il coperchio in vetro e smontare lo « scovolo ».
Sciacquare il recipiente in acciaio inox con acqua dolce e asciugarlo.
Non immergere il blocco motore (F) e il recipiente in acciaio inox (E) in acqua o altro
liquido.
Non mettere il blocco motore (F) e il recipiente in acciaio inox (E) in lavastoviglie.
Per evitare danni all’ambiente e alla salute causati da sostanze pericolose
delle parti elettriche ed elettroniche, gli apparecchi contrassegnati da questo
simbolo non devono essere smaltiti con i rifiuti indifferenziati, ma recuperati,
riutilizzati o riciclati.
108
Ricette
ZUPPA DI VERDURE
Cucinate in modo semplice e facile le vostre zuppe di verdure fresche. Per un antipasto o
un pasto, le vostre deliziose zuppe sono piene di vitamine.
Per zuppe più saporite cuocete verdure e prodotti di stagione.
Una zuppa fatta in casa si conserva per 24 ore. Potete prepararla in anticipo per riscaldarla
sul momento. Inoltre, è possibile congelare le vostre zuppe.
1 porro
1 rapa piccola
4 carote
1 cipolla
1 zucchina
2 patate piccole
Sale
1. Pulite tutte le vostre verdure e tagliatele a pezzetti
2. Montate le lame e il mixer nel recipiente
3. Mettete le vostre verdure a pezzetti nel recipiente in acciaio inox
4. Aggiungete dell’acqua nel recipiente. Livello minimo fino all’indicatore “I”, livello
massimo fino all’indicatore « II ».
6. Coprite il recipiente con il coperchio in vetro
Potete selezionare la modalità automatica per cuocere e mixare la vostra zuppa o
selezionare manualmente a piacimento il tempo di cottura, la temperatura di cottura e la
velocità di miscelazione.
Cottura in modalità automatica
7. Collegate l’apparecchio alla presa di corrente. Si attiva un segnale acustico, lo schermo
LCD si accende e si visualizza [0 :30].
8. Premete il pulsante AUTO per selezionare il programma automatico. Sullo schermo LCD
appare in alto a destra la parola AUTO.
9. Premete il pulsante START/STOP per iniziare la cottura.
Attivando il programma AUTO, la temperatura di cottura è di 100°C e le velocità di mixaggio
vengono selezionate automaticamente – L (Lenta) all’inizio della cottura e H (rapida) a fine
cottura.
Cottura in modalità manuale
7. Collegate l’apparecchio alla presa di corrente. Si attiva un segnale acustico, lo schermo
LCD si accende e si visualizza [0 :30].
8. Premete il pulsante « + » o « - » per selezionare la durata di cottura (Max: 24 ore).
109
Nota: la regolazione del tempo viene effettuata in minuti. Se si preme una volta il pulsante
« + », si aumenta il tempo di un minuto. Se si preme più a lungo il tasto « + », si aumenta
il tempo di 10 minuti.
9. Premete il pulsante TEMP più volte per selezionare la temperatura di cottura.
10. Premete il pulsante CHOP più volte per selezionare la velocità di mixaggio: S
(miscelazione), L (lenta) o H (rapida).
11. Premete il pulsante START/STOP per iniziare la cottura. Sullo schermo LCD, appare la
scritta
. Lo schermo LCD visualizza alternativamente [VELOCITÀ﹕TEMPO] e
[TEMPERATURA]. Il tempo di cottura diminuisce a poco a poco. In qualsiasi momento
è possibile prolungare o ridurre il tempo di cottura o di preparazione premendo i
pulsanti « + » o « - ».
ZUPPA DI POMODORI
6 pomodori o 2 scatole di pomodori pelati
4 patate
1 carota
1 cipolla
4 spicchi d’aglio
2 cucchiai da cucina di olio d’oliva
1 dado vegetale
1 litro d’acqua
Sale e pepe
Basilico
Dadini di mozzarella o di feta o pezzetti di parmigiano
1. Pulite le vostre verdure e tagliatele a pezzetti
2. Montate le lame e il mixer nel recipiente.
3. Mettete nel recipiente in acciaio inox le verdure a pezzetti, l’olio, il dado e qualche foglia
di basilico.
4. Aggiungete dell’acqua nel recipiente. Livello minimo fino all’indicatore “I”, livello
massimo fino all’indicatore « II ».
5. Coprite il recipiente con il coperchio
6. Collegate l’apparecchio alla presa di corrente. Si attiva un segnale acustico, lo schermo
LCD si accende e si visualizza [0 :30].
7. Premete il pulsante « + » o « - » per selezionare la durata di cottura. Selezionate 15 minuti.
8. Premete il pulsante TEMP più volte per selezionare la temperatura di cottura. Selezionate
100°C.
9. Premete il pulsante CHOP più volte per selezionare la velocità di mixaggio. Selezionare
S (Miscelazione).
10. Premete il pulsante START/STOP per iniziare la cottura.
Dopo 10 minuti, l’apparecchio inizia ad emettere un segnale acustico.
110
11. Premete il pulsante « + » o « - » per selezionare la durata di cottura. Selezionate 5 minuti.
12. Premete il pulsante TEMP più volte per selezionare la temperatura di cottura.
Selezionate 100°C.
13. Premete il pulsante CHOP più volte per selezionare la velocità di mixaggio. Selezionate
H.
14. Premete il pulsante START/STOP per iniziare la cottura.
Dopo 5 minuti, l’apparecchio inizia ad emettere un segnale acustico. Lal vostra zuppa è
pronta. Servitela con dadini di mozzarella o di feta o con pezzetti di parmigiano.
GASPACHO
Il Gaspacho (gazpacho in spagnolo) è una zuppa fredda di pomodori servita con verdure
tagliate a dadini. Deliziosamente rinfrescante, l’apprezzerete in estate come piatto
principale. Potete anche servirla come aperitivo in piccole coppe.
1 cetriolo
1 peperone rosso
1 peperone verde
1 kg di pomodori
4 spicchi d’aglio
1 cipolla
250 g di mollica di pane
1 dl di olio d’oliva
4 dl di brodo di fondo di cottura di pollame
1 dl di aceto di vino
sale
pepe
Un po’ di cayenna o di tabasco
1. Pulite tutte le verdure.
2. Spellate i pomodori dopo averli scottati qualche secondo in acqua bollente.
3. Togliete i semi e tagliate i pomodori a pezzetti.
4. Pulite e tagliate a pezzetti i peperoni, le cipolle e l’aglio.
5. Spellate, tagliate in due il cetriolo per togliere i semi e tagliatelo a pezzetti.
6. Mettete da parte una piccola parte di ogni verdura per guarnire il piatto.
7. Montate le lame e il mixer nel recipiente.
8. Mettete le vostre verdure a pezzetti nel recipiente in acciaio inox, salate e pepate.
9. Aggiungete l’olio d’oliva.
10. Coprite il recipiente con il coperchio in vetro.
11. Premete più volte il pulsante TEMP per selezionare OFF (niente cottura)
12. Premete il pulsante « + » o « - » per selezionare il tempo di preparazione. Selezionate
10 minuti.
13. Premete più volte il pulsante CHOP per selezionare la velocità di mixaggio. Selezionate
« H » (Rapida).
111
14. Premete il pulsante START/STOP per avviare il programma.
Dopo 10 minuti, l’apparecchio comincia ad emettere un segnale acustico.
In un contenitore a parte, mescolate il brodo di pollame freddo con l’aceto di vino e
aggiungete la mollica di pane. Mescolate.
15. Sollevate il coperchio di vetro.
16. Aggiungete il preparato di brodo di pollame / aceto / mollica di pane.
17. Mettete il coperchio di vetro sul recipiente.
18. Premete più volte il pulsante TEMP per selezionare OFF (niente cottura)
19. Premete il pulsante « + » o « - » per selezionare il tempo di preparazione. Selezionate
10 minuti.
20. Premete più volte il pulsante CHOP per selezionare la velocità di mixaggio. Selezionate
« H » (Rapida).
21. Premete il pulsante START/STOP per avviare il programma.
Dopo 10 minuti, l’apparecchio inizia ad emettere un segnale acustico.
22. Versate la minestra in un contenitore.
23. Condite e aggiungete spezie a vostro piacimento.
Servite il piatto freddo con le verdure messe da parte. Potete anche strofinare dell’aglio
su pezzetti di pane grigliato e aggiungere un cubetto di ghiaccio nel piatto al momento
della consumazione per mantenere tutta la freschezza.
SALSA OLANDESE
La salsa olandese è un’emulsione calda di succo di limone e di burro. Serve come base per
qualsiasi tipo di salsa.
Gustate la vostra salsa con filetti di pesce, riso etc…
3 tuorli d’uovo
150 g di burro
Il succo di ½ limone tiepido
Sale/pepe
1. Montate l’accessorio « Miscelatore » nel recipiente.
2. Mettete nel recipiente in acciaio inox i tuorli d’uovo, un po’ di sale e pepe e 20 g di burro.
3. Coprite il recipiente con il coperchio in vetro.
4. Montate il recipiente sul blocco motore.
5. Premete più volte il pulsante TEMP per selezionare la temperatura di cottura. Selezionate
40°C.
6. Premete il pulsante « + » o « - » per selezionare il tempo di cottura. Selezionate 10 minuti.
112
7. Premete più volte il pulsante CHOP per selezionare la velocità di mixaggio. Selezionate
« S » (miscelazione).
8. Premete il pulsante START/STOP per avviare il programma.
Dopo 10 minuti, l’apparecchio inizia ad emettere un segnale acustico.
9. Premete il pulsante START/STOP per spegnere l’apparecchio.
10. Premete più volte il pulsante TEMP per selezionare la temperatura di cottura.
Selezionate 80°C.
11. Premete il pulsante « + » o « - » per selezionare il tempo di cottura. Selezionate 5 minuti.
12. Premete più volte il pulsante CHOP per selezionare la velocità di mixaggio. Selezionate
« S » (miscelazione).
13. Premete il pulsante START/STOP per avviare il programma.
Durante i 5 minuti di cottura a 80°C aggiungete il resto del burro dall’apertura in cima al
coperchio (togliete il tappo dosatore).
Dopo 5 minuti, l’apparecchio inizia ad emettere un segnale acustico.
14. Premete il pulsante START/STOP per spegnere l’apparecchio.
15. Premete più volte il pulsante TEMP per selezionare la temperatura di cottura.
Selezionate 40°C.
16. Premete il pulsante « + » o « - » per selezionare il tempo di cottura. Selezionate 5 minuti.
17. Premete più volte il pulsante CHOP per selezionare la velocità di mixaggio. Selezionate
« S » (miscelazione).
18. Premete il pulsante START/STOP per avviare il programma.
19. Versate il succo di limone tiepido (un succo troppo freddo a volte fa cambiare colore
alla salsa).
Dopo 5 minuti, l’apparecchio emette un suono acustico. La vostra salsa è pronta.
Salsa mussolina: Aggiungete alla salsa olandese una parte di crema montata
immediatamente prima di servire. Calcolate all’incirca un quarto del volume.
Salsa mostarda: Aggiungete alla salsa olandese della mostarda a vostro piacimento.
Salsa maltese: Aggiungete alla salsa olandese il succo e le bucce (tagliate finemente a
julienne e sbollentate) di un’arancia sanguinella.
113
CONFETTURA DI FRAGOLE
Ricetta di confettura di fragole semplice e di rapida preparazione. Potete utilizzare
fragole varietà Gariguette, Charlotte o qualsiasi altra varietà di fragole. Per ottenere una
buona confettura di fragole dovete utilizzare delle fragole ben mature. Più le fragole sono
zuccherine, migliore sarà la vostra confettura.
500 g. di fragole
500 g. di zucchero
1. Pulite tutte le fragole, togliete i piccioli e tagliatele a pezzetti.
2. Montate l’accessorio « Miscelatore » nel recipiente.
3. Mettete le vostre fragole a pezzetti nel recipiente in acciaio inox con lo zucchero.
4. Coprite il recipiente con il coperchio in vetro.
5. Mettete il recipiente sul blocco motore.
6. Premete più volte il pulsante TEMP per selezionare la temperatura di cottura. Selezionate
120°C.
7. Premete il pulsante « + » o « - » per selezionare il tempo di cottura. Selezionate 10 minuti.
8. Premete il pulsante START/STOP per avviare il programma.
L’apparecchio cuocerà la vostra frutta con lo zucchero per 10 minuti. Dopo 10 minuti,
l’apparecchio inizia ad emettere un segnale acustico.
9. Premete il pulsante START/STOP per spegnere l’apparecchio.
10. Premete più volte il pulsante TEMP per selezionare la temperatura di cottura.
Selezionate 80°C.
11. Premete il pulsante « + » o « - » per selezionare il tempo di cottura. Selezionate 30 minuti.
12. Premete più volte il pulsante CHOP per selezionare la velocità di mixaggio. Selezionate
« S » (miscelazione).
13. Premete il pulsante START/STOP per avviare il programma.
L’apparecchio cuocerà le vostre fragole, mescolandole per 30 minuti.
Dopo 30 minuti, l’apparecchio inizia ad emettere un segnale acustico. Per sapere se la vostra
confettura è cotta, versate una goccia su un piatto freddo, se la goccia si rapprende, la vostra
confettura è cotta. Se non si rapprende, aggiungete altro tempo di cottura ad una
temperatura di 80°C con una velocità di mixaggio « S ».
Preparazione dei vasetti: bisognerebbe fare scaldare i vasetti e i coperchi, poi farli
asciugare prima di riempirli di confettura. Versate la confettura nei vasetti, chiudete i vasetti
e capovolgeteli. Aspettate che la confettura si raffreddi prima di rimettere i vasetti
all’impiedi.
114
CREMA AL CIOCCOLATO
Facile da preparare, potete anche preparare la vostra crema con del cioccolato al latte.
Gustate i vostri vasetti di crema con biscotti, frutta, brioches etc…
1l. di latte
120 g di cioccolato fondente
3 tuorli d’uovo
80 g di zucchero
40 g di farina
1. In un recipiente a parte, battete i tuorli d’uovo, lo zucchero e la farina.
2. Montate l’accessorio « Miscelatore » nel recipiente.
3. Versate il latte nel recipiente in acciaio inox.
4. Coprite il recipiente con il coperchio in vetro.
5. Montate il recipiente sul blocco motore.
6. Premete più volte il pulsante TEMP per selezionare la temperatura di cottura. Selezionate
80°C.
7. Premete il pulsante « + » o « - » per selezionare il tempo di cottura. Selezionate 6 minuti.
8. Premete il pulsante START/STOP per avviare il programma.
Dopo 6 minuti, l’apparecchio inizia ad emettere un segnale acustico. Il latte deve arrivare
ad ebollizione. In caso contrario, aggiungete qualche minuto di cottura.
9. Premete il pulsante START/STOP per spegnere l’apparecchio.
10. Aggiungete il cioccolato a pezzetti (attraverso l’apertura sopra il coperchio).
11. Premete più volte il pulsante TEMP per selezionare la temperatura di cottura.
Selezionate 80°C.
12. Premete il pulsante « + » o « - » per selezionare il tempo di cottura. Selezionate 5 minuti.
13. Premete più volte sul pulsante CHOP per selezionare la velocità di mixaggio. Selezionate
« S » (miscelazione).
14. Premete il pulsante START/STOP per avviare il programma.
Dopo 5 minuti, l’apparecchio inizia ad emettere un segnale acustico.
15. Premete il pulsante START/STOP per spegnere l’apparecchio.
16. Aprite il coperchio del recipiente in acciaio inox e aggiungete il preparato con tuorli
d’uovo / zucchero / farina nel recipiente.
17. Richiudete il recipiente con il coperchio.
18. Premete più volte il pulsante TEMP per selezionare la temperatura di cottura.
Selezionate 100°C.
19. Premete il pulsante « + » o « - » per selezionare il tempo di cottura. Selezionate 5 minuti.
20. Premete più volte il pulsante CHOP per selezionare la velocità di mixaggio. Selezionate
« S » (miscelazione).
115
21. Premete il pulsante START/STOP per avviare il programma.
Dopo 5 minuti, l’apparecchio inizia ad emettere un segnale acustico. Versate la vostra crema
in piccoli contenitori e lasciate raffreddare in frigorifero.
COMPOSTA DI PERE
Preparate in casa le vostre composte in meno di 30 minuti.
Gustate le vostre composte con yogurt, pan di zenzero, biscotti, purea di frutti rossi etc…
5 pere
Zucchero
Acqua
1. Pulite le pere, togliete la buccia e il torso e tagliatele a pezzetti.
2. Montate l’accessorio « Miscelatore » nel recipiente
3. Mettete nel recipiente in acciaio inox le pere a pezzetti e zuccherate a piacere.
4. Coprite il recipiente con il coperchio in vetro.
5. Montate il recipiente sul blocco motore.
6. Premete più volte il pulsante TEMP per selezionare la temperatura di cottura. Selezionate
100°C.
7. Premete il pulsante « + » o « - » per selezionare il tempo di cottura. Selezionate 10 minuti.
8. Premete il pulsante START/STOP per avviare il programma.
L’apparecchio cuocerà le pere con lo zucchero per 10 minuti. Dopo 10 minuti, l’apparecchio
emetterà un segnale acustico.
9. Premete il pulsante START/STOP per spegnere l’apparecchio.
10. Premete più volte il pulsante TEMP per selezionare la temperatura di cottura.
Selezionate 100°C.
11. Premete il pulsante « + » o « - » per selezionare il tempo di cottura. Selezionate 15 minuti.
12. Premete più volte il pulsante CHOP per selezionare la velocità di mixaggio. Selezionate
« S » (miscelazione).
13. Premete il pulsante START/STOP per avviare il programma.
Dopo 15 minuti, l’apparecchio inizia ad emettere un segnale acustico. La vostra composta
è pronta. Lasciate raffreddare prima di servire.
116
MILK-SHAKE MULTI-GUSTO
Il milk-shake è una bevanda mixata a base di frutta e latte.
Facile e di rapida preparazione è puro piacere al 100 %! Adattate le ricette al vostro gusto
personale, mixate soia, banane, kiwi, uva, pesche, latte, yogurt, ghiaccio, miele etc…
8 fragole
5 kiwi
2 banane
300 ml di latte freddo
1. Pulite la vostra frutta, sbucciate i kiwi e le banane, togliete i piccioli alle fragole e tagliatele
a pezzetti.
2. Montate le lame e il mixer nel recipiente.
3. Mettete la frutta a pezzetti nel recipiente in acciaio inox e aggiungete il latte.
4. Coprite il recipiente con il coperchio in vetro.
5. Premete più volte il pulsante TEMP per selezionare OFF (niente cottura)
6. Premete il pulsante « + » o « - » per selezionare il tempo di preparazione. Selezionate 10
minuti.
7. Premete più volte il pulsante CHOP per selezionare la velocità di mixaggio. Selezionate
« H » (Rapida).
14. Premete il pulsante START/STOP per avviare il programma.
L’apparecchio inizia ad emettere un segnale acustico dopo 10 minuti. Regolate la durata
di mixaggio in modo che la frutta sia ben mescolata. Zuccherate a piacere.
117
Notes :
118
Notes :
119
RC
120