Download MOVING HEAD

Transcript
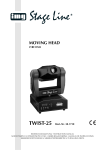
MOVING HEAD
LYRE DMX
TWIST-252
Best.-Nr. 38.1910
BEDIENUNGSANLEITUNG • INSTRUCTION MANUAL • MODE D’EMPLOI
ISTRUZIONI PER L’USO • GEBRUIKSAANWIJZING • MANUAL DE INSTRUCCIONES • INSTRUKCJA OBSŁUGI
SIKKERHEDSOPLYSNINGER • SÄKERHETSFÖRESKRIFTER • TURVALLISUUDESTA
D
A
CH
F
B
CH
NL
B
PL
S
Bevor Sie einschalten ...
GB
Before you switch on ...
Wir wünschen Ihnen viel Spaß mit Ihrem neuen Gerät von
„img Stage Line“. Dabei soll Ihnen diese Bedienungsanleitung helfen, alle Funktionsmöglichkeiten kennen zu lernen. Die Beachtung der Anleitung vermeidet außerdem
Fehlbedienungen und schützt Sie und Ihr Gerät vor eventuellen Schäden durch unsachgemäßen Gebrauch.
We wish you much pleasure with your new “img Stage
Line” unit. With these operating instructions you will be
able to get to know all functions of the unit. By following
these instructions false operations will be avoided, and
possible damage to yourself and your unit due to improper use will be prevented.
Den deutschen Text finden Sie auf den Seiten 4 – 9.
You will find the English text on the pages 4 – 9.
Avant toute mise en service ...
I
Prima di accendere ...
Nous vous remercions d’avoir choisi un appareil “img
Stage Line” et vous souhaitons beaucoup de plaisir à
l’utiliser. Cette notice a pour objectif de vous aider à
mieux connaître les multiples facettes de l’appareil. En
outre, en respectant les conseils donnés, vous éviterez
toute mauvaise manipulation de sorte que vous-même et
votre appareil soient protégés de tout dommage.
Vi auguriamo buon divertimento con il Vostro nuovo
apparecchio “img Stage Line”. Le istruzioni per l’uso Vi
possono aiutare a conoscere tutte le possibili funzioni. E
rispettando quanto spiegato nelle istruzioni, evitate di
commettere degli errori, e così proteggete Voi stessi, ma
anche l’apparecchio, da eventuali rischi per uso improprio.
La version française se trouve pages 10 – 15.
Il testo italiano lo potete trovare alle pagine 10 – 15.
Voordat u inschakelt ...
E
Antes de cualquier instalación ...
Wij wensen u veel plezier met uw nieuw toestel van “ img
Stage Line”. Met behulp van bijgaande gebruiksaanwijzing zal u alle functiemogelijkheden leren kennen.
Door deze instructies op te volgen zal een slechte werking vermeden worden, en zal een eventueel letsel aan
uzelf en schade aan uw toestel tengevolge van onzorgvuldig gebruik worden voorkomen.
Tenemos de agradecerle el haber adquirido un aparato
“img Stage Line” y le deseamos un agradable uso. Este
manual quiere ayudarle a conocer las multiples facetas
de este aparato. La observación de las instrucciones
evita operaciones erróneas y protege Vd. y vuestro aparato contra todo daño posible por cualquier uso inadecuado.
U vindt de nederlandstalige tekst op de pagina’s 16 – 21.
La versión española se encuentra en las páginas 16 – 21.
Przed uruchomieniem ...
DK
Inden De tænder for apparatet ...
Życzymy zadowolenia z nowego produktu “img Stage
Line”. Dzięki tej instrukcji obsługi będą Państwo w
stanie poznać wszystkie funkcje tego urządzenia.
Stosując się do instrukcji unikną Państwo błędów i
ewentualnego uszkodzenia urządzenia na skutek nieprawidłowego użytkowania.
Vi ønsker Dem god fornøjelse med Deres nye “img
Stage Line” apparat. Læs oplysningerne for en sikker
brug af apparatet før ibrugtagning. Følg sikkerhedsoplysningerne for at undgå forkert betjening og for at beskytte Dem og Deres apparat mod skade på grund af forkert brug.
Tekst polski znajduje się na stronach 22 – 24.
Sikkerhedsoplysningerne finder De på side 26.
Förskrift
Vi önskar dig mycket nöje med din nya enhet från “img
Stage Line”. Läs gärna säkerhetsinstruktionerna innan
du använder enheten. Genom att följa säkerhetsinstruktionerna kan många problem undvikas, vilket annars kan
skada enheten.
Du finner säkerhetsinstruktionerna på sidan 26.
FIN
Ennen virran kytkemistä ...
Toivomme, että uusi “img Stage Line”-laitteesi tuo sinulle
paljon iloa ja hyötyä. Ole hyvä ja lue käyttöohjeet ennen
laitteen käyttöönottoa. Luettuasi käyttöohjeet voit käyttää laitetta turvallisesti ja vältyt laitteen väärinkäytöltä.
Käyttöohjeet löydät sivulta 27.
w w w.imgstageline.com
2
1
2
DMX512 ADRESS SETTING
DMX
SHOW MODE
SLAVE MODE
MASTER
COLOR MODE
PAN INVERSION
SLAVE
TILT INVERSION
SOUND
DISPLAY INVERSION
FOCUS ADJUST
SELF-TEST
FIXTURE HOURS
1m
MENU
RESET
DOWN
UP
ENTER
3
3
4
POWER
DMX OUT
DMX
MIC
PUSH
MASTER
SLAVE
SOUND
230 V~
50 Hz
510 VA
USE ONLY WITH A 250V FUSE
MENU
DOWN
UP
SENSITIVITY
ENTER
DMX IN
5
6
7
8
9
10
LC-3
CONTROLLER
STAND
BY
18
FUNCTION
19
MODE
20
➁
3
11
12
13 14
REMOTE
CONTROL
15
16 17
➀
D
A
Bitte klappen Sie die Seite 3 heraus. Sie sehen
dann immer die beschriebenen Bedienelemente
und Anschlüsse.
CH
1
Übersicht der Bedienelemente und
Anschlüsse
1.1 TWIST-252
1
2
3
4
5
6
7
8
9
10
11
12
GB
Schwenkkopf
Dreharm
Tragegriffe
Montageplatte für die Befestigung an einer Traverse
Halterung für die Netzsicherung
Eine durchgebrannte Sicherung nur durch eine
gleichen Typs ersetzen.
Netzbuchse zum Anschluss an eine Steckdose
(230 V~/50 Hz) über das beiliegende Verbindungskabel
Ein-/Ausschalter POWER; leuchtet, sobald das
Gerät an einer Netzsteckdose angeschlossen ist
Display
Taste MENU zum Aufrufen des Einstellmenüs
Tasten UP und DOWN zur Auswahl einer Einstellung im Menü
Taste ENTER zum Bestätigen einer Menüeinstellung
Kontroll-LEDs für den Betriebsmodus:
DMX =
leuchtet bei am Eingang DMX IN (14)
anliegendem DMX-Steuersignal
MASTER = Master-Modus (Kap. 6.1 und 6.2);
Steuerung über die Fernbedienung
LC-3 oder das eingebaute Mikrofon
SLAVE = Slave-Modus (Kap. 6.1.1); Steuerung über einen zweiten TWIST-252
SOUND = leuchtet kurz auf, wenn das Gerät
durch ein Musiksignal die Farbe, das
Muster oder die Bewegung ändert
Please unfold page 3. Thus you will always
be able to see the operating elements and
connections described.
1
Operating Elements and Connections
1.1 TWIST-252
1
2
3
4
5
6
7
8
9
10
11
12
13
14
4
Panning head
Rotary arm
Carrying handles
Mounting plate for fixing the unit to a traverse
Mains fuse holder
Only replace a blown fuse by one of the same
type
Mains jack for connection to a mains socket
(230 V~/50 Hz) via the supplied connection cable
POWER switch; lights up as soon as the unit is
connected to the mains socket
Display
Button MENU for calling the adjusting menu
Buttons UP and DOWN to select a setting in the
menu
Button ENTER to confirm a menu setting
Indicating LEDs for the operating mode:
DMX =
lights up in case of a DMX control signal present at the input DMX IN (14)
MASTER = master mode (chapters 6.1 and 6.2);
control via the remote control LC-3
or the integrated microphone
SLAVE = slave mode (chapter 6.1.1); control
via a second TWIST-252
SOUND = shortly lights up if the colour, the pattern, or the movement of the unit is
changed by music control
DMX signal output (3-pole XLR);
1 = ground, 2 = DMX-, 3 = DMX+
DMX signal input (3-pole XLR);
1 = ground, 2 = DMX-, 3 = DMX+
13 DMX-Signal-Ausgang (3-pol. XLR);
1 = Masse, 2 = DMX-, 3 = DMX+
14 DMX-Signal-Eingang (3-pol. XLR);
1 = Masse, 2 = DMX-, 3 = DMX+
15 Anschlussbuchse für die Fernbedienung LC-3
16 Regler für die Empfindlichkeit des Mikrofons (17)
Durch Drehen im Uhrzeigersinn erhöht sich die
Empfindlichkeit.
17 Mikrofon zur Musiksteuerung
●
●
1.2 Fernbedienung LC-3
Die Fernbedienung ist als Zubehör erhältlich und
gehört nicht zum Lieferumfang des TWIST-252.
18 Taste STAND BY für die Funktion Blackout
(Schwenkkopf in die Ausgangsposition und
Blende geschlossen)
19 Taste FUNCTION:
im Modus Show 1 oder 2 zum Aktivieren eines
Strobe-Effekts (solange die Taste gedrückt wird)
im Slow-Modus zum Wechsel der 10 Farben und
danach zum Wechsel auf das nächste Muster
20 Taste MODE zum Umschalten zwischen
Modus Show 1 (LED leuchtet nicht)
Slow-Modus (LED leuchtet)
Modus Show 2 (LED blinkt)
Hinweis: Zur Steuerung über die Fernbedienung darf
am Eingang DMX IN (14) kein DMX-Signal anliegen.
2
Achtung!
Das Gerät wird mit lebensgefährlicher Netzspannung (230 V~) versorgt. Nehmen Sie deshalb nie
selbst Eingriffe im Gerät vor. Durch unsachgemäßes Vorgehen besteht die Gefahr eines elektrischen Schlages. Lassen Sie das Gerät in einer
Fachwerkstatt reparieren.
●
●
●
Hinweise für den sicheren Gebrauch
Dieses Gerät entspricht der Richtlinie für elektromagnetische Verträglichkeit 89/336/EWG und der
Niederspannungsrichtlinie 73/23/EWG.
Beachten Sie unbedingt die folgenden Punkte:
● Das Gerät ist nur zur Verwendung in Innenräumen
geeignet. Schützen Sie es vor Tropf- und Spritzwasser, hoher Luftfeuchtigkeit und Hitze (zulässiger Einsatztemperaturbereich 0 – 40 °C).
● Während des Betriebs wärmt sich der Schwenkkopf (1) stark auf. Um Verbrennungen zu vermei-
den, berühren Sie den Kopf nicht während des Betriebs bzw. lassen Sie ihn nach dem Ausschalten
einige Minuten abkühlen, bevor Sie ihn berühren.
Stecken Sie nichts durch die Lüftungsöffnungen.
Dies kann zu einem elektrischen Schlag führen!
Nehmen Sie das Gerät nicht in Betrieb bzw. ziehen Sie sofort den Netzstecker aus der Steckdose, wenn:
1. sichtbare Schäden am Gerät, z. B. am Gehäuse, an der Linse, am UV-Filter oder an der
Netzanschlussleitung, vorhanden sind,
2. nach einem Sturz oder Ähnlichem der Verdacht
auf einen Defekt besteht,
3. Funktionsstörungen auftreten.
●
●
Ziehen Sie den Netzstecker nie an der Zuleitung
aus der Steckdose, fassen Sie immer am Stecker
an.
Fassen Sie beim Transport des Gerätes nur an
den Tragegriffen (3) an. Auf keinen Fall das Gerät
am Schwenkkopf (1) oder Dreharm (2) tragen.
Verwenden Sie für die Reinigung des Gehäuses
nur ein trockenes, weiches Tuch, niemals Wasser
oder Chemikalien. Für die Linse kann auch ein
handelsübliches Glasreinigungsmittel verwendet
werden.
Wird das Gerät zweckentfremdet, nicht richtig
montiert, falsch bedient oder nicht fachgerecht repariert, kann keine Garantie für das Gerät und
keine Haftung für daraus resultierende Sach- oder
Personenschäden übernommen werden.
Soll das Gerät endgültig aus dem Betrieb genommen werden, übergeben Sie es zur umweltgerechten Entsorgung einem örtlichen Recyclingbetrieb.
15 Connection jack for the remote control LC-3
●
16 Control for the sensitivity of the microphone (17)
By turning the control clockwise, the sensitivity is
increased.
Do no insert anything into the air vents. This may
result in an electric shock!
●
Do not operate the unit or immediately disconnect
the mains plug from the mains socket
1. if there is visible damage to the unit, e. g. to the
housing, the lens, the UV filter, or the mains
cable,
2. if a defect might have occurred after the unit
was dropped or suffered a similar accident,
3. if malfunctions occur.
17 Microphone for music control
1.2 Remote control LC-3
The remote control is available as an accessory and
is not supplied with the TWIST-252.
18 Button STAND BY for the function Blackout
(panning head in the initial position and iris
closed)
Attention!
The unit is supplied with hazardous mains voltage (230 V~). Leave servicing to skilled personnel only. Inexpert handling may cause an electric
shock hazard. In any case the unit must be repaired by skilled personnel.
19 Button FUNCTION:
in the mode Show 1 or Show 2 to activate a
strobe effect (as long as the button is pressed)
in the Slow mode to change the colour (10 colours available) and then to change to the next
pattern
20 Button MODE to switch between
mode Show 1 (LED does not light up)
Slow mode
(LED lights up)
mode Show 2 (LED flashes)
●
Never pull the mains cable for disconnecting the
mains plug from the mains socket, always seize
the plug.
●
During transportation of the unit only seize the
carrying handles (3). Never carry the unit by the
panning head (1) or rotary arm (2).
●
For cleaning the housing only use a dry, soft cloth,
never use chemicals or water. For the lens also a
commercial detergent for glass may be used.
●
No guarantee for the unit and no liability for resulting damage to property or resulting personal injuries will be accepted if the unit is used for other
purposes than originally intended, if it is not correctly mounted or operated or not repaired in an
expert way.
●
If the unit is to be put out of operation definitively,
take it to a local recycling plant for a disposal
which is not harmful to the environment.
●
Important for U. K. Customers!
The wires in this mains lead are coloured in accordance with the following code:
green/yellow = earth
blue = neutral
brown = live
Note: For the control via the remote control, no DMX
signal must be present at the input DMX IN (14).
2
Safety Notes
This unit corresponds to the directive for electromagnetic compatibility 89/336/EEC and to the low
voltage directive 73/23/EEC.
Please observe the following items in any case:
●
●
The unit is suitable for indoor use only. Protect it
against dripping water and splash water, high air
humidity, and heat (admissible ambient temperature range 0 – 40 °C).
During operation the panning head (1) heats up
very much. To avoid burns, do not touch the head
during operation or let it cool down for some minutes after switching-off before touching it.
3
4
Leuchtmittel einsetzen
Das Lichteffektgerät wird ohne Leuchtmittel geliefert. Es wird eine Entladungslampe vom Typ MSD
250 W mit einem Sockel GY 9,5 benötigt.
Auf keinen Fall dürfen Lampen eines anderen
Typs verwendet werden!
Aus dem Sortiment von „img Stage Line“ kann folgendes Leuchtmittel eingesetzt werden:
Artikel
Best.-Nr.
HLO-250MSD 05.0005
1) Die obere Gehäuseschale des Schwenkkopfs
abschrauben. Die beiden Schrauben links und
rechts neben dem Aufdruck „Bulb Access“ zwi-
As the colours of the wires in the mains lead of this
appliance may not correspond with the coloured
markings identifying the terminals in your plug,
proceed as follows:
1. The wire which is coloured green and yellow
must be connected to the terminal in the plug
which is marked with the letter E or by the earth
symbol
, or coloured green or green and
yellow.
2. The wire which is coloured blue must be connected to the terminal which is marked with the
letter N or coloured black.
3. The wire which is coloured brown must be connected to the terminal which is marked with the
letter L or coloured red.
Warning – This appliance must be earthed.
Applications
The light effect unit TWIST-252 is especially suited
for professional stage and disco applications. It projects various, coloured patterns, thus providing an
ideal dancefloor atmosphere. The control of the unit
can be made via the integrated microphone, via the
remote control LC-3 (separately available as an
accessory) or via a DMX light control unit.
Inserting the Lamp
The light effect unit is supplied without lamp. A
discharge lamp of type MSD 250 W with a base
GY 9,5 is required.
Never use lamps of another type!
The following lamp may be used from the “img
Stage Line” product range:
Item
Order No.
HLO-250MSD 05.0005
3) Die neue Lampe mit einem sauberen, fusselfreien Tuch anfassen und in die Fassung
stecken. Dazu mithilfe eines Schraubendrehers
die Haltefedern am Sockel vorsichtig zur Seite
drücken. Den Lampensockel so führen, dass die
Anschlussstifte genau auf die Kontaktlöcher der
Fassung zeigen.
4) Den Lichtabschirmwinkel und die Gehäuseschale wieder festschrauben. Nach der Inbetriebnahme mit den drei Justiermuttern auf der
Schwenkkopfrückseite (durch A , B und C gekennzeichnet) maximale Helligkeit und gleichmäßige Ausleuchtung des Lichtspots einstellen.
●
Die hier aufgeführte Lampe enthält in geringen
Mengen umweltrelevante Schadstoffe (z. B.
Quecksilber) und muss deshalb in Europa als
Sondermüll entsorgt werden. In anderen Ländern
sind die jeweiligen nationalen Vorschriften zu
beachten.
●
Die Lampe muss spätestens nach der 1,25fachen
mittleren Lebensdauer gewechselt werden, da
mit fortschreitender Nutzungsdauer das Risiko
eines Lampenplatzers infolge von Gefügeveränderungen des Quarzglases deutlich ansteigt.
Das Gerät ist mit einem Betriebsstundenzähler ausgestattet. Dieser kann zur Bestimmung
der Lampenbrenndauer genutzt werden. Notieren
Sie sich bei einem Lampenwechsel den Zählerstand – siehe Kapitel 6.4 „Betriebsparameter verändern“, Menüpunkt Betriebsstundenzähler.
3000 h
Vorsicht!
1. Ziehen Sie vor dem Einsetzen bzw. Herausnehmen der Lampe unbedingt den Netzstecker!
2. Da die Lampe im Betrieb sehr heiß wird, müssen das Gehäuse und die Lampe nach dem
Betrieb erst abkühlen (Abkühlzeit min. 15 Minuten), bevor Sie die Lampe auswechseln können.
3. Blicken Sie niemals bei geöffnetem Gerät direkt
in die brennende Entladungslampe. Die hohe
Helligkeit und die UV-Strahlung können zu
Augenschäden führen.
4
2) Bei einem Lampenwechsel die alte Lampe aus
der Fassung entfernen.
mittlere Lebensdauer
Den Glaskolben der Lampe nie mit den Fingern
berühren! Hautfett und -schweiß mindern die
Leuchtkraft und brennen sich ein.
3
schem dem Lüfter und der Schwenkkopfrückseite entfernen. Jetzt kann der Lichtabschirmwinkel abgenommen werden und die Lampenfassung wird sichtbar.
Einsatzmöglichkeiten
Das Lichteffektgerät TWIST-252 ist besonders für
den professionellen Einsatz auf der Bühne und in
Diskotheken geeignet. Es projiziert verschiedene,
farbige Muster und sorgt somit für eine ideale
Dancefloor-Atmosphäre. Die Steuerung des Gerätes kann über das integrierte Mikrofon, über die
Fernbedienung LC-3 (separat als Zubehör erhältlich) oder über ein DMX-Lichtsteuergerät erfolgen.
Average Lifetime
3000 h
Never touch the glass bulb of the lamp with your fingers! Finger marks reduce the light intensity and
burn in.
5
Montage
Der TWIST-252 kann auf einer festen, ebenen
Fläche aufgestellt werden. Die Montageplatte (4)
dazu bei Bedarf abschrauben. Das Gerät lässt sich
mithilfe der Montageplatte aber auch kopfüber an
einer Traverse montieren. Zur Befestigung werden
stabile Montageschellen benötigt. Die Schellen an
den Langlöchern der Montageplatte festschrauben
und zusammen mit dem Gerät an die Traverse. Die
Montagestelle muss ausreichend stabil sein und
eine Last von min. 30 kg pro Gerät tragen können.
6
Bedienung
Nach einem Lampenplatzer während des Betriebs sollte die unmittelbare Umgebung der
Lampe vorsichtshalber verlassen werden, um
eine Gesundheitsgefährdung durch frei werdende
Quecksilberdämpfe völlig auszuschließen; für
eine gute Raumdurchlüftung sorgen.
Caution!
1. Disconnect in any case the mains plug before
inserting or removing the lamp!
2. As the lamp heats up very much during operation,
let the housing and the lamp first cool down after
operation (minimum cooling down time 15 minutes) before you are able to replace the lamp.
3. Never look directly into the lit discharge lamp
when the unit is opened. The high brightness
and the UV radiation may cause eye damage.
The unit is provided with a working hour
meter. This may be used to determine the lighting
time of the lamp. Note down the count of the
meter when replacing the lamp – see chapter 6.4
“Changing the operating parameters”, menu item
of working hour meter.
After a lamp explosion during operation, persons
should leave the immediate surroundings of the
lamp as a precaution to completely exclude a
health risk by the mercury vapours being released; ensure a good ventilation of the room.
1) Screw off the upper housing shell of the panning
head. Remove the two screws on the left and on
the right of the print “Bulb Access” between the
fan and the rear side of the panning head. Now
the light screening angle plate can be removed
and the lampholder becomes visible.
2) For a lamp replacement pull the old lamp out of
the lampholder.
3) Seize the new lamp with a clean cloth without fluffs
and place it into the lampholder. For this purpose
push the retaining springs at the base carefully to
the side by means of a screw driver. Guide the
lamp base so that the connection pins precisely
point to the contact holes of the lampholder.
4) Retighten the light screening angle plate and the
housing shell by screws. After setting into operation adjust the maximum brightness and uniform
illumination of the light spot with the three adjusting nuts on the rear side of the panning head
(marked by A , B and C ).
● The lamp quoted here contains slight quantities
of harmful substances which may affect the environment (e. g. mercury) and must therefore be
disposed of as a special waste in Europe. In
other countries the respective national regulations have to be observed.
● The lamp must be replaced at least after its
1.25 fold average lifetime because with increasing service life the risk of a lamp explosion will
considerably increase due to structural transformation of the quartz glass.
CH
Wichtig!
1. Zur Vermeidung von Wärmestaus im Gerät muss
die Montagestelle so gewählt werden, dass bei
Betrieb eine ausreichende Luftzirkulation gewährleistet ist. Das Gerät muss einen Mindestabstand von 1 m zu angrenzenden Flächen
haben und die Lüftungsöffnungen am Gehäuse
dürfen auf keinen Fall abgedeckt werden.
2. Achten Sie auch unbedingt auf einen ausreichenden Abstand zu leicht entflammbaren oder
hitzeempfindlichen Materialien.
3. Wird das Gerät als schwebende Last über Personen installiert, muss es zusätzlich gesichert
werden (z. B. durch ein Fangseil). Die beiliegende Schrauböse in die Gewindebuchse in der
Mitte der Geräteunterseite festschrauben und
an dieser das Fangseil anbringen. Das andere
Ende des Fangseils so befestigen, dass der
Fallweg des Gerätes nicht mehr als 20 cm betragen kann.
Das beiliegende Netzkabel an die Netzbuchse (6)
anschließen und den Stecker in eine Steckdose
(230 V~/50 Hz) stecken. Sobald das Gerät an der
Netzspannung angeschlossen ist, leuchtet der Netzschalter (7). Mit dem Netzschalter das Gerät einschalten. Der Schwenkkopf und alle Steuermotoren
fahren in eine definierte Ausgangsstellung. Währenddessen wird im Display (8) die Software-Version
●
D
A
●
5
GB
Mounting
The TWIST-252 may be set up on a firm, even surface. If required, screw off the mounting plate (4).
However, it can also be mounted upside down to a
traverse by means of the mounting plate. For fixing,
stable mounting clips are required. Tightly screw the
clips to the long holes of the mounting plate and
together with the unit to the traverse. The mounting
place must be of sufficient stability and be capable
of carrying a load of 30 kg per unit as a minimum.
Important!
1. To prevent heat accumulation within the unit, the
mounting place must be selected in such a way
that a sufficient air circulation will be ensured
during operation. The unit must have a minimum distance of 1 m to adjoining surfaces and
the air vents at the housing must not be covered
in any case.
2. Pay in any case attention to a sufficient distance
to easily flammable material or material sensitive to heat.
3. If the unit is installed as a suspended load
above persons, it must additionally be secured
(e. g. by a safety rope). Screw the supplied
safety lug into the thread jack in the centre of the
lower side of the unit and attach the safety rope
to it. Fix the other end of the safety rope in such
a way that the maximum falling distance of the
unit is 20 cm.
5
D
A
CH
angezeigt. Danach ist der TWIST-252 betriebsbereit. Nach dem Betrieb das Gerät mit dem Netzschalter ausschalten.
Hinweis: Als Lichtquelle dient eine Entladungslampe. Wird das Gerät nur kurz ausgeschaltet oder
nur kurz von der Stromversorgung getrennt, leuchtet
die Lampe nicht sofort wieder auf. Sie muss erst
einige Zeit abkühlen, um erneut zünden zu können.
6.1 Musiksteuerung
1) Um den TWIST-252 über das integrierte Mikrofon
(17) zu steuern, den Eingang DMX IN (14) nicht
anschließen. Wenn an ihm kein DMX-Steuersignal anliegt, leuchtet die gelbe LED MASTER (12)
und das Display (8) signalisiert
(Show 1)
oder
(Show 2).
Wichtig!
Für die Musiksteuerung die Funktion Blackout
über das Menü oder mit der Fernbedienung LC-3
(Taste STAND BY) ausschalten, anderenfalls
bleibt der Schwenkkopf in seiner Ausgangsposition und der Lichtstrahl abgeblendet.
a) Die Taste MENU (9) viermal drücken, so dass
im Display
(blackout mode) erscheint.
b) Die Taste ENTER (11) drücken. Das Display
blinkt und zeigt
(yes blackout).
c) Mit der Taste DOWN oder UP (10) auf
(no blackout) umschalten.
d) Zum Speichern die Taste ENTER drücken.
Das Display zeigt für einige Sekunden
.
Danach erscheint wieder die gewählte Betriebsart. Wird die Taste ENTER nicht innerhalb von 8 Sekunden betätigt, schaltet das
Gerät auf die vorherige Einstellung zurück.
e) Zum Starten des Programmablaufs das Gerät
mit dem Netzschalter POWER (7) kurz ausund wieder einschalten.
2) Die Betriebsart Show 1 ist für die Aufstellung des
Gerätes auf dem Fußboden vorgesehen. Der
Rotationswinkel um die waagerechte Achse
beträgt hierbei max. 210°. Bei der Betriebsart
GB
6
Operation
Connect the supplied mains cable to a mains socket
(6) and the plug to a mains socket (230 V~/50 Hz). As
soon as the unit is connected to the mains voltage,
the POWER switch (7) lights up. Switch on the unit
with the POWER switch. The panning head and all
control motors go to a defined initial position. While
doing this, the display (8) shows the software version.
Then the TWIST-252 is ready for operation. After
operation, switch off the unit with the POWER switch.
Note: A discharge lamp serves as a light source. If
the unit is only shortly switched off or disconnected
from the power supply only for a short time, the lamp
does not immediately light up again. It must cool
down for some time to be able to ignite again.
6.1 Music control
1) To control the TWIST-252 via the integrated
microphone (17), do not connect the input DMX
IN (14). If no DMX control signal is present at this
input, the yellow LED MASTER (12) lights up and
the display (8) signalizes
(Show 1) or
(Show 2).
Important!
For the music control switch off the function
Blackout via the menu or with the remote control
LC-3 (button STAND BY), otherwise the panning
head remains in its initial position and the light
beam is stopped down.
a) Press the button MENU (9) four times so that
the display shows
(blackout mode).
b) Press the button ENTER (11). The display
flashes and shows
(yes blackout).
c) Switch to
(no blackout) with the button
DOWN or UP (10).
d) To memorize, press the button ENTER. The
display shows
for some seconds. Then
the selected operating mode reappears. If the
button ENTER is not actuated within 8 seconds, the unit switches back to the previous
adjustment.
6
Show 2, die für die Deckenmontage vorgesehen
ist, beträgt der Winkel max. 90°.
a) Zum Umschalten zwischen Show 1 und 2 die
Taste MENU (9) zweimal drücken, so dass im
Display
(show mode) erscheint.
b) Die Taste ENTER (11) drücken. Das Display
blinkt.
c) Mit der Taste DOWN oder UP (10) zwischen
für Show 1 und
für Show 2 umschalten.
d) Zum Speichern die Taste ENTER drücken.
Das Display zeigt für einige Sekunden
.
Danach erscheint wieder die gewählte Betriebsart und der Programmablauf startet.
Wird die Taste ENTER nicht innerhalb von
8 Sekunden betätigt, schaltet das Gerät auf
die vorherige Einstellung zurück.
3) Den Regler SENSITIVITY (16) für die Mikrofonempfindlichkeit so einstellen, dass die Dynamik
der Musik optimal durch die Bewegungen des
Lichtstrahls sowie durch den Wechsel der Lichtmuster und Farben wiedergegeben wird. Die
größte Empfindlichkeit ist bei ganz nach rechts
gedrehtem Regler eingestellt.
Wenn eine Farb-, Muster- oder Bewegungsänderung durch ein Musiksignal erfolgt, leuchtet
jeweils kurz die grüne LED SOUND (12) auf.
Hinweis: Bei Veränderung der Lautstärke an der
Musikanlage muss auch die Mikrofonempfindlichkeit über den Drehregler entsprechend angepasst werden.
6.1.1 Zusammenschalten mehrerer TWIST-252
Es lassen sich mehrere Geräte zusammenschalten,
um so über das Mikrofon des Hauptgerätes (Master)
alle weiteren Nebengeräte (Slave) im gleichen
Rhythmus zu steuern.
1) Den Anschluss DMX OUT (13) des Hauptgerätes
über ein 3-poliges XLR-Kabel (z. B. Serie MEC-...
oder MECN-... aus dem Sortiment von „img
Stage Line“) mit dem Anschluss DMX IN (14) des
ersten Nebengerätes verbinden.
e) To start the programme sequence, shortly
switch the unit off and on again with the
POWER switch (7).
2) The operating mode Show 1 is provided for placing the unit on the floor. The rotation angle
around the horizontal axis is 210° as a maximum.
For the operating mode Show 2 provided for ceiling mounting, the angle is 90° as a maximum.
a) To switch between Show 1 and Show 2 press
the button MENU (9) twice so that the display
shows
(show mode).
b) Press the button ENTER (11). The display
flashes.
c) With the button DOWN or UP (10) switch between
for Show 1 and
for Show 2.
d) To memorize, press the button ENTER. The
display shows
for some seconds. Then
the selected operating mode reappears and
the programme sequence starts. If the button
ENTER is not actuated within 8 seconds, the
unit switches back to the previous adjustment.
3) Adjust the control SENSITIVITY (16) for the
microphone sensitivity so that the dynamic power
of the music is reproduced in an optimum way by
the movements of the light beam as well as by
the change of the light patterns and colours. The
highest sensitivity is set if the control is fully
turned to the right.
If the colour, the pattern, or the movement is
changed by music control, the green LED
SOUND (12) shortly lights up in each case.
Note: If the volume of the music system changes, the microphone sensitivity must be adapted
accordingly via the rotary control.
6.1.1 Interconnecting several TWIST-252 units
Several units can be interconnected in order to control all further auxiliary units (slave units) to the same
rhythm via the microphone of the main unit (master
unit).
1) Connect the output DMX OUT (13) of the main
unit via a 3-pole XLR cable (e. g. series MEC-... or
2) Den Anschluss DMX OUT des ersten Nebengerätes mit dem Anschluss DMX IN des zweiten
Nebengerätes verbinden usw.
3) Sobald an den Nebengeräten die Steuersignale
vom Hauptgerät anliegen, leuchtet bei ihnen die
rote LED SLAVE (12) konstant. Die Bewegungen
der Nebengeräte können mit dem Hauptgerät
synchron laufen oder genau entgegengesetzt
(z. B. wenn nur ein Nebengerät eingesetzt wird).
a) Zum Umschalten zwischen synchroner und
entgegengesetzter Bewegung die Taste MENU
(9) am Nebengerät dreimal drücken, so dass
im Display
(slave mode) angezeigt wird.
b) Die Taste ENTER (11) drücken. Das Display
blinkt.
c) Mit der Taste DOWN oder UP (10) zwischen
(normal) für synchrone und
(2 light show) für entgegengesetzte Bewegung umschalten.
d) Zum Speichern die Taste ENTER drücken.
Das Display zeigt für einige Sekunden
.
Danach erscheint wieder die gewählte Betriebsart (
für synchrone bzw.
für
entgegengesetzte Bewegung) und der Programmablauf startet. Wird die Taste ENTER
nicht innerhalb von 8 Sekunden betätigt,
schaltet das Gerät auf die vorherige Einstellung zurück.
6.2 Fernbedienung LC-3
Über die als Zubehör erhältliche Fernbedienung
LC-3 können verschiedene Funktionen gesteuert
werden.
1) Die Fernbedienung an die Buchse REMOTE
CONTROL (15) anschließen.
2) Der DMX-Eingang (14) darf nicht angeschlossen
sein; die gelbe LED MASTER (12) muss leuchten.
3) Über den DMX-Ausgang (13) können weitere
TWIST-252 angeschlossen werden (siehe Kapitel 6.1.1), um diese mit der Fernbedienung synchron zum Hauptgerät zu steuern.
MECN-... of the “img Stage Line” product range)
to the input DMX IN (14) of the first auxiliary unit.
2) Connect the connection DMX OUT of the first
auxiliary unit to the connection DMX IN of the
second auxiliary unit, etc.
3) As soon as the control signals from the main unit
are present at the auxiliary units, the red LED
SLAVE (12) constantly lights up at these units.
The movements of the auxiliary units may be synchronized with the main unit or be exactly opposite to it (e. g. if only one auxiliary unit is used).
a) To switch between synchronous and opposite
movement, press the button MENU (9) on the
auxiliary unit three times so that the display
shows
(slave mode).
b) Press the button ENTER (11). The display
flashes.
c) With the button DOWN or UP (10) switch between
(normal) for synchronous movement and
(2 light show) for opposite
movement.
d) To memorize, press the button ENTER. The
display shows
for some seconds. Then
the selected operating mode (
for synchronous movement or
for opposite
movement) reappears and the programme
sequence starts. If the button ENTER is not
actuated within 8 seconds, the unit switches
back to the previous adjustment.
6.2 Remote control LC-3
Via the remote control LC-3 available as an accessory different functions may be controlled:
1) Connect the remote control to the jack REMOTE
CONTROL (15).
2) The input DMX IN (14) must not be connected;
the yellow LED MASTER (12) must light up.
3) Via the output DMX OUT (13) it is possible to
connect further TWIST-252 units (see chapter
6.1.1) to control them synchronously to the main
unit with the remote control.
4) Mit der Taste STAND BY (18) lässt sich die Funktion Blackout ein- und ausschalten. Bei eingeschalteter Funktion leuchtet die LED neben der
Taste. Der Schwenkkopf fährt in die Ausgangsposition und die Blende wird geschlossen.
5) Mit der Taste MODE (20) den Betriebsmodus
wählen:
1. Modus Show 1 (LED neben der Taste leuchtet
nicht)
2. Slow-Modus (LED leuchtet kontinuierlich)
3. Modus Show 2 (LED blinkt)
a) Im Modus Show 1 (Rotationswinkel um die
waagerechte Achse max. 210°) und Modus
Show 2 (Rotationswinkel max. 90°) erfolgen
die Bewegung des Lichtstrahls sowie der
Wechsel der Farben und Muster musikgesteuert. Durch Gedrückthalten der Taste
FUNCTION (19) lässt sich einer der drei
Stroboskop-Effekte aktivieren:
1. Strobe-Effekt mit wechselnden Farben und
Mustern
2. Strobe-Effekt mit weißem Licht; bei den
Nebengeräten ist der Effekt synchron
3. Strobe-Effekt mit weißem Licht; bei den
Nebengeräten ist der Effekt entgegengesetzt
Beim erneuten Drücken der Taste FUNCTION
ist jeweils der nächste Strobe-Effekt aktiviert.
b) Im Slow-Modus wird nur die Bewegung des
Lichtstrahls musikgesteuert. Der Wechsel der
Farben und Muster erfolgt durch die Taste
FUNCTION. Mit jedem Tastendruck wird zur
nächsten Farbe gewechselt. Nachdem alle 10
Farben durchlaufen sind, wird mit einem weiteren Tastendruck das nächste Muster angewählt.
Kanal
1
Schwenkkopfdrehung (Pan) 540°
000 – 255
2
Schwenkkopfneigung (Tilt) 270°
000 – 255
3
4
5
6
6.3 Operation via a light control unit
For operation via a light control unit, the TWIST-252
is equipped with 16 DMX channels. Table fig. 3 indicates the functions and corresponding DMX values.
Kanal
Pan- und Tilt-Geschwindigkeit
schnell → langsam
Dimmer
dunkel → hell
Funktion
DMX-Wert
000 – 255
kein Effekt
Stroboskop langsam → schnell
Wackeleffekt langsam → schnell
000 – 015
016 – 135
136 – 255
Farbe1)
Weiß
Blau
Orange
Grün
Hellblau
Rot
Rosa
UV-Violett
Gelb
Hellgrün
ständiger Farbwechsel
langsam → schnell
000 – 012
013 – 025
026 – 038
039 – 051
052 – 063
064 – 076
077 – 089
090 – 102
103 – 115
116 – 127
—
8
Reset 2)
255
9
Gobo
kein Gobo
Gobo A
Gobo B
Gobo C
Gobo D
Gobo E
Gobo F
Gobo G
ständiger Wechsel
langsam → schnell
000 – 015
016 – 031
032 – 047
048 – 063
064 – 079
080 – 095
096 – 111
112 – 127
➂
128 – 255
1)
Channel
Function
DMX Value
1
rotation of panning head (pan) 540°
000 – 255
2
tilting of panning head (tilt) 270°
000 – 255
4
5
6
pan and tilt speed
fast → slow
dimmer
dark → bright
000 – 255
no effect
stroboscope slow → fast
wobbling effect slow → fast
000 – 015
016 – 135
136 – 255
colour1)
white
blue
orange
green
light-blue
red
pink
UV-violet
yellow
light-green
continuous change of colours
slow → fast
000 – 009
010 – 120
121 – 134
135 – 245
246 – 255
11
Prisma aus
Prisma ein
000 – 127
128 – 255
12
Prisma-Rotation
Stopp
Rechtsrotation schnell → langsam
Stopp
Linksrotation langsam → schnell
Stopp
000 – 009
010 – 120
121 – 134
135 – 245
246 – 255
13
Fokuseinstellung
000 – 255
14
vorprogrammierter Showablauf
kein Showablauf, DMX-Steuerung
Show 1, automatischer Ablauf
Show 2, automatischer Ablauf
Show 1, musikgesteuert
Show 2, musikgesteuert
000 – 031
032 – 127
128 – 223
224 – 239
240 – 255
15
vorprogrammierte Lichtstrahlmuster
für den über Kanal 14 gewählten Ablauf
nur autom. Farb- und Gobowechsel
Gobo-Rotation
Stroboskop
Wackeleffekt
Prisma
Prisma-Rotation
Stroboskop + Prisma-Rotation
000 – 047
048 – 095
096 – 143
144 – 191
192 – 207
208 – 239
240 – 255
16
Reset 2)
255
128 – 255
keine Funktion
3
10
Gobo-Rotation
Stopp
Rechtsrotation schnell → langsam
Stopp
Linksrotation langsam → schnell
Stopp
000 – 255
7
Zur Bedienung über ein Lichtsteuergerät ist der
TWIST-252 mit 16 DMX-Kanälen ausgestattet. In
der Tabelle Abb. 3 sind die Funktionen und zugehörigen DMX-Werte angegeben.
5) Select the operating mode with the button MODE
(20):
1. Mode Show 1 (LED next to the button does
not light up)
2. Slow mode (LED lights up continuously)
3. Mode Show 2 (LED flashes)
a) In the mode Show 1 (rotation angle around
the horizontal axis 210° as a maximum) and
mode Show 2 (rotation angle 90° as a maximum) the movement of the light beam and the
change of colours and patterns are musiccontrolled. By keeping the button FUNCTION
(19) pressed it is possible to activate one of
the three stroboscopic effects:
1. Strobe effect with changing colours and
patterns
2. Strobe effect with white light; with the auxiliary units, the effect is synchronous
3. Strobe effect with white light; with the auxiliary units, the effect is opposite
With each pressing of the button FUNCTION
the next strobe effect is activated in each
case.
b) In the Slow mode only the movement of the
light beam is controlled by the music. The
change of the colours and patterns is made by
the button FUNCTION. With each pressing of
the button the unit changes to the next colour.
After all 10 colours are run through, the next
pattern is selected with another pressing of
the button.
DMX-Wert
D
A
6.3 Bedienung über ein Lichtsteuergerät
4) With the button STAND BY (18) the function
Blackout can be switch on and off. With the function switched on, the LED next to the button lights
up. The panning head goes to the initial position
and the iris is closed.
Funktion
Belegung der DMX-Kanäle
Die angegebenen DMX-Werte für die Farbauswahl beziehen sich auf
den Farb-Modus „einfarbig“. Bei der Einstellung „zweifarbig“ (siehe Kap.
6.4) ist auch eine Zwischenstellung mit zwei Farben möglich.
2)
Um die Reset-Funktion zu aktivieren, Kanal 8 und Kanal 16 auf den
DMX-Wert 255 einstellen.
Channel
Function
DMX Value
10
gobo-rotation
stop
rotation to the right fast → slow
stop
rotation to the left slow → fast
stop
000 – 009
010 – 120
121 – 134
135 – 245
246 – 255
11
prism off
prism on
000 – 127
128 – 255
12
prism rotation
stop
rotation to the right fast → slow
stop
rotation to the left slow → fast
stop
000 – 009
010 – 120
121 – 134
135 – 245
246 – 255
13
focus adjustment
000 – 255
14
preprogrammed show sequence
no show sequence, DMX control
Show 1, automatic sequence
Show 2, automatic sequence
Show 1, music-controlled
Show 2, music-controlled
000 – 031
032 – 127
128 – 223
224 – 239
240 – 255
15
preprogrammed light beam patterns
for the sequence selected via channel 14
only auto. change of colours and gobos
gobo rotation
stroboscope
wobbling effect
prism
Prisma-Rotation
stroboscope + prism rotation
000 – 047
048 – 095
096 – 143
144 – 191
192 – 207
208 – 239
240 – 255
16
reset 2)
255
000 – 255
000 – 012
013 – 025
026 – 038
039 – 051
052 – 063
064 – 076
077 – 089
090 – 102
103 – 115
116 – 127
128 – 255
7
no function
—
8
reset 2)
255
9
gobo
no gobo
gobo A
gobo B
gobo C
gobo D
gobo E
gobo F
gobo G
continuous change
slow → fast
000 – 015
016 – 031
032 – 047
048 – 063
064 – 079
080 – 095
096 – 111
112 – 127
128 – 255
CH
➂
GB
Configuration of the DMX channels
1)
The DMX values indicated for the colour selection refer to the colour
mode “single-coloured”. For the adjustment “bicoloured” (see chapter
6.4) also an interim position between two colours is possible.
2)
To activate the reset function, adjust channel 8 and channel 16 to the
DMX value 255.
7
D
A
CH
1) Den DMX-Eingang (14) mit dem DMX-Ausgang
des Lichtsteuergerätes verbinden.
Zum Anschluss sollten spezielle Kabel für
hohen Datenfluss verwendet werden. Die Verwendung normaler Mikrofonkabel ist nur bei
einer Gesamtkabellänge bis 100 m zu empfehlen. Die besten Übertragungsergebnisse werden
mit einem abgeschirmten Mikrofonkabel von 2 x
0,25 mm2 oder einem speziellen Datenübertragungskabel erreicht. Bei Leitungslängen ab
150 m wird das Zwischenschalten eines DMXAufholverstärkers empfohlen (z. B. SR-103DMX
von „img Stage Line“).
2) Den DMX-Ausgang (13) mit dem DMX-Eingang
des nächsten Lichteffektgerätes verbinden. Dessen Ausgang wieder mit dem Eingang des nachfolgenden Gerätes verbinden usw., bis alle Lichteffektgeräte in einer Kette angeschlossen sind.
Die DMX-Ausgangsbuchse besitzt eine Verriegelung. Zum Herausziehen des Steckers den
PUSH-Hebel drücken.
3) Den DMX-Ausgang des letzten Lichteffektgerätes
der Kette mit einem 120-Ω-Widerstand (0,25 W)
abschließen: An die Pins 2 und 3 eines XLRSteckers den Widerstand anlöten und den Stecker in den DMX-Ausgang stecken.
4) Um den TWIST-252 von einem Lichtsteuergerät
bedienen zu können, muss die DMX-Startadresse für den 1. DMX-Kanal eingestellt werden. Ist z. B. am Steuergerät die Adresse 17 für
die Steuerung der Schwenkkopfdrehung vorgesehen, am TWIST-252 die Startadresse 17 einstellen.
a) Die Taste MENU (9) einmal drücken, so dass
im Display
(address) angezeigt wird.
b) Die Taste ENTER (11) drücken. Das Display
blinkt.
c) Mit der Taste DOWN oder UP (10) die entsprechende Adresse einstellen (1 – 497).
d) Zum Speichern die Taste ENTER drücken.
Das Display zeigt für einige Sekunden
.
Danach erscheint wieder die gewählte Start-
GB
1) Connect the DMX input (14) to the DMX output of
the light control unit.
For the connection, special cables for high
data flow should be used. The use of standard
microphone cables can only be recommended for
a total cable length of up to 100 m. The best transmission results are obtained with a screened
microphone cable of 2 x 0.25 mm2 or a special
data transmission cable. For cable lengths exceeding 150 m it is recommended to insert a DMX
level matching amplifier (e. g. SR-103DMX from
“img Stage Line”).
2) Connect the DMX output (13) to the DMX input of
the next light effect unit. Connect its output to the
input of the following unit, etc. until all light effect
units are connected in one row.
The DMX output jack has a latching. To pull
out the plug, press the PUSH lever.
3) Terminate the DMX output of the last light effect
unit in the row with a 120 Ω resistor (0.25 W): Solder the resistor to the pins 2 and 3 of an XLR plug
and connect the plug to the DMX output.
4) To be able to operate the TWIST-252 from a light
control unit, the DMX start address for the first
DMX channel must be adjusted. If e. g. the address 17 is provided on the control unit for the
control of the rotation of the panning head, adjust
the start address 17 at the TWIST-252.
a) Press the button MENU (9) once so that
(address) is displayed.
b) Press the button ENTER (11). The display
flashes.
c) With the button DOWN or UP (10) adjust the
corresponding address (1 – 497).
d) To memorize, press the button ENTER. The
display shows
for some seconds. Then
the selected start address is displayed again.
If the button ENTER is not actuated within
8 seconds, the unit switches back to the previous address.
8
adresse. Wird die Taste ENTER nicht innerhalb von 8 Sekunden betätigt, schaltet das
Gerät auf die vorherige Adresse zurück.
Nach dem Einstellen der Startadresse für den
1. Kanal sind die Kanäle 2 – 16 den darauf folgenden Adressen zugeordnet. Beispiel:
Startadresse 17 = Kanal für die Drehung des
Schwenkkopfes
Adresse 18 = Kanal für die Schwenkkopfneigung
Adresse 19 = Kanal für die Geschwindigkeit
…
Adresse 31 = Kanal zur Auswahl der vorprogrammierten Lichtstrahlmuster
Adresse 32 = Kanal für Reset
5) Nach dem Einstellen der Startadresse lässt sich
der TWIST-252 über das angeschlossene Steuergerät bedienen. Die eingestellte Startadresse
wird vom Display stets angezeigt, sobald Steuersignale vom DMX-Steuergerät empfangen werden. Zusätzlich leuchtet die rote LED DMX (12).
Blackout-Modus
6.4 Betriebsparameter verändern
Schwenkkopfdrehung (Pan)
Durch Aufrufen des Menüs lassen sich die folgenden
Parameter verändern. Die hier dargestellte Reihenfolge entspricht der Reihenfolge der Menüpunkte.
Einstellung der Startadresse (Kap. 6.3)
Blackout ein (yes blackout)
Liegt kein DMX-Steuersignal
an der Buchse DMX IN (14)
an, fährt der Schwenkkopf in
die Ausgangsposition und die
Blende wird geschlossen.
Blackout aus (no blackout)
Eine Musiksteuerung allein
durch das Mikrofon (17) ist
möglich.
Farb-Modus
einfarbig (normal)
Die Farbscheibe rastet exakt
bei einer Farbe ein.
zweifarbig (split colour)
Eine Zwischenstellung
zwei Farben ist möglich.
mit
normal
Drehung entgegengesetzt
Schwenkkopfneigung (Tilt)
normal
Bewegung entgegengesetzt
...
Displaydarstellung
Show-Modus (Kap. 6.1)
Show 1
Show 2
Slave-Modus (Kap. 6.1.1)
normal
um 180° gedreht
(für die Deckenmontage)
Mit der Taste ENTER die Einstellung umschalten. Das Display blinkt 8 Sekunden
lang. Danach blendet sich das Menü aus.
normal
2 Light Show
After adjusting the start address for the first channel, the channels 2 to 16 are assigned to the following addresses. Example:
start address 17 = channel for the rotation of the
panning head
address 18 = channel for the tilting of the panning
head
address 19 = channel for the speed
...
address 31 = channel for the selection of the preprogrammed light beam patterns
address 32 = channel for reset
5) After adjusting the start address, it is possible to
operate the TWIST-252 via the connected control
unit. The adjusted start address is always displayed as soon as control signals are received
from the DMX control unit. In addition, the red
LED DMX (12) lights up.
6.4 Changing the operating parameters
By calling the menu, the following parameters can
be changed. The order shown here corresponds to
the order of the menu items.
Adjustment of the start address
(chapter 6.3)
Blackout mode
blackout on (yes blackout)
If no DMX control signal is
present at the jack DMX IN
(14), the panning head goes
to the initial position and the
iris is closed.
blackout off (no blackout)
A music control only by the
microphone (17) is possible.
Colour mode
single-coloured (normal)
The colour disk locks into
place exactly at one colour.
bicoloured (split colour)
An interim position between
two colours is possible.
Rotation of panning head (pan)
normal
opposite rotation
Tilting of panning head (tilt)
normal
...
opposite movement
Display presentation
Show mode (chapter 6.1)
Show 1
Show 2
Slave mode (chapter 6.1.1)
normal
2 light show
normal
turned by 180°
(for ceiling suspension)
Switch over the adjustment with the button ENTER. The display flashes for
8 seconds. Then the menu is extinguished.
feste Schwenkkopfposition
Der Schwenkkopf lässt sich auf fünf verschiedene Positionen fest einstellen:
nach oben (unten), vorne, links, hinten
oder rechts zeigend. Durch mehrfaches
Drücken der Taste ENTER die Festposition anwählen. Zum Zurückschalten auf
den vorherigen Betriebsmodus die Taste MENU drücken. Der nächste Menüpunkt blinkt 8 Sekunden lang. Danach
blendet sich das Menü aus.
Selbsttest
Nach dem Drücken der Taste ENTER
läuft ein Selbsttest ab. Zum Beenden
die Taste MENU drücken. Der nächste
Menüpunkt blinkt 8 Sekunden lang. Danach blendet sich das Menü aus.
Betriebsstundenzähler (Fixture Hours)
Nach dem Drücken der Taste ENTER
zeigt das Display die Betriebsstunden
an. Zum Zurückschalten auf den vorherigen Betriebsmodus die Taste MENU
drücken. Der nächste Menüpunkt blinkt
8 Sekunden lang. Danach blendet sich
das Menü aus.
Reset
Durch Drücken der Taste ENTER erfolgt
eine Rückstellung: Der Schwenkkopf
fährt kurz in die Ausgangsstellung und
der Lichtstrahl wird abgeblendet. Danach schaltet das Gerät in den vorherigen Betriebsmodus zurück.
Bedienschritte
8
1) Die Taste MENU (9) so oft drücken, bis die entsprechende Anzeige im Display erscheint.
Stromversorgung: . . . . . . . . 230 V~/50 Hz
2) Bei den ersten sieben Menüpunkten (
Startadresse bis
Schwenkkopfneigung)
mit der Taste ENTER (11) die Auswahl bestätigen. Dann mit der Taste DOWN oder UP (10) die
Einstellung vornehmen und diese mit der Taste
ENTER innerhalb von 8 Sekunden speichern.
Bei dem Menüpunkt
Displaydarstellung
wird mit der Taste ENTER sofort die Einstellung
geändert und bei den letzten vier Menüpunkten
(
feste Schwenkkopfposition bis
Reset) die gewählte Funktion aktiviert.
Leuchtmittel: . . . . . . . . . . . . 1 x Entladungslampe
Typ MSD 250 W mit
Sockel GY 9,5
3) Um zum nächsten Menüpunkt zu springen, die
Taste MENU drücken.
4) Wird bei einem angewählten Menüpunkt innerhalb von 8 Sekunden keine weitere Taste gedrückt, blendet sich das Menü aus.
7
Technische Daten
Leistungsaufnahme: . . . . . . 510 VA
D
A
CH
Abstrahlwinkel: . . . . . . . . . . . 13°
Drehwinkel/-geschwindigkeit
senkrechte Achse (Pan): . 540° in 2,8 s
waagerechte Achse (Tilt): . 270° in 1,6 s
Einsatztemperatur: . . . . . . . . 0 – 40 °C
Abmessungen: . . . . . . . . . . . 400 x 500 x 360 mm
Gewicht: . . . . . . . . . . . . . . . . 26 kg
Laut Angaben des Herstellers.
Änderungen vorbehalten.
Reinigung der Optik
Die Linse und die Farbscheibe sollten in regelmäßigen Abständen, je nach Verschmutzung durch
Staub, Rauch oder andere Partikel, gereinigt werden. Nur dann kann das Licht in maximaler
Helligkeit abgestrahlt werden. Vor dem Öffnen des
Gerätes den Stecker aus der Steckdose ziehen und
das Gerät 15 Minuten abkühlen lassen.
Zur Reinigung ein weiches, sauberes Tuch und
ein handelsübliches Glasreinigungsmittel verwenden. Anschließend die Teile vorsichtig trocken
wischen.
Diese Bedienungsanleitung ist urheberrechtlich für MONACOR ® INTERNATIONAL GmbH & Co. KG
geschützt. Eine Reproduktion für eigene kommerzielle Zwecke – auch auszugsweise – ist untersagt.
Fixed panning head position
The panning head can be fixed to five
different positions: upwards (downwards), pointing to the front, right, back,
or left. Select the fixed position by pressing the button ENTER several times. To
switch back to the previous operating
mode, press the button MENU. The next
menu item flashes for 8 seconds. Then
the menu is extinguished.
Self-test
After pressing the button ENTER, a selftest is performed. To stop it, press the
button MENU. The next menu item
flashes for 8 seconds. Then the menu is
extinguished.
Working hour meter (fixture hours)
After pressing the button ENTER, the
display shows the working hours. To
switch back to the previous operating
mode, press the button MENU. The next
menu item flashes for 8 seconds. Then
the menu is extinguished.
Reset
By pressing the button ENTER, the unit
is reset: The panning head shortly goes
to the initial position and the light beam
is stopped down. Then the unit switches
back to the previous operating mode.
Operating steps
8
1) Press the button MENU (9) so many times until
the corresponding display is shown.
2) In case of the first seven menu items (
start
address to
tilting of panning head) confirm
the selection with the button ENTER (11). Then
make the adjustment with the button DOWN or
UP (10) and memorize it with the button ENTER
within 8 seconds.
For the menu item
of display presentation, the adjustment is immediately changed with
the button ENTER and the selected function is
activated for the last four menu items(
fixed position of panning head to
reset).
3) To go to the next menu item, press the button
MENU.
4) If no further button is pressed within 8 seconds in
case of a selected menu item, the menu is extinguished.
Power supply: . . . . . . . . . . . 230 V~/50 Hz
7
Specifications
GB
Power consumption: . . . . . . 510 VA
Lamp: . . . . . . . . . . . . . . . . . . 1 x discharge lamp,
type MSD 250 W with
base GY 9,5
Radiation angle: . . . . . . . . . . 13°
Rotating angle/speed
vertical axis (pan): . . . . . . 540° in 2.8 s
horizontal axis (tilt): . . . . . 270° in 1.6 s
Ambient temperature: . . . . . 0 – 40 °C
Dimensions: . . . . . . . . . . . . . 400 x 500 x 360 mm
Weight: . . . . . . . . . . . . . . . . . 26 kg
According to the manufacturer.
Subject to change.
Cleaning of the Optical System
The lens and the colour disk should be cleaned at
regular intervals, depending on impurities caused by
dust, smoke, or other particles. Only then the light
can be radiated in maximum brightness. Prior to
opening the unit disconnect the plug from the mains
socket and let the unit cool down for 15 minutes.
For cleaning use a soft, clean cloth and a commercial detergent for glass. Then carefully wipe the
parts dry.
All rights reserved by MONACOR ® INTERNATIONAL GmbH & Co. KG. No part of this instruction manual
may be reproduced in any form or by any means for any commercial use.
9
F
B
Ouvrez le présent livret page 3 de manière à
visualiser les éléments et branchements.
1
Eléments et branchements
1.1 TWIST-252
1
2
3
4
5
6
7
8
9
10
11
12
13
Tête inclinable
Bras de rotation
Poignées de transport
Plaque de montage pour une fixation sur une traverse
Porte fusible :
tout fusible fondu doit être remplacé uniquement
par un fusible de même type
Prise secteur à brancher à une prise secteur
230 V~/50 Hz, via le cordon de liaison livré
Interrupteur POWER Marche/Arrêt : brille dès
que l’appareil est relié à une prise secteur.
Affichage
Touche MENU pour sélectionner le menu de réglage
Touches UP et DOWN pour sélectionner un réglage du menu
Touche ENTER pour confirmer un réglage du
menu
LEDs de contrôle pour le mode de fonctionnement :
DMX =
brille si un signal de commande DMX
est présent à l’entrée DMX IN (14)
MASTER = mode master (voir chap. 6.1 et 6.2) ;
gestion via la télécommande LC-3
ou le micro intégré
SLAVE = mode slave (voir chap. 6.1.1) ; gestion via une seconde TWIST-252
SOUND = brille brièvement si l’appareil modifie
la couleur, le gobo ou le mouvement
via un signal de musique
Sortie signal DMX (XLR 3 pôles) :
1 = masse, 2 = DMX-, 3 = DMX+
Vi preghiamo di aprire completamente la pagina 3.
Così vedrete sempre gli elementi di comando e i
collegamenti descritti.
1
Elementi di comando e collegamenti
1.1 TWIST-252
1
2
3
4
5
6
7
8
9
10
11
12
10
●
15 Prise de branchement pour la télécommande
LC-3
CH
I
14 Entrée signal DMX (XLR 3 pôles) :
1 = masse, 2 = DMX-, 3 = DMX+
Testa orientabile
Braccio girevole
Maniglie
Piastra di montaggio per il fissaggio ad una traversa
Portafusibile;
sostituire un fusibile difettoso solo con uno dello
stesso tipo.
Presa per il collegamento con una presa di rete
(230 V~/50 Hz) mediante il cavo in dotazione
Interruttore on/off POWER; si illumina non appena l’apparecchio è collegato con una presa di rete
Display
Tasto MENU per chiamare il menu d’impostazione
Tasti UP e DOWN per selezionare un’impostazione del menù
Tasto ENTER per confermare un’impostazione
del menù
LED di controllo per la modalità di funzionamento:
DMX =
è acceso se all’ingresso DMX IN (14)
è presente un segnale DMX di comando
MASTER = modalità MASTER (capp. 6.1 e 6.2);
comando mediante il telecomando
LC-3 o il microfono integrato
SLAVE = modalità SLAVE (cap. 6.1.1); comando mediante una seconda
TWIST-252
SOUND = si accende brevemente se l’apparecchio cambia colore, disegno o movimento in seguito ad un segnale musicale
16 Réglage pour la sensibilité du micro (17) : en le
tournant dans le sens des aiguilles d’une montre,
la sensibilité augmente.
17 Micro pour la gestion via la musique
●
●
1.2 Télécommande LC-3
La télécommande est disponible en option mais
n’est pas livrée avec la TWIST-252
18 Touche STAND BY pour la fonction Blackout
(tête en position initiale et diaphragme fermé)
Attention !
L’appareil est alimenté par une tension dangereuse 230 V~. Ne touchez jamais l’intérieur de
l’appareil car en cas de mauvaise manipulation,
vous pourriez subir une décharge électrique.
Faites toujours appel à un technicien spécialisé
pour effectuer les réparations.
19 Touche FUNCTION :
en mode Show 1 ou 2, pour activer un effet
strobo (tant que la touche est enfoncée)
en mode Slow (lent), pour changer les 10 couleurs et pour passer au gobo suivant
20 Touche MODE pour commuter entre
mode Show 1 (la LED ne brille pas)
mode Slow
(la LED brille)
mode Show 2 (la LED clignote)
Conseil : pour une gestion via la télécommande,
aucun signal DMX ne doit pas présent à l’entrée
DMX IN (14).
●
●
●
2
Conseils d’utilisation et de sécurité
Cet appareil répond à la norme européenne
89/336/CEE relative à la compatibilité électromagnétique et à la norme européenne 73/23/CEE portant sur les appareils à basse tension.
●
Respectez scrupuleusement les points suivants :
●
Cet appareil n’est conçu que pour une utilisation
en intérieur. Protégez-le de tout type de projections d’eau, des éclaboussures, d’une humidité
élevée et la chaleur (plage de température de
fonctionnement autorisée : 0 – 40 °C).
13 Uscita segnali DMX (XLR a 3 poli);
1 = massa, 2 = DMX-, 3 = DMX+
14 Ingresso segnali DMX (XLR a 3 poli);
1 = massa, 2 = DMX-, 3 = DMX+
15 Presa di collegamento per il telecomando LC-3
16 Regolatore della sensibilità del microfono (17)
Girando in senso orario, la sensibilità aumenta.
17 Microfono per il comando tramite musica
●
●
●
●
1.2 Telecomando LC-3
Il telecomando è disponibile come accessorio e non
è in dotazione alla TWIST-252.
18 Tasto STAND BY per la funzione Blackout (testa
orientabile in posizione di partenza e diaframma
chiuso)
19 Tasto FUNCTION:
nella modalità Show 1 o 2 per attivare un effetto
stroboscopio (finché il tasto viene premuto)
nella modalità Slow per cambiare i 10 colori e
quindi per passare al disegno successivo
20 Tasto MODE per cambiare fra
modalità Show 1 (LED non è acceso)
modalità Slow
(LED è acceso)
modalità Show 2 (LED lampeggia)
N.B.: Per poter usare il telecomando, all’ingresso
DMX IN (14) non deve essere presente nessun segnale DMX.
●
●
Avvertenze di sicurezza
Quest’apparecchio è conforme alle direttive CE
89/336/CEE sulla compatibilità elettromagnetica e
73/23/CEE per apparecchi a bassa tensione.
Durante l’uso si devono osservare assolutamente i
seguenti punti:
● Far funzionare l’apparecchio solo all’interno di
locali. Proteggerlo dall’acqua gocciolante e dagli
spruzzi d’acqua, da alta umidità dell’aria e dal
calore (temperatura d’impiego ammessa fra 0 °C
e 40 °C).
Ne débranchez jamais l’appareil en tirant sur le
cordon secteur ; retirez toujours le cordon secteur
en tirant la prise.
Pour le transport, saisissez l’appareil uniquement
par les poignées (3). En aucun cas, vous ne
devez le porter par la tête (1) ou par le bras (2).
Pour nettoyer le boîtier, utilisez un chiffon sec et
doux, en aucun cas, de produits chimiques ou
d’eau. Pour la lentille, vous pouvez utiliser des
nettoyants pour verres usuels.
Nous déclinons toute responsabilité en cas de
dommages matériels ou corporels résultants si
l’appareil est utilisé dans un but autre que celui
pour lequel il a été conçu, s’il n’est pas correctement monté, utilisé ou n’est pas réparé par une
personne habilitée.
Lorsque l’appareil est définitivement retiré du service, vous devez le déposer dans une usine de
recyclage adaptée pour contribuer à son élimination non polluante.
Durante il funzionamento, la testa orientabile (1) si
riscalda molto. Per evitare ustioni non toccare la
testa durante il funzionamento, e dopo lo spegnimento lasciarla raffreddarsi per alcuni minuti
prima di toccarla.
Non inserire oggetti nelle fessure d’aerazione.
Altrimenti si potrebbe provocare una scarica
elettrica.
Non mettere in funzione l’apparecchio e staccare
subito la spina rete se:
1. l’apparecchio, p. es. il contenitore, la lente, il filtro UV o il cavo rete presentano dei danni visibili;
2. dopo una caduta o dopo eventi simili sussiste il
sospetto di un difetto;
3. l’apparecchio non funziona correttamente.
Attenzione!
Quest’apparecchio funziona con tensione di rete
di 230 V~. Non intervenire mai al suo interno; la
manipolazione scorretta può provocare delle
scariche pericolose. Se l’apparecchio viene
aperto, cessa ogni diritto di garanzia. Per l’assistenza, rivolgersi ad un laboratorio qualificato.
●
2
Pendant le fonctionnement, la tête (1) chauffe de
manière très importante. Pour éviter toute brûlure,
ne touchez jamais la tête pendant le fonctionnement ; après avoir éteint l’appareil, laissez-la refroidir quelques minutes avant de la toucher.
Ne faites rien tomber dans les ouïes de ventilation, vous pourriez vous électrocuter.
Ne faites pas fonctionner l’appareil et débranchez-le immédiatement du secteur lorsque :
1. des dommages apparaissent sur l’appareil, par
exemple le boîtier, la lentille, le filtre UV ou sur
le cordon secteur,
2. après une chute ou un cas similaire, vous avez
un doute sur l’état de l’appareil,
3. des défaillances apparaissent.
●
●
Staccare il cavo rete afferrando la spina, senza tirare il cavo.
Per trasportare l’apparecchio usare solo le apposite maniglie (3). In nessun caso portare l’apparecchio prendendolo per la testa orientabile (1) o
per il braccio girevole (2).
Per la pulizia usare solo un panno morbido,
asciutto; non impiegare in nessun caso prodotti
chimici o acqua. Per la lente si può usare anche
un detergente per vetri che si trova in commercio.
Nel caso d’uso improprio, di montaggio sbagliato,
d’impiego scorretto o di riparazione non a regola
d’arte non si assume nessuna garanzia per l’apparecchio e nessuna responsabilità per eventuali
danni consequenziali a persone o a cose.
Se si desidera eliminare l’apparecchio definitivamente, consegnarlo per lo smaltimento ad un’istituzione locale per il riciclaggio.
3
Possibilités d’utilisation
La lyre TWIST-252 est particulièrement bien adaptée à une utilisation professionnelle sur scène et en
discothèque. Elle projète des gobos aux formes
diverses et de couleurs et contribue ainsi à créer
une atmosphère “dance”. La gestion de la lumière
se fait par le microphone intégré, via la télécommande LC-3 (livrée en option séparément) ou via un
contrôleur DMX.
4
Placement de la lampe
Le jeu de lumière est livré sans lampe. Il est nécessaire d’utiliser une lampe à décharge de type MSD
250 W avec un culot GY 9,5.
En aucun cas, vous ne devez utiliser une lampe
de type différent !
Dans la gamme “img Stage Line”, la lampe suivante
peut être utilisée :
Article
Ref. num.
HLO-250MSD 05.0005
Durée de vie moyenne
3000 h
Ne touchez jamais le bulbe de la lampe avec les
doigts ; la sueur et les pellicules grasses sur les
doigts diminuent la puissance lumineuse de la
lampe et se consument.
Attention !
1. Avant d’insérer ou retirer la lampe halogène,
vous devez impérativement débrancher l’appareil du secteur.
2. Pendant le fonctionnement, la lampe est très
chaude, vous devez laisser refroidir le boîtier et
la lampe après toute utilisation et avant tout
remplacement (refroidissement pendant 15 minutes au moins).
3. Ne regardez jamais directement, appareil
ouvert, vers la lampe à décharge chaude. La
luminosité élevée et le rayonnement UV peuvent engendrer des troubles de la vue.
3
alla stampa “Bulb Access” fra il ventilatore e il
retro della testa orientabile. A questo punto si può
togliere la maschera di schermatura della lampadina e si vede il porta lampada.
Possibilità d’impiego
L’unità per effetti luce TWIST-252 è adatta in modo
particolare per l’impiego sul palcoscenico e in discoteca. L’apparecchio proietta diversi disegni colorati
creando un’atmosfera dancefloor ideale. Il comando
avviene tramite il microfono integrato, tramite il telecomando LC-3 (come accessorio) oppure per mezzo di un’unità di comando luce DMX.
4
1) Dévissez l’enveloppe supérieure du boîtier de la
tête ; retirez les deux vis à gauche et à droite à
côté de l’inscription “Bulb Access” entre le ventilateur et la face arrière de la tête. Vous pouvez
maintenant retirer la plaque coudée sert d’écran
à la lumière et la douille de la lampe est visible.
2) Pour changer la lampe, retirez l’ancienne du support de la lampe.
3) Saisissez la nouvelle lampe avec un tissu propre
et non pelucheux et placez-la dans la douille.
Avec un tournevis, poussez les ressorts de maintien sur le culot, avec précaution, sur le côté ; dirigez le culot de telle sorte que les pins de branchement soient exactement dirigés vers les trous
de contact de la douille de la lampe.
4) Revissez la plaque et l’enveloppe du boîtier. Une
fois l’appareil allumé, avec les trois écrous de
réglage sur la face arrière de la tête (repérés par
A , B et C ), réglez la luminosité maximale et un
éclairage uniforme du faisceau lumineux.
● La lampe proposée contient en faible quantité
des produits toxiques nocifs pour l’environnement (mercure par exemple). En Europe, il est
impératif de la déposer dans une poubelle adéquate. Dans d’autres pays, vous devez vous
reporter aux lois en vigueur.
● Il convient de remplacer la lampe après au moins
1,25ème de sa durée moyenne de vie car une
durée d’utilisation croissante augmente de manière significative le risque d’un éclatement de la
lampe à la suite de modifications de structure du
verre quartz.
La lyre est équipée d’un compteur d’heures de
fonctionnement de la lampe. Il peut être utilisé
pour déterminer la durée de fonctionnement de la
lampe. Lorsque vous changez la lampe, notez
l’indication du compteur – voir chapitre 6.4 “Modification des paramètres de fonctionnement”,
point “Compteur heures de fonctionnement”.
● Après un éclatement de la lampe pendant le
fonctionnement, il est recommandé de quitter
l’environnement immédiat de la lampe, par précaution, pour éviter toute mise en danger de la
Inserire la lampadina
L’unità viene consegnata senza lampadina. È richiesta una lampada a scarica elettrica del tipo MSD
250 W con zoccolo GY 9,5.
In nessun caso si devono usare lampadine di un
altro tipo!
Dal programma “img Stage Line” si può usare la
seguente lampadina:
Articolo
N. d’ordine
HLO-250MSD 05.0005
Durata media
2) Per sostituire la lampadina sfilare quella vecchio
dallo zoccolo.
3) Afferrare la nuova lampadina con un panno pulito
non sfilacciato e inserirla nella sua sede. Per fare
ciò spostare le molle vicino allo zoccolo delicatamente con l’aiuto di un cacciavite. Orientare lo
zoccolo in modo tale che i pin di contatto siano
esattamente di fronte ai fori di contatti del porta
lampada.
4) Riavvitare la maschera di schermatura e la parte
superiore del contenitore. Dopo la messa in funzione, con i tre dadi di regolazione (contrassegnati con A , B e C ) impostare la massima
luminosità e l’illuminazione uniforme della zona
interessata.
●
La lampadina indicata qui contiene piccole quantità di sostanze nocive all’ambiente (p. es. mercurio), e perciò in Europa deve essere trattata come
rifiuto tossico. In altri paesi si devono rispettare le
norme nazionali.
●
Al massimo dopo 1,25 volte la durata media della
lampadina occorre sostituirla perché con l’uso
aumenta il rischio di scoppio in seguito alle modifiche strutturali del vetro di quarzo.
L’apparecchio è equipaggiato con un contaore
che può essere usato per determinare le ore di
funzionamento della lampadina. Segnalare l’indicazione del contatore quando si sostituisce la
lampadina – vedi cap. 6.4 “Modificare i parametri
di funzionamento”, alla voce Contaore.
3000 h
Non toccare mai il vetro della lampadina con le dita!
I grassi e il sudore della pelle riducono la potenza e
lasciano tracce sul vetro.
Attenzione!
1. Staccare assolutamente la spina di rete prima di
inserire o togliere la lampada!
2. Poiché la lampada si riscalda moltissimo durante il funzionamento, occorre che il contenitore e la lampadina si possano raffreddare dopo
l’uso (minimo 15 minuti), prima di sostituire la
lampadina.
3. Non guardare mai direttamente la lampadina
accesa quando l’apparecchio è aperto. L’alta
luminosità e i raggi UV possono danneggiare gli
occhi.
1) Svitare la parte superiore della testa orientabile.
Togliere le due viti a sinistra e da destra vicino
●
Se la lampadina scoppia durante l’uso conviene
abbandonare per precauzione le dirette vicinanze della lampadina per escludere completamente
i rischi alla salute per i vapori di mercurio che si
libereranno; provvedere ad una buona aerazione
dell’ambiente.
santé générée par la dispersion à l’air libre des
vapeurs de mercure ; veillez à une aération correcte de la pièce.
F
B
CH
5
Montage
L’appareil peut être monté sur une surface fixe et
plane. Si besoin, la plaque de montage (4) peut être
dévissée. La lyre peut être montée sur une traverse,
la tête en bas via la plaque de montage. Pour la fixation, des clips stables de montage sont nécessaires.
Vissez solidement les clips sur les longs trous de la
plaque de montage et fixez-les ensemble avec l’appareil sur la traverse. La plaque de montage doit
être suffisamment stable et pouvoir supporter une
charge de 30 kg au moins par appareil.
Important !
1. Pour éviter toute accumulation de chaleur dans
l’appareil, le lieu de montage doit être choisi de
telle sorte que pendant le fonctionnement, la circulation d’air est suffisante. L’appareil doit être
placé à une distance minimale de 1 m des surfaces voisines et les ouïes de ventilation sur le
boîtier ne doivent en aucun cas être obturées.
2. Veillez impérativement à laisser une distance
suffisante avec des matériaux facilement inflammables ou sensibles à la chaleur.
3. Si l’appareil est installé comme charge suspendue au-dessus de personnes, il doit être en plus
assuré (p. ex. par une corde de sécurité). Vissez
l’œillet livré dans la prise filetée au centre de la
base de l’appareil et attachez à l’œillet la corde
de sécurité. Fixez l’autre extrémité de la corde
de telle sorte que la distance de chute maximale
de l’appareil soit de 20 cm au plus.
6
Utilisation
Reliez le cordon secteur à la prise secteur 230 V~/
50 Hz (6) puis l’autre extrémité à une prise secteur
230 V~/50Hz. Dès que l’appareil est relié à une tension d’alimentation, l’interrupteur secteur (7) s’allume.
5
Montaggio
I
La TWIST-252 può essere collocata su un piano
solido. Se necessario, svitare la piastra di montaggio (4). Ma l’apparecchio può esser montato anche
a testa in giù, su una traversa. Per il fissaggio occorrono delle fascette robuste di montaggio. Avvitare le
fascette alle asole della piastra di montaggio e,
insieme all’apparecchio, alla traversa. Il punto di
montaggio deve avere una stabilità sufficiente e
supportare un peso di 30 kg min. per apparecchio.
Importante!
1. Per evitare un accumulo di calore nell’unità
stessa, il punto di montaggio deve essere scelto
in modo da garantire una circolazione d’aria sufficiente. Lo strumento deve essere ad una
distanza minima di 1 m dalle superfici vicine, e
le aperture di aerazione non devono essere
coperte in nessun caso.
2. Considerare anche una distanza di sicurezza da
materiali facilmente infiammabili o sensibili al
calore.
3. Se l’apparecchio viene installato sospeso, sopra
delle persone, deve essere assicurato in modo
particolare (p. es. con una fune di sicurezza).
Avvitare l’occhiello di sicurezza in dotazione
nella presa filettata nel centro del lato inferiore
dell’apparecchio e collegare l’occhiello con la
fune di sicurezza. Fissare la fune in modo tale
che la caduta dell’apparecchio non può superare i 20 cm.
6
Funzionamento
Collegare il cavo rete in dotazione con la presa (6)
ed inserire la spina in una presa di rete
(230 V~/50 Hz). Non appena l’apparecchio è collegato con la tensione di rete, l’interruttore (7) si illumina. Accendere l’apparecchio con l’interruttore. La
testa orientabile e tutti i motori di comando si mettono in una precisa posizione di partenza. Intanto,
sul display (8) viene indicata la versione del soft-
11
F
B
CH
Allumez la lyre avec l’interrupteur. La tête et tous les
moteurs de commande se mettent dans une position
initiale définie. Pendant ce temps, sur l’affichage (8),
la version du logiciel est indiquée. Ensuite, l’appareil
est ensuite prêt à fonctionner. Après le fonctionnement, éteignez l’appareil avec l’interrupteur.
Conseil : comme source de lumière, on utilise une
lampe à décharge. Si l’alimentation est interrompue,
même brièvement, la lampe ne brille pas tout de
suite. Elle doit refroidir quelques instants pour pouvoir s’allumer à nouveau.
6.1 Commande via la musique
1) Pour commander la TWIST-252 via le microphone intégré (17), ne reliez pas l’entrée DMX IN
(14). Si aucun signal de commande DMX n’est
présent à cette entrée, la LED MASTER (12)
jaune brille et l’affichage (8) indique
(Show 1) ou
(Show 2).
Important !
Pour la gestion par la musique, déconnectez la
fonction Blackout via le menu ou la télécommande LC-3 (touche STAND BY), sinon la
tête reste dans sa position initiale et le faisceau
lumineux est éteint.
a) Enfoncez 4 fois la touche MENU (9) jusqu’à
ce que sur l’affichage
(blackout mode)
s’affiche.
b) Enfoncez la touche ENTER (11). L’affichage
clignote et indique
(yes blackout).
c) Avec la touche DOWN ou UP (10), commutez
sur
(no blackout).
d) Pour mémoriser, enfoncez la touche ENTER.
L’affichage indique pendant quelques secondes
. Ensuite le mode de fonctionnement
sélectionné s’affiche. Si la touche ENTER n’est
pas activée en l’espace de 8 secondes, l’appareil revient au réglage précédent.
e) Pour démarrer le déroulement du programme,
éteignez brièvement l’appareil avec l’interrupteur POWER (7) puis rallumez-le.
2) Le mode de fonctionnement Show 1 est prévu
pour le positionnement de l’appareil sur le sol.
I
ware. Dopodiché la TWIST-252 è pronta. Dopo l’uso
spegnerla con l’interruttore.
N.B.: Come sorgente di luce viene usata una lampada a scarica elettrica. Se la corrente viene interrotta solo brevemente, la lampada non si riaccende
subito. Deve prima raffreddarsi per potersi accendere di nuovo.
6.1 Comando tramite la musica
1) Per comandare la TWIST-252 tramite il microfono integrato (17) non si deve collegare l’ingresso DMX IN (14). Se a quell’ingresso non è
presente nessun segnale di comando DMX, il
LED giallo MASTER (12) è acceso e il display (8)
segnala
(Show 1) o
(Show 2).
Importante!
Per il comando tramite la musica occorre disattivare la funzione blackout con il menù o con il
telecomando LC-3 (tasto STAND BY); altrimenti,
la testa orientabile rimane nella sua posizione di
partenza e il raggio di luce viene soppresso.
a) Premere il tasto MENU (9) quattro volte in
modo che sul display appare
(blackout
mode).
b) Premere il tasto ENTER (11). Il display lampeggia e indica
(yes blackout).
c) Con il tasto DOWN o UP (10) passare a
(no blackout).
d) Per memorizzare la scelta premere il tasto
ENTER. Il display indica per alcuni secondi
. Successivamente appare di nuovo la
modalità selezionata. Se il tasto ENTER non
viene premuto entro 8 secondi, l’apparecchio
ritorna all’impostazione precedente.
e) Per avviare lo svolgimento del programma
spegnere l’apparecchio brevemente con l’interruttore POWER (7) e riaccenderlo.
2) La modalità Show 1 è prevista per l’apparecchio
collocato sul pavimento. L’angolo di rotazione
intorno all’asse orizzontale è di 210° max. Nella
modalità Show 2, prevista per il montaggio al soffitto, l’angolo è di 90° max.
12
L’angle de rotation autour de l’axe horizontal est
de 210° maximum. Pour le mode de fonctionnement Show 2, prévu pour un montage au plafond,
l’angle est de 90° max.
a) Pour commuter entre Show 1 et Show 2,
enfoncez deux fois la touche MENU (9) jusqu’à ce que
(show mode) s’affiche.
b) Enfoncez la touche ENTER (11). L’affichage
clignote.
c) Avec la touche DOWN ou UP (10), commutez
entre
pour (Show 1) et
pour
(Show 2).
d) Pour mémoriser, enfoncez la touche ENTER.
L’affichage indique pendant quelques secondes
. Ensuite, le mode de fonctionnement sélectionné est à nouveau visible et le
déroulement du programme commence. Si la
touche ENTER n’est pas activée en l’espace
de 8 secondes, l’appareil revient au réglage
précédent.
3) Réglez le réglage SENSITIVITY (16) de la sensibilité du micro de telle sorte que la dynamique de
la musique soit restituée de manière optimale par
les mouvements du faisceau lumineux et par le
changement des gobos et des couleurs. La sensibilité la plus grande est réglée lorsque le potentiomètre est entièrement à droite.
La LED verte SOUND (12) brille brièvement
lorsque l’appareil modifie, par un signal musical,
une couleur, un gobo ou un mouvement.
Conseil : lorsque le volume sur l’installation
audio est modifié, il faut adapter en conséquence
la sensibilité du micro via le réglage.
6.1.1 Activation combinée de plusieurs TWIST-252
Il est possible de faire fonctionner ensemble plusieurs lyres pour commander d’autres appareils
auxiliaires (Slave) sur le même rythme, via le micro
de l’appareil principal (Master).
1) Reliez le branchement DMX OUT (13) de l’appareil principal via un cordon XLR 3 pôles (p. ex.
MEC-… ou MECN-… de la gamme “img Stage
Line”) au branchement DMX IN (14) du premier
appareil auxiliaire.
a) Per cambiare fra le modalità Show 1 e Show 2
premere il tasto MENU (9) due volte in modo
che sul display appaia
(show mode).
b) Premere il tasto ENTER (11). Il display lampeggia.
c) Con il tasto DOWN o UP (10) cambiare fra
per Show 1 e
per Show 2.
d) Per memorizzare la scelta premere il tasto
ENTER. Il display indica per alcuni secondi
. Successivamente appare di nuovo la
modalità selezionata e il programma comincia
a svolgersi. Se il tasto ENTER non viene premuto entro 8 secondi, l’apparecchio ritorna
all’impostazione precedente.
3) Impostare il regolatore SENSITIVITY (16) per la
sensibilità del microfono in modo tale che il ritmo
della musica venga riprodotto in modo ottimale
dai movimenti del raggi di luce nonché dal cambio dei colori e dei disegni. La maggiore sensibilità si ha con il regolatore girato completamente a
destra.
Quando cambia il colore, il disegno o il movimento in seguito ad un segnale musicale, il LED
verde SOUND (12) si accende brevemente.
N.B.: Se si modifica il volume dell’impianto di
musica occorre adattare anche la sensibilità del
microfono con l’aiuto del relativo regolatore.
6.1.1 Collegamento di più TWIST-252
Si possono collegare più apparecchi per comandare, per mezzo del microfono dell’apparecchio
principale (Master), tutte le unità secondarie (Slave)
nello stesso ritmo.
1) Collegare l’uscita DMX OUT (13) dell’unità principale con l’ingresso DMX IN (14) del primo apparecchio secondario servendosi di un cavo XLR
a 3 poli (per esempio della serie MEC-… o
MECN-… del programma “img Stage Line”).
2) Collegare l’uscita DMX OUT del primo apparecchio secondario con l’ingresso DMX IN del
secondo apparecchio secondario ecc.
2) Reliez le branchement DMX OUT du premier
appareil auxiliaire au branchement DMX IN du
deuxième appareil auxiliaire et ainsi de suite.
3) Dès que les signaux de commande de l’appareil
principal sont présents sur les appareils auxiliaires, la LED rouge SLAVE (12) sur eux brille en
continu. Les mouvements du faisceau des appareils auxiliaires peuvent être synchronisés avec
l’appareil principal ou être exactement à l’inverse
(p. ex. si un seul appareil auxiliaire est utilisé).
a) Pour commuter entre mouvement synchrone
et opposé, enfoncez trois fois la touche MENU
(9) sur l’appareil auxiliaire jusqu’à ce que sur
l’affichage
(mode slave) soit visible.
b) Enfoncez la touche ENTER (11). L’affichage
clignote.
c) Avec la touche DOWN ou UP (10), commutez
entre
(normal) pour un mouvement
synchrone et
(2 light show) pour un
mouvement opposé.
d) Pour mémoriser, enfoncez la touche ENTER.
L’affichage indique pendant quelques secondes
. Ensuite, le mode de fonctionnement sélectionné (
pour mouvement
synchrone ou
pour mouvement opposé)
est à nouveau visible et le déroulement du programme commence. Si la touche ENTER n’est
pas activée en l’espace de 8 secondes, l’appareil revient au réglage précédent.
6.2 Télécommande LC-3
Diverses fonctions peuvent être gérées via la télécommande LC-3 disponible en option.
1) Reliez la télécommande à la prise REMOTE
CONTROL (15).
2) L’entrée DMX IN (14) ne doit pas être connectée ;
la LED jaune MASTER (12) doit briller.
3) Via la sortie DMX OUT (13), d’autres TWIST-252
peuvent être reliées (voir chapitre 6.1.1) pour les
gérer vers l’appareil principal de manière synchrone avec cette télécommande.
4) Avec la touche STAND BY (18), la fonction Blackout peut être activée ou éteinte. Si la fonction est
3) Non appena agli apparecchi secondari sono presenti i segnali di comando dell’unità principale, il
loro LED rosso SLAVE (12) rimane acceso. I
movimenti degli apparecchi secondari possono
essere in sincronia con l’unità principale oppure
possono essere il contrario (p. es. se si usa una
sola unità secondaria).
a) Per passare fra movimento sincronizzato e
movimento opposto premere tre volte il tasto
MENU (9) sull’apparecchio secondario in modo che il display indica
(slave mode).
b) Premere il tasto ENTER (11). Il display lampeggia.
c) Con il tasto DOWN o UP (10) cambiare fra
(normal) per un movimento sincronizzato e
(2 light show) per un movimento
opposto.
d) Per memorizzare la scelta premere il tasto
ENTER. Il display indica per alcuni secondi
. Successivamente appare di nuovo la
modalità selezionata (
per un movimento sincronizzato oppure
per un movimento opposto) e il programma comincia a
svolgersi. Se il tasto ENTER non viene premuto entro 8 secondi, l’apparecchio ritorna
all’impostazione precedente.
6.2 Telecomando LC-3
Con il telecomando opzionale LC-3 si possono
comandare diverse funzioni.
1) Collegare il telecomando con la presa REMOTE
CONTROL (15).
2) L’ingresso DMX (14) non deve essere collegato;
il LED giallo MASTER (12) deve essere acceso.
3) All’uscita DMX (13) si possono collegare altre
TWIST-252 (vedi cap. 6.1.1) per movimenti telecomandati sincronizzati con l’unità principale.
4) Con il tasto STAND BY (18) si può attivare e
disattivare la funzione Blackout. Se la funzione è
attivata, il LED vicino al tasto è acceso. La testa
orientabile ritorna nella posizione di partenza e il
diaframma viene chiuso.
activée, la LED à côté de la touche brille. La tête
se met dans la position initiale et le diaphragme
est fermé.
5) Avec la touche MODE (20), sélectionnez le mode
de fonctionnement :
1. Mode Show 1 (la LED à côté de la touche ne
brille pas)
2. Mode Slow
(la LED brille tout le temps)
3. Mode Show 2 (la LED clignote)
a) en mode Show 1 (angle de rotation autour de
l’axe horizontal 210° max.) et en mode show 2
(angle de rotation 90° max.), le mouvement du
faisceau lumineux et le changement des couleurs et des gobos s’effectuent selon la musique. En maintenant la touche FUNCTION (19)
enfoncée, on peut activer un des trois effets
stroboscope :
1. effet stroboscope avec couleurs et gobos
changeants
2. effet stroboscope avec lumière blanche ;
dans les appareils auxiliaires, l’effet est
synchrone.
3. effet stroboscope avec lumière blanche ;
dans les appareils auxiliaires, l’effet est
opposé.
Par une nouvelle pression sur la touche FUNCTION, le prochain effet stroboscope est respectivement activé.
b) en mode Slow, seul le mouvement du faisceau lumineux est géré par la musique. Le
changement des couleurs et des gobos se fait
via la touche FUNCTION. A chaque pression
sur la touche, on passe à la couleur suivante.
Une fois que les 10 couleurs sont passées, on
sélectionne avec une nouvelle pression sur la
touche, le gobo suivant.
Canal
Fonction
Valeur DMX
1
rotation tête (Pan) 540°
000 – 255
2
inclinaison tête (Tilt) 270°
000 – 255
3
4
5
6
7
vitesse pan/tilt
rapide → lent
Dimmer
sombre → clair
Valeur DMX
000 – 255
aucun effet
stroboscope lent → rapide
effet scintillement lent → rapide
000 – 015
016 – 135
136 – 255
couleur1)
blanc
bleu
orange
vert
bleu clair
rouge
rose
violet UV
jaune
vert clair
changement continu des couleurs
lent → rapide
aucune fonction
2)
8
Reset
9
Gobo
aucun Gobo
Gobo A
Gobo B
Gobo C
Gobo D
Gobo E
Gobo F
Gobo G
changement continu
lent → rapide
000 – 012
013 – 025
026 – 038
039 – 051
052 – 063
064 – 076
077 – 089
090 – 102
103 – 115
116 – 127
255
000 – 015
016 – 031
032 – 047
048 – 063
064 – 079
080 – 095
096 – 111
112 – 127
128 – 255
Valore DMX
1
Rotazione testa orientabile (Pan) 540°
000 – 255
2
Inclinazione testa orientabile (Tilt) 270°
000 – 255
4
5
6
7
nessun effetto
Stroboscopui lento → veloce
Effetto oscillazione lento → veloce
Colore 1)
bianco
blu
arancione
verde
azzurro
rosso
rosa
viola UV
giallo
verde chiaro
cambio colore continuo
lento → veloce
nessuna funzione
2)
8
Reset
9
Gobo
nessun gobo
Gobo A
Gobo B
Gobo C
Gobo D
Gobo E
Gobo F
Gobo G
cambio continuo
lento → veloce
6.3 Funzionamento tramite unità di comando
luce
11
prisme éteint
prisme allumé
000 – 127
128 – 255
12
rotation prisme
arrêt
rotation droite lent → rapide
arrêt
rotation gauche lent → rapide
arrêt
000 – 009
010 – 120
121 – 134
135 – 245
246 – 255
13
réglage focus
000 – 255
14
déroulement Show préprogrammé
aucun déroulement Show, gestion DMX
Show 1, déroulement automatique
Show 2, déroulement automatique
Show 1, géré par la musique
Show 2, géré par la musique
000 – 031
032 – 127
128 – 223
224 – 239
240 – 255
15
gobo faisceau lumineux préprogrammé pour la séquence sélectionné
via le canal 14
uniquement changement automatique
de couleur et de gobo
rotation gobo
stroboscope
effet scintillement
prisme
rotation prisme
stroboscope + Rotation prisme
000 – 047
048 – 095
096 – 143
144 – 191
192 – 207
208 – 239
240 – 255
16
Reset 2)
255
—
Funzione
Velocità Pan e Tilt
veloce → lento
Dimmer
scuro → chiaro
000 – 009
010 – 120
121 – 134
135 – 245
246 – 255
128 – 255
Canale
3
10
rotation gobo
arrêt
rotation droite lent → rapide
arrêt
rotation gauche lent → rapide
arrêt
000 – 255
La TWIST-252 dispose de 16 canaux DMX pour être
utilisée via un contrôleur. Le tableau (fig. 3) présente
les fonctions et valeurs DMX correspondantes.
Per il funzionamento tramite un’unità di comando
luce, la TWIST-252 è equipaggiata con sedici canali
DMX. La tabella fig. 3 indica le funzioni e i rispettivi
valori DMX.
Fonction
F
B
6.3 Utilisation via un contrôleur
5) Con il tasto MODE (20) selezionare la modalità:
1. modalità Show 1 (il LED vicino al tasto non è
acceso)
2. modalità Slow
(il LED rimane acceso)
3. modalità Show 2 (il LED lampeggia)
a) Nella modalità Show 1 (angolo di rotazione
intorno all’asse orizzontale max. 210°) e nella
modalità Show 2 (angolo di rotazione max.
90°), i movimenti del raggio di luce nonché il
cambio dei disegni e dei colori avvengono
seguendo la musica. Tenendo premuto il tasto
FUNCTION (19), viene attivato uno dei tre
effetti stroboscopici:
1. effetto stroboscopico con cambio fra colori
e disegni
2. effetto stroboscopico con luce bianca; negli
apparecchi secondari, l’effetto è sincronizzato
3. effetto stroboscopico con luce bianca; negli
apparecchi secondari, l’effetto è opposto.
Premendo di nuovo il tasto FUNCTION, si passa
all’effetto stroboscopico successivo.
b) Nella modalità Slow, solo il movimento del
raggio di luce viene comandato dalla musica.
Per cambiare il colore e il disegno, azionare il
tasto FUNCTION. Con ogni pressione del
tasto si passa al colore successivo. Dopo aver
scorso tutti e 10 i colori, una nuova pressione
del tasto chiama il disegno successivo.
Canal
➂
CH
Configuration des canaux DMX
1)
Les valeurs DMX indiquées pour la sélection de couleur se rapportent
au mode couleur “une couleur”. Pour le réglage “deux couleurs” (voir
chap. 6.4), un réglage intermédiaire avec deux couleurs est possible.
2)
Pour activer la fonction Reset, réglez le canal 8 et le canal 16 sur la
valeur DMX 255.
Canale
Funzione
Valore DMX
10
Rotazione gobo
Stop
rotazione a destra veloce → lento
Stop
rotazione a sinistra lento → veloce
Stop
000 – 009
010 – 120
121 – 134
135 – 245
246 – 255
11
Prisma off
Prisma on
000 – 127
128 – 255
12
Rotazione prisma
Stop
rotazione a destra veloce → lento
Stop
rotazione a sinistra lento → veloce
Stop
000 – 009
010 – 120
121 – 134
135 – 245
246 – 255
13
Impostazione fuoco
000 – 255
14
Svolgimento Show preprogrammato
nessuno svolgimento Show, comando
DMX
Show 1, svolgimento automatico
Show 2, svolgimento automatico
Show 1, comandato dalla musica
Show 2, comandato dalla musica
000 – 031
032 – 127
128 – 223
224 – 239
240 – 255
15
Disegni dei raggi di luce preprogrammati per lo svolgimento selezionato tramite il canale 14
cambio colore e gobo solo automatico
Rotazione gobo
Stroboscopio
Effetto oscillazione
Prisma
Rotazione prisma
Stroboscopio + Rotazione prisma
000 – 047
048 – 095
096 – 143
144 – 191
192 – 207
208 – 239
240 – 255
16
Reset 2)
255
000 – 255
000 – 255
000 – 015
016 – 135
136 – 255
000 – 012
013 – 025
026 – 038
039 – 051
052 – 063
064 – 076
077 – 089
090 – 102
103 – 115
116 – 127
128 – 255
—
255
000 – 015
016 – 031
032 – 047
048 – 063
064 – 079
080 – 095
096 – 111
112 – 127
➂
128 – 255
1)
I
Assegnazione dei canali DMX
I valori DMS indicati per la selezione dei colori si riferiscono alla modalità colore “monocolore”. Nell’impostazione “bicolore” (vedi cap. 6.4) è
possibile anche una posizione intermedia con due colori.
2)
Per attivare la funzione Reset, impostare per il canale 8 e il canale 16 il
valore DMX 255.
13
F
B
CH
I
14
1) Reliez l’entrée DMX (14) à la sortie DMX du contrôleur.
Pour le branchement, il est recommandé d’utiliser des câbles spécifiques pour des flots importants de données. L’emploi de câbles micro usuels ne peut être recommandé que pour des
longueurs de câble de 100 m maximum. Les
meilleurs résultats de transmission sont obtenus
avec un câble micro blindé de section 2 x
0,25 mm2 ou avec un câble spécifique pour la
transmission de données. Pour des longueurs de
liaison à partir de 150 m, il est recommandé de
brancher un amplificateur DMX de signal (p. ex.
SR-103DMX de “img Stage Line”).
2) Reliez la sortie DMX (13) à l’entrée DMX de l’appareil suivant. Reliez sa sortie à l’entrée du prochain appareil et ainsi de suite jusqu’à ce que tous
les jeux de lumière soient reliés dans une chaîne.
La prise de sortie DMX possède un verrouillage. Pour retirer la fiche, enfoncez le levier PUSH.
3) Terminez la sortie DMX du dernier jeu de lumière
de la chaîne avec une résistance 120 Ω (0,25 W) :
soudez aux pins 2 et 3 d’une fiche XLR la résistance et branchez la fiche dans la sortie DMX.
4) Pour pouvoir utiliser la TWIST-252 depuis un
contrôleur, l’adresse de démarrage DMX pour le
canal DMX 1 doit être saisie. Si par exemple sur
le contrôleur, l’adresse 17 est prévue pour la
gestion de la rotation de la tête, réglez sur la
TWIST-252 l’adresse de démarrage 17.
a) Enfoncez une fois la touche MENU (9) jusqu’à
ce que
(adresse) s’affiche.
b) Enfoncez la touche ENTER (11). L’affichage
clignote.
c) Avec la touche DOWN ou UP (10), réglez l’adresse de démarrage correspondante (1 – 497).
d) Pour mémoriser, enfoncez la touche ENTER.
L’affichage indique pendant quelques secondes
. Ensuite, l’adresse de démarrage
apparaît à nouveau. Si la touche ENTER n’est
pas activée en l’espace de 8 secondes, l’appareil revient à l’adresse précédente.
1) Collegare l’ingresso DMX (14) con l’uscita DMX
dell’unità di comando luce.
Per il collegamento si dovrebbero usare cavi
per un alto flusso di dati. L’impiego di normali cavi
per microfoni è consigliabile solo per una lunghezza complessiva dei cavi fino a 100 m. I migliori risultati di trasmissione si ottengono con cavi
schermati per microfoni di 2 x 0,25 mm2 oppure
con un cavo speciale per la trasmissione dati. Nel
caso di lunghezze oltre i 150 m è consigliabile l’inserimento di un amplificatore DMX (per esempio
SR-103DMX di “img Stage Line”).
2) Collegare l’uscita DMX (13) con l’ingresso DMX
della successiva unità per effetti luce, l’uscita di
quest’ultima con l’ingresso dell’unità successiva
e via dicendo finché tutte le unità sono collegate
formando una catena.
La presa d’uscita DMX è equipaggiata con un
blocco di sicurezza. Per sfilare il connettore premere la levetta PUSH.
3) Terminare con una resistenza di 120 Ω (0,25 W)
l’uscita DMX dell’ultima unità per effetti luce della
catena: saldare la resistenza ai pin 2 e 3 di un
connettore XLR e inserire il connettore nell’uscita
DMX.
4) Per potere comandare la TWIST-252 da un’unità
di comando luce, occorre impostare l’indirizzo di
start DMX per il primo canale DMX. Se, p. es., per
comandare la rotazione della testa orientabile,
sull’unità di comando è previsto l’indirizzo 17,
bisogna impostare sulla TWIST-252 l’indirizzo di
start 17.
a) Premere una volta il tasto MENU (9) in modo
da leggere sul display
(address).
b) Premere il tasto ENTER (11). Il display lampeggia.
c) Impostare l’indirizzo (fra 1 e 497) con l’aiuto
del tasto DOWN o UP (10).
d) Per memorizzare la scelta premere il tasto
ENTER. Il display indica per alcuni secondi
. Successivamente appare di nuovo l’indirizzo di start selezionato. Se il tasto ENTER
Après le réglage de l’adresse de démarrage pour
le canal 1, les canaux 2 – 16 sont attribués aux
adresses suivantes. Exemple :
Adresse de démarrage 17 = canal pour la rotation de la tête
Adresse 18 = canal pour l’inclinaison de la tête
Adresse 19 = canal pour la vitesse
…
Adresse 31 = canal pour la sélection des gobos
de lumière préprogrammés
Adresse 32 = canal pour la réinitialisation (reset)
5) Après le réglage de l’adresse de démarrage, la
TWIST-252 peut être utilisée via le contrôleur
relié. L’adresse de démarrage réglée est toujours
indiquée sur l’affichage, dès que les signaux de
commande sont reçus par le contrôleur DMX ; en
plus la LED rouge DMX (12) brille.
6.4 Modification des paramètres de fonctionnement
En appelant le menu, les paramètres suivants peuvent être modifiés. La série présentée ici correspond
à la série des points du menu.
Mode blackout
Blackout activé
(yes blackout)
si aucun signal de commande
DMX n’est présent à la prise
DMX IN (14), la tête va à la
position initiale et le diaphragme est fermé.
Blackout désactivé
(no blackout)
une gestion par la musique
uniquement par le micro (17)
est possible.
Mode couleur
une couleur (normal)
le disque de couleur se met
exactement en place sur une
couleur.
deux couleurs (split colour)
une position intermédiaire entre deux couleurs est possible.
Rotation tête (Pan)
Réglage de l’adresse de démarrage
(chapitre 6.3)
normal
rotation inversée
Inclinaison tête (Tilt)
...
normal
mouvement inversé
Mode show (chapitre 6.1)
Show 1
Show 2
Mode slave (chapitre 6.1.1)
normal
2 Light Show
non viene premuto entro 8 secondi, l’apparecchio ritorna all’indirizzo precedente.
Dopo l’impostazione dell’indirizzo di start per il
1. canale, i canali 2 – 16 sono assegnati agli indirizzi successivi. Esempio:
Indirizzo di start 17 = canale per la rotazione della
testa orientabile
Indirizzo 18 = canale per l’inclinazione della testa
orientabile
Indirizzo 19 = canale per la velocità
………..
Indirizzo 31 = canale per la selezione dei disegni
di raggi di luce preprogrammati
Indirizzo 32 = canale per il reset
5) Dopo l’impostazione dell’indirizzo start, la
TWIST-252 può essere comandata tramite l’unità
di comando collegata. L’indirizzo di start impostato viene sempre indicato dal display non appena
si ricevono dei segnali di comando dall’unità
DMX. Inoltre è acceso il LED rosso DMX (12).
6.4 Modificare i parametri di funzionamento
Chiamando il menù, si possono modificare i seguenti parametri. La sequenza riportata qui di seguito è quella del menù.
Visualisation affichage
normal
tourné de 180°
(pour le montage au plafond)
Avec la touche ENTER, commutez le
réglage, l’affichage clignote pendant
8 secondes. Ensuite, le menu s’efface.
Modalità Blackout
Blackout on (yes blackout)
Se alla presa DMX IN (14)
non è presente nessun segnale di comando DMX, la
testa orientabile ritorna nella
posizione di partenza e il
diaframma viene chiuso.
Blackout off (no blackout)
Il comando tramite musica
attraverso il solo microfono
(17) è possibile.
Modalità colore (fig. 4, canale 4)
monocolore (normale)
Il disco dei colori si ferma a
scatto esattamente su un colore.
bicolore (split color)
Sono possibili delle posizioni
intermedie fra due colori.
Rotazione testa orientabile (Pan)
normale
Impostazione dell’indirizzo di start
(cap. 6.3)
rotazione in senso opposto
Inclinazione testa orientabile (Tilt)
...
normale
movimento in senso opposto
Modalità Show (cap. 6.1)
Show 1
Show 2
Modalità Slave (cap. 6.1.1)
normale
2 Light Show
Visualizzazione display
normale
girato di 180°
(per il montaggio al soffitto)
Con il tasto ENTER cambiare impostazione. Il display lampeggia per 8 secondi. Dopodiché il menù si spegne.
Position fixe de la tête
La tête peut être réglée fixée sur 5 positions différentes : vers le haut (bas),
vers l’avant, la gauche, l’arrière, ou la
droite. Par plusieurs pressions sur la
touche ENTER, sélectionnez la position
fixe. Pour revenir au mode de fonctionnement précédent, enfoncez la touche MENU. Le point suivant du menu
clignote pendant 8 secondes. Ensuite le
menu ne s’affiche plus.
Auto test
Après une pression sur la touche ENTER, un auto test est effectué. Pour
l’arrêter, enfoncez la touche MENU. Le
prochain point du menu clignote pendant
8 secondes. Ensuite le menu s’efface.
Compteur heures de fonctionnement
(Fixture Hours)
Après une pression sur la touche ENTER, l’affichage indique les heures de
fonctionnement. Pour revenir au mode
de fonctionnement précédent, enfoncez
la touche MENU. Le prochain point du
menu clignote pendant 8 secondes. Ensuite le menu s’efface.
Reset
Après une pression sur la touche ENTER, une réinitialisation est effectuée :
la tête va brièvement sur la position
initiale et le faisceau s’arrête. Ensuite,
l’appareil revient au mode de fonctionnement précédent.
Etapes de fonctionnement
1) Enfoncez la touche MENU (9) jusqu’à ce que l’affichage correspondant soit visible.
2) Pour les sept premiers points du menu (de
adresse à
inclinaison tête), confirmez la
sélection avec la touche ENTER (11). Ensuite
avec la touche DOWN ou UP (10), effectuez le
réglage et mémorisez-le avec la touche ENTER
en l’espace de 8 secondes.
Dans le point de menu
, visualisation
affichage, le réglage est immédiatement modifié
avec la touche ENTER et pour les quatre derniers points du menu (
position tête fixe à
reset), la fonction sélectionnée est activée.
3) Pour passer au point de menu suivant, enfoncez
la touche MENU.
4) Si aucune autre touche n’est enfoncée en l’espace de 8 secondes dans le cas d’un point de
menu sélectionné, le menu s’efface.
7
8
Caractéristiques techniques
Alimentation : . . . . . . . . . . . . 230 V~/50 Hz
Consommation : . . . . . . . . . . 510 VA
F
B
CH
Lampe : . . . . . . . . . . . . . . . . 1 x lampe à décharge
type MSD 250 W
avec culot GY 9,5
Angle rayonnement : . . . . . . 13°
Angle rotation/vitesse
axe vertical (Pan) : . . . . . . 540° en 2,8 s
axe horizontal (Tilt) : . . . . . 270° en 1,6 s
Température fonc. : . . . . . . . 0 – 40 °C
Dimensions : . . . . . . . . . . . . 400 x 500 x 360 mm
Poids : . . . . . . . . . . . . . . . . . 26 kg
D’après les données du constructeur.
Tout droit de modification réservé.
Nettoyage de l’optique
Il est recommandé de nettoyer régulièrement la lentille et la plaque de couleurs, des impuretés causées
par la poussière, la fumée ou toute autre particule.
C’est à cette seule condition que la lumière peut
rayonner avec une luminosité maximale. Avant l’ouverture de l’appareil, débranchez-le du secteur et
laissez-le refroidir pendant 15 minutes.
Pour le nettoyage, utilisez un chiffon doux et propre et des produits de nettoyage de vitres usuels ;
ensuite, essuyez avec précaution les éléments.
Notice d’utilisation protégée par le copyright de MONACOR ® INTERNATIONAL GmbH & Co. KG. Toute
reproduction même partielle à des fins commerciales est interdite.
Posizione fisa della testa orientabile
per l’impostazione del fuoco
La testa orientabile può essere impostata su cinque differenti posizioni: verso
l’alto (basso), in avanti, a sinistra, indietro o a destra. Scegliere la posizione
premendo più volte il tasto ENTER. Per
ritornare alla modalità precedente, premere il tasto MENU. Il punto successivo
del menù lampeggia per 8 secondi.
Dopodiché il menù si spegne.
Autotest
Dopo aver premuto il tasto ENTER si
svolge l’autotest. Per terminare premere
il tasto MENU. Il punto successivo del
menù lampeggia per 8 secondi. Dopodiché il menù si spegne.
Contaore (Fixture Hours)
Dopo aver premuto il tasto ENTER, il
display indica le ore di funzionamento.
Per ritornare alla modalità precedente
premere il tasto MENU. Il punto successivo del menù lampeggia per 8 secondi.
Dopodiché il menù si spegne.
Reset
Premendo il tasto ENTER viene effettuato il reset: la testa orientabile ritorna
brevemente nella sua posizione di partenza e il raggio di luce viene soppresso. Dopodiché l’apparecchio ritorna
nella modalità precedente.
Passi da eseguire
1) Premere il tasto MENU (9) tante volte finché sul
display si vede l’indicazione desiderata.
2) Nei primi sette punti del menù (
Indirizzo di
start fino a
Inclinazione della testa orientabile) confermare la selezione con il tasto ENTER
(11). Quindi con i tasti DOWN o UP (10) effettuare l’impostazione e memorizzarla entro 8 secondi con il tasto ENTER.
Nel menù
Visualizzazione display, con
il tasto ENTER si modifica subito l’impostazione,
e negli ultimi quattro punti del menù (
Posizione fissa della testa orientabile fino a
Reset) la funzione selezionata viene attivata.
3) Per passare al punto successivo del menù, premere il tasto MENU.
4) Se con un punto del menù selezionato non si
preme nessun tasto nel giro di 8 secondi, il menù
si spegne.
7
8
Dati tecnici
I
Alimentazione: . . . . . . . . . . . 230 V~/50 Hz
Potenza assorbita: . . . . . . . . 510 VA
Lampadina: . . . . . . . . . . . . . 1 x lampada a scarica elettrica
tipo MSD 250 W con
zoccolo GY 9,5
Angolo di irradiazione: . . . . . 13°
Angolo/velocità di rotazione
asse verticale (Pan): . . . . . 540° in 2,8 s
asse orizzontale (Tilt): . . . 270° in 1,6 s
Temperatura d’impiego: . . . . 0 – 40 °C
Dimensioni: . . . . . . . . . . . . . 400 x 500 x 360 mm
Peso: . . . . . . . . . . . . . . . . . . 26 kg
Dati forniti dal costruttore.
Con riserva di modifiche tecniche.
Pulizia del sistema ottico
Si dovrebbe procedere, ad intervalli regolari, alla
pulizia della lente e del disco di colori per asportare
polvere, fumo e altre particelle. Solo così, la luce
può essere irradiata con la luminosità massima.
Prima di aprire l’apparecchio staccare la spina dalla
presa di rete e fare raffreddare l’apparecchio per
15 minuti circa.
Per la pulizia usare un panno morbido, pulito e un
detergente per vetri come si trovano in commercio.
Quindi asciugare le parti delicatamente.
La MONACOR ® INTERNATIONAL GmbH & Co. KG si riserva ogni diritto di elaborazione in qualsiasi forma
delle presenti istruzioni per l’uso. La riproduzione – anche parziale – per propri scopi commerciali è vietata.
15
NL
B
Vouw bladzijde 3 helemaal open, zodat u steeds
een overzicht hebt van de bedieningselementen
en de aansluitingen.
1
Overzicht van de bedieningselementen en aansluitingen
1.1 TWIST-252
1
2
3
4
5
6
7
8
9
10
11
12
E
Zwenkkop
Draaiarm
Draagbeugels
Montageplaat voor de bevestiging aan een traverse
Houder voor de netzekering
Vervang een gesmolten zekering uitsluitend door
een zekering van hetzelfde type.
POWER-jack voor aansluiting op een stopcontact (230 V~/50 Hz) met behulp van het bijgeleverde netsnoer
POWER-schakelaar; licht op, zodra het apparaat
op een stopcontact is aangesloten
Display
Toets MENU om het instelmenu op te roepen
De toetsen UP en DOWN om een instelling in het
menu te selecteren
Toets ENTER om een menu-instelling te bevestigen
Controle-LED’s voor de bedrijfsmodus:
DMX =
licht op bij een DMX-besturingssignaal op de ingang DMX IN (14)
MASTER = mastermodus (hoofdstuk 6.1 en 6.2);
besturing via de afstandsbediening
LC-3 of de geïntegreerde microfoon
SLAVE = slavemodus (hoofdstuk. 6.1.1); besturing via een tweede TWIST-252
SOUND = licht kort op, wanneer het apparaat
door een muzieksignaal de kleur, het
patroon of de beweging wijzigt
Abra el presente libro en la página 3 con el fin de
visualizar los elementos y las conexiones.
1
Elementos y conexiones
13 DMX-signaaluitgang (3-pol. XLR);
1 = massa, 2 = DMX-, 3 = DMX+
14 DMX-signaalingang (3-pol. XLR);
1 = massa, 2 = DMX-, 3 = DMX+
15 Aansluitjack voor de afstandsbediening LC-3
16 Regelaar voor de gevoeligheid van de microfoon (17)
Door naar rechts te draaien, neemt de gevoeligheid toe.
17 Microfoon voor muzieksturing
●
●
●
1.2 Afstandsbediening LC-3
De afstandsbediening is als toebehoren verkrijgbaar
en is niet in de levering van de TWIST-252 inbegrepen.
18 Toets STAND BY voor de functie Blackout
(zwenkkop in de oorspronkelijke positie en
paneel gesloten)
19 Toets FUNCTION:
in de modus Show 1 of 2 om een strobo-effect te
activeren (zolang de toets is ingedrukt)
in de modus Slow om de 10 kleuren af te wisselen en dan naar het volgende patroon gaan
20 Toets MODUS voor het wisselen tussen
modus Show 1 (De LED licht niet op)
modus Slow
(de LED licht op)
modus Show 2 (LED knippert)
Aanwijzing: Voor de besturing via de afstandsbediening mag er geen DMX-signaal naar de ingang DMX
IN (14) worden gestuurd.
2
Veiligheidsvoorschriften
Dit apparaat is in overeenstemming met de EU-richtlijn 89/336/EEG voor elektromagnetische compatibiliteit en 73/23/EEG voor toestellen op laagspanning.
Let eveneens op het volgende:
● Het apparaat is enkel geschikt voor gebruik binnenshuis. Vermijd druip- en spatwater, uitzonderlijk warme plaatsen en plaatsen met een hoge
15 Toma de conexión para el mando a distancia
LC-3
16 Potenciómetro de la sensibilidad del micro (17):
gírelo en el sentido horario, la sensibilidad aumenta.
17 Micro para controlar via música
Let op!
De netspanning (230 V~) van het apparaat is
levensgevaarlijk. Open het apparaat niet, want
door onzorgvuldige ingrepen loopt u het risico
van elektrische schokken. Laat het apparaat in
een erkende werkplaats herstellen.
●
●
●
●
●
5
6
7
8
9
10
11
12
13
14
16
Cabeza inclinable
Brazo de rotación
Asas de transporte
Placa de montaje para la fijación sobre una barra
transversal
Porta fusible
todo fusible fundido debe cambiar solamente por
un fusible de mismo tipo
Toma de conexión para conectar al 230 V~/
50 Hz, via el cable de conexión entregado
Interruptor POWER ON/OFF: brilla en cuanto el
aparato está conectado a una toma de red
Pantalla
Tecla MENU para llamar el menú de reglaje
Teclas UP y DOWN para seleccionar una opción
del menú
Tecla ENTER para confirmar una opción del menú
LEDs de control para el modo de funcionamiento:
DMX =
brilla si una señal DMX de control está presente en la entrada DMX IN (14)
MASTER =modo master (vea cap. 6.1 y 6.2);
control mediante el mando a distancia LC-3 o el micro integrado
SLAVE = modo slave (vea cap. 6.1.1); control
via una segunda TWIST-252
SOUND = brilla brevemente si el aparato modifica el color, el gobo o el movimiento
via una señal musical
Salida señal DMX (XLR 3 polos):
1 = masa, 2 = DMX-, 3 = DMX+
Entrada señal DMX (XLR 3 polos):
1 = masa, 2 = DMX-, 3 = DMX+
●
No inserte nada en los agujeros de ventilación,
podría sufrir una descarga eléctrica mortal.
●
No deje funcionar el aparato y desconéctelo inmediatamente cuando:
1. aparecen desperfectos en el aparato, por ejemplo la carcasa, la lente, el filtro UV, o en el cable
de conexión.
2. después de una caída o caso similar, si tiene
cualquier duda sobre el estado del aparato.
3. aparece mal funcionamiento.
1.2 Mando a distancia modelo LC-3
El mando a distancia está disponible en opción pero
no entregado con la TWIST-252
18 Tecla STAND BY para la función Blackout
(cabeza en posición inicial y diafragma cerrado)
19 Tecla FUNCTION:
en modo Show 1 o 2, para activar un efecto estrobo (mientras la tecla esté pulsada)
en modo Slow (lento), para cambiar los 10 colores y pasar al gobo siguiente.
20 Tecla MODE para conmutar entre:
modo Show 1 (el LED no brilla)
modo Slow
(el LED brilla)
modo Show 2 (el LED parpadea)
Consejo: para un control via el mando a distancia,
ninguna señal DMX debe estar presente en la entrada DMX IN (14).
2
Consejos de utilizacion y seguridad
Este aparato cumple con la normativa europea
89/336/CEE relativa a la compatibilidad electromagnética y con la normativa europea 73/23/CEE
relativa a los aparatos de baja tensión.
Respete escrupulosamente los puntos siguientes:
● Este aparato está fabricado únicamente para una
utilizacion en interior. No lo exponga a proyecciones de agua, a las salpicaduras, a una fuerte
humedad y al calor (rango de temperatura de funcionamiento aconsejado: 0 – 40 °C).
● Durante el funcionamiento, la cabeza (1) se calienta mucho. Para evitar quemaduras, no manipule nunca la cabeza durante el funcionamiento;
Trek de stekker nooit met het snoer uit het stopcontact, maar met de stekker zelf.
Neem bij transport van het apparaat enkel de
draagbeugels (3) vast. Draag het apparaat in
geen geval aan de zwenkkop (1) of draaiarm (2).
Verwijder het stof van de behuizing met een
droge, zachte doek. Gebruik zeker geen water of
chemicaliën. Voor de lens kunt u ook een in de
handel verkrijgbaar detergent voor glas gebruiken.
In geval van ongeoorloofd of verkeerd gebruik, verkeerde montage, foutieve bediening of van herstelling door een niet-gekwalificeerd persoon vervalt
de garantie en de verantwoordelijkheid voor hieruit
resulterende materiële of lichamelijke schade.
Wanneer het apparaat definitief uit bedrijf wordt
genomen, bezorg het dan voor milieuvriendelijke
verwerking aan een plaatselijk recyclagebedrijf.
deje siempre enfriar la cabeza unos 15 minutos
antes de cualquier manipulación.
1.1 TWIST-252
1
2
3
4
vochtigheid (toegestaan omgevingstemperatuurbereik: 0 – 40 °C).
Tijdens het gebruik warmt de zwenkkop (1) sterk
op. Om brandwonden te voorkomen, raakt u de
kop niet aan tijdens het gebruik resp. laat u de kop
na uitschakelen nog enkele minuten afkoelen,
alvorens hem vast te nemen.
Zorg ervoor dat u niets in de ventilatieopeningen
steekt. Er bestaat immers gevaar voor elektrische
schokken!
Schakel het apparaat niet in resp. trek onmiddellijk de stekker uit het stopcontact:
1. het apparaat, b.v. aan de behuizing, de lens,
het UV-filter of het netsnoer zichtbaar is
beschadigd,
2. er een defect zou kunnen optreden nadat het
apparaat bijvoorbeeld gevallen is,
3. het apparaat slecht functioneert.
¡Atención!
El aparato está alimentado por una tensión peligrosa de 230 V~. No manipule nunca el interior
del aparato, en caso de manipulación inadecuada, podría sufrir una descarga eléctrica mortal. Acuda siempre a un técnico especializado y
cualificado para efectuar las reparaciones.
●
No desconecte nunca el aparato tirando directamente del cable de conexión, sujételo siempre por
la extremidad (toma).
●
Para el transporte, sujete siempre el aparato únicamente por las asas (3). No sujete nunca el aparato por la cabeza (1), o por el brazo (2).
●
Para limpiar el aparato, utilice un paño seco y
suave, no utilice nunca productos químicos o
agua. Para la lente puede utilizar un producto de
limpieza usual para cristales.
●
Rechazamos cualquier responsabilidad en caso
de daños materiales o corporales resultantes de
una utilizacion no adecuada del aparato, si no
está correctamente instalado, utilizado o reparado
por una persona habilitada y cualificada, además
por todos estos mismos motivos el aparato
carecería de todo tipo de garantía.
●
Cuando el aparato está definitivamente sacado
del servicio, deposítelo en una fábrica de
reciclaje, para contribuir a una eliminación no contaminante.
3
4
links en rechts naast het opschrift “Bulb Access”
tussen de ventilator en de achterzijde van de
zwenkkop. Nu kunt u de lichtafschermhoek wegnemen, zodat de lampfitting zichtbaar wordt.
Toepassingen
Het lichteffectapparaat TWIST-252 is in het bijzonder geschikt voor professioneel gebruik op het
podium en in discotheken. Het projecteert diverse,
veelkleurige patronen en zorgt voor een ideale sfeer
op de dansvloer. De besturing van het apparaat kan
via de ingebouwde microfoon, via de afstandsbediening LC-3 (afzonderlijk als toebehoren verkrijgbaar)
of via een DMX-lichtregelaar gebeuren.
De lampen aanbrengen/vervangen
Het lichteffectapparaat wordt zonder lampen geleverd. Voor dit toestel is een ontladingslamp van het
type MSD 250 W met een voet GY 9,5 nodig.
Er mogen in geen geval lampen van een ander
type worden gebruikt!
Uit het gamma “img Stage Line” kan volgende lamp
worden gebruikt:
Artikel
bestelnr.
HLO-250MSD 05.0005
2) Bij het vervangen van de lamp neemt u de oude
lamp uit de fitting.
3) Neem de nieuwe lamp met een schone en niet
pluizende doek vast en breng ze aan in de fitting.
Druk hiervoor met een schroevendraaier de
klemveren op de lampvoet voorzichtig opzij.
Richt de lampvoet zo dat de aansluitpinnen precies op de contactgaten van de fitting passen.
4) Schroef de lichtafschermhoek en de plaat van de
behuizing weer vast. Na de ingebruikneming stelt
u met de drie regelschroeven aan de achterzijde
van de zwenkkop (aangeduid met A , B en C )
maximale helderheid en gelijkmatige uitstraling in
van de lichtspot.
●
De hier beschreven lamp bevat geringe hoeveelheden stoffen die schadelijk zijn voor het leefmilieu (b.v. kwikzilver) en moet daarom in Europa
als speciaal afval worden verwijderd. In de
andere landen dient men zich te houden aan de
desbetreffende nationale voorschriften.
●
De lamp moet uiterlijk na de 1,25-voudige gemiddelde levensduur worden vervangen, aangezien
bij langer gebruik het risico op barsten sterk
toeneemt ten gevolge van structurele veranderingen in het kwartsglas.
Het apparaat is uitgerust met een bedrijfsurenteller. U kunt hem gebruiken om de brandtijd
van de lamp te bepalen. Noteer bij het vervangen
van de lamp de meterstand – zie hoofdstuk 6.4
“Bedrijfsparameters wijzigen”, menu-item Bedrijfsurenteller.
gemiddelde levensduur
3000 h
Raak de glazen ballon van de nieuwe lamp niet met
de vingers aan! Huidvet en -zweet verminderen de
lichtsterkte en branden zich in.
Opgelet!
1. Alvorens de lamp aan te brengen resp. te verwijderen, dient u in elk geval de stekker uit het
stopcontact te trekken!
2. Omdat de lamp tijdens het gebruik zeer heet
wordt, moeten de behuizing en de lamp na gebruik van het apparaat eerst afkoelen (afkoeltijd
min. 15 minuten), alvorens de lamp te vervangen.
3. Kijk bij een geopend apparaat nooit rechtstreeks
in de brandende ontladingslamp. De grote helderheid en de UV-straling kunnen beschadiging
van de ogen veroorzaken.
●
1) Schroef de bovenste plaat van de behuizing van
de zwenkkop los. Verwijder de beide schroeven
3
4
el ventilador y la parte trasera de la cabeza.
Ahora puede sacar la placa acodada que desvía
la luz y aparezca el portalámpara.
Posibilidades de utilización
La TWIST-252 se adapta perfectamente a una utilización profesional en escenario y en discoteca.
Proyecta gobos con diversas formas y diversos
colores y crea una ambiente “dance”. El control del
aparato se efectúa por micro integrado, via el
mando a distancia LC-3 (entregado en opción separadamente) o via un controlador DMX.
Instalación de la lámpara
El efecto de luz está entregado sin lámpara. Es
necesario utilizar una lámpara a descarga de tipo
MSD 250 W con un zócalo de GY 9,5.
¡No utilice en ningún caso una lámpara de tipo
diferente!
En la gama “img Stage Line”, se puede utilizar la
lámpara siguiente:
Modelo
Ref. num.
HLO-250MSD 05.0005
2) Para cambiar la lámpara, saque la antigua del
portalámpara.
3) Sujete la nueva lámpara con un paño limpio sin
pelusa y colóquela en el portalámpara. Con
destornillador, pulse con precaución los muelles
del zócalo hacia el lado; coloque el zócalo de
manera que los pins de conexión estén exactamente orientados hacia los agujeros de contacto
del portalámpara.
4) Atornille la placa acodada y la parte superior de
la carcasa. Una vez el aparato conectado, con
los tres tuercas de reglaje de la parte trasera de
la cabeza (señalados par A , B y C ), regule la
luminosidad máxima y una iluminación uniforme
del haz luminoso.
1) Desatornille la parte superior de la carcasa del
aparato; saque las dos tuercas a la izquierda y a
la derecha de la inscripción “Bulb Access” entre
NL
B
Belangrijk!
1. Om te vermijden dat het apparaat oververhit
geraakt, moet de installatieplaats zorgvuldig
worden geselecteerd, zodat tijdens het gebruik
voldoende ventilatie is gegarandeerd. De afstand tussen het apparaat en de aangrenzende
oppervlakken moet minstens 1 m bedragen, en
de ventilatieopeningen van de behuizing mogen
in geen geval worden afgedekt.
2. Zorg in elk geval ook voor een voldoende grote
afstand tot licht ontvlambare of hittegevoelige
materialen.
3. Indien het apparaat als zwevende last boven
personen wordt geïnstalleerd, moet het bijkomend worden beveiligd (b.v. door een hijskabel). Draai het bijgeleverde schroefoog vast in
de schroefdraadmof in het midden onderaan het
toestel en bevestig hieraan de hijskabel. Bevestig het andere uiteinde van de hijskabel zo dat
het apparaat maar maximaal 20 cm kan vallen.
6
Bediening
Sluit het bijgeleverde netsnoer aan op de POWERjack (6) en plug de stekker in een stopcontact
(230 V~/50 Hz). Zodra het apparaat op de netspanning is aangesloten, licht de netschakelaar (7) op.
Schakel het apparaat in met de netschakelaar.
Zwenkkop en alle besturingsmotoren bewegen naar
een vastgelegde uitgangspositie. Intussen wordt op
het display (8) de softwareversie getoond. Daarna is
5
Montaje
E
El aparato puede instalarse sobre una superficie fija
y plana. Si es necesario, puede destornillar la placa
de montaje (4). El aparato puede instalarse sobre
una barra transversal, la cabeza hacia abajo via la
placa de montaje. Para la fijación, es necesario utilizar clips de montaje estables. Atornille solidamente
los clips en los agujeros largos de la placa de montaje y fije el conjunto con el aparato sobre la barra
transversal. El lugar de montaje debe ser suficientemente estable y soportar una carga de 30 kg como
mínimo por aparato.
¡Importante!
1. Para evitar toda acumulación de calor dentro
del aparato, debe elegir el lugar de montaje de
manera que durante el funcionamiento, la circulación de aire sea suficiente. Deberá colocar el
aparato a una distancia mínima de 1 m de las
superficies vecinas. Los agujeros de ventilación
de la carcasa no deben estar obstruidos en
ningún caso.
2. Deje imperativamente una distancia suficiente
entre el aparato y los materiales fácilmente inflamables o sensibles al calor.
3. Si debe instalar el aparato como carga suspendida encima de personas, debe tener a más una
seguridad (p. ej. por una cuerda de seguridad).
Atornille el mosquetón de seguridad entregado
en la tuerca enroscada en el centro de la base
del aparato y ate el mosquetón a la cuerda de
seguridad. Fije la otra extremidad de la cuerda
de manera a que la distancia de caída máxima
del aparato sea de 20 cm.
La lámpara indicada contiene en baja cantidad
productos tóxicos nocivos para el medio ambiente (mercurio p. ej.). En Europa, es imperativo
depositarla en basuras adecuadas especiales.
En otros países, vea las leyes vigentes.
●
Debe cambiar las lámparas lo más tarde después de pasar 1,25 veces la duración media de
vida indicado. Una duración larga de utilización
aumenta de manera significativa el riesgo de una
explosión de la lámpara por las modificaciones
de estructura del cristal de cuarzo.
La cabeza dispone de un contador de horas de
funcionamiento de la lámpara. Se puede utilizar
para determinar la duración de la lámpara encendida. Durante el cambio de la lámpara anote la
inscripción del contador. Vea cap. 6.4 “Modificación de los parámetros de funcionamiento”, opción contador horas de funcionamiento.
6
●
En el caso de una explosión de la lámpara durante
el funcionamiento, le aconsejamos de salir del entorno inmediato de la lámpara por precaución para
evitar completamente cualquier peligro provocado
por la dispersión de vapores de mercurio; controle
que se efectué una buena aeración.
Conecte el cable de conexión entregado a la toma
de red (6) y la otra extremidad a un enchufe 230 V~/
50 Hz. Cuando el aparato está conectado a una tensión de alimentación, el interruptor (7) se conecta.
Conecte la cabeza con el interruptor. La cabeza y
todos los motores de control se ponen en una posi-
3000 h
¡Atención!
1. Antes de insertar o sacar la lámpara, debe imperativamente desconectar el aparato de la red.
2. Durante el funcionamiento, la lámpara es muy
caliente, déje enfriar la carcasa y la lámpara
como mínimo 15 minutos después de cada utilización y antes de efectuar cualquier cambio.
3. No mire nunca directamente, aparatos abiertos,
hacia la lámpara a descarga encendida. La
luminosidad elevada y los rayos UV pueden
provocar daños de vista.
Montage
De TWIST-152 kan op een stevige, vlakke ondergrond worden opgesteld. Schroef de montageplaat
(4) hiervoor los indien nodig. U kunt het apparaat met
de montageplaat ook voorover gekanteld aan een
brug monteren. Voor de bevestiging hebt u stabiele
montageklemmen nodig. Schroef de klemmen vast
via de langgaten van de montageplaat en bevestig
ze samen met het apparaat aan de brug. De montageplaats moet voldoende stabiel zijn en een last van
minstens 30 kg per apparaat kunnen dragen.
●
Duración media de vida
No manipule nunca el cristal de la lámpara con los
dedos; el sudor y las partículas de grasa de los
dedos disminuyen la potencia luminosa de la lámpara y se marcan.
Wanneer de lamp barst op het ogenblik dat het
toestel is ingeschakeld, ontruimt men best uit
voorzorg de onmiddellijke omgeving van de lamp
om gevaar voor de gezondheid door vrijkomende
kwikzilverdampen volledig uit te sluiten; zorg
daarbij voor een goede ventilatie van de ruimte.
5
Utilización
17
NL
B
TWIST-252 bedrijfsklaar. Schakel het apparaat na
gebruik uit met de POWER-schakelaar.
Aanwijzing: Een ontladingslamp dient als lichtbron.
Indien het apparaat slechts even wordt uitgeschakeld of van de voedingsspanning losgekoppeld, licht
de lamp niet onmiddellijk weer op. Ze moet eerst
even afkoelen, om opnieuw te kunnen doen branden.
6.1 Muzieksturing
1) Om de TWIST-252 via de ingebouwde microfoon (17) te sturen, sluit u de ingang DMX IN (14)
niet aan. Bij afwezigheid van een DMX-besturingssignaal licht de gele LED MASTER (12) op,
en het display (8) geeft
(Show 1) of
(Show 2) aan.
Belangrijk!
Schakel voor de muzieksturing de functie
Blackout via het menu of met de afstandsbediening LC-3 (toets STAND BY), uit, anders blijft de
zwenkkop in zijn oorspronkelijke positie staan en
wordt de lichtbundel afgedekt.
a) Druk vier keer op de toets MENU (9), zodat op
het display de melding
(blackout mode)
verschijnt.
b) Druk op de toets ENTER (11). Het display
knippert en geeft de melding
(yes
blackout) weer.
c) Schakel met de toets DOWN of UP (10) naar
(no blackout).
d) Om op te slaan, drukt u op de toets ENTER. Op
het display verschijnt de melding
gedurende enkele seconden. Daarna wordt opnieuw
de geselecteerde bedrijfsmodus weergegeven.
Als u niet binnen de 8 seconden op de toets
ENTER drukt, schakelt het apparaat terug naar
de vorige instelling.
e) Om het programmaloop te starten, schakelt u
het toestel met de schakelaar POWER (7) kort
uit en opnieuw in.
2) De bedrijfsmodus Show 1 is bedoeld voor gebruik bij opstelling van het apparaat op de vloer.
De rotatiehoek rond de horizontale as bedraagt
E
ción inicial definida. Durante este tiempo, el display
(8), indica la versión del software. Entonces el aparato está listo para funcionar. Después del funcionamiento, desconecte el aparato con el interruptor.
Consejo: como fuente de luz, se utiliza una lámpara
a descarga. Si se interrumpe la alimentación, mismo
brevemente, la lámpara no brilla de seguida. Debe
enfriarse unos instantes para poder conectar de
nuevo.
6.1 Control mediante música
1) Para controlar la TWIST-252 via el micro integrado (17), no conecte la entrada DMX IN (14).
Si ninguna señal DMX de control está presente
en esta entrada, el LED MASTER (12) amarillo
brilla y el display (8) indica
(Show 1) o
(Show 2).
¡Importante!
Para controlar mediante música, desconecte la
función Blackout via el menú o el mando a
distancia LC-3 (tecla STAND BY), si no la cabeza
se queda en su posición inicial y el haz luminoso
se apaga.
a) Pulse 4 veces la tecla MENU (9) hasta que
aparezca en el display
(Blackout mode).
b) Pulse la tecla ENTER (11). El display parpadea e indica
(yes blackout).
c) Con la tecla DOWN o UP (10), conmute en
(no blackout).
d) Para memorizar, pulse la tecla ENTER. El display indica durantes unos segundos
.
Después aparece el modo de funcionamiento
seleccionada. Si no pulsa la tecla ENTER
antes de unos 8 segundos, el aparato vuelve
al funcionamiento precedente.
e) Para arrancar el desarrollo del programa,
apague brevemente el aparato con el interruptor POWER (7) y conéctelo de nuevo.
2) El de funcionamiento Show 1 está previsto para
la colocacíon del aparato sobre el suelo. El
ángulo de rotación alrededor del eje horizontal es
de 210° máximo. Para el modo de funcionamien-
18
hierbij max. 210°. Bij de bedrijfsmodus Show 2,
voorzien voor gebruik bij plafondmontage, bedraagt de hoek max. 90°.
a) Om te wisselen tussen Show 1 en 2 drukt u
tweemaal op de toets MENU (9), zodat op het
display de melding
(show mode) verschijnt.
b) Druk op de toets ENTER (11). Het display
knippert.
c) Wissel met de toets DOWN of UP (10) tussen
voor Show 1 en
voor Show 2.
d) Om op te slaan, drukt u op de toets ENTER.
Op het display verschijnt de melding
gedurende enkele seconden. Daarna verschijnt opnieuw de geselecteerde modus, en
het afspelen van het programma begint. Als u
niet binnen de 8 seconden op de toets ENTER
drukt, schakelt het apparaat terug naar de
vorige instelling.
3) Stel de regelaar SENSITIVITY (16) voor de microfoongevoeligheid zo in dat de dynamiek van
de muziek optimaal wordt weergegeven door de
bewegingen van de lichtbundel en door het wisselen van de lichtpatronen en de kleuren. De
grootste gevoeligheid is ingesteld, wanneer de
regelaar helemaal naar rechts is gedraaid.
Bij wijziging van kleur, patroon of beweging
door een muzieksignaal licht de groene LED
SOUND (12) telkens even op.
Aanwijzing: Bij verandering van het volume van
de muziekinstallatie dient ook de microfoongevoeligheid via de regelknop overeenkomstig te
worden aangepast.
6.1.1 Meerdere TWIST-252-apparaten aaneenschakelen
U kunt meerdere apparaten aaneenschakelen om
zo via de microfoon van het centrale apparaat
(master) alle overige randapparaten (slave) op hetzelfde ritme te besturen.
1) Verbind de aansluiting DMX OUT (13) van het
centrale apparaat via een 3-polige XLR-kabel
(b.v. serie MEC-... of MECN-... uit het gamma van
“img Stage Line”) met de aansluiting DMX IN (14)
van het eerste randapparaat.
2) Verbind de aansluiting DMX OUT van het eerste
randapparaat met de aansluiting DMX IN van het
tweede randapparaat etc.
3) Zodra de randapparaten de besturingssignalen
van het hoofdapparaat ontvangen, lichten de respectieve rode LED’s SLAVE (12) continu op. De
bewegingen van de randapparaten kunnen synchroon lopen met het centrale apparaat of net
omgekeerd (b.v. bij gebruik van slechts één randapparaat).
a) Om te wisselen tussen synchrone en tegengestelde beweging drukt u driemaal op de
toets MENU (9) van het randapparaat, zodat
op het display de melding
(slave mode)
verschijnt.
b) Druk op de toets ENTER (11). Het display
knippert.
c) Met de toets DOWN of UP (10) wisselt u tussen
(normaal) voor synchrone en
(2 light show) voor tegengestelde beweging.
d) Om op te slaan, drukt u op de toets ENTER.
Op het display verschijnt de melding
gedurende enkele seconden. Daarna verschijnt opnieuw de geselecteerde modus (
voor synchrone resp.
voor tegengestelde beweging), en het afspelen van het programma begint. Als u niet binnen de 8 seconden op de toets ENTER drukt, schakelt het
apparaat terug naar de vorige instelling.
6.2 Afstandsbediening LC-3
Via de als toebehoren verkrijgbare afstandsbediening
LC-3 kunnen verschillende functies worden gestuurd.
1) Sluit de afstandsbediening aan op de jack
REMOTE CONTROL (15).
2) De DMX-ingang (14) mag niet zijn aangesloten;
de gele LED MASTER (12) moet oplichten.
3) Via de DMX-uitgang (13) kunnen andere TWIST252-apparaten worden aangesloten (zie hoofd-
to Show 2, previsto para un montaje en techo, el
ángulo es de 90° max.
a) Para conmutar entre Show 1 y Show 2, pulse
dos veces la tecla MENU (9) hasta que el
mensaje
(show mode) aparezca.
b) Pulse la tecla ENTER (11). El display parpadea.
c) Con la tecla DOWN o UP (10), conmute entre
para Show 1 y
para Show 2.
d) Para memorizar, pulse la tecla ENTER. El display indica durante unos segundos
.
Después, el modo de funcionamiento seleccionado es de nuevo visible y el desarrollo del
programa empieza. Si la tecla ENTER no se
activa antes de 8 segundos, el aparato vuelve
al funcionamiento precedente.
3) Regule el potenciómetro SENSITIVITY (16) para
la sensibilidad del micro de manera a que la dinámica de la música se restituya de manera óptima
por los movimientos del haz luminoso y por el
cambio de los gobos y de los colores. La sensibilidad la más grande se regula cuando el potenciómetro está totalmente a la derecha.
El LED verde SOUND (12) brilla brevemente
cuando el aparato modifica mediante una señal
musical, un color, un gobo o un movimiento.
Consejo: cuando el volumen de la instalación
audio se modifica, debe adaptar en consecuencia la sensibilidad del micro via el potenciómetro.
3) En cuanto las señales de control está presentes
en los aparato auxiliares, el LED rojo SLAVE (12)
brilla en continuo. Los movimientos de los aparatos auxiliares pueden sincronizarse con el aparato principal o sincronizar de manera opuesta
(por ejemplo si se utiliza un solo aparato auxiliar).
a) Para conmutar entre movimiento sincronizado
y opuesto, pulse tres veces la tecla MENU (9)
del aparato auxiliar hasta que aparezca en el
display el mensaje siguiente
(slave
mode).
b) Pulse la tecla ENTER (11). El display parpadea.
c) Con la tecla DOWN o UP (10), conmute entre
(normal) para un movimiento sincronizado y
(2 light show) para un movimiento opuesto.
d) Para memorizar, pulse la tecla ENTER. El display indica durante unos segundos
.
Después aparece de nuevo en el display, el
funcionamiento seleccionado (
para
movimiento sincronizado y
para movimiento opuesto), y el desarrollo del programa
empieza. Si la tecla ENTER no se activa en
unos 8 segundos, el aparato vuelve al reglaje
precedente.
6.1.1
Interconexión de varias TWIST-252
Es posible interconectar varias TWIST-252 para controlar otros aparatos auxiliar (Slave) con el mismo
ritmo, via el micro del aparato principal (Master).
1) Conecte la toma DMX OUT (13) del aparato principal via un cable XLR 3 polos (por ejemplo
MEC-… o MECN-… de la gama “img Stage
Line”) a la toma DMX IN (14) del primer aparato
auxiliar.
2) Conecte la toma DMX OUT del primer aparato
auxiliar a la conexión DMX IN del segundo aparato auxiliar y así sucesivamente.
1) Conecte el mando a la toma REMOTE CONTROL (15).
6.2 Mando a distancia LC-3
Puede controlar diversas funciones mediante el
mando modelo LC-3 disponible en opción.
2) No conecte la entrada DMX IN (14); el LED amarillo MASTER (12) debe brillar.
3) Via la salida DMX OUT (13) puede conectar otras
TWIST-252 (vea capítulo 6.1.1) para controlar de
manera sincronizada con el aparato principal via
este mando.
4) Con la tecla STAND BY (18), puede activar o
desactivar la función blackout. Si la función está
activada, el LED al lado de la tecla brilla. La
stuk 6.1.1), om ze met de afstandsbediening synchroon met het centrale apparaat te besturen.
4) Met de toets STAND BY (18) kunt u de functie
Blackout in- en uitschakelen. Bij ingeschakelde
functie licht de LED naast de toets op. De zwenkkop wordt in de uitgangspositie gebracht en het
paneel wordt gesloten.
5) Selecteer met de toets MODE (20) de bedrijfsmodus:
1. modus Show 1 (LED naast de toets licht niet
op)
2. modus Slow
(LED licht continu op)
3. modus Show 2 (LED knippert)
a) In de modus Show 1 (rotatiehoek rond de horizontale as max. 210°) en modus Show 2 (rotatiehoek max. 90°) gebeurt het bewegen van de
lichtbundel evenals het wisselen van de kleuren
en patronen muziekgestuurd. Door de toets
FUNCTION (19) ingedrukt te houden, kunt u
een van de drie stroboscoop-effecten activeren:
1. Strobo-effect met wisselende kleuren en
patronen
2. Strobo-effect met wit licht; bij de randapparaten is het effect synchroon
3. Strobo-effect met wit licht; bij de randapparaten is het effect tegengesteld
Door opnieuw op de toets te drukken, is telkens het volgende strobo-effect geactiveerd.
b) In de modus Slow wordt alleen de beweging
van de lichtbundel muziekgestuurd. Het wisselen van de kleuren en patronen gebeurt met de
toets FUNCTION. Telkens u op de toets drukt,
wordt naar de volgende kleur geschakeld.
Nadat alle 10 kleuren aan bod zijn geweest,
wordt bij de volgende keer drukken op de toets
naar het volgende patroon geschakeld.
Kanaal
Functie
DMX-waarde
1
Zwenkkopdraaiing (Pan) 540°
000 – 255
2
Zwenkkopkanteling (Tilt) 270°
000 – 255
3
4
5
6
7
La TWIST-252 dispone de 16 canales DMX, para la
utilización mediante un controlador. La tabela esquema 3 presenta las funciones y los valores DMX
correspondientes.
10
Gobo-rotatie
Stop
rotatie naar rechts snel → langzaam
Stop
rotatie naar links langzaam → snel
Stop
000 – 009
010 – 120
121 – 134
135 – 245
246 – 255
11
prisma uit
prisma aan
000 – 127
128 – 255
12
prismarotatie
Stop
rotatie naar rechts snel → langzaam
Stop
rotatie naar links langzaam → snel
Stop
000 – 009
010 – 120
121 – 134
135 – 245
246 – 255
13
focusinstelling
000 – 255
14
voorgeprogrammeerd showverloop
geen showverloop, DMX-sturing
Show 1, automatisch verloop
Show 2, automatisch verloop
Show 1, muziekgestuurd
Show 2, muziekgestuurd
000 – 031
032 – 127
128 – 223
224 – 239
240 – 255
255
15
000 – 015
016 – 031
032 – 047
048 – 063
064 – 079
080 – 095
096 – 111
112 – 127
voorgeprogrammeerd lichtbundelpatroon voor het via kanaal 14 geselecteerde verloop
alleen autom. wisselen van kleur en gobo
Gobo-rotatie
stroboscoop
waggeleffect
prisma
prismarotatie
stroboscoop + prismarotatie
000 – 047
048 – 095
096 – 143
144 – 191
192 – 207
208 – 239
240 – 255
16
Reset 2)
255
Pan/Tilt-snelheid
snel → langzaam
Dimmer
donker → licht
000 – 255
geen effect
stroboscoop langzaam → snel
waggeleffect langzaam → snel
000 – 015
016 – 135
136 – 255
Kleur1)
Wit
Blauw
Oranje
Groen
Lichtblauw
Rood
Roze
UV-violet
Geel
Lichtgroen
permanente kleurafwisseling
langzaam → snel
geen werking
2)
000 – 255
000 – 012
013 – 025
026 – 038
039 – 051
052 – 063
064 – 076
077 – 089
090 – 102
103 – 115
116 – 127
128 – 255
—
8
Reset
9
Gobo
geen Gobo
Gobo A
Gobo B
Gobo C
Gobo D
Gobo E
Gobo F
Gobo G
voortdurend wisselend
langzaam → snel
128 – 255
Canal
Función
Valor DMX
1
rotación cabeza (Pan) 540°
000 – 255
2
inclinación cabeza (Tilt) 270°
000 – 255
Voor de bediening via een lichtregelaar beschikt de
TWIST-252 over 16 DMX-kanalen. In de tabel in
figuur 3 worden de functies en de bijbehorende
DMX-waarden weergegeven
6.3 Utilización mediante un controlador
Functie
DMX-waarde
NL
B
6.3 Bediening via een lichtregelaar
cabeza se pone en posición inicial y el diafragma
se cierra.
5) Con la tecla MODE (20), seleccione el modo de
funcionamiento:
1. Modo Show 1 (el LED al lado de la tecla no
brilla)
2. Modo Slow
(el LED brilla en permanencia)
3. Modo Show 2 (el LED parpadea)
a) En modo Show 1 (ángulo de rotación alrededor del eje horizontal 210° max.) y en modo
Show 2 (ángulo de rotación 90° max.), el
movimiento del haz luminoso y el cambio de
los colores y de los gobos se efectúan según
el ritmo de la música. Si mantiene la tecla
FUNCTION (19) pulsada, puede activar uno
de los tres efectos estroboscópicos:
1. efecto estroboscópico con colores y gobos
que cambian
2. efecto estroboscópico con luz blanca; para
los aparatos auxiliares, el efecto está sincronizado
3. efecto estroboscópico con luz blanca; para
los aparatos auxiliares, el efecto está
opuesto
Si pulsa de nuevo la tecla FUNCTION, el próximo efecto estroboscópico se activa respectivamente.
b) En modo Slow, solo el movimiento del haz
luminoso se controla mediante música. El
cambio de colores y gobos se efectúa via la
tecla FUNCTION. A cada presion en la tecla,
cambia para el color siguiente. Una vez que
los 10 colores hayan desfilado, si pulsa la
tecla otra vez, selecciona el gobo siguiente.
Kanaal
3
4
5
6
7
velocidad pan/tilt
rápido → lento
dimmer
oscuro → claro
ningún efecto
estroboscopio lento → rápido
efecto centelleo lento → rápido
color1)
blanco
azul
naranja
verde
azul claro
rojo
rosa
violeta UV
amarillo
verde claro
cambio continuo de colores
lento → rápido
ninguna función
2)
8
reset
9
gobo
ningún gobo
gobo A
gobo B
gobo C
gobo D
gobo E
gobo F
gobo G
cambio continuo
lento → rápido
➂
Bezetting van de DMX-kanalen
1)
De vermelde DMX-waarden voor het selecteren van de kleuren hebben
betrekking op de kleurmodus “eenkleurig”. Bij de instelling “tweekleurig”
(zie hoofdstuk 6.4) is ook een stand tussen twee kleuren mogelijk.
2)
Om de functie Reset te activeren, stelt u kanaal 8 en kanaal 16 in op de
DMX-waarde 255.
Canal
Función
Valor DMX
10
rotación gobo
paro
rotación derecha lento → rápido
paro
rotación izquierda lento → rápido
paro
000 – 009
010 – 120
121 – 134
135 – 245
246 – 255
11
prisma apagado
prisma encendido
000 – 127
128 – 255
12
rotación prisma
paro
rotación derecha lento → rápido
paro
rotación izquierda lento → rápido
paro
000 – 009
010 – 120
121 – 134
135 – 245
246 – 255
13
reglaje enfoque
000 – 255
14
desarrollo Show preprogramado
ningún desarrollo Show, control DMX
Show 1, desarrollo automático
Show 2, desarrollo automático
Show 1, controlado por la música
Show 2, controlado por la música
000 – 031
032 – 127
128 – 223
224 – 239
240 – 255
15
gobo haz luminoso preprogramado
para la secuencia seleccionada via el
canal 14
únicamente cambio automático de color y
de gobo
rotación gobo
estroboscopio
efecto centelleo
prisma
rotación prisma
estroboscopio + rotación prisma
000 – 047
048 – 095
096 – 143
144 – 191
192 – 207
208 – 239
240 – 255
16
reset 2)
255
000 – 255
000 – 255
000 – 015
016 – 135
136 – 255
000 – 012
013 – 025
026 – 038
039 – 051
052 – 063
064 – 076
077 – 089
090 – 102
103 – 115
116 – 127
128 – 255
—
255
000 – 015
016 – 031
032 – 047
048 – 063
064 – 079
080 – 095
096 – 111
112 – 127
128 – 255
➂
E
Configuración de los canales DMX
1)
Los valores DMX indicados para la selección de color se relacionan con
el modo color “un color”. Para el reglaje “dos colores” (vea capítulo 6.4),
un reglaje intermediario con dos colores es posible.
2)
Para activar la función Reset, regule el canal 8 y el canal 16 sobre el
valor DMX 255.
19
NL
B
1) Verbind de DMX-ingang (14) met de DMX-uitgang van de lichtregelaar.
Voor de aansluiting moeten speciale kabels
voor hoge gegevensstromen worden gebruikt.
Wanneer gebruik wordt gemaakt van gewone microfoonkabels, mag de totale kabellengte niet
meer dan 100 m bedragen. De beste overdracht
wordt verkregen met een afgeschermde microfoonkabel van 2 x 0,25 mm2 of een speciale datatransmissiekabel. Bij kabellengten vanaf 150 m
wordt het tussenschakelen van een DMX-ophaalversterker aanbevolen (b.v. SR-103DMX van “img
Stage Line”).
2) Verbind de DMX-uitgang (13) met de DMX-ingang van de volgende lichtregelaar. Verbind de
uitgang hiervan met de ingang van het volgende
apparaat etc., tot alle lichteffectapparaten in een
ketting zijn aangesloten.
DMX-uitgangsjack is uitgerust met een vergrendeling. Om de stekker uit te trekken, drukt u
op de PUSH-hendel.
3) Sluit de DMX-uitgang van de laatste lichtregelaar
in de ketting af met een weerstand van 120 Ω
(0,25 W): Soldeer de weerstand vast op de pinnen 2 en 3 van een XLR-stekker en plug de stekker in de DMX-uitgang.
4) Om de TWIST-252 van een lichtregelaar te kunnen bedienen, moet het DMX-startadres voor het
1ste DMX-kanaal worden ingesteld. Indien bijvoorbeeld het adres 17 voor het besturen van de
zwenkkopdraaiing is voorzien, stel dan op de
TWIST-252 het startadres 17 in.
a) Druk eenmaal op de toets MENU (9), zodat de
melding
(address) op het display verschijnt.
b) Druk op de toets ENTER (11). Het display
knippert.
c) Stel met de toets DOWN of UP (10) het overeenkomstige adres in (1 – 497).
d) Om op te slaan, drukt u op de toets ENTER.
Op het display verschijnt de melding
gedurende enkele seconden. Daarna wordt
E
6.4 De bedrijfsparameters wijzigen
Door het menu op te roepen, kunt u de volgende
parameters wijzigen. De hieronder weergegeven
volgorde komt overeen met de volgorde van de
menu-items.
Instelling van het startadres
(hoofdstuk 6.3)
Slavemodus (hoofdstuk. 6.1.1)
normaal
2 Light Show
Blackout-modus
Blackout aan (yes blackout)
Bij afwezigheid van een DMXbesturingssignaal op de jack
DMX IN (14), beweegt de
zwenkkop naar zijn oorspronkelijke positie en wordt het
paneel gesloten.
Blackout uit (no blackout)
Het is mogelijk de muziek te
sturen alleen door de microfoon (17).
Kleurmodus
eenkleurig (normaal)
De kleurschijf wordt precies
op één kleur vergrendeld.
tweekleurig (split colour)
Bij deze instelling is ook een
stand tussen twee kleuren
mogelijk.
Zwenkkopdraaiing (Pan)
normaal
rotatie tegengesteld
Zwenkkopkanteling (Tilt)
...
normaal
kanteling tegengesteld
Showmodus (hoofdstuk 6.1)
Show 1
Show 2
1) Conecte la entrada DMX (14) con la salida DMX
del controlador.
Para la conexión, es recomendado utilizar cables específicos para flujo de datos importante.
Solo le aconsejamos el empleo de cables de
micro usuales para longitudes de cable de 100 m
como máximo. Los mejores resultados de transmisión se obtienen con un cable de micro blindado de sección 2 x 0,25 mm2 o con un cable
específico para la transmisión de datos. Para
longitudes a partir de 150 m, le aconsejamos de
conectar un amplificador DMX de señal (p. ej.
SR-103DMX de “img Stage Line”).
Después del reglaje de la dirección de arranque
para el canal 1, los canales 2 – 16 se atribuyen a
las direcciones siguientes. Ejemplo:
2) Conecte la salida DMX (13) a la entrada DMX del
aparato siguiente. Conecte su salida con la entrada del próximo aparato y así sucesivamente
hasta que todos los efectos de luces estén
conectados en una cadena.
La toma de salida DMX dispone de un bloqueo.
Para sacar la clavija, pulse la palanca PUSH.
5) Después del reglaje de la dirección de arranque,
la TWIST-252 se puede utilizar via el controlador
conectado. La dirección de arranque regulada
siempre se indica en el display, en cuanto el controlador DMX recibe señales de control. Además,
el LED rojo DMX (12) brilla.
3) Termine a la salida DMX del último efecto de luz
de la cadena con una resistencia de 120 Ω
(0,25 W): soldar la resistencia en el pin 2 y 3 de
una toma XLR y conecte la toma a la salida DMX.
6.4 Modificación de los parámetros de funcionamiento
4) Para poder utilizar la TWIST-252 desde un controlador, debe seleccionar la dirección de arranque DMX para el canal DMX 1. Si por ejemplo en
el controlador, la dirección 17 está prevista para
controlar la rotación de la cabeza, regule en la
TWIST-252, la dirección de arranque 17.
a) Pulse una vez la tecla MENU (9) hasta que
aparezca el mensaje
(dirección).
b) Pulse la tecla ENTER (5). El display parpadea.
c) Con la tecla DOWN o UP (10), regule la dirección de arranque correspondiente (1 – 497).
d) Para memorizar, pulse la tecla ENTER. El display indica durante unos segundos
.
Después, la dirección de arranque seleccionada aparece de nuevo. Si la tecla ENTER no
se activa en unos 8 segundos, el aparato
vuelve a la dirección precedente.
20
opnieuw het geselecteerde startadres weergegeven. Als u niet binnen de 8 seconden op
de toets ENTER drukt, schakelt het apparaat
terug naar het vorige adres.
Na het instellen van het startadres voor het 1ste
kanaal zijn de kanalen 2 – 16 aan de daarop volgende adressen toegewezen. Voorbeeld:
Startadres 17 = kanaal voor het draaien van de
zwenkkop
Adres 18 = kanaal voor het kantelen van de
zwenkkop
Adres 19 = kanaal voor de snelheid
…
Adres 31 = kanaal voor het selecteren van het
voorgeprogrammeerde lichtbundelpatroon
Adres 32 = kanaal voor het resetten
5) Na instelling van het startadres kunt u de TWIST252 bedienen via de aangesloten regeleenheid.
Op het display verschijnt steeds het ingestelde
startadres vanaf het moment dat er besturingssignalen door het DMX-besturingsapparaat worden ontvangen. Bovendien licht de rode LED
DMX (12) op.
Dirección de arranque 17 = canal para la rotación de la cabeza
Dirección 18 = canal para la inclinación de la
cabeza
Dirección 19 = canal para la velocidad
…
Dirección 31 = canal para la selección de los
gobos preprogramados
Dirección 32 = canal para la reinicialización (reset)
Seleccionado el menú, los parámetros siguientes se
pueden modificar. La serie presentada seguidamente corresponde a la serie de las opciones de menú.
Modo Blackout
Blackout activado
(yes blackout)
Si ninguna señal DMX de
control está presente en la
toma DMX IN (14), la cabeza
se pone en posición inicial y el
diafragma se cierra.
Blackout desactivado
(no blackout)
El control por música solo se
puede efectuar a través del
micro integrado (17).
Modo color
un color (normal)
El gobo de colores se pone
exactamente en su sitio sobre
un color.
dos colores (split colour)
Una posición intermediaria
entre dos colores es posible.
Rotación cabeza (Pan)
Reglaje de la dirección de arranque
(capítulo 6.3)
normal
rotación opuesta
Inclinación cabeza (Tilt)
...
normal
movimiento opuesto
Modo show (capítulo 6.1)
Show 1
Show 2
Modo Slave (capítulo 6.1.1)
normal
2 Light Show
Visualización display
normal
girado de 180°
(para montaje en techo)
Con la tecla ENTER, conmute el reglaje, el display parpadea durante unos
8 segundos. Después se borra el menú.
Displayweergave
normaal
180° gedraaid
(voor de plafondmontage)
Schakel met de toets ENTER de instelling om. Het display knippert gedurende
8 seconden. Daarna verdwijnt het menu.
vaste zwenkkopstand
De zwenkkop kan in vijf verschillende
standen vast worden ingesteld: naar
boven (beneden), naar voor, links, naar
achter of rechts gericht. Selecteer de
vaste stand door meerdere keren op de
toets ENTER te drukken. Om naar de
vorige bedrijfsmodus terug te schakelen,
drukt u op de toets MENU. Het volgende
menu-item knippert gedurende 8 seconden. Daarna verdwijnt het menu.
Zelftest
Nadat u op de toets ENTER hebt gedrukt, start een zelftest. Om de test te
beëindigen, drukt u op de toets MENU.
Het volgende menu-item knippert gedurende 8 seconden. Daarna verdwijnt het
menu.
Bedrijfsurenteller (fixture hours)
Nadat u op de toets ENTER hebt gedrukt, verschijnt het aantal bedrijfsuren
op het display. Om naar de vorige bedrijfsmodus terug te schakelen, drukt u
op de toets MENU. Het volgende menuitem knippert gedurende 8 seconden.
Daarna verdwijnt het menu.
Reset
Door op de toets ENTER te drukken, reset u de instellingen: De zwenkkop gaat
even naar de uitgangspositie. Daarna
schakelt het apparaat terug naar de vorige bedrijfsmodus.
Posición fija de la cabeza
La cabeza se puede fijar de 5 maneras
diferentes: hacia arriba (bajo), hacia adelante, la izquierda, hacia atrás, o hacia la
derecha. Si pulsa varias veces la tecla
ENTER, seleccione la posición fija. Para
volver al modo de funcionamiento precedente, pulse la tecla MENU. La opción
siguiente del menú parpadea durante
unos 8 segundos. Después el menú desaparece del display.
Auto test
Si pulsa la tecla ENTER, se efectúa un
test. Para pararlo, pulse la tecla MENU.
La próxima opción del menú, parpadea
durante unos 8 segundos. Después se
borra el menú.
Contador de horas de funcionamiento
(Fixture Hours)
Si pulsa la tecla ENTER, el display indica las horas de funcionamiento. Para
volver al modo de funcionamiento precedente, pulse la tecla MENU. La próxima opción del menú parpadea durante unos 8 segundos. Después se borra
el menú.
Reset
Después de pulsar la tecla ENTER, se
efectúa una reinicialización: la cabeza
se pone brevemente en la posición inicial y el haz luminoso se apague. Después, el aparato vuelve al modo de funcionamiento precedente.
Bedieningsstappen
1) Druk op de toets MENU (9) tot de betreffende
weergave op het display verschijnt.
2) Bij de eerste zeven menu-items (
startadres tot
kantelen van de zwenkkop)
bevestigt u de selectie met de toets ENTER.
Daarna voert u met de toets DOWN of UP (10) de
instelling door en slaat u deze binnen de 8 seconden op met de toets ENTER.
Bij het menu-item
displayweergave
wordt met de toets ENTER onmiddellijk de instelling gewijzigd, en bij de laatste vijf menu-items
(
zwenkkopstand voor focusinstelling tot
Reset) de geselecteerde functie geactiveerd.
3) Om naar het volgende menu-item te gaan, drukt
u op de toets MENU.
4) Indien u bij een geselecteerd menu-item niet binnen de 8 seconden op een andere toets drukt,
verdwijnt het menu van het display.
7
8
Technische gegevens
Voedingsspanning: . . . . . . . 230 V~/50 Hz
NL
B
Vermogensverbruik: . . . . . . . 510 VA
Verlichting: . . . . . . . . . . . . . . 1 x ontladingslamp
type MSD 250 W met
sokkel GY 9,5
Uitstralingshoek: . . . . . . . . . 13°
Draaihoek/-snelheid
loodrechte as (Pan): . . . . . 540° in 2,8 s
horizontale as (Tilt): . . . . . 270° in 1,6 s
Omgevingstemperatuurbereik: . . . . . . . . . . . . . . . . . 0 – 40 °C
Afmetingen: . . . . . . . . . . . . . 400 x 500 x 360 mm
Gewicht: . . . . . . . . . . . . . . . . 26 kg
Opgemaakt volgens de gegevens van de fabrikant.
Wijzigingen voorbehouden.
De optica reinigen
De lens en de kleurschijf moeten op regelmatige tijdstippen, afhankelijk van de verontreiniging door stof,
rook of andere vuildeeltjes, worden gereinigd. Alleen
dan kan het licht met maximale helderheid worden
uitgestraald. Trek de stekker uit het stopcontact en
laat het apparaat 15 minuten afkoelen, alvorens het
te openen.
Voor de reiniging gebruikt u een zachte, schone
doek en een in de handel verkrijgbaar detergent
voor glas. Wrijf de onderdelen vervolgens voorzichtig droog.
Deze gebruiksaanwijzing is door de auteurswet beschermd aigendom van voor MONACOR ® INTERNATIONAL
GmbH & Co. KG. Een reproductie – ook gedeeltelijk – voor eigen commerciële doeleinden is verboden.
Etapas de funcionamiento
1) Pulse la tecla MENU (9) hasta que el display correspondiente aparezca.
2) Para las 7 primeras opciones del menú (de
dirección a
inclinación cabeza),
confirme la selección con la tecla ENTER (11).
Después con la tecla DOWN o UP (10), efectué
el reglaje y memorícelo con la tecla ENTER (de
un espacio de 8 segundos).
En la opción de menú
, visualización en
display, el reglaje se modifica inmediatamente
con la tecla ENTER y para las 4 últimas opciones
del menú (
posición cabeza fija a
reset), la función seleccionada se activa.
3) Para pasar a la opción de menú siguiente, pulse
la tecla MENU.
4) Si no pulsa ninguna otra tecla durante unos 8 segundos, en el caso de una opción de menú seleccionada, se borra el menú.
7
8
Características técnicas
E
Alimentación: . . . . . . . . . . . . 230 V~/50 Hz
Consumo: . . . . . . . . . . . . . . 510 VA
Lámpara: . . . . . . . . . . . . . . . 1 x lámpara a
descarga,
tipo MSD 250 W
con zócalo GY 9,5
Ángulo de radiación: . . . . . . 13°
Ángulo rotación/velocidad
Eje vertical (Pan): . . . . . . . 540° en 2,8 s
Eje horizontal (Tilt): . . . . . 270° en 1,6 s
Temperatura func.: . . . . . . . . 0 – 40 °C
Dimensiones: . . . . . . . . . . . . 400 x 500 x 360 mm
Peso: . . . . . . . . . . . . . . . . . . 26 kg
Limpieza de la óptica
Le aconsejamos limpiar la lente y el disco de colores
regularmente según las impurezas causadas por el
polvo, el humo u otras partículas. Solo con esta condición obtendrá una luminosidad máxima. Antes de
abrir el aparato, desconéctelo de la red y déjelo enfriarse durante unos 15 segundos.
Para limpiar, utilice un paño seco y suave y un
producto de limpieza usual para cristales; después
limpie con precaución los elementos.
Según datos del fabricante.
Nos reservamos el derecho de modificación sin previo aviso.
Manual de instrucciones protegido por el copyright de MONACOR ® INTERNATIONAL GmbH & Co. KG.
Toda reproducción incluida parcial con fines comerciales está prohibida.
21
PL
Prosimy o otworzenie instrukcji na stronie 3,
gdzie znajdą Państwo opisywane elementy
sterujące i gniazda połączeniowe.
1
Elementy Sterujące i Gniazda Połączeniowe
14
1.1 TWIST-252
1
2
3
4
5
6
7
8
9
10
11
12
●
●
3
Uchylna głowica
Ramię obrotowe
Uchwyty
Płyta montażowa służąca do mocowania urządzenia do trawersu
Uchwyt bezpiecznika
Zużyty bezpiecznik wymieniać jedynie na bezpiecznik tego samego typu
Gniazdo zasilania do podłączenia urządzenia
do gniazda sieci elektrycznej (230 V~/50 Hz) za
pomocą dołączonego przewodu zasilającego
Włącznik zasilania POWER; zapala się, gdy
urządzenie jest podłączona do zasilania
Wyświetlacz
Przycisk MENU do przywoływania funkcji menu
Przyciski UP i DOWN do wyboru ustawień
funkcji menu
Przycisk ENTER do zatwierdzania wybranego
ustawienia funkcji menu
Diody wskazujące wybrany tryb pracy:
DMX =
zapala się, gdy na wejściu DMX IN
(14) obecny jest sygnał DMX
MASTER = tryb urządzenia nadrzędnego (rozdziały 6.1 i 6.2); sterowanie za pomocą dołączonego zdalnego sterownika LC-3, lub zintegrowanego
mikrofonu
SLAVE =
tryb urządzenia podległego (rozdział 6.1.1); sterowanie poprzez inne
podłączone urządzenie TWIST-252
Dostawca oraz producent nie ponoszą odpowiedzialności za wynikłe ewentualne szkody
materialne lub uszczerbki na zdrowiu, jeżeli
urządzenie było używane niezgodnie z przeznaczeniem, zostało niepoprawnie zainstalowane lub
obsługiwane oraz było poddawane naprawom
przez nieautoryzowany personel.
Jeśli urządzenie nie będzie już nigdy więcej
używane, wskazane jest przekazanie go do miejsca utylizacji odpadów, aby zostało zniszczone
bez szkody dla środowiska.
Zastosowanie
15
16
17
1.2 Zdalny sterownik LC-3
Zdalny sterownik dostępny jest jako wyposażenie
dodatkowe. Nie jest dołączony do urządzenia
TWIST-252.
18 Przycisk STAND BY do uruchamiania funkcji
Blackout
(głowica w pozycji wyjściowej, przesłona zamknięta)
19 Przycisk FUNCTION:
w trybie Show 1, lub Show 2 do włączania
efektu stroboskopu (tak długo jak wciśnięty jest
przycisku)
w trybie Slow do zmiany koloru (10 dostępnych
kolorów) oraz do zmiany wzoru
20 Przycisk MODE do przełączania pomiędzy
tryb Show 1 (dioda się nie świeci)
tryb Slow
(dioda świeci się ciągle)
tryb Show 2 (dioda miga)
Uwaga: Aby sterować urządzeniem za pomocą
zdalnego sterownika, na wejściu DMX IN (14) nie
może występować sygnał DMX.
2. Lampa nagrzewa się mocno podczas pracy
urządzenia, dlatego należy pozwolić jej ostygnąć przed przystąpieniem do wymiany (minimalny czas chłodzenia to 15 minut).
3. Nie wolno patrzeć wprost na lampę wyładowczą, kiedy urządzenie jest otwarte. Jasność
oraz promieniowanie UV może być przyczyną
uszkodzenia wzroku.
1) Odkręcić górną pokrywę głowicy. Odkręcić dwie
śruby znajdujące się po lewej i prawej stronie
napisu “Bulb Access” pomiędzy wentylatorem
oraz tylną częścią głowicy. Następnie usunąć
zwierciadło. Uchwyt lampy będzie widoczny.
Urządzenie przeznaczone jest do pracy na scenie i
w dyskotekach. Generuje różnokolorowe wzory,
przez co wprowadza odpowiednią atmosferę na
parkiecie. Urządzenie może być sterowane za pomocą zintegrowanego mikrofonu, zdalnego sterownika LC-3 (dostępnego osobno jako wyposażenie
dodatkowe), lub za pomocą sygnału pochodzącego ze sterownika DMX.
2) W celu wymiany lampy należy najpierw wyciągnąć starą lampę z uchwytu.
4
4) Zainstalować zwierciadło i dokręcić górną pokrywę głowicy. Po uruchomieniu urządzenia ustawić maksymalną jasność oraz czystość wydobywającego się słupa światła przy użyciu trzech
śrub regulujących znajdujących się w tylnej
części głowicy (oznaczonych A , B oraz C ).
Instalowanie i Wymiana Lampy
Urządzenie dostarczane jest bez lampy. Do pracy
potrzebuje lampy wyładowczej typu MSD 250 W na
bazie typu GY 9,5.
Nie używać lamp innego typu!
W ofercie “img Stage Line” znajdują się następujące, pasujące lampy:
Artykuł
3) Chwycić lampę przez czysty kawałek materiału
nie pozostawiający żadnych elementów (drobnych strzępków materiału) i umieścić ją w uchwycie. W tym celu należy rozchylić uchwyty
mocujące na boki za pomocą śrubokręta.
Umieścić lampę w ten sposób, aby jej styki były
mocno osadzone w otworach uchwytu.
●
Lampy zawierają niewielką ilość substancji
szkodliwych (np.: rtęci). W związku z tym nie
wolno wyrzucać ich razem ze zwykłymi odpadkami. Muszą być umieszczane w specjalnych
pojemnikach.
●
Lampa musi być wymieniona najpóźniej po
upływie okresu 1,25 krotności średniej żywotności. Dłuższe użytkowanie może grozić jej
wybuchnięciem.
Urządzenie jest wyposażone w licznik czasu
pracy. Pozwala on na określenie czasu
żywotności lampy. Po wymianie lampy należy
zanotować dotychczasowe wskazanie licznika –
Numer Zam. Średnia Żywotność
HLO-250MSD 05.0005
3000 h
Nie wolno dotykać szklanej części lampy gołymi
rękoma! Odciski palców edukują intensywność
światła i powodują znacznie szybsze przepalanie
się lampy.
Uwaga!
1. Zawsze należy odłączyć główną wtyczkę zasilania przed włożeniem lub wyjęciem żarówki!
22
13
SOUND = zapala się chwilowo w momencie
zmiany koloru, wzoru, czy kierunku
ruchu urządzenia sterowanego
poprzez sygnał dźwiękowy odbierany przez zintegrowany mikrofon
Gniazdo wyjściowe sygnału DMX (3-biegunowy
XLR);
1 = masa, 2 = DMX-, 3 = DMX+
Gniazdo wejścia sygnału DMX (3-biegunowy
XLR);
1 = masa, 2 = DMX-, 3 = DMX+
Gniazdo do podłączania zdalnego sterownika
LC-3
Regulator czułości zintegrowanego mikrofonu
(17)
Czułość zwiększa się wraz z obrotem w prawo.
Zintegrowany mikrofon do sterowania urządzenia dźwiękiem
2
Informacje Dotyczące Bezpieczeństwa
Urządzenie to spełnia wytyczne normy zgodności
elektromagnetycznej 89/336/EEC oraz normy dla
urządzeń niskonapięciowych 73/23/EEC.
Należy przestrzegać poniższych zasad:
● Urządzenie jest przeznaczone tylko do użytku
wewnątrz pomieszczeń. Należy chronić je przed
wodą, wysoką wilgotnością i wysoką temperaturą (dopuszczalny zakres temperatury otoczenia, w którym pracuje urządzenie to 0 – 40 °C).
● Podczas pracy głowica urządzenia (1) bardzo się
nagrzewa. Aby uniknąć poparzeń, nie należy go
dotykać podczas pracy urządzenia oraz odczekać kilka minut po jego wyłączeniu.
● Nie umieszczać żadnych przedmiotów w wentylatorach powietrza. Może to doprowadzić do
porażenia prądem!
● Nie uruchamiać urządzenia oraz natychmiast
odłączyć je od zasilania:
1. jeśli istnieje widoczne uszkodzenie obudowy,
obiektywu, filtra UV, czy kabla zasilającego,
2. uszkodzenie mogło powstać na skutek upuszczenia urządzenia lub podobnego wypadku,
3. jeśli urządzenie nie działa prawidłowo.
Uwaga!
Urządzenie zasilane jest prądem zmiennym
(230 V~). Nieostrożne obchodzenie się z urządzeniem może spowodować porażenie prądem.
Naprawy mogą być dokonywane jedynie przez
wykwalifikowany personel.
●
●
●
Nie wolno ciągnąć za kabel zasilający, podczas
odłączania zawsze należy chwytać za wtyczkę.
Urządzenie przenosić przy pomocy uchwytów
(3). Nie wolno podnosić urządzenia chwytając za
głowicę (1), ani ramię (2).
Do czyszczenia obudowy używać tylko suchej,
miękkiej ściereczki, nie stosować środków czyszczących i wody. Do czyszczenia soczewki
można używać detergentów do szyb.
patrz rozdz. 6.4 “Zmiana parametrów pracy”,
menu licznika pracy.
●
5
W przypadku eksplozji lampy należy jak najszybciej opuścić pomieszczenie, w którym urządzenie pracowało, aby wyeliminować wszelkie
ryzyko uszkodzenia zdrowia przez rozpylone
odrobiny rtęci. Należy porządnie wywietrzyć
pomieszczenie.
Montaż
Urządzenie może być umieszczane na płaskich,
stabilnych podłożach. W razie potrzeby należy
odkręcić płytę montażową (4). Urządzenie może
być również montowane do trawersu i pracować w
pozycji odwróconej. Do mocowania należy używać
uchwytów montażowych. Należy dokręcić je do
podłużnych otworów płyty montażowej, a następnie płytę razem z płytą przymocować do trawersu.
Wymagana nośność trawersu wynosi 30 kg na
każde urządzenie.
Uwaga!
1. Aby zapobiec przegrzaniu urządzenia, miejsce
jego zamocowania musi być dostatecznie
wentylowane. Urządzenie musi znajdować się
przynajmniej 1 m od najbliższej przyległej
powierzchni. Otwory wentylacyjne w obudowie
urządzenia nie mogą pod żadnym pozorem
być zasłonięte.
2. Należy zwrócić szczególną uwagę na zachowanie dostatecznej odległości od materiałów
łatwopalnych oraz wrażliwych na gorąco.
3. Jeżeli urządzenie jest zamontowane ponad
miejscami, w których przebywają ludzie należy
je dodatkowo zabezpieczyć przed spadnięciem (np.: za pomocą stalowej linki). Wkręcić w
jeden z otworów ucho mocujące i przymocować do niego linkę bezpieczeństwa. Zamocować linkę w ten sposób, aby po ewentualnym
oderwaniu się urządzenie nie spadało więcej
niż 20 cm.
6
Działanie
Podłączyć kabel zasilający do gniazda (6) oraz do
gniazda sieci elektrycznej (230 V~/50 Hz). Po
podłączeniu urządzenia do zasilania zaświeci się
lampka włącznika zasilania (7). Włączyć urządzenie za pomocą włącznika POWER (7). Ruchoma
głowica oraz inne silniki ustawią się w pozycjach
wyjściowych. Na wyświetlaczu (8) pojawi się wersja
zainstalowanego oprogramowania. Po chwili
urządzenie będzie gotowe do pracy. Aby wyłączyć
urządzenie należy odłączyć je od zasilania.
Uwaga: Lampa wyładowcza służy jako źródło
światła. Jeżeli nastąpi chwilowa przerwa w prądzie
lampa nie będzie przez pewien czas reagować.
Przed ponowieniem pracy będzie musiała ostygnąć.
6.1 Sterowanie muzyką
1) Aby sterować urządzeniem za pomocą zintegrowanego mikrofonu (17), nie należy podłączać
sygnału DMX do wejścia DMX IN (14). Jeżeli do
gniazda nie jest podłączony sygnał DMX dioda
MASTER (12) świeci się w kolorze żółtym,
wyświetlacz (8) wskazuje
(Show 1), lub
(Show 2).
Uwaga!
Aby kontrolować urządzenie za pomocą dźwięku należy wyłączyć funkcję Blackout za pomocą funkcji menu, lub zdalnego sterownika
LC-3 (przycisk STAND BY). W przeciwnym
wypadku głowica pozostanie w pozycji wyjściowej, a przysłona będzie zasłonięta.
a) Wcisnąć przycisk MENU (9) czterokrotnie,
aby wyświetlacz (8) wskazywał
(funkcja blackout).
b) Wcisnąć przycisk ENTER (11). Wyświetlacz
będzie migał i wskazywał
(funkcja
blackout włączona).
c) Przełączyć do
(funkcja blackout wyłączona) za pomocą przycisku UP, lub DOWN
(10).
bór nie zostanie potwierdzony przyciskiem
ENTER w przeciągu 8 sekund, urządzenie
przełączy się ponownie w poprzedni tryb
pracy.
6.2 Zdalny sterownik LC-3
Zdalny sterownik LC-3 pomaga na sterowanie
różnymi funkcjami:
1) Podłączyć sterownik do gniazda REMOTE
CONTROL (15).
2) Wejście DMX IN (14) nie może być podłączone;
musi się świecić żółta dioda MASTER (12).
3) Do gniazda DMX OUT (13) można podłączać
kolejne urządzenia podległe TWIST-252 (patrz
rozdział 6.1.1), aby móc je kontrolować za pomocą urządzenia nadrzędnego wyposażonego
w zdalny sterownik.
4) Za pomocą przycisku STAND BY (18) można
włączać i wyłączać funkcją Blackout. Jeżeli
funkcja jest włączona, świeci się dioda znajdująca się obok przycisku. Głowica ustawia się w
pozycji wyjściowej, a przesłona jest zamknięta.
5) Wybrać tryb pracy za pomocą przycisku MODE
(20):
1. Tryb Show 1 (dioda obok przycisku nie
świeci się)
2. Tryb Slow
(dioda świeci się ciągle)
3. Tryb Show 2 (dioda miga)
a) W trybie Show 1 (kąt obrotu wokół osi poziomej wynosi maksymalnie 210°) oraz w trybie
Show 2 (kąt obrotu wokół osi poziomej
wynosi maksymalnie 90°) ruchy głowicy,
zmiana kolorów oraz wzorów są sterowane za
pomocą zintegrowanego mikrofonu. Przytrzymując wciśnięty przycisk FUNCTION (19)
można wybrać jeden z trzech efektów stroboskopowych:
1. Efekt stroboskopowy ze zmianą kolorów i
wzorów
2. Efekt stroboskopowy z białym światłem;
efekt synchroniczny dla pozostałych urządzeń podległych
d) W celu zapamiętania ustawienia wcisnąć
przycisk ENTER. Wyświetlacz pokaże
przez kilka sekund. Następnie wskaże ustawiony tryb pracy. Jeżeli przycisk ENTER nie
będzie wciśnięty przez 8 sekund, urządzenie
przełączy się do poprzedniego ustawienia.
e) Aby rozpocząć zaprogramowaną sekwencję
należy wyłączyć urządzenie i po chwili
włączyć za pomocą włącznika POWER (7).
2) Tryb pracy Show 1 przeznaczony jest do pracy,
jeżeli urządzenie ustawione jest na podłodze.
Zakres obrotów wokół osi poziomej wynosi
maksymalnie 210°. Trybie Show 2, przeznaczonym do pracy, gdy urządzenie jest podwieszone do trawersu, kąt ten wynosi maksymalnie
90°.
a) W celu przełączania pomiędzy trybami Show
1 i Show 2 należy dwukrotnie wcisnąć przycisk MENU (9), aby wyświetlacz wskazywał
(tryb show).
b) Wcisnąć przycisk ENTER (11). Wyświetlacz
zacznie migać.
c) Za pomocą przycisku UP, lub DOWN (10)
przełączać pomiędzy trybami
dla
Show 1 i
dla Show 2.
a) W celu zapamiętania ustawienia należy wcisnąć przycisk ENTER. Wyświetlacz przez kilka
sekund pokaże
. Następnie ponownie
pokaże się wybrane ustawienie. Jeżeli przycisk ENTER nie będzie wciśnięty przez 8 sekund, urządzenie przełączy się do poprzedniego ustawienia.
3) Ustawić czułość zintegrowanego mikrofonu za
pomocą regulatora SENSITIVITY (16) tak, aby
ruchy głowicy, zmiana kolorów i wzorów były
skoordynowane z rytmem muzyki. Maksymalna
czułość mikrofonu ustawiona jest, kiedy regulator jest maksymalnie obrócony w prawo.
W momencie zmiany kierunku ruchu głowicy,
koloru, lub wzoru chwilowo zaświeca się zielona
dioda SOUND (12).
3. Efekt stroboskopowy z białym światłem;
efekt jest przeciwny dla pozostałych urządzeń podległych
Każde wciśnięcie przycisku FUNCTION powoduje włączenie kolejnego efektu stroboskopowego.
b) W trybie Slow jedynie ruchy głowicy sterowane są dźwiękiem za pomocą zintegrowanego mikrofonu. Zmiana kolorów oraz wzorów dokonywana jest poprzez przyciśnięcie
przycisku FUNCTION. Każde przyciśnięcie
przycisku zmienia kolor na następny. Po
przełączeniu wszystkich 10 kolorów, kolejne
wciśnięcie przycisku zmienia wzór.
6.3 Sterowanie
świateł
za
pomocą
sterownika
Urządzenie TWIST-252 wyposażone jest w 16 kanałów DMX, dzięki czemu jest możliwe sterowanie
nim za pomocą sterownika DMX. Tabela 3 (patrz na
stronie 24) pokazuje funkcje oraz poszczególne
wartości DMX.
1) Podłączyć wejście DMX (14) z wyjściem DMX
urządzenia sterującego.
Do połączenia urządzeń należy używać specjalnych kabli przystosowanych do przepływu
dużej ilości informacji. Jeżeli odległość nie przekracza 100 m, możliwe jest stosowanie typowych
kabli mikrofonowych. Najlepszy efekt uzyskuje
się przy zastosowaniu ekranowanego kabla mikrofonowego 2 x 0,25 mm2, lub specjalnego kabla
przeznaczonego do transmisji danych. W przypadku odległości przekraczających 150 m zaleca
się zastosowanie wzmacniacza sygnału DMX
(np.: SR-103DMX z oferty “img Stage Line”).
2) Połączyć wyjście DMX (13) z wejściem DMX
kolejnego efektu świetlnego. Wyjście kolejnego
urządzenia połączyć z wejściem następnego,
itd. do momentu, kiedy wszystkie urządzenia
zostaną połączone w jeden szereg.
Gniazda sygnałów DMX wyposażone są w
zapadki blokujące. Aby wyciągnąć wtyczkę
należy wcisnąć dźwignię z napisem PUSH.
Uwaga: W przypadku zmiany głośności muzyki
należy ponownie ustawić czułość zintegrowanego mikrofonu.
PL
6.1.1 Łączenie kilku urządzeń TWIST-252
Istnieje możliwość łączenia kilku urządzeń TWIST252 tak, aby sygnał jednego z urządzeń (pracującego jako urządzenie nadrzędne) sterowanego za
pomocą zintegrowanego mikrofonu kierował sekwencjami pozostałych urządzeń pracujących jako
urządzenia podległe.
1) Połączyć wyjście DMX OUT (13) urządzenia
nadrzędnego z gniazdem DMX IN (14) urządzenia podległego za pomocą przewodu wyposażonego we wtyki XLR 3-biegunowe (np.: serii
MEC-…, lub MECN-… z oferty “img Stage Line”)
2) Połączyć wyjście DMX OUT pierwszego urządzenie podległego z wejściem DMX IN kolejnego, itd.
3) Jeżeli sygnał sterujący występuje na wejściach
urządzeń podległych czerwona dioda SLAVE
(12) ciągle się świeci. Ruchy urządzeń podległych mogą być zsynchronizowane z urządzeniem głównym, lub mogą być dokładnie przeciwne (np.: jeżeli dołączone jest tylko jedno
urządzenie pomocnicze).
a) Aby przełączyć urządzenie pomiędzy ruchem
synchronicznym, a przeciwnym należy trzykrotnie wcisnąć przycisk MENU (9) w urządzeniu podległym tak, aby wyświetlacz wskazywał
(tryb urządzenia podległego).
b) Wcisnąć przycisk ENTER (11). Wyświetlacz
zacznie migać.
c) Za pomocą przycisku DOWN, lub UP (10)
przełączyć pomiędzy
(normal) dla
pracy synchronicznej, a
(2 light show)
dla pracy przeciwnej.
d) W celu zapamiętania wyboru, wcisnąć przycisk ENTER. Wyświetlacz przez kilka sekund
wskaże
. Następnie pokaże wybrany
tryb pracy (
dla pracy synchronicznej,
lub
dla pracy przeciwnej) i rozpocznie
się odpowiednie sekwencja pracy. Jeżeli wy-
3) Należy zakończyć szereg DMX za pomocą opornika 120 Ω (0,25 W): należy przylutować opornik
do końcówek 2 i 3 wtyku XLR i włożyć wtyk do
gniazda wyjściowego DMX ostatniego urządzenia.
4) Aby móc obsługiwać urządzenie TWIST-252 za
pomocą sterownika DMX, należy ustawić sygnał
startowy pierwszego kanału DMX. Np.: jeżeli
adres 17 jest zarezerwowany w urządzeniu sterującym do rotacji głowicy, należy ustawić adres
17 w urządzeniu TWIST-252.
a) Wcisnąć przycisk MENU (9) tak, aby wyświetlił się napis
(address).
b) Wcisnąć przycisk ENTER (11). Wyświetlacz
zacznie migać.
c) Za pomocą przycisków DOWN, lub UP (10)
ustawić odpowiadający adres (1 – 497).
d) W celu zapamiętania wcisnąć przycisk ENTER. Wyświetlacz przez kilka sekund wyświetli napis
. Następnie wyświetli się
ponownie wybrany adres. Jeżeli przycisk ENTER nie zostanie wciśnięty przez 8 sekund,
urządzenie przełączy się ponownie do poprzedniego adresu.
Po regulacji adresu startowego kanału pierwszego, kanały 2 do 16 są przypisane do następujących adresów. Przykład:
adres startowy 17 = kanał rotacji głowicy
adres 18 = kanał wychyłu głowicy
adres 19 = kanał prędkości
...
adres 31 = kanał wybory zaprogramowanego
wzoru
adres 32 = kanał resetowania
5) Po regulacji adresu startowego, możliwe jest
sterowanie urządzeniem TWIST-252 za pomocą
dołączonego urządzenia DMX. Ustawione adresy
startowe wyświetlają się w momencie odbioru
sygnału sterującego ze sterownika DMX. Dodatkowo zaświeca się czerwona dioda DMX (12).
23
PL
Kanał
Funkcja
Wartość DMX
1
rotacja głowicy (obrót) 540°
000 – 255
2
odchylenie głowicy (wychył) 270°
000 – 255
3
4
5
prędkość obrotu i wychylenia
szybko → powoli
przełącznik światła
ciemne → jasne
000 – 255
brak efektu
stroboskop powoli → szybko
efekt drgania powoli → szybko
000 – 015
016 – 135
136 – 255
Kanał
Funkcja
Wartość DMX
10
rotacja gobo
stop
rotacja w prawo szybko → powoli
stop
rotacja w lewo powoli → szybko
stop
000 – 009
010 – 120
121 – 134
135 – 245
246 – 255
11
pryzmat wyłączony
pryzmat włączony
000 – 127
128 – 255
12
rotacja pryzmatu
stop
rotacja w prawo szybko → powoli
stop
rotacja w lewo powoli → szybko
stop
000 – 009
010 – 120
121 – 134
135 – 245
246 – 255
regulacja ostrości
000 – 255
000 – 255
1)
kolor
biały
niebieski
pomarańczowy
zielony
jasnoniebieski
czerwony
różowy
ultrafiolet
żółty
jasnozielony
ciągła zmiana kolorów
powoli → szybko
128 – 255
7
bez funkcji
—
8
reset 2)
255
6
000 – 012
013 – 025
026 – 038
039 – 051
052 – 063
064 – 076
077 – 089
090 – 102
103 – 115
116 – 127
13
14
15
9
gobo
bez gobo
gobo A
gobo B
gobo C
gobo D
gobo E
gobo F
gobo G
zmiana ciągła
szybko → powoli
000 – 015
016 – 031
032 – 047
048 – 063
064 – 079
080 – 095
096 – 111
112 – 127
16
➂
zaprogramowana sekwencja
bez zaprogramowanej sekwencji,
sterowanie DMX
Show 1, sekwencja automatyczna
Show 2, sekwencja automatyczna
Show 1, sterowanie dźwiękiem
Show 2, sterowanie dźwiękiem
zaprogramowane wzory świetlne
dla sekwencji wybranej za pomocą
kanału 14
tylko automatyczna zmiana kolorów i
efektu gobo
rotacja gobo
stroboskop
efekt drgania
pryzmat
rotacja pryzmatu
stroboskop + rotacja pryzmatu
reset2)
6.4 Zmiana parametrów pracy
Za pomocą menu można zmieniać następujące
parametry. Podana kolejność odpowiada kolejność pozycji menu.
Regulacja adresu startowego
(rozdział 6.3)
...
Tryb Show (rozdział 6.1)
Show 1
Show 2
Tryb Slave (rozdział 6.1.1)
normalny
000 – 031
032 – 127
128 – 223
224 – 239
240 – 255
2 light show
Tryb Blackout
blackout on
(funkcja blackout włączona)
Jeżeli na wejściu DMX IN (14)
nie ma sygnału DMX, głowica
ustawia się w pozycji wyjściowej, a przesłona jest zamknięta.
000 – 047
048 – 095
096 – 143
144 – 191
192 – 207
208 – 239
240 – 255
Blackout desactivado
(funkcja blackout wyłączona)
Możliwa jedynie kontrola za
pomocą zintegrowanego mikrofonu (17).
255
Konfiguracja kanałów DMX
Tryb kolorów
128 – 255
wiele kolorów (split colour)
Możliwe są pozycje przejściowe pomiędzy kolorami.
Obroty głowicy (Pan)
normalne
rotacja przeciwna
Odchylenie głowicy (Tilt)
normalne
odchylenie przeciwne
Tryb Wyświetlania
normalny
odwrócony o 180°
(przy montażu sufitowym)
Włączenie ustawienia za pomocą przycisku ENTER. Wyświetlacz miga przez
8 sekund, a następnie wygasza się.
Ustalona pozycja głowicy
Głowica może być ustawiana w pięciu
różnych pozycjach: w górę (w dół),
skierowana do przodu, w prawo oraz w
lewo. Należy wybrać ustaloną pozycją
wciskając kilkukrotnie przycisk ENTER.
Aby włączyć poprzedni tryb pracy należy wcisnąć przycisk MENU. Kolejna
opcja menu będzie migać przez 8 sekund. Następnie manu się wyłączy.
Self-test
Po przyciśnięciu przycisku ENTER urządzenie rozpoczyna testowanie. Aby
zatrzymać testowanie należy wcisnąć
przycisk MENU. Następna pozycja
menu miga przez 8 sekund, a następnie się wygasza.
1)
Wyszczególnione wartości DMX dla sekcji kolorów odnoszą się do trybu
jednokolorowego. Dla trybu wielokolorowego możliwe są również ustawienia pośrednie kolorów (patrz rozdział 6.4).
2)
Aby włączyć funkcję reset należy ustawić kanału 8 i 16 w wartości
DMX 255.
Licznik czasu pracy (Fixture Hours)
Po wciśnięciu przycisku ENTER, wyświetlacz pokazuje czas pracy. Aby powrócić do poprzedniego wskazania należy wcisnąć przycisk MENU. Następny
element menu świeci się przez 8 sekund, a następnie się wygasza.
Reset
Urządzenie kasuje się po wciśnięciu
przycisku ENTER: Głowica obrotowa
powoli ustawia się w pozycji wyjściowej. Następnie urządzenie włacza się
poprzednim trybie pracy.
Sposób poruszania się po menu
1) Wcisnąć przycisk MENU (9) tyle razy, ile potrzeba, aby pokazała się odpowiednia opcja.
2) W przypadku pierwszych siedmiu pozycji menu
(
adres startowy do
odchylenie się
głowicy), wybór potwierdza się za pomocą przycisku ENTER (11). Następnie ustawia się wybrany parametr za pomocą przycisku DOWN,
lub UP (10) i zatwierdza się przyciskiem ENTER
w przeciągu 8 sekund.
W przypadku pozycji menu
wskazanie
wyświetlacza, ustawienie zmienia się w momencie wciśnięcia przycisku ENTER. Ostatnie cztery
parametry menu są aktywowane za pomocą
przycisku ENTER (
ustalona pozycja
głowicy do
reset).
3) Aby przejść do kolejnej opcji menu, należy wcisnąć przycisk MENU.
4) Jeżeli przez 8 sekund nie jest wciskany żaden
przycisk, menu się wygasza.
pojedynczy kolor (normal)
Dysk z kolorami zatrzymuje
się w miejscu na jednym konkretnym kolorze.
7
Czyszczenie optyki
Obiektyw i kolorowy dysk powinny być czyszczone
w regularnych odstępach czasu zależnie od stopnia
zanieczyszczenia. Tylko wtedy światło może być
emitowane z maksymalną jasnością. Przed otwarciem urządzenia należy odłączyć urządzenie od
zasilania i pozwolić mu ostygnąć przez 15 minut.
Do czyszczenia używać delikatnego, czystego
kawałka materiału oraz detergentów przeznaczonych do czyszczenia obiektywów. Następnie
należy wszystko delikatnie zetrzeć.
8
Dane Techniczne
Zasilanie: . . . . . . . . . . . . . . . 230 V~/50 Hz
Pobór mocy: . . . . . . . . . . . . 510 VA
Lampa: . . . . . . . . . . . . . . . . . 1 x lampa wyładowcza,
typ MSD 250 W na
bazie GY 9,5
Kąt pokrycia: . . . . . . . . . . . . 13°
Kąt obrotu/prędkość
oś pionowa (obrót): . . . . . 540° w 2,8 s
oś pozioma (wychylenie): 270° w 1,6 s
Dopuszczalna temperatura
otoczenia pracy: . . . . . . . . . 0 – 40 °C
Rozmiary: . . . . . . . . . . . . . . . 400 x 500 x 360 mm
Waga: . . . . . . . . . . . . . . . . . . 26 kg
Zgodnie z danymi producenta.
Rzeczywiste parametry mogą odbiegać od podanych przez producenta.
Instrukcje obsługi są chronione prawem copyright for MONACOR ® INTERNATIONAL GmbH & Co. KG.
Przetwarzanie całości lub części instrukcji dla osobistych korzyści finansowych jest zabronione.
24
25
DK
Lyseffektenhed TWIST-252
●
Læs nedenstående sikkerhedsoplysninger opmærksomt igennem før ibrugtagning af enheden. Bortset
fra sikkerhedsoplysningerne henvises til den engelske, tyske, franske eller italienske tekst.
●
Vigtige sikkerhedsoplysninger
Enheden overholder EU-direktivet vedrørende elektromagnetisk kompatibilitet 89/336/EØF og lavspændingsdirektivet 73/23/EØF.
Vær altid opmærksom på følgende:
● Enheden er kun beregnet til indendørs brug. Beskyt
den mod vanddråber og -stænk, høj luftfugtighed
og varme (tilladt omgivelsestemperatur 0 – 40 °C).
● Under brug bliver panoreringshovedet (1) meget
varmt, undgå at røre hovedet (1) under brug. Lad
det køle i nogle minutter efter brug, før berøring.
● Undlad at indføre noget i kabinettets ventilationshuller! Dette kan forårsage fare for elektrisk stød.
● Tag ikke enheden i brug og tag straks stikket ud af
stikkontakten i følgende tilfælde:
1. hvis der er synlig skade på enheden, f. eks.
kabinettet, linsen, UV-filtret eller netkablet.
2. hvis der kan være opstået skade, efter at
enheden er tabt eller lignende.
3. hvis der forekommer fejlfunktion.
Forsigtig!
Enheden benytter livsfarlig netspænding (230 V~).
Ved usagligt udførte reparationer kan der opstå
betydelig fare for brugeren. Enheden skal altid
repareres af autoriseret personel.
●
●
●
S
Tag aldrig stikket ud af stikkontakten ved at
trække i kablet, tag fat i selve stikket.
Ved transport af enheden, skal håndtagene (3)
benyttes. Enheden må aldrig bæres i rammen (2)
eller hovedet (1).
Til rengøring af huset må kun benyttes en tør, blød
klud; der må under ingen omstændigheder benyttes kemikalier eller vand. Til rengøring af linsen
kan der benyttes almindelig vindues-/skærmrens.
Lyseffekten leveres uden lyskilde. Der skal brubes
en udladningspære af typen MSD 250 W med sokkel GY 9,5.
Andre typer lyskilder må under ingen omstændigheder benyttes!
Følgende lyskilder fra “img Stage Line” kan benyttes:
Type
OBS!
Enheten använder livsfarligt hög spänning
internt (230 V~). Felatigt utförda reparationer kan
leda till personskador. Enheten skall alltid lagas
på verkstad av utbildad personal.
●
●
●
26
Drag aldrig ut kontakten genom att dra i sladden
utan ta tag i kontaktkroppen.
Lyft i handtaget (3) endast då enheten skall transporteras. Lyft aldrig i panoreringshuvudet (1) eller
i fästet (2) som häller denna.
Rengör endast med en mjuk och torr trasa, använd aldrig kemikalier eller vatten vid rengöring.
Best. Nr.
HLO-250MSD 05.0005
Gns. levetid
3000 h
Rør aldrig ved lyskilden med fingrene. Fingeraftryk
reducerer lyset, brænder ind u glasset og nedsætter
lyskildens levetid væsentligt.
Vigtigt!
1. Før lyskilden installeres af enheden, skal stikket
under alle omstændigheder tages ud af stikkontakten!
2. Da halogenlamper bliver meget varme under
drift, skal de have lov til at køle ned efter brug af
enheden, før de udskiftes (nedkølingstiden er
mindst 15 minutter).
3. Kig aldrig direkte på lyskilden, når enheden er
åben. Det kraftige lys og UV-strålerne kan være
farlige for øjnene.
●
●
●
Säkerhetsföreskrifter
Enheten uppfyller EG-direktiv 89/336/EWG avseende elektromagnetiska störfält samt EG-direktiv
73/23/EWG avseende lågspänningsapplikationer.
Ge ovillkorligen även akt på följande:
● Enheten är endast avsedda för inomhusbruk.
Skydda enheten mot vätskor, hög luftfuktighet
och hög värme (tillåten omgivningstemperatur
0 – 40 °C).
● Vid användning blir det vridbara huvudet (1)
mycket varmt. För att undvika brännskador bör
inte panoreringshuvudet vidröras under gång,
samt tillåtas att kallna i flera minuter efter avslutad
användning.
● Stoppa aldrig något i kylhålen på chassiet! Detta
kan ge elektriska skador på person och materiel.
● Använd inte enheten och ta omedelbart kontakten
ur elurtaget om något av följande fel uppstår:
1. Om det finns synliga skador på enheten, chassiet, linsen, UV-filtret eller elsladden.
2. Enheten är skadad av fall e. d.
3. Enheten har andra felfunktioner.
●
Installering af lampen
Ljuseffektenhet TWIST-252
Innan enheten tas i bruk, läs först igenom säkerhetsföreskrifterna. Om ytterligare information önskas,
läs igenom den tyska, engelska, franska eller den
italienska texten som medföljer.
Hvis enheden benyttes til andre formål, end den
oprindeligt er beregnet til, hvis den monteres eller
betjenes forkert, eller hvis den ikke repareres af
autoriseret personel, omfattes eventuelle skader
ikke af garantien.
Hvis enheden skal tages ud af drift for bestandigt,
skal den bringes til en lokal genbrugsstation for
bortskaffelse.
●
Lyskilderne indeholder skadelige stoffer (f. eks.
kviksølv), som kan skade miljøet, og skal derfor
afleveres på en genbrugsstation.
Lamperne skal senest udskiftes efter at den gennemsnitlige levetid er overskredet med 25 %, da
Linsen kan rengöras med vanligt fönsterputsmedel.
Om enheten används för andra ändamål än
avsett, om den monteras eller används på fel sätt
eller inte repareras av auktoriserad personal upphör alla garantier att gälla. I dessa fall tas inget
ansvar för uppkommen skada på person eller
materiel.
Om enheten skall kasseras bör de lämnas in till
återvinning.
Montering av lampa
Ljuseffektenheten levereras utan lampa. En urladdningsbar lampa av typ MSD 250 W behövs.
Lampor av annan typ får under inga omständigheter användas.
Följande lampor från “img Stage Line” produkt
område kan användas.
Föremål
Order
nummer
HLO-250MSD 05.0005
Genomsnittlig
livslängd
3000 h
Rör aldrig vid glödlampan, fingeravtryck ger försämrad belysning och även inbränning av smuts på lampan.
Viktigt!
1. All montering/demontering av lampa skall ske
endast om kontakten är uttagen ur elurtaget!
2. Då halogenlampor blir mycket varma vid användning, låt först lampan kallna en stund
(minst 15 min.) innan byte sker för att undvika
brännskador.
3. Titta aldrig direkt in i blixtlampan när den är i
funktion. Det skarpa ljuset och UV-ljuset kan
orsaka permanenta ögonskador.
●
Lamporna som anvisas innehåller små mängder
skadligt material, främst kvicksilver, som kan
skada miljön och måste därför kasseras på ett
betryggande sätt enligt föreskrifter i respektive
land där dessa används.
der eller ved fortsat brug er fare for eksplosion
som følge af forhøjede strukturændringer i quartzglasset.
Enheden er forsynet med en levetidstæller.
Denne bruges til at bestemme levetiden på lyskilden. Noter tælleren når lyskilden udskiftes – se
kapitel 6.4 i det engelske afsnit under “Changing
the operation parameters”, menupunkt “Working
hour meter”.
Hvis en lampe eksploderer under drift skal de
umiddelbare omgivelser hvori lampen er monteret
forlades med det samme, for at undgå sundhedsfare der opstår som følge af kviksølvdampe; en
god udluftning af lokalet er påkrævet.
Montering
Enheden kan stilles på en jævn overflade. Skru evt.
monteringspladen (4) af. Der er også mulighed for at
montere enheden på hovedet i en traverse ved at
bruge monteringspladen. Til monteringen skal der
bruges monteringbeslag. Skru beslaget godt fast til
de lange huller i monteringspladen og derefter til
traversen. Monteringsstedet skal være stabilt og
kunne bære mindst 30 kg per enhet.
Vigtigt!
1. For at undgå ophobning af varme i enheden
skal monteringsstedet vælges således, at der
sikres tilstrækkelig luftcirkulation under drift. Stil
enheden mindst 1 m fra andre overflader. Kabinettets ventilationshuller må ikke tildækkes.
2. Det er ab solut nødvendigt at sikre tilstrækkelig
afstand til materialer, som er let antændelige og
følsomme over for varme.
3. Hvis enheden bliver monteret over et sted, hvor
der kan opholde sig personer, skal denne sikres
yderligere (f. eks med et sikkerhedsreb). Skru
den medfølgende sikkerhedslås fast i den midterste bøsning på undersiden af enheden og
fastgør et sikkerhedsreb til den. Sikkerhedsrebet skal have en længde, så enheden højest
kan falde 20 cm.
●
●
Lamporna måste bytas ut senast efter 1,25 gånger medellivslängden eftersom risken för en explosion därefter stiger avservärt p.g.a. strukturförändringar i kvartsglaset.
Enheten är försedd med en arbetstidsmätare.
Denna kan användas för avläsning av lampans
glödtid. Skriv ner tidgivningen vid byte av lampa –
se kapitel 6.4 “Changing the operation parameters” under punkten “Working hour meter”.
Om en lampexplosion skett då lampan varit i drift
skall rummet där apparaten finns, för säkerhets
skull utrymmas, för att fullständigt kunna utesluta
hälsovådlig kvicksilverånga. Sörj för god venitaltion.
Montering
TWIST-252 kan monteras på en fast och jämn yta.
Om så behövs, skruva loss monteringsplattan (4).
Det är också möjligt att montera enheten upp och
ner på en travers med hjälp av monteringsplattan.
För fastsättning behövs fästbultar. Skruva bultarna
genom de långa hålen i fästplattan och i traversen.
Monteringsplatsen måste ha tillräcklig för att bära
30 Kilo minimum.
Viktigt!
1. För att undvika överhettning av enheten skall
den monteras så att luften kan cirkulera fritt runt
den. Placera enheten minst 1 m från materialet
som skall belysas. Enheten får inte heller täckas
över då detta medför risk för brand.
2. Det är mycket viktigt att hålla avstånd från
brännbart eller värme känsligt material då lampan blir mycket varm vid användning.
3. Om enheten monteras hängande över personer, måste den även säkras med en vajer till traversen. Skruva fast den medföljande fästöglan i
mitten av den undre sidan av enheten och
anslut vajern i öglan. Vajern skall tillåta max.
20 cm fritt fall innan enheten stoppas.
Valoefektilaite TWIST-252
Ole hyvä ja huomioi aina seuraavat turvallisuutta
koskevat ohjeet ennen laitteen käyttöön ottoa. Katso
käyttöön liittyviä ohjeita Saksan, Englannin, Ranskan tai Italian kielisistä ohjeista, jos tarvitset lisää tietoa laitteen käytöstä.
●
Turvallisuudesta
Tämä laite vastaa direktiiviä 89/336/EEC sähkömagneettisesta yhteensopivuudesta sekä matalajännitedirektiiviä 73/23/EEC.
● Tämä laite soveltuu vain sisätilakäyttöön. Suojele
laitetta kosteudelta, vedeltä ja kuumuudelta (sallittu ympäröivä lämpötila 0 – 40 °C).
● Käytön aikana laitteen liikkuva kääntöpää (1) kuumenee voimakkaasti. Välttääksesi palovammoja
älä koske kääntöpäähän laitteen ollessa
toiminnassa, ja sammuttamisen jälkeenkin anna
laitteen jäähtyä muutamia minuutteja ennen
koskettamista.
● Älä työnnä mitään esinettä tuuletusaukosta sisään! Sähköiskun vaara.
● Irrota virtajohto pistorasiasta, äläkä käynnistä
laitetta, jos:
1. laitteessa on näkyviä vaurioita esim. ulkokuoressa, linsseissä, UV-filtterissä tai virtajohdossa
2. putoaminen tai muu vastaava vahinko on saattanut aiheuttaa vaurion
3. laitteessa esiintyy toimintahäiriöitä
Huomio!
Tämä laite toimii hengenvaarallisella jännitteellä
(230 V~). Jos laite ei toimi kunnolla, saattaa oikosulun vaara olla olemassa. Laite täytyy korjauttaa valtuutetussa huoltoliikkeessä.
●
●
●
Älä koskaan irrota virtajohtoa pistorasiasta johdosta vetämällä.
Kanna ja liikuta laitetta ainoastaan sen kahvoista
(3). Älä milloinkaan kanna laitetta sen kääntöpäästä (1) tai kääntöpään aisasta (2).
Käytä laitteen ulkopuoliseen puhdistamiseen aino-
●
astaan kuivaa, pehmeää kangasta. Älä milloinkaan käytä vettä tai kemikaaleja. Linssin puhdistamisessa voidaan käyttää markkinoilla olevia, tähän
käyttöön tarkoitettuja lasilinssinpuhdistusaineita.
Laitteen takuu raukeaa, eikä valmistaja, maahantuoja tai myyjä ota vastuuta mahdollisista välittömistä tai välillisistä vahingoista, jos laitetta on
käytetty muuhun kuin alkuperäiseen käyttötarkoitukseen, laitetta on taitamattomasti käytetty tai
asennettu, tai jos laitetta on huollettu muussa kuin
valtuutetussa huollossa.
Kun laite poistetaan lopullisesti käytösta, vie se paikalliseen kierrätyskeskukseen jälkikäsittelyä varten.
●
●
Polttimot on vaihdettava viimeistään, kun niitä on
poltettu 1,25-kertaisen keskimääräisen polttoiän
verran. Enemmän käytettäessä räjähtämisriski
huomattavasti kasvaa johtuen kvartsilasin liitoskohdissa tapahtuvista muutoksista.
Laitteessa on polttimon käyttöaikalaskuri, joka
auttaa ajoittamaan polttimon vaihtoa. Polttimoa
vaihtaessasi muista nollata laskuri – katso luku 6.4.
Käytössä tapahtuneen polttimon räjähdyksen jälkeen tulisi varovaisuussyistä poistua valoefektin
välittömästä läheisyydestä, jotta täysin vältyttäisiin vapautuneen elohopeahöyryn terveydelle haitallisilta vaikutuksilta. Huolehdi tilan tehokkaasta,
tuuletuksesta.
FIN
Lampun asennus
Valoefektilaite toimitetaan ilman polttimoa. Laitteessa
tulee käyttää MSD 250 W GY 9,5 -purkauspolttimoa.
Muuntyyppistä polttimoa ei saa käyttää missään
tapauksessa!
Seuraavia “img Stage Line” -tuoteryhmän polttimoita
voidaan käyttää:
Tuote
Tilausnumero Käyttöikä keskimäärin
HLO-250MSD 05.0005
3000 h
Älä koske sormilla polttimon lasiin! Sormenjäljet
vähentävät polttimon valotehoa ja lyhentävät polttimon elinikää.
Tärkeää!
1. Ennen lamppujen vaihtoa tai asennusta tulee
virtajohto irrottaa pistorasiasta!
2. Koska halogeenilamput kuumenevat käytön
aikana kovasti, anna niiden jäähtyä käytön jälkeen (jäähtymisaika ainakin 15 minuuttia).
3. Älä koskaan katso sytytettyyn purkauslamppuun laitteen ollessa avattuna. Lampun kirkkaus
ja UV-säteily saattavat aiheuttaa silmävaurion.
●
Tässä luetellut polttimot sisältävät pieniä määriä
haitallisiksi luokiteltuja aineita (esim. elohopeaa),
joten polttimoiden käytössä tulee noudattaa varovaisuutta ja hävitettäessä polttimot tulee toimittaa
ongelmajätekeräykseen.
Kiinnitys
Laite tulee asentaa tukevalle, tasaiselle pinnalle.
Näin käytettynä laitteen pohjassa sijaitseva asennuslevy (4) voidaan irroittaa. Laite voidaan myös ripustaa
ylösalaisin riippumaan esim. trussirakenteeseen, jota
tarkoitusta varten laitteen pohjan asennuslevyssä on
tukevat kiinnitysreiät. Kiinnitä laite pohjalevyineen
trussirakenteeseen. Varmista että kiinnityskohde on
riittävän tukevaa tekoa, ja että se pystyy kantamaan
vähintään 30 kg:n painon laitetta kohti.
Tärkeää!
1. Jotta lämmön kertyminen laitteeseen voitaisiin
estää, tulee asennuspaikka valita siten, että riittävä ilmanvaihto varmistetaan toiminnan
aikana. Sijoita laite niin, että ympäröiviin pintoihin jää vähintään 1 metrin välimatka. Laitteen
tuuletusaukkoja ei saa peittää (esim. kankailla,
verhoilla tms.).
2. Ehdottoman tärkeää on säilyttää riittävä etäisyys
syttyviin tai lämmönarkoihin materiaaleihin.
3. Varmista kiinnitys turvavaijerilla putoamisen
estämiseksi, erityisesti jos laitteen alapuolella
edes hetkellisesti oleilee ihmisiä. Kiinnitä laitteen mukana toimitettava silmukkapultti laitteen
rungossa olevaan naaraskierteeseen, ja kiinnitä
vaijeri silmukkapulttiin. Mitoita vaijeri niin, että
kuviteltua putoamismatkaa jää enintään 20 cm.
27
®
Copyright © by MONACOR INTERNATIONAL GmbH & Co. KG, Bremen, Germany. All rights reserved. A-0214.99.01.04.2004