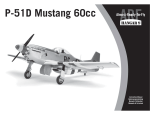
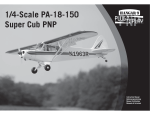
1
F4U-1D Corsair 60cc ARF Instruction Manual Bedienungsanleitung 1 NOTICE All instructions, warranties and other collateral documents are subject to change at the sole discretion of Horizon Hobby, Inc. For up-to-date product literature, visit horizonhobby. com and click on the support tab for this product. Safety warnings and precautions Safe operating recommendations Read and follow all instructions and safety precautions before use. Improper use can result in fire, serious injury and damage to property. • Inspect your model before every flight to ensure it is airworthy. Components Meaning of Special Language The following terms are used throughout the product literature to indicate various levels of potential harm when operating this product: NOTICE: Procedures, which if not properly followed, create a possibility of physical property damage AND a Use only with compatible components. Should any compatibility questions exist, please refer to the product instructions, component instructions or contact the appropriate Horizon Hobby office. little or no possibility of injury. Flight CAUTION: Procedures, which if not properly followed, create the probability of physical property damage Fly only in open areas to ensure safety. It is recommended flying be done at radio control flying fields. Consult local ordinances before choosing a flying location. AND a possibility of serious injury. WARNING: Procedures, which if not properly followed, create the probability of property damage, collateral damage, and serious injury OR create a high probability of superficial injury. ARNING: Read the ENTIRE instruction manual to become familiar with the features of the product W before operating. Failure to operate the product correctly can result in damage to the product, personal property and cause serious injury. Propeller Keep loose items that can become entangled in the propeller away from the prop. This includes loose clothing or other objects such as pencils and screwdrivers. Keep your hands away from the propeller as injury can occur. Batteries Always follow the manufacturer’s instructions when using and disposing of any batteries. Mishandling of Li-Po batteries can result in fire causing serious injury and damage. This is a sophisticated hobby product. It must be operated with caution and common sense and requires some basic mechanical ability. Failure to operate this Product in a safe and responsible manner could result in injury or damage to the product or other property. This product is not intended for use by children without direct adult supervision. Do not use with incompatible components or alter this product in any way outside of the instructions provided by Horizon Hobby, Inc. This manual contains instructions for safety, operation and maintenance. It is essential to read and follow all the instructions and warnings in the manual, prior to assembly, setup or use, in order to operate correctly and avoid damage or serious injury. Small Parts This kit includes small parts and should not be left unattended near children as choking and serious injury could result. • Be aware of any other radio frequency user who may present an interference problem. • Always be courteous and respectful of other users in your selected flight area. • Choose an area clear of obstacles and large enough to safely accomodate your flying activity. • Make sure this area is clear of friends and spectators prior to launching your aircraft. • Be aware of other activities in the vicinity of your flight path that could cause potential conflict. • Carefully plan your flight path prior to launch. • Abide by any and all established AMA National Model Aircraft Safety Code. Before Starting Assembly • Remove parts from bag. • Inspect fuselage, wing panels, rudder and stabilizer for damage. • If you find damaged or missing parts, contact your place of purchase. If you find any wrinkles in the covering, use a heat gun (HAN100) and covering glove (HAN150) or covering iron (HAN101) with a sealing iron sock (HAN141) to remove them. Use caution while working around areas where the colors overlap to prevent separating the colors. • Charge transmitter and receiver batteries. • Center trims and sticks on your transmitter. Age Recommendation: Not for children under 14 years. This is not a toy. Using the Manual This manual is divided into sections to help make assembly easier to understand. Boxes () have been placed next to each step. These help keep track of steps that have been completed. 2 • For a computer radio, create a model memory for this particular model. • Bind your transmitter and receiver, using your radio system’s instructions. IMPORTANT: Rebind the radio system once all control throws are set. This will keep the servos from moving to their endpoints until the transmitter and receiver connect. It will also guarantee the servo reversal settings are saved in the radio system. HINWEIS Alle Anweisungen, Garantien und anderen zugehörigen Dokumente können im eigenen Ermessen von Horizon Hobby, Inc. jederzeit geändert werden. Die aktuelle Produktliteratur finden Sie auf horizonhobby.com unter der Registerkarte „Support“ für das betreffende Produkt. Spezielle Bedeutungen Die folgenden Begriffe werden in der gesamten Produktliteratur verwendet, um auf unterschiedlich hohe Gefahrenrisiken beim Betrieb dieses Produkts hinzuweisen: Warnungen und Sicherheitsvorkehrungen Empfehlungen zum sicheren Betrieb Bitte lesen und befolgen Sie alle Anweisungen und Sichervorkehrungen vor dem Gebrauch. Falscher, nicht sachgemäßer Gebrauch kann Feuer, ernsthafte Verletzungen und Sachbeschädigungen zur Folge haben. • Überprüfen Sie zur Flugtauglichkeit ihr Modell vor jedem Flug. Komponenten HINWEIS: Wenn diese Verfahren nicht korrekt befolgt werden, können sich möglicherweise Sachschäden Verwenden Sie mit dem Produkt nur kompatible Komponenten. Sollten Fragen zur Kompatibilität auftreten, lesen Sie bitte die Produkt- oder Bedienungsanweisung oder kontaktieren den Service von Horizon Hobby. ACHTUNG: Wenn diese Verfahren nicht korrekt befolgt werden, ergeben sich wahrscheinlich Sachschäden UND die Gefahr von schweren Verletzungen. Fliegen WARNUNG: Wenn diese Verfahren nicht korrekt befolgt werden, ergeben sich wahrscheinlich Sachschäden, Fliegen Sie um Sicherheit garantieren zu können, nur in weiten offenen Gegenden. Wir empfehlen hier den Betrieb auf zugelassenen Modellflugplätzen. Bitte beachten Sie lokale Vorschriften und Gesetze, bevor Sie einen Platz zum Fliegen wählen. UND geringe oder keine Gefahr von Verletzungen ergeben. Kollateralschäden und schwere Verletzungen ODER mit hoher Wahrscheinlichkeit oberflächliche Verletzungen. WARNUNG: Lesen Sie die GESAMTE Bedienungsanleitung, um sich vor dem Betrieb mit den Produktfunktionen vertraut zu machen. Wird das Produkt nicht korrekt betrieben, kann dies zu Schäden am Produkt oder persönlichem Eigentum führen oder schwere Verletzungen verursachen. Dies ist ein hochentwickeltes Hobby-Produkt. Es muss mit Vorsicht und gesundem Menschenverstand betrieben werden und benötigt gewisse mechanische Grundfähigkeiten. Wird dieses Produkt nicht auf eine sichere und verantwortungsvolle Weise betrieben, kann dies zu Verletzungen oder Schäden am Produkt oder anderen Sachwerten führen. Dieses Produkt eignet sich nicht für die Verwendung durch Kinder ohne direkte Überwachung eines Erwachsenen. Verwenden Sie das Produkt nicht mit inkompatiblen Komponenten oder verändern es in jedweder Art ausserhalb der von Horizon Hobby, Inc. vorgegebenen Anweisungen. Diese Bedienungsanleitung enthält Anweisungen für Sicherheit, Betrieb und Wartung. Es ist unbedingt notwendig, vor Zusammenbau, Einrichtung oder Verwendung alle Anweisungen und Warnhinweise im Handbuch zu lesen und zu befolgen, damit es bestimmungsgemäß betrieben werden kann und Schäden oder schwere Verletzungen vermieden werden. Nicht geeignet für Kinder unter 14 Jahren. Dies ist kein Spielzeug. Über diese Anleitung Diese Anleitung ist zur Vereinfachung des Zusammenbaues in Sektionen unterteilt. Neben den Sektionen befinden sich Kästchen () die es Ihnen leichter machen den Arbeitsschritt als erledigt abzuhaken. Propeller Halten Sie lose Gegenstände die sich im Propeller verfangen können weg vom Propeller. Dieses gilt auch für Kleidung oder andere Objekte wie zum Beispiel Stifte oder Schraubendreher. Halten Sie ihre Hände weg vom Propeller, es besteht akute Verletzungsgefahr. Akkus • Beachten Sie andere Piloten deren Sendefrequenzen ihre Frequenz stören könnte. • Begegnen Sie anderen Piloten in ihrem Fluggebiet immer höflich und respektvoll. • Wählen Sie ein Fluggebiet, dass frei von Hindernissen und groß genug ist. • Stellen Sie vor dem Start sicher, dass die Fläche frei von Freunden und Zuschauern ist. • Beobachten Sie den Luftraum und andere Flugzeuge/ Objekte die ihren Flugweg kreuzen und zu einem Konflikt führen könnten. • Planen Sie sorgfältig ihren Flugweg vor dem Start. Vor dem Zusammenbau • Entnehmen Sie zur Überprüfung jedes Teil der Verpackung. • Überprüfen Sie den Rumpf, Tragflächen, Seiten- und Höhenruder auf Beschädigung. • Sollten Sie beschädigte oder fehlende Teile feststellen, kontaktieren Sie bitte den Verkäufer. Folgen Sie immer den Herstelleranweisungen bei dem Gebrauch oder Entsorgung von Akkus. Falsche Behandlung von LiPo Akkus kann zu Feuer mit Körperverletzungen und Sachbeschädigung führen. Zum Entfernen von Falten in der Bespannung verwenden Sie den Heißluftfön (HAN100) und Bespannhandschuh (HAN150) oder das Folienbügeleisen (HAN141). Bitte achten Sie bei überlappenden Farben, dass Sie diese sich bei dem Bearbeitung nicht trennen. Kleinteile • Laden des Senders und Empfängers. Dieser Baukasten beinhaltet Kleinteile und darf nicht unbeobachtet in der Nähe von Kindern gelassen werden, da die Teile verschluckt werden könnten mit ernsthaften Verletzung zur Folge. • Zentrieren der Trimmungen und Sticks auf dem Sender. • Sollten Sie einen Computersender verwenden, resetten Sie einen Speicherplatz und benennen ihn nach dem Modell. • Sender und Empfänger jetzt nach den Bindeanweisung des Herstellers zu binden. WICHTIG: Wir empfehlen dringend nachdem alle Einstellungen vorgenommen worden sind, das Modell neu zu binden. Dieses verhindert, dass die Servos in die Endanschläge laufen bevor sich Sender und Empfänger verbunden haben. Es garantiert auch, dass die Servoreverseeinstellungen in der RC Anlage gesichert sind. 3 Specifications•Spezifikationen Large Parts Layout•Bauteile (ohne Kleinteile) 85.5 in (217 cm) 1380 sq in (89 dm2) 11 1 70.0 in (177 cm) 6 9 16 28.5–31.0 lb (12.9–14.0 kg) 2-Stroke Gas/Petrol: 50–62cc 2-Takt Benzin: 50-62cc 4-Stroke Gas/Petrol: 57cc 4-Takt Benzin: 57cc 4 5 2 14 3 4-Stroke Glow: 77cc 4-Takt Glühzünder: 77cc 14 6 -channel (or greater) with 7-8 servos 6-Kanal (oder größer) mit 7-8 servos Spinner 11/2 inch (38mm, not included) 11/2 inch (38mm nicht im Lieferumfang) 10 12 15 4 7 13 8 Replacement parts•Ersatzteile Required Radio Equipment•erforderliche RC Ausrüstung PartEnglishDeutsch PartEnglishDeutsch 1. HAN476001 Fuselage with Fin Rumpf m. Seitenleitwerk SPMAR9110 AR9110 9-Channel DSMX® PowerSafe™ Receiver Spektrum AR9110 9 Kanal DSM X Empfänger mit Akkuweiche SPMB2700NM (2) 2700mAh 6.0V NiMH Receiver Pack 2700mAh 6.0V NiMH Empfänger Akku SPMEXEC312 (2) 12 inch EC3™ Extension with 16AWG Spektrum 30cm EC3 Verlängerung 16AWG 2. HAN476002 Right Wing Panel with Aileron and Outer Flap Tragfläche rechts m. Querruder u. äußerer Klappe 3. HAN476003 Left Wing Panel with Aileron and Outer Flap Tragfläche links m. Querruder u. äußerer Klappe 4. HAN476004 Wing Center Section with Flaps Tragfläche Mittelteil m. Klappen JRPS8231 (4) DS8231 Ultra Precision Servo (Aileron and elevator) DS8231 Ultra Präzisions Servo (Querruder und Höhenruder) 5. HAN476005 Stabilizer and Elevator Set Höhenleitwerk m. Ruder JRPS8411 (2) DS8411 Ultra Torque Servo (Rudder) DS8411 Ultra Torque Servo (Seitenruder) 6. HAN476006 Rudder Seitenruder JRPS821 DS821 High Torque Servo (Throttle) DS821 High Torque Servo (Gas) 7. HAN476007 Cowling Motorhaube JRPA215 (3) Heavy-Duty Servo Arms (2) Heavy Duty Servoarme (2) 8. HAN476008 Sliding Canopy bewegliche Kabinenhaube JRPA23611/2 inch Single Side Alum Adj Spline Servo Arm 11/2 inch Servoram Aluminium einseitig 9. HAN476010 Stabilizer Tube Set Leitwerksverbinder 10. HAN476014 Landing Gear Doors Fahrwerkstüren SPMA3001 (3) Heavy-Duty Servo Extension 6 inch (Receiver-aileron and flap) Spektrum Hochleistungs Servokabelverlängerung 15.24 cm (Empfänger Querruder und Klappe) 11. Decal Set Dekorbogen 12. HAN476016 Dummy Radial Motor Radialmotorattrappe SPMA3003 (2) Heavy-Duty Servo Extension 12 inch (Throttle and bind) Spektrum Hochleistungs Servokabelverlängerung 30.48 cm (Gas und Bindestecker) 13. HAN476020 Wing Pylons Waffenträger Tragfläche 14. HAN476021 Cockpit Kit Cockpit Kit SPMA3005 (2) Heavy-Duty Servo Extension 24 inch (Aileron in center section) Spektrum Hochleistungs Servokabelverlängerung 68.58 cm (Querruder innen) 15. HAN476022 Scale Detail Parts Scale Teile 16. Tail Cone Heckkonus PAAPT03 Medium CA Sekundenkleber mittel Small Parts (Not Shown)•KLEINTEILE (NICHT ABGEBILDET) PAAPT09 Thin CA Sekundenkleber dünnflüssig HAN476015 HAN476023 Required Adhesives•erforderliche Klebstoffe HAN476009 Solid Canopy (Optional) fixe Kabinenhaube PAAPT37 5-Minute Epoxy 5 Minuten Epoxy HAN476011 Pushrod Set Gestängeset PAAPT39 30-Minute Epoxy 30 Minuten Epoxy HAN476012 Hardware Kit Kleinteile PAAPT42Threadlock Schraubensicherungslack HAN476013 Wood Parts Holzteile Silicone adhesive Silikonklebstoff HAN476017 Bombs (Optional) Bomben PAAPT56 Canopy Glue Kabinenhaubenkleber HAN476018 Drop Tanks (Optional) Abwurftanks HAN476019 Scale 3 Blade Display Prop (Optional) 3 Blatt Display Propeller HAN476024 Retractable Tail Wheel (not Included) einziehbares Spornrad 5 2-Stroke Gas•2-Takt Benziner 4-Stroke GloW•4-Takt Glühzünder PartEnglishDeutsch PartEnglishDeutsch ZENE62A G62 Engine (3.8 cu in) G62 Motor (3.8 cu in) ZEN289874110 Aluminum Mount Aluminium Träger VSS2202 22 inch Diameter Gas-Series Prop, B-Pitch 22 inch Durchmesser Gas-Series Propeller, B-Pitch TRUTTH1500A1011/2 inch A-Style Prop Hub 10mm, G62 11/2 inch A-Style Prop Adapter 10mm, G62 TRU0127 Adapter Kit,10 x 1.25 x 50mm:G-62 Adapter Kit, 10 x 1.25 x 50mm:G-62 ZEN6200 G62 Spring Starter (GR62099) G62 Federstarter (GR62099) ZEN16210 Easy Link Carb Adapter/G62 Easy Link Vergasersadapter G62 HAN116 Fuel Filler with “T” Fitting and Overflow Fitting Kraftstoffstutzen mit T-Stück und Überlauf EVOE777 7-Cylinder 77cc 4-Stroke Glow Radial Engine Evolution Radial 4 Takt Verbrenner 7 Zylinder 77cc EVOA111 Multi Cylinder onboard glow plug driver Multizylinder Onboard Glühkerzenstecker Prop Mejzlick 23x10 Prop Mejzlick 23x10 Propeller TRUTTH1500AG 11/2 inch A-Style Prop Hub, Gas , FG57, EVG777R 11/2 inch A-Style Prop Hub, Gas , FG57, EVG777R TRU0100 Adapter Kit, 10 x 1mm:Moki 1.8-3.6 Prop Bolt Adapter Kit, 10 x 1mm: Moki 1.8-3.6 Prop Bolt SPMB2000LP LiPo Receiver Pack 2000mAh LiPo Empfänger Akku 2000mAh SAIG36154 Filter with Weight Filter mit Gewicht ZEN20000Zenoah™ Kill Switch Zenoah Kill Schalter HAN116 Fuel Filler with “T” Fitting and Overflow Fitting Hangar 9 Tanknippel mit T-Stück u. Überlauf Fitting HAN143 Kraftstofffilter: Benzin, Glühzünder HAN143 Pro Fuel Filter: Gas, Glow Hangar 9 Pro Spritfilter: Gas, Glow DUB222 (2) Fuel Line Glow x2 Kraftstoffschlauch Pro Fuel Filter: Gas, Glow 4-Stroke Gas•4 Takt Benziner SAIEG57T 57cc Gas Twin Engine 4-Stroke 57cc Benzin Zweizylinder 4 Takt Motor Pneumatic Retracts•Pneumatisches Einziehfahrwerk SPM9530Spektrum™ 3-Wire Switch Harness Spektrum Schalterkabel 3 Anschlüsse ROB157VRX Large Deluxe Air Control Kit, 60-80 Large Deluxe Air Control Kit, 60-80 VSS2202 22 inch Diameter Gas-Series Prop, B-Pitch 22 inch Durchmesser Gas-Series Propeller, B-Pitch JRPS821 DS821 High Torque Servo DS821 High Torque Servo TRUTTH1500AG 11/2 inch A-Style Prop Hub, Gas , FG57, EVG777R 11/2 inch A-Style Prop Hub, Gas , FG57, EVG777R HAN476025 Robart Retractable Main Gear (Air): F4U-1D Corsair 60cc Hangar 9 F4U-1D Corsair 60cc: Robart Hauptfahrwerk (Pneum) TRUTT0126A Tapered Jam Nut Adaptor Kit, 10 x 1.25 Prop Bolt Tapered Jam Nut Adaptor Kit, 10 x 1.25 Prop Bolt HAN476027 Robart Tail Wheel Air Cylinder: F4U-1D Corsair 60cc Hangar 9 F4U-1D Corsair 60cc: Robart Druckluftzylinder f. Spornrad SAIG36154 Filter with Weight Filter mit Gewicht SPMB2000LP LiPo Receiver Pack 2000mAh LiPo Empfänger Akku 2000mAh HAN476026 Robart Retractable Main Gear (Elec): F4U-1D Corsair 60cc Hangar 9 F4U-1D Corsair 60cc: Robart Hauptfahrwerk (Elektr.) SPMA3003 Heavy-Duty Servo Extension 12 inch Spektrum Hochleistungs Servokabelverlängerung 30.48 cm HAN476028 Robart Tail Wheel Electric Actuator: F4U-1D Corsair 60cc Hangar 9 F4U-1D Corsair 60cc: Robart E-Antrieb f. Spornrad HAN116 Fuel Filler with “T” Fitting and Overflow Fitting Hangar 9 Tanknippel mit T-Stück u. Überlauf Fitting HAN143 Hangar 9 Pro Spritfilter: Gas, Glow 6 Pro Fuel Filter: Gas, Glow Electric Retracts•Elektrisches Einziehfahrwerk Optional Wheels•Optionale Räder DUB500TL (2) Dubro Treaded Lite Wheel 5 inch Dubro Reifen Lite Wheel 5 inch HAN476029 (2) Robart 5 inch Aluminum 8 spoke Main Wheels and Tires (White): F4U-1D Corsair 60cc Robart 5 inch 8-Speichenräder und Reifen weiss: F4U-1D Corsair 60cc Optional Gear Doors (Parts listed are suggested)• Optionale Fahrwerkstüren (siehe Teileempfehlung) PartEnglishDeutsch SPMSA7010 (4) A7010 Wing Servo Spektrum A7010 Tragflächenservo Required Tools•Benötigtes Werkzeug EnglishDeutsch Box wrench: 17mm Ringschlüssel 17mm Clear tape klares Klebeband SPMA3002 (2) Heavy-Duty Servo Extension 9 inch Spektrum Hochleistungs Servokabelverlängerung 22.86 cm Crimping tool Crimpzange SOT130 (2) Hidden Hinge verdecktes Scharnier Cuttoff wheel Trennscheibe SOT132 Tri-Gear Door Kit 3-fach Fahrwerkstüren Kit DrillBohrer SOT140 Control Horn, Small with Screw Ruderhorn klein m. Schrauben Bohrer: 1,5mm, 2,5mm, 3mm, 5mm, 8mm DUB118 Hinge, Nylon, Small Kugelkopfanschluss 2-56 Drill bit: 1/16 inch, 3/32 inch, 7/64 inch, 1/8 inch, 3/16 inch, 5/16 inch DUB367 (8) Swivel Ball Link, 2-56 Kugelkopfanschluss 2-56 Epoxy brushes Pinsel SUL498 2-56 Threaded Studs, 1 inch (20) Gewindestangen 2-56 Felt-tipped pen Faserstift Flat screwdriver: small, medium Schraubendreher Schlitz klein, mittel Optional Lighting•Optionale Beleuchtung Controller: Universal Beleuchtungs Kit HemostatKlemme SPMVR5203 VR5203 Dual Output Regulator (if required) Spektrum Dual Spannungswandler (falls erforderlich) Hex wrench: .050 inch, 3/32 inch, 3/16 inch, 5/32 inch, 4mm, 5mm Inbusschlüssel: .050 inch, 3/32 inch, 3/16 inch, 5/32 inch, 4mm, 5mm EFLA601 Solid Red LED Rote LED leuchtend Hobby knife: #11 blade Hobbymesser mit # 11 Klinge EFLA602 Solid Clear LED Klare LED leuchtend Hobby scissors Hobbyschere EFLA604 Solid Green LED Grüne LED leuchtend Universal Beleuchtungs Kit Denatured alcohol Spiritus EFLA618 (2) 18-inch Lighting Extension Verlängerung 18 inch: Universal” Beleuchtungs Kit Light machine oil Nähmaschinenöl Low-tack tape Klebeband m. geringer Klebekraft EFLA619 24-inch Lighting Extension Verlängerung 24 inch: Universal Beleuchtungs Kit Mixing cups and sticks Mischbecher und Rührstäbchen EFLA620 (2) 36-inch Lighting Extension Verlängerung 36 inch: Universal Beleuchtungs Kit Needle nose pliers Spitzzange Nut driver: 3/16 inch, 9/32 inch, 1/4 inch Steckschlüssel: 3/16 inch, 9/32 inch, 1/4 inch EFLA600 Controller: Universal Lighting Kit Optional Payload Release•Optionales Nutzlastabwurfsystem PartEnglishDeutsch EFLA405 (2) Servoless Payload Release E-flite Servoloses Nutzlastabwurfsystem SPMA3001 Heavy-Duty Servo Extension 6 inch Spektrum Hochleistungs Servokabelverlängerung 15.24 cm SPMA3004 Heavy-Duty Servo Extension 18 inch Spektrum Hochleistungs Servokabelverlängerung 45.72 cm SPMA3005 Heavy-Duty Servo Extension 24 inch Spektrum Hochleistungs Servokabelverlängerung 68.58 cm EFLA406 Nutzlasthalter (2) Payload Mount (2 mounts) PencilStift Petroleum jelly Vaseline Phillips screwdriver: #1, #2 Phillips Schraubendreher: #1,#2 Pin vise Handbohrer 7 Fasteners•Verbindungselemente Required Tools•Benötigtes Werkzeug EnglishDeutsch PliersZange Razor saw Säge Rotary tool Dremel Flat Washer Unterlegscheibe Lock Nut Stopmutter Setscrew Madenschraube Hex Nut Sechskantmutter Metal Clevis Gabelkopf Button Head Cap Screw Halbrundschraube RulerLineal Sanding drum Schleiftrommel Medium grit sandpaper Schleifpapier mittel ScissorsSchere Side cutters Seitenschneider Turnbuckle tool Gewindestangen Werkzeug M Self-Tapping Screw Selbstschneidene Schraube 8 N Nylon Clevis Nylon Gabelkopf Self-Tapping Washer-Head Screw Schraube mit Unterlegscheibenkopf Blind nut Einschlagmutter Control horn Ruderhorn Ball link Kugelkopf Quick Connector Schnellverbinder Socket Head Cap Screw Inbusschraube Pinned hinge Scharnier Wheel collar Stellring Assembly Symbol Guide•Montage Symbole LL RR x2 Apply threadlock Ensure free rotation Use medium CA Use a pencil Schraubensicherungslack verwenden Rotation sicherstellen Mittelflüssigen Sekundenkleber verwenden Verwenden Sie einen Bleistift Assemble right and left Push tightly Use thin CA Use a felt-tipped pen Links und rechts montieren Fest drücken Dünnflüssigen Sekundenkleber verwenden Verwenden Sie einen Faserstift Repeat multiple times (as indicated) Apply oil Use 15-minute epoxy Fully tighten Verwenden Sie 15 Minuten Epoxy Vollständig festziehen/festschrauben Use 30-minute epoxy Use hobby knife with #11 blade Vorgang wiederholen (wie angezeigt) Öl verwenden OIL Ensure proper orientation Attach temporarily Ausrichtung/Richtung sicherstellen Vorübergehend anbringen 15 30 Verwenden Sie 30 Minuten Epoxy Verwenden Sie ein Hobbymesser mit # 11 Klinge 9 Joining the Wing Panels•Verkleben der Tragflächen 1 3 5 LL RR LL RR 2 Remove the joiner from the tip panel and slide it into the center section. It should slide in past the line drawn in the previous step. Nehmen Sie den Verbinder heraus und schieben ihn in das Mittelteil. Er sollte bis zur Markierung in die Fläche gehen. 4 OIL Separate the tip panel from the center section. Apply a coating of petroleum jelly to the area around the joiner pocket so when the tip panel is fit to the center section in the next steps it won’t be accidentally glued together. Nehmen Sie die Tragflächen wieder auseinander. Geben Sie ein Schicht Vaseline um die Verbinderöffnung am Mittelteil, so dass diese nicht aus Versehen geklebt werden kann. 6 LL RR Move the string located in the center section and tip panels so they will not interfere with the fit of the tip panels to the center section. Use tape to mark the aileron and flap panels with right or left so they can be relocated to their correct locations. Legen Sie die Schnur in dem Tragflächenmittelteil und Endteil aus dem Weg, so dass sie beim Zusammenfügen nicht stört. Markieren Sie die Querruder und Klappenfläche mit Links und Rechts auf Klebeband, dass Sie diese zuordnen können. LL RR Slide the wing joiner into the tip panel. Mark the joiner to indicate how far in the joiner fits in the tip panel. Schieben Sie den Flächenverbinder in das Endteil. Markieren Sie am Verbinder wie weit der Verbinder in die Fläche geht. LL RR Fit the tip panel and center section together. They will fit tightly together as shown. Schieben Sie das Aussen- und Mittelteil zusammen. Diese müssen wie abgebildet sauber zusammenpassen. LL RR Sand the joiner with coarse sandpaper where the joiner fits in the tip panel. Schleifen Sie den Verbinder mit groben Schleifpapier an wo er in das Flächenaussenteil gesteckt wird. 10 7 8 9 Aileron Servo Installation• Einbau der Querruderservos 1 LL RR LL RR Slide the joiner in position. Use isopropyl alcohol and a paper towel to remove the excess epoxy that will flow out when the joiner is slid into the joiner pocket. Separate the tip panels from the center section. Carefully remove the aileron servo cover from the tip panel. Schieben Sie den Verbinder in Position. Entfernen Sie austretenden Klebstoff mit Reinigungsalkohol und einem Papiertuch. LL RR 30 Apply a generous amount of 30-minute epoxy to the joiner and joiner pocket in the tip panel. Streichen Sie ausreichend 30 Minuten Epoxy auf den Verbinder und in die Verbindertasche. Nehmen Sie die Fächenaussenteile von dem Mittelteil ab. Nehmen Sie vorsichtig die Qerruderservoabdeckung vom Aussenteil ab. LL RR 1/4-20 x 1.5 inch 2 x2 Fit the tip panel and center section together. Use the 1/4-20 x 1.5-inch nylon bolt to hold the tip and center section together until the epoxy fully cures. Schieben Sie Aussen- und Mittelteil zusammen. Schrauben Sie die Fläche mit den 1/4 x 20 x 1,5 Inch Nylonschrauben zusammen bis der Klebstoff vollständig getrocknet ist. LL RR Use a pin vise and 1/16-inch (1.5mm) drill bit to enlarge the six holes for mounting the aileron servo covers. Vergrößern Sie mit dem 1,5mm Handbohrer die sechs Löcher für die Abdeckungsschrauben. 11 3 LL RR 5 6 7 LL RR LL RR M3 x 10 x6 Thread a screw into each of the holes in the aileron servo cover mounting holes. The screws used for the aileron servo covers are black in color. Remove the screws before proceeding. Drehen Sie eine Schraube in jedes Loch. Die Schrauben für die Abdeckung sind Schwarz. Entfernen Sie die Schrauben wieder bevor Sie fortfahren. 4 Prepare the aileron servos by installing the grommets and brass eyelets. Also install the Heavy Duty Servo Arms (JRPA215) perpendicular to the servo centerline. Bereiten Sie die Querruderservos durch einsetzen der Blechhülsen und Gummitüllen vor. Schrauben Sie ebenfalls die extra stabilen Arme (JRPA215) rechtwinklig zur Servomitte auf. Use a pin vise and a 1/16-inch (1.5mm) drill bit to drill the holes for the servo mounting screws through the backing plate of the servo mount. Thread a servo mounting screw into each of the holes in the aileron servo mounting holes. Remove the screws , then apply a small amount of thin CA to harden the threads. Secure the servo to the cover using the screws provided with the servo. LL RR Apply a small amount of thin CA to harden the threads made in the previous step. Geben Sie einen kleinen Tropfen dünnflüssigen Sekundenkleber in die Gewindelöcher um diese zu härten. 12 Bohren Sie mit einem 1,5mm Handbohrer die Löcher für die Servoschrauben durch die Rückplatte des Servohalters. Drehen Sie in jedes Loch eine Schraube, schrauben diese wieder heraus und geben einen Tropfen dünnflüssigen Sekundenkleber hinein um das Gewinde zu härten. Schrauben Sie das Servo in dem Halter fest. Tie the string around the aileron servo lead and use it to pull the lead through the tip panel. Knoten Sie die Schnur um das Querruderdervokabel und ziehen es damit durch die Tragfläche. 8 4 Aileron Preparation•Querrudervorbereitung 1 2 Top• Oberseite LL RR LL RR M3 x 10 x6 LL RR Secure the aileron servo into position using the black M3 x 10 washer head screws. The arrows indicate the location of the leading edge (1) and wing tip (2). Bottom• Unterseite x2 Thread the control horn on the screw. Drehen Sie das Ruderhorn auf die Schraube. Schrauben Sie die Querruderservoabdeckung mit den sechs schwarzen M2 x 10 Schrauben fest. Die Pfeile zeigen die Tragflächenvorderseite (1) und die Flächenspitze (2). 3 Insert the hinges into the ailerons. Use the depth gauge marked with an A to make sure the hinges fit into the aileron. It may be necessary to use a drill bit to make the hole deeper to fully insert the hinge into the aileron. Stecken Sie die Scharniere in die Querruder. Nutzen Sie zum anpassen die Markierung A auf dem Tiefenschablone. Es könnte notwendig sein die Bohrung dafür etwas zu vertiefen. 5 LL RR 8-32 8-32 x 21/4 x2 x2 Thread the screw through the aileron from the top. Secure the bolt using the nut on the bottom of the aileron. Drehen Sie die Schraube von der Oberseite durch das Querruder. Sichern Sie die Schraube mit der Mutter an der Unterseite. x6 Apply a small amount of petroleum jelly to the flex point of the hinge to prevent epoxy from entering the hinge. Geben Sie etwas Vaseline auf das Gelenk des Scharnieres damit es nicht verklebt. x3 Position the hinge perpendicular to the hinge line. Check that it can move freely. Richten Sie das Scharnier rechtwinklig zur Scharnierlinie aus. Prüfen Sie dass es sich frei bewegen kann. 13 6 7 8 Flap Hinging• Anschlagen der Klappen 1 LL RR LL RR Fit the aileron to the wing. There will be a gap of 1/32 to 1/16 inch (1 to 1.5mm) between the aileron leading edge and wing inner hinge surface. Check to make sure the aileron can move without binding. DO NOT glue the hinges at this time. It may be necessary to bevel the inner lip of the wing panel near the tip if you find the aileron binding. Sand and check the fit again until the aileron moves without any binding. Again, DO NOT glue the aileron to the wing at this time. Passen Sie das Querruder an die Tragfläche an. Zwischen Aussen- und Innenseite sollte ein Spalt von 1 bis 1,5 mm sein. Bitte überprüfen Sie dass sich das Querruder ohne blockieren bewegen kann. Kleben Sie das Querruder jetzt NOCH NICHT. Sollten Sie feststellen, dass das Querruder blockiert, könnte es notwendig sein die innere Lippe des Ruders anzuschrägen. Schleifen Sie und überprüfen Sie ob das Ruder jetzt ohne Blockade läuft. Kleben Sie das Ruder jetzt NOCH NICHT. 30 Use 30-minute epoxy to glue the hinges in the ailerons. Use the depth gauge to set the proper depth of the hinges. Make sure to apply epoxy to both the hinge and the aileron. Use a paper towel and rubbing alcohol to remove any excess epoxy. Kleben Sie die Scharniere mit 30 Minuten Epoxy in die Querruder und richten die Tiefe mit der Schablone aus. Achten Sie bitte darauf ausreichend Klebstoff auf das Scharnier und das Querruder zu geben. Entfernen Sie überschüssigen Klebstoff mit Reinigungsalkohol und einem Papiertuch. 14 LL RR ÎÎ DO NOT glue the hinges unless instructed to do so. The ailerons and flaps must be fit to the wing in order for everything to operate properly. ÎÎ Kleben Sie die Scharniere NICHT bis Sie dazu aufgefordert werden. Die Querruder und Klappen müssen in Fläche angepasst werden damit alles funktioniert. LL RR 1/4-20 x 1.5 inch x2 Fit the tip panel and center section together. Use the 1/4-20 x 1.5-inch nylon bolt to hold the tip and center section together. Schrauben Sie die Aussen- und Innenfläche mit den 1/4-20 x 1,5 inch Flächenschrauben zusammen. 2 3 4 5 x12 LL RR Apply a small amount of petroleum jelly to the flex point of the hinge to prevent epoxy from entering the hinge. Draw a line on all the flap hinges that is 9/32 inch (7mm) from the pin on the hinge. Geben Sie etwas Vaseline auf das Gelenk des Scharnieres damit es nicht verklebt. Zeichnen Sie eine Linie die 7mm von der Mitte entfernt ist auf das Scharnier. (siehe Abbildung) LL RR Fit the inner and center flap together. The joiner blade may bind slightly. Stecken Sie innere und mittlere Klappe zusammen. Der Verbinder könnte dabei etwas klemmen. LL RR If you find the joiner blade binding, carefully trim or sand the slot until the joiner blade can move freely inside the flap. Also check the fit between the center flap and outer flap at this time. The fit between the joiner and joiner pocket should allow for smooth movement, but should not be loose. If too much material is removed, or the fit is loose, a small amount of CA can be used to build up the edge. Insert the hinges into the flap panels until the line drawn in the previous step is aligned with the leading edge of the flap. Stecken Sie die Scharniere bis zur Markierung ein die Sie letzten Schritt gemacht haben. ÎÎ DO NOT glue the hinges unless instructed to do so. The ailerons and flaps must be fit to the wing in order for everything to operate properly. ÎÎ Kleben Sie die Scharniere NICHT bis Sie dazu aufgefordert werden. Die Querruder und Klappen müssen in Fläche angepasst werden damit alles funktioniert. Sollte der Verbinder klemmen, erweitern oder schleifen Sie vorsichtig den Schlitz auf bis der Verbinder ohne zu klemmen paßt. Prüfen Sie jetzt auch noch die Passung zwischen den beiden Teilen. Diese sollte gut sitzen aber nicht zu lose sein. Sollte Sie zuviel Material entfernt haben, können sie mit etwas Sekundenkleber die Kante wieder auffüttern. 15 6 7 8 LL RR LL RR Check the angle of the hinges in relationship to the flap center line. They will be perpendicular for the inner and outer flaps. Überprüfen Sie den Winkel der Scharniere in Verhältnis zur Klappenmittellinie. Diese müssen bei den inneren und äußeren Klappen rechtwinklig sein. LL RR The inner and center flap may need a shortened hinge installed where the joiner blade fits into the flap. Trim the hinge before inserting it into the flap sections. Bei der inneren- und mittleren Klappe kann es notwendig sein, das Scharnier auf der Seite des Verbinders zu kürzen. Kürzen Sie das Scharnier bevor Sie die Klappen einsetzen. 16 9 The hinges in the center flap will angle inward slightly when installed. This is due to the operating angle of the flap in relationship to the wing. Die Scharniere in der mittleren Klappe zeigen ein klein wenig nach innen wenn sie eingebaut sind. Dieses ist durch den Bewegung im Verhältnis zur Tragfläche gegeben. ÎÎ When fitting the flaps, take your time to check their alignment. Correctly positioning the hinges and flaps is key to making them operate through their full range of motion. ÎÎ Lassen Sie sich bei dem Anpassen der Klappen Zeit, da nur korrekt eingepasste Klappen den vollen Arbeitsweg ermöglichen. LL RR OIL Use sandpaper to lightly sand the flap control rod where it will be glued into the flap. Also apply a small amount of petroleum jelly where the joiner wire will ride in the center section of the wing. Schleifen Sie den Anlenkungsdraht wo in der Klappe sitzt etwas an. Streichen Sie etwas Vaseline auf die Stelle wo sich der Draht in der mittleren Klappe bewegt. 10 11 12 LL RR Check the operation of the flap, using care not to move the hinges from their locations. When positioned correctly, you will be able to achieve the throws listed in the Control Throw section of this manual. Prüfen Sie den Weg der Klappen und achten dabei darauf die Scharniere nicht aus ihren Positionen zu bewegen. Haben Sie die Klappen richtig positioniert werden diese die in der Anleitung angebenden Ausschläge erreichen. LL RR LL RR Insert the control rod in the center section. Make sure the flat area on the joiner wire faces up and away from the wing. The bevel should lean forward when the joiner is in the up position. Fit the inner, center and outer flap to the wing and center section. With the flaps in the up position, the gap between the wing center section, flap panels and aileron will all be parallel as shown. The inner flap and center section will align at the trailing edge. The aileron and flap will also align at the trailing edge. These alignments are very important to the correct operation of the flaps. Setzen Sie den Anlenkungsdraht in die mittlere Klappe. Stellen Sie bitte sicher, dass die flache Seite nach aussen weg von der Fläche zeigt. Die abgeschrägte Kante sollte nach vorne zeigen wenn der Draht in der eingefahren Position ist. Passen Sie die inneren, mittleren und äußeren Klappen ein. Bei eingefahrenen Klappen sollte der Spalt zwischen den Klappen wie abgebildet parallel sein. Die innere und mittlere Klappe sind an der Hinterkante auf einer Höhe. Diese Ausrichtung ist für den problemlosen Betrieb der Klappen sehr wichtig. 17 13 14 15 LL RR Check the alignment of the flaps to the top of the wing. It may be necessary to adjust the position of the holes to correct the alignment of the flap, or to allow the flap to move through its range of motion. Use a toothpick as a shim to take up any difference in diameter so the hinges will be glued securely. Überprüfen Sie die Ausrichtung der Klappen auf der Oberseite der Tragfläche. Es könnte hier notwendig sein die Scharniere in den Löcher zu positionieren damit die Klappen den vollen Weg fahren können. Nutzen Sie zum anpassen einen Zahnstocher zum ausgleichen, so dass die Klappen später sicher eingeklebt werden können. LL RR 30 Once the flap throw has been set, carefully remove the flaps from the wing panel without disturbing the position of the hinges in the flaps. Using 30-minute epoxy, remove and glue each hinge, noting their positioning and angles in relationship to the flap. Glue the hinges into the inner, center and outer flaps at this time. Allow the epoxy to fully cure before handling the flaps. Sind die Klappen eingestellt entfernen Sie vorsichtig Klappen von der Fläche ohne die Position der Scharniere zu vernändern. Kleben Sie jedes Scharnier mit 30 Minuten Epoxy ein. Merken Sie sich bei dem Einkleben genau die Postion jede einzelnen Scharnieres bevor sie diese festkleben. Kleben Sie jetzt die Scharniere der inneren, mittleren und äußeren Klappen. Lassen Sie den Kleber vollständig trocknen. 18 LL RR 30 Begin by placing the outer flap and aileron in position WITHOUT the use of epoxy. This will aid in the alignment of the remaining flap sections. Apply epoxy to the flap torque rod and flap hinges. Place the flaps into position and allow the epoxy to fully cure before proceeding, making sure to maintain the alignment of the flaps so they will operate correctly when the linkage is installed. Beginnen Sie die äußeren Klappen und die Querruder ohne Epoxy in Position zu setzen. Das hilft bei der Ausrichtung der verbleibenden Klappen. Geben Sie Epoxy auf den Klappendraht und Klappenscharniere. Setzen Sie die Klappen in Position und lassen das Harz vollständig trocknen. Überprüfen Sie dabei die korrekte Ausrichtung der Klappen, so dass diese einwandfrei arbeiten wenn die Anlenkung eingebaut ist. 17 Flap Servo Installation•Einbau der Klappenservos 1 3 M3 x 10 30 Use a small amount of epoxy to glue the dowel pins into the leading edge of the wing. Mark the pins and sand with coarse sand paper. Position the pins so 1/2 inch (13mm) of the pin extends forward of the wing. Kleben Sie mit etwas Epoxy die Führungsstifte vorne in die Fläche ein. Markieren und schleifen Sie die Stifte so dass 13mm nach vorne herausschauen. 4 x4 Move the string inside the center section so the flap servo can be installed. Bewegen Sie die Schnur in das Mittelteil, so dass Sie das Klappenservo einbauen können. 2 Use a pin vise and a 1/16-inch (1.5mm) drill bit to drill the holes for the servo mounting screws through the backing plate of the servo mount. Thread a servo mounting screw into each of the holes in the flap servo mounting holes. Remove the screws, then apply a small amount of thin CA to harden the threads. Secure the servo to the cover using the screws provided with the servo. Bohren Sie mit dem Handbohrer die Löcher für die Servobefestigungsschrauen durch die Rückplatte des Halters. Drehen Sie eine Schraube in jedes Loch und nehmen diese wieder heraus. Geben Sie in jedes Loch etwas dünnflüssigen Sekundenkleber um das Gewinde zu härten. Schrauben Sie dann das Servo mit den Schrauben aus dem Lieferumfang fest. Thread a screw into each of the flap servo mounting holes. Remove the screw, then apply a small amount of thin CA to harden the threads made by the screw. Secure the flap servo and mount in the center section. Drehen Sie eine Schraube in jedes Loch des Servohalters. Entfernen Sie die Schraube und geben etwas dünnflüssigen Sekundenkleber in das Loch um das Gewinde zu härten. Schrauben Sie dann das Klappenservo mit Halter in das Mittelteil. 5 Use a rotary tool and cut-off wheel to trim the aluminum control horn so only the inner hole remains. With the flap servo centered, attach the horn to the flap servo. Kürzen Sie mit dem Drehschleifer das Aluminiumservohorn so, dass nur das innere Loch verbleibt (siehe Abbildung) Setzen Sie bei zentriertem Servo das Horn auf. x2 x1 Remove the links from two of the control horns. Assemble the flap linkage using the ball ends on the single side and the swivel links on the dual end that are included with the model. Nehmen Sie die Anlekungen von zwei Ruderhörnern ab. Montieren Sie die Klappenanlenkung mit den Kugelköpfen auf der einen Seite und dem gedrehten Ende auf der anderen Seite aus dem Lieferumfang des Modells. 19 6 8 9 Aileron Servo Linkage Installation• Einbau der Querruderanlenkung 1 Attach the ball end to the flap servo arm. Connect the ball end to the flap control horns. Adjust the length of the linkage so the flaps are up when the servo is in the UP FLAP position. Setzen Sie den Kugelkopf auf den Klappenservoarm. 7 LL RR Schließen Sie die Kugelköpfe an die Klappenhörner an. Stellen Sie die Länge des Gestänges so ein, dass die Klappen eingefahren sind wenn das Servo in Position Klappen eingefahren ist. 4mm 8-32 x 1 inch x2 Attach the flap control horns to the flap torque rods. Make sure the screws that secure the ball ends face toward the centerline of the center section. The control horn must be parallel when the flaps are up. If not, use a flat file to change the positioning of the flat on one of the flap torque rods until both control horns are perfectly parallel. x2 x2 Prepare the control horns for the flaps. Note there is a right and left control horn to ease the installation of the linkage. Bereiten Sie die Ruderhörner für die Klappen vor. Bitte beachten Sie, dass es ein rechtes und linkes Ruderhorn gibt um die Montage zu vereinfachen. LL RR 4-40 M x2 x2 x2 Thread the nut on the aileron pushrod. The pushrod is threaded reverse on one end, so the nut will only fit on the correctly threaded end. Place a silicone retainer on the clevis, then thread the clevis 12 turns on the pushrod. Drehen Sie eine Mutter auf die Querruderanlenkung. Das Gewinde ist auf einer Seite anders herum so dass die Mutter nur auf eine Seite passt. Setzen Sie ein Stück Silikonschlauch auf den Gabelkopf und drehen den Gabelkopf dann 12 Umdrehungen auf das Gestänge. 2 Schrauben Sie die Ruderhörner auf das Klappengestänge. Stellen Sie sicher, dass die Schrauben zur Mittellinie zeigen. Die Ruderhörner müssen bei eingefahrenen Klappen parallel sein. Sollte das nicht der Fall sein ändern Sie mit einer Feile die Position der Anlenkung bis beide parallel sind. LL RR Thread the opposite end of the pushrod 12 turns into the nylon aileron control horn link. Drehen Sie die andere Seite des Gestänges 12 Umdrehungen auf den Ruderhornanschluss. 20 3 Retract Installation•Einbau des Einziehfahrwerkes 1 LL RR Connect the clevis to the aileron servo arm. Use the hole that is 11/16 inch (17mm) from the center of the arm. Slide the silicone retainer over the forks of the clevis. Schließen Sie den Gabelkopf am Querruderservoarm in dem Loch das 17mm von der Mitte des Arms entfernt ist an. Schieben Sie dann zur Sicherung den Silikonschlauch über den Gabelkopf. 4 LL RR 3 2 LL RR #8 x 3/4 Thread the bolt into the retract strut. A final nut is threaded against the strut to secure the bolt in position. x12 Use a drill and 3/32-inch (2.5mm) drill bit to enlarge the six holes for the retract mounting screws. Thread the screws into each of the holes to cut threads in the surrounding wood. Remove the screws before proceeding. Apply a small amount of thin CA to harden the threads. Vergrößern Sie mit einem 2,5mm Bohrer die sechs Löcher für das Einziehfahrwerk. Drehen Sie dann die Schrauben in die Löcher um Gewinde zu schneiden. Entfernen Sie die Schrauben wieder und geben etwas dünnflüssigen Sekundenkleber in die Öffnung um das Gewinde zu härten. Drehen Sie die Schraube in die Fahrwerksaufnahme. Als letztes wird dann noch die Sicherungsmutter aufgedreht die die Schraube in Position hält. Optional Wheels•Optionale Räder LL RR Prepare the wheel for installation by placing the bolt from the retracts through the wheels. The matching nuts are then threaded on the bolt. Tighten the nuts against each other to lock them together. Make sure the wheel can easily rotate on the bolt. LL RR With the radio system on and the aileron servo centered, adjust the length of the aileron linkage to center the aileron. Once centered, tighten the nut against the clevis to keep if from vibrating and changing position. Justieren Sie mit eingeschalteter Fernsteuerung und zentriertem Servo die Länge der Anlenkung. Ziehen Sie nach der Zentrierung die Mutter gegen den Gabelkopf damit er seine Position nicht mehr verändern kann. Bereiten Sie die Räder durch einsetzen der Schrauben vor. Kontern Sie die Schraube mit 2 Muttern. Ziehen Sie die Schrauben so an, dass sich das Rad frei drehen kann. LL RR Adding the optional powder-coated aluminum wheels will enhance the look and handling of your model. The installation of the optional wheels follows the same procedure as the included wheels. Verbessern Sie das Aussehen und das Handling mit den optionalen pulverbeschichteten Aluminiumrädern. Die Montage erfolgt in gleicher Weise wie bei den Rädern im Lieferumfang. 21 4 LL RR 5 6 7 LL RR #8 x 3/4 x12 Fit the retract into the wing. Secure the assembly in the wing. Once the retract has been positioned, remove it from the wing and attach two 18-inch (457mm) pieces of air line to the retract. Use the instructions included with the retract to colorcode the air line installation. Setzen Sie das Fahrwerk in die Tragfläche ein und schrauben es fest. Entfernen Sie nach dem Anpassen das Fahrwerk und schließen zwei 457mm lange Druckluftschläuche an. Beachten Sie bitte dazu die Einbauanleitung des Fahrwerks für die farbliche Zuordnung der Schläuche. LL RR Move the retract throguh both the UP and DOWN positions. Check that the wheel can rotate without rubbing the wing in the up position. Also check that the rotation pin in the front of the retract does not hit the top wing skin surface. If it does, clear shims have been provided to adjust the positioning of the retract mechanism so any interference can be corrected. Place the shims between the retract and mounts to correct any clearance issues. Bewegen Sie das Fahrwerk durch beide Positionen und achten bitte darauf, dass die Räder sich drehen können ohne die Fläche zu berühren. Prüfen Sie auch dass die Drehachse an der Vorderseite nicht die Tragfläche berührt. Sollte das der Fall sein korrigieren Sie die Position mit den transparenten Unterlegscheiben. 22 LL RR Tie one of the screws for mounting the retract to a 24-inch (609mm) piece of string. Lower the string into the wing, retrieving it at the opening for the flap servo. Knoten Sie eine der Befestigungsschrauben an eine 609mm lange Schnur. Führen Sie die Schnur durch die Öffnung des Klappenservos. 8 LL RR Tape the air line at the front of the retract to the string. Carefully pull the air line through the wing and to the opening at the center. Use low-tack tape to hold the air line in position. 9 11 12 LL RR LL RR LL RR Slide the air line at the rear of the retract through the predrilled hole in the spar. Carefully fit the retract (and shims) into the wing without pulling the air line at the front out of position. Move the retract to the up and down position and make sure that the rear air line will slide through the spar without resistance. Tape the rear air line and a 18-inch (457mm) servo extension to the string pre-installed in the center section. Make sure the extension is oriented correctly so it can be plugged into the servo lead for the aileron servo in the tip panel. Pull the lead and air line to the center of the center section and tape them in position at the center. Schieben Sie die Luftleitung an die Rückseite des Fahrwerks durch das Loch im Spant. Passen Sie vorsichtig das Fahrwerk mit den Unterlegscheiben in die Fläche ein ohne die Leitung aus dem Spant zu ziehen. Bewegen Sie das Fahrwerk in beide Postionen und stellen sicher dass die Luftleitung ohne Wiederstand durch den Spant gleitet. Kleben Sie das andere Leitungsende und eine 457mm Servoverlägerung an die Schnur in der Mittelsektion. Bitte achten Sie darauf, dass die Servoverlängerung richtig herum geführt wird, so dass sie angeschlossen werden kann und tapen diese in die Mittelsektion. Once placed, use a small amount of medium CA to glue the 18-inch (457mm) servo lead so it won’t interfere with the operation of the retract. Leave just enough of the lead exposed to connect the lead from the aileron servo when the panels are joined together. Einmal platziert kleben Sie die 457mm Servoverlängerug mit etwas Sekundenkleber ein, so dass sie nicht den Betrieb des Fahrwerkes stören kann. Lassen Sie dabei so ausreichend Platz so dass Sie die Stecker verbinden können wenn die Flächen zusammen gesteckt werden. 10 Kleben Sie den Luftschlauch an die Schnur und ziehen diesen vorsichtig bis zur Öffnung in die Mitte. Fixieren Sie den Schlauch in Position mit Klebeband mit geringer Klebekraft. LL RR Secure the retract mechanism in position. Schrauben Sie das Einzíehfahrwerk ein. 23 Landing Gear Door Installation•Einbau der Fahrwerkstüren 1 LL RR x4 Apply a small amount of petroleum jelly to the flex point of the hinge to prevent epoxy from entering the hinge. Entnehmen Sie die Stopper der Fahrwerksabdeckung. Bitte beachten Sie die erhabenen Linien die bei der Positionierung helfen. Geben Sie etwas Vaseline auf die Scharniermitte damit es nicht verklebt. LL RR Sand both the stops and the underside of the cover before gluing them together. Use medium CA to glue the stops to the underside of the covers, using the embossed lines to properly position the stops. Schleifen Sie die Stopper und die Unterseite der Abdeckung an bevor Sie diese verkleben. Verwenden Sie mittleren Sekundenkleber und nutzen sie die erhabenen Linien um die Stopper richtig zu positionieren. 24 6 LL RR LL RR 3 Locate the stops for the retract cover. Note there are embossed lines on the stops to aid in their positioning. 2 5 4 LL RR x4 Use side cutters to trim the hinges for the covers to the width shown in the photo. Trim all four hinges at this time. Make sure to trim the side of the hinge pin that is not barbed. Kürzen Sie die Scharniere auf die im Bild dargestellte Breite. Kürzen Sie die vier Scharniere gleichseitig. Bitte achten Sie darauf die ungesicherte Seite zu kürzen. M2 x 10 x6 Roughen the hinges and covers using coarse grit sandpaper. Clean the area using a paper towel and isopropyl alcohol. Use medium CA to glue the hinges in position, using care not to get glue in the hinge, which could prevent it from operating correctly. Tape the cover to the wing using low-tack tape. Use a drill and 1/32-inch (1mm) drill bit to drill the six holes to mount the cover to the wing. Lift the cover and enlarge the holes in the cover ONLY using a pin vise and 1/16-inch (1.5mm) drill bit. Secure the cover to the wing using the specified screws. Schleifen Sie die Scharniere und Abdeckung mit Schleifpapier an. Reinigen Sie die Klebefläche mit einem Papiertuch und Reinigungsalkohol und kleben diese mit mittlerem Sekundenkleber ein. Bitte achten Sie darauf dass kein Klebstoff in die Scharniere kommt und den Betrieb behindert. Kleben Sie die Abdeckung mit Klebeband mit geringer Klebkraft ein und bohren mit einem 1mm Bohrer die sechs Befestigungslöcher. Heben Sie die Abdeckung ab und vergrößern die Löcher mit einem 1,5mm Handbohrer. Schrauben Sie die Abdeckung mit den entsprechenden Schrauben fest. 7 LL RR 8 10 12 LL RR LL RR LL RR Lower the gear into the wing. Guide the door into position, checking the alignment to the cover. It may take a few tries and some trimming of the gear door to correctly position the door in relationship to the cover. With the cover and door removed, remove the clear tape. Use medium CA to glue the hinges to the door. Make sure to prepare the hinges and door before gluing to ensure a good bond between the two. Fahren Sie das Fahrwerk in die Tragfläche ein und überprüfen die Ausrichtung der Abdeckung. Zum Ausrichten können mehrere Versuche notwendig mit Positionierung der Abdeckung notwendig sein. Kleben Sie mit mittlerem Sekundenkleber die Scharniere an die Tür. Bereiten die Tür und Scharniere vor dem Kleben vor um eine gute Verbindung zu gewährleisten 9 Cut the rubber band. Use medium CA to glue the rubber band to the door in the location marks in the previous step. Schneiden Sie das Gummiband durch und kleben es mit mittleren Sekundenkleber auf die markierte Position. 13 11 Place a piece of tape on the hinges so the gear door can be attached and checked for alignment. With the gear in the DOWN position, attach the gear door using the tape. Kleben Sie ein Stück Klebeband auf die Scharniere und kleben diese mit den Scharnieren in der Fahrwerk ausgefahren Position an. LL RR LL RR Once the door and cover are aligned, use clear tape to secure them together. Carefully remove the screws to separate the assembly from the wing. Ist die Fahrwerkstür und Abdeckung ausgerichtet fixieren Sie die diese mit klarem Klebeband. Entfernen Sie dann vorsichtig die Schrauben um beides aus der Tragfläche zu entnehmen. LL RR With the gear in the DOWN position, mark the gear door for the location for the rubber band that will connect the door to the strut. Make sure to mark the gear door just above the rotational strut. Markieren Sie bei ausgefahren Fahrwerk die Position für das Gummiband das die Tür an der Strebe hält. Bitte achten Sie darauf die Strebe kurz überhalb des Drehpunktes zu markieren. Move the gear door against the strut. Use medium CA to glue the rudder band to the door, attaching it to the strut. The rudder band will have very light tension holding the door to the strut. Do not make this too tight, as it will stretch when the gear are retracted. Schieben Sie die Fahrwerkstür an die Strebe. Kleben Sie mit mittlerem Sekundenkleber das Gummiband an die Tür. Das Gummiband sollte dabei etwas Spannung haben, bitte achten Sie drauf dieses nicht zu stramm zu machen da es bei dem Ausfahren gedehnt wird. 25 14 16 ( Optional•Optional) LL RR Complete the retract installation by placing the connectors and t-fittings on the air lines running to the retracts. Use a 1-inch (25mm) piece of air line between the connectors and t-fittings. Tape the gear door to the wing using low-tack tape. Use a drill and 1/32-inch (1mm) drill bit to drill the six holes to mount the gear door to the wing. Lift the gear door and enlarge the holes in the gear door ONLY using a pin vise and 1/16-inch (1.5mm) drill bit. Beenden Sie den Einbau mit dem Aufsetzen der T-Stücken und Fitting auf den Druckluftschläuchen. Verwenden Sie ein 25mm langes Stück Druckluftschlauch zwischen den Anschlüssen und den T-Stücken. Kleben Sie die Tür mit Klebeband mit geringer Klebkraft fest. Bohren Sie mit einem 1mm Bohrer die sechs Löcher für die Fahrwerkstür in die Tragfläche. Nehmen Sie die Tür ab und vergrößern die Bohrlöcher mit einem Handbohrer und einem 1,5mm Bohrer. 15 LL RR The main gear doors can be made operational using the hardware listed at the beginning of the manual. Mounts for the hinges and servos will require fabrication by the modeler. Use the photos as a reference to modify your model to install the operational gear doors. A template has been provided to assist in making the servo mounting plate for the gear door servo on page 63 M2 x 10 x6 Trim the wheel cover to allow the wheel to retract into the wing using hobby scissors, a rotary tool and sanding drum. The door is secured using six screws as indicated in the photo. Schneiden Sie die Radabdeckung mit einer Hobbyschere und Schleiftrommel zurecht. Die Abdeckung wird mit den 6 Schrauben wie dargestellt angeschraubt. 26 17 Die Hauptfahrwerkstüren können mit dem zu Anfang gelisteten Zubehör betriebsfähig eingebaut werden. Die Halter für die Scharniere und Servos müssen von dem Modellbauer selber hergestellt werden. Nehmen Sie die Fotos dazu als Referenz. Eine Vorlage für die Halteplatte finden Sie auf Seite: 63. Receiver Battery Installation•Einbau des Empfängerakkus 1 6 5 3 M3 x 10 x4 30 Cut two pieces of hook and loop strap. Use epoxy to glue the straps to the front and rear formers. Make sure the straps are positioned so they will hook together and the receiver batteries can be secured in the battery compartment. Place a receiver battery into the compartment, routing the leads through the openings and into the fuselage. Setzen Sie den Empfängerakku in den Halter und führen die Kabel durch die Öffnungen im Rumpf. 4 Schneiden Sie zwei Streifen Klettband zurecht. Kleben Sie die beiden Streifen mit Epoxy auf die vorderen Spanten und achten darauf dass beide so geformt sind, dass sie zusammentreffen und der Akku damit gesichert wird. Führen Sie die Kabel der Empfängerakkus zum Empfänger im Rumpf. Schließen Sie 305mm Servoverlängerung an. Drehen Sie eine schwarze Schraube in jedes der Löcher um Gewinde in das Holz zu schneiden. Nehmen Sie die Schraube heraus und fahren mit dem nächsten Schritt fort. Geben sie etwas dünnflüssigen Sekundenkleber in die Löcher um die Gewinde zu härten. Sichern Sie die Akkuabdeckung im Rumpf mit den vier schwarzen M3 x 10 Schrauben. 2 Cut and place a second piece of foam, placing it on the first battery. Insert the second receiver battery, then secure the batteries using the hook and loop straps. Cut a piece of 1/4-inch (6mm) foam and place it into the battery compartment. Thread a black screw into each of the holes to cut threads in the surrounding wood. Remove the screw then proceed to the next step. Apply a small amount of thin CA to harden the threads made in the previous step. Secure the battery cover to the fuselage using the four black M3 x 10 washer heads screws. Route the leads from the batteries to the receiver inside the fuselage. Connect 12-inch (305mm) battery extensions to the batteries, routing the extensions through the formers toward the mounting area for the receiver. Schneiden Sie ein zweites Stück Schaumstoff zurecht und plazieren es auf dem ersten Akku. Legen Sie den zweite Akku darauf und sichern beide mit der Klettschlaufe. ÎÎ We made a small notch in the battery cover so the leads for the battery can be accessed from outside the fuselage to check the voltage of the packs before each flight. ÎÎ Wir haben einen schmalen Schlitz in die Akkuabdeckung gemacht, so dass sie die Akkukabel von aussen erreichen können um die Spannung vor jedem Flug zu überprüfen. Schneiden ein Stück 6mm Schaumstoff zurecht. 27 Rudder and Elevator Servo Installation• Einbau von Höhen und Seitenruderservo Air Tank and Receiver Installation•Einbau des Drucklufttank und des Empfängers 1 3 4 1 #4 Prepare the air tank by attaching a 2-inch (51mm) piece of air line to the tank. Connect a t-fitting to the air line, then cut two 6-inch (152mm) pieces of air line to connect to the t-fitting. On one 6-inch (152mm) line, connect the filling valve. The remaining line will route to the retract actuator valve. Use a pin vise and 1/16-inch (1.5mm) drill bit to enlarge the holes for the rudder (center) and elevator (outer) servo mounting screws. Thread a servo mounting screw into each of the holes to cut threads in the surrounding wood. Remove the screws, then apply a small amount of thin CA to harden the threads made in the previous step. Prepare and mount the rudder and elevator servos in the fuselage. Ist das Brettchen angepaßt sichern Sie es mit den Schrauben und Unterlegscheiben im Rumpf. Check the fit of the receiver tray in the fuselage. Some variation of the air tank length may exist. If the tray does not fit, mark the tray and remove it from the fuselage. Use a razor saw to trim the tray to fit as shown in the second photo. Überprüfen Sie die Passung des Empfängerbrettchen im Rumpf. Sollte dieses wegen dem Drucklufttank nicht ganz passen, nehmen Sie es wieder heraus und kürzen es wie auf dem zweiten Bild dargestellt. Setzten Sie den Tank in den Rumpf rein. Bitte achten Sie darauf dass er ganz nach vorne geschoben wird. x2 Once the tray has beet fit to the air tank, secure the tray in the fuselage using screws and washers. 2 Fit the air tank into the fuselage. Make sure to slide the tank fully forward in the fuselage. 28 x2 Schließen Sie an dem Drucklufttank einen 51mm langen Druckluftschlauch an. An diesen Schlauch wird ein T-Stück angeschlossen an die zwei 152cm lange Schlauchstücke angeschlossen werden. An das eine kommt das Füllventil, das zweite wird an das Fahrwerksventil geführt. Vergrößern Sie mit einem 1,5mm Handbohrer die Befestigungslöcher für das Seitenruderservo (Mitte) und das Höhenruderservo (aussen). Drehen Sie in jedes Loch eine Servobefestigungsschraube ein und wieder raus und geben dann etwas dünnflüssigen Sekundenkleber in das Gewinde um es zu härten. 4-40 x 1/2-inch 5 6 Remove the covering from the side of the fuselage for the switch mount. Secure the switch in the side of the fuselage using the hardware provided with the switch. Connect the leads for the rudder and elevator servos. Connect a 6-inch (152mm) lead for the aileron and flap servos. A 12-inch (305mm) lead will be required for connection to the throttle servo. Finally, connect a 12-inch (305mm) extension to the data port to allow access to the receiver for binding. Entfernen Sie für den Schalter die Bespannung im Rumpf. Schrauben Sie den Schalter mit dem Schrauben aus dem Lieferumfang ein. ÎÎ For a better scale appearance the switch can be mounted under the dash panel if using the sliding canopy. ÎÎ Für einen besseren Scale Eindruck kann der Schalter auch unter dem Panel der beweglichen Cockpithaube angebracht werden. Schließen Sie die Servoakabel der Höhen und Seiternruderservos an. Schließen Sie eine 152mm lange Verlängerung für die Querruder und Klappenservos an. Für den Anschluß des Gasservos wird eine 305mm Servoverlängerung benötigt. Als letztes schließen Sie bitte eine 305mm lange Verlängerung an den Dataport zum Binden des Empfängers an. 7a (Air retract Installation• Einbau des Pneumatikfahrwerks) Mount the receiver on a piece of 1/4-inch (6mm) foam in the fuselage using hook and loop straps. Cut the strap down the center so there are two pieces for mounting the receiver. Route the leads for the ailerons and flaps, as well as the throttle servo, through the fuselage. Montieren Sie den Empfänger auf einem Stück 6mm Schaumstoff im Rumpf mit den Klettschlaufen. Führen Sie die Kabel für Querruder und Klappen sowie für das Gasservo durch den Rumpf. 7B (Electric retract Installation• Einbau des elektrischen Fahrwerkes) Fabricate a support for the front of the receiver tray using the material from an unused engine mounting template. Mount the receiver in the fuselage. Route the leads for the ailerons and flaps, as well as the throttle servo, through the fuselage. Fertigen Sie aus einer ungenutzten Motorschablone einen Halter für das vordere Ende des Empfängerbrettchen. Montieren Sie den Empfänger im Rumpf. Führen Sie die Kabel für Querruder und Klappen sowie für das Gasservo durch den Rumpf. 29 8 9 Rudder Installation•Einbau des Seitenruders 1 2 x2 Position the hinge perpendicular to the hinge line. Check that it can move freely. Richten Sie das Scharnier rechtwinklig zur Scharnierlinie aus. Prüfen Sie dass es sich frei bewegen kann. 3 #4 4-40 x 1/2-inch x2 x2 30 Apply a small amount of silicone adhesive to the air tank former to keep the tank from rotating in the mount while flying your model. Secure the former in the fuselage. Geben Sie etwas Silikonklebstoff auf den Drucklufttankhalter damit der Tank sich im Flug nicht bewegen kann. Mount the remote receivers inside the fuselage as shown using hook and loop tape. Note the orientation of the antenna in relationship to the fuselage. Befestigen Sie die Satellitenempfänger wie abgebildet mit Klettband im Rumpf. Bitte beachten Sie die Ausrichtung der Antennen. 30 x2 Apply a small amount of petroleum jelly to the flex point of the hinge to prevent epoxy from entering the hinge. Insert the hinges into the rudder. Use the depth gauges marked R1 and R2 to make sure the hinges fit into the rudder. It may be necessary to use a drill bit to make the hole deeper and fully insert the hinge into the rudder. The depth gauges are marked for proper location and will fit the radius of the leading edge on the rudder. Once the hinges have been checked for alignment, use epoxy to glue the hinges into the rudder. Geben Sie etwas Vaseline auf die Gelenke der Scharniere damit diese nicht verkleben. Verwenden Sie die Maße R1 und R2 auf der Schablone um die Scharniere einzupassen. Es könnte notwendig sein die Löcher für die Scharniere zu vertiefen. Kleben Sie die Scharniere nach dem Anpassen mit Epoxy fest. Remove the covering for the rudder torque rod. Entfernen Sie die Abdeckung für den Ruderstift. 4 5 Rudder Linkage Installation•Einbau der Ruderanlenkung 1 Fit the rudder to the fin, guiding the torque rod into the fuselage. Make sure the rudder torque rod is inserted through the hole in the former for support. Once fit, remove the rudder and use epoxy on the hinges and in the hinge pocket to secure the rudder to the fin. 2 4mm 8-32 x 1 inch x1 x2 x2 Remove the link from the control horn. Thread the control horn on the bolt until the horn is against the head of the bolt. Rotate the bolt 2 turns so there is a slight gap between the horn and ball end. Thread the control horn into the wheel collar far enough that is can still be slid over the rudder torque rod. Passen Sie das Ruder an der Finne an und führen den Stift in den Rumpf. Stellen Sie sicher, dass der Stift in der Führung ist. Einmal angepasst, entfernen Sie das Ruder wieder und kleben es in den Scharniertaschen an die Finne. OIL Apply a small amount of petroleum jelly to the center of the rudder torque rod bushing to prevent accidentally gluing it to the rudder torque rod. Use medium CA to glue the torque rod in the fuselage. Geben Sie etwas Vaseline auf die Mitte des Ruderstiftlagers damit dieses nicht aus Versehen verklebt werden kann. Kleben Sie den Ruderstift mit mittlerem Sekundenkleber in den Rumpf. Drehen Sie das Horn vom Stellring und schrauben den Gestängeanschluss bis zur Oberkante der Schraube auf. Drehen Sie dann den Anschluß wieder zwei Umdrehungen zurück, so dass ein kleiner Spalt entsteht. Drehen Sie dann die Schraube wieder auf den Stellring dass er über den Ruderstift paßt. Slide the collar on the rudder torque rod. Tighten the bolt using a 9/32-inch (7mm) open end wrench. The control horn will not rotate and will be against the head of the bolt once the control horn is secure. Schieben Sie den Stellring auf den Ruderstift. Ziehen Sie die Schraube mit einem 7mm Gabelschlüssel an. Das Ruderhorn wird sich dabei nicht mitdrehen und bei gesicherten Stellring wieder am Schraubenkopf sein. 3 ÎÎ Note the position of the screw that secures the ball end, as this must be accessible when the control horn is placed inside the fuselage. ÎÎ Bitte beachten Sie, dass die Schraube die den Kugelkopf sichert bei im Rumpf eingesetzten Ruderhorn so positioniert sein muss, dass sie erreichbar ist. Thread the ball link on the 393/4-inch (1010mm) pushrod. Drehen Sie den Gestängeanschluß auf das 1010mm lange Gestänge. 31 4 5 7 Stabilizer Installation• Einbau des Höhenleitwerks 1 Center the rudder servo using the radio system. Place the large servo arm (not included, JRPA215) on the rudder servo so it is perpendicular to the servo center line. Zentrieren Sie das Seitenruderservo mit der Fernsteueranlage. Setzen Sie den großen Servoarm (JRPA215 nicht im Lieferumfang) rechtwinklig auf das Ruder auf. 6 Slide the 393/4-inch (1010mm) pushrod into the rudder pushrod tube. Secure the ball link in the control horn using the screw removed in Step 1. Schieben Sie das 1010mm lange Gestänge in das Seitenruderröhrchen. Sichern Sie den Gestängeanschluss im Ruderhorn mit der im Schritt 1 entfernten Schraube. x1 Attach the 4-40 ball end to the control horn on the end that aligns with the rudder pushrod. Schrauben Sie den 4.40 Kugelkopfanschluß wie abgebildet auf das Ruderhorn. 32 Thread the ball end on the rudder pushrod. With the rudder servo centered, place the horn on the rudder servo. Adjust the length of the pushrod so the rudder is centered at the rear of the fuselage. Drehen Sie den Gestängeanschluß auf das Gestänge. Setzen Sie mit zentriertem Servo das Ruderhorn auf das Servo. Stellen Sie die Gestängelänge so ein, dass das Ruder im Rumpf zentriert ist. 1/4 1/4-20 x 1 inch x2 x2 Secure the wing to the fuselage using the hardware listed. Schrauben Sie die Tragfläche mit den genannten Schrauben am Rumpf fest. 2 3 4 6 Slide the stabilizer on the tubes. The stabilizer will fit tightly against the fuselage. Install both stabilizer halves at this time. Remove the covering from the fuselage where the stabilizer fits against the fuselage. Leave a 1/8-inch (3mm) lip so the exposed wood will not be visible when the stabilizer is glued to the fuselage. Schieben Sie beide Leitwerksseiten auf die Verbinder. Das Leitwerk paßt sauber an den Rumpf. 5 Entfernen Sie die Bespannung vom Rumpf wo das Leitwerk auf den Rumpf trifft. Lassen Sie einen 3mm Steg stehen damit man nach der Verklebung kein Holz sieht. 7 Locate the elevator torque rod bushings. Check each bushing and mark them as right or left so they can be installed later in the manual. Prüfen Sie die Lager der Höhenruderstifte. Markieren Sie diese mit links oder rechts, so dass Sie diese später einbauen können. Center the elevator joiner tubes in the fuselage. Mark each side at the fuselage for center. Zentieren Sie die Leitwerksverbinder im Rumpf. Markieren Sie die Mitten zum zentrieren. Check alignment Ausrichtung überprüfen Step back from the aircraft and check that the stabilizer is in alignment with the wing. Treten Sie zurück und prüfen ob das Leitwerk zur Fläche richtig ausgerichtet ist. Remove the stabilizers and verify that the tubes are centered in the fuselage. If the joiner tubes slide while gluing the stabilizer, wrap a piece of low-tack tape around one end of the tube so they can be easily repositioned. Nehmen Sie das Leitwerk ab und überprüfen dass die Verbinder zentriert sind. Sollten sich die Verbinder während des Verklebens bewegen kleben sie um ein Ende etwas Klebeband mit geringer Klebkraft, so dass sie einfach positioniert werden können. 33 8 9 Elevator Installation•Einbau des Höhenruders 1 LL RR Lightly sand the tubes using coarse sandpaper. Use isopropyl alcohol and a paper towel to clean the stabilizer tubes, removing any oils or debris from the tubes. Schleifen Sie die Verbinder an und reinigen diese Alkohol und Papiertüchern. LL RR 30 Apply epoxy to the tubes and to the joiner pockets in the stabilizer. Also apply epoxy to the exposed wood on the root rib of the stabilizer. Slide the stabilizer into position, fitting it tightly against the fuselage. Remove any excess epoxy from the stabilizer and fuselage using a paper towel and isopropyl alcohol. Check the alignment of the stabilizer while the epoxy cures. Once cured, remove the tape from the tubes and install the remaining stabilizer half. Geben Sie Epoxy auf die Verbinder und Öffnungen. Streichen sie ebenfalls Epoxy auf die Kontaktstellen des Holzes. Schieben Sie eine Leitwerkshälfte in Position fest an den Rumpf. Entfernen Sie überschüssigen Klebstoff vom Rumpf mit Alkohol und Papiertüchern. Überprüfen Sie die Ausrichtung des Leitwerks während das Epoxy trocknet. Entfernen Sie nach dem Trocknen das Klebeband und kleben die zweite Leitwerkshälfte ein. 34 LL RR 30 x6 Apply a small amount of petroleum jelly to the flex point of the hinge to prevent epoxy from entering the hinge. Insert the hinges into the elevator. Use the depth gauges marked EO, EM and EI to make sure the hinges fit into the elevator. It may be necessary to use a drill bit to make the hole deeper to fully insert the hinge into the elevator. The depth gauges are marked for proper location and will fit the radius of the leading edge on the elevator. Once the positioning of the hinges have been set, use epoxy to glue them into position. Geben Sie etwas Vaseline auf die Gelenke der Scharniere damit diese nicht verkleben. Verwenden Sie die Maße EO, EM und EI auf der Schablone um die Scharniere einzupassen. Es könnte notwendig sein die Löcher für die Scharniere zu vertiefen. Kleben Sie die Scharniere nach dem Anpassen mit Epoxy fest. 2 x3 4 LL RR Position the hinge perpendicular to the hinge line. Check that it can move freely. Richten Sie das Scharnier rechtwinklig zur Scharnierlinie aus. Prüfen Sie dass es sich frei bewegen kann. 3 LL RR 5 x2 Thread the control horn on the elevator torque rod. Note that the head of the screw is facing toward the tip of the elevator. The top of the control horn is flush with the top of the torque rod. Drehen Sie ein Ruderhorn auf den Ruderstift. Bitte beachten Sie dass der Kopf der Schraube nach hinten und der Gestängeanschluß nach vorne zeigt. Die Oberkante des Anschlusses muß bündig mit der Schraube abschließen. LL RR 6 30 Check the fit of the elevator in place to the stabilizer. Also check that the torque rod bushing fits and allows the hinge gap between the elevator and stabilizer to be roughly 1/32 to 1/16 inch (1 to 1.5mm). It may be necessary to lightly sand the bushing for proper fit. Once set, use 30-minute epoxy to glue the hinges and torque rod bushing into position. Prüfen Sie die Passung des Höhenruders am Leitwerk. Prüfen Sie ebenfalls die Passung der Lager und das Spiel zwischen Ruder und Leitwerk. Das sollte 1 bis 1,5mm betragen. Es könnte notwendig sein das Lager für eine bessere Passung etwas anzuschleifen. Kleben Sie nach dem Einstellen die Scharniere und den Ruderstift mit 30 Minuten Epoxy fest. LL RR Center the elevator servo using the radio system. Place the large servo arm (not included, JRPA215) on the servo so it is perpendicular to the servo centerline. Use side cutters to trim the side of the arm toward the inside of the fuselage. Zentrieren Sie das Höhenruderservo mit der Fernsteuerung. Setzen Sie den großen Servoarm (nicht im Lieferumfang) rechtwinklig auf. Scheiden Sie mit einem Seitenschneider den Arm ab der nach innen zeigt. 7 LL RR Slide the torque rod bushing on the torque rod. Make sure the bushings are on the correct side of when the elevators are attached to the stabilizer. The torque rods face down. Schieben Sie das Ruderlager auf den Ruderstift. Stellen Sie sicher dass das Ruderlager auf der richtigen Seite ist. Der Ruderstift zeigt nach unten. LL RR x1 Attach the 4-40 ball end to the control horn on the servo arm. Schrauben Sie den 4-40 Kugelkopf Gestängeanschluß auf den Servoarm. 35 8 9 LL RR 10 LL RR Thread the 451/4-inch (1150mm) elevator pushrod 12 to 14 turns into the ball end. With the elevator and elevator servo centered, mark the pushrod at the edge of the ball link. This will help when threading the ball link on the pushrod. Drehen Sie das 1150mm lange Höhenrudergestänge 12 bis 14 Umdrehungen auf den Kugelkopf. Markieren Sie mit zentriertem Höhenruder und Servo das Gestänge am Anschluss. Dieses hilft bei dem Aufdrehen des Kugelkopfes. 11 LL RR Slide the elevator pushrod into the pushrod tubes. It is easiest to start outside the fuselage as the angle from the wing saddle will not allow for this installation. Once the servo arm is inside the fuselage, secure the arm to the elevator servo using the screw provided with the servo arm. Schieben Sie das Höhenrudergestänge in das Röhrchen. Am einfachsten beginnen Sie damit ausserhalb des Rumpfes. Sichern Sie dann den Servorm mit der Schraube aus dem Lieferumfang des Servos. LL RR Remove the ball link from the control horn. Thread the ball link on the elevator pushrod until it is aligned with the mark made in the previous step. Hold the pushrod wire inside the fuselage using pliers. Drehen Sie den Kugelkopf vom Ruderhorn und schrauben diesen bis zur Markierung aus dem letzten Schritt auf das Gestänge. Halten Sie bei dem Drehen das Gestänge mit einer Zange fest. 36 12 Check the alignment of the elevator when the ball link is repositioned in the control horn. Adjust the position as necessary so the elevator is centered when the servo is centered. Once the length of the pushrod is finalized, reinstall the screw and secure the ball link to the control horn. Überprüfen Sie die Ausrichtung des Höhenruders wenn der Kugelkopf auf dem Ruderhorn sitzt. Justieren Sie so die Position, dass das Ruder zentriert ist wenn der Servo zentriert ist. Haben Sie die Länge eingestellt schrauben sie die Schraube wieder ein und sichern den Kugelkopf auf dem Ruderhorn. 13 Pneumatic Retract Servo Installation•Einbau des pneumatischen Einziehfahrwerkservos 1 #2 3 4 #2 x 1/2 x2 x2 Thread a screw into each of the holes to cut threads into the surrounding wood. Remove the screw before proceeding. Apply a small amount of thin CA to harden the threads made in the previous step. Attach the tail cone to the fuselage. Drehen Sie eine Schraube in jedes Loch um ein Gewinde zu schneiden. Drehen Sie die Schraube wieder heraus und geben etwas dünnflüssigen Sekundenkleber in das Loch um die Gewinde zu härten. Schrauben Sie den Heckkonus an den Rumpf. N x1 Place the retract servo in the servo mount. Mark the locations for the servo mounting screws. Setzen Sie das Einziehfahrwerkservo in den Servohalter. Markieren Sie die Positionen für den Befestigungsschrauben. 2 Use a pin vise and 1/16-inch (1.5mm) drill bit to drill the mounting holes for the retract servo. Thread a servo mounting screw into each of the holes to cut threads into the surrounding wood. Remove the screw , then apply a small amount of thin CA to harden the threads. Secure the servo and the retract actuator valve in the retract servo mount. Assemble the pushrod with Z bend to the clevis and connect the linkage. Adjust the linkage so the valve is centered with the servo centered. Montieren Sie das Gestänge mit der Z-Biegung an den Gabelkopf und schließen es an. Justieren Sie die Anlenkung so, dass das Ventil zentriert ist wenn das Servo zentriert ist. Bohren Sie mit dem 1,5mm Handbohrer die Befestigungslöcher für das Servo. Drehen Sie eine Schraube in jedes Loch um ein Gewinde zu schneiden. Drehen Sie die Schraube wieder heraus und geben etwas dünnflüssigen Sekundenkleber in das Loch um die Gewinde zu härten. Center the retract servo by setting the throws at the transmitter to 0% in both directions. Install a servo arm on the servo, removing any arms that may interfere with the operation of the servo. Zentrieren Sie das Fahrwerksservo auf 0% Ausschlag in beide Richtungen. Setzen Sie den Servoarme auf und entfernen alle nicht benötigten Arme. 37 5 6 8 Tail Wheel Installation• Einbau des Spornrades 1 Prepare the connectors for the retract valve by attaching a 6-inch (152mm) piece of tubing to the connectors. Make sure to match the ail line fittings and color coding to match the air lines in the wing. Bereiten Sie die Anschlüsse mit 152mm langen Schlauch vor. Bitte achten Sie auf die richtigen Anschlüsse und Farbe die zu den Schläuchen in der Fläche passen muss. 7 Slowly increase the throw of the retract servo to move the valve to the UP and DOWN positions. Make sure not to set the throw with too much travel, as this could cause the servo to stall, resulting in possible damage to the servo or retract valve. Setzen Sie das Servo mit dem Ventil in de Rumpf ein. Schließen Sie die Drucklufttankleitung an das Ventil an. Verbinden Sie den Servoanschluß mit der Gearbuchse des Empfängers. Kleben Sie mit mittleren Sekundenkleber den Servohalter im Rumpf fest. 4-40 x1 Slide the 27-inch (685mm) (pneumatic) or 265/16-inch (668mm) (electric) tail wheel retract pushrod into the tube in the fuselage. Once the pushrod exits at the rear, thread a nut onto the pushrod. Vergrößern Sie langsam den Servoausschlag um das Ventil in beide Positionen zu bewegen. Bitte achten Sie darauf den Weg nicht zu groß zu stellen, da dieses das Servo oder das Ventil beschädigen könnte. Connect a 1-inch (25mm) piece of tubing to the lines that will actuate the retracts at the valve. Connect a t-fitting to the tubes at the valves, then attach the air lines and fittings prepared in the previous step. Schließen Sie ein 25mm langes Schlauchstück an den Ausgang an der zu den Fahrwerksventilen geht. Schließen Sie ein Stück an die Schläuche der Fahrwerksventile und dann an das T-Stück aus dem letzten Schritt. 38 Lower the retract servo assembly into the fuselage. Connect the air line from the air tank to the valve. Plug the servo into the retract port of the receiver. Use medium CA to glue the retract servo mount inside the fuselage. Schieben Sie das 685mm (Pneumatik) oder 668mm (Elektro) Gestänge des Spornrades in das Röhrchen. Drehen Sie nachdem das Gestänge durch das Röhrchen geführt wurde eine Mutter auf. 2 LL RR Cut the tail wheel cable into two equal lengths. Slide a brass crimp on one end of the cable, then slide the cable through the cable end. The cable then goes back through the crimp. 4 6 Cut the heat shrink tubing into four 30mm pieces. Schneiden Sie den Schrumpfschlauch in vier 30mm lange Teile. 5 LL RR Slide the heat shrink up against the nut, then use a heat gun to shrink the tubing into position. Schieben Sie den Schrumpfschlauch gegen die Mutter und schrumpfen dann den Schlauch in dieser Position. Schneiden Sie das Spornradkabel in zwei gleiche Teile. Schieben Sie eine Quetschhülse auf das Kabel, dann den Augenbolzen und führen das Kabel wieder durch die Quetschhülse. 7 8 Connect the clevises from the cables to the steering arm of the trail wheel retract assembly in the middle hole. Slide the silicone retainers over the forks of the clevis to secure their position. Schließen Sie den Gabelkopf im mittleren Loch des Ruderhebels des Spornrades an. Schieben Sie den Silikonschlauch zur Sicherung über den Gabelkopf. 9 3 LL RR 4-40 M x2 x2 x2 Slide the heat shrink on the cable. Thread a nut on the cable end, then slide a silicone retainer on the clevis. Thread the clevis on the cable end. LL RR Position the crimp so it is nearly touching the cable end, leaving a very small loop at the cable end. Secure the crimp to the cable. Positionieren Sie die Quetschülse nah am Augenbolzen, so dass nur ein kleiner Spalt bleibt. Quetschen Sie die Hülse. Schieben Sie den Schrumpfschlauf auf das Kabel. Drehen Sie eine Mutter auf das Kabel uns setzen den Silikonschlauch auf den Gabelkopf. Drehen Sie den Gabelkopf auf den Augenbolzen. Slide the cables into the tubes in the fuselage. Schieben Sie die Kabel in das Röhrchen im Rumpf. Thread the retract pushrod into the actuator clevis on the retract assembly until the pushrod is past the forks of the clevis. Snug the nut against the clevis. Final adjustment will be needed once the other end of the pushrod is attached to the actuator. Drehen Sie das Gestänge in den Gabelkof bis das Gewinde auf der anderen Seite heraustritt. Kontern Sie die Mutter gegen den Gabelkopf. Die Feineinstellung wird erst vorgenommen wenn das Gestänge auf der anderen Seite angeschlossen ist. 39 10 11 12 14 #4 Temporarily install the retract assembly into the fuselage. The assembly will be secured once the length of the retract actuator pushrod has been set. Setzen Sie die Mechanik vorübergehend in den Rumpf ein. Diese wird erst dann festgeschraubt wenn die Gestängelänge eingestellt ist. Thread the actuator pushrod into the retract actuator. While holding the actuator tightly against the former in the fuselage, check the operation of the tail wheel retract. It may take a few cycles to determine the length of the pushrod so the actuator and retract assembly work in unison. Tighten the nut in Step 9 after final adjustment. Drehen Sie das Gestänge in den Geber. Halten Sie den Geber dabei nah am Rumpfspant und überprüfen die Funktion des Spornrades. Zum Ermitteln der genauen Länge, bis Geber und Mechanik gleich laufen, können einige Versuche notwendig sein. Remove the pin and clip from the actuator and actuator mount. Secure the mount to the former using the screws supplied with the mount. Entfernen Sie den Pin und Clip des Gebers und Geberhalters. Sichern Sie den Halter im Spant mit den Schrauben aus dem Lieferumfang des Halters. 13 4-40 x 1/2-inch x6 x6 Install the screws that secure the retract assembly in the fuselage. Start with the screws inside the fuselage, working outward to maintain the alignment of the assembly. Schrauben Sie die Mechanik im Rumpf fest. Beginnen Sie mit den Schrauben an der Rumpfinnenseite und schrauben dann die äußeren fest damit das Bauteil ausgerichtet bleibt. 15 ÎÎ When using an air cylinder, the travel of the actuator is more than the travel required to operate the retract unit. Install and adjust the linkage so the excess travel is expended when the retract is in the DOWN position. ÎÎ Bei Verwendung eines Druckluftzylinders ist der zur Verfügung stehende Weg größer als zur Funktion benötigt. Stellen Sie die Anlenkung so ein, dass der größere Weg bei dem Fahrwerk im ausgefahrenen Zustand ist. Replace the pin and clip to attach the actuator to the mount. Setzen Sie den Pin und Clip wieder auf um den Geber in den Halter zu setzen. LL RR 4-40 M x2 x2 x2 With the tail wheel retract in the DOWN position, complete the steering cables and connect the clevises to the rudder servo arm. Check the operation of the tail wheel retract once all the components have been installed and make any necessary adjustment so the retract works without binding. Schließen Sie die Steuerkabel im eingefahrenen Zustand an. Überprüfen Sie nach dem Anschluß die Funktion und führen falls notwendig Einstellungen durch damit das Fahrwerk ohne zu klemmen arbeitet. 40 16 17 18 (Optional•Optional) Scale Exhaust Installation• Einbau der Scale Auspuffanlage 1 M2 x 8 M2 x 8 x4 Tape the tail gear cover to the fuselage using low-tack tape. Use a drill and 1/32-inch (1mm) drill bit to drill the four holes to mount the tail gear cover to the fuselage. Lift the tail gear cover and enlarge the holes in the tail gear cover ONLY using a pin vise and 1/16-inch (1.5mm) drill bit. Secure the cover to the fuselage using the screws indicated. Fixieren Sie die Spornradabdeckung mit Klebeband mit geringer Klebekraft. Bohren Sie mit einem 1mm Bohrer die 4 Löcher zur Befestigung der Abdeckung. Nehmen Sie die Abdeckung ab und vergrößern die Löcher im Rumpf mit einem 1,5mm Handbohrer. Schrauben Sie dann die Abdeckung mit den aufgeführten Schrauben fest. x6 LL RR Carefully trim the tail gear door to fit the tail wheel retract. Make sure the retract can move without hitting the door. Once the door has been trimmed, tape the tail gear door to the fuselage using low-tack tape. Use a drill and 1/32-inch (1mm) drill bit to drill the four holes to mount the tail gear door to the fuselage. Lift the tail gear door and enlarge the holes in the tail gear door ONLY using a pin vise and 1/16inch (1.5mm) drill bit. Secure the door to the fuselage using the screws indicated. Position the scale exhaust. The exhaust will rest against the engine box and cowl mounting lugs. Use a pin vise and 5/32inch (2mm) drill bit to drill the mounting holes for the scale exhaust. Positionieren Sie die Scale Auspuffanlage. Der Auspuff wird am Motorhalter positioniert und Motorhaubenhalter festgeschraubt. Bohren Sie mit einem 2mm Bohrer die Befestigungslöcher. Passen Sie vorsichtig die Fahrwerkstür an. Stellen Sie sicher dass das Fahrwerk ohne die Tür zu berühren ausfahren kann. Fixieren Sie dann die Fahrwerkstür mit Klebeband mit geringer Klebekraft. Bohren Sie mit einem 1mm Bohrer die 4 Löcher zur Befestigung der Fahrwerkstür. Nehmen Sie die Fahrwerkstür ab und vergrößern die Löcher im Rumpf mit einem 1,5mm Handbohrer. Schrauben Sie dann die Fahrwerkstür mit den aufgeführten Schrauben fest. The tail gear doors can be made operational using the hardware listed at the beginning of the manual. Mounts for the hinges will require fabrication by the modeler. Use the photos as a reference to modify your model to install the operational tail gear doors. Sie können die Fahrwerkstür mit den Teilen funktionsfähig machen die am Anfang der Anleitung gelistet sind. Die Halter für die Scharniere müssen dabei vom Modellbauer selber erstellt werden. Nutzen Sie dabei die Fotos als Referenz. 41 2 Engine Installation (G62)•Motoreinbau (G62) 1 LL RR M3 3 5 Use a rotary tool and sanding drum to enlarge the opening in the fuselage if you are using the optional spring starter on your engine. Make an area for the fuel lines to clear the spring starter so they are not damaged by the rotating starter. Examine the fuel tank to determine where the fuel lines attach inside the tank. Mark the fuel lines so they can be identified when the fuel tank is installed inside the fuselage. M3 x 10 x2 x4 Thread the screw into the hole to cut threads in the surrounding wood. Remove the screw, then apply a small amount of thin CA to harden the threads. Secure the scale exhaust to the fuselage. Drehen Sie die Schrauben in die Löcher um ein Gewinde zu schneiden. Drehen Sie die Schrauben wieder heraus und geben eine kleine Menge dünnflüssigen Sekundenkleber in das Loch um das Gewinde zu härten. Schrauben Sie dann den Auspuff fest. Place the engine mounting template in position on the firewall. Use a drill and 1/16-inch (1.5 mm) drill bit to drill the pilot holes for your particular motor. The center lines for the drill template will align with the ones on the firewall. Setzen Sie die Motorschablone auf dem Motorspant. Bohren Sie mit einem 1,5mm Bohrer die Pilotlöcher für den gewählten Motor. Die Mittellinien auf der Schablone müssen dabei deckungsgleich mit denen auf dem Motorspant sein. Vergrößern Sie mit einem Drehschleifer die Öffnung im Rumpf wenn Sie den optionalen Federstarter auf ihrem Motor verwenden. Markieren Sie die Position der Kraftstoffleitungen damit diese nicht vom drehenden Starter beschädigt werden können. Markieren Sie die Kraftstoffleitungen des Tanks, so dass Sie diese im eingebauten Zustand zuordnen können. 6 4 2 Place two tie wraps through the fuel tank mounting plate. Use care not to loop the tie wraps through any wiring or formers near the mounting plate. #4 Remove the template from the firewall. Use a drill and 5/16inch (8mm) drill bit to enlarge the holes in the firewall. Nehmen Sie die Schablone von dem Brandschott ab. Vergrößern Sie mit einem 8mm Bohrer die Löcher in dem Brandschott. 42 1/4-20 x 11/4 inch x1 x1 1/4-20 x4 Draw the blind nuts into the holes using one of the mounting screws and a washer. Drehen Sie die Einschlagmuttern mit Hilfe der Montageschrauben und Unterlegscheiben ein. Führen Sie zwei Kabelbinder durch den Halter. Achten Sie bitte darauf keine Kabel oder andere Spanten mit einzubinden. 7 9 11 12 1/4 Secure the fuel tank inside the fuselage using the tie wraps. Make sure the vent faces toward the top of the fuselage when the tank is installed. Befestigen Sie den Tank mit den Kabelbindern im Rumpf. Bitte achten Sie darauf dass die Öffnung nach vorne zeigt wenn der Tank eingebaut ist. 8 x1 Install the carburetor adapter and arm on the engine. Trim the arm to clear the engine, then attach the ball end to the arm. Do not use the cone washer when installing the ball end on the carburetor arm. Montieren Sie den Vergaseradapter und Gashebel auf dem Motor. Passen Sie den Arm so an, dass er frei vom Motor läuft. Verwenden Sie bei der Montage des Kugelkopfes nicht die konische Unterlegscheibe. 10 1/4-20 x 11/4 inch x4 x4 Attach the engine to the firewall. Note that the screw modified in the previous step will be located near the opening for the throttle servo. Montieren Sie den Motor an dem Motorspant. Achten Sie darauf dass die gekürzte Schraube in der Nähe der Öffnung für das Gasservo eingebaut wird. Use a pin vise and 1/16-inch (1.5mm) drill bit to enlarge the holes for the throttle servo mounting screws. Thread a servo mounting screw into each of the holes to cut threads in the surrounding wood. Remove the screw, then apply a small amount of thin CA to harden the threads. Secure the throttle servo in the fuselage. With the radio system on, move the stick to low throttle. Fit the large servo arm (not included) on the servo so it almost touches the exhaust port. Use side cutters to remove the arm indicated. Vergrößern Sie mit einem 1,5mm Bohrer die Befestigungsslöcherfür das Gasservo. Drehen Sie eine Servoschraube in jedes Loch, schrauben die Schraube wieder heraus und geben etwas dünnflüssigen Sekundenkleber in die Löcher um die Gewinde zu härten.Bringen Sie mit eingeschalteten Sender den Steuerhebel auf Leerlauf. Passen Sie den Servoarm (nicht im Lieferumfang) so an, dass er fast den Krümmeranschluss berührt. Schneiden Sie mit einem Seitenschneider den Arm wie angezeigt zurecht. Install the optional spring starter and mount on the engine. Use the instructions included with these accessories for their installation. Montieren Sie den optionalen Federstarter und den Motor. Lesen Sie dazu bitte die dazugehörigen Anweisungen. 1/4-20 x 11/4 inch x1 Use a rotary tool and cut-off wheel to trim one of the mounting screws to the length shown so it does not interfere with the installation of the throttle servo. Kürzen Sie mit einer Trennscheibe eine Schraube auf die abgebildete Länge, so dass sie den Einbau des Gasservos nicht behindert. 43 13 14 15 17 Enlarge the hole in the servo arm using a pin vise and 5/64inch (2mm) drill bit. Install the connector in the arm. Route the vent line from the fuel tank to the bottom of the fuselage. A fuel dot was mounted in the scale exhaust for the vent line to prevent it from interfering with the operation of the engine. Vergrößern Sie das Loch im Servoarm mit einem 2mm Handbohrer. Schrauben Sie dann den Gestängeanschluß in den Servoarm. Führen Sie die Tankentlüftungsleitung an die Rumpfunterseite. In dem Scaleauspuff ist ein Anschlussnippel eingebaut damit die Entlüftungsleitung den Motorbetrieb nicht behindert. Trim a mount for the engine kill switch using a spare engine mounting template. Secure the mount by making a slot in the side of the fuselage. Make sure the switch is accessible when the cowling is installed, but will not interfere with the installation of the cowl. x1 16 Attach the servo arm to the servo. Use the 2mm pushrod to make a linkage between the servo and carburetor. Check the operation of the carburetor using the radio system. Adjust the throw at the transmitter if necessary. Schrauben Sie den Servoarm auf das Servo. Verwenden Sie das 2mm Gestänge um den Gashebel mit dem Servo zu verbinden. Stellen Sie den Ausschlag am Sender wie benötigt ein. Connect the line from the clunk to the carburetor. Use a fuel filter near the carburetor to prevent debris in the fuel from entering the engine. Also use a fuel dot mounted in the scale exhaust to access the fuel line when the cowl is installed. Secure all connections using tie wraps to prevent them from disconnecting accidentally in flight. Schließen Sie die Kraftstofflleitung mit Pendel an den Vergaser an. Schließen Sie einen Kraftstofffilter in der Nähe des Vergase an um Verschmutzungen zu vermeiden. Verwenden Sie ebenfalls einen Anschlussnippel in dem Scaleauspuff damit Sie die Leitung bei montierter Haube erreichen können. Sichern Sie alle Schläuche mit Kabelbindern damit sich diese im Flug nicht lösen können. 44 Stellen Sie einen Halter aus einer nicht benötigten Motorschablone für den Motor Killschalter her. Sichern Sie den Halter mit einem Schlitz in der Rumpfseite. Stellen Sie bitte sicher dass der Schalter bei montierter Motorhaube zu erreichen ist, aber diese nicht stört. 18A (Evolution 777) 18B ( Saito FG57) Cowling Installation•Montage der Motorhaube 1 3 Locate the cowling. Note that the top of the cowling is indented, while the bottom is completely round. Cut and trim the forward portion of the engine to fit over the engine drive washer. Use silicone adhesive to glue the engine components together. Nehmen Sie die Motorhaube zur Hand. Bitte beachten Sie dass die Oberseite eingekerbt ist während die Unterseite vollständig rund ist. 2 When installing the Evolution® 777, use the drill template and photo to properly install the motor. When installing the Saito FG57, use the drill template and photo to properly install the motor. Verwenden Sie zum Einbau des Evolution 777 die Bohrschablone und als Referenz das Photo. Verwenden Sie zum Einbau des Saito FG 57 die Bohrschablone und als Referenz das Photo. Schneiden Sie die Öffnung für den Propellermitnehmer passend. Kleben Sie die Attrappenkomponenten mit Silikonklebstoff. ÎÎ We recommend painting the scale engine at this time. Use paints that are compatible to the material used for the engine, and that will withstand the fuel used for your particular engine. ÎÎ Wir empfehlen die Teile der Motorattrappe jetzt auch zu lackieren. Verwenden Sie dazu bitte geeignete Kraftstoff- feste Farben. Fit the cowling to the engine. Carefully trim the cowling to clear the muffler, spark plug or any other items that require access from outside the cowling. Passen Sie die Motorhaube an den Motor an. Schneiden Sie die Öffnungen für den Krümmer, Zündkerze oder andere Teile die Zugriff von aussen benötigen. 45 4 5 7 Cockpit Interior Installation• Einbau des Cockpitinterieurs 1 #4 Glue the scale engine inside the cowling using silicone adhesive. Kleben Sie die Motorattrappe mit Silikonklebstoff in die Motorhaube. ÎÎ The scale engine is not required when using the engine shown in this manual. Some engines may require the use of the scale engine as a baffle to reduce the amount of air entering the cowling for cooling. 4-40 x 3/4-inch x4 x4 Apply a small amount of canopy glue on the cowl mounting screws. This will keep the screws from vibrating loose, yet allow their removal from the cowling to service the engine. Geben Sie etwas Kabinenhaubenkleber auf die Motorhaubenschrauben. Dieses hindert die Schrauben daran sich zu lösen, erlaubt es aber noch die Haube für Wartungszwecke abzunehmen. Secure the propeller to the engine using the recommended spinner adapter. Use a box wrench to tighten the propeller bolt. Schrauben Sie den Propeller mit dem empfohlenen Adapter an. Ziehen Sie die Mutter mit einem Ringschlüssel fest. 8 Kleben Sie die Cockpitwand mit mittelflüssigem Sekundenkleber ein. Bitte stellen Sie sicher dass die Rückwand plan am Holz anliegt bevor der Kleber trocknet. 6 ÎÎ Verwenden Sie einen der beiden vorher genannten Motoren ist die Motorattrappe natürlich nicht nötig. Andere Motoren können jedoch den Einbau als Luftleitblech notwendig machen. 2 ÎÎ The scale engine will require trimming to fit the various components of your engine, such as the muffler and carburetor. It is easier to trim the scale engine before gluing it in the cowling. ÎÎ Die Motorattrappe muss an die verschiedenen Komponenten wie Krümmer oder Vergaser angepasst werden. Es ist einfacher dieses vor dem Einkleben zu machen. Use a small amount of medium CA to glue the cockpit back into the fuselage. Make sure the back is flat against the wood before the glue cures. Secure the spinner in position on the engine. Schrauben Sie den Spinner fest. Position the cowl, then secure the cowl to the fuselage using the screws prepared in the previous step. Positionieren Sie die Motorhaube und schrauben diese dann mit den vorbereiteten Schrauben fest. Fit the cockpit floor into the fuselage. Use a small amount of silicone adhesive where the floor contacts the fuselage to secure its position inside the fuselage. Passen Sie den Cockpitboden ein und kleben ihn an den Kontaktstellen mit etwas Silikonklebstoff im Rumpf ein. 46 3 4 5 6 M3 x1 Fit the instrument panel into the cockpit. Use hobby scissors to trim the panel as necessary. Glue the instrument panel in position once fit. Use a pin vise and 1/8-inch (3mm) drill bit to drill a hole in the cockpit floor for the control stick. Fit the control stick into position, then use the nut to secure the stick from underneath the cockpit floor using canopy glue. Passen Sie das Instrumentenpanel in das Cockpit ein. Nutzen Sie dazu eine Hobbyschere und kleben es dann fest. Use hobby scissors to trim the instrument panel. Trim the instrument panel decal and apply it to the instrument panel. Schneiden Sie mit einer Schere das Instrumentenbrett zurecht. Schneiden Sie die Instrumentenaufkleber aus und kleben diese auf das Instrumentenbrett. ÎÎ An instrument panel decal and a plastic instrument panel are included. Either one can be used. For added scale detail, the center holes of each instrument in the plastic instrument panel can be sanded out using a rotary cone sanding drum. The decal can then be placed on the fuselage first and the plastic instrument panel placed over the decal, giving a more three-dimensional effect. ÎÎ Im Baukasten ist eine Kunststoffinstrumentenpanel und ein Instrumentendekorbogen enthalten. Beide können genutzt werden. Schneiden Sie für einen besseren Scale Eindruck die Instrumente auf dem Kunstoffpaneel mit einem Drehfräser aus und kleben den Dekorbogen dahinter. Bohren Sie mit einem 3mm Handbohrer ein Loch für den Steuerknüppel in den Cockpitboden. Setzen Sie den Knüppel in Position und sichern ihn dann von der Unterseite des Cockpitbodens mit der Mutter und etwas Kabinenhaubenkleber. Fit the sides of the cockpit so they fit into position. Once fit, use silicone adhesive to glue the sides into position. Make sure the sides do not block the channels on the sides of the cockpit for the sliding canopy. Some trimming may be needed. 7 Passen Sie die Cockpitseiten an und kleben diese mit Silikonkleber ein. Bitte stellen Sie sicher, dass die Führungsschienen für die Cockpithaube nicht blockiert sind. Use silicone adhesive to glue the seat and headrest into the cockpit. Allow the adhesive to fully cure before proceeding. Kleben Sie mit Silkikonkleber den Sitz und die Kopfstütze in das Cockpit. Lassen Sie den Kleber vollständig aushärten bevor Sie weitermachen. 47 ÎÎ Additional detail can be added to the cockpit using a variety of items including, but not limited to paint,chalk, pins, etc. Use the following images to help in detailing the cockpit. ÎÎ Eine höhere Detaillierung kann auf verschiedenen Wegen erreicht werden. Zusätzliche Farbe oder etwas Kreide als Alterung oder kleine Knöpfe im Cockpit sind nur einige der vielen Möglichkeiten. Nutzen Sie die Bilder unten als Hilfestellung. Sliding Canopy Installation•Einbau der Cockpitöffnung ÎÎ The model comes with a sliding canopy. This has been tested with all of the suggested motors in this manual. The fit and installation of the front and back sections of the canopy are crucial to its correct operation. If a sliding canopy is not wanted, a solid canopy is available for purchase. 4 2 ÎÎ Das Modell ist mit einer zu öffnenden Cockpithaube ausgestattet. Diese wurde mit allen empfohlenden Motoren getestet. Das Anpassen der vorderen und hinteren Teile der Kabinenhaube ist für den einwandfreien Betrieb sehr wichtig. Sollten Sie die bewegliche Kabinenhaube nicht einbauen wollen ist eine feste Haube erhältlich. 1 Use sandpaper to lightly sand the edge of the forward canopy where it contacts the fuselage. Use isopropyl alcohol and a paper towel to remove any debris and oils from the canopy after sanding. Schleifen Sie mit Schleifpapier die vordere Kante der Kabinenhaube wo Sie Kontakt mit dem Rumpf hat. Entfernen Sie nach dem Schleifen mit Reinigungsalkohol und einem Papiertuch jegliche Verschmutzung. Check the fit of the forward and rear canopy pieces. They must fit together tightly. If not, lightly sand the face of the frame to compensate for any gaps between the forward and rear canopies. Fügen Sie die vorderen und hinteren Kabinenhaubenteile zusammen. Sollten diese nicht exakt passen, schleifen Sie den Rahmen an um eventuelle Lücken zwischen dem vorderen und hinteren Kabinehaubenteil zu schließen. 5 3 Use sandpaper to roughen the rear canopy where the canopy slides will be glued later in this section of the manual. Use isopropyl alcohol and a paper towel to remove any debris and oils from the canopy after sanding. Schleifen Sie den hinteren Teil der Kabinenhaube an wo später die Schienen verklebt werden. Entfernen Sie nach dem Schleifen mit Reinigungsalkohol und einem Papiertuch jegliche Verschmutzung. Applying felt to the rear edge of the canopy where it will contact the fuselage will help to prevent scratches in the covering from sliding the canopy. Adhesive-backed felt can be purchased at your local craft store. Kleben Sie Filz auf den hinteren Teil der Kabinenhaube damit diese nicht den Rumpf zerkratzt. Selbstklebendes Filz erhalten Sie bei ihrem Modellbauhändler. 48 Trim the covering from the sides of the fuselage to expose the slide rail for the canopy slides. Schneiden Sie die Bespannung auf den Rumpfseiten für die Kabinenhaubenschienen frei. 6 8 Apply one layer of tape toward the front of the rails. The tape should be just above and below the rails’ openings. Mark the aft location of the larger opening for the sliders. Kleben Sie wie abgebildet Klebeband an der Vorderseite der Schienen. Das Klebeband sollte über und unter der Öffnung für die Schienen sein. Markieren Sie die größere Öffnung für die Schieber. 7 Install the rear canopy on the front rails. Fit the rear canopy so that it is all the way forward in the front tracks. Setzen Sie die hintere Kabinenhaube auf die vorderen Schienen. Passen Sie die hintere Kabinenhaube so an, dass sie ganz vorne ist. 9 11 Fit the front canopy on the fuselage. Make sure that it fits flush to the rear and the center pins and magnets are engaged. Check that the rear canopy is still forward. This should be a very relaxed fit. Mark the location of the front canopy on the top of the fuselage. Now is a good time to paint the top of the fuselage under the front canopy if more detail is wanted. Use 5 min epoxy to glue the sliders to the rear canopy. Check to make sure the sliders are still aligned to the marks. Slightly fold the rear of the canopy edges up and apply a small amount of epoxy. Be very careful not to use too much glue. Check the fit again while doing this. Setzen Sie die vordere Kabinenhaube auf den Rumpf. Bitte stellen Sie sicher, dass die Pins und Magnete sitzen. Prüfen Sie dabei ob das hintere Kabinenhaubenteil noch ganz vorne sitzt. Die Passung sollte dabei locker sein. Markieren Sie die Position des vorderen Teils auf der Oberseite des Rumpfes. Sie können jetzt auch für mehr Scale Effekt die Oberseite des Rumpfes unter der Kabinenhaube lackieren. 12 10 Add half width layers until the slider will fit snuggly in the slot. The tape should not interfere with the installation and removal of the slider. Align the slider so that the front of the key is aligned with the mark on the tape. Kleben Sie halbe Breiten von Klebeband auf bis der Schieber stramm in den Schlitz passt. Das Klebeband sollte die Funktion nicht beeinflussen und der Schieber sich problemlos entfernen lassen. Richten Sie den Schieber so aus, dass die Vorderseite des Einsatzes auf einer Höhe mit der Markierung auf dem Klebeband ist. Kleben Sie die Schieber mit 5 Minuten Epoxy an das hintere Kabinenhaubenteil. Prüfen Sie bitte ob die Schieber noch auf einer Linie mit den Markierungen sind. Biegen Sie die hinteren Ecken der Kabinenhaube hoch und geben etwas 5 Minuten Epoxy auf die Schieber. Verwenden Sie nicht zuviel Klebstoff. Überprüfen Sie beim Kleben die Passung. Glue the front canopy to the fuselage using canopy glue. Make sure the canopy still retains a relaxed fit and that the rear section is forward. Allow the glue to fully cure before proceeding. Kleben Sie den vorderen Kabinenhaubenteil mit Kabinenhaubenkleber an den Rumpf. Bitte achten Sie darauf, dass die Haube noch gut sitzt und die hintere Haube noch ganz vorne ist. After all glue is dry. Slide the rear sliders forward a small amount, bowing the sides of the canopy a small amount. This will allow the rear sliders to come back out of the tracks so the forward sliders can slide back and be removed. Remove the tape and reinstall the canopy. Schieben Sie die hinteren Schieber etwas nach vorne und biegen dabei etwas die Seiten der Kabinenhaube. Dieses ermöglicht dass sich die hinteren Schieber aus den Schienen lösen, so dass die vorderen Schieber nach hinten kommen und entfernt werden können. Entfernen Sie das Klebeband und montieren dann die Kabinenhaube. 49 Optional Solid Canopy Installation• Optionaler Einbau der fixen Kabinenhaube Scale Accessories 2 4 Thread the pitot tube into the blind nut located in the left wing tip panel. Use canopy glue on the threads to keep it from vibrating loose during flight. Fit the guns to the wing. Trim the wing as necessary to fit the guns flush with the leading edge of the wing. Use canopy glue to glue the guns in position. Use low-tack tape to hold the guns in position until the glue fully cures. 1 1 Drehen Sie das Staurohr in die Blindmutter in der linken Tragfläche. Geben Sie Kabinenhaubenkleber auf das Gewinde damit sich das Staurohr im Flug nicht lösen kann. As an option, a one-piece canopy is available for those that do not wish to install the sliding canopy. Use medium grit sandpaper to roughen the inside edge of the canopy where it contacts the fuselage. Use canopy glue to secure the canopy to the fuselage. Use low-tack tape to hold the canopy in position until the glue fully cures. Als Option ist eine einteilige feste Kabinenhaube erhältlich für alle die keine Schiebehaube einbauen möchten. Rauen Sie mit mittleren Schleifpapier die Kontaktstellen zum Rumpf an und kleben die Haube mit Kabinenhaubenkleber fest. Fixieren Sie die Haube mit Klebeband mit geringer Klebekraft bis der Kleber vollständig getrocknet ist. 3 Passen Sie die Öffnungen an der Tragfläche an. Diese müssen plan anliegen. Kleben Sie diese mit Kabinenhaubenkleber ein und sichern mit Klebeband mit geringer Klebkraft bis der Kleber vollständig ausgehärtet ist. 5 Remove the covering from the blind nut in the top of the fuselage. Thread the antenna mast into the blind nut. Use canopy glue on the threads to keep it from vibrating loose during flight. Entfernen Sie die Bespannung über der Blindmutter im Rumpf. Drehen Sie die Antenne in die Mutter. Geben Sie Kabinenhaubenkleber auf das Gewinde damit sich die Antenne im Flug nicht lösen kann. Use hobby scissors to trim the three guns from the molded gun set. Schneiden Sie mit einer Schere die drei Geschützöffnungen zurecht. 50 Attach the stall strip to the wing panel using canopy glue. The stall strip is located 40mm from the outboard gun on the right wing tip panel. Kleben Sie die Stallwarnung mit Kabinenhaubenkleber an die Tragfläche. Die Stallwarnung wird 40mm neben dem Geschütz nach aussen auf die Vorderkante der Tragfläche geklebt. 6 Optional Lighting•Optionale Beleuchtung 1 5 3 Secure the lighting controller inside the fuselage. Connect the controller to an open port on the receiver to power and actuate the lights using the radio system. Connect an 18-inch (457mm) lighting extension to two of the leads from the controller to connect to the extension that will be located in the wing center section. Check the fit of the clear tip light lens as it will only fit to match the airfoil of the wing. Use canopy glue to glue the lens in position. Use low-tack tape to hold the lens in position until the glue fully cures. Überprüfen Sie die Passung der Beleuchtung da diese in das Profil passen müssen. Kleben Sie diese mit Kabinenhaubenkleber ein und sichern sie mit Klebeband mit geringer Klebkraft bis der Kleber vollständig ausgehärtet ist. Befestigen Sie den Beleuchtungscontroller im Rumpf und schließen ihn an einen freien Steckplatz im Empfänger an. Schließen Sie je eine 457mm lange Verlängerung an zwei Controllerausgänge an, denen von der Tragflächenmitte weitere Verlängerungen folgen. 2 Install two 18-inch (457mm) lighting extensions in the wing center section. Route the lighting extensions along the same route as the extensions for the aileron servos. Make sure to orient the extensions so they will connect to the extensions from the fuselage and wing tip panels. Schließen Sie zwei 457mm lange Verlängerungen in der Tragflächenmitte an. Führen Sie die Verlängerungen auf gleichem Weg wie die der Querruderservos. Achten Sie bitte darauf die Verlängerungen so zu führen, dass sie an die Anschlüsse im Rumpf und an den Flächenspitzen passen. Secure a 24-inch (609mm) lighting extension to a red LED light. The extension is then passed through the right wing panel from the wing tip. Use a very small amount of silicone adhesive to secure the LED in the right wing tip. The lens cover can be installed once the LED is in position. Schließen Sie eine rote LED an eine 609mm lange Verlängerung an. Die Verlängerung wird durch die rechte Tragfläche zur Flächenspitze geführt. Kleben Sie die LED mit etwas Silikonkleber ein. Die Abdeckung wird danach aufgeklebt. Use a pin vise and 5/32-inch (4mm) drill bit to drill the hole for the clear tail light. Insert the light from inside the tail cone. Use a very small amount of silicone adhesive to glue the tail light to the tail cone. Route a 36-inch (914mm) lighting extension though the fuselage and connect it to the lighting controller. Bohren Sie mit einem 4mm Bohrer das Loch für das klare Hecklicht. Setzen Sie die LED von innen ein und kleben sie mit etwas Silikonkleber fest. Führen Sie eine 914mm lange Verlängerung durch den Rumpf und schließen diese an den Controller an. 4 Secure a 24-inch (609mm) lighting extension to a green LED light. The extension is then passed through the left wing panel from the wing tip. Use a very small amount of silicone adhesive to secure the LED in the left wing tip. The lens cover can be installed once the LED in in position. Schließen Sie eine grüne LED an eine 609mm lange Verlängerung an. Die Verlängerung wird durch die rechte Tragfläche zur Flächenspitze geführt. Kleben Sie die LED mit etwas Silikonkleber ein. Die Abdeckung wird danach aufgeklebt. 51 Ordinance Installation•Anbau der Aussenlasten 1 4 6 3 Use a ruler to connect the lines at the front and rear of the center section. This will be used as a reference when placing the ordinance mounts. Place low-tack tape along the centerline of the center section. Kleben Sie wie abgebildet Klebeband mit geringer Klebekraft auf den Mittelbereich des Tragflächenmittelstückes. Verbinden Sie mit einem Lineal die Markierungen von vorne und hinten. Die Linie wird als Referenz für die Montage der Aussenlasten benötigt. 2 5 LL RR Connect the marks to create a reference line for mounting the ordinance pylon. This line will be parallel to the centerline on the bottom of the wing. Verbinden Sie die beiden Punkte als Referenz für den Aussenlasthalter. Diese Linie muss parallel zur Mittellinie laufen. 7 Place a small piece of low-tack tape at the rear of the center section. Use a ruler to mark the center line at the rear. With a square, transfer the centerline to the tape placed in Step 1. Kleben Sie ein kleines Sück Klebeband auf die hintere Seite des Mittelstücks und markieren wie im vorherigen Schritt die Mitte. Rest a ruler on the wing dowels. Measure and use a square to mark the centerline on the tape at the front of the wing center section. Legen Sie ein Lineal an und markieren auf dem Klebeband die Mittellinie. 52 LL RR Place low-tack tape on the bottom of the center section as shown. Using a ruler, place a mark at the front and rear 6 11/16 inches (170mm) from the centerline. Kleben Sie weitere Streifen Klebeband wie abgebildet. Markieren Sie mit den Lineal zwei Punkte vorne und hinten 170mm von der angezeichneten Mittellinie entfernt. LL RR Place a ruler so it is resting flat on the front of the center section. Slide a second ruler against the first ruler so the setback of the pylon can be marked. Legen Sie ein Lineal flach an der Vorderseite an. Schieben Sie wie abgebildet ein zweites Lineal gegen das erste, so dass die Montageposition des Nutzlasthalters markiert werden kann. 8 10 11 12 LL RR LL RR LL RR LL RR While holding the ruler, mark the location for positioning the pylon. This will be 4 7/8 inches (123mm) back from the front of the wing using the method of measurement shown in the previous step. Halten Sie das Lineal fest und markieren die Position des Halters. Diese ist 123mm von der Vorderseite nach hinten, nach der in dieser Anleitung beschriebenen Messmethode. Move the pylon, then drill the mounting holes using a drill and 5/64-inch (2mm) drill bit. The hole for the servo lead is drilled using an 5/16-inch (8mm) drill bit. Legen Sie den Halter zur Seite und bohren die Montagelöcher mit einem 2mm Bohrer. Das Loch für das Servokabel wird mit einem 8mm Bohrer gebohrt. 9 ÎÎ Use caution when drilling the holes, as drilling through the top of the wing is a possibility. We recommend using a variable speed drill and drilling slowly to prevent any mishaps. Insert an 18-inch (457mm) and 24-inch (609mm) servo extension into the center hole. Guide the 18-inch (457mm) lead to the center of the wing when it can be connected to the lead from the receiver. Guide the 24-inch (609mm) extension between the right and left releases. This will connect them so they are synchronized. Führen Sie eine 457mm und 609mm lange Verlängerung in das mittlere Loch. Führen Sie die 457mm lange Verlängerung zur Tagflächenmitte wo sie an den Empfänger angeschlossen werden kann. Führen Sie die 609 mm lange Verlängerung zwischen die linken linken und rechten Träger. Diese werden damit verbunden, so dass sie synchronisiert sind. M3 x 15 x4 Remove the tape from the wing. Thread the mounting screw into the front and rear holes to cut threads in the surrounding wood. Apply a small amount of thin CA to harden the threads. Secure the pylon to the wing using the screws listed. Entfernen Sie das Klebeband von der Tragfläche. Drehen Sie die Schrauben in die vorderen und hinteren Halter um ein Gewinde zu schneiden. Härten Sie das Gewinde mit etwas Sekundenkleber und schrauben dann den Träger mit den aufgeführten Schrauben fest. 13 ÎÎ Bitte sein Sie bei dem Bohren der Löcher sehr vorsichtig, da die Gefahr besteht durch die Tragfläche zu bohren. Wir empfehlen einen regelbaren Bohrer zu verwenden und langsam zu bohren. LL RR Position the pylon on the bottom of the wing using the marks made as reference. Align the front of the pylon with the mark made 4 7/8 inches (123mm) back from the front of the wing. Mark the locations for the rear mounting screw and servo lead on the tape. Setzen Sie den Halter auf die Tragfläche. Richten Sie die Vorderseite an der 123mm Markierung aus. Markieren Sie die Position der hinteren Montageschrauben und Servokabelführung. LL RR Insert the pre-bent wire included with the pylon into the release mechanism. Note the direction of the wire. Setzen Sie den vorgebogenen Draht aus dem Lieferumfang des Halters in die Auslösemechanik ein. Bitte beachten Sie dabei die abgebildete Richtung. 53 14 15 17 LL RR LL RR Draw a centerline on the hardwood mount located in the ordinance. The mount location can be seen when looking carefully at the ordinance. Zeichnen Sie eine Mittellinie auf dem Hartholzteil auf der Last. Die Position kann mit genauem Blick auf die Last erkannt werden. 18 Attach the release mount to the ordinance using either the screws provided with the release kit, or using epoxy. Montieren Sie den Halter an der Last. Sie könne ihn kleben oder schrauben. 16 Optional Drop Tanks•Optionale Abwurftanks LL RR Insert the release mechanism in the pylon. Secure the release using the hardware provided with the mechanism. Make sure to prepare the holes by threading the screw in the holes and hardening them with CA. Setzen Sie die Auslösemechanik in den Träger ein. Sichern Sie die Mechanik mit den mitgelieferten Schrauben. Bitte bereiten Sie die Löcher dafür durch eindrehen einer Schraube und härten der Gewinde mit Sekundenkleber vor. 54 LL RR Center the release mount forward and aft of the plywood plate. Use a rotary tool and cut-off wheel to cut a slot in the ordinance so the release mount can be attached. Drill two 5/64-inch (2mm) holes and prepare them using thin CA to secure the mount. Zentrieren Sie die Position auf der Hartholzplatte. Schneiden Sie mit einer Trennscheibe einen Schlitz in die Last, dass der Halter für den Auslösemechanismus montiert werden kann. Bohren Sie zwei 2mm Löcher und bereiten diese mit dünnflüssigen Sekundenkleber vor. LL RR The ordinance can now be mounted to the release mechanism by pulling the wire rearward and fitting the mount into the release. Die Last kann in den Auslösemechanismus eingesetzt werden in dem der Draht nach hinten gezogen wird. Decal Installation• Anbringen des Dekorbogen Apply the decals to your model using the image located on the following page of the manual and the box art from your model. Use a spray bottle and a drop of dish washing liquid or glass cleaner sprayed in the location of the decal to allow repositioning of the decal. Use a paper towel as a squeegee to remove excess water from under the decal. Allow the model to rest overnight so the remaining water can evaporate. Nutzen Sie zum Anbringen des Dekorbogens das folgende Bild oder die Abbildung auf dem Karton. Verwenden Sie zum Aufkleben eine Sprühflasche Wasser mit einem Tropfen Geschirrspülmittel oder Glasreiniger, damit Sie die Aufkleber noch verschieben können. Entfernen Sie überschüssiges Wasser mit einem Papiertuch und lassen die Aufkleber über Nacht trocknen. 55 Center of Gravity Der Schwerpunkt An important part of preparing the aircraft for flight is properly balancing the model. Ein sehr wichtiger Teil in der Flugvorbereitung ist es das Flugzeug richtig auszubalancieren. 1. Attach the wing panels to the fuselage. Make sure to connect the leads from the aileron to the appropriate leads from the receiver. Make sure the leads are not exposed outside the fuselage before tightening the wing bolts. Your model should be flight-ready before balancing. 1. Montieren Sie Tragflächen am Rumpf. Stellen Sie sicher, dass die Querruderservoanschlüsse in die richtigen Buchsen am Empfänger gesteckt sind. Achten Sie darauf, dass keine Kabel zwischen Rumpf und Fläche herausschauen. Das Modell sollte vor dem Balancieren flugfertig ausgerüstet sein. 2. The recommended Center of Gravity (CG) location for your model is 4.7–5.3 inches (120–135mm) back from the leading edge of the wing at the wing root as shown. Mark the location of the CG on the top of the wing. 2. Der empfohlene Schwerpunkt für Ihr Modell befindet sich in 120–135mm Entfernung zur Flügelvorderkante, wie abgebildet. Markieren Sie den Schwerpunkt an der Oberseite des Flügels. 3. When balancing your model, make sure it is assembled and ready for flight. Support the plane inverted at the marks made on the wing with your fingers or a commercially available balancing stand. This is the correct balance point for your model. 3. Das Modell sollte vor dem Ausbalancieren flugfertig ausgerüstet sein. Stellen Sie das ungedrehte Flugzeug mit den Markierungen auf dem Flügel auf Ihre Fingerspitzen oder einen im Handel erhältlichen Balancierständer. Dies ist der richtige Balancepunkt für Ihr Modell. ÎÎ When balancing your model with retracts, the Center of Gravity will shift slightly between the UP and DOWN positions. Make sure to balance your model with the retracts in the DOWN position. Nose weight This model will require additional nose weight. Weight can be added to the firewall using the supplied weight boxes or it can be added to the nose ring of the cowling. Lead shot and epoxy work well for this task. The model as shown in the manual using a Zenoah™ G-62 engine requires 24.0 oz (680 grams) of ballasts for balance. If adding weight to the cowling, it is very important that the inside of the cowling be prepped well before gluing in the weight. Sand the inside of the cowling with 80-grit sandpaper. Make sure that the surface that will be covered in glue is sanded very well. Clean the entire area using isopropyl alcohol and paper towels. Glue the lead shot into the cowling using 30-min epoxy. If using the weight boxes, the lead shot can be glued into them and to the motor box in the same manner. The balance of your propeller is very important. If using the weight in the cowling the propeller must be balanced to reduce vibrations. If the power system is not balanced it could cause the cowling to come loose or the lead shot to break loose in the cowling. CAUTION: You must adjust your aircraft’s center Gewicht in der Nase Diese Modell erfordert zusätzliches Gewicht in der Nase. Das Gewicht kann im Motorspant in den Ballastfächern untergebracht werden oder als Ring vorne in der Motorhaube. Dafür sind Bleikugeln gemischt mit Epoxy gut geeignet. Das Modell in dieser Anleitung ist mit einem Zenoah G-62 ausgestattet und erfordert 680 g Blei für den richtigen Schwerpunkt. Sollten Sie Blei in die Motorhaube geben, ist sehr wichtig dass diese entsprechend vorbereitet wird. Schleifen Sie die Motorhaube von innen mit 80 Schleifpapier gut an. Stellen Sie bitte sicher dass die gesamte Oberfläche die mit dem Kleber Kontakt hat sauber angeschliffen ist. Reinigen Sie die Oberfläche mit Reinigungsalkohol und Papiertüchern. Kleben Sie den Bleiballast dann mit 30 Minuten Epoxy ein. Sollten Sie die Ballastfächer nutzen wollen kleben Sie das Blei auf gleiche Weise ein. Sehr wichtig ist auch dass der Propeller gut gewuchtet ist. Sollten Sie das Gewicht in der Motorhaube untergebracht haben, muss der Propeller sauber gewuchtet sein um Vibrationen zu reduzieren. Bei einem ungewuchteten Antrieb könnte sich die Motorhaube oder einzelne Bleichgewichte lösen. of gravity and balance your model properly before attempting flights. ACHTUNG: Der Schwerpunkt muß vor dem Erstflug korrekt ausbalanciert sein. Balancing Stand 56 ÎÎ Bei dem Auswiegen des Modells bewegt sich der Schwerpunkt etwas zwischen der -Fahrwerk eingefahren- und -Fahrwerk ausgefahren- Position. Bitte achten Sie darauf den Schwerpunkt mit ausgefahrenem Fahrwerk einzustellen. Control Throws Ruderausschläge 1. Turn on the transmitter and receiver of your model. Check the movement of the rudder using the transmitter. When the stick is moved to the right, the rudder should also move right. Reverse the direction of the servo at the transmitter if necessary. 1. Schalten Sie den Sender und Empfänger ihres Modells ein. Prüfen Sie die Seitenruderaussschläge mit dem Sender. Bewegen Sie den Seitenruderstick nach rechts, sollte sich das Ruder auch nach rechts bewegen. Reversieren Sie falls notwendig die Funktion am Sender. 2. Check the movement of the elevator with the radio system. Moving the elevator stick toward the bottom of the transmitter will make the airplane elevator move up. 3. Check the movement of the ailerons with the radio system. Moving the aileron stick to the right will make the right aileron move up and the left aileron move down. 4. Use a ruler to adjust the throw of the elevator, ailerons and rudder. AileronAileronAileron (High Rate, 10% Exponential): (Mid Rate, 5% Exponential): (Low Rate, 0% Exponential): Up: Down: 7/8 inch (22mm) 7/8 inch (22mm) Up: Down: 5/8 inch (16mm) 5/8 inch (16mm) Up: Down: 15/32 inch (12mm) 15/32 inch (12mm) ElevatorElevatorElevator (High Rate, 15% Exponential): (Mid Rate, 6% Exponential): (Low Rate, 0% Exponential): Up:13/16 inch (30mm) Down: 7/8 inch (22mm) Up: Down: 1 inch (25mm) 11/16 inch (18mm) Up: Down: 21/32 inch (17mm) 1/2 inch (12mm) 2. Prüfen Sie die Höhenruderfunktion am Sender. Ziehen Sie den Höhenruderknüppel nach hinten, sollte sich das Ruder nach oben bewegen. 3. Prüfen Sie die Querrruderfunktion mit dem Sender. Bewegen Sie den Querruderstick nach rechts, bewegt sich das rechte Querruder nach oben und das linke Querrruder nach unten. 4. Messen Sie mit einem Lineal den Ausschlag von Höhen- Quer- und Seitenruder. Querruder:Querruder:Querruder: (Große Ruderausschläge) (mid rate) (Kleine Ruderausschläge) (10% Mittlere Ausschläge) (5% Mittlere Ausschläge) (0% Mittlere Ausschläge) Rauf: 22mmRauf: 16mmRauf: 12mm Runter: 22mmRunter: 16mmRunter: 12mm Höhenruder:Höhenruder:Höhenruder: (Große Ruderausschläge) (mid rate) (Kleine Ruderausschläge) (15% Mittlere Ausschläge) (6% Mittlere Ausschläge) (0% Mittlere Ausschläge) RudderRudder Rudder (High Rate, 15% Exponential): (Mid Rate, 8% Exponential): (Low Rate, 0% Exponential): Rauf: 30mmRauf: 25mmRauf: 17mm Runter: 22mmRunter: 18mmRunter: 12mm Right:25/32 inch (55mm) Left:25/32 inch (55mm) Seitenruder: (Große Ruderausschläge) (15% Mittlere Ausschläge) Right: Left: 19/16 inch (40mm) 19/16 inch (40mm) Right: 13/16 inch (30mm) Left: 13/16 inch (30mm) Flaps: Mid13/16 inch (30mm) Landing23/4 inch (70mm) Elevator to Flap Compensation Mid-Flap: Landing: 1/32 inch (.5 mm) Down 3/64 inch (1mm) Down These are general guidelines measured from our own flight tests. You can experiment with higher rates to match your preferred style of flying. Travel Adjust and Sub-Trims are not listed and should be adjusted according to each individual model and preference. Always install the control horns 90 degrees to the servo center line. Use sub-trim as a last resort to center the servos. We highly recommend re-binding the radio system once all of the control throws are set. This will keep the servos from moving to their endpoints until the transmitter and receiver connect. Seitenruder: (mid rate) (8% Mittlere Ausschläge) Seitenruder: (Kleine Ruderausschläge) (0% Mittlere Ausschläge) Rechts: 55mmRechts: 40mmRechts: 30mm Links: 55mmLinks: 40mmLinks: 30mm Klappen: Mitte: Landung: 30mm 70mm Höhenruder / Klappen Kompensation Klappen Mitte: Landung: .5mm runter 1mm runter Die hier genannten Ruderausschläge sind generelle Richtwerte die wir in unseren Testflügen erflogen haben. Sie können mit größeren Ausschlägen experimentieren wenn diese mehr zu ihrem Flugstil passen. Travel Adjust und Sub-Trimm Werte sind hier nicht gelistet und sollten individuell nach Modell und Vorliebe eingestellt werden. Montieren Sie die Servohörner immer 90° zur Servomitte. Nutzen Sie die Subtrimmfunktion als letzte Möglichkeit die Servos zu zentrieren. Wir empfehlen dringend nach Einstellung aller Ruderausschläge das System neu zu binden. Das hält die Servos davon ab in die Endausschläge zu laufen, solange der Sender und Empfänger noch nicht verbunden sind. 57 Preflight Checklist Vorflugkontrolle Daily Flight Checks Täglicher Flug Check • C harge the transmitter, receiver and motor battery for your airplane. Use the recommended charger supplied with your radio system. Follow the instructions provided with the radio. Charge the radio system the night before each flying session. Charge the transmitter and receiver batteries using only included or manufacturerrecommended chargers. Follow all manufacturer’s instructions for your electronic components. • L aden Sie den Sender- ,Empfänger- und Zündakku für Ihr Flugzeug. Verwenden Sie für die RC Anlage bitte das empfohlene Ladegerät. Folgen Sie zum Laden des Senders den Anweisungen aus der Bedienungsanleitung. Laden Sie den Sender den Abend vor dem Flug. Nutzen Sie zum Laden von Sender- und Empfängerakku nur im Lieferumfang befindliche oder empfohlene Ladegeräte. Folgen Sie allen Herstelleranweisungen der elektrischen Komponenten. • C heck the battery voltage of the transmitter battery. Do not fly below the manufacturer’s recommended voltage. To do so can crash your aircraft. • Ü berprüfen Sie die Spannung des Senderakkus. Fliegen Sie nicht wenn die Spannung unterhalb der vom Hersteller empfohlenen Spannung liegt, da dieses zu einem Absturz führen könnte. • C heck the radio installation and make sure all control surfaces (aileron, elevator, rudder and throttle) move correctly (i.e., the correct direction and with the recommended throws). • C heck all the hardware (control horns, servo arms, and clevises) to make sure they are secure and in good condition. • P rior to each flying session (and especially with a new model), perform a range check of your radio system. See your radio manual for the recommended range and instructions for your particular radio system. • R un the motor. With the model securely anchored, repeat the range check procedure. The range should not be significantly affected. If it is, do not attempt to fly! Remove the radio equipment and have it inspected by the manufacturer. • P rüfen Sie den RC Einbau und stellen sicher dass alle Ruderfunktionen (Quer-, Höhen-, Seitenruder) und Gas sich in die richtige Richtung mit den empfohlenen Ausschlägen bewegen. • Ü berprüfen Sie alle Teile der Anlenkungen (Ruderhörner, Servohebel und Gabelköpfe) und stellen sicher dass diese gut befestigt und in einwandfreiem Zustand sind. • V or jeder Flugsession (und insbesondere mit einem neuem Modell) führen Sie einen Reichweitentest mit dem RC System durch. Sehen Sie für die Durchführung und Reichweite in der Bedienungsanleitung ihrer Fernsteuerung nach. • L assen Sie den Motor laufen. Wiederholen Sie mit laufenden Motor den Reichweitencheck. Die Reichweite sollte nicht signifikant beeinflußt werden. • Ist dieses der Fall fliegen Sie nicht. Bauen Sie die RC Komponenten aus und lassen diese vom Hersteller überprüfen. 58 When you check these batteries, ensure you have the polarities correct on your expanded scale voltmeter. • C heck all hardware (linkages, screws, nuts, and bolts) prior to each day’s flight. Ensure that binding does not occur and that all parts are properly secured. Achten Sie bei dem Test darauf, dass die Polarität auf dem Voltmeter richtig angezeigt wird. • Ensure all surfaces are moving in the proper manner. • Ü berprüfen Sie alle montierten Teile (Verbindungen, Schrauben, Muttern und Bolzen vor jedem Flug. Stellen Sie sicher, dass nichts blockiert und alle Teile vernünftig gesichert sind. • P erform a ground range check before each day’s flying session. • S tellen Sie sicher, dass sich alle Ruder in die richtige Richtung bewegen. • P rior to starting your aircraft, turn off your transmitter, then turn it back on. Do this each time you start your aircraft. If any critical switches are on without your knowledge, the transmitter alarm will sound a warning. • F ühren Sie einen Reichweitentest vor jeder Flugsession durch. • Check that all trim levers are in the proper location. • A ll servo pigtails and switch harness plugs should be secured in the receiver. Make sure the switch harness moves freely in both directions. • S chalten Sie dem Starten des Modells den Sender Aus und wieder Ein. Machen Sie das vor jedem Starten. Sollten sich kritische Schalter auf EIN Position ohne ihr Wissen befinden wird der Sender Alarm geben. • P rüfen Sie ob alle Trimmschieber in der richtigen Position sind. • A lle Servokabel und Schalter sollten im Empfänger gesichert sein. Stellen Sie sicher dass der Ein/Aus Schalter sich ungehindert in beide Richtungen bewegen kann. Limited Warranty What this Warranty Covers Limitation of Liability Inspection or Services Non-Warranty Service Horizon Hobby, Inc. (“Horizon”) warrants to the original purchaser that the product purchased (the “Product”) will be free from defects in materials and workmanship at the date of purchase. HORIZON SHALL NOT BE LIABLE FOR SPECIAL, INDIRECT, INCIDENTAL OR CONSEQUENTIAL DAMAGES, LOSS OF PROFITS OR PRODUCTION OR COMMERCIAL LOSS IN ANY WAY, REGARDLESS OF WHETHER SUCH CLAIM IS BASED IN CONTRACT, WARRANTY, TORT, NEGLIGENCE, STRICT LIABILITY OR ANY OTHER THEORY OF LIABILITY, EVEN IF HORIZON HAS BEEN ADVISED OF THE POSSIBILITY OF SUCH DAMAGES. Further, in no event shall the liability of Horizon exceed the individual price of the Product on which liability is asserted. As Horizon has no control over use, setup, final assembly, modification or misuse, no liability shall be assumed nor accepted for any resulting damage or injury. By the act of use, setup or assembly, the user accepts all resulting liability. If you as the purchaser or user are not prepared to accept the liability associated with the use of the Product, purchaser is advised to return the Product immediately in new and unused condition to the place of purchase. If this Product needs to be inspected or serviced and is compliant in the country you live and use the Product in, please use the Horizon Online Service Request submission process found on our website or call Horizon to obtain a Return Merchandise Authorization (RMA) number. Pack the Product securely using a shipping carton. Please note that original boxes may be included, but are not designed to withstand the rigors of shipping without additional protection. Ship via a carrier that provides tracking and insurance for lost or damaged parcels, as Horizon is not responsible for merchandise until it arrives and is accepted at our facility. An Online Service Request is available at http://www.horizonhobby.com/content/_service-center_ render-service-center. If you do not have internet access, please contact Horizon Product Support to obtain a RMA number along with instructions for submitting your product for service. When calling Horizon, you will be asked to provide your complete name, street address, email address and phone number where you can be reached during business hours. When sending product into Horizon, please include your RMA number, a list of the included items, and a brief summary of the problem. A copy of your original sales receipt must be included for warranty consideration. Be sure your name, address, and RMA number are clearly written on the outside of the shipping carton. Should your service not be covered by warranty, service will be completed and payment will be required without notification or estimate of the expense unless the expense exceeds 50% of the retail purchase cost. By submitting What is Not Covered This warranty is not transferable and does not cover (i) cosmetic damage, (ii) damage due to acts of God, accident, misuse, abuse, negligence, commercial use, or due to improper use, installation, operation or maintenance, (iii) modification of or to any part of the Product, (iv) attempted service by anyone other than a Horizon Hobby authorized service center, (v) Product not purchased from an authorized Horizon dealer, or (vi) Product not compliant with applicable technical regulations. OTHER THAN THE EXPRESS WARRANTY ABOVE, HORIZON MAKES NO OTHER WARRANTY OR REPRESENTATION, AND HEREBY DISCLAIMS ANY AND ALL IMPLIED WARRANTIES, INCLUDING, WITHOUT LIMITATION, THE IMPLIED WARRANTIES OF NON-INFRINGEMENT, MERCHANTABILITY AND FITNESS FOR A PARTICULAR PURPOSE. THE PURCHASER ACKNOWLEDGES THAT THEY ALONE HAVE DETERMINED THAT THE PRODUCT WILL SUITABLY MEET THE REQUIREMENTS OF THE PURCHASER’S INTENDED USE. Purchaser’s Remedy Horizon’s sole obligation and purchaser’s sole and exclusive remedy shall be that Horizon will, at its option, either (i) service, or (ii) replace, any Product determined by Horizon to be defective. Horizon reserves the right to inspect any and all Product(s) involved in a warranty claim. Service or replacement decisions are at the sole discretion of Horizon. Proof of purchase is required for all warranty claims. SERVICE OR REPLACEMENT AS PROVIDED UNDER THIS WARRANTY IS THE PURCHASER’S SOLE AND EXCLUSIVE REMEDY. Law These terms are governed by Illinois law (without regard to conflict of law principals). This warranty gives you specific legal rights, and you may also have other rights which vary from state to state. Horizon reserves the right to change or modify this warranty at any time without notice. WARRANTY SERVICES Questions, Assistance, and Services Your local hobby store and/or place of purchase cannot provide warranty support or service. Once assembly, setup or use of the Product has been started, you must contact your local distributor or Horizon directly. This will enable Horizon to better answer your questions and service you in the event that you may need any assistance. For questions or assistance, please visit our website at www.horizonhobby. com, submit a Product Support Inquiry, or call the toll free telephone number referenced in the Warranty and Service Contact Information section to speak with a Product Support representative. the item for service you are agreeing to payment of the service without notification. Service estimates are available upon request. You must include this request with your item submitted for service. Non-warranty service estimates will be billed a minimum of ½ hour of labor. In addition you will be billed for return freight. Horizon accepts money orders and cashier’s checks, as well as Visa, MasterCard, American Express, and Discover cards. By submitting any item to Horizon for service, you are agreeing to Horizon’s Terms and Conditions found on our website http://www.horizonhobby. com/content/_service-center_render-service-center. ATTENTION: Horizon service is limited to Product compliant in the country of use and ownership. If received, a non-compliant Product will not be serviced. Further, the sender will be responsible for arranging return shipment of the un-serviced Product, through a carrier of the sender’s choice and at the sender’s expense. Horizon will hold non-compliant Product for a period of 60 days from notification, after which it will be discarded. NOTICE: Do not ship LiPo batteries to Horizon. If you have any issue with a LiPo battery, please contact the appropriate Horizon Product Support office. Warranty Requirements For Warranty consideration, you must include your original sales receipt verifying the proof-of-purchase date. Provided warranty conditions have been met, your Product will be serviced or replaced free of charge. Service or replacement decisions are at the sole discretion of Horizon. 59 Garantie und Service Informationen Warnung Ein ferngesteuertes Modell ist kein Spielzeug. Es kann, wenn es falsch eingesetzt wird, zu erheblichen Verletzungen bei Lebewesen und Beschädigungen an Sachgütern führen. Betreiben Sie Ihr RC-Modell nur auf freien Plätzen un beachten Sie alle Hinweise der Bedienungsanleitung des Modells wie auch der Fernsteuerung. Garantiezeitraum Exklusive Garantie ¬ Horizon Hobby Inc (Horizon) garantiert, dass das gekaufte Produkt frei von Materialund Montagefehlern ist. Der Garantiezeitraum entspricht den gesetzlichen Bestimmung des Landes, in dem das Produkt erworben wurde. In Deutschland beträgt der Garantiezeitraum 6 Monate und der Gewährleistungszeitraum 18 Monate nach dem Garantiezeitraum. Einschränkungen der Garantie (a) Die Garantie wird nur dem Erstkäufer (Käufer) gewährt und kann nicht übertragen werden. Der Anspruch des Käufers besteht in der Reparatur oder dem Tausch im Rahmen dieser Garantie. Die Garantie erstreckt sich ausschließlich auf Produkte, die bei einem autorisierten Horizon Händler erworben wurden. Verkäufe an dritte werden von dieser Garantie nicht gedeckt. Garantieansprüche werden nur angenommen, wenn ein gültiger Kaufnachweis erbracht wird. Horizon behält sich das Recht vor, diese Garantiebestimmungen ohne Ankündigung zu ändern oder modifi zieren und widerruft dann bestehende Garantiebestimmungen. (b) Horizon übernimmt keine Garantie für die Verkaufbarkeit des Produktes, die Fähigkeiten und die Fitness des Verbrauchers für einen bestimmten Einsatzzweck des Produktes. Der Käufer allein ist dafür verantwortlich, zu prüfen, ob das Produkt seinen Fähigkeiten und dem vorgesehenen Einsatzzweck entspricht. (c) Ansprüche des Käufers ¬ Es liegt ausschließlich im Ermessen von Horizon, ob das Produkt, bei dem ein Garantiefall festgestellt wurde, repariert oder ausgetauscht wird. Dies sind die exklusiven Ansprüche des Käufers, wenn ein Defekt festgestellt wird. 60 Horizon behält sich vor, alle eingesetzten Komponenten zu prüfen, die in den Garantiefall einbezogen werden können. Die Entscheidung zur Reparatur oder zum Austausch liegt nur bei Horizon. Die Garantie schließt kosmetische Defekte oder Defekte, hervorgerufen durch höhere Gewalt, falsche Behandlung des Produktes, falscher Einsatz des Produktes, kommerziellen Einsatz oder Modifi kationen irgendwelcher Art aus. Die Garantie schließt Schäden, die durch falschen Einbau, falsche Handhabung, Unfälle, Betrieb, Service oder Reparaturversuche, die nicht von Horizon ausgeführt wurden aus. Rücksendungen durch den Käufer direkt an Horizon oder eine seiner Landesvertretung bedürfen der Schriftform. Schadensbeschränkung Horizon ist nicht für direkte oder indirekte Folgeschäden, Einkommensausfälle oder kommerzielle Verluste, die in irgendeinem Zusammenhang mit dem Produkt stehen verantwortlich, unabhängig ab ein Anspruch im Zusammenhang mit einem Vertrag, der Garantie oder der Gewährleistung erhoben werden. Horizon wird darüber hinaus keine Ansprüche aus einem Garantiefall akzeptieren, die über den individuellen Wert des Produktes hinaus gehen. Horizon hat keinen Einfl uss auf den Einbau, die Verwendung oder die Wartung des Produktes oder etwaiger Produktkombinationen, die vom Käufer gewählt werden. Horizon übernimmt keine Garantie und akzeptiert keine Ansprüche für in der folge auftretende Verletzungen oder Beschädigungen. Mit der Verwendung und dem Einbau des Produktes akzeptiert der Käufer alle aufgeführten Garantiebestimmungen ohne Einschränkungen und Vorbehalte. Wenn Sie als Käufer nicht bereit sind, diese Bestimmungen im Zusammenhang mit der Benutzung des Produktes zu akzeptieren, werden Sie gebeten, dass Produkt in unbenutztem Zustand in der Originalverpackung vollständig bei dem Verkäufer zurückzugeben. Sicherheitshinweise Dieses ist ein hochwertiges Hobby Produkt und kein Spielzeug. Es muss mit Vorsicht und Umsicht eingesetzt werden und erfordert einige mechanische wie auch mentale Fähigkeiten. Ein Versagen, das Produkt sicher und umsichtig zu betreiben kann zu Verletzungen von Lebewesen und Sachbeschädigungen erheblichen Ausmaßes führen. Dieses Produkt ist nicht für den Gebrauch durch Kinder ohne die Aufsicht eines Erziehungsberechtigten vorgesehen. Die Anleitung enthält Sicherheitshinweise und Vorschriften sowie Hinweise für die Wartung und den Betrieb des Produktes. Es ist unabdingbar, diese Hinweise vor der ersten Inbetriebnahme zu lesen und zu verstehen. Nur so kann der falsche Umgang verhindert und Unfälle mit Verletzungen und Beschädigungen vermieden werden. Fragen, Hilfe und Reparaturen Kostenpflichtige Reparaturen Ihr lokaler Fachhändler und die Verkaufstelle können eine Garantiebeurteilung ohne Rücksprache mit Horizon nicht durchführen. Dies gilt auch für Garantiereparaturen. Deshalb kontaktieren Sie in einem solchen Fall den Händler, der sich mit Horizon kurz schließen wird, um eine sachgerechte Entscheidung zu fällen, die Ihnen schnellst möglich hilft. Liegt eine kostenpflichtige Reparatur vor, erstellen wir einen Kostenvoranschlag, den wir Ihrem Händler übermitteln. Die Reparatur wird erst vorgenommen, wenn wir die Freigabe des Händlers erhalten. Der Preis für die Reparatur ist bei Ihrem Händler zu entrichten. Bei kostenpflichtigen Reparaturen werden mindestens 30 Minuten Werkstattzeit und die Rückversandkosten in Rechnung gestellt. Wartung und Reparatur Muss Ihr Produkt gewartet oder repariert werden, wenden Sie sich entweder an Ihren Fachhändler oder direkt an Horizon. Sollten wir nach 90 Tagen keineEinverständniserklärung zur Reparatur vorliegen haben, behalten wir uns vor, das Produkt zu vernichten oder anderweitig zu verwerten. Rücksendungen / Reparaturen werden nur mit einer von Horizon vergebenen RMA Nummer bearbeitet. Diese Nummer erhalten Sie oder ihr Fachhändler vom technischen Service. Mehr Informationen dazu erhalten Sie im Serviceportal unter www. Horizonhobby.de oder telefonisch bei dem technischen Service von Horizon. Achtung: Kostenpflichtige Reparaturen nehmen wir nur für Elektronik und Motoren vor. Mechanische Reparaturen, besonders bei Hubschraubern und RC-Cars sind extrem aufwendig und müssen deshalb vom Käufer selbst vorgenommen werden. Packen Sie das Produkt sorgfältig ein. Beachten Sie, dass der Originalkarton in der Regel nicht ausreicht, um beim Versand nicht beschädigt zu werden. Verwenden Sie einen Paketdienstleister mit einer Tracking Funktion und Versicherung, da Horizon bis zur Annahme keine Verantwortung für den Versand des Produktes übernimmt. Bitte legen Sie dem Produkt einen Kaufbeleg bei, sowie eine ausführliche Fehlerbeschreibung und eine Liste aller eingesendeten Einzelkomponenten. Weiterhin benötigen wir die vollständige Adresse, eine Telefonnummer für Rückfragen, sowie eine Email Adresse. Garantie und Reparaturen Garantieanfragen werden nur bearbeitet, wenn ein Originalkaufbeleg von einem autorisierten Fachhändler beiliegt, aus dem der Käufer und das Kaufdatum hervorgeht. Sollte sich ein Garantiefall bestätigen wird das Produkt repariert oder ersetzt. Diese Entscheidung obliegt einzig Horizon Hobby. Warranty and Service Contact Information• Garantie und Service Kontaktinformationen Country of Purchase Horizon Hobby Horizon Service Center (Repairs and Repair Requests) United States of America Horizon Product Support (Product Technical Assistance) Sales Contact Information servicecenter.horizonhobby.com/RequestForm/ www.quickbase.com/db/ bghj7ey8c?a=GenNewRecord 888-959-2305 888-959-2305 [email protected] Horizon Technischer Service [email protected] Sales: Horizon Hobby GmbH +49 (0) 4121 2655 100 France Service/Parts/Sales: Horizon Hobby SAS [email protected] China Service/Parts/Sales: Horizon Hobby – China [email protected] Germany 4105 Fieldstone Rd Champaign, Illinois, 61822 USA [email protected] Service/Parts/Sales: Horizon Hobby Limited United Kingdom Address +44 (0) 1279 641 097 +33 (0) 1 60 18 34 90 +86 (021) 5180 9868 Instructions for disposal of WEEE by users in the European Union This product must not be disposed of with other waste. Instead, it is the user’s responsibility to dispose of their waste equipment by handing it over to a designated collections point for the recycling of waste electrical and electronic equipment. The separate collection and recycling of your waste equipment at the time of disposal will help to conserve natural resources and ensure that it is recycled in a manner that protects human health and the environment. For more information about where you can drop off your waste equipment for recycling, please contact your local city office, your household waste disposal service or where you purchased the product. Units 1–4 , Ployters Rd, Staple Tye Harlow, Essex, CM18 7NS, United Kingdom Christian-Junge-Straße 1 25337 Elmshorn, Germany 11 Rue Georges Charpak 77127 Lieusaint, France Room 506, No. 97 Changshou Rd. Shanghai, China 200060 Anweisungen zur Entsorgung von Elektro- und ElektronikAltgeräten für Benutzer in der Europäischen Union Dieses Produkt darf nicht zusammen mit anderem Abfall entsorgt werden. Stattdessen ist der Benutzer dafür verantwortlich, unbrauchbare Geräte durch Abgabe bei einer speziellen Sammelstelle für das Recycling von unbrauchbaren elektrischen und elektronischen Geräten zu entsorgen. Die separate Sammlung und das Recycling von unbrauchbaren Geräten zum Zeitpunkt der Entsorgung hilft, natürliche Ressourcen zu bewahren und sicherzustellen, dass Geräte auf eine Weise wiederverwertet werden, bei der die menschliche Gesundheit und die Umwelt geschützt werden. Weitere Informationen dazu, wo Sie unbrauchbare Geräte zum Recycling abgeben können, erhalten Sie bei lokalen Ämtern, bei der Müllabfuhr für Haushaltsmüll sowie dort, wo Sie das Produkt gekauft haben. 61 AMA National Model Aircraft Safety Code Effective January 1, 2013 A. GENERAL: (h) Not operate model aircraft while under the influence of alcohol or while using any drug which could adversely affect the pilot’s ability to safely control the model. B. RADIO CONTROL (RC) 1. All pilots shall avoid flying directly over unprotected people, vessels, vehicles or structures and shall avoid endangerment of life and property of others. 7. Under no circumstances may a pilot or other person touch a model aircraft in flight while it is still under power, except to divert it from striking an individual. This does not apply to model aircraft flown indoors. A model aircraft is a non-human-carrying aircraft capable of sustained flight in the atmosphere. It may not exceed limitations of this code and is intended exclusively for sport, recreation and/or competition. All model flights must be conducted in accordance with this safety code and any additional rules specific to the flying site. (i) Not operate model aircraft carrying pyrotechnic devices which explode or burn, or any device which propels a projectile or drops any object that creates a hazard to persons or property. Exceptions: 2. A successful radio equipment ground-range check in accordance with manufacturer’s recommendations will be completed before the first flight of a new or repaired model aircraft. 1. Model aircraft will not be flown: • Free Flight fuses or devices that burn producing smoke and are securely attached to the model aircraft during flight. 3. At all flying sites a safety line(s) must be established in front of which all flying takes place (AMA Document #706-Recommended Field Layout): (a) Maintain control during the entire flight, maintaining visual contact without enhancement other than by corrective lenses prescribed for the pilot. • Rocket motors (using solid propellant) up to a G-series size may be used provided they remain attached to the model during flight. Model rockets may be flown in accordance with the National Model Rocketry Safety Code but may not be launched from model aircraft. (a) Only personnel associated with flying the model aircraft are allowed at or in front of the safety line. (b) Fly using the assistance of a camera or First-Person View (FPV) only in accordance with the procedures outlined in AMA Document #550. • Officially designated AMA Air Show Teams (AST) are authorized to use devices and practices as defined within the Team AMA Program Document (AMA Document #718). (c) An area away from the safety line must be maintained for spectators. (a) In a careless or reckless manner. (b) At a location where model aircraft activities are prohibited. 2. Model aircraft pilots will: (a) Yield the right of way to all man carrying aircraft. (b) See and avoid all aircraft and a spotter must be used when appropriate. (AMA Document #540-D-See and Avoid Guidance.) (c) Not fly higher than approximately 400 feet above ground level within three (3) miles of an airport, without notifying the airport operator. (d) Not interfere with operations and traffic patterns at any airport, heliport or seaplane base except where there is a mixed use agreement. (e) Not exceed a takeoff weight, including fuel, of 55 pounds unless in compliance with the AMA Large Model Aircraft program. (AMA Document 520-A) (f) Ensure the aircraft is identified with the name and address or AMA number of the owner on the inside or affixed to the outside of the model aircraft. (This does not apply to model aircraft flown indoors). (g) Not operate aircraft with metal-blade propellers or with gaseous boosts except for helicopters operated under the provisions of AMA Document #555. 62 (j) Not operate a turbine-powered aircraft, unless in compliance with the AMA turbine regulations. (AMA Document #510-A). 3. Model aircraft will not be flown in AMA sanctioned events, air shows or model demonstrations unless: (a) The aircraft, control system and pilot skills have successfully demonstrated all maneuvers intended or anticipated prior to the specific event. (b) An inexperienced pilot is assisted by an experienced pilot. 4. When and where required by rule, helmets must be properly worn and fastened. They must be OSHA, DOT, ANSI, SNELL or NOCSAE approved or comply with comparable standards. (b) At air shows or demonstrations, a straight safety line must be established. 8. RC night flying requires a lighting system providing the pilot with a clear view of the model’s attitude and orientation at all times. 9. The pilot of a RC model aircraft shall: Please see your local or regional modeling association’s guidelines for proper, safe operation of your model aircraft. (d) Intentional flying behind the safety line is prohibited. FAA Information 4. RC model aircraft must use the radio-control frequencies currently allowed by the Federal Communications Commission (FCC). Only individuals properly licensed by the FCC are authorized to operate equipment on Amateur Band frequencies. Prior to flying, contact your local or regional modeling organizations for guidance and familiarize yourself with the current local rules and FAA regulations governing model aviation in your location. 5. RC model aircraft will not operate within three (3) miles of any pre-existing flying site without a frequencymanagement agreement (AMA Documents #922-Testing for RF Interference; #923- Frequency Management Agreement) 6. With the exception of events flown under official AMA Competition Regulations, excluding takeoff and landing, no powered model may be flown outdoors closer than 25 feet to any individual, except for the pilot and the pilot’s helper(s) located at the flight line. More information about model aviation can be found at www. modelaircraft.org. The Federal Aviation Administration can be found online at www.faa.gov. 21/4 inch (28mm) 63 © 2013 Horizon Hobby, Inc. Hangar 9, DSMX, JR, Evolution, PowerSafe and EC3 are trademarks or registered trademarks of Horizon Hobby, Inc. The Spektrum trademark is used with permission of Bachmann Industries, Inc. Zenoah is a trademark or registered trademark of Husqvarna Zenoah Co. Ltd. Corporation and is used with permission. Saito is a trademark of Saito Seisakusho Co. Ltd, Japan. All other trademarks, service marks and logos are the property of their respective owners. Job #27195 Created 11/2012