1
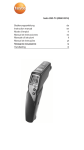
testo 845 Infrarot- Messgerät Bedienungsanleitung Instruction manual de en Inhalt 1. 2. 3. Allgemeine Hinweise ............................................2 Sicherheitshinweise ............................................3 Bestimmungsgemäße Verwendung ....................4 Produktbeschreibung ..........................................5 3.1 3.2 3.3 4. 5. Inbetriebnahme ..................................................7 Bedienung ..........................................................7 5.1 5.2 6. Fühler anschließen ........................................................7 Ein- / Ausschalten ..........................................................8 Gerät einstellen ..................................................8 6.1 6.2 6.3 6.4 6.5 6.6 6.7 7. Anzeige- und Bedienelemente ........................................5 Schnittstellen ..................................................................6 Spannungsversorgung ..................................................6 Gerätekonfiguration ........................................................8 Messkonfiguration ........................................................10 Emissionsgrad ............................................................13 Messprotokolle speichern ............................................13 Messprotokolle drucken ..............................................14 Aktuelle Werte drucken ................................................14 Messwertspeicher voll ..................................................14 Programmieren ..................................................15 7.1 Software installieren ..........................................................15 7.2 testo 845 an PC anschließen ............................................15 7.3 Verbindung einrichten ........................................................15 7.4 Verbindung öffnen ..............................................................16 7.5 testo 845 programmieren ..................................................16 7.6 Verbindung trennen ............................................................17 8. 9. 10. 11. 12. Messen ............................................................18 Wartung und Pflege ..........................................21 Fragen und Antworten ......................................22 Technische Daten ..............................................23 Zubehör / Ersatzteile ..........................................24 2 Allgemeine Hinweise Allgemeine Hinweise Dieses Kapitel gibt wichtige Hinweise zur Nutzung der vorliegenden Dokumentation. Diese Dokumentation enthält Informationen, die für einen sicheren und effizienten Einsatz des Produkts beachtet werden müssen. Lesen Sie diese Dokumentation aufmerksam durch und machen Sie sich mit der Bedienung des Produkts vertraut, bevor Sie es einsetzen. Bewahren Sie dieses Dokument griffbereit auf, um bei Bedarf nachschlagen zu können. Kennzeichnungen Darstellung Bedeutung Bemerkungen Warnhinweis: Warnung! Warnhinweis aufmerksam lesen und die genannten Vorsichtsmaßnahmen treffen! Schwere Körperverletzungen können eintreten, wenn die genannten Vorsichtsmaßnahmen nicht getroffen werden. Warnhinweis: Vorsicht! Warnhinweis aufmerksam lesen und die genannten Vorsichtsmaßnahmen treffen! Leichte Körperverletzungen oder Sachschäden können eintreten, wenn die genannten Vorsichtsmaßnahmen nicht getroffen werden. Gibt hilfreiche Tipps und Informationen. Nennt das Ziel, welches durch nachfolgend beschriebene Handlungsschritte erreicht wird. Bei nummerierten Handlungszielen die vorgegebene Reihenfolge beachten! Voraussetzung muss erfüllt sein, damit eine Handlung wie beschrieben ausgeführt werden kann. Handlungsschritte ausführen. Bei nummerierten Handlungsschritten die vorgegebene Reihenfolge beachten! Text erscheint auf dem Gerätedisplay. Taste drücken. Taste drücken. Nennt das Ergebnis eines vorangegangenen (Handlungs-)Schritts. Verweis auf weiterführende oder detailliertere Informationen. ±, 1, 2 Hinweis Handlungsziel Voraussetzung i, 1, 2, ... (Handlungs-)Schritt Text Displaytext Bedientaste Funktionstaste Resultat Querverweis Taste - º Personenschäden / Sachschäden vermeiden i Mit dem Messgerät und Fühlern nicht an oder in der Nähe von spannungs- führenden Teilen messen. en fr Dieses Kapitel nennt allgemeine Regeln, die für einen sicheren Umgang mit dem Produkt unbedingt beachtet werden müssen. es Sicherheitshinweise it 1. de 1. Sicherheitshinweise 3 Fachgerecht entsorgen i Defekte Akkus / leere Batterien an den dafür vorgesehenen Sammelstellen abgeben. i Produkt nach Ende der Nutzungszeit an Testo senden. Wir sorgen für eine umweltschonende Entsorgung. sv nl ?? Produktsicherheit / Gewährleistungsansprüche wahren i Das Messgerät nur innerhalb der in den Technischen Daten vorgegebenen Parameter betreiben. i Das Messgerät nur sach- und bestimmungsgemäß verwenden. Keine Gewalt anwenden. i Nicht elektromagnetischer Strahlung (z. B. Mikrowellen, Induktionsheizungen), statischer Aufladung, Hitze oder starken Temperaturschwankungen aussetzen. i Handgriffe und Zuleitungen nicht Temperaturen über 70°C aussetzen, wenn diese nicht ausdrücklich für höhere Temperaturen zugelassen sind. Temperaturangaben auf Sonden / Fühlern beziehen sich nur auf den Messbereich der Sensorik. i Das Messgerät nur öffnen, wenn dies zu Wartungs- oder Instandhaltungszwecken ausdrücklich in der Dokumentation beschrieben ist. Nur Wartungs- und Instandsetzungsarbeiten durchführen, die in der Dokumentation beschrieben sind. Dabei die vorgegebenen Handlungsschritte einhalten. Aus Sicherheitsgründen nur Original-Ersatzteile von Testo verwenden. i Laserstrahlung! Nicht in den Laserstrahl blicken. Laserklasse 2. ?? verwenden. i Infrarotmessung: Bei Messung von spannungsführenden Teilen erforderliche Sicherheitsabstände einhalten. pt i Das Messgerät nie zusammen mit Lösungsmitteln lagern, keine Trockenmittel 4 2. Bestimmungsgemäße Verwendung 2. Bestimmungsgemäße Verwendung Dieses Kapitel nennt die Anwendungsbereiche, für die das Produkt bestimmt ist. Setzen Sie dass Produkt nur für die Bereiche ein, für die es konzipiert wurde. Im Zweifelsfall bitte bei Testo nachfragen. Das testo 845 ist ein kompaktes Infrarot-Thermometer zur berührungslosen Messung von Oberflächentemperaturen. Mit dem testo 845 können über angeschlossene Fühler zusätzlich Messungen durchgeführt werden. In folgenden Bereichen darf das Produkt nicht eingesetzt werden: · In explosionsgefährdeten Bereichen. · Zu diagnostischen Messungen im medizinischen Bereich In Großbritannien darf das testo 845 aus patentrechtlichen Gründen nicht in Verbindung mit dem Feuchtemodul verwendet werden. it 3.1 Anzeige- und Bedienelemente en Dieses Kapitel gibt eine Übersicht über die Komponenten des Produkts und deren Funktionen. fr Produktbeschreibung es 3. de 3. Produktbeschreibung 5 Tastenfunktionen Taste Funktionen Konfigurationseinstellungen ändern Ausdruck der Werte auf Testo-IR-Drucker Gerätekonfiguration: Justage auslösen Speicherung eines Messprotokolls Mess- und Gerätekonfigurationmenü: Werte übernehmen und Sprung zum nächsten Einstellmenü Wechsel zwischen den möglichen Displaybildern Mess- und Gerätekonfigurationmenü: Einstellwerte ändern sv (standardmäßig bei 0563 8451; nachrüstbar bei 0563 8450) Messtaste Batteriefach IR-Diode für Drucker Display Schiebeschalter Bedientasten Fühlerbuchse USB-Schnittstelle nl Infrarot-Sensor Feuchtemodul ?? ?? pt Übersicht 6 3. Produktbeschreibung Display Anzeige + °C/°F Funktionen Temperatur-Messwert IR + °C/°F Temperaturmesswert Kontaktfühler +% Feuchtemesswert Umgebung in % relative Feuchte + °C/°F Temperaturmesswert Umgebung + °Ctd Taupunkt der Umgebung +°C ∆td Taupunktabstand 3.2 Schnittstellen USB-Schnittstelle Über die USB-Schnittstelle an der Unterseite des Geräts kann das Netzteil (Zubehör) zur Spannungsversorgung des Geräts angeschlossen werden. Mess- / Gerätedaten können über die USB-Schnittstelle mit einem PC ausgetauscht werden. Das Messgerät ist ein HighPower-Gerät, evtl. ist ein zusätzlicher USB-Hub erforderlich! Fühlerbuchse(n) Über die Fühlerbuchse an der Unterseiteseite des Geräts können steckbare Thermoelement-Fühler Typ K angeschlossen werden. 3.3 Spannungsversorgung Die Spannungsversorgung erfolgt über zwei Mignon-Batterien (im Lieferumfang) bzw. -akkus bzw. über ein USB-Netzteil (Zubehör). Das Laden von Akkus im Gerät ist nicht möglich. ² Batterien / Akkus 1 Batteriefachdeckel am Hangriff öffnen. 2 Batterien / Akkus (2 x Mignon) in das Batteriefach einlegen. Polung beach- Bedienung Dieses Kapitel beschreibt die Handlungsschritte, die beim Einsatz des Produkts häufig ausgeführt werden. 5.1 Fühler anschließen Steckbare Fühler Steckbare Fühler müssen vor dem Einschalten des Messgeräts angeschlossen werden, damit diese vom Messgerät erkannt werden. i Anschlussstecker des Fühlers in die Fühlerbuchse des Messgeräts stecken. Feuchtemodul 0636 9784 anschließen Placeholder Sensoranbau i Abdeckung mit einem geeigneten Werkzeug vorsichtig öffnen. i Abdeckung vom Anschlussstecker entfernen. i Feuchtemodul mit Stecker verbinden und in das Gehäuse schieben. en fr ?? ?? 5. nl sv ten! 3 Batteriefachdeckel schließen. es Dieses Kapitel beschreibt die Handlungsschritte, die zur Inbetriebnahme des Produkts erforderlich sind. it Inbetriebnahme pt 4. de 4. Inbetriebnahme 7 8 5. Bedienung 5.2 Ein-/Ausschalten ² Gerät einschalten: i Messtaste drücken und gedrückt halten - Die Messansicht wird geöffnet: Der aktuelle Messwert und der Min-, Max-Wert werden angzeigt. ² Gerät ausschalten: i Gerät schaltet nach 10 s ohne Tastenbetätigung selbstständig aus. 6. Gerät einstellen Dieses Kapitel beschreibt die Handlungsschritte, die zur Anpassung des Messgeräts an spezielle Messaufgaben erforderlich sind. 6.1 Gerätekonfiguration Im Konfigurationsmenü werden die Grundeinstellungen des Messgeräts vorgenommen. Der Konfigurationsmodus kann jederzeit verlassen werden. Dazu drücken. Gerät wechselt zur Messansicht. Bereits durchgeführte Änderungen im Konfigurationsmodus die mit übernommen wurden, werden dabei gespeichert. 1 Konfigurationsmodus öffnen: Das Gerät ist eingeschaltet und befindet sich in der Messansicht. i Messtaste gedrückt halten und kurz drücken: °C wird angezeigt. - Das Gerät befindet sich nun im Konfigurationsmodus. 2 Temperatur einstellen: Der Konfigurationsmodus ist geöffnet, °C wird angezeigt. i Mit / °C/°F einstellen und mit bestätigen. Mit wird die Einstellung übernommen und zur nächsten Funktion gewechselt. º Weiter mit Handlungsziel DISPLAYBELEUCHTUNG EINSTELLEN. 6. Gerät einstellen 9 de 3 Displaybeleuchtung einstellen: bestätigen. (2x) zum Menü Auto on/off. Mit / die gewünschte Option wählen und mit bestätigen. Während einer Dauermessung ist die Laserfunktion nicht verfügbar. º Weiter mit Handlungsziel LASER EINSTELLEN. Der Konfigurationsmodus ist geöffnet, °C wird angezeigt. i Mit i Mit / (3x) zum Menü Laser on/off. die gewünschte Option wählen und mit bestätigen. º Weiter mit Handlungsziel DATUM EINSTELLEN. 6 Datum einstellen: Der Konfigurationsmodus ist geöffnet, °C wird angezeigt. i Mit (4x) zum Menü Datum einstellen. Tag einstellen: Mit / den gewünschten Tag wählen und mit bestätigen. Monat einstellen: Mit / den gewünschten Monat wählen und mit bestätigen. Jahr einstellen: Mit / das gewünschten Jahr wählen und mit bestätigen. º Weiter mit Handlungsziel UHRZEIT EINSTELLEN. 7 Uhrzeit einstellen: Der Konfigurationsmodus ist geöffnet, °C wird angezeigt. i Mit (7x) zum Menü Uhrzeit einstellen. Stunde einstellen: Mit / die gewünschte Stunde wählen und mit bestätigen. Minuten einstellen: Mit / die gewünschte Minute wählen und mit bestätigen. ?? nl 5 Laser einstellen: pt i Mit sv Der Konfigurationsmodus ist geöffnet, °C wird angezeigt. it es 4 Dauermessung einstellen (siehe auch Kapitel 8. Messen): fr i Mit ?? zum Menü Displaybeleuchtung Ein/Aus. Mit / die gewünschte Option wählen und mit º Weiter mit Handlungsziel DAUERMESSUNG EINSTELLEN. en Der Konfigurationsmodus ist geöffnet, °C wird angezeigt. 10 6. Gerät einstellen º Weiter mit Handlungsziel FEUCHTEMODUL BEI 11.3 UND 75.3 %RF JUSTIEREN (nur mit eingebautem Feuchtemodul). 8 Feuchtemodul bei 11.3 und 75.3 %rF justieren (nur mit eingebautem Feuch- temodul): Vor der Kontrolle oder einem Abgleich sollten Fühler und Kontroll- und Abgleichset bei einem konstanten Temperaturbereich (+20...+30 °C) ca. 12 Stunden gelagert werden. Zum Abgleich des Feuchtemoduls im Prüfbehälter den Feuchtfühler vorsichtig aus dem testo 845 ziehen. Während des Abgleichs kann der Prüfbehälter waagerecht gelagert werden. - Für die Kontrolle beträgt die Mindestangleichzeit bei eingestecktem Fühler in die Prüfbehälter 15 Minuten. - Beim Abgleich wird eine Angleichzeit von mindestens einer Stunde empfohlen. - Sämtliche störenden Einflüsse von außen fernhalten (direkte Wärmeeinstrahlung, Luftzug usw.). - Anwendungshinweis “Kontroll- und Abgleichset für Feuchtesensoren” beachten (Art.-Nr. 0973 1820). Der Konfigurationsmodus ist geöffnet, °C wird angezeigt. i Mit zum Menü Feuchtemodul bei 11.3.und 75.3 %rF justieren Justage auslösen. Der korrigierte Wert wird für 3 sec. angzeigt. º Weiter mit Handlungsziel WERKSRESET. i Mit 9 Werksreset: Der Konfigurationsmodus ist geöffnet, °C wird angezeigt. i Mit zum Menü Werksreset (Reset). Die Werte werden auf den Auslieferungszustand zurückgesetzt Mit / die gewünschte Option wählen und mit bestätigen. Rücksprung ins Hauptmenü. . 6.2 Messkonfiguration Im Konfigurationsmenü werden Einstellungen für das Messen vorgenommen. Der Konfigurationsmodus kann jederzeit verlassen werden. Dazu drücken. Gerät wechselt zur Messansicht. Bereits durchgeführte Änderungen im Konfigurationsmodus werden dabei gespeichert. 6. Gerät einstellen 11 de 1 Konfigurationsmodus öffnen: drücken. - Das Gerät befindet sich nun im Konfigurationsmodus. fr i en Das Gerät ist eingeschaltet und befindet sich in der Messansicht. ε es 2 Emissionsgrad einstellen ( ): Der Konfigurationsmodus ist geöffnet. it bestätigen. º Weiter mit Handlungsziel AUSWAHL DES ZU ÜBERWACHENDEN ALARMWERTES. 3 Auswahl des zu überwachenden Alarmwertes (dtd, Ir, rH Surface): Der Konfigurationsmodus ist geöffnet. i Mit / die gewünschte Option wählen und mit bestätigen. º Weiter mit Handlungsziel OBEREN GRENZWERT EINSTELLEN (IR). ?? ?? oder º Weiter mit Handlungsziel GRENZWERT EINSTELLEN ∆TD oder º Weiter mit Handlungsziel GRENZWERT EINSTELLEN RHSI. 4 Oberen Grenzwert einstellen (Ir): Der Konfigurationsmodus ist geöffnet. i Mit / den oberen Grenzwert einstellen und mit bestätigen. Bei Überschreiten des oberen Grenzwertes wird in der oberen Zeile der Max-Wert angezeigt (Grenzwertüberschreitungssymbol erscheint). Als Hauptwert wird die IR-Temperatur angezeigt. In der unteren Zeile wird der dazugehörende Grenz-/Alarmwert dargestellt. Das Alarmsymbol erscheint. Ist ein akustischer Alarm ausgewählt, ertönt dieser. Wird der Grenzwert wieder unterschritten, wird in das zuvor dargestellte Display zurückgesprungen. º Weiter mit Handlungsziel UNTEREN GRENZWERT EINSTELLEN (IR). 5 Unteren Grenzwert einstellen (Ir): Der Konfigurationsmodus ist geöffnet. i Mit / den Unteren Grenzwert einstellen und mit pt Wert einstellen und mit sv / nl i Mit bestätigen. Bei Unterschreiten des unteren Grenzwertes wird in der oberen Zeile der Grenz-/Alarmwert angezeigt ( Grenzwertunterschreitungssymbol erscheint). Als Hauptwert wird die IR-Temperatur angezeigt. In der unteren 12 6. Gerät einstellen Zeile wird der dazugehörende Min-Wert dargestelt. Das Alarmsymbol erscheint. Ist ein akustischer Alarm ausgewählt, ertönt dieser. Wird der Grenzwert wieder überschritten, wird in das zuvor dargestellte Display zurückgesprungen. º Weiter mit Handlungsziel AKUSTISCHER ALARM EIN/AUS. 6 Grenzwert einstellen (dtd) (nur in Verbindung mit dem Feuchtemodul): Der Konfigurationsmodus ist geöffnet. i Mit / den Grenzwert einstellen und mit bestätigen. Bei der Taupunktabstandsüberwachung kann nur ein Grenzwert gewählt werden. Wird der eingestellte Grenzwert unterschritten, wird in der oberen Zeile der Grenzwert dargestellt. Hauptwert ist der aktuelle Taupunktabstandswert. In der unteren Zeile ist der Min-Wert dargestellt. Das Alarmsymbol blinkt. Ist ein akustischer Alarm ausgewählt, ertönt dieser. Wird der Grenzwert wieder überschritten, wird in das zuvor dargestellte Display zurückgesprungen. º Weiter mit Handlungsziel AKUSTISCHER ALARM EIN/AUS. 7 Grenzwert einstellen (rH Surface) (nur in Verbindung mit dem Feuchtemodul): Der Konfigurationsmodus ist geöffnet. i Mit / den Grenzwert einstellen und mit bestätigen. Bei der Oberflächenfeuchte kann nur ein Grenzwert gewählt werden. Wird der eingestellte Grenzwert unterschritten, wird in der oberen Zeile der Grenzwert dargestellt. Hauptwert ist die aktuelle Oberflächenfeuchte. In der unteren Zeile ist der Min-Wert dargestellt. Das Alarmsymbol blinkt. Ist ein akustischer Alarm ausgewählt, ertönt dieser. Wird der Grenzwert wieder überschritten, wird in das zuvor dargestellte Display zurückgesprungen. º Weiter mit Handlungsziel AKUSTISCHER ALARM EIN/AUS. 8 Akustischer Alarm ein/aus (BEEP On/OFF): Der Konfigurationsmodus ist geöffnet. i Mit / die gewünschte Option wählen und mit º Weiter mit Handlungsziel SPEICHER LÖSCHEN JA/NEIN. bestätigen. 6. Gerät einstellen 13 de 9 Speicher löschen ja/nein (dEL On/OFF): / die gewünschte Option wählen und mit Rücksprung ins Messmenü. bestätigen. SPEICHER LÖSCHEN löscht den gesamten Speicherinhalt. Emissionsgradtabelle wichtiger Materialien (typische Werte) Material (Temperatur) ε Material (Temperatur) ε Aluminium, walzblank (170°C) Baumwolle (20°C) Beton (25°C) Eis, glatt (0°C) Eisen, abgeschmirgelt (20)°C Eisen mit Gusshaut (100°C) Eisen mit Walzhaut (20°C) Gips (20°C) Glas (90°C) Gummi, hart (23°C) Gummi, weich-grau (23°C) Holz (70°C) Kork (20°C) 0,04 0,77 0,93 0,97 0,24 0,80 0,77 0,90 0,94 0,94 0,89 0,94 0,70 Kühlkörper, schwarz eloxiert (50°C) Kupfer, leicht angelaufen (20°C) Kupfer, oxidiert (130°C) Kunststoffe: PE, PP, PVC (20°C) Messing, oxidiert (200°C) Papier (20°C) Porzellan (20°C) Schwarzer Lack, matt (80°C) Stahl, wärmebeh. Oberfläche (200°C) Stahl, oxidiert (200°C) Ton, gebrannt (70°C) Transformatorenlack (70°C) Ziegelstein, Mörtel, Putz (20°C) 0,98 0,04 0,76 0,94 0,61 0,97 0,92 0,97 0,52 0,79 0,91 0,94 0,93 6.4 Messprotokolle speichern Um ein Messprotokoll abzuspeichern muss die Taste gedrückt werden. Das Gerät kann sich im Mess- oder HOLD-Modus befinden. Während des Speicherns wird der Hauptwert weiterhin angezeigt. In der unteren Zeile wird die aktuelle Protokollnummer angezeigt. Zusätzlich erscheint das SpeichernSymbol +M. Es können 90 Messprotokolle gespeichert werden. pt sv nl ?? ?? Materialien besitzen unterschiedliche Emissionsgrade, das heißt sie senden unterschiedliche Mengen an elektromagnetischer Strahlung aus. Der Emissionsgrad des testo 845 ist ab Werk auf 0,95 eingestellt. Dies ist optimal zur Messung von Nichtmetallen, Kunststoffen und Lebensmitteln (Papier, Keramik, Gips, Holz, Farben und Lacke). Blanke Metalle und Metalloxide sind aufgrund ihres niedrigen bzw. uneinheitlichen Emissionsgrades nur bedingt für die IR-Messung geeignet. Emissionsgrad erhöhende Beschichtungen wie z. B. Lack oder EmissionsKlebeband (Art.-Nr. 0554 0051) auf das Messobjekt aufbringen. Falls dies nicht möglich ist: Mit Kontakt-Thermometer messen. it es 6.3 Emissionsgrad fr i Mit en Der Konfigurationsmodus ist geöffnet. 14 6. Gerät einstellen 6.5 Messprotokolle drucken In diesem Kapitel wird der Ausdruck von Messprotokollen erklärt 1 Messprotokolle ausdrucken: Das Gerät befindet sich in der Messansicht (Hold-Modus). i gedrückt halten und drücken. Speichermenü aufrufen. Mit / gespeichertes Messprotokoll auswählen und mit bestätigen. Werte des Messprotokolls werden angezeigt. Mit Mit Mit / weitere gespeicherte Messprotokolle ansehen. Ausdruck starten. zurück ins Speichermenü. Die IR-Diode befindet sich an der Vorderseite des testo 845. Das testo 845 auf den Drucker richten. Mit Rücksprung ins Messmenü Der Konfigurationsmodus kann jederzeit verlassen werden. Dazu drücken. Gerät wechselt zur Messansicht. Bereits durchgeführte Änderungen im Konfigurationsmodus werden dabei gespeichert. 6.6 Aktuelle Werte drucken In diesem Kapitel wird der Ausdruck von aktuellen Werten erklärt 1 Aktuelle Werte drucken: Das Gerät befindet sich in der Messansicht (Hold-Modus). Mit Ausdruck starten. 6.7 Messwertspeicher voll Wenn 90 Messwertprotokolle gespeichert sind, wird FULL angezeigt. Messwertspeicher bei Bedarf löschen. 7.2 testo 845 an PC anschließen i Schließen Sie das USB-Verbindungskabel an Ihren PC an. i Schließen Sie das USB-Verbindungskabel an das testo 845 an. i Starten Sie die Software testo ComSoft. 7.3 Verbindung einrichten i Software testo ComSoft starten. i In der Menüleiste Gerät die Funktion Autodetect wählen. Das Fenster Autodetect Gerätesuche öffnet. Die Verbindung zum gefundenen testo 845 wird automatisch eingerichtet und der Name der Verbindung erscheint im Datenbereich. oder i In der Menüleiste Gerät die Funktion Neues Gerät wählen. Das Fenster Neues Gerät einrichten Assistent öffnet. i In der Geräteauswahl testo 845 wählen und auf Weiter klicken. i Namen für die Verbidung eingeben und auf Weiter klicken. en fr es ?? ?? Um die Programmierung des testo 845 nach Ihren individuellen Bedürfnissen anzupassen benötigen Sie einen PC, auf dem die Software testo ComSoft (im Lieferumfang enthalten) und der USB-Treiber installiert sind. Die Anleitung zur Installation und Bedienung der Software und des USB-Treibers finden Sie in der Bedienungsanleitung testo ComSoft und in der Bedienungsanleitung des USBTreibers. i Nach erfolgreicher Installation der Software testo 845 an PC anschließen. it 7.1 Software installieren pt Dieses Kapitel beschreibt die Handlungsschritte, die zur Erstellung von Messprogrammen erforderlich sind. sv Programmieren nl 7. de 7. Programmieren 15 16 7. Programmieren 7.4 Verbindung öffnen i Im Fenster Datenbereich doppelt auf die Verbindung klicken, die geöffnet werden soll. Ist ein Messprotokoll im testo 845 gespeichert, erscheinen das Protokollsymbol und der Kurztitel des Protokolls unter der geöffneten Verbindung. Eine Verbindung für mehrere testo 845 verwenden Sie können unterschiedliche testo 845 über eine eingerichtete Verbindung anschließen. Beim Wechseln des testo 845 muss die Verbindung getrennt und anschließend für das neue testo 845 neu geöffnet werden, da dieses ansonsten von der Software nicht identifiziert werden kann. 7.5 testo 845 programmieren Durch die Programmierung werden im testo 845 vorhandenen Messwerte gelöscht. i Eventuell vorhandene Daten vor einer Programmierung aus dem testo 845 auslesen (siehe Bedienungsanleitung zur Software testo ComSoft). i In der Menüleiste Gerät die Funktion Gerätesteuerung wählen. Diese Funktion ist nur aktiviert, wenn der Name der Verbindung farblich hinterlegt ist. Ist dies nicht der Fall: i Zuerst auf den Namen der Verbindung klicken und anschließend Gerät > Gerätesteuerung wählen. - Das Fenster für das Programmieren des testo 845 öffnet. 7.5.1 testo 845 programmieren Instrument Datum und Uhrzeit: Das eingestellte Datum und die Uhrzeit des testo 845 wird angezeigt. i Um das Datum und die Uhrzeit des testo 845 mit der Uhr Ihres PCs zu synchronisieren wählen Sie Synchronisieren . Optionen i Emissionsgrad einstellen. Angezeigten Wert markieren und ändern. i Einheit °C/°F einstellen. i Laser, Dauermessung und Beleuchtung aktivieren/deaktivieren. en i Drucker Kopfzeilen eingeben. de 7. Programmieren 17 fr Messkonfiguration Oberflächenfeuchte -20.0 - it Taupunktabstand -40.0 pt oberer Grenzwert unterer Grenzwert Infrarot 950.0 10.0 es Grenzwerte (Werkeinstellung) Justage Feuchtemodul i Taste Justage Feuchtemodul drücken. Das Fenster Dialog öffnet. i Zum Abgleich die Tasten 11.3% und 75.3% drücken. i Fenster schießen. 7.5.2 Programmierung abschließen i Auf Übernehmen klicken, um die durchgeführte Programmierung in das testo 845 zu übernehmen. 7.6 Verbindung trennen i Im Fenster Datenbereich mit der rechten Maustaste auf die Verbindung klicken die Sie trennen wollen. i Schließen wählen. - Die Verbindung zum testo 845 ist getrennt. nl ?? ?? Reset i Speicher löschen zulassen aktivieren/deaktivien - Speicher löschen. Speicherinhalt wird gelöscht. - Werkreset Geräteeinstellungen werden auf die Werkseinstellungen zurückgesetzt. sv i Akustischen Alarm aktivieren/deaktivieren 18 8. Messen 8. Messen Dieses Kapitel beschreibt die Handlungsschritte, die zur Durchführung von Messungen mit dem Produkt erforderlich sind. Messfleck, Entfernung Abhängig von der Entfernung des Messgeräts zum Messobjekt wird ein bestimmter Messfleck erfasst. Messoptik (Verhältnis Entfernung : Messfleck) Scharfpunkt -M Messung Scharfpunkt-Messung am Gerät einstellen. Im Display wird das Symbol angezeigt. Ø 543 mm Ø 263 mm Ø 20mm Ø 151 mm Ø1 mm Laser 70 mm 600 mm 1000 mm 2000 mm Fernfeld-M Messung Fernfeldmessung am Gerät einstellen. Im Display wird das Symbol Ø 279 mm Ø 130mm Ø 40 mm Ø 16mm 1200 mm 2000 mm 5000 mm 10000 mm Ø 20 mm angezeigt. Die Messmenüs können sowohl bei gedrückter Messtaste als auch im Hold-Modus durchgeschaltet werden. en ² Messung durchführen: de 8. Messen 19 Im Hold-Modus werden die zuletzt gemessenen Messwerte festgehalten. pt sv Das Gerät misst, solange die Messtaste gedrückt wird. Bei Loslassen der Messtaste gelangt das Gerät in den Hold-Modus. Der Hold-Modus wird bei erneutem betätigen der Messtaste wieder verlassen. Die Max- und Min-Werte werden zurückgesetzt. it es Dauermessung ausgeschaltet fr Hold-M Modus ?? ?? Das Gerät misst ohne die Betätigung der Messtaste. Durch Betätigung der Messtaste wird der Hold-Modus aktiviert. Bei erneuter Betätigung misst das Gerät weiter. Die Max- und Min-Werte werden zurückgesetzt. nl Dauermessung eingeschaltet Messung ( 1 IR-M ) Das Gerät ist eingeschaltet und befindet sich in der Messansicht. Max und Min sind aktiviert. IR-Messung ist eine optische Messung. Linse sauber halten. Nicht mit beschlagener Linse messen. Messung und TE-F Fühler ( 2 IR-M / ) Messmenü nur bei gestecktem TE-Fühler aktiv. Mit / die gewünschte Option wählen. ² Emissionsgrad einstellen . Gerät befindet sich im Hold-Modus. Mit und / Emissionsgrad einstellen. Während der Einstellung muss gedrückt bleiben. Bei jeder Änderung des Emissionswertes wird der IR-Temperaturwert aktualisiert. So kann der Emissionsgrad von Oberflächen ermittelt werden 20 8. Messen Mindesteinstechtiefe bei Tauch-/ Einstechfühlern beachten: 10 x Fühlerdurchmesser Einsatz in aggressiven Säuren oder Basen vermeiden. Mit Kreuzbandkopf-Oberflächenfühlern nicht an scharfen Kanten messen. Anzeige: 1. Max.-Wert, 2. IR-Temperatur, 3. Min.-Wert Messung und Feuchtemodul ( 3 IR-M / ) Messmenü nur bei gestecktem Feuchte-Fühler aktiv. Mit / den gewünschte Anzeigemodus wählen. Anzeige: 1. Feuchte, 2. IR-Temperatur, 3. Taupunkt 4 Temperatur und Feuchtemodul ( ) Messmenü nur bei gestecktem Feuchte-Fühler aktiv. Mit / den gewünschte Anzeigemodus wählen. Anzeige: 1. Feuchte, 2. Temperatur, 3. Taupunkt 5 Taupunktabstand ( ) Messmenü nur bei gestecktem Feuchte-Fühler aktiv. Anzeige des Taupunktabstandes inkl. Max- und Min.-Werte Mit / Anzeige: den gewünschte Anzeigemodus wählen. 1. Max.-Wert, 2. Taupunktabstand, 3. Min.-Wert 6 Oberflächenfeuchte Schimmelgefährdete Decken und Wände können anhand der Oberflächenfeuchte lokalisiert werden. Die Oberflächenfeuchte wird von 0...1,0 gemessen (0 = trocken, 1 = sehr feucht). Nach DIN EN ISO 13788 besteht das Risiko eines Schimmelbefalls an Oberflächen, wenn die Feuchte über mehrere Tage den Wert 0,8 übersteigt. Das testo 845 berechnet aus der Oberflächentemperatur (IR) und dem Taupunkt der Luft die Oberflächenfeuchte. Messmenü nur bei gestecktem Feuchte-Fühler aktiv. Anzeige der Oberflächenfeuchte inkl. Max- und Min.-Werte Mit / Anzeige: den gewünschte Anzeigemodus wählen. 1. Max.-Wert, 2. berechnete Oberflächenfeuchte, 3. Min.-Wert ± Gehäuse reinigen: i Das Gehäuse bei Verschmutzung mit einem feuchten Tuch (Seifenlauge) reinigen. Keine scharfen Reinigungs- oder Lösungsmittel verwenden! en fr Dieses Kapitel beschreibt die Handlungsschritte, die zur Erhaltung der Funktionsfähigkeit und zur Verlängerung der Lebensdauer des Produkts beitragen. es Wartung und Pflege it 9. de 8. Wartung und Pflege 21 nehmen Am Batterieentnahmeband ziehen oder mit dem Zeigefinger auf den oberen Teil der Batterie /Akku drücken Die Batterie/ Akku ist entriegelt. 3 Batterien /Akkus entnehmen und neue Batterien / neue Akkus einlegen. Polung beachten! 4 Batteriefach schließen. sv nl 2 Verbrauchte Batterien / leere Akkus heraus- ?? 1 Batteriefach am Handgriff öffnen. ?? Das Gerät ist ausgeschaltet. pt ± Batterie / Akku wechseln: 22 10. Fragen und Antworten 10. Fragen und Antworten Frage Mögliche Ursachen leuchtet. Gerät läßt sich nicht einschalten Nach dem Einschalten leuchten Laser kurz auf und gehen danach aus Messwertanzeige - - - - leuchtet. Anzeige FULL erscheint - Batterie leer. - Batterie leer. Batterie wechseln. Batterie wechseln. - Batterie leer Batterie wechseln. Err EE oder Err HSEE erscheint - Messwerte außerhalb des Messbereichs. - Messprotokollspeicher voll Mögliche Lösung Speicher löschen Gerät an den Testo -Kundendienst einschicken Falls wir Ihre Frage nicht beantworten konnten, wenden Sie sich bitte an Ihren Händler oder den Testo-Kundendienst. Genauigkeit °C Kontakt (Typ K) +/- 1 Digit Genauigkeit Feuchtemodul +/- 1 Digit Emissionsfaktor Wellenlänge Öffnungsverhältnis umschaltbar Fühler Messrate Einsatztemperatur Lagertemperatur Batterie-Typ Batterie-Standzeit Batterie-Wechsel Gehäuse Display Maße testo 845 in mm (LBH) Maße Koffer in mm (LBH) Gewicht testo 845 ohne Feuchtemodul Gewicht testo 845 mit Feuchtemodul Gewicht Gerät und Koffer EU-Richtlinie Empfindlichkeit bei IR-Messung: Störaussendung: en fr es it pt sv Genauigkeit IR (bei 23°C) +/- 1 Digit nl Auflösung testo 845 Temperatur (°C / °F) Infrarot-Sensor • IR-°C -35°C...+950°C • Feuchtemodul 0...100%rF 0...+50°C -20...+50°C td • Kontakt-°C -35...+950 °C 0,1°C (°C-Messgrößen) 0,1%rF (Feuchte) 0,1°C td (Taupunkt) +/- 2,5°C (-35...-20.1°C) +/-1,5°C (-20...+19,9°C) +/-0,75°C (+20.0...+99,9°C) +/-0,75% v.Mw.(+100...+950°C) +/- 0,75°C (-35...+75°C) +/-1 % v.Mw. (+75,1...+950°C) +/- 2% rF (2...98% rF) +/-0,5 °C (+10...+40°C) +/-1,0 °C (restlicher Bereich) einstellbar 0,1...1,0 8...14 µm Fernfeld: 75:1 (16mm, Abstand 1200mm) Nahfeld (Scharfpunkt): 1mm, Abstand 70mm integriert infrarot t95: 150 ms Scanning Max/Min/Alarm: 100 ms -20°C...+50°C -40°C...+70°C 2 x AA AlMn 25 h (ohne Laser) 10 h (mit Laser ohne Beleuchtung) 5 h (mit Laser und 50% Beleuchtung) durch Anwender ABS (schwarz, grau), Metallblende dreizeilig mit Beleuchtung 155 x 58 x 195 405 x 340 x 93 455 g 465 g 2700 g 89/336/EWG ± 2°C (± 3,6°F) für 640 MHz ... 680 MHz in 2,5 V/m Feld (+20.0...+99,9°C) handelsübliche Begrenzung laut EN 61326-1. ?? Bezeichnung Meßgröße Meßwertaufnehmer Meßbereich ?? 11. Technische Daten de 11. Technische Daten 23 24 12. Zubehör/Ersatzteile 12. Zubehör/Ersatzteile Dieses Kapitel nennt wichtige Zubehör- und Ersatzteile für das Produkt. Bezeichnung Feuchtemodul nachrüstbar Oberflächen-Fühler mit federndem TE-Band, kurzzeitig bis +500 °C, TE Typ K Oberflächen-Fühler mit federndem TE-Band, kurzzeitig bis +500 °C, TE Typ K, abgewinkelt Wasserdichter Oberflächen-Fühler, TE Typ K Robuster Luftfühler, TE Typ K Testo Protokolldrucker mit kabelloser IRDA- und Infrarot-Schnittstelle Ersatz-Thermopapier für Drucker (6 Rollen) Ersatz-Thermopapier für Drucker (6 Rollen), langzeit-lesbar (10 Jahre) Externes Ladegerät incl. 4 Ni.MH Akkus 300 mA, 50/60 Hz, 12 VA/Gerät Netzteil, 5 VDC/500 mA Kontroll- und Feuchteabgleich-Set 11,3 %rF / 75,3 %rF Klebeband für blanke Oberflächen, E=0,93, temperaturbeständig bis +300 °C Silikon-Wärmeleitpaste (14g) Tmax = +260 °C ISO-Kalibrier-Zertifikat, Kalibrierpunkt +60 °C, +120 °C, +180 °C ISO-Kalibrier-Zertifikat, Kalibrierpunkt -18 °C, 0 °C, +60 °C Artikel-Nr. 0636 9784 0602 0393 0602 0993 0602 0693 0602 1793 0554 0547 0554 0569 0554 0568 0554 0610 0554 0447 0554 0660 0554 0051 0554 0004 0520 0002 0520 0401 Eine vollständige Liste aller Zubehör- und Ersatzteile finden Sie in den Produktkatalogen und -broschüren oder im Internet unter: www.testo.com testo 845 Infrared measuring instrument Bedienungsanleitung Instruction manual de en Contents General information ....................................................26 1. Safety instructions ............................................27 2. Intended purpose ..............................................28 3. Product description ..........................................29 3.1 3.2 3.3 4. 5. Commissioning ................................................31 Operation ..........................................................31 5.1 5.2 6. Connecting probes ......................................................31 Switching on / off ........................................................32 Setting instrument ............................................32 6.1 6.2 6.3 6.4 6.5 6.6 6.7 7. Display and operating elements ....................................29 Interfaces ....................................................................30 Voltage supply ..............................................................30 Instrument configuration ..............................................32 Measurement configuration ..........................................34 Degree of emission ......................................................37 Storing measurement protocols ..................................37 Printing measurement protocols ..................................38 Printing current readings ..............................................38 Reading memory full ....................................................38 Programming ....................................................39 7.1 Installing software ............................................................39 7.2 Connecting testo 845 to a PC ............................................39 7.3 Setting up connection ........................................................39 7.4 Opening connection ..........................................................40 7.5 Programming testo 845 ....................................................40 7.6 Disconnecting ....................................................................41 8. 9. 10. 11. 12. Measuring ........................................................42 Care and maintenance ......................................45 Questions and answers ....................................46 Technical data ..................................................47 Accessories / spare parts ..................................48 26 General information General information This chapter provides important information on the use of this documentation. This documentation contains information which must be observed in order to ensure safe and efficient application of the product. Read this document carefully and familiarize yourself with the operation of the product before putting it to use. Keep this document close to hand in order to be able to refer to it when necessary. Symbols Symbol Meaning Comments Warning! Read the warning carefully and take the safety measures described! Serious injury can occur if the safety measures are not taken. Attention! Read the warning carefully and take the safety measures described! Light injury or object damage can occur if the safety measures are not taken. ±, 1, 2 Information Handling objective Prerequisite i, 1, 2, ... (Handling) step Text Display text Operating key Function key Result Cross reference Provides useful tips and information. Describes the objective reached by the following handling steps. Observe the order for numbered handling objectives Prerequisite must be fulfilled in order for a step to be carried out as described Carry out handling steps. Observe the order for numbered handling steps! Text appears in instrument display. Press key. Press key. Describes the result of a (handling) step previously carried out. Reference to further or more detailed information. Taste - º i Infrared measurement: When measuring live components, observe the necessary safety distance. Product safety / Preserving warranty claim i Use the measuring instrument only within the parameters given in the Technical Data. i Use the instrument only for the purpose for which it is intended. Do not use force. i Do not subject to electromagnetic radiation (microwaves, induction heating), static electricity, heat or extreme temperature fluctuations. i Do not subject handles and wires to temperatures over 70 °C if these are not expressly approved for higher temperatures. Temperature information on probes/sensors refers only to the measuring range of the sensors. i Open the measuring instrument for maintenance or repair purposes only if this is expressly described in the documentation. Carry out only maintenance and repair work which is described in the documentation. When doing so, observe the steps prescribed. For safety reasons, use only original Testo replacement parts. i Laser radiation! Do not look into the laser beam. Laser class 2. Correct disposal i Hand in defective rechargeable batteries / empty batteries to the correct collecting points. i Send the product back to Testo if it is no longer to be used. We will dispose of it ecologically. en fr es it i Never store the instrument together with solvents, do not use dessicants. pt i Do not use the measuring instrument on or close to live components. sv Avoiding damage and injury nl This chapter describes general rules which must be observed in order to ensure safe use of the product. ?? Safety instructions ?? 1. de 1. Safety instructions 27 28 2. Intended purpose 2. Intended purpose This chapter describes the areas of application for which the instrument is intended. Use the product only for the areas for which it was designed. In case of doubt please consult Testo. The testo 845 is a compact infrared thermometer for the non-contact measurement of surface temperatures. Using connected probes, additional measurements can be made with the testo 845. The product may not be used in the following areas: · In areas where there is a danger of explosion. · For diagnostic measurements in medicine. For reasons of Patent Law, the testo 845 may not be used in Great Britain in combination with the humidity module. it 3.1 Display and operating elements en This chapter provides an overview of the components of the product and their functions. fr Product description es 3. de 3. Product description 29 Button functions Button Functions Change configuration settings Printout of values on Testo IR printer Instrument configuration: activate adjustment Store a measurement protocol Measurement and instrument configuration menu: apply values and jump to next setting menu Switch between possible display images Measurement and instrument configuration menu: change setting values sv (standard with 0563 8451; retrofittable for 0563 8450) Measurement trigger Battery compartment IR diode for printer Display Slide switch Operating buttons Probe socket USB interface nl Infrared sensor Humidity module ?? ?? pt Overview 30 3. Product description Display Display + °C/°F Functions Temperature reading IR + °C/°F Temperature reading contact probe +% Ambient humidity value in % relative humidity + °C/°F Ambient temperature reading + °Ctd Ambient dewpoint + °C ∆td Dewpoint distance 3.2 Interfaces USB interface The mains unit (accessory) for the voltage supply of the instrument can be connected via the USB interface on the underside of the instrument. Measurement / instrument data can be exchanged with a PC via the USB interface. The measuring instrument is a HighPower instrument, an additional USB-hub may be necessary! Probe socket(s) Plug-in thermocouple probes type K can be connected via the probe socket on the underside of the instrument. 3.3 Voltage supply The voltage supply is provided by two mignon batteries (included in delivery) or rechargeable batteries or via a USB mains unit (accessories). Rechargeable batteries cannot be charged in the instrument. ² Batteries / rechargeable batteries 1 Open the battery compartment cover in the handle. 2 Fit batteries / rechargeable batteries (2 x Mignon) into the battery Operation This chapter describes the handling steps which are carried out often when using the instrument 5.1 Connecting probes Plug-in probes Plug-in probes must be connected before switching on the measuring instrument in order for them to be recognized by the instrument. i Insert the connection plug of the probe into the probe socket of the instrument. Connecting humidity module 0636 9784 i Open the cover carefully using a suitable tool. Placeholder sensoranbau i Remove the cover from the connection plug. i Connect the humidity module to the plug and push into the housing. en fr ?? ?? 5. nl sv compartment. Observe polarity! 3 Close the battery compartment cover. es This chapter describes the handling steps necessary for commissioning the instrument. it Commissioning pt 4. de 4. Commissioning 31 32 5. Operation 5.2 Switching on / off ² Switching instrument on: i Press measurement trigger and hold down - The measurement display is opened: The current measurement value and the min. / max. values are displayed ² Switching instrument off: i The instrument switches off automatically after 10 s if no button is pressed. 6. Setting instrument This chapter describes the handling steps required to adapt the measuring instrument for special measurement tasks. 6.1 Instrument configuration The basic settings for the measuring instrument are carried out in the configuration menu. The configuration mode can be exited at any time. To do this, press . Instrument switches to measurement display. Changes already applied with in the configuration mode are saved. 1 Opening configuration mode: The instrument is switched on and is in measurement display. i Hold down measurement trigger and briefly press : °C is displayed. - The instrument is now in configuration mode. 2 Setting temperature: The configuration mode is open, °C is displayed. i Set °C/°F with / °C/°F and confirm with The setting is applied with tion. . and the instrument jumps to the next func- º Continue with handling objective SETTING DISPLAY ILLUMINATION. 6. Setting instrument 33 de 3 Setting display illumination: en The configuration menu is open, °C is displayed. i Go to menu Display illumination On/Off with . fr . Select the desired option with / and confirm with .º Continue with SET CONTINUOUS MEASUREMENT. es 4 Setting continuous measurement (see also Chapter 8. Measuring): it The configuration mode is open, °C is displayed. (2x). Select the desired option with / and confirm with . The laser function is not available during continuous measurement. º Continue with handling objective SETTING LASER. sv pt i Go to menu Auto on/off with nl 5 Setting laser: Select the desired option with (3x). / and confirm with . ?? i Go to menu Laser on/off with ?? The configuration mode is open, °C is displayed. º Continue with handling objective SETTING DATE. 6 Setting date: The configuration mode is open, °C is displayed. i Go to menu Setting date with (4x). Setting day: Select the desired day with / Setting month: Select the desired month with . confirm with Setting year: Select the desired year with and confirm with / and / and confirm with . . º Continue with handling objective SETTING TIME. 7 Setting time: The configuration mode is open, °C is displayed. i Go to menu Setting time with (7x). Setting hour: Select the desired hour with / and confirm with . Setting minute: Select the desired minute with / and confirm with . º Continue with handling objective ADJUSTING HUMIDITY MODULE AT 11.3 AND 75.3 %RH (only with integrated humidity module). 34 6. Setting instrument 8 Adjusting humidity module at 11.3 and 75.3 %rF (only with integrated humi- dity module): Before checking or calibrating, the probe and the checking and calibrating set should be stored at a constant temperature range (+20 to +30 °C) for approx. 12 hours. To calibrate the humidity module in the test container, carefully pull the humidity probe out of the testo 845. The test container can be stored horizontally during calibration. - The minimum assimilation time for checks with the probe inserted into the test container is 15 minutes. - A minimum assimilation time of one hour is recommended for calibration. - Keep away from all external interference (direct heat radiation, draughts etc.). - Observe directions for use “Control and humidity adjustment set) (Order No. 0973 1820). The configuration mode is open, °C is displayed. i Go to menu Adjusting humidity module at 11.3 and 75.3 %RH with . . The corrected value is displayed for 3 s. º Continue with handling objective FACTORY SETTINGS. i Activate adjustment with 9 Factory settings: The configuration mode is open, °C is displayed. i Go to menu Factory settings (reset) with . The values return to the delivery status. . Select the desired option with / and confirm with Return to main menu. . 6.2 Measurement configuration In the configuration menu, settings for measurement are carried out. The configuration mode can be exited at any time. To do this, press . Instrument switches to measurement display. Changes already applied with in the configuration mode are saved. 1 Opening configuration mode: The instrument is switched on and is in measurement display. i Press drücken. - The instrument is now in configuration mode. 6. Setting instrument 35 ε de 2 Setting degree of emission ( ): i Set value with / and confirm with en The configuration mode is open. . fr º Continue with SELECTION OF ALARM VALUE TO BE MONITORED. The configuration mode is open. i Select upper limit value with / and confirm with . If the upper limit value is exceeded, the max. value is displayed in the top line (symbol for exceeded upper limit value appears). The IR temperature is displayed as the main value. The corresponding limit/alarm value is displayed in the lower line. The alarm symbol appears. If an acoustic alarm has been selected, it sounds. If the value drops back under the limit value, the instrument returns to the display previously shown. º Continue with SETTING LOWER LIMIT VALUE (IR). 5 Setting lower limit value (Ir): The configuration mode is open. i Select lower limit value with / and confirm with . If the lower limit value is exceeded, the max. value is displayed in the top line (symbol for exceeded lower limit value appears). The IR temperature is displayed as the main value. The corresponding limit/alarm value is displayed in the lower line. The alarm symbol appears. If an acoustic alarm has been selected, it sounds. If the value climbs back over the limit value, the instrument returns to the display previously shown. º Continue with handling objective AUDIBLE ALARM ON/OFF. pt ?? ?? 4 Setting upper limit value (Ir): sv Select the desired option with / and confirm with . º Continue with handling objective SETTING UPPER LIMIT VALUE (IR). or º Continue with handling objective SETTING LIMIT VALUE ∆TD or º Continue with handling objective SETTING LIMIT VALUE RHSI. nl The configuration mode is open. it es 3 Selection of alarm value to be monitored (dtd, Ir, rH Surface): 36 6. Setting instrument 6 Setting limit value (dtd) (only in combination with the humidity module): The configuration mode is open i Set the limit value with / and confirm with . When monitoring dewpoint distance, only one limit value can be selected If the set limit value is exceeded, the limit value is displayed in the top line. The current dewpoint distance is displayed as the main value. The min. value is displayed in the lower line. The alarm symbol flashes. If an acoustic alarm has been selected, it sounds. If the value climbs back over the limit value, the instrument returns to the display previously shown. º Continue with AUDIBLE ALARM ON/OFF. 7 Setting limit value (rH Surface) (only in combination with humidity module): The configuration mode is open. i Select limit value with / and confirm with . For surface moisture, only one limit value can be selected. If the set limit value is exceeded, the limit value is displayed in the top line. The current surface moisture is displayed as the main value. The min. value is display ed in the lower line. The alarm symbol flashes. If an acoustic alarm has been selected, it sounds. If the value climbs back over the limit value, the instrument returns to the display previously shown. º Continue with handling objective AUDIBLE ALARM ON/OFF. 8 Audible alarm (BEEP On/OFF): The configuration mode is open. i Select the desired option with / º Continue with DELETE MEMORY YES/NO. and confirm with . and confirm with . 9 Delete memory yes/no (dEL On/OFF): The configuration mode is open. i Select the desired option with / Return to measurement menu. DELETE MEMORY deletes the entire contents of the memory. 6. Setting instrument 37 0,04 0,77 0,93 0,97 0,24 0,80 0,77 0,90 0,94 0,94 0,89 0,94 0,70 Cooling element, black anodized (50°C) Copper, slightly oxidized (20°C) Copper, oxidized (130°C) Plastics: PE, PP, PVC (20°C) Brass, oxidized (200°C) Paper (20°C) Porcelain (20°C) Black paint, matt (80°C) Steel, heat-treated surface (200°C) Steel, oxidized (200°C) Clay, fired (70°C) Transformer lacquer (70°C) Bricks, mortar, plaster (20°C) 0,98 0,04 0,76 0,94 0,61 0,97 0,92 0,97 0,52 0,79 0,91 0,94 0,93 6.4 Storing measurement protocols To store a measurement protocol, the button must be pressed. The instrument can be in measurement or HOLD mode. The main value continues to be displayed during storage. The current protocol number is displayed in the lower line. The storage symbol +M is additionally displayed. 90 measurement protocols can be displayed. fr es it pt sv nl Aluminium, bright rolled (170°C) Cotton (20°C) Concrete (25°C) Ice, smooth (0°C) Iron, sanded (20)°C Iron with casting skin (100°C) Iron with rolling skin (20°C) Plaster (20°C) Glass (90°C) Rubber, hard (23°C) Rubber, soft grey (23°C) Wood (70°C) Cork (20°C) ?? Degree of emission table for important materials (typical values) Material (Temperature) ε Material (Temperature) ε ?? Materials have different degrees of emission, i.e. they produce different quantities of electromagnetic radiation. The degree of emission of the testo 845 is set at 0.95 ex-works. This is optimal for measurements of non-metals, plastics and food (paper, ceramics, plaster, wood, paints and lacquers). Because of their low or inconsistent degrees of emission, bright metals and metal oxides have only limited suitability for IR measurements. Apply emission-enhancing coatings such as paint or emission adhesive tape (Order No. 0554 0051) to the object to be measured. If this is not possible, measure with a contact thermometer. en de 6.3 Degree of emission 38 6. Setting instrument 6.5 Printing measurement protocols In this chapter, the printing of measurement protocols is explained 1 Printing measurement protocols: The instrument is in measurement display (Hold mode). i Hold down and press . Call up memory menu. Select stored measurement protocol with / and confirm with Measurement protocol values are displayed. View further stored measurement protocols with Start printout with . Return to memory menu with . / . . The IR diode is situated on the front of the testo 845. Point the testo 845 at the printer. Return to measurement menu with . The configuration menu can be exited at any time. To do this, press . Instrument switches to measurement display. Changes already carried out in the configuration menu are stored. 6.6 Printing current readings In this chapter, the printing of current readings is explained 1 Printing current values: The instrument is in measurement display (Hold mode). Start printout with . 6.7 Reading memory full When 90 measurement protocols have been stored, FULL is displayed. Delete reading memory as required. 7.2 Connecting testo 845 to a PC i Connect the USB connection cable to your PC. i Connect the USB connection cable to the testo 845. i Start the software testo ComSoft. 7.3 Setting up connection i Start software testo ComSoft. i Select the function Autodetect in the menu bar Instrument. The window Autodetect opens. The connection to the testo 845 found is set up automatically and the name of the connection appears in Archive. or i Select the function New device in the menu barInstrument. The window New device setup wizard opens. i Select testo 845 in the instrument choice and click on Next . i Enter the name of the connection and click on Next . en fr es it pt In order to adapt the programming of the testo 845 to your individual needs, you require a PC in which the software testo ComSoft (included in delivery) and the USB driver have been installed. You will find the instructions for the installation and operation of the software and the USB driver in the instruction manuals for testo ComSoft and the USB driver. i After successfully installing the software, connect testo 845 to the PC. sv 7.1 Installing software nl This chapter describes the handling steps necessary to create measurement programmes. ?? Programming ?? 7. de 7. Programmieren 39 40 7. Programming 7.4 Opening connection i Double-click on the connection to be opened in the window Archive. If a measurement protocol has been stored in the testo 845, the protocol symbol and the short title of the protocol appear under the opened connection. Using one connection for several testo 845 You can connect different testo 845 via one connection. When the testo 845 is changed, the connection must be broken and then re-made for the new testo 845, otherwise the software will not be able to identify it. 7.5 Programming testo 845 Programming deletes all values stored in testo 845. i Read any existing data out of the testo 845 before programming (see instruction manual for the software testo ComSoft). i Select the function device control in the menu bar Instrument. This function is only active when the name of the connection is marked in colour. If this is not the case: i First click on the name of the connection and then Instrument> device control . - The window for programming the testo 845 opens. 7.5.1 Programming testo 845 Instrument Date and time: The set date and time of the testo 845 are displayed. i To synchronize the date and time with the clock in your PC, select synchronize . Options i Set degree of emission. Mark displayed value and alter. i Set unit °C/°F. i Activate/deactivate laser, continuous measurement and illumination. en i Enter headers for printer. de 7. Programming 41 fr Measurement configuration it Surface moisture -20.0 - pt upper limit value lower limit value Infrared Dew point distance 950.0 10.0 -40.0 es Limit values (Factory setting) Humidity module adjustment i Press Adjustment humidity module button. The window Dialog opens. i To adjust press the buttons 11.3% and 75.3%. Close window 7.5.2 Ending programming i Click on Apply to apply the programming carried out to testo 845. 7.6 Disconnecting i In the window Archive, click on the connection you want to disconnect with the right-hand mouse key. i Select Close. The connection to testo 845 is disconnected. nl ?? ?? Reset i Activate/deactivate Allow store deletion - Delete memory. Memory contents are deleted. - Factory settings Instrument settings are returned to factory settings sv i Activate/deactivate Audible alarm 42 8. Measuring 8. Measuring This chapter describes the handling steps required to carry out measurements with the product. Measurement point, distance Depending on the distance between the measuring instrument and the object to be measured, a certain measurement point is recorded. Measurement optics (Ratio distance : measuring point) Close focus measurement Set close focus measurement in the instrument. The symbol is shown in the display Ø 543 mm Ø 263 mm Ø 20mm Ø 151 mm Ø1 mm Laser 70 mm 600 mm 1000 mm 2000 mm Far field measurement Set far field measurement in the instrument. The symbol is shown in the display. Ø 279 mm Ø 130mm Ø 40 mm Ø 16mm 1200 mm 2000 mm 5000 mm 10000 mm Ø 20 mm Scrolling through the measurement menus is possible with the measurement trigger pressed down as well as in the Hold mode. en ² Carrying out measurements: de 8. Measuring 43 In the hold mode the last recorded measurement readings are frozen. pt ?? The measuring instrument measures without the use of the measurement trigger. The Hold mode is activated by pressing the measurement trigger. The instrument continues to measure as soon as the measurement trigger is pressed again. The max. and min. values are reset. ?? Continuous measurement switched on nl sv The instrument measures as long as the measurement trigger is pressed. The instrument goes into Hold mode when the measurement trigger is released. The Hold mode is exited as soon as the measurement trigger is pressed again. The max. and min. values are reset. it es Continuous measurement switched off fr Hold mode 1 IR measurement ( ) The instrument is switched on and is in measurement display. Max and Min are activated. IR measurement is an optical measurement. Keep the lens clean. Do not measure if the lens is fogged. 2 IR measurement and TC probes ( / ) Measurement menu only active when TC probe is plugged in. Select the desired option with / . ² Setting degree of emission. Instrument is in Hold mode. Set degree of emission with and / . During setting, must be held down. The IR temperature value is updated with every alteration of the emission value. The degree of emission of surfaces can thus be determined. 44 8. Measuring Observe minimum penetration depth for immersion / penetration probes: 10 x probe diameter Avoid applications in aggressive acids or alkalis. Do not make measurements on sharp edges with cross-band surface probes. Display: 1. Max. value, 2. IR temperature, 3. Min. value 3 IR measurement and humidity module ( / ) Measurement menu only active when humidity probe is plugged in. Select the desired display mode with / . Display:1. Humidity, 2. IR-Temperature, 3. Dewpoint 4 Temperature and humidity module ( ) Measurement menu only active when humidity probe is plugged in. Select the desired display mode with / . Display:1. Humidity, 2. IR-Temperature, 3. Dewpoint 5 Dewpoint distance ( ) Measurement menu only active when humidity probe is plugged in. Display of dewpoint distance incl. max. and min. values. Select the desired display mode with / . Display:1. Max. value, 2. Dewpoint distance, 3. Min. value 6 Surface moisture Walls and ceilings in danger of mould can be localized based on the surface moisture. The surface moisture is measured from 0 to 1.0 (0 = dry, 1 = very damp). According to DIN EN ISO 13788, the danger of mould on surfaces exists if the moisture level rises above 0.8 over several days. The testo 845 calculates the surface moisture from the surface temperature (IR) and the dewpoint of the air. Measurement menu only active when humidity probe is plugged in. Display of surface moisture incl. max. and min. values. Select the desired display mode with / . Display:1. Max value, 2. Calculated surface moisture, 3. Min. value ± Cleaning the housing: i If dirty, clean the housing with a damp cloth (soap solution). Do not use any aggressive cleaning products or solvents! en fr This chapter describes the handling steps which contribute to maintaining the functionality of the product and to extending its useful life. es Care and maintenance it 9. de 9. Care and maintenance 45 batteries Pull the battery removal strip or push on the upper part of the battery with your finger. The battery is released. 3 Remove batteries and replace with new batteries. Observe polarity! 4 ReClose battery compartment. sv nl 2 Remove empty batteries / rechargeable ?? 1 Open the battery compartment in the handle. ?? The instrument is switched off. pt ± Changing battery / rechargeable battery: 46 10. Questions and answers 10. Questions and answers Question Possible causes Possible solution is lit. Intrument cannot be switched on. Lasers light up briefly after switching on, then go out. Measurement value - - - - lights up. Display FULL appears - Battery empty. - Battery empty. Change battery. Change battery. - Battery empty. Change battery. Err EE or Err HSEE appears - Measurement value outside measuring range. - Measurement protocol Delete memory memory full Send instrument to Testo Customer Services If we were not able to answer your question, please contact your dealer or Testo Customer Service. 11. Technical data 47 Accuracy °C contact (Type K) +/- 1 digit Accuracy humidity module +/- 1 digit Emission factor Wavelength Switchable distance ratio Probe Measurement rate Application temperature Storage temperature Battery type Battery life Battery exchange Housing Display Dimensions testo 845 in mm (LBH) Dimensions case in mm (LBH) Weight testo 845 without humidity module Weight testo 845 with humidity module Weight instrument and case EU guideline Sensitivity IR measurement: Interference: en fr es it pt sv nl Accuracy IR (at 23°C) +/- 1 digit ?? Resolution testo 845 Temperature (°C / °F) Infrared sensor • IR °C -35°C to +950°C • Humidity module 0 to 100%RH 0 to +50°C -20 to +50°C td • Contact °C -35 to +950 °C 0.1°C (°C measurement parameters) 0.1%RH (humidity) 0.1°C td (dewpoint) +/- 2.5°C (-35 to -20.1°C) +/-1.5°C (-20 to +19.9°C) +/-0.75°C (+20.0 to +99.9°C) +/-0.75% of m.v.(+100 to +950°C) +/- 0.75°C (-35 to +75°C) +/-1 % of m.v. (+75.1 to +950°C) +/- 2% RH (2 to 98% RH) +/-0.5 °C (+10 to +40°C) +/-1.0 °C (remaining range) adjustable 0.1 to 1.0 8 to14 µm Far field: 75:1 (16mm, distance 1200mm) Close focus: 1mm, distance 70mm integrated infrared t95: 150 ms Scanning max./min./Alarm: 100 ms -20°C to +50°C -40°C to +70°C 2 x AA AlMn 25 h (without laser) 10 h (with laser without backlight) 5 h (with laser and 50% backlight) by user ABS (black, grey), metal cover three-line with backlight 155 x 58 x 195 405 x 340 x 93 455 g 465 g 2700 g 89/336/EWG ± 2°C (± 3.6°F) for 640 MHz to 680 MHz in 2.5 V/m field. (+20.0...+99,9°C) trade-typical limit according to EN 61326-1 ?? Description Measurement parameter Measurement value recorder Measuring range de 11. Technical data 48 12. Accessories / spare parts 12. Accessories / spare parts This chapter describes important accessories and spare parts for the instrument Description Retrofittable humidity module Surface probe with sprung TC band, short-term up to +500 °C, TC Type K Surface probe with sprung TC band, short-term up to +500 °C, TC Type K, angled Waterproof surface probe, TC Type K Robust air probe, TC Type K Testo report printer with wireless IRDA and infrared interface Spare thermal paper for printer (6 rolls) Spare thermal paper for printer (6 rolls), long-term legible (10 years) External charger incl. 4 Ni.MH rechargeable batteries 300 mA, 50/60 Hz, 12 VA/instrument Mains unit, 5 VDC/500 mA Control and humidity adjustment set 11.3 %RH / 75.3 %RH Adhesive tape for polished surfaces, ε=0.93, heat-proof up to +300 °C Silicone heat-conducting paste (14g) Tmax = +260 °C ISO calibration certificate, calibration points +60 °C, +120 °C, +180 °C ISO calibration certificate, calibration points -18 °C, 0 °C, +60 °C Order no. 0636 9784 0602 0393 0602 0993 0602 0693 0602 1793 0554 0547 0554 0569 0554 0568 0554 0610 0554 0447 0554 0660 0554 0051 0554 0004 0520 0002 0520 0401 A complete list of all accessories and spare parts can be found in the product catalogues and brochures or on the internet at: www.testo.com ?? ?? nl sv pt it es fr en de 49 50 ?? ?? nl sv pt it es fr en de 51 testo AG Telefon: (07653) 681-0 Fax: (07653) 681-100 E-Mail: [email protected] Internet: http://www.testo.com Instrumentos testo S. A. 08348 Cabrils (Barcelona) Tel. (93) 753 95 20 Fax: (93) 753 95 26 E-Mail: [email protected] Internet: http://www.testo.es www.testo.com Postfach 11 40, 79849 Lenzkirch Testo-Straße 1, 79853 Lenzkirch 0977.8450/03/T/wh/30.05.2006