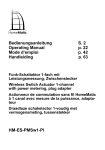
1
Bedienungsanleitung Operating Manual Handleiding
Mode d’emploi
Funk-Schaltaktor 1-fach,
Zwischenstecker Typ F
Wireless Switch Actuator 1-channel,
plug adapter type F
Draadloze schakelactor 1-voudig,
tussenstekker type F
Actionneur de commutation sans fil à 1 canal,
adaptateur type F
HM-LC-Sw1-Pl-DN-R1
S. 2
p. 19
p. 36
p. 53

Lieferumfang
Anzahl
1x
1x
Artikel
HomeMatic Funk-Schaltaktor 1-fach, Zwischenstecker
Typ F
Bedienungsanleitung
1. Ausgabe Deutsch 10/2014
Dokumentation © 2014 eQ-3 AG, Deutschland
Alle Rechte vorbehalten. Ohne schriftliche Zustimmung des Herausgebers darf dieses Handbuch auch nicht auszugsweise in irgendeiner Form reproduziert werden oder unter Verwendung elektronischer,
mechanischer oder chemischer Verfahren vervielfältigt oder verarbeitet
werden.
Es ist möglich, dass das vorliegende Handbuch noch drucktechnische
Mängel oder Druckfehler aufweist. Die Angaben in diesem Handbuch
werden jedoch regelmäßig überprüft und Korrekturen in der nächsten
Ausgabe vorgenommen. Für Fehler technischer oder drucktechnischer
Art und ihre Folgen übernehmen wir keine Haftung.
Alle Warenzeichen und Schutzrechte werden anerkannt.
Printed in Hong Kong
Änderungen im Sinne des technischen Fortschritts können ohne Vorankündigung vorgenommen werden.
140071 / V 1.0
2

Inhaltsverzeichnis
1
Hinweise zu dieser Anleitung . . . . . . . . . . . . . . . . . . . . . . . . . . 4
2Gefahrenhinweise . . . . . . . . . . . . . . . . . . . . . . . . . . . . . . . . . . . 4
3
Funktion und Geräteübersicht . . . . . . . . . . . . . . . . . . . . . . . . . . 7
4
Allgemeine Systeminformation zu HomeMatic . . . . . . . . . . . . . 8
5Inbetriebnahme . . . . . . . . . . . . . . . . . . . . . . . . . . . . . . . . . . . . . 8
5.1
Einfache Bedienfunktionen am Gerät . . . . . . . . . . . . . . . . . . . . 8
5.2Anlernen . . . . . . . . . . . . . . . . . . . . . . . . . . . . . . . . . . . . . . . . . . 8
5.2.1 Anlernen an HomeMatic Geräte . . . . . . . . . . . . . . . . . . . . . . . . 9
5.2.2 Anlernen an eine HomeMatic Zentrale . . . . . . . . . . . . . . . . . . 10
6Bedienung . . . . . . . . . . . . . . . . . . . . . . . . . . . . . . . . . . . . . . . . 13
7
Werkseinstellungen wiederherstellen . . . . . . . . . . . . . . . . . . . 14
8
Fehler- und Rückmeldungen der Geräte-LED . . . . . . . . . . . . .14
8.1Blinkcodes . . . . . . . . . . . . . . . . . . . . . . . . . . . . . . . . . . . . . . . . 14
8.2
Anzeige des Betriebszustandes . . . . . . . . . . . . . . . . . . . . . . . 15
8.3
Duty Cycle . . . . . . . . . . . . . . . . . . . . . . . . . . . . . . . . . . . . . . . . 15
9
Verhalten nach Spannungswiederkehr . . . . . . . . . . . . . . . . . . 16
10
Wartung und Reinigung . . . . . . . . . . . . . . . . . . . . . . . . . . . . . . 16
11
Allgemeine Hinweise zum Funkbetrieb . . . . . . . . . . . . . . . . . . 17
12
Technische Daten . . . . . . . . . . . . . . . . . . . . . . . . . . . . . . . . . . 17
3
Hinweise zu dieser Anleitung
1
Hinweise zu dieser Anleitung
Lesen Sie diese Anleitung sorgfältig, bevor Sie Ihre HomeMatic Komponenten in Betrieb nehmen. Bewahren Sie die Anleitung zum späteren Nachschlagen auf! Wenn Sie das Gerät anderen Personen zur
Nutzung überlassen, übergeben Sie auch diese Bedienungsanleitung.
Benutzte Symbole:
Achtung! Hier wird auf eine Gefahr hingewiesen.
Hinweis. Dieser Abschnitt enthält zusätzliche wichtige
Informationen!
Hinweis. Dieser Abschnitt enthält zusätzliche wichtige
Informationen zur Verwendung des Gerätes in Verbindung mit
der HomeMatic Zentrale.
2
Gefahrenhinweise
Bei Sach- oder Personenschäden, die durch unsachgemäße
Handhabung oder Nichtbeachten der Gefahrenhinweise
verursacht werden, übernehmen wir keine Haftung. In solchen
Fällen erlischt jeder Gewährleistungsanspruch! Für Folgeschäden übernehmen wir keine Haftung!
Öffnen Sie das Gerät nicht. Es enthält keine durch den
Anwender zu wartenden Teile. Das Öffnen des Gerätes birgt
die Gefahr eines Stromschlages. Im Fehlerfall lassen Sie das
Gerät von einer Fachkraft prüfen.
Verwenden Sie das Gerät nicht, wenn es von außen erkennbare
Schäden z. B. am Gehäuse, an Bedienelementen oder an den
Anschlussbuchsen bzw. eine Funktionsstörung aufweist. Lassen
Sie das Gerät im Zweifelsfall von einer Fachkraft prüfen.
4
Gefahrenhinweise
Aus Sicherheits- und Zulassungsgründen (CE) ist das
eigenmächtige Umbauen und/oder Verändern des Produkts
nicht gestattet.
Betreiben Sie das Gerät nur in Innenräumen und setzen Sie es
keinem Einfluss von Feuchtigkeit, Vibrationen, ständiger
Sonnen- oder anderer Wärmeeinstrahlung, Kälte und keinen
mechanischen Belastungen aus.
Das Gerät ist kein Spielzeug, erlauben Sie Kindern nicht damit
zu spielen. Lassen Sie das Verpackungsmaterial nicht achtlos
liegen, Plastikfolien/-tüten, Styroporteile, etc., könnten für
Kinder zu einem gefährlichen Spielzeug werden.
Beachten Sie vor Anschluss eines Verbrauchers die technischen Daten, insbesondere die maximal zulässige Schaltleistung des Relais und Art des anzuschließenden Verbrauchers!
Alle Lastangaben beziehen sich auf ohmsche Lasten! Belasten
Sie das Gerät nur bis zur angegebenen Leistungsgrenze. Eine
Überlastung kann zur Zerstörung des Gerätes, zu einem Brand
oder elektrischen Unfall führen.
Das Gerät darf nur an eine leicht zugängliche Netz-Steckdose
angeschlossen werden. Bei Gefahr ist das Gerät aus der
Netz-Steckdose zu ziehen.
Verwenden Sie den HomeMatic Zwischenstecker nur in fest
installierten Steckdosen mit Schutzkontakten, nicht in
Steckdosenleisten oder mit Verlängerungskabeln.
Schließen Sie keine Endgeräte an den HomeMatic Zwischenstecker an, deren unbeaufsichtigtes Einschalten Brände oder
andere Schäden verursachen könnte (z. B. Bügeleisen).
Ziehen Sie grundsätzlich den Stecker des Endgerätes aus dem
HomeMatic Zwischenstecker, bevor Sie Veränderungen am
5
Gefahrenhinweise
Endgerät vornehmen (z. B. Glühlampenwechsel).
Verlegen Sie Kabel stets so, dass diese nicht zu Gefährdungen
für Menschen und Haustiere führen können.
Das Gerät ist nicht zum Freischalten geeignet. Die Last ist
nicht galvanisch vom Netz getrennt.
Reinigen Sie das Gerät nur nach Entfernen aus der Steckdose
mit einem trockenen Leinentuch, das bei starken Verschmutzungen leicht angefeuchtet sein kann. Verwenden Sie zur
Reinigung keine lösemittelhaltigen Reinigungsmittel. Achten
Sie darauf, dass keine Feuchtigkeit in das Geräteinnere
gelangt.
Jeder andere Einsatz als der in dieser Bedienungsanleitung
beschriebene ist nicht bestimmungsgemäß und führt zu
Gewährleistungs- und Haftungsausschluss. Dies gilt auch für
Umbauten und Veränderungen. Das Gerät ist ausschließlich
für den privaten Gebrauch gedacht.
HomeMatic Zwischenstecker dürfen nicht hintereinander
gesteckt werden.
Geräte mit elektronischen Netzteilen (z. B. Fernseher oder
Hochvolt-LED-Leuchtmittel) stellen keine ohmschen Lasten
dar. Sie können Einschaltströme von über 100 A erzeugen.
Schalten solcher Verbraucher führt zu vorzeitigem Verschleiß
des Aktors.
Das Gerät ist nur für den Einsatz in wohnungsähnlichen
Umgebungen geeignet.
6
Funktion und Geräteübersicht
3
Funktion und Geräteübersicht
Der HomeMatic Funk-Schaltaktor 1-fach, Zwischenstecker ermöglicht
das Schalten von angeschlossenen Geräten per Funk.
Das Gerät kann schnell und ohne Werkzeug montiert werden und ist
nach dem Einstecken in die Steckdose sofort betriebsbereit. Mit dem
Funk-Schaltaktor ist sowohl eine einfache Bedienung am Gerät als
auch das Anlernen von mehreren HomeMatic Geräten (z. B. HomeMatic Funk-Fernbedienung) möglich. Die Geräte-LED signalisiert z. B.
Betriebszustände und Fehlermeldungen.
In Verbindung mit der HomeMatic Zentrale CCU2 kann der FunkSchaltaktor über die WebUI Bedienoberfläche individuell konfiguriert
und der volle Funktionsumfang genutzt werden. Sie können bspw. die
maximale Ein- bzw. Ausschaltdauer des Gerätes sowie eine Verzögerungszeit für das Ein- bzw. Ausschalten angeschlossener Verbraucher
einstellen.
A
B
(A) - Kanaltaste
(B) - Geräte-LED
7
Allgemeine Systeminformation zu HomeMatic
4
Allgemeine Systeminformation zu
HomeMatic
Dieses Gerät ist Teil des HomeMatic Haussteuersystems und arbeitet
mit dem bidirektionalen BidCoS® Funkprotokoll.
Alle Geräte werden mit einer Standardkonfiguration ausgeliefert. Darüber hinaus ist die Funktion des Gerätes über ein Programmiergerät
und Software konfigurierbar. Welcher weitergehende Funktionsumfang
sich damit ergibt, und welche Zusatzfunktionen sich im HomeMatic
System im Zusammenspiel mit weiteren Komponenten ergeben, entnehmen Sie bitte dem HomeMatic WebUI Handbuch.
Alle technischen Dokumente und Updates finden Sie stets aktuell im
Downloadbereich unter www.homematic.com.
5
5.1
Inbetriebnahme
Einfache Bedienfunktionen am Gerät
• Stecken Sie den Funk-Schaltaktor in die Steckdose.
Das Gerät ist sofort betriebsbereit und kann an eine HomeMatic Zentrale (oder an andere HomeMatic Geräte) angelernt werden.
Das Gerät verfügt über eine Kanaltaste (A), die über einen kurzen Tastendruck zur Bedienung (ein- bzw. ausschalten) von angeschlossenen
Verbrauchern genutzt werden kann.
Um das Gerät in seinem vollen Funktionsumfang in Ihrem HomeMatic
System nutzen und konfigurieren zu können, müssen Sie es zunächst
Anlernen (vgl. Kapitel „5.2 Anlernen“ auf Seite 8).
5.2
Anlernen
Bitte lesen Sie diesen Abschnitt vollständig, bevor Sie mit dem
Anlernen beginnen.
Damit der Funk-Schaltaktor in Ihr HomeMatic System integriert wird und
8
Inbetriebnahme
mit anderen HomeMatic Komponenten (z. B. einer HomeMatic FunkFernbedienung) kommunizieren kann, muss das Gerät zunächst angelernt werden. Sie können den Funk-Schaltaktor an andere HomeMatic
Geräte oder an die HomeMatic Zentrale anlernen:
5.2.1 Anlernen an HomeMatic Geräte
Wenn Sie den Funk-Schaltaktor an ein oder mehrere Geräte anlernen
möchten, müssen die beiden zu verknüpfenden Geräte in den Anlernmodus gebracht werden. Dafür gehen Sie wie folgt vor:
Halten Sie beim Anlernen einen Mindestabstand von 50 cm
zwischen den HomeMatic Geräten ein.
Aktivieren Sie zunächst den Anlernmodus am Funk-Schaltaktor.
• Halten Sie die Kanaltaste (A) für mindestens 4 Sekunden gedrückt.
Langsames Blinken der Geräte-LED (B) signalisiert den Anlernmodus. Die Anlernzeit beträgt max. 20 Sekunden.
>4s
• Versetzen Sie jetzt das Gerät, das Sie an den Funk-Schaltaktor
anlernen möchten (z. B. eine HomeMatic Funk-Fernbedienung, s.
nachfolgende Abbildung), in den Anlernmodus. Nehmen Sie die
9
Inbetriebnahme
Batteriefachabdeckung ab und drücken Sie kurz mit einem spitzen
Gegenstand auf die Anlerntaste.
• Nach dem Anlernvorgang erlischt die Geräte-LED des FunkSchaltaktors.
Nach erfolgreichem Anlernen können Sie den Funk-Schaltaktor z. B.
mit einer HomeMatic Funk-Fernbedienung ein- und ausschalten.
Wenn kein Anlernen erfolgt, wird der Anlernmodus automatisch
nach 20 Sekunden beendet. Befinden sich andere Geräte im
Anlernmodus, werden diese angelernt.
5.2.2 Anlernen an eine HomeMatic Zentrale
Um Ihr Gerät softwarebasiert und komfortabel
• steuern und konfigurieren,
• direkt mit anderen Geräten verknüpfen oder
• in Zentralenprogrammen nutzen zu können,
K
CY
CMY
MY
Y
CM
10
M
C
muss es zunächst an die HomeMatic Zentrale angelernt werden. Das
Anlernen neuer Geräte an die Zentrale erfolgt über die HomeMatic Bedienoberfläche „WebUI“.
Inbetriebnahme
Sobald ein Gerät an eine Zentrale angelernt ist, kann es nur
noch über diese mit anderen Geräten verknüpft werden.
Jedes Gerät kann immer nur an eine Zentrale angelernt
werden.
Halten Sie beim Anlernen einen Mindestabstand von 50 cm
zwischen den HomeMatic Geräten und der Zentrale ein.
Zum Anlernen Ihres Gerätes an die Zentrale gehen Sie wie folgt vor:
• Öffnen Sie die WebUI-Bedienoberfläche in Ihrem Browser. Klicken
Sie auf den Button „Geräte anlernen“ im rechten Bildschirmbereich.
• Um den Anlernmodus zu aktivieren, klicken Sie im nächsten Fenster auf „BidCoS-RF Anlernmodus“.
11
Inbetriebnahme
• Der Anlernmodus ist für 60 Sekunden aktiv. Das Infofeld zeigt die
aktuell noch verbleibende Anlernzeit.
• Versetzen Sie innerhalb dieser Anlernzeit auch den Funk-Schaltaktor in den Anlernmodus. Halten Sie die Kanaltaste (A) für mindestens 4 Sekunden gedrückt. Langsames Blinken der Geräte-LED
(B) signalisiert den Anlernmodus.
>4s
• Nach kurzer Zeit erscheint das neu angelernte Gerät im Posteingang Ihrer Bedienoberfläche. Der Button „Posteingang“ zeigt dabei
an, wie viele neue Geräte erfolgreich angelernt wurden.
• Lernen Sie ggf. weitere Geräte an, indem Sie die vorher beschriebenen Schritte für jedes Gerät wiederholen.
• Konfigurieren Sie nun die neu angelernten Geräte im Posteingang
wie im Abschnitt „Neu angelernte Geräte konfigurieren“ beschrieben.
Neu angelernte Geräte konfigurieren
Nachdem Sie Ihren Funk-Schaltaktor an die HomeMatic Zentrale angelernt haben, wird er in den „Posteingang“ verschoben. Hier muss Ihr
Gerät und die dazugehörigen Kanäle zunächst konfiguriert werden,
damit es für Bedien- und Konfigurationsaufgaben zur Verfügung steht.
Vergeben Sie einen Namen und ordnen Sie das Gerät bzw. die Kanäle
12
Bedienung
einem Raum zu. Sie haben zusätzlich die Möglichkeit, die Ein- bzw.
Ausschaltdauer des Gerätes sowie eine Verzögerungszeit für das Einbzw. Ausschalten angeschlossener Verbraucher einzustellen.
Anschließend können Sie Ihr Gerät über die WebUI steuern und konfigurieren, direkt mit anderen Geräten verknüpfen oder in Zentralenprogrammen nutzen. Einzelheiten hierzu entnehmen Sie bitte dem HomeMatic WebUI Handbuch (zu finden im Downloadbereich der Website
www.homematic.com).
6
Bedienung
Nach dem Anlernen und Konfigurieren können Sie den Funk-Schaltaktor z. B. mit einer angelernten HomeMatic Funk-Fernbedienung steuern und so angeschlossene Verbraucher an- und ausschalten (s. nachfolgende Abbildung).
Licht an
Licht aus
13
Werkseinstellungen wiederherstellen
7
Werkseinstellungen wiederherstellen
Die Werkseinstellungen des Funk-Schaltaktors können manuell wiederhergestellt werden. Dabei gehen alle Einstellungen und Informationen verloren.
Um die Werkseinstellungen wiederherzustellen, gehen Sie wie folgt
vor:
• Halten Sie die Kanaltaste (A) für mindestens vier Sekunden
gedrückt, bis die Geräte-LED (B) langsam zu blinken beginnt.
• Lassen Sie die Taste wieder los.
>4s
• Drücken Sie nun die Kanaltaste (A) erneut für vier Sekunden, bis
die Geräte-LED (B) schnell zu blinken beginnt.
• Lassen Sie die Taste wieder los.
• Die Geräte-LED erlischt.
• Die Werkseinstellungen des Gerätes sind nun wiederhergestellt.
8
Fehler- und Rückmeldungen der
Geräte-LED
8.1
Blinkcodes
Verschiedene Zustände des Funk-Schaltaktors werden durch rotes
Blinken der Geräte-LED (B) angezeigt:
14
Fehler- und Rückmeldungen der Geräte-LED
Blinkfolge
Bedeutung
Langsames Blinken Anlernmodus aktiv
oder Vorstufe zum
Wiederherstellen der
Werkseinstellungen
Schnelles Blinken
Die Werkseinstellungen des Gerätes
wurden wiederhergestellt
1 x langes, 1 x
Sende-Limit (Duty-Cykurzes Blinken
cle) erreicht
1 x langes, 2 x
kurzes Blinken
8.2
Gerät defekt
Lösung
/
/
Siehe Kapitel „8.3
Duty Cycle“ auf Seite
15
Bitte wenden Sie sich
an Ihren Fachhändler.
Anzeige des Betriebszustandes
Sobald der Funk-Schaltaktor eingeschaltet ist, leuchtet die Geräte-LED
(B) dauerhaft.
Nach Konfiguration des Funk-Schaltaktors über die Zentrale oder über
ein Programmiertool zeigt die Geräte-LED neben den beschriebenen
noch zusätzliche Zustände des Gerätes an (z. B. Ein- bzw. Ausschaltverzögerung sowie Ein- bzw. Ausschaltdauer).
8.3
Duty Cycle
Der Duty Cycle beschreibt eine gesetzlich geregelte Begrenzung der
Sendezeit von Geräten im 868 MHz Bereich. Das Ziel dieser Regelung
ist es, die Funktion aller im 868 MHz Bereich arbeitenden Geräte zu
gewährleisten.
In dem von uns genutzten Frequenzbereich 868 MHz beträgt die maximale Sendezeit eines jeden Gerätes 1 % einer Stunde (also 36 Sekunden in einer Stunde). Die Geräte dürfen bei Erreichen des 1 %-Limits
nicht mehr senden, bis diese zeitliche Begrenzung vorüber ist. Gemäß
15
Verhalten nach Spannungswiederkehr
dieser Richtlinie, werden HomeMatic Geräte zu 100 % normenkonform
entwickelt und produziert.
Im normalen Betrieb wird der Duty Cycle in der Regel nicht erreicht.
Dies kann jedoch in Einzelfällen bei der Inbetriebnahme oder Erstinstallation eines Systems durch vermehrte und funkintensive Anlernprozesse der Fall sein. Eine Überschreitung des Duty Cycle Limits wird
durch einmal langes und einmal kurzes Blinken der Geräte LED angezeigt und kann sich durch temporär fehlende Funktion des Gerätes
äußern. Nach kurzer Zeit (max. 1 Stunde) ist die Funktion des Gerätes
wiederhergestellt.
9
Verhalten nach Spannungswiederkehr
Nach dem Einstecken des Gerätes in eine Steckdose oder nach Wiederkehr der Netzspannung führt der Funk-Schaltaktor einen Selbsttest
durch. Sollte dabei ein Fehler festgestellt werden, so wird dieses durch
Blinken der Geräte-LED dargestellt (s. Kapitel „8.1 Blinkcodes“ auf Seite
14). Dieses wiederholt sich kontinuierlich und das Gerät nimmt seine
eigentliche Funktion nicht auf.
Sollte der Test ohne Fehler durchlaufen, sendet der Funk-Schaltaktor ein
Funktelegramm mit seiner Statusinformation aus. Damit bei Spannungswiederkehr (etwa nach Netzspannungsausfall oder Abschaltung) nicht
alle HomeMatic Aktoren gleichzeitig senden, wartet der Funk-Schaltaktor
eine zufällige Verzögerungszeit vor dem Senden. In dieser Zeit blinkt die
Geräte-LED langsam rot. Ist die Verzögerungszeit sehr kurz, kann es
sein, dass das Blinken kaum wahrnehmbar ist.
10
Wartung und Reinigung
Das Produkt ist wartungsfrei. Überlassen Sie eine Reparatur einer
Fachkraft. Reinigen Sie das Produkt mit einem weichen, sauberen,
trockenen und fusselfreien Tuch. Für die Entfernung von stärkeren
Verschmutzungen kann das Tuch leicht mit lauwarmem Wasser angefeuchtet werden. Verwenden Sie keine lösemittelhaltigen Reinigungsmittel, das Kunststoffgehäuse und die Beschriftung kann dadurch angegriffen werden.
16
Allgemeine Hinweise zum Funkbetrieb
11
Allgemeine Hinweise zum Funkbetrieb
Die Funk-Übertragung wird auf einem nicht exklusiven Übertragungsweg realisiert, weshalb Störungen nicht ausgeschlossen werden können. Weitere Störeinflüsse können hervorgerufen werden durch Schaltvorgänge, Elektromotoren oder defekte Elektrogeräte.
Die Reichweite in Gebäuden kann stark von der im Freifeld
abweichen. Außer der Sendeleistung und den Empfangseigenschaften der Empfänger spielen Umwelteinflüsse wie Luftfeuchtigkeit neben baulichen Gegebenheiten vor Ort eine
wichtige Rolle.
Wird beim Funk-Schaltaktor die „gesicherte Übertragung“
(AES) aktiviert, bedeutet dies:
• höheres Kommunikationsaufkommen,
• Aktor-Gruppen können nicht mehr gleichzeitig Befehle ausführen.
Weitere Informationen zur gesicherten Übertragung (AES) finden Sie
im HomeMatic WebUI Handbuch unter www.homematic.com.
Hiermit erklärt die eQ-3 AG, dass sich dieses Gerät in Übereinstimmung mit den grundlegenden Anforderungen und den anderen relevanten Vorschriften der Richtlinie 1999/5/EG befindet.
Die vollständige Konformitätserklärung finden Sie unter
www.homematic.com.
12
Technische Daten
Geräte-Kurzbezeichnung:
Versorgungsspannung:
Stromaufnahme:
Leistungsaufnahme Ruhebetrieb:
Lastart:
Maximale Schaltleistung:
Relais:
HM-LC-Sw1-Pl-DN-R1
230 V/50 Hz
16 A max.
0,6 W
ohmsche Last
3680 W
Schließer, 1-polig, μ-Kontakt
17
Technische Daten
Funkfrequenz:
868,3 MHz
Schaltspiele:
40000 (16 A, ohmsche Last)
Empfängerkategorie:
SRD Category 2
Typ. Funk-Freifeldreichweite:
> 100 m
Duty Cycle:
< 1 % pro h
Betriebsart:
S1
Schaltertyp:
unabhängig montierter Schalter
Schutzart:
IP20
Schutzklasse:
I
Wirkungsweise:
Typ 1
Stehstoßspannung:
2500 V
Verschmutzungsgrad:2
Umgebungstemperatur:
-10 °C bis +35 °C
Abmessungen (B x H x T): 59 x 122 x 40 mm (ohne Stecker)
Gewicht:
174 g
Technische Änderungen vorbehalten.
Entsorgungshinweis
Gerät nicht im Hausmüll entsorgen! Elektronische Geräte sind
entsprechend der Richtlinie über Elektro- und Elektronik-Altgeräte über die örtlichen Sammelstellen für Elektronik-Altgeräte
zu entsorgen.
Konformitätshinweis
Das CE-Zeichen ist ein Freiverkehrszeichen, das sich ausschließlich an die Behörden wendet und keine Zusicherung
von Eigenschaften beinhaltet.
Bei technischen Fragen zum Gerät, wenden Sie sich bitte an
Ihren Fachhändler.
18

Package contents
Quantity Item
1x
HomeMatic Wireless Switch Actuator 1-channel, plug
adapter type F
1x
Operating manual
1st English edition 10/2014
Documentation © 2014 eQ-3 AG, Germany
All rights reserved. Translation from the original version in German.
This manual may not be reproduced in any format, either in whole or
in part, nor may it be duplicated or edited by electronic, mechanical or
chemical means, without the written consent of the publisher.
Typographical and printing errors cannot be excluded. However, the
information contained in this manual is reviewed on a regular basis and
any necessary corrections will be implemented in the next edition. We
accept no liability for technical or typographical errors or the consequences thereof.
All trademarks and industrial property rights are acknowledged.
Printed in Hong Kong
Changes may be made without prior notice as a result of technical advances.
140071 / V 1.0
19

Table of contents
1
Information about this manual . . . . . . . . . . . . . . . . . . . . . . . . . 21
2
Hazard information . . . . . . . . . . . . . . . . . . . . . . . . . . . . . . . . . 21
3
Function and device overview . . . . . . . . . . . . . . . . . . . . . . . . . 24
4
General information about the HomeMatic system . . . . . . . . . 25
5Start-up . . . . . . . . . . . . . . . . . . . . . . . . . . . . . . . . . . . . . . . . . . 25
5.1
Simple operating functions on the device . . . . . . . . . . . . . . . . 25
5.2Teaching-in . . . . . . . . . . . . . . . . . . . . . . . . . . . . . . . . . . . . . . . 25
5.2.1 Teaching-in directly in to HomeMatic devices . . . . . . . . . . . . . 26
5.2.2 Teaching-in to a HomeMatic Central Control Unit . . . . . . . . . . 27
6Operation . . . . . . . . . . . . . . . . . . . . . . . . . . . . . . . . . . . . . . . . .30
7
Restore factory settings . . . . . . . . . . . . . . . . . . . . . . . . . . . . . .31
8
Error codes and device LED feedback . . . . . . . . . . . . . . . . . . 32
8.1
Flash codes . . . . . . . . . . . . . . . . . . . . . . . . . . . . . . . . . . . . . . . 32
8.2
Operational status display . . . . . . . . . . . . . . . . . . . . . . . . . . . . 32
8.3
Duty cycle . . . . . . . . . . . . . . . . . . . . . . . . . . . . . . . . . . . . . . . . 32
9
Behaviour after power recovery . . . . . . . . . . . . . . . . . . . . . . . 33
10
Maintenance and cleaning . . . . . . . . . . . . . . . . . . . . . . . . . . . 33
11
General information about radio operation . . . . . . . . . . . . . . . 34
12
Technical specifications . . . . . . . . . . . . . . . . . . . . . . . . . . . . . . 34
20
Information about this manual
1
Information about this manual
Please read this manual carefully before beginning operation with your
HomeMatic components. Keep the manual so you can refer to it at a
later date if you need to. If you hand over the device to other persons
for use, please hand over the operating manual as well.
Symbols used:
Attention! This indicates a hazard.
Note. This section contains important additional information.
Note. This section contains additional important information
about using the device in connection with the HomeMatic
Central Control Unit.
2
Hazard information
We do not assume any liability for damage to property or
personal injury caused by improper use or the failure to
observe the hazard information. In such cases any claim under
warranty is extinguished! For consequential damages, we
assume no liability!
Do not open the device. It does not contain any parts that can
be maintained by the user. There is a risk of electric shock if
the device is opened. In the event of an error, have the device
checked by an expert.
Do not use the device if there are signs of damage to the
housing, control elements or connecting sockets, for example,
or if it demonstrates a malfunction. If you have any doubts,
have the device checked by an expert.
21
Hazard information
For safety and licensing reasons (CE), unauthorized change
and/or modification of the product is not permitted.
The device may only be operated indoors and must be
protected from the effects of moisture, vibrations, solar or other
methods of heat radiation, cold and mechanical loads.
The device is not a toy; do not allow children to play with it. Do
not leave packaging material lying around, plastic films/bags,
pieces of polystyrene etc., can be dangerous in the hands of a
child.
Please take the technical data (in particular the maximum
permissible switching capacity of the relay and the type of load
to be connected) into account before connecting a load! All
load data relates to resistive loads! Do not exceed the capacity
specified for the device. Exceeding this capacity could lead to
the destruction of the device, to a fire or to an electrical
accident.
The device may only be connected to an easily accessible
power socket outlet. In case of danger, disconnect the device
from the power socket outlet.
Only use the HomeMatic Switch Actuator with properly installed
wall outlets with earth contacts and not with multiple socket
outlets or extension cables.
Do not connect devices into the HomeMatic Switch Actuator
which could cause fire or other types of damage in unattended
operation (e.g. irons).
Remove the plug of the connected device from the HomeMatic
Switch Actuator, whenever you make changes or modifications
to the device (e.g. replacing light bulbs).
22
Hazard information
Always lay cables in such a way that they do not become a risk
to people and domestic animals.
The device has not been designed to support safety disconnection. The load is not isolated from the mains.
Before cleaning the device, unplug it from the socket outlet.
Use a dry linen cloth to clean the device. If the device is
particularly dirty, you can slightly dampen the cloth to clean it.
Do not use any detergents containing solvents for cleaning
purposes. Make sure that no moisture will ingress into the
housing.
Using the device for any purpose other than that described in
this operating manual does not fall within the scope of intended
use and shall invalidate any warranty or liability. This also
applies to any conversion or modification work. The device is
intended for private use only.
Do not connect multiple plug adapters into one another.
Devices with electronic power supply units (e.g. TV or high
voltage LED light sources) are no ohmic loads. They can
generate inrush currents with more than 100 A. Switching such
kind of loads may lead to premature wear of the actuator.
The device may only be operated whitin residential buildings.
23
Function and device overview
3
Function and device overview
The HomeMatic Wireless Switch Actuator 1-channel, plug adapter enables switching of connected devices via radio.
The device can be easily mounted without tools - after the device has
been plugged in, it is immediately ready for use. The wireless switch
actuator enables easy operation directly on the device. Alternatively,
multiple HomeMatic devices (e.g. HomeMatic remote controls) can be
assigned. Information about the current operating status or error messages is given be the device LED.
In connection with the HomeMatic Central Control Unit CCU2 the wireless switch actuator can be individually configured via the WebUI user
interface and the full range of functions can be used. The maximum
switch on and off duration as well as a delay time for switching connected devices on and off can be individually adjusted.
A
B
(A) - Channel button
(B) - Device LED
24
General information about the HomeMatic system
4
General information about the HomeMatic
system
This device is part of the HomeMatic home control system and works
with the bidirectional BidCoS® wireless protocol.
All devices are delivered in a standard configuration. The functionality
of the device can also be configured with a programming device and
software. The additional functions that can be made available in this
way and the supplementary functions provided by the HomeMatic system when it is combined with other components are described in the
HomeMatic WebUI Manual.
All current technical documents and updates are provided in the download area at www.homematic.com.
5
5.1
Start-up
Simple operating functions on the device
• Insert the wireless switch actuator into a socket.
The device is immediately ready for operation and can be taught-in to a
HomeMatic CCU (or to other HomeMatic devices).
Via the channel button (A), connected loads can be controlled (switch
on and off) with a short button press.
Before being able to use and configure your device in the HomeMatic
system, the switch actuator has to be taught-in first (see sec. „5.2 Teaching-in“ on page 25).
5.2
Teaching-in
Please read this entire section before starting the teach-in
procedure.
To integrate the switch actuator into your HomeMatic system and enable it to communicate with other HomeMatic devices (e.g. HomeMatic
25
Start-up
remote control), you must teach it in first. You can teach-in the switch actuator directly to other HomeMatic devices or to the HomeMatic Central
Control Unit:
5.2.1 Teaching-in directly in to HomeMatic devices
If you want to teach-in the switch actuator to one or more HomeMatic
devices, the teach-in mode of both devices has to be activated first. To
do this, proceed as follows:
During teach-in, please make sure you maintain a distance of at
least 50 cm between the devices.
Activate the teach-in mode of your switch actuator.
• Therefore, press and hold the channel button (A) for at least 4 seconds. The device LED (B) will flash slowly to indicate that teach-in
mode is active. The teach-in time is 20 seconds.
>4s
• Now put the device you wish to teach-in to the switch actuator
(e.g. HomeMatic remote control, see the following fig.) into teachin mode. Remove the battery compartment cover and press the
teach-in button briefly using a pointed object.
26
Start-up
• After teaching-in, the device LED of the switch actuator will stop
flashing.
After successfully teaching-in the device, it can be switched on and off
e.g. by a HomeMatic remote control.
If no teach-in operations are carried out, teach-in mode is
exited automatically after 20 seconds. If other devices are also
in teach-in mode, they will be taught-in.
5.2.2 Teaching-in to a HomeMatic Central Control Unit
Your device can be conveniently
• controlled and configured,
• connected directly to other devices or
• used in Central Control Unit programs
K
CY
CMY
MY
Y
CM
M
C
by using the HomeMatic software “WebUI”. Therefore, your switch actuator has to be taught-in to the HomeMatic Central Control Unit first.
New devices are taught-in to the Central Control Unit via the HomeMatic „WebUI“.
As soon as a device has been taught-in to a Central Control
Unit, it can only be connected to other components via this
unit.
27
Start-up
Each device can only be taught-in to one Central Control Unit.
During teach-in, please make sure you maintain a distance of
at least 50 cm between the HomeMatic devices and the
Central Control Unit.
To teach-in your device to the Central Control Unit, proceed as follows:
• Open the “WebUI” user interface in your browser. Click the “Teachin devices” button on the right-hand side of the screen.
• To activate teach-in mode, click “Start teach-in mode” in the next
window.
• Teach-in mode remains activated for 60 seconds. An information
28
Start-up
box shows how much teach-in time remains.
• Meanwhile, please activate the teach-in mode of your switch actuator to teach-in as well. Therefore, press and hold the channel button (A) for at least 4 seconds. The device LED (B) will flash slowly
to indicate that teach-in mode is active.
>4s
• After a short time, the newly taught-in device will appear in the inbox of your software interface. The button „Inbox (x new devices)“
indicates how many new devices have been taught-in successfully.
• If required, you can teach-in additional devices by repeating the
steps described above for each device.
• Now configure the newly taught-in devices in the inbox as described in section „Configuring newly taught-in devices“ .
Configuring newly taught-in devices
Once you have taught-in your switch actuator to the HomeMatic Central Control Unit, it will be moved to the inbox. Here, you must configure
the device and its associated channels in order to make them available for operating and configuration tasks. Give the device a name
and assign the device/channels to a room. You can individually adjust
the switch on and off duration of the device as well as a delay time for
switching connected devices on and off.
29
Operation
Now you can use the „WebUI“ user interface to control your device,
configure it, connect it directly to other devices, or use it in central control unit programs. Please refer to the HomeMatic WebUI Manual for
more details (you can find this in the „Downloads“ area of the website
www.homematic.com).
6
Operation
After teaching-in and configuring the device, you can control the switch
actuator e.g. with a connected remote control to switch on and off connected loads (see the following fig.).
Lights on
Lights off
30
Restore factory settings
7
Restore factory settings
The factory settings of the switch actuator can be restored manually. If
you do this, you will lose all your settings.
To restore the factory settings, please proceed as follows:
• Press and hold down the channel button (A) for at least four
seconds until the device LED (B) will slowly start flashing.
• Release the button again.
>4s
• Press and hold down the channel button (A) again for at least 4
seconds until the device LED (B) will quickly start flashing.
• Release the button again.
• The device LED stops flashing.
• The factory settings of the device are now restored.
31
Error codes and device LED feedback
8
8.1
Error codes and device LED feedback
Flash codes
Various actuator states are indicated by the device LED (B):
Flashing sequence
Slow flashing
Fast flashing
1 x long, 1 x short
flashing
1 x long, 2 x short
flashing
8.2
Meaning
Teach-in mode
activated or stage
before restoring the
factory settings
The factory settings
of the device will be
restored.
Transmit limit (duty
cycle) reached
Device defective
Solution
/
/
please see sec. „8.3 Duty
cycle“ on page 32
Please contact your
specialist dealer.
Operational status display
The device LED (B) lights up permanently as soon as the switch actuator is switched on.
After configuring the switch actuator with the Central Control Unit or
a programming tool, the device LED indicates other device states besides those described (e.g. switch on and off delay or duration).
8.3
Duty cycle
The duty cycle is a legally regulated limit of the transmission time of
devices in the 868 MHz range. The aim of this regulation is to safeguard the operation of all devices working in the 868 MHz range.
In the 868 MHz frequency range we use, the maximum transmission
time of any device is 1% of an hour (i.e. 36 seconds in an hour). Devices must cease transmission when they reach the 1% limit until this
time restriction comes to an end. HomeMatic devices are designed and
32
Behaviour after power recovery
produced with 100% conformity to this regulation.
During normal operation, the duty cycle is not usually reached. However, repeated and wireless-intensive teach-in processes mean that it
may be reached in isolated instances during start-up or initial installation of a system. If the duty cycle is exceeded, this is indicated by one
long and one short red flash of the device LED, and may manifest itself
in the device temporarily working incorrectly. The device starts working
correctly again after a short period (max. 1 hour).
9
Behaviour after power recovery
After the device has been inserted to a socket or after power recovery the
switch actuator performs a self-test/restart. The device LED will flash if an
error is detected during this check (see sec. „8.1 Flash codes“ on page
32). This is repeated continuously and the device does not perform its
function.
If the test is completed without errors, the switch actuator transmits a
wireless telegram containing its status information. To prevent all HomeMatic actuators from transmitting at the same time when power is recovered (after a mains power failure or a disconnection, for example), there
is a random delay before the switch actuator transmits. During this time,
the device LED flashes slowly. If the delay is very short, this flashing may
be almost imperceptible.
10
Maintenance and cleaning
The product does not require any maintenance. Enlist the help of an
expert to carry out any repairs. Clean the product using a soft, lint-free
cloth that is clean and dry. You may dampen the cloth a little with lukewarm water in order to remove more stubborn marks. Do not use any
detergents containing solvents, as they could corrode the plastic housing and label.
33
General information about radio operation
11
General information about radio operation
Radio transmission is performed on a non-exclusive transmission path,
which means that there is a possibility of interference occurring. Interference can also be caused by switching operations, electrical motors
or defective electrical devices.
The range of transmission within buildings can differ greatly
from that available in the open air. Besides the transmitting
power and the reception characteristics of the receiver,
environmental factors such as humidity in the vicinity have an
important role to play, as do on-site structural/screening
conditions.
If “secure transmission” (AES) is activated for the switch
actuator, this implies:
• increased volume of communication traffic
• actuator groups are unable to execute commands simultaneously.
Please refer to the HomeMatic WebUI Manual at www.homematic.com
for further information on secured operation.
eQ-3 AG hereby declares that this device complies with the essential
requirements and other relevant regulations of Directive 1999/5/EC.
You can find the full declaration of conformity at www.homematic.com.
12
Technical specifications
Device short description:
Supply voltage:
Current consumption:
Power consumption in standby:
Load type:
Maximum switching capacity:
Relay:
34
HM-LC-Sw1-Pl-DN-R1
230 V/50 Hz
16 A (max.)
0.6 W
ohmic load
680 W
NO contact, 1-pole, μ contact
Technical specifications
Radio frequency:
Switching cycle:
Receiver category:
Typ. open area RF range:
Duty cycle:
Operating mode:
Switch type:
Degree of protection:
Protection class:
Method of operation:
Withstand voltage:
Degree of pollution:
Ambient temperature:
Dimensions (W x H x D):
Weight:
868.3 MHz
40000 (16 A, ohmic load)
SRD category 2
> 100 m
< 1 % per h
S1
independently mounted switch
IP20
I
Type 1
2500 V
2
-10 °C to +35 °C
59 x 122 x 40 mm (not incl. plug)
174 g
Subject to technical changes.
.
Instructions for disposal
Do not dispose of the device with regular domestic waste.
Electronic equipment must be disposed of at local collection
points for waste electronic equipment in compliance with the
Waste Electrical and Electronic Equipment Directive
Information about conformity
The CE Marking is simply an official symbol relating to the free
movement of a product; it does not warrant a product’s characteristics.
For technical support, please contact your specialist dealer.
35

Leveringsomvang
Aantal
1x
1x
Artikel
Draadloze HomeMatic-schakelactor 1-voudig, tussenstekker type F
Handleiding
1e uitgave Nederlands 10/2014
Documentatie © 2014 eQ-3 AG, Duitsland
Alle rechten voorbehouden. Zonder schriftelijke toestemming van de
uitgever mogen deze handleiding of fragmenten ervan op geen enkele
manier worden gereproduceerd of met behulp van elektronische, mechanische of chemische middelen worden verveelvoudigd of verwerkt.
Het is mogelijk dat deze handleiding nog druktechnische gebreken of
drukfouten vertoont. De gegevens in deze handleiding worden echter
regelmatig gecontroleerd en indien nodig in de volgende uitgave gecorrigeerd. Voor fouten van technische of druktechnische aard inclusief de
gevolgen ervan stellen wij ons niet aansprakelijk.
Alle handelsmerken en octrooirechten worden erkend.
Printed in Hong Kong
Wijzigingen die de technische vooruitgang dienen, zijn zonder voorafgaande aankondiging mogelijk.
140071 / V 1.0
36

Inhoudsopgave
1
Instructies bij deze handleiding . . . . . . . . . . . . . . . . . . . . . . . . 38
2Gevaarsaanduidingen . . . . . . . . . . . . . . . . . . . . . . . . . . . . . . . 38
3
4
Werking en overzicht van het apparaat . . . . . . . . . . . . . . . . . . 41
Algemene systeeminformatie over
HomeMatic . . . . . . . . . . . . . . . . . . . . . . . . . . . . . . . . . . . . . . . 42
5Inbedrijfstelling . . . . . . . . . . . . . . . . . . . . . . . . . . . . . . . . . . . . 42
5.1
Eenvoudige bedieningsfuncties aan het apparaat . . . . . . . . . 42
5.2Aanleren . . . . . . . . . . . . . . . . . . . . . . . . . . . . . . . . . . . . . . . . . 42
5.2.1 Aanleren aan HomeMatic-apparaten . . . . . . . . . . . . . . . . . . . 43
5.2.2 Aanleren aan een HomeMatic-centrale . . . . . . . . . . . . . . . . . . 44
6Bediening . . . . . . . . . . . . . . . . . . . . . . . . . . . . . . . . . . . . . . . . 47
7
Fabrieksinstellingen opnieuw instellen . . . . . . . . . . . . . . . . . . 48
8
Fout- en terugmeldingen van de apparaatled . . . . . . . . . . . . . 48
8.1Knippercodes . . . . . . . . . . . . . . . . . . . . . . . . . . . . . . . . . . . . . 48
8.2
Weergave van de bedrijfstoestand . . . . . . . . . . . . . . . . . . . . . 49
8.3
Duty cycle . . . . . . . . . . . . . . . . . . . . . . . . . . . . . . . . . . . . . . . . 49
9
Gedrag na een terugkeer van de spanning . . . . . . . . . . . . . . . 50
10
Onderhoud en reiniging . . . . . . . . . . . . . . . . . . . . . . . . . . . . . . 50
11
Algemene instructies voor het draadloze bedrijf . . . . . . . . . . . 51
12
Technische gegevens . . . . . . . . . . . . . . . . . . . . . . . . . . . . . . . 51
37
Instructies bij deze handleiding
1
Instructies bij deze handleiding
Lees deze handleiding zorgvuldig door, vóór u de HomeMatic apparaten in gebruik neemt. Bewaar de handleiding, om ze ook later nog te
kunnen raadplegen! Als u het apparaat door andere personen laat gebruiken, geef dan ook deze handleiding mee.
Gebruikte symbolen
Let op! Hier wordt op een risico attent gemaakt.
Opmerking Dit hoofdstuk bevat aanvullende belangrijke
informatie.
Opmerking Dit hoofdstuk bevat aanvullende belangrijke
informatie over het gebruik van het apparaat in combinatie met
de HomeMatic-centrale.
2
Gevaarsaanduidingen
Voor zaak- of personenschade die door een onjuist gebruik of
niet-naleving van de gevaarsaanduidingen veroorzaakt is,
stellen wij ons niet aansprakelijk. In dergelijke gevallen vervalt
ieder garantierecht! Voor gevolgschade stellen wij ons niet
aansprakelijk!
Open het apparaat niet. Het bevat geen onderdelen die door
de gebruiker moeten worden onderhouden. Het openen van
het apparaat houdt het risico van een elektrische schok in. In
het geval van een defect dient u het apparaat naar de
klantenservice te sturen.
Gebruik het apparaat niet, indien het uiterlijk zichtbare schade,
bijv. aan de kast, bedieningselementen of aansluitbussen, of
een storing vertoont. Laat het apparaat in geval van twijfel
controleren door een specialist of onze service.
38
Gevaarsaanduidingen
Om redenen van veiligheid en markering (CE) is het eigenmachtig verbouwen en/of veranderen van het product niet
toegestaan.
Gebruik het apparaat uitsluitend binnen en stel het niet bloot
aan vocht, trillingen, langdurig zonlicht of andere warmtebronnen, koude en mechanische belastingen.
Het apparaat is geen speelgoed! Laat kinderen er niet mee
spelen. Laat verpakkingsmateriaal niet rondslingeren. Plastic
folies en zakken, vormstukken van styropor enz. kunnen door
kinderen als gevaarlijk speelgoed worden gebruikt.
Controleer voordat u een verbruiker aansluit, de technische
gegevens en met name het maximaal toegestane schakelvermogen van het relais en het type van de aan te sluiten
verbruiker! Alle lastgegevens hebben betrekking op ohmse
lasten! Belast het apparaat uitsluitend tot de opgegeven
vermogensgrens. Een overbelasting kan tot de vernieling van
het apparaat, een brand of elektrisch ongeval leiden.
Het apparaat mag alleen op een gemakkelijk toegankelijk
stopcontact worden aangesloten. Bij gevaar moet het apparaat
uit het stopcontact worden getrokken.
Gebruik de HomeMatic-tussenstekker alleen in vast geïnstalleerde stopcontacten met randaarding, niet in contactdozen of
met verlengkabels.
Sluit op de HomeMatic-tussenstekker geen eindapparaten aan
die bij onbedoeld inschakelen een brand of andere schade
kunnen veroorzaken (bijv. strijkijzers).
Trek altijd eerst de stekker van het eindapparaat uit de
HomeMatic-tussenstekker, voordat u veranderingen aan het
eindapparaat aanbrengt (bijv. een lamp vervangt).
39
Gevaarsaanduidingen
Leg het snoer altijd zo, dat dit niet tot risico’s voor mensen of
huisdieren kan leiden.
Het apparaat is niet voor vrijschakelen geschikt. De last is niet
galvanisch van het net gescheiden.
Reinig het apparaat alleen wanneer de stekker uit het
stopcontact getrokken is, met een droge, linnen doek, die bij
sterke verontreinigingen ook licht mag worden bevochtigd.
Gebruik voor de reiniging geen oplosmiddelhoudende
reinigingsmiddelen. Zorg ervoor dat er geen vocht binnen in
het apparaat terechtkomt.
Elk ander gebruik dan wat in deze handleiding beschreven
wordt, is oneigenlijk en leidt tot de uitsluiting van garantie en
aansprakelijkheid. Dit geldt ook voor verbouwingen en
veranderingen. Het apparaat is uitsluitend voor particulier
gebruik bedoeld.
HomeMatic-tussenstekkers mogen niet achter elkaar
worden gestoken.
Apparaten met elektronische adapters (bijv. televisietoestellen
of hoogspannings-ledlampen) vormen geen ohmse lasten.
Deze kunnen inschakelstromen van meer dan 100 A genereren. Het schakelen van dergelijke verbruikers leidt tot
vroegtijdige slijtage van de actor.
Het apparaat is uitsluitend geschikt voor gebruik in woonruimten en soortgelijke omgevingen.
40
Werking en overzicht van het apparaat
3
Werking en overzicht van het apparaat
De draadloze HomeMatic-schakelactor 1-voudig, tussenstekker maakt
het mogelijk om aangesloten apparaten draadloos te schakelen.
Het apparaat kan snel en zonder gereedschap worden gemonteerd
en is na het insteken in een stopcontact direct gebruiksklaar. Met de
draadloze schakelactor is zowel een eenvoudige bediening aan het
apparaat als het aanleren van meerdere HomeMatic-apparaten (bijv.
draadloze HomeMatic-afstandsbediening) mogelijk. De apparaatled
geeft bijv. bedrijfstoestanden en foutmeldingen aan.
In combinatie met de HomeMatic-centrale CCU2 kan de draadloze
schakelactor via de WebUI-bedieningsinterface individueel worden geconfigureerd en kunnen alle functies worden gebruikt. U kunt bijvoorbeeld de maximale in- en uitschakelduur van het apparaat alsmede
een vertragingstijd voor het in- en uitschakelen van de aangesloten
verbruikers instellen.
A
B
(A) - kanaaltoets
(B) - apparaatled
41
Algemene systeeminformatie over HomeMatic
4
Algemene systeeminformatie over
HomeMatic
Dit apparaat is een onderdeel van het HomeMatic-domoticasysteem en
werkt met het bidirectionele BidCoS®-communicatieprotocol.
Alle apparaten worden met een standaardconfiguratie afgeleverd.
Daarnaast kan de werking van het apparaat via een programmeerapparaat en software worden geconfigureerd. Welke uitgebreide functies
hierbij ontstaan en welke extra mogelijkheden het HomeMatic-systeem
in combinatie met andere componenten biedt, vindt u in het HomeMatic WebUI-handboek.
De actuele versie van alle technische documenten en updates vindt u
in het downloadgedeelte op www.homematic.com.
5
5.1
Inbedrijfstelling
Eenvoudige bedieningsfuncties aan het apparaat
• Steek de draadloze schakelactor in het stopcontact.
Het apparaat is direct gebruiksklaar en kan aan een HomeMatic-centrale (of aan andere HomeMatic-apparaten) worden aangeleerd.
Het apparaat beschikt over een kanaaltoets (A), die met een korte druk
voor de bediening (in- en uitschakelen) van aangesloten verbruikers
kan worden gebruikt.
Om het apparaat met al zijn functies in uw HomeMatic-systeem te kunnen gebruiken en configureren, moet u het apparaat eerst aanleren (zie
hoofdstuk „5.2 Aanleren“ op pagina 42).
5.2
Aanleren
Lees dit hoofdstuk volledig door, voordat u met het aanleren
begint.
Om de draadloze schakelactor in uw HomeMatic-systeem te integre-
42
Inbedrijfstelling
ren, zodat hij met andere HomeMatic-componenten (bijv. een draadloze
HomeMatic-afstandsbediening) kan communiceren, moet het apparaat
eerst worden aangeleerd. U kunt de draadloze schakelactor aan andere
HomeMatic-apparaten of aan de HomeMatic-centrale aanleren.
5.2.1 Aanleren aan HomeMatic-apparaten
Indien u de draadloze schakelactor aan een of meerdere apparaten wilt
aanleren, moeten de beide te verbinden apparaten in de aanleermodus
worden gebracht. Ga hiervoor als volgt te werk:
Houd bij het aanleren een minimumafstand van 50 cm tussen de
HomeMatic-apparaten aan.
Activeer eerst de aanleermodus aan de draadloze schakelactor.
• Houd de kanaaltoets (A) ten minste 4 seconden ingedrukt. Een langzaam knipperende apparaatled (B) geeft aan dat de aanleermodus
is ingeschakeld. De aanleertijd bedraagt max. 20 seconden.
>4s
• Breng nu het apparaat dat u aan de draadloze schakelactor wilt
aanleren (bijv. een draadloze HomeMatic-afstandsbediening, zie
onderstaande afbeelding), in de aanleermodus. Verwijder het deksel van het batterijvak en druk met een puntig voorwerp op de aanleertoets.
43
Inbedrijfstelling
• Na het aanleerproces gaat de apparaatled van de draadloze schakelactor uit.
U hebt aanvullend de mogelijkheid om de in- en uitschakelduur van het
apparaat alsmede een vertragingstijd voor het in- en uitschakelen van
de aangesloten verbruikers in te stellen.
Indien er geen aanleren plaatsvindt, wordt het aanleerproces
na 20 seconden beëindigd. Indien andere apparaten zich in de
aanleermodus bevinden, dan worden deze aangeleerd.
5.2.2 Aanleren aan een HomeMatic-centrale
Om uw apparaat softwarematig en comfortabel
• te kunnen besturen en configureren,
• direct met andere apparaten te kunnen verbinden of
• in centrale programma’s te kunnen gebruiken,
44
K
CY
CMY
MY
Y
CM
M
C
moet het eerst aan de HomeMatic-centrale worden aangeleerd. Het
aanleren van nieuwe apparaten aan de centrale gebeurt via de HomeMatic-bedieningsinterface ‘WebUI’.
Inbedrijfstelling
Zodra een apparaat aan een centrale is aangeleerd, kan het
alleen nog via deze met andere apparaten worden verbonden.
Elk apparaat kan altijd aan slechts één centrale worden
aangeleerd.
Houd bij het aanleren een minimumafstand van 50 cm tussen
de HomeMatic-apparaten en de centrale aan.
Voor het aanleren van uw apparaat aan de centrale gaat u als volgt te
werk:
• Open de WebUI-bedieningsinterface in uw browser. Klik op de
knop ‘Apparaat aanleren’, die zich rechts op het scherm bevindt.
• Om de aanleermodus te activeren, klikt u in het volgende venster
op ‘BidCoS-RF-aanleermodus’.
45
Inbedrijfstelling
• De aanleermodus blijft 60 seconden actief. In het informatieveld
wordt de resterende aanleertijd aangegeven.
• Breng binnen deze aanleertijd ook de draadloze schakelactor in de
aanleermodus. Houd de kanaaltoets (A) ten minste 4 seconden ingedrukt. Een langzaam knipperende apparaatled (B) geeft aan dat
de aanleermodus is ingeschakeld.
>4s
• Na korte tijd verschijnt het nieuw aangeleerde apparaat in de
inbox van uw bedieningsinterface. De knop ‘Inbox’ geeft hierbij aan
hoeveel nieuwe apparaten met succes zijn aangeleerd.
• Leer eventueel nog andere apparaten aan, door de hierboven beschreven stappen voor ieder apparaat te herhalen.
• Configureer nu de nieuw aangeleerde apparaten in de inbox, zoals
beschreven in het hoofdstuk „Nieuw aangeleerde apparaten configureren“.
Nieuw aangeleerde apparaten configureren
Nadat u uw apparaat aan de HomeMatic-centrale hebt aangeleerd,
wordt het naar de ‘Inbox’ verplaatst. Hier moeten uw apparaat en de
bijbehorende kanalen eerst worden geconfigureerd, om het apparaat
voor bedienings- en configuratietaken beschikbaar te maken. Kies een
46
Bediening
naam en wijs het apparaat resp. de kanalen aan een ruimte toe. U kunt
bijvoorbeeld de maximale in- en uitschakelduur van het apparaat alsmede een vertragingstijd voor het in- en uitschakelen van de aangesloten verbruikers instellen.
Daarna kunt u uw apparaat via WebUI besturen en configureren, direct
met andere apparaten verbinden, in centrale programma’s gebruiken.
Meer details hierover vindt u in het HomeMatic WebUI-handboek (te
vinden in het downloadgedeelte van de website www.homematic.com).
6
Bediening
Na het aanleren en configureren kunt u de draadloze schakelactor bijv.
met een aangeleerde draadloze HomeMatic-afstandsbediening besturen en zo aangesloten verbruikers in- en uitschakelen (zie onderstaande afbeelding).
Licht aan
Licht uit
47
Fabrieksinstellingen opnieuw instellen
7
Fabrieksinstellingen opnieuw instellen
De fabrieksinstellingen van het apparaat kunnen handmatig opnieuw
worden ingesteld. Hierbij gaan alle instellingen en informatie verloren.
Om de fabrieksinstellingen te herstellen, gaat u als volgt te werk:
• Houd de kanaaltoets (A) ten minste vier seconden ingedrukt, tot de
apparaatled (B) langzaam begint te knipperen.
• Laat de toets los.
>4s
• Druk nu de kanaaltoets (A) opnieuw vier seconden in, tot de apparaatled (B) snel begint te knipperen.
• Laat de toets los.
• De apparaatled gaat uit.
• De fabrieksinstellingen zijn nu weer ingesteld.
8
8.1
Fout- en terugmeldingen van de apparaatled
Knippercodes
Verschillende toestanden van de draadloze schakelactor worden door
een rood knipperen van de apparaatled (B) aangegeven:
48
Fout- en terugmeldingen van de apparaatled
Knipperreeks
Langzaam knipperen
Snel knipperen
1 x lang, 1 x kort
1 x lang, 2 x kort
8.2
Betekenis
Aanleermodus actief
of voorfase voor het
herstellen van de fabrieksinstellingen
De fabrieksinstellingen van het apparaat
worden teruggezet.
Zendlimiet (duty-cycle) bereikt
Apparaat defect
Oplossing
/
/
Zie hoofdstuk „8.3
Duty Cycle“ op pagina 15
Apparaat defect;
neem contact op met
uw dealer.
Weergave van de bedrijfstoestand
Wanneer het apparaat geactiveerd is, licht de apparaatled (B) permanent op.
Na het configureren van de draadloze schakelactor via de centrale of
een programmeertool geeft de apparaatled, behalve de reeds beschreven toestanden van het apparaat, nog aanvullende toestanden aan
(bijv. in- of uitschakelvertraging en in- of uitschakelduur).
8.3
Duty cycle
De duty cycle beschrijft een wettelijk geregelde begrenzing van de
zendtijd van apparaten in het 868 MHz-bereik. Het doel van deze regeling is om de werking van alle in het 868MHz-bereik werkende apparaten te garanderen.
In het door ons gebruikte frequentiebereik van 868 MHz bedraagt de
maximale zendtijd van een apparaat 1% van een uur (dus 36 seconden per uur). De apparaten mogen bij het bereiken van de
1%-limiet niet meer zenden, tot deze tijdelijke begrenzing weer voorbij
49
Gedrag na een terugkeer van de spanning
is. In overeenstemming met deze richtlijn worden HomeMatic-apparaten 100% conform de norm ontwikkeld en geproduceerd.
In het normale bedrijf wordt de duty cycle doorgaans niet bereikt. In
afzonderlijke situaties kan dit bij de inbedrijfstelling of eerste installatie
van een systeem wel het geval zijn, wanneer meerdere en zendintensieve aanleerprocessen actief zijn. Een overschrijding van de dutycycle-limiet wordt aangegeven door een eenmalig lang en eenmalig
kort knipperen van de apparaatled en kan zich uiten in een tijdelijke onderbreking van de werking van het apparaat. Na korte tijd (max. 1 uur)
werkt het apparaat weer normaal.
9
Gedrag na een terugkeer van de spanning
Na het insteken van het apparaat in een stopcontact of na het terugkeren van de netspanning voert de draadloze schakelactor een zelftest uit.
Indien hierbij een fout wordt vastgesteld, dan wordt dit aangegeven door
een knipperen van de apparaatled (zie hoofdstuk „8.1 Knippercodes“ op
pagina 48). Dit herhaalt zich continu en het apparaat neemt zijn eigenlijke functie niet op.
Indien de test zonder fouten wordt doorlopen, verzendt de draadloze
schakelactor een telegram met zijn statusinformatie. Opdat bij een terugkeer van de spanning (bijvoorbeeld na een netuitval of uitschakeling)
niet alle HomeMatic-actoren tegelijk zouden zenden, wacht de draadloze
schakelactor een toevallige vertragingstijd voordat hij zendt. Tijdens deze
tijd knippert de apparaatled langzaam rood. Indien de vertragingstijd zeer
kort is, kan het gebeuren dat dit knipperen nauwelijks waarneembaar is.
10
Onderhoud en reiniging
Het product is onderhoudsvrij. Laat reparaties over aan een vakman.
Reinig het product met een zachte, schone, droge en pluisvrije doek.
Voor het verwijderen van sterke verontreinigingen kan de doek licht
met lauw water worden bevochtigd. Gebruik geen oplosmiddelhoudende reinigingsmiddelen. Deze kunnen de kunststof kast en opschriften
aantasten.
50
Algemene instructies voor het draadloze bedrijf
11
Algemene instructies voor het draadloze
bedrijf
De draadloze communicatie wordt via een niet-exclusief communicatiekanaal gerealiseerd, zodat storingen niet kunnen worden uitgesloten.
Andere storende invloeden kunnen afkomstig zijn van schakelprocessen, elektromotoren of defecte elektrische apparaten.
Het bereik in gebouwen kan sterk afwijken van het bereik in
het vrije veld. Behalve het zendvermogen en de ontvangsteigenschappen van de ontvangers spelen ook omgevingsinvloeden zoals luchtvochtigheid en de bouwkundige situatie een
belangrijke rol.
Indien bij de draadloze schakelactor de ‘beveiligde overdracht’
(AES) wordt ingeschakeld, betekent dit:
• meer communicatie,
• actorgroepen kunnen niet meer gelijktijdig commando’s uitvoeren.
Meer informatie over de beveiligde overdracht (AES) vindt u in het HomeMatic WebUI-handboek op www.homematic.com.
Hierbij verklaart eQ-3 AG dat dit apparaat in overeenstemming is met
de fundamentele eisen en andere relevante voorschriften van de richtlijn 1999/5/EG.
De volledige conformiteitsverklaring vindt u op www.homematic.com.
12
Technische gegevens
Apparaatcode: HM-LC-Sw1-Pl-DN-R1
Voedingsspanning:
230 V/50 Hz
Stroomopname:
16 A max.
Opgenomen vermogen bij stand-by:
0,6 W
Type belasting:
ohmse last
Maximaal schakelvermogen:
3680 W
Relais:
maakcontact, 1-polig, μ-contact
51
Technische gegevens
Zendfrequentie:
868,3 MHz
schakelingen:
40000 (16 A, ohmse last)
Ontvangersklasse
SRD category 2
Typ: bereik in het vrije veld:
> 100 m
Duty cycle:
< 1 % per h
Bedrijfswijze:
S1
Type schakelaar: onafhankelijk gemonteerde schakelaar
Beschermingsgraad:
IP20
Beschermklasse:
I
Werkwijze:
type 1
Statische impulsspanning:
2500 V
Verontreinigingsgraad:
2
Omgevingstemperatuur:
-10 °C tot +35 °C
Afmetingen (b x h x d):
59 x 122 x 40 mm (zonder stekker)
Gewicht:
174 g
Technische wijzigingen voorbehouden.
Verwijdering
Het apparaat hoort niet in de vuilnisbak! Elektronische apparaten moeten overeenkomstig de richtlijn voor afgedankte elektrische en elektronische apparaten worden ingeleverd bij de
inzamelpunten voor afgedankte apparaten.
Informatie met betrekking tot de conformiteit
De CE-markering is een label voor het vrije verkeer van goederen binnen de Europese Unie en is uitsluitend bedoeld voor de
desbetreffende autoriteiten. Het is geen garantie voor bepaalde
eigenschappen.
Met technische vragen over het apparaat kunt u terecht bij uw
speciaalzaak.
52

Contenu de la livraison
Nombre Articles
1x
Actionneur de commutation sans fil HomeMatic à 1 canal,
adaptateur type F
1
Mode d’emploi
1ère édition française 10/2014
Documentation © 2014 eQ-3 AG, l’Allemagne
Tous droits réservés. Le présent manuel ne peut être reproduit (en
totalité ou sous forme d’extraits) de manière quelconque sans l’accord
écrit de l’éditeur, ni copié ou modifié par procédés électroniques, mécaniques ou chimiques.
Il est possible que le présent manuel contienne des défauts typographiques ou des erreurs d’impression. Les indications du présent
manuel sont régulièrement vérifiées et les corrections effectuées dans
les éditions suivantes. Notre responsabilité ne saurait être engagée en
cas d’erreur technique ou typographique et pour les conséquences en
découlant.
Tous les sigles et droits protégés sont reconnus.
Imprimé à Hong Kong
Les modifications en vue d’amélioration technique peuvent être effectuées sans avertissement préalable.
140071 / V 1.0
53

Table des matières
1
Remarques sur la présente notice . . . . . . . . . . . . . . . . . . . . . 55
2
Mises en garde . . . . . . . . . . . . . . . . . . . . . . . . . . . . . . . . . . . . 55
3
Fonction et aperçu de l’appareil . . . . . . . . . . . . . . . . . . . . . . . 58
4
Informations générales sur le système HomeMatic . . . . . . . . 59
5
Mise en service . . . . . . . . . . . . . . . . . . . . . . . . . . . . . . . . . . . . 59
5.1
Fonctions d’utilisation simples sur l’appareil . . . . . . . . . . . . . . 59
5.2Apprentissage . . . . . . . . . . . . . . . . . . . . . . . . . . . . . . . . . . . . . 59
5.2.1 Apprentissage avec les appareils HomeMatic . . . . . . . . . . . . 60
5.2.2 Enregistrement dans une centrale HomeMatic . . . . . . . . . . . . 61
6Utilisation . . . . . . . . . . . . . . . . . . . . . . . . . . . . . . . . . . . . . . . . . 64
7
Restaurer les réglages d’usine . . . . . . . . . . . . . . . . . . . . . . . . 65
8
Signaux d’erreur et de confirmation de la DEL de l’appareil . . 66
8.1
Codes de clignotement . . . . . . . . . . . . . . . . . . . . . . . . . . . . . . 66
8.2
Affichage de l’état de fonctionnement . . . . . . . . . . . . . . . . . . . 67
8.3
Duty Cycle . . . . . . . . . . . . . . . . . . . . . . . . . . . . . . . . . . . . . . . . 67
9
Comportement après le retour de la tension . . . . . . . . . . . . . . 68
10
Entretien et nettoyage . . . . . . . . . . . . . . . . . . . . . . . . . . . . . . . 68
11
Remarques générales au sujet du fonctionnement radio . . . . 69
12
Caractéristiques techniques . . . . . . . . . . . . . . . . . . . . . . . . . . 70
54
Technische gegevens
1
Remarques sur la présente notice
Lisez attentivement la présente notice avant de mettre les composants
HomeMatic en service. Conservez la notice pour pouvoir vous y référer
ultérieurement ! Si vous laissez d’autres personnes utiliser l’appareil,
n’oubliez pas de leur remettre également cette notice d’utilisation.
Symboles utilisés :
Attention ! Ce symbole indique un danger.
Remarque : Cette section contient d’autres informations
importantes !
Remarque : Cette section contient d’autres informations
importantes concernant l’utilisation de l’appareil avec la CCU2
HomeMatic.
2
Mises en garde
Notre responsabilité ne saurait être engagée en cas de
dommages matériels ou de dommages aux personnes dus au
maniement inapproprié ou au non-respect des consignes de
sécurité. Dans de tels cas, tout droit à la garantie est annulé !
Nous ne pouvons être tenus responsables des dommages
indirects occasionnés !
N’ouvrez pas l’appareil. Aucune pièce requérant un entretien
de la part de l’utilisateur ne se trouve à l’intérieur. L’ouverture
de l’appareil peut provoquer un court-circuit. En cas de
dysfonctionnement, renvoyez l’appareil au service après-vente.
N’utilisez pas l’appareil s’il présente des dommages extérieurs
visibles, par exemple sur le boîtier, les éléments de commande
ou sur les connecteurs, ni s’il présente un dysfonctionnement.
En cas de doute, faites vérifier l’appareil par du personnel
spécialisé ou par notre service.
55
Mises en garde
Pour des raisons de sécurité et d’autorisation (CE), les
transformations et/ou modifications arbitraires du produit ne
sont pas autorisées.
Utilisez l’appareil uniquement dans les pièces intérieures. Ne
l’exposez pas aux influences de l’humidité, des vibrations,
d’une exposition constante au soleil ou à tout autre rayonnement de chaleur, du froid ni d’aucune charge mécanique.
L’appareil n’est pas un jouet, ne permettez pas à des enfants
de jouer avec lui. Ne laissez pas traîner le matériel d’emballage sans surveillance : les sachets/feuilles en plastique,
éléments en polystyrène peuvent constituer des jouets
dangereux pour les enfants.
Avant de brancher un consommateur, respectez les données
techniques, y compris la puissance de commutation maximale
du relais et le type de consommateur à brancher ! Toutes les
indications de charges se réfèrent aux charges ohmiques ! Ne
sollicitez l’appareil que jusqu’à la limite de puissance indiquée.
Une surcharge peut détruire l’appareil, provoquer un incendie
ou un accident électrique.
L’appareil peut uniquement être branché à une prise secteur
facilement accessible. En cas de danger, l’appareil doit être
débranché de la prise secteur.
Utilisez l’adaptateur HomeMatic uniquement dans les prises
fixes avec contact de protection et non dans les blocs
multiprises ou les prolongateurs.
Ne branchez pas de terminaux dans l’adaptateur HomeMatic
dont la mise en marche sans surveillance pourrait provoquer
des incendies ou d’autres détériorations (fer à repasser, par
exemple).
56
Mises en garde
De manière générale, retirez la prise du terminal de l’adaptateur HomeMatic avant de procéder à toute modification du
terminal (pour changer une ampoule, par exemple).
Rangez toujours le câble de sorte à ce qu’il ne mette pas en
danger les personnes et les animaux.
L’appareil ne convient pas pour la déconnexion. La charge
n’est pas séparée de façon galvanique du réseau.
Nettoyez l’appareil uniquement après l’avoir débranché de la
prise avec un chiffon en lin sec. En cas de saletés plus
importantes, il peut être légèrement humidifié. Pour le
nettoyage n’utilisez pas de produit à base de solvant. Veillez à
ce qu’aucune humidité ne pénètre dans l’appareil.
Toute application autre que celle décrite dans la notice d’utilisation n’est pas conforme et entraîne l’exclusion de la garantie et
de la responsabilité. Il en va de même pour les modifications et
les transformations. L’appareil est destiné exclusivement à une
utilisation privée.
Les adaptateurs HomeMatic ne doivent pas être branchés
les uns après les autres.
Les appareils disposant de blocs d’alimentation électroniques
(comme les téléviseurs ou les lampes DEL à haute tension, par
exemple) ne représentent pas de charges ohmiques. Vous
pouvez générer des courants de démarrage de plus de 100 A.
L’allumage de ces consommateurs provoque cependant une
usure prématurée de l’actionneur.
L’appareil convient uniquement pour l’utilisation dans des
environnements d’habitat.
57
Fonction et aperçu de l’appareil
3
Fonction et aperçu de l’appareil
L’actionneur de commutation sans fil HomeMatic à 1 canal, adaptateur
permet d’allumer les appareils branchés par radio.
L’appareil peut se monter rapidement sans outil. Une fois branché, il
est immédiatement opérationnel. Avec l’actionneur de commutation
sans fil, utiliser l’appareil et procéder à l’apprentissage de plusieurs
appareils HomeMatic (comme, par exemple la télécommande radio
HomeMatic) est très facile. Les appareils DEL signalent, par exemple,
les états de fonctionnement et les messages d’erreur.
En connexion avec la centrale HomeMatic CCU2, l’actionneur de commutation sans fil peut être configuré individuellement par l’intermédiaire
de l’interface utilisateur WebUI, ce qui permet également de l’utiliser
dans toute l’étendue de sa fonctionnalité. Par exemple, vous pouvez, régler la durée maximale d’allumage et d’arrêt de l’appareil ainsi
qu’une durée de décalage pour la mise en marche/arrêt des consommateurs branchés.
A
B
(A) - Touche canal
(B) - DEL de l’appareil
58
Informations générales sur le système HomeMatic
4
Informations générales sur le système
HomeMatic
Cet appareil fait partie du système de commande de la maison HomeMatic et travaille avec le protocole radio bidirectionnel BidCoS®.
Tous les appareils sont livrés avec une configuration standard. De plus,
la fonction de l’appareil peut être configurée par l’intermédiaire d’un
programmateur et d’un logiciel. Pour en savoir plus sur l’étendue des
fonctionnalités en découlant et sur les fonctionnalités supplémentaires
possibles dans le système HomeMatic avec d’autres composants,
merci de vous référer au manuel HomeMatic WebUI.
Vous trouverez tous les documents techniques et mises à jour actuels
dans l’espace de téléchargement sur www.homematic.com.
5
5.1
Mise en service
Fonctions d’utilisation simples sur l’appareil
• Branchez l’actionneur de commutation sans fil dans la prise.
L’appareil est immédiatement prêt à l’emploi et peut être enregistré
dans une centrale HomeMatic (ou dans d’autres appareils HomeMatic).
L’appareil dispose d’une touche canal (A) pouvant être utilisée par les
consommateurs branchés en exerçant une courte pression (pour allumer ou éteindre).
Pour pouvoir utiliser et configurer l’appareil dans toute l’étendue de sa
fonctionnalité dans votre système HomeMatic, vous devez d’abord procéder à un apprentissage (voir chapitre „5.2 Apprentissage“ à la page
59).
5.2
Apprentissage
Merci de lire attentivement cette section avant de procéder à
l’apprentissage.
59
Mise en service
Pour que l’actionneur de commutation sans fil puisse être intégré dans
votre système HomeMatic et puisse communiquer avec d’autres composants HomeMatic (une télécommande radio HomeMatic, par exemple),
il faut d’abord procéder à l’apprentissage de l’appareil. Vous pouvez
procéder à l’apprentissage de l’actionneur de commutation sans fil avec
d’autres appareils HomeMatic ou avec la centrale HomeMatic.
5.2.1 Apprentissage avec les appareils HomeMatic
Si vous voulez procéder à l’apprentissage de l’actionneur de commutation sans fil avec un ou plusieurs appareils, les deux appareils à connecter doivent être mis en mode d’apprentissage. Pour ce faire, procédez
de la manière suivante :
Lors de l’apprentissage, gardez une distance minimale de 50 cm
entre les appareils HomeMatic.
Activez d’abord le mode d’apprentissage sur l’actionneur de commutation sans fil.
• Maintenez la touche du canal (A) enfoncée pendant au moins 4
secondes. Le clignotement lent de la DEL de l’appareil (B) indique
l’entrée en mode d’apprentissage. Le temps d’apprentissage est de
20 secondes max.
60
Mise en service
>4s
• Faites ensuite entrer en apprentissage l’appareil que vous voulez
enregistrer dans l’actionneur de commutation sans fil (une télécommande radio HomeMatic, par exemple, voir illustration ci-dessous).
Retirez le couvercle du compartiment à batterie puis, à l’aide d’un
objet pointu, enfoncez brièvement la touche d’apprentissage.
61
Mise en service
• Une fois l’apprentissage terminé, la DEL de l’actionneur de commutation s’éteint.
Une fois l’apprentissage réussi, vous pouvez allumer/éteindre l’actionneur de commutation sans fil avec une télécommande radio HomeMatic, par exemple.
En l’absence d’apprentissage, le processus d’apprentissage se
désactive automatiquement au bout de 20 secondes. Si
d’autres appareils se trouvent en mode d’apprentissage, ils
seront enregistrés.
5.2.2 Enregistrement dans une centrale HomeMatic
Pour pouvoir commander et configurer confortablement
• votre appareil assisté par logiciel,
• le relier directement à d’autres appareils ou
• l’utiliser dans des programmes de centrale,
vous devez tout d’abord procéder à son apprentissage avec la centrale
HomeMatic. L’apprentissage de nouveaux appareils avec la centrale s’effectue par l’intermédiaire de l’interface utilisateur HomeMatic
« WebUI ».
Dès qu’un appareil est enregistré dans la centrale, il ne peut
plus être relié à d’autres appareils que par l’intermédiaire de
celle-ci.
Chaque appareil peut être enregistré dans une seule centrale.
Lors de l’apprentissage, gardez une distance minimale de
50 cm entre les appareils HomeMatic et la centrale.
Pour procéder à l’apprentissage de votre appareil à la centrale, procé-
62
Mise en service
dez comme suit :
• Ouvrez l’interface utilisateur WebUI dans votre navigateur. Cliquez
sur le bouton « Enregistrer l’appareil » dans la partie droite de
l’écran.
• Pour activer le mode d’apprentissage, cliquez sur « Mode d’apprentissage BidCoS-RF » dans la fenêtre suivante.
• Le mode d’apprentissage reste actif pendant 60 secondes. La zone
d’information indique la durée d’apprentissage restante.
• Durant cette période d’apprentissage, mettez également l’actionneur de commutation sans fil en mode d’apprentissage. Maintenez
la touche du canal (A) enfoncée pendant au moins 4 secondes.
Le clignotement lent de la DEL de l’appareil (B) indique l’entrée en
mode d’apprentissage.
63
Mise en service
>4s
• Après quelques instants, l’appareil nouvellement enregistré apparaît dans la boîte de réception de votre interface utilisateur. Le bouton « Boîte de réception » indique combien de nouveaux appareils
ont été correctement enregistrés.
• Le cas échéant, procédez à l’apprentissage d’autres appareils en
répétant pour chaque appareil les étapes précédemment décrites.
• Configurez désormais les nouveaux appareils enregistrés dans la
boîte de réception, comme indiqué dans la section « Configurer les
nouveaux appareils enregistrés ».
Configurer les nouveaux appareils enregistrés
Une fois que vous avez procédé à l’apprentissage dans la centrale
HomeMatic, votre appareil est déplacé dans la boîte de réception. Ici,
votre appareil et les canaux correspondants doivent tout d’abord être
configurés pour être disponibles pour les tâches opérationnelles et de
configuration. Attribuez un nom à votre appareil et affectez-le et/ou
affectez les canaux à une pièce. Vous avez également la possibilité
de régler la durée maximale de marche ou d’arrêt de l’appareil ainsi
qu’une durée de décalage pour la mise en marche/arrêt des consommateurs branchés.
64
Utilisation
Vous pouvez ensuite commander et configurer votre appareil par l’intermédiaire de l’interface WebUI, le relier directement avec les autres
appareils ou l’utiliser dans des programmes centraux. Vous trouverez
de plus amples informations à ce sujet dans le manuel WebUI HomeMatic (disponible dans l’espace de téléchargement du site Internet
www.homematic.com).
6
Utilisation
Après l’apprentissage et la configuration, vous pouvez commander
l’actionneur de commutation sans fil avec une télécommande radio HomeMatic enregistrée, par exemple, et allumer ou éteindre les consommateurs branchés (voir illustration ci-dessous).
Lumière
allumée
Lumière
éteinte
65
Restaurer les réglages d’usine
7
Restaurer les réglages d’usine
Les réglages d’usine de l’actionneur de commutation sans fil peuvent
éventuellement être restaurés manuellement. Tous les réglages et
informations seront alors perdus.
Pour restaurer les réglages d’usine, procédez comme suit :
• Maintenez la touche canal (A) enfoncée pendant au moins quatre
secondes jusqu’à ce que la DEL de l’appareil (B) commence à
clignoter lentement d’une lumière.
• Relâchez la touche.
>4s
• Maintenez ensuite à nouveau la touche canal (A) enfoncée pendant quatre secondes jusqu’à ce que la DEL de l’appareil (B) commence à clignoter rapidement d’une lumière.
• Relâchez la touche.
• La DEL de l’appareil s’éteint.
• Les paramètres d’usine de l’appareil sont désormais restaurés.
66
Signaux d’erreur et de confirmation de la DEL de l’appareil
8
8.1
Signaux d’erreur et de confirmation de la
DEL de l’appareil
Codes de clignotement
Les différents états de l’actionneur de commutation sans fil sont affichés par un clignotement rouge de la DEL de l’appareil (B) :
Séquence de clignotement
Clignotement lent
Clignotement
rapide
1 x clignotement
long, 1 x clignotements courts
1 x clignotement
long, 2 x clignotements courts
8.2
Signification
Solution
Mode d'apprentissage
actif ou étape préalable à la restauration
des réglages d'usine
Les paramètres
d'usine de l'appareil
sont en cours de réinitialisation.
Limite d'émission (Duty-Cycle)
/
Appareil défectueux
/
voir chapitre „8.3
Duty Cycle“ à la
page 68
Contactez votre
revendeur.
Affichage de l’état de fonctionnement
Dès que l’actionneur de commutation sans fil est allumé, la DEL de
l’appareil (B) brille en continu.
Après la configuration de l’actionneur de commutation sans fil par
l’intermédiaire de la centrale ou d’un utilitaire de programmation, la
DEL de l’appareil affiche d’autres états de l’appareil (par ex. décalage
de la mise en marche/arrêt et durée d’allumage/arrêt) en plus de ceux
précédemment décrits.
67
Comportement après le retour de la tension
8.3
Duty Cycle
Le Duty Cycle décrit une limite légale réglée de la durée d’émission
des appareils dans la bande de fréquence des 868 MHz. L’objectif de
cette règle est de garantir la fonction de tous les appareils travaillant
dans la bande de fréquence 868 MHz.
Dans la bande de fréquence de 868 MHz que nous utilisons, la durée
d’émission de chaque appareil s’élève à 1 % d’une heure (soit 36 secondes par heure). Une fois la limite de 1 % atteinte, ces appareils ne
peuvent plus émettre jusqu’à ce que cette limite de temps soit écoulée.
Conformément à cette directive, les appareils HomeMatic sont développés et fabriqués à 100 % en conformité avec les normes.
En règle générale, en fonctionnement normal, le Duty Cycle n’est jamais atteint. Dans des cas exceptionnels, lors de la mise en service ou
de la première installation d’un système, ce peut être le cas en raison
des processus d’apprentissage multipliés sollicitant fort la radio. Un
dépassement de la limite du Duty Cycle est affiché par un clignotement
long et un clignotement court de la DEL de l’appareil et peut s’exprimer
par l’absence temporaire de fonction de l’appareil. Après quelques instants (1 heure max.), la fonction de l’appareil est restaurée.
9
Comportement après le retour de la tension
Après le branchement de l’appareil dans une prise ou après le retour de
la tension du secteur, l’actionneur de commutation effectue un autotest.
Si un défaut est constaté, il sera indiqué par un clignotement de la DEL
de l’appareil (voir chapitre „8.1 Codes de clignotement“ à la page 67).
Cette opération se répète continuellement et l’appareil ne reprend pas sa
fonction habituelle.
Si le test s’effectue sans erreur, l’actionneur de commutation envoie un
radiogramme informant de son statut. Lors du retour de la tension (après
une panne d’électricité ou un arrêt), pour que tous les actionneurs HomeMatic n’émettent pas en même temps, l’actionneur de commutation émet
en décalé après un temps de retard aléatoire. Pendant ce temps, la DEL
de l’appareil clignote lentement d’une lumière rouge. Si le temps de retard
est très court, il est possible que le clignotement ne soit pas perceptible.
68
Entretien et nettoyage
10
Entretien et nettoyage
Le produit ne requiert aucun entretien. Les réparations doivent être
effectuées par un spécialiste. Nettoyez le produit avec un chiffon doux,
propre, sec et non pelucheux. Pour enlever des salissures plus conséquentes, le chiffon peut être légèrement humidifié avec de l’eau tiède.
N’utilisez pas de produits nettoyants contenant des solvants susceptibles d’attaquer le boîtier et les inscriptions.
11
Remarques générales au sujet du fonctionnement radio
La transmission radio est réalisée par une voie non exclusive, ce qui
peut provoquer des interférences. D’autres perturbations peuvent être
provoquées par des opérations d’allumage, des moteurs électriques ou
les appareils électriques défectueux.
La portée à l’intérieur des bâtiments peut être très différente de
celle en champ libre. En-dehors des performances d’émission
et des propriétés de réception des récepteurs, les influences
environnementales comme l’hygrométrie et les données
structurelles du site jouent un rôle important.
Si le « transfert sécurisé » (AES) est activé pour l’actionneur
de commutation sans fil, cela signifie :
• un volume de communication plus élevé,
• que les groupes d’acteurs ne peuvent plus exécuter de commandes en même temps.
Vous trouverez de plus amples informations sur le transfert sécurisé
(AES) sur le manuel WebIU HomeMatic sur www.homematic.com.
La eQ-3 AG déclare par la présente que cet appareil est conforme
aux exigences fondamentales et autres dispositions importantes de la
69
Caractéristiques techniques
directive 1999/5/CE.
Vous trouverez la déclaration de conformité intégrale sous
www.homematic.com.
12
Caractéristiques techniques
Désignation synthétique de l’appareil :
HM-LC-Sw1-Pl-DN-R1
Tension d’alimentation :
230 V/50 Hz
Courant absorbé :
16 A max.
Puissance absorbée en mode veille :
0,6 W
Type de charge :
charge ohmique
Puissance de commutation maximale :
3680 W
Relais :
contact de travail, 1 pôle, μ-contact
Fréquence radio :
868,3 MHz
cycles de manœuvre :
40000 (16 A, charge ohmique)
Catégorie de récepteur :
SRD catégorie 2
Type portée radio en champ libre :
> 100 m
Duty Cycle :
< 1 % par h
Mode de fonctionnement :
S1
Type de commutateur : commutateur monté individuellement
Type de protection :
IP20
Classe de protection :
I
Mode d’action :
Type 1
Tension de tenue aux chocs :
2500 V
Degré d’encrassement :
2
Température ambiante :
-10 °C à +35 °C
Dimensions (l x h x p) :
59 x 122 x 40 mm (sans fiche)
Poids :
174 g
Sous réserve de modifications techniques.
70
Caractéristiques techniques
Consignes pour l’élimination
L’appareil ne doit pas être éliminé avec les ordures ménagères ! Les appareils électroniques sont à éliminer conformément à la directive relative aux appareils électriques et électroniques usagés par les points de collecte locaux d’appareils
usagés!
Informations de conformité
Le sigle CE est un sigle de libre circulation destiné uniquement
aux administrations ; il ne constitue pas une garantie de caractéristiques.
Pour toute question technique concernant l‘appareil, merci de
contacter votre revendeur.
71
Bevollmächtigter des Herstellers:
Manufacturer’s authorised representative:
eQ-3 AG
Maiburger Straße 29
26789 Leer / GERMANY
www.eQ-3.de
72