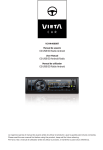
Download Car receiver PY-9398
Transcript
Car receiver PY-9398
1/
2 / IN T
3/ RP T
4/ RD M
AUX
BND
AMS
M D
5 / -1 0
6 / +1 0
M U
D IS P
PY-9398
Owner’s manual EN
Bedienungsanleitung DE
Instrukcja obsługi PL
Manual de utilizare RO
Owner’s manual
ITEM
Installation4
Wire connection diagram
6
Front panel
7
General operations
8
Radio operations
10
RDS Operations
12
Bluetooth Operations
13
Remote control layout
14
Specification
16
EN
3
Owner’s manual
PRECAUTIONS
Choose the mounting location where the unit will not interfere with the normal driving function of
the driver.
Before finally installing the unit, connect the wiring temporarily and make sure it is all connected
up properly and the unit and the system work properly.
Use only the parts included with the unit to ensure proper installation. The use of unauthorized
parts can cause malfunctions.
Consult with your nearest dealer if installation requires the drilling of holes or other modifications
of the vehicle.
Install the unit where it does not get in the driver‘s way and cannot injure the passenger if there is
a sudden stop. Like an emergency stop.
Avoid installing the unit where it would be subject to high temperature, such as from direct sunlight, or from hot air, form the heater, or where it would be subject to dust, dirt or excessive vibration. Do not expose this equipment to rain or moisture.
DIN FRONT-MOUNT (Method A)
Installing the unit
1. Dashboard
2. Holder
After inserting the holder into the
dashboard, select the appropriate tab according to the thickness of the dashboard material
and bend them inwards lo secure
the holder in (Fig. 1) place.
3. Screw
EN
4
Owner’s manual
Fig.2
Fig.3
1. Dashboard
2. Nut(5 mm)
3. Spring Washer
4. Screw (5x25rnm)
5. Screw
6. Strap
Be sure to use the strap to secure the back of the unit in place.
The strap can be bent by hand to
the desired angle.
7. Plain Washer
1. Frame
2. Insert fingers into the groove in the front
of frame and pull out to remove the frame.
(When reattaching the frame, point the side
with a groove downwards and attach it.)
3. Lever
Insert the levers supplied with the unit into
the grooves at both sides of the unit and
shown in figure until they click. Pulling the
levers makes possible to remove the unit
from the dashboard.
DIN REAR-MOUNT (Method B)
Installation using the screw holes on the
sides of the unit
Fastening the unit to the factory
radio mounting bracket:
1. Select a position where the screw holes
oft he bracket and the screw holes of the
main unit become aligned (are fitted), and
tighten the screws at 2 places on each
side. Use either truss screws (5 >< 5mm)
or flush surface screws (4 x 5mn1)
2. Screw
3. Dashboard or Console
EN
INPUT THE SD CARD
The SD oblique angle keeps
Rightward exposure, put into the
SD slot and press it again to eject.
5
Owner’s manual
WIRE CONNECTION DIAGRAM
BLUETOOTH ANTENNA
15A
RED
BLUE
WHITE
WHITE/BLACK
GREEN
GREEN/BLACK
EN
6
YELLOW
BLACK
GREY
GREY/BLACK
VIOLET
VIOLET/BLACK
Owner’s manual
FRONT PANEL LAYOUT
2 13 11 14
1/
2 / IN T
3
15 10 1 6
3/ RP T
19
6
22
4/ RD M
AUX
9
BND
AMS
M D
5 / -1 0
6 / +1 0
M U
17
18
4
D IS P
PY-9398
5 12 1
20
21
7
1. Power / Mode Button
2. Release Button
3. Vo|ume / Sel Button
4. Mute / Hangup a call Button
5. Display Buttom
6. LCD Display
7. Flashing LED
8. Reset Button
9. Band switch / lD3 select / Receive
a call
10. Tune Seek & Track forward Button
11. Tune Seek & Track reverse Button
12. Automatically memory storing
13. Play/Pause & Preset Button 1
8
14. Intro & Preset Button 2
15. Repeat & Preset Button 3
16. Random & Preset Button 4
17. Preset Button 5
18. Preset Button 6
19. Remote Control Sensor
20. USB connecter
21. SD/MMC Slot
22. AUX IN JACK
EN
7
Owner’s manual
GENERAL OPERATIONS
ON / OFF
Press POWER butt on (1 ) to turn on the unit. Press it more than 1 second to turn off
FRONT PANEL RELEASE
Press REL button (2) to detach the removable front panel
SOUND ADJUSTMENT
Turn on (3) can adjust the desired volume quality.
Press SEL button (3) will change in the following order.
Option:
VOLUME
Rotating this knob, you can adjust VOL/BASS/TREB/BAL/FAD . To select the functions, press
the VOL knob shortly until the desired functions are shown on the display.
Increase or decrease the volume by turn the VOL knob right or left. These buttons
can be used to adjust the BASS, TREBLE, BALANCE and FADER.
BASS
Press VOL/SEL button(3) one time. Adjust bass level by using VOL/SEL(3) Knob.
TREBLE
Press VOL/SEL button(3) two times. Adjust treble level by using VOL/SEL(3) Knob
BALANCE
Press VOL/SEL button(3) three times. Adjust sound balance between left and right speakers
by using VOL/SEL(3)Knob.
FADER (optional)
EN
Press SEL button(3) four times. Adjust sound balance between front and rear speakers by using VOL/SEL(3) Knob.
SELECT MENU
Press VOL/SEL button for several seconds, selecting menu is activated as cyclical
mode of following function for use’s selection:
VOL
BAS
STEREO/MONO
TRE
BAL
DX/LOC
FAD
LOUD OFF/ON
SUB ON/OFF
DSP OFF
MUTE OFF
Press VOL/SEL button shortly and turn VOL button to right or left to select different
menu mode.
8
Owner’s manual
MUTE OFF/ON
Select “MUTE on ” mode to cut down the speakers output, return to “MUTE OFF”
mode to resume the speakers output.
LOC/DX SELECTOR
Press SEL buttom and choose LOC to select strong or weak station reception. It is set to
LOC mode when LOC is first pressed. “LOC” appears and only local station is available. It is
switched to DX mode when LOC is pressed again. Both distance and local stations can be
received.
LOUDNESS ON/OFF
Press SEL button, and choose LOU to increase the low frequency. This can improve the sensitivity of your ears. And ” LOUD” appears in the LCD when the loudness mode is activated.
MO/ST SELECTOR
Press SEL button and select ST MONO or STEREO mode. When “ST”appears in the LCD
display. During the player mode, press the button to switch left speaker/right speaker/stereo.
AREA SETUP
In Radio mode‘ Press SEL button for several seconds, LCD will be show from AREAUSA/
EUR. At AREA USA/EUR. You can use VOL +/- to select the AREA frequency.
DISPLAY
Press DISP button (5) to operate as the conversion of each display mode as follow:
- Time is displayed for 5sec when DISP key is pressed, and it returns to its
previous display unless DISP key is pressed again.
3) From the clock mode, when DISP Key is pressed for longer than 1sec,
clock mode switches to clock Adjusting mode and the clock display
begins flashing. At this time clock or minute can be changed by pressing(+/-),
or the ENCODER VOLUME.
LIQUID CRYSTAL DISPLAY
Exhibit current frequency and activated functions on the display (6).
FLASHING LED
When ACC off ,take out the from panel from main unit that the LED (7) will be flashing.
EN
9
Owner’s manual
RESET
RESET button (8) is placed on the housing and must be activated with either
a ball point pen or thin metal object. (Do not use sharp object to avoid damaging
the unit.) The RESET button (8) is to be activated for the following reasons:
- Initial installation of the unit when all wiring is completed.
- All the function buttons do not operate.
- Error symbol on the display.
RADIO OPERATION
BAND SELECTION
At tuner mode, press BAND button (9) to select the desired band. The reception band will
change in the following order:
STATION SELECTION
Press TUNE/SEEK/TRACK FORWARD button (10) or TUNE/SEEK/TRACK
REVERSE button (11) shortly for manual tuning function.
Press for several seconds the automatic tuning mode (SEEK
mode) is selected.
AUTOMATICALLY MEMORY STORING & PROGRAM SCANNING
-Automatically Memory Storing
Press AMS(MP3) button (12) for several seconds, the radio searches from the current frequency and checks the signal strength until one cycle search is finished.
And then 6 strongest stations are stored into the corresponding preset number button,
- Program Scanning
Press AMS(MP3) button (12) shortly to scan preset station. When the AMS mode is carry out,
“INT” appear on LCD display, the unit scan each stored station for 5 seconds, you also can
press the corresponding number button or AMS button. Your desired station will start playing.
EN
STATION STORING
Press preset button (13~18)
1) RADIO MODE.
M1 ~ M6
- PRESET MEMORY is loaded when key is pressed for less than 1 second.
- PRESET MEMORY is saved when key is pressed for longer than 1 sec.
2) CD/MP3/FLASH MP3
PLAY/ PAUSE
Press preset button (13) is activated. During a PAUSE, DISC INDICATOR flashes.
TOP - First song will play when Top key is pressed for lunger than 0.5 sec during play.
10
Owner’s manual
INT
Press preset button (14) During INTRO ON, INT indicator comes on and begins playing the first
10sec of each song, until the last song is played. It begins playing the entire track from where INT
started
RPT
Press preset button (15) Flash play mode: REPEAT ON / OFF is activated.
When REPEAT ON, RPT INDICATOR comes on and repeats the current music track.
RDM
Press preset button (16) During RANDOM ON, RDM INDICATOR is turned on and each track of
disc is played in random instead of normal order.
SELECT TRACKS
During USB/SD operation, press SEEK “<<” (11) button or SEEK ”>>”(10) button to move to the
previous track or the following track, Track number shows on display. During USB / SD, hold
SEEK “<<” (11) button or SEEK ”>>”(10) to fast reverse or fast forward. Music play starts from
when you release the button.
Press preset button (17 18)
- MP3 MODE : 10 TRACK UP / DOWN is activated.
When the total track is 10 or less, KEY is inactivated.
EN
11
Owner’s manual
RDS (RADIO DATA SYSTEM) OPERATlON
AF :Alternative Frequencies
~ Setting RDS Mode Press AF button (20) and release immediately to switch on or off RDS mode.
Whenever RDS is switched on, symbol “AF” appears on the display.
AF / REG
AF
- AF I REG key directs the activation of AF SEARCH.
- AF indicator is displayed when AF is ON, AF search is activated when reception is bad.
- During FM MODE, when AF is ON, SEEK, SCAN, AUTO, MEMORY function can only receive
and save RDS program. However, when Italy option is in use, regardless of RDS programs that
satisfy SD LEVEL Can be received and saved.
Indicator
Condition
AF ON
AF ON MODE, RDS information is received.
AF OFF
AF OFF MODE
AF blink
AF ON MODE, RDS information is not received.
REGION
- AF MODE is converted to REGION ON I OFF MODE when AF ON MODE 15 pressed for
longer lsec.
- ON : Pl CODE is checked when AF CHECK in progress
- OFF: PI CODE and COVERAGE AREA is not checked when AF CHECK in progress.
PTY
RADIO MODE
- Previous PTY is displayed when PTY key (16) is pressed. If there are no keys entered for
2 seconds, previously selected PTY is searched. During 1 LOOP, if desired PTY is not found, NO
PTY is displayed.
- 2 program types are SPEECH and MUSIC.
By pressing PTY once, MUSIC is entered. When PTY is pressed the second time, SPEECH is
entered.
M1~M6 keys can be used to select the desired program type.
TA
TA button (12) is operated as follows:
- TA is turned ON / OFF and TA indicator is displayed. When traffic announcement is transmitted,
regardless of the mode, traffic announcement is received.
EN
12
If VOLUME LEVEL is below 20, VOLUME LEVEL is raised to 20, and returns to its previous
mode and volume level when the traffic announcement is over.
If volume is adjusted during traffic announcement, only the previous volume is valid.
- When TA is on, SEEK, SCAN, AUTO MEMORY function can be received or saved only when
traffic program identification code has been received.
- When TA is ON, traffic program identification code is not received during specified time.
TAALARM : NO TA/ TP is displayed and alarm is set off.
TA SEEK : TA SEEK is activated.
Owner’s manual
BLUETOOTH
1.Pairing connect.
Turn on car unit, put your mobile near the unit, activate your mobile bluetooth function.Soon the
phone will find the new bluetooth device “CAR AUDIO” . Input the pairing password “8888” and
clik OK. The phone will prompt the matching successful.When the pairing connect is successful,on
the LCD, it shows BT ON, and the bluetooth logo “ ”will stop blinking .Then you may perform the
bluetooth operation.
REMARK:depend on bluetooth mobile, the bluetooth system support “HSP” “HFP” “A2DP” and
AVRCP bluetooth profile.
2.Handsfree phone service
If your mobile phone have matched with the unit, you can dial calls out through your mobile
phone. It will turn to unit automatically when calling come in and the calling phone number will
indicate on the LCD screen.
-Press the “BAND” button shortly to accept the call .Then you can talk with the other party through
the mic on the panel.
-Press “MUTE” button shortly to reject the call when calling come in.
-Press “MUTE” button shortly to hang up after you finish the talk.
3.Advance Audio distributing profile(A2DP) playing.
Through mobile and unit A2DP connected, press “MODE” and turn to A2DP mode at the same
time, the music playing in mobile can turn to the unit audio system play. “A2DP” will display on
LCD.
-Press button “ <<” and “ >> ” in the panel can select the music track.
-Press “ PAUSE” button shortly to pause the music playing.
-Press “BAND”(mode) longly to temporarily discommect the bluetooth.
-Press “BAND”(mode) button longly again to reconnect the bluetooth.
4.Phone number book.
This bluetooth system can automatically store incoming call numbers, up to 10 phone numbers.
-Press “MUTE”(mode) button longly to enter the phone number book and press VOL button to
look up the phone number.
-Press “BAND” button once can call out you desired phone number.
5. Interrupt bluetooth connection/reconnection.
Pressing the “BAND” button shortly to interrupt the bluetooth connection when your are talking a
call and the voice can turn to mobile speaker.
Press “BAND” button again to reconnection.
NOTE:Different mobile phone have different responses.We do not guarantee all the
operation of connectable devices.
6. How to delete stored phone number?
The unit can store ten number of missed ,rejected and ANS separately, and the first number will
auto deleted when the 11th number calling
EN
7.How to use “RECEIVED” “MISSED” “REJECTED” MANU
ANS/AUTO ANS” Functions.
Press MUTE” for 3 seconds to enter into “RECEIVED” “MISSED” “REJECTED” MANU ANS/AUTO
ANS”. Turn VOL button for choosing the telephone number.
13
Owner’s manual
REMOTE CONTROL LAYOUT
EN
14
1. PowerButton
2. Pause / Play / Preset Button1
3. Intro / Preset Button2
4. Repeat Playing / Preset Button3
5. Random / Preset Button4
6. Preset Button5
7. Preset Button6
8. Mute / Hangup a call
9. Volume Control
10. Mode Switch
11. Alternative Frequencies Button
12. TrafficAnnouncement Button
13. Scan Button
14. Display Button
15. APS / AMS Button
16. Programe Type Button
17. Band Switch / Receive a call
18. Tuning / Selecting Tracks / F F / F R
19. Select Button
Owner’s manual
Replacing the Battery
When the operational range of the remote control becomes short or non functions while operating
Replace a new CR2025 battery Make sure the battery polarity before replacement
1. Pull out Battery Holder while pressing the stopper
2. Put the button type battery(+)mark upward into the Battery Holder
3. Insert the Battery Holder into the Remote control
EN
15
Owner’s manual
SPECIFICATION
General
Power Supply Requirements:
Load Impedance
Maximum Output Power:
Chassis Dimensions:
Current Drain:
DC 14,4V, Negative Ground
4 ohms
40W X 4(CH)
178x130x50mm(WxDxH)
15A
Tone Controls
Bass (at 100Hz):
Treble (at 10K):
+10dB/-10dB
+10dB/-10dB
USB/SD MUSIC Player
Signal to Noise Ratio:
Channel Separation:
Frequency Response:
FM Radio
Frequency Coverage (MHz):
IF:
Sensitivity (S/N-30dB):
Stereo Separation:
AM Radio
Frequency Coverage (KHz):
IF:
Sensitivity (S/N-20dB):
More than 60dB
More than 60dB
20Hz-20KHz
87 5 -108MHz
10.7MHz
12dBu
>30dB
522 -1620KHz
450KHz
42dBu
Remarks
Specifications subject to change without notice.
„The Lechpol company declares that product PY-9398 is consistent with the essential requirements and other relevant provisions
of directive 1999/5/EC. The proper declaration for download from www.lechpol.eu”
EN
16
Bedienungsanleitung
INHALT
Instalation18
Anschlussdiagramm20
Frontplatte21
Allgemeine Funktionen
22
Radio Funktionen
24
RDS Funktionen
26
Bluetooth Funktionen
27
Fernbedienung28
Technische Daten
30
DE
17
Bedienungsanleitung
INSTALLATION
VORSICHTSMASSNAHMEN
Der Ort der Montage sollte so gewählt werden, dass das Gerät den Fahrer nicht stört.
Vor dem endgültigen Einbau, vorübergehend Gerät mit Spannung versorgen und sicherstellen,
dass es richtig angeschlossen ist und dass sowohl das Gerät als auch das System in normalen
Parameter funktionieren.
Verwenden Sie nur die mitgelieferten Teile zur korrekten Installation. Die Verwendung anderer
Bauteile kann zu Störungen oder Geräteschäden führen.
Fragen Sie Ihren nächstgelegenen Autohändler, wenn die Installation Bohrungen oder sonstige
Änderungen des Autos erfordert.
Installieren Sie das Gerät so, dass es nicht den Fahrer stört und die Passagiere nicht verletzt im
Falle eines plötzlichen Bremsmanövers, wie eine Not-Bremsung.
Installieren das Gerät nicht an Orten, wo es hohen Temperaturen, wie Sonnenlicht, warme Luft,
heiße Luft von der Heizung oder an Orten mit Staub, Schmutz oder starken Vibrationen ausgesetzt ist.
Schützen Sie das Gerät vor Feuchtigkeit.
FRONTMONTAGE (Methode A) Geräteeinbau
1. Armaturenbrett
2. Rahmen
Nach dem Einlegen in das
Armaturenbrett, wählen Sie die
Halter abhängig von der Dicke des
Armaturenbretts und biegen sie diese
um den Rahmen zu befestigen (Abb. 1)
3. Schraube
DE
18
Bedienungsanleitung
Fig.2
Fig.3
1. Armaturenbrett
2. Mutter (5mm)
3. Sicherungsscheibe
4. Schraube (5 x 25mm)
5. Schraube
6. Montageband
Verwenden Sie das Montageband zur
Sicherung der Rückseite des Geräts.
Das Band kann bis zum gewünschte
Winkel gebogen werden. (Abb. 2)
7. Flachscheibe
1. Rahmen (Abb. 3)
2. Legen Sie die Finger in die Nut im vorderen
Rahmen und ziehen Sie um den Rahmen zu
entfernen. (Um den Rahmen wieder zu
befestigen, einfach mit dem Schlitz nach unten
eindrücken).
3. Löseschlüssel
Setzen Sie die beigelegten Löseschlüssel in die
Nut auf beiden Seiten des Geräts so ein das się
mit einem Klicken einrasten. Durch ziehen an
beiden Schlüssel wird das Gerät aus dem
Armaturenbrett entfernt.
EINBAU DES GERÄTES IM WERKSEITIGEN
SCHACHT
1. Wählen Sie eine Position, wo die Bohrungen des
Halters und der zentralen Einheit in der gleichen Linie
sind und ziehen Sie die zwei Schrauben an jeder Seite
an. Verwenden Się entweder Ankerbolzen (5x5mm) oder
Schrauben mit Senkkopf (4x5mm).
2. Schraube
3. Armaturenbrett.
OBS.: La metoda B nu se utilizeaza suportul metalic, inelul
dreptunghiular de plastic si banda de montaj.
EINFÜGEN VON SD
DE
SD schrägen Winkel des Abstiegs zu halten
Exposition: Ich lege die SD-Bereich und drücken
Sie ihn erneut, um sie zu entfernen.
19
Bedienungsanleitung
WEITERE INFORMATIONEN
ANSCHLUSSDIAGRAMM
BLUETOOTH ANTENNA
15A
RED
YELLOW
BLACK
BLUE
GREY
WHITE
GREY/BLACK
WHITE/BLACK
VIOLET
GREEN
GREEN/BLACK
VIOLET/BLACK
A) ANTENNE
B) LINIENAUSGANG HINTEN RECHTS
C) LINIENAUSGANG HINTEN LINKS
D) LINIENAUSGANG VORNE RECHTS
E) LINIENAUSGANG HINTEN LINKS
F) SUBWOOFER
DE
20
IGNITION SWITCH (B+); RED – ZÜNDSCHLÜSSEL (B+); rotes Kabel
AUTO ANTENNA, BLUE – ANTENNENANSCHLUSS, blaues Kabel
FRONT Lch SPEAKER „+”, WHITE –LAUTSPRECHER VORNE LINKS „+”, weißes Kabel
FRONT Lch SPEAKER „-“, WHITE/BLACK –LAUTSPRECHER VORNE LINKS „-“ schwarz/weiß Kabel
REAR Lch SPEAKER „+”, GREEN – LAUTSPRECHER HINTEN LINKS „+”, grünes Kabel
REAR Lch SPEAKER „-”, GREEN/BLACK – LAUTSPRECHER HINTEN LINKS „-”, grün/schwarz Kabel
MEMORY BACKUP, YELLOW – STROMVERSORGUNG SPEICHER, gelbes Kabel (an + Anschließen)
GROUND, BLACK – MASSEANSCHLUSS, schwarzes Kabel
FRONT Rch SPEAKER „+”, GREY –LAUTSPRECHER VORNE RECHTS „+”, graues Kabel
FRONT Rch SPEAKER „-“, GREY/BLACK – LAUTSPRECHER VORNE RECHTS „-”, grau/schwarz
Kabel
REAR Rch SPEAKER „+”, VIOLET – LAUTSPRECHER HINTEN LINKS „+”, violettes Kabel
REAR Rch SPEAKER „- “, VIOLET/BLACK – LAUTSPRECHER HINTEN LINKS „-“, violett/ schwarz
Kabel
Bedienungsanleitung
ALLGEMEINE FUNKTIONEN
FRONTPLATTE
2 13 11 14
1/
2 / IN T
3
15 10 1 6
3/ RP T
19
6
22
4/ RD M
AUX
9
BND
AMS
M D
5 / -1 0
6 / +1 0
M U
17
18
4
D IS P
5 12 1
PY-9398
20
21
7
8
1. Taste Ein/Aus /Modus
2. Taste Lösen der Frontplatte
3. Lautstärkeregler / Auswahltaste/
4. Taste Ton aus/
Taste
5. Taste Display
6. LCD Display
7. Blinkende LED
8. Taste Reset
9. Taste Wellenbereich wählen/ Taste / ID3
10. Taste Frequenz suchen / Nächste Melodie
11. Taste Frequenz suchen / Vorherige Melodie
12. Automatische Senderspeicherung (AMS)
13. Taste Wiedergabe/Pause & Stationstaste 1
14. Taste Intro & Stationstaste 2
15. Taste Wiederholung & Stationstaste 3
16. Taste zufällige Reihenfolge & Stationstaste 4
17. Stationstaste 5
18. Stationstaste 6
19. Sensor für Fernbedienung
20. Mini USB Steckplatz
21. Steckplatz für SD/MMC Karte
22. AUX Eingang
DE
21
Bedienungsanleitung
ALLGEMEINE FUNKTIONEN
EIN / AUS-SCHALTEN/TON AUS
Drücken Sie den Ein/Aus Schalter (1) um das Gerät einzuschalten. Nochmaliges drücken und
gedrückt halten schaltet das Gerät aus.
ABNEHMEN DER FRONTPLATTE
Drücken Sie die Taste Entriegeln der Frontplatte (2) zum entfernen der Frontplatte.
REGLAREA SUNETULUI
Accesand aceasta setare (3) puteti regla calitatea volumului dorita.
Apasati butonul SEL (3) pentru a schimba setarile in urmatoarea ordine:
LAUTSTÄRKE
Durch drehen der Taste (3) kann die gewünschte Lautstärke geregelt werden. Drehen der
Taste VOL nach rechts erhöht die Lautstärke; drehen der Taste VOL nach links verringert die
Lautstärke;
Hinweis: Werkseitig ist das Gerät auf Lautstärkeregelung eingestellt.
BASS
Drücken Sie die Auswahltaste (3) SEL einmal. Regeln Sie den Bass durch drehen der Taste
(3) VOL/SEL.
TREBLE
Drücken Sie die Auswahltaste (3) SEL zweimal. Regeln Sie die hohen Töne durch drehen der
Taste (2) VOL/SEL.
BALANCE
Drücken Sie die Auswahltaste (3) SEL dreimal. Regeln Sie die Balance zwischen rechten und
linken Lautsprecher durch drehen der Taste (3) VOL/SEL.
FADER (optional)
Drücken Sie die Auswahltaste (3) SEL viermal. Regeln Sie die Balance zwischen vordere und
hintere Lautsprecher durch drehen der Taste (3) VOL/SEL.
DE
Modul SELECTARE MENIU
Apasati butonul VOL/SEL (3) timp de cateva secunde, selectarea meniului este activata ca
si mod ciclic al urmatoarelor functii:
VOL
BAS
STEREO/MONO
22
TRE
BAL
DX/LOC
FAD
LOUD OFF/ON
SUB ON/OFF
DSP OFF
MUTE OFF
Bedienungsanleitung
TON ABSCHALTEN
Wählen Sie „MUTE ON“ (4) der Ton wird abgeschaltet; Wählen Sie „MUTE OFF“ der Ton wird
wieder eingeschaltet.
LOCAL / DX
In Gegenden mit starkem Signal, durch Auswahl der Option „LOCAL“ werden nur lokale Sender mit starkem Signal empfangen. In Gegenden mit schwachem Signal, durch Auswahl der
Option „DX“ werden alle Sender empfangen.
LOUDNESS EIN/AUS
Im Modus „LOUD ON“ werden die Bässe und Höhen angehoben.
STEREO/MONO
Wenn FM Sender schwach und unterbrochen empfangen werden, kann dieses durch umschalten auf Mono-Wiedergabe verbessert werden.
ZONE AUSWÄHLEN
Im Radiomodus drücken Sie die Auswahltaste (3) SEL einige Sekunden. Im LCD Display
erscheint BEEP ON >>AREA USA/EUR. Durch drehen der Taste (3) VOL/SEL wird die Option
USA oder EUROPA ausgewählt.
DISPLAY
Drücken Sie die Taste DISPLAY (5) für folgenden Einstellungsmodus:
- Zeit wird für 5 Sekunden angezeigt beim drücken der Taste Display und kehrt in den Ausgangszustand zurück, es sei denn die Taste DISPLAY wird wieder gedrückt
- Aus dem Uhrmodus, beim drücken der Taste DISPLAY länger als 1 Sekunde, Uhrmodus
schaltet in den Zeiteinstellungsmodus und die Uhranzeige beginnt zu blinken. Nun kann die
Stundenanzeige oder Minutenanzeige eingestellt werden durch drücken der Tasten (+/-) oder
des LAUTSTÄRKEREGLERS.
LCD - DISPLAY-ANZEIGE
In diesem Bereich werden Informationen zum Wellenbereich, zur Frequenz und zu anderen
Einstellungen angezeigt. (6).
BLINKENDE LED
Wenn die Frontplatte nicht richtig einrastet blinkt die LED.
RESET
Die Taste RESET (8) befindet sich im Gehäuse und muss entweder mit einer Kugelschreibermine oder einem dünnem Metallobjekt gedrückt werden (Benutzen Sie keine scharfe Gegenstände um Beschädigung des Geräts zu vermeiden). Die Taste RESET (8) muss in folgenden
Fällen gedrückt werden:
- Nach der ersten Installation nachdem alle Anschlüsse beendet sind
- Die Funktionstasten zigen keine Reaktion
- Fehlersymbol im Display
DE
23
Bedienungsanleitung
RADIO FUNKTIONEN
WELLENBEREICH AUSWÄHLEN
Im Radiomodus, durch wiederholtes drücken der Taste Wellenbereich (9) BAND, wird der Wellenbereich in folgender Reihenfolge ausgewählt:
RADIOSENDER AUSWÄHLEN
Im Radiomodus drücken Sie kurz die Tasten (10) Frequenz erhöhen (SEEK) oder (11) Frequenz
verringern (SEEK ) zur automatischen Suche eines Radiosenders.
Drücken Sie die Tasten (10) Frequenz erhöhen (SEEK ) oder (11) Frequenz verringern (SEEK)
länger als 1 Sekunde zur manuellen Einstellung des Senders.
AUTOMATISCHE SPEICHERUNG UND SENDERSUCHE
-Automatische Speicherung
Drücken Sie die Taste AMS (12) für einige Sekunden, das Radio sucht von der aktuellen Frequenz
an und überprüft die Signalstärke bis ein Zyklus beendet ist. Nun sind die 6 stärksten Radiosender gespeichert in den zugehörigen Stationsspeicher.
- Programmsuche
Drücken Sie kurz die Taste AMS (12), um die gespeicherten Sender für kurze Zeit (5 Sekunden)
anzuhören. Im Display wird ÏNT angezeigt. Um den gewünschten Sender anzuhören können Sie
die zugehörige Stationstaste oder die Taste AMS drücken.
SPEICHERN DER RADIOSENDER
Drücken Sie eine Stationstaste (13 ~ 18) im Radiomodus M1-M6
- Radiosender wird aus dem Speicher aufgerufen beim drücken der Taste unter 1 Sekunde
- Radiosender wird gespeichert beim drücken der Taste länger als 1 Sekundea.
SD/MMC KARTE UND USB SPEICHER – MP3-WIEDERGABE:
WIEDERGABE UND PAUSE
Drücken Sie die Taste Wiedergabe/Pause (13) um die Wiedergabe anzuhalten; die ZEITANZEIGE
blinkt; nochmaliges drücken starte die Wiedergabe; drücken der Taste länger als 1 Sekunde wird
die Wiedergabe beendet.
DE
24
INT
Drücken Sie die Taste (14) INT – INTRO. Die INT Anzeige leuchtet und die Wiedergabe beginnt
mit den ersten 10 Sekunden von jeder Melodie von INT Angefangen bis zur letzten. Danach wird
die Melodie vom INT Start komplett abgespielt.
Bedienungsanleitung
WIEDERHOLUNG (RPT)
Drücken Sie die Taste (15): die Funktion WIEDERHOLUNG EIN/AUS (RPT ON/OFF) ist aktiviert.
Beim Start der Funktion erscheint die Anzeige RPT und die gerade ausgewählte Melodie wird
wiederholt. Nochmaliges drücken stoppt die Funktion.
ZUFÄLLIGE REIHENFOLGE (RDM)
Drücken Sie die Taste (16): Wenn diese Funktion aktiviert ist erscheint die Anzeige RDM. Die
Melodien werden in zufälliger Ordnung gespielt. Nochmaliges drücken stoppt die Funktion.
SUCHFUNKTIONEN (Z.B. TITEL/DATEI/ORDNER SUCHEN).
Im MP3 Modus drücken Sie die Tasten Vorlauf/Rücklauf SEEK >> (11) oder SEEK << (10) um
die vorherige oder nächste Melodie Auszuwählen. Melodienummer wird im Display angezeigt.
Halten Sie die taste gedrückt für schnellen Vorlauf/Rücklauf. Die Wiedergabe beginnt beim loslassen der Taste.
Drücken der Stationstaste (17 – 18):
- MP3 Modus: Funktion 10 Melodien Vorwärts/Rückwärts ist aktiviert.
- Wenn die Gesamtzahl der Melodien 10 oder weniger beträgt sind die Tasten inaktiv.
DE
25
Bedienungsanleitung
RDS FUNKTIONEN (RADIO INFORMATIONEN SYSTEM)
AF – ALTERNATIVE FREQUENZEN
Drücken Sie die Taste (20) [AF] um den RDS – Modus Ein- oder Auszuschalten. Wenn der RDS –
Modus Eingeschaltet ist, erscheint die Anzeige „AF“ am Display.
Die Anzeige „AF“ Erscheint sobald AF Eingeschaltet wird. Die Suche nach einer alternativen
Frequenz startet sobald das Radiosignal zu schwach wird.
Bei FM Empfang, wenn AF Eingeschaltet ist, die Funktionen Suchen, Speichern, Auto, können
nur RDS - Programme empfangen und speichern. Trotzdem, wenn die Option ITALIA aktiviert ist,
können alle Programme die den Grenzwert überschreiten Empfangen und Gespeichert werden
INDIKATOR
KONDITIONEN
AF ON
Option AF EIN, Empfang von RDS Informationen
AF OFF
Option AF AUS
AF Blink
Option AF EIN, kein Empfang von RDS Informationen
REGION
AF –Beim drücken der Taste AF länger als eine Sekunde wird in Modus REGION EIN/AUS umgeschaltet
EIN (ON) – PI- Kode (Programm–Identifikations-Kode) wird überprüft wenn AF Kontrolle im Gange
ist
AUS (OFF) – PI – Kode und Flächendeckung werden nicht überprüft wenn AF Kontrolle im Gange
ist
PROGRAMMTYP (PTY)
RADIO MODUS
Vorheriger PTY wird angezeigt beim drücken der Taste (21) PTY. Wenn keine andere Taste in den
nächsten 2 Sekunden gedrückt wird, vorheriger PTY wird gesucht. Im 1 Suchzyklus, wenn der
gesuchte Programmtyp nicht gefunden wird, erscheint die Anzeige „NO PTY“.
Zwei Programmtypen stehen zur Verfügung: SPRACHE (SPEECH) UND MUSIK (MUSIC).
Einmaliges drücken von PTY: Option Musik; Nochmaliges drücken: Option Sprache.
Die Stationstasten M1-M6 werden zur Auswahl des Programmtyps verwendet:
DE
26
VERKEHRSINFORMATIONEN (TA)
Die Taste (22) TA hat folgende Funktionen:
TA EIN Am Display wird TA Angezeigt.
Wenn Verkehrsinformationen gesendet werden, wird die aktuelle Tonquelle unterbrochen.
Wenn die Lautstärke unter 20 ist, wird die Lautstärke auf 20 gestellt und nach den Verkehrsinformationen wieder zurückgestellt
Wenn die Lautstärke während einer Verkehrsinformation geregelt wird, ist nur die vorherige Lautstärke gültig.
Wenn TA Eingeschaltet ist, die Funktionen Suchen, Automatische Speicherung können empfangen oder gespeichert werden nur wenn der Identifikationskode des Verkehrsinformationen
Programms erhalten wird
Wenn TA Eingeschaltet ist, der Identifikationskode des Verkehrsinformationen Programms wird
nicht in einer bestimmten Zeit Empfangen
ALARM TA: NO TA/TP wird Angezeigt und der Alarm ist Ausgeschaltet
SUCHEN TA (TA SEEK): die TA Suche ist aktiviert.
Bedienungsanleitung
BLUETOOTH-FUNKTIONEN
1. Koppeln der Geräte
Schalten Sie Ihr Autoradio ein; legen Sie das Mobiltelefon mit Bluetooth Funktion in der Nähe des
Autoradios, kurz danach findet das Mobiltelefon das neue Bluetooth-Gerät “CAR AUDIO”, Geben Sie
das Kopplungs-Passwort “8888” ein und klicken auf OK, es erscheint die Meldung Kopplung erfolgreich,
wenn die Verbindung erfolgreich hergestellt wurde, erscheint auf dem LCD-Bildschirm die Meldung
BT ON und das Bluetooth-Logo “ “ hört auf zu blinken. Danach können Sie die Bluetooth-Funktionen
ausführen.
HINWEIS: abhängig vom Bluetooth Mobiltelefon unterstützt das Bluetooth System “HSP” “HFP” “A2DP”
und AVRCP Bluetooth Profil
2. Funktion Mobiltelefon Freisprecheinrichtung
Wenn Ihr Mobiltelefon mit dem CAR AUDIO System verbunden ist, können Sie Anrufe betätigen und
bei Eingang eines Anrufes wird das Klingeln des Mobiltelefons automatisch zu den Lautsprechern des
Autoradios umgeleitet und die Telefonnummer des Anrufers erscheint am LCD Bildschirm.
- Drücken Sie kurz die Taste “WELLENBEREICH/ ” um das Gespräch anzunehmen. Nun können Sie
das Gespräch führen über das Mikrofon an der Frontplatte.
- Drücken Sie kurz die Taste “TON AUS/ ” um aufzuhängen wenn das Gespräch beendet ist.
- Drücken Sie kurz die Taste “TON AUS/ ” um das Gespräch abzulehnen bei eingehenden Anruf.
3. Musikwiedergabe über A2DP.
Ihr Mobiltelefon und Autoradio sind über A2DP verbunden (Drücken der Taste “MODUS” und wählen den
Modus A2DP). Wenn Sie Ihren mobilen Musik-Player aufrufen, um Musik zu hören, wird der Musik-Ton
über das Audiosystem des Fahrzeugs übertragen, “A2DP” erscheint im LCD Display.
Drücken Sie die Taste “ ” und “ ” an der Frontplatte zum Auswählen der Musiktitel.
Drücken Sie kurz die Taste “ ” zum Anhalten der Wiedergabe (Pause).
Durch drücken der Taste “WELLENBEREICH/ ” länger als eine Sekunde wird die aktuelle Bluetooth
Verbindung zeitweise unterbrochen.
Durch erneutes drücken der Taste “WELLENBEREICH/ ” länger als eine Sekunde wird die Bluetooth
Verbindung wieder hergestellt.
4. Wählen einer Nummer aus dem Telefonbuch
Dieses Bluetooth System kann automatisch die vermissten Telefonanrufe speichern (bis zu 10 Telefonnummern).
- Drücken lang die Taste “ TON AUS /
” zum aufrufen der Liste und suchen die gewünschte Telefonnummer mit den Tasten Lautstärkeregler.
- Drücken Sie kurz die Taste “WELLENBEREICH/ ” um den Wahlvorgang mit der gewählte Telefonnummer zu starten.
5. Bluetooth Verbindung unterbrechen/wiederherstellen.
Durch kurzes drücken der Taste “WELLENBEREICH/ ” wird die aktuelle Bluetooth Verbindung zeitweise unterbrochen; wenn das Mobiltelefon im Freisprechmodus oder A2DP Modus war, wird der Ton
oder Musikwiedergabe des Mobiltelefons wieder auf die Telefonlautsprecher geleitet.
Durch erneutes drücken der Taste “WELLENBEREICH/ ” wird die Bluetooth Verbindung wieder hergestellt.
HINWEIS: Verschiedene Mobiltelefone haben verschiedene Reaktionen. Wir garantieren nicht alle Funktionen der anschließbaren Geräte.
6. Löschen einer gespeicherten Telefonnummer
Dieses Bluetooth System kann automatisch die vermissten, abgelehnten und angenommene Telefonanrufe separat speichern. Die erste Nummer wird automatisch gelöscht beim Eingang der 11-ten Nummer.
DE
7. Benutzen der Funktion “EMPFANGENE” “VERMISSTE” “ABGELEHNTE” “MANU ANS/AUTO
ANS”
- Drücken für 3 Sekunden die Taste “ TON AUS / ” zum aufrufen der Liste “EMPFANGENE” “VERMISSTE” “ABGELEHNTE” “MANU ANS/AUTO ANS” und suchen die gewünschte Telefonnummer mit den
Tasten Lautstärkeregler.
27
Bedienungsanleitung
FERNBEDIENUNG
DE
28
1. Taste Ein/Aus
2. Taste Wiedergabe/ Pause/
Stationstaste 1
3. Taste Intro & Stationstaste 2
4. Taste Wiederholung/ Stationstaste 3
5. Taste zufällige Reihenfolge/
Stationstaste 4
6. Stationstaste 5
7. Stationstaste 6
8. Taste Ton aus/
Taste
9. Lautstärkekontrolle
10. Taste Modus
11. Taste Alternative Frequenzen (RDS)
12. Taste Verkehrs-Mitteilungen (RDS)
13. Taste suchen
14. Taste Display
15. Taste APS/AMS
16. Taste Programmtyp (RDS)
17. Taste Wellenbereich/
Taste
18. Taste Frequenz / Melodien suchen/ Schneller
Vorlauf/ Rücklauf
19. Auswahltaste
Bedienungsanleitung
BATTERIE AUSTAUSCHEN
Wenn die Reichweite der Fernbedienung nachläst, oder nicht mehr Funktioniert, muss die Batterie
Ausgetauscht werden. Verwenden Sie für die neue Batterie den Typus CR2025. Beim Einlegen
der Batterie achten Sie auf die korrekte Polarität.
1. Ziehen Sie das Batteriefach hinaus bei gedrückter Sicherung.
2. Legen Sie die Batterie mit dem (+) Zeichen nach oben in den Halter.
3. Schieben Sie das Batteriefach in die Fernbedienung.
DE
29
Bedienungsanleitung
TECHNISCHE DATEN
ALLGEMEINE TECHNISCHE DATEN
BETRIEBSSPANNUNG:
AUSGANGSIMPEDANZ:
MAXIMALE AUSGANGSLEISTUNG:
ABMESSUNGEN:
LEISTUNGSAUFNAHME:
DC 14,4V, negativer Masseanschluss
4 ohms
40W X 4(CH)
178x130x50mm(WxDxH)
15A
TONKONTROLLE
BASS (bei 100 Hz):
HÖHEN (bei 100 KHz):
+10dB/-10dB
+10dB/-10dB
USB/SD MUSIKWIEDERGABE
SIGNAL- RAUSCHABSTAND:
STATIONEN TRENNUNG:
FREQUENZGANG:
größer als 60dB
größer als 60dB
20Hz-20KHz
RADIO FM
EMPFANGSBEREICH (MHz):
ZWISCHENFREQUENZ (IF):
SENSIBILITÄT (S/N-30 dB):
KANALTRENNUNG:
87 5 -108MHz
10.7MHz
12dBu
>30dB
RADIO AM
EMPFANGSBEREICH (KHz):
ZWISCHENFREQUENZ (IF):
SENSIBILITÄT (S/N-20 dB):
522 -1620KHz
450KHz
42dBu
HINWEIS: TECHNISCHE DATEN KÖNNEN OHNE VORANKÜNDIGUNG GEÄNDERT WERDEN
„Hiermit erklär die Firma Lechpol dass sich das Gerät PY-9398 im Einklang mit den grundlegenden Anforderungen und anderen relevanten Bestimmungen der Richtlinie 1999/5/EG befindet. Konformitätserklärung zum
Download auf www.lechpol.eu”
DE
30
Instrukcja obsługi
SPIS TREŚCI
Instalacja radia
32
Schemat podłączenia
34
Panel przedni
35
Podstawowe operacje
36
Radio38
RDS40
Bluetooth41
Pilot zdalnego sterowania
42
Specyfikacja techniczna
44
PL
31
Instrukcja obsługi
INSTALACJA
Uwagi
Zainstaluj radio w taki sposób aby nie utrudniało prowadzenia pojazdu.
Przed ostatecznym zainstalowaniem radia w kieszeni podłącz wszystkie przewody i włącz radio
aby sprawdzić czy cały system nagłośnienia działa poprawnie.
Do poprawnej instalacji radia użyj dołączonych do niego akcesoriów, zastosowanie nieautoryzowanych komponentów może skutkować niepoprawnym działaniem radia.
Skonsultuj się Z autoryzowanym serwisem twojego samochodu jeżeli instalacja radia wymaga
dokonania modyfikacji w samochodzie np. wywiercenia otworów itp.
Zainstaluj radio w sposób solidny i bezpieczny, aby nie wyrządziło nikomu krzywdy w przypadku
np. awaryjnego hamowania.
Nie instaluj radia w miejscach gdzie będzie narażone na nadmierne nagrzewanie np. narażone na
bezpośrednie działanie promieni słonecznych, przy nawiewach ciepłego powietrza, w miejscach
gdzie nadmiernie zbiera się kurz, brud itp.
INSTALACJA (Metoda A)
Instalacja urządzenia
1. Deska rozdzielcza samochodu
2. Kieszeń
Po zainstalowaniu kieszeni we
wnęce, zabezpiecz ją przed
wypadaniem przez odgięcie
zaczepów.
3. Śruba
PL
32
Instrukcja obsługi
Rys.2
Rys.3
1. Deska rozdzielcza
2. Nakrętka (5mm)
3. Podkładka
4. Śruba
5. Śruba
6. Uchwyt
Do przymocowania tylnej części radia
użyj uchwytu (6).
Uchwyt ten można łatwo wygiąć ręką.
7. Podkładka
1. Ramka
2. Złap palcami za brzeg ramki Jak na
rysunku powyżej) i ją wyciągnij. Przy
ponownym montażu zwróć uwagę aby
nie zamontować jej odwrotnie.
3. Radio
Wsuń specjalne klucze (są w komplecie)
w szczeliny po obu stronach radia, aż
usłyszysz kliknięcie. Następnie pociągnij
całość do siebie aby wyjąć radio.
MONTAŻ RADIA W FABRYCZNEJ KIESZENI (Metoda B)
Montaż radia w fabrycznej kieszeni
1,Wstaw radio aby otwory na śruby w
radiu pokrywały się z otworami w
kieszeni.
Przymocuj radio za pomocą śrub po
dwie po każdej stronie
Użyj śrub: 5x5mm lub 4x5mm.
2. Śruby
3. Kokpit
INSTALACJA KARTY SD
Wsuń kartę do gniazda etykietką
do góry, aby wyjąc kartę z radia
ponownie ją naciśnij
PL
33
Instrukcja obsługi
DIAGRAM PODŁĄCZANIA PRZEWODÓW
Antena Bluetooth
TYLNY
PRAWY GOŚNIK
PRZEDNI
LEWY GOŚNIK
ANTENA
GND
PRZEDNI
PRAWY GOŚNIK
15A
PODTRZYMANIE
PAMIĘCI +12V
ZASILANIE
TYLNY
LEWYY GOŚNIK
ZASILANIE (B+) CZERWONY
ZASILANIE ANTENY
PL
34
NIEBIESKI
ŻÓŁTY
CZARNY
PODTRZYMANIE PAMIĘCI
UZIEMIENIE (B-)
SZARY
GŁOŚNIK PRAWY PRZÓD +
SZARO-CZARNY
GŁOŚNIK PRAWY PRZÓD -
ZIELONY
FIOLETOWY
GŁOŚNIK PRAWY TYLNY +
ZIELONY
-CZAARNY
FIOLETOWY
- CZARNY
GŁOŚNIK PRAWY TYLNY -
GŁOŚNIK LEWY PRZÓD +
BIAŁY
GŁOŚNIK LEWY PRZÓD -
BIAŁO-CZARNY
GŁOŚNIK LEWY TYLNY +
GŁOŚNIK LEWY TYLNY -
Instrukcja obsługi
PANEL PRZEDNI - OBJAŚNIENIE PRZYCISKÓW
2 13 11 14
1/
2 / IN T
3
15 10 1 6
3/ RP T
19
6
22
4/ RD M
AUX
9
BND
AMS
M D
5 / -1 0
6 / +1 0
M U
17
18
4
D IS P
PY-9398
5 12 1
20
21
7
8
1. Przycisk power / wybór trybu
2. Przycisk opuszczania panelu
3. Regulacja poziomu dźwięku / menu
4. Wyciszenie / zakończenie rozmowy
5. Przycisk Display
6. Wyświetlacz LCD
7. Dioda LED
8. Przycisk reset
9. Zmiana częstotliwości /
odebranie rozmowy / lD3 select
10. Strojenie & wybór ścieżki
11. Strojenie & wybór ścieżki
12. AMS
13. Play/Pauza & Przycisk numeryczny 1
14. Intro & Przycisk numeryczny 2
15. Repeat & Przycisk numeryczny 3
16. Random & Przycisk numeryczny 4
17. Przycisk numeryczny 5
18. Przycisk numeryczny 6
19. Czujnik pilota zdalnego sterowania
20. Port USB
21. Gniazdo SD/MMC
22. AUX IN
PL
35
Instrukcja obsługi
PODSTAWOWE OPERACJE
ON / OFF
Wciśnij przycisk POWER (1) aby włączyć radio. Naciśnij i przytrzymaj przycisk dłużej niż 1s by
wyłączyć radio.
OPUSZCZANIE PANELU
Naciśnij przycisk REL (2) by opuścić panel.
USTAWIENIA DŹWIĘKU
Naciśnij przycisk SEL (3) aby przejść do ustawień według schematu.
GŁOŚNOŚĆ
Za pomocą gałki VOL/ SEL (3) dostosujesz poziom dźwięku. Przekręć gałkę w lewo by
zmniejszyć poziom dźwięku, a w prawo by zwiększyć poziom dźwięku. Aby wybrać funkcję
naciśnij krótko przycisk. Na ekranie pokażą się wybrane funkcje. By dostosować ich ustawienia przekręć gałką w prawo lub lewo.
NISKIE TONY (BASS)
Naciśnij przycisk VOL/SEL (3) jeden raz, aby przejść do trybu ustawień bassu. Następnie
obróć pokrętło VOL (3) zgodnie lub przeciwnie do ruchu wskazówek zegara aby
dostosować poziom basu.
WYSOKIE TONY (TREBLE)
Naciśnij przycisk VOL/SEL (3) dwa razy, aby przejść do trybu ustawień treble. Następnie
obróć pokrętło VOL (3) zgodnie lub przeciwnie do ruchu wskazówek zegara aby
dostosować poziom wysokich tonów.
BALANS PRAWO / LEWO
Naciśnij przycisk VOL/SEL (3) trzy razy, aby przejść do trybu ustawień balance. Następnie
obróć pokrętło VOL (3) zgodnie lub przeciwnie do ruchu wskazówek zegara aby ustawić
balans prawo-lewo.
BALANS TYŁ / PRZÓD (FADER)
Naciśnij przycisk VOL/SEL (3) cztery razy, aby przejść do trybu ustawień fader. Następnie
obróć pokrętło VOL (3) zgodnie lub przeciwnie do ruchu wskazówek zegara aby ustawić
balans tyl-przód.
WYBÓR MENU
PL
Naciśnij i przytrzymaj przycisk VOL/SEL (3) przez kilka sekund aby wybrać:
VOL
BAS
STEREO/MONO
36
TRE
BAL
DX/LOC
FAD
LOUD OFF/ON
SUB ON/OFF
DSP OFF
MUTE OFF
Instrukcja obsługi
Wyciszanie
By natychmiast wyciszyć radio naciśnij przycisk MUTE (4). Naciśnięcie przycisku ponownie
spowoduje powrót do poprzedniego poziomu dźwięku.
LOC/DX
Naciśnij przycisk SEL i wybierz ustawienia DX/LOC Pokręć gałką zmiany regulacji głośności
i ustaw tryb LOC aby odbierać tylko stacje lokalne. Na ekranie pojawi się napis “LOC”Wybierz
DX aby odbierać wszystkie stacje.
LOUDNESS ON/OFF
Naciśnij przycisk SEL i wybierz ustawienia LOUD. By aktywować funkcję przekręć gałką regulacji głośności. Na ekranie pojawi się napis “LOUD“ gdy opcja zostanie aktywowana.
MO/ST
Naciśnij przycisk SEL i przejdź do ustawień STEREO (MONO)
Kiedy stacja FM ma słaby sygnał i jest zakłócana. Wybierając tryb MONO można poprawić jej
sygnał i wyeliminować szumy.
WYBÓR OBSZARU USA / EUR
W trybie radia naciśnij przycisk SEL przez kilka sekund. Na wyświetlaczu ukażą się opcje
AREA USA/EUR. Opcja AREA USA/EUR umożliwia wybór częstotliwości obszaru poprzez
VOL +/-.
DISPLAY
Naciśnij i przytrzymaj przycisk DISP (6) na ekranie przez 5s wyświetli się obecny czas.
By zmienić ustaienia czasu naciśnij i przytrzymaj przycisk DISP (6) zegar przejdzie w tryb
ustawień i zacznie migać. By zmienić godzinę przekręć gałkę regulacji głośności w prawo vol
“+” lub by zmienić ustawienia minut przekręć gałkę regulacji głośności w lewo vol ”-”. A następnie zatwierdzi ustawienia przyciskając ponownie przycisk SEL.
WYŚWIETLACZ LCD
Wyświetlacz LCD (6) pełni funkcję informacyjną, wyświetla obecny status radia.
DIODA LED
Po zdjęciu panelu przedniego i wyłaczonym zasilaniu dioda led zacznie migać.
PRZYCISK RESET
Przycisk RESET (8) znajduje się na obudowie pod panelem przednim i może być aktywowany
za pomocą końcówki długopisu lub cienkiego metalowego przedmiotu (Nie należy używać
ostrych przedmiotów, aby uniknąć uszkodzenia urządzenia)
Przycisku RESET należy użyć gdy:
- Początkowa instalacja urządzenia.
- Nie wszystkie przyciski funkcyjne działają.
- Wyświetla się symbol błędu na wyświetlaczu.
PL
37
Instrukcja obsługi
RADIO
WYBÓR PASMA
W trybie radia naciśnij przycisk BAND (9) aby wybrać żądane pasmo fal radiowych. Pasmo
fal będzie zmieniane w następującej kolejności:
WYBÓR STACJI
W trybie radia naciśnij i przytrzymaj przycisk (10) „SEEK <<” lub (11) „SEEK >>”, aby automatycznie wyszukać stacje radiowe.
W trybie radia naciśnij krutko przycisk „SEEK <<” lub „SEEK >>” aby ręcznie wyszukać stacje
radiowe.
AUTOMATYCZNE PROGRAMOWANIE STACJI, SKANOWANIE STACJI
-Automatyczne programowanie stacji
Naciśnij i przytrzymaj przycisk AMS (Mp3) (12) przez kilka sekund. Urządzenie przeszuka
aktualny zakres częstotliwości. Po przeszukaniu całego zakresu 6 stacji z najsilniejszym
sygnałem zostanie zapisanych.
- Strojenie stacji
Naciśnij krótko przycisk AMS (13) aby przeskanować zaprogramowane stacje. Urządzenie przeskanuje zapamiętane stacje. Gdy poziom sygnału będzie większy niż stacji zapisanej urządzenie
zatrzyma sie na kilka sekund na danej stacji a następnie powróci do skanowania.
ZAPAMIĘTYWANIE STACJI
Naciśnij jeden z przycisków numerycznych (13~18)
1) TRYB RADIA.
M1 ~ M6
- Aby wybrać wcześniej zaprogramowaną stację wciśnij szybko (<1s) przycisk 1-6
- Aby zapisać aktualną częstotliwość do pamięci wciśnij i przytrzymaj przycisk 1-6.
PL
38
2) Tryb MP3/FLASH MP3
PLAY/ PAUZA
Wciśnij przycisk (13) aby rozpaczać odtwarzanie / wyłączyć pauze.
TOP - Wciśnij i przytrzymaj przycisk aby zacząć odtwarzanie od pierwszego utworu.
INT
Funkcja Intro Wciśnij przycisk (14) radio będzie odtwarzać po 10s każdego utworu. Po odtworzeniu wszystkich zacznie normalnie odtwarzać utwory zaczynające się od miejsca w którym funkcja
została wyłączona.
Instrukcja obsługi
RPT
Naciśnij przycisk (15): Gdy funkcja powtarzania zostanie włączona na wyświetlaczu pojawi się
napis REPEAT ON. A radio zacznie powtarzać odtwarzanie wybranego utworu.
RDM
Naciśnij przycisk (16): Aby włączyć lub wyłączyć funkcję odtwarzania Iosowego.
Naciśnij przycisk (17) przez więcej niż 1s by przejść do poprzedniego folderu, Naciśnij przycisk
(18) by przejść do następnego folderu.
SELECT TRACKS
Naciśnij przycisk (11 / 10) „<<” / „>>” aby wybrać następny bądź poprzedni utwór
Naciśnij í przytrzymaj przez kilka sekund przycisk (11 / 10) „<<” / „>>” aby przewinąć ścieżkę do
przodu bądź do tyłu.
PL
39
Instrukcja obsługi
RDS (RADIO DATA SYSTEM)
AF: częstotliwość alternatywna
Aby włączyć /wyłączyć funkcję AF wciśnij przycisk AF (11 na pilocie). Funkcja aktywuje się gdy
odbierana stacja ma słaby sygnał. Gdy funkcja AF jest włączona funkcje SEEK, SCAN,
AUTO, MEMORY wyszukują tylko stacje z RDS-em.
Ikona
Opis
AF ON
AF ON MODE sygnał RDS jest odbierany
AF OFF
AF OFF MODE
AF miga
AF ON MODE sygnał RDS nie jest odbierany
PTY - typy programów
- użyj przycisku PTY (16 na pilocie) aby wybrać określony typ programu.
Po wciśnięciu przycisku PTY, ostatni typ programu zostanie wyświetlony. Jeżeli w
przeciągu 2s nie będzie wciśnięty przycisk z żądanym PTY, zostanie odszukany ostatnio
zapamiętany PTY. Radio zacznie wyszukiwać określonych informacji. Jeżeli określone
audycje nie zostaną znalezione, funkcja PTY automatycznie się wyłączy.
W pamięci są zapisane dwa typy programów SPEECH i MUSIC.
Wciśnij raz PTY aby wybrac’ MUSIC wciśnij dwa razy PTY aby wybrać SPEECH.
Przyciski M1-M6 znajdujące się na pilocie mogą być użyte do wyboru żądanego typu
programu:
TA - komunikaty drogowe
TP/TA (Traffic Programme/TrafficAnnoucement) TP przycisk (12 na pilocie) informuje nas, że
stacja przygotowuje i nadaje serwisy dla kierowców, a sygnał TA jest nadawany w czasie takiego
programu (następuje wtedy dodatkowo zmiana PTY na “Traffic”). Jeśli chcemy, gdy
ostatnio odbierana stacja nada sygnał TA, odbiornik na czas programu zatrzyma
odtwarzanie płyty, by po zakończeniu programu kontynuować poprzednio wykonywaną
czynność.
Podczas nadawania komunikatów drogowych. niezależnie od trybu. komunikaty są
odbierane. Jeżeli poziom dźwięku jest poniżej 20, jest automatycznie zwiększany do 20, a
po zakończeniu transmisji jest automatycznie przywracany do poprzedniego poziomu.
Jeżeli poziom dźwięku przestroi się na czas nadawania komunikatu, w tym momencie
tylko poprzednie ustawienie poziomu dźwięku jest dostępne.
Gdy funkcja TA jest włączona, funkcje SEEK, SCAN, AUTO MEMORY są dostępne.
PL
40
Instrukcja obsługi
BLUETOOTH
1. Parowanie urządzeń.
Włącz jednostkę w samochodzie, połóż telefon obok radia, następnie aktywuj Bluetooth w telefonie i wyszukaj urządzenie. Po pewnej chwili telefon znajdzie nowe urządzenie „CAR AUDIO„
Wprowadź hasło „8888” a następie je zatwierdź. Telefon poinformuje o poprawnym sparowaniu
urządzeń, na wyświetlaczu radia pojawi się napis BT ON, a logo Bluetooth przestanie migać.
Uwaga: w zależności od rodzaju Bluetooth-a w telefonie, system bluetooth obsługuje profile:
„HSP”, „HFP”, „A2DP” i „AVRCP”.
2. Profil “wolne ręce” HFP (Hands-Free Profile)
Po poprawnym sparowaniu telefonu z urządzeniem będzie można wykonywać i odbierać połączenia używając profilu wolne ręce:
-Naciśnij przycisk „BAND” krótko, aby odebrać połączenie.
-Naciśnij przycisk „MUTE” krótko, aby odrzucić połączenie, bądź zakończyć rozmowę.
3. Profil zaawansowanej dystrybucji audio A2DP (Advanced Audio Distribution Profile)
Gdy telefon jest poprawnie sparowany z radiem naciśnij przycisk “MODE” i włącz profil A2DP. Po
włączeniu profilu A2DP muzyka z telefonu zacznie być odtwarzana w radiu. Na wyświetlaczu radia
wyświetli się napis „A2DP„
-Naciśnij przycisk “<< ” lub “>> ” by wybrać utwór muzyczny
-Naciśnij przycisk“ PAUSE” by zatrzymać odtwarzanie.
-Naciśnij i przytrzymaj przycisk “BAND”(mode) by tymczasowo rozłączyć bluetooth.
-Ponownie naciśnij i przytrzymaj przycisk “BAND”(mode) by ponownie połączyć bluetooth.
4. Książka telefoniczna
System Bluetooth może automatycznie przechowywać numery przychodzących połączeń - max
10 numerów.
- Naciśnij i przytrzymaj przycisk “MUTE”(mode) by wejść do książki telefonicznej, następnie naciśnij przycisk VOL aby wyszukać numer telefonu.
- Naciśnij raz przycisk „BAND„ by wywołać żądany numer telefonu.
5. Przerwanie połączenia Bluetooth
Podczas rozmowy naciśnij przycisk “BAND” krótko, by przerwać połączenie, głoś zostanie przeniesiony na głośnik telefoniczny.
Naciśnij przycisk „BAND„ ponownie, by wznowić połączenie bluetooth.
Uwaga: Różne telefony komórkowe mają różną reakcje. Nie gwarantujemy poprawnego działania
wszystkich operacji.
6. Jak usunąć numer zapisany numer telefonu?
Urządzenie może przechowywać po dziesięć numerów telefonicznych dla niee odebranych,
odrzucony i odebranych, pierwszy numer zostanie automatycznie usunięty przy zapisie 11 w kolejności numeru.
7.Funkcja “RECEIVED” “MISSED” “REJECTED” MANU ANS/AUTO ANS”
Naciśnij i przytrzymaj przycisk „MUTE” przez 3s by przejść do menu “RECEIVED” “MISSED”
“REJECTED” ANS/AUTO ANS”. Obróć obróć gałką głośności VOL w lewo lub w prawo by wybrać
numeru telefonu.
PL
41
Instrukcja obsługi
PILOT ZDALNEGO STEROWANIA
1. Włącznik
2. Pauza / Play / Przycisk numeryczny1
3. Intro / Przycisk numeryczny2
4. Powtarzanie / Przycisk numeryczny3
5. Random / Przycisk numeryczny4
6. Przycisk numeryczny5
7. Przycisk numeryczny6
8. Wyciszenie / zakończenie rozmowy
9. Regulacja poziomu dźwięku
PL
42
10. Przełącznik trybu pracy
11. AF (RDS)
12. TA (RDS)
13. Scan
14. Display
15. APS / AMS
16. PTY (RDS)
17. Zmiana pasma / Zakończenie rozmowy
18. Strojenie / Wybór ścieżki / F F / F R
19. Ustawienia dźwięku
Instrukcja obsługi
WYMIANA BATERII
Gdy skróci się zasięg działania pilota lub pilot przestanie funkcjonować, należy wymienić baterię
w pilocie na nową (typu CR2025) podczas wymiany należy zwrócić uwagę na polaryzację baterii.
1. Zdejmij pokrywę baterii pilota
2. Włóż nową baterie zgodnie z oznaczona polaryzacją
3. Załóż pokrywkę baterii
PL
43
Instrukcja obsługi
SPECYFIKACJA
Ogólna
Zasilanie:
Impedancja:
Maksymalna moc wyjściowa
Wymiary:
Pobór proądu:
DC 14,4V, Uziemienie na minusie
4 ohms
40W X 4(CH)
178x130x50mm(WxDxH)
15A
Kontrola tonów
Bass (at 100Hz):
Treble (at 10K):
+10dB/-10dB
+10dB/-10dB
USB/SD
S/N
Separacja kanałów::
Pasmo przenoszenia:
Radio FM
Zakres (MHz):
IF:
Czułość użytkowa (S/N-30dB):
Separacja kanałów:
Radio AM
Zakres (KHz):
IF:
Czułość użytkowa (S/N-20dB):
> 60dB
> 60dB
20Hz-20KHz
87 5 -108MHz
10.7MHz
12dBu
>30dB
522 -1620KHz
450KHz
42dBu
Uwaga:
specyfikacja urządzenia może ulec zmianie bez wcześniejszego powiadamiania.
„Niniejszym firma Lechpol oświadcza, że urządzenie PY-9398* jest zgodne z zasadniczymi wymaganiami oraz innymi stosownymi
postanowieniami dyrektywy 1999/5/WE. Właściwa deklaracja do pobrania na stronie www.lechpol.eu”
PL
44
Manual de utilizare
CUPRINS
Instalare46
Schema de conectare
48
Panoul frontal 49
Functii generale
50
Functii radio
52
System RDS
54
Functii BLUETOOTH
55
Telecomanda
56
Specyficatii
58
RO
45
Manual de utilizare
PRECAUTIONS
Locul de instalare trebuie ales astfel incat aparatul sa nu deranjeze conducatorul auto .
Inainte de instalarea finala, conectati temporar aparatul si asigurati-va ca este conectat in mod
adecvat si ca atat el cat si sistemul functioneaza in parametri normali.
Folositi numai componentele din dotare pentru a va asigura ca instalarea este corecta. Utilizarea
altor componente poate provoca defectarea aparatului.
Consultati cel mai apropiat dealer auto daca instalarea aparatului necesita gaurire sau alte modificari ale autoturismului (gaurire, cablare, etc.)
Instalati aparatul astfel incat acesta sa nu deranjeze soferul si sa nu raneasca pasagerii in cazul
unei opriri bruste.
MONTARE PRIN FATA (Metoda A)
Installing the unit
1. Tabloul de bord
2. Suportul
Dupa inserarea suportului in
tabloul de bord, selectati agatatorile in functie de grosimea
materialului tabloului de bord si
indoiti-le pentru a fixa suportul la
locul lui. (fig.1)
3. Surub
RO
46
Manual de utilizare
Fig.2
Fig.3
1. Tablou de bord
2. Piulita (5mm)
3. Saiba de siguranta
4. Surub (5 x 25mm)
5. Surub
6. Banda
Folositi banda pentru a fixa partea
din spate a aparatului. Banda poate fi
indoita pana in unghiul dorit.
7. Saiba fara filet.
1. Cadru
2. Introduceti degetele in canelura din fata
cadrului si trageti pentru a scoate cadrul.
(Pentru a fixa cadrul inca o data, formati
alte orificii si atasati aparatul).
3. Cheita
Introduceti cheita cu care este dotat
aparatul in canelura din ambele parti ale
aparatului, pana cand auziti un pocnet.
Aceasta va face posibila inlaturarea
aparatului din tabloul de bord.
MONTARE PRIN SPATE (Metoda B)
Instalarea se face folosind gaurile suruburilor de
pe extremitatile aparatului .
Fixarea aparatului in lacasul original
Suport de montare:
1. Alegeti o pozitie in care gaurile de surub ale
suportului si cele ale unitatii centrale sa fie pe
aceeasi linie si strangeti suruburile in doua locuri
pe fiecare parte. Folositi fie suruburi de ancorare
(5x5mm) fie suruburi cu cap ingropat (4x5mm).
2. Surub
3. Tablou de bord sau Consola.
INTRODUCEREA
CARDULUI SD
Unghiul oblic al cardului SD
mentine expunerea descendenta:
introduceti-I in spatiul SD si apasati
inca o data pentru a-l scoate.
RO
47
Manual de utilizare
SCHEMA DE CONECTARE
BLUETOOTH ANTENNA
15A
RED
YELLOW
BLACK
BLUE
GREY
WHITE
WHITE/BLACK
GREY/BLACK
VIOLET
GREEN
GREEN/BLACK
VIOLET/BLACK
IGNITION SWITCH (B+); RED – BUTON CONTACT (B+); cablu rosu
AUTO ANTENNA, blue – ANTENA AUTO, cablu albastru
FRONT Lch SPEAKER „+” ,WHITE – DIFUZOR FATA Lch „+”, cablu alb
FRONT Lch SPEAKER „-„ , WHITE/BLACK– DIFUZOR FATA Lch „-„, cablu alb/negru
REAR Lch SPEAKER „+”,GREEN – DIFUZOR SPATE Lch „+”, cablu verde
REAR Lch SPEAKER „-„ , GREEN/BLACK – DIFUZOR SPATE Lch „-”, cablu verde/negru
YELLOW , MEMORY BACKUP– ALIMENTARE MEMORIE, fir galben (se leaga la +)
BLACK, GROUND– MASA, cablu negru
FRONT Rch SPEAKER „+”, GREY – DIFUZOR FATA Rch „+”, cablu gri
FRONT Rch SPEAKER „-„, GREY/BLACK – DIFUZOR FATA Rch „-”, cablu gri/negru
REAR Rch SPEAKER „+” , VIOLET– DIFUZOR SPATE Rch „+”, cablu violet
REAR Rch SPEAKER „-„ ,VIOLET/BLACK– DIFUZOR SPATE Rch „-„, cablu violet/negru
RO
48
ANTENNA – ANTENA
REAR Rch LINE OUT– IESIRE LINIE Rch SPATE
REAR Lch LINE OUT– IESIRE LINIE Lch SPATE
FRONT Rch LINE OUT– IESIRE LINIE Rch FATA
FRONT Lch LINE OUT– IESIRE LINIE Lch FATA
SUBWOOFER
Manual de utilizare
PANOUL FRONTAL
2 13 11 14
1/
2 / IN T
3
15 10 1 6
3/ RP T
19
6
22
4/ RD M
AUX
9
BND
AMS
M D
5 / -1 0
6 / +1 0
M U
17
18
4
D IS P
5 12 1
PY-9398
20
21
7
8
1. Tasta Pornire/Mod
2. Tasta de eliberare a panoului frontal
3. Tasta Volum/Selectare
4. Taste Silentios/
Tasta
5. Tasta Afisaj
6. Ecran LCD
7. LED intermitent
8. Tasta Resetare
9. Banda radio/ Comutator
/ Selectare ID3
10. Tasta Cautare frecventa/ melodia urmatoare
11. Tasta Cautare frecventa / melodia anterioara
12. Memorare automata (AMS)
13. Tasta Redare/Pauza & Buton presetat 1
14. Tasta Intro & Buton presetat 2
15. Tasta Repetare & Buton presetat 3
16. Tasta redare aleatorie & Buton presetat 4
17. Buton presetat 5
18. Buton presetat 6
19. Senzor telecomanda
20. Slot Mini USB
21. Slot card SD/MMC
22. Intrare AUX
RO
49
Manual de utilizare
FUNCTII GENERALE
Pornire/Oprire sistem
Apasati orice buton pentru a porni aparatul. Apasati si tineti apasat butonul PORNIRE pentru
a opri aparatul.
Nota: Dupa oprirea aparatului, nivelul volumului si setarile radio curente vor fi memorate, iar la
pornirea aparatului, acesta va relua statusul memorat, pe care l-ati setat.
Deconectare panou frontal
Apasati butonul REL (2) pentru demontarea panoului frontal detasabil.
Reglarea sunetului
Apasarea butonului (3) poate regla calitatea dorita a volumului.
A) Apasarea butonului SEL (3) va schimba urmatoarea ordine:
Optiuni:
Controlul Volumului/ Selectare
Rotiti acest buton pentru a regla Volumul/Bass/Treb/Bal/Fad. Pentru a selecta functiile, apasati
butonul pentru VOL scurt pana cand functiile dorite apar pe afisaj.
Mariti sau micsorati volumul prin rotirea butonului VOL la dreapta sau stanga. Aceste butoane
pot fi folosite pentru reglare BASS, TREBLE, BALANCE si FADER.
Bass
Apasati butonul VOL/SEL (3) o data. Reglati nivelul de bass folosind butonul VOL/SEL (3).
Treble
Apasati butonul VOL/SEL (3) de doua ori. Reglati nivelul de inalte (treble) folosind butonul
VOL/SEL (3).
Balans
Apasati butonul SEL (3) de trei ori. Reglati balansul intre difuzoarele stanga si dreapta folosind
butonul VOL/SEL (3).
Fader
Apasati butonul VOL/SEL (3) de patru ori. Reglati balansul dintre difuzoarele din fata si cele
din spate folosind butonul VOL/SEL (3).
Modul SELECTARE MENIU
Apasati butonul VOL/SEL (3) timp de cateva secunde, selectarea meniului este activata ca
si mod ciclic al urmatoarelor functii:
VOL
RO
50
BAS
STEREO/MONO
TRE
BAL
DX/LOC
FAD
LOUD OFF/ON
SUB ON/OFF
DSP OFF
MUTE OFF
Manual de utilizare
MUTE - SILENTIOS
Apasati butonul MUTE (4) pentru a pune sunetul pe silentios. Apasati-l inca o data pentru a
reveni la volumul anterior.
LOCAL/DX
Alegeti pozitia “locala” in zone cu semnal puternic pentru a permite radioului sa selecteze doar
posturile radio cu semnal puternic in timpul reglarii manuale.
Nu alegeti aceasta optiune in zone cu semnal mai slab, pentru a putea asculta toate posturile
radio.
LOUDNESS
Naciśnij przycisk SEL i wybierz ustawienia LOUD . By aktywować funkcję przekręć gałką
regulacji głośności.
STEREO/MONO
Cand posturile radio FM au semnal slab si se receptioneaza cu bruiaje, receptionarea acestora poate fi imbunatatita prin selectarea modului MONO.
SETARE ZONA
Pe modul Radio, apasati butonul SEL timp de cateva secunde. Afisajul LCD va indica BEEP
ON
DISPLAY
Apasati butonul DISPLAY (5), pentru urmatoarele setari:
- Timpul este afisat timp de 5 secunde atunci cand apasati tasta de afisare DISP si revine la
starea initiala, cu exceptia cazului in care butonul DISP este apasat din nou.
- Apasati butonul DISP pe modul ceas mai mult de 1 secunda, modul ceas se schimba pe
modul de setare timp si afisajul va incepe sa palpaie. Acum afisajul orei sau afisajul minutelor
poate fi reglat prin apasarea tastelor (+ / -) sau de butonul de control al volumului.
LIQUID CRYSTAL DISPLAY- AFISAJ CU CRISTALE LICHIDE
Sunt expuse aici frecventa curenta si functiile activate (6).
FLASHING LED – LED INTERMITENT
Daca partea detasabila a aparatului nu se fixeaza in aparat, LED-ul (7) va lumina intermitent.
RESETARE
Butonul RESETARE (8), se afla pe carcasa si trebuie apasat fie cu un pix sau un obiect subtire
de metal. (Nu folositi obiecte ascutite pentru a evita deteriorarea aparatului). Butonul RESETARE (8) trebuie sa fie apasat in urmatoarele cazuri:
- Dupa instalarea initiala dupa ce toate conexiunile sunt finalizate
- Tastele functionale nu raspund comenzilor
- Simbolul de eroare apare pe afisaj
RO
51
Manual de utilizare
FUNCTII RADIO
Alegerea Iungimii de unda
Apasati butonul (9) (BAND-Lungimea de unda) in mod repetat pentru a alege Iungimea de
unda in urmatoarea ordine:
Alegerea postului radio
Pe modul RADIO, apasati scurt SEEK << (cauiare) sau butonul sau SEEK >> pentru a
cauta automat un post radio, apasati SEEK << (cautare) sau butonul sau SEEK >>
timp mai multe secunde pentru functia de reglare manuala.
Memorare automata si scanare programe
- MEMORARE AUTOMATA
Apasati butonul (12) AMS (MP3) pentru cateva secunde, radioul cauta o frecventa si
verifica semnalul pana cand un ciclu de cautare este terminat.
Astfel, primele 6 dintre posturile de radio receptionate sunt stocate fiecare la butonul
corespunzator.
- SCANARE PROGRAME
Apasati scurt butonul (12) AMS (MP3) pentru a scana un post de radio reglat. Cand modul
AMS este pornit, simbolul „INT” apare pe afisaj. Puteti de asemenea apasa butoanele
corespunzatoare sau butonul AMS cand postul radio dorit este schimbat. Acel post radio va
porni.
Stocarea posturilor radio
Apasati butoanele presetate (13-18)
MODUL RADIO
M1 ~M6
- MEMORIE PRESETATA este incarcata cand este apasat butonul pentru mai putin de 1
secunda.
- MEMORIE PRESETATA este salvata cand este apasat butonul pentru mai mult de 1
secunda.
2) CD/ MP3/ FLASH MP3
PORNIRE/PAUZA
Apasati si butonul (13) este activat. In Iimpul PAUZEI, INDICATORUL DE DISC Iumineaza
intermitent.
TOP- prima melodie va incepe cand primul buton este apasat pentru mai muli de 0.5 sec.
RO
52
Manual de utilizare
INT
Apasati butonul (14). In timp ce butonul INTRO este pomit, indicatorul INT va pomi primeIe
10 secunde din fiecare melodie, pana la ultima. Se va derula tot discul de unde a inceput INT
RPT
Apasati butonul presetat (15): Modul de redare flash: functia REPETARE PORNITA/OPRITA
este activata. Cand funcita REPETARE PORNITA, INDICATORUL REPETARII pomesc si
repeta piesa curenta.
RDM (random - redare aleatoare)
Apasati butonul presetat (16): Cand functiile RANDOM PORNIT, INDICATORUL RDM sunt
pornite si fiecare piesa este redata aleator.
SELECTARE PIESE
In limpul functionarii modurilor USB/SD, apasati tasta SEEK << (11) sau SEEK >> (10)
pentru a schimba pe piesa anłerioara sau pe urmatoarea, numarul piesei va aparea pe afisaj.
In timpul functionarii modurilor USB/SD, tineti apasata tasta SEEK << (11) sau SEEK >>
(10) pentru a derula inapoi sau inainte. Redarea muzicii va incepe atunci cand eliberati butonul.
Apasati butonul presetat (17 -18):
Modul MP3: opłiunea 10 Sus/Jos este activata.
Cand totalul pieselor este 10 sau mai putin, tasta este dezactivata.
RO
53
Manual de utilizare
FUNCTII RDS (SISTEM DE DATE RADIO)
AF: Frecvente Alternative
- pentru a seta Modul RDS, apasati butonul AF (20) si eliberati butonul pentru a porni sau opri modul
RDS. Ori de cate ori modul RDS este pornit, simbolul AF va aparea pe afisaj.
AF/REG
AF
- tasta AF/REG indica activarea CAUTARII FRECVENTELOR ALTERNATIVE.
- Indicatorul AF este afisat cand AF este pornit, cautarea se activeaza atunci cand semnalul receptionat nu mai este bun.
- In modul FM, cand AF este pornit, functiile de CAUTARE, SCANARE, AUTO, MEMORARE pot
receptiona si salva doar programe RDS. Cu toate acestea, cand optiunea ITALIA este activata, indiferent daca e sau nu RDS, programele care corespund nivelului SD pot fi receptionate si salvate.
Ikona
Opis
AF ON
modul AF ON, informatie RDS primita
AF OFF
modul AF OFF
AF blink
modul AF ON, nu se recepteaza informatii RDS
REGION
- modul AF este transformat in modul REGION ON/OFF cand modul AF ON este apasat pentru mai
mult de 1 secunda.
- ON: CODUL PI este verificat cand controlul AF este in desfasurare.
- OFF: CODUL PI si SUPRAFATA DE ACOPERIRE nu sunt verificate cand AF este in desfasurare.
PTY
MODUL RADIO
- PTY anterior este afisat cand tasta PTY (16) este apasata. Daca nici o alta tasta nu este apasata
timp de 2 secunde, PTY anterior selectat va fi cautat. In timpul LOOP 1, daca PTY dorit nu este
gasit, NO PTY va fi afisat.
- 2 tipuri de programe: SPEECH si MUSIC.
Apasand PTY o data, apare optiunea MUSIC. Cand PTY este apasat a doua oara, apare optiunea
SPEECH.
Tastele M1-M6 pot fi folosite pentru alegerea tipului de program dorit.
TA
Butonul TA (12) functioneaza dupa cum urmeaza:
- TA este pornit/oprit si indicatorul TA este afisat.
Cand se transmit informatii despre trafic, indiferent de mod, informatiile se primesc.
RO
54
Daca NIVELUL VOLUMULUI este sub 20, volumul se ridica la 20, si revine la modul si volumul
anterior daca informatiile despre trafic s-a oprit.
Daca volumul este modificat in timpul unei informatii despre trafic, numai volumul anterior este
valabil.
- Cand TA este pornit, functiile SEEK, SCAN, AUTO MEMORY pot fi receptionate sau salvate numai
daca se primeste codul de identificare al programului traficului.
- Cand TA este pornit, codul de identificare al programului traficului nu se receptioneaza intr-un timp
stabilit.
ALARMA TA: nici o functie TA/TP nu este afisata iar alarma este dezactivata.
CAUTARE TA: CAUTAREA TA este activata.
Manual de utilizare
Functii BLUETOOTH
1. Imperecherea cu un telefon mobil
Porniti sistemul audio al masinii, conectati telefonul dumneavoastra care are si functia de bluetooth in
apropierea sistemului audio al masinii. Mobilul va gasi noul dispozitiv Bluetooth “CAR AUDIO”; introduceti parola “8888” si apasati tasta OK. Cand conexiunea a reusit pe afisajul TFT avertizarea luminoasa
intermitenta a logo-ului Bluetooth-ului “ “ se va opri. Indeplinirea functiilor Bluetooth-ului vor putea fi in
continuare efectuate prin apasarea butonului de pe panoul din fata sau prin telecomanda.
OBSERVATIE: in functie de dispozitivul bluetooth al telefonului mobil, bluetooth-ul sistemului audio al
masinii va suporta variantele de tip “HSP”, “HFP”, “A2DP” si “AVRCP”.
2. Functia hands-free
In cazul in care telefonul mobil este conectat la sistemul audio al masinii, puteti apasa si solicita primirea
unui apel, apelul este redirectionat automat la difuzoarele de radio ale masinii sși numarul de telefon al
apelantului apare pe ecranul LCD.
- Apasati butonul “BAND (banda de frecventa)” pentru a accepta apelul. Acum puteti conduce conversatia
prin microfonul de pe panoul frontal.
- Apasati butonul “MUTE” scurt pentru a respinge un apel.
- Apasati butonul “MUTE”, scurt pentru a incheia conversatia.
3. Redarea muzicii prin A2DP
Prin functia A2DP se realizeaza conexiunea dintre sistemul audio si telefonul mobil in privinta redarii
fisierelor muzicale. Cand veti doriti sa ascultati muzica din telefonul mobil, A2DP va realiza transferul pe
sistemul audio al masinii, prin apasarea butonului “ ” si “ ” si selectarea melodiei. Dupa conectarea
sistemului audio si a telefonului mobil prin A2DP, in timp ce telefonul mobil reda muzica, apasati butonul
“MODE” pe modul A2DP, sunetul de la telefonul mobil va putea fi auzit acum prin difuzoarele masinii.
Selectati piesele apasand butoanele “ ” si “ ” ale sistemului audio.
Apasati butonul “ “ sau “ ” care au aceeasi functie ca si la redarea unui disc.
Telefonul dumneavoastra mobil si radio-ul auto sunt conectate prin A2DP (apasati butonul “MODE” si
selectati modul A2DP). Daca accesati playerul muzical portabil pentru a asculta muzica, sunetul este
transferat la sistemul masinii, simbolul “A2DP” apare pe ecranul LCD.
- apasati butonul “ ” si “ ” de pe panoul frontal pentru a selecta melodiile.
- apasati scurt butonul “ ” pentru a intrerupe redarea (pauza).
- apasati tasta “BAND (banda de frecventa)” pentru mai mult de o secunda, conexiunea curenta Bluetooth
este intrerupta temporar.
- apasati din nou tasta “BAND (banda de frecventa)” pentru mai mult de o secunda, conexiunea Bluetooth
este restabilita.
4. Apelare din agenda telefonului
Acest sistem Bluetooth poate inregistra automat apelul pierdut (ultimele 10 numere de telefon).
- Apasati si tineti apasat butonul “MUTE (mod)” pentru a apela lista si a localiza numarul de telefon dorit
folosind butoanele de control al volumului.
- Apasati butonul “BAND (banda de frecventa)” scurt pentru a porni procesul de apelare cu numarul de
telefon selectat.
5. Intreruperea conexiunii Bluetooth/Reconectare
Apasand butonul “BAND” scurt veti intrerupe conexiunea curenta prin bluetooth. Cand telefonul este pe
handsfree sau A2DP sunetul soneriei sau al muzicii se va auzi prin difuzoarele mobilului.
Apasand butonul “BND” inca o data mai mult de o secunda puteti conecta din nou conexiunea bluetooth.
6. Stergerea unui numar de telefon memorat
Acest sistem Bluetooth poate salva in mod automat zece apeluri pierdute, respinse si apeluri acceptate
separat. Primul numar este sters automat la intrarea celui de al 11-lea numar.
7. Folosirea functiilor “APEL PRIMITE” “APEL PIERDUT” “APEL PIERDUT” “MANU ANS / AUTO
ANS”
- Apasati butonul „MUTE” timp de 3 secunde pentru a accesa lista de “Apeluri Primite” “Apeluri pierdute”
“Apeluri respinse” “MANU ANS / AUTO ANS”. Pentru cautarea numarului de telefon dorit folositi butonul
de control al volumului.
RO
55
Manual de utilizare
TELECOMANDA
1. Tasta Pornire
2. Tasta Pauza/ redare/ Buton presetat 1
3. Tasta Intro & Buton presetat 2
4. Tasta Repetare redare/ Buton presetat 3
5. Tasta redare aleatorie/ Buton presetat 4
6. Buton presetat 5
7. Buton presetat 6
8. Tasta Silentios/
Tasta
9. Tasta control volum
10. Tasta Mod
RO
56
11. Tasta Frecvente alternative (RDS)
12. Tasta Informatii din trafic (RDS)
13. Tasta cautare
14. Tasta Afisaj
15. Tasta APS/AMS
16. Tasta tipul programului (RDS)
17. Tasta banda de frecventa/ Tasta
18. Tasta Frecventa / Selectare melodii/
Derulare inainte / Derulare inapoi
19. Tasta Selectare
Manual de utilizare
INLOCUIREA BATERIEI LA TELECOMANDA
Cand raza de operare a lelecornenzii slabeste sau telecomanda nu mai functioneaza este
recornandata inlocuirea bateriei vechi si inlocuirea cu o baterie noua. Asigurati-va ca
polaritatea bateriei este corecta ínainte de inlocuire, in caz contrar telecomanda se poate
defecta.
1. Scoateti suportul pentru baterie in timp ce apasati sistemul de blocare
2. Puneti bateria ou semnul (+) in sus in suport
3. Inserati suportul in telecomanda
RO
57
Manual de utilizare
SPECIFICATII
SPECIFICATII GENERALE
ALIMENTAREA LA RETEA:
IMPEDANTA
PUTERE MAXIMA:
DIMENSIUNI:
CURENT CONSUMAT:
DC 14,4V, Minusul la masa
4 ohms
40W X 4(CH)
178x130x50mm(WxDxH)
15A
FRECVENTE
BASS (la 100Hz):
TREBLE (la 10K):
+10dB/-10dB
+10dB/-10dB
USB/SD
RAPORT SEMNAL / ZGOMOT
SEPARARE POSTURI:
RASPUNS IN FRECVENTA:
RADIO FM
Frequency Coverage (MHz):
IF:
SENSIBILITATE (S/N-30dB):
SEPARARE STEREO:
RADIO AM
Frequency Coverage (KHz):
IF:
SENSIBILITATE (S/N-20dB):
> 60dB
> 60dB
20Hz-20KHz
87 5 -108MHz
10.7MHz
12dBu
>30dB
522 -1620KHz
450KHz
42dBu
NOTA:
SPECIFICATIILE SE POT SCHIMBA FARA O INSTIINTARE PREALABILA
„Compania Lechpol declară că produsul PY-9398 este în conformitate cu cerinţele esenţiale şi alte prevederi
relevante ale Directivei 1999/5/CE. Declaraţia pentru descărcare este postata pe site-ul www.lechpol.eu”
RO
58
Bedienungsanleitung
DE
59
www.peiying.eu


