1
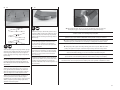
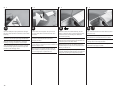
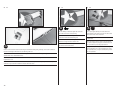
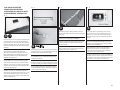
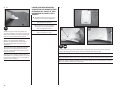
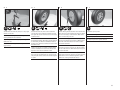
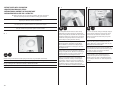
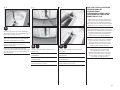
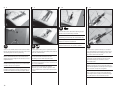
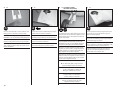
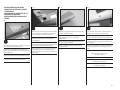
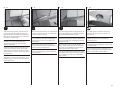
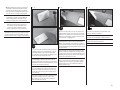
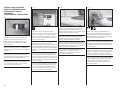
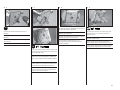
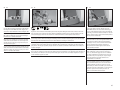
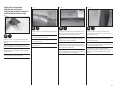
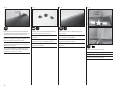
2 LL RR Use a flat file to create to flat areas on the axle. File the first 1/4 inch (6mm) of the axle, and an area 1/4 inch (6mm) wide centered 1 inch (25mm) from the end of the axle. Feilen Sie zwei Stellen auf der Achse flach. Feilen Sie je einen 6mm breiten Streifen am Anfang der Achse und den zweiten 25mm weiter nach innen. Utilisez une lime pour effectuer un méplat sur 6mm de long depuis l’extrémité de l’axe. Effectuez un deuxième méplat de 6mm de large à une distance de 25mm. Con una lima creare delle zone piatte sull’albero. Inizialmente i primi 6mm dell’asse e poi altri 6mm a 25mm dall’estremità dell’asse. 3 LL RR M3 x 20 x4 Secure the landing gear mount in the wing using the hardware listed and a #2 Phillips screwdriver. Make sure the axle is perpendicular to the edge of the wing as shown, as there is a right and left landing gear included with your model. Sichern Sie den Fahrwerkshalter in der Tragfläche mit den aufgeführten Teilen und einem #2 Phillips Schraubendreher. Stellen Sie sicher, dass die Achse im rechten Winkel zur Tragflächenvorderkante ist. Bitte beachten Sie auch, dass es eine rechte und linke Seite gibt. Fixez la jambe de train sous l’aile en utilisant les vis indiquées et un tournevis cruciforme #2. Assurez-vous que l’axe de roue est à la perpendiculaire des longeron de fixation comme sur la photo, votre modèle est livré avec une jambe gauche et une jambe droite. Fissare il supporto del carrello nell’ala usando la viteria elencata e un cacciavite a stella #2. Accertarsi che l’asse sia perpendicolare al bordo dell’ala, come illustrato, tenendo conto che nel modello sono inclusi un carrello destro e uno sinistro. 32 4 LL RR M2 x 10 x4 5 LL RR RT Secure the landing gear door to the wing using the screws listed and a #1 Phillips screwdriver. Use rubberized CA to glue a rubber band to the gear door and around the landing gear strut. Montieren Sie die Fahrwerkstür mit den aufgeführten Schrauben und einem #1 Phillips Schraubendreher. Kleben Sie mit gummierten Sekundenkleber ein Gummiband an die Fahrwerkstür und um das Fahrwerksbein. Fixez la trappe de train à l’aile en utilisant les vis indiquées et un tournevis cruciforme #1. Utilisez de la colle cyano caoutchouc pour coller la bande caoutchouc qui entoure la jambe à la trappe. Fissare il portello all’ala usando le viti elencate e un cacciavite a stella #1. Usare colla CA gommosa per incollare un elastico al portello del carrello e intorno alla gamba del carrello.