1
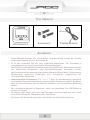
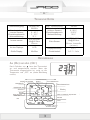
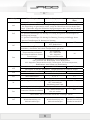
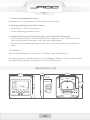
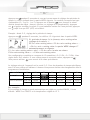
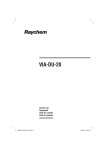
DE FR EN Thermostat RMTMS01 (seite 1-13) Thermostat RMTMS01 (page 14-25) Heating Thermostats RMTMS01 (page 26-36) Original Bedienungsanleitung / Liebe Kundin, lieber mode d‘emploi original / Original Instruction Manual Kunde, danke, dass Sie sich für unser Produkt entschieden haben. Bitte lesen Sie die Bedienungsanleitung aufmerksam durch, bevor Sie das Produkt montieren, anschließen oder benutzen, um Schäden durch nicht sachgemäßen Gebrauch zu vermeiden. Beachten Sie insbesondere die Sicherheitshinweise. Sollten Sie dieses Produkt an Dritte weitergeben, muss diese Bedienungsanleitung mit ausgehändigt werden. Chères clientes, chers clients, Nous vous remercions d‘avoir choisi notre produit. Nous vous prions de bien vouloir lire le mode d´emploi attentivement avant de monter ou d‘utiliser le produit afin d´éviter des dommages causés par une utilisation non conforme. Si vous souhaitez donner ce produit à une tierce personne, veuillez y joindre cette notice d‘utilisation. Dear Customer, Thank you for choosing our product. Please read this manual carefully before assembling or using the product, to avoid damage caused by improper use. Please pay special attention to the safety instructions. If the product is passed on to third parties, this manual has to be passed on along with the product. 1 DE FR DE EN Teile Übersicht Schrauben Set Heizthermostat Temperatursensor Schraubenset Wärmethermostate Temperatursensor Allgemeines • Dieses Wärmethermostat mit wöchentlicher Programmierung wendet die aktuelle single-chip Computer Control Technologie an. • Es ist sehr verlässlich und mit einer Entstörung ausgestattet. Das Thermostat is energiesparend und sorgt für gemütliche Wärmebedingungen. • Das Gerät kann in Kombination mit elektrischen Heizgeräten oder Warmwassersystemen von elektrischen Heizgeräten oder Antriebssteuerungen verwendet werden. Das Thermostat startet und stoppt das zu kontrollierende Objekt (Ventil, Bodenheizung, Wandheizung, elektrische Heizkörper, etc.) automatisch entsprechend der voreingestellten Temperatur. • Unterschiedliche Zeitspannen: 5+2 / 6+1 / 7 Tage, die Heizausrüstung unterstützt verschiedene Temperatureinstellungen entsprechend 6 Zeitspannen täglich. Der Nutzer kann für unterschiedliche Zwecke zwischen manueller und automatischer Bedienung wählen. • Das verarbeitete Material ist flammfest, sicher und zuverlässig. Das LCD-Display ist einfach zu reinigen. • Die Uhrzeit läuft weiter auch wenn das Thermostat vom Strom getrennt wird. Somit wird die Einstellung der Zeitspannen nicht beeinflusst. • Die Sperre des Tastenfelds verhindert, dass Kinder das Gerät falsch bedienen. 2 DE FR DE EN Technische Daten Stromversorgung: 85-230V AC 50/60Hz Messbereich des inneren Sensors: Einstellungsbereich: Werkseinstellung: 0 - 40°C 5 – 35°C 25°C NTC B=3380 10k@25 Grad Celsius Innerer sensor: Max. Tastenleistung: 3A/16A Messbereich des aüßeren Sensors: Einstellungsbereich: Werkseinstellung: 0 - 99°C, 5-95°C 50°C Extra Sensor: NTC B=3380 10k@25 Grad Celsius, Länge=3m (optional) Art des Displays: LCD Displayauflösung: 0,1°C Größe Display: 60x32mm Einstelleinheit: 0,5°C / Stufe Beschreibung An (On) und Aus (Off) Durch Drücken von kann das Thermostat an- und ausgeschaltet werden. Wenn das Thermostat ausgeschaltet ist, zeigt es die Temperatur und „OFF“ an (siehe Abbildung rechts). manueller betrieb erwärmung automatischer modus Lufttemperatur bodentemperatur gemessener wert Uhrzeit abschnitt woche wert systemuhr einstellen wert woche oder abschnitt runter uhr hoch menü power: an/aus 3 DE FR DE EN Kindersicherung Drücken Sie die Tasten und gesperrt. LCD zeigt an: --- für 2 Sekunden gleichzeitig. Das Tastenfeld ist Drücken Sie die Tasten zu entsperren. für 2 Sekunden gleichzeitig um das Tastenfeld wieder und Temperaturregelungsbetrieb Es gibt drei unterschiedliche Betriebsarten: Interne Kontrolle (IN): Nur der innere Sensor wird zur Messung der Temperatur benutzt. Geeignet zur Messung der Luft- oder Raumtemperatur. Äußere Kontrolle (OUT): Nur der äußere Sensor wird zur Messung der Temperatur benutzt. Geeignet zur Messung der Temperatur des Heizkörpers. Doppelte Temperaturkontrolle (ALL): Innerer Sensor (Temperaturmessung) und äußerer Sensor (Schutz vor Überhitzung) werden benutzt. Misst die Raumtemperatur und zeigt an ob der Heizkörper überhitzt ist. Falls der äußere Sensor eine zu hohe Temperatur anzeigt, schaltet das Thermostat die Heizung aus. Drei unterschiedliche Temperaturanzeigen IN- oder ALL-Mode: Der Hauptbildschirm zeigt die Luft- oder Raumtemperatur wenn „AIR“ leuchtet. Der Monitor stellt die Temperatur alle 5 Sekunden neu ein oder zeigt alternativ die aktuelle Uhrzeit. OUT-Mode: „FLOOR“ leuchtet auf. Der Hauptbildschirm zeigt die Bodentemperatur oder der äußere Sensor die Umgebungstemperatur. ALL-Mode: Drücken Sie und und die Bodentemperatur oder die Umgebungstemperatur können festgestellt werde. „FLOOR“ leuchtet auf. Der Hauptbildschirm zeigt automatisch die Lufttemperatur an und 5 Sekunden später leuchtet das „AIR“- Symbol. 4 DE FR DE EN Systemuhrzeit Gehen Sie folgendermaßen vor um die Uhrzeit einzustellen: Drücken Sie für 5 Sekunden und Sie gelangen in das Menü „Uhrzeiteinstellung“. Die aktuellen Einstellungen leuchten auf und werden angezeigt. Drücken Sie und wählen Sie die Einheit, die Sie verändern möchten (Woche/Stunde/Minute). Drücken Sie oder um die aktuellen Einstelllungen zu ändern. Falls Sie den vorherigen Wert ändern möchten, drücken Sie die Taste . Nachdem Sie die Einstellungen geändert haben, drücken Sie um das Menü „Uhrzeiteinstellung“ wieder zu verlassen. Automatik / Drücken Sie manueller Schalter um zwischen automatischem und manuellem Betrieb zu wählen. Manueller Betrieb: Das System kontrolliert die Temperatur gemäß dem eingestellten Wert ohne Veränderungen. Automatischer Betrieb: Das System kontrolliert die Temperatur zu unterschiedlichen Zeiten gemäß der voreingestellten Werte. Das Zeichen leuchtet auf, was bedeutet, dass das System im automatischen Modus läuft. Die Symbole WEEK (Woche) und STAGE (Abschnitt) leuchten abwechselnd alle 5 Sekunden auf, 1-7 stehen für systematische Wiederverwendung. Wenn der Bildschirm WEEK anzeigt, zeigen 1-7 die Werte der Woche. Zeigt der Bildschirm STAGE, zeigen 1-6 die aktuellen Werte. Einstellung von Zeitspannen Das Thermostat stellt den Betrieb nicht ein wenn Sie die Zeitspannen einstellen. Es speichert die Daten und verlässt das Menü automatisch wenn alle Einstellungen beendet wurden. Im automatischen Betrieb kann die Temperaturkontrolle über die Einstellung der Zeitspannen ausgeführt werden. Einmal eingestellt, können die Daten gespeichert und immer wieder benutzt werden. Das Thermostat kann drei verschiedene Pläne (5+2 / 6+1 / 7) in 6 Zeitspannen speichern, eine Woche für einen Zyklus. Alle Daten werden als Startzeit (Stunden:Minuten) und Temperaturwert dieser Zeitspanne abgespeichert. Die Endzeit entspricht der Startzeit des nächsten Zyklus. Sie können je nach Bedarf einen bestimmten Zyklus beenden. 5 DE FR DE EN Drücken Sie für 5 Sekunden und Sie kommen in Menü zur Einstellung der Zeitspanne. Die Nummer im WEEK Bereich blinkt. Diese Nummer entspricht der Art des Sets (5+2 oder 6+1 oder 7). Drücken Sie den Knopf um den gewünschten Wert (Startzeit: Stunden, Minuten und Einstellung der Temperatur) zu verändern. Drücken Sie oder um den Wert zu verändern. Falls Sie eine Zeitspanne beenden möchten, drücken Sie bis OFF (AUS) angezeigt wird. Beispiel: Modus 5+2, Einstellung der Zeitspanne: Drücken Sie für 5 Sekunden, die Ziffern 1-5 blinken im WEEK Bereich. P1 (Zeitspanne 1): hr (Stunde)>min>setting value (Einstellung des Wertes)-> P2:hr>min>setting value-> P3: hr>min>setting value->…-> P6:hr>min>setting value: Der Bereich WEEK ändert 6-7 automatisch und blinkt. P1: hr>min>setting value-> P2:hr>min>setting value-> P3: hr>min>setting value->…-> P6:hr>min>setting value Eine komplette Einstellung besteht aus 12 Sets (<5>P1-P6,<2>P1-P6). Sie stellen also 12X3 Werte ein. Falls Sie einen Wert überspringen möchten, drücken Sie . Sie können benutzen um zum vorherigen Wert zurückzukehren. Die Werkseinstellung des Gerätes ist der 5+2 Modus. Für zeitspezifische Daten siehe folgende Tabelle. Sie können im Einstellungsprogramm Änderungen vornehmen: 5+2 Montag modus ID Freitag Start Zeit Set wert Samstag und Start Zeit Sonntag Set wert bis P1 P2 P3 P4 P5 P6 06:00 22°C 06:00 08:00 15°C 08:00 11:30 15°C 11:30 12:30 15°C 12:30 17:00 22°C 17:00 22:00 15°C 22:00 22°C 15°C 15°C 15°C 22°C 15°C Beispiel: Wenn Sie die Systemzeit im automatischen Betrieb auf Freitag 8:20 Uhr eingestellt haben, zeigt das Display: WEEK 5 oder STAGE2 an und die eingestellte Temperatur von 15°C. 6 DE FR DE EN Fortgeschrittene Einstellungsfunktionen des Systems Achtung: Systemeinstellungen werden benutzt um wichtige Parameter des Systems einzustellen, was nur von Spezialisten durchgeführt werden sollte. Nehmen Sie keine unzulässigen Änderungen vor. Das Gerät wurde bereits von Spezialisten auf Fehler geprüft und es ist deshalb nicht nötig, das System neu einzustellen. Eingeben von fortgeschrittenen Einstellungsfunktionen: Drücken Sie um das Thermostat auszuschalten. Der Display zeigt „OFF“ an. Drücken Sie nochmals um es einzuschalten. Drücken Sie in den nächsten Sekunden und Sie gelangen in das Menü für fortgeschrittene Einstellungsfunktionen. Drücken Sie um die Systemparameter zu verändern. Gleichzeitig drücken Sie oder um die Einstellungen zu ändern. Wählen Sie mit oder ein Set aus, sonst kann der Parameter nicht geändert werden. Um die Einstellungen zu speichern, gehen Sie alle Funktionen durch und verlassen Sie das Systemmenü. Systemparameter in der folgenden Reihenfolge: AdJ>PrG>LtP>SEn>t0P>dt0>dt1>bL>Sat>dEF Der Display Typ des Thermostats ist ein LCD. Es kann Schwankungen zwischen den angezeigten und den tatsächlichen Temperaturen geben. Bitte halten Sie sich an die folgende Tabelle: 7 DE FR DE EN Anzeige AdJ PrG Einstellung von Einstellungsbereich Voreingestellter Wert Temperatur -5°C~5°C -2,5°C Wird benutzt um den Fehler zu korrigieren, gemessener Wert des Sensors. Sobald die Einstellung vorgenommen wurde, zeigt der Bildschirm den korrekten Wert. Nach 3 Sekunden zeigt der Bildschirm den gemessenen Wert nach der Korrektur. Der Zeitspannen Modus 5+2/6+1/7 5+2 5+2 gleiche Einstellungen für Montag bis Freitag und gleiche Einstellungen für Samstag und Sonntag 6+1 gleiche Einstellungen für Montag bis Samstag, Sonntag unabhängig davon LtP Sen tOP dt0 dt1 bL Sat deF 7 gleiche Einstellungen für Montag bis Sonntag Antifrost On: Aktiviert/ OFF OFF: Deaktiviert Schutz vor kalten Temperaturen, geeignet für Wassersysteme. Verhindert, dass Rohre bei kalten Temperaturen gefrieren. IN: eingebaut Temperaturkontrollmodus OUT: außerhalb IN ALL: doppelte bei unterschiedlichen Sensor Temperaturkontrolle Einstellungen IN: Kontrolle der Raumtemp. durch Raumsensor OUT: Kontrolle der Bodentemp. durch Bodensensor ALL: doppelte Temperaturkontrolle, Raumsensor für Raumtemperatur, Bodensensor zum Schutz vor Überhitzung Sensor Limit Außentemperatur 40-80°C 50°C Der Sensor ist auf ALL eingestellt, Temperaturlimit für äußeren Sensor Wert Raumsensor 0,5-4°C 1°C Wert des eingebauten Raumtemperatursensors Wert Bodensensor 0,5-5°C 3°C Wert des externen Bodentemperatursensors Hintergrundbeleuchtung ON: immer an OFF OFF: Automatische Abschaltung nach 5 sek. Hintergrundbeleuchtung kann je nach persönlichem Bedarf eingestellt werden OFF: Status immer aus OFF Status bei Wiedereinschalten ON: wie vorher Boot-Status, Aus-Status oder weiterhin vorheriger Status Wiederherstellung von Werkseinstellungen Wiederherstellung von Werkseinstellungen 8 Um Standardeinstellung wiederherzustellen DE FR DE EN Fehler und Lösungen 1. Keine Anzeige • Stromversorgungssystem hat Probleme oder Stromversorgung ist nicht korrekt, überprüfen Sie ob das Kabel korrekt angeschlossen ist. • Falls etwas mit der Verbindung nicht stimmt, schließen Sie bitte den Draht gemäß dem Diagramm auf der Rückseite des Produktes an. • Die Umgebungstemperatur ist zu niedrig, bitte beachten Sie den geeigneten Temperaturbereich. Falls die Temperatur niedriger als -5 °C ist, arbeitet das Display des Thermostats nicht richtig. • Stromversorgungseinheit und Kopplung der Hauptplatine sind nicht richtig miteinander verbunden, bitte korrekt verbinden. • Stromversorgungseinheit und Kopplung der Hauptplatine sind falsch herum verbunden, bitte achten Sie auf die richtige Richtung. • Stromversorgungseinheit und Kopplung der Hauptplatine sind beschädigt, bitte überlasten Sie diese nicht. Die Länge der Kopplung beträgt 6m, gehen Sie bei der Installation vorsichtig vor. Fall sie beschädigt wird, ist ein Umtausch ausgeschlossen. 2. Riss im Display Falls das Display durch harte Gegenstände oder durch plötzliche Krafteinwirkung bricht, besteht kein Anspruch auf Ersatz. 3. Schwarzer Bildschirm Falls die Temperatur der Display Oberfläche zu hoch ist, stellen Sie sicher, dass sich kein Heizkörper in der Nähe befindet. Falls dies der Fall ist, entfernen Sie diesen. 4. Display ER0 Falls etwas mit dem inneren Sensor nicht stimmt, untersuchen Sie, ob der kleine schwarze Punkt im Temperaturfenster während der Monatge beschädigt wurde. 5. Display ER1 Das System ist auf ALL (beide Temperaturen) eingestellt oder nicht mit dem externen Sensor verbunden oder etwas stimmt mit dem externen Sensor nicht 6. Kein Stift auf LCD Untersuchen Sie, ob die Eisenplatte bei der Montage verformt wurde. Falls dies der Fall ist, korrigieren Sie es. 9 DE FR DE EN 7. Keine Hintergrundbeleuchtung Untersuchen Sie, ob das Kabel oder die Platte entfernt wurde. 8. Hintergrundbeleuchtung scheint immer • Einstellung bL, ON im Systemmenü • Sie ist beschädigt, ersetzen Sie sie 9. Große Abweichung zwischen gemessener und eigentlicher Temperatur • Das Thermostat sollte an einem belüfteten Platz angebracht sein. Installieren Sie es nicht in der prallen Sonne oder in der Nähe eines Heizkörpers. • Die hintere Schraubenverbindung ist nicht fest, was zu Überhitzung der Netzstation führt. 10. Display 0°C Falls die Außentemperatur weniger als 0°C beträgt, zeigt das Display 0°C. Die oben genannten Lösungen passen zu den häufigsten Fehlern. Falls Sie das Problem nicht alleine lösen können, kontaktieren Sie einen Fachhändler! Abmessungen 60,00 60.00 12,20 12.20 86.10 86,10 in mm 57,16 à Ø Ø57.16 8,00 8.00 59,00 59.00 86.10 86,10 32,00 32.00 28,80 28.80 4,00 4 0 4.00 10 DE FR DE EN Kabeldiagramm RMTMS01 Baujahr: 2013 Seriennummer: 3143Input : 230V ac 50/60Hz Imax 16A N1 N ac in JAGO AG | Iingersheimerstr. 12|D-70499 Stuttart | Germany L L1 extra sensor LOAD 11 DE FR DE EN Installation / Montage A A A A B B A A A A C ACHTUNG 1. Die Installation muss von einer Elektrofachkraft oder einem qualifizierten Installateur durchgeführt werden. 2. Um eine Gefährdung durch Stromschlag zu vermeiden, trennen Sie die Stromzufuhr zum Thermostat. 3. Beizen Sie das Ende von jedem Draht, wenn nötig, ab. (Maximal 6 mm) Monatge 1. Entfernen Sie den vorderen quadratischen Rahmen des Thermostats. (Siehe Abb.) 2. Kippen Sie vorsichtig das Bedienfeld nach außen, indem Sie einen kleine, flache Schnalle (B) drücken oder mit dem Daumen in dessen Steckplatz drücken, der sich auf dem oberen Bereich des Thermostats befindet. 3. Lösen Sie die Schrauben der Klemmleiste die sich an der hinteren Unterseite der Grundplatte befinden und verbinden Sie die Kabel an den jeweiligen Anschlüssen entsprechend. Danach ziehen Sie die Schrauben wieder fest und denken daran diese nicht zu fest anzuziehen, da die Drähte leicht beschädigt werden können. 4. Montieren Sie die Grundplatte an der Wand mit den mitgelieferten Schrauben. 5. Montieren Sie das Bedienfeld wieder auf die Grundplatte und setzen Sie den quadratischen Rahmen wieder auf das Gerät bis es einrastet. 6. Aktivieren Sie wieder die Stromzufuhr für dasThermostat und programmieren Sie dieses gemäß der Bedienungsanleitung. Hergestellt in PRC für: JAGO AG, Ingersheimer Str. 12, D-70499 Stuttgart Tel/Fax-Nr. 0900-1524624 (49cent/Min* aus dem dt. Festnetz, höchstens 2,99 Euro/Min* aus dem Mobilfunknetz (*inkl.19% MwSt.)) 12 DE FR DE EN EG - Konformitätserklärung gemäß der EG-Niederspannungs-Richtlinie 2006/95/EG gemäß Anhang III B; vom 12. Dez. 2006 Hiermit erklären wir, dass das nachstehend bezeichnete Produkt in seiner Konzeption und Bauart sowie in der von uns in Verkehr gebrachten Ausführung den grundlegenden Sicherheits- und Gesundheitsanforderungen der EG-Richtlinie Niederspannung entspricht. Bei einer mit uns nicht abgestimmten Änderung des Produktes verliert diese Erklärung ihre Gültigkeit. Bevollmächtigter: JAGO AG Ingersheimer Str. 12, D-70499 Stuttgart Beschreibung des elektrischen Betriebsmittels: Funktion: Thermostat Typ/Modell:RMTMS01 Handelsmarke:JAGO Netzspannung: 85 – 230V ac ~ 50/60Hz Es wird die Übereinstimmung mit weiteren, ebenfalls für das Produkt geltenden Richtlinien/ Bestimmungen erklärt: • EG-Richtlinie über elektromagnetische Verträglichkeit (EMV) 2004/108/EG Angewandte Normen insbesondere: • EN 60730-2-9:2010 • EN 60730-1:2011 Jahreszahl der CE-Kennzeichenvergabe: 2013 Ort / Datum / Unterschrift: Stuttgart, 15.05.2013 Angaben zum Unterzeichner: Hr. Jakovac, Vorstand 13 DE FR EN Liste Schrauben Set thermostat des pièces Temperatursensor visser set Wärmethermostate capteur de température Généralités • Thermostat avec programmation hebdomadaire qui applique la technologie de contrôle d‘ordinateur à puce unique. • Très fiable et équipé d‘un système de blindage. Le thermostat est économe en énergie et assure des conditions agréables d‘utilisation. • L‘appareil peut être utilisé avec des radiateurs électriques, des systèmes d‘eau chaude à chauffage électrique, ou des mécanismes de commandes. Le thermostat démarre et arrête automatiquement l‘objet à commander (vanne, chauffage au sol, chauffage mural, radiateurs électriques, etc.) en fonction de la température préréglée. • Différentes périodes de temps: 5+2 / 6+1 / 7 jours, l‘équipement de chauffage prend en charge différents réglages de température correspondant à 6 périodes par jour. L‘utilisateur peut sélectionner entre le mode manuel et automatique selon l‘utilisation souhaitée. • Le matériel à utiliser est résistant aux flammes, sûr, et fiable. Le design est élégant et l‘écran-miroir est facile à nettoyer. • L‘horloge continue à fonctionner même lorsque le thermostat est déconnecté de toute alimentation, par conséquent le réglage des périodes de temps n‘est pas affecté. • Le verrouillage du clavier empêche les enfants d‘utiliser l‘appareil de manière inappropriée. 14 DE FR EN Caractéristiques Alimentation électricité: Étendue de mesure du détecteur interne: Plage de réglage: réglage usine: Capteur interne: Type d‘écran: Taille de l‘écran: 85-230V AC 50/60Hz 0 - 40°C 0 - 35°C 25°C NTC B=3380 10k@25 degrés Celsius techniques Performance max. touches: Étendue de mesure du détecteur externe: Plage de réglage: Réglage usine: Détecteur extra: LCD 60x32mm Résolution: Définition: 3A/16A 0 - 99°C, 5-95°C 50°C NTC B=3380 10k@25 degrés Celsius, longueur= 3m (optional) 0,1°C 0,5°C / étape Mode d‘emploi On et Off En appuyant sur le bouton le thermostat peut être activé ou désactivé. Lorsque le thermostat est éteint, il indique la température et OFF (voir figure ci-dessous). fonctionnement manuel modè automatique température de l‘air chauffage température au sol valeur mesurée secondes partie semaine définition des valeurs du système d‘horloge valeur pour la partie ou la semaine vers le bas horloge vers le haut menu power: on/offauffage 15 DE FR EN Blocage Appuyez sur les boutons et simultanément pendant 2 secondes. Le clavier est verrouillé. L‘écran LCD affiche: ---. Appuyez sur les boutons déverrouiller le clavier. et Opération simultanément pendant 2 secondes pour de contrôle de température Il y a trois modes de fonctionnement différents: Le contrôle interne (IN): seul le détecteur interne est utilisé pour mesurer la température. Convient pour mesurer l‘air ou la température ambiante. Le contrôle externe (OUT): seul le détecteur externe est utilisé pour mesurer la température.de la sonde externe est seulement utilisé pour mesurer la température. Convient pour mesurer la température du radiateur. Double contrôle de la température (ALL): le détecteur interne (mesure de la température) et le détecteur externe (protection contre la surchauffe) sont utilisés pour mesurer la température. Mesure la température ambiante et indique si l‘appareil de chauffage est en surchauffe. Si le détecteur externe indique une température trop élevée, le thermostat coupe le chauffage. Trois indicateurs de température différents Mode IN ou ALL: l‘écran principal indique la température de l‘air ou de la salle si AIR est allumé. L‘écran affiche la température toutes les 5 secondes ou bien affiche l‘heure actuelle. Mode OUT: FLOOR est affiché. L‘écran principal indique la température du sol, ou le capteur externe indique la température ambiante. Mode ALL: Appuyez sur et et la température au sol ou la température ambiante peuvent être déterminées et FLOOR est affiché. L‘écran principal astreint automatiquement la température de l‘air et 5 secondes plus tard l‘icône AIR s‘allume. 16 DE FR EN Système d‘horloge Suivez ces étapes pour régler l‘heure: appuyez sur pendant 5 secondes, et vous entrez dans le menu de réglage de l‘horloge. Les réglages actuels vont s‘allumer et s‘afficher. Appuyez sur et sélectionnez l‘unité que vous souhaitez modifier (semaine / heure / minute). Appuyez sur ou pour modifier les réglages actuels. Si vous souhaitez modifier la valeur précédente, appuyez sur le bouton . Après avoir modifié les réglages, appuyez sur afin de quitter le réglage de l‘horloge. Interrupteur Appuyez sur automatique / manuel pour choisir entre le mode automatique et manuel. Mode manuel: e système contrôle la température en fonction de la valeur donnée, sans modifications. Mode automatique: le système contrôle la température à des moments différents en fonction des valeurs prédéfinies. Le voyant est allumé, ce qui signifie que le système est en mode automatique. Le symbole WEEK (semaine) et STAGE (partie) clignotent en alternance toutes les 5 secondes, 1-7 correspondent à la réutilisation systématique. Si l‘écran affiche WEEK, 1-7 correspondent aux valeurs de la semaine. Si l‘écran indique STAGE, 1-6 correspondent aux valeurs actuelles. Réglage des périodes de temps Le thermostat ne s‘arrête pas lorsque vous définissez les périodes. Il stocke les données et quitte le menu automatiquement lorsque tous les réglages sont terminés. En mode automatique, le contrôle des températures peut être exécuté durant le réglage des périodes de temps. Une fois définies, les données peuvent être enregistrées et être utilisées encore et encore. Le thermostat peut enregistrer trois plans différents (5 +2 / 6 +1 / 7) en 6 périodes de temps, une semaine pour un cycle. Toutes les données seront mémorisées en temps de démarrage (heures : minutes) et en valeur de la température. L‘heure de fin correspond à l‘heure de début du cycle suivant. Vous pouvez mettre fin à un cycle particulier si besoin. 17 DE FR EN Appuyez sur pendant 5 secondes et vous arrivez au menu de réglage des périodes de temps. Le chiffre indiqué dans la partie WEEK clignote. Ce nombre correspond au type d‘ensembles (5 + 2 ou 6 + 1 ou 7). Appuyez sur le bouton pour changer la valeur désirée (temps de début : heures, minutes, ou réglage de la température). Appuyez sur ou pour modifier la valeur. Si vous souhaitez mettre fin à une période, appuyez sur jusqu‘à ce que OFF (OFF) soit affiché. Exemple : Mode 5 +2, réglage de la période de temps: Appuyez sur ….. pendant 5 secondes, les chiffres 1-5 clignotent dans la partie WEEK. P1 (période de temps 1): hr (heure)> min> setting value (réglage de la valeur) -> P2: hr> min> setting value-> P3: hr> min> setting value-> ... -> P6: hr> min > setting value. La partie WEEK change 6-7 automatiquement et clignote. P1 : hr> min> setting value-> min> -> P2: hr> min> la mise en valeur> P3:hr>min>setting value->…-> P6:hr>min>setting value Une configuration complète se compose de 12 ensembles (<5> P1-P6, <2> P1-P6). Vous réglez donc 12x3 valeurs. Si vous voulez passer à une autre valeur, appuyez sur . Vous pouvez utiliser pour revenir à la valeur précédente. Le réglage usine de l‘appareil est le mode 5 +2. Pour des données de temps spécifiques, merci de vous référer au tableau ci-dessous.Vous pouvez réaliser des changements dans le programme d‘installation : mode 5+2 Lundi au Vendredi Samedi et Dimanche ID P1 P2 P3 P4 P5 P6 Start time Set value Start time 06:00 22°C 06:00 08:00 15°C 08:00 11:30 15°C 11:30 12:30 15°C 12:30 17:00 22°C 17:00 22:00 15°C 22:00 Set 22°C 15°C 15°C 15°C 22°C 15°C value Par exemple: Si le système de temps en mode automatique est réglé sur vendredi 08h20, l‘écran affiche : WEEK 5 ou STAGE 2 et la température réglée de 15°C. 18 DE FR EN Capacités de réglage avancé du système Note: les réglages du système sont utilisés pour définir les paramètres importants du système ; ceux-ci doivent être effectués uniquement par des spécialistes. Ne faites pas de modifications non-autorisées. L‘appareil a déjà été examiné concernant des problèmes éventuels il n‘est donc pas nécessaire de réinitialiser le système. Entrez le réglage de fonctions avancées: appuyez sur pour éteindre le thermostat. L‘écran affiche „OFF“. Appuyez à nouveau sur et il est à nouveau activé. Appuyez quelques secondes plus tard sur et vous entrerez dans le menu de réglage des fonctions avancées. Appuyez sur pour modifier les paramètres du système. Dans le même temps, appuyez sur ou pour modifier les réglages. Appuyez sur ou pour choisir un ensemble, sinon les paramètres ne peuvent être modifiés. Pour enregistrer les paramètres, passez par toutes les fonctions et quittez le menu système. Les paramètres du système sont à suivre dans l‘ordre suivant: AdJ>PrG>LtP>SEn>t0P>dt0>dt1>bL>Sat>dEF Le type d‘écran du thermostat est un segment LCD. Il peut y avoir des variations entre les températures indiquées et réelles. Veuillez respecter le tableau suivant: 19 DE FR EN Ecran AdJ PrG LtP Sen tOP dt0 dt1 bL Sat deF Réglage de Domaine de réglage Valeur entrée précédemment Température -5°C~5°C -2,5°C Corrige l‘erreur de la valeur de mesure du détecteur. Une fois le réglage terminé, l‘écran affiche après 3 secondes la valeur correcte mesurée. Mode des périodes de temps 5+2/6+1/7 5+2 5 +2 mêmes réglages du lundi au vendredi et mêmes réglages pour samedi et dimanche 6 +1 mêmes réglages du lundi au samedi, indépendamment du dimanche 7, mêmes paramètres du lundi au dimanche Antigel On: activé/ OFF OFF: désactivé Protection contre le froid, adapté pour les systèmes d‘eau. Prévient le gel des tuyaux lors des températures froides. IN: interne Mode contrôle des OUT: externe IN températures ou détecteur ALL: double contrôle IN: contrôle interne, température ambiante OUT: contrôle externe, détecteur au sol ALL: double contrôle des températures , détecteur interne pour la température ambiante, détecteur externe pour protéger contre la surchauffe Détecteur limite température 40-80°C 50°C extérieure Le détecteur est réglé sur ALL, limite de température pour le détecteur externe Détecteur interne valeur 0,5-4°C 1°C valeur du capteur de température interne Détecteur externe valeur 0,5-5°C 3°C valeur du capteur de température externe Rétroéclairage ON: Toujours sur OFF OFF: Arrêt automatique après 5 sek. Le rétroéclairage peut être installé selon les besoins personnels de chaque utilisateur OFF: Status immer aus OFF Statut pour reconnexion ON: wie vorher Sera utilisé pour le contrôle de l‘état du courant Restauration des paramètres d‘usine Restauration des paramètres d‘usine 20 Pour rétablir les réglages standards DE FR EN Problèmes et solutions 1. Pas d‘affichage • Le système d‘alimentation a des problèmes ou l‘alimentation en électricité n‘est pas correcte, vérifiez que le câble est bien branché. • Si un élément ne marche pas pour cause de connexion, veuillez vous référer au diagramme au dos. • La température ambiante est trop faible, veuillez faire attention au type de température approprié. Si la température affichée est inférieure à -5 ° C, l‘affichage du thermostat ne fonctionne pas correctement. • Si l‘unité d‘alimentation électrique et le couplage de la carte mère ne sont pas correctement connectés ensemble, veuillez les connecter correctement. • Si l‘unité d‘alimentation électrique et le couplage de la carte mère sont connectés dans le mauvais sens, veuillez les connecter dans le bon sens. • Si l‘unité d‘alimentation électrique et le couplage de la carte mère sont endommagés, veuillez ne pas forcer. La longueur du couplage est de 6 m, veuillez procéder avec prudence lors de l‘installation. Si vous l‘endommagez, cela annulera la excluant le change. 2. Fissuration de l‘écran Si l‘affichage a été mis en contact avec des objets durs ou s‘il présente des impacts, aucun remplacement ne seront mis en place. 3. Écran noir Si la température de la surface d‘affichage est trop élevée, assurez-vous qu‘il n‘y ait pas de radiateur proche. Si c‘est le cas, éloignez-le. 4. Écran ER0 Si quelque chose ne fonctionne pas avec le détecteur interne, examinez si le petit point noir dans la fenêtre de température a été endommagé lors de l‘éloignement. 5. Écran ER1 Le système est réglé sur ALL (deux températures), ou n‘est pas relié au détecteur externe, ou quelque chose ne fonctionne pas avec le détecteur externe. 6. Pas de stylo sur l‘écran LCD Examinez si la plaque de fer a été déformée par défaut de construction. Si c‘est le cas, corrigez le défaut. 21 DE FR EN 7. Pas de rétroéclairage Vérifiez si le câble a été retiré, si la plaque a été retirée. 8. Rétroéclairage semble toujours luire • Réglage BL, dans le menu système. • Il est endommagé, remplacez-le. 9. Grand écart entre la température mesurée et réelle • Le thermostat doit être installé dans un endroit aéré. Ne l‘installez pas en plein soleil ou près d‘un radiateur. • La connexion à vis à l‘arrière n‘est pas établie, ce qui conduit à une surchauffe de la station principale. 10. Écran 10 degrés Si la température extérieure est inférieure à 0 ° C, l‘afficheur indique 0 ° C. Les solutions citées ci-dessus sont les plus courantes concernant les problèmes rencontrés. Si vous n‘avez pas réussi à résoudre votre problème, contactez votre revendeur! Dimensions en mm 60,00 60.00 12,20 12.20 86.10 86,10 57,16 à Ø Ø57.16 8,00 8.00 59,00 59.00 86.10 86,10 32,00 32.00 28,80 28.80 4,00 4 0 4.00 22 DE FR EN Schéma du câblage RMTMS01 Baujahr: 2013 Seriennummer: 3143Input : 230V ac 50/60Hz Imax 16A N1 N ac in JAGO AG | Iingersheimerstr. 12|D-70499 Stuttart | Germany L L1 extra sensor LOAD 23 DE FR EN Schéma d‘installation A A A A B B A A A A Attention: 1. L‘installation doit être effectuée par un électricien ou un installateur qualifié. 2. Pour éviter tout risque de choc électrique, coupez l‘alimentation des systèmes de chauffage et de refroidissement. 3. Coupez les extrémités des fils, si nécessaire (6 mm au maximum). Installation 4. Retirez le cadre carré avant du thermostat. (voir image) 5. Retirez délicatement le tableau de commande en insérant un tournevis à lame plate ou un ongle dans la rainure en haut du thermostat. 6. Desserrez les vis du bornier dans le bas de la plaque de base et glissez les fils dans le branchement approprié. Ensuite, serrez les vis. Ne serrez pas trop les vis, car les fils sont très fragiles. 7. Fixez la plaque de base avec les vis sur le mur. 8. Remettez le tableau de commande dans la plaque de base et fixez aussi le cadre carré jusqu‘à ce qu‘il s‘enclenche. 9. Reconnectez le système au réseau électrique, et programmez le thermostat comme décrit dans le manuel. Fabriqué en RPC pour: JAGO AG, Ingersheimer Str. 12, 70499 Stuttgart / Allemagne Tel/Fax-Nr. +49 711 320 90 498 (Coût d‘un appel fixe France, Suisse ou Belgique vers l‘Allemagne) 24 DE FR EN CE - Certificat de conformité Européenne selon les directives européennes „basse tension“ 2006/95/CE appendice III B; du 12. Déc. 2006 Par la présente, nous déclarons que le produit désigné ci-dessous en vertu de sa conception et de son type de construction, correspondent aus exigences de santé et de sécurité fondamentales des normes CE. Cette déclaration n‘est plus valible, dans le cas où la machine est soumise à des modifications non agrées de notre part. Fondé de pouvoir: JAGO AG Ingersheimer Str. 12, D-70499 Stuttgart Description de l‘équipement électrique: Fonction: Thermostat Type de machine: RMTMS01 Marque de distribution:JAGO Tension de Réseau: 85 – 230V ac ~ 50/60Hz Les recommandations/ dispositions en vigueur seront appliquées pour d‘autre, ainsi que pour ce produit: • Directive CE sur la compatabilité électromagnétique (EMC) 2004/108/CE Normes appliquées: • EN 60730-2-9:2010 • EN 60730-1:2011 Année d‘attribution de la marque distinctive CE: 2013 Lieu / Date / Signature: Stuttgart, 15.05.2013 Indication concernant le signataire: M. Jakovac, Président du conseil d‘administration 25 DE EN FR EN List set HeatingScrew thermostats of Parts T emperature sensor screw set Heating Thermostats Temperature sensor General • Heating Thermostat with weekly programming adopts the latest single-chip computer control technology. • It has the high reliability and powerful anti-jamming. It can realization energy-saving and comfortable living environment. • The application is the electric heating equipment and Water heating system of electric heating or actuator control. According to the preset temperature, the thermostat will automatically start and stop the controlled object (valve, floor heating, the heating wall, electric heater etc). • Multiple time modes: 5+2/6+1/7days, the heating equipment supports different temperature setting accordingly with 6 time-modes daily. Users are free to choose manual mode or full automatic mode for different purposes. • Using flame resistance material, the heating equipment is safe and reliable. Its appearance is stylish and its mirror screen would be very easy to clean. • The clock would continue to run even if power was cut off and it will not affect the period setting value. • Keypad locking function is designed to prevent the children from misusing. 26 DE EN FR EN Technical Power Supply: Internal sensor measurement range: Setting range: factory settings: Inside sensor: parameters 85-230VAC 50/60Hz The maximum switch power: External sensor measurement range: Setting range: factory settings: 0 - 40°C 5-35°C 25°C NTC B=3380 10k@25 degrees Celsius Display type: LCD Display area: 60 x 32mm Extra Sensor: 3A/16A 0 - 99°C, 5-95°C 50°C NTC B=3380 10k@25 degrees Celsius, Length=3m (optional) Display resolution: 0.1°C Setting Unit: 0.5°/step Operation Guide On and off Press you can turn on or turn off the thermostat power. When thermostat is OFF, it display the air temperature and OFF. (see following image) mode Air temperature Floor temperature 27 DE EN FR EN Lock Press key for 2 seconds at the same time,the keypad is locked. LCD will show ---. In the locked status, press the key for 2 seconds, it will be unlocked. Temperature control mode According to the sensor setting of thermostat, there are three different control modes, enter the advance function to set. Internal control (IN): Only enable internal sensor to temperature measurement, that the temperature control basis from the internal temperature sensor. It is suitable for the detection of air temperature or the room temperature. External control (OUT): Only enable external sensor to temperature measurement, that the temperature control basis from the external sensor. It is suitable for the detection of the heating body temperature. Dual temperature control (ALL): Temperature control is based on the internal sensor (Temperature measurement) and external sensor (over-temperature protection). Adapted to detect the room temperature and is monitored whether the heating element over temperature. If the external sensor is over temperature, thermostat will shuts down the heater. Display three types of temperature When the thermostat works in mode IN and mode ALL .The main screen shows air temperature or room temperature, when AIR icon will be lit. The vice-monitor would set temperature every 5 seconds and alternatively display current time. When the thermostat works in OUT mode, the FLOOR icon will be lit. The main screen will display floor temperature or external sensor location temperature. When the temperature is in mode ALL, press and can detect floor temperature or external sensor location, and the FLOOR icon will be lit. The main screen will automatically display air temperature 5 seconds later after the AIR icon lit. 28 DE EN FR EN System time How to set the system time: Keep pressing for 5 seconds,it will enter into the time setting. The current revisable object will flash and display. Press and choose time you want to revise (week / hour / minute), press or to modify the current setting. If you need to modify the previous parameters, please press key. After the modified minutes you can press to exit the system clock settings. Automatic / Press manual switch you can choose the manual mode or automatic mode. Manual mode: System will control temperature under the set value without any change. Automatic mode: System would control temperature according to the preset temperature values in different time. The icon will lit, which means that the system is running under automatic mode. The week and Stage icon would alternately display every 5 seconds, 1-7 is systematic reuse. When screen shows WEEK, 1-7 would display the values of the week. When screen shows STAGE, 1-6 would display the current values. Setting the periods of time modes The thermostat can’t quit when you set the periods and it will automatically save data and exit when all setting is finished. The periods setting can realize the control of temperature and time under automatic mode. Once setting up, the values could be saved and reused in the thermostat forever. The thermostat can save three kinds of schedules (5+2 / 6+1 / 7) in 6 periods; One week for a cycle. Each data is saved as the start time (hours: minutes) and the temperature values of this period. The end time of the period would be saved as the start time of next period. You can also shut down a certain period according to your needs. 29 DE EN FR EN Press the for 5 seconds, you will enter into the period setting interface. The number is blinking in WEEK area, it means the mode of your set (5+2 or 6+1 or 7). You can press button to select the object you want to modify (the period start time: hours, minutes and set temperature). Press or to modify the value. If you want to turn off a period, please press until the OFF shows. For example: in the 5+2 mode, the period setting sequence: Press 5s, the week area will blinking 1-5, Reference on the right Image P1:hr>min>setting value-> P2:hr>min>setting value-> P3:hr>min> setting value->…-> P6:hr>min>setting value: The week area will auto change 6-7 and blinking. P1:hr>min>setting value-> P2:hr>min>setting value-> P3:hr>min>setting value->…->P6:hr>min>setting value Total setting value is 12 sets (<5>P1-P6,<2>P1-P6), you will setting 12X3 values. If you want skip the setting item you can press , You can use the to back to the previous setting. The automatic default mode of the machine factory is 5+2 mode. Time specific data see the following table. You can modify when you enter the programming interface: 5+2 ID P1 P2 P3 P4 P5 P6 Start time Set value Start time 06:00 22°C 06:00 08:00 15°C 08:00 11:30 15°C 11:30 12:30 15°C 12:30 17:00 22°C 17:00 22:00 15°C 22:00 Set 22°C 15°C 15°C 15°C 22°C 15°C mode Monday to Friday Saturday to Sunday value For example: in the automatic mode, when the system time for the Friday 08:20, display will show: WEEK 5 or STAGE 2 and the setting temperature value of 15 degrees. 30 DE EN FR EN Advanced function setting Warning: System setting is used to set some important parameters of the system, that’s only for professionals. Do not make any improper modification. The item already been debugged and tested by professionals, there is no need to reset. Enter the advanced function setting: Press the to switch off the thermostat,Display will show “OFF”. Press again, it will turn on. Please press Key in next second, it will into the advanced function setting. You can press to switch the system parameters. At the same time, press the or with the parameters to modify settings. Select a set of content. If you do not by the or , the parameters will not modified. If you want to save the data, you must go through all the functions and exit the system menu. The system parameters according to the following order: AdJ>PrG>LtP>SEn>t0P>dt0>dt1>bL>Sat>dEF The thermostat’s display type is LCD segment displaying. There are some different for the display value and practical value.Please refer to the specific figure: 31 DE EN FR EN Dis play S et the content A djustment range The default value AdJ temperature correction ,setting item -5℃ ~ 5℃ -2.5℃ It is used to correct correctthe measured values the the sensor the error,the error, sensor . When you set it, the LCD displays the correction value. After three seconds, the LCD displays the measured value after correction. PrG T he period-time mode 5+ 2 /6+ 1 /7 5+ 2 5+2 :Monday to Friday to set the same and Saturday to Sunday to set the same 6+1 :Monday to Saturday to set the same, Sunday is independent 7:Monday to Sunday is same setting value. LtP A ntifreez e O n: E na ble / O F F : D is a ble Low temperature protection, what is suitable for the water system OFF To prevent was protect the pipe at low temperature from freezing. Sen temperature control mode at different Sensor or temperature control mode sensor setting IN: Built-in OUT: External IN ALL: Dual temperature control IN: temperature control mode differentOut sensor setting OUT: control by sensor floor sensor, with external sensordouble IN : internal control, room at sensor :external control, floor ALLonly :double temperature ALL: Dual temperature control, the heater stop when room temperature > setting value or floor temperature > setting value (tOP) control, the internal room temperature sensor, external sensor overheating protecting tOP floor-temperature‘s External temperaturelimited sensor value limit 40-80℃ 50℃ floor-temperature value with ALLlimit mode (Sen) sensor value The sensor is set tolimited ALL, the temperature external dt0 value Internal sensor hysteresis dt1 value External sensor hysteresis 0.5-4℃ 1℃ 0.5-5℃ 3℃ O n: A lwa ys on OFF value Built-in temperature sensor hysteresis External temperature sensor value hysteresis bL B a cklig hting status OFF :Auto turn off after 5sec Backlight lighting mode, can be set according to personal preference Sat status S ta tus when a t re-pboot ower O F F : off s ta tus a t every boot time OFF On: the same as previous, boot offthe status or continue previous boot status Used status, to control power state of the deF Restore factory settings The Restore factory settings To restore the default settings error and solution of common system 1. No display • Power supply system is having problems or power is supplied incorrectly, please check if the inlet wire is normal. • If the connection is not right, please wired up as the wiring diagram on the back side. • The thermostat of the working environment temperature is too low, please note the thermostat temperature range. If the temperature is lower than -5 °C, the thermostat cannot normally display. • Power supply box and the motherboard Coupling is not connected correctly, please connect correctly. • Power supply box and the motherboard Coupling is opposite inserted, please mind the direction • Power supply box and the motherboard Coupling is broken, please don‘t overexert. Coupling length is 6cm, the installation must be careful. If damaged, no replacement. 32 DE EN FR EN 2. Display rupture Display encounters hard objects or sudden force, no replacement. 3. Display a black screen If the display surface temperature is too high, please note whether there is heater nearby, if so please remove. 4. Display ER0 If internal sensor is abnormal, please pay attention to whether the small black dot in temperature sensing window damaged during removal. 5. Display ER1 The system is set in the dual temperature control (ALL) mode, or it is not connected with an external sensor, or the external sensor is abnormal. 6. No pen on LCD Please check whether the iron plate is deformation when installation. If it is deformation, please correct it. 7. No backlight Please check backlight cable is pulled off the panel was removed. 8. Backlight always bright • It is set bL is ON in the system menu • It is damaged, please replace it. 9. Large deviation of measurement temperature and the actual temperature The thermostat should be installed at ventilated place. It cannot be installed at the place in direct sunshine or nearby the heater Back connection screw is not locked, causing terminal serious fever. 10. Display 0 degrees When the thermostat of the working environment temperature below the detection 0 degrees, that display 0 degrees. The above is some of the most common errors, if you can’t solve, please contact the local dealer! Dimensions in mm 60.00 60.00 12.20 12.20 86.10 86.10 57.16 à Ø Ø57.16 8.00 8.00 59.00 59.00 86.10 86.10 32.00 32.00 28.80 28.80 4.00 4 0 4.00 33 DE EN FR EN Wiring diagram RMTMS01 Baujahr: 2013 Seriennummer: 3143Input : 230V ac 50/60Hz Imax 16A N1 N ac in JAGO AG | Iingersheimerstr. 12|D-70499 Stuttart | Germany L L1 extra sensor LOAD 34 DE EN FR EN Installation Diagram A A A A B B A A A A ATTENTION 1. The installation must be performed by an electrician or a qualified installer. 2. In order to avoid any risk of electric shock, cut power to the heating/cooling system. 3. Strip the end of each wire if necessary. (Maximum of 6mm) INSTALLATION 1. Remove the front square frame from the thermostat. (See pictures) 2. Gently tilt the control panel outwards by placing a small flat head terminal driver or your thumb into the slot located on the upper part of the thermostat (B). 3. Loosen the screws (A) of the terminal block located at the rear bottom of the baseplate and insert wires into the respective terminals accordingly. After that, tighten the screws and remember not to over tighten them as the wires are easily broken. 4. Fix the baseplate to the wall by using the screws provided. 5. Reinstall the control panel back onto the baseplate and snap the square frame back to the device as well. 6. Apply power back to the system and program thermostat according to the operating instructions. Made in PRC for: JAGO AG, Ingersheimer Str. 12, 70499 Stuttgart / Germany Tel/Fax-Nr. 0900-1524624 (49 cent/min* from german landline, max. 2,99 Euro/min* from mobile network (*incl. 19% VAT)) 35 DE EN FR EN EC - Declaration of Conformity in accordance with the EC low voltage directive 2006/95/EC in accordance with appendix III B; of 12. Dec. 2006 Hereby we explain that the below designated product in its conception and design, as well as in the model brought into circulation by us, complies with the appropriate fundamental safety and health requirements of the EC low voltage directive. In case of an non-coordinated change of the product this declaration becomes void. Representative: JAGO AG Ingersheimer Str. 12, D-70499 Stuttgart Description of the electrical equipment: Function: Heating Thermostats Machine type: RMTMS01 Trademark:JAGO Power supply: 85 – 230V ac ~ 50/60Hz The agreement with further valid guidelines/regulations following for the product is explained: • EC Directive of Electromagnetic Compatibility (EMC) 2004/108/EC Reference to the standards: • EN 60730-2-9:2010 • EN 60730-1:2011 Year of the CE characteristic assignment: 2013 Place / Date / Signature: Stuttgart, 15.05.2013 Title of Signatory: Mr. Jakovac, Managing Board 36