1
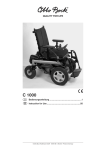
B 600
Bedienungsanleitung ......................................................1
Instructions for Use.......................................................55
© Otto Bock HealthCare GmbH · 647G120=D/GB · Printed in Germany
Inhaltsverzeichnis
Inhaltsverzeichnis
Seite
1
2
3
Allgemeines ........................................................................................ 3
Konformitätserklärung......................................................................... 3
Sicherheitshinweise ............................................................................ 4
4
5
6
7
8
Anwendungsgebiet ............................................................................. 7
Service ............................................................................................... 8
Transport und Lagerung ..................................................................... 9
Anlieferung ....................................................................................... 10
Einstellmöglichkeiten ......................................................................... 10
3.1
3.2
8.1
8.2
8.3
8.4
9
9.1
9.2
10
10.1
10.2
10.3
10.4
10.5
10.6
10.7
10.8
10.9
10.10
10.11
11
11.1
11.2
11.3
12
12.1
12.2
12.3
12.4
12.5
12.5.1
12.5.2
12.6
12.7
Bedeutung der Symbolik .............................................................................. 4
Allgemeine Sicherheitshinweise ................................................................... 4
Rücken ...................................................................................................... 11
Armauflage ................................................................................................ 12
Bedienpult ................................................................................................. 12
Fußraste .................................................................................................... 14
Ein- und Aussteigen .......................................................................... 15
Von der Seite ............................................................................................. 15
Von vorn .................................................................................................... 15
Inbetriebnahme................................................................................. 16
Einschalten ................................................................................................ 17
Fahrfunktion „Drive“ ................................................................................... 18
Zusatzfunktion „Mode“............................................................................... 18
Beleuchtung .............................................................................................. 18
Bremsentriegelung..................................................................................... 19
Aktivierung der Wegfahrsperre .................................................................. 21
Hupe ......................................................................................................... 22
Batterieanzeige.......................................................................................... 22
Laden ........................................................................................................ 22
Batterien.................................................................................................... 25
Sicherung .................................................................................................. 27
Status- und Fehleranalyse ................................................................ 28
Warnung ................................................................................................... 28
Fehler ........................................................................................................ 29
Defekt/Versagen ........................................................................................ 30
Optionen........................................................................................... 30
Hubsitz ...................................................................................................... 31
Elektrische Sitzkantelung ........................................................................... 33
Federung der Vorderräder ......................................................................... 33
Lenkarretierung der Vorderräder ................................................................ 34
Hochschwenkbare Fußrasten .................................................................... 35
Höhenverstellung .................................................................................................. 35
Hochschwenken ................................................................................................... 35
Elektrische Fußrasten ................................................................................ 35
Elektrische Rückenwinkelverstellung Standardsitz...................................... 36
Bedienungsanleitung B600
1
Inhaltsverzeichnis
12.8
12.9
Seite
Recaro-Sitz................................................................................................ 37
Bedienpult ................................................................................................. 37
12.9.1
12.9.2
Nach unten verstellbar .......................................................................................... 37
Wegschwenkbar .................................................................................................. 38
13
Wartung und Pflege.......................................................................... 46
12.10
12.11
12.12
12.13
12.14
12.15
12.16
12.17
13.1
13.2
13.3
13.4
14
15
16
17
17.1
17.2
17.3
17.4
17.5
17.6
2
Bedienpult Delta ........................................................................................ 39
LCD .......................................................................................................... 39
Blas-Saugsteuerung .................................................................................. 40
Tastenmodul .............................................................................................. 42
Kinnsteuerung............................................................................................ 42
Externer Kilometerzähler ............................................................................ 44
Beckengurt ................................................................................................ 45
Weitere Optionen....................................................................................... 45
Wartung .................................................................................................... 46
Defekte Beleuchtung.................................................................................. 47
Reifen wechseln......................................................................................... 49
Reinigung und Pflege ................................................................................. 50
Entsorgung ....................................................................................... 50
Technische Daten B600.................................................................... 51
Technische Daten Ladegerät ............................................................ 52
Garantiebedingungen ....................................................................... 53
Gegenstand der Garantie .......................................................................... 53
Umfang der Garantie ................................................................................. 53
Bedingungen für die Inanspruchnahme ...................................................... 53
Ausschluss der Garantie............................................................................ 54
Haftung ..................................................................................................... 54
Nebenbestimmungen ................................................................................. 54
Bedienungsanleitung B600
Allgemeines
1
Allgemeines
Die vorliegende Bedienungsanleitung beschreibt die Handhabung des Elektrorollstuhls
B600. Sie vermittelt dem Nutzer sowie den Begleitpersonen die notwendigen Kenntnisse
über die Funktion, Wartung und Entsorgung. Sie beinhaltet die für eine gefahrlose
Bedienung erforderlichen Hinweise und gibt bei auftretenden Störungen Hinweise auf
mögliche Ursachen und deren Beseitigung.
Diese Bedienungsanleitung wurde auf Grundlage der
DIN EN 62079 „Erstellung von Anleitungen - Gliederung, Inhalt und Darstellung“
erarbeitet.
Der Elektrorollstuhl ist nach den derzeit gültigen Regeln der Technik aufgebaut und
betriebssicher. Für die Sicherheit gelten harmonisierte Normen, UVV’s und Richtlinien.
Mit dem Elektrorollstuhl steht ein Qualitätsprodukt zur Verfügung, das einen vielseitigen
Einsatz im täglichen Gebrauch zur Fortbewegung von behinderten Menschen ermöglicht.
Besondere Merkmale des Elektrorollstuhls sind:
l
l
Individuelle Anpassungsmöglichkeiten durch Optionen und Sonderbau über modulare
Komponenten (Fahrgestell, Sitzsystem, Steuerung, Zubehör).
Servicefreundlichkeit durch einfache und übersichtliche Zugänglichkeit zu allen
Baugruppen.
Vor dem Gebrauch des Elektrorollstuhls ist die Bedienungsanleitung, insbesondere das
Kapitel „Sicherheitshinweise“, vom Nutzer oder Begleitperson sorgfältig durchzulesen.
Technische Änderungen zu der in dieser Bedienungsanleitung beschriebenen Ausführung
behalten wir uns vor.
2
Konformitätserklärung
Die Fa. Otto Bock Health Care GmbH erklärt als Hersteller in alleiniger Verantwortung,
dass der Elektrorollstuhl mit den Anforderungen der Richtlinie 93/42/EWG übereinstimmt.
Die Entwicklung, Konstruktion und Bau dieses Produktes entsprechen in vollem Umfang
den sicherheitstechnischen Anforderungen der
l
DIN EN 12182
Technische Hilfen für Behinderte
„Allgemeine Anforderungen und Prüfverfahren“
l
DIN EN 12184
Elektrorollstühle und -mobile und zugehörige Ladegeräte
„Anforderungen und Prüfverfahren“
Bedienungsanleitung B600
3
Sicherheitshinweise
3
Sicherheitshinweise
3.1
Bedeutung der Symbolik
Hinweis!
Hinweise zur Gerätebedienung.
Achtung!
Warnhinweise auf mögliche technische Schäden.
Gefahr!
Warnhinweise auf mögliche Unfall- und Verletzungsgefahren.
Hinweis!
Hinweise zum Umweltschutz.
3.2
Allgemeine Sicherheitshinweise
Gefahr!
Um Stürze und gefährliche Situationen zu vermeiden, muss der
Umgang mit dem neuen Elektrorollstuhl erst auf ebenem und
überschaubarem Gelände trainiert werden.
Gefahr!
Jede Beförderung über eine Neigung ist gefährlich, wenn die
selbsttätigen Bremsen nicht betriebsbereit sind.
Gefahr!
Vorsicht beim Umgang mit Feuer, insbesondere brennenden
Zigaretten. Rückenbespannung und Sitzkissen sind leicht
entzündbar.
4
Bedienungsanleitung B600
Sicherheitshinweise
Gefahr!
Bei Fahrten im öffentlichen Straßenverkehr ist die Straßenverkehrsordnung zu beachten.
Achtung!
Zum Ein- und Aussteigen aus dem Elektrorollstuhl muss die
Rollstuhlsteuerung ausgeschaltet sein.
Achtung!
Beim Ein- und Aussteigen aus dem Elektrorollstuhl die
Fußauflagen nicht benutzen.
Achtung!
Die Auswirkungen der Schwerpunktverlagerung auf das
Verhalten des Elektrorollstuhls an Gefällstrecken, Steigungen,
seitliche Neigungen oder beim Überwinden von Hindernissen sind
mit sicherer Unterstützung eines Helfers zu testen.
Achtung!
Den Elektrorollstuhl nur bestimmungsgemäß einsetzen.
Da die kritische Hindernisbewältigung 5 cm beträgt, muss das
Überqueren von Absätzen, die höher als 5 cm sind, vermieden
werden.
Achtung!
Hindernisse wie Stufen oder Bordsteinkanten nicht ungebremst
befahren.
Achtung!
Beim Benutzen von Hebebühnen ist darauf zu achten, dass der
Elektrorollstuhl mittig auf der Hubfläche steht und keine Teile,
wie z. B. die Kippschutzrollen, in den Gefahrenbereich ragen.
Achtung!
Die Steuerung während der Fahrt auf Hebebühnen, Aufzügen
oder in der U-Bahn ausschalten, die Bremse darf nicht entriegelt
werden.
Bedienungsanleitung B600
5
Sicherheitshinweise
Hinweis!
Die maximale Zuladung für den Elektrorollstuhl beträgt 120 kg.
Als Option kann der Elektrorollstuhl auf eine maximale Zuladung
von 180 kg aufgerüstet werden
Hinweis!
Die Fahrleistungseigenschaften des Elektrorollstuhls
können durch elektromagnetische Felder beeinflusst werden
(Mobiltelefone oder sonstige abstrahlenden Geräte). Während
des Fahrbetriebes sind alle mobilen Geräte abzuschalten.
Hinweis!
Der Elektrorollstuhl kann selbst elektromagnetische Felder
erzeugen, die zu Störungen anderer Geräte führen können. Die
Steuerung ist daher auszuschalten, wenn keine Funktion benötigt
wird.
Hinweis!
Auf ausreichende Profiltiefe und korrekten Luftdruck (siehe
Reifenmantel) der Bereifung achten.
Hinweis!
Bei Dunkelheit möglichst helle Kleidung oder Kleidung
mit Reflektoren tragen. Die seitlich und rückwärtig am
Elektrorollstuhl angebrachten Reflektoren müssen gut sichtbar
sein.
Hinweis!
Der Elektrorollstuhl ist nur im Temperaturbereich von –25 °C bis
+50 °C funktionsfähig.
Hinweis!
Für eine Benutzung auf sehr glatten Flächen (z. B. vereisten
Oberflächen) ist der Elektrorollstuhl nicht geeignet.
Hinweis!
Fahrten auf sehr grobkörnigen Oberflächen (Schotter oder
Geröll) sind zu vermeiden.
6
Bedienungsanleitung B600
Anwendungsgebiet
Hinweis!
Der Elektrorollstuhl ist für das Befahren von Steigungen und
Gefällstrecken bis 17 % zugelassen.
Hinweis!
Die Steuerung während des Ladevorganges ausschalten.
Hinweis!
Zur Sicherheit einen Beckengurt anbringen, er kann als Zubehör
bezogen werden.
Hinweis!
Die Reinigung auf keinen Fall mit Wasserschlauch oder
Hochdruckreiniger durchführen.
Hinweis!
Bei längeren Standzeiten oder beim Versand des Elektrorollstuhls
ist die Sicherung zu entnehmen.
4
Anwendungsgebiet
Der Elektrorollstuhl dient ausschließlich gehunfähigen und gehbehinderten Menschen zum
individuellen Gebrauch der Selbstbeförderung oder durch bestimmte Sondersteuerungen
für die Beförderung durch Begleitpersonen.
Der B600 ist ein Elektrorollstuhl für den Innen- und Außenbereich. Er ist hinreichend
kompakt und wendig in Innenräumen und in der Lage, einige Hindernisse im Freien
(Kategorie B der EN 12184) zu überwinden.
Die Vielfalt der Optionen und Einstellmöglichkeiten durch die modulare Bauweise erlauben
einen Einsatz bei Gehunfähigkeit/Gehbehinderung durch
l
l
l
l
l
Lähmungen
Gliedmaßenverlust
Gliedmaßendefekt/-deformation
Gelenkkontrakturen/-schäden
Sonstige Erkrankungen
Bedienungsanleitung B600
7
Service
Insbesondere wurde der Elektrorollstuhl für Nutzer konzipiert, die in der Lage sind, sich
selbstständig in einem Elektrorollstuhl fortzubewegen.
Bei der individuellen Versorgung sind außerdem
l
l
l
l
Körpergröße und Gewicht (Zuladung 120 kg, optional 180 kg)
Physische und psychische Verfassung
Alter des Patienten
Wohnverhältnisse und Umwelt
zu beachten.
5
Service
Service und Reparaturen am Elektrorollstuhl dürfen nur vom autorisierten Fachhandel
durchgeführt werden. Bei auftretenden Fehlern bitte an den Fachhändler wenden, der den
Stuhl angepasst hat.
Ihr autorisierter Fachhandel:
Hinweis!
Der Elektrorollstuhl muss einmal jährlich von einem autorisierten
Fachhändler auf Fahrsicherheit überprüft werden!
8
Bedienungsanleitung B600
Transport und Lagerung
6
Transport und Lagerung
Beim Transport des Elektrorollstuhls ist auf eine ausreichende Absicherung durch
Spanngurte im Fahrzeug zu achten.
Um die Gurte anzubringen, sind 4 Befestigungsösen am Rahmen des Elektrorollstuhls
vorgesehen. Während des Transportes die Steuerung ausschalten und die Bremse
einriegeln.
Nutzung Ihres Otto Bock Produktes als Sitz beim Transport in Behindertentransportkraftwagen (BTW)
Wenn und wann immer möglich, sollten Fahrzeuginsassen während der Fahrt in einem
Behindertentransportkraftwagen (BTW) die im Fahrzeug installierten Sitze und die dazugehörigen Rückhaltesysteme nutzen. Nur so sind Insassen bei einem Unfall optimal geschützt.
Unter Verwendung der von Otto Bock angebotenen Sicherungselemente und dem Einsatz
geeigneter Rückhaltesysteme, kann Ihr Otto Bock Produkt B600 als Sitz beim Transport
in Behindertentransportkraftwagen (BTW) genutzt werden. Nähere Informationen dazu
erhalten Sie in unserer Bedienungsanleitung
„Nutzung Ihres Rollstuhls/ Sitzschalenuntergestells oder Buggies als Sitz
beim Transport in Behindertentransportkraftwagen“, Bestellnummer: 646D158
Hinweis!
Lesen Sie vor der Nutzung Ihres Otto Bock Produktes als Sitz beim Transport
in Behindertentransportkraftwagen (BTW) die Bedienungsanleitung 646D158 !
Um das Packmaß beim Rollstuhltransport zu verringern, Rückenlehne einklappen sowie
Armauflagen und Fußrasten abnehmen (Abbildung 1).
Abbildung 1: Packmaß
Genauere Hinweise sind im Kapitel „Einstellmöglichkeiten“ beschrieben.
Die Transport- und Lagerungstemperatur muss in einem Bereich von –10 °C bis +40 °C
liegen.
Bedienungsanleitung B600
9
Anlieferung
Hinweis!
Bei längeren Standzeiten oder beim Versand des Elektrorollstuhls
ist die Sicherung zu entnehmen!
Zum Befahren von Laderampen ist der Lenkstopp, der einen mühelosen Geradeauslauf
des Elektrorollstuhls gewährleistet, sehr hilfreich.
Dieser Lenkstopp wird optional angeboten und kann problemlos nachgerüstet werden.
7
Anlieferung
Der Fachhändler liefert den Elektrorollstuhl fahrbereit an.
Alle Einstellungen sind den Angaben im Bestellblatt entsprechend vorgenommen oder
werden vom Fachhändler direkt vor Ort getätigt.
Der Elektrorollstuhl ist auf die jeweiligen persönlichen Bedürfnisse eingestellt.
Vor der ersten Fahrt müssen alle Teile der Grundausstattung (Abbildung 2) auf
Vollständigkeit überprüft werden:
3
2
1
4
5
8
7
6
1
Rückenlehne
2
Armauflage
3
Joystick & Steuerung
4
Sitzkissen
5
Fußbrett
6
Bremsentriegelung
7
Motor & Antriebsrad
8
Antikipprollen
Abbildung 2: Grundausstattung
Die Funktionen der einzelnen Komponenten sind entsprechend den Hinweisen im Kapitel
„Einstellmöglichkeiten“ und im Kapitel „Inbetriebnahme“ zu kontrollieren. Eventuell
auftretende Störungen werden im Kapitel „Status- und Fehleranalyse“ näher erläutert.
Im Bordwerkzeug ist ein Satz Innensechskantschlüssel in den Größen 3, 4, 5, 6 sowie ein
Maulschlüssel Größe 13 enthalten.
8
Einstellmöglichkeiten
Am Elektrorollstuhl lassen sich zahlreiche Einstellungen vornehmen.
Sitzhöhe, Sitzbreite, Sitzwinkel sind gemäß der Kundenbestellung eingestellt und dürfen
nur vom Fachhändler geändert werden.
Die Einstellung der standardmäßig eingebauten Antriebsradfederung muss vom
Fachhandel vorgenommen werden.
10
Bedienungsanleitung B600
Einstellmöglichkeiten
Durch den teleskopierbaren Vorderrahmen kann der Radabstand des Elektrorollstuhls an
den jeweiligen Sitzaufbau angepasst werden (Abbildung 3).
Aufgrund der Schwerpunktverlagerung ist diese Einstellung nur vom autorisierten
Fachhandel vorzunehmen.
Der Benutzer kann den Rückenwinkel variieren, Armauflagenhöhe und Unterschenkellänge
ändern sowie die Fußrasten und die Armauflagen abbauen.
Abbildung 3: Teleskopierbarer Vorderrahmen
8.1
Rücken
Durch Ziehen des am unteren Ende des Rückens liegenden Entriegelungsgurtes lässt sich
die Neigung des Rückens in 4 verschiedene Positionen ändern.
Steht der Rücken im gewünschten Winkel, rasten die Verriegelungen in die nächste
Arretierung ein, sobald der Gurt wieder losgelassen wird (Abbildung 4).
Abbildung 4: Entriegelungsgurt
Bedienungsanleitung B600
11
Einstellmöglichkeiten
8.2
Armauflage
Die Armauflagen lassen sich durch Lösen der Flügelschrauben nach oben herausnehmen.
Die Flügelschrauben befinden sich am unteren Ende der Armauflagenhalter (Abbildung 5).
Abbildung 5: Armauflagen herausnehmen
Die Höhe der Armauflage wird durch Lösen der Schraube am oberen Ende der
Armauflagenhalter verändert (Abbildung 6).
Bei der Verstellung ist darauf zu achten, dass die Schraube wieder fest angezogen wird.
Abbildung 6: Höhenverstellung der Armauflagen
8.3
Bedienpult
Zur Anpassung des Bedienpultes an die Armlehne werden die Befestigungsschrauben an
der Unterseite der Armlehne gelöst.
Das Bedienpult ist nach vorn bzw. nach hinten zu schieben und an die gewünschte
Armlänge anzupassen (Abbildung 7).
12
Bedienungsanleitung B600
Einstellmöglichkeiten
Abbildung 7: Anpassung des Bedienpultes
Diese Funktion ist sehr hilfreich bei der Verwendung von Armlagerungsschalen und
Handauflagen, die im Zubehörkatalog zu finden sind. Ist die Bedienpultschiene zu lang,
kann der überstehende Teil einfach abgesägt werden.
Das Bedienpult kann durch Lösen des Verbindungssteckers auch komplett von der
Armlehne entfernt werden. Hierzu wird der Sicherungsring des Steckers bis zur Endlage
nach links gedreht (Abbildung 8).
Abbildung 8: Verbindungsstecker lösen
Der Stecker kann nun nach hinten gezogen werden. Beim Anbau ist darauf zu achten,
dass der Sicherungsring bis zum Einrasten nach rechts gedreht wird.
Weitere Verstellmöglichkeiten des Bedienpults werden im Kapitel „Optionen“ näher
erläutert.
Bedienungsanleitung B600
13
Einstellmöglichkeiten
8.4
Fußraste
Beim Abbau der Fußrasten muss das Wadenband ausgehängt werden.
Die Arretierung der Fußraste wird gelöst (Abbildung 9) und nach außen bzw. nach
innen geklappt. In dieser Position ist es möglich, die Fußraste nach oben zu ziehen und
abzubauen.
Abbildung 9: Arretierung der Fußraste
Es ist darauf zu achten, dass beim Aus- und Einklappen die Finger nicht gequetscht
werden.
Beim Anbau der Fußrasten diese von oben in die Halterung einhängen und nach innen
schwenken, bis die Arretierung einrastet.
Das Wadenband wieder an der Halterung anbringen.
Durch Lösen der Schraube am Fußbrettbügel lässt sich die Fußauflage an die
entsprechende Unterschenkellänge und die Dicke des verwendeten Sitzkissens anpassen.
Der Fußbrettbügel darf nicht mehr als 160 mm aus der Halterung gezogen werden
(Abbildung 10).
Abbildung 10: Verstellung Fußbrettbügel
14
Bedienungsanleitung B600
Ein- und Aussteigen
Achtung!
Bei allen Verstellungen darauf achten, dass Schrauben und
Muttern wieder fest angezogen sind.
9
Ein- und Aussteigen
Der Elektrorollstuhl ist modular aufgebaut.
Armauflagen und Fußrasten lassen sich leicht demontieren und ermöglichen somit einen
guten Zugang für den Transfer von der Seite oder von vorn.
9.1
Von der Seite
Der Elektrorollstuhl muss möglichst nahe an die Sitzfläche gefahren werden.
Dazu sind die Armauflagen auf der Einstiegsseite zu entfernen (Abbildung 11) und
gegebenenfalls die Fußraste abzumontieren.
Der Nutzer kann nun seitlich auf die Sitzfläche rutschen.
Durch die Verwendung eines Rutschbrettes wird der Transfer erleichtert.
Zum Übersetzen kann die Beleuchtungsanlage nach unten geschwenkt werden.
Abbildung 11: Armauflage abnehmen
9.2
Von vorn
Durch das Hochklappen der beiden Fußrasten wird der Zugang zum Ein- und Ausstieg
von vorn ermöglicht (Abbildung 12).
Das seitliche Abklappen der Fußrasten vergrößert den Ein- bzw. Ausstiegsbereich
(Abbildung 13).
Die Fußrasten können auch komplett demontiert werden.
Mit Hilfe einer Begleitperson oder eines Transferlifters kann der Nutzer von vorn in den
Stuhl ein- bzw. aussteigen. Auch der Einsatz einer Drehscheibe wird so unterstützt.
Bedienungsanleitung B600
15
Inbetriebnahme
Abbildung 12: Hochklappen der Fußrasten
Abbildung 13: Abklappen der Fußrasten
10
Inbetriebnahme
Die Steuerung des Elektrorollstuhls erfolgt über das Modular Control System.
Es handelt sich hierbei um ein Bedienpult zur Eingabe der Fahrbefehle durch den
Benutzer und zur Anzeige des aktuellen Status sowie einen Kontroller, der aus den
Eingabedaten die Motoren und sonstige elektrische Funktionen ansteuert.
Die Datenübertragung erfolgt über ein Bussystem.
Durch diesen modularen Aufbau ist es möglich, weitere Module und Eingabegeräte,wie z.
B. Kinnsteuerung, Saug-Blas-Steuerung oder elektrische Sitzfunktionen, anzuschließen.
Die Steuerung kann durch die Programmierbarkeit vom Fachhändler auf die persönlichen
Bedürfnisse des Benutzers angepasst werden.
16
Bedienungsanleitung B600
Inbetriebnahme
10.1
Einschalten
Hinweis!
Die Hauptsicherung des Elektrorollstuhl ist bei Anlieferung
ausgesteckt und befindet sich in der Schutzhülle am
Bedienpult. Diese Sicherung muss vor der Inbetriebnahme in
den Sicherungshalter am hinteren Ende der Batteriewanne
eingesteckt werden (siehe Kapitel „Inbetriebnahme/Sicherung“).
Den Elektrorollstuhl durch Betätigung der Taste 1 einschalten (Abbildung 14).
Die Anzeige 4 zeigt den Ladezustand der Batterien.
Bei der Anzeige 10 leuchten je nach gewählter Fahrstufe die Leuchtdioden 1 bis 4.
Blinken oder Lauflicht in der Batterieanzeige deutet auf einen Systemfehler hin.
Wird die Steuerung eine Zeit lang nicht betätigt, schaltet sich der Rollstuhl automatisch
ab.
Die Steuerung lässt sich jederzeit mit Taste 1 ausschalten, im Fahrbetrieb wird der
Elektrorollstuhl sofort gebremst.
1
2
3
4
10
5
9
8
7
6
Abbildung 14: Bedienpult
Position
1
2
3
4
5
6
7
8
9
10
Bedienungsanleitung B600
Bezeichnung
Ein/Aus
Hupe
Licht
Batterieanzeige
Joystick
Blinker rechts und links
Warnblinker
Anzeige „Fahren oder Zusatzfunktion“
Fahrstufe erhöhen/Zusatzfunktion
Fahrstufenanzeige
17
Inbetriebnahme
10.2
Fahrfunktion „Drive“
Nach dem Einschalten befindet sich die Steuerung in zuletzt gewählten Fahrstufe. Mit
der Taste 9 lässt sich die Fahrstufe erhöhen. Nach der Fahrstufe 4 folgt der Sprung
in Fahrstufe 1. Zum Fahren wird der Joystick (5) verwendet. Je weiter dieser von der
Mittelstellung ausgelenkt wird, desto schneller bewegt sich der Elektrorollstuhl in
diese Richtung. Die jeweilige Maximalgeschwindigkeit bei vollem Ausschlag hängt
von der gewählten Fahrstufe ab. Die Geschwindigkeits-, Beschleunigungs- und
Verzögerungswerte können vom Fachhändler auf die individuellen Benutzerwünsche
eingestellt werden.
Wird der Joystick losgelassen, setzt automatisch die Bremsfunktion ein und der Stuhl
kommt zum Stehen. Im Stillstand sind die mechanischen Bremsen aktiv und der
Elektrorollstuhl kann nicht rollen.
Wird keine Fahrfunktion ausgeübt, muss die Steuerung ausgeschaltet werden.
Unkontrolliertes Fahren durch zufällige Joystickbetätigung wird dadurch vermieden.
10.3
Zusatzfunktion „Mode“
Durch die Betätigung der Taste M (ca. 2 Sekunden) wechselt das System vom
Fahrmodus zu den Zusatzfunktionen. Bei der Fahrstufenanzeige steht jede LED für eine
bestimmte Zusatzfunktion. Der Wechsel zwischen den verschieden Funktionen erfolgt
durch kurzen Tastendruck auf die Taste M oder durch Joystickbewegung nach rechts.
Um wieder in den Fahrmodus zu gelangen, ist die Taste M erneut (ca. 2 Sekunden) zu
betätigen.
10.4
Beleuchtung
Der Elektrorollstuhl ist standardmäßig mit einer Beleuchtung ausgerüstet.
Am Vorderrahmen sind rechts und links je ein Halogenstrahler sowie ein Frontblinker
angebracht.
Diese lassen sich zum seitlichen Übersetzten beim Standardsitz umklappen (Abbildung
15).
Die Blinker sind zum Schutz vor Beschädigung mit einer Gummilagerung ausgestattet.
Blinker und Rückleuchte sind in die Heckverkleidung eingebaut (Abbildung 16).
Vom Bedienpult aus werden Warnblinker, Licht sowie Blinker rechts und links ein- und
ausgeschaltet.
Die Vorgehensweise zum Wechseln defekter Lampen ist im Kapitel „Wartung und Pflege“
beschrieben.
18
Bedienungsanleitung B600
Inbetriebnahme
Abbildung 15: Umklappen der Frontbeleuchtung
Abbildung 16: Heckbeleuchtung
10.5
Bremsentriegelung
Bei einem Ausfall der Steuerung oder zu geringer Batteriekapazität kann der
Elektrorollstuhl B600 geschoben werden. Dazu wird die Bremse über die mechanische
Entriegelung gelöst. Die Bremsentriegelung befindet sich je nach Wunsch rechts oder
links zwischen Fahrrahmen und Sitz. Aus Sicherheitsgründen muss zunächst der
Entriegelungsbolzen nach oben gezogen werden (Abbildung 17).
! Hinweis:
Die Bremse muss in dieser Stellung noch eingeriegelt sein! Sollte
die Schiebefunktion schon aktiv sein, wenden Sie sich bitte an ihren
Fachhändler.
! Hinweis:
Reparaturen und Einstellungen an der Bremse dürfen nur von
Fachpersonal durchgeführt werden.
! Gefahr:
Eine falsche Einstellung kann zum Verlust der Bremswirkung führen.
Lebensgefahr!
Bedienungsanleitung B600
19
Inbetriebnahme
Abbildung 17: Bremsentriegelungsbolzen
Der eigentliche Bremsentriegelungshebel ist nun freigegeben und kann nach vorne
gedrückt werden bis der Rastpunkt erreicht ist (Abbildung 18).
Die Steuerung erkennt in dieser Position die entriegelte Bremse und deaktiviert die
Fahrfunktion.
Abbildung 18: Bremsentriegelungshebel
Achtung!
Gibt die Steuerung bei entriegelter Bremse kein Fehlersignal,
muss die Bremseinstellung vom Fachhandel überprüft werden.
Achtung!
Nach dem Umlegen des Bremslösehebels in die Schiebestellung
sind sämtliche Bremssysteme ausgeschaltet.
20
Bedienungsanleitung B600
Inbetriebnahme
Zum Einriegeln der Bremse wird der Hebel nach oben gedrückt, bis der
Entriegelungsbolzen einrastet.
Zur Aktivierung der Fahrfunktion muss die Steuerung aus- und wieder eingeschaltet
werden.
10.6
Aktivierung der Wegfahrsperre
Aktivierung über Handbedienung (Handcontrol mit Licht, Bediengerät B)
Durch langes Drücken (>5 Sekunden) der Warnblinktaste wird die Wegfahrsperre
aktiviert. Die Steuerung quittiert dies mit einem kurzen akustischen Signal und schaltet sich
anschließend ab.
Aktivierung über Steuerknüppel
Da sich mit dieser Systemkonfiguration keine Warnblinktaste im System befindet, wird die
Aktivierung über den folgenden neuen Menüpunkt durchgeführt.
Modus Fahren
Fahren 1
l
Fahren 2
l
Fahren 3
l
Fahren 4
l
Wegfahrsperre
Zusatzfunktionen
...
l
Wird der Eintrag „Wegfahrsperre“ (USER) angewählt, so erfolgt eine Quittierung mittels
akustischen Signals und die Steuerung schaltet sich ab.
Einschalten des Systems mit aktivierter Wegfahrsperre
System ohne LCD
Beim Einschalten wird nach dem LED Test ein schnelles Lauflicht an den Fahrstufen-LED‘s
angezeigt (LED 1, 2, 3, 4, 3, 2, 1, 2, 3, 4, 3, ... — immer nur eine LED aktiv). Nun muss
der Joystick nach vorne in die Endstellung gedrückt werden, nach ca. 3 Sekunden ertönt
ein Piepsignal. Anschließend wird der Joystick nach hinten gezogen und auch hier ertönt
nach ca. 3 Sekunden ein akustisches Signal. Dies deaktiviert die Wegfahrsperre und das
Fahren wird freigegeben. Stimmt die Joystickeingabe nicht, so bleibt die Sperre, auch wenn
nachträglich der richtige Bewegungsablauf am Joystick eingegeben wird, aktiv. Nach 10
Sekunden schaltet die Steuerung wieder automatisch ab.
System mit LCD
Nach dem Einschalten wird ein Informationsfenster am
LCD angezeigt. Das folgende Beispiel veranschaulicht
die Art der Anzeige. Das System verhält sich sonst
analog der Variante ohne LCD (siehe oben).
Abbildung 19: Wegfahrsperre
Bedienungsanleitung B600
21
Inbetriebnahme
10.7
Hupe
Beim Betätigen der Taste 2 ertönt die Hupe.
10.8
Batterieanzeige
Das Batteriedisplay zeigt verschiedene Funktionen:
l
l
l
Betriebsbereitschaft der Steuerung
Ladezustand der Batterie
Status und Fehlermeldungen
Im Fahrbetrieb leuchtet die Anzeige ständig und zeigt den jeweiligen Ladezustand der
Batterie an. Die Anzeige besteht aus 7 Segmenten. Jedes Segment zeigt ca. 14 % der
Gesamtladung an. Bei einer Reichweite auf ebener Strecke von ca. 35 km entspricht
jedes Segment bei gleichbleibender Fahrbelastung etwa 5 km Reichweite.
Hinweise zum Umgang mit der Batterieanzeige:
Batterie geladen
Batterie nach Möglichkeit laden
Batterie dringend laden
Direkt nach dem Einschalten zeigt die Anzeige den gespeicherten Batteriestand vom
letzten Ausschalten.
Der genaue Batteriestatus wird nach kurzem Fahren angezeigt.
10.9
Laden
Die Kapazität der Batterien bestimmt die Reichweite des Elektrorollstuhls.
Viele Faktoren beeinflussen die Kapazität. Neben der Temperatur, dem Batteriealter und
der Fahrbelastung wirkt sich die Art des Ladens erheblich auf die Kapazität und somit auf
die Reichweite aus.
Längeres Fahren im roten Bereich hat Tiefentladung und somit Schädigung der Batterie
zur Folge. Außerdem besteht das Risiko, dass der Elektrorollstuhl bei der Fahrt im
entladenen Zustand stehen bleibt und den Anwender in eine Gefahrensituation bringen
kann.
Bei täglicher Benutzung kann das Ladegerät über Nacht angeschlossen werden, um
immer wieder volle Kapazität und somit maximale Reichweite zu erhalten.
Wird der Elektrorollstuhl längere Zeit nicht bewegt, muss zur Erhaltung der Kapazität
mindestens einmal pro Woche ein Ladezyklus durchgeführt werden.
Hinweis!
Für Schäden, die durch Tiefentladungen entstehen, wird keine
Gewährleistung übernommen.
22
Bedienungsanleitung B600
Inbetriebnahme
Hinweis!
Bei längerem Stillstand Hauptsicherung ziehen oder den
Elektrorollstuhl einmal wöchentlich laden.
Hinweis!
Es darf nur das von der Fa. Otto Bock HealthCare GmbH
vorgesehene Ladegerät verwendet werden.
Beim Anschließen des Ladegerätes ist darauf zu achten, dass zuerst das Ladegerät
mit der Ladebuchse verbunden wird (Abbildung 20). Die Ladebuchse ist im linken bzw.
rechten Seitenverkleidungsteil integriert. Das Ladegerät ist dann an die Netzsteckdose
anzuschließen.
Die Angaben auf dem Typenschild des Ladegerätes müssen mit der länderspezifischen
Spannung des jeweiligen Stromnetzes übereinstimmen.
Der Ladevorgang beginnt automatisch.
Der momentane Ladezustand wird über die LEDs des Ladegerätes angezeigt.
Ladegerät
Das Ladegerät ist für wartungsfreie (Gel) sowie wartungsarme (Säure) Bleiantriebsbatterien mit einer Nennspannung von 24V und einer Nennkapazität von C5= 50..80 Ah
ausgelegt. Um den jeweiligen Batterietyp best möglich zu Laden sind zwei Ladekennlinien
im Gerät eingespeichert. Die passende Kennlinie wird bei Auslieferung des Rollstuhls
werkseitig eingestellt. Kommt das Ladegerät an einem anderen Rollstuhl zum Einsatz oder
werden neue Batterien am Rollstuhl eingebaut muss die Kennlinie kontrolliert werden.
Die Batterieart ist am Schalter auf der Unterseite des Gerätes (verdeckt durch einen
grünen Klebepunkt) einstellbar und wird durch Blinken der grünen LED beim Start des
Ladevorgangs signalisiert.
Achtung!
Eine falsch zugeordnete Einstellung kann die Batterie dauerhaft
schädigen!
Abbildung 20: Ladebuchse
Bedienungsanleitung B600
23
Inbetriebnahme
Hinweis!
Während des Ladevorganges ist die Steuerung abzuschalten.
Der komplette Ladestrom wird in die Batterie eingespeist.
Das Ladegerät ist mit 3 LED-Anzeigen ausgerüstet:
Gelbe LED leuchtet
Batterie wird geladen
Grüne LED blinkt
Startphase 1x
Startphase 2x
Ständig:
Kennlinie für wartungsarme Bleibatterie
(Säure)
Kennlinie für wartungsfrei Bleibatterie
(Gel)
Batterie zu ca. 80% geladen
Grüne LED leuchtet
Batterie voll
Rote LED leuchtet
Batterie defekt, Batterie fehlt, Ladezeit
überschritten
Keine LED leuchtet
Netz fehlt
Das Ladegerät verfügt über eine programmierte Nachladephase.
Wird nach ca. 8 Stunden bei zuvor entladener Batterie die Vollladung erreicht, kann das
Gerät bedenkenlos angeschlossen bleiben.
Bei Beendigung des Ladevorganges ist zuerst der Netzstecker, dann der Ladestecker zu
ziehen.
Hinweis!
Die Gummikappe muss zum Schutz vor Feuchtigkeit wieder in
die Ladebuchse eingesteckt werden.
Nach erneutem Einschalten der Steuerung ist der Elektrorollstuhl fahrbereit.
Achtung!
Beim Laden von Batterien können explosive Gase entstehen. In
geschlossenen Räumen ist deshalb für ausreichende Belüftung
zu sorgen!
In der Nähe des Ladegerätes und beim Umgang mit Batterien
nicht rauchen!
Feuer und Funkenbildung vermeiden!
Lüftungsschlitze nicht verdecken!
l
l
l
l
l
24
Das Ladegerät nur innerhalb der angegebenen Temperatur- und Feuchtigkeitsgrenzen
verwenden (Kapitel „Technische Daten, Ladegerät“).
Das Ladegerät immer mit den vorhandenen Gummifüßen auf ebenen Untergrund
stellen.
Gegen direkte Sonneneinstrahlung schützen, um zusätzliche Erwärmung des Gerätes
zu verhindern.
Staub und Schmutz vermeiden. Sie beeinträchtigen die Funktion des Ladegerätes.
Zur Reinigung nur ein trockenes Tuch verwenden.
Bedienungsanleitung B600
Inbetriebnahme
10.10 Batterien
Der Elektrorollstuhl ist in der Standardausführung mit zwei 12 V-Blei-Säure-Batterien mit
einer Kapazität von 60 Ah ausgestattet.
Beim Laden kommt es kurzzeitig zur Umwandlung des Wasser-Säuregemisches in Gas.
Der Flüssigkeitsstand muss monatlich kontrolliert werden. Bei Bedarf ist nachzufüllen.
Der Elektrorollstuhl verfügt zur Wartung bzw. zum Aus- und Einbau der Batterien über ein
Batterieschubfach (Abbildung 21).
Abbildung 21: Batterieschubfach
Der Entriegelungsbolzen in der Vertiefung unterhalb der Stoßstange (Abbildung 22) wird
nach oben gedrückt, so dass die Schublade durch leichten Zug nach hinten herausrollt.
Abbildung 22: Entriegelungsbolzen für Batteriefach
Bedienungsanleitung B600
25
Inbetriebnahme
Um den Deckel des Batteriefaches abzunehmen, wird der Schnappverschluss des
Haltegurtes gelöst (Abbildung 23).
Abbildung 23: Schnappverschluss des Haltegurtes
Hinweis!
Bei Arbeiten an den Batterien die beigelegten Warnhinweise des
Batterieherstellers genau lesen!
Die Batterien sind nach Abnahme des Deckels von oben frei zugänglich (Abbildung 24).
Abbildung 24: Batteriedeckel
Hinweis!
Den Elektrorollstuhl zur Batteriekontrolle immer auf eine ebene
Fläche stellen!
Schraubt man die Verschlusskappen der einzelnen Kammern mit einem großen Schraubendreher
auf, ist der Flüssigkeitsstand der Batterie an den Säurestandsmarken zu erkennen. Steht die
Flüssigkeit unter diesem Maß, muss destilliertes Wasser nachgefüllt werden. Optional können
wartungsfreie Blei-Gel-Batterien verwendet werden.
26
Bedienungsanleitung B600
Status- und Fehlermeldung
Achtung!
Beim Schließen des Batterieschubfaches ist auf korrektes Einrasten
des Entriegelungsbolzens zu achten. Der Entriegelungsbolzen muss
im Antriebsträger in der dafür vorgesehenen Aussparung einrasten!
Bei korrekter Verriegelung ist der Bolzen auf der Unterseite des
Antriebsträgers sichtbar bzw. deutlich zu erfühlen.
Abbildung. 25: Entriegelungsbolzen eingerastet
10.11 Sicherung
Die 80 A-Schmelzsicherung befindet sich am hinteren Ende der Batteriewanne.
Zum Austausch der Sicherung wird die Kappe des Sicherungshalter über den seitlichen
Schnappverschluss geöffnet. (Abbildung 26)
Nach austauschen der Sicherung auf richtiges Einrasten der Kappe achten.
Achtung!
Bei Wartungsarbeiten am Elektrorollstuhl mit geöffnetem
Batteriedeckel ist aus Sicherheitsgründen die Sicherung stets zu
entfernen.
Abbildung 26: Sicherungshalter
Bedienungsanleitung B600
27
Status- und Fehlermeldung
11
Status- und Fehleranalyse
Die MCS-Steuerung verfügt zur Status- und Fehleranalyse über verschiedene
Anzeigekategorien. Die Steuerung unterscheidet je nach Auswirkung auf des System:
l
Warnung
l
Fehler
l
Defekt
l
Versagen
In den folgenden Tabellen werden die Anzeigecodes mit den dazugehörigen Fehlergruppen sowie
den möglichen Ursachen und Maßnahmen erläutert.
11.1
Warnung
Eine Warnung weist auf einen Status oder eine Fehlfunktion einzelner Komponenten hin.
Komponenten ohne Fehler werden in ihrer Funktion nicht eingeschränkt.
Das bedeutet, dass z. B. durch den Ausfall eines Blinkers die Lichtfunktion weiter
gewährleistet bleibt.
Darstellung: Für 4 Sekunden blinken die LEDs 2 x pro Sekunde.
Außerdem ertönen 2 akustische Signale.
Wiederholung des Vorganges jede Minute oder einmalig beim
Systemstart.
Anzeige
28
Fehlergruppe
Mögliche Ursache
Mögliche Maßnahme
Batterie-Warnung
Batteriespannung zu hoch
oder zu niedrig
Laden oder Entladen
je nach Batterieanzeige
TemperaturWarnung
Impulssteuerung (Kontroller)
oder Motor überhitzt
Fahrgeschwindigkeit
drosseln/abkühlen lassen
ImpulssteuerungWarnung
Problem mit der
Motorregelung
Neustart
Multifunktionstaste
bzw. Ein-/Aus-Taste
Verbindungsfehler/Defekt
der Tasten
Verbindungskabel/Tasten
kontrollieren
beschränktes
Fahren
bestimmte Sitzfunktion
ausgefahren (Hubsitz)
in normale Sitzposition
fahren
Ein-/AusgabemodulWarnung
Motor nicht angeschlossen
Motor überlastet
Ausgabe (z. B. Blinker defekt)
Verbindungskabel/Kontakte
Beleuchtungskörper
kontrollieren
Ladegerät Sperre
Ladegerät angeschlossen
nach Ladevorgang, Gerät
vom Netz trennen
Bedienungsanleitung B600
Status- und Fehleranalyse
11.2
Fehler
Ein Fehler beeinflusst die Funktion der MCS-Steuerung. Das System ist nicht voll
lauffähig, bis der Fehler behoben wurde.
Darstellung: Blinksignale LEDs: 4 x / Sekunde
akustisches Signal: 2 x / Sekunde.
Anzeige
Fehlergruppe
Mögliche Ursache
Mögliche Maßnahme
Batterie-Fehler
Batterie ist entladen
oder überladen
Laden oder Entladen
je nach
Batterieanzeige
Rechter Antriebsmotor
oder Bremse
Rechter Antriebsmotor
bzw. Bremse nicht
angeschlossen,
Kontaktprobleme oder
Kabelbruch
Kontrolle Motorkabel
und Steckverbindung
am Kontroller
Linker Antriebsmotor
oder Bremse
Linker Antriebsmotor
bzw. Bremse nicht
angeschlossen
Kontaktprobleme oder
Kabelbruch
Kontrolle Motorkabel
und Steckverbindung
am Kontroller
Fehler Eingabemodul
Joystick nicht in Nullposition,
beim Systemstart nicht
kalibriert,
defektes Eingabemodul
Kontrolle der
mechanischen Nullstellung sowie der
Leichtgängigkeit des
Joysticks/Neustart
Fehler Ausgabemodul
Fehlerhafte Verbindung
zum Ausgabemodul/
defektes Modul
Steckkontakt auf festen
Sitz prüfen/Neustart
Fehler Impulssteuerung
Fehler im Kontroller
Steckkontakte auf
festen Sitz
prüfen/Neustart
Kommunikationsfehler
Modul nicht
angeschlossen,
defekte Verbindung
Steckkontakte auf
festen Sitz
prüfen/Neustart
Bedienungsanleitung B600
29
Optionen
11.3
Defekt/Versagen
Bei einem Defekt handelt es sich um einen schwerwiegenden Ausfall einer
Systemkomponente.
Nach Beseitigung des Fehlers wird das System durch einen Neustart aktiviert.
Ein Versagen ist der größte anzunehmende Fehlerzustand, der zum sofortigen Notstopp
des Systems führt.
Darstellung: Lauflicht mit akustischem Signal
Anzeige
Fehlergruppe
Mögliche Ursache
Mögliche Maßnahme
Falsche Systemkonfiguration
Ein-/Ausschaltmodul fehlt
oder defekt,
zwei gleiche Module in
Konkurrenz,
falsches Eingabegerät
konfiguriert/angeschlossen,
Anschluss der
Eingabegeräte,
Steckverbindung der
Module prüfen,
Neustart
Höheres Bediengerät
defekt
Positionsverlust im
Joystick
Kontrolle der
mechanischen
Nullstellung sowie der
Leichtgängigkeit des
Joysticks/Neustart
Sind die auftretenden Fehler mit den beschriebenen Maßnahmen nicht direkt zu beheben,
hat der Fachhändler die Möglichkeit, mit dem Handprogrammiergerät den genauen
Fehlercode auszulesen und eine bessere Systemanalyse durchzuführen.
Die bisher aufgetretenen Fehler werden als Fehlergeschichte gespeichert und geben
Aufschluss über sämtliche vorgefallenen Fehlfunktionen.
Daraus kann der weitere Reparaturablauf des Systems abgeleitet werden.
12
Optionen
Der Elektrorollstuhl ist als modulares System aufgebaut.
Die MCS-Steuerung bietet die Möglichkeit, zahlreiche elektrische Zusatzfunktionen sowie
speziell angepasste Eingabegeräte zu verwenden.
Außerdem können weitere Zubehörteile angebaut werden.
Diese sind im Bestellblatt und im Zubehörkatalog vollständig aufgelistet.
Einige wichtige Optionen sind nachfolgend näher erläutert.
30
Bedienungsanleitung B600
Optionen
12.1
Hubsitz
Der Elektrorollstuhl B600 kann optional mit einem Hubsitz ausgerüstet werden. Die
Sitzfläche wird per Motorantrieb um bis zu 40 cm erhöht. Die Ansteuerung erfolgt per
Joystick im Modus "Zusatzfunktion" oder über Tastenmodul. Die Fahrfunktion bleibt
selbst bei ausgefahrenem Hubsitz erhalten. Die Maximalgeschwindigkeit ist aufgrund der
verringerten Kippstabilität reduziert sobald der Hubsitz aus der unteren Endlage fährt. Dies
wird am Bedienpult durch Blinken der „Drive“ LED angezeigt. Ist ein LCD angeschlossen
erscheint ein „Schneckensymbol“ zur Erkennung des Kriechgangs.
Abbildung 27 : Schneckensymbol zur
Erkennung des Kriechganges
Um die Sicherheit beim Hubsitz zu gewährleisten sind folgende Hinweise unbedingt zu
beachten:
Gefahr!
Die Hubvorrichtung ist nur auf ebenem Untergrund zu verwenden.
Gefahr!
Der Fahrbetrieb mit reduzierter Geschwindigkeit ist nur zum
Rangieren zu verwenden.
Achtung!
Die maximale Zuladung des Hubsitzes beträgt 100 kg.
Gefahr!
Die Hubvorrichtung ist nur mit senkrechtem Rückenwinkel zu
verwenden.
Gefahr!
Im Bereich zwischen Sitzrahmen und Rollstuhlrahmen befinden
sich konstruktionsbedingte Quetschkanten. Begleitpersonen sind
darauf hinzuweisen.
Achtung!
Es ist darauf zu achten, dass sich keine Gegenstände im
Hubbereich befinden.
Bedienungsanleitung B600
31
Optionen
Gefahr!
Wird bei Betätigung der Hubvorrichtung nicht der Kriechgang
aktiv, so ist umgehend der Fachhändler aufzusuchen um den
Fehler zu beheben. Bis zur Behebung darf der E-Rollstuhl nur mit
eingefahrener Hubvorrichtung benutzt werden.
Achtung!
Die Nutzung (Anheben und Absenken) der Hubvorrichtung ist auf
die Dauer von 6 Minuten/Stunde beschränkt.
Gefahr!
Bei Veränderung der Anbauposition von Hubvorrichtung oder
Patientensitz besteht Kippgefahr.
Gefahr!
Bei Nachrüstung oder Umbau sind die Vorgaben in der
Serviceanleitung zu erfüllen.
32
Bedienungsanleitung B600
Optionen
12.2
Elektrische Sitzkantelung
Die elektrische Sitzkantelung ermöglicht eine Kippung des Sitzwinkels auf maximal
30° aus der Waagerechten (Abbildung 28). Die integrierte Schwerpunktverlagerung
verbessert die Stabilität bei maximalem Kippwinkel. Die Ansteuerung erfolgt per Joystick
im Modus „Zusatzfunktion“.
Abbildung 28: Elektrische Sitzkantelung
Achtung!
Bei angewinkelter Sitzkantelung ist beim Befahren von
Steigungen aufgrund der veränderten Kippstabilität besondere
Vorsicht geboten!
12.3
Federung der Vorderräder
Der Elektrorollstuhl ist standardmäßig mit einer Antriebsradfederung ausgestattet.
Zur Erhöhung des Fahrkomforts besteht die Möglichkeit, eine Vorderradfederung als
weitere Option anzubauen, die besonders beim Befahren unebener Strecken für eine
bessere Bodenhaftung sorgt (Abbildung 29).
Abbildung 29: Federung der Vorderräder
Bedienungsanleitung B600
33
Optionen
12.4
Lenkarretierung der Vorderräder
Das Befahren von Rampen oder Fahrstuhlkabinen erfordert einen exakten Geradeauslauf
des Rollstuhls.
Der Elektrorollstuhl bietet optional die Möglichkeit, die Vorderräder in Vorwärtsposition zu
arretieren.
Kurvenfahrten sind nicht mehr möglich.
Dazu wird der Klapphebel auf dem Vorderrahmen etwas zur Seite gedrückt.
Er springt aus der Mittenposition (Abbildung 30).
Abbildung 30: Einrasten der Lenkarretierung
Ein Bolzen an der Unterkante des Vorderrahmens fährt heraus und rastet in der
Vordergabel ein, sobald die Geradeausposition erreicht ist. Die Kurvenfahrt ist nun
gesperrt.
Der Elektrorollstuhl fährt jetzt gerade aus vorwärts oder rückwärts.
Dreht man den Klapphebel wieder zur Mittenposition, wird die Lenkradgabel entriegelt
und ist frei drehbar.
Der Hebel rastet in der Mitte des Vorderrahmens in entriegelter Position ein (Abbildung
31).
Abbildung 31:Ausrasten der Lenkarretierung
34
Bedienungsanleitung B600
Optionen
12.5
Hochschwenkbare Fußrasten
12.5.1 Höhenverstellung
Durch Lösen der Schraube am Fußbrettbügel lässt sich die Fußauflage der jeweiligen
Unterschenkellänge und Dicke des verwendeten Sitzkissens anpassen.
Im Fußbrettbügel sind fünf Gewindebohrungen vorgesehen, die die fünf Positionen für die
Höhenverstellung realisieren.
Hinweis!
Schrauben und Muttern wieder fest anziehen.
12.5.2 Hochschwenken
Durch Druck auf die Fußauflage nach vorn bzw. Druck von unten an den Fußbrettbügel
kann die Fußraste nach oben verstellt werden.
Die Feststellung erfolgt über Rastpunkte.
Ist die gewünschte Höhe erreicht, arretieren sich die Fußrasten bei Belastung.
Zum Entriegeln den Fußbrettbügel leicht anheben und den am oberen Drehpunkt
angebrachten Hebel nach hinten drücken.
Beim Loslassen des Entriegelungshebels rastet der Fußbrettbügel in der nächsten
Position ein.
12.6
Elektrische Fußrasten
Um dauerhafte Druckbelastungen zu vermeiden, besteht die Möglichkeit, am
Elektrorollstuhl elektrische Fußrasten anzubringen (Abbildung 32).
Im Zusatzfunktionsmenü der Steuerung können die rechte, die linke sowie beide
Fußrasten gleichzeitig betätigt werden.
Abbildung 32: Elektrische Fußrasten
Bedienungsanleitung B600
35
Optionen
12.7
Elektrische Rückenwinkelverstellung Standardsitz
Der Rückenwinkel des Standardsitzes kann mit einer elektrischen Verstellung ausgerüstet
werden (Abbildung 33).
Achtung!
Bei nach hinten ausgelenktem Rückenwinkel ist beim Befahren
von Steigungen aufgrund der veränderten Kippstabilität
besondere Vorsicht geboten!
Abbildung 33: Rückenwinkelverstellung
Um beim Transport das flache Packmaß zu erhalten, wird der Querbolzen am unteren
Ende des Antriebes entriegelt, indem der Hebel nach oben gedrückt wird (Abbildung 34).
Nach Abnahme der Seitenteile kann das Rückenteil nach vorn auf der Sitzfläche abgelegt
werden. Zum Aufklappen wird der Rücken wieder nach oben geklappt und der Antrieb auf
die Verriegelung gedrückt. Der Bolzen rastet ein.
Abbildung 34: Entriegelungsbolzen Rückenwinkelverstellung
Hinweis!
Beim Einrasten der Rückenlehne ist auf festen Sitz der
Verriegelung zu achten!
36
Bedienungsanleitung B600
Optionen
12.8
Recaro-Sitz
Der Elektrorollstuhl kann mit verschiedenen Recaro-Sitzmodellen ausgestattet werden.
Die Einstellung des Rückenwinkels erfolgt mit dem Drehgriff an der rechten bzw. linken
Seite der Rückenlehne.
Zum Umklappen der Rückenlehne dient ein Entriegelungsgriff. Dieser befindet sich seitlich
an der Lehne. Durch Ziehen des Entriegelungsgriffes nach oben kann die Rückenlehne
nach vorn geklappt werden.
Der Recaro-Sitz kann mit einer elektrischen Rückenverstellung ausgerüstet werden. Die
Ansteuerung erfolgt im Menü „Zusatzfunktionen“ über die Rollstuhlsteuerung.
Der Recaro-Sitz ist leicht vom Fahrgestell zu lösen.
Handlungsfolge:
- Den Entriegelungsgurt unter dem vorderen Teil der Sitzfläche nach vorne ziehen.
- Beide Arretierungsbolzen, die den Sitz am rechten und linken Sitzrahmen verriegeln,
lösen.
- Um die hintere Sitzaufnahme aus den Haltebuchsen zu lösen, wird der Sitz leicht nach
hinten gekippt und etwas zurückgeschoben.
- Den Recaro-Sitz abnehmen.
- Für Wartungsarbeiten besteht jetzt freier Zugang.
- Beim Anbau wird die hintere Kante des Recaro-Sitzes am Ende des Sitzrahmens
aufgesetzt.
- Den Sitz nach vorn schieben bis die hintere Sitzaufnahme in den Haltebuchsen hängt.
- Den Sitz nach vorn kippen, bis die Arretierungsbolzen am Sitzrahmen einrasten.
Achtung!
Beim Anbau des Recaro-Sitzes darauf achten, dass die Sitzaufnahme
fest in den Haltebuchsen sitzt und die vorderen Arretierungsbolzen
bis zum Schlüsselring eingerastet sind!
12.9
Bedienpult
12.9.1 Nach unten verstellbar
Optional kann ein spezieller Bedienpulthalter angebaut werden, der es ermöglicht, das
Bedienpult nach unten zu verschieben.
Dabei wird die Befestigungsschraube (Abbildung 35) gelöst und die Höhe des
Bedienpultes bzw. Joystickhöhe an die Armlehnen angepasst.
Achtung!
Bei allen Verstellungen die Schrauben und Muttern wieder fest
anziehen!
Bedienungsanleitung B600
37
Optionen
Abbildung 35: Bedienpult nach unten verstellbar
12.9.2 Wegschwenkbar
Um mit dem Elektrorollstuhl näher an bzw. unter eine Tischkante zu fahren, kann mit einem
speziellen Halter das Bedienteil seitlich abgeschwenkt werden.
Handlungsfolge:
- Mit etwas Druck den Bedienpulthalter zur Seite drücken.
- Das Drehelement wird entriegelt und das Bedienpult lässt sich seitlich abschwenken
(Abbildung 37).
- Das Bedienpult kann bis zur Armlehne zurückgedreht werden.
- Beim Zurückfahren in die Ursprungsposition rastet das Drehelement dort wieder ein.
Abbildung 36: Entriegelungshebel
38
Bedienungsanleitung B600
Optionen
Abbildung 37: Bedienpult seitlich abschwenkbar
12.10 Bedienpult Delta
Um den Winkel des Bedienteils zu verändern, kann als Option das zweigeteilte Bedienpult
Delta angebaut werden.
Unter der schwarzen Abdeckkappe befindet sich eine Feststellschraube.
Diese Schraube wird um ca. 1 Umdrehung gelöst. Der Winkel des Anzeige- und
Tastenmoduls kann geändert werden.
Nach der Einstellung ist die Schraube wieder fest anzuziehen.
Das Bedienpult Delta ist auch bei der Option „Begleitpersonensteuerung und
Tischsteuerung“ einsetzbar.
12.11 LCD
Beim Einsatz von Sondersteuerungen, wie Kinnsteuerung oder Blas-Saugsteuerung, wird
das LCD-Modul als Anzeigemodul angewendet.
Bei der Steuerung mit dem Bedienpult ist das LCD-Modul sehr hilfreich (Abbildung 38).
Im Fahrbetrieb werden Fahrstufe, Geschwindigkeit sowie zurückgelegte Kilometer
angezeigt.
Durch die kurze Betätigung der Mode-Taste auf dem Bedienteil wird die Fahrstufe erhöht.
Die Fahrfunktion wird mit dem Joystick ausgeführt.
Durch längere Betätigung der Mode-Taste gelangt man vom Fahrmodus in den
Menümodus (Abbildung 39). Hier kann die Fahrstufe geändert sowie Zusatzfunktionen,
Licht und Hupe angesteuert werden.
Bedienungsanleitung B600
39
Optionen
Abbildung 38: LCD-Modul
Abbildung 39: Wechsel Fahrmodus in Menümodus
Menüsteuerung:
Joystick vorwärts
>>
im Menü nach oben
Joystick rückwärts >>
im Menü nach unten
Joystick rechts
>>
im Menü auswählen
Joystick links
>>
im Menü eine Ebene höher
Mode-Taste
>>
Zurück zum Fahrmodus
Bei der Verwendung verschiedener Eingabegeräte erfolgt die Fahrsteuerung durch das
Modul, von dem der Elektrorollstuhl eingeschaltet wurde.
12.12 Blas-Saugsteuerung
Beim Einsatz der Blas-Saugsteuerung werden die Fahr- und Zusatzfunktionen durch
verschiedene Kombinationen von Blas- und Saugbefehlen gesteuert.
Zusätzlich wird zur Menüführung der Multifunktionsschalter (MFS) eingesetzt (Abbildung
40). Bei langsamen Fahrgeschwindigkeiten wird die Position der Lenkung auf dem LCD
angezeigt.
40
Bedienungsanleitung B600
Optionen
Abbildung 40: Blas-Saugsteuerung
Zur Ansteuerung gibt es zwei Befehlsarten:
-
Kurzes Saugen oder Blasen
Langes Saugen oder Blasen
Menüsteuerung
Steuerung EIN:
Steuerung AUS:
Nach oben:
Nach unten:
Nach rechts/Auswählen:
Nach links:
Eine Menüebene höher:
MFS lang drücken
MFS lang drücken
2 x kurz blasen
2 x kurz saugen
1 x kurz blasen
1 x kurz saugen
2 x kurz saugen/MFS kurz drücken
Gehaltener Modus
Die Fahrbewegung des letzten Befehls wird solange ausgeführt, bis ein neuer Befehl
gegeben wird.
Vorwärts:
Rückwärts:
Rechts während der Fahrt:
Links während der Fahrt:
Rechts aus dem Stillstand:
Links aus dem Stillstand:
Nothalt:
Fahrstufe ändern (1,2..,5,1,2..):
Fahrmodus verlassen:
Bedienungsanleitung B600
1 x kurz und 1 x lang blasen
1 x kurz und 1 x lang saugen
1 x kurz blasen
1 x kurz saugen
1 x lang blasen
1 x lang saugen
MFS lang drücken
2 x kurz blasen
2 x kurz saugen
41
Optionen
Ungehaltener Modus
Die Fahrbewegung wird ausgeführt, solange der Befehl angesteuert ist.
Vorwärts fahren: 1 x kurz und 1 x lang blasen
Rückwärts fahren: 1 x kurz und 1 x lang saugen
Rechtskurve: 1 x lang blasen
Linkskurve: 1 x lang saugen
Nothalt: MFS drücken / lang saugen oder blasen
Fahrmodus verlassen: 2 x kurz saugen
12.13 Tastenmodul
Das Tastenmodul bietet die Möglichkeit elektrische Zusatzfunktionen während des normalen
Fahrbetriebs zu betätigen. Die 5 Tastenpaare erlauben die Ansteuerung der Kantelung, der
elektrischen Rückenverstellung, des Hubfunktion sowie der rechten und linken Fußraste.
Abbildung 41: Tastenmodul
12.14 Kinnsteuerung
Die Kinnsteuerung ermöglicht die Steuerung der Rollstuhlfunktionen durch einen kleinen
Joystick der durch einen Schwenkarm direkt am Kinn des Benutzers positioniert werden
kann.
Über einen separaten Multifunktionsschalter werden alle benötigten Schaltfunktionen
betätigt (Abbildung 42).
Der Multifunktionsschalter besitzt drei Schaltstellungen.
Mit I/O (oben) wird die Steuerung ein- bzw. ausgeschaltet. Mit der Mode-Taste (unten)
kann wie beim normalen Bedienpult die Fahrstufe erhöht und bei längerer Betätigung der
Fahrmodus verlassen werden.
Die Schwenktaste (rechts) dient zum Abschwenken der Joystickarmes.
Solange diese Taste betätigt wird, fährt der Joystickarm auf den Benutzer zu.
Bei erneuter Betätigung folgt ein Drehrichtungswechsel, der Joystick dreht sich vom
Benutzer weg.
Diese Funktion steht der Begleitperson durch den Schwenkschalter an der Rückseite der
Kopfstütze ebenfalls zur Verfügung.
42
Bedienungsanleitung B600
Optionen
Der Joystick erfüllt alle Funktionen entsprechend dem Standardjoystick.
Abbildung 42: Kinnsteuerung
Achtung!
Bei Verwendung einer Sondersteuerung muss eine genaue
Einweisung des Benutzers durch den Fachhandel erfolgen!
Weitere Sondersteuerungen, wie Lauflicht-, Tablett-, Buddy-Button- und Umfeldsteuerung,
sind in Verbindung mit dem LCD-Modul erhältlich.
Bedienungsanleitung B600
43
Optionen
12.15 Externer Kilometerzähler
Im externen Kilometerzähler ist eine Geschwindigkeitsanzeige, ein Etappenkilometerzähler,
ein Gesamtkilometerzähler sowie eine Uhr (Abbildung 43) integriert.
Abbildung 43: Kilometerzähler
Zeigt das Display links oben km/h, ist die Geschwindigkeitsanzeige aktiv.
Durch Betätigung der gelben Taste erscheint die Etappenkilometeranzeige, die durch drei
blinkende Pfeile an der linken Displayseite gekennzeichnet ist.
Betätigt man die Taste länger als zwei Sekunden, wird die Etappenstrecke auf Null
gesetzt.
Durch einen weiteren kurzen Tastendruck wird der Gesamtkilometerzähler angezeigt.
Durch erneutes Drücken der Taste, erscheint die Uhr auf dem Display.
Zur Einstellung der Uhrzeit muss die Taste länger als 2 Sekunden gedrückt werden.
Es erscheint 12: und 24: im Wechsel.
Bei 24: wird die 24-Stundenanzeige aktiviert. Bei 12: die 12-Stundenanzeige.
Es erscheint die Uhrzeit. Jede Stelle wird automatisch nacheinander durchgezählt.
Die Einstellung der Uhr erfolgt durch Tastenbetätigung solange, bis die gewünschte Ziffer
auf dem Display erscheint.
Ist die Gesamtkilometeranzeige aktiv, kann man durch Drücken der gelben Taste (länger
als 2 Sekunden) zwischen km/h und m/h wechseln und den Radumfang eingeben.
Dieser errechnet sich nach folgender Formel:
44
Bedienungsanleitung B600
Optionen
Reifengröße 14 Zoll
Zoll in cm
U=dxπ
14“ x 25,4 = 355,6 mm
35,56 mm x 3,1416 = einzugebener Wert
Der externe Kilometerzähler wird am Schutzbügel für das Bedienteil befestigt.
12.16 Beckengurt
Der Elektrorollstuhl kann mit einem Beckengurt ausgerüstet werden (Abbildung 44).
Dieser dient ausschließlich als Sicherheitsgurt während der Fahrt mit dem Elektrorollstuhl.
Der Gurt darf keinesfalls als Sicherheitsgurt beim Transport im PKW verwendet werden.
Abbildung 44: Beckengurt
12.17 Weitere Optionen
-
Montageset für Kopfstützen (Abbildung 45)
Anbringen von Kopfstützen (Zubehörkatalog)
Abbildung 45: Montageset für Kopfstützen
Bedienungsanleitung B600
45
Wartung und Pflege
l
l
l
l
l
l
l
l
l
Kantensteighilfe
Überwindung von Kanten und Stufen mit einer Maximalhöhe von 10 cm
Pannensichere Bereifung
Vollgummireifen
Anatomisch geformte Sitzsysteme
Verschiedene Modelle von „Recaro“ für besseren Sitzkomfort und mehr
Anpassungsmöglichkeiten stehen zur Verfügung
Gurtsysteme
Beckengurt, Brustgurt sowie Hosenträgergurt von Schroth
Sitzschalenaufnahme
Zur Adaption von speziellen Sitzschalen; Bedienpulthalter für Sitzschalen
Armlagerungszubehör
Spezialadapter für die Armlagen (Zubehörkatalog)
Begleitpersonensteuerung
Separates Bedienpult an der Rückenlehne
Joystickzubehör
Tetragabel, STICK S80, Softball, Golfball, Steuerknüppelschaft flexibel
Schutzbügel Bedienpult
Metallbügel zum Schutz gegen Stöße
l
Stockhalter
l
Rückspiegel anklappbar
l
l
Therapietisch
Aufsetzbare Tischplatte
Zubehörkasten, Zubehörtasche, Handytasche
Weitere optionale Anbauteile sind im Bestellblatt und im Zubehörkatalog enthalten.
13
Wartung und Pflege
13.1
Wartung
Vor jedem Einsatz ist die Funktionsfähigkeit des Elektrorollstuhls zu überprüfen.
Die in der folgenden Auflistung beschriebenen Tätigkeiten sind in den angegebenen
Abständen vom Anwender auszuführen.
46
Bedienungsanleitung B600
Wartung und Pflege
Tätigkeit
täglich
wöchentlich
monatlich
Bereifung
Luftdruck (siehe Reifenmantel)
Ausreichende Profiltiefe
X
X
Batterien
Flüssigkeits- bzw.
Säurestand
(nicht bei Gel-Batterien)
X
Beleuchtung
Elektronik
Bremse
Bremse
Beschädigung am Gehäuse
Elektrische Funktion
X
X
Steuerung ohne
Fehlermeldung
Ladegerät zeigt keine
Fehlermeldung an den LEDs
Bremshebel bei
eingeschalteter
Steuerung betätigen
Einstellung des
Bremsentriegelungshebels
>> vor jeder Fahrt <<
X
X
X
Achtung!
Die Steuerung gibt bei Betätigung des Bremshebels ein Fehlersignal
auf dem Bedienpult aus. Ist diese Funktion nicht gewährleistet, muss
eine Einstellung durch den Fachhandel erfolgen!
Treten bei der Wartung Probleme auf, muss ein autorisierter Fachhandel konsultiert
werden (Kapitel „Service“).
13.2
Defekte Beleuchtung
Bei defektem Gehäuse oder defekter Lampe können die entsprechenden Teile beim
Fachhändler bestellt werden.
Zum Wechseln der Halogenlampe des Frontlichtes kann die Scheibe durch leichten Druck
auf den schwarzen Rasthebel am unteren Ende des Beleuchtungskörpers nach vorn
geklappt und ausgebaut werden (Abbildung 46).
Die Lampe wird mit dem Sicherungsring herausgezogen und durch eine Neue ersetzt.
Beim Einbau ist darauf zu achten, dass sich die Kerbe an der Lampenfassung in der
richtigen Position befindet.
Bedienungsanleitung B600
47
Wartung und Pflege
Abbildung 46: Wechsel des Frontlichtes
Zum Wechseln der Heckblinker und der Heckbeleuchtung ist die Scheibe abzuschrauben.
Die Lampe wird leicht nach innen gedrückt und nach links gedreht.
Nach einer Viertelumdrehung die Lampe herausziehen (Abbildung 47).
Durch Einstecken und Rechtsdrehung der passenden Lampe ist die Funktion wieder
hergestellt.
Nähere Angaben zu den verwendeten Lampen sind im Kapitel „Technische Daten“
enthalten.
Hinweis!
Beim Einbau der Scheiben ist auf genauen Sitz auf dem
Gehäuse sowie festen Sitz der Schrauben zu achten. Eintritt von
Feuchtigkeit in den Beleuchtungskörper ist zu vermeiden!
Abbildung 47: Wechsel Heckblinker und Heckbeleuchtung
48
Bedienungsanleitung B600
Wartung und Pflege
13.3
Reifen wechseln
Handlungsfolge:
- Zur Demontage der Antriebsräder sind die Kreuzschlitzschraube in der Mitte des
Rades zu lösen und die Radabdeckungen abzunehmen (Abbildung 48).
- Radschraube (Abbildung 49) lösen und das Rad abziehen.
- Die zweigeteilte Felge wird durch Lösen der vier Innensechskantschrauben
auseinandergebaut.
- Der defekte Schlauch ist frei zugänglich und kann gewechselt werden.
- Zum Ausbau der Frontbereifung wird die Achsschraube gelöst und die Achse
herausgezogen.
- Die zweiteilige Felge wird auch hier auseinander geschraubt und der defekte Schlauch
gewechselt.
Abbildung 48: Radabdeckung
Abbildung 49: Radschraube
Bedienungsanleitung B600
49
Entsorgung
13.4
Reinigung und Pflege
Bei der Reinigung des Elektrorollstuhls dürfen die elektrischen Komponenten nicht mit
Wasser in Berührung kommen.
Hinweis!
l
Bedienpult, Ladegerät, Armauflage und Sitzbespannung nur
mit einem feuchten Tuch und einer milden Reinigungslösung
säubern.
l
Rückenlehnen und Sitzkisten mit einer trockenen Bürste
pflegen.
l
Räder und Rahmen mit einer feuchten Kunststoffbürste
reinigen.
l
Direkten Wasserkontakt mit Elektronik, Motoren und Batterien
vermeiden.
l
Zur Reinigung kein Scheuermittel verwenden.
l
Auf keinen Fall mit Wasserschlauch oder Hochdruckreiniger
die Reinigung durchführen.
l
Den Elektrorollstuhl einmal jährlich beim autorisierten
Fachhändler auf Fahrsicherheit überprüfen lassen!
14
Entsorgung
Ist der Elektrorollstuhl Eigentum der Krankenkasse, so geht er nach Gebrauch an diese
zurück.
Ist der Stuhl im Privatbesitz, so gelten zur Entsorgung folgende Hinweise:
- Wird der Elektrorollstuhl nicht mehr genutzt, muss er sachgemäß, entsprechend den
Entsorgungsrichtlinien des Herstellerlandes des Elektrorollstuhls, entsorgt werden.
- Die Batterien sind bei der Recyclingstelle der Abfallentsorgung des jeweiligen
Wohnsitzes abzugeben.
- Ebenso verhält es sich mit Rädern, Rahmen und Sitz.
- Die Entsorgung von Elektronik und Motoren erfolgt bei der Elektronikschrottannahme
der Abfallentsorgung des jeweiligen Wohnsitzes.
- Wird ein nichtbenötigter Elektrorollstuhl in anderen Ländern entsorgt, muss sich der
Besitzer bei der dortigen Stadtverwaltung über die jeweiligen Entsorgungsrichtlinien
informieren.
Achtung!
Bei Arbeiten an den Batterien die beigelegten Warnhinweise des
Batterieherstellers unbedingt lesen!
Hinweis!
Defekte Batterien werden beim Erwerb neuer Batterien beim
Fachhändler im Tausch zurückgenommen.
50
Bedienungsanleitung B600
Technische Daten B600
15
Technische Daten B600
Maße und Gewichte
Sitzbreite:
Sitztiefe:
Sitzhöhe:
Armauflagenhöhe:
Armauflagenlänge:
Unterschenkellänge:
Rückenhöhe:
Rückenwinkel:
Gesamtbreite:
Gesamthöhe:
Gesamtlänge:
Wendekreis:
Reifengröße:
Luftdruck:
Leergewicht:
maximale Zuladung:
vorn
hinten
vorn
38 - 42 cm oder 43 - 48 cm
38 - 46 cm oder 42 - 50 cm
45 - 60 cm
24 - 36 cm
26 cm
25 - 34 cm oder 35 - 44 cm
oder 45 - 54 cm
45 oder 55 cm
-9/1/11/21° oder 0/10/20/30°
64,5 cm
103 cm
108 cm
155 cm
8’’ - 10’’
14’’
siehe Reifenmantel
115 kg
120 kg (optional 180 kg)
Elektrische Anlage
Betriebsspannung:
Batterien:
Elektronik:
Beleuchtung:
Ladegerät:
Sicherung:
Nasszellen-Batterien
Gel-Batterien
Modell
Frontblinker
Frontlicht
Heckblinker
Hecklicht
Modell
Eingang
Ausgang
24 V
2 x 12 V, 60 Ah (5 h)
2 x 12 V, 50 Ah (5 h)
MCS
24 V DC max. 100 A
H21W 12 V BAY9s
HMP 08 2,4 W, 6 V, PX13,5s
C21W 12 V, BA15s
C5W 6 V, BA15s
MEG 2408
230 V, 60/50 Hz
24 V, DC/8 A
80 A
Fahrdaten
Geschwindigkeit:
Steigfähigkeit:
überwindbare Hindernisse:
Reichweite:
6 km/h bzw. 10 km/h
17 %
5 cm
ca. 35 km
Technische Änderungen vorbehalten.
Bedienungsanleitung B600
51
Technische Daten Ladegerät
16
Technische Daten Ladegerät
Automatikladegerät mit computergesteuerter Kennlinie für
24 V-Bleiantriebsbatterien.
52
Netzanschluss:
230 V -10 %, +6 %
Netzfrequenz:
50 Hz ± 4 %
Schutzklasse:
1 (Schutzleiter)
Ladeanschluss:
24 VDC
Nennladestrom:
8A
Restwelligkeit:
<1 %
Ladekennlinie:
IUU mit Erhaltungsladestufe,
computergesteuert
Sicherung primär:
G-Schmelzeinsatz T 4 A,
nicht von außen zugänglich
Sicherung sekundär:
elektronischer, reversibler
Verpolschutz,
kurzschlussfest, leerlauffest,
Schutz vor Überhitzung
Schutzart:
IP 21
Umgebungstemperatur:
-10 °C bis + 40 °C
Anzeige:
2 LED
Gewicht:
1,7 kg
Abmessungen (BxHxT):
105 x 65 x 205 mm
Bedienungsanleitung B600
Garantiebedingungen
17
Garantiebedingungen
17.1
Gegenstand der Garantie
-
Diese Garantie gilt für Rollstühle.
- Die Garantie umfasst Ansprüche des Sanitätshauses/Dienstleisters gegen die
Otto Bock HealthCare GmbH und berührt nicht die gesetzlichen Ansprüche aus
Mängelgewährleistung des Endverbrauchers gegenüber dem Sanitätshaus oder
anderer Dienstleister, die die Versorgung des Patienten zu verantworten haben.
17.2
Umfang der Garantie
- Otto Bock HealthCare garantiert unter Einhaltung der in Ziffer 3 beschriebenen
Bedingungen und unter Beachtung der Ausschlüsse gemäß Ziffer 4, dass an
Rahmenteilen und Kreuzstreben bei manuellen Serienrollstühlen und bei Rahmenteilen
für Serienelektrorollstühle über die gesetzliche Gewährleistungsfrist hinaus bis zu 4
Jahren nach Ersteinsatz keine Konstruktions-, Fertigungs- oder Materialfehler auftreten,
die die Einsatzfähigkeit des Rollstuhls wesentlich beeinträchtigen.
- Treten 2 Jahre nach Ersteinsatz Konstruktions,- Fertigungs- oder Materialfehler auf, so
ersetzt Otto Bock HealthCare nach seiner Wahl den Rollstuhl insgesamt, tauscht aus
oder repariert schadhafte Teile des Rahmens und der Kreuzstreben. Weitergehende
Ansprüche auf Minderung, Rückgängigmachung des Vertrages oder Schadensersatz
stehen dem Sanitätshaus/Dienstleister aus dieser Garantie nicht zu.
17.3
Bedingungen für die Inanspruchnahme
Die Garantie kann das Sanitätshaus/Dienstleister nur dann in Anspruch nehmen, wenn
- es sich um einen Ersteinsatz handelt,
- der Rollstuhl durch einen kassenzugelassenen Fachbetrieb angewendet wurde,
- die Weitergabe der Komplettversorgung durch den kassenzugelassenen Fachbetrieb
erfolgt und dieser einen Mängelbericht beifügt,
- bei der Erstellung von Sonderanfertigungen aus den Serienprodukten zur Anpassung
der Serienprodukte an die individuellen Gegebenheiten eines Patienten ausschließlich
Medizinprodukte mit CE-Kennzeichen verwendet werden und dabei eine Verwendung
entsprechend der diesen Medizinprodukten vorgegebenen Zweckbestimmung erfolgt,
Bedienungsanleitung B600
53
Garantiebedingungen
- Veränderungen an einem Rollstuhl nicht über die von Otto Bock HealthCare
vorgesehene Anpassung (z. B. Einstellen der Länge der Beinstütze) und die Nutzung
des durch die Otto Bock HealthCare empfohlenen Zubehörs (Baukastensystem)
hinausgehen
- derjenige, der Medizinprodukte repariert (aufbereitet), dabei ausschließlich vom
Hersteller freigegebene Ersatzteile/Anbauteile (Originalersatzteile) verwendet und nach
Vorschrift des Herstellers (siehe Bedienungsanleitung) arbeitet.
17.4
Ausschluss der Garantie
Die Garantie greift nicht ein, wenn Otto Bock HealthCare nachweist, dass
- die Bedingungen für die Inanspruchnahme gemäß Ziffer 3 nicht erfüllt sind,
- die Herabsetzung der Einsatzfähigkeit des Rollstuhls auf einer nicht fachgerechten
Verwendung des Rollstuhls, insbesondere nicht nach der Herstellerbeschreibung
erlaubter Umbauten, beruht,
- die Herabsetzung der Einsatzfähigkeit des Rollstuhls auf den üblichen Verschleiß,
insbesondere die in der Regel nur auf ein Jahr begrenzte Einsatzfähigkeit von Motoren,
Ladegeräten und Batterien, zurückzuführen ist,
- die Herabsetzung der Einsatzfähigkeit des Rollstuhls auf einer fehlerhaften Lagerung,
Beförderung oder unsachgemäßen sowie unfachmännischen Nutzung und Lagerung
beruht,
- die Herabsetzung der Einsatzfähigkeit des Rollstuhls auf einer Veränderung der
körperlichen Konstitution des Patienten, z. B. erhebliche Gewichtszunahme beruht,
- die Herabsetzung der Einsatzfähigkeit auf höherer Gewalt beruht.
17.5
Haftung
- Für die Ausführung der Leistungen aufgrund dieser Garantie haftet Otto Bock
HealthCare bei Verletzung nicht wesentlicher Verpflichtungen nur für leichte
Fahrlässigkeit und übernimmt keine Haftung für vorsätzliches Handeln von
Erfüllungsgehilfen. Im übrigen beschränken sich Ersatzansprüche auf den bei Beginn
der Ausführung der Leistungen vorhersehbaren Schaden.
17.6
Nebenbestimmungen
- Ausgetauschte Teile dürfen von der Fa. Otto Bock HealthCare drei Wochen nach
Rückgabe vernichtet werden, es sei denn, der Patient oder dessen Kostenträger
(Krankenkasse) widersprechen.
- Erfüllungsort für die Leistungen aus der Garantie ist Duderstadt.
- Diese Garantie unterliegt dem deutschen Zivil- und Handelsrecht.
54
Bedienungsanleitung B600
Table of Contents
1
2
3
3.1
3.2
4
5
6
7
8
8.1
8.2
8.3
8.4
9
9.1
9.2
10
10.1
10.2
10.3
10.4
10.5
10.6
10.7
10.8
10.9
10.10
10.11
11
11.1
11.2
11.3
12
12.1
12.2
12.3
12.4
12.5
12.5.1
12.5.2
12.6
12.7
12.8
Page
General Information ................................................................................... 57
Declaration of Conformity .......................................................................... 57
Safety Instructions ..................................................................................... 58
Warning Symbols ...................................................................................... 58
General Safety Instructions........................................................................ 58
Field of Application .................................................................................... 61
Service ...................................................................................................... 62
Transport and Storage............................................................................... 63
Delivery...................................................................................................... 64
Setting and Adjustment Possibilities........................................................... 64
Back.......................................................................................................... 65
Armrest...................................................................................................... 66
Control Panel............................................................................................. 66
Footrest ..................................................................................................... 68
Getting Into and Out of the Wheelchair...................................................... 69
From the Side ............................................................................................ 69
From the Front........................................................................................... 69
Putting into Operation ................................................................................ 70
Switching On............................................................................................. 71
"Drive" Function......................................................................................... 72
Additional "Mode" Function........................................................................ 72
Lighting...................................................................................................... 72
Brake Release ........................................................................................... 73
Activation of Drive-away Lock .................................................................... 75
Horn .......................................................................................................... 76
Battery Indicator ........................................................................................ 76
Charging ................................................................................................... 76
Batteries .................................................................................................... 79
Fuse .......................................................................................................... 81
Status and Error Analysis .......................................................................... 82
Warning..................................................................................................... 82
Errors ........................................................................................................ 83
Defect / Failure .......................................................................................... 84
Options...................................................................................................... 84
Lift Seat..................................................................................................... 85
Electric Seat Tilt......................................................................................... 87
Spring-mounted Front Wheels ................................................................... 87
Front Wheel Swivel Lock ........................................................................... 88
Elevating Footrests .................................................................................... 89
Height Adjustment ..................................................................................... 89
Elevating the Footrests............................................................................... 89
Electric Footrests ....................................................................................... 89
Electric Back Angle Adjustment of the Standard Seat................................ 90
Recaro Seat .............................................................................................. 91
B600 – Instructions for Use
55
Table of Contents
12.9
12.9.1
12.9.2
12.10
12.11
12.12
12.13
12.14
12.15
12.16
12.17
13
13.1
13.2
13.3
13.4
14
15
16
17
17.1
17.2
17.3
17.4
17.5
17.6
56
Page
Control Panel............................................................................................. 91
Lower Position Mounting............................................................................ 91
Swing-away Control Panel ........................................................................ 92
Delta Control Panel ................................................................................... 93
LCD .......................................................................................................... 93
Blow-and-Suck Control.............................................................................. 94
Push Button Module .................................................................................. 96
Chin Control .............................................................................................. 96
External Mileage Indicator.......................................................................... 97
Lap Belt..................................................................................................... 98
Other Options............................................................................................ 98
Maintenance and Cleaning ........................................................................ 99
Maintenance.............................................................................................. 99
Defective Lighting .................................................................................... 100
Changing Tyres........................................................................................ 102
Cleaning.................................................................................................. 103
Disposal .................................................................................................. 103
Technical Data of the B600...................................................................... 104
Technical Data of the Battery Charger ..................................................... 105
Terms of Extended Warranty .................................................................... 106
Subject of the Extended Warranty............................................................ 106
Scope of the Extended Warranty ............................................................. 106
Conditions for Laying Claims ................................................................... 106
Exclusion of the Extended Warranty ......................................................... 107
Liability .................................................................................................... 107
Incidental Provisions ................................................................................ 107
B600 – Instructions for Use
General Information
1
General Information
The present Instructions for Use describe the manipulation of the B600 power wheelchair.
They provide the user and the attendants with the necessary knowledge regarding
function, maintenance and disposal of the wheelchair. They contain all information which
is needed for a safe manipulation as well as possible causes and help for elimination in
case of malfunctions.
These Instructions for Use have been prepared on the basis of the
DIN EN 62079 standard
"Preparation of Instruction Manuals - Construction, Contents
and Representation".
The B600 power wheelchair has been constructed in accordance with the currently valid
technical rules and is safe in operation. For the safety, harmonized standards, regulations
for prevention of accidents and directives apply.
The B600 power wheelchair is a quality product offering versatile use in everyday life for
the mobility of disabled people.
The following special features are the characteristics of the B600:
- Individual adaptations are possible through options and custom fabrication with
modular components (chassis, seating system, control unit, accessories).
- Easy servicing due to good and clear accessibility of all component groups.
Before using the B600 power wheelchair, the user or attendant must read the Instructions
for Use thoroughly, especially the section "Safety Instructions".
The design, as described in these Instructions for Use, is subject to technical alterations
without notice.
2
Declaration of Conformity
Otto Bock HealthCare GmbH as manufacturer with sole responsibility declares that
the B600 power wheelchair conforms to the requirements of the European Directive for
Medical Products 93/42/EEC.
Development, construction and design of this product fully meet the requirements
regarding technical safety laid down in the following standards:
- DIN EN 12182
Technical products for disabled
"General Requirements and Methods of Testing"
- DIN EN 12184
Power wheelchairs and mobiles and corresponding battery
chargers
"Requirements and Methods of Testing"
B600 – Instructions for Use
57
Safety Instructions
3
Safety Instructions
3.1
Warning Symbols
Note!
Information regarding manipulation of the product.
Attention!
Warning messages regarding possible technical damages.
Danger!
Warning messages regarding possible risks of accident or injury.
Note!
Information regarding environment protection.
3.2
General Safety Instructions
Danger!
To avoid potentially dangerous situations such as tipping, it
is necessary that you become familiar with your new power
wheelchair on level ground first.
Danger!
When using the wheelchair on inclined surfaces ensure the
automatic brakes are operating correctly.
Danger!
Be especially careful with any naked flames and cigarettes, as
the back upholstery and seat cushion could catch fire.
58
B600 – Instructions for Use
Safety Instructions
Danger!
When using your wheelchair in the public traffic, you are
subjected to observe the traffic regulations according to the Road
Traffic Act.
Attention!
When getting into or out of the power wheelchair, the wheelchair
control must be switched off.
Attention!
Do not use the footrests as a stepstool when getting into or out
of your wheelchair.
Attention!
Get to know with assistance from another person how the power
wheelchair reacts when the center of gravity is shifted, i.e. when
driving on slopes or inclines or clearing obstacles like steps and
curbs.
Attention!
Use your power wheelchair properly.
The critical obstacle height is 5 cm. Therefore, it is necessary to
avoid driving over steps or curbs higher than 5 cm.
Attention!
Do not drive against obstacles (including steps, curbs or doors)
without braking first.
Attention!
When using lifting platforms, be sure that the power wheelchair
is standing centrically on the lifting platform area and that none
of the wheelchair’s components, such as the anti-tipper, is
protruding into the danger area.
Attention!
When using the wheelchair on lifting platforms, elevators or in the
underground, the wheelchair control must be switched off and
the brake must not be released.
B600 – Instructions for Use
59
Safety Instructions
Note!
The maximum load for the B600 power wheelchair is 120
kg (265 lbs.). Optionally the B600 power wheelchair can be
retrofitted for a maximum load of 180 kg (397 lbs.).
Note!
The driving characteristics of the B600 power wheelchair can
be influenced by electromagnetic fields (mobile phones or other
radiating devices). All mobile devices must be switched off when
driving.
Note!
It is also possible that the B600 power wheelchair itself
generates electromagnetic fields that might cause interference
in other devices. Therefore, the control is to be switched off
whenever you don’t need it.
Note!
Ensure the tyres have sufficient tread depth and check that the
pneumatic tyres are inflated to the correct tyre pressure (printed
on the sidewall of the tyre).
Note!
Ensure you are visible in the dark. If possible, wear light clothes
or clothing with reflectors. Be sure the reflectors installed at the
side and the rear of the power wheelchair are clearly visible.
Note!
The B600 power wheelchair may be used within a temperature
range from -25 °C to +50 °C.
Note!
The B600 is not suited for driving on very slippery (such as icy)
surfaces.
Note!
Avoid driving on very coarse-grained surfaces (gravel, pebbles,
shingle or scree).
60
B600 – Instructions for Use
Field of Application
Note!
The B600 power wheelchair has been approved for driving on
inclines and slopes of up to 17 %.
Note!
During battery charging, the wheelchair control must be switched
off.
Note!
For safety reasons, we recommend attaching a lap belt, which is
available as accessory.
Note!
Never use a water hose or high-pressure cleaning apparatus for
cleaning the wheelchair.
Note!
When the B600 is not used over extended periods of time or for
dispatching the B600, the fuse must be removed.
4
Field of Application
The B600 power wheelchair is designed solely for people who are unable to walk or who
have a walking impediment. The wheelchair can be controlled either by the patient or by
an attendant with the use of special controls.
The B600 is a power wheelchair that is designed for indoor and outdoor use. It is
sufficiently compact and manoeuvrable for the use indoors and can overcome some
obstacles outdoors (category B of the EN 12184 standard).
The versatility of this wheelchair is due to its modular design with adaptable options and
adjustment possibilities. Typical use would be for patients with walking impediments /
inability due to:
l
l
l
l
l
l
Palsies
Paralysis
Loss of limbs
Defective / deformed limbs
Joint contractures / defects
Other diseases
B600 – Instructions for Use
61
Service
The B600 power wheelchair was specially designed for users who are able to
independently move in a power wheelchair.
Fitting Considerations:
l
l
l
l
5
Body height and weight (maximal load is 120 kg, optionally 180 kg)
Physical and psychological limitations
Age of the user
Home conditions and environment
Service
Service and repairs on the B600 power wheelchair may only be carried out by authorised
dealers. Should any problems arise, please contact your wheelchair supplier.
Your authorised dealer is:
Note!
The B600 power wheelchair must be checked and serviced at
least ONCE a year by an authorised dealer!
62
B600 – Instructions for Use
Transport and Storage
6
Transport and Storage
When transporting the B600 power wheelchair in a vehicle, ensure the wheelchair control
is switched off and that the automatic brake has not been disengaged. The wheelchair
must then be fully secured by means of tension straps.
The frame of the B600 power wheelchair has four fixing eyelets for attachment of the
straps.
Using your Otto Bock product as a seat in motor vehicles
We recommend that, wherever and whenever possible, wheelchair users transfer to the
seats installed in the motor vehicle and use the corresponding vehicle restraint systems,
because this is the only way to ensure optimum protection of the passengers in case of
an accident.
It is, however, possible to use your Otto Bock B600 as a seat in a motor vehicle, provided
that the Otto Bock safety elements and appropriate restraint systems are used. For more
information, please refer to our instructions for use:
"Using your wheelchair/ mobility base with seating shell or buggy as a seat in
motor vehicles”, article number: 646D158
Warning!
Please read the 646D158 Instructions for Use before using your Otto Bock
product as a seat in motor vehicles!
To reduce the folding size for transport of the wheelchair, fold down the backrest and
remove the armrests and footrests (Fig. 1).
Fig. 1: Folding size
For further details please refer to the section "Setting and Adjustment Possibilities”.
The temperature during transport and storage must be between -10 °C and +40 °C.
B600 – Instructions for Use
63
Delivery
Note!
When the B600 is not used over extended periods of time or for
dispatching the B600, the fuse must be removed!
When driving onto ramps the swivel lock, which ensures effortless straight line forward
movement of the B600, is very helpful.
This swivel lock is optionally available and can also be easily retrofitted.
7
Delivery
Upon delivery by the specialist dealer the B600 is ready for use.
All settings have been made in accordance with the indications on the order form or are
made directly on site by the dealer.
The B600 is adapted to the personal requirements of the individual.
Before using the wheelchair for the first time, all components of the standard equipment
(Fig. 2) must be checked for completeness.
3
2
1
4
5
8
7
6
1
Backrest
2
Armrest
3
Joystick & control unit
4
Seat cushion
5
Footplate
6
Brake release
7
Motor & rear wheel
8
Anti-tippers
Fig. 2: Standard equipment
The functions of the individual components must be checked according to the instructions
in the sections "Setting and Adjustment Possibilities” and "Putting into Operation”. Should
any problems arise please refer to the section "Status and Error Analysis”.
The tool kit provided contains one set of Allen wrenches, sizes 3 mm, 4 mm, 5 mm, 6 mm,
and one open-end 13 mm spanner.
8
Setting and Adjustment Possibilities
The B600 power wheelchair offers numerous setting possibilities.
The seat height, seat width and seat angle have been set in accordance with the
indications on the customer order form and may only be changed by the dealer.
Setting of the rear wheel spring system which is included in the standard equipment must
be carried out by the dealer.
64
B600 – Instructions for Use
Setting and Adjustment Possibilities
The telescoping front frame of the B600 power wheelchair allows the wheelbase to be
adapted to the seat in use (Fig. 3).
Since this setting involves a shift of the center of gravity it may only be carried out by an
authorised dealer.
However the user can vary the back angle, change the armrest height and lower leg
length and disassemble the footrests and armrests themselves.
Fig. 3: Telescoping front frame
8.1
Back
The back can be adjusted to four different angle positions by pulling the release strap
which is located at the base of the back.
Once the back is in the desired position, release the strap to engage the locks (Fig. 4).
Fig. 4: Release strap
B600 – Instructions for Use
65
Setting and Adjustment Possibilities
8.2
Armrest
Remove the armrests by loosening the thumb screws and lifting the armrest. The thumb
screws are located at the lower end of the armrest holders (Fig. 5).
Fig. 5: Removal of the armrests
The armrest height is changed by loosening the screw at the upper end of the armrest
holders (Fig. 6).
Ensure the screw is snugly re-tightened after making any adjustments.
Fig. 6: Height adjustment of the armrests
8.3
Control Panel
For adjusting the position of the control panel on the armrest, loosen the attachment
screws on the underside of the armrest.
Slide the control panel backwards or forwards to position it to the desired arm length
(Fig. 7).
66
B600 – Instructions for Use
Setting and Adjustment Possibilities
Fig. 7: Adjustment of the control panel
This function is very helpful when using channel forearm pads and hand pads, which are
described in the Wheelchair Accessories Catalogue. If the control panel rail is too long,
the protruding part can simply be cut off with a saw.
After loosening the connection plug, the control panel can also be removed completely
from the armrest. To do this, turn the lock ring of the plug to the left up to its end position
(Fig. 8).
Fig. 8: Loosening of the connection plug
Pull off the plug. When remounting the control panel, make sure to turn the lock ring to the
right until it locks in place.
For further adjustment possibilities of the control panel please refer to the section
"Options”.
B600 – Instructions for Use
67
Setting and Adjustment Possibilities
8.4
Footrest
To disassemble the footrest, the calf band must be unhooked.
Release the footrest lock (Fig. 9), then swing away the footrest either inwards or
outwards. When in this position, the footrest can be pulled upwards and removed.
Fig. 9: Footrest lock
Take care not to get your fingers jammed when swinging the footrest away or back in
place.
For remounting, relocate the footrest in either the inner or outer positions and swing it
back into position so the lock engages.
Reattach the calf band to the holding device.
To adjust the height of the footplates loosen the screw at the footrest hanger and adjust
the height to suit your lower leg length and compensate for the seat cushion height used.
The footplates adjustment must not be extended by more than 160 mm below the hanger
(Fig. 10).
Fig. 10: Adjustment of the footrest hanger
68
B600 – Instructions for Use
Getting Into and Out of the Wheelchair
Attention!
Ensure all screws and nuts are firmly re-tightened after making
any adjustments.
9
Getting Into and Out of the Wheelchair
The B600 power wheelchair has been designed as a modular system.
The armrests and footrests can be removed easily and thus allow easy access for transfer
from the side or from the front.
9.1
From the Side
Move the B600 power wheelchair as close as possible to the seat.
For this purpose, remove the armrests on the side where the user will get into the
wheelchair (Fig. 11) and also remove the footrest if necessary.
Now the user can slide onto the seat.
Use of a transfer board will make transfer easier.
The lighting installation can be swung down for transfer.
Fig. 11: Removal of armrest
9.2
From the Front
After flipping up the two footplates, the user can get into and out of the wheelchair from
the front (Fig. 12).
The space for getting into/out of the wheelchair can be increased by swinging the
footrests to the side (Fig. 13).
The footrests can also be removed completely.
With the assistance of an attendant or by means of a transfer lifter, the user can get into
or out of the wheelchair from the front. Use of a rotation plate is also possible.
B600 – Instructions for Use
69
Putting into Operation
Fig. 12: Flipping up the footplates
Fig. 13: Swinging away the footrests
10
Putting into Operation
To control the B600 power wheelchair, the Modular Control System is used.
The Modular Control System comprises a control panel for entering the driving
instructions by the user and for displaying the current state as well as a controller, which
uses the input data to control the motors and other electric functions.
Data transmission is realized via a bus system.
This modular design allows to connect other modules and input devices such as chin
control, suck-and-blow control or electric seat functions.
The specialist dealer can program the control and thus adapt the wheelchair control to
the individual user’s requirements.
70
B600 – Instructions for Use
Putting into Operation
10.1
Switching On
Note!
Upon delivery, the main fuse of the B600 power wheelchair is
not connected. It is contained in the protective covering on the
control panel. Before using the B600 power wheelchair, this
fuse must be inserted into the fuse holder at the rear end of the
battery case (see section "Putting into Operation / Fuse").
Press button 1 to switch on the wheelchair control (Fig. 14).
The indicator 4 shows the remaining battery capacity.
The indicator 10 will show 1-4 lit LEDs depending on the selected speed level. When the
battery indicator flashes or the LEDs continually light up one after another, this means a
system error has occurred.
When the control unit is not used for some time, the wheelchair is switched off
automatically. The control can be switched off at any time using button 1; if this occurs
whilst driving the wheelchair will be braked immediately.
1
2
3
4
10
5
9
8
7
6
Fig. 14: Control panel
Item
1
2
3
4
5
6
7
8
9
10
B600 – Instructions for Use
Description
On/Off
Horn
Light
Battery indicator
Joystick
Direction indicators, right and left
Warning flasher
Indicator "Drive or additional function"
Increase speed level / Additional function
Speed level indicator
71
Putting into Operation
10.2
"Drive" Function
After switching on, the control is in the speed level which had been selected last. Button
9 is used to increase the speed level. After speed level 4, the control switches back to
speed level 1. For driving use the joystick 5. The further the joystick is moved away from
the mid-position, the faster the B600 power wheelchair will drive in this direction. The
maximum speed with full deflection of the joystick is dependent on the selected speed
level. The characteristics for speed, acceleration and deceleration can be adapted by the
dealer to meet the individual user’s requirements.
As soon as the joystick is released, the wheelchair is braked automatically until it stops
moving. When standing still, the mechanical brakes are automatically active so the B600
cannot move.
If the drive function is not required, the wheelchair control must be switched off to prevent
uncontrolled driving trough accidental joystick manipulation.
10.3
Additional "Mode" Function
When the button M is pressed and held for approx. 2 seconds, the system will change
from driving mode to the additional functions. In the speed level indicator, each LED
stands for a certain additional function. To change between the different functions, shortly
press the button M or move the joystick to the right. To switch back to the driving mode,
again hold the button M depressed for approx. 2 seconds.
10.4
Lighting
Standard equipment of the B600 power wheelchair includes a lighting installation.
One halogen light and one front direction indicator are attached to the front frame on the
right and left side.
For user transfer to and from the side of the wheelchair, they can be folded away (with
standard seat) (Fig. 15).
To protect the direction indicators against damage they are provided with rubber
bearings. Rear direction indicators and rear lights are integrated into the rear covering
(Fig. 16).
The control panel is used to switch on and off the warning flasher, lights and direction
indicators.
For changing defective lamps, please refer to section "Maintenance and Cleaning".
72
B600 – Instructions for Use
Putting into Operation
Fig. 15: Folding away the front lights
Fig. 16: Rear lights
10.5
Brake Release
In case of failure of the control unit or insufficient battery capacity, it is possible to push
the B600 power wheelchair. To do this, the brake must be released using the mechanical
release mechanism. The brake release mechanism is located either on the right or left side
of the wheelchair between the frame and seat.
For safety reasons you must first pull up the release bolt (Fig. 17).
! Note:
When in this position, the brake must still be engaged! Should
the brake already be released and the pushing function be
active at this stage, please contact your wheelchair supplier.
! Note:
Repairs and adjustments on the brake may only be carried out
by specialist staff.
! Danger
Wrong adjustments can lead to brake function failure and
danger to life!
B600 – Instructions for Use
73
Putting into Operation
Fig. 17: Brake release bolt
Now the brake release lever has been released and can be pressed forwards and
downwards fully (Fig. 18).
In this position, the control will recognize that the brake has been released and
automatically deactivate the driving function.
Fig. 18: Brake release lever
Attention!
If the control shows no error signal when the brake is released,
the brake setting must be checked by the specialist dealer.
Attention!
After turning the brake release lever into the pushing position,
all brake systems are switched off.
74
B600 – Instructions for Use
Putting into Operation
To reactivate the brake, pull the lever upwards until the release bolt engages.
To reactivate the driving function switch off and then switch on again the wheelchair
control.
10.6
Activation of Drive-away Lock
Activation via hand control (hand control with light, control panel B)
To activate the drive-away lock press the warning flasher button longer than 5 seconds.
The control will acknowledge this with a short acoustic signal and then switch off
automatically.
Activation via control stick
Since there is no warning flasher button in the system with this system configuration, use the
following new menu item for activation.
Drive mode
Drive 1
Drive 2
l
Drive 3
l
Drive 4
l
Drive-away lock
Additional functions
...
l
l
After selecting the entry "Drive-away lock” (USER) the control will acknowledge this with an
acoustic signal and then switch off automatically.
Switching the System on with activated Drive-away Lock
System without LCD
After switching on and the LED test, the speed level LEDs will quickly light up one after
another (LED 1, 2, 3, 4, 3, 2, 1, 2, 3, 4, 3, ... with only one LED active at a time). Now move
the joystick to the front end position until a beep signal occurs after approx. 3 seconds. Next,
move the joystick to the rear until again a beep signal occurs after approx. 3 seconds. Now
the drive-away lock is deactivated and driving is possible. If the joystick is not moved correctly,
the drive-away lock remains activated, even if the joystick is moved once again and this time
correctly. After 10 seconds the control switches off again automatically.
System with LCD
After switching on, an information window appears
on the LCD. The following example illustrates the kind
of display. For the rest, the system is analog to the
version without LCD (see above).
Fig. 19: Drive-away lock
B600 – Instructions for Use
75
Putting into Operation
10.7
Horn
Press button 2 to sound the horn.
10.8
Battery Indicator
The battery indicator displays different functions:
l
l
l
Readiness for operation of the control unit
Remaining battery capacity
Status and error messages
When in driving mode, the indicator is lit on a steady basis and shows the remaining
battery capacity. The indicator consists of 7 segments, each segment representing
approximately 14 % of the total capacity. With a distance range of approx. 35 km on even
ground at constant speed, each segment corresponds to a distance range of approx.
5 km.
Information regarding correct use of the battery indicator:
Battery is charged
Charge the battery, if possible
Battery charging is urgently
required
Immediately after switching on, the indicator shows the battery capacity status saved
before the wheelchair was switched off the last time.
The exact state of the remaining capacity will be displayed after driving for a short
moment.
10.9
Charging
The batteries’ capacity determines the distance range of the B600 power wheelchair.
Many factors have an influence on the batteries’ capacity. Besides the temperature, the
age of the batteries and the time and extent of driving, the way you charge the batteries
has considerable effects on the capacity and thus on the distance range.
Driving over a longer period of time with only the red LEDs of the battery indicator lit will
result in battery discharge and thus battery damage. In addition, there is the risk that the
B600 may stop due to zero battery capacity and bring the user into a dangerous situation.
If the B600 power wheelchair is used daily, we recommend connecting the battery
charger over night to always obtain full capacity and thus the maximal distance range.
If the B600 is not used for a longer period of time, a charging cycle must be carried out
once a week to maintain the batteries’ capacity.
76
B600 – Instructions for Use
Putting into Operation
Note!
The warranty is void in case of damages that result from a totally
discharged battery!
Note!
When the B600 is not used over extended periods of time,
disconnect the main fuse or charge the B600 power wheelchair
once a week.
Note!
Only the battery charger provided by Otto Bock HealthCare
GmbH may be used for charging.
Before connecting the battery charger ensure the control is switched off, now connect the
battery charger to the charging receptacle (Fig. 20). The charging receptacle is integrated in
the left or right lateral covering. Next, connect the battery charger to a wall socket.
The indications on the type plate of the battery charger must be identical to the voltage of the
mains supply of your country.
Charging will start automatically.
The current charging state is indicated by the LEDs of the battery charger.
Battery Charger
The battery charger is designed for maintenance-free (gel) and low-maintenance (acid)
lead batteries with a nominal voltage of 24 V and a nominal capacity of C5= 50..80 Ah. For
optimal charging of both kinds of batteries two charging characteristic curves are saved in
the charger. Upon delivery of the wheelchair, the battery charger‘s characteristic curve will
be factory-set in accordance with the kind of battery the wheelchair is equipped with. If the
battery charger is to be used with another wheelchair or if new batteries are installed in the
wheelchair, the characteristic curve must be checked. The kind of battery can be changed
by means of a switch located on the underside of the charger (covered by a green adhesive
label) and is indicated by a flashing signal of the green LED at the beginning of the charging
process.
Attention!
Wrong setting of the characteristic curve can result in permanent
damage to the battery!
green
green
lowmaintenance
maintenancefree (gel)
Fig. 20: Charging receptacle
B600 – Instructions for Use
77
Putting into Operation
Note!
During battery charging, the control must be switched off.
The complete charging current will be fed into the battery.
The battery charger features 3 LED indicator lamps:
Yellow LED is lit
Battery is charging
Green LED if flashing
1 time at the
Characteristic curve for low-maintenance
beginning of the
lead batteries (acid)
charging process
2 times at the
Characteristic curve for maintenance-free
beginning of the
lead batteries (gel)
charging process
Permanent
flashing:
Battery is charged to approx. 80%
Green LED is lit
Battery is fully charged
Red LED is lit
Defective battery; battery is missing;
charging time has been exceeded
No LED is lit
No mains supply
The battery charger features a programmed recharging phase.
After approx. 8 hours of full charging of a previously discharged battery, the battery
charger can remain connected without having to fear overcharging or damage to the
battery. When the charging process is complete, first disconnect the battery charger from
the mains supply and then disconnect the battery charger from the charging receptacle.
Note!
The rubber cap must be re-inserted into the charging receptacle
to protect it from humidity.
Switching the wheelchair control on again will make the B600 ready for driving.
Note!
During battery charging, explosive gases can develop. For this
reason, provide for sufficient ventilation when using the battery
charger in closed rooms.
Do not smoke when being near the battery charger or handling
the batteries!
Avoid fire and sparking!
Do not cover the vent slots!
l
l
l
l
l
78
Use the battery charger only within the indicated temperature range and humidity limits
(see section "Technical Data of the Battery Charger").
Always place the battery charger with its rubber feet on a level surface.
Protect the battery charger from direct sunlight, since this would additionally heat up
the charger.
Avoid dust and dirt from affecting the function of the battery charger.
To clean the charger, use a dry cloth.
B600 – Instructions for Use
Putting into Operation
10.10 Batteries
The standard version of the B600 power wheelchair includes two 12 V lead acid batteries
with a capacity of 60 Ah.
During the charging process, the water acid mixture is converted into gas for a short time.
The liquid level must be checked on a monthly basis and be topped up if required.
For maintenance purposes and for mounting/dismounting the batteries, the B600 power
wheelchair features a battery drawer (Fig. 21).
Fig. 21: Battery drawer
Push the release bolt, which is located in the recess below the bumper (Fig. 22),
upwards. Now you can easily pull out the drawer to the rear.
Fig. 22: Release bolt for battery drawer
B600 – Instructions for Use
79
Putting into Operation
To remove the cover of the battery case undo the snap lock of the safety strap (Fig. 23).
Fig. 23: Snap lock of the safety strap
Note!
Before making any maintenance work on the batteries, please
read the warning instructions of the battery’s manufacturer
thoroughly!
Once the cover is removed, you have free access to the batteries from above (Fig. 24).
Fig. 24: Battery cover
Note!
When checking the battery’s filling level of the B600 power
wheelchair, make sure the B600 is standing on level ground!
Unscrew the cover caps of the individual chambers using a large screwdriver to see the
battery’s liquid level on the acid level markings. If the liquid is below this measure, top up
with distilled water.
Maintenance-free lead gel batteries can be used as an option.
80
B600 – Instructions for Use
Status and Error Message
Attention!
When closing the battery drawer make sure that the release
bolt correctly snaps into place. The release bolt must engage in
the drive unit sustainer in the recess provided for this purpose!
If correctly locked, the bolt is visible and clearly tangible on the
underside of the drive unit sustainer.
Fig. 25: Release bolt engaged
10.11 Fuse
The 80 A fuse is located at the rear end of the battery case.
To replace the fuse, undo the lateral snap lock to open the cover of the fuse holder
(Fig. 26).
After replacing the fuse, make sure that the cover properly snaps into place.
Attention!
During any maintenance work on the B600 where the battery
cover is open, the fuse must always be removed for safety
reasons.
Fig. 26: Fuse holder
B600 – Instructions for Use
81
Status and Error Message
11
Status and Error Analysis
The MCS control has different indication categories for the status and error analysis.
Depending on the effects on the system, the control differentiates the following indications:
l
Warning
l
Error
l
Defect
l
Failure
In the following tables, the indication codes with the corresponding error groups as well
as the possible causes and measures are described.
11.1
Warning
A warning indicates a status or malfunction of individual components.
Components without error are not restricted in their function.
This means, for example, that the light function remains intact in the case that one
direction indicator has failed.
Display:
Indicator
The LEDs flash 2 times per second for a duration of 4 seconds.
In addition, 2 acoustic signals are emitted.
This process is repeated every minute or happens once when the
system is started.
Error group
Possible cause
Possible Measure
Battery warning
Battery voltage too high
or too low
Temperature
warning
Overheated impulse control
(controller) or motor
Charge or discharge
depending on the battery
indicator
Reduce driving speed
/ let cool down
Impulse control
warning
Motor regulation
problem
Restart
Multifunction button
Connection error /
Check connection cable /
Driving is
restricted
Certain seat function has
been applied (lift seat)
Bring seat in normal
position
Input / output
module warning
Motor is not connected,
overloaded motor,
output (e.g. defective
direction indicator)
Battery charger is connected
Check connection cables /
lamp contacts
or On/Off button
Battery charger
blocking
82
Button defect
buttons
Disconnect the battery
charger after charging
B600 – Instructions for Use
Status and Error Analysis
11.2
Errors
An error affects the function of the MCS control. The system is not fully operational until
the error has been eliminated.
Display:
Flashing signals of the LEDs: 4 x / second
Acoustic signal: 2 x / second.
Indicator
Error group
Possible cause
Possible measure
Battery error
Battery is discharged
or overcharged
Charge or discharge
depending on the
battery indicator
Right drive motor
or brake
Right drive motor or
brake are not
connected,
poor contact or
cable break
Check motor cable
and plug connection
on the controller
Left drive motor
or brake
Left drive motor or
brake are not
connected,
poor contact or
cable break
Check motor cable
and plug connection
on the controller
Error of input module
Joystick is not in midposition,
not calibrated during
system start,
defective input module
Check the
mechanical midposition and that the
joystick moves
easily / restart
Error of output module
Defective connection
to the output module /
defective module
Check plug contact for
firm seat / restart
Error of impulse control
Error in the controller
Check plug contacts
for firm seat
/ restart
Communication error
Module is not
connected,
defective connection
Check plug contacts
for firm seat
/ restart
B600 – Instructions for Use
83
Options
11.3
Defect / Failure
A defect represents a serious failure of a system component.
After elimination of the error, the system will be re-activated by re-starting it.
A failure represents the most serious possible error status, which results in an immediate
emergency stop of the system.
Display:
The LEDs continually light up one after another accompanied
by an acoustic signal
Indicator
Error group
Possible cause
Possible measure
Incorrect system
configuration
On/Off module is missing
or defective,
two equal modules are
competing,
wrong input device
configurated / connected
Connect the
input devices,
check the plug
connection
of the modules,
restart
Higher control device
defective
Lost of the position
of the joystick
Check the
mechanical
mid-position and if
the joystick moves
easily / restart
If you don’t manage to directly eliminate the occurring errors with the described measures,
the specialist dealer has the possibility to read the exact error code with the hand
programming device and make a better system analysis.
The errors which occurred before are saved as error history and give information on all
malfunctions which ever have occurred.
This will help to determine the further procedure of repair of the system.
12
Options
The B600 power wheelchair has been designed as a modular system.
The MCS control offers the possibility to use various electrical additional functions as well
as specially adapted input devices.
In addition, other accessory components can be added to the wheelchair.
The complete range of accessory components is listed on the Order Form and in the
Wheelchair Accessories Catalogue.
Some important options are described in the following.
84
B600 – Instructions for Use
Options
12.1
Lift Seat
The B600 power wheelchair can be optionally equipped with a lift seat. This option allows
to lift the seat by up to 40 cm by means of a motor drive. To control the seat lift function,
either the joystick is used in the "additional function" mode or the push-button module is
used. The driving function remains available even with lifted seat. Because of the lower
stability of the power wheelchair against tipping, the maximum speed is reduced as soon
as the lift seat leaves the lowest position. On the control panel this is indicated by flashing
of the "Drive" LED. If an LCD is connected, a "snail symbol" appears to indicate the creep
speed.
Fig. 27:
Snail symbol indicates creep speed
To provide safety when using the lift seat function, the following instructions must be
observed:
Danger!
Use the lift seat function on level ground only.
Danger!
The driving operation with reduced speed is only to be used for
manoeuvring.
Attention!
Maximum load capacity of the lift seat is 100 kg (220 lbs).
Danger!
Use the lift seat function only with vertically adjusted backrest.
Danger!
In the section between seat frame and wheelchair frame there
are pinch points which are caused by the construction. This risk
of getting pinched must be explained to attendants.
Attention!
Ensure that there are no objects in the lifting range.
B600 – Instructions for Use
85
Options
Danger!
If the wheelchair does not switch to creep speed as soon as
the lift seat function is activated, immediately contact your
wheelchair supplier to eliminate the fault. Until fault repair, the
power wheelchair may only be used with the seat in its lowest
position.
Attention!
The use of the lift seat function (lifting and lowering) is restricted
to a duration of 6 minutes per hour.
Danger!
When the mounting position of the lift seat device or of the
patient seat is changed, there is the risk of tipping of the
wheelchair.
Danger!
When retrofitting or changing the seat lift device, the instructions
given in the Service Instructions must be observed.
86
B600 – Instructions for Use
Options
12.2
Electric Seat Tilt
The electric seat tilt function allows seat tilt of up to 30° from the horizontal (Fig. 28). The
integrated shift of the center of gravity improves the stability with maximal seat tilt. To
control the seat tilt, the joystick is used in the "additional function" mode.
Fig. 28: Electric seat tilt
Attention!
Be particularly careful when driving on inclines with the seat in tilt
position, because the stability against tipping is reduced!
12.3
Spring-mounted Front Wheels
Standard equipment of the B600 power wheelchair includes spring-mounted rear wheels.
To increase driving comfort, the B600 offers the possibility to be equipped with springmounted front wheels, which provide for better adherence to the ground, especially when
driving on uneven terrain (Fig. 29).
Fig. 29: Spring-mounted front wheels
B600 – Instructions for Use
87
Options
12.4
Front Wheel Swivel Lock
In most cases when driving onto ramps or into elevators the wheelchair requires to be
driven precisely in a straight line.
The front wheel swivel lock option of the B600 power wheelchair offers this possibility by
locking the front wheels in the forward position.
This prevents the wheelchair from turning.
Slightly rotate the folding lever on the front frame to the side.
The folding lever will jump out of its normal mid-position (Fig. 30).
Fig. 30: Engaging the swivel lock
A bolt is released from the frame and engages in the front caster fork as soon as the
straight forward position is reached. The wheelchair can no longer turn.
Now the B600 can drive straight forward or backward.
To release: Turn the folding lever back to the mid-position where it will disengage the bolt
from the front caster fork (Fig. 31).
Fig. 31: Disengaging the swivel lock
88
B600 – Instructions for Use
Options
12.5
Elevating Footrests
12.5.1 Height Adjustment
By loosening the screw at the footrest hanger, the footrest height can be adjusted to
suit the individual lower leg length and compensate for the seat cushion height you use.
There are five threaded holes in the footrest hanger for realization of the five positions
of height adjustment.
Note!
Snugly re-tighten all screws and nuts.
12.5.2 Elevating the Footrests
Either apply a light pressure to the footplate and raise the leg or raise the footrest by
hand to the required height.
After you have reached the desired height, the footrests will engage under weight
bearing in one of the ratchet points.
To release the footrest lock, slightly lift the footrest and depress the lever located on the
outside of upper footrest pivot point.
When you let go of the release lever, the footrest will engage in the next ratchet
position.
12.6
Electric Footrests
To avoid permanent pressure loads, the B600 offers the possibility for mounting electric
footrests (Fig. 32).
In the control’s additional function menu, you can operate the right and left footrest
separately as well as both at the same time.
Fig. 32: Electric footrests
B600 – Instructions for Use
89
Options
12.7
Electric Back Angle Adjustment of the Standard Seat
It is possible to equip the standard seat with an electric back angle adjustment (Fig. 33).
Attention!
Be particularly careful when driving on inclines with the back inclined
to the rear, because the stability against tipping is reduced!
Fig. 33: Back angle adjustment
To obtain a low folding height for transport, release the cross bolt at the lower end of the
drive unit by pushing the lever upward (Fig. 34). Remove the side panels and fold down
the back part onto the seat bottom. For unfolding, unfold the back and press the drive unit
onto the lock to engage the bolt.
Fig. 34: Release bolt for back angle adjustment
90
B600 – Instructions for Use
Options
Note!
Make sure that the backrest firmly locks in place!
12.8
Recaro Seat
The B600 power wheelchair can be equipped with different Recaro seat models.
The turning handle on the right or left side of the backrest is used to adjust the back
angle.
To fold down the backrest, a release handle is used, which is located laterally at the
backrest. By pulling the release handle upward, the backrest can be folded down to the
front.
The Recaro seat can be equipped with an electric back angle adjustment. To control the
electric back angle adjustment, the menu "Additional functions" of the wheelchair control
is used.
The Recaro seat can easily be removed from the chassis.
Way of proceeding:
- Pull at the release strap which is located below the anterior part of the seat bottom.
- Loosen the two locking bolts which lock the seat to the right and left seat frame.
- To release the posterior seat attachment from the retainer bushings, slightly tilt the seat
to the rear and slide back a little.
- Remove the Recaro seat.
- Now you have free access for any maintenance work.
- For remounting, place the posterior edge of the Recaro seat on the end of the seat
frame.
- Slide the seat forwards until the posterior seat atachment hangs in the retainer
bushings.
- Tilt the seat to the front until the locking bolts engage with the seat frame.
Attention!
Make sure when mounting the Recaro seat, that the seat is securely
attached to the retainer bushings and that the anterior locking bolts
have engaged up to the key ring!
12.9
Control Panel
12.9.1 Lower Position Mounting
A special control panel holder can be mounted as an option allowing the control panel to
be mounted and adjusted downwards.
To do this, loosen the attachment screw (Fig. 35) and adapt the height of the control
panel and joystick height to the armrest.
B600 – Instructions for Use
91
Options
Attention!
Make sure to snugly re-tighten the screws and nuts after all
adjustments!
Fig. 35: Control panel, lower position mounting
12.9.2 Swing-away Control Panel
To allow the user to drive the B600 power wheelchair closer to a table or even below the
edge of a table, the control panel can be swung to the side with a special control panel
holder.
Way of proceeding:
- By applying slight pressure, press the control panel holder to the side to release the
pivot element.
- The control panel can now be swung away to the back up to the armrest (Fig. 37).
- When bringing the control panel back to its original position, the pivot element engages
automatically.
Fig. 36: Release lever
92
B600 – Instructions for Use
Options
Fig. 37: Control panel, swing-away to the side
12.10 Delta Control Panel
The two-piece Delta control panel can be mounted to allow angle adjustment of the
control panel.
Loosen by approx. 1 turn the adjustment screw which is located below the black cover
cap.
Now you can change the angle of the indicator / push button module.
Firmly re-tighten the screw after making adjustments.
The Delta control panel can be used together with the option "control for attendant and
table-top control".
12.11 LCD
When special controls such as chin control or blow-and-suck control are used, the LCD
module is used as indicator module.
When using the control panel, the LCD module is very helpful (Fig. 38).
In the driving mode the display shows the speed level, speed and the distance covered.
To increase the speed level, shortly press the mode button on the control panel.
The joystick is used for the drive function.
To change from driving mode to menu mode hold the mode button depressed for a while
(Fig. 39). Here you can change the speed level and control additional functions such as
lights and horn.
B600 – Instructions for Use
93
Options
Fig. 38: LCD module
Fig. 39: Change from driving mode to menu mode
Menu control:
Joystick to the front
>>
go up in the menu
Joystick to the rear
>>
go down in the menu
Joystick to the right
>>
select in the menu
Joystick to the left
>>
one level upward in the menu
Mode button
>>
go back to driving mode
When different input devices are used, the wheelchair will be controlled by the module
which was used to switch the B600 on.
12.12 Blow-and-Suck Control
When the blow-and-suck control is used, the drive and additional functions are controlled
by different combinations of blow and suck instructions.
In addition, the multifunction switch (MFS) is used for moving within the menu (Fig. 40).
With slow driving speed, the steering position is displayed on the LCD module.
94
B600 – Instructions for Use
Options
Fig. 40: Blow-and-suck control
There are two types of instructions:
Short sucking or blowing
Long sucking or blowing
Menu control
Control ON:
Control OFF:
Go up:
Go down:
To the right / select:
To the left:
One menu level upward:
long pressure on MFS
long pressure on MFS
2 x short blowing
2 x short sucking
1 x short blowing
1 x short sucking
2 x short sucking / short pressure on MFS
Continued mode
The wheelchair moves until a new instruction is given.
Forward travel:
Reverse motion:
Right turn during driving:
Left turn during driving:
Right turn directly after starting:
Left turn directly after starting:
Emergency stop:
Change speed level (1,2..,5,1,2..):
Leave driving mode:
1 x short and 1 x long blowing
1 x short and 1 x long sucking
1 x short blowing
1 x short sucking
1 x long blowing
1 x long sucking
long pressure on MFS
2 x short blowing
2 x short sucking
Un-continued mode
The wheelchair moves as long as the instruction is given.
Forward travel:
Reverse motion:
Right turn:
Left turn:
Emergency stop:
Leave driving mode:
B600 – Instructions for Use
1 x short and 1 x long blowing
1 x short and 1 x long sucking
1 x long blowing
1 x long sucking
Push on MFS / long sucking or blowing
2 x short sucking
95
Options
12.13 Push Button Module
The push button module offers the possibility to control electric additional functions
during normal driving. 5 pairs of push buttons allow to control the seat tilt, electric back
adjustment, lift function, as well as the right and left footrest.
Fig. 41: Push button module
12.14 Chin Control
The chin control allows the user to control the wheelchair functions with a small joystick
which can be positioned directly at the user’s chin by means of a swivel arm.
A separate multifunction switch is used to control all required switch functions (Fig. 42).
The multifunction switch has three possible positions.
The I/O button (on top) is used to switch the control on and off. The mode button (below)
can be used (as with the normal control panel) to increase the speed level and – when
depressed for a while – to leave the driving mode.
The swivel button (right) is used to swivel the joystick arm.
As long as this button is being pressed, the joystick arm moves up to the user.
When pressed again, the joystick arm will change direction and move away from the user.
Another swivel switch is attached to the rear side of the headrest to also allow the
attendant to control this function.
The joystick’s functions are similar to those of the standard joystick.
Fig. 42: Chin control
96
B600 – Instructions for Use
Options
Attention!
When a special control is used, the specialist dealer must instruct the
user in detail on how to use the control!
Other special controls such as LED-push button control, 5-button keyboard control,
Buddy-Button control and environment control are available in conjunction with the LCD
module.
12.15 External Mileage Indicator
As an optional extra you can have fitted to the protective bow of the control panel an
external mileage indicator, which includes a speedometer, a day’s mileage indicator, a
total mileage indicator and a time indicator (Fig. 43).
Fig. 43: Mileage indicator
If the display shows m/h in the left upper corner, this means the speed indicator is active.
Using the yellow button you can switch to the day’s mileage indicator which shows three
flashing arrows on the left side of the display.
To reset the day’s mileage indicator to zero, depress and hold the button for 3 seconds.
Shortly press the button again to display the total mileage indicator.
Press again to see the time display.
To set the time, depress and hold the button for 3 seconds.
12: and 24: will appear in alternating manner.
To activate the 24-hour display, press the button whilst the 24: is displayed, to activate the
12-hour display, press the button whilst the 12: is displayed.
Now the time is displayed and the digits are automatically advanced one after the other.
To set the time, depress the button until the desired digits are shown on the display.
When the total mileage indicator is active you can change between m/h and km/h by
pressing and holding the yellow button for 3 seconds. For the mileage measurement the
wheel circumference needs to be entered here.
To calculate the wheel circumference use the following formula:
B600 – Instructions for Use
97
Options
Wheel size 14"
Inches in cm
14" x 25.4 = 355.6 mm
U = d x π 35.56 mm x 3.1416 = value to be entered
12.16 Lap Belt
The B600 power wheelchair can be equipped with a lap belt (Fig. 44).
The lap belt serves exclusively as a safety belt when driving the power wheelchair.
! Important: The lap belt must never be used as a safety belt for the user when being
transported in the wheelchair in a motor vehicle.
Fig. 44: Lap belt
12.17 Other Options
-
Head support fixture (Fig. 45)
For the attachment of headrests (see Accessories Catalogue)
Fig. 45: Head support fixture
98
B600 – Instructions for Use
Maintenance and Cleaning
- Curb Climbing Assist
For clearing curbs and steps having a maximal height of 10 cm
- Puncture Resistant Tyres
Solid rubber tyres
- Anatomically Shaped Seating Systems
Different models of "Recaro” seats are available for greater comfort and more
adaptation possibilities
- Belt Systems
Lap belt, chest belt, and four-way chest strap kit from Schroth
- Seating Shell Interface
For the adaption of special seating shells; control panel holder for seating shells
- Armrest Accessories
Special adapters for the armrests (see Accessories Catalogue)
- Attendant Control
Separate control panel at the backrest
- Joystick Accessories
Fork for tetraplegics, STICK S80, soft ball, golf ball, flexible control stick shaft
- Protective Bow for Control Panel
Metal bow for protecting the control panel against shocks and damage
- Crutch Holder
- Folding Rearview Mirror
- Tray
Attachable tray top
- Accessories Case, Accessories Bag, Pocket for mobile phone
Other optional add-on components are available on the Order Form and in the
Accessories Catalogue.
13
Maintenance and Cleaning
13.1
Maintenance
The function of the B600 power wheelchair must be checked before each use.
The items listed in the following table must be checked by the user at the indicated
intervals. Failure to carry out these simple checks may lead to problems arising that could
invalidate the warranty.
B600 – Instructions for Use
99
Maintenance and Cleaning
To be checked
Batteries
monthly
Electronics
X
X
Liquid / acid level
(not with gel batteries)
Damage of the housing
Electric function
Lighting
Brake
weekly
Tyre air pressure (printed on
the side wall of the tyre)
Sufficient tread depth
Tyres
Brake
daily
X
X
X
Control without
error message
Battery charger doesn’t show
any error messages on the LEDs
Manipulate brake lever
with the control
switched on
>> each time before driving <<
X
X
Adjustment of the brake
release lever
X
Attention!
When the brake lever is manipulated, the wheelchair control emits an
error signal on the control panel. If this function is not ensured, the
specialist dealer must make a corresponding setting!
If you have any problems carrying out this maintenance work, please contact an
authorised dealer (section "Service").
13.2
Defective Lighting
If a housing or lamp is defective, the corresponding components can be ordered from your
specialist dealer.
To change the halogen lamp of the front light, slightly press the black engaging lever at
the lower end of the lamp. Now the pane can be folded to the front and removed (Fig. 46).
Take the lamp by the lock ring, pull it out and replace it with a new one.
When mounting, make sure that the notch on the lamp socket is correctly positioned.
100
B600 – Instructions for Use
Maintenance and Cleaning
Fig. 46: Replacing the front light
For changing the rear direction indicators and the rear lights, unscrew the pane.
Lightly press in the lamp and turn it to the left by approx. 90°, then remove it (Fig. 47).
Insert the matching lamp and turn it to the right to provide function.
Further information on the lamps used is contained in the section "Technical Data".
Note!
When re-inserting the panes make sure they are seated exactly
on the housing and check that the screws are firmly tightened.
Avoid that moisture can enter the lamps!
Fig. 47: Replacing rear direction indicators and rear lamps
B600 – Instructions for Use
101
Maintenance and Cleaning
13.3
Changing Tyres
Way of proceeding:
- For dismounting the rear wheels, loosen the Phillips head screw in the middle of the
wheel and remove the wheel cover (Fig. 48).
- Loosen the screw of the wheel (Fig. 49) and pull off the wheel.
- Disassemble the two-piece rim by loosening the four Allen head screws.
- The defective tube is freely accessible and can be replaced.
- For dismounting the front tyres, loosen the screw of the axle and remove the axle.
- Again, disassemble the two-piece rim and replace the defective tube.
Fig. 48: Wheel cover
Fig. 49: Screw of the wheel
102
B600 – Instructions for Use
Disposal
13.4
Cleaning
When cleaning the B600 power wheelchair, the electrical components must not come in
contact with water.
Note!
- For cleaning the control panel, battery charger, armrest and
seat upholstery use only a damp piece of cloth and a mild
cleansing solution.
- For cleaning the backrest and seat cushion use a dry brush.
- For cleaning wheels and frame use a damp plastic brush.
- Please prevent the electronics, motors and batteries from
direct contact with water.
- Do not use any scouring agents.
- Never use a water hose or high-pressure cleaning apparatus
for cleaning the wheelchair.
- Please ensure your B600 power wheelchair is checked and
serviced at least ONCE a year by an authorised dealer!
14
Disposal
For disposal of the B600 power wheelchair, the disposal regulations of the respective
country shall apply.
B600 – Instructions for Use
103
Technical Data of the B600
15
Technical Data of the B600
Measurements and weights
Seat width:
Seat depth:
Seat height:
Armrest height:
Armrest length:
Lower leg length:
Back height:
Back angle:
Overall width:
Overall height:
Overall length:
Turning radius:
Tyre size:
Air pressure:
Weight when empty:
Maximum load capacity:
front
rear
front
38 - 42 cm or 43 - 48 cm
38 - 46 cm or 42 - 50 cm
45 - 60 cm
24 - 36 cm
26 cm
25 - 34 cm or 35 - 44 cm
or 45 - 54 cm
45 or 55 cm
-9/1/11/21° or 0/10/20/30°
64.5 cm
103 cm
108 cm
155 cm
8’’ - 10’’
14’’
printed on the sidewall of the tyre
115 kg
120 kg (optionally 180 kg)
Electrical installation
Operating voltage:
Batteries:
Electronics:
Lighting:
Battery charger:
Fuse:
wet cell batteries
gel batteries
model
front direction indicator
front light
rear direction indicator
rear light
model
input
output
24 V
2 x 12 V, 60 Ah (5 h)
2 x 12 V, 50 Ah (5 h)
MCS
24 V DC max. 100 A
H21W 12 V BAY9s
HMP 08 2.4 W, 6 V, PX13.5s
C21W 12 V, BA15s
C5W 6 V, BA15s
MEG 2408
230 V, 60/50 Hz
24 V, DC/8 A
80 A
Driving data
Speed:
Climbing ability:
Obstacle height that can be cleared:
Distance range:
6 km/h / 10 km/h
17 %
5 cm
approx. 35 km
Technical modifications reserved.
104
B600 – Instructions for Use
Technical Data of the Battery Charger
16
Technical Data of the Battery Charger
Automatic battery charger with computer-controlled characteristic curve for 24 V lead acid
batteries.
Power requirements:
230 V -10 %, +6 %
Mains frequency:
50 Hz ± 4 %
Protection class:
1 (protective conductor)
Charging connection:
24 VDC
Nominal charging current:
8A
Residual ripple:
<1 %
Charging characteristic curve:
IUU with trickle charging phase,
computer-controlled
Primary fuse:
T4G fuse link, not accessible from outside
Secondary fuse:
Electronic, reversible reverse battery
protection,
short circuit-proof, idling-proof,
overheating protection
Protective system:
IP 21
Ambient temperature:
-10 °C to + 40 °C
Indicator:
2 LEDs
Weight:
1.7 kg
Dimensions (WxHxD):
105 x 65 x 205 mm
B600 – Instructions for Use
105
Terms of Extended Warranty
17
Terms of Extended Warranty
17.1
Subject of the Extended Warranty
-
This extended warranty applies to wheelchairs.
- The extended warranty comprises claims of the medical supply store / service
company against Otto Bock HealthCare GmbH and does not affect the statutory
warranty claims of the ultimate consumer towards the medical supply store or any
other service company being responsible for the fitting of the patient.
17.2
Scope of the Extended Warranty
- Otto Bock HealthCare guarantees, subject to the adherence to the conditions
described in paragraph 3 and subject to the observance of the exclusions according
to paragraph 4, that beyond the statutory warranty period, up to 4 years after the first
use no construction faults, fabrication faults or material faults will occur on frame parts
and cross braces of manual wheelchairs fabricated in series production and on frame
parts of power wheelchairs fabricated in series production that considerably impair the
wheelchair’s usability.
- If 2 years after the first use construction faults, fabrication faults or material faults
occur, Otto Bock HealthCare has the choice either to replace the entire wheelchair or
to replace or repair defective parts of the frame and of the cross braces. This extended
warranty does not entitle the medical supply store / service company to further claims
for reduction, cancellation of the contract or damage.
17.3
Conditions for Laying Claims
The medical supply store / service company can lay claims under the extended warranty,
only if
- it refers to first use,
- the wheelchair has been employed by a healthcare provider authorised by the healthinsurance system,
- the healthcare provider authorised by the health-insurance system passes the complete
fitting on along with a report of defects,
- for the construction of custom fabrications made from the products fabricated in series
production to adapt them to the individual conditions of a patient exclusively medical
products with CE-mark are used and these products are used in conformity with the
functional purpose appropriate for such medical products,
106
B600 – Instructions for Use
Terms of Extended Warranty
- modifications on a wheelchair do not go beyond the adaptation intended by Otto
Bock HealthCare (e.g. adjusting the legrest length) and the use of the accessories
recommended by Otto Bock HealthCare (modular system),
- the one who repairs (adapts) medical products uses exclusively spare parts and addon parts authorised by the manufacturer (original spare parts) and works according to
the provisions given by the manufacturer (see instructions for use).
17.4
Exclusion of the Extended Warranty
The extended warranty is not effective, if Otto Bock HealthCare proves that
- the conditions for laying claims according to paragraph 3 are not complied with,
- the diminution of the wheelchair’s usability is due to unprofessional employment of the
wheelchair especially retrofits which do not conform to the manufacturer’s description,
- the diminution of the wheelchair’s usability is due to normal wear and tear especially of
motors, battery chargers and batteries whose usability is usually limited to one year,
- the diminution of the wheelchair’s usability is due to incorrect storage, transport or
inappropriate as well as unprofessional use and storage,
- the diminution of the wheelchair’s usability is due to a change of the patient’s physical
constitution, e.g. considerable increase in weight,
- the diminution of the wheelchair’s usability is due to force majeure.
17.5
Liability
- For the undertaking of performance under this extended warranty, Otto Bock
HealthCare is liable only for slight negligence in case unessential obligations have
been violated; Otto Bock HealthCare assumes no liability for intentional acts of
persons performing extended warranty service on our behalf. In addition, damages
claims are restricted to the damage foreseeable at the beginning of the undertaking of
performance.
17.6
Incidental Provisions
- Otto Bock HealthCare is allowed to destroy replaced parts three weeks after return
unless the patient or his/her paying party (health insurance company) expressly object.
- Place of fulfillment of performance under this extended warranty is Duderstadt.
- This extended warranty is governed by German civil and commercial law; place of
jurisdiction is Duderstadt.
B600 – Instructions for Use
107
Hersteller/Manufacturer:
Otto Bock HealthCare GmbH
Max-Näder-Straße 15 · D-37115 Duderstadt
National: Telefon (0 55 27) 848 1461/1462/1463 · Fax (0 55 27) 848 14 60
International: Phone +49-5527-848-1304/1562/1590/1594/3663 · Fax +49-5527-848-1676
e-mail: [email protected] · Internet: http://www.ottobock.com
Versandanschrift für Rücksendungen/Address for Returns
Otto Bock HealthCare GmbH
Lindenstraße 13 · D-07426 Königsee
Otto Bock HealthCare GmbH has been certified by the German Society for the Certification of Quality Assurance Systems (DQS)
in accordance with DIN EN ISO 9001 standard, reg. no. 779 (management system)