1
TFA_No. 30.2026_Anleitung_08/13
16.09.2013
12:12 Uhr
AVENUE – Digitales Gartenthermometer mit Solarbeleuchtung
AVENUE – Garden thermometer with solar lighting
AVENUE – Thermomètre de jardin à éclairage solaire
AVENUE – Termometro da giardino con illuminazione solare
AVENUE – Tuinthermometer met zonneverlichting
AVENUE – Termómetro de jardín con iluminación solar
Seite 1
Bedienungsanleitung
Operating Instructions
Mode d’emploi
Istruzioni per l’uso
Gebruiksaanwijzing
Instrucciones para el manejo
Kat. Nr. 30.2026
TFA_No. 30.2026_Anleitung_08/13
16.09.2013
12:12 Uhr
Seite 2
Fig. 1
Fig. 2
P
I
A
G
D
E
F
H
1.2V,AA
Rechargable
N
L
J
MODE
+1
1.5V, AA
Alkaline
-A
-B
-C
O
Side
Front
B
C
K
1.2V,AA
Rechargable
2000 mAH
1.5V, AA
Alkaline
2
M
MODE
+1
-A
-B
-C
+/- 1Hr
3
TFA_No. 30.2026_Anleitung_08/13
16.09.2013
12:12 Uhr
Seite 3
AVENUE – Digitales Gartenthermometer mit Solarbeleuchtung
Vielen Dank, dass Sie sich für dieses Gerät aus dem Hause TFA entschieden haben.
1. Bevor Sie mit dem Gerät arbeiten
• Lesen Sie sich bitte die Bedienungsanleitung genau durch.
• Durch die Beachtung der Bedienungsanleitung vermeiden Sie auch Beschädigungen des
Gerätes und die Gefährdung Ihrer gesetzlichen Mängelrechte durch Fehlgebrauch.
• Für Schäden, die aus Nichtbeachtung dieser Bedienungsanleitung verursacht werden, übernehmen wir keine Haftung.
• Ebenso haften wir nicht für inkorrekte Messwerte und Folgen, die sich aus solchen ergeben
können.
• Beachten Sie besonders die Sicherheitshinweise!
• Bewahren Sie diese Bedienungsanleitung gut auf!
2. Einsatzbereich und alle Vorteile Ihres neuen Gerätes
• Klares funktionales Design
• Großes digitales Display mit 3 verschiedenen Anzeigen:
1. Aktuelle Temperatur
2. Aktuelle Temperatur und Uhrzeit im Wechsel
3. Aktuelle Temperatur, Tageshöchst- und Tiefstwerte und Uhrzeit im Wechsel
• Maxima-Minima-Werte mit automatischer Rückstellung
• Automatische Hintergrundbeleuchtung bei Dunkelheit
• Stab (teilbar) aus Aluminium
• Zum Einstecken in den Boden
• Solarpanel - 180° drehbar
• Wetterfest
3. Zu Ihrer Sicherheit
• Das Produkt ist ausschließlich für den oben beschriebenen Einsatzbereich geeignet. Verwenden
Sie das Produkt nicht anders, als in dieser Anleitung dargestellt wird.
• Das eigenmächtige Reparieren, Umbauen oder Verändern des Gerätes ist nicht gestattet.
• Dieses Gerät ist nicht für medizinische Zwecke oder zur öffentlichen Information geeignet und
nur für den privaten Gebrauch bestimmt.
Vorsicht!
Verletzungsgefahr:
• Bewahren Sie das Gerät und die Batterien außerhalb der Reichweite von Kindern auf.
4
AVENUE – Digitales Gartenthermometer mit Solarbeleuchtung
• Batterien nicht ins Feuer werfen, kurzschließen, auseinander nehmen oder aufladen. Explosionsgefahr!
• Batterien enthalten gesundheitsschädliche Säuren. Um ein Auslaufen der Batterien zu vermeiden,
sollten schwache Batterien möglichst schnell ausgetauscht werden. Beim Hantieren mit ausgelaufenen Batterien chemikalienbeständige Schutzhandschuhe und Schutzbrille tragen!
Wichtige Hinweise zur Produktsicherheit!
• Vorsicht: Das Solarpanel ist empfindlich. Lassen Sie das Gerät nicht fallen und setzen Sie es keinen heftigen Stößen, Erschütterungen oder extremen Temperaturen aus.
• Setzen Sie das Gerät keinen extremen Temperaturen, Vibrationen und Erschütterungen aus.
4. Bestandteile
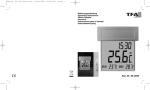
LCD-Anzeige (Fig. 1):
A: Batteriesymbol
B: Anzeige Uhrzeit/Temperatur
C: Symbol Sommerzeit (DST)
D: Automatische Rückstellung (Auto Reset)
E: Displaymodus A, B oder C
F: PM bei 12-Stunden-System
G: Symbol Höchsttemperatur
H: Symbol Tiefsttemperatur
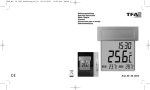
Tasten (Fig. 2):
I: MODE Taste (im Batteriefach)
J: +1 Taste (im Batteriefach)
K: Schiebeschalter A-B-C (im Batteriefach)
L: +/-1Hr Taste
M: ECO Schalter
Gehäuse (Fig. 1+2):
N: Batteriefach (verschraubt)
O: Temperaturfühler
P: Solarpanel
5
TFA_No. 30.2026_Anleitung_08/13
16.09.2013
12:12 Uhr
AVENUE – Digitales Gartenthermometer mit Solarbeleuchtung
Seite 4
5. Inbetriebnahme
• Öffnen Sie mit einem Schraubenzieher das Batteriefach.
• Legen Sie die beigefügten Batterien (oben: wiederaufladbare Batterie 1 x 1,2 V AA für die
Beleuchtung und unten: für die allgemeine Funktion 1 x 1,5 V AA) in das Batteriefach. Achten Sie
auf die richtige Polarität beim Einlegen der Batterien.
• ACHTUNG: Die aufladbare 1,2 V Batterie für die Hintergrundbeleuchtung ist im Auslieferungszustand nicht vollständig geladen. Für die maximale Leistungsfähigkeit empfiehlt es sich,
die aufladbare Batterie vor der ersten Nutzung an einem sonnigen Tag über das Solarpanel
vollständig aufladen zu lassen. Alternativ kann die aufladbare Batterie auch mit einem
gewöhnlichen Akku-Ladegerät aufgeladen werden.
• Ziehen Sie die Schutzfolie vom Display ab.
• Das Gerät ist jetzt betriebsbereit.
• Alle Segmente werden kurz auf dem Display angezeigt.
• 0:00 erscheint im Display und das DST-Symbol
blinkt.
• Gilt momentan die Sommerzeit, drücken Sie zur Bestätigung die +1 Taste, während das Symbol
blinkt. Das DST-Symbol
bleibt im Display stehen.
• Während der Winterzeit drücken Sie noch einmal die +1 Taste und das DST-Symbol
verschwindet.
• Erfolgt keine Eingabe, hört das DST-Symbol
nach 15 Sekunden auf zu blinken und verschwindet.
• Um eine einfache Umstellung der Uhrzeit mit einem Tastendruck zu ermöglichen, ist eine korrekte Einstellung notwendig (siehe Umstellung Sommer-/Winterzeit).
• Die Bedienknöpfe befinden sich im Batteriefach.
5.1 Einstellung der Uhrzeit
• Stellen Sie den Schiebeschalter auf Position B oder C.
• Wenn die Uhrzeit angezeigt wird, gelangen Sie durch Drücken der MODE Taste in den Einstellmodus.
• Die Stundenanzeige blinkt im Display.
• Stellen Sie mit der +1 Taste die gewünschten Stunden ein. Für einen Schnelldurchlauf halten Sie
die Taste gedrückt.
• Drücken Sie nochmals die MODE Taste und stellen Sie auf gleiche Weise die Minuten ein.
• Durch Drücken der MODE Taste kehren Sie in den Normalmodus zurück.
• Das Gerät verlässt automatisch den Einstellungsmodus, wenn ca. 15 Sekunden keine Taste
gedrückt wurde.
6
AVENUE – Digitales Gartenthermometer mit Solarbeleuchtung
5.2 °C/°F Umstellung
• Wenn die Temperatur im Display angezeigt wird, können Sie mit dem +1 Taste die Anzeige von
°C auf °F umschalten, gleichzeitig wechselt das Zeitsystem von 24 auf 12 Stunden.
• PM erscheint nach 12 h im Display.
• Schließen Sie das Batteriefach wieder.
5.3 Umstellung Sommer- /Winterzeit
• Halten Sie die +/-1 Hr Taste außerhalb des Batteriefachs für 3 Sekunden gedrückt, wenn die Uhrzeit angezeigt wird, ändert sich die Sommerzeit in Winterzeit oder umgekehrt (+/-1 Std.).
• Achten Sie auf die richtige Einstellung bei der Inbetriebnahme!
5.4 Auswahl Display-Modus
• Schalterposition A: Aktuelle Temperatur (Display: >)
• Schalterposition B: Aktuelle Temperatur und Uhrzeit im Wechsel (Display: >>)
• Schalterposition C: Aktuelle Temperatur, Tageshöchst- und Tiefstwerte und Uhrzeit im Wechsel
(Display: >>>)
5.5 Höchst- und Tiefsttemperaturen
• Die Maxima- und Minimawerte werden automatisch zurückgestellt: Die Höchsttemperatur um 8
Uhr morgens und die Tiefsttemperatur um 20 Uhr abends. Dafür muss die aktuelle Uhrzeit eingestellt sein.
• Auto Reset blinkt im Display.
5.6 Temperatursensor
• Der silberfarbene Stift ist der Temperatursensor. Dieser sollte sorgsam behandelt und nicht
beschädigt werden. Der Temperaturfühler hat keine Einstellfunktion. Er misst die Temperatur.
5.7 Beleuchtung und Standortwahl
• Durch die Solarzellen wird die mitgelieferte wiederaufladbare Batterie umweltschonend aufgeladen.
• Bitte beachten Sie bei der Standortwahl, dass das Solarpanel mindestens 8 - 10 Stunden am Tag
Licht bekommt, um eine langfristig ausreichende Stromversorgung zu gewährleisten. Das Thermometer verfügt über einen Lichtsensor und schaltet die Beleuchtung bei Dunkelheit zwischen 5
bis 9 Uhr morgens und 18 bis 23 abends Uhr automatisch an. Vermeiden Sie deshalb die Nähe
von künstlichem Licht (z.B. Straßenlaternen).
7
TFA_No. 30.2026_Anleitung_08/13
16.09.2013
12:12 Uhr
AVENUE – Digitales Gartenthermometer mit Solarbeleuchtung
Seite 5
AVENUE – Digitales Gartenthermometer mit Solarbeleuchtung
• Mit dem ECO Schalter können Sie die zeitgesteuerte Beleuchtung an- (links) und ausschalten
(rechts).
• Ist der ECO-Modus nicht aktiviert, wird die Beleuchtung immer eingeschaltet, wenn durch das
Solarpanel entsprechende Dunkelheit registriert wird.
• Wenn das Batteriesymbol im Display erscheint, ist die Spannung in der aufladbaren Batterie
niedrig und die Beleuchtung kann sich vorübergehend ausschalten, bis die Stromversorgung
über das Solarpanel wieder ausreicht.
• Suchen Sie sich einen schattigen Platz aus. Direkte Sonneneinstrahlung verfälscht die Messwerte.
• Drücken Sie den Bodenteller in den Boden.
• Montieren Sie den Stab zusammen und stecken ihn durch das Bohrloch in die Erde. Setzen Sie
das Thermometer auf den Stab und drehen Sie das Solarpanel (180° drehbar) in die Richtung, in
der es die höchste Lichtzufuhr erhält.
6. Pflege und Wartung
• Um die beste Funktionsfähigkeit zu erhalten, sollte das Solar-Panel immer sauber sein. Reinigen
Sie die Solarzellen und das Display mit einem weichen Tuch und eventuell ein wenig Glas- oder
Monitorreiniger. Keine Scheuer- oder Lösungsmittel verwenden!
• Entfernen Sie die Batterie, wenn Sie das Gerät längere Zeit nicht verwenden.
6.1 Batteriewechsel
• Wenn die Anzeige schwächer wird, wechseln Sie bitte die 1,5 V AA Batterie.
• Verwenden Sie Alkaline Batterien. Vergewissern Sie sich, dass die Batterie polrichtig eingelegt
ist.
7. Fehlerbeseitigung
Problem
Keine Anzeige /
Unkorrekte Anzeige
8. Entsorgung
Dieses Produkt wurde unter Verwendung hochwertiger Materialien und Bestandteile hergestellt, die
recycelt und wiederverwendet werden können.
8
Dieses Gerät ist entsprechend der EU-Richtlinie über die Entsorgung von Elektround Elektronik-Altgeräten (WEEE) gekennzeichnet.
Dieses Produkt darf nicht mit dem Hausmüll entsorgt werden. Der Nutzer ist verpflichtet, das Altgerät zur umweltgerechten Entsorgung bei einer ausgewiesenen
Annahmestelle für die Entsorgung von Elektro- und Elektronikgeräten abzugeben.
9. Technische Daten
Messbereich Temperatur:
-25 °C…+70 °C (+13 °F…+158 °F)
Genauigkeit:
±1°C
0°C...+45°C (+32°F...+113°F)
±1.5°C
-25°C...0°C (-13°F…+32°F) und
+45°C...+70°C (+113°F...+158°F)
Auflösung:
0,1 °C
Spannungsversorgung:
1 x 1,2 V AA wiederaufladbare Batterie und
1x 1,5 V AA Batterie
Gehäusemaße:
175 x 38 x 1145 mm
Gewicht:
592 g (nur das Gerät)
Lösung
➜ Batterie polrichtig einlegen
➜ Batterie wechseln
➜ Achten Sie darauf, dass keine Gegenstände das
Solar-Panel abdecken
Batterien und Akkus dürfen keinesfalls in den Hausmüll!
Als Verbraucher sind Sie gesetzlich verpflichtet, gebrauchte Batterien und Akkus zur
umweltgerechten Entsorgung beim Handel oder entsprechenden Sammelstellen
gemäß nationaler oder lokaler Bestimmungen abzugeben.
Die Bezeichnungen für enthaltene Schwermetalle sind:
Cd=Cadmium, Hg=Quecksilber, Pb=Blei
TFA Dostmann GmbH & Co.KG, Zum Ottersberg 12, D-97877 Wertheim.
Diese Anleitung oder Auszüge daraus dürfen nur mit Zustimmung von TFA Dostmann veröffentlicht
werden. Die technischen Daten entsprechen dem Stand bei Drucklegung und können ohne vorherige
Benachrichtigung geändert werden. www.tfa-dostmann.de
08/13
9
TFA_No. 30.2026_Anleitung_08/13
16.09.2013
12:12 Uhr
AVENUE – Garden thermometer with solar lighting
Seite 6
Thank you for choosing this instrument from TFA.
1. Before you start using it
• Please make sure to read the instruction manual carefully.
• Following and respecting the instructions in your manual will prevent damage to your instrument and loss of your statutory rights arising from defects due to incorrect use.
• We shall not be liable for any damage occurring as a result of not following these instructions. Likewise, we take no responsibility for any incorrect readings and for any consequences which may result from them.
• Please take particular note of the safety advice!
• Please keep this instruction manual for future reference.
2. Field of operation and all the benefits of your new instrument at a glance
• Clear functional design
• Large digital display with 3 different modes:
1. Current temperature
2. Current temperature and time in sequence
3. Current, highest and lowest temperature and time in sequence
• Maximum and minimum values with auto reset
• Automatic backlight at dark
• Rod (separable) in aluminium
• For putting in the ground
• Solar panel - 180° rotatable
• Weather resistant
3. For your safety
• This product is exclusively intended for the field of application described above. It should only
be used as described within these instructions.
• Unauthorised repairs, modifications or changes to the product are prohibited.
• This product is not be used for medical purpose or for public information, it is only intended for
home use.
Caution!
Risk of injury:
• Keep this instrument and the batteries out of the reach of children.
10
AVENUE – Garden thermometer with solar lighting
• Batteries must not be thrown into a fire, short-circuited, taken apart or recharged. Risk of explosion!
• Batteries contain harmful acids. Low batteries should be changed as soon as possible to prevent
damage caused by leaking.
• Wear chemical-resistant protective gloves and glasses when handling leaking batteries.
Important information on product safety!
• Attention: The solar panel is fragile. Do not drop the instrument and avoid collisions, vibration
or extreme temperatures.
• Do not place your product near extreme temperatures, vibrations or shocks.
4. Elements
LCD display (Fig. 1):
A: Battery symbol
B: Indication time/temperature
C: Symbol Daylight Saving Time (DST)
D: Automatic reset (Auto Reset)
E: Display mode A, B or C
F: PM at 12-hours system
G: Symbol maximum temperature
H: Symbol minimum temperature
Buttons (Fig. 2):
I: MODE button (in the battery compartment)
J: +1 button (in the battery compartment)
K: Switch A-B-C (in the battery compartment)
L: +/- 1Hr button
M: ECO slide
Housing (Fig. 1-2):
N: Battery compartment (screwed)
O: Temperature probe
P: Solar panel
11
TFA_No. 30.2026_Anleitung_08/13
16.09.2013
AVENUE – Garden thermometer with solar lighting
12:12 Uhr
Seite 7
AVENUE – Garden thermometer with solar lighting
5. Getting started
• Open the battery compartment by a screw driver.
• Insert the batteries (above: rechargeable battery 1 x 1,2 V AA for the illumination; down: battery
1 x 1,5 V AA for all functions) into the battery compartment, observing the correct polarity.
• ATTENTION: The 1.2 V rechargeable battery for the backlight is not fully charged when
shipped. For maximum efficiency it is advisable to have the rechargeable battery fully
charged by the solar panel on a sunny day before the first use. Alternatively, the rechargeable battery can be recharged with an ordinary battery charger.
• Pull the protective foil off the display.
• The unit is now ready to use.
• All LCD segments will light up for about a few seconds
• 00:00 appears on the display and the DST symbol
is flashing.
• Do we have Daylight Saving Time, press +1 button for confirmation while the symbol is flashing
and the DST symbol
remains on the display.
• During standard time press +1 button once again and the DST symbol
disappears.
• Is there no confirmation within 15 seconds the DST symbol
stops flashing and disappears.
• For a simple time switch with only one keypress you have to have a correct setting (see point:
Daylight Saving Time / Standard Time switch)
• The buttons are located inside the battery compartment.
5.3 Daylight Saving Time / Standard Time switch
• When the time appears on the display hold +/-1 Hr button outside the battery compartment for 3
seconds and summertime changes in to wintertime and vice versa (+/-1 hour).
• Please pay attention to the correct setting at the startup procedure.
5.1 Setting of the clock
• Slide the switch to position B or C.
• As soon as the time appears in the display press MODE button to enter the setting mode.
• The hour digit is flashing.
• Press +1 button to set the hours. Hold and press the button for a fast count.
• Press MODE button again and set minutes in the same way.
• Press MODE button again and you will return to normal mode.
• The instrument will quit the setting mode, if there is no button used within 15 seconds period.
5.7 Backlight and fixing
• The supplied battery will be recharged in an environmentally friendly manner by the solar panel.
• Please consider when choosing a location that the solar panel needs at least 8-10 hours of light
per day to guarantee a long-term sufficient power supply. The thermometer is provided with a
light sensor to turn on the light automatically at dark between 5 and 9 o’clock and 18 and 23
o’clock. Avoid the closeness of artificial light (like: street lighting).
• With the ECO slide it is possible to turn the time controlled illumination on (left) or off (right)
• If the ECO mode is not active the illumination will turn on automatically as soon as the solar
panel indicates darkness.
• When the battery symbol appears on the display, the voltage of the rechargeable battery is low
and the back light function can be temporarily disabled, until the power supply by the solar panel
is sufficient again.
• Choose a shady position. Direct sunshine falsifies the measurement.
• Press the plate firmly into the ground.
5.2 Display change °C/°F
• When the display shows the current temperature, press +1 button to change between °C or °F as
temperature unit, at the same time the time system changes from 24 to 12 hour-system.
• PM appears on the display after noon.
• Close the battery compartment again.
12
5.4 Select display mode
• Switch position A: Current temperature (display: >)
• Switch position B: Current temperature and time alternately (display: >>)
• Switch position C: Current temperature, highest/lowest temperature and time alternately (display: >>>)
5.5 Maximum and minimum temperatures
• There is an automatic update of maximum temperature at 8:00 and minimum temperature at
20:00. Please set the actual time to activate this function.
• Auto Reset flashes on the LCD.
5.6 Temperature probe
• The silver pin is the temperature probe. Please take care of it and do not break it. The temperature probe has no adjusting function. It only measures the temperature.
13
TFA_No. 30.2026_Anleitung_08/13
16.09.2013
12:12 Uhr
Seite 8
AVENUE – Garden thermometer with solar lighting
• Mount the rod and put it into the ground passing through the hole in the middle of the plate. Fix
the thermometer on the rod and turn the solar panel (rotatable 180°) to the direction where it
receives the highest light supply.
AVENUE – Garden thermometer with solar lighting
Measuring range temperature:
-25 °C…+70 °C (+13 °F…+158 °F)
Accuracy:
±1°C
0°C...+45°C (+32°F...+113°F)
±1.5°C
-25°C...0°C (-13°F…+32°F) and
+45°C...+70°C (+113°F...+158°F)
6. Care and maintenance
• For best function keep the solar panel always clean. Clean it with a soft cloth and maybe a little
glass- or display cleaner. Do not use solvents or scouring agents.
• Remove the battery if you do not use the product for a long period of time.
6.1 Battery replacement
• Please change the 1.5 V AA battery when the display becomes weak.
• Use alkaline batteries only. Observe correct polarity.
7. Troubleshooting
Problem
No display /
Incorrect indication
Resolution:
0,1 °C
Power consumption:
1x 1.2 V AA rechargeable battery and
1x 1.5 V AA battery
Housing dimension:
175 x 38 x 1145 mm
Weight:
592 g (instrument only)
Solutions
➜ Ensure correct polarity, when inserting the battery
➜ Change the battery
➜ Make sure that no objects cover the solar panel
8. Waste disposal
This product has been manufactured using high-grade materials and components which can be
recycled and reused.
Never dispose of empty batteries and rechargeable batteries in household waste.
As a consumer, you are legally required to take them to your retail store or to appropriate collection sites depending on national or local regulations in order to protect
the environment.
The symbols for the heavy metals contained are:
Cd=cadmium, Hg=mercury, Pb=lead
This instrument is labeled in accordance with the EU Waste Electrical and Electronic
Equipment Directive (WEEE).
Please do not dispose of this instrument in household waste. The user is obligated to
take end-of-life devices to a designated collection point for the disposal of electrical
and electronic equipment, in order to ensure environmentally-compatible disposal.
14
9. Specifications
TFA Dostmann GmbH & Co.KG, Zum Ottersberg 12, D-97877 Wertheim.
No part of this manual may be reproduced without written consent of TFA Dostmann. The technical
data are correct at the time of going to print and may change without prior notice.
www.tfa-dostmann.de
08/13
15
TFA_No. 30.2026_Anleitung_08/13
16.09.2013
12:12 Uhr
Seite 9
AVENUE – Thermomètre de jardin à éclairage solaire
Nous vous remercions d'avoir choisi l'appareil de la Société TFA.
1. Avant d'utiliser l'appareil
• Lisez attentivement le mode d'emploi.
• En respectant ce mode d'emploi, vous éviterez d'endommager votre appareil et de perdre
vos droits résultant d'un défaut pour cause d'utilisation non-conforme.
• Nous n'assumons aucune responsabilité pour des dommages qui auraient été causés par le
non-respect du présent mode d'emploi.
• De même, nous n’assumons aucune responsabilité pour des relevés incorrects et les conséquences qu’ils pourraient engendrer.
• Suivez bien toutes les consignes de sécurité!
• Conservez soigneusement le mode d'emploi!
2. Aperçu du domaine d'utilisation et tous les avantages de votre nouvel appareil
• Design clair et fonctionnel
• Grand écran avec 3 modes différents:
1. Température actuelle
2. Température actuelle et temps réciproquement
3. Température actuelle, maximale et minimale et temps réciproquement
• Valeurs maxima et minima avec réactualisation automatique
• Éclairage automatique à la tombée de la nuit
• Bâton (sécable) en aluminium
• Avec bâton à enficher dans le sol
• Panneau solaire - rotatif 180°
• Résistant aux intempéries
3. Pour votre sécurité
• L'appareil est destiné uniquement à l'utilisation décrite ci-dessus. Ne l'utilisez jamais à d'autres
fins que celles décrites dans le présent mode d'emploi.
• Vous ne devez en aucun cas réparer, démonter ou modifier l'appareil par vous même.
• Cet appareil ne convient ni à utilisation médicale ou l'information publique, il est destiné uniquement à un usage privé.
Attention!
Danger de blessure:
• Gardez l'appareil et les piles hors de la portée des enfants.
16
AVENUE – Thermomètre de jardin à éclairage solaire
• Ne jetez jamais les piles dans le feu, ne les court-circuitez pas, ne les démontez pas et ne les
rechargez pas. Risques d'explosion!
• Les piles contiennent des acides nocifs pour la santé. Une pile faible doit être remplacée le plus
rapidement possible, afin d'éviter une fuite. Pour manipuler des piles qui ont coulé, utilisez des
gants de protection chimique spécialement adaptés et portez des lunettes de protection !
Conseils importants de sécurité du produit!
• Attention: Le panneau solaire est fragile. Ne laissez pas tomber l'appareil et ne l'exposez pas à
chocs, des vibrations excessives ou à des températures extrêmes.
• Évitez d’exposer l’appareil à des températures extrêmes, à des vibrations ou à des chocs.
4. Composants
Affichage (Fig. 1):
A: Symbole de pile
B: Affichage horloge/température
C: Symbole de DST (Daylight Saving Time – heure d’ètè)
D: Remise à zéro automatique (Auto Reset)
E: Mode d’écran A, B ou C
F: PM au système de temps à 12 heures
G: Symbole de température maximale
H: Symbole de température minimale
Touches (Fig. 2):
I: Touche MODE (compartiment à pile)
J: Touche +1 (compartiment à pile)
K: Commutateur A-B-C (compartiment à pile)
L: Touche +/-1Hr
M: Commutateur ECO
Boîtier (Fig. 1+2):
N: Compartiment à pile (vissé)
O: Sonde de température
P: Panneau solaire
17
TFA_No. 30.2026_Anleitung_08/13
16.09.2013
AVENUE – Thermomètre de jardin à éclairage solaire
12:12 Uhr
Seite 10
5. Mise en service
• Ouvrir le compartiment à piles avec un tournevis.
• Introduire les batteries fournies (haut: 1 accu rechargeable 1 x 1,2 V AA pour l'éclairage, et bas:
1 x 1,5 V AA pour le fonctionnement général) dans le compartiment à piles. Pour l'insertion des
batteries, faire attention à la polarisation correcte.
• ATTENTION: La batterie rechargeable de 1,2 V pour l'éclairage arrière n'est pas entièrement
chargée dans son état de livraison. Pour lui donner sa capacité maximale de puissance, il
est recommandé de charger entièrement la batterie rechargeable avant son premier usage
en la mettant sur le panneau solaire par une journée bien ensoleillée. Alternativement on
peut aussi recharger la batterie sur un appareil de chargement d'accus ordinaire.
• Tirer la feuille de protection de l´affichage.
• L´instrument est maintenant prêt à fonctionner.
• Tous les segments LCD s'allument.
• 0:00 apparaît sur l'affichage et le symbole de DST
clignote.
• Si l'heure d'été est en vigueur, presser la touche +1 pour confirmation pendant que le symbole
clignote. Le symbole
reste à l'affichage.
• Pour l'heure d'hiver presser encore une fois la touche +1.
• Si l'on ne saisit rien le symbole de DST
s'arrête de clignoter (15 secondes), puis il disparaît.
• Pour pouvoir changer d'heure par une simple pression de touche, il faut que le réglage soit correct (voir point: Passage heure d'été/heure d’hiver).
• Les touches se trouvent dans le compartiment à pile.
5.1 Réglage de l'heure
•
•
•
•
Pousser le commutateur à la position B ou C.
Lorsque l'heure est affichée, on accède au mode de réglage en pressant la touche MODE.
L'indication de l'heure reluit.
Par la touche +1 vous pouvez régler les heures. Si vous maintenez la touche appuyée, la valeur
augmentera plus vite.
• Presser encore une fois la touche MODE et entrer pareillement les minutes.
• Presser encore la touche MODE afin de retourner en mode normal.
• Le mode de réglage est toujours automatiquement terminé après 15 secondes sans qu'aucune
action de touche ne se produise.
18
AVENUE – Thermomètre de jardin à éclairage solaire
5.2 Commutation °C/°F
• Lorsque la température actuelle est indiquée, l´affichage de la température peut être renversé de
°C en °F en pressant le bouton +1. Si l'on a réglé l'unité de mesure sur Fahrenheit, le format de
l'heure sera automatiquement indiqué sous la forme 12 heures.
• PM apparaît sur l'affichage après midi.
• Refermer le couvercle du compartiment à pile.
5.3 Passage de l’heure d'été à l’heure d’hiver
• Maintenir pressée pendant 3 secondes la touche +/-1 Hr à l'extérieur du compartiment d à pile,
lorsque l'heure est affichée l'heure d'été passe à l'heure d'hiver ou inversement (+/- 1 heure).
• Lors de la mise en service faire attention d'effectuer un réglage correct !
5.4 Mode d’écran
• Commutateur position A: Température actuelle (display: >)
• Commutateur position B: Température actuelle et heure alternante (display: >>)
• Commutateur position C: Température actuelle, maximale, minimale et heure alternante (display:
>>>)
5.5 Températures maximales et minimales
• Les valeurs maximales et minimales sont mises en arrière automatiquement : la température
maximale à 8 le matin et la température minimale à 8 le soir. Pour cela il faut ajuster l’heure
actuelle.
• Auto Reset clignote sur le display.
5.6 Sonde de température
• La sonde de température est le crayon argenté. Il faut traiter la sonde avec précaution et ne pas
l’endommager. La sonde de température ne possède aucune fonction de réglage, elle sert uniquement à mesurer la température.
5.7 Éclairage et fixation
• Le chargement écologique de la pile accu rechargeable fournie par panneau solaire.
• Lors du choix de l'emplacement, assurez-vous que le panneau photovoltaïque soit exposé au
moins 8-10 heures par jour à la lumière, afin de garantir une alimentation électrique suffisante à
long terme. Le thermomètre est équipé d’un capteur de lumière et enclenche automatiquement
l’éclairage dès qu’il fait sombre de 5 à 9 heures et de 18 à 23 heures.
19
TFA_No. 30.2026_Anleitung_08/13
16.09.2013
12:12 Uhr
Seite 11
AVENUE – Thermomètre de jardin à éclairage solaire
AVENUE – Thermomètre de jardin à éclairage solaire
• Avec le commutateur ECO vous pouvez activer (à gauche) et désactiver (à droite) l'éclairage à
commande de temps.
• Si le mode ECO n'est pas activé, l'éclairage s'allume en permanence, lorsque le panneau solaire
détecte le degré d'obscurité correspondant.
• Si le symbole de pile apparaît sur le display, le chargement à pile accu est petit et il est possible
que la lumière se déclenche jusqu'au retour à une alimentation suffisante.
• Choisir un emplacement à l'ombre. Le rayonnement solaire direct fausse les mesures.
• Presser la plate dans le sol.
• Assembler le bâton et l’enficher dans le sol en passant le trou. Mettre le thermomètre sur le
bâton et tournez le panneau solaire (rotatif 180°) dans la direction vers laquelle la lumière est la
plus forte.
9. Caractéristiques techniques
6. Entretien et maintenance
• Afin d’assurer un fonctionnement optimal, veillez à ce que le panneau solaire reste toujours propre. Nettoyez les cellules solaires avec un chiffon doux en ajoutant éventuellement un peu de
produit à vitres ou de produit de nettoyage pour moteur. N’utilisez aucun dissolvant ou agent
abrasif!
• Enlevez la pile, si vous n’utilisez pas votre appareil pendant une durée prolongée.
Plage de mesure température:
-25 °C…+70 °C (+13 °F…+158 °F)
Précision:
±1°C
0°C...+45°C (+32°F...+113°F)
±1.5°C
-25°C...0°C (-13°F…+32°F) et
+45°C...+70°C (+113°F...+158°F)
6.1 Remplacement de la pile
Résolution:
0,1 °C
• Veuillez échanger la pile 1 x 1,5 V AA si l’affichage devient faible.
• Utiliser des batteries alcalines. S'assurer que la batterie soit introduite avec la bonne polarisation.
Alimentation:
Accu rechargeable 1 x 1,2 V AA et
pile 1 x 1,5 V AA
7. Dépannage
Mesure de boîtier:
175 x 38 x 1145 mm
Problème
Solution
Poids:
592 g (appareil seulement)
Aucun affichage /
Indication incorrecte
➜ Contrôlez la bonne polarité de la pile
➜ Changez la pile
➜ Assurez-vous qu'aucun objet ne couvre le panneau solaire
8. Traitement des déchets
Ce produit a été fabriqué avec des matériaux de construction de haute qualité qui peuvent être recyclés et réutilisés.
20
Les piles et accus usagés ne peuvent en aucun cas être jetés dans les ordures ménagères !
En tant qu'utilisateur, vous avez l'obligation légale de rapporter les piles et accus
usagés à votre revendeur ou de les déposez dans une déchetterie proche de votre
domicile conformément à la réglementation nationale et locale.
Les métaux lourds sont désignés comme suit: Cd=cadmium, Hg=mercure, Pb=plomb
Cet appareil est conforme aux normes de l'UE relatives au traitement des déchets
électriques et électroniques (WEEE).
L'appareil usagé ne doit pas être jeté dans les ordures ménagères. L’utilisateur s’engage, pour le respect de l’environnement, à déposer l’appareil usagé dans un centre
de traitement agréé pour les déchets électriques et électroniques.
TFA Dostmann GmbH & Co.KG, Zum Ottersberg 12, D-97877 Wertheim.
La reproduction, même partielle du présent mode d'emploi est strictement interdite sans l'accord
explicite de TFA Dostmann. Les spécifications techniques de ce produit ont été actualisées au
moment de l'impression et peuvent être modifiées, sans avis préalable.
www.tfa-dostmann.de
08/13
21
TFA_No. 30.2026_Anleitung_08/13
16.09.2013
12:12 Uhr
AVENUE – Termometro da giardino con illuminazione solare
Seite 12
Vi ringraziamo per aver scelto l'apparecchio della TFA.
1. Prima di utilizzare l'apparecchio
• Leggete attentamente le istruzioni per l'uso.
• Seguendo le istruzioni per l'uso, eviterete anche di danneggiare il dispositivo e di pregiudicare, a causa di un utilizzo scorretto, i diritti del consumatore che vi spettano per legge.
• Decliniamo ogni responsabilità per i danni derivanti dal mancato rispetto delle presenti
istruzioni per l'uso.
• Allo stesso modo, non siamo responsabili per eventuali misurazioni errate e per le conseguenze che ne possono derivare.
• Prestate particolare attenzione alle misure di sicurezza!
• Conservate con cura queste istruzioni per l'uso!
2. Tutte le applicazioni e tutti i vantaggi del vostro nuovo apparecchio
• Design chiaro e funzionale
• Grande display con 3 modi differenti:
1. Temperatura attuale
2. Temperatura attuale e tempo a turno
3. Temperatura attuale, maximale e minimale e tempo a turno
• Valori massimi e minimi con aggiornamento automatico
• Retroilluminazione automatica in caso di oscurità
• Barra (divisibile) in alluminio
• Da inserire nel terreno
• Pannello solare - girevole 180°
• Resistente alle intemperie
3. Per la vostra sicurezza
• Il prodotto è adatto esclusivamente agli utilizzi di cui sopra. Non utilizzate il prodotto in maniera
diversa da quanto descritto in queste istruzioni.
• Non sono consentite riparazioni, alterazioni o modifiche non autorizzate del dispositivo.
• Questo apparecchio non è adatto a scopi medici né a dimostrazioni pubbliche ma è destinato
esclusivamente ad un uso privato.
Avvertenza!
Pericolo di lesioni:
• Tenete il dispositivo e le batterie lontano dalla portata dei bambini.
22
AVENUE – Termometro da giardino con illuminazione solare
• Non gettare le batterie nel fuoco, non polarizzarle in maniera scorretta, non smontarle e non cercare di ricaricarle. Pericolo di esplosione!
• Le batterie contengono acidi nocivi per la salute. Sostituite quanto prima le batterie quasi scariche, in modo da evitare che si scarichino completamente. Quando si maneggiano batterie esaurite indossate sempre guanti resistenti alle sostanze chimiche e occhiali di protezione.
Avvertenze sulla sicurezza del prodotto!
• Avvertenza: il pannello solare è delicato. Prestare attenzione a non sottoporlo l’apparecchio a
eccessive urti, vibrazioni o temperature estreme.
• Non esporre l'apparecchio a temperature estreme, vibrazioni e urti.
4. Componenti
Display LCD (Fig. 1):
A: Simbolo di batteria
B: Display tempo/temperatura
C: Simbolo DST (Daylight Saving Time – ora legale)
D: Reset automatico (Auto Reset)
E: Modi display A, B o C
F: PM nel formato 12 ore
G: Simbolo temperatura massima
H: Simbolo temperatura minima
Tasti (Fig. 2):
I: Tasto MODE (nel vano batteria)
J: Tasto +1 (nel vano batteria)
K: Commutatore A-B-C (nel vano batteria)
L: Tasto +/- 1Hr
M: Interruttore ECO
Struttura esterna (Fig. 1+2):
N: Vano batteria (fissato con vite)
O: Sonda della temperatura
P: Pannello solare
23
TFA_No. 30.2026_Anleitung_08/13
16.09.2013
12:12 Uhr
AVENUE – Termometro da giardino con illuminazione solare
Seite 13
5. Messa in funzione
• Aprire il vano batteria con un cacciavite.
• Inserire le batterie fornite nel vano batteria (alto: batteria ricaricabile 1 x 1,2 V AA per l'illuminazione, basso: batteria per il funzionamento generale 1 x 1,5 V AA), rispettando attentamente le
polarità indicate.
• Levare il foglio protettivo dal display.
• ATTENZIONE: La batteria da 1,2 V ricaricabile per la retroilluminazione non è completamente
carica al momento della fornitura. Per ottenere le massime prestazioni, prima del primo utilizzo si consiglia di lasciar ricaricare completamente la batteria in un giorno di sole tramite
il pannello solare. In alternativa la batteria ricaricabile può essere ricaricata anche con un
caricabatterie tradizionale.
• Ora l'apparecchio è pronto per l'uso.
• Tutti i segmenti del’ LCD appaiono
• Sul display compare 0:00 e il simbolo DST
lampeggia.
• Quando si è nell’ora legale, per confermare questo fatto premere il tasto +1 mentre il simbolo
lampeggia. Il simbolo
resta fisso sul display.
• Quando si è nell’ora solare, premere di nuovo il tasto +1 e il simbolo DST
scompare.
• Se non ha luogo alcuna immissione, il simbolo DST
smette di lampeggiare e scompare.
• Per rendere possibile una facile regolazione dell'orario con la pressione di un solo tasto, è
necessaria un'impostazione corretta (ved.: Cambio dell'ora legale/ora solare).
• I tasti di comando si trovano nel vano batteria.
5.1 Impostazione dell’ora
•
•
•
•
Impostare l'interruttore a scorrimento sulla posizione B o C.
Quando è visualizzata l'ora, premere il tasto MODE per entrare in modalità impostazione.
L’indicazione dell’ora lampeggia.
Impostare l'ora desiderata con il tasto +1. Tenendo premuto il tasto il valore aumenta più velocemente.
• Premendo di nuovo il tasto MODE e inserire i minuti nello stesso modo.
• Premere il tasto MODE per ritornare alla modalità normale.
• L'apparecchio esce automaticamente dalla modalità impostazione se non si preme alcun tasto
per più di 15 secondi.
24
AVENUE – Termometro da giardino con illuminazione solare
5.2 Commutazione °C/°F
• La temperatura viene visualizzata sul display. Con il tasto +1 è possibile commutare la visualizzazione da °C a °F, nel qual caso il sistema di indicazione dell'ora passa dal metodo a 24 ore a
quello a 12 ore.
• Sul display compare PM dopo mezzodì.
• Richiudere il vano batteria.
5.3 Cambio dell'ora legale/ora solare
• Tenere premuto il tasto +/-1 Hr all'esterno del vano batteria per 3 secondi quando è visualizzata
l'ora: l'orario legale si trasforma in orario solare o viceversa (+/-1 ora).
• Al momento della messa in funzione, ricordarsi di eseguire un'impostazione corretta.
5.4 Selezione modi display
• Posizione interruttore A: temperatura attuale (display: >)
• Posizione interruttore B: temperatura attuale e ora del cambio (display: >>)
• Posizione interruttore C: temperatura attuale, valori massimi e minimi del giorno e ora del cambio (display: >>>)
5.5 Temperature massime e minime
• La temperatura massima viene aggiornata automaticamente alle ore 8:00 e la minima alle ore
20:00, pertanto è necessario impostare l'orologio. A tale scopo è necessario che l'ora sia impostata correttamente.
• Sul display lampeggia Auto Reset.
5.6 Sonda della temperatura
• Il puntalino argenteo è il sensore di temperatura. Maneggiarlo con cura e prestare attenzione a
non danneggiarlo. Essa misura la temperatura.
5.7 Illuminazione e posizionamento
• La batteria ricaricabile, fornita in dotazione, viene ricaricata tramite celle solari nel massimo
rispetto dell'ambiente.
• Per la scelta della posizione, tenere presente che il pannello solare deve ricevere la luce per
almeno 8-10 ore al giorno al fine di garantire un'alimentazione sufficiente e di lunga durata. Il
termometro dispone di un sensore luminoso che avvia automaticamente l'illuminazione in caso
di oscurità dalle ore 5 alle ore 9 e dalle ore 18 alle ore 23.
25
TFA_No. 30.2026_Anleitung_08/13
16.09.2013
12:12 Uhr
Seite 14
AVENUE – Termometro da giardino con illuminazione solare
• Con l'interruttore ECO è possibile l'illuminazione a tempo si accende (sinistra) e disinserirlo
(destra).
• Se la modalità ECO non è attivata, l'illuminazione viene sempre attivata quando il pannello solare
registra una oscurità adeguata.
• Quando sul display appare il simbolo di batteria, la tensione della batteria ricaricabile è bassa. Si
puo spegnere l'illuminazione e resta spenta finché l'alimentazione di corrente proveniente dal
pannello solare non sarà di nuovo sufficiente.
• Cercare un luogo ombreggiato. Una irradiazione diretta del sole modifica i valori.
• Premere la lastra nella terra.
• Montare l'asta e infilarla nella terra passando attraverso il foro centrale. Impostare il termometro
sull'asta e ruotare il pannello solare (girevole 180°) nella direzione nella quale esso riceve il massimo flusso luminoso.
AVENUE – Termometro da giardino con illuminazione solare
9. Dati tecnici
Campo di misura temperatura:
-25 °C…+70 °C (+13 °F…+158 °F)
6. Cura e manutenzione
• Per ottenere una funzionalità ottimale, mantenere il pannello solare sempre pulito. Pulire le celle
solari con un panno morbido ed eventualmente qualche goccia di detergente per vetri o per
monitor. Non usare solventi o abrasivi.
• Rimuovere la batteria, se non si utilizza per un periodo prolungato.
Precisione:
±1°C
0°C...+45°C (+32°F...+113°F)
±1.5°C
-25°C...0°C (-13°F…+32°F) e
+45°C...+70°C (+113°F...+158°F)
6.1 Sostituzione della batteria
• Quando la visualizzazione diventa debole, sostituire la batteria AA da 1,5 V.
• Utilizzare batterie alcaline. Accertarsi di aver inserito la batteria con le polarità giuste.
Alimentazione:
Dimensioni esterne:
175 x 38 x 1145 mm
7. Guasti
Problema
Peso:
592 g (solo apparecchio)
Nessuna indicazione /
Indicazione non corretta
Risoluzione:
0,1 °C
Batteria ricaricabile 1 x 1,2 V AA e
batteria 1 x 1,5 V AA
Risoluzione del problema
➜ Inserire la batteria rispettando le corrette polarità
➜ Cambiare le batterie
➜ Assicurarsi che nessun oggetto copre il panello solare
8. Smaltimento
Questo prodotto è stato realizzato utilizzando materiali e componenti di alta qualità che possono
essere riciclati e riutilizzati.
È assolutamente vietato gettate le batterie tra i rifiuti domestici.
26
In qualità di consumatori, siete tenuti per legge a consegnare le batterie usate al
negoziante o ad altri enti preposti al riciclaggio in conformità alle vigenti disposizioni
nazionali o locali, ai fini di uno smaltimento ecologico.
Le sigle dei metalli pesanti contenuti sono: Cd=cadmio, Hg=mercurio, Pb=piombo
Questo apparecchio è etichettato in conformità alla Direttiva UE sullo smaltimento
delle apparecchiature elettriche ed elettroniche (WEEE).
Questo prodotto non deve essere smaltito insieme ai rifiuti domestici. Il consumatore è
tenuto a consegnare il vecchio apparecchio presso un punto di raccolta per lo smaltimento di apparecchiature elettriche ed elettroniche ai fini di uno smaltimento ecologico.
TFA Dostmann GmbH & Co.KG, Zum Ottersberg 12, D-97877 Wertheim.
È vietata la pubblicazione delle presenti istruzioni o di parti di esse senza una precedente autorizzazione della TFA Dostmann. I dati tecnici corrispondono allo stato del prodotto al momento della
stampa e possono cambiare senza preavviso.
www.tfa-dostmann.de
08/13
27
TFA_No. 30.2026_Anleitung_08/13
16.09.2013
12:12 Uhr
Seite 15
AVENUE – Tuinthermometer met zonneverlichting
Hartelijk dank dat u voor dit apparaat van de firma TFA hebt gekozen.
1. Voor u met het apparaat gaat werken
• Leest u a.u.b. de gebruiksaanwijzing aandachtig.
• Door rekening te houden met wat er in de handleiding staat, vermijdt u ook beschadigingen van
het apparaat en riskeert u niet dat uw wettelijke rechten door verkeerd gebruik niet meer gelden.
• Voor schade die wordt veroorzaakt doordat u geen rekening houdt met de handleiding aanvaarden wij geen aansprakelijkheid.
• Ook zijn wij niet verantwoordelijk voor verkeerde metingen en de mogelijke gevolgen die
daaruit voortvloeien.
• Neem in elk geval acht op de veiligheidsinstructies !
• Bewaar deze gebruiksaanwijzing a.u.b. goed!
2. Hoe u uw nieuw apparaat kunt gebruiken en alle voordelen ervan in één oogopslag
• Duidelijk functioneel design
• Groot display met 3 verschillende modi:
1. Momentane temperatuur
2. Momentane temperatuur en tijd afwisselend
3. Momentane temperatuur, maximum- en minimumtemperatuur en tijd afwisselend
• Maximum- en minimumwaarden met automatische reset
• Automatische schermverlichting bij duisternis
• Staaf (deelbaar) uit aluminium
• Voor plaatsing in de aarde
• Zonnepaneel - 180° draaibaar
• Weerbestendig
3. Voor uw veiligheid
• Het produkt is uitsluitend geschikt voor de hierboven beschreven doeleinden. Gebruik het produkt niet anders dan in deze handleiding is aangegeven.
• Het eigenmachtig repareren, verbouwen of veranderen van het apparaat is niet toegestaan.
• Het apparaat is niet geschikt voor medische doeleinden of voor openbare informatie, maar
bestemd voor particulier gebruik.
Voorzichtig!
Kans op letsel:
• Bewaar het apparaat en de batterijen buiten de reikwijdte van kinderen.
28
AVENUE – Tuinthermometer met zonneverlichting
• Batterijen niet in het vuur gooien, niet kortsluiten, niet uit elkaar halen of opladen. Kans op explosie!
• Batterijen bevatten zuren die de gezondheid schaden. Zwakke batterijen moeten zo snel mogelijk
worden vervangen om lekkage van de batterijen te voorkomen. Draag handschoenen die bestand
zijn tegen chemicaliën en een beschermbril wanneer u met uitgelopen batterijen hanteert!
Belangrijke informatie
over de produktveiligheid!
• Opgelet: Het zonnepaneel is breekbaar. Laat het apparaat niet vallen en vermijd heftige schokken, trillingen of extreme temperaturen.
• Stel het apparaat niet bloot aan extreme temperaturen, trillingen en schokken.
4. Onderdelen
Indicatie (Fig. 1):
A: Batterijsymbool
B: Display tijd/temperatuur
C: Zomertijd symbool (DST)
D: Automatische reset (Auto Reset)
E: Display Mode A, B of C
F: PM bij 12-uur-cyclus
G: Symbool maximale temperatuur
H: Symbool laagste temperatuur
Toetsen (Fig. 2):
I: MODE toets (in het batterijvak)
J: +1 toets (in het batterijvak)
K: A-B-C schuifschakelaar (in het batterijvak)
L: +/- 1Hr toets
M: Schakelaar ECO
Behuizing (Fig. 1+2):
N: Batterijvak (vastgeschroefd)
O: Temperatuurvoeler
P: Zonnepaneel
29
TFA_No. 30.2026_Anleitung_08/13
16.09.2013
AVENUE – Tuinthermometer met zonneverlichting
12:12 Uhr
Seite 16
5. Inbedrijfstelling
• Open de batterijhouder met een schroevendraaier
• Stop de bijgevoegde batterijen (boven: oplaadbare batterij 1 x 1,2 V AA voor de verlichting en
beneden: voor het algemeen functioneren 1 x 1,5 V AA) in het batterijvak. Let bij het inzetten van
de batterijen op de juiste polariteit.
• OPGELET: De oplaadbare 1,2 V batterij voor de achtergrondverlichting is in leveringstoestand
niet volledig geladen. Voor een maximaal vermogen is het raadzaam de oplaadbare batterij
voor het eerste gebruik op een zonnige dag via het zonnepaneel volledig te laten opladen.
Alternatief kan de oplaadbare batterij ook met een gewone batterijlader worden opgeladen.
• Trek de beschermfolie van het display af.
• Het toestel is nu bedrijfsklaar.
• Alle LCD-schermsegmenten verschijnen.
• 0:00 verschijnt op het display en het DST symbool
knippert.
• Geldt momenteel de zomertijd, druk dan als bevestiging op de +1 toets terwijl het symbool knippert. Het symbool
blijft op het display.
• Druk tijdens de wintertijd nogmaals op de +1 toets en het DST symbool
verdwijnt op het display.
• Volgt geen invoer, stopt het DST symbool
met knipperen (15 seconden) en het symbool verdwijnt.
• Om een tijdomstelling eenvoudig door het drukken van een knop mogelijk te maken, is een correcte instelling vereist.(zie: Omschakeling zomer-/wintertijd).
• De bedientoetsen zitten in het batterijvak.
5.1 Tijdinstelling
•
•
•
•
Zet de schuifschakelaar in positie B of C.
Verschijnt de tijd, druk dan op de MODE toets om naar de instellingsmodus over te schakelen.
De uuraanduiding knippert.
Met de +1 toets stelt u de uren in. Als u de toets ingedrukt houdt wordt de waarde sneller verhoogd.
• Druk nogmaals op de MODE toets en stel op dezelfde manier de minuten in.
• Druk nog eens op de MODE toets om naar de normaalmodus terug te keren.
• Het apparaat verlaat automatisch de instelmodus, als er langer dan 15 seconden geen toets
wordt ingedrukt.
30
AVENUE – Tuinthermometer met zonneverlichting
5.2 Overschakelen °C/°F
• Verschijnt de actuele temperatuur op het display, kunt u met de +1 toets de weergave van °C
naar °F overschakelen, tegelijk schakelt het tijdsysteem van 24 naar 12 uren.
• PM verschijnt op de display na middag.
• Sluit het batterijvak weer.
5.3 Omschakeling zomer-/wintertijd
• Houdt u de +/-1 Hr toets buiten het batterijvak 3 seconden lang ingedrukt wanneer de tijd verschijnt, schakelt de zomertijd naar wintertijd of omgekeerd (+/- 1 uur).
• Let op de juiste instelling bij het in gebruik nemen!
5.4 Selectie Display Mode
• Schakelpositie A: Actuele temperatuur (display: >)
• Schakelpositie B: Actuele temperatuur en tijd afwisselend (display: >>)
• Schakelpositie C: Actuele temperatuur, dagmaximum- en minimum en tijd afwisselend (display:
>>>)
5.5 Maximum- en minimumwaarden
• De maximum- en de minimumwaarden worden automatisch gereset: De maximale temperatuur
om 8 uur 's morgens en de laagste temperatuur om 20 uur 's avonds. Hiervoor moet de huidige
tijd ingesteld zijn.
• Het symbool Auto Rest knippert op de display.
5.6 Temperatuurvoeler
• De zilverachtig stift is de temperatuursensor. Deze dient met zorg behandeld te worden en mag
niet beschadigd worden. De temperatuurvoeler heeft geen instelfunctie. Hij meet de temperatuur.
5.7 Verlichting en plaatsing
• De zonnepaneel laden de bijgeleverde oplaadbare batterij milieuvriendelijk weer op.
• Kies de standplaats zo, dat het zonnepaneel overdag minstens 8-10 uur licht kan opnemen zodat
langdurig voor voldoende stroom wordt gezorgd. De thermometer beschikt over een lichtsensor
en zet bij duisternis de verlichting automatisch van 5 tot 9 uur en van 18 tot 23 uur aan.
• U kunt met de ECO schakelaar de tijdgestuurde verlichting aan- (links) en uitschakelen (rechts).
• Is de ECO-modus niet geactiveerd, dan wordt de verlichting altijd geactiveerd, wanneer er door
het zonnepaneel een dienovereenkomstige duisternis geregistreerd wordt.
31
TFA_No. 30.2026_Anleitung_08/13
16.09.2013
12:12 Uhr
Seite 17
AVENUE – Tuinthermometer met zonneverlichting
AVENUE – Tuinthermometer met zonneverlichting
• Verschijnt het batterijsymbool op het display, is de spanning in de oplaadbare batterij laag. De
verlichting kan tijdelijk uitgaan tot het zonnepaneel weer voldoende stroom heeft geleverd.
• Zoek een schaduwrijke plaats. Directe zonbestraling vervalst de meetwaarden.
• Druk de plaat in de grond.
• Monteer de staaf en steek hem door het gat in de grond. Zet de thermometer op de staaf en
draai de zonnepaneel (180° draaibaar) in de richting met de grootste lichttoevoer.
6. Schoonmaken en onderhoud
• Houd het zonnepaneel altijd proper om een optimale functie te waarborgen. Reinig de zonnecellen met een zachte lap en eventueel met wat reinigingsmiddel voor glas of beeldschermen. Geen
schuur- of oplosmiddelen gebruiken!
• Verwijder de batterij als u het apparaat langere tijd niet gebruikt.
9. Technische gegevens
Meetbereik temperatuur:
-25 °C…+70 °C (+13 °F…+158 °F)
Precisie:
6.1 Batterijwissel
• Vervang de 1,5 V AA batterij wanneer de weergave zwakker wordt.
• Gebruik Alkaline batterijen. Controleer of de batterij met de juiste poolrichtingen zijn geplaatst.
±1°C
0°C...+45°C (+32°F...+113°F)
±1.5°C
-25°C...0°C (-13°F…+32°F) en
+45°C...+70°C (+113°F...+158°F)
Resolutie:
0,1 °C
Spanningsvoorziening:
7. Storingswijzer
Probleem
Oplaadbare batterij 1x 1,2 V AA en
batterij 1x 1,5 V AA
Oplossing
Afmetingen behuizing:
175 x 38 x 1145 mm
➜ Batterij met de juiste poolrichting plaatsen
➜ Vervang de batterij
➜ Plaats geen voorwerpen die het zonnepaneel kunnen
blokkeren
Gewicht:
592 g (alleen het apparaat)
Geen indicatie /
Geen correcte indicatie
8. Verwijderen
Dit produkt is vervaardigd van hoogwaardige materialen en onderdelen, die kunnen worden gerecycled en hergebruikt.
Batterijen en accu's mogen niet met het huisvuil worden weggegooid.
Als consument bent u wettelijk verplicht om gebruikte batterijen en accu's bij uw
dealer af te geven of naar de daarvoor bestemde containers volgens de nationale of
lokale bepalingen te brengen om een milieuvriendelijk verwijderen te garanderen.
De benamingen van de zware metalen zijn: Cd=cadmium, Hg=kwikzilver, Pb=lood
32
Dit apparaat is gemarkeerd in overeenstemming met de EU-richtlijn (WEEE) over het
verwijderen van elektrisch en elektronisch afval.
Dit produkt mag niet met het huisvuil worden weggegooid. De gebruiker is verplicht
om de apparatuur af te geven bij een als zodanig erkende plek van afgifte voor het
verwijderen van elektrisch en elektronisch apparatuur om een milieuvriendelijk verwijderen te garanderen.
TFA Dostmann GmbH & Co.KG, Zum Ottersberg 12, D-97877 Wertheim.
Deze gebruiksaanwijzing of gedeelten eruit mogen alleen met toestemming van TFA Dostmann worden gepubliceerd. De technische gegevens van dit apparaat zijn actueel bij het ter perse gaan en
kunnen zonder voorafgaande informatie worden gewijzigd.
www.tfa-dostmann.de
08/13
33
TFA_No. 30.2026_Anleitung_08/13
16.09.2013
12:12 Uhr
AVENUE – Termómetro de jardín con iluminación solar
Seite 18
Muchas gracias por haber adquirido este dispositivo de TFA.
1. Antes de utilizar el dispositivo
• Lea detenidamente las instrucciones de uso.
• Si sigue las instrucciones de uso, evitará que se produzcan daños en el dispositivo y no comprometerá sus derechos por vicios, prevista legalmente debido a un uso incorrecto.
• No asumimos responsabilidad alguna por los daños originados por el incumplimiento de
estas instrucciones de uso. Del mismo modo, no nos hacemos responsables por cualquier
lectura incorrecta y de las consecuencias que pueden derivarse de tales.
• Tenga en cuenta ante todo las advertencias de seguridad.
• Guarde estas instrucciones de uso en un sitio seguro.
2. Ámbito de aplicación y ventajas de su nuevo dispositivo
• Diseño funcional claro
• Gran display con 3 modos diferentes:
1. Temperatura actúale
2. Temperatura actúale y tempo por turno
3. Temperatura actúale, máxima y mínima y tempo por turno
• Valores máximos y mínimos con reposición automático
• Iluminación de fondo automática con sensor de luz
• Barra (divisible) de aluminio
• Barra para pinchar en tierra
• Panel solar - girable 180°
• Resistente a la intemperie
3. Para su seguridad
• El producto solo es adecuado para el ámbito de aplicación descrito anteriormente. No emplee el
dispositivo de modo distinto al especificado en estas instrucciones.
• No está permitido realizar reparaciones, transformaciones o modificaciones por cuenta propia
en el dispositivo.
• Este dispositivo no está indicado para fines médicos ni para información pública, sino que está
destinado únicamente para uso privado.
¡Precaución!
Riesgo de lesiones:
• Mantenga el dispositivo y las pilas fuera del alcance de los niños.
34
AVENUE – Termómetro de jardín con iluminación solar
• No tire las pilas al fuego, no las cortocircuite, desmonte ni recargue, ya que existe riesgo de
explosión.
• Las pilas contienen ácidos nocivos para la salud. Las pilas con un estado de carga bajo deben
cambiarse lo antes posible para evitar fugas. Utilice guantes protectores resistentes a productos
químicos y gafas protectoras si manipula pilas con fugas de líquido!
¡Advertencias importantes
sobre la seguridad del producto !
• Precaución: El panel solar es delicado. No deje caer el aparato ni tampoco lo exponga a golpes
fuertes, vibraciones o temperaturas extremas.
• No exponga el dispositivo a temperaturas extremas, vibraciones ni sacudidas extremas.
4. Componentes
Pantalla LCD (Fig. 1):
A: Símbolo de la pila
B: Indicación tiempo/temperatura
C: Símbolo de horario de verano (DST)
D: Reposición Automática (Auto Reset)
E: Selección modos del display A, B o C
F: PM en el sistema de horario de 12 horas
G: Símbolo de temperatura máxima
H: Símbolo de temperature minima
Teclas (Fig. 2):
I: Tecla MODE (en el compartimiento de las pilas)
J: Tecla +1 (en el compartimiento de las pilas)
K: Interruptor A-B-C (en el compartimiento de las pilas)
L: Tecla +/- 1Hr
M: Interruptor ECO
Cuerpo (Fig. 1+2):
N: Compartimiento de las pilas (atornillado)
O: Sonda térmica
P: Panel solar
35
TFA_No. 30.2026_Anleitung_08/13
16.09.2013
AVENUE – Termómetro de jardín con iluminación solar
12:12 Uhr
Seite 19
5. Puesta en marcha
• Abra el compartimiento de las pilas con un destornillador.
• Inserte las pilas suministradas (arriba: pila recargable 1 x 1,2 V AA para la iluminación y abajo:
para la función general 1 x 1,5 V AA) en el compartimiento de las pilas. Compruebe que la polaridad sea la correcta al introducir las pilas.
• ATENCIÓN: La pila recargable de 1,2 voltios para la iluminación de fondo no está completamente cargada cuando sale de fábrica. Para alcanzar el mayor rendimiento posible de la pila
se recomienda cargarla a través del panel solar en un día de sol antes de utilizarla por primera vez. Alternativamente, puede cargar la pila también con un cargador de pilas corriente.
• Saque la película de protección del display.
• El aparato está listo para funcionar.
• Todos los segmentos se iluminan.
• En el display aparece 0:00 y el símbolo de DST
parpadea.
• Si desea ajustar el horario de verano confirme pulsando la tecla +1 mientras el símbolo de DST
parpadea. El símbolo
permanece en la pantalla.
• Si desea ajustar el horario de invierno, vuelva a pulsar una vez más la tecla +1. Il símbolo de
DST
desaparece.
• El símbolo deja de parpadear y desaparece si no realiza ningún ajuste durante más de 15 segundos.
• Existe la posibilidad de cambiar fácilmente la hora pulsando una tecla, pero para ello es necesario
realizar previamente un ajuste concreto (véase el punto: Cambio de horario de verano/invierno).
• Las teclas de manejo se encuentran situados en el compartimento para las pilas.
5.1 Ajuste de la hora
•
•
•
•
Ajuste el conmutador corredizo a la posición B o C.
Cuando sea indicada la hora, podrá acceder al modo de ajuste pulsando la tecla MODE.
El indicador de la hora comienza a parpadear.
Ajuste las horas a través de la tecla +1. Si mantiene pulsada la tecla cambia el valor más rápidamente.
• Si pulsa de nuevo la tecla MODE y introduzca del mismo modo los minutos.
• Si pulsa de nuevo la tecla MODE para regresar al modo normal.
• El aparato sale automáticamente del modo de ajuste si no se pulsa ninguna tecla durante más de
15 segundos.
36
AVENUE – Termómetro de jardín con iluminación solar
5.2 Conmutación °C/°F
• Cuando sea indicada la temperatura actual en el display, a través de la tecla +1 puede conmutar
la indicación de °C a °F, al mismo tiempo cambia el sistema temporal de 24 a 12 horas.
• En el display aparece PM después de mediodía.
• Vuelva a cerrar el compartimiento de las pilas.
5.3 Horario de verano/invierno
• Mantenga pulsada la tecla +/-1 Hr fuera del compartimento de las pilas durante 3 segundos.
Seguidamente será indicada la hora y podrá conmutar del horario de verano al de invierno o
viceversa (+/- 1 hora).
• ¡Asegúrese de haber realizado el ajuste correcto durante la puesta en funcionamiento!
5.4 Selección modos del display
• Posición de conmutación A: temperatura actual (display: >)
• Posición de conmutación B: temperatura actual y horario en alternancia (display: >>)
• Posición de conmutación C: temperatura actual, valores máximos y mínimos del día y horario en
alternancia (display: >>>)
5.5 Valores máximos y mínimos
• Los valores máximos y mínimos se reponen automáticamente: La temperatura máxima a las
8:00 de la mañana y la temperatura mínima a las 20:00 horas de la tarde. Para ello deberá ajustar el horario actual.
• AUTO RESET parpadea en el display.
5.6 Sensor de la temperatura
• El plateado es el sensor de la temperatura. Éste debe tratarse con cuidado para evitar que se
averíe. La sonda de la temperatura no tiene función de ajuste. Mide la temperatura.
5.7 Iluminación y colocación
• Por medio del panel solares se recarga la pila de forma inofensiva para el medio ambiente.
• Con el fin de poder garantizar un suministro de corriente suficiente a largo plazo, seleccione por
favor un lugar de ubicación del termómetro en el que el panel solar pueda captar como mínimo
8 - 10 horas de luz diarias. El termómetro dispone de un sensor de luz y conecta la iluminación
automáticamente en la oscuridad de 5 a 9 y 18 a 23 horas.
37
TFA_No. 30.2026_Anleitung_08/13
16.09.2013
12:12 Uhr
Seite 20
AVENUE – Termómetro de jardín con iluminación solar
AVENUE – Termómetro de jardín con iluminación solar
• Con el interruptor ECO puede activar (izquierda) o desactivar (derecha) la iluminación controlada
por temporizador.
• Si el modo ECO no está activado, la iluminación se activa siempre que el panel solar registra una
cierta oscuridad.
• Si aparece el símbolo de la pila en la pantalla, significa que la carga de la pila recargable es baja;
en este caso, la iluminación se puede desconectar temporalmente hasta que el panel solar vuelva a suministrar suficiente energía.
• Busque un lugar sombreado. La irradiación solar directa falsea los valores de medición.
• Apretar la placa en la tierra.
• Ensamble la barra e introdúzcala en la tierra a través del agujero. Coloque el termómetro sobre la
barra y gíre el panel solar (girable 180°) a la dirección en la cual obtendrá el máximo suministro
de luz.
6. Cuidado y mantenimiento
• Para obtener la mejor funcionalidad, el panel solar deberá estar siempre limpio. Limpie las células solares con un paño blando y eventualmente con un limpiador para cristales o bien monitor.¡No utilizar ningún medio abrasivo ni disolventes!
• Extraiga la pila si no va a usar el dispositivo por un largo período de tiempo.
6.1 Cambio de la pila
• Si la pantalla se debilita, cambie la pila AA de 1,5 V por una nueva.
• Utilice pilas alcalinas. Asegúrese de que la pila se coloque con la polaridad correcta.
7. Averías
Problema
Ninguna indicación /
Indicación incorrecta
38
9. Datos técnicos
Gama de medición temperatura:
-25 °C…+70 °C (+13 °F…+158 °F)
Precisión:
±1°C
0°C...+45°C (+32°F...+113°F)
±1.5°C
-25°C...0°C (-13°F…+32°F) y
+45°C...+70°C (+113°F...+158°F)
Resolución:
0,1 °C
Alimentación de tensión:
Pila recargable 1x 1,2 V AA y pila 1x 1,5 V AA
Solución de averías
Dimensiónes de cuerpo:
175 x 38 x 1145 mm
➜ Asegúrese que las pilas estén colocadas con la polaridad
correcta
➜ Cambiar la pila
➜ Asegúrese de que no hay objetos que cubren el panel solar
Peso:
592 g (solo dispositivo)
8. Eliminación
Este producto ha sido fabricado con materiales y componentes de máxima calidad que pueden ser
reciclados y reutilizados.
Las pilas y baterías no pueden desecharse en ningún caso junto con la basura doméstica.
Como consumidor, está obligado legalmente a depositar las pilas y baterías usadas
de manera respetuosa con el medio ambiente en el comercio especializado o bien en
los centros de recogida y reciclaje previstos para ello según el reglamento nacional o
local.
Las denominaciones de los metales pesados que contienen son:
Cd=cadmio, Hg=mercurio, Pb=plomo
Este dispositivo está identificado conforme a la Directiva de la UE sobre residuos de
aparatos eléctricos y electrónicos (WEEE).
No deseche este producto junto con la basura doméstica. El usuario está obligado a
llevar el dispositivo usado a un punto de recogida de aparatos eléctricos y electrónicos acreditado para que sea eliminado de manera respetuosa con el medio ambiente.
TFA Dostmann GmbH & Co.KG, Zum Ottersberg 12, D-97877 Wertheim.
Estas instrucciones o extractos de las mismas no pueden ser publicados sin la autorización de la
TFA Dostmann. Los datos técnicos de este producto corresponden al estado en el momento de la
impresión y pueden ser modificados sin previo aviso.
www.tfa-dostmann.de
08/13
39